2016-2018 NISSAN CONNECT NAVIGATION SYSTEM SOFTWARE UPDATE ...

2017 NAVIGATIONSYSTEM
OWNER’S MANUAL
For your safety, read carefully and keep in this vehicle.
20
17
NIS
SA
N N
AV
IGA
TIO
N S
YS
TE
MS
G5
NJ-N
Printing : January 2017 (02) Publication No.:
Printed in U.S.A.N17E SG5NUU1
SG5NJ-N

NISSAN CONSUMER AFFAIRS DE-PARTMENTFor assistance or inquiries about the NISSANwarranty, service or general questions, contactthe NISSAN Consumer Affairs Department at:
For U.S. customers
Nissan North America, Inc.
Consumer Affairs Department
P.O. Box 685003
Franklin, TN 37068-5003
1-800-NISSAN-1
(1-800-647-7261)
For Canadian customers
Nissan Canada Inc.
5290 Orbitor Drive
Mississauga, Ontario L4W 4Z5
1-800-387-0122
NISSANCONNECTSM HELPDESKCONTACT INFORMATIONFor assistance or inquiries about the Nissan-ConnectSM, or to order updated map data,contact the NISSAN NAVIGATION SYSTEMHELPDESK at:
For U.S customers
. E-MAIL: [email protected]
. WEB SITE:http://www.NissanNavigation.com
. PHONE: 1-888-661-9995
For Canadian customers
. WEB SITE: www.nissan.ca
. PHONE: 1-800-387-0122 (option 4)
FOREWORD
Thank you for purchasing a NISSAN vehicle.
This user’s manual is for NissanConnectSM andthe systems linked to NissanConnectSM offeredin your NISSAN vehicle.
Please read this manual carefully to ensure safeoperation of NissanConnectSM.
. Because of possible specification changesand optional equipment, some sections ofthis manual may not apply to your vehicle.
. All information, specifications and illustra-tions in this manual are those in effect at thetime of printing. NISSAN reserves the right tochange specifications or design at any timewithout notice.
. Do not remove this manual from the vehiclewhen selling this vehicle. The next user of thesystem may need the manual.

Table of Contents1 Introduction
How to use this manual .......... 1-2Safety information..................... 1-3Laser product ............................ 1-4Customer assistance ............... 1-5
2 Getting Started
Control buttonsand functions ............................. 2-2Starting system ......................... 2-5Touch panel operation ............ 2-5Navigation systemstatus screen ............................. 2-7Shortcut menu........................... 2-7Map menu .................................. 2-8Display View Bar ...................... 2-8How to input lettersand numbers ............................ 2-10Functions disabledwhile driving ............................. 2-11
3 Map operation
Map types................................... 3-2Displaying currentvehicle location ......................... 3-4Moving map ............................... 3-5Changing scale of map .......... 3-6Change map .............................. 3-7Setting split screen .................. 3-8Map view settings .................... 3-8Setting informationon map ...................................... 3-11Traffic information on map.... 3-12
4 Setting destination
Changing region ....................... 4-2Destination screen ................... 4-3Finding address ........................ 4-7Finding points of interest ........ 4-8Setting homeas destination .......................... 4-10Finding nearby place ............. 4-11
Searching fromStored Locations .................... 4-11Searching from history .......... 4-12Using Journey Planner .......... 4-12Setting intersection ................ 4-13Settingfreeway entrance/exit ............. 4-14Setting city center .................. 4-14Setting by phone number .... 4-15Setting from stored routes.... 4-15Searching by connectingData Center ............................. 4-16Setting by NissanConnectSM
Services .................................... 4-17Setting point on map............. 4-18Procedures aftersetting route ............................. 4-18
5 Route guidance
About route guidance ............. 5-2Guidance screen settings ...... 5-7Canceling Route ....................... 5-7

Route menu screen ................. 5-7Editing route .............................. 5-8Recalculating route ................ 5-11Searching for detour routeusing traffic information ........ 5-11Displaying Turn List................ 5-13Route guidance settings ...... 5-13
6 Storing a location/route
Storing location ......................... 6-2Storing route .............................. 6-3Storing avoid area .................... 6-4Editing stored information ...... 6-5Deleting stored item ................ 6-9Transferring information to/from address book ................. 6-11
7 Information and settings
Information screen.................... 7-2SiriusXM Traffic information ... 7-4SiriusXM Travel Link .............. 7-7
NissanConnectSM
Services .................................... 7-14Settings screen ....................... 7-24Navigation settings................. 7-30
8 Voice recognition
Voice recognition ...................... 8-2
9 General information
Current vehicle location .......... 9-2Route calculation ...................... 9-6Route guidance......................... 9-8Map data .................................. 9-10How to handle theSD card .................................... 9-14
10 Troubleshooting guide
System unit .............................. 10-2Navigation ................................. 10-3Voice recognition ................. 10-11

1 Introduction
How to use this manual ........................................................... 1-2
For safe operation ............................................................... 1-2
Reference symbols ............................................................. 1-2
Screen illustrations .............................................................. 1-2
Safety information ..................................................................... 1-3
Laser product ............................................................................ 1-4
Trademarks ......................................................................... 1-4
Customer assistance ............................................................... 1-5

HOW TO USE THIS MANUAL
This manual uses special words, symbols, iconsand illustrations organized by function.
Please refer to the following items and familiarizeyourself with them.
FOR SAFE OPERATION
WARNING
This is used to indicate the presence of ahazard that could cause death or seriouspersonal injury. To avoid or reduce therisk, the procedures must be followedprecisely.
CAUTION
This is used to indicate the presence of ahazard that could cause minor or mod-erate personal injury or damage to yourvehicle. To avoid or reduce the risk, theprocedures must be followed carefully.
NOTE:
Indicates items that help you understandand maximize the performance of yourvehicle. If ignored, they may lead to amalfunction or poor performance.
REFERENCE SYMBOLS
INFO:
This indicates information that is necessary forefficient use of your vehicle or accessories.
Reference page:
This indicates the title and page that you shouldrefer to.
[ ]:
This indicates a key/item displayed on thescreen.
Voice Command:
This indicates an operation by voice command.
SCREEN ILLUSTRATIONSIcons and menu items displayed on the screenmay be abbreviated or omitted from the screenillustrations when appropriate. The omitted iconsand menu items are described as dotted lines asillustrated.
1-2
1. Introduction
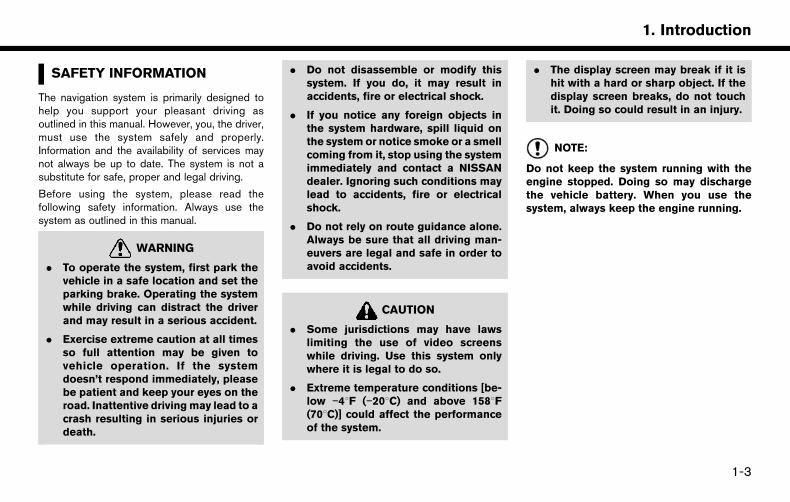
SAFETY INFORMATION
The navigation system is primarily designed tohelp you support your pleasant driving asoutlined in this manual. However, you, the driver,must use the system safely and properly.Information and the availability of services maynot always be up to date. The system is not asubstitute for safe, proper and legal driving.
Before using the system, please read thefollowing safety information. Always use thesystem as outlined in this manual.
WARNING
. To operate the system, first park thevehicle in a safe location and set theparking brake. Operating the systemwhile driving can distract the driverand may result in a serious accident.
. Exercise extreme caution at all timesso full attention may be given tovehicle operation. If the systemdoesn’t respond immediately, pleasebe patient and keep your eyes on theroad. Inattentive drivingmay lead to acrash resulting in serious injuries ordeath.
. Do not disassemble or modify thissystem. If you do, it may result inaccidents, fire or electrical shock.
. If you notice any foreign objects inthe system hardware, spill liquid onthe system or notice smoke or a smellcoming from it, stop using the systemimmediately and contact a NISSANdealer. Ignoring such conditions maylead to accidents, fire or electricalshock.
. Do not rely on route guidance alone.Always be sure that all driving man-euvers are legal and safe in order toavoid accidents.
CAUTION
. Some jurisdictions may have lawslimiting the use of video screenswhile driving. Use this system onlywhere it is legal to do so.
. Extreme temperature conditions [be-low 48F ( 208C) and above 1588F(708C)] could affect the performanceof the system.
. The display screen may break if it ishit with a hard or sharp object. If thedisplay screen breaks, do not touchit. Doing so could result in an injury.
NOTE:
Do not keep the system running with theengine stopped. Doing so may dischargethe vehicle battery. When you use thesystem, always keep the engine running.
1-3
1. Introduction

LASER PRODUCT
This NissanConnectSM is certified as a Class 1laser product.
The system complies with DHHS Rules 21 CFRChapter 1, Subchapter J.
WARNING
. Do not disassemble or modify thissystem. There are no user serviceableparts in the system.
. If maintenance, adjustments and op-erations other than those specified inthis manual are attempted, injury dueto laser radiation and exposure couldoccur.
TRADEMARKS
Required SiriusXM Satellite Radio and SiriusXMTraffic monthly subscriptions are sold separately.SiriusXM Traffic are only available in selectmarkets. For more information,
see www.siriusxm.com/siriusxmtraffic
Required SiriusXM Satellite Radio and SiriusXMTravel Link monthly subscriptions are soldseparately. SiriusXM Travel Link is only availablein select markets. For more information,
see www.siriusxm.com/travellink
*C 2012 Google Inc. All rights reserved. GoogleCalendarTM calendaring application is a trade-mark of Google Inc.
1-4
1. Introduction

CUSTOMER ASSISTANCE
For assistance or inquiries about the NISSANNavigation System, or to order updated mapdata, contact the NISSAN NAVIGATION SYS-TEM HELPDESK. See the contact informationon the inside front cover of this manual.
1-5
1. Introduction

MEMO
1-6
1. Introduction

MEMO
1-7
1. Introduction

MEMO
1-8
1. Introduction

2 Getting Started
Control buttons and functions ............................................... 2-2
How to handle display ........................................................ 2-2
Control panel ........................................................................ 2-3
Multi-function controller ..................................................... 2-4
Steering-wheel switches ................................................... 2-4
Starting system .......................................................................... 2-5
Start-up screen .................................................................... 2-5
Touch panel operation ............................................................. 2-5
Operating menu screen ..................................................... 2-6
Scrolling message or list ................................................... 2-6
Selecting item ...................................................................... 2-7
Adjusting volume and settings ....................................... 2-7
Navigation system status screen .......................................... 2-7
Shortcut menu ........................................................................... 2-7
Edit shortcut menu ............................................................ 2-8
Map menu .................................................................................. 2-8
Display View Bar ...................................................................... 2-8
Customizing the Display View Bar ............................. 2-10
How to input letters and numbers ..................................... 2-10
Character (letters and numbers) input screen ........ 2-10
Functions disabled while driving ........................................ 2-11

CONTROL BUTTONS ANDFUNCTIONS
Designs and button layout may vary dependingon the specifications and the model.
HOW TO HANDLE DISPLAYThe display is a liquid crystal display and shouldbe handled with care.
WARNING
Never disassemble the display. Someparts utilize extremely high voltage.Touching them may result in seriouspersonal injury.
Characteristics of liquid crystal display. If the temperature inside the vehicle is
especially low, the display will stay relativelydim or the movement of the images may beslow. These conditions are normal. Thedisplay will function normally when theinterior of the vehicle has warmed up.
. Some pixels in the display are darker orbrighter than others. This condition is aninherent characteristic of liquid crystal dis-play, and it is not a malfunction.
. A remnant of the previous display image mayremain on the screen. This screen burn isinherent in display, and it is not a malfunction.
Maintenance of display
CAUTION
. To clean the display, stop the vehiclein a safe location.
. Clean the display with the ignitionswitch in the OFF position. If thedisplay is cleaned while the ignitionswitch is in the ON position, uninten-tional operation may occur.
. When cleaning the display, never usea rough cloth, alcohol, benzine, thin-ner or any kind of solvent or papertowel with a chemical cleaning agent.Doing so will cause scratches ordeterioration of the panel.
. Do not splash any liquid such aswater or car fragrance on the display.Contact with liquid will cause thesystem to malfunction.
To clean the display screen, use a dry, soft cloth.If additional cleaning is necessary, use a smallamount of neutral detergent with a soft cloth.
Never spray the screen with water or detergent.Dampen the cloth first, then wipe the screen.
2-2
2. Getting Started

CONTROL PANEL
*1 <CLIMATE>:
Push to display the screen for air condi-tioner operations.
Refer to the vehicle Owner’s Manual.
*2 <CAMERA> (models with Around ViewMonitor):
Push to operate the Around View Monitor.
Refer to the vehicle Owner’s Manual.
< > (models without Around ViewMonitor):
Push to operate hands-free phone.
Refer to the vehicle Owner’s Manual.
*3 <APPS>:
Push to display the available Apps.
Refer to the vehicle Owner’s Manual.
*4 <NAVI>:
Push to display the navigation menu.“Destination screen” (page 4-3)
*5 Multi-function controller:
Push to select an item on the screen, selectthe highlighted item, or scroll the map on thescreen, etc.
“Multi-function controller” (page 2-4)
*6 <STATUS>:
Push to display the current setting of thevehicle information, air conditioner, audioand navigation route information.
*7 <INFO>:
Push to display the information menu.“Information screen” (page 7-2)
*8 < >, <+>/<->:
Push < > to switch the display bright-ness to the daytime mode or the nighttimemode, and to adjust the display brightnesslevel using the multi-function controllerwhile the indicator is displayed at thebottom of the screen. Push and hold< > to turn the display on and off.
The display brightness can also be adjustedusing <+> or < >.
*9 <AUDIO>:
Push to operate the audio system.
Refer to the vehicle Owner’s Manual.
*10 < BACK>:
Push to return to the previous screen. In asettings screen, this button is also used toapply the setting.
*11 <MAP>:
Push to display the current location mapscreen.
*12 <SETTING>:
Push to access the system settings.
*13 <VOICE>:
Push to repeat the voice guidance for aguide point.
2-3
2. Getting Started

MULTI-FUNCTION CONTROLLER
*1 <ENTER>:
Push to select the highlighted item on thescreen.
If this button is pushed while a map isdisplayed, the map menu screen is dis-played.
“Map menu” (page 2-8)
*2 Main directional buttons:
Use to move across the map, select an itemon the screen or adjust a setting (volume,brightness, etc.).
*3 Additional directional buttons:
Use to move across the map or select anitem on the character input screen.
*4 Center dial:
Turn to highlight an item on the screen oradjust a setting.
The center dial can also be used to adjustthe map scale.
STEERING-WHEEL SWITCHES
*1 <ENTER>:
Tilt to highlight an item on the screen oradjust a setting. Push to select the high-lighted item.
If this button is tilted up while the audiofunction is activated and the map or statusscreen is displayed, the audio system canbe operated.
If this button is pushed while a map isdisplayed, the map menu screen is dis-played.
“Map menu” (page 2-8)
*2 < >:
Push to return to the previous screen.
This button is used for the vehicle informa-tion display operation, also.
2-4
2. Getting Started

Refer to the vehicle Owner’s Manual.
*3 <+ >:
Use to adjust the volume. These buttonshave the same function as that of <VOL>on the audio system.
Refer to the vehicle Owner’s Manual.
*4 <SOURCE> :
Use to switch the audio mode (source).
Refer to the vehicle Owner’s Manual.
*5 < > (TALK):
Push to start a voice recognition session.During a voice recognition session, pushingthis button cancels the voice guidance andyou can speak a voice command immedi-ately.
Push and hold this button to end a voicerecognition session.
*6 < >:
Push to display the phone mode screen.
Refer to the vehicle Owner’s Manual.
*7 < >:
This button is used for the vehicle informa-tion display operation.
Refer to the vehicle Owner’s Manual.
STARTING SYSTEM
The system starts when the ignition switch ispushed to the “ACC” or “ON” position.
START-UP SCREENFor this system, when the ignition switch ispushed to the “ACC” or “ON” position, the start-up screen is displayed.
Touch [OK] after reading and agreeing to themessage. If you do not agree to the message,some of the functions will be disabled.
NOTE:
Do not keep the navigation system on withthe engine stopped. Doing so may dis-charge the vehicle battery. When you usethe navigation system, always keep theengine running.
INFO:
Once you select [Decline] on the start-up screen,the [OK]/[Decline] screen will not be displayedfor 30 days.
TOUCH PANEL OPERATION
Basic touch panel operation methods areexplained here.
. Touch
Select and execute the selected key on thescreen.
2-5
2. Getting Started

. Swipe
Menu screen pages will skip to the nextpage.
. Drag
Drag up or down to scroll. You can scroll upand down a list screen.
Various further operations are possible for a mapscreen. For detailed operations of the mapscreen, refer to the map operation section.
“Operating with touch panel operation”
(page 3-4)
OPERATING MENU SCREEN
*1 Touch [<] to scroll to the previous page.
*2 Touch a preferred icon to execute a functionand display the next screen.
*3 Indicates the position of the currentlydisplayed page out of the total number ofavailable pages.
*4 Touch [>] to scroll to the next page.
A swipe gesture can also be used to movequickly between screens.
SCROLLING MESSAGE OR LIST
*1 Drag the scroll bar up or down to scroll themessage or list up or down.
*2 Touch a preferred item.
*3 If a listed item name is not completelydisplayed (due to length), touch [>] todisplay the hidden part of the name.
*4 Touch [ ] or [ ] to scroll the message orlist one item at a time.
Touch [ ] or [ ] to skip to the next page.
2-6
2. Getting Started
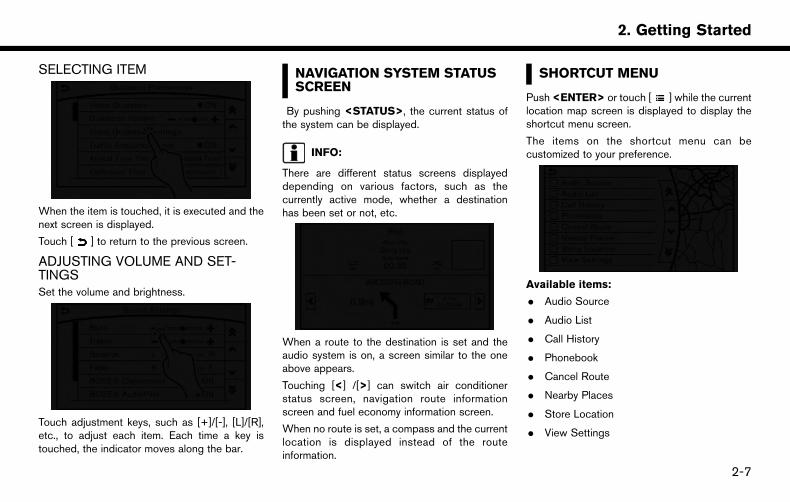
SELECTING ITEM
When the item is touched, it is executed and thenext screen is displayed.
Touch [ ] to return to the previous screen.
ADJUSTING VOLUME AND SET-TINGSSet the volume and brightness.
Touch adjustment keys, such as [+]/[-], [L]/[R],etc., to adjust each item. Each time a key istouched, the indicator moves along the bar.
NAVIGATION SYSTEM STATUSSCREEN
By pushing <STATUS>, the current status ofthe system can be displayed.
INFO:
There are different status screens displayeddepending on various factors, such as thecurrently active mode, whether a destinationhas been set or not, etc.
When a route to the destination is set and theaudio system is on, a screen similar to the oneabove appears.
Touching [<] /[>] can switch air conditionerstatus screen, navigation route informationscreen and fuel economy information screen.
When no route is set, a compass and the currentlocation is displayed instead of the routeinformation.
SHORTCUT MENU
Push <ENTER> or touch [ ] while the currentlocation map screen is displayed to display theshortcut menu screen.
The items on the shortcut menu can becustomized to your preference.
Available items:
. Audio Source
. Audio List
. Call History
. Phonebook
. Cancel Route
. Nearby Places
. Store Location
. View Settings
2-7
2. Getting Started

. Select Add/Edit
. (Blank)
EDIT SHORTCUT MENUThe following procedure can edit or sort theshortcut menu.
1. Select [Select Add/Edit] to register a newitem to the menu, or to change an existingmenu item.
2. Select preferred setting.
. [Change Order]
Change the order in which shortcut menuitems are shown. Touch and hold the [ ]displayed next to the item you wish torelocate. Drag the icon to the position inthe list where you wish to insert the item.
. [Edit Shortcut Items]
Edit items to be displayed in the shortcutmenu.
MAP MENU
While scrolling the map screen, push<ENTER>or touch [ ] to display the Map Menu.
Available items:
. New Destination
. Show Current Location
. Store Location
. Nearby Places
. Delete Stored Location
DISPLAY VIEW BAR
Various map information screens can be shownby selecting from the Display View Bar.
When the screen displays the map, push<MAP> to show the Display View Bar.
Select an icon in the Display View Bar. Thecurrent view will changed and the Display ViewBar will be closed.
The following display views are available.
Viewing Split Map:
2-8
2. Getting Started

The map can be displayed on a split screen.Each screen can be adjusted independently.
Viewing Intersection:
The next intersection is always displayed.
INFO:
When no route is set, the intersection screen isnot displayed and the map is displayed on the fullscreen.
Viewing Turn List:
This displays the turn list on the left screen.
When approaching a guide point, the left screenautomatically switches to an enlarged view of theintersection.
INFO:
When no route is set, the turn list screen is notdisplayed and the map is displayed in the fullscreen.
Viewing Where am I ?:
This displays the information about the currentvehicle location.
Viewing Turn by Turn:
This displays a turn point when driving accordingto route guidance.
INFO:
When no route is set, a turn point screen is notdisplayed and the map is displayed in the fullscreen.
Viewing Fuel Economy
Fuel economy information can be checked whiledriving.
2-9
2. Getting Started

Viewing Eco Drive Report:
Your driving score will be displayed in real time,with 100 points designated as the score for idealeco-driving.
For improving your score:
. When starting off, depress the acceleratorgently.
. When cruising, accelerate and decelerate aslittle as possible.
. When decelerating, releasing the accelera-tor early.
CUSTOMIZING THE DISPLAY VIEWBARThe menu icons on the Display View Bar can becustomized to your preference.
1. Push<SETTING> and touch [Navigation] todisplay the navigation setting screen.
2. Touch [Map & Display View] and touch[Change Order].
3. Change the order of the icons to bedisplayed on the Display View Bar. Touchand hold the [ ] displayed next to the itemyou wish to relocate. Drag the icon to theposition in the list where you wish to insertthe item.
HOW TO INPUT LETTERS ANDNUMBERS
CHARACTER (letters and numbers)INPUT SCREENAlphanumeric characters are entered using thekeyboard screen.
*1 Touch a character on the displayed key-board. The selected character is entered.
*2 Entered characters are displayed here.
*3 Touch [Delete] to delete the last characterentered.
Touch and hold [Delete] to delete all thecharacters entered.
2-10
2. Getting Started

*4 The symbol keys are displayed by touching[Symbols]. The alphabet keys are displayedby touching [A-Z].
*5 Touch [Space] to enter a space.
*6 Touch [OK] or [List] to finalize your input.
INFO:
. Touch [CAPS] to toggle uppercase andlowercase characters on the keyboardscreen.
. Touch [ ] or [ ] to move the characterinput position.
FUNCTIONS DISABLED WHILEDRIVING
Example
2-11
2. Getting Started

To help ensure safe driving, some functionscannot be operated or have limited operationwhile the vehicle is in motion.
The on-screen text and keys for these restrictedfunctions will be “grayed-out” or muted andcannot be selected while driving. In some cases,a screen message will appear indicating arestricted function.
Restricted functions while driving include:
. Character (letter and number) input screen.
. Scrolling and viewing of certain list screens
. Displaying detail information and touchingitem on the information screen
. Adding/editing home location, address bookentries and current route
. Making a call by dial number and handsetphonebook
. Setting phone, NissanConnectSM Servicesand Bluetooth functions
These functions will become available againwhen the vehicle is not in motion.
Some of the destination setting functions thatbecome unavailable while driving can be oper-ated by voice recognition system. Available voicecommands may differ depending on the lan-guage setting.
2-12
2. Getting Started

3 Map operation
Map types ................................................................................... 3-2
2D map .................................................................................. 3-2
BirdviewTM (3D) map .......................................................... 3-3
Building graphics ................................................................. 3-4
Displaying current vehicle location ....................................... 3-4
Operating with control panel ............................................ 3-4
Operating with touch panel operation ........................... 3-4
Moving map ................................................................................ 3-5
2D map .................................................................................. 3-5
BirdviewTM (3D) map .......................................................... 3-5
Changing scale of map ............................................................ 3-6
Touch panel operation ........................................................ 3-6
Multi-function controller operation ................................ 3-6
Map scale ............................................................................ 3-6
Change map .............................................................................. 3-7
Setting split screen .................................................................. 3-8
Map view settings .................................................................... 3-8
Setting information on map ................................................. 3-11
Displaying facility icons ................................................. 3-11
Displaying map scrolling information ......................... 3-11
Road color ....................................................................... 3-11
Traffic information on map ................................................... 3-12

MAP TYPES
Two types of map views are available: 2D mapand BirdviewTM (3D) map.
2D MAPThe 2D map displays the map in a two-dimensional environment similar to a road map.
Screen information:
*1 Arrow:
Indicates the turning direction of the nextguide point. Distance to the guide point isalso indicated above the arrow.
*2 Traffic indicator:
Displays the reception condition of trafficinformation transmitted from the trafficinformation provider.
When the reception condition of trafficinformation transmitted from the provider isnot detected, the traffic indicator will be
“grayed-out”.
*3 Waypoint:
Displays the set locations between thestarting point and the destination. A max-imum of five waypoints can be set.
*4 Guide point:
Indicates a guide point on the route.
*5 Vehicle icon:
Indicates the current vehicle location andthe direction of travel.
3-2
3. Map operation

*6 Starting point:
Displays the vehicle location, with which theroute is set, as the starting point.
*7 Speed limit icon:
Displays the speed limit of the currentdriving road.
*8 NissanConnectSM Services antennaicon
When the system connects to the Nissan-ConnectSM Services Data Center, an an-tenna icon will appear on the screen.
“NissanConnectSM Services features”(page 7-14)
*9 Clock
Display current time.“Clock settings” (page 7-26)
*10 Remaining time and distance to thedestination:
Indicates the approximate remaining timeand distance to the destination or waypoint.This indicator will appear when a destinationor waypoint is set and route guidance isstarted.
*11 IVR soft button:
Touch the icon to connect to the Nissan-ConnectSM Services Interactive VoiceMenu.
“Connecting to Interactive VoiceMenu” (page 7-18)
*12 Map menu icon:
Touch the icon to display the shortcut menuor map menu.
“Shortcut menu” (page 2-7)“Map menu” (page 2-8)
*13 Scale indicator:
Indicates the scale of the map.
Touch the icon to display the scale bar. Themap scale can be adjusted using the scalebar.
“Changing scale of map” (page 3-6)
*14 / Direction indicator:
Indicates the directional setting of the map.Touch the icon to change the setting.
: North always pointing up.
: Direction of the vehicle always pointingup.
*15 Avoid area (green or blue):
Displays the areas to avoid that are stored inthe Address Book. During the route search,the route guidance is performed by search-ing for a route that avoids those areas.
*16 Street name:
Displays the name of the street that the
vehicle is currently driving on.
*17 Suggested route:
Appears in bold blue during route guidance.
*18 Stored location (yellow):
Displays the locations that are stored in theAddress Book. The icons can be changedaccording to your preferences.
*19 Destination:
Indicates the destination location of theroute guidance.
Upon reaching the destination, the addresswill be displayed on the map screen.
BirdviewTM (3D) MAPBirdviewTM displays the map from an elevatedperspective. In BirdviewTM, it is easy to recognizean image of the route because it provides apanoramic view over a long distance.
3-3
3. Map operation

INFO:
Note the following items about the BirdviewTM
display.. “BirdviewTM” is a registered trademark of
Clarion Co., Ltd.
. The map in BirdviewTM always appears withthe current forward direction facing up.
BUILDING GRAPHICSIn an area where the building graphics are storedin the map data, the building graphics aredisplayed when the map is zoomed in. On the2D map display, these are called “Buildingfootprint graphics”, and on the BirdviewTM dis-play, these are called “3D building graphics”.
The way of looking at the map is the same for the2D and BirdviewTM maps.
Building footprint graphics (2D map)
3D building graphics (BirdviewTM map)
INFO:
In an area where the building graphics are notstored in the map data, the normal map isdisplayed even when the map is zoomed in.
DISPLAYING CURRENT VEHICLELOCATION
OPERATING WITH CONTROL PA-NELThe basic map screen displays the currentlocation (the position where the vehicle mark islocated). Push <MAP> to display the currentlocation on the map when another screen isdisplayed.
After moving the map, push <BACK> on themap screen to display the current location mapscreen.
OPERATING WITH TOUCH PANELOPERATION
After moving the map, touch [ ] on the mapscreen to display the current location mapscreen.
3-4
3. Map operation

MOVING MAP
The operations for moving across the map aredifferent between the 2D and BirdviewTM maps.
Map scrolling operations are limited and not fullyavailable while driving. When detailed mapscreen is displayed while driving, the map cannotbe scrolled.
2D MAPThe following touch panel operations are avail-able to move map.
. Touch
Touch the screen. The cross pointer isdisplayed at the center of the map. Touchingthe screen again will scroll the map towardthe touched location.
. Long touch
Touch the direction to move to. The mapcontinues to scroll while the screen istouched.
While driving, one-touch continuous scrol-ling is disabled.
. Drag
Drags the map while the screen is touched.
. Swipe
Swipe to scroll the map.
Multi-function controller operation:
Push and hold the main directional buttons andthe additional directional buttons to scroll themap in the corresponding direction. The crosspointer is displayed at the center of the map.
BirdviewTM (3D) MAPThe following touch panel operations are avail-able to move map.
. Touch
Touch the screen. The cross pointer isdisplayed at the center of the map. Touchingthe screen again will scroll the map towardthe touched location.
Touch [ ] or [ ] to change the direction ofthe map.
. Long touch
Touch the direction to move to. The mapcontinues to scroll while the screen istouched.
While driving, one-touch continuous scrol-ling is disabled.
. Drag
Drags the map while the screen is touched.
. Swipe
Swipe the touch panel to scroll the mapscreen quickly.
Multi-function controller operation:
Push and hold the left and right main directionalbuttons to rotate the map counterclockwise orclockwise.
Push and hold the rest of the main directionalbuttons or additional directional buttons to scrollthe map in the corresponding direction. Thecross pointer is displayed at the center of themap.
3-5
3. Map operation

CHANGING SCALE OF MAP
There are several methods for changing the mapscale.
TOUCH PANEL OPERATION
1. Touch .
The scale bar is displayed.
2. Touch [Zoom In] or [Zoom Out] to changethe scale.
Pinch-in
To view a wider area, pinch-in the map screen.
Pinch-out
To view the map in detail, pinch-out the mapscreen.
Free zoom:
Depending on the setting, using the center dial tochange the map scale may adjust the scalenormally, or it may engage the free zoom (finerscale adjustment in smaller steps).
“Settings screen” (page 7-24)
MULTI-FUNCTION CONTROLLEROPERATIONTurn the center dial clockwise or counterclock-wise to change the map scale.
Clockwise: Zoom in
Counterclockwise: Zoom out
MAP SCALEAny required map scale (map coverage) be-tween 320 miles (640 km) and 1/32 mile (25 m)can be selected.
US Units Metric Units
320 miles 640 km
80 miles 160 km
32 miles 64 km
8 miles 16 km
5 miles 10 km
2 miles 4 km
1 mile 2 km
1/2 mile 1 km
1/4 mile 500 m
1/8 mile 200 m
1/16 mile 100 m
1/32 mile 50 m
1/64 mile 25 m
3-6
3. Map operation

INFO:
The traffic information icons are not displayed onthe map screen when the map scale is set to 8miles (16 km) or higher.
“Traffic information on map” (page 7-6)
CHANGE MAP
The map view type can be changed by touching[ ] / [ ] on the map screen.
The screen will change to North Up, Heading Upand BirdviewTM each time [ ] / [ ] istouched.
North Up
Heading Up
BirdviewTM
You can also set the map view by pushing<SETTING> and touch [Navigation].
“Map view settings” (page 3-8)
3-7
3. Map operation

SETTING SPLIT SCREEN
It is possible to view the two types of map view orthe map view, and other information at the sametime. The right screen displays the map screen,and the left screen displays a turn list or aninformation screen.
1. Push <MAP> while the current locationmap screen is displayed, the Display ViewBar is displayed.
2. Select the screen you would like to set.“Display View Bar” (page 2-8)
MAP VIEW SETTINGS
The setup for the map view is performed from theSettings menu.
1. Push <SETTING>.
2. Touch [Navigation].
The following settings are available.
3-8
3. Map operation

Menu item Action
[Map & Display View] [Change Order] Sort the icon on the Display View Bar.
[Full Map] Display full map screen.
[Split Map] Select one of the settings to be applied to the display.“Display View Bar” (page 2-8)
[Intersection]
[Turn List]
[Where am I?]
[Turn by Turn]
[Fuel Economy]
[ECO Drive Report]
Menu item Action
[Map Preferences] [Map View ] [North Up] Select one of the map views to be applied to the map screen.
[Heading Up]
[Birdview (3D)]
[Long Range Heading Up] The position of the vehicle icon can be changed to view a wider area in thetraveling direction. The vehicle icon is located slightly lower than the center of thescreen.Long Range Map View is available only when the map view is “Heading Up”.
[Map Color] Select a preferred map color.
[Map Text Size] [Large] Sets the font size.
[Medium]
[Small]
3-9
3. Map operation

Menu item Action
[Birdview Angle] Adjusts the BirdviewTM angle.
[Auto North Up] Sets the top of the map to remain oriented to the north.
[Show FWY Exit] Sets the display of the freeway exit information icon on/off.
[Automatic Display in Fwy Mode] The turn list can be set to on or off to be displayed automatically while driving ona freeway.
[Names Displayed on Map] [Place Names] Allows place names to be displayed on the map screen.
[POI Names] Allows facilities names to be displayed on the map screen.
[Road Names] Allows road names to be displayed on the map screen.
[Left Split Map Settings] [Left Side Map Orientation] The map view for the left side of split screen can be selected from North Up orHeading Up.
[Long-Range Driving Direc-tion]
Allows the map view for the left side of the split screen to change the position ofthe vehicle icon so that a wider area in the traveling direction can be viewed. Thevehicle icon is located slightly lower than the center of the screen.
3-10
3. Map operation

SETTING INFORMATION ONMAP
Some information on the map can be displayedor hidden.
DISPLAYING FACILITY ICONSThe facility icons can be displayed or hidden bytype.
1. Push <SETTING>.
2. Touch [Navigation].
3. Touch [POI Icons Displayed on Map].
4. Touch the preferred icon. The indicator of theselected icon illuminates.
INFO:
. The map icons are not displayed on themap screen when the map scale is setto 1/4 mile (500 m) or higher in the 2Dand BirdviewTM map.
. If brand icons are registered in the map data,the brand they will be displayed on the mapinstead of the general map icons listed.
Available setting icon. : Restaurant
. : Gas Station
. : Hotel
. : ATM
. : Rest Area
DISPLAYING MAP SCROLLING IN-FORMATIONInformation about the location, on which thecenter of the cross pointer is placed by scrollingon the map, can be set to be displayed.
1. Push <SETTING>.
2. Touch [Navigation] and touch [Other Set-tings].
3. Touch [Map Scrolling Information].
4. Touch the preferred information item.
The following information items are available.
. [Stored Location Icon Info]
. [Destination/Waypoint Icon Info]
. [Latitude/Longitude Info]
ROAD COLORThe road types are differentiated by color.
Freeway: Red or light red (zoomed in)
Main road: Brown or dark yellow
Narrow street: Gray
Road with incomplete map data: Dark green
3-11
3. Map operation

TRAFFIC INFORMATION ONMAP
With a subscription to the SiriusXM Traffic, trafficinformation is displayed.
“Traffic information on map” (page 7-6)
Free Flow: Green arrow
Moderate traffic: Yellow arrow
Heavy traffic: Red
Section affected by serious traffic event: Purple
The following traffic information icons may bedisplayed
: Accident
: Closed road
: Information
: Road work
: Slippery road
: Weather
: Incident
3-12
3. Map operation

4 Setting destination
Changing region ........................................................................ 4-2
Specifying state/province .................................................. 4-2
Specifying city ...................................................................... 4-2
Destination screen .................................................................... 4-3
Finding address ......................................................................... 4-7
Finding points of interest ......................................................... 4-8
Searching by a landmark name ........................................ 4-8
Searching from the landmark category .......................... 4-9
Setting home as destination ................................................ 4-10
Finding nearby place ............................................................. 4-11
Searching from Stored Locations ...................................... 4-11
Searching from history .......................................................... 4-12
Using Journey Planner .......................................................... 4-12
Setting intersection ................................................................ 4-13
Setting freeway entrance/exit ............................................. 4-14
Setting city center ................................................................. 4-14
Setting by phone number .................................................... 4-15
Setting from stored routes .................................................. 4-15
Searching by connecting Data Center ............................. 4-16
Setting by NissanConnectSM Services ............................ 4-17
Searching by using IVR soft button on map ........... 4-17
Using Google send-to-car ........................................... 4-17
Using Destination Send to Car ................................... 4-17
Setting point on map ............................................................ 4-18
Procedures after setting route ........................................... 4-18
Moving location of destination .................................... 4-19

CHANGING REGION
When setting a destination, the location can benarrowed down by specifying the region or city.
SPECIFYING STATE/PROVINCEThe state to be searched will be changed whensearching for a destination by entering anaddress: [Street Address], [Points of Interest]or [Intersection], etc.
1. Push <NAVI>.
2. Touch [Destination Menu].
3. Touch the key of the desired search methodto be set.
4. Touch [State/Province:].
5. Enter the name of the state and then touch[List]. A list screen is displayed.
6. Touch the preferred region from the list. Aftersetting, the display automatically returns tothe Destination screen.
INFO:
. It is not possible to search for a route fromthe continental United States to Hawaii.
. When the system is restarted, it sets thestate to that automatically detected by theGPS.
. When display State/Province input screen,touch [Country] to change the country.
SPECIFYING CITYWhen searching for a destination, the search canbe narrowed down by specifying the city.
1. Touch [City]. A character input screen isdisplayed.
2. Enter the name of the city and then touch[List]. A list screen is displayed.
INFO:
. The same screen will be displayed when alocation is searched from a street.
. Touch [Last 5 Cities] to display the lastfive cities set as destinations.
. Touch [All Cities] to display the all cities inthe current state/province.
3. Touch the city of the destination from the list.
INFO:
The number of matches are displayed to the leftof the entry results. In some cases, the number ofmatches displayed on the screen and in the listmay differ. If this occurs, enter more charactersto further reduce the number of matches.
4-2
4. Setting destination

DESTINATION SCREEN
There are several methods that can be used to set a destination. Understand the advantages of each method and select the best method for finding andsetting a preferred destination.
Step Setting item Action
Push <NAVI>. [Street Address] Searches for a destination by address.“Finding address” (page 4-7)
[Points of Interest] Searches for a destination from various categories of businesses orlocations.
“Finding points of interest” (page 4-8)
[Home] Searches for a route from the current location to the previously storedhome destination.
“Setting home as destination” (page 4-10)
[Destination Menu] [Street Address] Searches for a destination by address.“Finding address” (page 4-7)
[Points of Interest] Searches for a destination from various categories of businesses orlocations.
“Finding points of interest” (page 4-8)
4-3
4. Setting destination

Step Setting item Action
[Home] Searches for a route from the current location to the previously storedhome destination.
“Setting home as destination” (page 4-10)
[Nearby Places] Searches for points of interest near the current vehicle location, suchas restaurants and charging stations, etc.
“Finding nearby place” (page 4-11)
[Stored Locations] Searches for a destination from the list of the stored locations.“Searching from Stored Locations” (page 4-11)
[Previous Destinations] Sets the previous starting point as the destination. Searches for thedestination from the previous destinations.
“Searching from history” (page 4-12)
[Journey Planner] Sets a route plan downloaded from the NISSAN Owner’s PortalWebsite.
“Using Journey Planner” (page 4-12)
[Intersection] Searches for a destination from an intersection.“Setting intersection” (page 4-13)
[Freeway Entrance/Exit] Searches for a destination from a freeway entrance/exit.“Setting freeway entrance/exit” (page 4-14)
[City Center] Sets the center of a city as the destination.“Setting city center” (page 4-14)
[Phone Numbers] Searches for a point of interest by a telephone number.“Setting by phone number” (page 4-15)
[Stored Routes] Selects a stored route.“Setting from stored routes” (page 4-15)
[Connected Search] Input a keyword of a point of interest and connect and search theNissanConnectSM Services Data Center.
“Searching by connecting Data Center” (page 4-16)
4-4
4. Setting destination

Step Setting item Action
Scroll map and touch [ ]. [New Destination] Set a location scrolled to on the map as the destination
Push <INFO>. [NissanConnect Ser-vices]
[Connect to Voice Menu] Connects to the NissanConnectSM Services Interactive Voice Menu.
[Sync All Feeds] Updates information list by connecting to the NissanConnectSM
Services Data Center.
[Connected Search] Input a keyword of a point of interest and connect and search theNissanConnectSM Services Data Center.
“Searching by connecting Data Center” (page 4-16)
[Send to Car] Search for a location using Google maps, and download theinformation to set the destination via the NissanConnectSM ServicesData Center.
“Using Google send-to-car” (page 4-17)
[Destination Send to Car] Search for destinations from a point of interest (POI) databaseaccessed within the NissanConnectSM portal website.
“Using Destination Send to Car” (page 4-17)
[Journey Planner] Sets a route plan downloaded from the NISSAN Owner’s PortalWebsite.
“Using Journey Planner” (page 4-12)
[History] The information feeds that were previously referred to are displayed.
Push IVR soft button.Speak your choice, or ask the NissanConnectSM Services Response Specialists directly tosearch for your destination.
Set the destination with the assistance of a NissanConnectSM
Services Response Specialist.
4-5
4. Setting destination

INFO:
. If the route is already set, the selected location becomes a waypoint.
. After setting a destination, the location of the destination can be adjusted and the location can be stored in the Address Book, etc.“Procedures after setting route” (page 4-18)
. The destination can be deleted.“Canceling Route” (page 5-7)
4-6
4. Setting destination

FINDING ADDRESS
Searches for a destination by address.
1. Push <NAVI>.
2. Touch [Street Address]. A number inputscreen is displayed.
3. Input the street address.
. When [City] is selected , a city can bespecified by typing the city name.
. When [City Center] is touched while a cityis selected, the center of the citybecomes the target of the search.
. Touch [Intersection] to enter the intersec-tion.
. If the house number is not available, touch[No House #].
4. When information about house number,street, city, and state are entered, the
destination is proposed on the display.Touch [OK].
INFO:
. Touch [State/Province:] or [City] to nar-row down the specified region and city.
“Changing region” (page 4-2)
5. Enter the name of the street. After finishingthe entry, touch [List]. A list of streets isdisplayed.
6. Touch the street of the destination from thelist.
INFO:
Touch [ ] to return to the previous screen.
7. Touch [Start] to start route guidance.
INFO:
. The [Street Address] can also be set bypushing <NAVI> and then touching[Destination Menu].
. After setting a destination, the location ofthe destination can be adjusted and thelocation can be stored in the AddressBook, etc.
“Procedures after setting route”
(page 4-18)
Voice command
1. Push < > located on the steering-wheel.
2. After the tone sounds, speak a command.
To searches for a destination by address:
“Navigation”, "Street Address”
4-7
4. Setting destination

FINDING POINTS OF INTEREST
This allows you to find a facility by name or bycategory. Specify the region and city of thedestination to find it more quickly.
NOTE:
Locations and business hours of facilitiesare subject to change, which may not bereflected in the map data. Double-checkthis information before you go to anemergency facility to ensure that you canreceive the proper support. Otherwise, youmay not receive emergency help when youarrive at the destination.A confirmation message also appears onthe navigation screen. Follow the displayedinstructions and check the items required.
SEARCHING BY A LANDMARKNAME1. Push <NAVI>.
2. Touch [Points of Interest].
3. Touch [Spell Name]. A character inputscreen is displayed.
INFO:
Touch [City] and touch [Last 5 Cities] todisplay the last five cities recently set asdestinations.
4. Enter the name of the destination facility.After finishing the entry, touch [List]. A listscreen is displayed.
5. Touch the preferred destination facility fromthe list.
Narrow down conditions:
. [Sort]:
— [By Distance]:
Shows a list of facilities that are near thecurrent vehicle location.
— [By Name]:
Shows a list of facilities sorted alphabe-tically by name order.
. [By Category]:
Display the list that summarizes theentered names into categories. Selectthe category to narrow down the search.Touch [Show Related] to display therelated facility on the narrowed downcategory list.
. [City/Area]:
— [Within a City]:
Input the city to narrow down the targetcity.
— [Near Destination]:
When the destination is set, this indicatesa list of facilities around the destination.
— [Show Along Route]:
The system displays the facilities locatedalong the route.
4-8
4. Setting destination

INFO:
. Touch [ ] in the list screen to displaythe detailed information about the POIthat is selected. Touch [Call] to make acall to the facility.
6. Whole route map is displayed. Touch [Start]to start route guidance.
INFO:
. The [Points of Interest] can also be set bypushing <NAVI> and then touching [Desti-nation Menu].
. If [Space] is touched and a keyword isinputted, a search will be possible afterentering two or more words.
. After setting a destination, the location of thedestination can be adjusted and the locationcan be stored in the Stored Locations, etc.
“Procedures after setting route”(page 4-18)
SEARCHING FROM THE LANDMARKCATEGORY1. Push <NAVI>.
2. Touch [Points of Interest]. The main categorymenu is displayed.
3. Touch the main category. The subcategorylist is displayed.
4. Touch the subcategory. A list screen isdisplayed.
Narrow down conditions:
. [Sort]:
— [By Distance]:
Shows a list of facilities that are near thecurrent vehicle location.
— [By Name]:
Shows a list of facilities sorted alphabe-tically by name order.
. [Spell Name]:
Enter the facilities name to narrow downthe search.
. [City/Area]:
— [Within a City]:
Input the city to narrow down the targetcity.
— [Near Destination]:
When the destination is set, this indicatesa list of facilities around the destination.
— [Show Along Route]:
The system displays the facilities locatedalong the route.
5. Touch the preferred destination facility fromthe list.
Touch [Start] to start route guidance.
INFO:
. After setting a destination, the location of thedestination can be adjusted.
“Procedures after setting route”(page 4-18)
. If the nearest POI cannot be searched, amessage asking whether to search from anextended area will be displayed. When [Yes]is selected, the system starts to search for
4-9
4. Setting destination

POI in a wider area. SETTING HOME AS DESTINA-TION
The home location can be set as the destinationif the home location is stored in advance. Thisfunction is especially useful when searching for aroute to return to the home location.
1. Push <NAVI>.
2. Touch [Home].
3. The home location is displayed, and thesystem sets the home location as thedestination.
INFO:
If the home location is not stored yet, thesystem will automatically display a screen forstoring it.
“Storing home location” (page 6-2)
4. Touch [Start] to start route guidance.
INFO:
The [Home] can also be set by pushing <NAVI>and then touching [Destination Menu].
Voice command
1. Push < > located on the steering-wheel.
2. After the tone sounds, speak a command.
To set the home location as the destination:
“Home”
4-10
4. Setting destination

FINDING NEARBY PLACE
A facility located near the current vehicle locationor another location that you move to by scrollingthe map can be set as the destination. Thisallows you to set the destination to a facilitylocated near the current vehicle location oranother location that you move to by scrollingthe map.
1. Push <NAVI>.
2. Touch [Destination Menu].
3. Touch [Nearby Places]. The category list isdisplayed.
4. Select [RESTAURANT] for example.
5. Select preferred category from the subcategory list.
6. Touch the preferred destination from the list.The position of the selected location isdisplayed in the preview.
INFO:
. If the suggested route is already set, bytouching [Show Along Route], the systemdisplays only the facilities located alongthe route.
. A maximum of 100 facilities can bedisplayed on the list screen.
7. Touch [Start] to start route guidance.
INFO:
You can also set the destination by touching[ ] when scrolling the map and selecting[Nearby Places] from the shortcut menu.
SEARCHING FROM STOREDLOCATIONS
Storing frequently used destinations in theAddress Book makes it easy to set a destination.Locations should be stored in the Address Bookbefore using this function.
“Storing location” (page 6-2)
1. Push <NAVI>.
2. Touch [Destination Menu].
3. Touch [Stored Locations].
4. Touch the preferred location from the list.
INFO:
. Selecting [Sort] displays a list of varioussort functions.
— [By Number]:
The Address Book entries are displayedin ascending numerical order.
4-11
4. Setting destination

— [By Name]:
The Address Book entries are displayedin alphabetic order.
— [By Icon]:
By selecting a particular icon, a list thatcontains only the Address Book entriesassociated with that icon is displayed.
— [By Group]:
By selecting a particular group (family,friends, leisure, etc.), the selected groupis displayed at the top of the list.
. When [Store] is touched, a new locationcan be stored.
5. Touch [Start] to start route guidance.
Voice command
1. Push < > located on the steering-wheel.
2. After the tone sounds, speak a command.
To set the destination from the Stored Locations:
“ Stored Locations”
SEARCHING FROM HISTORY
A previous destination can be set as thedestination.
Up to 100 previous destinations will beautomatically stored. If the number of previousdestinations exceeds 100, the oldest one will bereplaced by the newest one.
1. Push <NAVI>.
2. Touch [Destination Menu].
3. Touch [Previous Destinations]. A list screenis displayed.
4. Touch the previous start point or the previousdestination from the list.
5. Touch [Start] to start route guidance.
Voice command
1. Push < > located on the steering-wheel.
2. After the tone sounds, speak a command.
To display the previous destinations list:
“Previous Destinations”
USING JOURNEY PLANNER
It is possible to set the route according to theroute plan created in advance by the NISSANOwner’s Portal Website.
INFO:
Use of NissanConnectSM Services features isdependent upon a valid subscription and thetelematics device being in operative condition, aswell as cellular connectivity, navigation map dataand GPS satellite signal reception being avail-able.
1. Push <NAVI>.
2. Touch [Destination Menu].
3. Touch [Journey Planner]. The system willconnect to the NissanConnectSM ServicesData Center and display the Journey Plannerlist screen.
4-12
4. Setting destination

4. Select the preferred route plan from the list.
INFO:
. Touch [Update List] to update the listinformation.
. Touch [Details] to preview the route.
. Touch to display facility information.
5. The selected route plan is displayed. Touch[Start] after confirming the location of thedisplayed destination.
INFO:
. The Journey Planner can also be set bypushing <INFO> and then touching [Nis-sanConnect Services].
. Journey Planner is a NissanConnectSM
Services feature. Subscription is requiredto use the NissanConnectSM Services.
. Journey Planner cannot be used if [Decline]is touched on the Start-up Screen.
. Refer to the NISSAN Owner’s Portal Web-site for how to set the destination usingJourney Planner.
SETTING INTERSECTION
It is possible to set an intersection of any twostreets as the destination and have the systemcalculate a route.
1. Push <NAVI>.
2. Touch [Destination Menu] and touch [Inter-section].
3. The first street input screen is displayed.
INFO:
Touch [State/Province], [Country] or [City] tonarrow down the specified country and city.
4. Enter the name of the first street. Afterfinishing the entry, touch [List]. A list screenis displayed.
INFO:
If the country or city is changed afterselecting the first street, the first street thatwas selected will be canceled.
5. Touch a street as the first street from the list.
6. The second street input screen is displayed.
7. Enter the name of the second street. Afterfinishing the entry, touch [List]. A list screenis displayed.
INFO:
Touch [Map] on the list to preview thelocation of the selected junction.
8. Touch a street as the second street from thelist.
9. Whole route map is displayed. Touch [Start]to start route guidance.
4-13
4. Setting destination

SETTING FREEWAY ENTRANCE/EXIT
It is possible to set the destination to an entranceor exit of a freeway.
1. Push <NAVI>.
2. Touch [Destination Menu].
3. Touch [Freeway Entrance/Exit]. A characterinput screen is displayed.
4. Enter the name of the freeway. After finishingentry, touch [List].
5. Touch the preferred freeway.
6. Touch [Entrance] /[Exit]. A list screen isdisplayed.
7. Touch the preferred destination from the list.The selected location is displayed in thepreview.
INFO:
Touch [Sort] and touch [By Distance] to sortthe list by the nearest distance. Touch [ByRoad No.] to sort by the road no.
8. Touch [Start] to start route guidance.
SETTING CITY CENTER
It is possible to set the center of a specified cityas a destination.
1. Push <NAVI>.
2. Touch [Destination Menu].
3. Touch [City Center]. A character inputscreen is displayed.
4. Enter the name of the city and touch [List]. Alist screen is displayed.
INFO:
Touch [Last 5 Cities] to display the last fivecities recently set as destinations.
5. Touch the preferred destination from the list.
INFO:
Touch [Map] to preview on the display.
6. The selected destination is displayed. Touch[Start] after confirming the location of thedisplayed destination.
4-14
4. Setting destination

SETTING BY PHONE NUMBER
If the phone number of a facility is known, it ispossible to search for a facility by entering thephone number.
INFO:
. If the area code of the specified telephonenumber does not exist in the map data, thesystem cannot search for the location.
. Only the locations included in the databasein the map data can be searched for byphone number. Residential phone numberscannot be used to search for a location.
1. Push <NAVI>.
2. Touch [Destination Menu].
3. Touch [Phone Numbers]. The telephonenumber input screen is displayed.
4. Enter the telephone number including thearea code. After finishing entry, touch [OK].
INFO:
A list screen is displayed if there are two ormore search results. Touch the preferreddestination from the list.
5. The selected destination is displayed. Touch[Start] after confirming the location of thedisplayed destination.
SETTING FROM STOREDROUTES
It is possible to select a preferred route from thestored routes.
1. Push <NAVI>.
2. Touch [Destination Menu].
3. Touch [Stored Routes]. A list screen isdisplayed.
4. Touch the preferred route from the list.
5. The stored route is displayed, touch [NewDest.].
6. The entire route is shown on the map. Touch[Start] to start route guidance.
4-15
4. Setting destination

INFO:
. The stored route only includes locations(destination and waypoints) and route cal-culation conditions, not the route itself.Therefore, when the destination is set usinga stored route, a different route may besuggested if the current vehicle location isdifferent from the one when the route wasstored.
SEARCHING BY CONNECTINGDATA CENTER
It is possible to find a point of interest byinputting a keyword and connecting to theNissanConnectSM Services Data Center. Thesearched location can be set as a destination.
INFO:
Use of NissanConnectSM Services features isdependent upon a valid subscription and thetelematics device being in operative condition, aswell as cellular connectivity, navigation map dataand GPS satellite signal reception being avail-able.
1. Push <NAVI>.
2. Touch [Destination Menu].
3. Touch [Connected Search].
4. Enter the keyword and touch [Search]. Thesystem will connect to the NissanConnectSM
Services Data Center and the search resultswill be displayed.
5. Touch the preferred destination from the list.
INFO:
. Touch [info] to display the facility informa-tion.
. Touch [Details] to display the informationfeeds screen.
“Screen information” (page 7-20)
6. The entire destination is shown. Touch [Start]to start route guidance.
INFO:
The Connected Search can also be set bypushing <INFO> and then touching [Nissan-Connect Services].
4-16
4. Setting destination

SETTING BY NISSANCON-NECTSM SERVICES
It is possible to set the destination using theNissanConnectSM Services features.
“NissanConnectSM Services” (page 7-14)
INFO:
Use of NissanConnectSM Services features isdependent upon a valid subscription and thetelematics device being in operative condition, aswell as cellular connectivity, navigation map dataand GPS satellite signal reception being avail-able.
SEARCHING BY USING IVR SOFTBUTTON ON MAP
It is possible to set a destination by touching theIVR (Interactive Voice Response) soft button*1on the map. You can choose from the optionsprovided by the voice guidance and speak your
choice, or ask the NissanConnectSM ServicesResponse Specialists directly to search for yourdestination.
“Connecting to Interactive Voice Menu”(page 7-18)
USING GOOGLE SEND-TO-CARIt is possible to search for a location usingGoogle maps, and to download the informationto set the destination via the NissanConnectSM
Services Data Center.
1. Push <INFO>.
2. Touch [NissanConnect Services].
3. Touch [Send to Car].
The system connects to the NissanCon-nectSM Services Data Center and thedestination list is downloaded.
4. Select the preferred destinations from thelist. The position of the selected location isdisplayed in the preview.
INFO:
Select [Update List] to update the listinformation.
5. Touch [Start] to start route guidance.
INFO:
Refer to the NISSAN Owner’s Portal Website forthe destination setting using Google send to car.
USING DESTINATION SEND TO CARDestination Send to Car enables you to searchfor destinations from a point of interest (POI)database accessed within the NissanConnectSM
portal website.
1. Push <INFO>.
2. Touch [NissanConnect Services].
3. Touch [Destination Send to Car].
4. Select preferred folder.
5. Select preferred channel. The list of destina-tions which you set at the NissanConnectSM
portal website is displayed.
6. Select preferred destination from the list.
4-17
4. Setting destination

INFO:
Select [Update List] to update the list of point ofinterest.
SETTING POINT ON MAP
It is possible to set a location scrolled to on themap as the destination and have the systemcalculate a route.
1. Scroll the map, place the cross pointer overthe preferred location, and touch [ ].
INFO:
. The point on the blinking road where thecenter of the cross pointer is located canbe set as a destination.
2. Touch [New Destination].
3. The entire route is shown. Touch [Start] tostart route guidance.
PROCEDURES AFTER SETTINGROUTE
The system sets the destination to the selectedlocation and starts calculating a route. Afterperforming a route search, route guidance canbe started. Also, it is possible to confirm orchange a route.
Available items after setting route
. [Start]:
Starts route guidance to the selected desti-nation.
INFO:
If no operations have been performed on thesystem for several seconds, [Start] is automati-cally selected, and the system starts routeguidance. When the vehicle is being driven,[Start] is automatically selected and the system
4-18
4. Setting destination

will start the route guidance function.
. [More Routes]:
Route conditions for route calculation can bechanged.
The routes may not always be different.
— [Fastest Route] :Prioritizes the shortest time.
— [Energy-Saving] :Energy-Saving route.
— [Shortest Distance] :Prioritizes the shortest distance.
. [Turn List]:
Display the turn list.
. [Add Waypoint]:
Allows you to edit the route by adding adestination or waypoint.
— If a waypoint is added, three alternativeroutes cannot be selected.
— If a destination is added, the priordestination becomes a waypoint.
— It is possible to edit or add a destination orwaypoints to the route that is already set.
“Editing route” (page 5-8)
. [Move Loc.]
The location of the destination or waypoint
can be adjusted by moving the cross pointeracross the map.
“Moving location of destination”(page 4-19)
. [Information]:
Allows you to store the destination. If there isinformation about the destination (streetaddress and phone number) stored in themap data, it can also be displayed.
MOVING LOCATION OF DESTINA-TIONThe location of the destination can be adjustedby moving the cross pointer across the map.
1. After setting destination, touch [Move Loc.].
2. Touch map screen. A map screen with thedestination located on the map center isdisplayed.
3. Adjust the location by moving the crosspointer across the map and touch [OK]. Thelocation of the destination is modified.
INFO:
. The screen for adjusting the location alsochanges when the map screen displayed onthe right side of the screen is touched.
. The map scale can be changed.“Changing scale of map” (page 3-6)
4-19
4. Setting destination

MEMO
4-20
4. Setting destination

5 Route guidance
About route guidance .............................................................. 5-2
Voice guidance during route guidance .......................... 5-2
Route guidance screens .................................................... 5-4
Guidance screen settings ....................................................... 5-7
Canceling Route ........................................................................ 5-7
Route menu screen .................................................................. 5-7
Editing route ............................................................................... 5-8
Setting destination or waypoint ....................................... 5-9
Editing/deleting destination or waypoint ....................... 5-9
Changing route calculation conditions ....................... 5-10
Changing order of destination and waypoints ........ 5-10
Recalculating route ............................................................... 5-11
Searching for detour route using traffic information ..... 5-11
Traffic information based detour ................................. 5-11
Specified distance based detour ............................... 5-12
Automatic detour guidance ......................................... 5-12
Displaying Turn List ............................................................... 5-13
Route guidance settings ...................................................... 5-13
Guidance settings .......................................................... 5-14
Route Settings ................................................................ 5-16

ABOUT ROUTE GUIDANCE
After setting the route, select [Start] to start routeguidance.
Throughout route guidance, the system navi-gates you through the guide points using visualand voice guidance.
CAUTION
. The navigation system’s visual andvoice guidance is for reference pur-poses only. The contents of theguidance may be inappropriate de-pending on the situation.
. Follow all traffic regulations whendriving along the suggested route(e.g., one-way traffic).
“Route guidance” (page 9-8)
VOICE GUIDANCE DURING ROUTEGUIDANCE
Basics of voice guidanceVoice guidance announces which direction toturn when approaching an intersection for whicha turn is necessary.
Example of voice guidance
*1 “In about one quarter mile (400 meters),right (left) turn.”
“Right (left) turn ahead.”
*2 “In about one quarter mile (400 meters)freeway entrance on your right onto (roadnumber and direction).”
“Freeway entrance on your right onto (road
5-2
5. Route guidance

number and direction).”
*3 “In about one mile (two kilometers), exit onyour right.”
“Exit on your right.”
*4 “You have arrived at your destination. End-ing route guidance.”
Directions will differ, depending on the road type.
INFO:
. Distances may vary, depending on thevehicle speed.
. There may be some cases in which voiceguidance and actual road conditions do notcorrespond. This may occur because ofdiscrepancies between the actual road andthe information on the map data, or may alsobe due to the vehicle’s speed.
. In case voice guidance does not correspondto the actual road conditions, follow theinformation obtained from traffic signs ornotices on the road.
. Route guidance provided by the navigationsystem does not take carpool lane drivinginto consideration, especially when carpoollanes are separated from other road lanes.
. The system will only announce street nameswhen the system language is set to English.Street names are not announced when thesystem is set to French or Spanish.
. When approaching a guide point (intersec-tion or corner), destination, etc. during routeguidance, voice guidance announces theremaining distance and/or turning direction.
Repeating voice guidanceThis function is available throughout routeguidance, from the time after the route calcula-tion is completed until the vehicle arrives at thedestination. Push <VOICE>. Voice guidancewill be repeated.
INFO:
. If <VOICE> is pushed when the vehicle isdeviating from the suggested route andwhen the automatic reroute function is off,voice guidance will announce, “Proceed tothe highlighted route.”
. If <VOICE> is pushed when the vehicle isgoing in the wrong direction, the system willannounce a route to allow you to resume theroute set with voice guidance.
Notification when approaching desti-nationOrdinary road:
When approaching the destination, voice gui-dance will announce, “You have arrived at yourdestination. Ending route guidance.” To reachyour final destination, refer to the map screen.
Dark green road:
After passing the last turning point on asuggested route, voice guidance will announce,“The route to your destination includes roadsthrough incomplete map areas. Voice guidancewill not be provided in these areas.” Whenapproaching the endpoint of the suggested road,voice guidance will announce, “Entering the roadwith incomplete map data. Please use thedirection arrow and distance information toproceed to your destination.”
Notes on voice guidance. Voice guidance in this system should be
regarded as a supplementary function.When driving the vehicle, check the routeon the map and follow the actual roads andtraffic regulations.
. Voice guidance is activated only for inter-sections with certain conditions. There maybe cases where the vehicle has to turn, but
5-3
5. Route guidance

voice guidance is not provided.
. Voice guidance contents may vary, depend-ing on the direction of the turn and the type ofintersection.
. The voice guidance timing will vary depend-ing on the situation.
. When the vehicle has deviated from thesuggested route, voice guidance is notavailable. The system will not announce this.Refer to the map and recalculate the route.
“Recalculating route” (page 5-11)
. Voice guidance may not accurately corre-spond with road numbers and directions atfreeway junctions.
. Voice guidance may not accurately corre-spond to street names at freeway exits.
. The displayed street names may sometimesdiffer from the actual names, or “UNKNOWNSTREET NAME” may be displayed.
. Voice guidance is not available when the[Voice Guidance] is turned off.
“Volume settings” (page 7-28)
. Voice guidance will start when the vehicleenters the suggested route. Refer to the mapfor directions to the starting point of theroute.
. When approaching a waypoint, voice gui-dance will announce, “You have arrived atwaypoint 1 (2, 3, 4,...).” Voice guidance willswitch to the next section of the route. Whenvoice guidance is not available, refer to themap for directions.
. In some cases, voice guidance ends beforearrival at the destination. Refer to thedestination icon on the map to reach thedestination.
. If the system recognizes on which side thedestination (waypoint) is located, voiceguidance will announce “on the right/left”after announcing the arrival at the destina-tion.
. Voice guidance may be partially operationalor inoperative due to the angle of roads at anintersection.
. Because freeway lane information is avail-able only for approximately 7,000 majorfreeways in North America, it is not possibleto display information for all junctions andexits.
. Freeway exit information may differ from theinformation on the actual exit signs.
. Because it is not possible to consider dataconcerning roads that are seasonally avail-
able or unavailable, a route may be displayedthat does not match the actual trafficrestrictions. Be sure to follow the actualtraffic restrictions while driving.
. Canada and Alaska contain many roads withincomplete map data. As a result, whensearching for a route, the route may includeroads with incomplete data. In regions whereroad data is not complete, voice guidancemay stop for long periods of time. Be sure tofollow the actual traffic restrictions whiledriving.
ROUTE GUIDANCE SCREENSVarious guidance screens are displayed duringroute guidance.
5-4
5. Route guidance

Route guidance on map screen
When route guidance starts, the small turn arrowon map is displayed in the upper left corner of themap screen. This arrow indicates the turningdirection at the next guide point (corner orintersection). The distance is also displayed. Atthe top of the screen, the distance to the nextguide point and the name of the next street toturn on to are displayed. Also, there may becases where next street names are announced.
Enlarged intersection view
When approaching a guide point, the systemautomatically changes to the split screen andshows an enlarged view of the intersection onthe left screen. To switch to the previous screenwhile the enlarged intersection view is displayed,push <MAP>.
Depending on the setting, the system canconstantly display the split screen as the displayview screen.
Junction guidance
While driving on a freeway, when the vehicle isapproximately one mile (approximately two km)from a junction, the system automaticallyswitches to the split screen and displays anenlarged view of the junction on the left screen.After passing the junction, the system automa-tically returns to the full screen mode. To switchto the previous screen while the enlargedjunction view is displayed, push <MAP>.
5-5
5. Route guidance

Turn list
When approaching a guide point, the left screenautomatically switches to an enlarged view of theintersection. To switch to the previous screenpush <MAP>.
Depending on the setting, the system canconstantly display the split screen as the displayview screen.
Showing freeway exit information
When [Show FWY Exit] is set to ON and theroute includes a freeway or toll road, all exitsalong the route which have exit information willbe shown in the turn list. The exit information isshown as icons.
Selecting a waypoint from the exitinformation listWhen exit information is displayed on the turnlist, a waypoint to a facility located near thefreeway exit can be set as a waypoint. The facilitycategories that are not shown with an iconcannot be selected.
1. Touch the exit where the exit information iconis displayed. The category list screen isdisplayed.
2. Touch the landmark category. The list screenfor showing facilities located near the free-way exit is displayed.
INFO:
The facility categories that are not shownwith an icon cannot be selected.
3. Touch the preferred facility for the waypoint.
4. The waypoint is set, and the route search isperformed.
“Procedures after setting route”(page 4-18)
5-6
5. Route guidance

GUIDANCE SCREEN SETTINGS
The guidance screen can be displayed at alltimes even when the vehicle is located away fromthe guide point. Various types of screens can beset.
“Display View Bar” (page 2-8)
CANCELING ROUTE
It is possible to delete a destination and allwaypoints that have already been set.
1. Push <NAVI>.
2. Touch [Cancel Route].
3. A confirmation message is displayed.
The destination and the waypoints aredeleted.
INFO:
. The [Cancel Route] can also be set bypushing <NAVI> and then touching [RouteMenu].
. The deleted destination and waypointscannot be reactivated.
ROUTE MENU SCREEN
WARNING
Always stop the vehicle in a safe locationbefore modifying the route conditions.Modifying the route conditions whiledriving may cause an accident.
During route guidance, the route conditions canbe modified and the route information can beconfirmed. Set route conditions according toyour personal preference.
Route menu screen display only when adestination is already set.
1. Push <NAVI>.
2. Touch [Route Menu].
3. The following items are available.
5-7
5. Route guidance

Available settings
. [Edit Route]:
Edit or add a destination or waypoint to theroute that is already set.
“Editing route” (page 5-8)
. [Search Criteria Settings]:
Change the route calculation conditionsanywhere along the route.
“Route Settings” (page 5-16)
. [Recalculate]
Manually search for the route again afterchanging the search conditions and have thesystem calculate a route.
“Recalculating route” (page 5-11)
. [Show Destination]:
The destination is displayed on the mapscreen.
. [Detour]:
A detour of a specified distance can becalculated.
“Specified distance based detour”(page 5-12)
. [Cancel Route]:
The destination and the waypoints on theroute are deleted.
. [Turn List]:
Display the turn list.“Displaying Turn List” (page 5-13)
INFO:
The [Cancel Route], [Turn List] and [Edit Route]can be set only by pushing <NAVI>.
EDITING ROUTE
1. Push <NAVI>.
2. Touch [Edit Route].
3. Set the preferred conditions.
Available settings
*1 [Add Destination]
Touch to add a destination.“Setting destination or waypoint”(page 5-9)
*2 Current destination:
Changes or deletes the destination.“Editing/deleting destination or way-point” (page 5-9)
*3 Condition for calculating a route to thedestination:
Changes the conditions for calculating aroute to the destination.
5-8
5. Route guidance

“Changing route calculation condi-tions” (page 5-10)
*4 [Add Waypoint]“Setting destination or waypoint”(page 5-9)
*5 Current waypoint:
Changes or deletes the waypoint.“Editing/deleting destination or way-point” (page 5-9)
*6 Condition for calculating a route to awaypoint:
Changes the conditions for calculating aroute to a waypoint.
“Changing route calculation condi-tions” (page 5-10)
*7 [Sort]:
Sorts the waypoint and the destination.
*8 [Store Route]:
Stores route include a destination, way-points, and route condition. A maximum offive routes can be stored. Stored routes canbe easily retrieved and set as the suggestedroute.
INFO:
The [Edit Route] can also be set by pushing<NAVI> and then touching [Route Menu].
SETTING DESTINATION OR WAY-POINTA destination or waypoint can be added to aroute that has already been set. A total of sixdestinations or waypoints can be set.
1. Push <NAVI>.
2. Touch [Edit Route].
3. Touch [Add Destination] or [Add Waypoint].
INFO:
If [Add Destination] is selected, the currentdestination changes to a waypoint.
4. Set a destination or waypoint. The method ofsearching for a destination or waypoint is thesame as the one for a destination.
“Destination screen” (page 4-3)
5. The system will recalculate the routes.
INFO:
The prior route is automatically deleted.
EDITING/DELETING DESTINATIONOR WAYPOINTA destination or waypoint that has already beenset can be modified or deleted. If a location ismodified or deleted when a suggested route isalready set, the prior suggested route will berecalculated accordingly.
1. Touch a destination or waypoint that isalready set.
2. Touch the item you would like to set.
Available settings
. [Move Loc.]:
The location of the destination or way-
5-9
5. Route guidance

point can be adjusted by moving thecross pointer across the map.
. [Delete]:
A destination or waypoint that has alreadybeen set can be deleted.
INFO:
If the destination is deleted, the final waypoint ofthe route becomes the destination.
CHANGING ROUTE CALCULATIONCONDITIONSEach section of the route between waypointscan have different route calculation conditions.After setting these conditions, the entire routecan be recalculated.
1. Touch the preferred section of the route tothe destination or waypoint.
2. Touch the preferred condition.
3. The conditions are changed and the displayreturns to the Edit Route screen.
INFO:
. The recalculated route may not be theshortest route because the system prioritizesroads that are easy to drive on for safetyreasons.
CHANGING ORDER OF DESTINA-TION AND WAYPOINTSThe order of a destination and waypoints that arealready set can be changed.
1. Touch [Sort]. A list of the destination andwaypoints is displayed.
2. When [ ] is touched, a chime will sound. Stilltouching the icon, slide it to the place whereyou would like to move it.
3. Touch [ ] to apply the change.
5-10
5. Route guidance

RECALCULATING ROUTE
A route can be manually searched again afterchanging the search conditions.
1. Push <NAVI>.
2. Touch [Route Menu].
3. Touch [Recalculate]. A message is displayedand the route is recalculated.
INFO:
. When a waypoint has been set on the route,the system will search for only one route,even if route recalculation is performed.
. When the vehicle deviates from the sug-gested route, the route from the currentlocation to the destination is automaticallysearched again by the Auto Reroute func-tion.
“Route Settings” (page 5-16)
SEARCHING FOR DETOURROUTE USING TRAFFIC INFOR-MATION
There are two methods for setting a detour route:A detour route setting taking traffic informationinto consideration and a detour route settingspecifying the distance
TRAFFIC INFORMATION BASED DE-TOURWhen a serious traffic event occurs on the route,or if the system finds a faster route, a detour alertwill display automatically. If the automatic alert isnot noticed, a detour can also be searched formanually.
1. Push <NAVI>.
2. Touch [Route Menu].
3. Touch [Detour].
4. Touch [Traffic Detour].
5. When the detour search is successful,detailed information about the detour routeand the comparison screen of the two routesare displayed.
*1 Original route (blue)
*2 Detour route (purple)
*3 The change of distance and estimatedtravel time to destination when thedetour route is taken.
6. To accept the suggested detour route, touch[Yes].
INFO:
. If no route is set, or [Use Traffic Info] is turnedoff, this function cannot be operated.
. If a detour route is not selected and nofurther action is performed, the detour routewill be automatically canceled.
. The detour suggestion can be retrieved evenafter the message disappears by manuallyselecting [Traffic Detour]. The system willthen search for the detour again and willsuggest a detour if one is available at thattime.
. Without a subscription to SiriusXM Traffic, itwill not be possible to receive traffic detour
5-11
5. Route guidance

information or apply settings for functionsrelated to traffic information. A messageappears when a related menu item isselected.
SPECIFIED DISTANCE BASED DE-TOURTo detour from the suggested route, a routedetouring for a specified distance can becalculated.
1. Push <NAVI>.
2. Touch [Route Menu].
3. Touch [Detour].
4. Touch a detour distance select from 1/2 mile,1 mile, 3 miles or 5 miles. After calculatingthe detour, the system displays the detourroute on the map.
INFO:
. When the vehicle has deviated from thesuggested route, [Detour] cannot be se-lected.
. If the system cannot calculate a detour withthe specified conditions the previous sug-gested route is displayed.
. If the vehicle is traveling very fast, the detourroute may start from a location that the
vehicle has already passed.
AUTOMATIC DETOUR GUIDANCEWhen [Auto Reroute] and [Use Traffic Info] areturned on in the detailed route settings, amessage will be displayed automatically whenthe system finds a detour.
“Route Settings” (page 5-16)
To accept the suggested detour route, touch[Yes].
INFO:
. If no operation is performed for one minuteafter the message is displayed, the messagedisappears. The detour will not be accepted,and the current suggested route will remainunchanged.
. When [Traffic Announcements] is turned onin the guidance settings, the system willannounce voice guidance at the same time
that the message appears on the screen.“Guidance settings” (page 5-14)
5-12
5. Route guidance

DISPLAYING TURN LIST
When approaching a guide point, the left screenautomatically switches to an enlarged view of theintersection.
1. Push <NAVI>.
2. Touch [Turn List].
INFO:
The [Turn List] can also be set by pushing<NAVI> and then touching [Route Menu].
ROUTE GUIDANCE SETTINGS
The route search conditions and route guidancecan be set.
5-13
5. Route guidance

GUIDANCE SETTINGS
Various guidance information can be set to be played during route guidance and the route and/or voice guidance can be activated or deactivated.
1. Push <SETTING>.
2. Touch [Navigation].
Setting item Action
[Guidance Preferences] [Voice Guidance] Activates or deactivates voice guidance.
[Guidance Volume] Adjusts the volume level of voice guidance.
[Voice Guidance Set-tings]
Sets advanced settings for the voice guidance announced or chime at guidepoints.
[Turn Point] Turns on the sound that chimes when a maneuver should be performed.
[Simple Guide] The system announces voice guidance twice: “Simple Guidance 1” and “SimpleGuidance 2”.
[Normal Guide] The system announces voice guidance three times : “Simple Guidance 1”,“Simple Guidance 2” and “Turn Point”.
[Full Guide] The system announces voice guidance at all times.
5-14
5. Route guidance

Setting item Action
[Traffic Announcement] Activate/deactivate the traffic announcement. When this item is activated, thesystem provides an announcement of a traffic information event on the route. Theindicator illuminates if traffic announcement is activated.
[Arrival Time Format] [Estimated Time of Arri-val]
Displays the estimated arrival time.
[Trip Time Remaining] Displays the time required to travel to the destination.
[Estimated Time] [Destination] Switches the display of the estimated travel time to the destination or waypointthat is displayed on the map screen. Display of the travel time to thedestination.
[Waypoints] Display of the travel time to the waypoint.
[Set Average Speeds] [Auto] If set to ON, the system automatically calculates the time required to travel to thedestination.
[Freeway] Adjust the average vehicle speed on a freeway.
[Main Road] Adjust the average vehicle speed on a main road.
[Town Road] Adjust the average vehicle speed on a town road.
[Residential] Adjust the average vehicle speed in a residential area.
[Reset Settings] Sets the average vehicle speeds to the default values.
[Auto Reroute] If the vehicle deviates from the suggested route, the system automaticallyrecalculates a route that guides the vehicle to the suggested route.
5-15
5. Route guidance

INFO:
The guidance volume can also be adjusted by turning the audio system volume control button or pushing <+>/< > on the steering-wheel while voiceguidance is being announced.
ROUTE SETTINGS
It is possible to set the conditions of the route search.
1. Push <SETTING>.
2. Touch [Navigation].
Setting Item Action
[Route SearchCriteria]
[Search Criter-ia]
[Fastest Route] Prioritizes using freeway.
[Energy-Saving] Prioritizes the route with the lowest fuel consumption.
[Shortest Distance] Prioritizes the shortest route.
[Route Prefer-ences]
[Minimize Toll Roads] Minimizes the use of toll roads.
[Use Time RestrictedRoads]
[Use RestrictedRoads (Recom-mended)]
Uses any roads subject to time restrictions.
[Ignore Restrictions] Does not use any roads subject to restrictions.
[Avoid RestrictedRoads]
Uses roads subject to restrictions sparingly.
[Use Real Time Traffic Info] Uses the latest traffic information received via the SiriusXM Trafficbroadcast.
[Use Avoid Area Settings] Enables the avoid area setting.“Storing avoid area” (page 6-4)
5-16
5. Route guidance

Setting Item Action
[Use Ferries] Includes the use of ferries.
[Use Learned Routes] Uses the roads that are most frequently traveled with the help of self-learning technology.
[Use HOV Lanes] Uses the HOV lanes.
[Auto Reroute] If the vehicle deviates from the suggested route, the system automaticallyrecalculates a route that leads the vehicle to the suggested route.
INFO:
. Only one of these route condition can beutilized at a time.
. The recalculated route may not be theshortest route because the system prioritizesroads that are easy to drive on for safetyreasons.
. If route conditions are set from [SearchCriteria], all sections in the route are subjectto the same route conditions even thoughdifferent route conditions have been set fordifferent sections in [Edit Route].
. If [Use Time Restricted Roads] is deacti-vated, the system calculates a route withoutany consideration of the regulations con-cerning the time or day of the week. There-fore, the suggested route may include a roadsubject to traffic regulations concerning thetime or day of the week. When driving along
the route, always follow all traffic regulationsregardless of whether [Use Time RestrictedRoads] is set to be considered or not.
. If the system cannot calculate any alternativeroutes, the previous route is displayed.
. If the vehicle greatly deviates from thesuggested route, the system calculates anew route.
. Traffic jam information displayed on the mapscreen is not statistical traffic information.
. Even when [Use Real Time Traffic Info] isturned on, if traffic information has not beenprovided for the area, a detour may notalways be indicated in a location where atraffic jam occurs.
. The system may not lead to a detour if trafficclosure or a traffic jam occurs far from thepresent location.
. The system calculates to reduce the timerequired for the entire route from the start tothe destination. If there are no appropriateroutes, the system may lead to a route wherea traffic jam occurs instead of leading to adetour.
5-17
5. Route guidance

MEMO
5-18
5. Route guidance
6 Storing a location/route
Storing location ......................................................................... 6-2
Storing home location ........................................................ 6-2
Storing location by searching ........................................... 6-2
Storing location by moving map ...................................... 6-3
Storing route .............................................................................. 6-3
Storing avoid area ..................................................................... 6-4
Editing stored information ....................................................... 6-5
Editing stored home and location ................................... 6-5
Editing avoid area .............................................................. 6-8
Editing stored route .......................................................... 6-9
Deleting stored item ................................................................ 6-9
Deleting stored item individually ................................. 6-10
Deleting individual item on map .................................. 6-11
Transferring information to/from address book .............. 6-11

STORING LOCATION
Often visited locations can be stored in theStored Locations. The stored addresses can beeasily retrieved to set them as a destination orwaypoint. The Stored Locations can store up to200 locations.
STORING HOME LOCATION
1. Push <NAVI>.
2. Touch [Home].
3. If the home location is not registered, thesystem asks to store it.
4. Set the Home location using the sameprocedure as setting a destination.
“Destination screen” (page 4-3)
5. A message is displayed and the homelocation is stored.
Other Settings
1. Push <SETTING>.
2. Touch [Navigation] and touch [Edit/DeleteStored Locations].
3. Touch [Stored Locations] and touch [HomeLocation (None)].
4. Touch the appropriate method to set alocation. The search methods are the sameas for setting a destination.
“Destination screen” (page 4-3)
5. Adjust the location of the stored item andedit the contents of the stored item asnecessary. After finishing the setting, touch[ ].
STORING LOCATION BY SEARCH-INGIt is possible to store a location by searching invarious ways.
1. Push <SETTING>.
2. Touch [Navigation].
3. Touch [Edit/Delete Stored Locations].
4. Touch [Stored Locations].
5. Touch [Add New].
6. Touch the appropriate method to set alocation. The search methods are the sameas for setting a destination.
“Destination screen” (page 4-3)
7. A message is displayed, and the address ofthe location is stored in the Stored Loca-tions.
8. Adjust the location of the stored item andedit the contents of the stored item asnecessary.
“Editing stored home and location”(page 6-5)
9. After finishing the setting, touch [ ].
INFO:
. When the location is stored in the StoredLocations, [Stored Locations] can be used tosearch for the location.
. When 200 store locations are alreadystored, a new store location cannot bestored until a currently stored store location
6-2
6. Storing a location/route

is deleted.
STORING LOCATION BY MOVINGMAP1. Move to the preferred location on the map
and touch [ ].
2. Touch [Store Location]. Confirm the contentsof the message then touch [Yes].
3. The icon representing the stored location isdisplayed on the map.
INFO:
The address is stored in the first availableposition number in the Store Location list.
STORING ROUTE
A maximum of five calculated routes can bestored. Stored routes can be easily retrieved andset as the suggested route.
If any waypoints are not set on the route, theroute cannot be stored.
1. Push <NAVI> and touch [Edit Route].
2. Touch [Store Route]. A confirmation mes-sage is displayed. Select [Yes] to store thecurrent route.
Other settings
A route can also be stored using the followingprocedure.
1. Push <SETTING>.
2. Touch [Navigation] and touch [Edit/DeleteStored Locations].
3. Touch [Stored Route Plans].
4. Touch [Store Current Route]. A confirmationmessage is displayed.
5. Confirm the contents of the message thentouch [Yes]. The current route is stored.
INFO:
. A stored route includes only locations(destination and waypoints) and route cal-culation conditions, not the route itself.
. The route is stored in the first availableposition number in the store current routelist.
. When five routes are already stored in theaddress book, a new route cannot be storeduntil a route is deleted.
“Deleting stored item” (page 6-9)
6-3
6. Storing a location/route

STORING AVOID AREA
An Avoid Area can be stored. The Avoid Area isan area that can be excluded from a route, suchas a road that is always congested. Once AvoidAreas are stored, the system avoids those areaswhen calculating a route. Up to 10 Avoid Areascan be stored.
1. Push <SETTING>.
2. Touch [Navigation] and touch [Edit/DeleteStored Locations].
3. Touch [Avoid Areas].
4. Touch [Add New].
Touch the appropriate method to search for alocation.
“Destination screen” (page 4-3)
5. Adjust the location edit the contents of theAvoid area as necessary.
“Editing avoid area” (page 6-8)
6. After finishing the setting, touch [ ].
INFO:
. A maximum of 10 Avoid Areas can be stored.When 10 Avoid Areas are already stored, anew Avoid Area cannot be stored until acurrently stored Avoid Area is deleted.
“Deleting stored item” (page 6-9)
6-4
6. Storing a location/route

EDITING STORED INFORMATION
Items stored in the system can be modified. These settings can be edited to make the navigation system more useful.
EDITING STORED HOME AND LOCATION
Step 1 Step 2 Step 3 Step 4 Action
1. Push <SETTING>.
2. Touch [Navigation].
3. Touch [Edit/DeleteStored Locations].
4. Touch [Stored Locations].
[Sort] Sort the stored locations.
[Add New]“Storing location by searching” (page 6-2)
[Home Location] [Edit] [Move Location] Adjust the location of the stored location.
[Phone No.] Stores the telephone number of the home location.
[Icon] Changes the icon of the home to the preferred one.
[Show Icon on Map] Displays the home icon on the map.
[Alarm Sounds] Sets the tone of the alarm that sounds when the vehicleapproaches the home.
[Alarm Direction] Sets the alarm to sound when approaching from a specificdirection.
6-5
6. Storing a location/route

Step 1 Step 2 Step 3 Step 4 Action
[Alarm Distance] Sets the alarm to sound when reaching a specific distanceto the home.
[Delete] Delete the stored home location.
Touch the preferredstored address from thelist.
[Edit] [Move Location] Adjust the location of the stored location.
[Name] Changes the name of a stored location.
[Phone No.] Stores the telephone number of a stored location.
[Icon] Changes the icon of a stored location to the preferred one.
[Show Icon on Map] Displays the icon on the map of a stored location.
[Group] Groups the stored locations.
[Alarm Sounds] Sets the tone of the alarm that sounds when the vehicleapproaches a stored location.
[Alarm Direction] Sets the alarm to sound when approaching from a specificlocation.
[Alarm Distance] Sets the alarm to sound when reaching a specific distanceto a stored location.
[Delete] Delete the stored location.
6-6
6. Storing a location/route

INFO:
. By changing the icons, the usage of the [By Icon] option of the sort function can be optimized more effectively.
. By grouping the stored addresses, the [By Group] option of the sort function can be used more effectively in the [Sort] mode.
. Once the direction and the distance to sound an alarm are set, the system will sound the alarm when the vehicle enters the triggering zone.
6-7
6. Storing a location/route

EDITING AVOID AREA
Step 1 Step 2 Step 3 Action
1. Push <SETTING>.
2. Touch [Navigation].
3. Touch [Edit/Delete Stored Loca-tions].
4. Touch [Avoid Areas].
5. Touch the preferred Avoid Areafrom the list.
[Edit] [Move Location] Display the Avoid Area, and adjusts the location of the Avoid Area.
[Rename] Changes the name of an Avoid Area.
[Resize Area] Adjusts the range of the Avoid Area.
[Minimize Toll Roads] Sets the route to include or not include freeways.
[Delete] Delete an Avoid Area.
INFO:
. Touch [Add New] on the list screen to add a new avoid area.
. Touch [Map] on the list screen to display the avoid area location.
. The Avoid Area is displayed in green if it includes a freeway or in blue if it does not include a freeway.
. If the current vehicle location is set to an Avoid Area, the system will not provide route guidance.
6-8
6. Storing a location/route

EDITING STORED ROUTE1. Push <SETTING>.
2. Touch [Navigation] and touch [Edit/DeleteStored Locations].
3. Touch [Stored Route Plans].
4. Touch the preferred stored route from thelist.
Available setting items
. [Rename]:
Changes the stored route name.
. [Delete]:
Delete the stored route.
INFO:
Touch [Store Current Route] to store the currentroute.
DELETING STORED ITEM
The locations and routes in the Address Bookcan be deleted. Two deletion methods areavailable: deleting an individual item and deletingall stored items.
INFO:
. Deleted items cannot be restored. Beforedeleting an item, always make sure that theitem is no longer needed.
6-9
6. Storing a location/route

DELETING STORED ITEM INDIVIDUALLY
1. Push <SETTING>.
2. Touch [Navigation] and touch [Edit/DeleteStored Locations].
Step 1 Step 2 Step3 Action
[Delete Stored Items] [Delete Stored Loca-tions]
[Sort] Sort stored locations in [By Number]/[By Name]/[By Icon]/[By Group].
[Delete All] Delete all stored locations.
[Multi Select] Delete the selected stored locations.Touch [Select All] to select all stored locations. Touch [Clear All] to resetthe selected stored location.
Stored location list Touch the preferred item from the list, delete the selected stored locationindividually.
[Delete Stored RoutePlans]
[Delete All] Delete all stored routes.
Touch the preferred item from the list. Delete the selected stored routes.
[Delete Avoid Areas] [Delete All] Delete all Avoid Areas.
Touch the preferred item from the list. Delete the selected Avoid Area.
[Reset Learned Routes] Delete the learned routes.
6-10
6. Storing a location/route
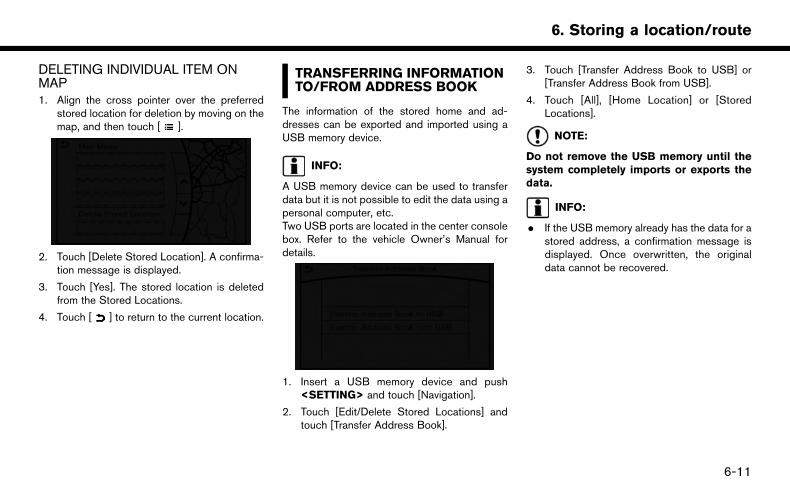
DELETING INDIVIDUAL ITEM ONMAP1. Align the cross pointer over the preferred
stored location for deletion by moving on themap, and then touch [ ].
2. Touch [Delete Stored Location]. A confirma-tion message is displayed.
3. Touch [Yes]. The stored location is deletedfrom the Stored Locations.
4. Touch [ ] to return to the current location.
TRANSFERRING INFORMATIONTO/FROM ADDRESS BOOK
The information of the stored home and ad-dresses can be exported and imported using aUSB memory device.
INFO:
A USB memory device can be used to transferdata but it is not possible to edit the data using apersonal computer, etc.Two USB ports are located in the center consolebox. Refer to the vehicle Owner’s Manual fordetails.
1. Insert a USB memory device and push<SETTING> and touch [Navigation].
2. Touch [Edit/Delete Stored Locations] andtouch [Transfer Address Book].
3. Touch [Transfer Address Book to USB] or[Transfer Address Book from USB].
4. Touch [All], [Home Location] or [StoredLocations].
NOTE:
Do not remove the USB memory until thesystem completely imports or exports thedata.
INFO:
. If the USB memory already has the data for astored address, a confirmation message isdisplayed. Once overwritten, the originaldata cannot be recovered.
6-11
6. Storing a location/route

MEMO
6-12
6. Storing a location/route

7 Information and settings
Information screen .................................................................... 7-2
SiriusXM Traffic information .................................................... 7-4
Viewing traffic information ................................................. 7-4
Viewing available traffic information ................................ 7-4
Display urgent traffic information ..................................... 7-5
Traffic Information Settings ............................................... 7-6
Traffic information on map ................................................. 7-6
SiriusXM Travel Link ............................................................... 7-7
Viewing SiriusXM Travel Link ......................................... 7-8
NissanConnectSM Services ................................................. 7-14
Subscription to NissanConnectSM Services ............. 7-14
Important information regarding access toNissanConnectSM Services ........................................... 7-14
NissanConnectSM Services features ......................... 7-14
Connecting to Interactive Voice Menu ...................... 7-18
Setting route to a searched destination ................... 7-19
Viewing information feeds ............................................ 7-19
Emergency support ....................................................... 7-21
NissanConnectSM Services settings ......................... 7-23
Settings screen ...................................................................... 7-24
Clock settings ................................................................. 7-26
Language setting ............................................................ 7-27
Volume settings .............................................................. 7-28
Screen Settings .............................................................. 7-29
Navigation settings ................................................................ 7-30

INFORMATION SCREEN
The information screen sets or displays various information that is helpful for using the vehicle. Available items include the vehicle information, trafficinformation, current location information and navigation software version.
Push <INFO> to display the information menu.
The displayed items vary depending on the vehicle model.
Menu item Result
[Fuel Economy] Display the Fuel Economy screen.The current and average fuel economy, the distance to empty [Range] can be confirmed.
[History] The Fuel Economy history screen can be scrolled.Display Fuel Economy history screen. Touch [<]/[>] will display an older history or the newesthistory.
[Reset] Reset the average Fuel Economy.The average for the Reset-to-Reset period is stored as a fuel economy history.When reset average Fuel Economy on the screen, the average fuel consumption on the tripcomputer is also reset at the same time.
[Eco Drive Report] Displays the Eco Drive Report for “Start”/“Cruise”/“Deceleration”.
[History] The Eco Drive Report History screen can be scrolled.Display the Eco Drive Report History screen. Touch [<]/[>] to display an older history or the newesthistory.
[Reset] Reset the Eco Drive Report screen.The average for the Reset-to-Reset period is stored as an Eco Drive Report history.
[Traffic Information] Allows traffic information setup.“Viewing traffic information” (page 7-4)
[Map Information] Display the map version, software version and Navi ID.
7-2
7. Information and settings

[NissanConnect Services] Display the NissanConnectSM Services menu.“NissanConnectSM Services” (page 7-14)
[SXM Info] Display the SiriusXM Travel Link information menu.“Viewing SiriusXM Travel Link ” (page 7-8)
INFO:
. A SiriusXM Travel Link or SiriusXM Traffic subscription is necessary to receive SiriusXM information services.
. Use of NissanConnectSM Services features is dependent upon a valid subscription and the telematics device being in operative condition, as well ascellular connectivity, navigation map data and GPS satellite signal reception being available.
7-3
7. Information and settings

SiriusXM TRAFFIC INFORMA-TION
VIEWING TRAFFIC INFORMATIONSiriusXM Traffic information is a subscriptionservice offered by SiriusXM Satellite Radio.
This service provides real-time information re-garding traffic flow, accidents, road constructionand other incidents, where available.
SiriusXM Traffic combines information fromcommercial and public traffic data providersincluding government departments of transpor-tation, police, emergency services, road sensors,cameras and aircraft reports. The traffic informa-tion is broadcast to the vehicle by the SiriusXMsatellites. Traffic information available for theroute you selected is shown on the navigationscreen so traffic conditions between your vehicleand the destination are known. Three types ofreal-time traffic information for major roadwaysare shown on the navigation system:
. Unscheduled traffic data for example, acci-dents and disabled vehicles.
. Scheduled traffic data, for example roadconstruction and road closures.
. Traffic flow information (rate of speed data).
WARNING
SiriusXM Traffic information is not asubstitute for attentive driving. Trafficconditions change constantly and emer-gency situations can arise without warn-ing. Relying only on SiriusXM Trafficinformation may lead to a collision andcould result in serious personal injury.
NOTE:
Flow information is provided only for roadsequipped with traffic sensors and is notavailable in all markets covered by theservice. Flow data may not be available onportions of a road that is under construc-tion.SiriusXM Traffic information is available in for alimited number of markets. To subscribe or tocheck if this service is available in your area:
call 1-866-635-2349 or see www.siriusxm.com/siriusxmtraffic
INFO:
If you do not have a contract for SiriusXM Trafficinformation service, a message appears, and itwill not be possible to check the information onthe traffic information system.
VIEWING AVAILABLE TRAFFIC IN-FORMATION
1. Push <INFO>.
2. Touch [Traffic Information].
3. Touch the preferred information.
7-4
7. Information and settings

Availableitem
Action
[NearbyTraffic Info]
The list of available traffic informationaround the current vehicle location isdisplayed.
[Info onRoute]
This is only available when a route isset. The list of traffic informationfound on the recommended routefrom the current vehicle location tothe destination is displayed. Thedetailed information about displayedevents can also be checked.
Viewing traffic information listThe list of traffic information found on therecommended route from the current vehiclelocation to the destination is displayed. Thedetailed information about displayed events canalso be checked.
1. Push <INFO>.
2. Touch [Traffic Information].
3. Touch [Nearby Traffic Info] or [Info on Route].
4. Touch the preferred information from Trafficinfo screen.
5. Touch the event to check the detailedinformation. Touch [Map] to display trafficinformation location.
6. The map screen centered around the se-lected event is displayed. On the display, thedetailed information about the event isdisplayed.
The message can be scrolled.
7. Touch [ ] to return to the previous screen.
DISPLAY URGENT TRAFFIC INFOR-MATIONWhen an urgent event is found around thecurrent vehicle location, a message pops upautomatically with a voice announcement.
The message includes the icon, event type, eventinformation and the direct distance from thecurrent location to the event.
INFO:
. Urgent traffic information is displayed re-gardless of whether the traffic informationsystem is on or off.
. When there are multiple urgent events, theevent with the shortest direct distance fromthe current location is displayed.
. If the urgent event is on the recommendedroute, and if a detour is found, the detourroute notification screen is displayed whenthe vehicle approaches the detour point.
7-5
7. Information and settings

TRAFFIC INFORMATION SETTINGSThis displays or changes the settings for thetraffic information related functions.
1. Push <SETTING>.
2. Touch [Navigation].
3. Touch [Traffic Info Settings].
4. Touch the preferred setting. The indicator forthe selected setting illuminates.
Available setting items
. [Use Traffic Info]:
Enables all traffic information related func-tions.
. [Show Incidents on Map]:
Displays the traffic incidents (e.g., accident)on the map screen.
. [Show Traffic Info]:
Displays the traffic flow with an arrow on themap screen.
. [Traffic Announcements]:
Announces the traffic information event onthe route.
INFO:
. Even when [Show Traffic Info] and [ShowIncidents on Map] are set to off, the listdisplay of [Info on Route] and [Nearby TrafficInfo] will not be affected.
. Even when [Traffic Announcement] is set tooff, the route guidance will not be affected.Also, the announcement of emergency in-formation and weather information will not beturned off.
Voice command
1. Push < > located on the steering-wheel.
2. After the tone sounds, speak a command.
To turn the traffic information system on oroff:
“Traffic Information”
TRAFFIC INFORMATION ON MAPWith a subscription to SiriusXM Traffic service,traffic information is displayed on both 2D mapand BirdviewTM map screen.
“Notes on SiriusXM Traffic information”(page 7-13)
Screen information
7-6
7. Information and settings

*1 Traffic indicator:Displays the reception condition of trafficinformation transmitted from the provider.When reception condition of trafficinformation transmitted from the provider isnot detected, the traffic indicator will be“grayed-out”.
*2 Estimated travel time to destination calcu-lated with consideration of traffic informa-tion on route.
*3 Road conditionsFree Flow: Green arrowModerate traffic: Yellow arrowHeavy traffic: Red arrowSection affected by serious traffic event:Purple arrow
*4 Traffic information icon:If a route is not already set, all of the trafficinformation icons on the map screen aredisplayed in color. When a route is alreadyset, the icons on the route are displayed incolor, and the icons outside the route aredisplayed in gray.
: Accident
: Closed road
: Information
: Road work
: Slippery road
: Weather
: Incident
Traffic information display and scale levels
2D map and Birdview Map
5 miles 10 km
2 miles 4 km
1 mile 2 km
1/2 mile 1 km
1/4 mile 400 m
1/8 mile 200 m
1/16 mile 100 m
1/32 mile 50 m
1/64 mile 25 m
SiriusXM TRAVEL LINK
SiriusXM Travel Link information is a subscriptionservice offered by SiriusXM Satellite Radio. It isnecessary to subscribe to use the SiriusXMTravel Link information.
This service provides real-time information re-garding current weather, fuel prices, sportsscores, stock tickers and movie times whereavailable. The SiriusXM Travel Link is broadcastto the vehicle by SiriusXM Satellite Radio.
The service enables you to view the followinginformation on the navigation system:
*Current information around the destination
*Detailed information and forecasts of an area ofinterest
*Countrywide and local maps with the currentweather, temperature, warnings and road condi-tion information
*List of warning/watches events detectedaround the current location
*Pop-up messages on the navigation screen withvoice announcements when warnings andwatches are detected around the current loca-tion
7-7
7. Information and settings

WARNING
SiriusXM Travel Link information is not asubstitute for attentive driving. Weatherconditions change constantly and emer-gency situations can arise without warn-ing. Relying only on SiriusXM Travel Linkinformation could result in serious per-sonal injury.
VIEWING SiriusXM TRAVEL LINKSiriusXM Travel Link information is available inlimited markets. To subscribe to or check if thisservice is available in the area, call 1-866-635-2349 or access http://www.siriusxm.com/travellink.
INFO:
. If a contract is not completed for theSiriusXM Travel Link information service, amessage appears and it will not be possibleto check the information on the trafficinformation system.
. The weather information is available only forareas that provide weather information to
SiriusXM Travel Link.
example
7-8
7. Information and settings

Automotive Weather information
Step 1 Step 2 Menu item Action
Push <INFO>. [SXM Info] [AutomotiveWeather]
[Current Weather] Display current weather condition information. Touch [Near Destination] todisplay the current weather condition for the area near the destination, touch[Near Current Loc.] to display the current weather conditions near thevehicles current location. Touch [Selected City] to change the city.
[5-DAY Forecast] Display the current five-day weather forecast. Touch [Near Destination] todisplay the five-day weather forecast for area near the destination, touch[Near Current Loc.] to display the five-day weather forecast for the area nearthe vehicle’s current location. Touch [Selected City] to change the city.
[Graphical Map] Display a graphical map of the weather information. Touch [+]/[-] to changethe map scale to 320 miles (640 km) (U.S), 32 miles (64 km) (Middle scale)or 5 miles (10 km) (Detail scale). Touch [Radar] to display the weather radarmap. Touch [Chart] to display weather surface features and pressure, whenthe map scale is U.S. (320 miles (640 km)). Touch [Storm] to display Storminformation, when the map scale is U.S. (320 miles (640 km)) or Middlescale (32 miles (64 km)). Touch [Winds] to display wind information, whenmap scale is Detail scale (5 miles (10 km)).
7-9
7. Information and settings

Fuel Prices information
Step 1 Step 2 Menu item Action
Push <INFO>. [SXM Info] [Fuel Prices] Display fuel prices. Select gas station from the fuel prices list to displaydetail information or a call a selected gas station from the list.Touch [Select Fuel] to select fuel type information, touch [Prices] to displaythe fuel price list.Touch [Near Current Loc.]/[Near Destination]/[Select Fuel] to sort bydistance or sort by prices from the list.Set destination selected gas station from the list.
Sports Score information
Step 1 Step 2 Menu item Action
Push <INFO>. [SXM Info] [Sports Scores] Select from list. Display current event state (scheduledgame, during the game, match results)
XM channels to display infor-mation
Select to listen to the radio.
[Select League] [Add League] Add favorite sports genre for the list. Whenthe number of registration is 10, it will begrayed out.
[Delete League] [Multi Select] Delete multiple selected sports scores.
[Delete All] Delete all sports scores.
Select fromlist.
Delete a selected sports score.
Select from list. Display the detail of a score.
7-10
7. Information and settings

Stock Tickers information
Step 1 Step 2 Menu item Action
Push <INFO>. [SXM Info] [Stock Tickers] Display stock names, stock prices, fluctuationcontents, variable stock prices, and the receivingdate/time.
[Add Stock] Add displaying stock.
[Delete Stock] [Delete All] Delete all stocks.
[Multi Select] Delete multiple selected stock.
Select from list. Delete a selected stock.
Movie Times information
Step 1 Step 2 Menu item Action
Push <INFO>. [SXM Info] [Movie Listings] [Select City] Select from list. Select the city.
[Theater] [Movies] Select from list. Display detailed movie information.
[Theater Info] Display theater information.
[GO] Set a destination selected from the list oftheaters.
[Near Destination] Display the theater near the vehicle’s destina-tion.
[Near Current Loc.] Display the theater near the vehicle’s currentlocation.
[Selected City] Change the city.
7-11
7. Information and settings

Step 1 Step 2 Menu item Action
[Movie] Select from list. Display information for the movie theater se-lected from the list.
[Details] Display movie title, rating and run time.
7-12
7. Information and settings

Notes on SiriusXM Traffic information. The SiriusXM Traffic information service is
not provided for some cities. In addition, thecities for which the traffic information serviceis provided may be changed.
. In some cases, infrastructure problems mayprevent the complete display of the trafficinformation. This is not a malfunction.
. Due to infrastructure problems, or due to thetime when the traffic information servicebroadcast is received, the displayed informa-tion may differ from the actual traffic condi-tions.
. Depending on the traffic information, adetour route may be slower than the originalroute.
. SiriusXM Traffic is a service of Sirius XMRadio. SiriusXM Traffic is only available inselect markets and is subject to dataavailability. Reception of the XM signal mayvary depending on location. It requires amonthly premium subscription. The serviceprovider is solely responsible for the qualityand accuracy of the information provided. Allfees and programming are subject tochange. For more details on the SiriusXMTraffic service, terms and conditions, please
visit www.siriusxm.com.
You can also contact SiriusXM at
1-866-635-2349.
. SiriusXM Traffic is available in over 130metropolitan markets. For the most currentlist of markets covered, please refer to
www.siriusxm.com/siriusxmtraffic, or callSiriusXM Listener Care at 1-866-635-2349.
. Due to road maintenance, infrastructureproblems (e.g. malfunction of road sensors,outage of central computer of infrastructure)or natural disasters, there are times whensome or all traffic information may not beavailable.
. Incident information is based on humancollection. Not all incidents that have hap-pened are collected and provided.
. Due to infrastructure problems, or transmis-sion delay, there are times when the informa-tion may differ from the actual condition.Always observe safe driving practices andfollow all traffic regulations.
. Due to the coverage and quality of trafficinformation and road conditions, it is notalways possible for the system to provide theshortest time route even when traffic in-formation is considered.
. Traffic information that is displayed may differfrom information from other media (e.g.,radio), as other media may use differentinformation sources.
7-13
7. Information and settings

NISSANCONNECTSM SERVICES
SUBSCRIPTION TO NISSANCON-NECTSM SERVICESA subscription is required to use the Nissan-ConnectSM Services. For the details about thesubscription, visit the NISSAN Owner’s PortalWebsite or contact a NISSAN dealer.
IMPORTANT INFORMATION RE-GARDING ACCESS TO NISSAN-CONNECTSM SERVICESOnly use NissanConnectSM Services poweredby SiriusXM when safe to do so. Late availabilityfor some features. Services require an operatingvehicle device and cellular and GPS coverage.Cellular network and GPS signals not available inall areas and/or at all times. Neither Nissan norSirius XM are responsible for associate costs, ifany, for continued operation due to cellularnetwork termination/changes. Cellular providermay terminate/restrict service without notice.Certain services require a PIN for activation.Enrollment and Subscription Agreement re-quired. See www.nissanusa.com/connect (forUS), www.nissan.ca/nissanconnect (Canada/English) or www.nissan.ca/nissanconnect/fr(Canada/French) for details and servicelimitations. Enrollment is required to receive full
suite of services. Text rates and/or data usagemay apply.
Google CalendarTM is a trademark of Google Inc.
NISSANCONNECTSM SERVICESFEATURESNissanConnectSM Services provides varioustypes of information and services by connectingyour vehicle to the NissanConnectSM ServicesData Center and NissanConnectSM ServicesResponse Center using the TCU (TelematicsControl Unit) installed in your vehicle.
WARNING
. Radio waves could adversely affectelectric medical equipment. Indivi-duals who use a pacemaker shouldcontact the device manufacturer re-garding any possible effects beforeusing the system.
. The TCU antenna is installed insidethe upper central part of the instru-ment panel. An occupant should notget any closer to the antenna thanspecified by the pacemaker manu-facturer. The radio waves from theTCU antennamay adversely affect theoperation of the pacemaker whileusing the NissanConnectSM Services.
. Please note that the Automatic Colli-sion Notification service and Emer-gency Call function cannot be used inthe following conditions:
— NissanConnectSM Services sub-scription has expired or was can-celed.
— The vehicle is outside the areawhere the cellular network serviceis receivable.
— The vehicle is in a location withpoor signal reception such as atunnel, underground parking gar-age, behind a building or in amountainous area.
— The line is busy.
— The TCU (Telematics Control Unit)or other systems of your vehicleare not working properly.
— The NissanConnectSM Servicesnetwork or call center is disabled.
— It may not be possible to make anemergency call in all accidents oremergencies, or if you are in alocation without reception.
7-14
7. Information and settings

. Park the vehicle in a safe locationand set the parking brake beforeoperating <SOS>.
. Inappropriate use of the service maybe a violation of local laws and resultin a criminal penalty.
INFO:
. NissanConnectSM Services features aredependent upon subscription enrollmentand the telematics device being in operativecondition, cellular connectivity, navigationmap data availability and GPS satellite signalreception. Terms and conditions of theNissanConnectSM Services SubscriptionAgreement apply.
. Enrollment is required in order to useNissanConnectSM Services. The servicesthat can be received vary depending on theplan in which you are enrolled.
. After the complimentary trial period, you willbe charged for the service at the applicablesubscription rate. The services that can bereceived vary depending on the plan towhich you subscribe.
. Laws in some jurisdictions may restrict theuse of “Text-to-Speech.” Check local reg-ulations before using this feature.
NissanConnectSM Services may be updated.The latest detailed information is available onthe following websites or from the support line.
NissanConnectSM Services website:
For U.S.
www.nissanusa.com/connect
For Canada
www.nissan.ca/nissanconnect (English)
www.nissan.ca/nissanconnect/fr (French)
NissanConnectSM Services supportline:
1-855-426-6628
. Automatic Collision Notification:
The TCU (Telematics Control Unit) gener-ates a signal automatically to the Nissan-ConnectSM Services Response Center in theevent of an accident severe enough totrigger one of the vehicle’s air bags. Whenthe signal is generated, a Response Spe-cialist receives the vehicle location andcustomer information and notifies the properauthorities in accordance with establishedpolicies and procedures.
. Curfew Alert:
Curfew Alert allows you to monitor the timeand day when your vehicle is driven. If yourNISSAN vehicle is operated outside of thepre-determined schedule, you will receive anotification according to your preference(email, text message, or automated phonecall).
. Emergency Call:
The Emergency Call feature provides emer-gency assistance by connecting to a Re-sponse Specialist. In the event of anemergency, push the in-vehicle <SOS>button to use this feature. The ResponseSpecialist provides various assistance de-pending on the situation
“Emergency support” (page 7-21)
. Enhanced Roadside Assistance:
Enhanced Roadside Assistance allows youto receive assistance from the RoadsideResponse Specialist for a non-emergencyincident that requires a towing or third-partyresponse service. The service is accessed bytouching the IVR (Interactive Voice Re-sponse) soft button on the navigation screenor by pushing the in-vehicle <SOS> button.Roadside Assistance may also be used inconjunction with the Emergency Assistance
7-15
7. Information and settings

service, if warranted.“Emergency support” (page 7-21)
. Report Stolen Vehicle:
A Response Specialist will attempt to obtainlocation information from a reported stolenvehicle and provide that information to locallaw enforcement agencies to assist in therecovery of your stolen vehicle.
. Alarm Notification:
The Alarm Notification feature will notify youvia the chosen notification method on theNissanConnectSM portal website when yourvehicle alarm system is activated.
. Scheduled Maintenance Notification:
The Maintenance Alert Notification providesyour vehicle’s mileage data to NISSAN.NISSAN notifies you of maintenance notifi-cations using this mileage data.
. Maintenance Alert:
Maintenance Alert allows you to receivenotifications via the chosen notificationmethod set in the NissanConnectSM portalwebsite in the event of a vehicle sub-systemmalfunction. The service is managed throughthe NissanConnectSM portal website.
. Assisted Search:
The Assisted Search helps you search for
Points of Interest via a live ResponseSpecialist by pushing the Interactive VoiceResponse (IVR) soft button on the navigationscreen. A Response Specialist will assist infinding your requested point of interest byname or category and have the resultsautomatically downloaded to your Nissan-ConnectSM system.
. Destination Send to Car:
Use the NissanConnectSM App or WebPortal to search for Points of Interest on amap, then send the coordinates directly toyour vehicle. You’ll be able to set thelocations as destinations, and get voice-guided driving directions when you ready toset out on your adventure.
“Using Destination Send to Car”(page 4-17)
. Connected Search:
Connected Search gives you the ability toconduct a point of interest search around thevehicle location via the Destination menu ofthe navigation system. This search links tothe NissanConnectSM Services databasewhich may have destination information thatis more up to date than your navigationsystem.
“Searching by connecting Data Cen-ter” (page 4-16)
. Boundary Alert:
The Boundary Alert helps you keep track ofyour NISSAN vehicle, even after you havehanded the keys to another person. Set “staywithin” or “keep out of” drive zones on theNissanConnectSM Web Portal, and you willreceive a notification if your vehicle is drivenoutside those boundaries.
. Speed Alert:
Speed Alert allows you to monitor the speedof your vehicle by receiving alerts. You canset the maximum speed via the NissanCon-nectSM portal website, and if your vehicleexceeds the specified speed threshold, youwill receive a notification via the chosenmethod. You can also query the NissanCon-nectSM portal website to view a listing of MaxSpeed Alert notifications.
. Valet Alert:
Valet Alert notifies you if the vehicle movesoutside a 0.2 mile radius of the location seton the NissanConnectSM portal website. Youcan activate Valet Alert from the “VoiceMenu” and saying “Valet Alert” when the callis connected.
“Connecting to Interactive VoiceMenu” (page 7-18)
7-16
7. Information and settings

. Journey Planner feature allows you to set theroute according to the route plan created inadvance using the NISSAN Owner’s PortalWebsite.
“Using Journey Planner” (page 4-12)
Notice to Bluetooth Hands-freephone usersWhile the vehicle is connected to the Nissan-ConnectSM Services Response Specialists orthe emergency support staff at the NissanCon-nectSM Service Response Center, the Blue-tooth Hands-Free phone system will bedisabled and the Hands-Free mode will switchto the handset mode automatically. After the callis terminated, the Bluetooth Hands-Free phonesystem will switch from handset mode to Hands-Free mode automatically.
This is to avoid various services by NissanCon-nectSM Service Response Specialists (such asroute guidance) and NissanConnectSM Servicesemergency support staff from being interruptedby incoming calls. Incoming phone calls receivedwhile the vehicle is connected to the ServiceCenter will not be listed in the call history of theBluetooth Hands-free phone system. Howeverthose incoming calls may be listed in the callhistory of your mobile phone, depending on itscapabilities. After disconnecting communication
with the NissanConnectSM Services ResponseSpecialist or NissanConnectSM Services emer-gency support staff, check the incoming callhistory on your mobile phone when it is safe to doso.
INFO:
. If your Bluetooth Hands-Free phone re-ceives an incoming call while you are speak-ing with an operator, a pop-up messageasking whether you would like to take the callis displayed.
. For details of the Bluetooth Hands-freephone system, refer to the vehicle Owner’sManual.
Service applicationA separately purchased NissanConnectSM Ser-vices subscription is required. For detailedinformation, contact a NISSAN dealer or referto the following NissanConnectSM portal web-site:
NissanConnectSM Services website:
For U.S.
www.nissanusa.com/connect
For Canada
www.nissan.ca/nissanconnect (English)
www.nissan.ca/nissanconnect/fr (French)
NissanConnectSM Services supportline:
1-855-426-6628
INFO:
If the vehicle is owned by another person and isresold, the subscription for this service must becanceled and all data stored on the device mustbe deleted.
Operating tips
WARNING
. Use the NissanConnectSM Servicesafter stopping your vehicle in a safelocation. If you have to use theNissanConnectSM Services whiledriving, exercise extreme caution atall times so full attention may begiven to vehicle operation.
. If you are unable to devote fullattention to vehicle operation whiletalking with the NissanConnectSM
Services, pull off the road to a safelocation and stop your vehicle.
7-17
7. Information and settings

. Do not use the NissanConnectSM Serviceswith the engine stopped. Doing so maydischarge the vehicle battery.
. The NissanConnectSM Services cannot beused under the following conditions:
— The NissanConnectSM Services sub-scription has expired.
— The vehicle is outside the area where thecellular network service is receivable.
— The vehicle is in a location with poorsignal reception such as a tunnel, under-ground parking garage, behind a buildingor in a mountainous area.
— The line is busy.
— The TCU (Telematics Control Unit) orother systems of your vehicle are notworking properly.
— The NissanConnectSM Services networksystem is disabled.
. Information Feeds download cannot be usedwhen the vehicle is connected to theNissanConnectSM Services Data Centerand NissanConnectSM Services ResponseCenter.
. Communication with the NissanConnectSM
Services Data Center is related to the data
communication mode and may cause occa-sional difficulty in receiving signals, and thesignal receivable area may be limited com-pared to regular mobile phones.
. You may hear clicks or experience interrup-tions while speaking with the NissanCon-nectSMServices Response Specialists. Thisis due to a shift in the connection zone and isnot a malfunction.
. Depending on the line used, the soundvolume may decrease. Adjust the volume asnecessary.
. Received sounds may be distorted orambient noise may sound like voices of acrowd. This is due to the use of the digitalline and is not a malfunction.
. You may hear your own voice from thespeaker when talking with the NissanCon-nectSM Services Response Specialists dueto a network disturbance. When this occurs,reconnect the line after a few minutes or at adifferent location.
. This vehicle incorporates a communicationdevice that is called a TCU (TelematicsControl Unit). The communication connec-tion between this unit and the NissanCon-nectSM Services Data Center allows forvarious services. When the system connects
to the NissanConnectSM Services DataCenter, an antenna icon will appear on thescreen. Use the service in a location wherethe symbol representing good signal recep-tion appears on the screen.
: When the signal reception is good
: When the signal reception is bad
. The NissanConnectSM Services use the TCU(Telematics Control Unit) for communica-tions. Even if the signal strength bar of the in-vehicle data communication module indi-cates good reception, connection to theNissanConnectSM Services Data Centermay be disabled. This does not indicate amalfunction. Operate the system again aftera few minutes.
CONNECTING TO INTERACTIVEVOICE MENUVarious services to support your driving areavailable by using Interactive Voice Menu. Formore details, refer to the NissanConnectSM
Services website or contact the NissanCon-nectSM Services support line.
NissanConnectSM Services website:
For U.S.
www.nissanusa.com/connect
For Canada
7-18
7. Information and settings

www.nissan.ca/nissanconnect (English)
www.nissan.ca/nissanconnect/fr (French)
NissanConnectSM Services supportline:
1-855-426-6628
1. Push <INFO>.
2. Touch [NissanConnect Services].
3. Touch [Connect to Voice Menu].
4. The system connects to the NissanCon-nectSM Services Response Center andmenu options will be announced. Speak yourpreferred option.
. Assisted Search
Set a destination using an InteractiveVoice Response (IVR) system.
. Roadside Assistance
Connect to the Roadside ResponseSpecialist.
. Valet Alert
Turns on the Valet Alert function andmonitors the vehicle movement within acertain range.
. Account Management
Connects to the NissanConnectSM Ser-vices Response Specialist.
INFO:
. You can also connect to a NissanConnectSM
Services Interactive Voice Menu by touchingthe IVR soft button *1 on the map.
. After selecting [Connect to Voice Menu], itmay take some time until the system initiatesconnection, depending on the technicalenvironment and whether the TCU (Tele-matics Control Unit) is being used by otherservices.
. If your Bluetooth Hands-Free phone re-ceives an incoming call while you are speak-ing with an operator, a pop-up messageasking whether you would like to take the callis displayed.
. To avoid disconnecting the line, do not turnoff the engine.
SETTING ROUTE TO A SEARCHEDDESTINATIONUse Connected Search to find destinations viathe Internet and set a route to them directly fromyour navigation system.
1. Push <INFO>.
2. Touch [NissanConnect Services].
3. Touch [Connected Search]. A keyboard isdisplayed.
4. Enter the keyword and touch [Search]. Thesystem will connect to the Internet and thesearch results will be displayed.
5. Touch a preferred destination from the listand touch [Start] to start the route guidance.
VIEWING INFORMATION FEEDSContents of the various NissanConnectSM Ser-vices information can be downloaded.
Viewing information feedsContents of the various NissanConnectSM Ser-vices information services can be downloaded.
1. Push <INFO>.
2. Touch [NissanConnect Services].
3. Touch [Sync All Feeds]. A folder list isdisplayed.
7-19
7. Information and settings

4. Touch a preferred folder. A list of informationfeeds is displayed.
5. Touch a preferred information feed. Thecontent can be viewed on the touch screendisplay if the vehicle is parked. While driving,the system will read out the information.
INFO:
. Touch [Menu] during communication with theNissanConnectSM Services Data Center tocancel the connection.
. A message is displayed when the commu-nication is disconnected while downloadinginformation due to a poor communicationstatus. Select [Yes] to restart the download.
. Laws in some jurisdictions may restrict theuse of “Text-to-Speech.” Check local reg-ulations before using this feature.
. Some terminology such as personal names,place names, special terms, symbols, etc.may not be announced correctly. This is not amalfunction.
. The system will pause announcements wheninterrupted by the voice guidance given bythe navigation system. When the voiceguidance finishes, the system will restartthe announcement.
. The volume can be adjusted when thesystem announces the information.
“Volume settings” (page 7-28)
. The selected content is read out while thevehicle is being driven, or if parked, you canread the content on the display.
. Content settings can be made using theNissanConnectSM Services website. Formore details, refer to the NissanConnectSM
Services website or contact the NissanCon-nectSM Services support line.
NissanConnectSM Services website:
For U.S.
www.nissanusa.com/connect
For Canada
www.nissan.ca/nissanconnect (English)
www.nissan.ca/nissanconnect/fr (French)
NissanConnectSM Services supportline:
1-855-426-6628
Screen information:
When information feeds are downloaded fromthe NissanConnectSM Services Data Center, thecontents of the information are displayed whilethe vehicle is stopped.
*1 Menu:
Stop the announcement of the content(Text-to-Speech) and display the operationmenu.
*2 Contents:
The contents of the NissanConnectSM
Services feeds are displayed.
*3 [ ]/[ ]:
Turns to the next or previous page if theinformation has a number of content pages.
*4 :
If the information contains map information,the icon will be displayed. It can be set asthe destination.
*5 :
If the information contains phone numberinformation, the icon is displayed. It ispossible to make a phone call to the facility.
7-20
7. Information and settings

After parking the vehicle in a safe location andtouching [Menu], the operation menu is dis-played on the right side of the screen.
INFO:
The availability of the operation menu itemsdiffers depending on the contents of theselected information feeds.
Updating All Information FeedsIt is possible to synchronize with the list updatedNissanConnectSM portal website, such as “Des-tination Send to Car” or “Journey Planner”, etc.
For more details, refer to the NissanConnectSM
Services website or contact the NissanCon-nectSM Services support line.
NissanConnectSM Services website:
For U.S.
www.nissanusa.com/connect
For Canada
www.nissan.ca/nissanconnect (English)
www.nissan.ca/nissanconnect/fr (French)
NissanConnectSM Services support line:
1-855-426-6628
1. Push <INFO>.
2. Touch [NissanConnect Services].
3. Touch [Sync All Feeds].
4. The latest information is sent from theNissanConnectSM Services Response Cen-ter and an updated list is displayed.
Viewing information feeds historyThe information feeds that were previouslyreferred to are displayed.
1. Push <INFO>.
2. Touch [NissanConnect Services].
3. Touch [History].
4. Touch the preferred item.
5. A history list is displayed. Touch the pre-ferred information feed.
EMERGENCY SUPPORTNissanConnectSM Services provides variousservices to support an emergency response forthe registered vehicle and its occupants.
For example, in the event of an illness or seriousinjury, you can seek support by pushing <SOS>(the SOS call switch located near the map light)and connecting to the NissanConnectSM Ser-vices Response Center. The NissanConnectSM
Services Response Center can pinpoint thelocation of the vehicle via GPS (Global Position-ing System), and send the information to lawenforcement, ambulance services or other agen-cies as needed.
NissanConnectSM Services website:
For U.S.
www.nissanusa.com/connect
For Canada
www.nissan.ca/nissanconnect (English)
www.nissan.ca/nissanconnect/fr (French)
NissanConnectSM Services supportline:
7-21
7. Information and settings

1-855-426-6628
WARNING
. Please note that the Automatic Colli-sion Notification service and Emer-gency Call function cannot be usedunder the following conditions:
— NissanConnectSM Services sub-scription has expired or was can-celed.
— The vehicle is outside the areawhere the cellular network serviceis receivable.
— The vehicle is in a location withpoor signal reception such as atunnel, underground parking gar-age, behind a building or in amountainous areas.
— The line is busy.
— The TCU (Telematics Control Unit)or other systems of your vehicleare not working properly.
— The NissanConnectSM Servicesnetwork system is disabled.
— It may not be possible to make anemergency call in the event of
some accidents or emergencies,or if you are in a location withoutreception.
. Park the vehicle in a safe locationand set the parking brake beforeoperating <SOS>.
. Only use this service in the event ofan emergency. There may be a pen-alty for inappropriate use of theservice.
Making an emergency call
1. Push <SOS>. An emergency call is sent tothe emergency call center. At the same time,the vehicle information (location of thevehicle, vehicle speed and the direction oftravel) is also transferred.
2. When the line is connected to the Nissan-ConnectSM Services Response Center,speak to the emergency support staff.
If you want to cancel the emergency call, pushand hold <SOS> for a few seconds.
INFO:
. After <SOS> is pushed, it may take sometime until the system initiates a connection,depending on the technical environment andwhether the TCU (Telematics Control Unit) isbeing used by other services.
. Emergency support is available when<SOS> indicator lamp is turned on. Emer-gency support cannot be used when<SOS> indicator lamp is turned off. Whenthe emergency support is running theindicator lamp will blink without display showany error message after <SOS> waspushed.
. To avoid disconnecting the line, do not turnoff the engine.
7-22
7. Information and settings

NISSANCONNECTSM SERVICES SETTINGS
You can delete NissanConnectSM Services history, return to the default settings, and display user information from the setting screen.
Step 1 Step 2 Menu Action
Push<SETTIN-G>.
[Nissan-Connect-Services]
[Information Settings] [Send Vehicle Information] When this item is turned on, the vehicle information(the data regarding your driving information such asvehicle location, driving history, fuel economy, etc.) canbe sent to the NissanConnectSM Services center.
[Delete Vehicle Information] Delete all Vehicle Information.
[Delete Search History] [Delete Voice Menu History] Delete all Voice Menu history.
[Delete Connected Search History] Delete all Connected Search history.
[Delete NissanConnect Services History] Delete NissanConnectSM Services histories.
[Reset All NissanConnect Services Settings] All NissanConnectSM Services settings are returned tothe default settings.
[Unit ID Information] Display the Unit ID, TCU (Telematics Control Unit) ID,SIM ID and VIN Information necessary for userregistration.
[Vehicle Data Transmission Setting] When [OK] is touched, data transmission to theNissanConnectSM Services Data Center is enabled.Touch [Decline] to disable the NissanConnectSM
Services functions.
7-23
7. Information and settings

SETTINGS SCREEN
The system can be customized to make it easier for you to use.
The displayed items vary depending on the equipped options.
The order of displayed items can be sorted.
Step Menu Item Result
Push<SETTING>.
[Bluetooth] Set the Bluetooth Audio and Phone.Refer to the vehicle Owner’s Manual for details.
[Phone/Mail] Display the Phone/Mail setting screen.Refer to the vehicle Owner’s Manual for details.
[Navigation] Display the Navigation setting screen.“Navigation settings” (page 7-30)
[Audio] Display the Audio setting screen.Refer to the vehicle Owner’s Manual for details.
[Screen] Set the Screen display to the preferred settings.“Screen Settings” (page 7-29)
[Volume Adjustment] Set the Volume Adjustment.“Volume settings” (page 7-28)
[Clock] Set the Clock to your preferred settings.“Clock settings” (page 7-26)
[NissanConnect Services] Set NissanConnectSM Services to your preferred settings.“NissanConnectSM Services” (page 7-14)
[Voice Recognition] Set Minimize Voice Feedback to on/off and the audio setting for voice recognitionuse.
[Camera/Sonar] Set the Camera/Sonar to your preferred settings.Refer to the vehicle Owner’s Manual for details.
7-24
7. Information and settings

Step Menu Item Result
[Other] [Language] Set the Language to your preferred settings.“Language setting” (page 7-27)
[Keyboard Type] Set the Keyboard Type to [ABC] or [QWERTY].
[Low on Fuel Alert] Set the fuel low notification to on/off.
[Software Information] Display the Software Information.
7-25
7. Information and settings

CLOCK SETTINGS
This changes the clock settings.
Step Menu item Action
1. Push <SETTING>.
2. Touch [Clock].
[On-Screen Clock] Set the clock display on/off. When this item is on, the clock display appears.
[Daylight Savings Time] Select the setting for the daylight saving time from ON or OFF. Each time by touchingthis item changes the setting.
[Clock Format (24h)] Select the clock format between 12-hour and 24-hour times. When the indicator lightilluminates, the clock is set to the 24-hour format.
[Time Zone] Select an appropriate time zone from the list. When selecting [AUTO], the systemselects the time zone automatically.
[Offset Adjustment] Adjust the offset value (hour and minutes).
7-26
7. Information and settings

LANGUAGE SETTING
This changes the display language used in the system.
Step Setting item Action
1. Push <SETTING>.
2. Touch [Other].
3. Touch [Language].
[System Language] Select the language of the display.
INFO:
. Do not push the ignition switch while changing the language.
7-27
7. Information and settings

VOLUME SETTINGS
This turns on and off, as well as adjusts, the volume for various functions including audio, phone (ringer, incoming, and outgoing volumes), navigation voiceguidance, as well as system beeps.
Step Setting item Action
1. Push <SETTING>.
2. Touch [Volume Adjustment].
[Audio Volume] Adjust the volume level of the audio system.
[Voice Guidance] Set on/off of the voice guidance.
[Guidance Volume] Adjust the volume level of guidance voice.
[Ringtone Volume] Adjust the volume level of the ringtone.
[Incoming Call Vol.] Adjust the incoming call volume.
[Outgoing Call Vol.] Adjust the outgoing call volume.
[NissanConnect Svcs Vol] Adjust the volume level of the NissanConnectSM Services informationchannel.
[Sonar Volume] Adjust the volume level of the sonar warning volume.
[Button Beep sound] Turn the button beep sound and alarm for a prohibited operation to on/off.
7-28
7. Information and settings

SCREEN SETTINGSThis menu turns on and off the display and adjusts the image quality of the display.
Step Setting item Action
1. Push <SETTING>.
2. Touch [Screen].
[Display Settings] [Brightness] Adjust the brightness.
[Contrast] Adjust the contrast.
[Black Level] Adjust the black level.
[Display OFF] Turn the screen on or off.Push and hold <CAMERA> button for more than 2 seconds to turn thedisplay on.
[Day/Night] Adjust the display brightness. Toggle the map color between the dayscreen and night screen.
[Change Map Color] Toggle the map color between the day screen and night screen.
[Reset Settings] This restores the display settings to the default settings.
7-29
7. Information and settings

NAVIGATION SETTINGS
The navigation system can be customized according to the user’s preference.
1. Push <SETTING>.
2. Touch [Navigation].
3. Touch the item you would like to set.
[Map & Display View]
Setting Map & Display View.“Map view settings” (page 3-8)
[Map Preferences]
Setting map view, orientation, font size or map color etc.“Map view settings” (page 3-8)
[POI Icons Displayed on Map]
The facility icons can be displayed or hidden by type.“Displaying facility icons” (page 3-11)
[Guidance Preferences]
Various guidance information can be set to be played during route guidance and the route and/or voiceguidance can be activated or deactivated.
“Guidance settings” (page 5-14)
[Route Search Criteria]
It is possible to set the condition of the route search.“Route Settings” (page 5-16)
[Traffic Info Settings]
Displays or changes the settings for the traffic information“Traffic Information Settings” (page 7-6)
7-30
7. Information and settings

[Safety Guide Settings]
Setting item Action
[Speed Limit Info] Display speed limit information.
[Edit/Delete Stored Locations]
Stored Locations, Route Plans and Avoid Area. You can also edit stored Items.“Editing stored information” (page 6-5)
[Delete Previous Destinations]
Setting item Action
[Multiple Selection] Previous destination list Select to delete previous destination.
[Select All] Select all previous destinations to delete.
[Delete] Clear the selected previous destination.
[Delete All] Delete all previous destination.
[Previous Start Point] Delete previous start point.
Touch the preferred previous destination from the list. Delete previous destination.
7-31
7. Information and settings

[Other Settings]
Setting item Action
[Small Step Zoom With Dial]Sets the free zoom function on or off. It is possible to adjust the scale in smaller steps than withnormal scale adjustment.
[Map Scrolling Information]
Information about the location, on which the center of the cross pointer is placed by scrolling onthe map, can be set to be displayed.
“Displaying map scrolling information” (page 3-11)
[Customize Nearby Places] Item List Customize the five nearby categories to show the categories that you frequently use.
[Restore Default Settings] Reset the five nearby categories that you have set.
[Tracking Dots Displayed onMap]
[Show Tracking Dots on Map] Displays a stored tracked route on the map.
[Dist. Between Tracking Dots] Select tracking dot interval.
[Delete Track to Current Lo-cation]
Deletes the stored tracked route.
[Adjust Current Location] If the vehicle icon indicating the current vehicle location is not in the correct position, the locationof the vehicle icon on the map screen can be adjusted.
[Reset Settings]
This resets various settings (display, volume level, etc.) to the default settings.
7-32
7. Information and settings

8 Voice recognition
Voice recognition ....................................................................... 8-2
Using Voice Recognition System .................................... 8-2
Before starting ..................................................................... 8-2
Giving voice commands .................................................. 8-2
Voice recognition settings ............................................ 8-11

VOICE RECOGNITION
USING VOICE RECOGNITION SYS-TEM
InitializationWhen the ignition switch is turned on, VoiceRecognition is initialized. When completed, thesystem is ready to accept voice commands. If <
> on the steering-wheel is pushed before theinitialization completes, the display will show amessage to wait until the system has been ready.
BEFORE STARTINGTo get the best recognition performance fromVoice Recognition, observe the following items.
. The interior of the vehicle should be as quietas possible. Close the windows to eliminatethe surrounding noises (traffic noise, vibra-tion sounds, etc.), which may prevent thesystem from correctly recognizing the voicecommands.
. Wait until the tone sounds before speaking acommand.
. Speak in a natural conversational voicewithout pausing between words.
GIVING VOICE COMMANDS1. Push < > located on the steering-wheel.
2. A list of commands appears on the screen,and the system provides the voice menuprompt.
When this screen is displayed, almost all ofthe commands can be recognized. Availablecommands for each categories can beshown on the right side of the screen.Highlight a category listed in the left side ofthe screen with the multi-function controllerto find your preferred command.
INFO:
Selecting a category by touching the screenwill execute the command. After executingthe category command, only the commandsrelated to the selected category can berecognized.
“Command list” (page 8-7)
3. After the tone sounds and the icon on thescreen changes from to , speak acommand. You can also select a commandby directly touching the screen.
INFO:
The Voice Recognition system will pause itsoperation when the multi-function controlleris moved. To resume the operation, push< > on the steering-wheel
4. Continue to follow the voice menu promptsand speak after the tone sounds until thepreferred operation is completed.
INFO:
To cancel a voice command, push and hold< >.You can interrupt the voice prompt at any time bypushing < >.
Operating tips. Speak a command after the tone.
. If the command is not accepted, the systemannounces, “Please say again”. Repeat thecommand in a clear voice.
8-2
8. Voice recognition

. Push < > on the steering-wheel switchonce to return to the previous screen.
. Voice commands spoken from the passen-ger seat cannot be recognized.
. When < > on the steering wheel ispressed while the air conditioner is set tothe Auto mode, the system controls the airconditioner fan speed in order to improvevoice recognition performance. When thefan speed is set higher than the 4th speedposition, the fan speed is decreased to 4thspeed. When the air conditioner is set to themanual mode, the fan speed does notchange. The accuracy of voice recognitionmay be affected depending on the fan speedand the air direction.
. To skip the voice guidance function and givethe command immediately, push < > onthe steering-wheel to interrupt the system.Remember to speak after the tone.
. To cancel the command, push and hold< > or < > on the steering-wheel.
. Push < > on the steering-wheel to stopthe voice prompt and give the command atonce. Remember to wait for the tone beforespeaking.
. To adjust the volume of the system feedback,push <->/<+> on the steering-wheel oruse the audio system <VOL> while thesystem is making an announcement.
. For searching with Street Address, Point ofInterest and City Center, the searching areais automatically set to the state where yourvehicle is located. Use Change State/Pro-vince to change the search area to anotherstate if necessary.
“Changing region” (page 4-2)
How to see voice command screen1. Push < > to display the first screen of the
voice command list.
2. Speak a command or select an item from thevoice command list. The Second screen isdisplayed.
3. Speak a command. The list screen is screenis displayed.
4. Speak preferred number from the list toperform operation.
INFO:
. The voice commands can be spoken one at atime following prompts step by step or thecommand can be spoken successively in onestep.
First screen
*1 Shows available command list. It is alsoavailable to select a command from this listby touching or using the multi-functioncontroller.
*2 Shows available command list. Displayedcommands are only available to executethrough voice recognition. You can saycommands from the left screen and theright screen continuously.
8-3
8. Voice recognition

Second screen
*3 Previously selected command.
*4 Command list
You can say a command from the list, touchthe screen directly or select, using the multi-function controller. You can say preferredword for < > enclosed part of the com-mand.
*5 [Previous]/[Next]
Say as a command or touch to go to theprevious/next screen. It cannot be selectedusing the steering switch or multi-functioncontroller.
List screen
*6 Speak 1 to 6 numbers to select. Also, youcan touch the screen directly, using themulti-function controller.
How to speak numbersVoice Recognition requires the user to speaknumbers in a certain way when giving voicecommands.
General rule:
Only single digits 0 (zero) to 9 can be used. (Forexample, if speaking 500, “five zero zero” can beused, but “five hundred” cannot.)
Examples:
1-800-662-6200
“One eight zero zero six six two six two zero zero”
INFO:
For the best recognition, speak “zero” for thenumber “0” and “oh” for the letter “o”.
Voice command examplesAs examples, some additional basic operationsthat can be performed by voice commands aredescribed here.
Example 1 Placing call from handsfreephonebook:
1. Push < > located on the steering-wheel.
2. Wait for the indicator to change to .Speak “Phone”.
8-4
8. Voice recognition

INFO:
. You can also speak “Phone” “Call<Name>” continuously. After “Dial” isspoken, no name listed in Phonebook canbe recognized. Only telephone numberscan be recognized.
3. Speak “Call <Name>”.
When an option is set in the contact list of acell phone, the option can be commandeddirectly. For example, “Call John SmithWork”or “Call John Smith Other”, etc.
INFO:
. Names in Phonebook can be recognizedby speaking the person’s first and lastname, or just their first name. When aname is spoken in the order of last nameand then first name, or when only the lastname is spoken, the name cannot berecognized.
. Even if words describing family relations,such as “Dad” or “Mom”, are registered ina cell phone, the system can onlyrecognize names. If you want the systemto recognize words like “Dad” or “Mom”,register “Dad/Mom” in Favorites from[Phonebook/Favorites Settings] or regis-
ter “Dad/Mom” as a name in a cell phone.
4. The system announces, “Please say or selectan item number from the displayed list.” Toselect the displayed matching item, speak anumber from 1 to 6.
INFO:
. If the selected number has more than onephone number registered to it, the phonenumber list screen is displayed.
Example 2 Setting destination by address:
1. Push < > located on the steering-wheel.
2. Wait for the indicator change to . Speak“Navigation”.
3. Speak “Street Address”.
4. Speak the full address.
For example : “123 Main Street”, followed bythe city name.
INFO:
. You can also speak or select “Within aCity” and “Change State”. When select-ing “Within a City”, the search addresswill become more successful.
. State is set automatically to the state ofthe vehicle’s current location. To searchfor an address in another state, speak the"Change State", and then speak the stateto be recognized.
. Even when the state has been changedusing voice recognition, it is reset the nexttime voice input is used. The state of thevehicle’s current location is automaticallyset.
. Letters of the alphabet cannot be in-cluded in house numbers. If there is noappropriate house number, a representa-tive point is displayed.
5. The matching address will be displayed.Select from number 1 to 6 .
6. Speak “Calculate Route” to set the destina-tion.
Example 3 Playing Radio:
1. Push < > located on the steering-wheel.
8-5
8. Voice recognition

2. Wait for the indicator change to . Speak“Audio”.
3. Speak “Play FM”. The radio turns on andplays the previously selected station.
INFO:
. You can also speak “FM <station num-ber>” to turn the radio on and tune in apreferred radio station.
. Using “FM <frequency> HD <channelnumber>” allows you to specify the HDsub-channel directly.
8-6
8. Voice recognition

Command list
To use the Voice Recognition function, you can speak commands in the order of 1st command, 2nd command and 3rd command. You can also operate thesystem by directly speaking the 2nd or 3rd command.
Variable numbers or words such as names can be applied in the < > when speaking a command.
Some navigation commands are only for English.
General Command
Command Action
Show More Commands Display other commands of the same category.
Go Back Corrects the last recognition result to return to the previous screen.
Exit Cancels Voice Recognition.
Help Announces how to use voice guidance.
Next Skip to the next page.
Previous Skip to the previous page.
General phone command
Refer to the vehicle Owner’s Manual.
Phone Command
Refer to the vehicle Owner’s Manual.
General navigation command
The following commands can be used during the Navigation voice recognition session.
8-7
8. Voice recognition

Command Action
Within a City Search a destination from the specified city.
Change State Change the state to search.
Calculate Route Calculate a route.
Adjust Location Fine-tune the destination.
Navigation Command
1st Command 2nd Command 3rd Command Action
Navigation Street Address <House number>, <Street>,<City>
Used to search for a street address. Follow the prompts to enter the streetaddress.
Points of Interest <POI name> Used to search for the POI within a specified state or city. Follow theprompts to enter the place name.
Nearby <POI Category> <1 - 6> Say “Nearby” followed by a POI category name such as Gas station,Restaurant or Parking. You can say any category name that appears whenusing manual controls. The system will always search for nearby matchesregardless of the current state location.
Nearby Near Current Location If a route is already set, you can search a destination from “Near CurrentLocation”.
Along Route If a route is already set, you can search a destination from “Along Route”.
Near Destination If a route is already set, you can search destination from “NearDestination”.
Go Home Sets a route to your home location.
Previous Destinations <1 - 6> Sets a route to a previously entered destination.
Address Book <Stored location name><1 - 6>
Sets a route to a location stored in the Stored Locations.
8-8
8. Voice recognition

1st Command 2nd Command 3rd Command Action
City Center <City name> Sets a route to a city center.
Nearby Freeways <1 - 6> Sets a route to a nearby entrance to a freeway.
Intersections <City name> Sets a route to an intersection.
Cancel Route Delete a destination and way point.
Recalculate Route Freeway Preferred Sets the route search condition to find the fastest time.
Energy-Saving Sets the route search condition to find the energy-saving route.
Shortest Distance Sets the route search condition to find the shortest distance.
Traffic Detour Sets the route search condition to detour traffic jam and traffic accident.
Zoom In <1-13> Increases the magnification of the map by the number of steps specified.
Zoom Out <1-13> Decreases the magnification of the map by the number of steps specified.
Zoom Streets Change to the street map.
North Up Sets the 2D full map to North Up.
Heading Up Sets the 2D full map to Heading Up.
2D Map Change the current map to a 2D Heading Up map.
3D Map Change the current map to a 3D map.
Voice Guidance OFF / Voice Guidance ON Turns the navigation guidance on and off.
Show POI Icons Display the icon of <POI Category> in MAP.
Remove POI Icons Remove the icon of <POI Category> in MAP.
8-9
8. Voice recognition

NOTE:
. When searching for an address, the state cannot be specified by voice commands. Speak an address within the state or change thestate setting prior to starting the voice recognition session.
INFO:
. When the current car position is in Puerto Rico and Guam, the system does not recognize the general navigation commands.
. Searching by Points of Interest is limited to the area of the current state or the state set in Change State. The Points of Interest command is a functionthat recognizes the POI names registered in the navigation system.
. When the “Points of Interest” command is spoken in voice recognition, some POI cannot be used for “Points of Interest” search with voice commandoperations.
For “Nearby” search, all registered categories can be recognized by the voice recognition system.
It may be possible to change some of the categories shown above.
Audio Command
Refer to the vehicle Owner’s Manual.
Information Command
1st Command 2nd Command 3rd Command Action
Information Voice Menu Connect to the NissanConnectSM Services Response Specialists.
Fuel Prices Displays the fuel prices.
Weather Forecast Display the weather forecast.
Current Weather Display the nearby weather (current weather).
Sports Scores Display the sports scores.
Traffic Information Turns the traffic information system on or off.
Route Information Display the route information.
8-10
8. Voice recognition

. The Fuel Prices, Weather Forecast, Current Weather, Sports Scores and Traffic Information will not operate without a subscription to Sirius XM Radio.
Vehicle Info Command
Refer to the vehicle Owner’s Manual.
VOICE RECOGNITION SETTINGSThe voice recognition functions can be set.
1. Push <SETTING>.
2. Touch [Voice Recognition].
3. Touch the item you would like to set.
Available settings
. [Minimize Voice Feedback]:
Sets the Minimize Voice Feedback functionON (short feedback) or OFF (long feed-back).
. [Audio Device Setting]:
Select an audio device to be operated via theVoice Recognition system from the audiodevices connected to the USB connectors.A device with an indicator light illuminatedcan be operated with the Voice Recognitionsystem.
8-11
8. Voice recognition

MEMO
8-12
8. Voice recognition

9 General information
Current vehicle location ........................................................... 9-2
Display of current vehicle location .................................. 9-2
What is GPS (Global Positioning System)? ................ 9-2
Incorrect display of vehicle position ............................... 9-3
Detailed Map Coverage Areas (MCA) fornavigation system ................................................................ 9-5
When gray road is displayed on map ............................ 9-5
Route calculation ....................................................................... 9-6
Route guidance ......................................................................... 9-8
Notification of intersection on ordinary road ................. 9-8
Notification of consecutive intersections onordinary roads ...................................................................... 9-8
Notification of freeway entrance .................................... 9-8
Notification of freeway junction ..................................... 9-9
Notification of freeway exit .............................................. 9-9
Map data .................................................................................. 9-10
SD card slot .................................................................... 9-10
How to handle the Map SD card ............................... 9-10
How to order map data updates ................................ 9-10
About map icons ............................................................ 9-11
About map data .............................................................. 9-11
End-user terms ............................................................... 9-12
How to handle the SD card ................................................ 9-14

CURRENT VEHICLE LOCATION
DISPLAY OF CURRENT VEHICLELOCATIONThis navigation system combines the dataobtained from the vehicle (by gyro sensor) andfrom GPS (Global Positioning System) satellitesto calculate the current location of the vehicle.This position is then displayed throughout routeguidance to a destination.
WHAT IS GPS (Global PositioningSystem)?GPS is a position detecting system that usessatellites deployed by the U.S. government. Thisnavigation system receives radio signals fromthree or more different satellites that orbit13,049 miles (21,000 km) above the earth inspace, and detect the position of the vehicle byutilizing the principle of triangulation.
Positioning adjustmentWhen the system judges that the vehicle positionis not accurate based on vehicle speed and gyrosensor data calculations, the system will auto-matically adjust the position of the vehicle iconusing GPS signals.
Receiving signals from GPS satellitesThe reception of GPS signals can be weak,depending on the environment. Vehicles in thefollowing areas/environments may not receiveGPS signals.
* Inside tunnels or parking garages
* In areas with numerous tall buildings
* Under multi-layered highways
9-2
9. General information

* Areas with numerous tall trees
* In a canyon
INFO:
The GPS antenna is located on the instrumentpanel inside the vehicle. Do not place anyobjects, especially cellular phones or transcei-vers, on the instrument panel. Because thestrength of the GPS signal is approximately onebillionth of that of TV waves, phones andtransceivers will affect or may totally disrupt thesignal.
INCORRECT DISPLAY OF VEHICLEPOSITIONThe following cases may affect the displayaccuracy of the vehicle’s position or travelingdirection. The accuracy will return to normal if thedriving conditions return to normal.
* When there is a similar road nearby.
* When the vehicle is traveling in an area witha grid pattern road system.
* When the vehicle is passing through a largeY-shaped intersection/junction.
9-3
9. General information

* When the vehicle is traveling on a contin-uous, slowly curving road.
* When the vehicle is traveling on a road withrepeating S-shaped curves.
* When the vehicle is on a loop bridge.
* When the vehicle is on a snow-covered orunpaved road.
* When repeatedly turning left or right, ordriving in zigzags.
* When the vehicle is rotated on a parking lotturntable while the ignition switch is off.
9-4
9. General information

* When driving on a road not displayed on themap screen or a road that has beenchanged due to additional construction orother reasons.
* When the GPS positioning accuracy is low.
INFO:
. The vehicle icon may be misaligned whenstarting the vehicle just after starting theengine.
. The vehicle icon may also be misaligned ifdifferent sized tires or tire chains areinstalled.
. The system has a function that automaticallycorrects the vehicle icon position when it ismisaligned from the actual position.
. Vehicle position correction by GPS may notfunction when the vehicle is stopped.
. If the vehicle icon position does not return tonormal even after driving for a while, correctthe vehicle icon position manually.
DETAILED MAP COVERAGE AREAS(MCA) FOR NAVIGATION SYSTEMThis system is designed to help guiding to thedestination, and it also performs other functionsas outlined in this manual. However, the systemmust be used safely and properly. Informationconcerning road conditions, traffic signs and theavailability of services may not always be up-to-date. The system is not a substitute for safe,proper and legal driving.
Map data covers select metropolitan areas in the
United States and Canada.
Map data includes two types of areas: “Detailedcoverage areas” providing all detailed road dataand other areas showing “Main roads only”.
INFO:
Detailed map data is not available in many areasand is generally limited to select major metropo-litan areas.
WHEN GRAY ROAD IS DISPLAYEDON MAP. When you are driving on a road displayed in
gray after the vehicle has deviated from thesuggested route during route guidance,automatic rerouting may not start immedi-ately.
. The navigation system does not provideroute guidance for roads displayed in darkgreen. Therefore, if the destination is set on aroad displayed in dark green, the enlargedmap display will return to the ordinary mapscreen at some point on a suggested routethat is near the destination. Also, voiceguidance will stop at some point on asuggested route that is near the destination.
. Places information and street names nearroads displayed in gray may not be contained
9-5
9. General information
in the map data. ROUTE CALCULATION
. There may be cases where carpool lanes areincluded on a suggested route when theautomatic rerouting function is activated,even if the [Use Time Restricted Roads] isset to [Use Restriction Info].
“Route Settings” (page 5-16)
. The navigation system does not provideroute guidance for roads displayed in darkgreen.
. If the destination is set on a dark green road,the enlarged map display will switch to theordinary map screen at some point andsuggest a route that is near the destination.The distance and direction to the endpoint ofthe suggested route will be displayed in thelower right corner of the screen. Also, at thistime, voice guidance will announce, “Theroute to the destination includes roadsthrough incomplete map areas. Voice gui-dance will not be provided in these areas.”
When approaching the endpoint of thesuggested route, voice guidance will an-nounce, “Entering the road with incompletemap data. Use the direction arrow anddistance information to proceed to yourdestination.”
To reach the destination, refer to the mapscreen. Always follow actual roads andregulations and drive safely.
. The suggested route may not be the short-est, nor are other circumstances such astraffic jams considered.
. Because of the inevitable difference in roadconditions and circumstances between thetime you use this system and the time theinformation was produced for the map data,there may be discrepancies in roads andregulations. In such cases, actual roadconditions and regulations take precedenceover map data information.
. During route calculation, the map will notscroll, however the vehicle icon will moveaccording to the actual vehicle’s movement.
. During route calculation, buttons such as<MAP> and <NAVI> will be disabled.
. In some cases, after the calculation iscomplete, the calculated route may not beimmediately displayed.
. Waypoints that have been passed will bedisregarded by rerouting calculation.
. If you scroll the map while the suggestedroute is being drawn, it may take more time tofinish drawing.
9-6
9. General information

. Route calculation may not be completed inthe following cases.
— If there is no main road within a range of1.5 miles (2.5 km) from the vehicle, amessage saying so will appear on thescreen. Try recalculating when the vehicleis closer to a main road.
— If there is no main road within a range of1.5 miles (2.5 km) from the destination orwaypoint, a message saying so willappear on the screen. Try setting thelocation closer to a main road.
— If the vehicle is too close to the destinationor if there are no roads to the destination,a message saying so will appear on thescreen.
— If it is impossible to reach the destinationor waypoints because of traffic regula-tions, etc.
— If the only route to reach the destination orwaypoints is extremely complicated.
. The following may occur when the route isdisplayed.
— If you calculate a route on a main road, thestarting point of the route may not exactlymatch the current vehicle location.
— The endpoint of the route may not exactlymatch the destination.
— If you calculate a route on a main road, thesystem may display a route from anothermain road. This may be because theposition of the vehicle icon is not accu-rate. In this case, park the vehicle in a safelocation and reset the vehicle icon, orcontinue driving to see if the position ofthe vehicle icon is automatically adjustedbefore recalculating the route.
— There are cases in which the systemshows an indirect route to reach thedestination or waypoints, if you set themfrom stored or facility information. In orderto correct this, you must be careful aboutthe traffic direction, especially when laneswith different travel directions are shownseparately, such as interchanges andservice areas.
— This system makes no distinction be-tween limited traffic control and totalcontrol (blockage). It may show anindirect route even if the road is usable.
— Even if the freeway preference is set toOFF, a route that uses the freeway may besuggested.
— Even if the ferry preference is set to OFF, aroute that uses a ferry line may besuggested.
9-7
9. General information

ROUTE GUIDANCE
INFO:
The system will only announce street nameswhen the system language is set to English.Street names are not announced when thesystem is set to French/Spanish.
NOTIFICATION OF INTERSECTIONON ORDINARY ROAD
1. “In about one quarter mile (400 meters), right(left) turn.”
2. “Right (left) turn ahead.”
NOTIFICATION OF CONSECUTIVEINTERSECTIONS ON ORDINARYROADS
When the road has three or more consecutiveintersections ahead, voice guidance will an-nounce the following.
1. “In about one quarter mile (400 meters), right(left) turn, then in about one quarter mile(400 meters) left (right) turn.”
2. “Left (right) turn ahead, then in about onequarter mile (400 meters) right (left) turn.”
NOTIFICATION OF FREEWAY EN-TRANCE
1. “In about one quarter mile (400 meters)freeway entrance on your right onto (roadnumber and direction).”
2. “Freeway entrance on your right onto (roadnumber and direction).”
9-8
9. General information

NOTIFICATION OF FREEWAY JUNCTION
1. “In about one mile (two kilometers), keep tothe right (left) onto (road number anddirection), then in about one quarter mile(400 meters) keep to the right (left).”
2. “Keep to the right (left) onto (road numberand direction), then in about one quarter mile(400 meters) keep to the right (left) onto(road number and direction).”
3. “Keep to the right (left) onto (road numberand direction).”
NOTIFICATION OF FREEWAY EXIT
1. “In about one mile (two kilometers), exit onyour right.”
2. “Take the second exit on your right.”
9-9
9. General information

MAP DATA
SD CARD SLOTThe SD card slot is located inside the consolebox.
Insert an SD card. Push the inserted SD card inand release it to eject the SD card from the slot.An SD card containing map data is provided withthe vehicle.
NOTE:
. Never insert foreign objects such ascoins into the SD card slot. Doing somay result in a malfunction of thedevice.
. Do not apply overload to the SD cardwhen inserting it to the slot. Doing somay result in a malfunction of thedevice.
. The SD card may be hot when it isremoved from the device. This does notindicate a malfunction.
INFO:
Do not remove the SD card containing map datathat is inserted in the slot. When this SD cardcontaining map data is removed the navigationsystem will not operate. If the SD card containingmap data is accidentally removed, after reinsert-ing the SD card containing map data into theslot, place the ignition switch in the OFF positionand then place it back in the ON position again.
HOW TO HANDLE THE MAP SDCARDAn SD card that includes the map data isinserted. When handling the Map SD card,please be careful and adhere to the followinginstructions:
. An SD card is inserted in the slot. This is theSDHC card that is exclusively used for thisdevice. This card includes the map data. TheSDHC card is necessary to operate thedevice. Do not remove this card except whenupdating the map data is required.
. Never analyze, modify, delete or format themap data. Doing so may cause an improperoperation of the device.
. The SDHC card that is exclusively used forthis device does not work properly if it isinserted in another device.
. The map data cannot be used even if it iscopied to another SDHC card.
. Do not remove the SDHC card containingmap data from the system. Using the systemwith the SDHC card containing map dataremoved will prevent some functions fromoperating.
NOTE:
Do not remove the SD card containing mapdata that is inserted in the slot. When thisSD card containing map data is removedthe navigation system will not operate. Ifthe SD card containing map data is acci-dentally removed, after reinserting the SDcard containing map data into the slot,place the ignition switch in the OFF posi-tion and then place it back in the ONposition again.
HOW TO ORDER MAP DATA UP-DATESTo order updated map data, contact the NISSANNAVIGATION SYSTEM HELPDESK. See thecontact information on the inside front cover ofthis manual.
9-10
9. General information

ABOUT MAP ICONSThe marks of companies displayed by thisproduct to indicate business locations are themarks of their respective owners. The use ofsuch marks in this product does not imply anysponsorship, approval, or endorsement by suchcompanies of this product.
ABOUT MAP DATA1. This map data has been prepared by
CLARION CO., LTD. (CLARION), underlicense from HERE. has added, processedand digitized data based on the digital roadmap data of HERE. Due to the productiontiming of the map data, some new roads maynot be included in this map data or some ofthe names or roads may be different fromthose at the time you use this map data.
2. Traffic control and regulation data used inthis map data may be different from those atthe time you use this map data due to thedata production timing. When driving yourvehicle, follow the actual traffic control signsand notices on the roads.
3. Reproducing or copying this map software isstrictly prohibited by law.
Published by Nissan North America, Inc.
*C 2016 HERE. All Rights Reserved.
*C ZENRIN CO., LTD. 2016. All rights reserved.
WARNING
. This navigation system should not beused as a substitute for your ownjudgement. Any route suggestionsmade by this navigation system maynever override any local traffic reg-ulations, your own judgement, and/or knowledge of safe driving prac-tices. Disregard route suggestions bythe navigation system if such sugges-tions would: cause you to perform anhazardous or illegal maneuver, placeyou in an hazardous situation, orroute you into an area you considerunsafe.
. The advice provided by the naviga-tion system is to be regarded only asa suggestion. There may be situa-tions where the navigation systemdisplays the vehicle’s location incor-rectly, fails to suggest the shortestcourse, and/or fails to direct you toyour desired destination. In suchsituations, rely on your own drivingjudgement, taking into account cur-rent driving conditions.
. Do not use the navigation system toroute you to emergency services. Thedatabase does not contain a com-plete listing of locations of emer-gency service providers such aspolice, fire stations, hospitals andclinics. Please use your judgementand your ability to ask for directionsin these situations.
. As the driver you solely are respon-sible for your driving safety.
— In order to avoid traffic accidents,do not operate the system whiledriving.
— In order to avoid traffic accidents,operate the system only when thevehicle is stopped at a safe placeand the parking brake is set.
— In order to avoid traffic accidentsor traffic offence, remember thatactual road conditions and trafficregulations take precedence overthe information contained on thenavigation system.
— Accordingly, the Software maycontain inaccurate or incompleteinformation due the passage oftime, changing circumstances, and
9-11
9. General information

due to the nature of the sourcesused. Please observe the actualtraffic circumstances and regula-tions at all times while driving.
— In a situation when actual roadconditions and traffic regulationsdiffer from the information con-tained on the navigation system,then abide by traffic rules.
— The navigation system does notprovide, or account for in any way,information regarding traffic androad laws; speed restrictions; roadconditions including road slope,grade, and/or surface conditions;obstruction information includingbridge and tunnel height andwidth, and/or other prevailing driv-ing and/or road conditions. Alwaysrely on your own driving judgment,taking into account current drivingconditions.
— Minimize the amount of time spentviewing the screen while driving.
The marks of companies displayed by thisproduct to indicate business locations arethe marks of their respective owners. The use
of such marks in this product does not implyany sponsorship, approval, or endorsementby such companies of this product.
END-USER TERMSThe data (“Data”) is provided for your personal,internal use only and not for resale. It is protectedby copyright, and is subject to the followingterms and conditions which are agreed to by you,on the one hand, and CLARION CO., LTD.(“CLARION”) and its licensors (including theirlicensors and suppliers) on the other hand.
*C 2016 HERE. All rights reserved.
This data includes information taken with permis-sion from Canadian authorities, including *C HerMajesty, *C Queen’s Printer for Ontario, *CCanada Post, GeoBase , *C Department ofNatural Resources Canada. All rights reserved.
HERE holds a non-exclusive license from theUnited States Postal Service to publish and sellZIP+4 information.
*C United States Postal Service 2015. Pricesare not established, controlled or approved bythe United States Postal Service . The followingtrademarks and registrations are owned by theUSPS: United States Postal Service, USPS, andZIP+4.
Terms and conditionsPersonal Use Only. You agree to use this Datatogether with Nissan Automotive Products forthe solely personal, non-commercial purposesfor which you were licensed, and not for servicebureau, time-sharing or other similar purposes.Accordingly, but subject to the restrictions setforth in the following paragraphs, you agree notto otherwise reproduce, copy, modify, decom-pile, disassemble or reverse engineer any portionof this Data, and may not transfer or distribute itin any form, for any purpose, except to the extentpermitted by mandatory laws. Multi-disc setsmay only be transferred or sold as a complete setas provided by CLARION and not as a subsetthereof.
Restrictions.Except where you have beenspecifically licensed to do so by CLARION, andwithout limiting the preceding paragraph, youmay not (a) use this Data with any products,systems, or applications installed or otherwiseconnected to or in communication with vehicles,capable of vehicle navigation, positioning, dis-patch, real time route guidance, fleet manage-ment or similar applications; or (b) with or incommunication with any positioning devices orany mobile or wireless-connected electronic orcomputer devices, including without limitationcellular phones, palmtop and handheld compu-
9-12
9. General information

ters, pagers, and personal digital assistants orPDAs.
Warning.The Data may contain inaccurate orincomplete information due to the passage oftime, changing circumstances, sources used andthe nature of collecting comprehensive geo-graphic data, any of which may lead to incorrectresults.
No Warranty.This Data is provided to you “asis,” and you agree to use it at your own risk.CLARION and its licensors (and their licensorsand suppliers) make no guarantees, representa-tions or warranties of any kind, express orimplied, arising by law or otherwise, includingbut not limited to, content, quality, accuracy,completeness, effectiveness, reliability, fitnessfor a particular purpose, usefulness, use orresults to be obtained from this Data, or thatthe Data or server will be uninterrupted or error-free.
Disclaimer of Warranty: CLARION AND ITSLICENSORS (INCLUDING THEIR LICENSORSAND SUPPLIERS) DISCLAIM ANY WARRAN-TIES, EXPRESS OR IMPLIED, OF QUALITY,PERFORMANCE, MERCHANTABILITY, FIT-NESS FOR A PARTICULAR PURPOSE ORNON-INFRINGEMENT. Some States, Territoriesand Countries do not allow certain warrantyexclusions, so to that extent the above exclusion
may not apply to you.
Disclaimer of Liability: CLARION AND ITSLICENSORS (INCLUDING THEIR LICENSORSAND SUPPLIERS) SHALL NOT BE LIABLE TOYOU: IN RESPECT OF ANY CLAIM, DEMANDOR ACTION, IRRESPECTIVE OF THE NATUREOF THE CAUSE OF THE CLAIM, DEMAND ORACTION ALLEGING ANY LOSS, INJURY ORDAMAGES, DIRECT OR INDIRECT, WHICHMAY RESULT FROM THE USE OR POSSES-SION OF THE INFORMATION; OR FOR ANYLOSS OF PROFIT, REVENUE, CONTRACTSOR SAVINGS, OR ANY OTHER DIRECT,INDIRECT, INCIDENTAL, SPECIAL OR CON-SEQUENTIAL DAMAGES ARISING OUT OFYOUR USE OF OR INABILITY TO USE THISINFORMATION, ANY DEFECT IN THE INFOR-MATION, OR THE BREACHOF THESE TERMSOR CONDITIONS, WHETHER IN AN ACTIONIN CONTRACT OR TORT OR BASED ON AWARRANTY, EVEN IF CLARION OR ITSLICENSORS HAVE BEEN ADVISED OF THEPOSSIBILITY OF SUCH DAMAGES. SomeStates, Territories and Countries do not allowcertain liability exclusions or damages limitations,so to that extent the above may not apply to you.
Export Control. CLARION shall not export fromanywhere any part of the Data or any directproduct thereof except in compliance with, and
with all licenses and approvals required under,applicable export laws, rules and regulations,including but not limited to the laws, rules andregulations administered by the Office of ForeignAssets Control of the U.S. Department ofCommerce and the Bureau of Industry andSecurity of the U.S. Department of Commerce.To the extent that any such export laws, rules orregulations prohibit HERE from complying withany of its obligations hereunder to deliver ordistribute Data, such failure shall be excused andshall not constitute a breach of this Agreement.
Entire Agreement.These terms and conditionsconstitute the entire agreement between CLAR-ION (and its licensors, including their licensorsand suppliers) and you pertaining to the subjectmatter hereof, and supersedes in their entiretyany and all written or oral agreements previouslyexisting between us with respect to such subjectmatter.
Governing Law. The above terms and condi-tions shall be governed by the laws of the Stateof Illinois, without giving effect to (i) its conflict oflaws provisions, or (ii) the United NationsConvention for Contracts for the InternationalSale of Goods, which is explicitly excluded. Youagree to submit to the jurisdiction of the State ofIllinois for any and all disputes, claims andactions arising from or in connection with the
9-13
9. General information

Data provided to you hereunder.
Government End Users. If the Data is beingacquired by or on behalf of the United Statesgovernment or any other entity seeking orapplying rights similar to those customarilyclaimed by the United States government, theData is a “commercial item” as that term isdefined at 48 C.F.R. (“FAR”) 2.101, is licensed inaccordance with the End-User Terms underwhich this Data was provided, and each copyof the Data delivered or otherwise furnished shallbe marked and embedded as appropriate withthe following “Notice of Use,” and shall betreated in accordance with such Notice:
NOTICE OF USE
CONTRACTOR (MANUFACTURER/ SUPPLIER)NAME: HERE
CONTRACTOR (MANUFACTURER/SUPPLIER)ADDRESS:
c/o Nokia 425 West Randolph Street, Chicago,Illinois 60606
This Data is a commercial item as defined in FAR2.101 and is subject to the End-User Terms under
which this Data was provided.
*C 2016 HERE – All rights reserved.
If the Contracting Officer, federal governmentagency, or any federal official refuses to use the
legend provided herein, the Contracting Officer,federal government agency, or any federal officialmust notify HERE prior to seeking additional oralternative rights in the Data
HOW TO HANDLE THE SD CARD
When handling the SD card, please be carefuland adhere to the following instructions:
. Always follow the instructions described inthis manual and in the handbook attached tothe SD card when using an SD card in thisdevice.
. Do not handle an SD card with wet hands.Doing so may cause electric shock or amalfunction.
. Do not allow hands or metal objects tocontact the terminal area of SD cards.
. Do not place SD cards on the instrumentpanel, on any place with direct sunlight or inmoist circumstances. Doing so may damageor deform the SD card.
. Do not use any conventional cleaner, ben-zine, thinner or antistatic spray.
. Do not use SD cards in any place wherestatic electricity or electric noise adverselyaffects SD cards. This may cause datacorruption or data loss.
. SD card optimization must not be performed.
. Always place the SD card in its storage casewhen not in use.
9-14
9. General information

. If an SD card is disposed of when it is notused, it is recommended not only to deletethe stored data but also to physically breakthe card.
9-15
9. General information

MEMO
9-16
9. General information

10 Troubleshooting guide
System unit .............................................................................. 10-2
Liquid crystal display ....................................................... 10-2
Navigation ................................................................................ 10-3
Basic operations ............................................................... 10-3
Vehicle icon ........................................................................ 10-4
Route calculation and visual guidance ..................... 10-6
Voice guidance ............................................................... 10-8
Traffic information ........................................................... 10-9
NissanConnectSM Services ...................................... 10-10
Voice recognition ................................................................ 10-11

SYSTEM UNIT
LIQUID CRYSTAL DISPLAY
Symptom Possible cause Possible solution
The screen is too dark. The cabin temperature is too low. Wait until the cabin temperature becomes moderate.
Screen brightness is set to the maximum darkness. Adjust the brightness setting of the screen.“Screen Settings” (page 7-29)
The screen is too bright. Screen brightness is set to the maximum brightness. Adjust the brightness setting of the screen.“Screen Settings” (page 7-29)
A small black spot or a small bright spot appears onthe screen.
This is a typical phenomenon for liquid crystaldisplay.
This is not a malfunction.
A dot or stripe pattern appears on the screen. Electromagnetic waves that are generated from neonbillboards, high voltage electric power cables, hamradios or other radio devices equipped to othervehicles may adversely affect the screen.
This is not a malfunction.
Image lag appears on the screen. This is a typical phenomenon for liquid crystaldisplay.
This is not a malfunction.
Image motion displayed on the screen is slow. The cabin temperature is less than 508F (08C). Wait until the cabin temperature rises to within 508F(08C) and 1228F (508C).
When looking at the screen from an angle, the screenlightens or darkens.
This is a typical phenomenon for liquid crystaldisplay.
Adjust the brightness setting of the screen.“Screen Settings” (page 7-29)
The screen turns blue or an error message isdisplayed.
A system malfunction has occurred. Contact a NISSAN dealer for an inspection.
The SD card is not inserted into the slot correctly. If the SD card containing map data is accidentallyremoved, after reinserting the SD card containingmap data into the slot, place the ignition switch in theOFF position and then place back in the ON positionagain.
10-2
10. Troubleshooting guide

NAVIGATION
BASIC OPERATIONS
Symptom Possible cause Possible solution
No image is displayed. The brightness is at the lowest setting. Adjust the brightness of the display.“Screen Settings” (page 7-29)
The display is turned off. Push the and hold < > to turn on the display.
No voice guidance is available.orThe volume is too high or too low.
The volume is not set correctly, or it is turned off. Adjust the volume of voice guidance.
Voice guidance is not provided for certain streets(roads displayed in gray).
This is not a malfunction.
No map is displayed on the screen. A screen other than a map screen is displayed. Push <MAP>.
The screen is too dim. The movement is slow. The temperature in the interior of the vehicle is low. Wait until the interior of the vehicle has warmed up.
Some pixels in the display are darker or brighter thanothers.
This condition is an inherent characteristic of liquidcrystal display.
This is not a malfunction.
Some menu items cannot be selected. Some menu items become unavailable while thevehicle is driven.
Park the vehicle in a safe location, and then operatethe navigation system.
10-3
10. Troubleshooting guide

VEHICLE ICON
Symptom Possible cause Possible solution
Names of roads and locations differ be-tween Plan View and BirdviewTM.
This is because the quantity of the displayed information isreduced so that the screen does not become too cluttered.There is also a chance that names of the roads or locations maybe displayed multiple times, and the names appearing on thescreen may be different because of a processing procedure.
This is not a malfunction.
The vehicle icon is not displayed in thecorrect position.
The vehicle was transported after the ignition switch was pushedoff, for example, by a ferry or car transporter.
Drive the vehicle for a period of time on a roadwhere GPS signals can be received.
The position and direction of the vehicle icon may be incorrectdepending on the driving environments and the levels ofpositioning accuracy of the navigation system.
This is not a malfunction. Drive the vehicle for aperiod of time to automatically correct the positionand direction of the vehicle icon.
“Current vehicle location” (page 9-2)
When the vehicle is traveling on a new road,the vehicle icon is located on another roadnearby.
Because the new road is not stored in the map data, the systemautomatically places the vehicle icon on the nearest roadavailable.
Updated road information will be included in thenext version of the map data.
The screen does not switch to the nightscreen even after turning on the headlights.
The daytime screen was set the last time the headlights wereturned on.
Set the screen to the night screen mode using< > when turning on the headlights.
“Screen Settings” (page 7-29)
The map does not scroll even when thevehicle is moving.
The current location map screen is not displayed. Push <MAP>.
The vehicle icon is not displayed. The current location map screen is not displayed. Push <MAP>.
10-4
10. Troubleshooting guide

Symptom Possible cause Possible solution
The location of the vehicle icon is misalignedfrom the actual position.
When using tire chains or replacing the tires, speed calculationsbased on the speed sensor may be incorrect.
Drive the vehicle for a period of time (atapproximately 19 MPH (30 km/h) for about 30minutes) to automatically correct the vehicle iconposition.If this does not correct the vehicle icon position,contact a NISSAN dealer.
The map data has a mistake or is incomplete (the vehicle iconposition is always misaligned in the same area).
Updated road information will be included in thenext version of the map data.
10-5
10. Troubleshooting guide

ROUTE CALCULATION AND VISUAL GUIDANCE
Symptom Possible cause Possible solution
Waypoints are not included in the autoreroute calculation.
Waypoints that have been already passed are not included in theauto reroute calculation.
To go to that waypoint again, edit the route.
Route information is not displayed. Route calculation has not yet been performed. Set the destination and perform route calculation.
The vehicle is not on the suggested route. Drive on the suggested route.
Route guidance is set to OFF. Turn on route guidance.
Route information is not provided for certain types of roads (roadsdisplayed in dark green).
This is not a malfunction.
The auto reroute calculation (or detourcalculation) suggests the same routeas the one previously suggested.
Route calculations took priority conditions into consideration, butthe same route was calculated.
This is not a malfunction.
A waypoint cannot be added. Five waypoints are already set on the route, including ones that thevehicle has already passed.
A maximum of 5 waypoints can be set on the route. Togo to 6 or more waypoints, perform route calculationsmultiple times as necessary.
The suggested route is not displayed. Roads near the destination cannot be calculated. Reset the destination to a main or ordinary road, andrecalculate the route.
The starting point and destination are too close. Set a more distant destination.
The starting point and destination are too far away. Divide the trip by selecting one or two intermediatedestinations, and perform route calculations multipletimes.
There are time restricted roads (by the day of the week, by time)near the current vehicle location or destination.
Set [Use Time Restricted Roads] to OFF.“Route Settings” (page 5-16)
A part of the route is not displayed. The suggested route includes narrow streets (roads displayed ingray).
This is not a malfunction.
10-6
10. Troubleshooting guide

Symptom Possible cause Possible solution
The part of the route that the vehiclehas already passed is deleted.
A route is managed by sections between waypoints. If the vehiclepassed the first waypoint, the section between the starting pointand the waypoint is deleted (it may not be deleted depending on thearea).
This is not a malfunction.
An indirect route is suggested. If there are restrictions (such as one-way streets) on roads close tothe starting point or destination, the system may suggest an indirectroute.
Adjust the location of the starting point or destination.
The systemmay suggest an indirect route because route calculationdoes not take into consideration some areas such as narrow streets(gray roads).
Reset the destination to a main or ordinary road, andrecalculate the route.
The landmark information does notcorrespond to the actual information.
This may be caused by insufficient or incorrect map data. Updated information will be included in the nextversion of the map data.
The suggested route does not exactlyconnect to the starting point, way-points or destination.
There is no data for route calculation closer to these locations. Set the starting point, waypoints and destination on amain road, and perform route calculation.
10-7
10. Troubleshooting guide

VOICE GUIDANCE
Symptom Possible cause Possible solution
Voice guidance is not available. Voice guidance is only available at certain intersections marked with. In some cases, voice guidance is not available even when the
vehicle makes a turn.
This is not a malfunction.
The vehicle has deviated from the suggested route. Go back to the suggested route or requestroute calculation again.
Voice guidance is set to OFF. Turn on voice guidance.
Route guidance is set to OFF. Turn on route guidance.
The guidance content does not corre-spond to the actual road conditions.
The content of voice guidance may vary, depending on the types ofintersections at which turns are made.
Follow all traffic rules and regulations.
10-8
10. Troubleshooting guide

TRAFFIC INFORMATION
Symptom Possible cause Possible solution
Traffic information is not displayed. Traffic information is not set to ON. Set the traffic information to ON.
The vehicle is in an area where traffic information is notavailable.
Scroll to an area where traffic information is available.
The subscription to SiriusXM Traffic is incomplete, or thesubscription to SiriusXM Traffic has expired.
Check the subscription status of SiriusXM Traffic.
The map scale is set at a level where the display of icons isimpossible.
Check that the map scale is set at a level in which thedisplay of icons is possible.
“Traffic information on map” (page 7-6)
With the automatic detour route searchON, no detour route is set to avoidcongested areas.
There is no faster route compared to the current route,based on the road network and traffic information.
The automatic detour search is not intended for avoidingtraffic jams. It searches for the fastest route taking intoconsideration conditions as traffic jams. Follow the currentroute. Also see “NOTES ON TRAFFIC INFORMATION” forfurther information.
“Notes on SiriusXM Traffic information” (page 7-13)
The route does not avoid a road sectionwith traffic information stating that it isclosed due to road construction.
The navigation system is designed not to avoid this eventbecause the actual period of closure may differ from thedeclared roadwork period.
Observe the actual road conditions and follow theinstructions on the road for a detour when necessary. If theroad is closed, use the detour function and set the detourdistance to avoid the road section that is closed.
10-9
10. Troubleshooting guide

NISSANCONNECTSM SERVICES
Symptom Possible cause Possible solution
The system cannot connect tothe NissanConnectSM ServicesData Center.
A subscription for the NissanConnectSM
Services has not been established.Sign up for a subscription to the NissanConnectSM Services. For details aboutsubscriptions, contact the NissanConnectSM Services support line at 1-855-426-6628.
The communication line is busy. Try again after a short period of time.
The vehicle is in a location where it isdifficult to receive radio waves.
When the vehicle moves to an area where radio waves can be transmittedsufficiently, communication will be restored. When the icon on the display showsthat the vehicle is inside the communication area, the system can be used.
TCU (Telematics Control Unit) is not turnedon.
If the icon does not show that the vehicle is inside the communication area despitethe fact that the vehicle is in that location, contact the NissanConnectSM Servicessupport line at 1-855-426-6628.
Radio wave reception is not sufficient forTCU operation.
When the vehicle moves to an area where radio waves can be transmittedsufficiently, communication will be restored. When the icon on the display showsthat the vehicle is inside the communication area, the system can be used.
Some of the items that aredisplayed on the menu screencannot be selected.
The vehicle is being driven and some menuitems are disabled.
The vehicle is being driven. Stop the vehicle in a safe location and apply the parkingbrake before operating the functions.
Some parts of the screen arenot displayed.
The vehicle is being driven and some menuitems are disabled.
Operate the system after stopping the vehicle in a safe location and applying theparking brake.
The system does not announceinformation.
The volume level is set to the minimum. Adjust the volume level by operating the VOLUME control knob located on thecontrol panel or on the steering-wheel switch while the system is announcinginformation.
10-10
10. Troubleshooting guide

VOICE RECOGNITION
Symptom Possible cause Possible solution
The system does not operate or fails to interpret thecommand correctly.
The interior of the vehicle is too noisy. Close the windows or have the other occupants bequiet.
The fan speed of the air conditioner is too fast. Decrease the fan speed of the air conditioner.
The noise generated by driving the vehicle is tooloud.
Reduce the vehicle speed, and then speak thecommand.
The voice command is spoken in a low voice. Speak the command in a louder voice.
The timing of speaking a command is too fast. Speak the command after confirming the following: avoice guidance is announced, a tone sounds, and anicon on the screen changes from white to orange.
The command is spoken too slowly. Speak in a natural voice without pausing betweenwords.
The system prompt to say command again. Pronunciation is unclear. Speak clearly.
The command is spoken too late after the tone. Speak the command within 5 seconds after con-firming the following: a voice guidance is announced,a tone sounds, and an icon on the screen changesfrom white to orange.
An improper command is spoken. Speak the command or a number that is displayed inwhite on the screen.
Speak a command that is shown in the command list.
The system does not correctly recognize a numberspoken.
Many numbers are spoken at once. Place a pause between the appropriate digits forcorrect recognition by the system. When speaking atelephone number, place a pause between areacodes, dial codes, etc.
10-11
10. Troubleshooting guide

Symptom Possible cause Possible solution
Voice recognition does not operate, and a tonesounds twice after pushing < >.
< > button is pushed immediately after startingthe engine.
Push < > again after a short period of time.
The Navigation item is not displayed in the voiceoperation menu screen.
Voice Recognition command preparation for thenavigation system is not completed immediately afterthe system is started.
Display any screen other than the Voice Recognitionscreen, and then push < >.
The system does not correctly recognize a Point ofInterest (POI) name spoken.
There are some rare cases where a POI is unavail-able by Voice Recognition but the location can befound on the map.
This is not a malfunction. Consider using an alternatesearch method, like street address.
Partial or Alias name is spoken. For best results, speak the full name.
Some POI category name can only be searched fromNearby.
This is not a malfunction.
10-12
10. Troubleshooting guide

MEMO
10-13
10. Troubleshooting guide

MEMO
10-14
10. Troubleshooting guide

AAbout route guidance........................................ 5-2
Adjusting volume and settings........................ 2-7
BBuilding graphics................................................ 3-4
CCanceling Route................................................. 5-7
Changing map view........................................... 3-7
Changing order of destinationand waypoints.................................................. 5-10
Changing region................................................. 4-2
Changing scale of map..................................... 3-6
Clock settings.................................................. 7-26
Command list...................................................... 8-7
Connecting to Interactive Voice Menu....... 7-18
Control buttons and functions......................... 2-2
Control panel....................................................... 2-3
Current vehicle location.................................... 9-2
Customer assistance......................................... 1-5
DDeleting stored item.......................................... 6-9
Destination screen............................................. 4-3
Display urgent traffic information.................... 7-5
Display View Bar................................................ 2-8
Displaying current vehicle location................. 3-4
EEditing route........................................................ 5-8
Editing stored information................................ 6-5
Emergency support......................................... 7-21
FFinding address.................................................. 4-7
Finding nearby place...................................... 4-11
Finding points of interest.................................. 4-8
Functions disabled while driving.................. 2-11
GGiving voice commands................................... 8-2
Guidance screen settings................................ 5-7
HHow to handle display....................................... 2-2
How to handle the Map SD card................ 9-10
How to handle the SD card.......................... 9-14
How to see voice command screen.............. 8-3
IInformation feeds............................................. 7-19
Information screen.............................................. 7-2
LLaser product...................................................... 1-4
MMaintenance of display..................................... 2-2
Map data............................................................ 9-10
Map operation..................................................... 3-1
Map types............................................................. 3-2
Map view settings.............................................. 3-8
Moving map......................................................... 3-5
Multi-function controller:................................... 2-4
NNavigation settings.......................................... 7-30
Navigation system status screen.................... 2-7
NissanConnectSM Services.......................... 7-14
NissanConnectSM Services feature............ 7-14
NissanConnectSM Services application..... 7-17
11-1
Index

NissanConnectSM Services settings.......... 7-23
Notes on SiriusXM Traffic information........ 7-13
PProcedures after setting route..................... 4-18
RRecalculating route......................................... 5-11
Route calculation................................................ 9-6
Route guidance.......................................... 5-1, 9-8
Route guidance settings................................ 5-13
Route menu screen............................................ 5-7
SSafety information............................................... 1-3
Screen Settings............................................... 7-29
Scrolling message or list.................................. 2-6
Searching for detour route usingtraffic information............................................. 5-11
Searching from history................................... 4-12
Searching from Stored Locations............... 4-11
Selecting item..................................................... 2-7
Setting at information on map...................... 3-11
Setting by NissanConnectSM Services...... 4-17
Setting by phone number.............................. 4-15
Setting city center........................................... 4-14
Setting destination............................................. 4-1
Setting freeway entrance/exit....................... 4-14
Setting from stored routes............................ 4-15
Setting home as destination......................... 4-10
Setting intersection......................................... 4-13
Setting point on map...................................... 4-18
Settings screen................................................ 7-24
Shortcut menu..................................................... 2-7
SiriusXM Travel Link........................................... 7-7
split screen........................................................... 3-8
Start-up screen................................................... 2-5
Steering-wheel switches.................................. 2-4
Storing avoid area.............................................. 6-4
Storing home location....................................... 6-2
Storing location................................................... 6-2
Storing location/route........................................ 6-1
Storing route........................................................ 6-3
Subscription toNissanConnectSM Services.......................... 7-14
TTouch panel......................................................... 2-5
Trademarks........................................................... 1-4
Traffic information............................................... 7-4
Traffic information on map................................ 7-6
Traffic information settings............................... 7-6
Transferring information to/fromaddress book.................................................... 6-11
UUpdating All Information Feeds .................. 7-21
Using Destination Send to Car.................... 4-17
Using Google send-to-car............................ 4-17
Using Journey Planner.................................... 4-12
VViewing available traffic information............... 7-4
Viewing information feeds history................ 7-21
Viewing SiriusXM Travel Link ........................ 7-8
Voice recognition................................................ 8-2
Voice recognition (Troubleshooting)......... 10-11
Voice recognition settings............................. 8-11
Volume settings................................................ 7-28
11-2
Index


2017 NAVIGATIONSYSTEM
OWNER’S MANUAL
For your safety, read carefully and keep in this vehicle.
20
17
NIS
SA
N N
AV
IGA
TIO
N S
YS
TE
MS
G5
NJ-N
Printing : January 2017 (02) Publication No.:
Printed in U.S.A.N17E SG5NUU1
SG5NJ-N