18 oz 2-man shelter - csm.ornl.govgeist/Philmont/2-man-shelter.pdf · An 18 oz 2-Man Shelter that...
13
An 18 oz 2-Man Shelter that Helps keep you warm Al Geist Pictured below is a simple “A” frame tent built from two Adventure Medical Space Blankets. A third blanket was cut up to make rain flaps that cover the zippered, no-see-um doors on both ends in bad weather. The silvered polyethylene material is quiet, tough, easy to fold, totally waterproof, and adds thermal insulation to the tent. Not only is the tent lightweight, but its thermal insulation allows a lighter sleeping bag to be used. The tent weighs 18 oz. It is 42 inches high and has a rectangular footprint of 7 ½ ft x 6 ft. The 45 sq.ft. footprint provides a lot of space for 2 men and gear. I studied a half-dozen tent designs that can be supported with one or two hiking poles. I settled on the classic “A” frame shape with center-zippered doors on both ends because it provides a lot of volume and floor space for the amount of material used. Another plus to this design is that with both doors unzipped the body of the tent becomes a large rectangular space blanket with grommets, which has many uses only limited by your imagination. For example, it can be pitched in a variety of tarp shapes; it can be used as a hypothermia blanket; it can become an emergency bivy, it can be pitched silver side up to make a cool shady area; it can be folded and worn as a baggy poncho, the list goes on and on. At Philmont I used it only as a two man tent, sharing it with the Troop’s Scout Master who also went on our Trek. I evaluated the following five materials to build the tent from: Cuben, silnylon, Tyvvek, mylar space blanket, and polyethelene space blanket. All have pros and cons, which I give in the table below. As with all ultralight materials they have to be handled with care. I built two prototypes from mylar trying different construction techniques and studying how well the thermal insulation worked and ventilation worked. I used the mylar tent for all the Troop outings for a year including winter camping and really liked it. One cool feature of the mylar tents was that they are two way Detail showing how loop on end of tape hooks on a hiking pole. Girth hitch is used to attach the single reflective cord to the handle, whose ends are staked out in a “V” to form a stable tripod on each end of tent. At the end of this article are scans of Al’s notebook pages describing the tent construction details and folding instructions.
Transcript of 18 oz 2-man shelter - csm.ornl.govgeist/Philmont/2-man-shelter.pdf · An 18 oz 2-Man Shelter that...

An 18 oz 2-Man Shelter that Helps keep you warm
Al Geist
Pictured below is a simple “A” frame tent built from two Adventure Medical Space Blankets. A third blanket was cut up to make rain flaps that cover the zippered, no-see-um doors on both ends in bad weather. The silvered polyethylene material is quiet, tough, easy to fold, totally waterproof, and adds thermal insulation to the tent. Not only is the tent lightweight, but its thermal insulation allows a lighter sleeping bag to be used. The tent weighs 18 oz. It is 42 inches high and has a rectangular footprint of 7 ½ ft x 6 ft. The 45 sq.ft. footprint provides a lot of space for 2 men and gear.
I studied a half-dozen tent designs that can be supported with one or two hiking poles. I settled on the classic “A” frame shape with center-zippered doors on both ends because it provides a lot of volume and floor space for the amount of material used. Another plus to this design is that with both doors unzipped the body of the tent becomes a large rectangular space blanket with grommets, which has many uses only limited by your imagination. For example, it can be pitched in a variety of tarp shapes; it can be used as a hypothermia blanket; it can become an emergency bivy, it can be pitched silver side up to make a cool shady area; it can be folded and worn as a baggy poncho, the list goes on and on. At Philmont I used it only as a two man tent, sharing it with the Troop’s Scout Master who also went on our Trek. I evaluated the following five materials to build the tent from: Cuben, silnylon, Tyvvek, mylar space blanket, and polyethelene space blanket. All have pros and cons, which I give in the table below. As with all ultralight materials they have to be handled with care. I built two prototypes from mylar trying different construction techniques and studying how well the thermal insulation worked and ventilation worked. I used the mylar tent for all the Troop outings for a year including winter camping and really liked it. One cool feature of the mylar tents was that they are two way
Detail showing how loop on end of tape hooks on a hiking pole. Girth hitch is used to attach the single reflective cord to the handle, whose ends are staked out in a “V” to form a stable tripod on each end of tent.
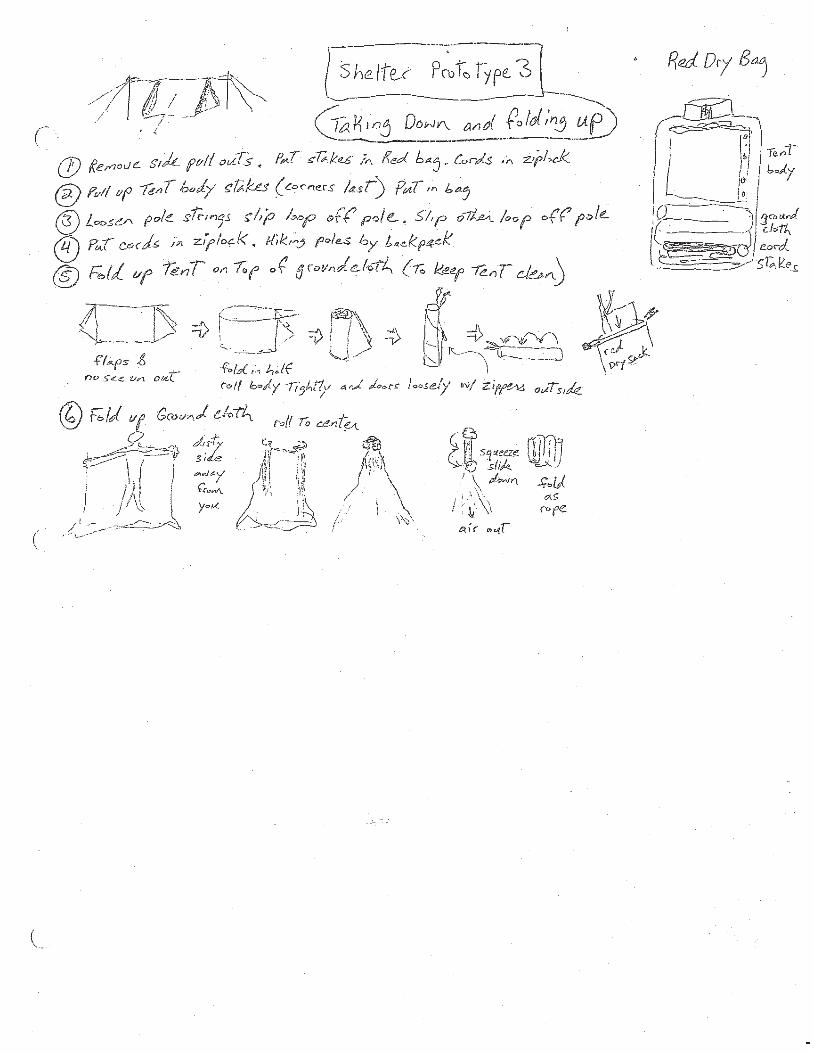
At the end of this article are scans of Al’s notebook pages describing the tent construction details and folding instructions.

mirrors. People inside can see out – stars, trees, bears, … People outside only see a silver tent. In comparison, one complaint about Cuben is it is transparent—other people in the campground can see you getting dressed in the tent. When building my mylar tent prototypes I found that if Scotch “Transparent duct tape” is placed on the Space Blanket then I could sew through the tape to attach the noseeum doors and side pullouts. I was going to take the mylar tent to Philmont, but I read some stories about troops getting hit with violent hailstorms there. I worried that mylar might get punctured by a large hailstone so I built a third prototype using Adventure Medical space blankets. These blankets are made of silvered polyethelene rather than mylar and are much more resistant to puncture and tearing. They are also quiet and easy to fold.
On the negative side, polyethelene has a much lower tensile strength than mylar. It stretches and if stretched beyond a certain amount it permanently deforms. The easiest way to describe how this material resists puncture and tearing is that it is like a trash bag. Poking it with your finger will make a permanent deformation, but will not make a hole. By comparison mylar does not stretch or deform. Mylar will strongly resist all loads until the loads exceed a certain amount then it will fail catastrophically. Transparent duct tape is the secret to the success of using Space Blankets. It serves multiple jobs. It is placed to carry all the loads on the tent. For example, the ridgeline tensile load between the hiking poles runs through the reinforced tape rather than through the tent material. The tape is used to reinforce the edges and prevent stretching. The filaments in the tape prevent tears from starting at any of the load points and allow the Space Blanket material to be sewn. For example, the noseeum doors are sewn to the reinforced edges. Brass grommets are placed every 12 inches along the reinforced bottom edges for stakes or tie-outs. There is reinforcing tape that runs from the ridgeline to the ground under the side pull-outs. And as a final job the tape is great for repairing any holes or tears that you get in the tent.
Material Pros Cons Cuben Lightest reinforced fabric in world
Waterproof Very Expensive ($25/yd) Transparent (but not clear)
silnylon Less expensive ($7/yd) Available in many colors
Water resistant but large drops will splatter through
Tyvek Tough sheet material Very water resistant Makes good ground cloth
Stiff material Difficult to sew (not a fabric) Comes in white with Tyvek written on it
Silvered Mylar Very cheap ($0.50/yd) Lighter than Cuben Strong and no stretch Waterproof Thermal insulation
Stiff material Noisy (crinkles) Cannot be sewn must be taped Bad failure mode—material is very strong but once a rip starts it will run
Silvered Polyethelene
Cheap ($1/yd) called “poor man’s Cuben” Tough (resists tearing, puncture) Waterproof Thermal insulation
Stretchy, not strong (like a trashbag) Strength can be supplied selectively with reinforced tape Cannot be sewn must be taped (but reinforced tape can be sewn)

A nice fact about how I built this ultralight tent is that using Space Blankets and reinforced tape means that the tent materials cost only a few dollars and construction is straightforward. Rain Flaps. During my year of prototype testing I did not have rain flaps on the mylar tents. Instead I would close the ends together to keep out rain. One way to envision what this looks like is to imagine changing the footprint shape from a rectangle to the shape of a football. Not having rain flaps cut the weight of the tent by 1/3 since almost an entire third space blanket is used to make the flaps. These mylar tents weighed just 12 oz. With only one person in the tent (or two boys) this clever method works fine. But the ends of the tent are too narrow for two 72” Big Agnes sleeping pads. I had two adults in the tent at Philmont, so when I built the polyethylene Space Blanket prototype, I added rain flaps over the noseeum doors (see the figure below). The flaps have a single grommet in the corner for a stake or ties to keep them closed. They are cut so that they overlap several inches to keep out rain. When closed a small air vent naturally forms at the top of the flaps under the ridgeline tape. Don’t change the design to seal the flaps up tight because you will create an asphyxiation hazard. At Philmont we only closed the flaps when it was raining. The flaps were normally kept rolled back out of the way and tied by 6” pieces of elastic cord. To prevent lose; the elastic cords were sewn to the reinforced edge of the tent body.
The next innovation was to use many small stakes and spread the load across the ultralight tent material. Given the light materials, it greatly reduces the chance of failure if the wind load is spread across the material rather than putting high stress on four corner stakes. Spreading the load across many stakes also reduces the chance that a stake will pull out. I built a set of very light wire stakes. As the name implies I took wire used in lawn mower throttle cables, cut it into 7” lengths, and bent the top 1” into an “O” as shown. I found that the “O” at the top worked much better than a traditional “U” or Sheppard’s hook because wire stakes can (often) rotate in the ground, which can allow cordage to slip off a "U". The "O" isn't closed - there is a small gap between the shaft and "O" so the cord will slide right up into the "O" but get caught there and won't slip out no matter
Reflective cord on side pull-out attaches to an elastic shock cord to reduce chance of failure. The pull-out is sewn to reinforcing tape that runs inside from the center stake to the ridgeline and down to the center stake on other side.

how the stake rotates. We stayed at two Philmont camps where the tents were exposed to strong wind gusts. When this was the case, we staked the tent down in every grommet. When our tent site was sheltered, we only used half the stakes. Even though the stakes are very thin, in a year of testing and two weeks at Philmont I have never had a stake pull out. Being a wire, the stakes are easy to push into the ground but it is also true that they cannot be hammered. I worried that the ground at Philmont might be like concrete, but that worry was unfounded. We had no trouble using the wire stakes. And they saved a lot of weight compared to carrying the same number of aluminum or titanium stakes. The last innovation in this tent design was to have a detached, disposable floor. The floor of a tent takes the most abuse. A ground cloth is typically used to help protect the floor and help keep it clean. With a disposable floor, you don’t have to worry about protecting it or keeping it clean. Use it until it starts to wear out then replace it. Saves the weight of a ground cloth, and you can continue to use the Space Blanket tent year after year without having to replace it every time your lightweight floor gets filthy or worn. Our Troop camps year round and I replace my floor about every six months. For this idea to be practical the floor must be really cheap and really easy to make. And of course it is. The floor is made from paint drop cloth. I went to Wal-Mart and bought the thinnest paint drop cloth they had. The thinnest is also the lightest and cheapest. It was 9’x12’ of 0.8mil and cost about $1.00 when purchased in a pack of three. I cut 3’ off one end and make a 9’x9’ sheet and I am done. It would be hard to get cheaper or easier than that. You may be asking, “Why 9’x9’ when the tent footprint is 6’x7.5’?” I create a bathtub floor by running the excess lengths up the side walls and screen doors. An extra 18” on each side may seem like a lot, trust me it is not. I’ve tried shorter dimensions and anything under 8’x9’ has problems because the wrinkles in the drop cloth and uneven ground use up inches. I could save a little weight by going 8’x9’ but having a perfect square has the advantage that I never have to worry about getting it turned the wrong way. Another advantage is if I do get a hole in the floor in an inconvenient place during a trek, I can just rotate the floor. I found having a detached floor provides some interesting capabilities. I pull it back to make a mini vestibule just inside the door to put muddy boots inside the tent, but not get the floor dirty. The floor serves as a clean flat surface to fold the tent body back up. And having a large sheet of plastic like this in your pack can have a lot of uses in an emergency situation. Folding a large sheet of plastic tightly can be hampered when air gets trapped inside. The notebook pages attached describe a simple, fast way to compactly fold the floor without trapping any air and keeping the dirty side from getting on anything. Pitching tips: As with any tent setup, try to pick a level site. Hook the tape loops onto the poles so you know how far apart to put the poles. Orient the tent so the breeze blows through the tent rather than against the side. I tried both orientations and it makes a big difference. Stake out the poles then stake out the four corners of the tent, then the side pullouts, and the center stakes below the pullouts. Stake the sides right down to the ground—do not leave a gap. The last step is to put in the floor. Lay the folded up floor down the center of the tent and then spreading it out to the side walls.

When putting your sleeping gear in the tent, here is a tip: Sleep head to toe giving each person their own door and set bags at a slight diagonal to give large headroom for both people (as shown in the figure below). I put my boots right inside the door and used them to store headlamp and glasses so these were handy and easy to find in the dark when the call of nature hit in the middle of the night.
Construction. Appended are my construction notes scanned from my notebook. Here is a collection of construction questions I have received and my answers. These may be helpful for others wanting to build their own lightweight tent using these materials and techniques. 1. Can I buy some of those fabrics and zippers from stores, or is it all mail-order?
I ended up getting most of the materials, including the noseeum, mail-order. The space blankets and
cordage I got from REI. I got the tape from Home Depot. From thru-hiker.com I got the #3 zippers and
double-sided pulls (so you have a handle to unzip the tent from the inside and from the outside).
2. Was the duct tape used clear for purely aesthetic reasons?
No. You want to use "Scotch Transparent Duct Tape" for the following reasons:
- The clear duct tape is 6X more UV resistant, i.e. it will last six times longer than gray tape when
exposed to the sun's rays

- The gray tape has cloth reinforcement, which you can tear with your fingers. The clear duct tape uses a
mesh of plastic filaments (like strapping tape) which you can't tear. You have to cut the tape.
- The plastic reinforcements provide a stronger base for sewing through. The sewing thread is going in
and out around these plastic filaments
- The Scotch brand uses waterproof glue. I used some really cheap tape on earlier prototypes and found
that not all vendors use waterproof glue.
And one other note. I used 1" wide strips of the tape in building the tents. I cut the 1.9" wide duct tape
roll in half with an Exacto knife.
3. In your notebook sketches, you refer to both clear duct tape and "Scotch Ultimate tape". I don't find
anything on the latter.
Check out "Part 3" of Char-e-it construction at www.csm.ornl.gov/~geist/Philmont for pictures of both
types of tape. Although I wrote "ultimate" tape in my notes, the official name is "Scotch Extreme
Application Tape". The tape has stronger reinforcing filaments (130 lbs/in) and more aggressive glue
compared to clear duct tape, but I don't know it's UV rating. It costs about $1 more a roll.
4. Run tape around the entire perimeter ... on one face of the space blanket or both?
On the perimeter I put 1/2" on the inside, then folded the 1" tape over the edge and put the other
1/2" on the outside. This doubled the reinforcement right at the edge and when sewing noseeum to the
edge the thread goes through filaments on both sides of the space blanket.
5. Do you overlap the two space blankets where they join at the ridgeline or butt them?
I butted the two sheets. The hardest part of the construction is getting the two sheets taped together
using a single long strip of tape without getting wrinkles and keeping the sheets straight. Take your time.
I laid the two edges to be taped on a 10' 2x4, pulled taunt and wrinkle free by clamps on both ends.
Yet I still got a few wrinkles. Another thing to watch out for. There will be a static electricity charge
between the tape and sheet. As you get the two close and are lining the tape, the sheet will jump up as
much as 1/4" and stick crooked to the tape. Been there done that... )-:
Another tip. I found that the tape adhesive is so good that if it just touches the heatsheet it can not be
pulled off. One the edge reinforcement - no big deal just trim any overhanging tape and start again from
that point. For the ridgeline you want a single strip of tape if at all possible, so the tension load is carried
only through the filaments. For this reason there is no cutting the ridgeline tape and starting over
straight or if you do just know that this will be a weak point in the ridgeline.
An idea just popped into my head while reading your email. I wonder if you could put a light coat of
spray adhesive on the 10' 2x4 so that it would be like a giant post-it note. Lay (stick) the butted sheets
on the board. Then unroll a few inches of tape, stick it down, and work your way across the ridgeline
that way.
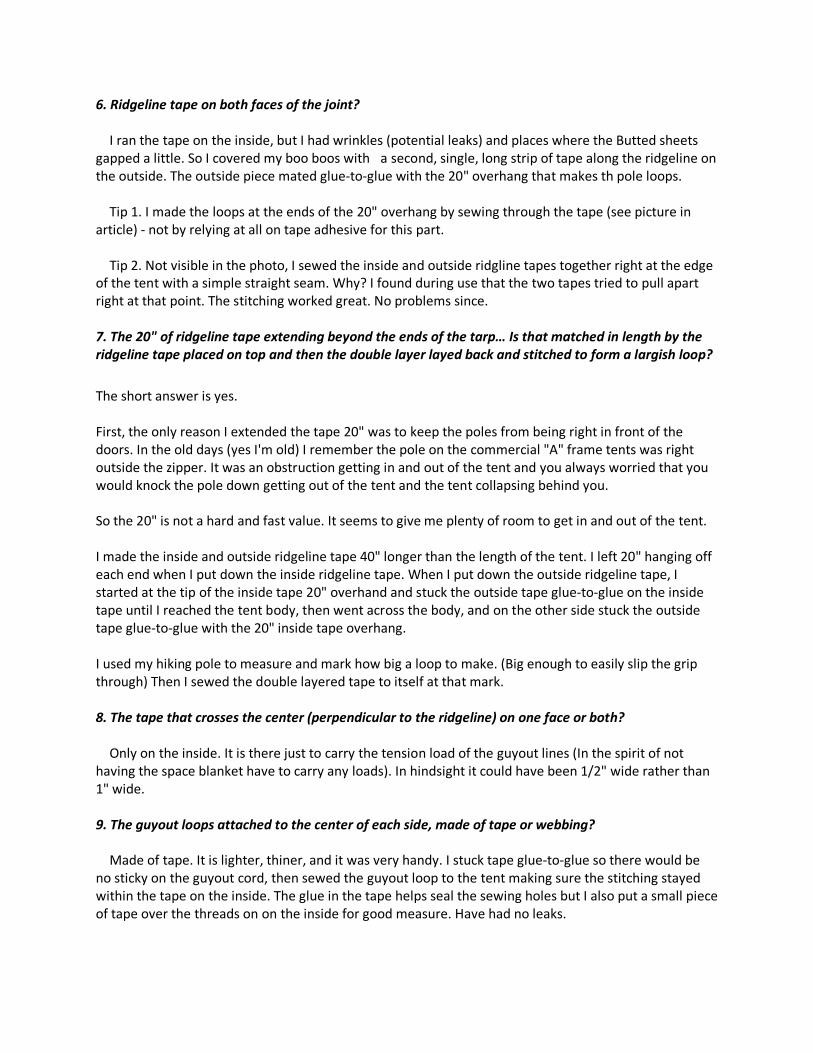
6. Ridgeline tape on both faces of the joint?
I ran the tape on the inside, but I had wrinkles (potential leaks) and places where the Butted sheets
gapped a little. So I covered my boo boos with a second, single, long strip of tape along the ridgeline on
the outside. The outside piece mated glue-to-glue with the 20" overhang that makes th pole loops.
Tip 1. I made the loops at the ends of the 20" overhang by sewing through the tape (see picture in
article) - not by relying at all on tape adhesive for this part.
Tip 2. Not visible in the photo, I sewed the inside and outside ridgline tapes together right at the edge
of the tent with a simple straight seam. Why? I found during use that the two tapes tried to pull apart
right at that point. The stitching worked great. No problems since.
7. The 20" of ridgeline tape extending beyond the ends of the tarp… Is that matched in length by the
ridgeline tape placed on top and then the double layer layed back and stitched to form a largish loop?
The short answer is yes.
First, the only reason I extended the tape 20" was to keep the poles from being right in front of the
doors. In the old days (yes I'm old) I remember the pole on the commercial "A" frame tents was right
outside the zipper. It was an obstruction getting in and out of the tent and you always worried that you
would knock the pole down getting out of the tent and the tent collapsing behind you.
So the 20" is not a hard and fast value. It seems to give me plenty of room to get in and out of the tent.
I made the inside and outside ridgeline tape 40" longer than the length of the tent. I left 20" hanging off
each end when I put down the inside ridgeline tape. When I put down the outside ridgeline tape, I
started at the tip of the inside tape 20" overhand and stuck the outside tape glue-to-glue on the inside
tape until I reached the tent body, then went across the body, and on the other side stuck the outside
tape glue-to-glue with the 20" inside tape overhang.
I used my hiking pole to measure and mark how big a loop to make. (Big enough to easily slip the grip
through) Then I sewed the double layered tape to itself at that mark.
8. The tape that crosses the center (perpendicular to the ridgeline) on one face or both?
Only on the inside. It is there just to carry the tension load of the guyout lines (In the spirit of not
having the space blanket have to carry any loads). In hindsight it could have been 1/2" wide rather than
1" wide.
9. The guyout loops attached to the center of each side, made of tape or webbing?
Made of tape. It is lighter, thiner, and it was very handy. I stuck tape glue-to-glue so there would be
no sticky on the guyout cord, then sewed the guyout loop to the tent making sure the stitching stayed
within the tape on the inside. The glue in the tape helps seal the sewing holes but I also put a small piece
of tape over the threads on on the inside for good measure. Have had no leaks.

10. Did you buy a few lawn mower throttle cables to get the wire for stakes or do you have a
suggested source of wire stock?
Actually I went to the mower shop and asked to buy a roll of throttle cable wire. The "lifetime supply"
cost me about $14. I found it comes in two sizes. I bought the thinner one. In hindsight I think I would
have bought the one that was a few hundredths of an inch thicker. But the one I got worked fine.
11. I'm also impressed your wire stakes can go into packed down tent sites like that. What approx
gauge?
I just measured the spring steel wire I used. It is 1/16" diameter. I think that translates to be 16 gauge.
The reason the wire stakes are easy to insert is because the frontal area is so small. There is very little
ground that has to be pushed out of the way. A small twist back and forth has always been enough to
push in the wire stakes right up to the head. This was true at all our Philmont camp sites as well as on
our shakedown hikes.
There is only one place I have had no luck getting in the stakes. It was in a packed gravel tent bed of an
RV campsite. The message is don't do ultralight camping in RV campsites.
12. You are using tape stake loops now rather than grommets, correct?
I have built a dozen space blanket tents in the past couple years. They all used "tape stake loops"
except for this last one (described in this article) where I tried grommets. Having tried both now, I like
the tape loops better. Mainly because they allow the tent to be folded tighter.
More discussion on the stake loops can be found in a discussion I had in the backpackinglight.com
forum: Philmont/Homemade tents. Take a look.
13. What kind of size does it all pack down to?
If you want to get crazy compact. I used to pack the mylar tent body, cordage, and stakes in a quart
ziplock bag! I packed the floor into a second quart ziplock. After a few trips I came to my senses and
realized I was spending more time getting the tent into the ziplock than it took to take the tent down. So
I got "less crazy" and just put the stakes, cordage, floor, and body all in a single small drysack in the
order shown in the notebook pages below. The dry sack is 11"x7"x3" and I can squeeze the air out
AFTER putting everything into the sack to make it smaller. Much faster, easier to pack up the tent this
way.
14. I was planning loops to stay away from grommets. It can't be pitched quite as close to the ground
but that should aid in ventilation, too. Did you not like stake loops?
Having now tried both loops and grommets with Space Blanket material, I like the loops better. Since the
maximum stress (and most likely point for a tear) is right at the edge of the material beside the loop, I
ran a second 3" strip of tape along the edge to spread the stress. Here is how I made the loops on my
Mylar tents.
To keep the loop from being sticky, I used a 1"x1" piece of tape stuck glue-to-glue in the center of the 3"
strip of transparent duct tape forming the loop.

I run the wire stakes through the loops created in the tape and into the ground. After about a year of
use, I have not had any failures ie rips or tears at the stake loops (Knock on wood)
15. I had envisioned the stake would go thru the loop created in the tape (where the 1 x 1 piece is)
though it would need to be twisted about 90*. It appears you had your's stick out 1/2" from the edge.
I was thinking more like 2" so it would be easier to twist without affecting the body so much.
Yes this does twist the loop 90 degrees. When I build my next tent I will still leave the loop sticking out
just 1/2" but make the loop-tape only 1/2" wide. I haven't had any issue with loop twisting over that
short distance on the mylar tent body when using the wire stakes. The wire stakes are only 1/16" in
diameter. If you are using fatter stakes that fill up these small loops, then the twist occurs over a much
shorter distance and you should consider a longer loop.
My thoughts about sticking out just 1/2" is that this allows me to stake the tent right to the ground if I
want to, and if I wanted to stake it higher I can put a cord through the short loop.
If I made the loops 2" long, then I would take away my option to stake a side right to the ground if I
needed to.
16. Did you do anything to finish the cut edge of noseeum that would lay on the ground?
I finished the zipper and tent edges of the noseeum, but I left the ground edge unfinished. I had cut it
long enough to finish, but found that extra length more useful to tuck up under the floor forming a good
bug seal. I see no signs of the noseeum unraveling on the raw edge after many outings (otherwise I
would have finished the edge).
17. Have you tried just overlapping the noseeum doors? I was going to try to do away with the zippers
Yep. I tried that first. Even mild breezes would push the screens in. Though still overlapped, there
formed a "gap" between the doors that let in flying insects while I slept.
Next I had the idea of using mini-binder clips to hold the doors closed. I took the edges of the two doors,
rolled them into one another, then put three clips along the rolled edge. One at the bottom and two
equally spaced along the 42 inches. This idea worked fine for a couple outings until I tested it in really

gusty, high wind conditions. The middle clip would pop off when a strong enough wind blew against the
noseeum doors.
Before I made doors, I considered just making a noseeum curtain, but when I calculated how much extra
material is needed to be able to lift up the curtain to crawl in the tent(about a factor of two), I killed that
idea. It would add too much unnecessary weight and size to the folded tent.
So I bit the bullet, went to thru-hiker.com and ordered a roll of #3 coil zipper and double sided pulls. I
put the zipper in the middle (rather than the tent edge of the door for two reasons. First, the zipper is
shorter (42" vs 56") and thus lighter. Second, the zipper in the middle is easier to get to by either of the
two people in the tent. There is no reaching over the other person to get to a zipper along the tent edge.
And finally I like the symmetrical design that allowed the doors to be unzipped and the tent body used
as a 9'x7.5' tarp.
Tip: When sewing the noseeum to the zipper and tent body, make your stitch length long. I read that in
the backpacklight forums and did this when making my tents.
I look forward to winter backpacking with the silvered tents. I found out last winter that they really do
feel warmer inside than my Sierra Designs Lightening. And much lighter to boot.
18. I wonder if a few strips of velcro would work? You'd need just small pieces on one door and the
other door would have (mostly) horizontal strips, increasing in length closer to the ground. 4 would
probably be enough. Based on Al's diagram, he made it so the tent could be anywhere from 66" to 72"
wide (42-45" tall) so the lowest strip would need to be about 6" long.
Not recommended - the hook part of the Velcro rips the heck out of the noseeum when packed.
19. Does your 18 oz figure include all the cords, stakes and "floor" or just the main body?
18oz for tent body and all cordage
4oz for the 9'x9' sheet used for the disposable floor
1oz for 22 wire stakes (plenty and then some)
1oz for dry sack that I put it all in
-------
24oz Total
20. What type of condensation issues did you have
At Philmont the air is so dry that condensation was not an issue. In Tennessee, where I'm from, humidity
and rain are the norm. In Tennessee I have avoided condensation issues by:
- leaving the rain flaps rolled up when not raining in (sometimes only one end needs to be closed up)
- overlap the rain flaps a couple inches apart so air can circulate but rain sheds off.
- heavy blowing rain. Button up the tent tight and keep saying to yourself "it is a lot dryer in here than
out there"
I continue to be amazed at the lack of condensation in this tent. I believe it is mainly due to the flow
through ventilation afforded by the large noseeum doors on both ends.

112”x112” design option. There is a really neat design option if you build a slightly larger version with a square tent body, for example 9'x9'. In addition to the "A" frame set up, it will also fold into a 9' tetrahedran with a pole in the center. (see the figures below) I built a 1/20 scale model but never built a full scale one. Rather than tape two 56"x92" sheets together (making a 112"x92" which is what I did to make the 2 man tent I took to Philmont) you can shorten four space blankets to 56"x56" and tape then into a 112"x112" square. The first feature of this design is that the increase in length of the "A" tent from 92 to 112 inches would allow me to fold in the ends and avoid making rain flaps. When the weather is nice the added length makes lots of extra gear storage space in the tent. A second feature of this plan is that if weather ever got totally crazy on some outing (winds over 40 mph) that the tent could also be configured into a 112" tetrahedron, which is very wind resistant. The tetrahedron is really easy to set up. Lay a square tarp flat, stake out three corners; pull the fourth corner over to one of the staked corners. Crawl under with a hiking pole and raise the center of the tarp as high at it will go (Approximately 60”). I built a 1/20 scale model to see where to put stake loops so they worked for both configurations. In studying the model I decided that the tent was bigger than I needed.