TOP DOG - Hobby Lobby · TOP DOG When you think of needle felting, cute and cuddly creatures...
8
CRAFTING HAS NEVER Felt BETTER!
Transcript of TOP DOG - Hobby Lobby · TOP DOG When you think of needle felting, cute and cuddly creatures...
CRAFTING HAS NEVER Felt BETTER!
2 Hobby Lobby Product Inspirations
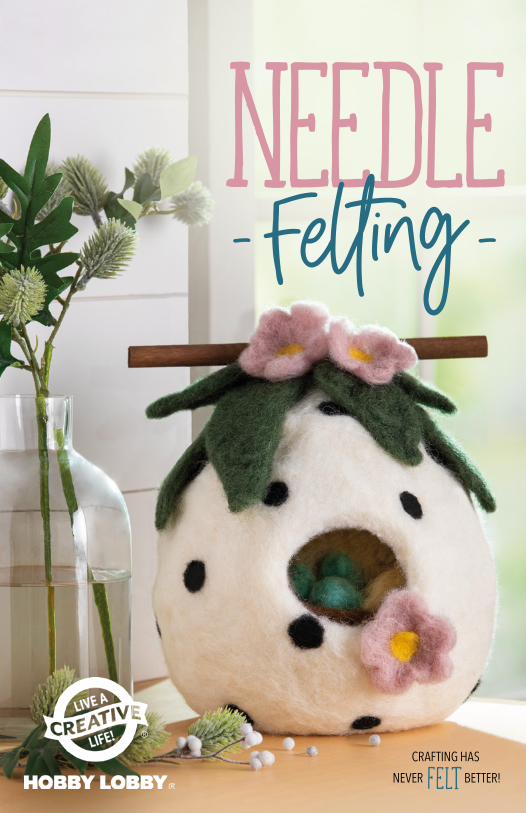
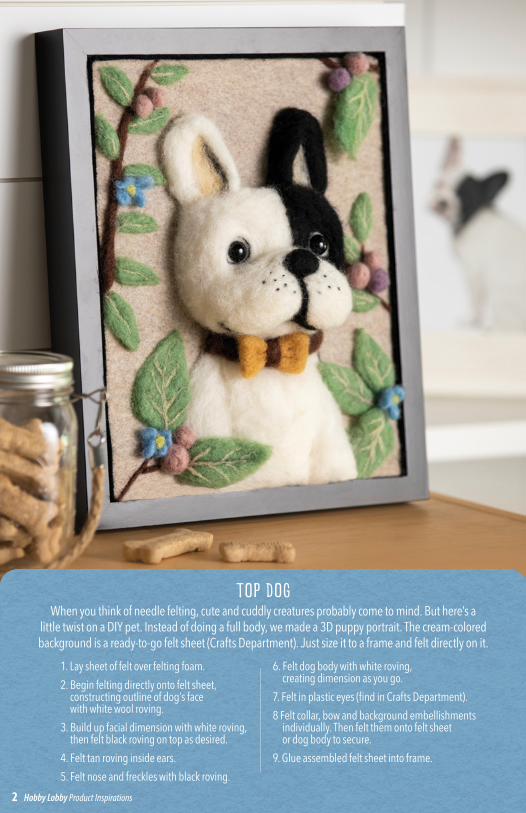
TOP DOGWhen you think of needle felting, cute and cuddly creatures probably come to mind. But here’s a
little twist on a DIY pet. Instead of doing a full body, we made a 3D puppy portrait. The cream-colored background is a ready-to-go felt sheet (Crafts Department). Just size it to a frame and felt directly on it.
1. Lay sheet of felt over felting foam.2. Begin felting directly onto felt sheet,
constructing outline of dog’s face with white wool roving.
3. Build up facial dimension with white roving, then felt black roving on top as desired.
4. Felt tan roving inside ears.5. Felt nose and freckles with black roving.
6. Felt dog body with white roving, creating dimension as you go.
7. Felt in plastic eyes (find in Crafts Department).8 Felt collar, bow and background embellishments
individually. Then felt them onto felt sheet or dog body to secure.
9. Glue assembled felt sheet into frame.
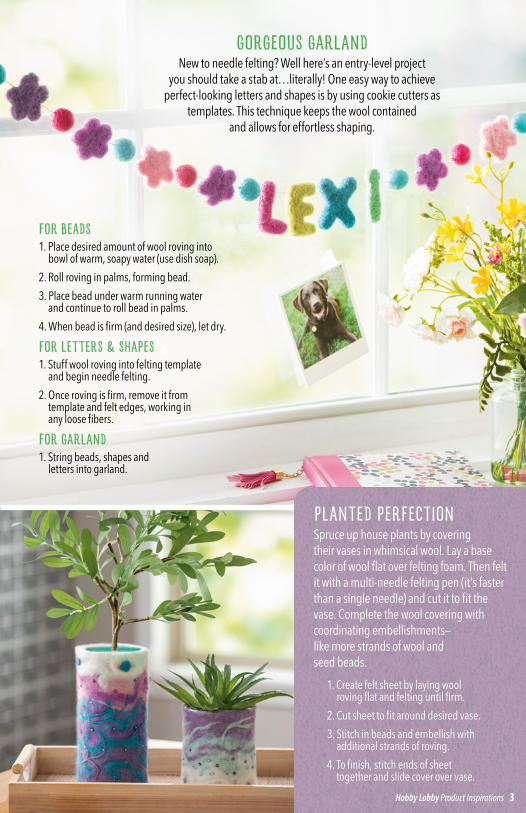
PLANTED PERFECTIONSpruce up house plants by covering their vases in whimsical wool. Lay a base color of wool flat over felting foam. Then felt it with a multi-needle felting pen (it’s faster than a single needle) and cut it to fit the vase. Complete the wool covering with coordinating embellishments— like more strands of wool and seed beads.
GORGEOUS GARLANDNew to needle felting? Well here’s an entry-level project
you should take a stab at…literally! One easy way to achieve perfect-looking letters and shapes is by using cookie cutters as
templates. This technique keeps the wool contained and allows for effortless shaping.
Hobby Lobby Product Inspirations 3
1. Create felt sheet by laying wool roving flat and felting until firm.
2. Cut sheet to fit around desired vase.3. Stitch in beads and embellish with
additional strands of roving.4. To finish, stitch ends of sheet
together and slide cover over vase.
FOR BEADS1. Place desired amount of wool roving into
bowl of warm, soapy water (use dish soap).2. Roll roving in palms, forming bead.3. Place bead under warm running water
and continue to roll bead in palms.4. When bead is firm (and desired size), let dry.
FOR LETTERS & SHAPES1. Stuff wool roving into felting template
and begin needle felting.2. Once roving is firm, remove it from
template and felt edges, working in any loose fibers.
FOR GARLAND1. String beads, shapes and
letters into garland.

FELTED FUNIf you’re designing a diorama for a school project (or just for playtime after school), needle felting is a great way to create custom characters, scenery and everything in between! Tip: For the flat pieces—
like the door and leaves—we felted wool into large sheets and then cut out the shapes.
4 Hobby Lobby Product Inspirations
1. Glue green ready-to-go felt (for grass) to inside of storage box lid.
2. Layer and felt brown and tan wool roving into sheet (tree bark), then glue felted sheet onto foam board that's been scored and formed into tube shape. Glue trunk into place.
3. Layer strands of blue roving across green felt to create river. Glue down blue roving to secure.
4. For door and leaves, felt roving into flat sheets, then cut out desired shapes and assemble as desired.
5. Make additional accessories—like pebbles, animals and gnomes—by layering pieces of roving, felting, and repeating until desired shape and firmness are achieved.

WING ITNo more waiting in the wings for you— your needle felting is about to take flight! Moth bodies: Roll wool into a tube shape and felt until firm. Wings: Layer pieces of wool and felt them together, shaping as you go. P.S. Instead of needle felting the legs and antennae, we used chenille stem pieces.
FELTED FASHIONWhen working on projects that require felt beads—like this beaded wall hanging—use a wet felting technique to save time. How-to: Place wool into hot, soapy water, then roll the wet piece in your palms, forming a bead. Once it’s firm, let it dry.
1. Place desired amount of wool roving into bowl of warm, soapy water (use dish soap).
2. Roll roving in palms, forming bead.3. Place bead under warm running water and
continue to roll bead in palms.4. When bead is firm (and desired size), let dry.5. Stain dowel rod and attach jute for hanging.6. Tie cording to dowel rod and string beads into
V-shaped pattern. Tie off ends to secure bead strands.
1. For moth bodies, roll wool roving into tube shapes and felt.
2. For wings, layer and felt roving (shaping as you go). Felt in spots last.
3. Hot glue wings to bodies.
4. For legs and antennae, cut sections of bump chenille stems, insert where desired, and hot glue in place.
Hobby Lobby Product Inspirations 5
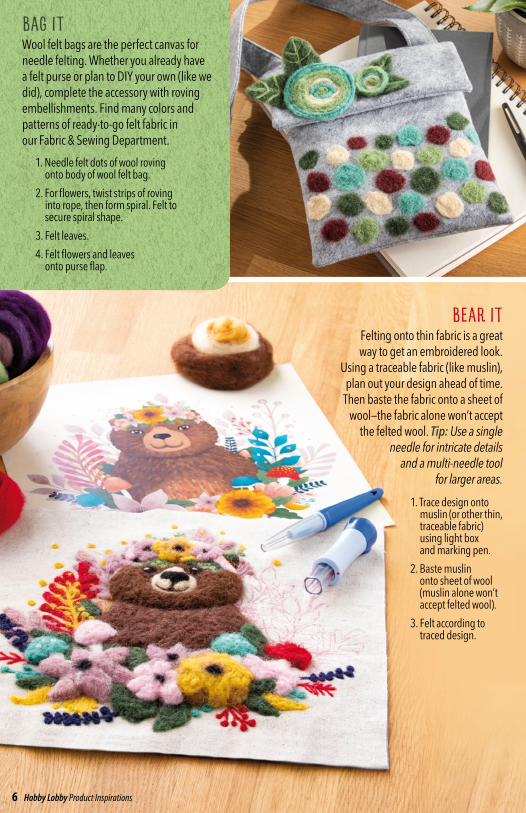
BEAR ITFelting onto thin fabric is a great way to get an embroidered look.
Using a traceable fabric (like muslin), plan out your design ahead of time.
Then baste the fabric onto a sheet of wool—the fabric alone won’t accept
the felted wool. Tip: Use a single needle for intricate details
and a multi-needle tool for larger areas.
BAG ITWool felt bags are the perfect canvas for needle felting. Whether you already have a felt purse or plan to DIY your own (like we did), complete the accessory with roving embellishments. Find many colors and patterns of ready-to-go felt fabric in our Fabric & Sewing Department.
1. Needle felt dots of wool roving onto body of wool felt bag.
2. For flowers, twist strips of roving into rope, then form spiral. Felt to secure spiral shape.
3. Felt leaves.4. Felt flowers and leaves
onto purse flap.
1. Trace design onto muslin (or other thin, traceable fabric) using light box and marking pen.
2. Baste muslin onto sheet of wool (muslin alone won’t accept felted wool).
3. Felt according to traced design.
6 Hobby Lobby Product Inspirations
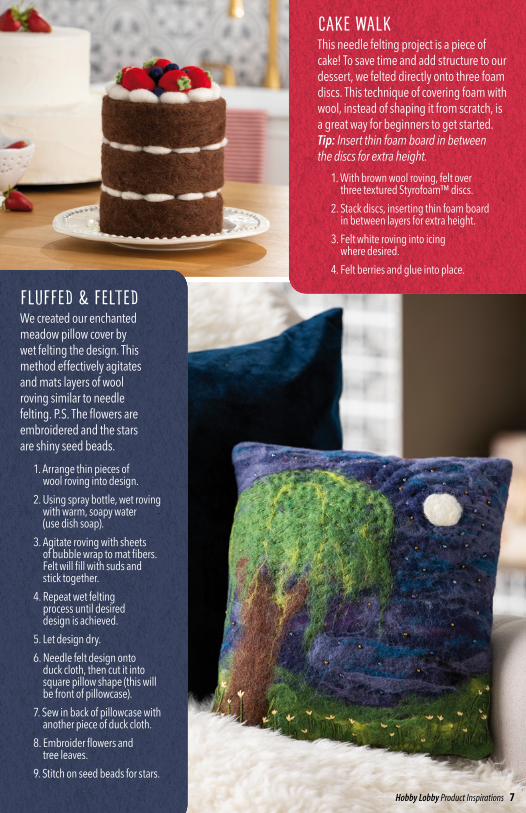
FLUFFED & FELTEDWe created our enchanted meadow pillow cover by wet felting the design. This method effectively agitates and mats layers of wool roving similar to needle felting. P.S. The flowers are embroidered and the stars are shiny seed beads.
CAKE WALKThis needle felting project is a piece of cake! To save time and add structure to our dessert, we felted directly onto three foam discs. This technique of covering foam with wool, instead of shaping it from scratch, is a great way for beginners to get started. Tip: Insert thin foam board in between the discs for extra height.
1. With brown wool roving, felt over three textured Styrofoam™ discs.
2. Stack discs, inserting thin foam board in between layers for extra height.
3. Felt white roving into icing where desired.
4. Felt berries and glue into place.
1. Arrange thin pieces of wool roving into design.
2. Using spray bottle, wet roving with warm, soapy water (use dish soap).
3. Agitate roving with sheets of bubble wrap to mat fibers. Felt will fill with suds and stick together.
4. Repeat wet felting process until desired design is achieved.
5. Let design dry.6. Needle felt design onto
duck cloth, then cut it into square pillow shape (this will be front of pillowcase).
7. Sew in back of pillowcase with another piece of duck cloth.
8. Embroider flowers and tree leaves.
9. Stitch on seed beads for stars.
Hobby Lobby Product Inspirations 7
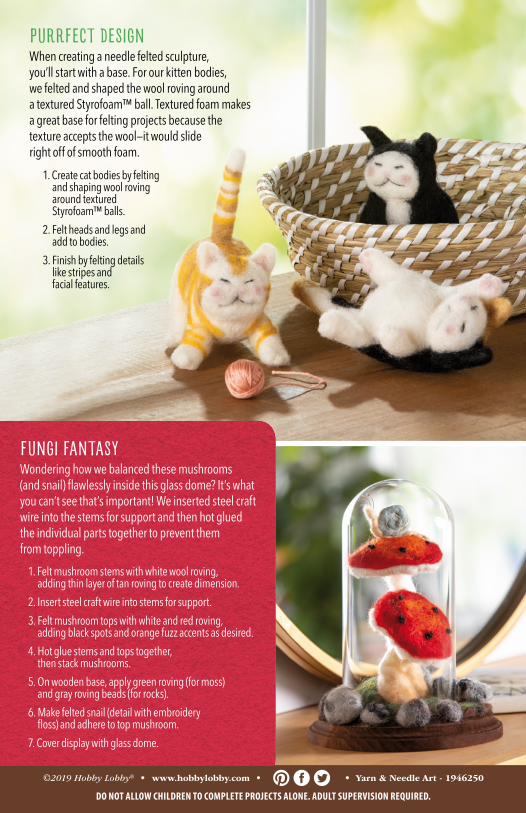
PURRFECT DESIGNWhen creating a needle felted sculpture, you’ll start with a base. For our kitten bodies, we felted and shaped the wool roving around a textured Styrofoam™ ball. Textured foam makes a great base for felting projects because the texture accepts the wool—it would slide right off of smooth foam.
FUNGI FANTASYWondering how we balanced these mushrooms (and snail) flawlessly inside this glass dome? It’s what you can’t see that’s important! We inserted steel craft wire into the stems for support and then hot glued the individual parts together to prevent them from toppling.
©2019 Hobby Lobby® • www.hobbylobby.com • • Yarn & Needle Art - 1946250
DO NOT ALLOW CHILDREN TO COMPLETE PROJECTS ALONE. ADULT SUPERVISION REQUIRED.
1. Create cat bodies by felting and shaping wool roving around textured Styrofoam™ balls.
2. Felt heads and legs and add to bodies.
3. Finish by felting details like stripes and facial features.
1. Felt mushroom stems with white wool roving, adding thin layer of tan roving to create dimension.
2. Insert steel craft wire into stems for support.3. Felt mushroom tops with white and red roving,
adding black spots and orange fuzz accents as desired.4. Hot glue stems and tops together,
then stack mushrooms.5. On wooden base, apply green roving (for moss)
and gray roving beads (for rocks).6. Make felted snail (detail with embroidery
floss) and adhere to top mushroom.7. Cover display with glass dome.