![Western Pacific Region Neglected Tropical Diseases News · 2018-06-20 · WPR ws 25 t} o , o ZK Pv]Ì }vZ P]}voK8 (} Z t vW ]. 6 Photos from the Western Pacific Regional Training](https://static.fdocuments.in/doc/165x107/5ecf4c8fef0e483c994b6cf4/western-pacific-region-neglected-tropical-diseases-news-2018-06-20-wpr-ws-25-t.jpg)
NYI’s Three Guidelines and Six Tips for Great Photos · NYI’s Three Guidelines and Six Tips for...
16
NYI’s Three Guidelines and Six Tips for Great Photos N E W Y O R K I N S T I T U T E O F P H O T O G R A P H Y 1 0 0 Y E A R S 1910-2010 Educating Photographers Since 1910.
Transcript of NYI’s Three Guidelines and Six Tips for Great Photos · NYI’s Three Guidelines and Six Tips for...

NYI’s Three Guidelines and Six Tips for Great Photos
NEW
YO
RK INSTITUTE OF PHOTO
GRA
PH
Y
100 YEARS1910-2010Educating Photographers Since 1910.
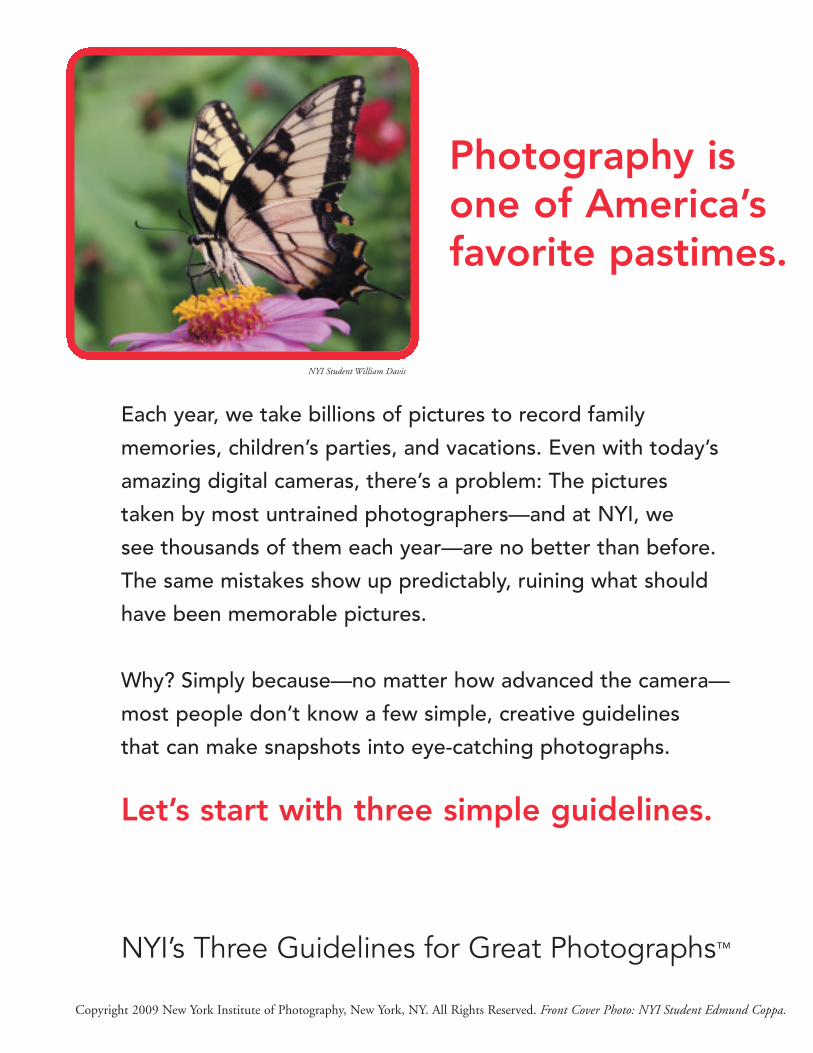
Each year, we take billions of pictures to record family
memories, children’s parties, and vacations. Even with today’s
amazing digital cameras, there’s a problem: The pictures
taken by most untrained photographers—and at NYI, we
see thousands of them each year—are no better than before.
The same mistakes show up predictably, ruining what should
have been memorable pictures.
Why? Simply because—no matter how advanced the camera—
most people don’t know a few simple, creative guidelines
that can make snapshots into eye-catching photographs.
Let’s start with three simple guidelines.
Copyright 2009 New York Institute of Photography, New York, NY. All Rights Reserved. Front Cover Photo: NYI Student Edmund Coppa.
NYI Student William Davis
NYI’s Three Guidelines for Great Photographs™
Photography isone of America’sfavorite pastimes.

Before you take any picture, you have to answer one question:
“What do I want to be the subject of this picture?”
Only after you have answered this question are you ready to take the picture.
Now, this seems pretty obvious. You wouldn’t be taking this picture if you didn’t knowwhat you wanted it to be about, would you? Yet, it’s the single most important failing inmost pictures taken by amateurs.
You know what you want to be your subject. But the picture you capture often doesn’texpress what you saw in the viewfinder. Let’s say you took a picture of Little Sally in yourbackyard. Sure, when you get back the print you see Little Sally right there, but you alsosee the trashcan, the fire hydrant, the broken deck chair, and the telephone pole thatseems to be growing out of her head.
NYI Student William Davis
Guideline One
KnowYour
Subject
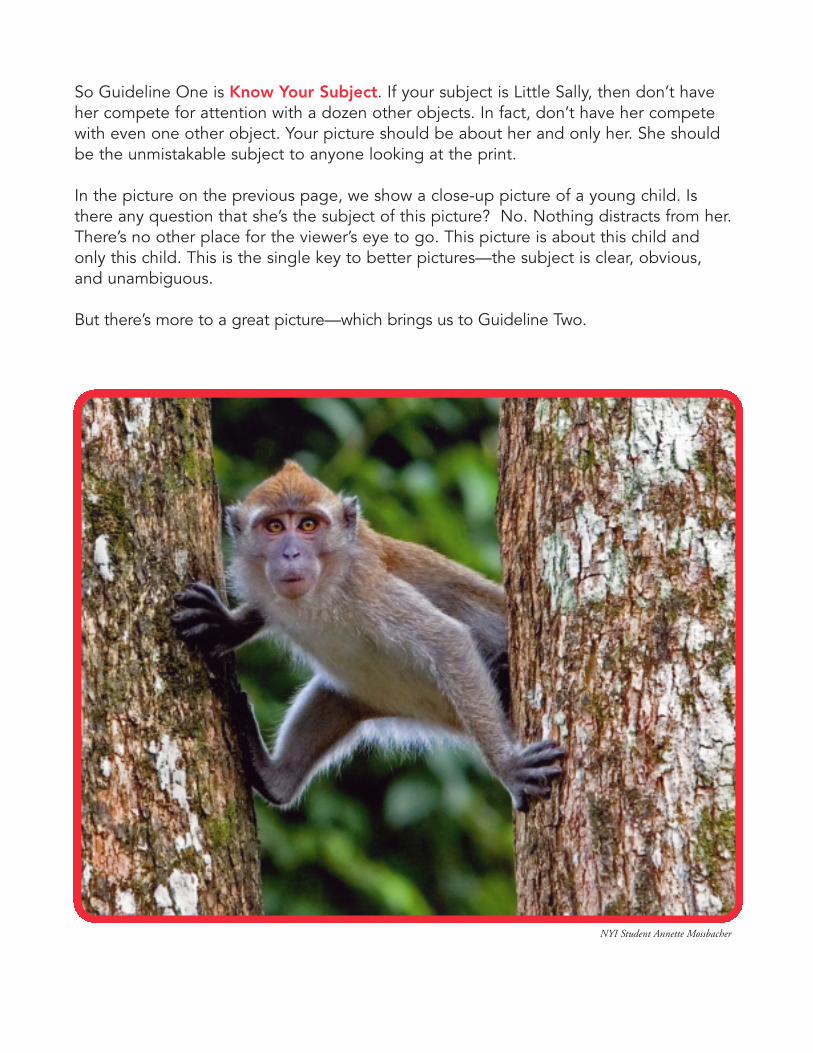
So Guideline One is Know Your Subject. If your subject is Little Sally, then don’t haveher compete for attention with a dozen other objects. In fact, don’t have her competewith even one other object. Your picture should be about her and only her. She shouldbe the unmistakable subject to anyone looking at the print.
In the picture on the previous page, we show a close-up picture of a young child. Is there any question that she’s the subject of this picture? No. Nothing distracts from her.There’s no other place for the viewer’s eye to go. This picture is about this child and only this child. This is the single key to better pictures—the subject is clear, obvious, and unambiguous.
But there’s more to a great picture—which brings us to Guideline Two.
NYI Student Annette Mossbacher
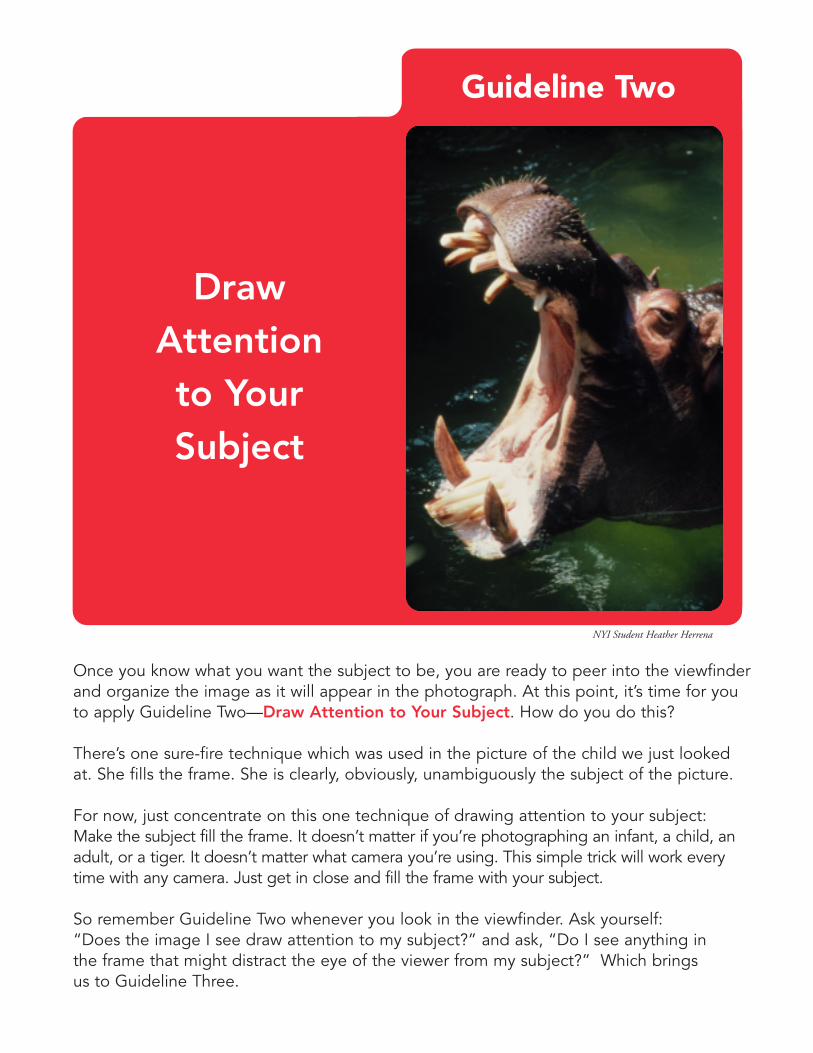
Once you know what you want the subject to be, you are ready to peer into the viewfinderand organize the image as it will appear in the photograph. At this point, it’s time for youto apply Guideline Two—Draw Attention to Your Subject. How do you do this?
There’s one sure-fire technique which was used in the picture of the child we just lookedat. She fills the frame. She is clearly, obviously, unambiguously the subject of the picture.
For now, just concentrate on this one technique of drawing attention to your subject:Make the subject fill the frame. It doesn’t matter if you’re photographing an infant, a child, anadult, or a tiger. It doesn’t matter what camera you’re using. This simple trick will work everytime with any camera. Just get in close and fill the frame with your subject.
So remember Guideline Two whenever you look in the viewfinder. Ask yourself: “Does the image I see draw attention to my subject?” and ask, “Do I see anything in the frame that might distract the eye of the viewer from my subject?” Which brings us to Guideline Three.
NYI Student Heather Herrena
Guideline Two
DrawAttention to YourSubject
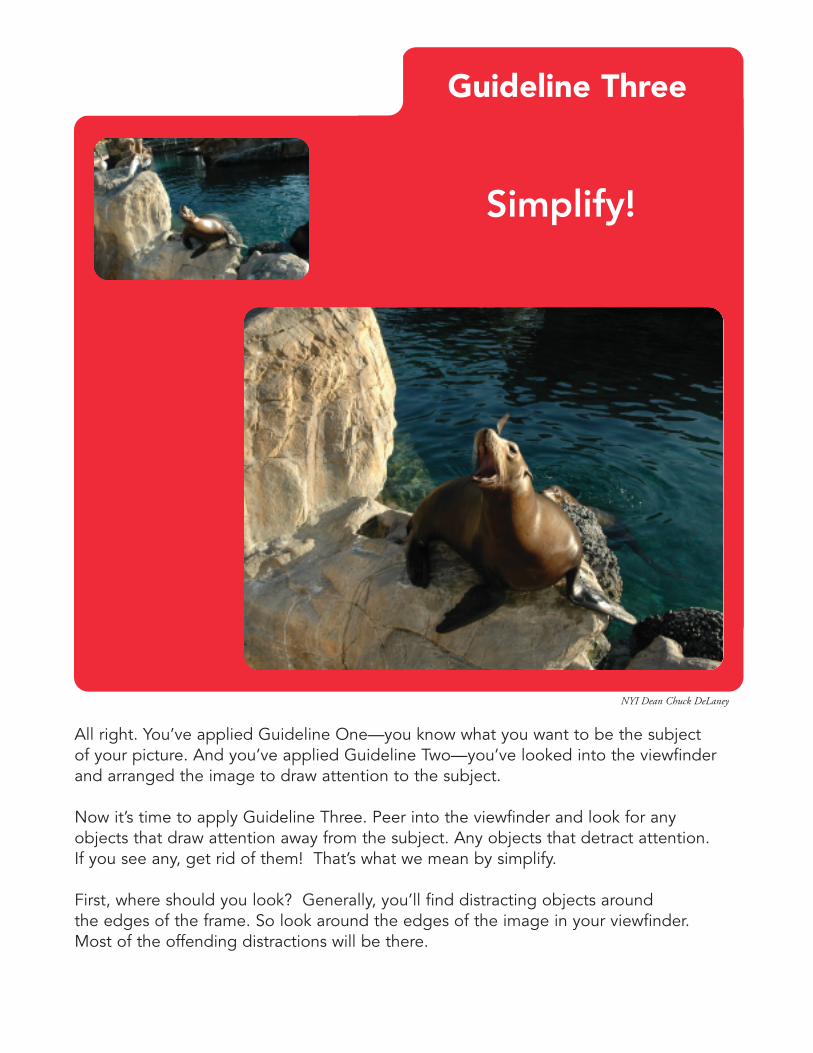
All right. You’ve applied Guideline One—you know what you want to be the subject of your picture. And you’ve applied Guideline Two—you’ve looked into the viewfinderand arranged the image to draw attention to the subject.
Now it’s time to apply Guideline Three. Peer into the viewfinder and look for any objects that draw attention away from the subject. Any objects that detract attention. If you see any, get rid of them! That’s what we mean by simplify.
First, where should you look? Generally, you’ll find distracting objects around the edges of the frame. So look around the edges of the image in your viewfinder. Most of the offending distractions will be there.
NYI Dean Chuck DeLaney
Guideline Three
Simplify!

Second, if you find a distracting object, how can you get rid of it? One way is to move it. Suppose you see a distracting wastepaper basket in the picture. Perhaps you can pick it up and move it a few feet out of view. Or you see a distracting piece of paper on the floor. Pick it up!
But it’s not always easy or even possible to move the object. What if the distraction is a telephone? Or the Empire State Building?
You can’t move it, but you can move your camera. Often, just taking a step or two will do the trick.
Or you may be able to move your subject—especially if it is a person. When he or she moves, the background changes and your goal should be to get the offendingobject to disappear from your viewfinder.
Or—and this is often the best solution—get in closer and fill the frame with your subject so that the distracting object in the background disappears. As you’ve already guessed, this solution ties right in with what you’ve learned about filling the frame with your subject. It’s usually the easiest as well as the best solution.
These Three Guidelines are simple, and they are the key to successful pictures in every situation. Look in the viewfinder and, before you shoot, apply them to every picture you take anywhere.
NYI Student Kevin Pfeifer
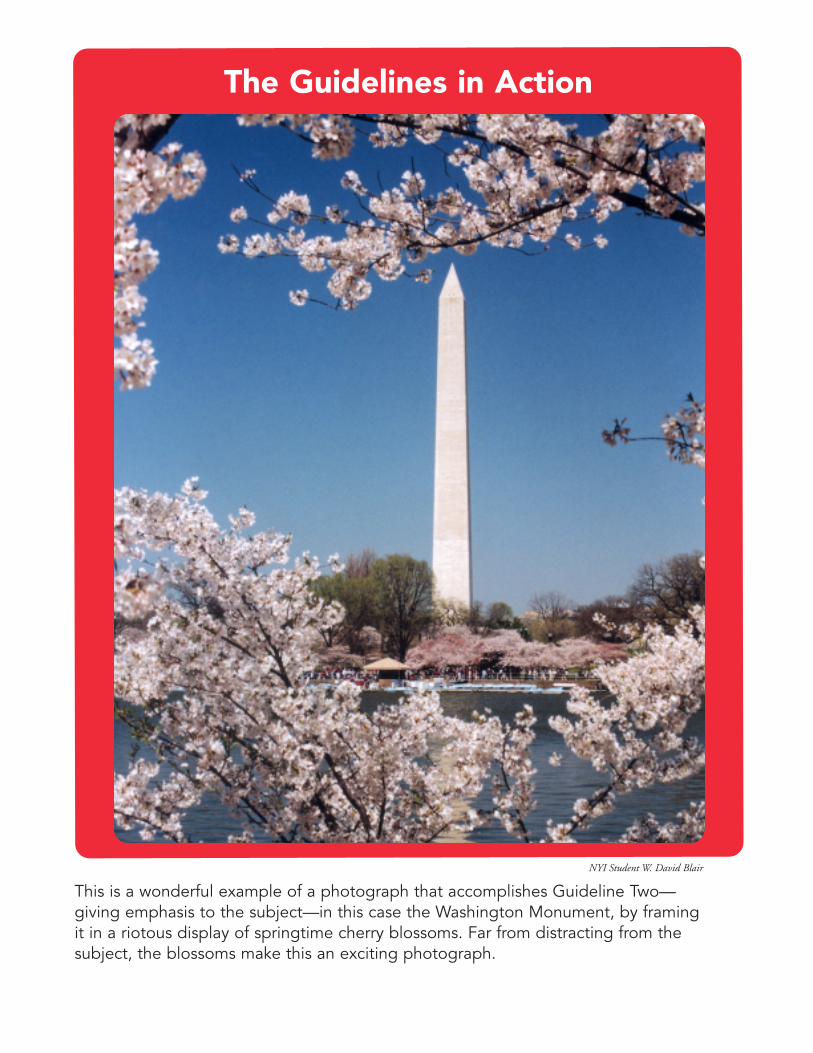
This is a wonderful example of a photograph that accomplishes Guideline Two—giving emphasis to the subject—in this case the Washington Monument, by framing it in a riotous display of springtime cherry blossoms. Far from distracting from the subject, the blossoms make this an exciting photograph.
NYI Student W. David Blair
The Guidelines in Action

Here’s a tight portrait of a boy and his dog. The subject is both of them and their loving relationship. Notice the tear in the leg of the jeans that exposes the boy’s knee? Is it a distraction? We don’t think so. It adds to the informality of the photo and also provides a strong base on which his loving dog rests its head. Now cover the knee with your hand and notice how the picture changes. Some people will prefer this cropped version.
NYI Student Murnice Kuesel
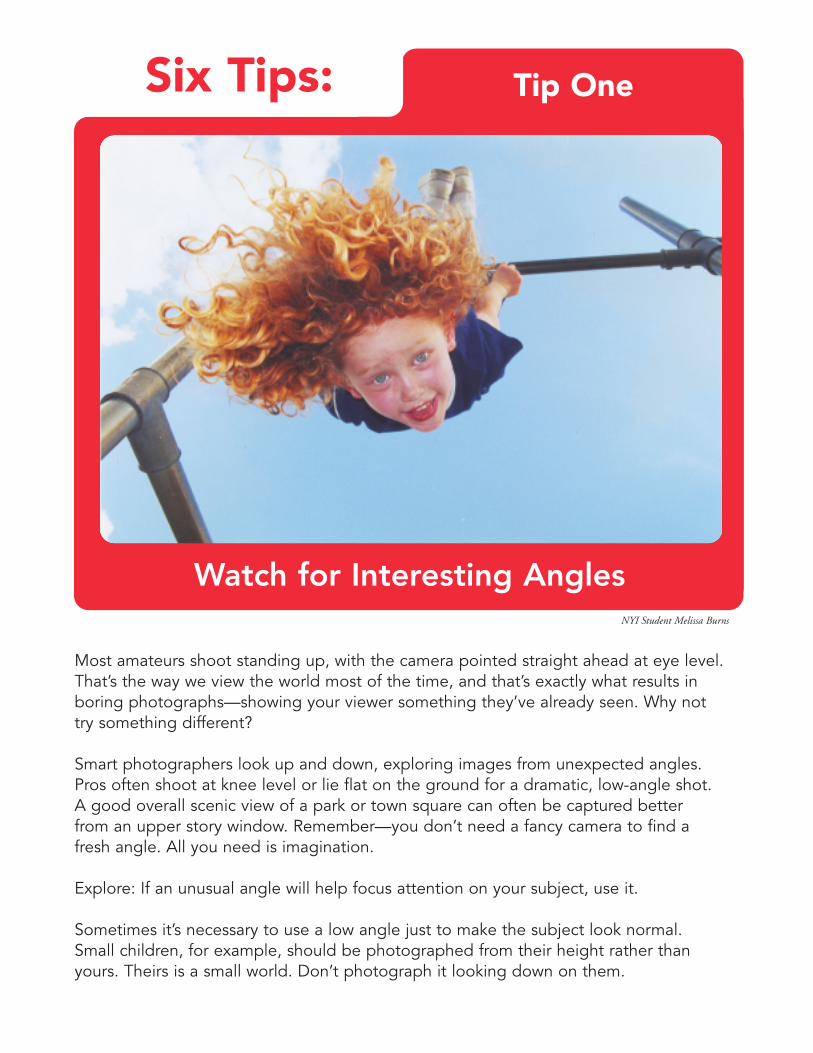
Most amateurs shoot standing up, with the camera pointed straight ahead at eye level.That’s the way we view the world most of the time, and that’s exactly what results in boring photographs—showing your viewer something they’ve already seen. Why not try something different?
Smart photographers look up and down, exploring images from unexpected angles. Pros often shoot at knee level or lie flat on the ground for a dramatic, low-angle shot. A good overall scenic view of a park or town square can often be captured better from an upper story window. Remember—you don’t need a fancy camera to find a fresh angle. All you need is imagination.
Explore: If an unusual angle will help focus attention on your subject, use it.
Sometimes it’s necessary to use a low angle just to make the subject look normal. Small children, for example, should be photographed from their height rather than yours. Theirs is a small world. Don’t photograph it looking down on them.
NYI Student Melissa Burns
Watch for Interesting Angles
Six Tips: Tip One
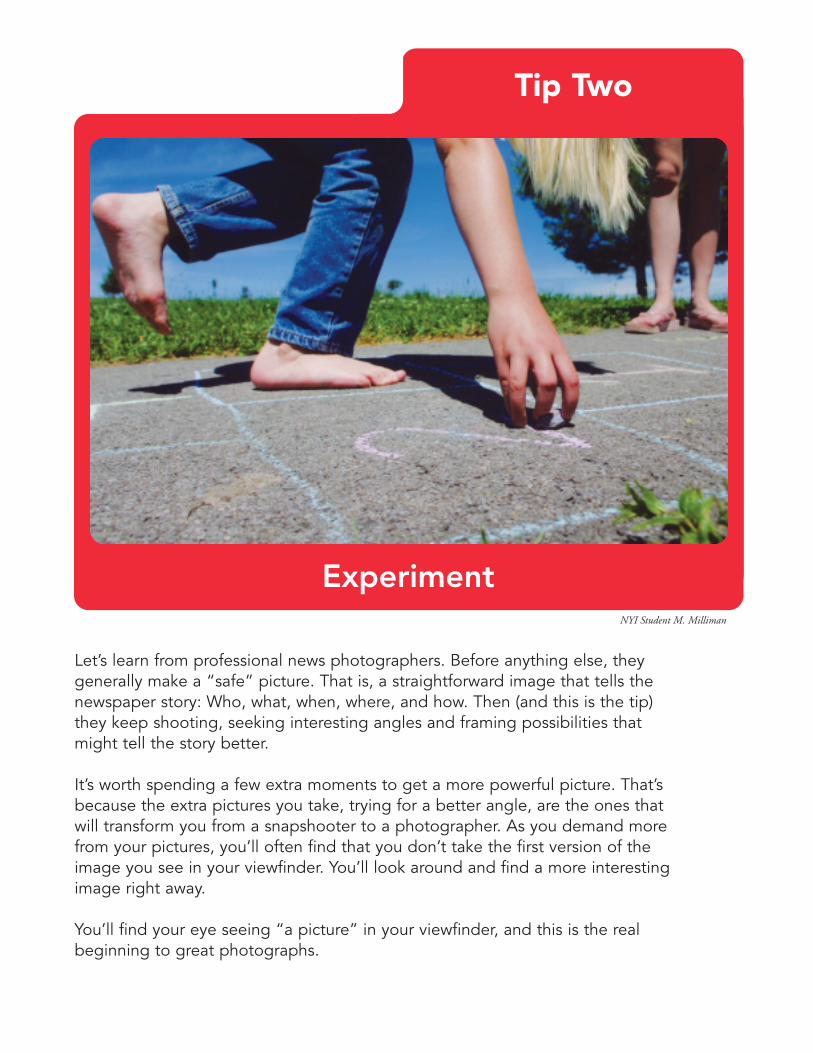
Let’s learn from professional news photographers. Before anything else, they generally make a “safe” picture. That is, a straightforward image that tells the newspaper story: Who, what, when, where, and how. Then (and this is the tip) they keep shooting, seeking interesting angles and framing possibilities that might tell the story better.
It’s worth spending a few extra moments to get a more powerful picture. That’s because the extra pictures you take, trying for a better angle, are the ones that will transform you from a snapshooter to a photographer. As you demand more from your pictures, you’ll often find that you don’t take the first version of the image you see in your viewfinder. You’ll look around and find a more interesting image right away.
You’ll find your eye seeing “a picture” in your viewfinder, and this is the real beginning to great photographs.
NYI Student M. Milliman
Experiment
Tip Two
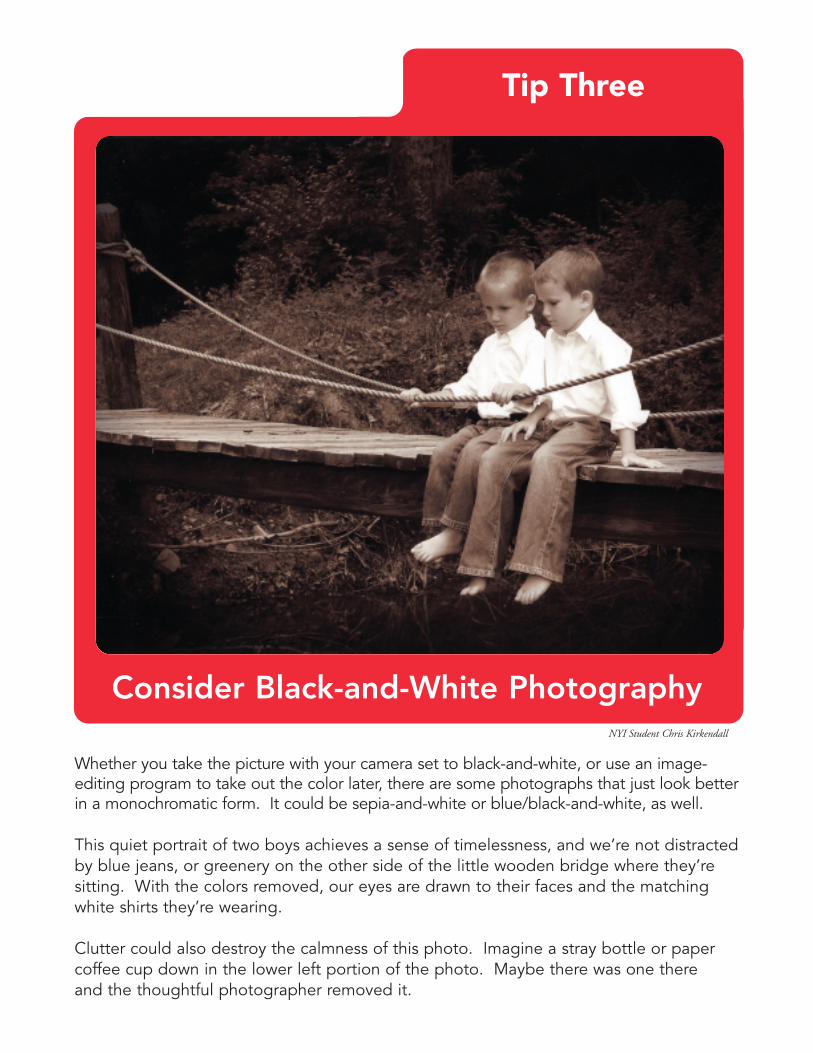
Whether you take the picture with your camera set to black-and-white, or use an image-editing program to take out the color later, there are some photographs that just look betterin a monochromatic form. It could be sepia-and-white or blue/black-and-white, as well.
This quiet portrait of two boys achieves a sense of timelessness, and we’re not distractedby blue jeans, or greenery on the other side of the little wooden bridge where they’re sitting. With the colors removed, our eyes are drawn to their faces and the matchingwhite shirts they’re wearing.
Clutter could also destroy the calmness of this photo. Imagine a stray bottle or papercoffee cup down in the lower left portion of the photo. Maybe there was one there and the thoughtful photographer removed it.
Consider Black-and-White PhotographyNYI Student Chris Kirkendall
Tip Three
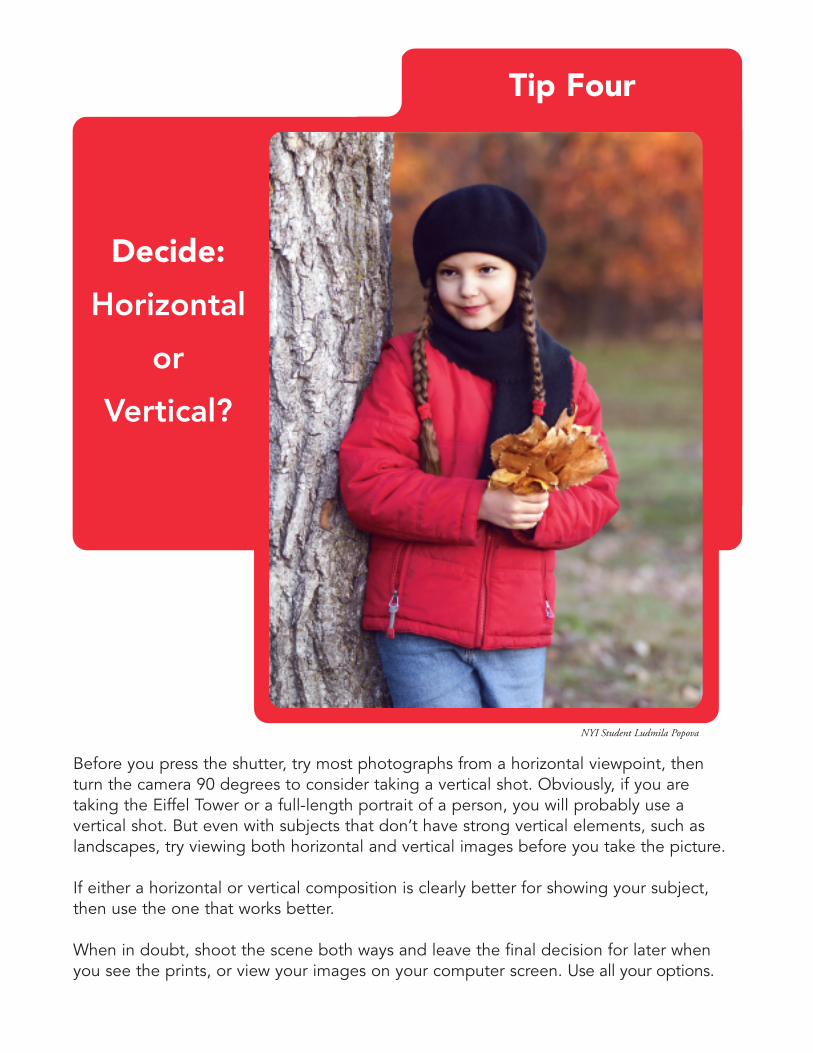
Before you press the shutter, try most photographs from a horizontal viewpoint, then turn the camera 90 degrees to consider taking a vertical shot. Obviously, if you are taking the Eiffel Tower or a full-length portrait of a person, you will probably use a vertical shot. But even with subjects that don’t have strong vertical elements, such aslandscapes, try viewing both horizontal and vertical images before you take the picture.
If either a horizontal or vertical composition is clearly better for showing your subject,then use the one that works better.
When in doubt, shoot the scene both ways and leave the final decision for later whenyou see the prints, or view your images on your computer screen. Use all your options.
NYI Student Ludmila Popova
Decide:
Horizontal
or
Vertical?
Tip Four

While standing on a mid-Manhattan street looking up at the Empire State Building at twilight, you can see tourists’ cameras flashing from the observation deck. But that little electronic flash is designed to light up subjects from about 3 to 12 feet away. It won’t illuminate the miles of caverns in New York. And it won’t illuminate the musicianson stage when you take a picture from the 35th row of the arena. In fact, the flash mayactually hurt the picture. At the Empire State building, many amateurs shoot through a glass partition. What the camera “sees” when the flash goes off is the glare on theglass. And that’s what you see in the picture. In the 35th row of the arena, the flash lights up the backs of the people in front of you. They become the subject of your picture, whether you intended it or not.
Another example: Flash will hurt your picture if you have two subjects where one is threefeet from the camera and the other is eight feet away. The flash will either turn the closerone into a bright, burned-out blob or fail to sufficiently light the subject farther away, or both. Solution? Either turn off the flash or move the subjects so they are an equal distance from your flash.
NYI Student Edmund Coppa
Don’t Use Flash When It Hurts
Tip Five
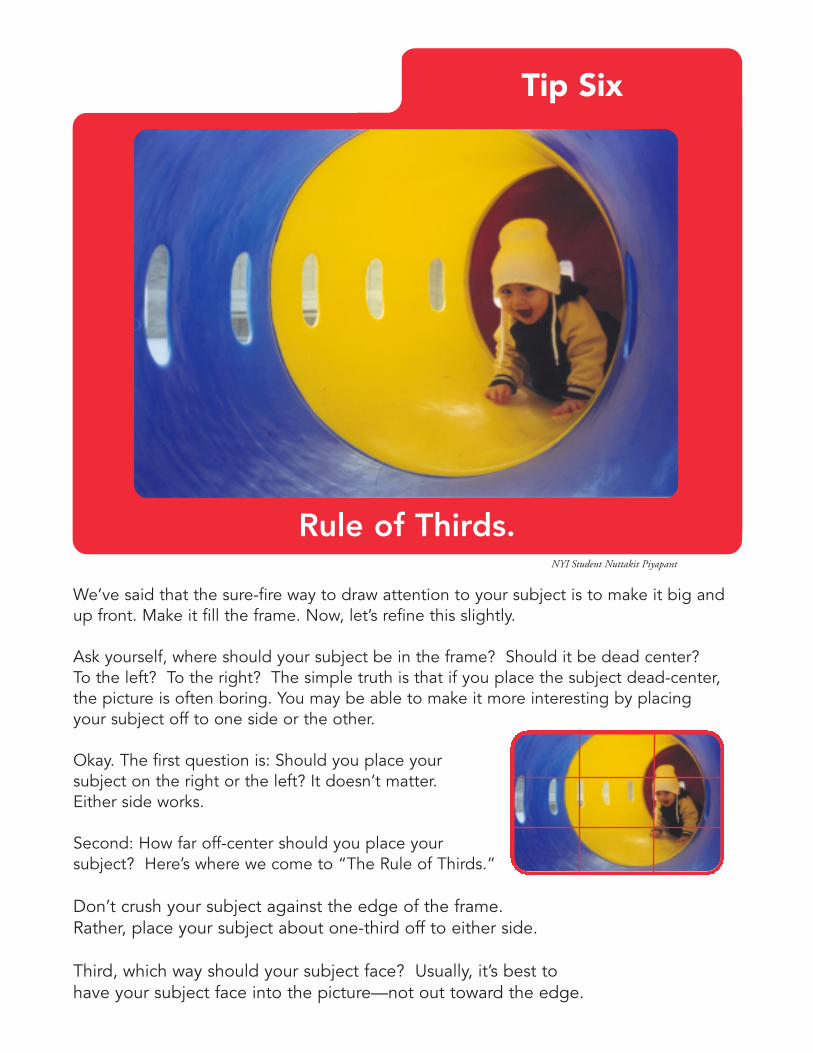
We’ve said that the sure-fire way to draw attention to your subject is to make it big andup front. Make it fill the frame. Now, let’s refine this slightly.
Ask yourself, where should your subject be in the frame? Should it be dead center? To the left? To the right? The simple truth is that if you place the subject dead-center,the picture is often boring. You may be able to make it more interesting by placing your subject off to one side or the other.
Okay. The first question is: Should you place your subject on the right or the left? It doesn’t matter. Either side works.
Second: How far off-center should you place your subject? Here’s where we come to “The Rule of Thirds.”
Don’t crush your subject against the edge of the frame. Rather, place your subject about one-third off to either side.
Third, which way should your subject face? Usually, it’s best tohave your subject face into the picture—not out toward the edge.
Rule of Thirds.NYI Student Nuttakit Piyapant
Tip Six
About NYIP
Copyright 2009 New York Institute of Photography, New York, NY. All Rights Reserved.
The New York Institute of Photography, established in 1910, is the world’s oldest and largest photographyschool. Founded as a residential school, NYI has alsooffered correspondence training since 1922 and hasbeen exclusively a home-study school since 1975.
NYI’s multi-media Complete Course in ProfessionalPhotography consists of printed lessons enriched bydozens of audio and video programs. Students submit Photo Projects that are evaluated by working professional photographers, thus bringing the classroom right into the student’s home. NYI has more than 20,000active students in the U.S. and over 50 countries abroad.
In addition to the Complete Course in Professional Photography, NYI also offers Photoshop for Photographers (Complete Course in Digital Photography) and the NYI Short Course: Fundamentals of Digital Photography. The Fundamentals Course is designed for amateur photographers who want to take great photographs with a high-performance digital camera for family, fun, or business purposes.
For information about all of NYI’s programs and to request a free course
catalog, visit us online at www.nyip.com!
The New York Institute of Photography211 East 43rd Street, Suite 2402, New York, NY 10017
Tel: 212-867-8260 Fax: 212-867-8122 E-mail: [email protected]
NEW
YO
RK INSTITUTE OF PHOTO
GRA
PH
Y
100 YEARS1910-2010