


Languages
Pages
Legal


Page | 1
Zend Framework Getting Started
I Overview of Zend Framework
Zend Framework is an open source framework for developing web applications and services
with PHP 5 Zend Framework is implemented using 100 object-oriented code The
component structure of Zend Framework is somewhat unique each component is designed
with few dependencies on other components This loosely coupled architecture allows
developers to use components individually We often call this a use-at-will design (refers
to zend manual)
a Model ndash View ndash Controller
Model - This is the part of your application that defines its basic functionality
behind a set of abstractions Data access routines and some business logic can be
defined in the model
View - Views define exactly what is presented to the user Usually controllers pass
data to each view to render in some format Views will often collect data from the
user as well This is where youre likely to find HTML markup in your MVC
applications
Controller - Controllers bind the whole pattern together They manipulate models
decide which view to display based on the users request and other factors pass
along the data that each view will need or hand off control to another controller
entirely
Page | 2
II Environment Settings
a Zend Server CE (Community Edition)
httpwwwzendcomenproductsserver-cedownloads
Zend Server Community Edition (CE) is the free edition of Zend Server The different
between Zend Server and Zend Serve CE describe below
Description Zend Server Zend Server CE Complete PHP stack that includes ZF
Yes Yes
Opcode acceleration (Zend Optimizer+)
Yes Yes
PHP application deployment
Yes
Page caching and job queue support
Yes
PHP monitoring and code tracing
Yes
Zend Server Cluster Manager support
Yes
echnical support updates and hotfixes
Yes IBM only for 1 year
Packaging Linux Windows Mac Os X iBM i
Support PHP Version 52 atau 53
Page | 3
Notes This Tutorial will be only showed using Zend Server CE Windows
version So you advised for this specific OS
b Zend Studio vs Eclipse PHP
Zend actually already provided tools for develop zend application and
integrated with zend framework as well It is Zend Studio You can
download it in httpwwwzendcomproductsstudio This tool is free
trial for 60 days
Already bundled based on specific OS (Operating System) such as Linux
Windows and Mac OS X
Another tool for zend application development is Eclipse PHP which is
could be downloaded at httpeclipseorgpdtdownloads As far as this
document being made I just know the last version of PHP Eclipse is Helios
This tool is free and unlimited for PHP development but since zend
framework is actually one of many PHP Framework we can use this tool
Notes you may be advised to use Eclipse PHP since I will use this tools as
the mostly screenshot on every examples I made
c Zend Framework
You can download at httpframeworkzendcomdownloadcurrent
Choose Zend Framework Full Version because itrsquos already included with
the documentation and manual
Page | 4
III Installation
a Zend Server CE
For Installing Zend Server CE simply you just click the installer for
windows Follow every step to complete the installations By default zend
will be located in CProgram FilesZend
b Eclipse PHP
Page | 5
Install Eclipse PHP isnrsquot really hard seriously For windows you can simply
extract it and run it by clicked on the executable file usually eclipseexe
Or if you downloaded installer version you just need to follow the
instructions and run it There is another dependency for using eclipse
you must have installed Java JDK or JRE on your computer
c Zend Framework
Extract downloaded Zend Framework on CProgram
FilesZendApache2htdocs The following results
In this training I use Zend Framework with current version which is version
11111 You are advised to use the same version too to experience the same
result
IV Development
a Installation Zend Application
Firstly make sure your Zend Server already running on your computer
Clicked on apache icon on the right side of your desktop window ( ) and
start the apache zend server Open your browser and type
httplocalhost[portnumber] eg httplocalhost80 or
httplocalhost90 Port Number is set when you installed zend server
before In this session I will use the second example (httplocalhost90) If
you succeed the preview on your browser should be like the picture below
Page | 6
Well now open your zend framework folder (already extracted) on CProgram
FilesZendApache2htdocs (CProgram
FilesZendApache2htdocsZendFramework-11111bin) using command
prompt
Next we will create Zend Framework using zf create project command See
example below
Page | 7
Type on your command window zf create project trainingsession
trainingsession is the name of our project Back to explorer and open directory
CProgram FilesZendApache2htdocsZendFramework-11111bin
Yoursquoll find sharingsession folder like the picture below
Cut and paste trainingsession folder into
CProgram FilesZendApache2htdocs
Page | 8
Well you already made a simple project using zend framework To access this
application back to your browser and browse for url
httplocalhost90trainingsessionpublic
b Develop Simple MVC Architecture
Now open your IDETool (I mean Eclipse) and create new PHP Project just
like the picture below
Page | 9
Next fill the form just like this
Page | 10
Settings
Project name trainingsession
Contents create project at existing location
(CProgram FilesZendApache2htdocstrainingsession)
PHP Version PHP 53 (Based on the downloaded Zend Server CE)
The following is the result until this step
Page | 11
First I would like to explain the structure of Zend MVC Web Application
showed the picture above Our controllers will be placed on
applicationcontrollers directory View will be place on
applicationviewsscripts And Models will be placed on applicationmodels
Page | 12
i Create View Form
Usually view form is htmlcssjavascript part of web development In this
section I wonrsquot explain html css or even javascript part For more details you can
just google it by yourself I just want to show you how to create simple elegant
form using form builder which is available on the internet Irsquoll use this form
builder httpwwwphpformorgformbuilder Just added some input form by
simply clicked on form panel on the right side See the picture below for the
result
Then you can click save and download the generated form files Open folder
extract and open html file by clicked it twice
Page | 13
Now open your eclipse again Create folder style javascript images and
css as shown below
Page | 14
Now moved generated form code into associated folder Move css files
into css folder gif and png into images folder and js into javascript
folder
Now open formhtml (from generated code) select all copy and paste it
on indexphtml in folder applicationviewsscriptsindex
Page | 15
Now refresh your browser on
httplocalhost90trainingsessionpublic
Page | 16
Well now we will configure the path of the css javascript and the images Open
indexphtml on eclipse and change the following code
Viewcss
ltlink rel=stylesheet type=textcss href=viewcss media=allgt
into
ltlink rel=stylesheet type=textcss
href=trainingsessionstylecssviewcss media=allgt
Viewjs
ltscript type=textjavascript src=viewjsgtltscriptgt
Into
ltscript type=textjavascript
src=trainingsessionstylejavascriptviewjsgtltscriptgt
Page | 17
Calendarjs
ltscript type=textjavascript src=calendarjsgtltscriptgt
Into ltscript type=textjavascript
src=trainingsessionstylejavascriptcalendarjsgtltscriptgt
Toppng ltimg id=top src=toppng alt=gt
Into ltimg id=top src=trainingsessionstyleimages toppng alt=gt
Calendargif ltimg id=cal_img_5 class=datepicker src=calendargif alt=Pick a dategt
into ltimg id=cal_img_5 class=datepicker
src=trainingsessionstyleimagescalendargif alt=Pick a dategt
Bottompng ltimg id=bottom src=bottompng alt=gt
Into ltimg id=bottom src=trainingsessionstyleimagesbottompng alt=gt
Now if you are done on changing the path refresh your browser (httplocalhost90trainingsessionpublic)
Page | 18
Now I would like to redirect to httplocalhost90trainingsessionpublic if users access httplocalhost90trainingsession since the main program is in there (public) I just need to create indexhtml on httplocalhost90trainingsession and add the following code
ltmeta http-equiv=rdquoREFRESHrdquo content=rdquo0url=publicrdquogtltHEADgt
The following steps are
1 Create indexhtml
Page | 19
2 Added the above code
3 Try to refresh httplocalhost90trainingsession Now it should be redirected
into httplocalhost90trainingsessionpublic
Page | 20
i Path configuration on Zend
Actually while we browse httplocalhost90trainingsessionpublic the zend first
execute function index() on IndexController and automatically execute the view named
indexphtml on folder index (same as the controller name itrsquos a must) This is why we
can view directly without configured which controller and view to be rendered This url
is also same as httplocalhost90trainingsessionpublicindexphpIndexindex the
first ldquoIndexrdquo is reference to IndexController and the second ldquoindexrdquo is reference to
index function
Another example is
httplocalhost90trainingsessionpublicindexphpErrorerror which is execute
function error() on ErrorControllerphp
ii Clean Url Implementation
To remove indexphp on path to accomplish clean url just follow these steps
1 On configapplicationini
Add resourcesview=[]
Page | 21
2 In applicationBootstrapphp
Add the following code
3 Edit httpdconf
Page | 22
4 Now for access function error on ErrorController you can just type
httplocalhost90trainingsessionpublicErrorerror
Page | 23
Next we will add action into the form when submit So we will need controller to
handle the request
These are the following steps
1 Add action url into the form (trainingsessionpublicsubmit)
This url means the submit button will post form data into SubmitController and default
function which is function indexAction() So on controller folder create new file which
is named SubmitController
2 Create SubmitControllerphp and methodfunction indexAction()
3 Add a little source code like below
Page | 24
The first line of source code above shows that we wouldnrsquot user default view render
which is Submitindexphtml Instead we will create new view (line 2) and setting the
path of new View into sharingsessionapplicationviewsscripts On the last lines we
render View which is located in
sharingsessionapplicationviewsscriptsIndexindexphtml
Page | 25
Pay attentions that this is the same view as the form view before Yes because we
simply tell zend to render Indexindexphtml which is actually the same file when we
access it via url on localhost90sharingsessionpublicIndexindex
4 Transfer data into View
Now we will create simple notification into the view See the picture below
Page | 26
On the indexphtml add the following code
Now you can try to submit your form by click on submit button
Page | 27
5 Saving data into database
Well Irsquoll use MySQL Database to demonstrate this sub section Irsquoll assume you already
knew about the definition of database and minimum knowledge about SQL In MVC
architecture all the things which are directly connected with database should be put on
model classesmodel files Now try to create model file on folder models with
filename ldquoRegisterphprdquo like the following picture
Page | 28
The code above showed how to configure database connection Notice that you can
manage more than one connection into some databases with simply create another
model files Now add one function to submit data into table users Here is the sample
code
6 After this add the following code on the SubmitController class which is will be
used for calling our model Here is the following code
Page | 29
7 Notice that on the following code we will get the request parameter such as
name and address from form input After get the values of this attributes wersquoll
simply create Application_Model_Register object and calling createUser method
with associated parameters Now in order to send the right data (such as name
and address) into this controller wersquoll change name attribute on the html tag
(form view) Here is the picture which is described it
a Change method to get
b Change attribute name into ldquonamerdquo from before ldquoelement_1_1rdquo
c Change attribute name into ldquoaddressrdquo from before ldquoelement_2_1rdquo
Page | 30
8 Now you already create View Controller and Model to handle this form submit
request To be make sure we need to test it right So firstly I will create
database in my MySQL RDBMS Irsquoll use MySQL which is bundled with XAMPP You
can download it if you want This is the screenshot
I will submit this form data
Page | 31
And this following picture shows the result on my table
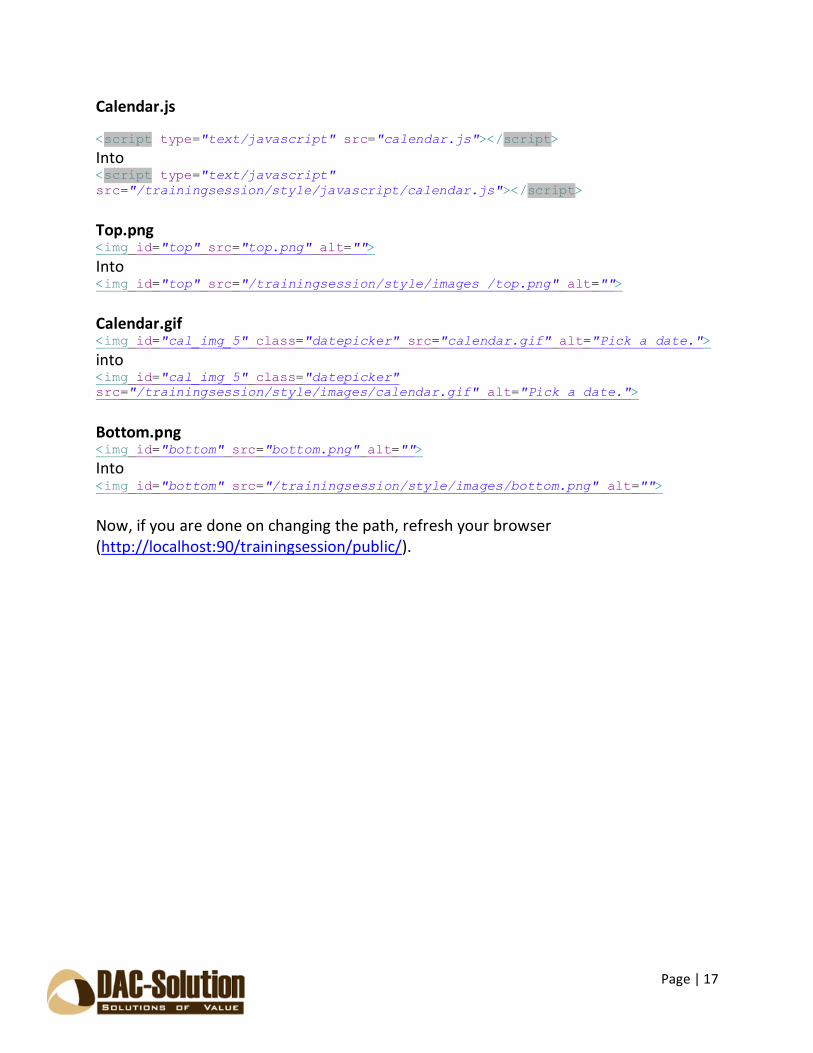
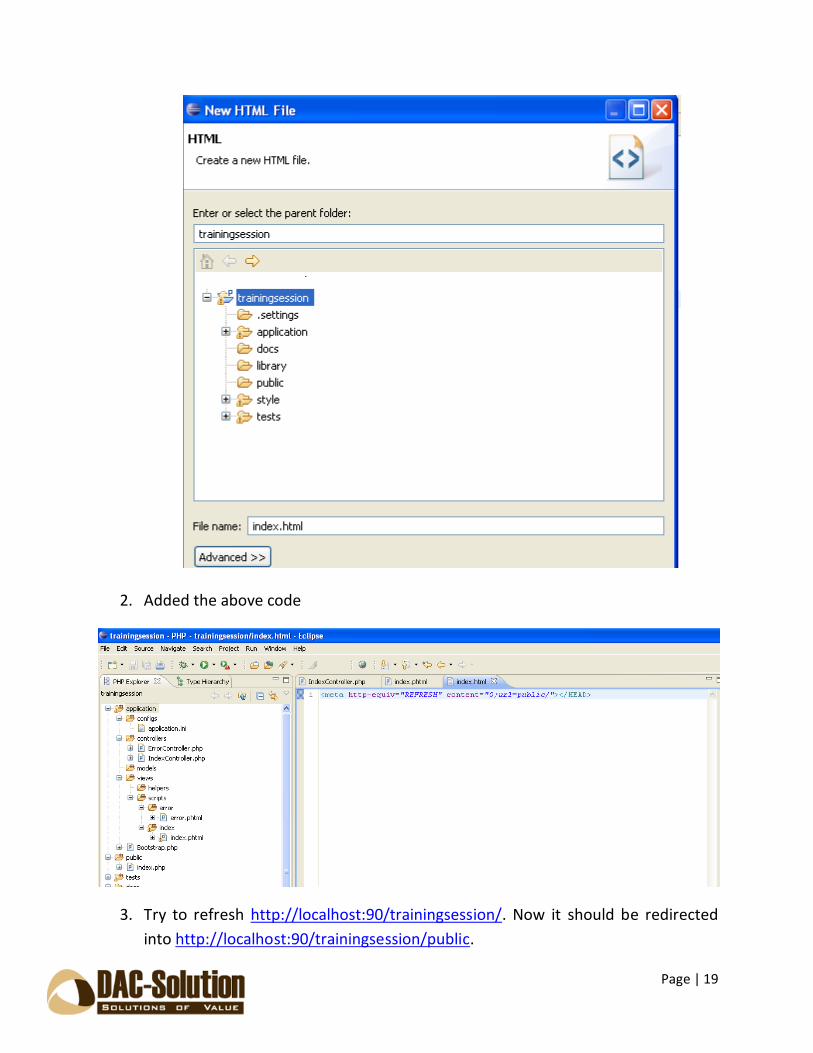
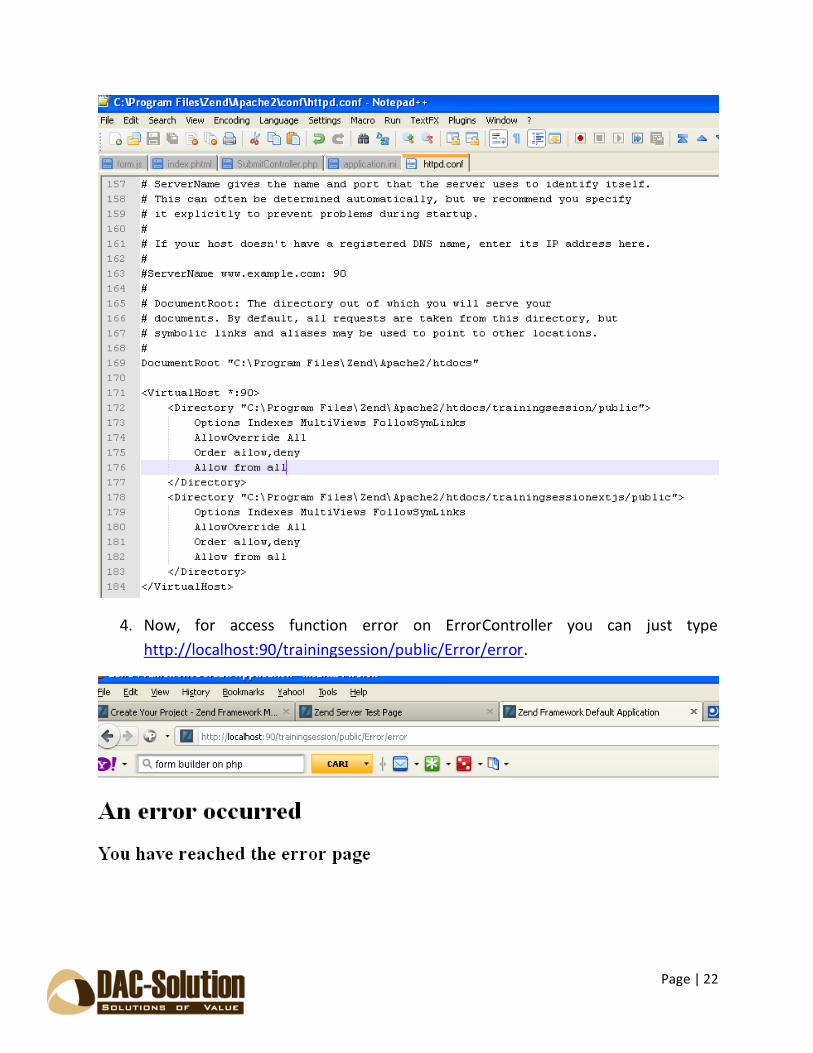

Page | 31
And this following picture shows the result on my table
Top Related