


Languages
Pages
Legal


1
XP
New Perspectives on New Perspectives on Creating Web Pages Creating Web Pages
with HTMLwith HTML
Tutorial 6: Creating Web Page Tutorial 6: Creating Web Page FormsForms
2
XPTutorial ObjectivesTutorial Objectives
Learn about CGI scriptsLearn about CGI scripts Review the various parts of an online Review the various parts of an online
formform Create form elementsCreate form elements Create a hidden field on a formCreate a hidden field on a form Work with form attributesWork with form attributes Learn how to send data from a form to a Learn how to send data from a form to a
CGI scriptCGI script Learn how to send form information Learn how to send form information
without using CGI scriptswithout using CGI scripts

3
XPAn Example of a FormAn Example of a Form
This figure shows a sketch of a proposed registration form.

4
XPThe Interaction between a The Interaction between a Web Page Form and a CGI Web Page Form and a CGI
ScriptScriptThis figure shows how a Web page form interacts with a CGI script.

5
XPWorking with CGI ScriptsWorking with CGI Scripts
HTML supports tags for creating forms, however, it HTML supports tags for creating forms, however, it does not process the information.does not process the information.
Use Use CGI (Common Gateway Interface)CGI (Common Gateway Interface) script to script to process form information.process form information.
CGI script runs on the Web server and receives data CGI script runs on the Web server and receives data from a form and uses it to perform a set of tasks.from a form and uses it to perform a set of tasks.
Web page designers may not be able to create or Web page designers may not be able to create or edit CGI scripts.edit CGI scripts. Internet Service Providers (ISPs) and universities may Internet Service Providers (ISPs) and universities may
provide CGI scripts that their customers and student can provide CGI scripts that their customers and student can use on their Web sites, but which they cannot directly use on their Web sites, but which they cannot directly access or modifyaccess or modify

6
XPCGI ScriptsCGI Scripts
Among the many things CGI scripts made Among the many things CGI scripts made possible are:possible are: online database containing customer informationonline database containing customer information catalogues for ordering and purchasing items catalogues for ordering and purchasing items
onlineonline databases containing product support informationdatabases containing product support information determining the number of times a Web page has determining the number of times a Web page has
been accessedbeen accessed server-side image mapsserver-side image maps message boards for online discussion forumsmessage boards for online discussion forums e-mail for discussion groupse-mail for discussion groups

7
XPCGI Script RestrictionsCGI Script Restrictions
There are several reasons to restrict direct There are several reasons to restrict direct access to CGI scripts:access to CGI scripts: CGI scripts are actually running a program CGI scripts are actually running a program
directly on the serverdirectly on the server security riskssecurity risks from computer hackers from computer hackers drain on system resources caused by large drain on system resources caused by large
numbers of programs running simultaneouslynumbers of programs running simultaneously System administration are understandably System administration are understandably
careful to maintain strict control over their careful to maintain strict control over their servers and systems.servers and systems.

8
XPCGI Scripts and Computer CGI Scripts and Computer LanguagesLanguages
CGI scripts can be written in a variety of different CGI scripts can be written in a variety of different computer languages. Some of the most commonly computer languages. Some of the most commonly used languages are:used languages are: AppleScriptAppleScript ASPASP C/C++C/C++ PerlPerl TCLTCL The UNIX shellThe UNIX shell Visual BasicVisual Basic
The computer language used depends on the Web The computer language used depends on the Web server.server.
9
XPForm Components and Form Components and ElementsElements
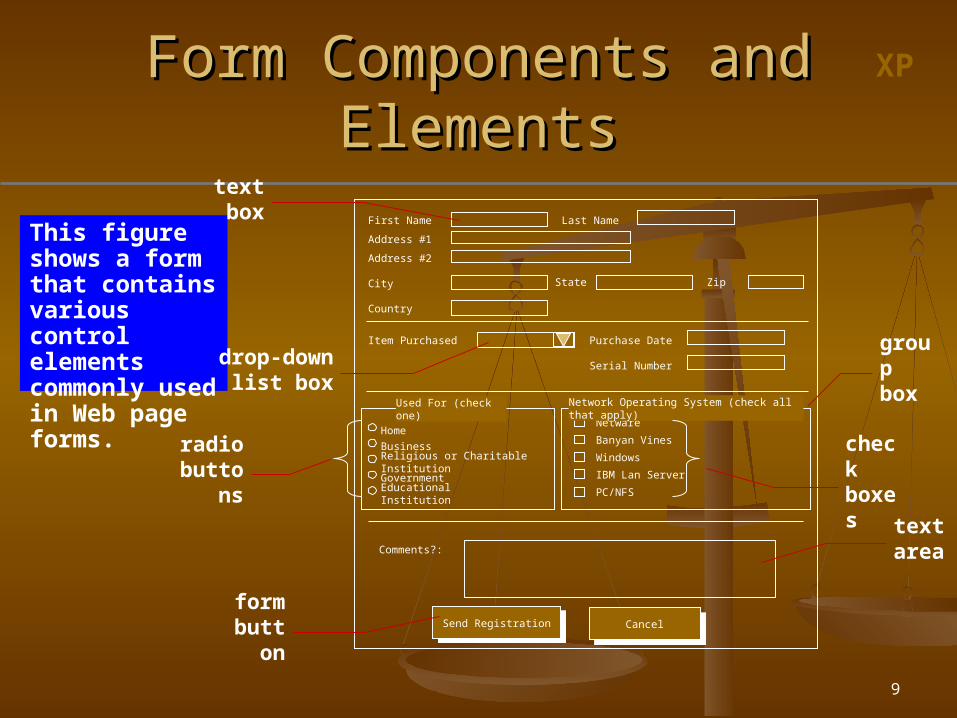
This figure shows a form that contains various control elements commonly used in Web page forms.
First Name
Address #1
Address #2
City
Last Name
Country
State Zip
Item Purchased Purchase Date
Home
Business
Government
Educational Institution
Netware
Banyan Vines
Windows
IBM Lan Server
Comments?:
Send RegistrationSend RegistrationCancelCancel
Serial Number
Used For (check one) Network Operating System (check all that apply)
Religious or Charitable Institution
PC/NFS
text box
drop-down list box
radio buttons
check boxes
text area
form button
group box

10
XPForm Control ElementsForm Control Elements
Control elements that are commonly used:Control elements that are commonly used: text boxestext boxes for text and numerical entries for text and numerical entries selection listsselection lists for long lists of options, usually for long lists of options, usually
appearing in a appearing in a drop-down list boxdrop-down list box radio buttonsradio buttons, also called , also called option buttonsoption buttons, to , to
select a single option from a predefined listselect a single option from a predefined list check boxescheck boxes to specify an item as either present to specify an item as either present
or absentor absent groups boxesgroups boxes to organize form elements to organize form elements text areastext areas for extended entries that can include for extended entries that can include
several lines of textseveral lines of text buttonsbuttons that can be clicked to start processing that can be clicked to start processing
the formthe form
11
XPForm Control Elements Form Control Elements ContinuedContinued
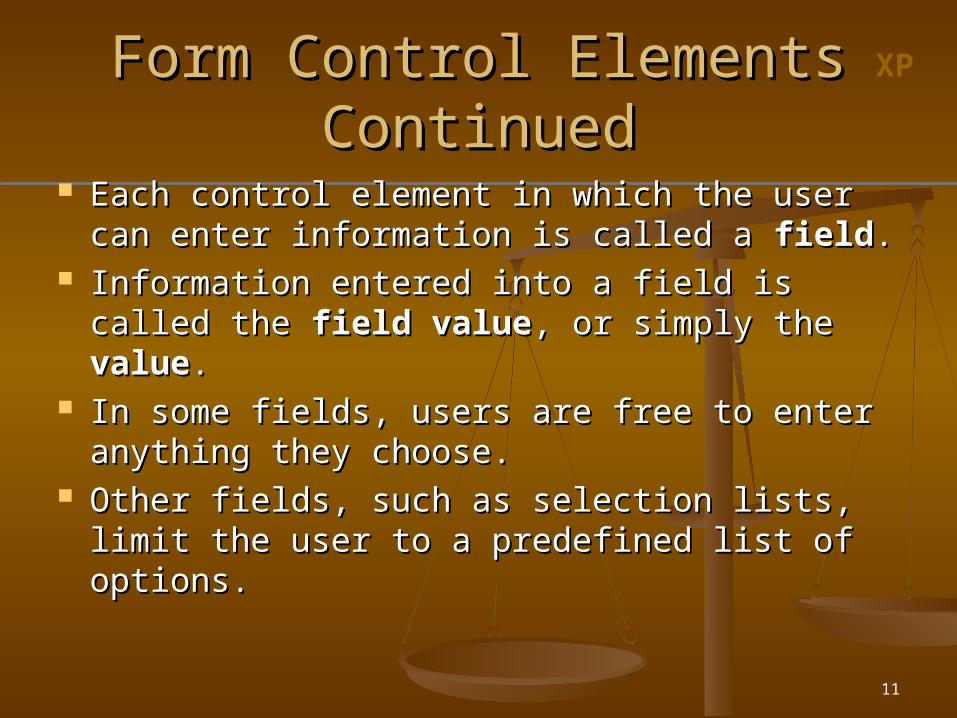
Each control element in which the user Each control element in which the user can enter information is called a can enter information is called a fieldfield..
Information entered into a field is called Information entered into a field is called the the fieldfield valuevalue, or simply the , or simply the valuevalue..
In some fields, users are free to enter In some fields, users are free to enter anything they choose.anything they choose.
Other fields, such as selection lists, limit Other fields, such as selection lists, limit the user to a predefined list of options.the user to a predefined list of options.

12
XPThe The <form><form> Tag Tag
The The <form><form> tag identifies the beginning and end of a tag identifies the beginning and end of a form.form.
A single page can include several different forms, but A single page can include several different forms, but you cannot nest one form inside another.you cannot nest one form inside another.
The general syntax of the The general syntax of the <form><form> tag is: tag is:<form attributes><form attributes>
form elements and layout tagsform elements and layout tags
</form></form> Between the Between the <form><form> and and </form></form> tags, place the tags, place the
various tags for each of the fields in the form.various tags for each of the fields in the form. Use standard HTML tags to specify the form’s Use standard HTML tags to specify the form’s
appearance.appearance.

13
XPThe The <form><form> Tag Continued Tag Continued
A single Web page can contain A single Web page can contain multiple forms, the multiple forms, the <form><form> tag tag includes the includes the namename attribute. attribute.
The name attribute identifies each The name attribute identifies each form on the page.form on the page.
The name attribute is also needed The name attribute is also needed for programs that retrieve values for programs that retrieve values from the form.from the form.

14
XPAdding the Adding the <form><form> Tag Tag
The <form> tag includes attributes that control how the form is processed, including information on what CGI script to use, how the data is to be transferred to the script, and so forth.
This figure shows the form name “reg.”

15
XPStructuring a FormStructuring a Form
Horizontal lines can provide structure Horizontal lines can provide structure to a form by separating sections.to a form by separating sections.

16
XPLayout of a Registration FormLayout of a Registration Form
contact information
buttons
product information
comments
usage information
This figure shows sections that are separated from each other with a horizontal line. Structuring a form in this fashion can make it easier to identify the different sections.
17
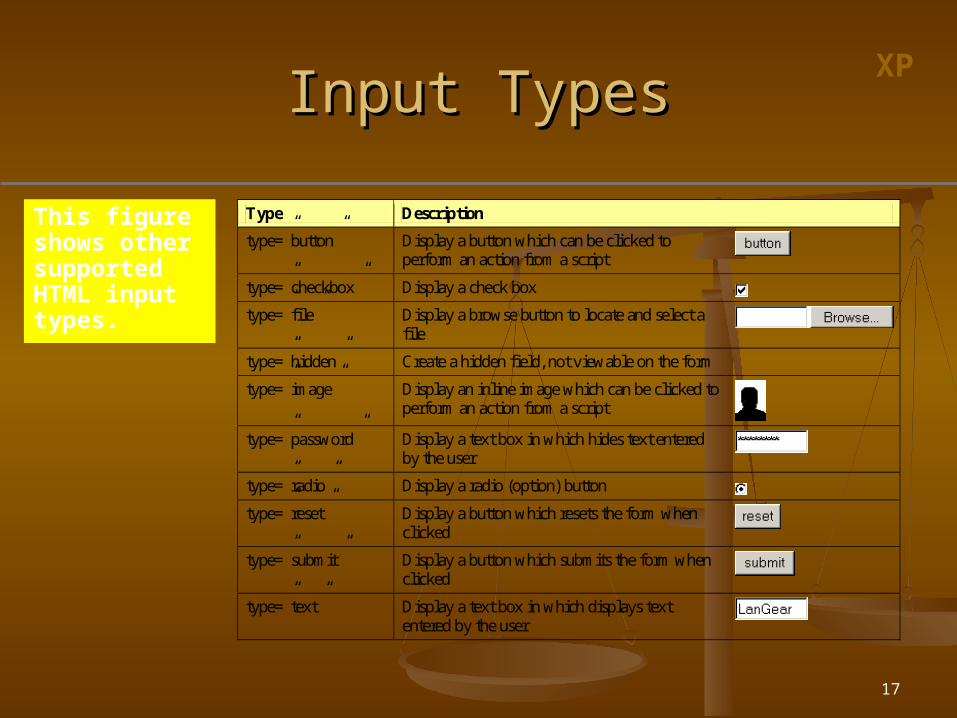
XPInput TypesInput Types
Type Description
type=”button” Display a button which can be clicked to perform an action from a script
type=”checkbox” Display a check box
type=”file” Display a browse button to locate and select a file
type=”hidden” Create a hidden field, not viewable on the form
type=”image” Display an inline image which can be clicked to perform an action from a script
type=”password” Display a text box in which hides text entered by the user
type=”radio” Display a radio (option) button
type=”reset” Display a button which resets the form when clicked
type=”submit” Display a button which submits the form when clicked
type=”text” Display a text box in which displays text entered by the user
This figure shows other supported HTML input types.
18
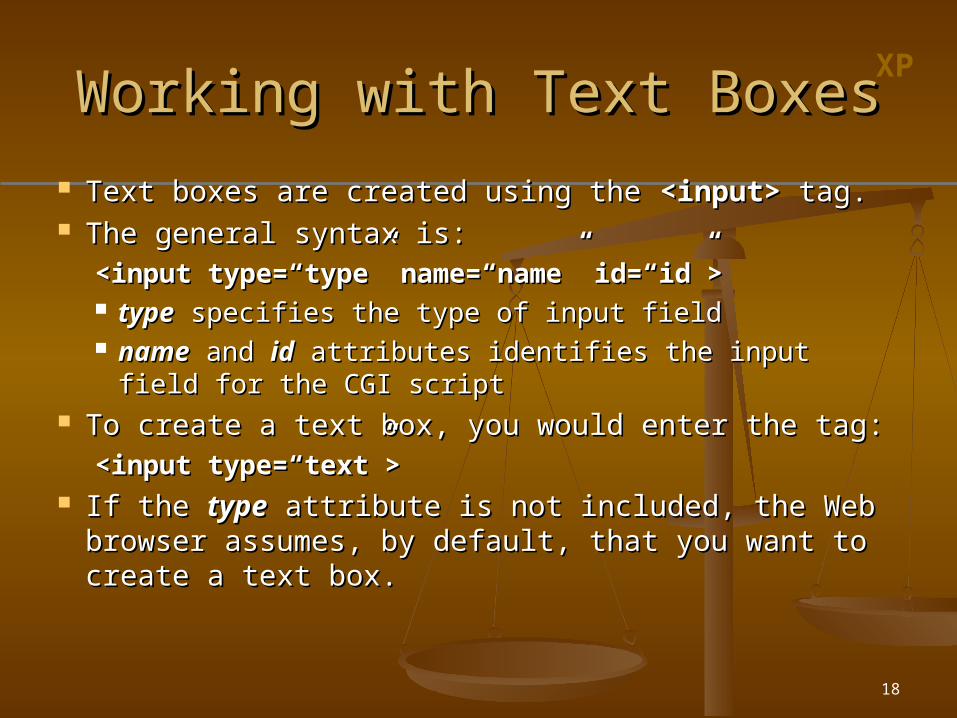
XPWorking with Text BoxesWorking with Text Boxes
Text boxes are created using the Text boxes are created using the <input><input> tag. tag. The general syntax is:The general syntax is:
<input type=“type” name=“name” id=“id”><input type=“type” name=“name” id=“id”> typetype specifies the type of input field specifies the type of input field namename and and idid attributes identifies the input field for attributes identifies the input field for
the CGI scriptthe CGI script To create a text box, you would enter the tag:To create a text box, you would enter the tag:
<input type=“text”><input type=“text”> If the If the typetype attribute is not included, the Web attribute is not included, the Web
browser assumes, by default, that you want to browser assumes, by default, that you want to create a text box.create a text box.

19
XPThe The namename and and idid Attribute Attribute
The The namename and and idid attributes of the attributes of the <input><input> tag tag identifies the input field for the CGI script.identifies the input field for the CGI script.
The The namename attribute represents the older attribute represents the older standard, but it is deprecated in HTML 4.01, standard, but it is deprecated in HTML 4.01, however, some CGI scripts still recognize only however, some CGI scripts still recognize only the the namename attribute attribute
The newest standard uses the The newest standard uses the idid attribute. attribute. The The idid attribute is required, if a form contains attribute is required, if a form contains
form labels.form labels. It is best to duplicate the information by using It is best to duplicate the information by using
both the both the namename and and idid attributes. attributes.

20
XPCreating a Text BoxCreating a Text Box
To create a text box, use the following HTML code:To create a text box, use the following HTML code:
<input name=“name” id=“id” value=“value” <input name=“name” id=“id” value=“value” size=“value” maxlength=“value”>size=“value” maxlength=“value”>
namename and and idid attributes identify the field attributes identify the field valuevalue attribute assigns a default value to the attribute assigns a default value to the
text boxtext box sizesize attribute defines the width of the text box attribute defines the width of the text box
in number of charactersin number of characters maxlengthmaxlength attribute defines the maximum attribute defines the maximum
number of characters allowed in the fieldnumber of characters allowed in the field

21
XPName/Value Pairs sent from Name/Value Pairs sent from the Web Form to the CGI Scriptthe Web Form to the CGI Script
This figure shows when form data is sent to the CGI script, the script receives the name or id of each field in the form paired with whatever value the user entered in the field. The script then processes the data according to each name/value pair.

22
XPCGI Script NamesCGI Script Names
Some CGI scripts require a particular field or groups Some CGI scripts require a particular field or groups of fields.of fields. for example, a CGI script whose purpose is to e-mail for example, a CGI script whose purpose is to e-mail
form values to another user might require a field form values to another user might require a field named “named “emailemail” that contains the e-mail address of the ” that contains the e-mail address of the recipientrecipient
Before using a CGI script, check the documentation Before using a CGI script, check the documentation for any requirements and then design your form for any requirements and then design your form accordingly.accordingly.
Case is important in field names.Case is important in field names. a field named “a field named “emailemail” might not be interpreted by the ” might not be interpreted by the
CGI script in the same way as a field named “CGI script in the same way as a field named “EMAILEMAIL””

23
XPText Boxes on the FormText Boxes on the Form
text box
Text boxes are blank and do not contain any accompanying text, a text description needs to be inserted, such as “Last Name”, adjacent to each box so that the user knows what to enter.
24
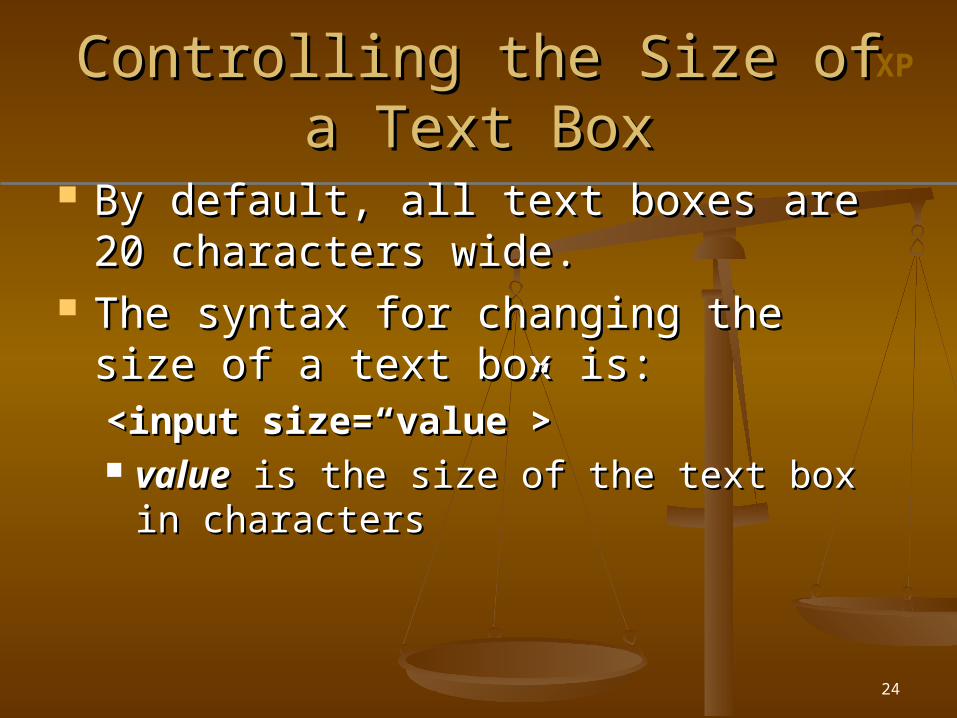
XPControlling the Size of a Text Controlling the Size of a Text BoxBox
By default, all text boxes are 20 By default, all text boxes are 20 characters wide.characters wide.
The syntax for changing the size of a The syntax for changing the size of a text box is:text box is:<input size=“value”><input size=“value”> valuevalue is the size of the text box in is the size of the text box in
characterscharacters

25
XPSetting the Width of Text BoxesSetting the Width of Text Boxes
This figure shows an example of code for setting the width of text boxes.

26
XPResult of Setting the Result of Setting the Width of Text BoxesWidth of Text Boxes
text box width set to 30 characters
Once changes are made, save the changes to a file, and then reload or refresh it in the browser.
Netscape users may have to close and open the file for the changes to the Web form to take effect.

27
XPSetting the Maximum Length Setting the Maximum Length for Text Inputfor Text Input
Setting the width of a text box does not limit the Setting the width of a text box does not limit the number of characters the box can hold.number of characters the box can hold. if a user enters text longer than the box’s width, if a user enters text longer than the box’s width,
the text scrolls to the leftthe text scrolls to the left the user cannot see the entire text, but all of it is the user cannot see the entire text, but all of it is
sent to the CGI script for processingsent to the CGI script for processing The syntax for setting the maximum length for The syntax for setting the maximum length for
field input is:field input is:<input maxlength=“value”><input maxlength=“value”> valuevalue is the maximum number of characters that is the maximum number of characters that
can be stored in the fieldcan be stored in the field

28
XPSpecify the Maximum LengthSpecify the Maximum Lengthfor a Fieldfor a Field
no more than 5 characters are allowed in this text box
This figure shows an example of limiting the width of the zip code field to five characters.

29
XPSetting a Default Value for a Setting a Default Value for a FieldField
When the same value is entered into a When the same value is entered into a field, it may make sense to define a field, it may make sense to define a default value for a field.default value for a field.
Default values can save time and increase Default values can save time and increase accuracy for users of a Web site.accuracy for users of a Web site.
To define a default value, use the To define a default value, use the following syntax:following syntax:<input value=“value”><input value=“value”> valuevalue is the default text or number that is is the default text or number that is
displayed in the fielddisplayed in the field
30
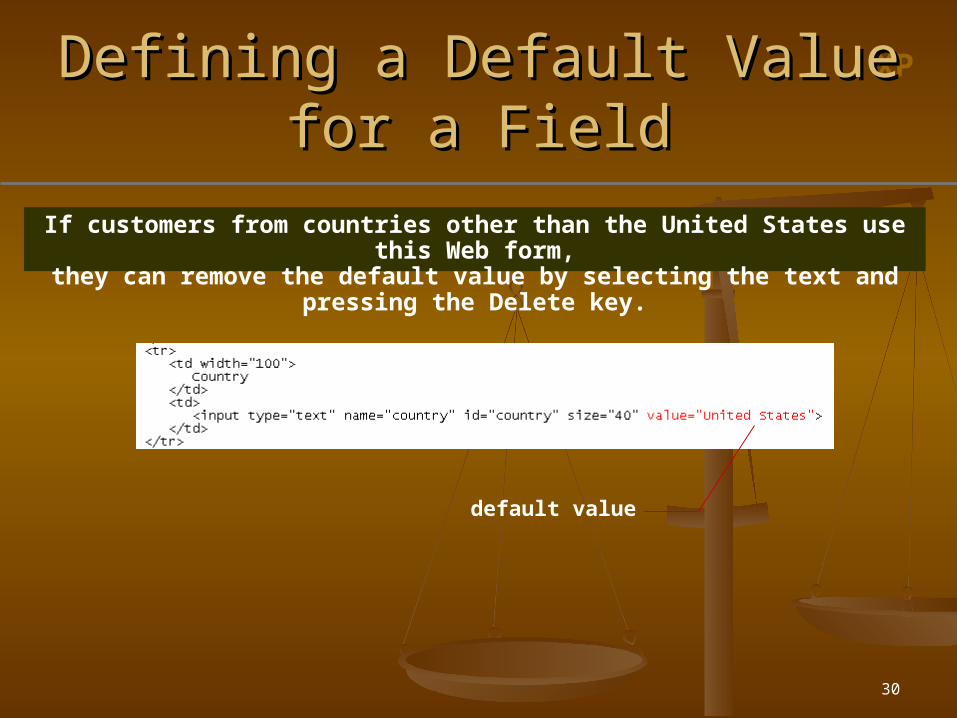
XPDefining a Default Value for a Defining a Default Value for a FieldField
default value
If customers from countries other than the United States use this Web form,they can remove the default value by selecting the text and pressing the Delete key.
31
XPCreating a Password FieldCreating a Password Field
A A password fieldpassword field is a text box in which the is a text box in which the characters typed by the user are displayed characters typed by the user are displayed as as bulletsbullets or or asterisks asterisks i.e. ****.i.e. ****.
The syntax for creating a Password field is:The syntax for creating a Password field is:<input type=“password”><input type=“password”>
Using a password field should not be Using a password field should not be confused with having a secure connection.confused with having a secure connection.
The password itself is not encrypted.The password itself is not encrypted. The password field only acts as a mask for a The password field only acts as a mask for a
field entry as it is entered.field entry as it is entered.

32
XPWorking with Form LabelsWorking with Form Labels
HTML allows you to formally link a label HTML allows you to formally link a label with an associated text element for with an associated text element for scripting purposes.scripting purposes.
The syntax for creating a form label is:The syntax for creating a form label is:<label for=“id”>label text</label><label for=“id”>label text</label> idid is the value of the id attribute for a field is the value of the id attribute for a field
on the formon the form labellabel text is the text of the label text is the text of the label you must bind the label to the id attribute you must bind the label to the id attribute
of the field and not the name attributeof the field and not the name attribute

33
XPWorking with Form LabelsWorking with Form Labels
Labels can simplify the data entry process by Labels can simplify the data entry process by allowing a user to click on either the control allowing a user to click on either the control element or the element’s label to enter data.element or the element’s label to enter data.
Labels allow users to write scripts to modify Labels allow users to write scripts to modify their content for interactive forms.their content for interactive forms.
The The <label><label> tag is part of the HTML 4.0 tag is part of the HTML 4.0 specifications, however, it is not currently specifications, however, it is not currently supported by supported by NetscapeNetscape..
The The NetscapeNetscape browser, and versions of the browser, and versions of the Internet ExplorerInternet Explorer browser prior to 4.0, ignore browser prior to 4.0, ignore the the <label><label> tag, but still display the label text. tag, but still display the label text.

34
XPCreating a Label for the Creating a Label for the fnamefname FieldField
value of the id attribute for the first name field
This figure shows a label for the fname field.

35
XPCreating a Selection ListCreating a Selection List
A A selection listselection list is a list box from which a user is a list box from which a user selects a particular value or set of values.selects a particular value or set of values.
Selection lists are good to use when there is a Selection lists are good to use when there is a fixed set of possible responses.fixed set of possible responses.
Selection lists help prevent spelling mistakes Selection lists help prevent spelling mistakes and erroneous entries.and erroneous entries.
A selection list is created using the A selection list is created using the <select><select> tag.tag.
The The <option><option> tag is used to specify individual tag is used to specify individual selection items.selection items.

36
XPCreating a Selection ListCreating a Selection List
items in the selection list
selection list field name
This figure shows HTML code for creating a selection list.

37
XPUsing a Selection ListUsing a Selection List
Your selection list might look slightly different depending on the browser and browser version.

38
XPUsing the Using the <select><select> and and <option><option> Tags Tags
The general syntax for the The general syntax for the <select><select> and and <option><option> tags tags is:is:<select name=“name” id=“id”><select name=“name” id=“id”><option> item1<option> item1 <option> item2<option> item2......
</select></select> namename and and idid attribute identify the selection field attribute identify the selection field each each <option><option> tag represents an individual item in tag represents an individual item in
the selection listthe selection list the text in the selection list is indicated by the text in the text in the selection list is indicated by the text in
item1item1, , item2item2, and so forth, and so forth The The <option><option> tag is a one-sided tag. tag is a one-sided tag.

39
XPModifying the Appearance Modifying the Appearance of a Selection Listof a Selection List
HTML provides several attributes to modify HTML provides several attributes to modify the appearance and behavior of selection the appearance and behavior of selection lists and options.lists and options.
By default, the By default, the <select><select> tag displays one tag displays one option from the selection list, along with a list option from the selection list, along with a list arrow to view additional selection options.arrow to view additional selection options.
The number of options displayed can be The number of options displayed can be modified with the modified with the sizesize attribute. attribute.
The syntax of the The syntax of the sizesize attribute is: attribute is:<select size=“value”><select size=“value”>

40
XPModifying the Appearance Modifying the Appearance of a Selection List Continuedof a Selection List Continued valuevalue is the number of items that the is the number of items that the
selection list displays in the formselection list displays in the form by specifying a value greater than 1, the by specifying a value greater than 1, the
selection list changes from a drop-down selection list changes from a drop-down list box to a list boxlist box to a list box
if the if the sizesize attribute is equal to the attribute is equal to the number of options in the selection list, number of options in the selection list, the scroll bar is either not displayed or is the scroll bar is either not displayed or is dimmeddimmed

41
XPSelection Lists with Selection Lists with Different Size ValuesDifferent Size Values
size = "1" size = "4"
size = "7" size = "9"
This figure shows selection lists with different size values.

42
XPMaking Multiple SelectionsMaking Multiple Selections
When using multiple selections, users are not When using multiple selections, users are not limited to a single selection from a selection limited to a single selection from a selection list.list.
Adding the Adding the multiplemultiple attribute to the attribute to the <select><select> tag allows multiple selections from a list.tag allows multiple selections from a list.
The syntax for this attribute is:The syntax for this attribute is:
<select multiple><select multiple> A common method to make multiple selections A common method to make multiple selections
from a selection list is to hold down a specific from a selection list is to hold down a specific key while making selections.key while making selections.

43
XPMaking Multiple Selections Making Multiple Selections ContinuedContinued
The Windows operating system, multiple The Windows operating system, multiple selections can be made as follows:selections can be made as follows: for for noncontiguous selectionsnoncontiguous selections, press and , press and
hold the Ctrl key while you make your hold the Ctrl key while you make your selectionsselections
for a for a contiguous selectioncontiguous selection, select the first , select the first item, press and hold the Shift key, and then item, press and hold the Shift key, and then select the last item in the range select the last item in the range
Check and verify that the CGI scripts used Check and verify that the CGI scripts used are designed to handle multiple selection are designed to handle multiple selection lists.lists.

44
XPWorking with Option ValuesWorking with Option Values
By default, a form sends the values that are By default, a form sends the values that are displayed in the selection list to the CGI script.displayed in the selection list to the CGI script.
Instead of sending an entire text string, an Instead of sending an entire text string, an abbreviation or code can be sent to the CGI abbreviation or code can be sent to the CGI script.script.
Specify the value that is sent to the CGI script Specify the value that is sent to the CGI script with the with the valuevalue attribute. attribute.
Use the Use the selectedselected attribute to specify which attribute to specify which item in the selection is selected, or item in the selection is selected, or highlighted, when the form is displayed.highlighted, when the form is displayed.

45
XPWorking with Option GroupsWorking with Option Groups
The most recent releases of HTML allows The most recent releases of HTML allows you to organize selection lists into distinct you to organize selection lists into distinct groups called groups called option groupsoption groups..
The syntax for creating an option group is:The syntax for creating an option group is:<optgroup label=“label”><optgroup label=“label”> labellabel is the label assigned to the option group is the label assigned to the option group the text for the label appears in the selection the text for the label appears in the selection
list above each group of items but is not a list above each group of items but is not a selectable item from the listselectable item from the list

46
XPOption GroupsOption Groups
a single option group
option group label
a single option group
option group label
Internet Explorer and Netscape versions prior to 6.0 display the selection list without the group labels.

47
XPWorking with Radio ButtonsWorking with Radio Buttons
Radio buttonsRadio buttons display a list of choices from which display a list of choices from which a user makes a selection.a user makes a selection.
Only one radio button can be selected at a time.Only one radio button can be selected at a time. The syntax to create a radio button is:The syntax to create a radio button is:
<input type=“radio” name=“name” id=“id” <input type=“radio” name=“name” id=“id” value=“value”>value=“value”>
namename identifies the field containing the radio button identifies the field containing the radio button idid attribute identifies the specific option. Only attribute identifies the specific option. Only
required if you intend to use a field label with the required if you intend to use a field label with the radio buttonradio button
valuevalue attribute indicates the value sent to the CGI attribute indicates the value sent to the CGI script, if that radio button is selected by the userscript, if that radio button is selected by the user

48
XPWorking with Working with Radio Buttons ContinuedRadio Buttons Continued
The The namename attribute must be included, attribute must be included, because it groups distinct radio buttons because it groups distinct radio buttons together.together. selecting one radio button in the group selecting one radio button in the group
automatically deselects all of the other radio automatically deselects all of the other radio buttons in that groupbuttons in that group
Insert descriptive text next to the button.Insert descriptive text next to the button. Enclose text within a label tag to allow Enclose text within a label tag to allow
the user to select the radio button or the user to select the radio button or label.label.

49
XPCreating Radio ButtonsCreating Radio Buttons
This figure shows an example of HTML code that creates radio buttons for party affiliations.
In this sample code, the value sent to the CGI script does not match the field label. If the user selects the Republican radio button, the value “gop”
is sent to the CGI script paired with the field name “party.”

50
XPSelection Lists vs. Radio Selection Lists vs. Radio ButtonsButtons
If you have a long list of options, use If you have a long list of options, use a selection list.a selection list.
If you want to allow users to select If you want to allow users to select more than one option, use a more than one option, use a selection list with the multiple selection list with the multiple attribute.attribute.
If you have a short list of options, If you have a short list of options, and only one option is allowed at a and only one option is allowed at a time, use radio buttons.time, use radio buttons.

51
XPCreating a Group BoxCreating a Group Box
A A group boxgroup box labels an entire collection of labels an entire collection of radio buttons.radio buttons.
A group box is a box placed around a set A group box is a box placed around a set of fields that indicates that they belong to of fields that indicates that they belong to a common group.a common group.
The syntax for creating a group box is:The syntax for creating a group box is:<fieldset><fieldset>
<legend align=“align”>legend text</legend><legend align=“align”>legend text</legend>
collection of fieldscollection of fields
</fieldset></fieldset>
52
XPCreating a Group Box Creating a Group Box ContinuedContinued
the the <legend><legend> tag is used to display a tag is used to display a legend on the group boxlegend on the group box
legend textlegend text specifies the text for that specifies the text for that legendlegend
the the alignalign attribute specifies where the attribute specifies where the legend is placed in the boxlegend is placed in the box
align values are “align values are “toptop” (the default), ” (the default), ““bottombottom”, “”, “leftleft”, and “”, and “rightright””
browsers only support “browsers only support “toptop” and ” and ““rightright” options at this time” options at this time

53
XPCreating a Group Box and Creating a Group Box and LegendLegend
start of group box
group box legend
resulting radio buttons and group box
This figure shows an example of a group box applied to a set of radio buttons.

54
XPGroup Box SizeGroup Box Size
There is no attribute to control the size of a group There is no attribute to control the size of a group box.box.
The box’s height will be large enough to The box’s height will be large enough to accommodate the fields and labels in the field set.accommodate the fields and labels in the field set.
The width is the width of whatever space remains The width is the width of whatever space remains on the Web page.on the Web page.
To set the width to a specific value use a table cell To set the width to a specific value use a table cell to place the group box and set the width of the to place the group box and set the width of the cell.cell. group boxes cannot extend across table cells; all of group boxes cannot extend across table cells; all of
the fields in the field set must be placed within a the fields in the field set must be placed within a single cellsingle cell

55
XPWorking with Check BoxesWorking with Check Boxes
A A check boxcheck box is either selected or not, there is only one is either selected or not, there is only one check box per field.check box per field.
Check boxes are created using the following syntax:Check boxes are created using the following syntax:<input type=“checkbox” name=“name” id=“id” <input type=“checkbox” name=“name” id=“id” value=“value”>value=“value”>
namename and and idid attribute identify the check box attribute identify the check box the the valuevalue attribute specifies the value that is sent to the attribute specifies the value that is sent to the
CGI script when the check box is selectedCGI script when the check box is selected The The <input><input> tag for a check box does not display any tag for a check box does not display any
text.text. Check boxes are not selected by default.Check boxes are not selected by default.
to do this, add the to do this, add the checkedchecked attribute to the attribute to the <input><input> tag tag

56
XPAdding Check BoxesAdding Check Boxes
This figure shows different check boxes. The user can click either the check box or the label associated with the check box to select and deselect.

57
XPGroup Boxes for Radio ButtonsGroup Boxes for Radio Buttonsand Check Boxesand Check Boxes

58
XPCreating a Text AreaCreating a Text Area
To create a larger To create a larger text areatext area for a text for a text box, use the tag:box, use the tag:<textarea name=“name” id=“id” rows=“value” <textarea name=“name” id=“id” rows=“value” cols=“value”> default text </textarea>cols=“value”> default text </textarea>
rowsrows and and colscols attributes define the dimensions attributes define the dimensions of the text boxof the text box
the the rowsrows attribute indicates the number of lines attribute indicates the number of lines in the text boxin the text box
Default text can be specified in the text Default text can be specified in the text box when the form is initially displayed.box when the form is initially displayed.

59
XPCreating a Text AreaCreating a Text Area
resulting text area
dimensions of text area
default text area text
This figure shows an example of a text area with default text.
The <textarea> tag is a two-sided tag, which means that it has an opening tag <textarea>, and a closing tag, </textarea>.

60
XPWrap Attribute ValuesWrap Attribute Values
The text entered in a text area wraps to the next line when it exceeds the width of the box. To control how a browser wraps text to a new line use the wrap attribute.
This figure shows the three possible wrap options.

61
XPThe The wrapwrap Attribute for Text Attribute for Text
Set the value of the Set the value of the wrapwrap attribute to either attribute to either “soft”“soft” or or “hard”“hard” to allow text to wrap within to allow text to wrap within the text box.the text box. the “the “hardhard” setting preserves any line wrapping that ” setting preserves any line wrapping that
takes place in the text box and the “soft” setting takes place in the text box and the “soft” setting does not.does not.
If no value for the wrap attribute is specified, a If no value for the wrap attribute is specified, a value of “value of “softsoft” is used.” is used.
For comment fields, use the For comment fields, use the <textarea><textarea> tag tag with the wrap attribute set to “soft” so that the with the wrap attribute set to “soft” so that the user’s comments wrap to the next line in the user’s comments wrap to the next line in the box.box.

62
XPComment Text AreaComment Text Area
In this figure the text box includes a vertical scroll bar, so that a user can scroll to see the hidden text, if needed.

63
XPCreating Form ButtonsCreating Form Buttons
Another type of control element is Another type of control element is one that performs an action. In one that performs an action. In forms, this is usually done with a forms, this is usually done with a buttonbutton..
Buttons can be clicked to:Buttons can be clicked to: run programsrun programs submit formssubmit forms reset the form to its original statereset the form to its original state

64
XPCreating a Push ButtonCreating a Push Button
One type of button, called a One type of button, called a push push buttonbutton, is created using the , is created using the <input><input> tag tag as follows:as follows:<input type=“button” value=“text”><input type=“button” value=“text”> texttext is the text that appears on the button is the text that appears on the button
By themselves, push buttons perform no By themselves, push buttons perform no actions in the Web page.actions in the Web page.
To create an action, write a script or To create an action, write a script or program that runs automatically when the program that runs automatically when the button is clicked.button is clicked.

65
XPCreating Submit and Reset Creating Submit and Reset ButtonsButtons
A A submit buttonsubmit button is a button that submits is a button that submits the form to the CGI script for processing.the form to the CGI script for processing.
A A reset buttonreset button resets the form to its resets the form to its original (default) values.original (default) values.
The syntax for creating these two buttons The syntax for creating these two buttons is:is:<input type=“submit” value=“text”><input type=“submit” value=“text”>
<input type=“reset” value=“text”><input type=“reset” value=“text”> valuevalue attribute defines the text that appears attribute defines the text that appears
on the buttonon the button

66
XPThe The namename and and valuevalue Attributes Attributes
The The namename and and valuevalue attributes can be used attributes can be used for for pushpush, , submitsubmit, and , and resetreset buttons. buttons.
Use these attributes when the form Use these attributes when the form contains multiple buttons and a program contains multiple buttons and a program that processes the form needs to that processes the form needs to distinguish one button from another.distinguish one button from another. for example, a Web page advertising a for example, a Web page advertising a
shareware program might include three shareware program might include three buttons: buttons:
one used to download the programone used to download the program another used to retrieve informationanother used to retrieve information the third to cancel the formthe third to cancel the form

67
XPCreating a Form ButtonCreating a Form Button
The figure shows HTML tags for buttons that download a program, retrieves information, and resets the form to its original values.

68
XPCreating Buttons Creating Buttons with the with the <button><button> Tag Tag
Buttons created with the Buttons created with the <input><input> tag do not allow the tag do not allow the Web page designer to control the appearance of the Web page designer to control the appearance of the button.button.
For greater artistic control over the appearance of the For greater artistic control over the appearance of the button, use the button, use the <button><button> tag. tag.
The syntax of the The syntax of the <button><button> tag is: tag is:<button name=“name” value=“value” type=“option”><button name=“name” value=“value” type=“option”> button text and HTML tagsbutton text and HTML tags</button></button> namename attribute specifies the name of the button attribute specifies the name of the button valuevalue attribute sends to a CGI script attribute sends to a CGI script typetype attribute specifies the button type (submit, reset, attribute specifies the button type (submit, reset,
or button)or button)

69
XPUsing the Using the <button><button> Tag Tag
button image
the button type is a simple push button
contents of the button
The figure shows how to create a button that contains formatted text and an inline image.
The default value for the type attribute is “button”. Within the <button> tags you can place whatever HTML tags you wish to format the button’s appearance. This includes inline images.

70
XPCreating File ButtonsCreating File Buttons
A A file buttonfile button is used to select files so is used to select files so that their contents can be submitted that their contents can be submitted for processing to a CGI script.for processing to a CGI script.
The contents of the file are not The contents of the file are not displayed--only the file’s location.displayed--only the file’s location.
A programmer can then use that A programmer can then use that information to retrieve a file and use it information to retrieve a file and use it for whatever purpose is required by for whatever purpose is required by the script.the script.

71
XPUsing a File ButtonUsing a File Button
1. User clicks the Browse button
2. Selects a file from the Choose File dialog box
3. The filename and location are automatically placed in the text box
The figure shows an example of using the file button to return the location of a file named “report.doc.”

72
XPCreating Image FieldsCreating Image Fields
Inline images can act like submit buttons, so that when the Inline images can act like submit buttons, so that when the user clicks the image, the form is submitted.user clicks the image, the form is submitted.
The syntax for this type of control element is:The syntax for this type of control element is:
<input type=“image” src=“URL” name=“text” <input type=“image” src=“URL” name=“text” value=“text”>value=“text”>
URLURL is the filename and location of the inline image is the filename and location of the inline image namename attribute assigns a name to the field attribute assigns a name to the field valuevalue attribute assigns a value to the image attribute assigns a value to the image
When the form is submitted to the CGI script, the When the form is submitted to the CGI script, the coordinates of where the user clicked are attached to the coordinates of where the user clicked are attached to the image’s name and value in the format: image’s name and value in the format: namex_coordinatenamex_coordinate, , value.y_coordinatevalue.y_coordinate..
73
XPUsing an Image Control Using an Image Control with a CGI Scriptwith a CGI Script
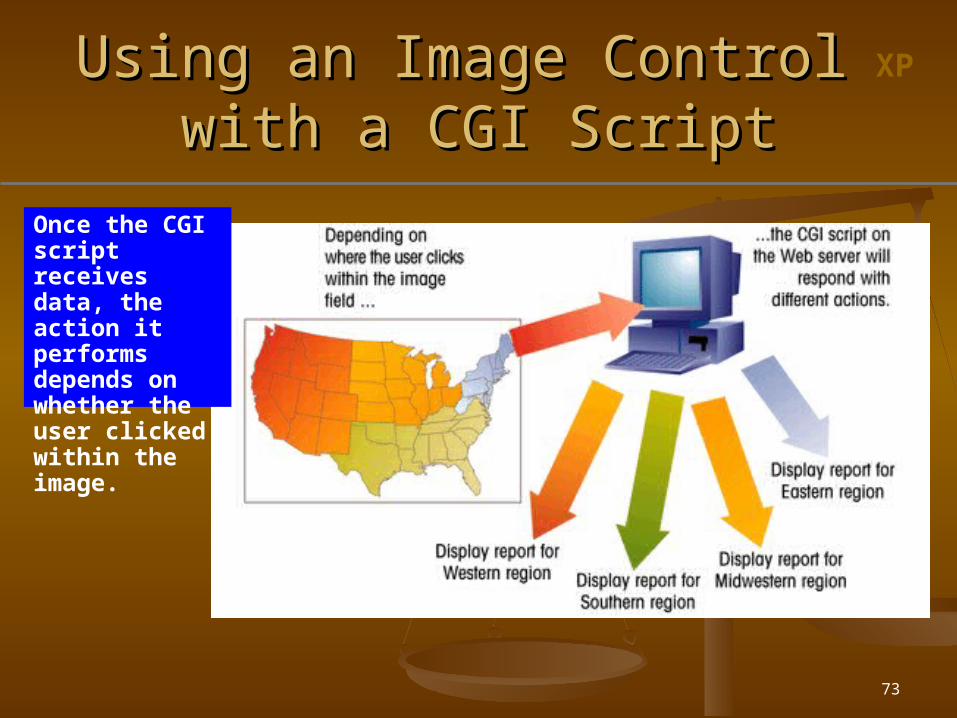
Once the CGI script receives data, the action it performs depends on whether the user clicked within the image.

74
XPWorking with Hidden FieldsWorking with Hidden Fields
A A hidden fieldhidden field is added to the form but not is added to the form but not displayed in the Web page.displayed in the Web page.
Because the field is hidden, it can be placed Because the field is hidden, it can be placed anywhere between the opening and closing anywhere between the opening and closing <form><form> tags.tags.
The syntax for creating a hidden field is:The syntax for creating a hidden field is:<input type=“hidden” name=“name” value=“value><input type=“hidden” name=“name” value=“value>
Place all hidden fields in one location to make it Place all hidden fields in one location to make it easier to read and interpret the HTML code.easier to read and interpret the HTML code.
Include a comment describing the purpose of the Include a comment describing the purpose of the field.field.

75
XPAdding a Hidden FieldAdding a Hidden Field
This figure shows an example of the hidden field code.

76
XPWorking with Form AttributesWorking with Form Attributes
To specify where to send the form To specify where to send the form data and how to send it add the data and how to send it add the following attributes to the following attributes to the <form><form> tag: tag:<form action=“URL” method=“option” <form action=“URL” method=“option” enctype=“text”>enctype=“text”>
URLURL specifies the filename and location of specifies the filename and location of the CGI script that process the formthe CGI script that process the form
methodmethod attribute specifies how your Web attribute specifies how your Web browser sends data to the CGI scriptbrowser sends data to the CGI script
enctypeenctype attribute specifies the format of attribute specifies the format of the data stored in the form’s fieldthe data stored in the form’s field

77
XPThe The methodmethod Attribute Attribute
There are two possible values for the method attribute: There are two possible values for the method attribute: “get”“get” or or “post”“post”.. the “the “getget” method (the default) packages the form data ” method (the default) packages the form data
by appending it to the end of the URL specified in the by appending it to the end of the URL specified in the action attributeaction attribute
the “the “postpost” method sends form data in a separate data ” method sends form data in a separate data stream, allowing the Web server to receive the data stream, allowing the Web server to receive the data through what is called “standard input”through what is called “standard input”
the “the “postpost” method is considered the preferred way of ” method is considered the preferred way of sending data to a Web serversending data to a Web server
The “The “postpost” method is also safer, because some Web ” method is also safer, because some Web servers limit the amount of data sent via the “get” servers limit the amount of data sent via the “get” method and will truncate the URL, cutting off valuable method and will truncate the URL, cutting off valuable informationinformation

78
XPThe The enctypeenctype Attribute Attribute
The exact meaning of the The exact meaning of the enctypeenctype attribute is attribute is a technical issue.a technical issue.
The default enctype value is “The default enctype value is “application/x-application/x-www-form-urlencodedwww-form-urlencoded.”.”
Another enctype value that is often used is Another enctype value that is often used is ““multipart/form-datamultipart/form-data,” which allows the ,” which allows the form to send files to the Web server along with form to send files to the Web server along with any form data.any form data.
The most basic way of encoding data is to use The most basic way of encoding data is to use ““text/plaintext/plain,” which encodes the data as ,” which encodes the data as simple text.simple text.

79
XPSpecifying Where and HowSpecifying Where and Howto Send Form Datato Send Form Data
This figure shows the CGI script that processes the form is located at the URL http://www.langear.com/cgi/mailer (a fictional address) and uses the “post” method.

80
XPForm ValuesForm Values
The Web browser presents a page, an example of which is shown in this figure, displaying the name of each field in the form and the value assigned to it. At the same time, the CGI script formats a mail message to be sent to the address you entered.

81
XPUsing the “Using the “mailtomailto” Action” Action
Use the Use the ““mailtomailto”” action to send form action to send form information via e-mail without using a CGI script.information via e-mail without using a CGI script.
This action accesses the user’s own e-mail This action accesses the user’s own e-mail program and uses it to mail form information to program and uses it to mail form information to a specified e-mail address, bypassing the need a specified e-mail address, bypassing the need for using CGI scripts on a Web server.for using CGI scripts on a Web server.
The syntax of the The syntax of the ““mailtomailto”” action is: action is:<form action=“mailto:e-mail_address” <form action=“mailto:e-mail_address” method=“post” enctype=“text/plain”>method=“post” enctype=“text/plain”>
e-mail_addresse-mail_address is the e-mail address of the is the e-mail address of the recipient of the formrecipient of the form
82
XPUsing the “Using the “mailtomailto””Action ContinuedAction Continued
Not all browsers support the “Not all browsers support the “mailtomailto” ” action.action. for example, versions of for example, versions of Internet ExplorerInternet Explorer
earlier than 4.0 and earlier than 4.0 and NetscapeNetscape NavigatorNavigator 3.03.0 do not do not
Another concern is that messages sent Another concern is that messages sent via the “via the “mailtomailto” action are not ” action are not encrypted for privacy.encrypted for privacy.
The recipient’s email address is revealed The recipient’s email address is revealed to the user.to the user.

83
XPMail Message Created Using Mail Message Created Using the “mailto” Actionthe “mailto” Action
This figure shows an e-mail message that the “mailto” action generated for a registration form.
The format of the mail message may look different depending on the browser or e-mail software.

84
XPSpecifying the Tab OrderSpecifying the Tab Order
Users navigate through a Web form using the Tab Users navigate through a Web form using the Tab key.key. the Tab key moves the cursor from one field to another the Tab key moves the cursor from one field to another
in the order that the field tags are entered.in the order that the field tags are entered. Add the Add the tabindextabindex attribute to any control attribute to any control
element in the form to specify the tab order.element in the form to specify the tab order. With each element assigned a tab index number, With each element assigned a tab index number,
the cursor moves through the fields from the the cursor moves through the fields from the lowest index number to the highest.lowest index number to the highest. for example, to assign the tab index number “1” to the for example, to assign the tab index number “1” to the
fname field, enter the code: fname field, enter the code: <input name=“fname” <input name=“fname” tabindex=“1”>tabindex=“1”>

85
XPTab Order and BrowsersTab Order and Browsers
Browsers that do not support the tab Browsers that do not support the tab order feature simply ignores the order feature simply ignores the tabindex attribute and continues to tabindex attribute and continues to tab to the fields in the order that tab to the fields in the order that they appear in the HTML code.they appear in the HTML code.

86
XPSpecifying an Access KeySpecifying an Access Key
An An access keyaccess key is a single key that you type in is a single key that you type in conjunction with the Alt key for Windows users conjunction with the Alt key for Windows users or the Command key for Macintosh users, to or the Command key for Macintosh users, to jump to one of the control elements in the form.jump to one of the control elements in the form.
Add the Add the accesskeyaccesskey attribute to any of the attribute to any of the control elements to create an access key.control elements to create an access key.
To create an access key for the lname field, To create an access key for the lname field, enter the following code: enter the following code: <input name=“lname” <input name=“lname” accesskey=“1”>accesskey=“1”> if a user types Alt+l (or Command+1 for Macintosh if a user types Alt+l (or Command+1 for Macintosh
users), the control element for the lname field is users), the control element for the lname field is selectedselected

87
XPSpecifying an Access Key Specifying an Access Key ContinuedContinued
Use letters that are not reserved by the Use letters that are not reserved by the browser.browser. for example, Alt_f is used by Internet for example, Alt_f is used by Internet
Explorer to access the File menuExplorer to access the File menu When an access key is used, provide some When an access key is used, provide some
visual clue about the key’s existence.visual clue about the key’s existence. the accepted method is to underline the the accepted method is to underline the
character corresponding to the access key. character corresponding to the access key. For example, “For example, “LLast Name”ast Name”

88
XPTutorial 6 SummaryTutorial 6 Summary
Worked with Web page forms.Worked with Web page forms. Overview of scripts.Overview of scripts. CGI scripts.CGI scripts. Created simple input boxes.Created simple input boxes. Worked with properties.Worked with properties. Controlled the appearance of input Controlled the appearance of input
boxes.boxes. Worked with Web form elements and Worked with Web form elements and
components.components.

89
XPTutorial 6 Summary ContinuedTutorial 6 Summary Continued
Controlled the appearance and Controlled the appearance and behavior of various elements.behavior of various elements.
Examined form buttons, form images Examined form buttons, form images and hidden fields.and hidden fields.
Focused on how information is Focused on how information is transferred from the Web page form transferred from the Web page form to the CGI script.to the CGI script.
Worked with various form actions and Worked with various form actions and methods.methods.
Top Related