


Languages
Pages
Legal

AS124816-L
Untangling Python: A Crash Course on Dynamo's Python Node Gui Talarico - WeWork
Learning Objectives
● Understand the difference between Python and IronPython ● Develop a basic understanding of how Python works within Dynamo ● Understand the default template and other boilerplate code commonly used ● Learn how to better understand and troubleshoot Dynamo Python code.
Description This class will walk through the basic concepts of using Python within the Dynamo Environment. We will cover basic Python concepts that are needed to write a few code samples, as well as explain in detail boilerplate and import codes that are used. The class will also touch on some aspects of the Revit API that are needed to perform basic operations such as the active document and transactions. Speaker Gui Talarico is a Senior Building Information Specialist in the Product Development Group at WeWork. Prior to joining WeWork, he was a computational designer at SmithgroupJJR and an adjunct faculty at Virginia Tech, where he taught Computational Design. He has also taught Dynamo and Grasshopper Workshops, and Python courses for beginners. Gui has spoken at several industry events including DC Revit User Group, DC Dynamo, National Building Museum Keystone Society, and the WeWork Product Talk Series. Beyond his professional work, he is active in several online communities and Open Source projects. In 2016 he started Revit API Docs, a comprehensive and extensible online Documentation for the Revit API which has been widely recognized as a valuable resource to the Revit API Community.
Relevant Project ● revitapidocs.com ● github.com/gtalarico/revitpythonwrapper ● github.com/gtalarico/ironpython-stubs
Social Media Twitter @gtalarico Github @gtalarico
Page 1
A Few Words on Python What is Python? Python is a high-level, general-purpose, open-source programming language. The language is widely used in a variety of fields, including mathematics, data-science, and web-development. Python is also an interpreted language, meaning, its code is interpreted without requiring compilation. The program that interprets and executes the code is called an interpreter. Interpreters can be executed independently, or embedded within other applications. The most common Python interpreter implementation it’s CPython, which is written in the language “C” and it’s considered to be the main-stream or reference Python implementation.
What is IronPython?
IronPython is an implementation of Python created by Microsoft and it’s written in C#. The C# implementation allows the interpreted python code to interact directly with other applications that are part of the Microsoft .NET framework (C#, F#, VB, etc) through the Common Language Runtime (clr module). This language interoperability has made IronPython a popular language for creating embedded scripting environments within Windows applications that use the .NET framework. Some applications that offer embedded python scripting environments are Rhino + Grasshopper, Autodesk Maya, and of course, Dynamo. While Python code can be written to be compatible with both mainstream Python and IronPython, this is only true when the code doesn’t take advantage of implementation-specific features. For example, code that requires .NET interoperability requires the ironpython-exclusive clr module. Conversely, python code that depends on libraries that rely on native C code cannot run in IronPython (Numpy, Pandas, etc).
Why Learn Python Recognized as having a shallow learning curve, Python has become a popular choice for education environments and beginners. The syntax and language-constructs are simple and promote code-readability - when well written; its code is often considered easy to read even by non-programmers. Python’s language design also makes it an excellent language to create short macro-like scripts and automation logic due to its conciseness and comprehensive standard library (modules that are built-in and shipped with the language). Lastly, adding a language like Python to your toolset enables you to develop tools and workflows that are often faster than pure visual-programming, but also allow you to overcome limitations where the programs fall short.
Page 2
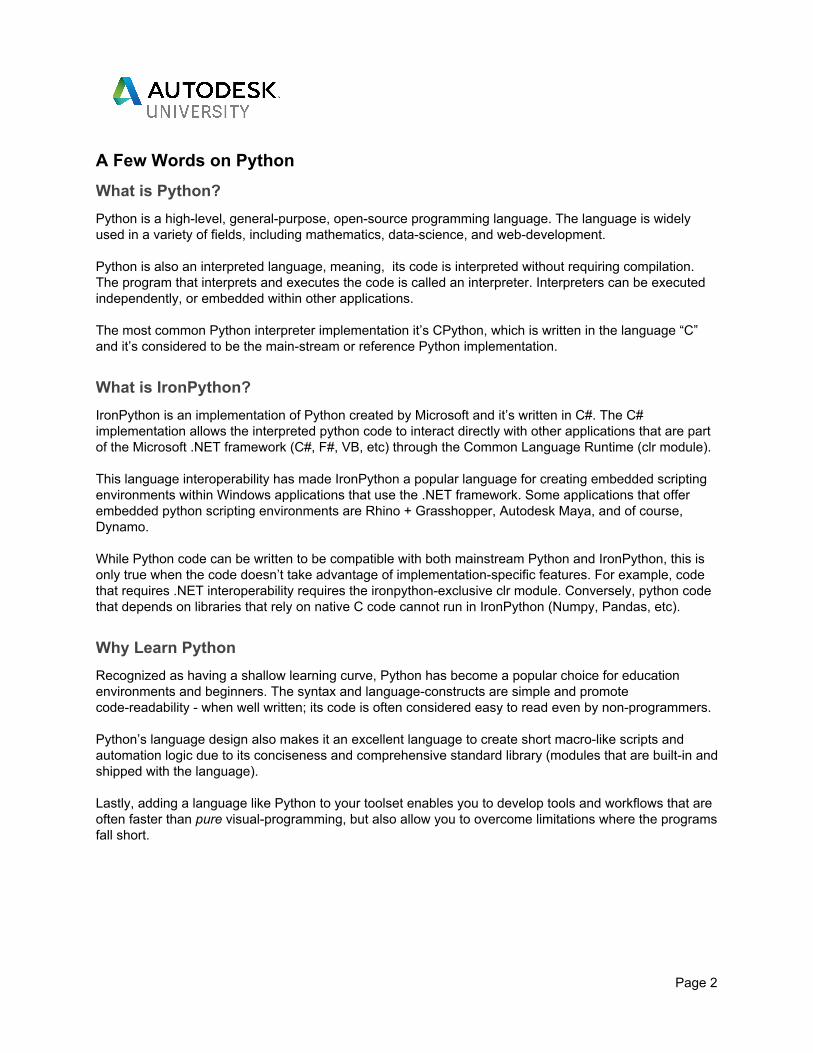
Writing and Executing Python Code Development Environments Python code can be written using any text, although most developers use robust text editors like Atom, Sublime, Visual Studio Code, or Notepad ++. Integrated Development Environments like PyCharm or Visual Studio can also be used, however, I find they are often intimidating for beginners. You can also write your code directly in embedded editors such as the one provided by Dynamo, although they usually lack many of the features provided by the alternatives above like code completion, code linting, and file management.
Dynamo Python Script Editor Atom Editor
Executing Python Code
Within Dynamo Dynamo provides a simple Script Editor with basic syntax-highlighting and limited autocompletion. This is enough for most simple scripts, however a developer may want to migrate to external editors as complexity increases. More details on how to use an external editor will be explained further down in the course.
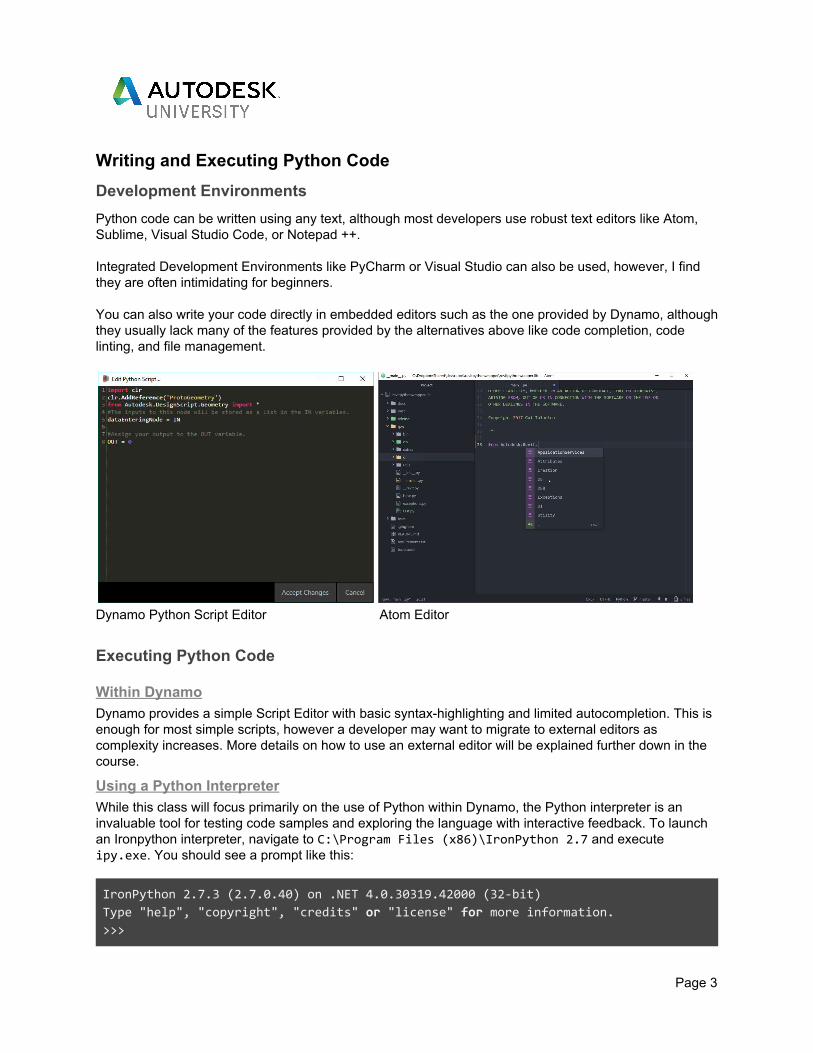
Using a Python Interpreter While this class will focus primarily on the use of Python within Dynamo, the Python interpreter is an invaluable tool for testing code samples and exploring the language with interactive feedback. To launch an Ironpython interpreter, navigate to C:\Program Files (x86)\IronPython 2.7 and execute ipy.exe. You should see a prompt like this:
IronPython 2.7.3 (2.7.0.40) on .NET 4.0.30319.42000 (32-bit) Type "help", "copyright", "credits" or "license" for more information. >>>
Page 3
Introduction to Python While a comprehensive language tutorial is not in the scope of this class, it will be helpful for those with no prior Python experience that we cover a few basic concepts and language features. You can try typing the commands below on an Ironpython Interpreter shown in the section above. Note: the >>> caret indicates the code is being run from an interpreter in interactive mode.In some examples, blank lines might follow to indicate the output or result of the line executed.
Printing and Commenting
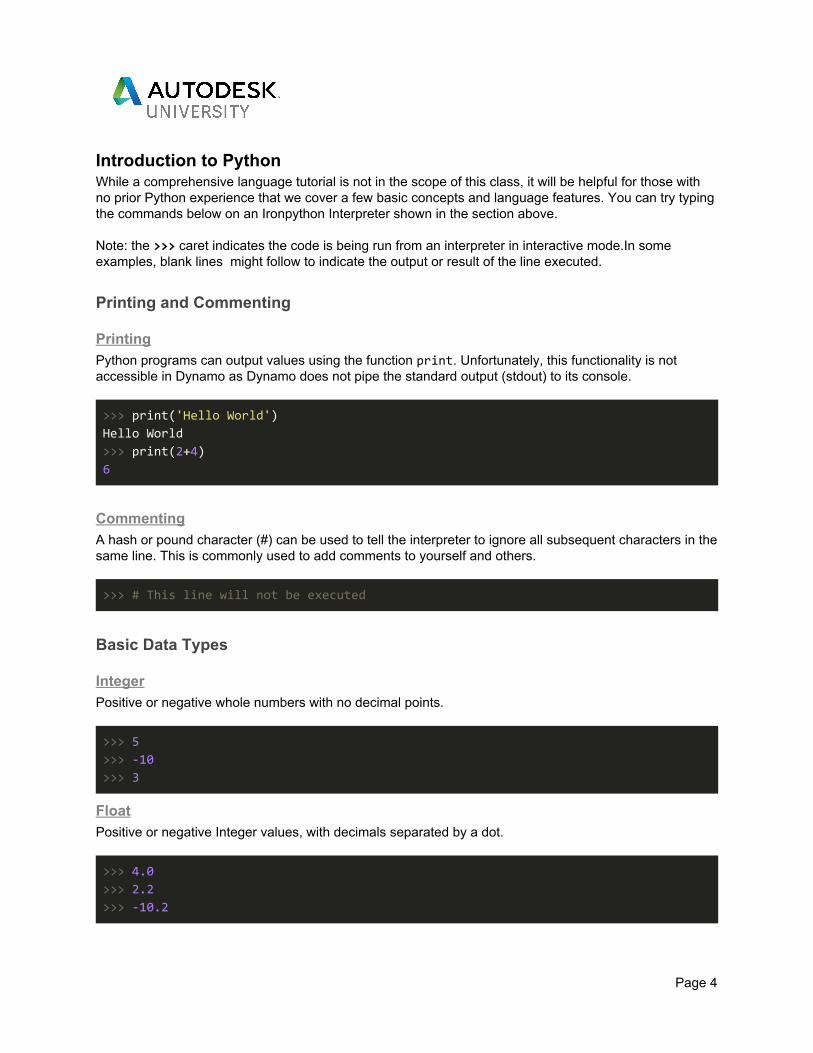
Printing Python programs can output values using the function print. Unfortunately, this functionality is not accessible in Dynamo as Dynamo does not pipe the standard output (stdout) to its console.
>>> print('Hello World') Hello World >>> print(2+4) 6
Commenting A hash or pound character (#) can be used to tell the interpreter to ignore all subsequent characters in the same line. This is commonly used to add comments to yourself and others.
>>> # This line will not be executed
Basic Data Types
Integer Positive or negative whole numbers with no decimal points.
>>> 5 >>> -10 >>> 3
Float Positive or negative Integer values, with decimals separated by a dot.
>>> 4.0 >>> 2.2 >>> -10.2
Page 4
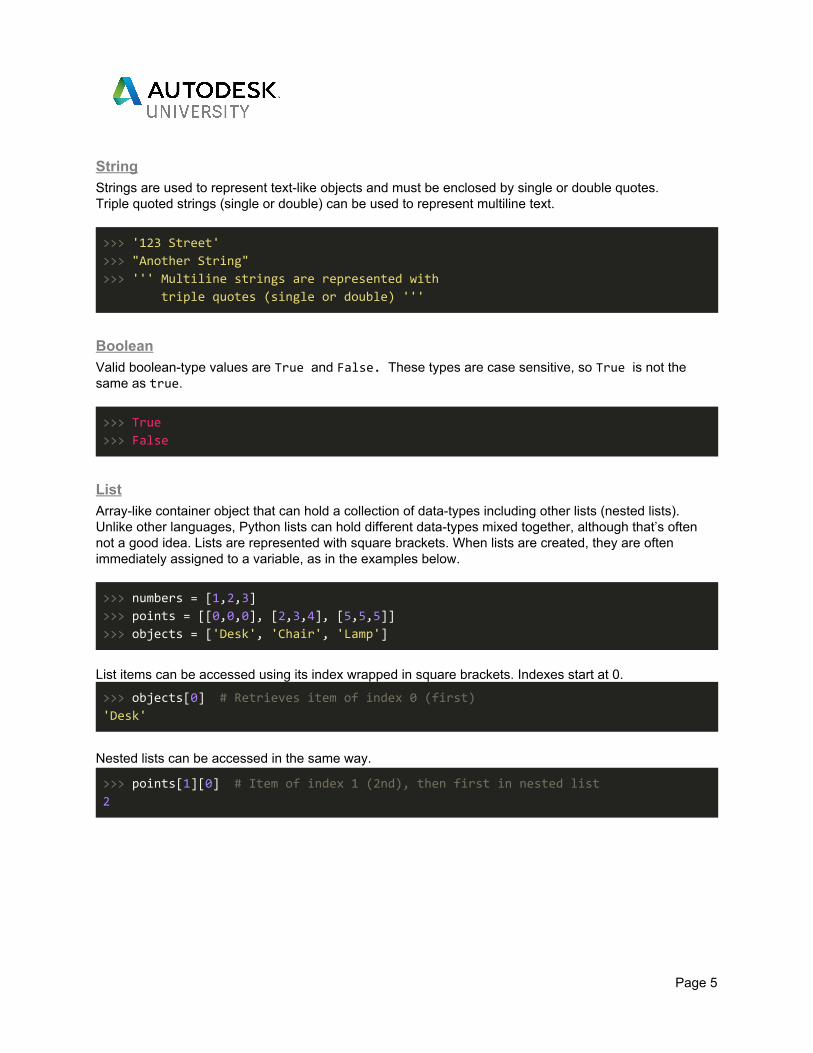
String Strings are used to represent text-like objects and must be enclosed by single or double quotes. Triple quoted strings (single or double) can be used to represent multiline text.
>>> '123 Street' >>> "Another String" >>> ''' Multiline strings are represented with triple quotes (single or double) '''
Boolean Valid boolean-type values are True and False. These types are case sensitive, so True is not the same as true.
>>> True >>> False
List Array-like container object that can hold a collection of data-types including other lists (nested lists). Unlike other languages, Python lists can hold different data-types mixed together, although that’s often not a good idea. Lists are represented with square brackets. When lists are created, they are often immediately assigned to a variable, as in the examples below.
>>> numbers = [1,2,3] >>> points = [[0,0,0], [2,3,4], [5,5,5]] >>> objects = ['Desk', 'Chair', 'Lamp']
List items can be accessed using its index wrapped in square brackets. Indexes start at 0.
>>> objects[0] # Retrieves item of index 0 (first) 'Desk'
Nested lists can be accessed in the same way.
>>> points[1][0] # Item of index 1 (2nd), then first in nested list 2
Page 5
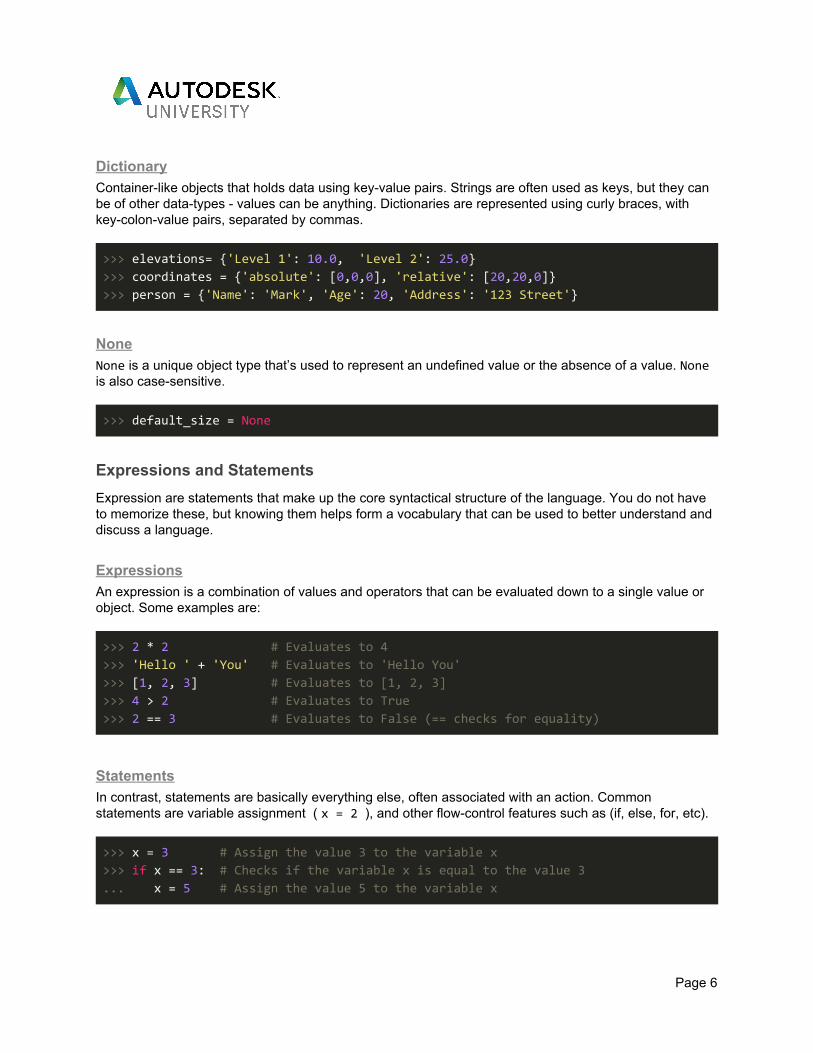
Dictionary Container-like objects that holds data using key-value pairs. Strings are often used as keys, but they can be of other data-types - values can be anything. Dictionaries are represented using curly braces, with key-colon-value pairs, separated by commas.
>>> elevations= {'Level 1': 10.0, 'Level 2': 25.0} >>> coordinates = {'absolute': [0,0,0], 'relative': [20,20,0]} >>> person = {'Name': 'Mark', 'Age': 20, 'Address': '123 Street'}
None None is a unique object type that’s used to represent an undefined value or the absence of a value. None is also case-sensitive.
>>> default_size = None
Expressions and Statements Expression are statements that make up the core syntactical structure of the language. You do not have to memorize these, but knowing them helps form a vocabulary that can be used to better understand and discuss a language.
Expressions An expression is a combination of values and operators that can be evaluated down to a single value or object. Some examples are:
>>> 2 * 2 # Evaluates to 4 >>> 'Hello ' + 'You' # Evaluates to 'Hello You' >>> [1, 2, 3] # Evaluates to [1, 2, 3] >>> 4 > 2 # Evaluates to True >>> 2 == 3 # Evaluates to False (== checks for equality)
Statements In contrast, statements are basically everything else, often associated with an action. Common statements are variable assignment ( x = 2 ), and other flow-control features such as (if, else, for, etc).
>>> x = 3 # Assign the value 3 to the variable x >>> if x == 3: # Checks if the variable x is equal to the value 3 ... x = 5 # Assign the value 5 to the variable x
Page 6
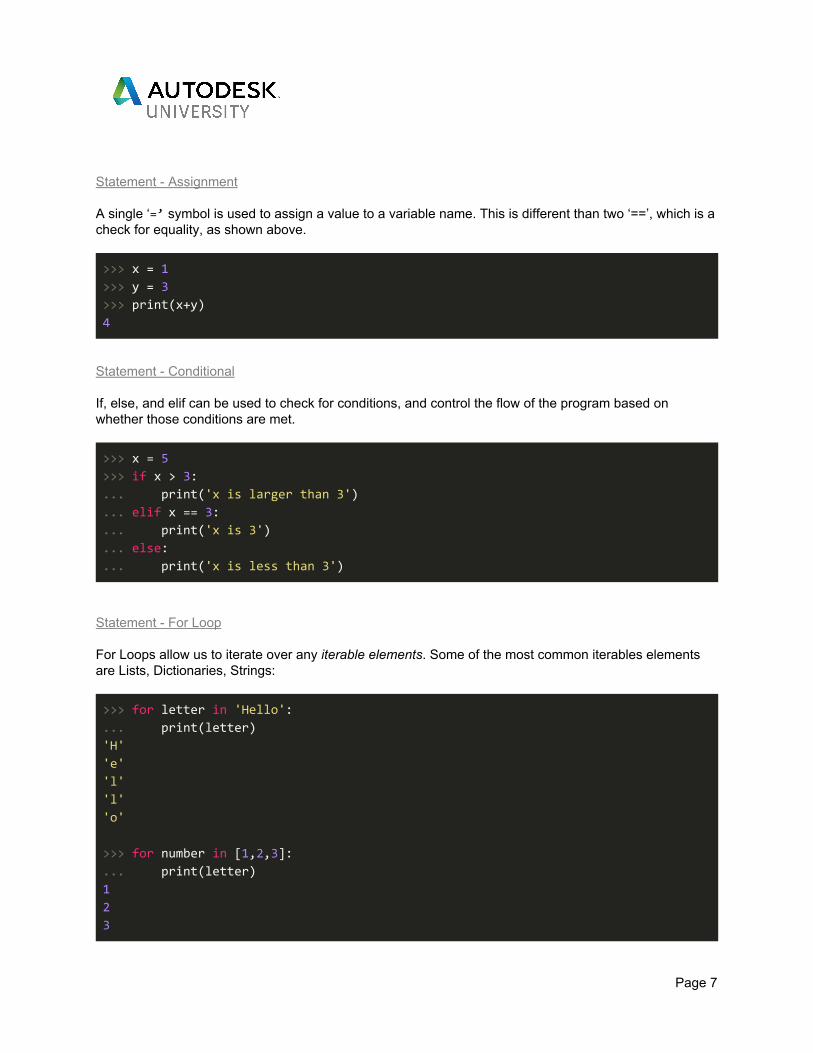
Statement - Assignment A single ‘=’ symbol is used to assign a value to a variable name. This is different than two ‘==’, which is a check for equality, as shown above.
>>> x = 1 >>> y = 3 >>> print(x+y) 4
Statement - Conditional If, else, and elif can be used to check for conditions, and control the flow of the program based on whether those conditions are met.
>>> x = 5 >>> if x > 3: ... print('x is larger than 3') ... elif x == 3: ... print('x is 3') ... else: ... print('x is less than 3')
Statement - For Loop For Loops allow us to iterate over any iterable elements. Some of the most common iterables elements are Lists, Dictionaries, Strings:
>>> for letter in 'Hello': ... print(letter) 'H'
'e'
'l'
'l'
'o'
>>> for number in [1,2,3]: ... print(letter) 1
2
3
Page 7
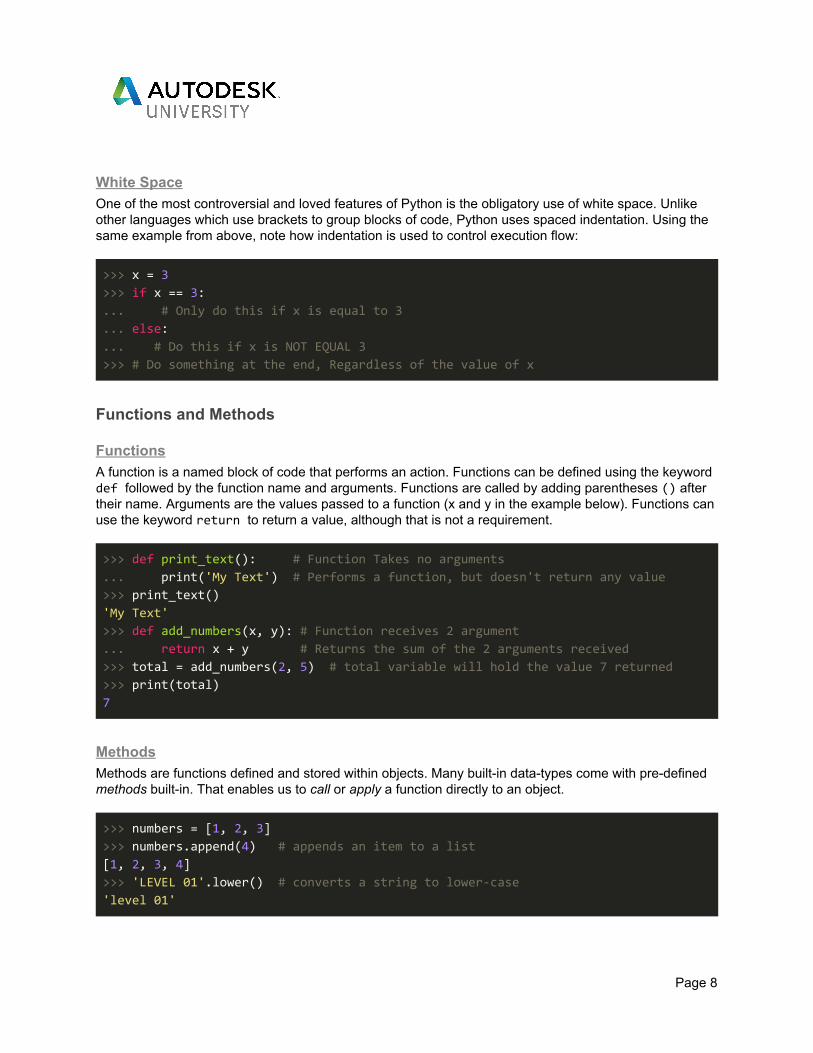
White Space One of the most controversial and loved features of Python is the obligatory use of white space. Unlike other languages which use brackets to group blocks of code, Python uses spaced indentation. Using the same example from above, note how indentation is used to control execution flow:
>>> x = 3 >>> if x == 3: ... # Only do this if x is equal to 3 ... else: ... # Do this if x is NOT EQUAL 3 >>> # Do something at the end, Regardless of the value of x
Functions and Methods
Functions A function is a named block of code that performs an action. Functions can be defined using the keyword def followed by the function name and arguments. Functions are called by adding parentheses () after their name. Arguments are the values passed to a function (x and y in the example below). Functions can use the keyword return to return a value, although that is not a requirement.
>>> def print_text(): # Function Takes no arguments ... print('My Text') # Performs a function, but doesn't return any value >>> print_text() 'My Text' >>> def add_numbers(x, y): # Function receives 2 argument ... return x + y # Returns the sum of the 2 arguments received >>> total = add_numbers(2, 5) # total variable will hold the value 7 returned >>> print(total) 7
Methods Methods are functions defined and stored within objects. Many built-in data-types come with pre-defined methods built-in. That enables us to call or apply a function directly to an object.
>>> numbers = [1, 2, 3] >>> numbers.append(4) # appends an item to a list [1, 2, 3, 4] >>> 'LEVEL 01'.lower() # converts a string to lower-case 'level 01'
Page 8

Classes Classes are recipes for custom data-types. For instance, one could create a class called Door. An instance of this class might have a property door.is_open that returns True or False, a property door.width that returns its width, and a method door.open() which will open it. Creation or further details on classes are beyond the scope of this this course, but we will use a few custom classes defined by the Revit API in later examples. You can read more about Python Classes on the official docs at docs.python.org/3/tutorial/classes.html
Imports Imports can be used to load additional modules, classes, or functions into your script. These can come from another script you have written, or from the Python Standard Library. The standard library is a large collection of packages that is shipped with Python to extend functionality. For instance, the math module contains additional math-related tools; the time module gives you tools for working with time. You can read more about all the modules available in the Standard library on https://docs.python.org
Below are two simple examples that use the os and sys module to access functionality related to the operating system and the interpreter:
>>> import os # imports the os module >>> os.listdir('C:/') # call listdir method to get files in directory ['Program Files', 'ProgramData', 'Users', 'Windows', 'Logs' ]
>>> import sys # imports the sys module >>> sys.version '2.7.3 (IronPython 2.7.3 (2.7.0.40) on .NET 4.0.30319.42000 (32-bit))' >>> sys.exit() # Execution of program is terminated
Finding Imported Modules Python does a few tricks behind the scenes to locate packages and modules during import time. The locations that will be searched are stored as a list in the path property of the sys module. The list can be accessed using sys.path. The default IronPython sys.path is shown below. ‘.’ means “look in the current directory”, and the other 3 locations are folders within the IronPython Installation directory.
>>> import sys >>> sys.path ['.', 'C:\\Program Files (x86)\\IronPython 2.7\\Lib', 'C:\\Program Files (x86)\\IronPython 2.7\\DLLs', 'C:\\Program File s (x86)\\IronPython 2.7', 'C:\\Program Files (x86)\\IronPython 2.7\\lib\\site-packages']
Page 9
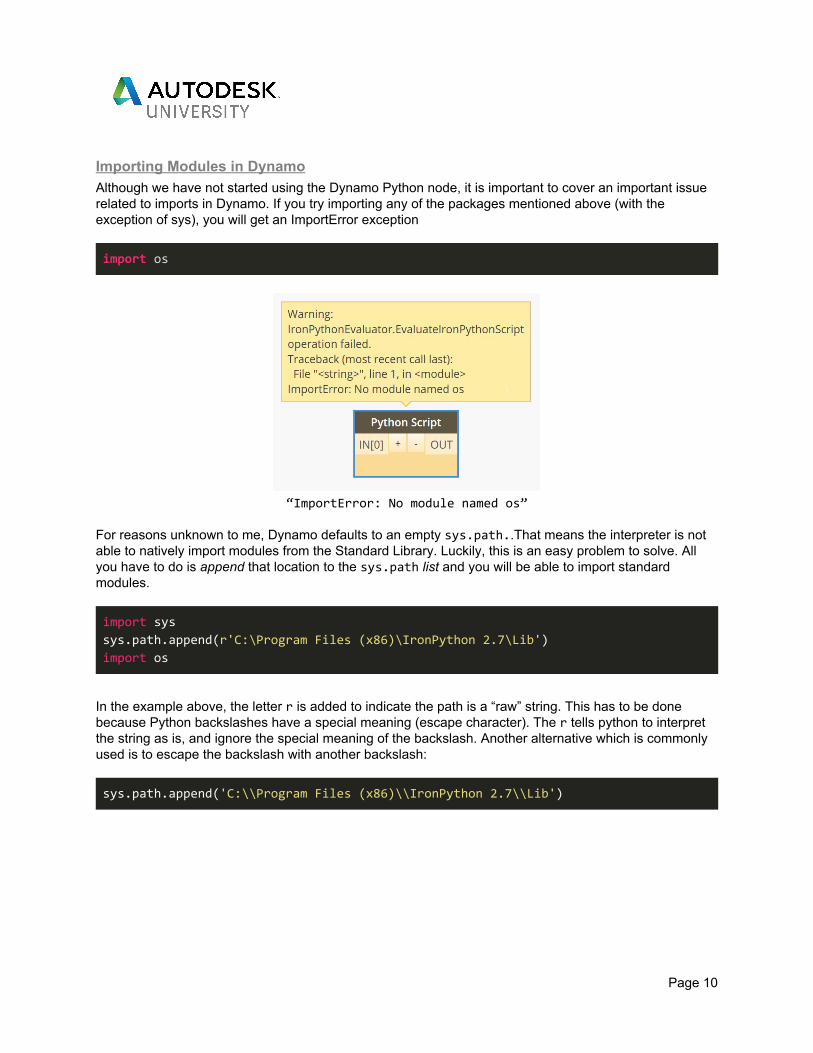
Importing Modules in Dynamo Although we have not started using the Dynamo Python node, it is important to cover an important issue related to imports in Dynamo. If you try importing any of the packages mentioned above (with the exception of sys), you will get an ImportError exception
import os
“ImportError: No module named os”
For reasons unknown to me, Dynamo defaults to an empty sys.path..That means the interpreter is not able to natively import modules from the Standard Library. Luckily, this is an easy problem to solve. All you have to do is append that location to the sys.path list and you will be able to import standard modules.
import sys sys.path.append(r'C:\Program Files (x86)\IronPython 2.7\Lib') import os
In the example above, the letter r is added to indicate the path is a “raw” string. This has to be done because Python backslashes have a special meaning (escape character). The r tells python to interpret the string as is, and ignore the special meaning of the backslash. Another alternative which is commonly used is to escape the backslash with another backslash:
sys.path.append('C:\\Program Files (x86)\\IronPython 2.7\\Lib')
Page 10
Dynamo Python Nodes
Python Script Node
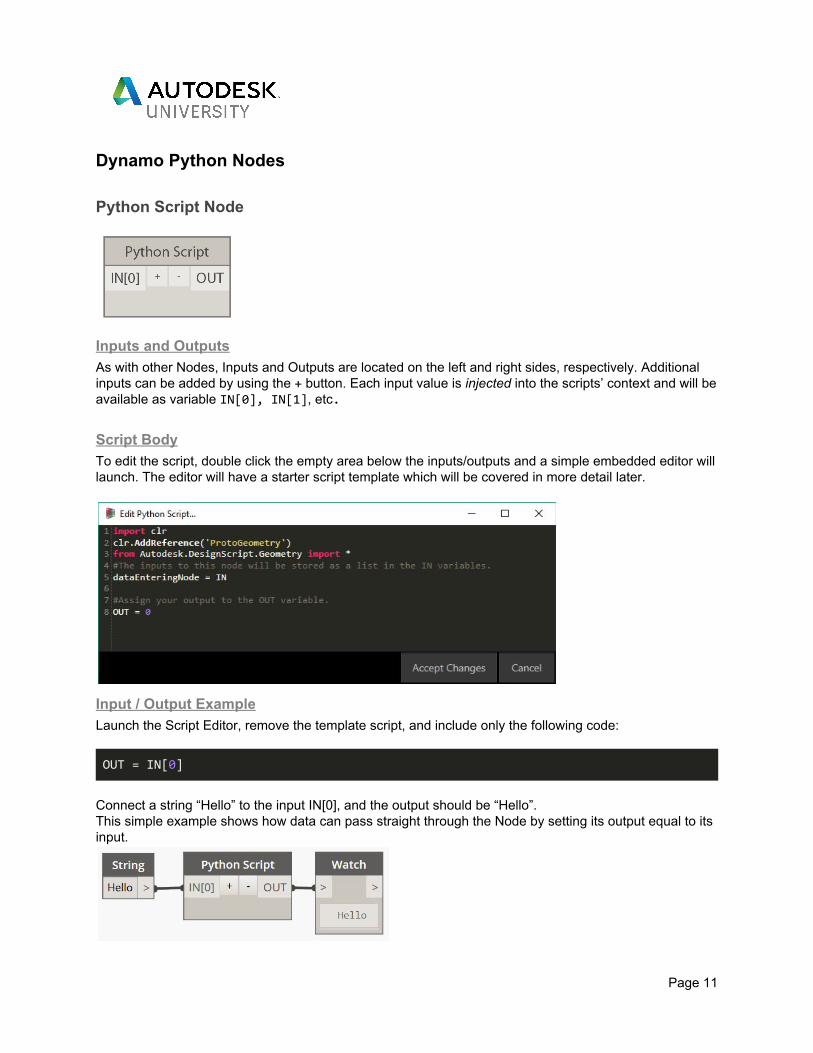
Inputs and Outputs As with other Nodes, Inputs and Outputs are located on the left and right sides, respectively. Additional inputs can be added by using the + button. Each input value is injected into the scripts’ context and will be available as variable IN[0], IN[1], etc.
Script Body To edit the script, double click the empty area below the inputs/outputs and a simple embedded editor will launch. The editor will have a starter script template which will be covered in more detail later.
Input / Output Example Launch the Script Editor, remove the template script, and include only the following code:
OUT = IN[0]
Connect a string “Hello” to the input IN[0], and the output should be “Hello”. This simple example shows how data can pass straight through the Node by setting its output equal to its input.
Page 11
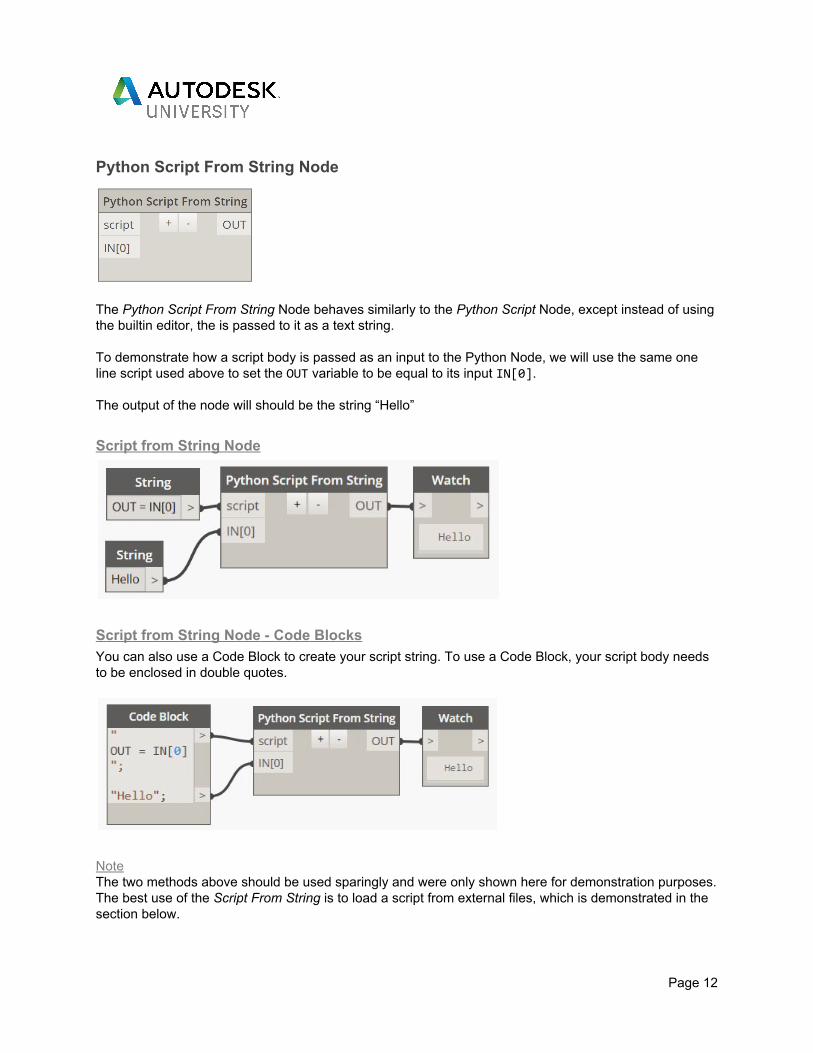
Python Script From String Node
The Python Script From String Node behaves similarly to the Python Script Node, except instead of using the builtin editor, the is passed to it as a text string. To demonstrate how a script body is passed as an input to the Python Node, we will use the same one line script used above to set the OUT variable to be equal to its input IN[0]. The output of the node will should be the string “Hello”
Script from String Node
Script from String Node - Code Blocks You can also use a Code Block to create your script string. To use a Code Block, your script body needs to be enclosed in double quotes.
Note The two methods above should be used sparingly and were only shown here for demonstration purposes. The best use of the Script From String is to load a script from external files, which is demonstrated in the section below.
Page 12
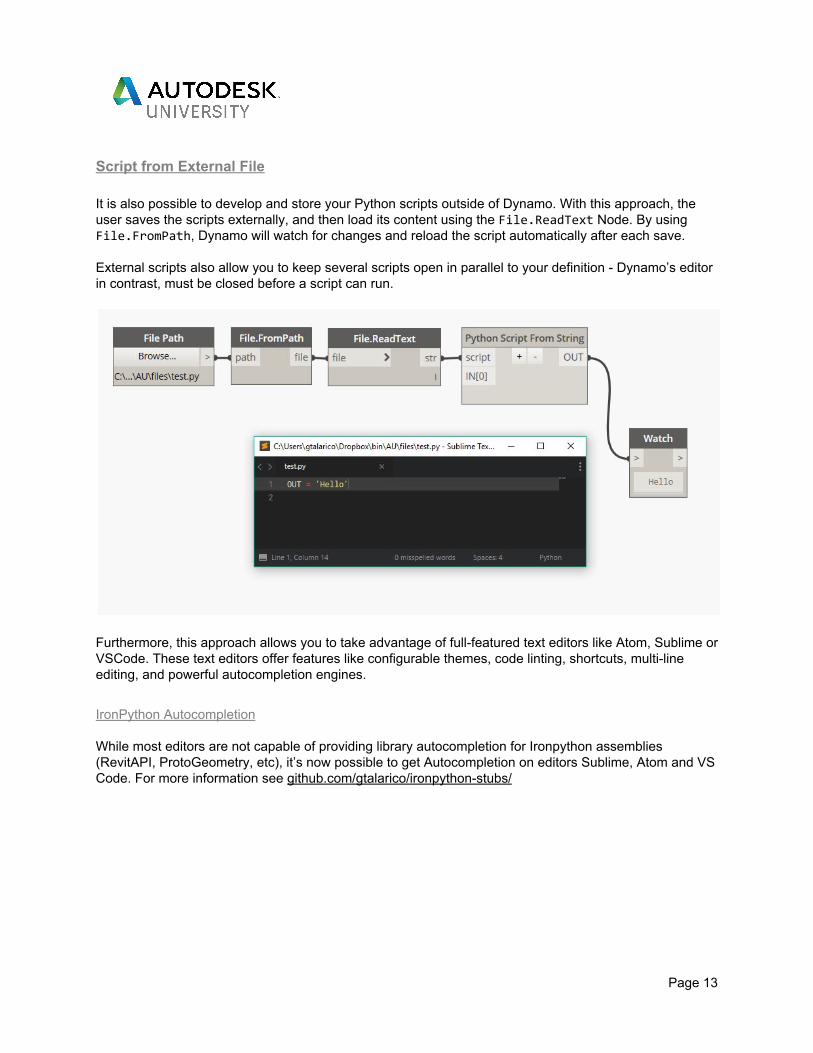
Script from External File It is also possible to develop and store your Python scripts outside of Dynamo. With this approach, the user saves the scripts externally, and then load its content using the File.ReadText Node. By using File.FromPath, Dynamo will watch for changes and reload the script automatically after each save. External scripts also allow you to keep several scripts open in parallel to your definition - Dynamo’s editor in contrast, must be closed before a script can run.
Furthermore, this approach allows you to take advantage of full-featured text editors like Atom, Sublime or VSCode. These text editors offer features like configurable themes, code linting, shortcuts, multi-line editing, and powerful autocompletion engines.
IronPython Autocompletion While most editors are not capable of providing library autocompletion for Ironpython assemblies (RevitAPI, ProtoGeometry, etc), it’s now possible to get Autocompletion on editors Sublime, Atom and VS Code. For more information see github.com/gtalarico/ironpython-stubs/
Page 13
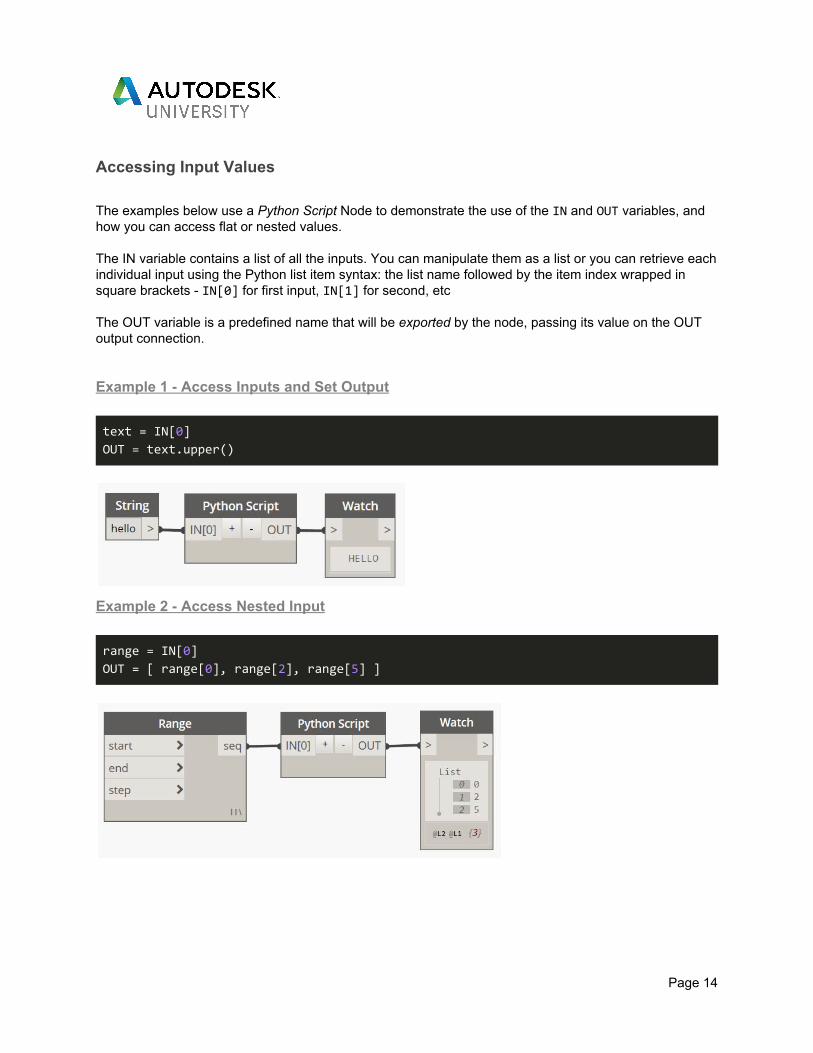
Accessing Input Values The examples below use a Python Script Node to demonstrate the use of the IN and OUT variables, and how you can access flat or nested values. The IN variable contains a list of all the inputs. You can manipulate them as a list or you can retrieve each individual input using the Python list item syntax: the list name followed by the item index wrapped in square brackets - IN[0] for first input, IN[1] for second, etc The OUT variable is a predefined name that will be exported by the node, passing its value on the OUT output connection. Example 1 - Access Inputs and Set Output
text = IN[0] OUT = text.upper()
Example 2 - Access Nested Input
range = IN[0] OUT = [ range[0], range[2], range[5] ]
Page 14
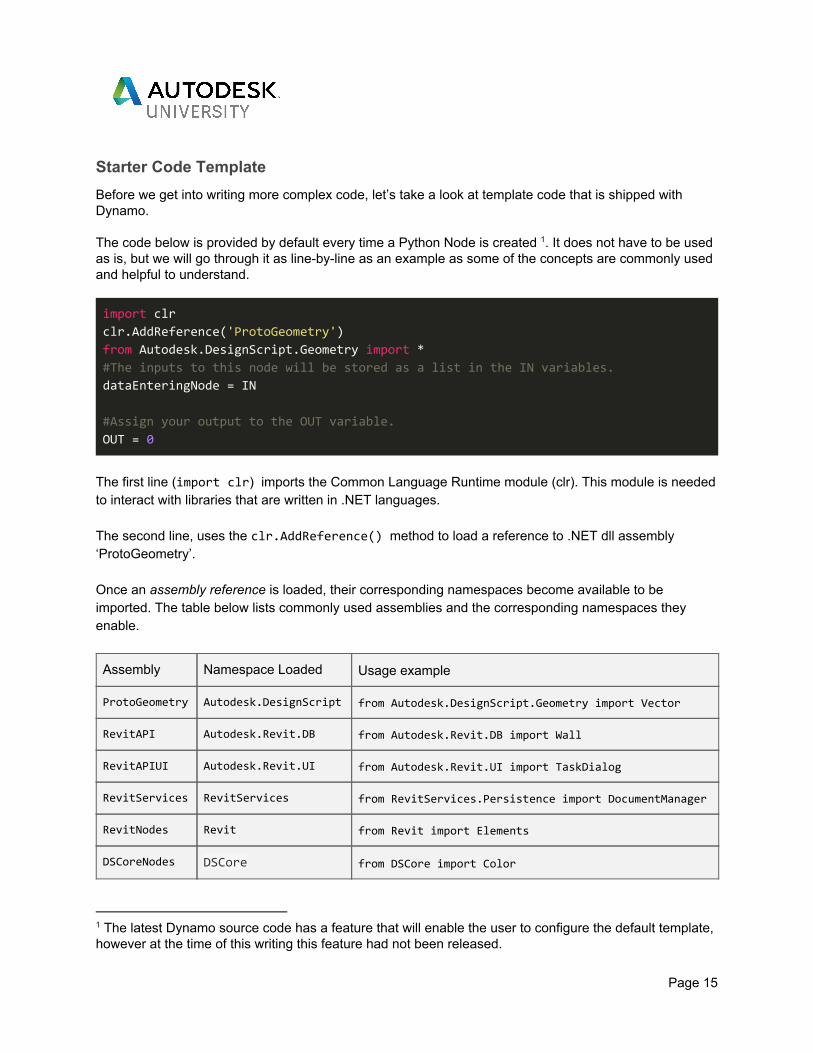
Starter Code Template Before we get into writing more complex code, let’s take a look at template code that is shipped with Dynamo. The code below is provided by default every time a Python Node is created . It does not have to be used 1
as is, but we will go through it as line-by-line as an example as some of the concepts are commonly used and helpful to understand.
import clr clr.AddReference('ProtoGeometry') from Autodesk.DesignScript.Geometry import * #The inputs to this node will be stored as a list in the IN variables. dataEnteringNode = IN
#Assign your output to the OUT variable. OUT = 0
The first line (import clr) imports the Common Language Runtime module (clr). This module is needed to interact with libraries that are written in .NET languages. The second line, uses the clr.AddReference() method to load a reference to .NET dll assembly ‘ProtoGeometry’. Once an assembly reference is loaded, their corresponding namespaces become available to be imported. The table below lists commonly used assemblies and the corresponding namespaces they enable.
Assembly Namespace Loaded Usage example
ProtoGeometry Autodesk.DesignScript from Autodesk.DesignScript.Geometry import Vector
RevitAPI Autodesk.Revit.DB from Autodesk.Revit.DB import Wall
RevitAPIUI Autodesk.Revit.UI from Autodesk.Revit.UI import TaskDialog
RevitServices RevitServices from RevitServices.Persistence import DocumentManager
RevitNodes Revit from Revit import Elements
DSCoreNodes DSCore from DSCore import Color
1 The latest Dynamo source code has a feature that will enable the user to configure the default template, however at the time of this writing this feature had not been released.
Page 15
In other words, once we add a reference to the Protogeometry.dll assembly (‘ProtoGeometry’) , the 2
corresponding Namespace becomes available: Autodesk.DesignScript. 3
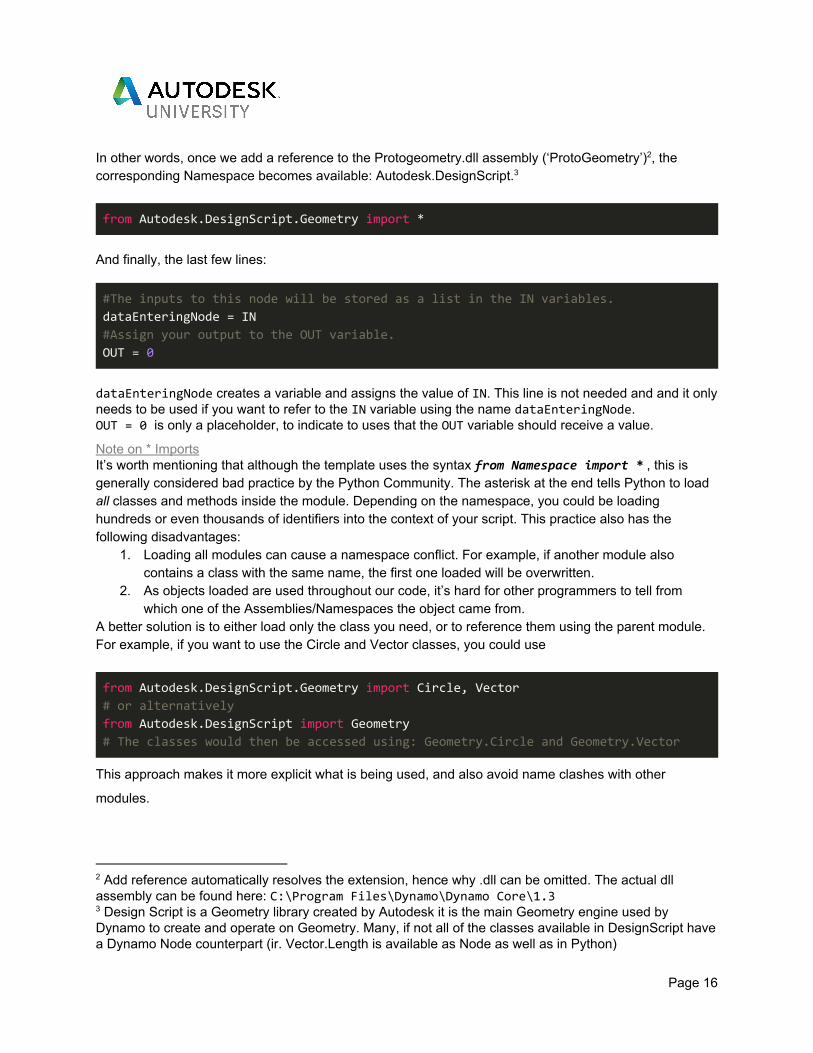
from Autodesk.DesignScript.Geometry import *
And finally, the last few lines:
#The inputs to this node will be stored as a list in the IN variables. dataEnteringNode = IN #Assign your output to the OUT variable. OUT = 0
dataEnteringNode creates a variable and assigns the value of IN. This line is not needed and and it only needs to be used if you want to refer to the IN variable using the name dataEnteringNode. OUT = 0 is only a placeholder, to indicate to uses that the OUT variable should receive a value.
Note on * Imports It’s worth mentioning that although the template uses the syntax from Namespace import * , this is generally considered bad practice by the Python Community. The asterisk at the end tells Python to load all classes and methods inside the module. Depending on the namespace, you could be loading hundreds or even thousands of identifiers into the context of your script. This practice also has the following disadvantages:
1. Loading all modules can cause a namespace conflict. For example, if another module also contains a class with the same name, the first one loaded will be overwritten.
2. As objects loaded are used throughout our code, it’s hard for other programmers to tell from which one of the Assemblies/Namespaces the object came from.
A better solution is to either load only the class you need, or to reference them using the parent module. For example, if you want to use the Circle and Vector classes, you could use
from Autodesk.DesignScript.Geometry import Circle, Vector # or alternatively from Autodesk.DesignScript import Geometry # The classes would then be accessed using: Geometry.Circle and Geometry.Vector
This approach makes it more explicit what is being used, and also avoid name clashes with other
modules.
2 Add reference automatically resolves the extension, hence why .dll can be omitted. The actual dll assembly can be found here: C:\Program Files\Dynamo\Dynamo Core\1.3 3 Design Script is a Geometry library created by Autodesk it is the main Geometry engine used by Dynamo to create and operate on Geometry. Many, if not all of the classes available in DesignScript have a Dynamo Node counterpart (ir. Vector.Length is available as Node as well as in Python)
Page 16
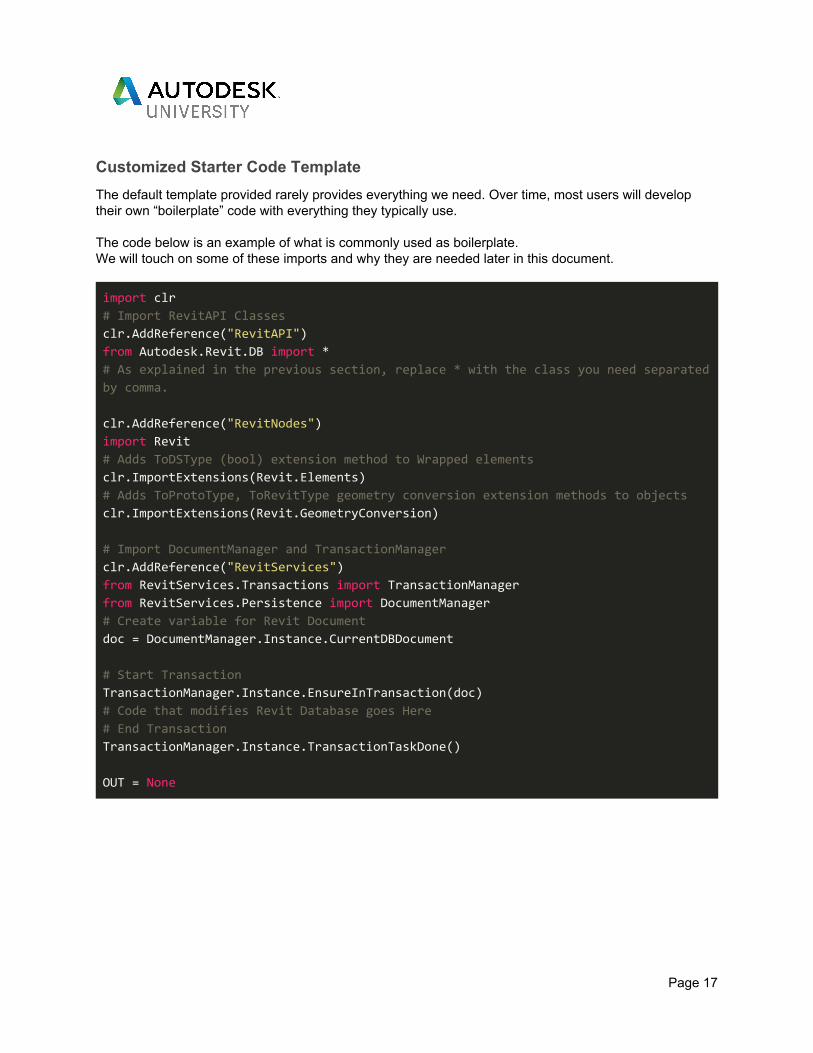
Customized Starter Code Template The default template provided rarely provides everything we need. Over time, most users will develop their own “boilerplate” code with everything they typically use. The code below is an example of what is commonly used as boilerplate. We will touch on some of these imports and why they are needed later in this document.
import clr # Import RevitAPI Classes clr.AddReference("RevitAPI") from Autodesk.Revit.DB import * # As explained in the previous section, replace * with the class you need separated by comma.
clr.AddReference("RevitNodes") import Revit # Adds ToDSType (bool) extension method to Wrapped elements clr.ImportExtensions(Revit.Elements)
# Adds ToProtoType, ToRevitType geometry conversion extension methods to objects clr.ImportExtensions(Revit.GeometryConversion)
# Import DocumentManager and TransactionManager clr.AddReference("RevitServices") from RevitServices.Transactions import TransactionManager from RevitServices.Persistence import DocumentManager # Create variable for Revit Document doc = DocumentManager.Instance.CurrentDBDocument
# Start Transaction TransactionManager.Instance.EnsureInTransaction(doc)
# Code that modifies Revit Database goes Here # End Transaction TransactionManager.Instance.TransactionTaskDone()
OUT = None
Page 17
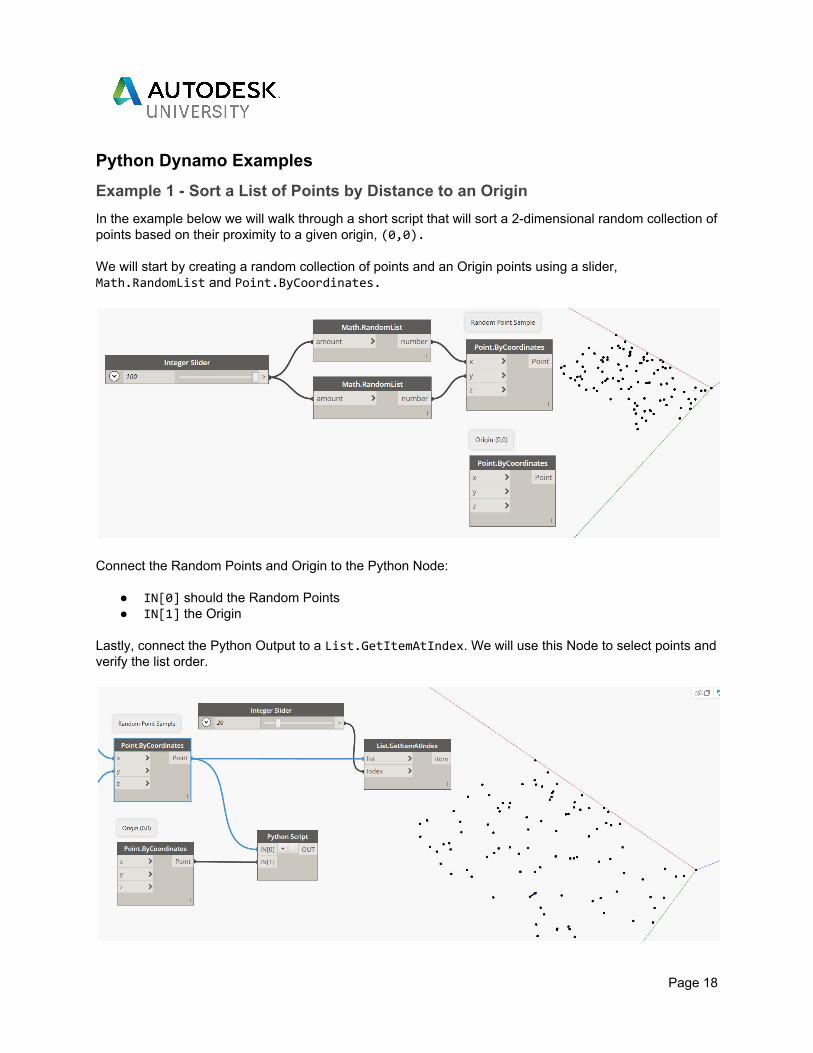
Python Dynamo Examples Example 1 - Sort a List of Points by Distance to an Origin In the example below we will walk through a short script that will sort a 2-dimensional random collection of points based on their proximity to a given origin, (0,0). We will start by creating a random collection of points and an Origin points using a slider, Math.RandomList and Point.ByCoordinates.
Connect the Random Points and Origin to the Python Node:
● IN[0] should the Random Points ● IN[1] the Origin
Lastly, connect the Python Output to a List.GetItemAtIndex. We will use this Node to select points and verify the list order.
Page 18
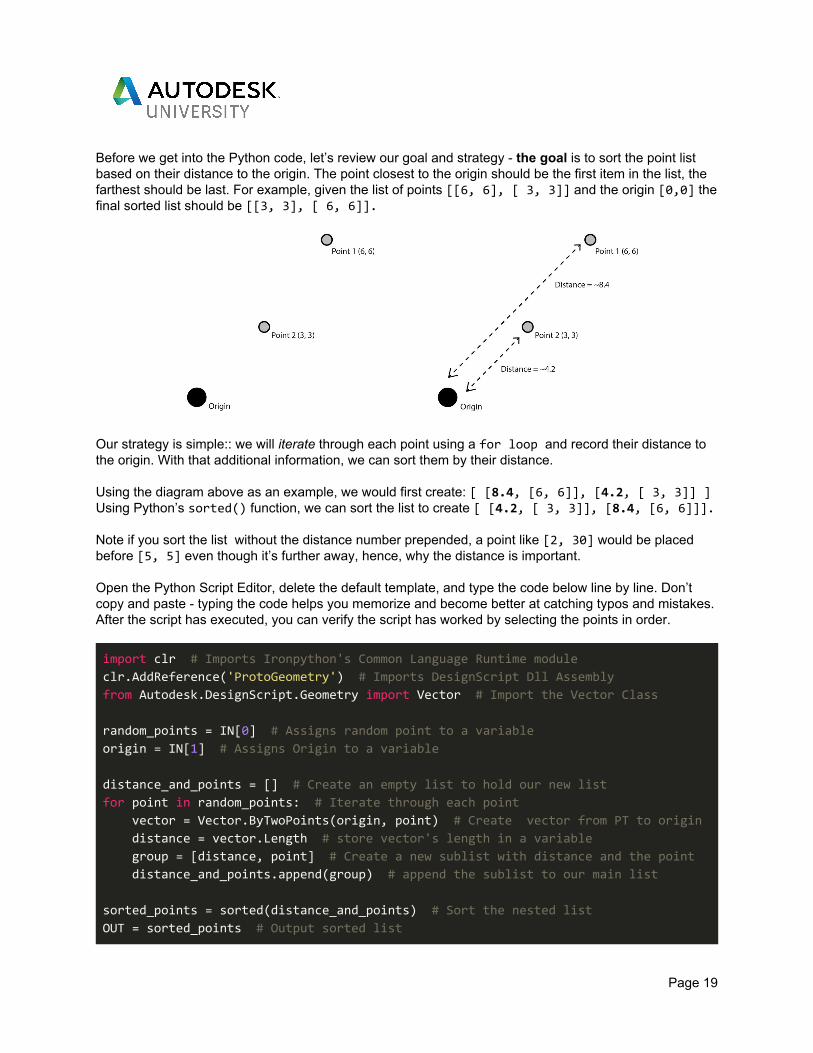
Before we get into the Python code, let’s review our goal and strategy - the goal is to sort the point list based on their distance to the origin. The point closest to the origin should be the first item in the list, the farthest should be last. For example, given the list of points [[6, 6], [ 3, 3]] and the origin [0,0] the final sorted list should be [[3, 3], [ 6, 6]].
Our strategy is simple:: we will iterate through each point using a for loop and record their distance to the origin. With that additional information, we can sort them by their distance. Using the diagram above as an example, we would first create: [ [8.4, [6, 6]], [4.2, [ 3, 3]] ] Using Python’s sorted() function, we can sort the list to create [ [4.2, [ 3, 3]], [8.4, [6, 6]]]. Note if you sort the list without the distance number prepended, a point like [2, 30] would be placed before [5, 5] even though it’s further away, hence, why the distance is important. Open the Python Script Editor, delete the default template, and type the code below line by line. Don’t copy and paste - typing the code helps you memorize and become better at catching typos and mistakes. After the script has executed, you can verify the script has worked by selecting the points in order.
import clr # Imports Ironpython's Common Language Runtime module clr.AddReference('ProtoGeometry') # Imports DesignScript Dll Assembly from Autodesk.DesignScript.Geometry import Vector # Import the Vector Class
random_points = IN[0] # Assigns random point to a variable origin = IN[1] # Assigns Origin to a variable
distance_and_points = [] # Create an empty list to hold our new list for point in random_points: # Iterate through each point vector = Vector.ByTwoPoints(origin, point) # Create vector from PT to origin distance = vector.Length # store vector's length in a variable group = [distance, point] # Create a new sublist with distance and the point distance_and_points.append(group) # append the sublist to our main list
sorted_points = sorted(distance_and_points) # Sort the nested list OUT = sorted_points # Output sorted list
Page 19
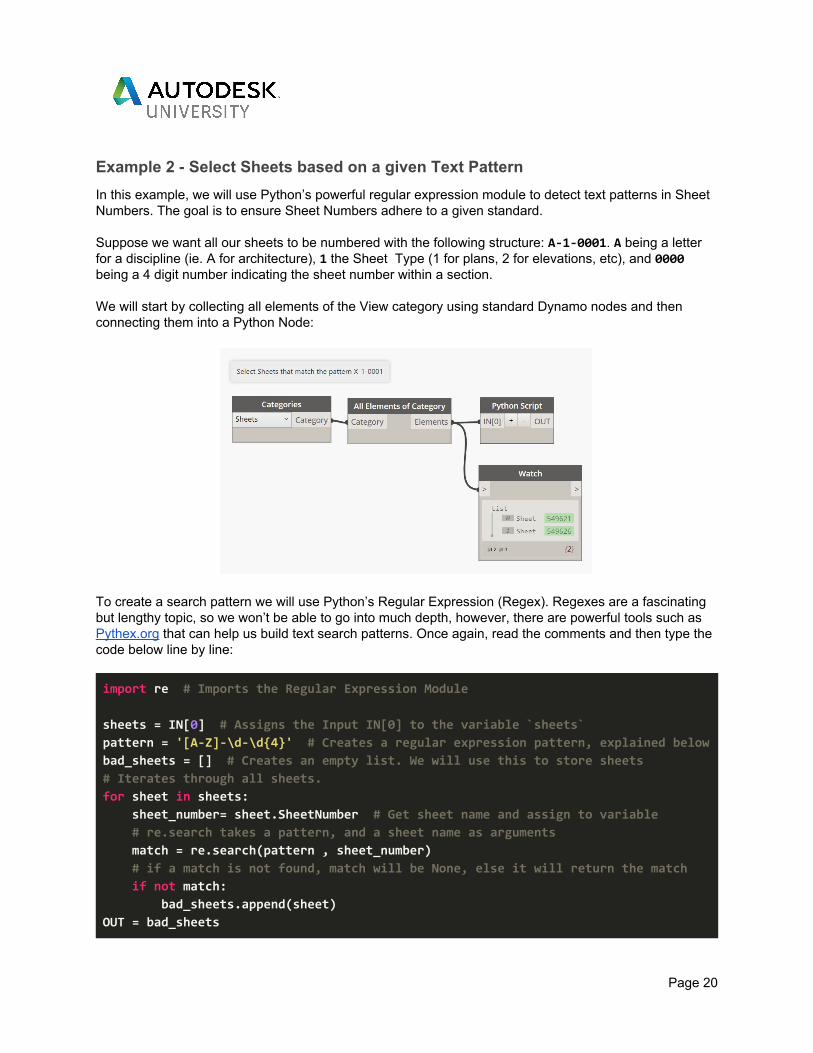
Example 2 - Select Sheets based on a given Text Pattern In this example, we will use Python’s powerful regular expression module to detect text patterns in Sheet Numbers. The goal is to ensure Sheet Numbers adhere to a given standard. Suppose we want all our sheets to be numbered with the following structure: A-1-0001. A being a letter for a discipline (ie. A for architecture), 1 the Sheet Type (1 for plans, 2 for elevations, etc), and 0000 being a 4 digit number indicating the sheet number within a section. We will start by collecting all elements of the View category using standard Dynamo nodes and then connecting them into a Python Node:
To create a search pattern we will use Python’s Regular Expression (Regex). Regexes are a fascinating but lengthy topic, so we won’t be able to go into much depth, however, there are powerful tools such as Pythex.org that can help us build text search patterns. Once again, read the comments and then type the code below line by line: import re # Imports the Regular Expression Module
sheets = IN[0] # Assigns the Input IN[0] to the variable `sheets` pattern = '[A-Z]-\d-\d{4}' # Creates a regular expression pattern, explained below bad_sheets = [] # Creates an empty list. We will use this to store sheets # Iterates through all sheets. for sheet in sheets: sheet_number= sheet.SheetNumber # Get sheet name and assign to variable # re.search takes a pattern, and a sheet name as arguments match = re.search(pattern , sheet_number) # if a match is not found, match will be None, else it will return the match if not match: bad_sheets.append(sheet) OUT = bad_sheets
Page 20
Now let’s review the regular expression we used:
'[A-Z]-\d-\d{4}'
[A-Z] Matches all characters between A and Z
- Matches a dash
\d Matches a single “Digit” character
- Matches a dash
\d{4} Matches a sequence of 4 digits
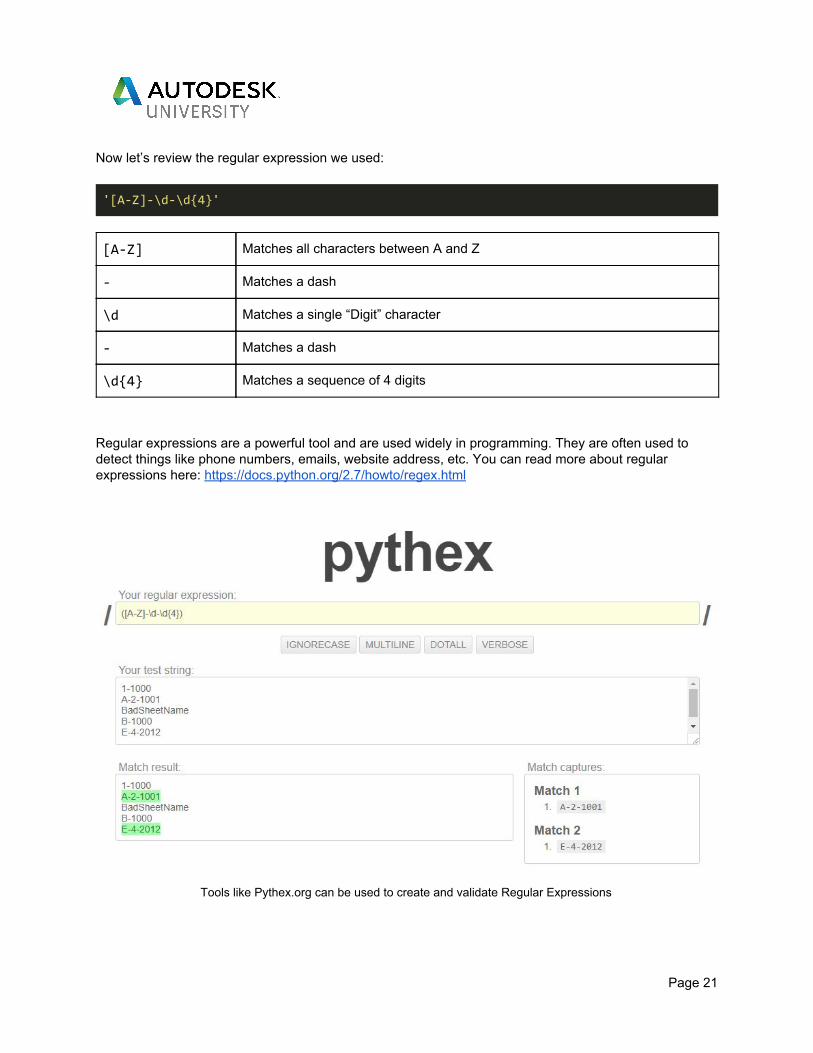
Regular expressions are a powerful tool and are used widely in programming. They are often used to detect things like phone numbers, emails, website address, etc. You can read more about regular expressions here: https://docs.python.org/2.7/howto/regex.html
Tools like Pythex.org can be used to create and validate Regular Expressions
Page 21
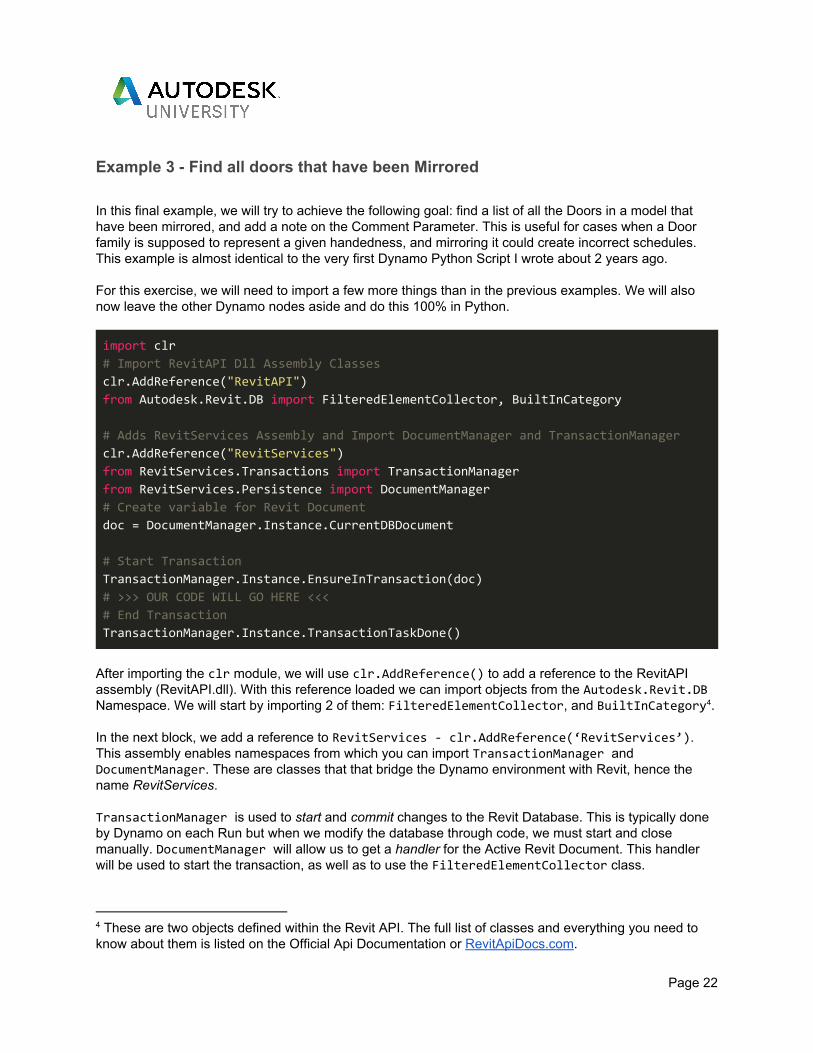
Example 3 - Find all doors that have been Mirrored In this final example, we will try to achieve the following goal: find a list of all the Doors in a model that have been mirrored, and add a note on the Comment Parameter. This is useful for cases when a Door family is supposed to represent a given handedness, and mirroring it could create incorrect schedules. This example is almost identical to the very first Dynamo Python Script I wrote about 2 years ago. For this exercise, we will need to import a few more things than in the previous examples. We will also now leave the other Dynamo nodes aside and do this 100% in Python.
import clr # Import RevitAPI Dll Assembly Classes clr.AddReference("RevitAPI") from Autodesk.Revit.DB import FilteredElementCollector, BuiltInCategory
# Adds RevitServices Assembly and Import DocumentManager and TransactionManager clr.AddReference("RevitServices") from RevitServices.Transactions import TransactionManager from RevitServices.Persistence import DocumentManager # Create variable for Revit Document doc = DocumentManager.Instance.CurrentDBDocument
# Start Transaction TransactionManager.Instance.EnsureInTransaction(doc)
# >>> OUR CODE WILL GO HERE <<< # End Transaction TransactionManager.Instance.TransactionTaskDone()
After importing the clr module, we will use clr.AddReference() to add a reference to the RevitAPI assembly (RevitAPI.dll). With this reference loaded we can import objects from the Autodesk.Revit.DB Namespace. We will start by importing 2 of them: FilteredElementCollector, and BuiltInCategory . 4
In the next block, we add a reference to RevitServices - clr.AddReference(‘RevitServices’). This assembly enables namespaces from which you can import TransactionManager and DocumentManager. These are classes that that bridge the Dynamo environment with Revit, hence the name RevitServices. TransactionManager is used to start and commit changes to the Revit Database. This is typically done by Dynamo on each Run but when we modify the database through code, we must start and close manually. DocumentManager will allow us to get a handler for the Active Revit Document. This handler will be used to start the transaction, as well as to use the FilteredElementCollector class.
4 These are two objects defined within the Revit API. The full list of classes and everything you need to know about them is listed on the Official Api Documentation or RevitApiDocs.com.
Page 22
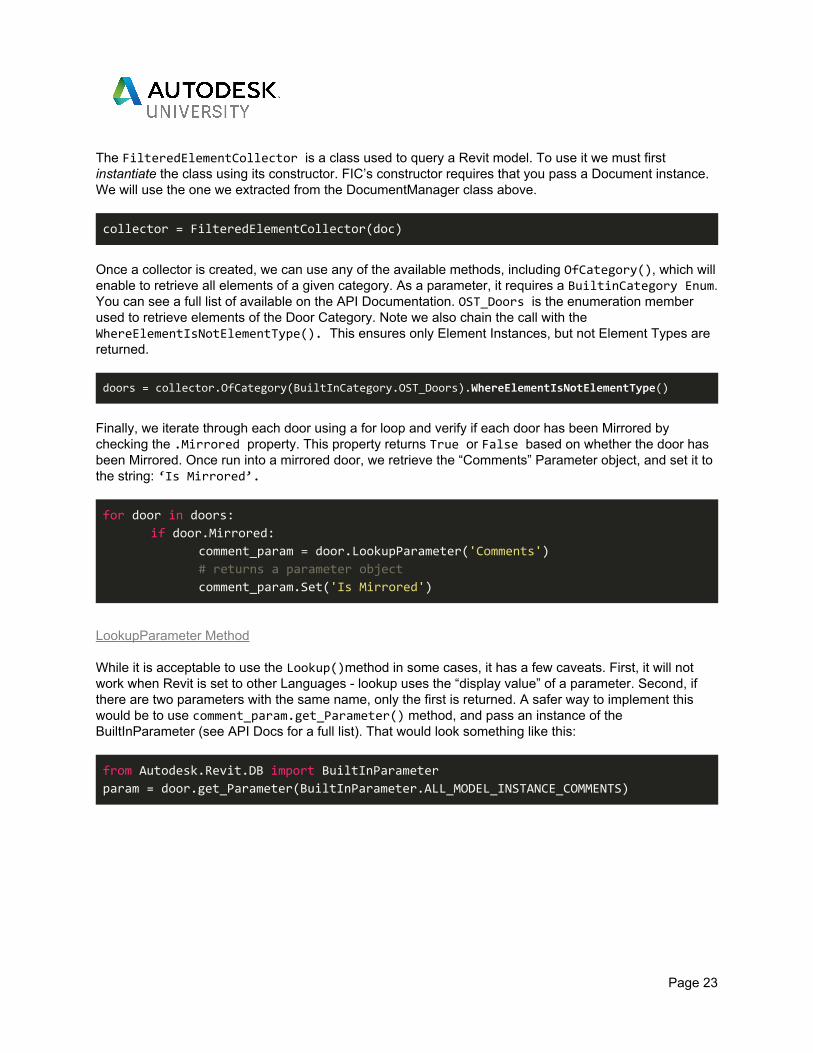
The FilteredElementCollector is a class used to query a Revit model. To use it we must first instantiate the class using its constructor. FIC’s constructor requires that you pass a Document instance. We will use the one we extracted from the DocumentManager class above.
collector = FilteredElementCollector(doc)
Once a collector is created, we can use any of the available methods, including OfCategory(), which will enable to retrieve all elements of a given category. As a parameter, it requires a BuiltinCategory Enum. You can see a full list of available on the API Documentation. OST_Doors is the enumeration member used to retrieve elements of the Door Category. Note we also chain the call with the WhereElementIsNotElementType(). This ensures only Element Instances, but not Element Types are returned. doors = collector.OfCategory(BuiltInCategory.OST_Doors).WhereElementIsNotElementType()
Finally, we iterate through each door using a for loop and verify if each door has been Mirrored by checking the .Mirrored property. This property returns True or False based on whether the door has been Mirrored. Once run into a mirrored door, we retrieve the “Comments” Parameter object, and set it to the string: ‘Is Mirrored’.
for door in doors: if door.Mirrored:
comment_param = door.LookupParameter('Comments') # returns a parameter object comment_param.Set('Is Mirrored')
LookupParameter Method While it is acceptable to use the Lookup()method in some cases, it has a few caveats. First, it will not work when Revit is set to other Languages - lookup uses the “display value” of a parameter. Second, if there are two parameters with the same name, only the first is returned. A safer way to implement this would be to use comment_param.get_Parameter() method, and pass an instance of the BuiltInParameter (see API Docs for a full list). That would look something like this:
from Autodesk.Revit.DB import BuiltInParameter param = door.get_Parameter(BuiltInParameter.ALL_MODEL_INSTANCE_COMMENTS)
Page 23
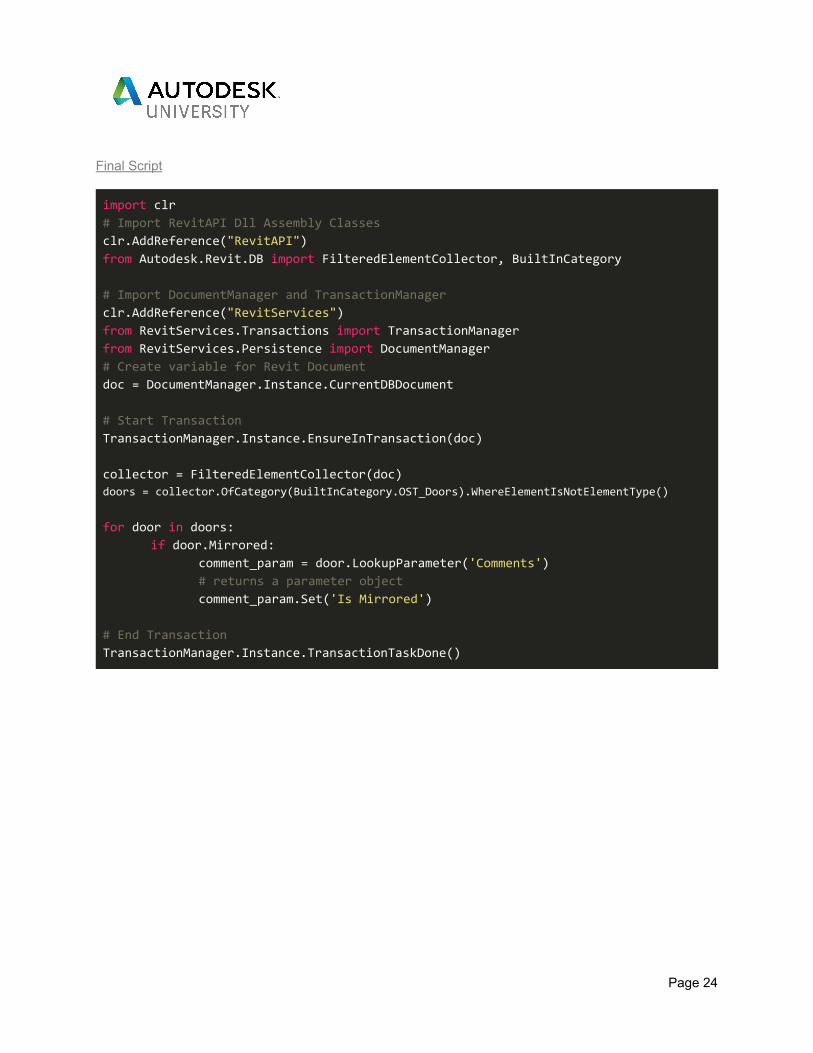
Final Script
import clr # Import RevitAPI Dll Assembly Classes clr.AddReference("RevitAPI") from Autodesk.Revit.DB import FilteredElementCollector, BuiltInCategory
# Import DocumentManager and TransactionManager clr.AddReference("RevitServices") from RevitServices.Transactions import TransactionManager from RevitServices.Persistence import DocumentManager # Create variable for Revit Document doc = DocumentManager.Instance.CurrentDBDocument
# Start Transaction TransactionManager.Instance.EnsureInTransaction(doc)
collector = FilteredElementCollector(doc) doors = collector.OfCategory(BuiltInCategory.OST_Doors).WhereElementIsNotElementType()
for door in doors: if door.Mirrored:
comment_param = door.LookupParameter('Comments') # returns a parameter object comment_param.Set('Is Mirrored')
# End Transaction TransactionManager.Instance.TransactionTaskDone()
Page 24
Additional Tips It takes time to learn and get to know all the available modules and classes. Even then, it is impossible to memorize every important detail about them. I find the tricks below helpful when trying to understand a class or method that I am not familiar with.
Exploring Objects
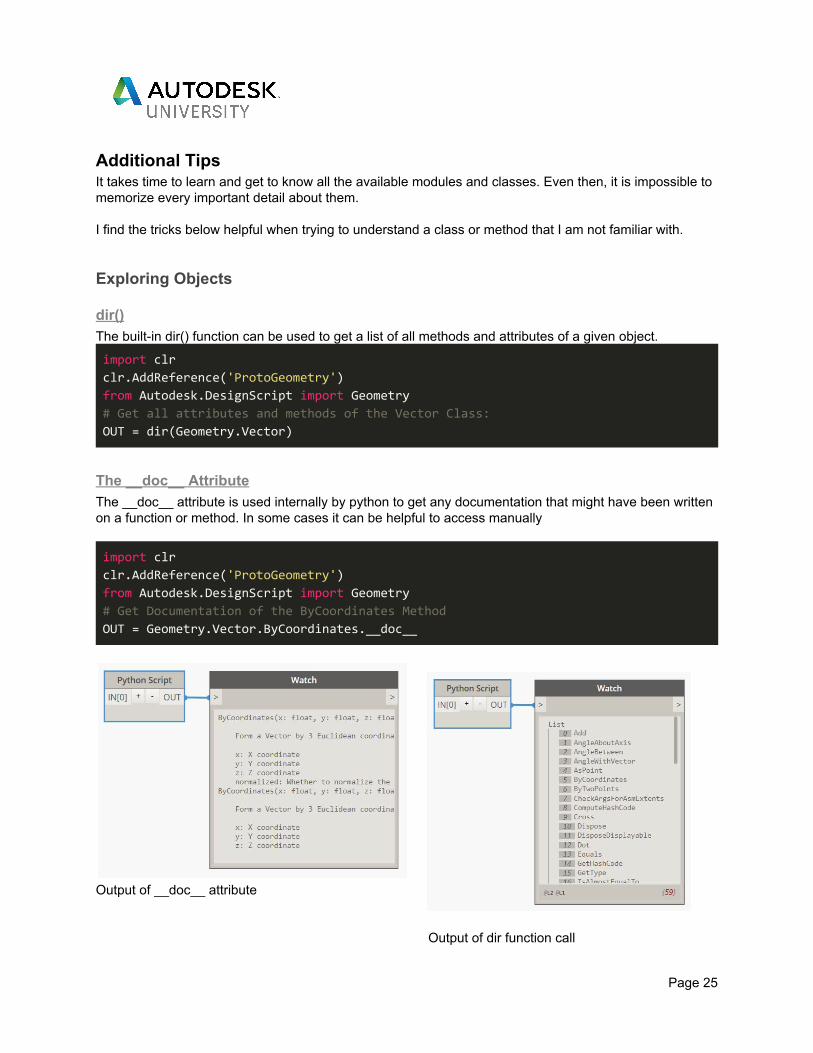
dir() The built-in dir() function can be used to get a list of all methods and attributes of a given object.
import clr clr.AddReference('ProtoGeometry') from Autodesk.DesignScript import Geometry # Get all attributes and methods of the Vector Class: OUT = dir(Geometry.Vector)
The __doc__ Attribute The __doc__ attribute is used internally by python to get any documentation that might have been written on a function or method. In some cases it can be helpful to access manually
import clr clr.AddReference('ProtoGeometry') from Autodesk.DesignScript import Geometry # Get Documentation of the ByCoordinates Method OUT = Geometry.Vector.ByCoordinates.__doc__
Output of __doc__ attribute Output of dir function call
Page 25
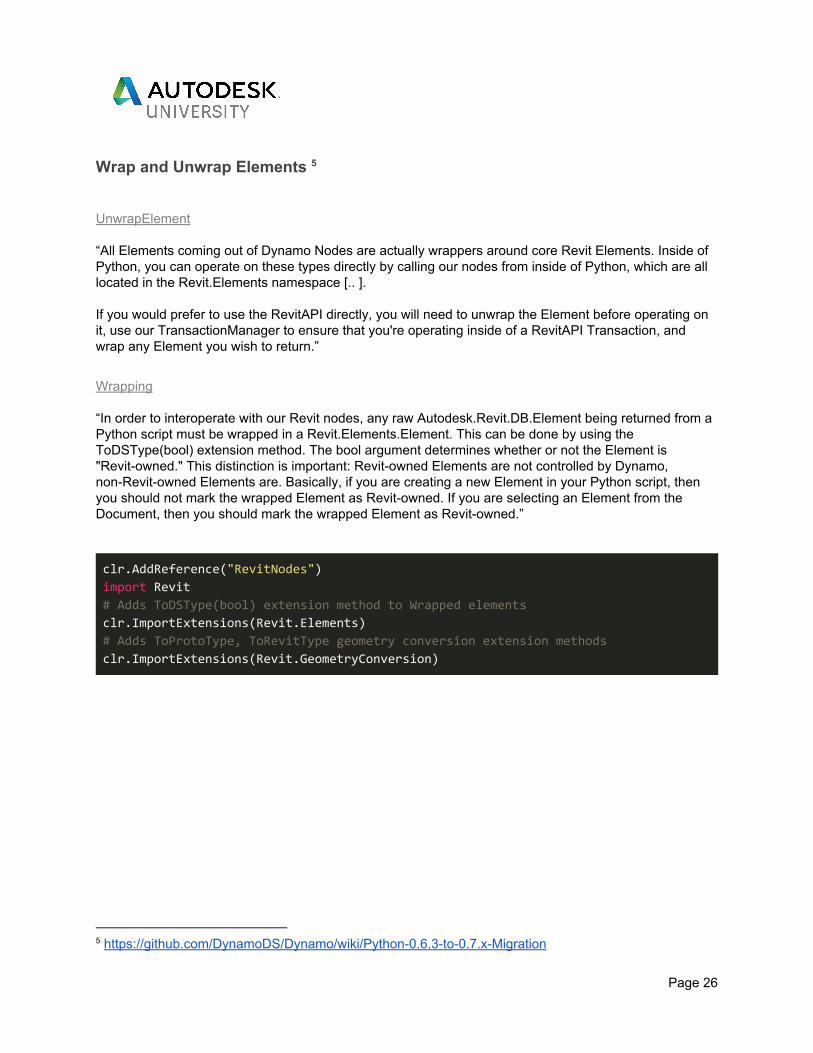
Wrap and Unwrap Elements 5
UnwrapElement “All Elements coming out of Dynamo Nodes are actually wrappers around core Revit Elements. Inside of Python, you can operate on these types directly by calling our nodes from inside of Python, which are all located in the Revit.Elements namespace [.. ]. If you would prefer to use the RevitAPI directly, you will need to unwrap the Element before operating on it, use our TransactionManager to ensure that you're operating inside of a RevitAPI Transaction, and wrap any Element you wish to return.”
Wrapping “In order to interoperate with our Revit nodes, any raw Autodesk.Revit.DB.Element being returned from a Python script must be wrapped in a Revit.Elements.Element. This can be done by using the ToDSType(bool) extension method. The bool argument determines whether or not the Element is "Revit-owned." This distinction is important: Revit-owned Elements are not controlled by Dynamo, non-Revit-owned Elements are. Basically, if you are creating a new Element in your Python script, then you should not mark the wrapped Element as Revit-owned. If you are selecting an Element from the Document, then you should mark the wrapped Element as Revit-owned.”
clr.AddReference("RevitNodes") import Revit # Adds ToDSType(bool) extension method to Wrapped elements clr.ImportExtensions(Revit.Elements)
# Adds ToProtoType, ToRevitType geometry conversion extension methods clr.ImportExtensions(Revit.GeometryConversion)
5 https://github.com/DynamoDS/Dynamo/wiki/Python-0.6.3-to-0.7.x-Migration
Page 26
Appendix
Packages and Relevant Projects
Exploring Packages Many Dynamo Packages are written in python and the code is available for you to explore. Being comfortable exploring code written by other developers is an essential skill to master. You can learn the patterns and tricks experience developers use by reading their code. Below is a list of some packages I have personally explored during my learning journey: https://github.com/andydandy74/ClockworkForDynamo/tree/master/nodes/1.x/python https://github.com/dimven/SpringNodes/tree/master/Nodes https://github.com/eirannejad/pyRevit/tree/master/extensions/pyRevitTools.extension/pyRevit.tab https://github.com/ladybug-tools/ladybug-dynamo
RevitPythonShell Revit Python Shell is an interactive Ironpython Console that can run inside of Revit. I find RPS to be one of the most useful tools for learning the API. Before spending time trying to do something with the Revit API within a Dynamo script, test the API and objects interactively. https://github.com/architecture-building-systems/revitpythonshell https://daren-thomas.gitbooks.io/scripting-autodesk-revit-with-revitpythonshell/content
pyRevit pyRevit is an IronPython script library for Revit. The pyRevit framework allows you to create Ironpython .py files and add them directly to your ribbon. If you are not familiar with the project be sure to check it out: http://eirannejad.github.io/pyRevit/whatspyrevit/
RevitPythonWrapper Revit Python Wrapper was created to help Python programmers write Revit API code. Wrapper classes make the interaction with API objects less repetitive, and more consistent with Python’s conventions. The library contains many helpful classes, helpers and easy to use Wpf Forms. For more information see: revitpythonwrapper.readthedocs.io
Page 27
Dynamo - Python Resources Dynamo Wiki https://github.com/DynamoDS/Dynamo/wiki/Python-0.6.3-to-0.7.x-Migration Namespaces, Moduls, DSCore http://dynamoprimer.com/en/12_Best-Practice/12-3_Scripting-Reference.html DesignScript Code Syntax http://dynamoprimer.com/en/07_Code-Block/7-2_Design-Script-syntax.html
Dynamo Learning Resources Dynamo Primer http://dynamoprimer.com Dynamo Primer - Python http://dynamoprimer.com/en/09_Custom-Nodes/9-4_Python.html Parametric Monkey https://parametricmonkey.com/tutorials/ Learn Dynamo https://learndynamo.com/
Communities Revit API Forum http://forums.autodesk.com/t5/revit-api/bd-p/160 Revit API Docs http://www.revitapidocs.com Dynamo Forum https://forum.dynamobim.com Stackoverflow: revit-api http://stackoverflow.com/questions/tagged/revit-api
Page 28
Revit API Blogs and Resources Building Coder Blog http://thebuildingcoder.typepad.com BoostYourBim https://boostyourbim.wordpress.com SpiderInNet http://spiderinnet.typepad.com Archi-lab.net http://archi-lab.net/ dp-stuff.org http://dp-stuff.org Nathan's Revit API Notebook http://wiki.theprovingground.org/revit-api
Official Autodesk Resources Autodesk Developer Network http://usa.autodesk.com/adsk/servlet/index?siteID=123112&id=2484975 2017: Developer's Guide http://help.autodesk.com/view/RVT/2017/ENU/?guid=GUID-F0A122E0-E556-4D0D-9D0F-7E72A9315A42
Page 29
Python Documents and Guides
Python Official Documentation - for IronPython use 2.7 docs https://docs.python.org Official Python Style Guide https://www.python.org/dev/peps/pep-0008/ Code Academy https://www.codecademy.com/learn/python Dive into Python Book http://www.diveintopython.net/ Automate the Boring Stuff https://automatetheboringstuff.com/
IronPython Documentation
Official IronPython Documentation http://ironpython.net/documentation/ IronPython History https://en.wikipedia.org/wiki/IronPython IronPython Episode on Talk Python To Me https://talkpython.fm/episodes/show/74/past-present-and-future-of-ironpython
Page 30
Top Related