


Languages
Pages
Legal


Origami House with Windowsby Clifford Jones
Origami House with Windows v1.0 Designed by Clifford Jones (Foldtastic)
©2014
Red lines are mountain folds. Blue lines are valley folds.
1. Colored side up. Precrease in order shown below. Creases marked with “S” will form structure of the house. All other creases will form the pleats to create the windows.
S
S
S
12 354 6 78 9
10 1112 1314 15
16
17
18
19
20
24
23
25
26
27
28 30
29
32
31
21
22
33
34
S S

Origami House with Windows v1.0 Designed by Clifford Jones (Foldtastic)
©2014
2. Next steps will show process for pleating one window.
Crease pattern to make one window. Colored side up.
Indented window panes
Window grid (vertical to plane
of paper)
Edges of window (vertical to plane
of paper)
Origami House with Windows v1.0 Designed by Clifford Jones (Foldtastic)
©2014
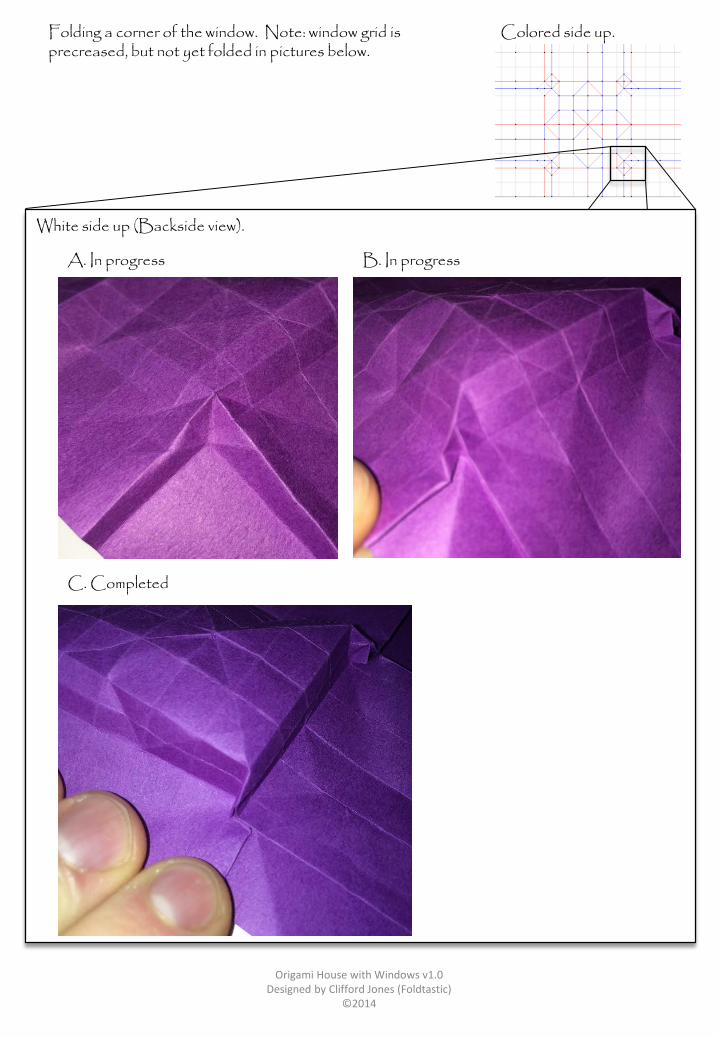
Folding a corner of the window. Note: window grid is precreased, but not yet folded in pictures below.
A. In progress B. In progress
C. Completed
White side up (Backside view).
Colored side up.
Origami House with Windows v1.0 Designed by Clifford Jones (Foldtastic)
©2014
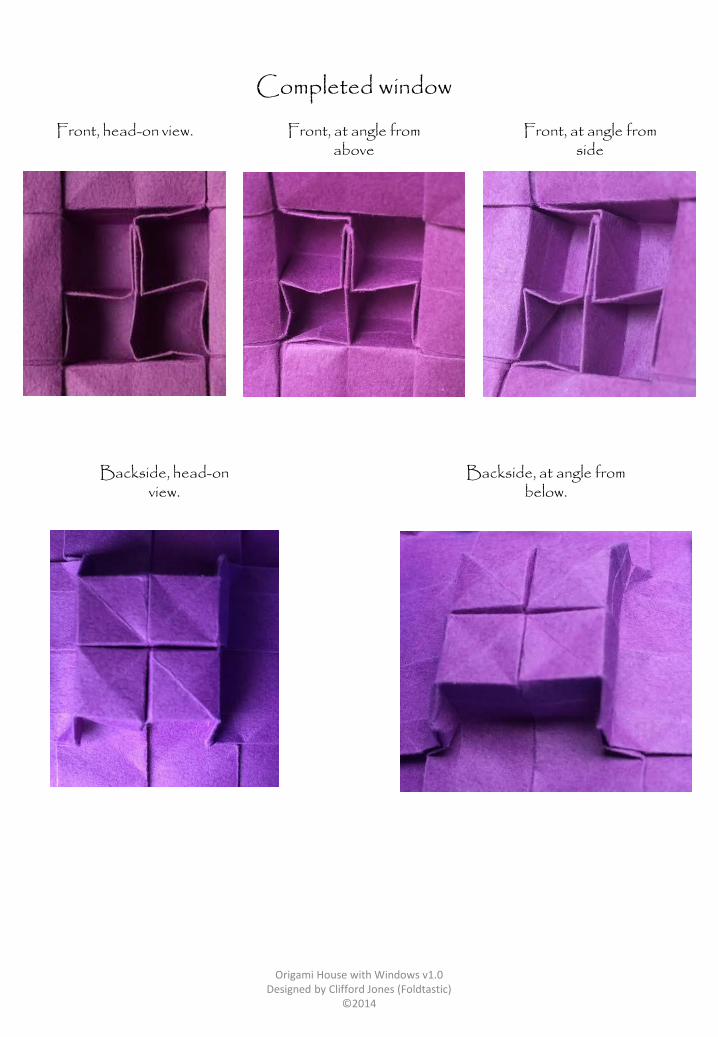
Front, head-on view. Front, at angle from above
Front, at angle from side
Backside, head-on view.
Backside, at angle from below.
Completed window
Origami House with Windows v1.0 Designed by Clifford Jones (Foldtastic)
©2014
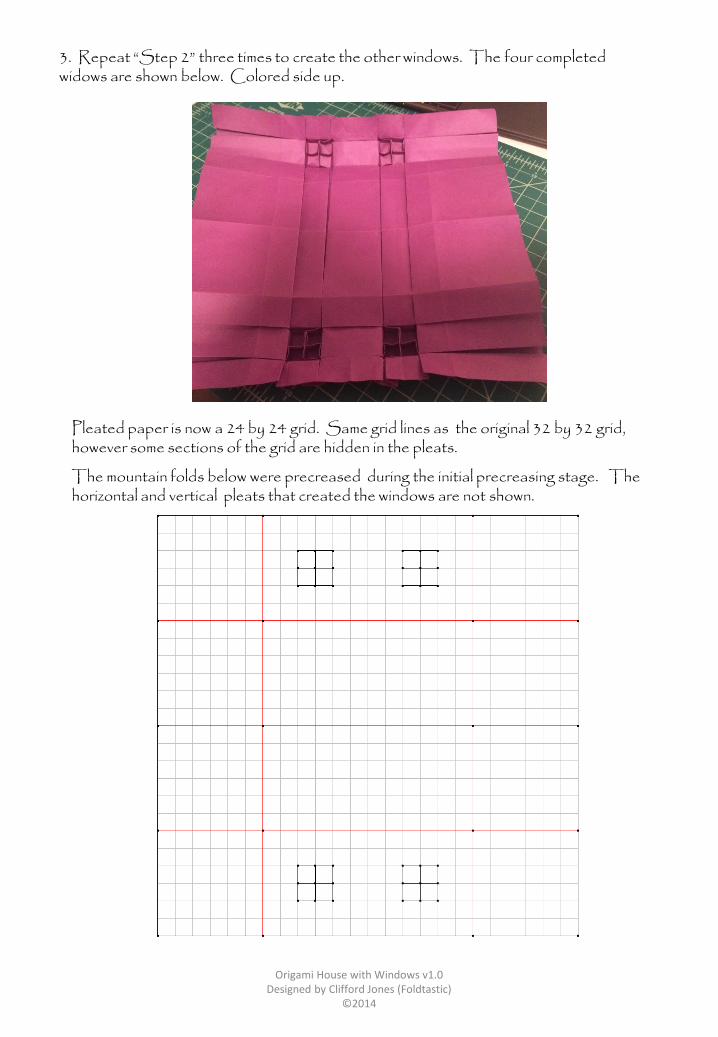
3. Repeat “Step 2” three times to create the other windows. The four completed widows are shown below. Colored side up.
Pleated paper is now a 24 by 24 grid. Same grid lines as the original 32 by 32 grid, however some sections of the grid are hidden in the pleats.
The mountain folds below were precreased during the initial precreasing stage. The horizontal and vertical pleats that created the windows are not shown.

Origami House with Windows v1.0 Designed by Clifford Jones (Foldtastic)
©2014
4. Make creases shown below. Colored side up. Result, viewed from end, with creases of next step starting to form.
5. Make creases shown below In progress
Result.

Origami House with Windows v1.0 Designed by Clifford Jones (Foldtastic)
©2014
6. Fold over excess paper, creating the additional creases shown
Result
7. Repeat steps 4-6 on other end of paper
Completed Model
Copyright notice: If you wanted to use this model for any commercial or non-commercial purpose, I’d almost certainly grant you that right free of charge. Email: [email protected].
Planned renovations for v2.0:- Improved roof shape- Roof overhang- Shingles on roof- Chimney- Door (maybe)
This is one of my first designs.
Comments or suggestions greatly appreciated.
I’d love to hear about it if anyone folds this.
Top Related