


Languages
Pages
Legal

Nissan Titan XD Installation Instructions TITAN Part No. 04 0000 0109 pg.1 Rev. 07.09.18
TITAN pt. no.: 04 0000 0109 Important: Please read these instructions carefully and completely before starting the installation.
TITAN Fuel Tanks™
INSTALLATION INSTRUCTIONS
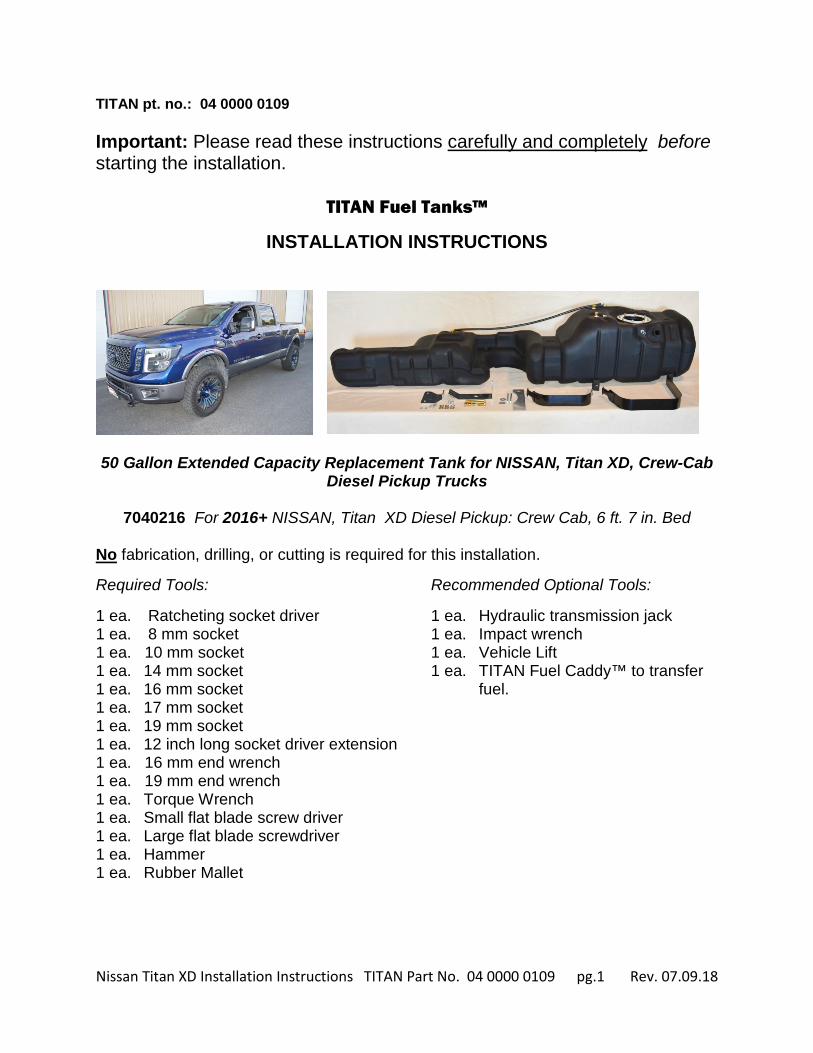
50 Gallon Extended Capacity Replacement Tank for NISSAN, Titan XD, Crew-Cab
Diesel Pickup Trucks
7040216 For 2016+ NISSAN, Titan XD Diesel Pickup: Crew Cab, 6 ft. 7 in. Bed
No fabrication, drilling, or cutting is required for this installation. Required Tools: Recommended Optional Tools: 1 ea. Ratcheting socket driver 1 ea. Hydraulic transmission jack 1 ea. 8 mm socket 1 ea. Impact wrench 1 ea. 10 mm socket 1 ea. Vehicle Lift 1 ea. 14 mm socket 1 ea. TITAN Fuel Caddy™ to transfer 1 ea. 16 mm socket fuel. 1 ea. 17 mm socket 1 ea. 19 mm socket 1 ea. 12 inch long socket driver extension 1 ea. 16 mm end wrench 1 ea. 19 mm end wrench 1 ea. Torque Wrench 1 ea. Small flat blade screw driver 1 ea. Large flat blade screwdriver 1 ea. Hammer 1 ea. Rubber Mallet
Nissan Titan XD Installation Instructions TITAN Part No. 04 0000 0109 pg.2 Rev. 07.09.18
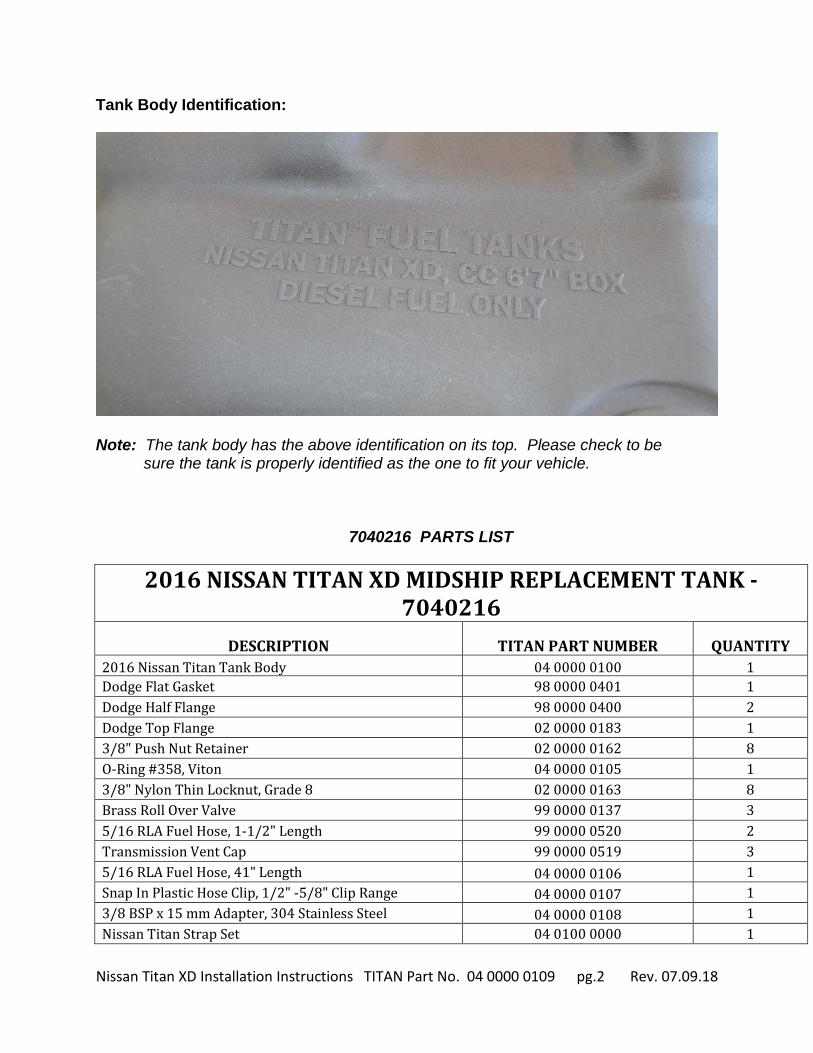
Tank Body Identification:
Note: The tank body has the above identification on its top. Please check to be
sure the tank is properly identified as the one to fit your vehicle.
7040216 PARTS LIST
2016 NISSAN TITAN XD MIDSHIP REPLACEMENT TANK - 7040216
DESCRIPTION TITAN PART NUMBER QUANTITY
2016 Nissan Titan Tank Body 04 0000 0100 1 Dodge Flat Gasket 98 0000 0401 1 Dodge Half Flange 98 0000 0400 2 Dodge Top Flange 02 0000 0183 1 3/8" Push Nut Retainer 02 0000 0162 8 O-Ring #358, Viton 04 0000 0105 1 3/8" Nylon Thin Locknut, Grade 8 02 0000 0163 8 Brass Roll Over Valve 99 0000 0137 3 5/16 RLA Fuel Hose, 1-1/2" Length 99 0000 0520 2 Transmission Vent Cap 99 0000 0519 3 5/16 RLA Fuel Hose, 41" Length 04 0000 0106 1 Snap In Plastic Hose Clip, 1/2" -5/8" Clip Range 04 0000 0107 1 3/8 BSP x 15 mm Adapter, 304 Stainless Steel 04 0000 0108 1 Nissan Titan Strap Set 04 0100 0000 1
Nissan Titan XD Installation Instructions TITAN Part No. 04 0000 0109 pg.3 Rev. 07.09.18
Nissan Titan Front Support Set 04 0101 0000 1 Nissan Titan Mid Support Plate 04 0000 0103 1 1/4"-20 x 1-1/2" Cap Screw, Grade 5 Zinc-Plated Steel 99 0000 0836 2 1/4" Screw Size, Steel Unthreaded Spacer, 3/4" Length,
5/8" OD 99 0000 0837 2
1/4"-20 Nylon Locknut, Grade 5 Zinc-Plated Steel 99 0000 0838 2 1/4" SAE Flat Washer, Zinc-Plated Steel 99 0000 0719 2 1/2"-13 x 4-1/2" Cap Screw, Grade 8 Zinc-Plated Steel 99 0000 0784 2 1/2"-13 Nylon Locknut, Grade 8 Zinc-Plated Steel 99 0000 0156 3 1/2" Flat Washer, Grade 8 Zinc-Plated Steel 99 0000 0685 6 1/2"-13 x 1-1/2" Cap Screw, Grade 8 Zinc-Plated Steel 99 0000 0839 1 M8 x 1.25, 140 mm Length Cap Screw, Class 8.8 Zinc-
Plated Steel 99 0000 0840 2
5/16" Oversized Flat Washer, 1-1/2" OD, Zinc-Plated Steel 99 0000 0841 2
Part Carton, 12" X 7" X 7" 99 0000 0842 1 Carton, 93" L X 19.5" W X 18.5" H 04 0000 0104 1 Instructions 04 0000 0109 1
IMPORTANT NOTICE: Before installation, be sure to thoroughly inspect inside of the tank for ANY foreign debris! NOTE: Take a moment and write the new TITAN™ Tank serial number in the back of this instruction booklet now. The serial number is found on the bottom of tank.
Nissan Titan XD Installation Instructions TITAN Part No. 04 0000 0109 pg.4 Rev. 07.09.18
Nissan Titan XD vehicles with Cummins engines sometimes experience loss of Low Pressure Pump prime. This causes an “Extended Crank” condition or a “Low Fuel Rail Pressure” indicator light. This happens with both stock fuel tanks and aftermarket fuel tanks. This condition occurs most often when the tanks are ¼ or less full. As of now Nissan’s solution to the problem is shown below*. Check with your Nissan dealer to find the latest updates.
PURGE AIR OUT OF THE FUEL SYSTEM AFTER SERVICING THE FUEL SYSTEM, OR AFTER REFILLING A COMPLETELY EMPTY FUEL TANK [OR AFTER EXPERIENCING A “LOW FUEL RAIL PRESSURE” OR “EXTENDED CRANK” CONDITION] BY THE FOLLOWING PROCEDURE:
1 Turn the ignition ON (foot off brake, push ignition twice), and wait for 90 seconds to prime the fuel system. After 90 seconds, crank the engine for a maximum of 30 seconds or until the engine starts. If the engine does not start, repeat this step.
2 When the engine does start, it may operate erratically and with increased noise levels for a few minutes. This is a normal condition as air is being removed from the system.
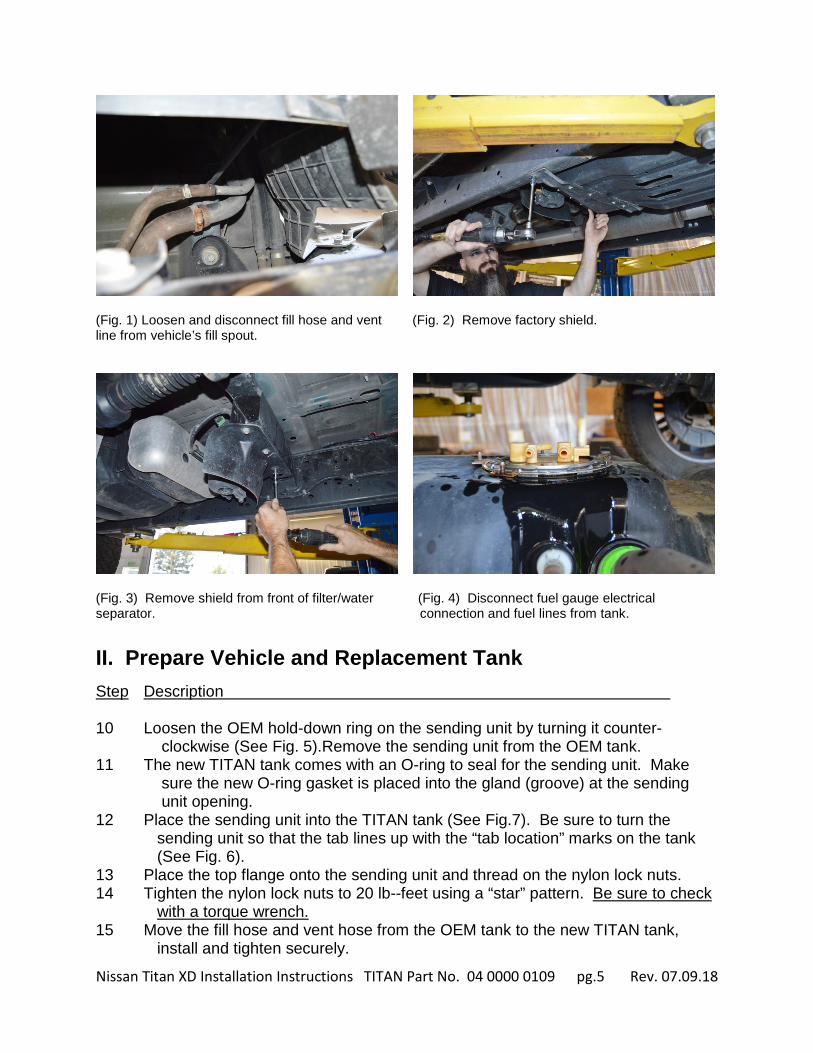
*Nissan: NTB18024 I. Remove Original Equipment Tank Step Description 1 Using best, safe practices, place the vehicle on a hoist that leaves the entire underside of the frame unobstructed. 2 Drain all the fuel from the original equipment (OEM) tank using a TITAN Fuel Caddy™, or a pump, or siphon. 3 Remove the factory shield from the bottom of the tank (See Fig. 2). 4 Disconnect the fill hose and vent line from the vehicle’s fill spout (See Fig. 1). 5 Support the OEM tank. 6 Remove the shield from the front of the filter/water separator (See Fig. 3). 7 Loosen and remove OEM tank straps by first undoing the bolts on straps at inboard side of the tank. Lower tank a few inches. 8 Remove the metal fuel line protector and disconnect fuel gauge electrical connection and fuel lines from sending unit on top of the tank (See Fig. 4). 9 Remove the OEM tank from the vehicle.
Nissan Titan XD Installation Instructions TITAN Part No. 04 0000 0109 pg.5 Rev. 07.09.18
(Fig. 1) Loosen and disconnect fill hose and vent (Fig. 2) Remove factory shield. line from vehicle’s fill spout.
(Fig. 3) Remove shield from front of filter/water (Fig. 4) Disconnect fuel gauge electrical separator. connection and fuel lines from tank.
II. Prepare Vehicle and Replacement Tank
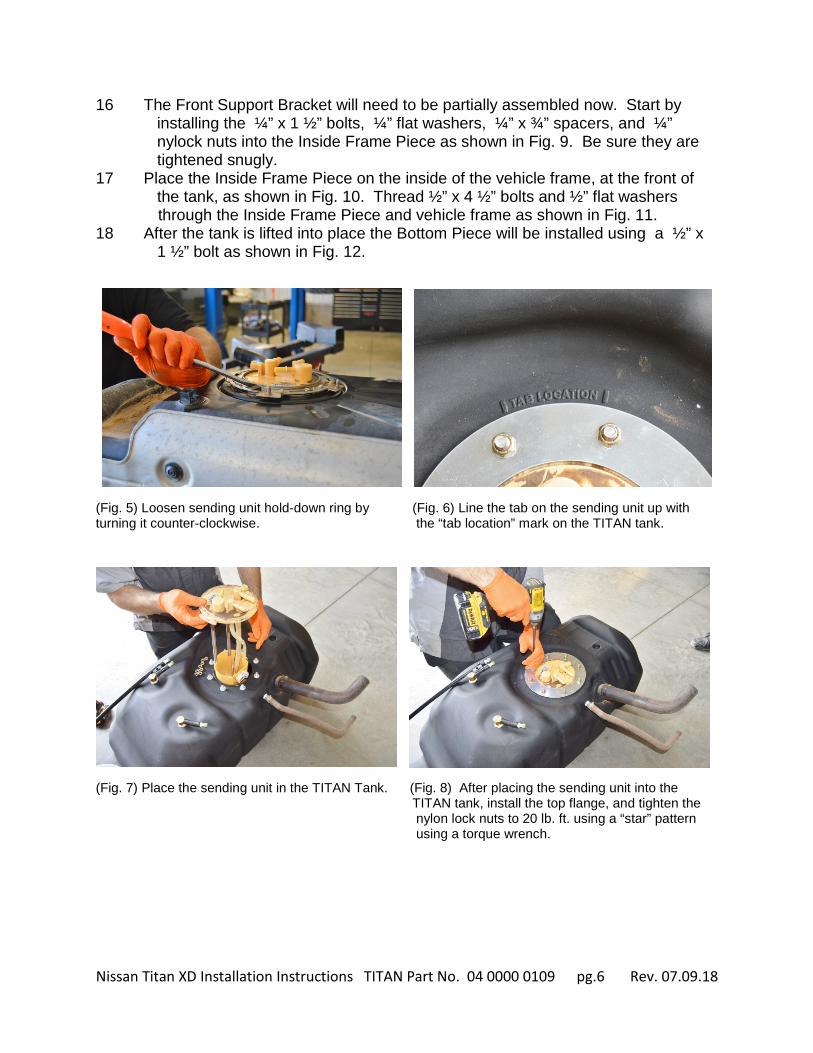
Step Description 10 Loosen the OEM hold-down ring on the sending unit by turning it counter-
clockwise (See Fig. 5).Remove the sending unit from the OEM tank. 11 The new TITAN tank comes with an O-ring to seal for the sending unit. Make sure the new O-ring gasket is placed into the gland (groove) at the sending unit opening. 12 Place the sending unit into the TITAN tank (See Fig.7). Be sure to turn the sending unit so that the tab lines up with the “tab location” marks on the tank (See Fig. 6). 13 Place the top flange onto the sending unit and thread on the nylon lock nuts. 14 Tighten the nylon lock nuts to 20 lb--feet using a “star” pattern. Be sure to check with a torque wrench. 15 Move the fill hose and vent hose from the OEM tank to the new TITAN tank, install and tighten securely.
Nissan Titan XD Installation Instructions TITAN Part No. 04 0000 0109 pg.6 Rev. 07.09.18
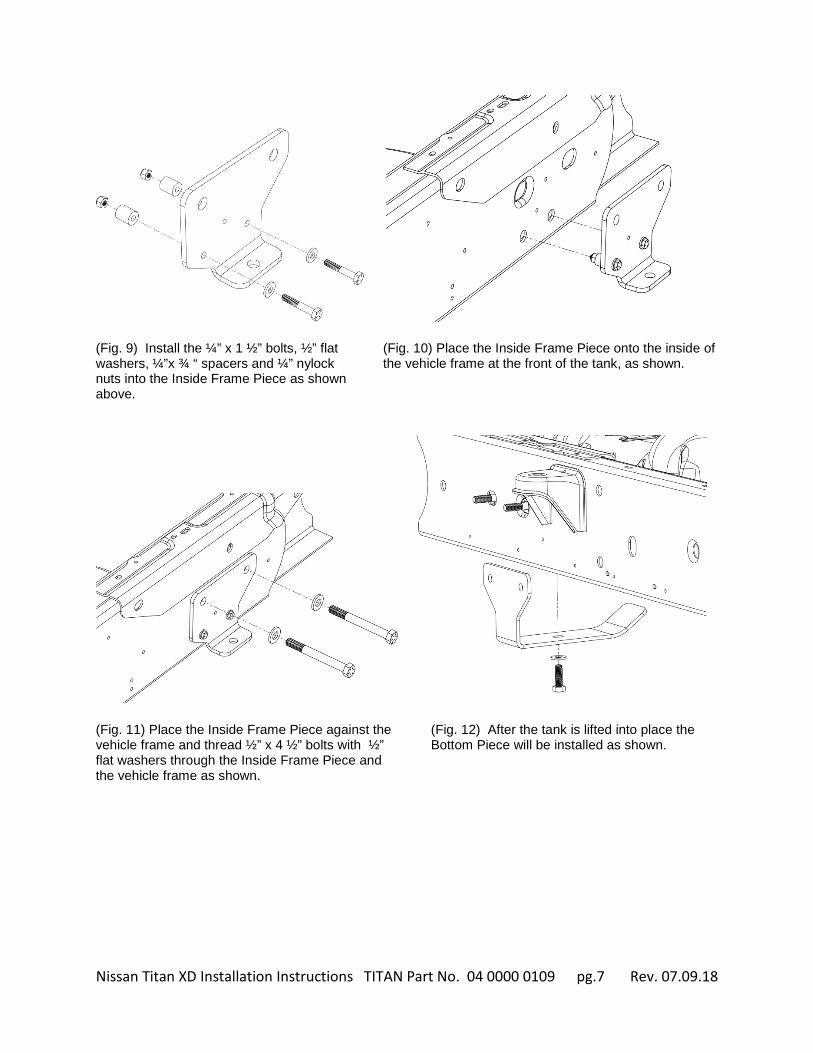
16 The Front Support Bracket will need to be partially assembled now. Start by installing the ¼” x 1 ½” bolts, ¼” flat washers, ¼” x ¾” spacers, and ¼” nylock nuts into the Inside Frame Piece as shown in Fig. 9. Be sure they are tightened snugly. 17 Place the Inside Frame Piece on the inside of the vehicle frame, at the front of the tank, as shown in Fig. 10. Thread ½” x 4 ½” bolts and ½” flat washers through the Inside Frame Piece and vehicle frame as shown in Fig. 11. 18 After the tank is lifted into place the Bottom Piece will be installed using a ½” x 1 ½” bolt as shown in Fig. 12.
(Fig. 5) Loosen sending unit hold-down ring by (Fig. 6) Line the tab on the sending unit up with turning it counter-clockwise. the “tab location” mark on the TITAN tank.
(Fig. 7) Place the sending unit in the TITAN Tank. (Fig. 8) After placing the sending unit into the TITAN tank, install the top flange, and tighten the nylon lock nuts to 20 lb. ft. using a “star” pattern using a torque wrench.
Nissan Titan XD Installation Instructions TITAN Part No. 04 0000 0109 pg.7 Rev. 07.09.18
(Fig. 9) Install the ¼” x 1 ½” bolts, ½” flat (Fig. 10) Place the Inside Frame Piece onto the inside of washers, ¼”x ¾ “ spacers and ¼” nylock the vehicle frame at the front of the tank, as shown. nuts into the Inside Frame Piece as shown above.
(Fig. 11) Place the Inside Frame Piece against the (Fig. 12) After the tank is lifted into place the vehicle frame and thread ½” x 4 ½” bolts with ½” Bottom Piece will be installed as shown. flat washers through the Inside Frame Piece and the vehicle frame as shown.
Nissan Titan XD Installation Instructions TITAN Part No. 04 0000 0109 pg.8 Rev. 07.09.18
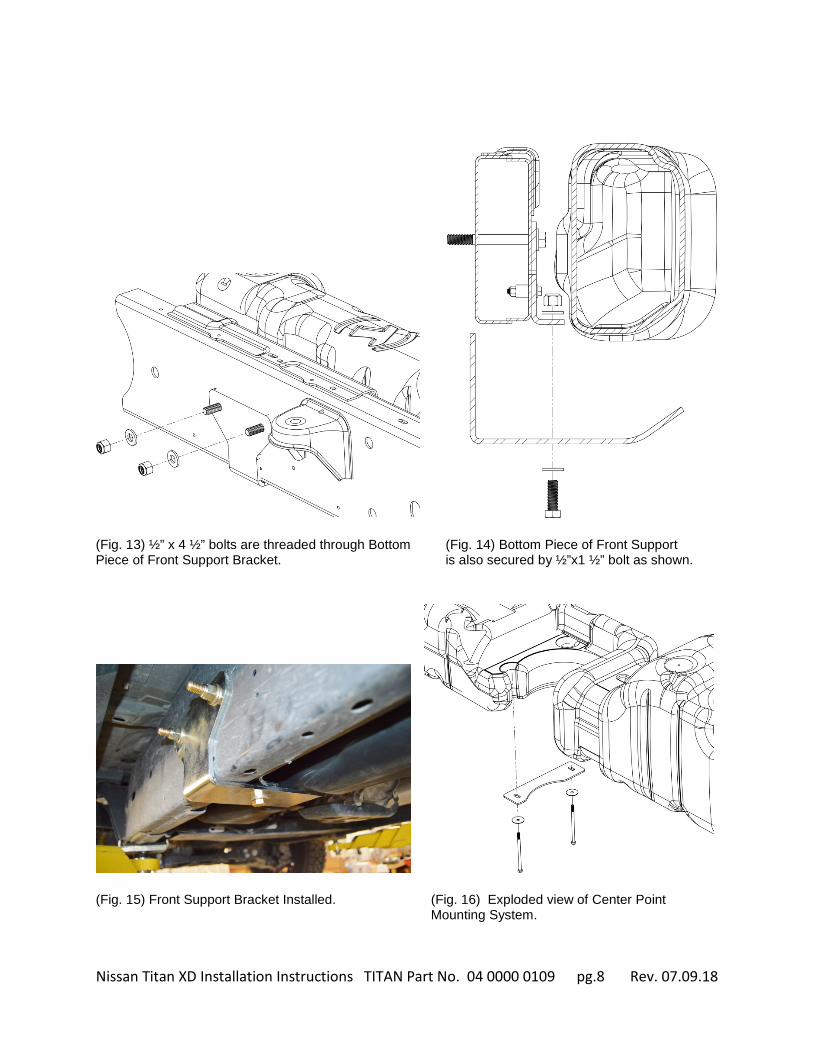
(Fig. 13) ½” x 4 ½” bolts are threaded through Bottom (Fig. 14) Bottom Piece of Front Support Piece of Front Support Bracket. is also secured by ½”x1 ½” bolt as shown.
(Fig. 15) Front Support Bracket Installed. (Fig. 16) Exploded view of Center Point Mounting System.
Nissan Titan XD Installation Instructions TITAN Part No. 04 0000 0109 pg.9 Rev. 07.09.18
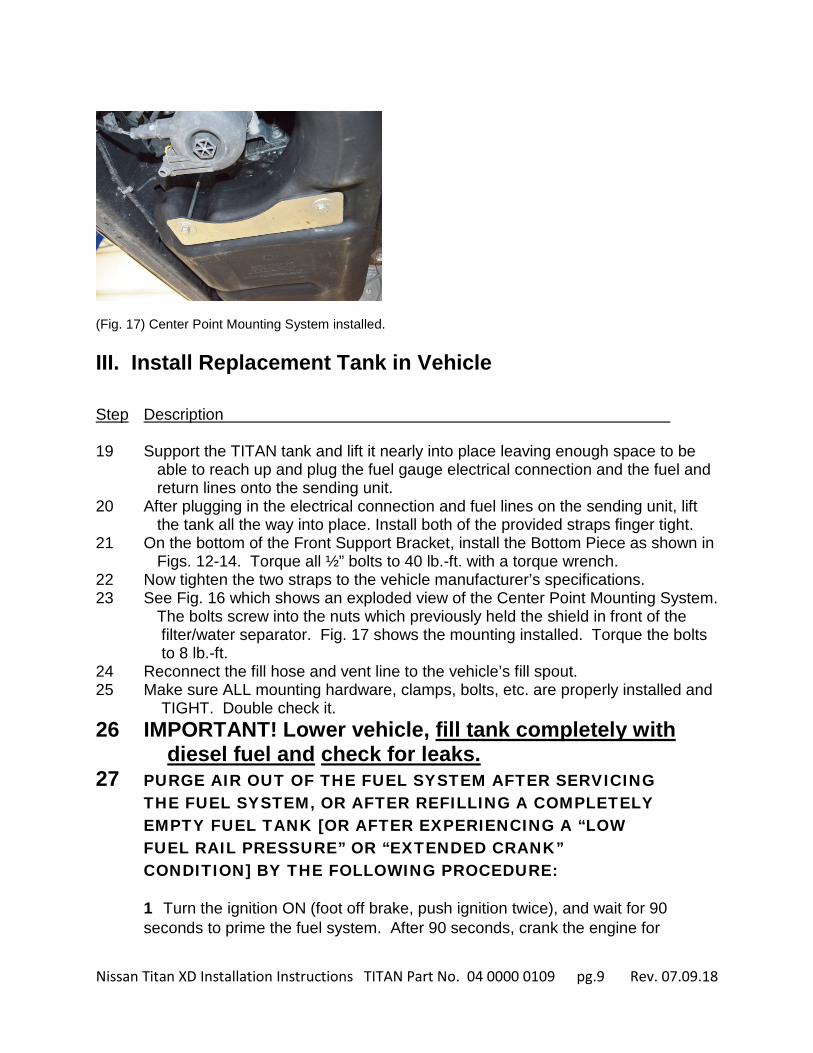
(Fig. 17) Center Point Mounting System installed. III. Install Replacement Tank in Vehicle Step Description 19 Support the TITAN tank and lift it nearly into place leaving enough space to be able to reach up and plug the fuel gauge electrical connection and the fuel and return lines onto the sending unit. 20 After plugging in the electrical connection and fuel lines on the sending unit, lift the tank all the way into place. Install both of the provided straps finger tight. 21 On the bottom of the Front Support Bracket, install the Bottom Piece as shown in Figs. 12-14. Torque all ½” bolts to 40 lb.-ft. with a torque wrench. 22 Now tighten the two straps to the vehicle manufacturer’s specifications. 23 See Fig. 16 which shows an exploded view of the Center Point Mounting System. The bolts screw into the nuts which previously held the shield in front of the filter/water separator. Fig. 17 shows the mounting installed. Torque the bolts to 8 lb.-ft. 24 Reconnect the fill hose and vent line to the vehicle’s fill spout. 25 Make sure ALL mounting hardware, clamps, bolts, etc. are properly installed and
TIGHT. Double check it. 26 IMPORTANT! Lower vehicle, fill tank completely with diesel fuel and check for leaks. 27 PURGE AIR OUT OF THE FUEL SYSTEM AFTER SERVICING
THE FUEL SYSTEM, OR AFTER REFILLING A COMPLETELY EMPTY FUEL TANK [OR AFTER EXPERIENCING A “LOW FUEL RAIL PRESSURE” OR “EXTENDED CRANK” CONDITION] BY THE FOLLOWING PROCEDURE:
1 Turn the ignition ON (foot off brake, push ignition twice), and wait for 90 seconds to prime the fuel system. After 90 seconds, crank the engine for
Nissan Titan XD Installation Instructions TITAN Part No. 04 0000 0109 pg.10 Rev. 07.09.18
a maximum of 30 seconds or until the engine starts. If the engine does not start, repeat this step.
2 When the engine does start, it may operate erratically and with increased noise levels for a few minutes. This is a normal condition as air is being removed from the system.
NOTE: It is possible for a warning or indicator light to illuminate due to air entering the fuel system.
Nissan: NTB18024
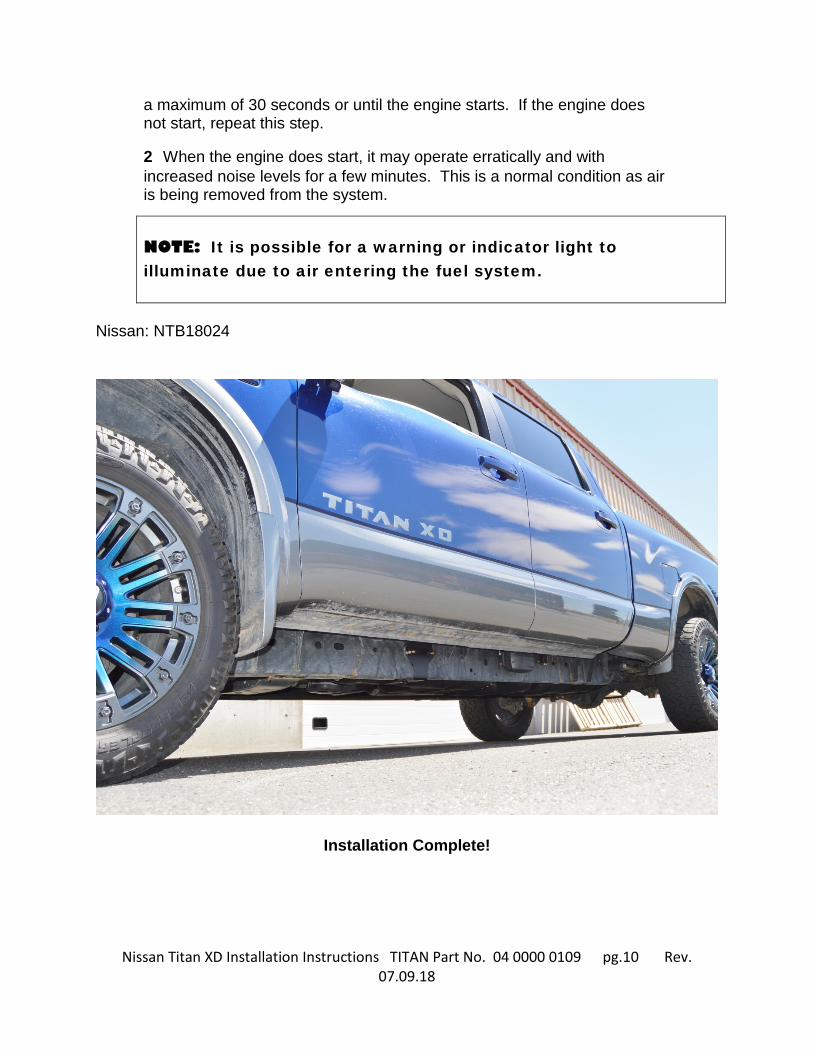
Installation Complete!
Nissan Titan XD Installation Instructions TITAN Part No. 04 0000 0109 pg.11 Rev. 07.09.18
Go to TITAN’s website to view video installation instructions and tips.
* All capacities are approximate Be sure to return the completed warranty registration for your new Titan fuel tank; or you
can register on-line at www.titanfueltanks.com
You will find your tank’s serial number located on the bottom of the tank. Write your tank’s Serial Number here:___________________________
A tank must be registered within sixty (60) days of receipt for the warranty to be valid.
Warranty is void if product is improperly installed.
For questions or customer service call (800) 728-4982
TITAN Fuel Tanks P.O. Box 2225
Idaho Falls, ID 83403 USA Telephone (208) 522-1325, FAX (208) 529-2162
www.titanfueltanks.com TITAN Fuel Tanks are PROUDLY MADE IN THE USA
Revised 07.09.18 ©2018 Supertanks, LLC. All rights reserved.
Top Related