


Languages
Pages
Legal

GETTING YOUR ROLLER IMAGES
IN SHAPE (AND SIZE) By David Punia, Jvillage Project Manager
Roller images are the content type associated with a Jvillage 2.0 slide show. In order to have a consistent, high
quality slide show, you must prepare all your graphical images to meet a chosen specification. You can work
this out with your Project Manager when your site is being built.
THE KEYS TO CONSISTENCY AND QUALITY
When preparing your Roller images for upload to your Jvillage 2.0 website, there are only two things that
make a difference, Aspect Ratio and Image Width. If you mind these two variables, you will achieve a slide
show that displays quickly and without a border that bounces up and down from slide to slide.
ASPECT WHAT?
Aspect Ratio. It’s not as complex as it might sound. The aspect ratio of any image is simply the numerical
relationship between its height and its width. You may see it written as a number, like 1.5, or as a ratio, e.g.
3:2. What this means is that for any image, regardless of its actual size, the width is one and one‐half times the
height. In other words, for every 3 units of width, there are 2 units of height. Here are a few examples, using a
3:2 aspect ratio:
Image size Height/Width Aspect Ratio
600 pixels X 400 pixels 1.5 3:2
9 inches X 6 inches 1.5 3:2
100 cm X 66.67 cm 1.5 3:2
Working with your Jvillage Project Manager and/or your Graphic Designer, you will decide on a standard
aspect ratio for your slide show. Appendix 1 shows some examples of a single image cropped to different
aspect ratios. Appendix 2 lists some standard aspect ratios. If you will be using digital photographs in your
slide show, you may wish to choose a standard ratio, one that is common for digital photographs, for instance.
You’ll have to do more editing with a non‐standard ratio. If you are upgrading to Jvillage 2.0 from an existing
website that already has a slide show, you can use the aspect ratio of your existing slides; just do the math.
LOOKING GOOD ON EVERY SCREEN
The responsive design aspects of modern websites, including Jvillage 2.0, allow for consistently good displays
on everything from a 24‐inch wide‐screen monitor to a 4‐inch smartphone. Your images will be automatically
adjusted to display optimally on whatever device or browser window size your visitor is using. With the advent
of higher and higher resolution displays, images that were considered suitable just a few years ago may suffer
when displayed on modern computer screens. Depending upon the Jvillage Style you select for your website,
your Project Manager will recommend a standard Width for your roller images. In fact, there is considerable
flexibility here, but choosing a single standard makes things easier. A typical standard width for roller images
on Jvillage 2.0 websites is 800 pixels. This allows for images to display well on today’s monitors without a
significant loss of quality, if a browser must enlarge an image.
GETTING YOUR IMAGES IN SHAPE (AND SIZE)
The instructions that follow provide a step by step procedure for editing your digital images so they will be the
right shape and size for uploading to your Jvillage 2.0 website as Roller images. We will be using pixlr.com, a
simple but powerful, free, web‐based image/photo editing site created by Autodesk, Inc.
For this example, we will start with a JPEG format image that is 1200 x 950 pixels in size. The aspect ratio of
the original image is 1200/950 = 1.263. For our Roller images, we’ve decided upon an aspect ratio of 1.67
(5:3), a shorter, wider image than the original. Our desired width is 800 pixels.
OPEN OUR FAVORITE IMAGE EDITOR
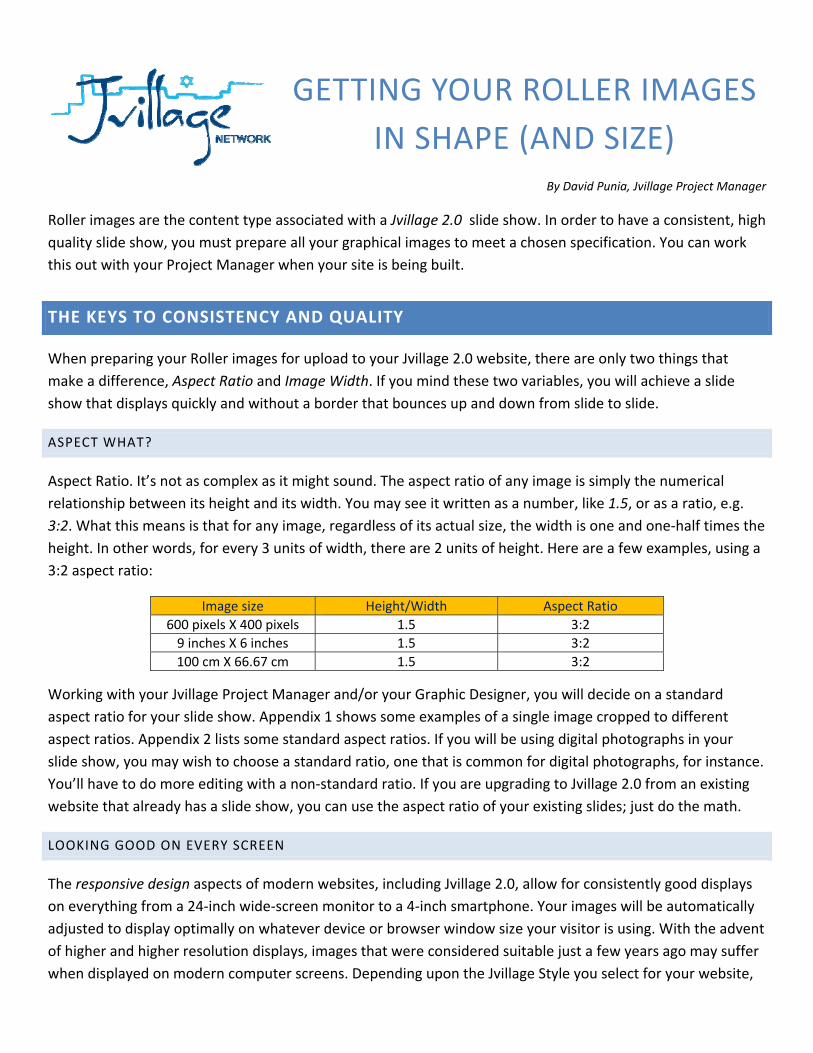
1. Open your Internet browser and go to www.pixlr.com. Here’s what you’ll see.
2. Select Open image from computer. This will open a dialog box so you can browse your computer for
the file you wish to edit.
3. Find and open the file you wish to edit. Here’s our example:

GET YOUR IMAGE IN SHAPE
4. Select the Crop tool in pixlr, top left corner of the tool set, as shown above.
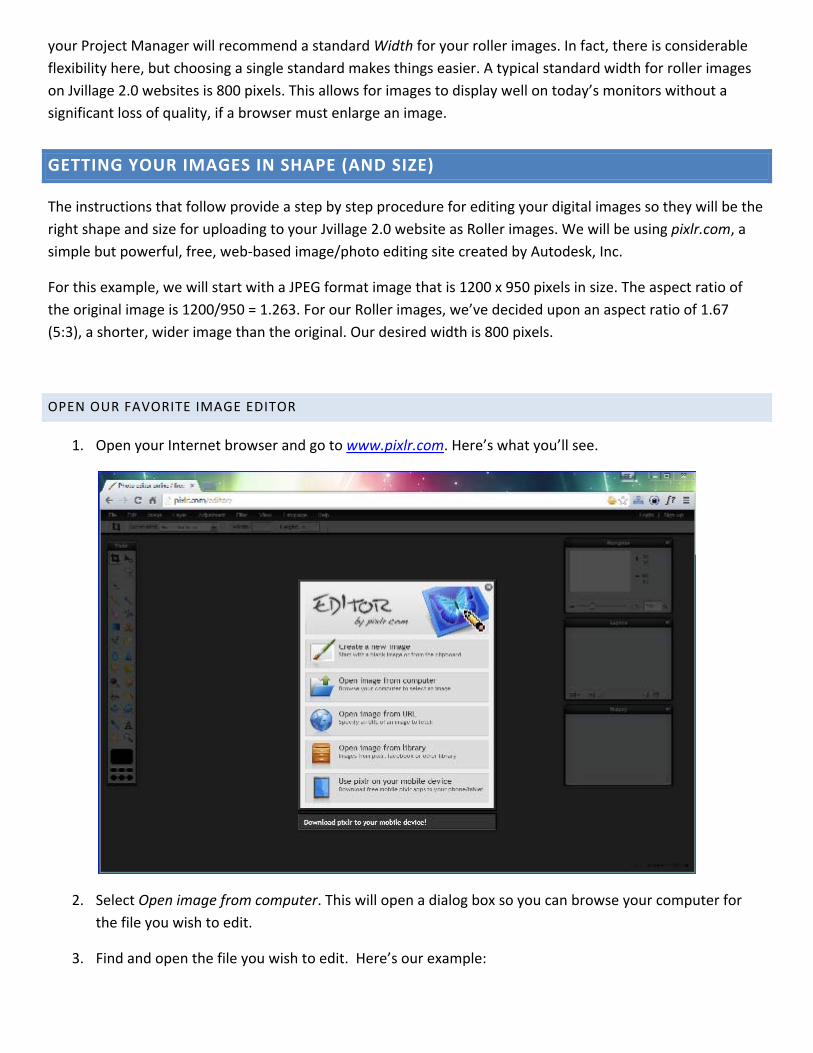
5. Open the Constraint dropdown and select Aspect Ratio.
6. Enter your desired aspect ratio in the Width and Height fields. For example, if your aspect ratio is 3:2,
enter 5 in the Width field and 3 in the Height field.
7. Now, click and drag your cursor across the image to see the crop guide, which shows the area of your
crop at the aspect ratio you have entered.
8. Use your mouse to resize (grab the corners) and move (drag from within the box) the guide box until
you have a desirable looking crop. Consider where the picture elements fall and what gets cropped
out.
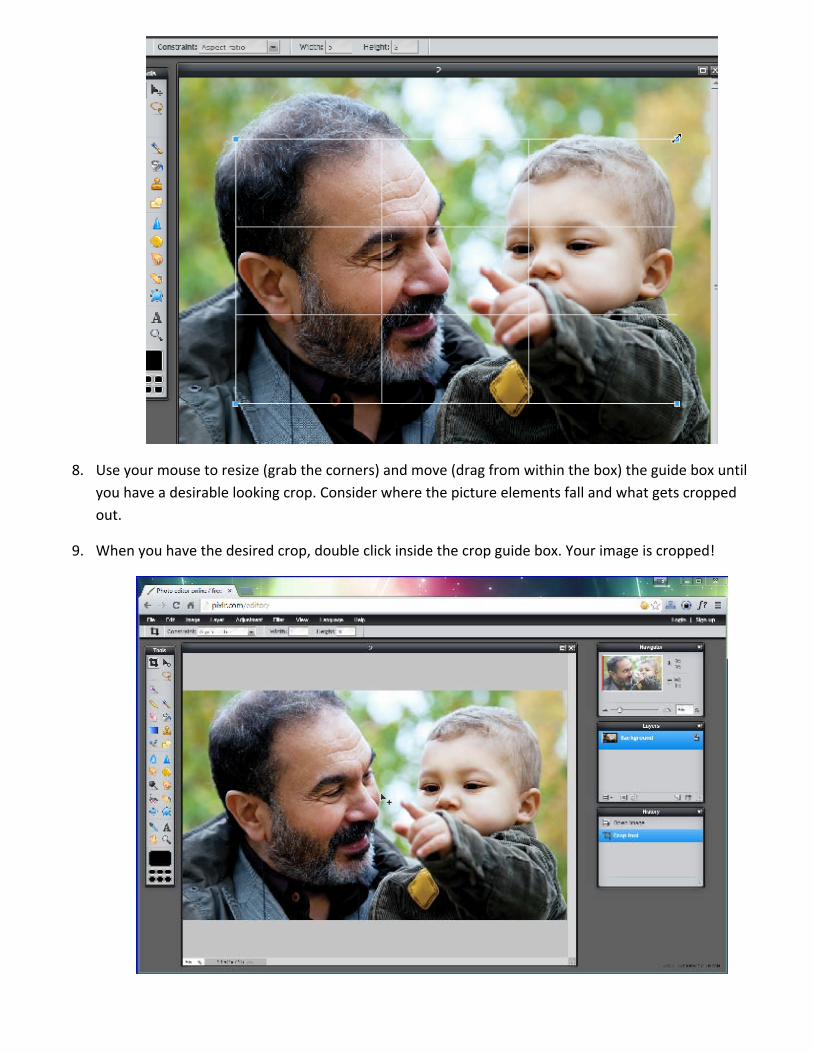
9. When you have the desired crop, double click inside the crop guide box. Your image is cropped!

SIZE MATTERS
10. Now that the image is cropped to the right shape, let's resize it so it will display well on your site.
11. Click on the Image menu and select Image size.
The Image size dialog box will open.
12. Enter the desired Width of your final image. For most Jvillage 2.0 sites, this will be 800 pixels.
13. The Height field will automatically be calculated. Don't change it.
14. Click OK. Your resized image will appear in the main window. Same shape, only smaller.

15. Click on the File menu, then click Save.
16. We suggest giving your file a descriptive name, one that may even include the aspect ratio or size of
the image, e.g. chanukah‐5‐3.png, or chanukah‐800‐480.png. Your files will be much easier to manage
if they have descriptive names. Be careful not to overwrite your original image file!
17. Save the edited file back to your computer, in a folder where you can find it.
VOILA! YOUR IMAGE HAS EARNED THE RIGHT TO BE A JVILLAGE 2.0 ROLLER IMAGE!
18. Now you can open your Jvillage website, add content of the type Roller image, and upload the image
you just created to an appropriate folder. Again, use a descriptive Title for each roller image. It's much
easier to manage roller images with names like Chanukah, Taubman concert 2014, and Pray With Us,
than Slide 1, Slide 2, Slide 3, etc.
If you follow these instructions for each image you wish to appear in your slide show, you are virtually
guaranteed they will display nicely and consistently on your home page.
APPENDIX 1: ASPECT RATIOS AND CROPPING EXAMPLES
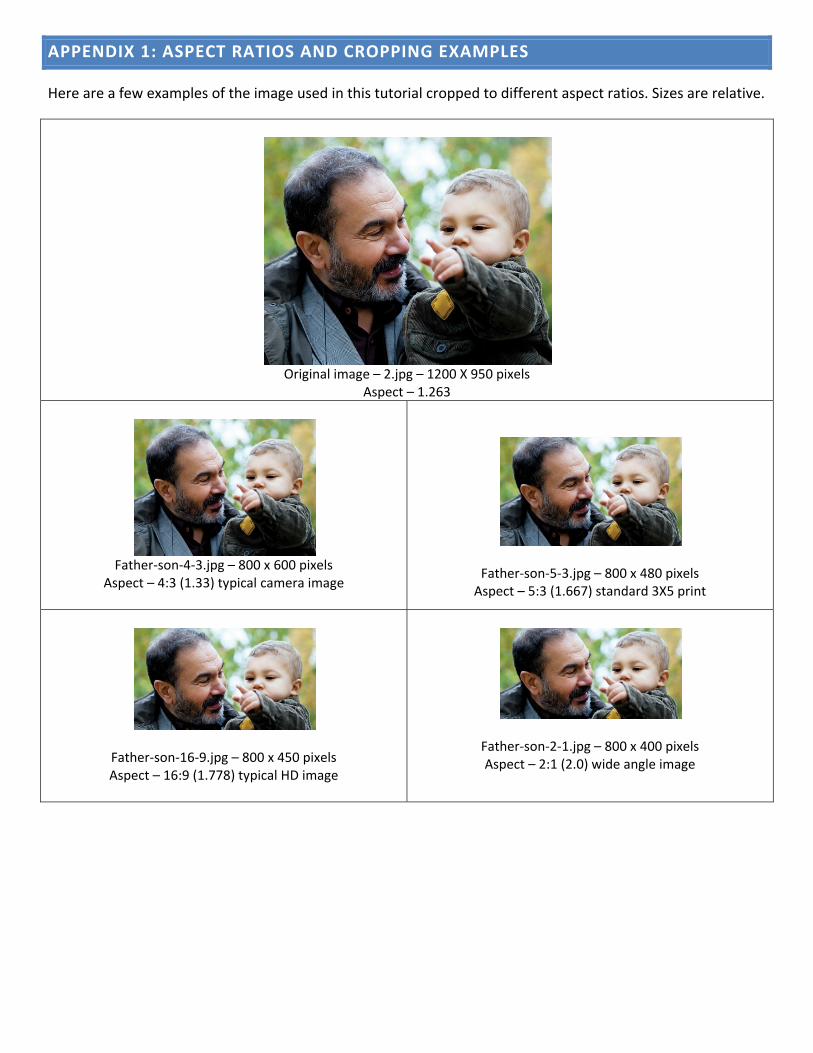
Here are a few examples of the image used in this tutorial cropped to different aspect ratios. Sizes are relative.
Original image – 2.jpg – 1200 X 950 pixels
Aspect – 1.263
Father‐son‐4‐3.jpg – 800 x 600 pixels
Aspect – 4:3 (1.33) typical camera image
Father‐son‐5‐3.jpg – 800 x 480 pixels Aspect – 5:3 (1.667) standard 3X5 print
Father‐son‐16‐9.jpg – 800 x 450 pixels Aspect – 16:9 (1.778) typical HD image
Father‐son‐2‐1.jpg – 800 x 400 pixels Aspect – 2:1 (2.0) wide angle image

APPENDIX 2: COMMON ASPECT RATIOS
Choosing an aspect ratio that is already in common use may save you some cropping. You will, most likely, still
need to resize your images, especially digital photographs taken with modern cameras or phones. Today’s
digital cameras can usually produce images at several selectable aspect ratios. Higher resolution originals
provide more opportunity for cropping and enlarging small areas of an image.
ASPECT RATIO COMMON USES COMMON RESOLUTIONS NOTES
1.0 1:1 Square images, icons, badges, Facebook profile pictures
16x16 (icons) 120x120 (thumbnail images) 160x160 (Facebook profile pic)
Not generally suitable for slide shows, unless accompanied by a text box.
1.33 4:3 Standard computer monitors, television, consumer video, most point & shoot digital cameras
640x480* 800x600* 1280x960 (1 Megapixels) 1600x1200 (2 Megapixels) 2048x1536 (3 Megapixels) 2560x1920 (5 Megapixels) 3264x2448 (8 Megapixels)
The most common format for digital photography. Still too tall for many slide shows, unless accompanied by a text box. Pushes content down the page.
1.5 3:2 Standard 35mm film format, most digital SLR (DSLR) cameras, iPhones
960x640* 1440x960 1152x768 3072x2048
Very common in analog and digital photography, especially SLRs. Still on the tall side.
1.6 8:5 Some computer screens 1152x720* 2048x1280 1680x1050 1920x1200 2560x1600
Wider format provides shorter slides.
1.667 5:3 Common European widescreen standard, some computer screens
800x480 1280x768 2048x1228
Nice balance of height and width
1.77 16:9 HD video/digital TV standard. Many cellphone and newer video cameras, some widescreen notebook computers
1280x720 1600x900 2048x1152 3200x1800
Most common HD videocam format. Most devices have single shot capability.
2.0 2:1 Some Nokia smartphones 800x400 1280x640 1600x800
Good for wide slide shows
2.7 ~8:3 Facebook cover photos 720x256 851x315
Good for wide slide shows
Top Related