


Languages
Pages
Legal


F R E E P A T T E R NF R E E P A T T E R N
f e a t u r i n gf e a t u r i n g A Q U A R E L L EA Q U A R E L L E C O L L E C T I O NC O L L E C T I O N B YB Y K A T A R I N A R O C C E L L AK A T A R I N A R O C C E L L A

© 2020 Courtesy of Art Gallery Quilts LLC. All Rights Reserved.
F A B R I C S D E S I G N E D B Y K A T A R I N A R O C C E L L A
D E S I G N E D B Y
AQU-76752ANEMONE STUDY MORNING
AQU-76759BUTTERCUPS STILL LIFE
AQU-66752ANEMONE STUDY MIDNIGHT
AQU-76757FLORAL PIGMENTS DRY
AQU-76755GESTURAL LINES
AQU-76750IMPRESSIONIST WASH FRESH
AQU-66751TACHISME LUMINOUS
AQU-76753STIPPLING PRACTICE LIGHT
AQU-76756RHOMBASTIC NEGATIVE
AQU-66750IMPRESSIONIST WASH CRISP
AQU-76751TACHISME MAGENTA

artgal lery fabr ics . com
PE-451ICY MINT
PE-470 LAVANDER WATER
FE-505 DEEP OCEAN
PE-403 FRESH WATER
PE-495 FIELD OF LAVENDER
PE-408 WHITE LINEN
FE-519 ICY BLUE
FE-508 AQUA HAZE
PE-452 SPRUCE
ADD IT IONAL BLENDERS FOR TH IS PROJECT ADD IT IONAL BLENDERS FOR TH IS PROJECT

artgal lery fabr ics . com
FINISHED SIZE | 12" × 12"
FABR IC REQUIREMENTSFABR IC REQUIREMENTS
CUTT ING D IRECT IONSCUTT ING D IRECT IONS
¼" seam allowances are included.WOF means width of fabric.
CONSTRUCT IONCONSTRUCT ION
Sew all rights sides together with ¼" seam allowance.
DIAGRAM 1
Four at a time HST method:
• Star by placing one 7½ ” square from fabric D and F right sides together.
• Sew all around the square at leaving ¼“ seam alloawnce.
• Mark diagonal lines corners to corners on the wrong side of the fabric square.
• Using your rotary blade, cut the square following the drawn lines.
• Press each HST amd trim to a 3” squares.
• Twelve (12) 2” squares from fabric A.
• Eight(8) 5” x 2” rectangles from fabric B.
• Four (4) 2” squares from fabric C.
• One (1) 5½” square from fabric D.
• Eight(8) 2” squares from fabric E.
• One (1) 5½” square from fabric F.
• Eight(8) 3½” x 2” rectangle from fabric G.
Block 1
Fabric A AQU-66752 F8.
Fabric B AQU-66751 F8.
Fabric C AQU-76756 F8.
Fabric D AQU-76750 F8.
Fabric E PE-495 F8.
Fabric F PE-470 F8.
Fabric G FE-543 F8.
Block 2
Fabric A AQU-76750 F8.
Fabric B AQU-76755 F8.
Fabric C AQU-76751 F8.
Fabric D AQU-76759 F8.
Fabric E PE-452 F8.
Fabric F FE-505 F8.
Fabric G PE-408 F8.
Block 3
Fabric A AQU-76752 F8.
Fabric B AQU-76759 F8.
Fabric C FE-505 F8.
Fabric D AQU-76750 F8.
Fabric E PE-403 F8.
Fabric F PE-451 F8.
Fabric G FE-508 F8.
Block 4
Fabric A AQU-76757 F8.
Fabric B AQU-76753 F8.
Fabric C AQU-76756 F8.
Fabric D AQU-76752 F8.
Fabric E PE-451 F8.
Fabric F FE-519 F8.
Fabric G FE-508 F8.

artgal lery fabr ics . com
• Take one (1) 2” square from fabric E and place it on the right edge of one (1) 3½” x 2” rectangle from fabric G.
• Draw a diagonal line from the top righ corner to the bottom left corner of the 2“ square from fabric E.
• Sew on the drawn line and trim excess fabic measuring ¼” away from the stitch.
• Make a total of four G-Ea.
• Repeat the same step with one (1) 2” square from fabric A and one (1) 5” x 2” rectangle from fabric B. make a total of four B-Aa.
• Take one (1) 2” square from fabric E and place it on the right edge of one (1) 3½” x 2” rectangle from fabric G.
• Draw a diagonal line from the top left corner to the bottom right corner of the 2“ square from fabric E.
• Sew on the drawn line and trim excess fabic measuring ¼” away from the stitch.
• Make a total of four G-Eb.
• Repeat the same step with one (1) 2” square from fabric A and one (1) 5” x 2” rectangle from fabric B.
• Make a total of four B-Ab.
Block Construction
• Sew one (1) D-F half square triangle with one (1) G-Eb unit.
• Sew one (1) G-Ea unit with one (1) 2” square from fabric C.
DIAGRAM 2
DIAGRAM 3
DIAGRAM 4
DIAGRAM 5
DIAGRAM 6
DIAGRAM 7
G-Eb
G-Ea
B-Aa
x4
x4
x4
B-Ab
G-Eb
G-EaG-Ea
D-F
2” x 2” C
x4
x4
x4

artgal lery fabr ics . com
• Add one (1) B-Ab to the right side of the unit.
• Sew one (1) B-Aa unit with one (1) 2” square from fabric A.
• Sew the two units previously sewn. • Sew one (1) B-Aa2 unit to the bottom of the sewn unit. Repeat this step 3 more times. you should have a total of four blocks.
• Arrange the four blocks in two rows of two blocks each.
DIAGRAM 8
DIAGRAM 11
DIAGRAM 12
DIAGRAM 13
DIAGRAM 9
DIAGRAM 10
x4
x4
x4
x4
B-Ab
B-Aa B-Aa2
B-Aa2
Row 1
Row 2
2” x 2” A
• Sew rows together.
artgal lery fabr ics . com
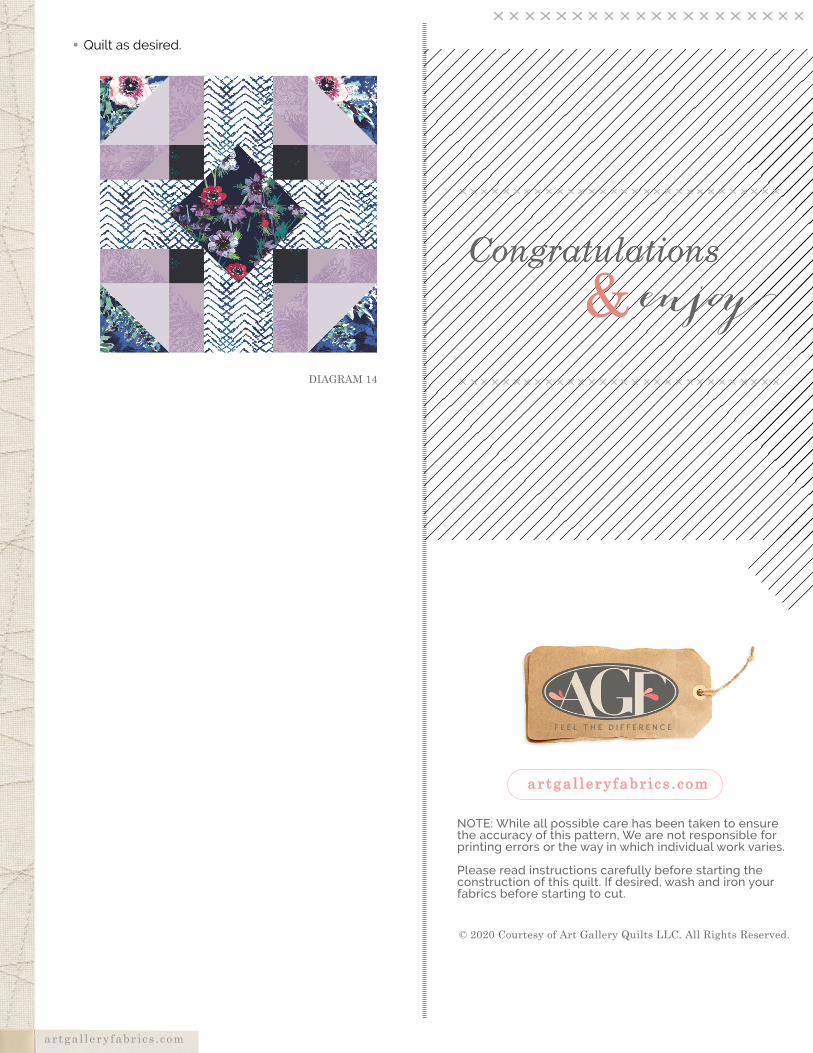
DIAGRAM 14
• Quilt as desired.
NOTE: While all possible care has been taken to ensure the accuracy of this pattern, We are not responsible for printing errors or the way in which individual work varies.
Please read instructions carefully before starting the construction of this quilt. If desired, wash and iron your fabrics before starting to cut.
artgal lery fabr ics . comartgal lery fabr ics . com
© 2020 Courtesy of Art Gallery Quilts LLC. All Rights Reserved.
Top Related