


Languages
Pages
Legal


‘Explode Your Deadlift’ by Andy Bolton and Elliot Newman © 2011, All Rights Reserved
www.andyboltonstrength.net
2
What Every Athlete Should Know About The
World’s Toughest Test Of Strength
By Andy Bolton and Elliot Newman ©2011, All Rights Reserved

‘Explode Your Deadlift’ by Andy Bolton and Elliot Newman © 2011, All Rights Reserved
www.andyboltonstrength.net
3
Notice To Those Who Are Thinking Of Abusing This Book (Or in other words… “Who wants to get sued or go to jail?”) This book is copyright 2011 with all rights reserved. It is illegal to copy, distribute, or create derivative works from this book in whole or in part or to contribute to the copying, distribution, or creating of derivative works of this book. If you attempt to copy, steal, or distribute all or any part of this book without permission, I will have my solicitor contact you and make you wish that you’d never had such an idea in your life. You can count on this. I am a man of my word. By purchasing this book, you agree to the following: You understand that the information contained in this book is an opinion, and it should be used for personal entertainment purposes only. You are responsible for your own behaviour, and none of this book is to be considered legal or personal advice. I expect you to abide by these rules. I have people who spend a lot of time searching the Internet for people who violate my copyrights. Now that we’re finished with this notice, let’s discover how to
“Explode Your Deadlift”…

‘Explode Your Deadlift’ by Andy Bolton and Elliot Newman © 2011, All Rights Reserved
www.andyboltonstrength.net
4
Table of Contents 1. Introduction 2. What To Wear When Training The Deadlift 3. Conventional Or Sumo? 4. The Conventional Set-Up 5. The Conventional Deadlift 6. The Sumo Set-Up 7. The Sumo Deadlift 8. Trouble-Shooting 9. Competition And The Deadlift Suit 10. Andy’s Deadlift Photographed 11. A word on technique 12. The Mind-Set For A Big Pull 13. About The Authors
‘Explode Your Deadlift’ by Andy Bolton and Elliot Newman © 2011, All Rights Reserved
www.andyboltonstrength.net
5
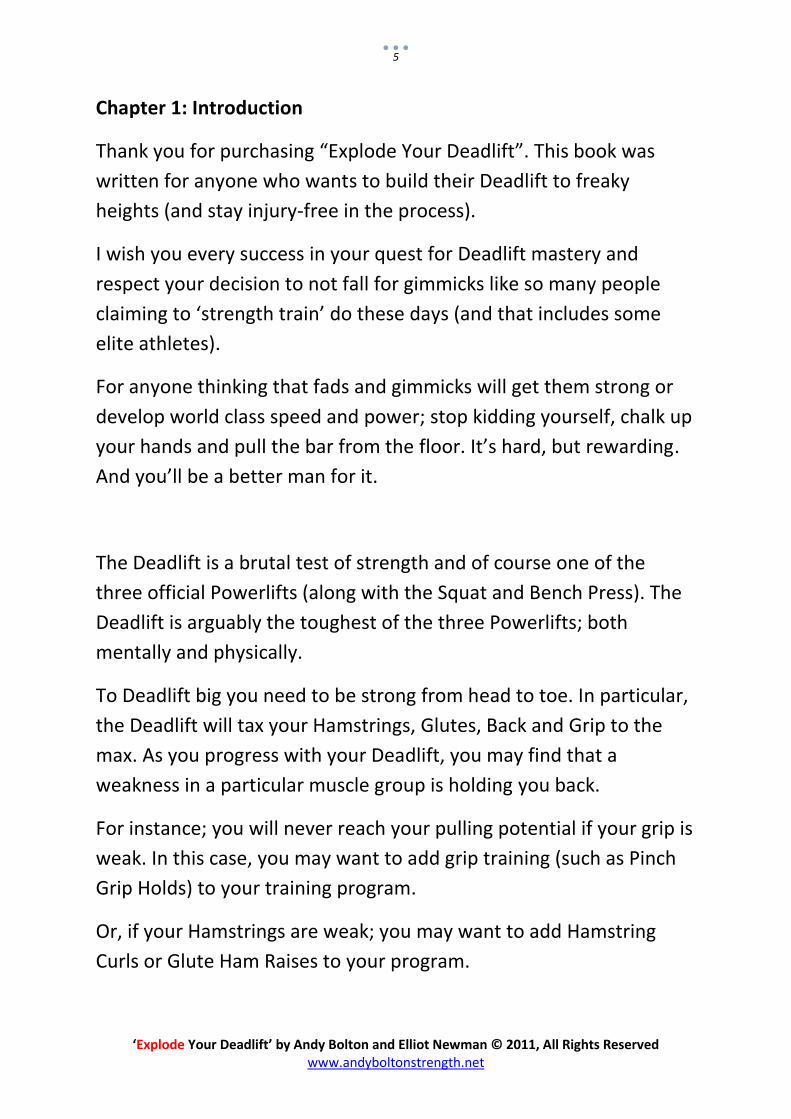
Chapter 1: Introduction
Thank you for purchasing “Explode Your Deadlift”. This book was
written for anyone who wants to build their Deadlift to freaky
heights (and stay injury-free in the process).
I wish you every success in your quest for Deadlift mastery and
respect your decision to not fall for gimmicks like so many people
claiming to ‘strength train’ do these days (and that includes some
elite athletes).
For anyone thinking that fads and gimmicks will get them strong or
develop world class speed and power; stop kidding yourself, chalk up
your hands and pull the bar from the floor. It’s hard, but rewarding.
And you’ll be a better man for it.
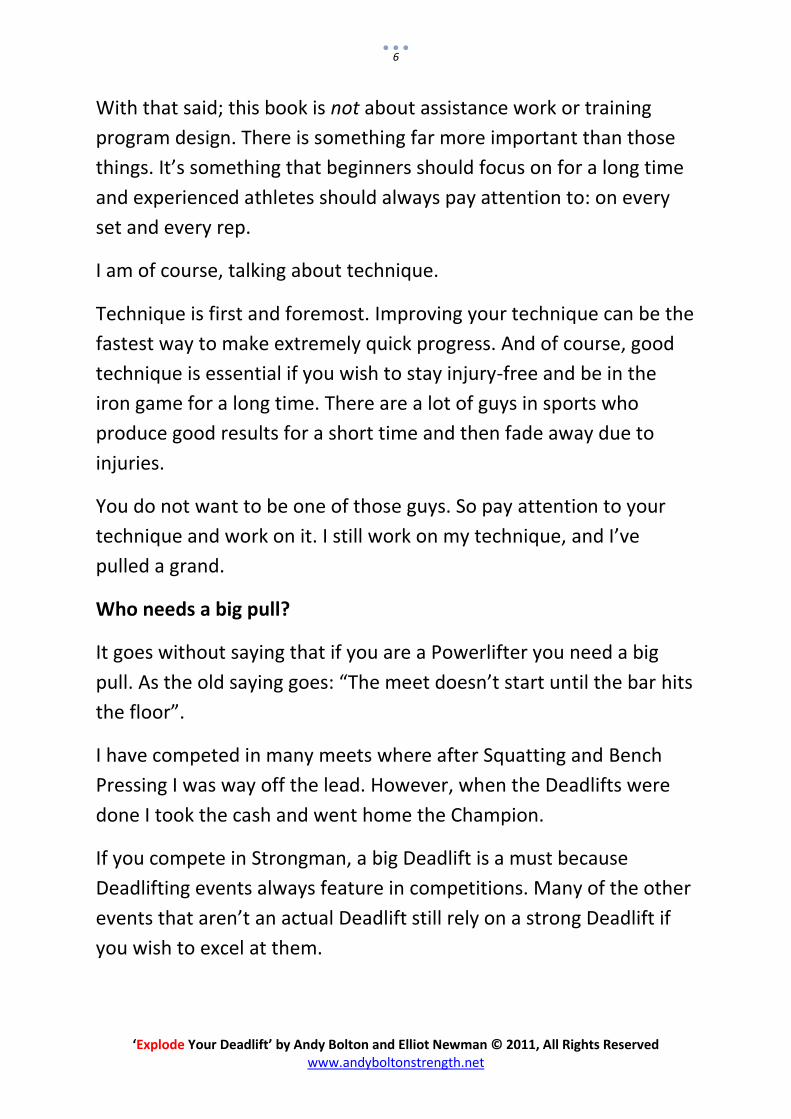
The Deadlift is a brutal test of strength and of course one of the
three official Powerlifts (along with the Squat and Bench Press). The
Deadlift is arguably the toughest of the three Powerlifts; both
mentally and physically.
To Deadlift big you need to be strong from head to toe. In particular,
the Deadlift will tax your Hamstrings, Glutes, Back and Grip to the
max. As you progress with your Deadlift, you may find that a
weakness in a particular muscle group is holding you back.
For instance; you will never reach your pulling potential if your grip is
weak. In this case, you may want to add grip training (such as Pinch
Grip Holds) to your training program.
Or, if your Hamstrings are weak; you may want to add Hamstring
Curls or Glute Ham Raises to your program.
‘Explode Your Deadlift’ by Andy Bolton and Elliot Newman © 2011, All Rights Reserved
www.andyboltonstrength.net
6
With that said; this book is not about assistance work or training
program design. There is something far more important than those
things. It’s something that beginners should focus on for a long time
and experienced athletes should always pay attention to: on every
set and every rep.
I am of course, talking about technique.
Technique is first and foremost. Improving your technique can be the
fastest way to make extremely quick progress. And of course, good
technique is essential if you wish to stay injury-free and be in the
iron game for a long time. There are a lot of guys in sports who
produce good results for a short time and then fade away due to
injuries.
You do not want to be one of those guys. So pay attention to your
technique and work on it. I still work on my technique, and I’ve
pulled a grand.
Who needs a big pull?
It goes without saying that if you are a Powerlifter you need a big
pull. As the old saying goes: “The meet doesn’t start until the bar hits
the floor”.
I have competed in many meets where after Squatting and Bench
Pressing I was way off the lead. However, when the Deadlifts were
done I took the cash and went home the Champion.
If you compete in Strongman, a big Deadlift is a must because
Deadlifting events always feature in competitions. Many of the other
events that aren’t an actual Deadlift still rely on a strong Deadlift if
you wish to excel at them.

‘Explode Your Deadlift’ by Andy Bolton and Elliot Newman © 2011, All Rights Reserved
www.andyboltonstrength.net
7
If you are an athlete who requires strength, speed and power, then
the Deadlift is a great addition to your strength training. It’s easier to
learn than the Olympic Lifts (The Clean and Jerk and Snatch) and also
easier to learn than Squatting. And the Deadlift will help build a very
strong posterior chain (Glutes, Hamstrings, Lower Back).
Of course a strong posterior chain is essential for explosive power
and speed. (Just take a look at the Hamstring development of some
top Sprinters).
Rugby Players, American Football Players, Boxers, Mixed Martial
Artists, Wrestlers, the list goes on and on; and all will benefit from
well-performed Deadlifts.
This book focuses on the Conventional Deadlift and the Sumo
Deadlift. However, if you wish to do other variations in your training
(such as Rack Pulls or Romanian Deadlifts) you will find that if you
master the techniques presented to you here; you will be easily able
to perform any Deadlift variation with good form, if you just apply a
little logical thought first.
Deadlift History
Deadlift records have not moved much in the past 10 years or so. I
believe this is down to powerlifting equipment. In recent years
powerlifting equipment has progressed massively.
It is not uncommon for experienced lifters to gain 300 pounds from
their Squat equipment and the same goes on their Bench. I myself
get around 300 pounds out of my Bench shirt.
However, most athletes are lucky to see a 25 pound carry over out of
their Deadlift suit. (I’ve pulled 440kg Raw and 457.5kg Equipped: not
much difference).

‘Explode Your Deadlift’ by Andy Bolton and Elliot Newman © 2011, All Rights Reserved
www.andyboltonstrength.net
8
In spite of this, you can improve your pull if you master your
technique, train sensibly and train hard!
And there are some freaks that are bucking the trend and putting up
some insane numbers right now.
Benedikt Magnusson recently took out my own world record
Deadlift, with a monster pull of 1015lbs. Benni; respect to you my
friend… but I’m coming for you.
The incredible Tom Martin (from the United Kingdom) has pulled
355kg in competition, as an 82.5kg Junior. This is amazing and puts
him in the top 5 all-time in his weight category (irrespective of age
class or federation).
Throughout history there have been many great pullers, (certainly
too many to list here). Lamar Grant springs to mind as a lightweight
freak: pulling way over 600lbs at a tiny bodyweight.
A little heavier, at 90kg, the great Vince Anello amazed crowds “back
in the day” with pulls of over 800lbs at 198lbs bodyweight.
One of my own training partners, Brian Reynolds, pulled 800lbs at
100kg bodyweight nearly 20 years ago. In the process he won the IPF
Worlds as a junior. That pull is only just outside of the all-time top 20
in the 100kg class, yet nearly 2 decades have slipped by. This just
shows how slow Deadlift records progress on a World level.
Another great friend and training partner of mine, Dave Carter,
continues to amaze. He is still pulling 330kg at 90kg bodyweight at
nearly 50 years of age. (But then has won the British Championships
over 10 times so it doesn’t really surprise me, but it probably does
you and it should definitely inspire you).
‘Explode Your Deadlift’ by Andy Bolton and Elliot Newman © 2011, All Rights Reserved
www.andyboltonstrength.net
9
Of course, Dave still has his name on the all-time top 20 list. I forget
the weight class, but he’s there.
Everybody loves to see what the heavyweights can lift. That’s true in
all strength sports (Powerlifting, Strongman and Weightlifting).
Naturally, it is heavyweight athletes who are responsible for most of
the pulls in the ‘900lbs Club’.
This is a very exclusive club and only 13 men are subscribers.
Ed Coan, (the best Powerlifter of all-time pound for pound), is the
lightest man on the list. He pulled 900lbs at just 220lbs bodyweight.
Ed pulled his 900lbs Sumo style, but pulled big throughout his career
using both Sumo and Conventional.
That’s pretty unusual though, because he is only one of a couple of
men in the 900lbs club to get there with a Sumo pull. Most guys
pulled conventional.
Doyle Kenady was the man who created the 900lbs club. He will
forever be a legend, as all great athletes who break significant
milestones will be.
Just look at Roger Bannister, the first man to run a sub-4 minute
mile. Despite the 4 minute barrier having been broken many times
since, I can’t name another guy who’s done it. But I sure as hell
remember Roger Bannister!
Chuck Fought is the youngest man to pull 900lbs, doing so in his early
twenties. Another phenomenal achievement.
In 2006 I created a club all of my own. The 1000lbs club. I pulled
1003lbs and then in 2009 I extended my World Record Deadlift with
a pull of 1008lbs. Since then, Benni has pushed the record a little
further; coming from a previous best of 978lbs to 1015lbs.

‘Explode Your Deadlift’ by Andy Bolton and Elliot Newman © 2011, All Rights Reserved
www.andyboltonstrength.net
10
Competition is good for all sports and this motivates me to train even
harder.
Without competition sports die.
Just compare Boxing and the UFC. The former suffering from too
many ‘Champions’ who all seem to duck each other and avoid the big
fights that the public want to see. The latter is an amazing
organisation where the best are made to compete against the best.
They simply have no choice. Dana White won’t allow it.
I have of course pulled 900lbs in competition more times than
anybody else who has ever lived. At the time of writing I honestly
can’t remember how many competition pulls of over 900lbs I have to
my name.
I do know that it’s nearly 40. And keep watching, because that
number will grow.
‘Explode Your Deadlift’ by Andy Bolton and Elliot Newman © 2011, All Rights Reserved
www.andyboltonstrength.net
11
Chapter 2: What To Wear When Training The Deadlift
I was training the other day and saw a guy (who clearly wasn’t a
competitive athlete), Deadlift 220kg and then just miss 230kg. This is
no world class strength feat, but I was mildly impressed because he
wasn’t a big guy and unfortunately you don’t see many guys training
hard these days.
A week later I see the same guy again and figure I’d help him out a
little. I noticed that when he missed 230kg he was wearing some
trainers with those fancy air-bubbles in the heel.
I also noticed that as he pulled, the shoes were compressing by
about an inch and robbing him of a ton of stability. This was clearly a
strength leakage and a major loss of power; not to mention an injury
risk.
I suggested that he remove the shoes and Deadlift in his socks the
next time he pulls and I also told him that 230kg would fly for him
(which I genuinely believed it would if he had a stable base to pull
from).
His reply surprised me and was ridiculous to say the least:
“Thanks for the advice mate; but I can’t be bothered with the hassle
of taking my shoes off”
At this point I was much less impressed by this guy than I first
thought and left him to bathe in his mediocrity.
Why go to the effort of loading the bar to a personal best weight,
train pretty dam hard to give your-self a legitimate shot at pulling it
and then miss it due to something as simple as lousy footwear?
It’s not as if the solution cost anything! The guy was just a lazy S.O.B.
‘Explode Your Deadlift’ by Andy Bolton and Elliot Newman © 2011, All Rights Reserved
www.andyboltonstrength.net
12
Don’t be like this guy.
The morale of the story is to pay attention to what you wear when
Deadlifting because it could be the difference between a personal
best and failure.
Also, be sure to hold yourself to a high standard. Not just in the gym,
but in all areas of your life. To say you can’t be bothered to do
something so quick and easy is just absurd.
The most important thing to consider when you train the Deadlift is
footwear.
I train my Deadlift on a Wednesday after Squats. For the Squat I wear
dedicated Squat shoes from Inzer.
However, when Deadlifting, I want to be as close to the floor as
possible (in order to reduce the range of motion). A shorter range of
motion will almost instantly improve your weight on the bar.
You may see bodybuilders wearing big Timberland Boots in your
favourite muscle magazines. But please, leave this for their photo-
shoots and wear what will improve your pull; not what looks the best
at a nightclub.
For this reason, I wear Deadlift slippers to Deadlift. Cheap, effective
and as close to Deadlifting barefoot as I’m allowed to do in
competition.
Deadlift slippers have a sole about 3mm thick and when you have
them on you don’t really feel like you are wearing anything on your
feet. This not only reduces your range of motion; but also improves
your proprioception.

‘Explode Your Deadlift’ by Andy Bolton and Elliot Newman © 2011, All Rights Reserved
www.andyboltonstrength.net
13
Put simply, all those small muscles in your foot will be better able to
help you balance if you are as close to barefoot as possible when
training the Deadlift.
Big, thick soles ruin your proprioception, make your feet weak and
hurt your strength.
Incidentally, if you are not a Powerlifter and don’t have to worry
about competition rules relating to footwear; I highly recommend
just Deadlifting barefoot.
It’s healthy for your feet and your pull.
If you don’t like the idea of Deadlifting barefoot (or if you gym
doesn’t allow it) then Chuck Taylor Converse trainers are a good bet,
as is any other trainer that is flat soled and stable.
Vibram Five Fingers (those funky trainers with a hole for each toe)
would also be great Deadlifting shoes but I can’t see the point as
they cost so much money compared to Slippers or Converse.
You want to avoid a heel (because it throws you forwards and off
line) and unstable shoes at all costs. Unstable shoes and/or shoes
with a heel will rob you of pounds on the Deadlift bar and could
promote injury.
After footwear, what you wear on your lower body is next most
important when Deadlifting.
Long socks (up to the knee) are a must. They help the bar slide up
the shin and stop you getting blood all over the bar.
Above the knee, shorts are better than tracksuit bottoms for two
reasons. Firstly, if you wear shorts you can accurately position your

‘Explode Your Deadlift’ by Andy Bolton and Elliot Newman © 2011, All Rights Reserved
www.andyboltonstrength.net
14
feet during your set up without a bunch of material obstructing your
view.
Secondly, if you wear tracksuit bottoms there is always the risk that
the bulky material will catch on your thumb or the bar and either
weaken your grip or cause the bar to snag during a rep. Both are
highly annoying when you are training the Deadlift.
Wear what you like on your upper half. It doesn’t matter when
pulling Deadlifts. A t-shirt or a top with sleeves will be fine. Just make
sure you are comfortable.
You can wear a weightlifting belt for Deadlifting. For Powerlifters,
you will probably find that the belt adds pounds to the bar. Everyone
will find that the belt adds a feeling of tightness to their trunk.
Use the belt on your sets from about 40 to 50% of your max
upwards. Invest in a decent belt, from a Powerlifting company (I have
always used Inzer, but you have other choices too). Many of the
bodybuilding belts are a joke and offer no real support because they
are too thin.
Also, do not be the chump who wears their belt for the entire
workout; as this will weaken your trunk. Add the belt for heavy sets
and take it off in between.
To re-cap:
Here’s what to wear when Deadlifting:
- T-shirt or Jumper
- Shorts (or singlet)
- Long socks (up to the knee)
- Deadlift Slippers (or Converse)
- Wear your belt from 40% of your max and up

‘Explode Your Deadlift’ by Andy Bolton and Elliot Newman © 2011, All Rights Reserved
www.andyboltonstrength.net
15
- Bonus Tip:
I shouldn’t have to say this but I’m going to. Don’t wear gloves when
Deadlifting. In effect they make your hands fatter and your grip
weaker. Man up and let your hands get used to holding the bar. Sure,
you’ll develop a few callouses; but if that puts you off maybe you
aren’t cut out for Deadlifting anyway.
Also, whilst not exactly something you wear (but still on the topic of
what not to do)… ditch the mirror. Training in front of a mirror will
ruin your technique and if you are a competitive lifter it will be quite
a shock to you when you turn up at the meet and there is no mirror!
‘Explode Your Deadlift’ by Andy Bolton and Elliot Newman © 2011, All Rights Reserved
www.andyboltonstrength.net
16
Chapter 3: Conventional Or Sumo?
The issue of whether to pull with a conventional stance or a sumo
stance is a huge debate. Before getting into that, let’s just define
what each style looks like.
The Conventional Deadlift
The Conventional Deadlift uses a stance that is usually around hip
width and the hands grip the bar outside of the legs.
The Sumo Deadlift
The Sumo Deadlift utilises a very different approach. The feet are
placed in a much wider stance and the hands grip the bar inside of
the feet. This is much like the posture a Sumo wrestler adopts at the
start of their fights, hence the name.
What is stated above is absolutely true. However, this does not mean
that there are only two styles of Deadlift. Take 1000 athletes and
they’ll all pull slightly differently. They’ll all have their own style.
This is down to two reasons. Firstly, different body proportions (arm
and leg length, torso length etc). The great Lamar Grant’s hands were
only just above his knees when he had a Deadlift locked out.
Less genetically gifted Deadlifters may find their hands nearer their
crotch at lockout. Those with ‘Alligator’ arms will know all about this.
But then those dudes are built to Bench (so you can’t have it all
handed to you on a plate).
Do you think these factors will affect how different athlete’s
Deadlifts look? You bet they will.
‘Explode Your Deadlift’ by Andy Bolton and Elliot Newman © 2011, All Rights Reserved
www.andyboltonstrength.net
17
The second reason why every athlete will develop a different Deadlift
style is due to which muscle groups they are stronger in. If one
athlete has a very strong back but comparatively weak Legs and
Glutes, his Deadlift will be very back dominant. The converse is likely
to be true for an athlete with strong hips and legs and a weaker back.
So every athlete must find their style, but there are definitely some
dos and don’ts (which we’ll get onto in the next chapters).
Right now, let’s concentrate on how you should decide whether to
pull Conventional or Sumo.
The competitive Powerlifter should pull in his or her strongest
stance. Makes sense, right? You want the biggest total at the
competition and part of that total is the Deadlift. So pull using your
strongest stance.
For athletes in sports where they are competing to improve their
strength and power in order to sprint faster, jump higher and throw
further; I favour the Conventional Deadlift over the Sumo Deadlift
(provided their form is good).
This is because the Sumo stance is not very closely related to a
sprinting stance, throwing stance or any other common stance in
most sports. For this reason, the Conventional Deadlift will develop
strength that carries over better to sports.
However, on this same topic, we should remember that staying
injury-free is of primary importance for the athlete. Testing his or her
Deadlift strength is of secondary importance to displaying their best
on the field, court, pitch or in the ring.
Therefore, the athlete should use the Deadlift variety that they can
perform with great technique and if they can perform the
‘Explode Your Deadlift’ by Andy Bolton and Elliot Newman © 2011, All Rights Reserved
www.andyboltonstrength.net
18
Conventional Deadlift like this, then it should be favoured over the
Sumo the majority of the time.
We should also remember that athletes should use their sports
practise to improve their sports movements and the weight room to
get strong.
So with that in mind, don’t totally disregard the Sumo because it still
works the hell out of the Posterior Chain and this will lead to faster
sprinting, higher jumps, more powerful kicks and bigger throws.
I have pulled Conventional throughout my career. It suits me
because I have a freakishly strong back. However, I know other lifters
whose Glutes and Hamstrings are comparatively stronger than their
Back and the Sumo can favour them better.
Other athletes like to mix things up a lot in their training and use
both styles. This has merit because the style they are weaker on will
train the weak muscle groups.
Don’t be afraid to experiment and try new things. What’s the worst
that can happen? You just go back to what you did before.
If you have a very strong Back and you Deadlift Conventional then it
makes sense that your Back will get very strong, perhaps at the
expense of Glute and Hamstring strength. In the long run this could
lead to injury and a failure to reach your potential.
If you switched to Sumo pulls for a while (or maybe alternated on a
weekly basis) the Sumo will force the Hamstrings and Glutes to work
harder and go some way toward making you more balanced.
One major benefit of the Sumo Deadlift over the Conventional
Deadlift is the reduced range of motion. And this can be significant.
‘Explode Your Deadlift’ by Andy Bolton and Elliot Newman © 2011, All Rights Reserved
www.andyboltonstrength.net
19
We’re talking inches here. Play around with this in the gym and see
for yourself.
On the flip side, a major drawback of the Sumo is the hip flexibility
that is required to achieve a good set up position. A lot of
Powerlifters and athletes are simply too stiff in their hips to Sumo
Deadlift with good form. However, this could be easily remedied
with some foam rolling and mobility drills before each training
session and some static stretching or band stretching afterwards.
Another point for consideration in the Conventional vs. Sumo debate
is the fact that the Sumo is a more technical lift. Don’t get me wrong;
both styles require dedicated work to develop good form and
constant conscious thought to maintain and improve on form.
But the Sumo is the more technical lift.
If you wind up with your feet half an inch off the optimal position at
set-up, the bar may not leave the floor with the Sumo style. This is
not normally the case with Conventional Deadlifts. There is more
margin for error.
As previously mentioned; there are many different styles of
Conventional and Sumo Deadlifts. Let’s explore a few of the
successful ones here:
Textbook Conventional Deadlift:
This is how I pull. The feet are hip width apart and the toes are
pointed straight ahead, the lower back is arched and the shoulders
relaxed throughout.
‘Explode Your Deadlift’ by Andy Bolton and Elliot Newman © 2011, All Rights Reserved
www.andyboltonstrength.net
20
Extreme Upper Back Rounded Style:
This is how Konstantin Konstantinovs (KK) pulls. KK obviously has a
monstrously strong back otherwise this style wouldn’t work.
He sets up with his upper back rounded as much as possible, with the
lower back arched.
This style lends itself to those with a very very strong upper back. I
wouldn’t recommend this style unless you are a competitive lifter,
due to the increased injury risk to the back.
The Duck Stance:
Vince Anello pulled this way and it’s similar to the way KK pulls. The
upper back is rounded and the heels are nearly touching at set up,
with the toes pointed way out (around 45 degrees).
Again, only recommended if you are a competitive lifter and have
monstrous upper back strength.
Textbook Sumo Deadlift:
The feet are underneath the power ring on the bar, with the toes
turned out. The lower back remains arched throughout and the
shoulders stay relaxed.
Watch Dan Austin or Jarmo Virtanen for examples of this style (Just
search for them on YouTube).
Crab Stance:
I may have just made that name up? But, it does suit the way this
style looks.

‘Explode Your Deadlift’ by Andy Bolton and Elliot Newman © 2011, All Rights Reserved
www.andyboltonstrength.net
21
The feet are much closer together than during a regular Sumo
Deadlift. In fact, they are only just outside the hands, with the toes
turned out around 25 to 45 degrees.
Ultra-Wide Sumo’s:
To perform ultra-wide Sumo Deadlifts you need very good hip
flexibility.
The stance is very wide, with the toes nearly touching the plates and
the feet turned way out.
This style places a ton of work of the Glutes and Hamstrings and a
little less stress on the lower back.
So it’s a great way to bring up those areas.
Just be careful not to drop the bar on your toes when you set it back
down.
Let’s now move onto looking at how to set-up for the conventional
pull.
‘Explode Your Deadlift’ by Andy Bolton and Elliot Newman © 2011, All Rights Reserved
www.andyboltonstrength.net
22
Chapter 4: The Conventional Set-Up
Before we get into the set-up for the Conventional Pull, let me just
clarify that I will be describing what I consider to be optimal
technique for this style of Deadlift (both from a Maximal Strength
perspective and an injury-risk perspective).
Foot Position
The feet should be placed around hip width apart. That means that if
you were to draw a line from your armpit straight down to the floor;
that line would fall just on the outside of your foot.
Another good way to find your optimal stance is to do a vertical
jump. Look at where you place your feet before jumping and this
width of stance is usually a pretty decent one for the Conventional
Deadlift.
If your stance is too narrow you will have less stability and this will
knock pounds off your Deadlift.
If your stance is too wide, it will force you to grip the bar wider than
necessary and this will weaken your grip and again, pounds will be
lost from the bar.
So feet hip width apart.
Your toes should either point straight ahead or be turned out up to
15 degrees.
The bar should be within 2 inches of your shins. I have the bar very
nearly touching the shins at the start of my Deadlift and I believe this
to be the optimum position.
For reference, this places the bar pretty much right over the middle
of my foot (as viewed from the side).

‘Explode Your Deadlift’ by Andy Bolton and Elliot Newman © 2011, All Rights Reserved
www.andyboltonstrength.net
23
If you have the bar any further than 2 inches away from your shins
then you will more than likely encounter some problems. As soon as
the bar leaves the floor it will pull you forwards, put extra pressure
on your lower back and cause you to miss maximal weights.
So play around with this to find your ‘sweet-spot’ but keep that bar
close.
Foot position re-cap
- Assume a hip width stance
- Toes point straight ahead or pointed slightly out
- Shins are within 2 inches of the bar
How To Grip The Bar
During the set-up of your Deadlift allow your arms to relax and hang
straight down from your shoulders.
Then grip the bar.
If you have set your feet correctly this will put your hands just
outside your shins and your arms will be close to your body. This is
the simplest way to grip the bar and the safest.
A wider grip (one where the hands are further away from the body
and closer to the collars of the bar) makes no sense at all. Let me
repeat that: A wider grip (one where the hands are further away
from the body and closer to the collars of the bar) makes no sense at
all.
Yet I see Powerlifters and athletes make this mistake over and over
again.
A wider than necessary grip is bad for two reasons:
- It makes your grip weaker

‘Explode Your Deadlift’ by Andy Bolton and Elliot Newman © 2011, All Rights Reserved
www.andyboltonstrength.net
24
- It increases the risk of injury to the Biceps; especially your
supinated hand (the one that’s turned under)
I know of one lifter who snapped both Biceps whilst Deadlifting. And
sure enough, he Deadlifted with a wide grip. Don’t make this
mistake.
This leads us nicely into the issue of whether to use the hook grip,
under-over grip or double overhand grip.
I’ll start by saying this. I have never got on with the hook grip. Tried it
and hated it. If you can use it respect to you.
The hook grip is a double overhand grip with the thumbs under the
index fingers. It’s used in weightlifting but you don’t see many
Powerlifters or other athletes use it.
I have big hands, but I’ve only every seen lifters with unbelievably big
hands make it work on the Deadlift. So probably avoid the hook grip
unless you are a Powerlifter with huge hands.
I’ve also heard that excessive use of the hook grip can cause nerve
damage in the index fingers. I’m not sure how true that is, but it’s
worth bearing in mind. And it makes a ton of sense, especially if you
try the hook grip for yourself and feel how much pressure there is on
those index fingers. It’s pretty intense.
The advantage of the hook grip is that it keeps the shoulders square.
This is a benefit because it should avoid any issues relating to un-
even development (symmetry) due to using an over-under grip.
The over-under grip involves having one hand supinated and one
hand pronated during your Deadlifts. This is the best solution for
most athletes and Powerlifters and will let you lift the most weight.

‘Explode Your Deadlift’ by Andy Bolton and Elliot Newman © 2011, All Rights Reserved
www.andyboltonstrength.net
25
If you are concerned about un-even development from Deadlifting
like this then you could try switching your grip on each set. On your
first set you’d go right hand under and left hand over, on the next set
you’d go right hand over and left hand under and so on.
Another option is a double overhand grip without using the hook
grip. It’s a fine variation for beginners but you will find you can’t lift
much weight this way unless you have freaky big hands and a
monstrous grip (like powerlifting great Brad Gillingham).
For other Powerlifters and athletes a double overhand grip is for
warming up only.
Lastly, on the subject of grip; let’s talk about straps. Lifting straps
help you lift more weight by wrapping around the bar and taking the
grip issue out of the lift.
I’m not a big fan of this method for Powerlifters because an over-
reliance on straps will lead to weak hands. I’ve seen lifters do 800
pounds in the gym and struggle with 700lbs at the meet. The only
difference was straps! If they’d just worked on their grip they’d have
put a 100 pounds on their total.
Start to ask yourself empowering questions:
“How can I get my grip strong enough to hold 800 pounds?”
Not…
“How can I stroke my ego in the gym and pull a weight that I have no
chance of pulling at the meet?”
When you ask the right questions, you find the right answers.
‘Explode Your Deadlift’ by Andy Bolton and Elliot Newman © 2011, All Rights Reserved
www.andyboltonstrength.net
26
For athletes, straps are a little better because athletes don’t have to
pull max Deadlifts in competition. However, for many sports a strong
grip is essential, so again; I don’t really favour the use of straps.
A simple tip to strengthen your grip is to use chalk. Climbing chalk
can be found at outdoor stores and works wonders. Save it for hot
days when your hands are sweaty and/or your heaviest sets.
Nothing is sillier than seeing a 600 pound Deadlifter chalk up for his
135lbs warm up sets. It just makes an unnecessary mess and is a
waste of time and money.
Lower Back Position
At the start of your Deadlift your lower back must be set in an arched
position. If you are unsure how this feels try the following drill:
Stand up straight with your feet hip width apart and look straight
ahead.
Now push your Glutes slightly to the rear and bend your knees
slightly.
Finally, pull your tailbones up towards the sky. This is how the lower
back arch feels and it’s this position that you should try to set at the
start of the Deadlift and maintain throughout.
The opposite of an arched position is a rounded lower back and this
is a lousy position as injury risk is high.
You must flex your abs hard in order to keep the lower back arched.
The abs must also be strong, so do some heavy Ab work. Side-bends,
Planks, Side Planks, Pull Down Abs, Full Contact Twists and Pallof
Press Variations are all great trunk exercises that will give you the
‘Explode Your Deadlift’ by Andy Bolton and Elliot Newman © 2011, All Rights Reserved
www.andyboltonstrength.net
27
strength needed to hold the lower back arch when you are
Deadlifting.
Shoulders and Upper Back
The shoulders and upper back should be relaxed when performing
the Conventional Deadlift.
This is to reduce the range of motion.
Imagine the position you set when Bench Pressing. Shoulders back
and down, upper back tight. This is the opposite of what you need
when Deadlifting.
That Bench Press position could add 6 to 12” to your range of motion
on the Deadlift! I don’t know about you, but I don’t want to pull the
bar any further than I have to. Do you?
So learn to arch the lower back and relax the shoulders and upper
back. It’ll take some dedicated practise but it’s worth it.
Head Position
I use and believe in a neutral head position on the Deadlift. Stand up
straight and look straight ahead. Your head is in a neutral position.
When you Deadlift, your torso will have a forward lean in the start
position. Therefore, with a neutral head position you will end up
looking at the floor, around 6 to 10 feet in front of the bar at the
start of the Deadlift.
Do not look down at the bar. This will more than likely cause you to
miss heavy weights forwards.
And do not look up at the sky, as this will cause you to have poor
balance.

‘Explode Your Deadlift’ by Andy Bolton and Elliot Newman © 2011, All Rights Reserved
www.andyboltonstrength.net
28
The only other option, other than keeping the head neutral; is to
look straight ahead.
Conventional Set-up Checklist:
- Hip width stance, toes straight ahead (or turned out up to 15
degrees)
- Arms hang straight down from your shoulders and grip the bar
very close to the shins
- Use an over-under grip
- Arch your lower back and brace the abs hard
- Relax your upper back and shoulders, to reduce range of
motion
- Head position neutral or straight ahead
- Wear a belt on your heaviest sets
‘Explode Your Deadlift’ by Andy Bolton and Elliot Newman © 2011, All Rights Reserved
www.andyboltonstrength.net
29
Chapter 5: The Conventional Deadlift
You now know how to set-up for the Conventional Deadlift. Once
you are set-up, there are a couple of things to do before the bar
leaves the ground.
Firstly, flex your triceps to keep your arms locked straight.
Remember, any bending of the arms during your Deadlift greatly
increases the risk of a Bicep tear.
Secondly, take a deep breath of air into your belly and push your abs
out and into your belt. If you are not wearing a belt, brace the abs
hard (Imagine what you would do if somebody was going to punch
you in the stomach and you will soon get the idea).
The third thing you must do is perform a “Lat-lock”. This simply
means that you must flex your Lats as hard as possible. When you do
this in combination with bracing your Abs you create tremendous
stiffness in your torso.
This stiffness give you the best chance of keeping the lower back
arched throughout your Deadlifts and simultaneously creates more
strength (through the Law of Irradiation) and minimises injury risk.
The fourth thing you must do before the bar leaves the floor is
gradually apply some tension to it. Let me explain this concept as it’s
one that people struggle with.
In the Squat or the Bench Press you start the lift with an eccentric
(lowering) phase and then you complete the lift with a concentric
phase. Due to these lifts starting with an eccentric phase, there is a
stretch reflex.
The stretch reflex helps you lift more weight. Try performing a Bench
Press with a 5 second pause on the chest and you will totally

‘Explode Your Deadlift’ by Andy Bolton and Elliot Newman © 2011, All Rights Reserved
www.andyboltonstrength.net
30
eliminate the stretch reflex. In the process you will also reduce the
amount of weight you can lift.
The Deadlift (by definition) starts from the floor, with no eccentric
phase and no stretch reflex. If you do not gradually apply tension to
the bar you will be weaker and you will put un-due strain on the
biceps.
By not gradually applying tension to the bar before it leaves the floor
you ‘yank’ at it. This looks jerky and is usually accompanied by a
bending of the arms and a rounding of the lower back.
In effect, this method is like an on off switch. You are over the bar,
set-up but with no tension; and then in an instant, you apply
maximal tension and drive the bar off the floor.
This is bad. It’s a weak way to lift and a dangerous one.
Here’s the correct way to do it.
Once you are set-up, gradually (over the course of a second or two),
apply tension to the bar. For reference, if I’m pulling 950 pounds, I
may take a couple of seconds to gradually wind the tension up to
that level and get the bar moving. It does not happen instantly.
I appreciate that this is a hard concept to grasp (and believe me, it’s
not that easy to get down on paper).
If you want a visual reference, go on YouTube (do a search for Andy
Bolton) and check out my Deadlift videos. I grip the bar and drive my
shins forwards 3 times before the bar leaves the floor. Each time I do
this I am ramping up the tension.
‘Explode Your Deadlift’ by Andy Bolton and Elliot Newman © 2011, All Rights Reserved
www.andyboltonstrength.net
31
I don’t just grip it and go. So build the tension gradually (over 1 to 2
seconds) and you will pull more weight and have less chance of
injury.
As the bar leaves the floor, pull backwards. This means keeping your
weight spread from your mid-foot to heel and keeping the bar very
close to your shins.
In fact, all great Deadlifters have scars on their shins. This is because
they literally drag the bar up their shins. You must do the same if you
want a big pull.
If you allow the weight to pull you forwards and your bodyweight
ends up on your toes then you are doomed to failure as you get near
your max. Allowing your bodyweight to drift forwards will also place
way more stress on your lower back and hamstrings than is optimal.
So keep your weight on your mid-foot and heels and keep the bar
close to your body.
As the bar gets to knee height, you must start to drive the Glutes
forwards and keep ‘pulling back’. This driving of the Glutes will allow
you to lock out big weights.
If your Glutes are weak and /or you don’t know how to squeeze
them, try this drill. The Glute Bridge is simple and effective and can
be performed as part of your warm-up for 1 or 2 sets of 10 to 15
reps.
- Lie on your back with your feet flat on the floor and knees bent
- Place the palms of your hands on your Quads
- Squeeze your Glutes and lift your hips as high off the floor as
you can (keeping a neutral position in your lower back)
- Hold for a second at the top
‘Explode Your Deadlift’ by Andy Bolton and Elliot Newman © 2011, All Rights Reserved
www.andyboltonstrength.net
32
- Lower your Glutes back down to the floor (focusing on
squeezing the Glutes throughout)
- Repeat for reps
Once you get good at the Glute Bridge you can progress to the Single
leg version and then the weighted version, with a barbell across the
lowest part of your belly.
If you have ever seen a guy miss a Deadlift a couple of inches from
lockout then it is often because he just didn’t know how to, or wasn’t
strong enough to; push his Glutes forwards. So awaken your Glutes,
become aware of how to squeeze and get them strong. Your Deadlift
will thank you.
As well as driving the Glutes forwards, think about pulling your
shoulders and upper back behind the bar as you get the bar past
your knees. This is very powerful once you get it right.
To re-cap:
- keep your bodyweight on the mid to rear of your feet and drag the
bar up the shins
- At knee height forcefully drive the Glutes forwards and try to
simultaneously get your shoulders and upper back behind the bar
The finish position of the Deadlift involves being stood up straight
with your arms locked out, chest out and shoulders back. There is no
need to overarch and it is dangerous for the lower back. I see lifters
do this all the time and it makes me cringe.
Just stand up straight with the bar at lockout and keep the abs tight
throughout.

‘Explode Your Deadlift’ by Andy Bolton and Elliot Newman © 2011, All Rights Reserved
www.andyboltonstrength.net
33
To lower the bar to the floor keep it close to your body, push your
Glutes to the rear and when it gets back down to knee height let it
drop. There’s no need to slowly lower the bar all the way down to
the floor on Deadlifts.
Make sure that before you pull your next rep you assume the same
set-up position as you did on your previous rep. There is a bad
tendency for the bar to drift a little further forward on every rep.
On rep 1 you set-up correctly, shins nearly touching the bar. By rep 3
the bar is 4 inches from the shins. This is a disaster on a number of
levels.
For starters, these reps that are not performed with your “first rep”
set-up will not carry over as well to your max because in effect they
are not the same lift.
Secondly, the further the bar gets from your shins, the more stress
you put on your lower back. When you pick up a box off the floor do
you stand close to it or a long way away? The Deadlift is no
different… keep the bar close at all times and on every rep.
This issue of the bar getting further and further away from your shins
on every rep is particularly common on speed work. I think this is
because a lot of lifters think that speed work has to be rushed.
In reality, you must lift the bar up as explosively as possible and then
make sure you set-up correctly before pulling the next rep. The law
of Compensatory Acceleration is only applied to the concentric
phase of the lift and not the eccentric phase of the Deadlift.
Compensatory Acceleration means that you always aim to lift the bar
as quickly as possible. This must be applied to speed weights and
max weights alike. Obviously, speed weights (around 50 to 65%) will

‘Explode Your Deadlift’ by Andy Bolton and Elliot Newman © 2011, All Rights Reserved
www.andyboltonstrength.net
34
move very quickly and max weights won’t. But it’s the intent that
counts. And the intent must be there with max weights. Nobody ever
lifted a max intentionally slowly. It’s impossible.
Leave the slow lifting to bodybuilders; yes, it can make you big. But,
it won’t do anything for your athleticism, speed or limit strength.
When lifting and applying compensatory acceleration, wait until you
have around 35 to 40% of your max on the bar. With weights lighter
than this you risk injury by hyper-extending your joints at lockout if
you move the bar too quickly.
A simple way to make sure that you start each pull from the correct
set-up position is to stand up and re-set yourself in between reps. I
don’t like this method myself, but it works. I have worked hard on
this so I can simply lower the bar quickly, pause and go again; safe in
the knowledge that the bar is in the same starting position on every
rep.
Beginners (or less natural Deadlifters) may want to stand up and
totally re-set themselves between reps.
This leads nicely into the platform you are using to Deadlift on. Try
your very best to find a totally flat platform. If you don’t, not only are
you placing stress un-evenly on your body (and increasing injury risk),
you will also find it near impossible to get the bar level on anything
other than single rep sets.
So pay attention to the surface that you are pulling your Deadlifts on.
‘Explode Your Deadlift’ by Andy Bolton and Elliot Newman © 2011, All Rights Reserved
www.andyboltonstrength.net
35
Chapter 6: The Sumo Set-Up
Finding a good Sumo Set-up will take some tweaking and
considerable patience. A lot will depend on your limb and torso
length and your hip mobility. Don’t be afraid to try different things
until you find a sweet spot.
Foot Position
Use the power ring on the bar as your guide for Sumo stance width.
When first experimenting with the Sumo style try setting up so that
the power ring is directly above your mid foot. (You may end-up
finding a much wider stance suits you, or a closer one; but this is a
good starting point).
The bar wants to be very close to your shins and definitely not more
than 2 inches away from the shins.
The feet must be turned out. If you try to Sumo Deadlift with your
toes pointed straight ahead you will not be able to achieve a good
set-up position.
How much you turn your toes out is up to you. 30 to 45 degrees is a
good starting point and you’ll need to experiment from there. If you
turn your toes out too much you will have poor balance. If you don’t
turn them out enough, you’ll compromise your start position.
In general, the wider your stance, the more you can turn the toes
out. (Just remember the balance issue).
Where to Position Your Weight
With the Sumo Deadlift your weight must be on the mid foot and
heels, and also on the outside on your foot. By forcing your weight
on the outside of your foot you simultaneously force the knees out

‘Explode Your Deadlift’ by Andy Bolton and Elliot Newman © 2011, All Rights Reserved
www.andyboltonstrength.net
36
and this creates a space for your hips to sit into, (much like a multi-
ply Squat).
How To Grip The Bar
With the Sumo Deadlift the hands are placed inside the legs.
Once your feet are set, let your arms relax and hang straight down
from your shoulders. Then grip the bar with a mixed grip (one hand
over and one hand under).
If you grip the bar narrower than this then you risk suffering the
helicopter effect when you lift the bar. If you grip the bar too wide
you will weaken your grip and expose the biceps to a higher chance
of injury.
A word of caution: if you are a smaller Powerlifter or athlete you may
find that when your arms relax and hang straight down from your
shoulders, you are gripping part of the smooth part of the bar. This is
not optimal for grip strength and you may want to move your hands
out just enough so that they are on the knurling.
Lower Back
The lower back must be in an arched position, just as with the
conventional Deadlift. Review Chapter 4 for more information on
this.
Shoulders and Upper Back
Again, as with the conventional Deadlift, you want to relax the upper
back and shoulders on the Sumo Deadlift in order to shorten your
range of motion.
‘Explode Your Deadlift’ by Andy Bolton and Elliot Newman © 2011, All Rights Reserved
www.andyboltonstrength.net
37
With the Sumo Deadlift you cannot use an exaggerated rounding of
the upper back (KK style). You will simply not lock heavy weights out
like this.
If you find yourself naturally gravitating towards an extreme
rounding of the upper back when Deadlifting, then you probably
should stick with the Conventional Deadlift. It will not work on the
Sumo.
Head Position
On the Sumo Deadlift keep the head neutral or look straight ahead.
The usual pitfalls of poor head position apply to the Sumo, as they do
to the Conventional pull.
If you look straight up at the sky, you will have poor balance.
If you look down at the bar, you will have a tendency to get pulled
forwards, your weight will drift onto your toes and you will miss
heavier weights.
Sumo Set-up Re-cap:
- Take a wide stance and turn the toes out
- Keep the weight on your mid-foot, heels and favour the outside
of your feet
- The bar should be very close to your shins
- Arch your lower back
- Relax the upper back and shoulders (but avoid excessive
rounding)
- Keep the head neutral or look straight ahead

‘Explode Your Deadlift’ by Andy Bolton and Elliot Newman © 2011, All Rights Reserved
www.andyboltonstrength.net
38
Chapter 7: The Sumo Deadlift
You are set-up and ready to pull.
Before the bar leaves the floor you must take a deep breath into
your belly and push out against your lifting belt (or just brace the abs
hard if you are not using one).
Force your knees out and keep the weight on the outer edge of your
shoes.
Also, be sure that your hips are only set as low as they need to be in
order for your lower back to be arched and your Scapular directly
over the bar.
If you sink the hips lower than necessary you are trying to turn the
movement into a Squat and this will result in the hips shooting up
and the bar not moving (at least until you are in a better start
position).
Let me explain.
If your hips are too low in your start position of the Deadlift, your
shoulders will be too far behind the bar and you will be in a less than
optimal Deadlifting position. Your brain will subconsciously realise
this and before the bar leaves the floor you will let your hips rise and
the shoulders move forwards, in order to find a closer to optimal
start position.
This effect will be magnified the closer you get to your max and will
result in a loss of power. So it pays to get the start position right
before you initiate the pull.
Only drop the hips enough in order to get an arched lower back.

‘Explode Your Deadlift’ by Andy Bolton and Elliot Newman © 2011, All Rights Reserved
www.andyboltonstrength.net
39
As you drive the bar off the floor, be sure to keep it close to the shins
(which should be vertical or nearly vertical at the start of the pull). At
knee height, push those Glutes forwards and try to get the shoulders
and upper back behind the bar. Stand tall at lockout with the
shoulder backs and abs still tight.
Lower the bar by pushing the Glutes back and dropping it from
around knee height. Do not perform slow eccentrics on Deadlifts; it is
a waste of time.
The same rule regarding start position for multiple rep sets applies to
the Sumo as it does to the Conventional Deadlift. Make sure that you
start reps 2, 3, 4 etc in the same position as your first rep. If need be,
stand up and re-set between reps.
You will find that the need for a perfectly level platform is even
greater for the Sumo Deadlift than it is with the Conventional Pull.
The wide stance makes getting your set up right near impossible
unless you can get the bar to sit square before you address it. So pay
attention to the surface you train on.
If you switch to Sumo Deadlifting you may soon realise how un-even
many gym floors are. It’s a pain in the ass but you’ll have to find a
solution.
‘Explode Your Deadlift’ by Andy Bolton and Elliot Newman © 2011, All Rights Reserved
www.andyboltonstrength.net
40
Chapter 8: Trouble-Shooting
Problems and Solutions for the Conventional Deadlift:
Problem: My Lower Back Hurts
Go see a Doctor or Chiropractor.
Seriously, don’t risk a serious injury to your lower back as this could
put you out of training for a long time or worse; permanently.
However, I will say this. If you rely heavily on your back for your
Conventional Pull, switching to Sumo Pulling for a while and bringing
up your Hamstring and Glute Strength could solve your problem.
Pain is your indicator to STOP. Don’t ignore it. There is a big
difference between the pain of tired muscles (usually a dull ache)
and the pain that accompanies injury to the lower back (usually
sharp and shooting).
If switching to Sumo cures your problem (ie the pain goes away) then
great. If not, take professional advice from someone qualified to deal
with the lower back.
At the very least, read some of Stuart McGill’s stuff if you have lower
back issues, or just wish to understand the anatomy of the area
better than you do now.
Exercises to bring up weak Glutes:
- Glute Bridge
- Single Leg Glute Bridge
- Barbell Glute Bridge
- Reverse Hypers
- Bulgarian Split Squat

‘Explode Your Deadlift’ by Andy Bolton and Elliot Newman © 2011, All Rights Reserved
www.andyboltonstrength.net
41
Exercises to bring up weak Hamstrings:
- Leg Curls
- Band Leg Curls
- Glute Ham Raises
- Reverse Hypers with a long strap
Now this is counter-intuitive; but it pays to remember that if your
lower back hurts it often doesn’t mean that it’s weak. It often means
it’s strong and over-used. (ie you have over-relied on it). That’s why
the switch to Sumo and the emphasis on bringing up your Glutes and
Hamstrings may help if you have lower back pain.
Problem: Weak Off The Floor
Pulling from a deficit can help with this problem. Simply stand on 1, 2
or 3” mats and pull your Deadlifts through an extended range of
motion for a few weeks. This builds tremendous starting strength
and helps develop a strong grip.
I don’t recommend pulling from excessive deficits like 4” to 6”. This is
because most athletes have enough problems trying to pull with
good form from the floor or a 2” deficit. Above 3” and most athletes
form goes down the toilet. The risk/benefit ratio is no longer stacked
in the athletes favour.
So choose your deficit height carefully.
Another option is to try Box Squatting. If you are weak off the floor
on your Deadlift then you need more starting strength. A correctly
performed Box Squat (with a pause on the box) trains you the same
way as the Deadlift. It builds static, overcome by dynamic Strength.
A third thing you could do if you are weak off the floor is to look at
your training program. Could it be that you are doing too many rack

‘Explode Your Deadlift’ by Andy Bolton and Elliot Newman © 2011, All Rights Reserved
www.andyboltonstrength.net
42
pulls and other partial movements and not actually pulling enough
from the floor? If so, start pulling more from the floor. Sometimes
the simplest solutions are the best.
Finally, too much accommodating resistance (bands and chains) can
build the lockout at the expense of your strength off the floor.
Remember, you have to break the weight off the floor in order to
have a chance of locking it out. So find some balance in your training
if you use Bands and Chains.
Problem: Weak At Lockout
If you are weak at lockout, partial Deadlifts are a great way to work
on this problem.
Don’t stroke your ego and pull from way above the knee, using a
weight you will never pull from the floor. This will just fry your CNS
and burn you out.
Partial Deadlifts work great from just below the knee. Pull from a
Power Rack, Mats or Blocks. (Just be sure to use an old bar if you are
pulling from pins in a rack, as you will bend the bar at some point.
Better to do this with a $150 bar than a $600 bar).
Also, be sure that your form during the partials is the same as if
you’d pulled the weight from the floor. Don’t just pull wildly in order
to get the weight up. For the partial work to carry over to your full
range Deadlift you must match Deadlift postures at all times on both
partial training exercises (like Rack pulls) and the regular Deadlifting
from the floor.
Bands and Chains can also help build lockout strength by over-
loading the top part of the movement (although I have never used
this personally in my training, but I know plenty of lifters who have).

‘Explode Your Deadlift’ by Andy Bolton and Elliot Newman © 2011, All Rights Reserved
www.andyboltonstrength.net
43
Problems and Solutions for the Sumo Deadlift:
Problem: My Hips Feel Beat Up
This is a common complaint from Sumo Deadlifters.
If you experience hip pain from Sumo Deadlifting and it’s there the
first time you try it, then hip mobility drills will probably help you out
because you are lacking the required mobility to perform the
exercise well.
Don’t use the Sumo Deadlift until you have gained enough mobility
in the hips to do so pain free. There is nothing clever about training
through easily avoidable pain.
However, if the hip pain has come on after you have been
performing the Sumo Deadlift for weeks or months on end, the
solution may be different.
Switching to Conventional Deadlifts for a while could help out.
Also, bringing your stance in a little might be just what you need. If
you Sumo wider than feels comfortable you may well bring on this
kind of hip pain.
A good rule of thumb is to use a width of stance where in your start
position you can still force your knees out and over your heels. If you
film your Sumo and your stance is so wide that your knees are inside
your feet, your stance is too wide.
Problem: Weak Off The Floor
If you are weak off the floor, deficit pulls can be a big help. Try
standing on 1, 2 or 3” mats and pull from there. Do this for a few
weeks and then switch back to a regular range of motion.
‘Explode Your Deadlift’ by Andy Bolton and Elliot Newman © 2011, All Rights Reserved
www.andyboltonstrength.net
44
You should find that you have gained some starting strength off the
floor and your grip will feel stronger too.
A second exercise that can really help the start of the Sumo Deadlift
is wide stance box squats. The stance should be a similar width to
your Sumo Deadlift. If you are doing these Box Squats raw, then just
be careful you don’t beat up your hips by going too wide. A loose
pair of briefs can be used to offer some support and protection to
the hips (this applies even if you are a Raw lifter).
Problem: Weak At Lockout
Partial Deadlifts will help the Sumo Lockout. Partials are best
performed with a conventional stance; even if you pull sumo.
Pull from the pins in a power rack, mats or from blocks. Just keep it
real and pull from below knee height. (Pulling above the knee
becomes an ego stroke and a great way to burn you out).
The Deadlift lockout can also be improved with a lot of upper back
and lat work.
Here are a few exercises you should try:
- One Arm DB Rows
- Seated Hammer Rows
- Low Pulley Rows (all grips)
- Pulldowns (all grips)
- Pull ups/Chins
- Shrugs (use DB’s or a BB)
‘Explode Your Deadlift’ by Andy Bolton and Elliot Newman © 2011, All Rights Reserved
www.andyboltonstrength.net
45
The Kettlebell Swing
I’ve included the Kettlebell Swing at the end of the Troubleshooting
section because it’s a great move to help improve your Deadlift,
regardless of whether you pull Conventional or Sumo.
And if you’re a beginner it’s also a great introduction to Deadlifting.
The Swing, (if performed correctly), will teach you to arch your lower
back, keep the trunk tight and be extremely explosive with your
Glutes and Hamstrings.
Here’s how it works:
Pick up a Kettlebell (KB) off the floor and hold it at arms-length.
Assume a fairly wide stance (outside shoulder width) and let the KB
hang between your legs. Turn your toes out 25 to 45 degrees.
To initiate the Swing, take a deep breath of air into your belly and
keep your abs flexed hard throughout.
Now lean over, keep your lower back arched and let the KB swing
between your legs. Only allow the legs to bend slightly. When you
feel a stretch in your hamstrings reverse the movement by violently
snapping the hips forwards.
How high you swing the KB is a product of how hard you snap your
hips through and the weight of KB you choose to use. Your arms are
passive in the Swing and if you feel it in your shoulders then you are
using too much Delts and not enough hips.
Do not turn your swing into a shoulder raise!
This movement takes some practice, but it is well worth it. You
should feel it in your hamstrings and Glutes. If you feel it in the
Lower Back you are not doing it right.

‘Explode Your Deadlift’ by Andy Bolton and Elliot Newman © 2011, All Rights Reserved
www.andyboltonstrength.net
46
Start with a 16kg KB or 24kg KB and work up. Get your form down
first though. Various set and rep ranges can work well on this
movement (so experiment and find what works for you).
2 things to remember about the Swing:
- It’s an assistance movement; so don’t use it instead of your
regular Deadlift work
- It’s not a Squat pattern! Those fitness babes are late night
infomercials are not doing it right. The Swing is a Deadlift
pattern. Remember: sit way back, shins stay vertical, knees only
bend slightly and it’s all in the hips.
For more information on Kettlebells visit www.dragondoor.com
‘Explode Your Deadlift’ by Andy Bolton and Elliot Newman © 2011, All Rights Reserved
www.andyboltonstrength.net
47
Chapter 9: Competition And The Deadlift Suit
It’s hard to believe how many competitive Powerlifters miss a
Deadlift because they don’t know the rules of the federation they are
competing in.
The information in this chapter will hopefully stop you from ever
missing a lift due to not knowing the rules. However, I would still
advise you to check your federation’s rules on their website for
clarification.
With that said, the following is true at meets, most of the time:
- Wear long socks or you won’t be allowed to Deadlift
- There is no start command on the Deadlift
- Once you have locked out your pull you must wait until the
head judge lowers his hand and says “down”, before you lower
the weight
- You must have your hands on the bar until you have it back on
the floor (if you let go of the bar when setting it back down you
fail the lift; regardless of how easily you pulled it)
It’s always a shame to see a lifter smoke a lift or grind out a great
personal best at a meet and then not get credit for the lift because
they drop the weight or don’t wait for the judges “down” command.
The bottom line is this: you must know the rules and eliminate silly
mistakes.
The Deadlift suit is an interesting thing. It doesn’t give anywhere
near the support and help that Squat equipment and Bench Press
equipment gives. However, at the meet every pound counts and
there are some things you should know about your suit.

‘Explode Your Deadlift’ by Andy Bolton and Elliot Newman © 2011, All Rights Reserved
www.andyboltonstrength.net
48
I will only talk about the Conventional Pull here as I don’t have much
experience of the equipped Sumo Pull.
I have my suit cut in the following way:
- Tight in the hips (but not so tight that I can’t get down to the
bar)
- High at the front
- Low at the back
- Straps not too tight
The secret to this set up is that I feel it pulls me back when pulling
and helps at lockout. And it took some years to figure this out.
A lot of Deadlift suits are cut at the same height at the front and the
back. These suits give good pop off the floor put can pull you
forwards at lockout (especially if the straps are too tight).
So I had Inzer make me this new style of suit where the front is much
higher (the straps don’t start until around chest height). And it’s cut
lower in the back, so it only just covers my lower back.
This still gives a good pop off the floor but instead of hurting my
lockout, it helps it by pulling me back.
‘Explode Your Deadlift’ by Andy Bolton and Elliot Newman © 2011, All Rights Reserved
www.andyboltonstrength.net
49
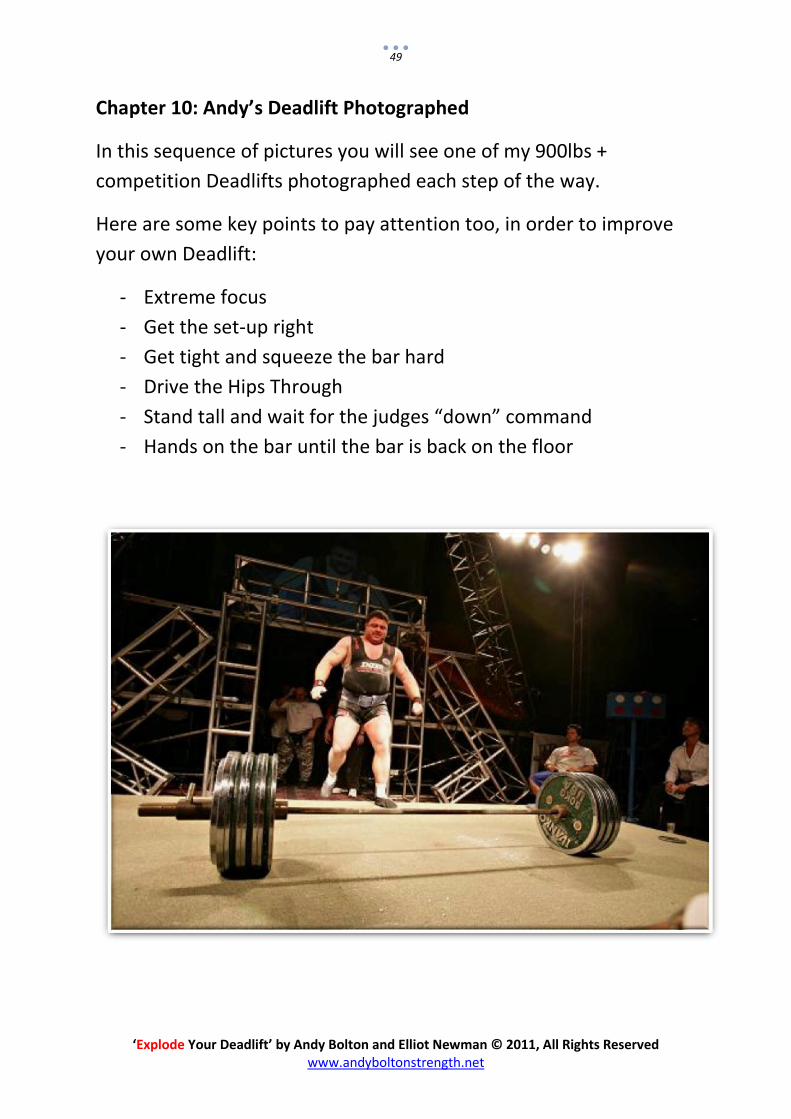
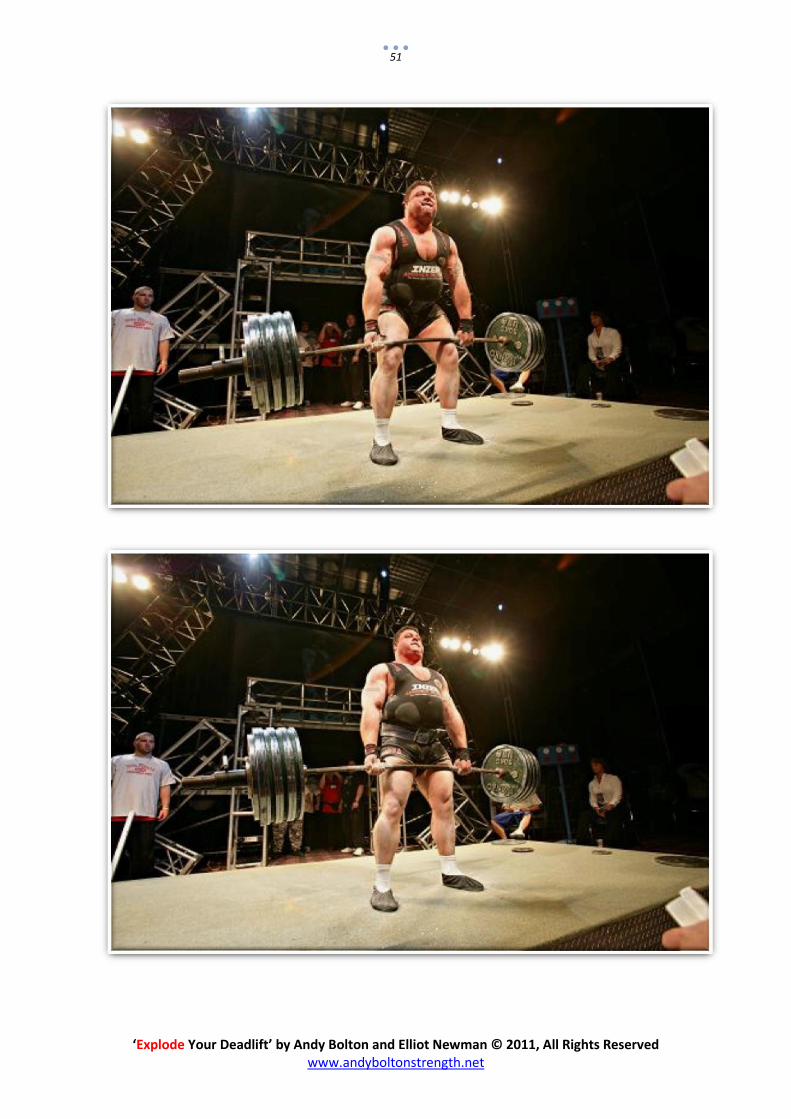
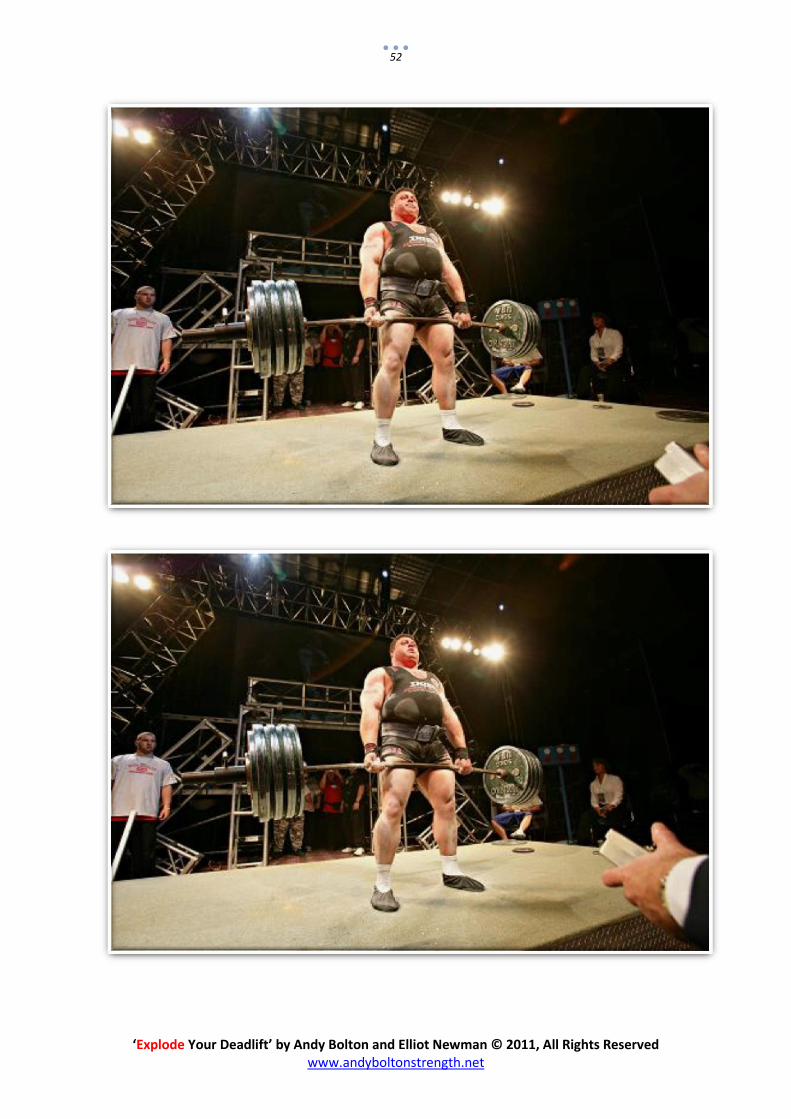
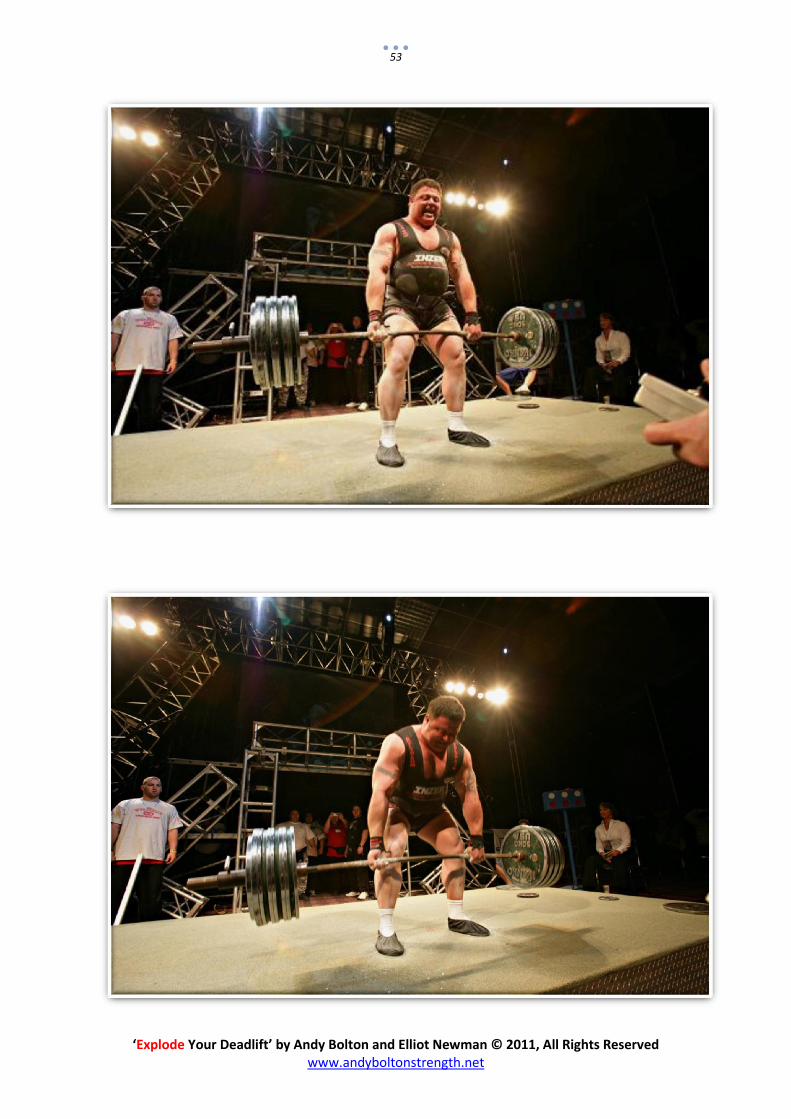
Chapter 10: Andy’s Deadlift Photographed
In this sequence of pictures you will see one of my 900lbs +
competition Deadlifts photographed each step of the way.
Here are some key points to pay attention too, in order to improve
your own Deadlift:
- Extreme focus
- Get the set-up right
- Get tight and squeeze the bar hard
- Drive the Hips Through
- Stand tall and wait for the judges “down” command
- Hands on the bar until the bar is back on the floor

‘Explode Your Deadlift’ by Andy Bolton and Elliot Newman © 2011, All Rights Reserved
www.andyboltonstrength.net
50
‘Explode Your Deadlift’ by Andy Bolton and Elliot Newman © 2011, All Rights Reserved
www.andyboltonstrength.net
51
‘Explode Your Deadlift’ by Andy Bolton and Elliot Newman © 2011, All Rights Reserved
www.andyboltonstrength.net
52
‘Explode Your Deadlift’ by Andy Bolton and Elliot Newman © 2011, All Rights Reserved
www.andyboltonstrength.net
53

‘Explode Your Deadlift’ by Andy Bolton and Elliot Newman © 2011, All Rights Reserved
www.andyboltonstrength.net
54
‘Explode Your Deadlift’ by Andy Bolton and Elliot Newman © 2011, All Rights Reserved
www.andyboltonstrength.net
55
Chapter 11: A Word On Technique
This entire book has focused on correct Deadlift technique because great technique will allow you to achieve your strength potential on the Deadlift and minimise injury risk. It is true in every sport that I have ever studied that the athletes at the highest level tend to have the best technique. This does not mean that they all look the same when competing in their given sports; but rather that certain communalities will exist. For example, every strong Deadlifter you see will aim to perfect their set-up, but you will see some top Deadlifters pulling Conventional and some pulling Sumo. Every top Golfer will keep a constant spine angle, but the way they use their arms during the swing may differ greatly (just go compare Tiger Woods and Jim Furyk). The bottom line is to practise your technique on every single rep, without exception. Also, use foam rolling and mobility drills to warm yourself up before Deadlifting and use appropriate assistance exercises to bring up weak areas and make your Deadlift more balanced. Technique is much like your strength. Progress will not be linear. You will have good days and bad days. Regardless, do not let this get you down, but do make sure that over time your technique gets better, because that’s one of the hallmarks of great athletes. They tend to have great technique.
We also must be realistic about Deadlift form for competitive
Powerlifters when they are very near their max or attempting a new
personal best.
To be brutally honest, there are very few lifters who can maintain
perfect form with near maximal weights on the Deadlift. For
‘Explode Your Deadlift’ by Andy Bolton and Elliot Newman © 2011, All Rights Reserved
www.andyboltonstrength.net
56
competition purposes this is ok; just be sure to do the best you can
and keep your lower back arched. If the upper back rounds more
than usual on the Conventional Deadlift with near max weights then
so be it. Do what you have to do to hit your best total on the day.
Just make sure that in training you focus on correct technique all the
time.
With the Sumo pull, technique will stay very similar with heavy
weights as with lighter weights. This is because any excessive
rounding of the upper back will result in the lockout becoming very
difficult. Therefore extra rounding of the upper back in the Sumo
Deadlift with near maximal weights is counter-productive.
For athletes who are not Powerlifters (ie they are using the Deadlift
to run faster, jump higher, punch harder and throw further) it is
important to practice great form all the time.
There is no need for an American Football player, Rugby Player or
Boxer to push their Deadlifts so hard that their form falls to pieces.
This is because the injury risk far outweighs any benefits that
maximal singles could bring an athlete who is not a competitive lifter.

‘Explode Your Deadlift’ by Andy Bolton and Elliot Newman © 2011, All Rights Reserved
www.andyboltonstrength.net
57
Chapter 12: The Mind-Set For A Big Pull
A bullet proof mind-set can be the difference between a PR and a disappointment, or a World Record and not budging the bar from the floor. With that in mind, I’m going to share with you how I approach the Deadlift from a mental point of view. In my opinion, there is no lift that is more mental than the Deadlift. Just watch the aggression and focus on my face before I pull. Or the war-dance Benni performs before his big lifts. And check out the frenzy Chuck Vogelphol gets himself into before pulling big. Clearly, big Deadlifts are very mental. Here’s what to do to train your mind and have it serve you and not destroy you: 1. Get in the zone before you get to the gym. You can do this by listening to some empowering music in the car on the way to the gym. I like Hip Hop or Heavy Metal. Now is not the time for your favourite love song. 2. Visualise your top set before you do it. The human mind cannot tell the difference between something strongly imagined and something you have actually done. So if you visualise your Deadlifts in your mind, with enough intensity and clarity prior to doing them; you should find the performance of the lift much easier when you come to do it. 3. Never think of failure. This one is obvious but it is easy to let your mind play games on you if you are not careful. Do not think of missing your top set or a PB in competition. This is just weak. As soon as any negative thought like this comes to mind you must change your focus immediately to something that is going to help you: like smoking the lift!

‘Explode Your Deadlift’ by Andy Bolton and Elliot Newman © 2011, All Rights Reserved
www.andyboltonstrength.net
58
4. Never let a weight intimidate you. Think of others who have done what you are about to attempt and this way you will see that it is entirely possible (I have not had such a luxury for most of my Deadlift career. Poor me). 5. Commit to the lift. Once the bar is in your hands you must be aggressive and attack the weight. Fight it all the way to lockout. 6. Believe in yourself. The Deadlift is a solo physical endeavour and you and only you can break gym PB’s and meet PB’s. Nobody else can do it for you.

‘Explode Your Deadlift’ by Andy Bolton and Elliot Newman © 2011, All Rights Reserved
www.andyboltonstrength.net
59
Chapter 13. About The Authors
Andy Bolton is one of the greatest Powerlifters of all time. A multiple world champion in the WPC and WPO federations, one of only 5 men to ever Squat over 1200lbs and the first man to ever pull in excess of 1000lbs on the Deadlift.
Elliot Newman is a competitive Powerlifter who has competed in the BDFPA, WDFPF, BPC and WPC. He has competition best lifts of 255kg Squat, 157.5kg Bench and 260kg Deadlift. He is passionate about all things related to nutrition and strength training. For more information on how YOU can develop herculean strength, explosive power and muscular size, check out:
http://www.andyboltonstrength.net
Top Related