


Languages
Pages
Legal


8/19/2019 EVision 7.0 Installation Guide for UNIX
http://slidepdf.com/reader/full/evision-70-installation-guide-for-unix 1/82
I n s t a l l a t i o n o f e V i s i o n ™ f o r
U N I X ® Se r v e r a n d
W i n d o w s
®
C l i e n t R e l e a s e 7 .0
TIE
Installation Guide

8/19/2019 EVision 7.0 Installation Guide for UNIX
http://slidepdf.com/reader/full/evision-70-installation-guide-for-unix 2/82

8/19/2019 EVision 7.0 Installation Guide for UNIX
http://slidepdf.com/reader/full/evision-70-installation-guide-for-unix 3/82
Trademarks
eVision is a trademark and spEDI*map is a registered trademark ofTIE Kinetix. Microsoft, Windows and MS-SQL Server are either registeredtrademarks or trademarks of Microsoft Corporation in the United Statesand/or other countries. Oracle is a registered trademark of Oracle
Corporation. Pentium is a registered trademark of Intel Corporation. A+ isa trademark and Cleo is a registered trademark of Interface Systems, Inc.UNIX is a registered trademark of The Open Group.
U.S. Government Restricted Rights
Use, duplication, or disclosure by the U.S. Government is subject torestrictions set forth in subparagraphs (a) through (d) of the CommercialComputer-Restricted Rights clause at FAR 52.227-19 when applicable, or insubparagraph (c)(1)(ii) of the Rights in Technical Data and ComputerSoftware clause at DFARS 252.227-7013, or to TIE Kinetix's standardcommercial license, as applicable, and in similar clauses in the NASA FAR
Supplement.
Trademark and Copyright Owner
TIE Kinetix1360 Energy Park Drive, Suite 110St. Paul, MN 55108 USA651.999.8600
24 New England Executive ParkBoston, MA 01803 USA
TIE Kinetix Confidential and Proprietary
THIS WORK CONTAINS VALUABLE CONFIDENTIAL AND PROPRIETARYINFORMATION. DISCLOSURE, USE, OR REPRODUCTION WITHOUT THEWRITTEN AUTHORIZATION OF TIE KINETIX IS PROHIBITED. THISUNPUBLISHED WORK BY TIE KINETIX IS PROTECTED BY THE LAWS OF THEUNITED STATES AND OTHER COUNTRIES AND BY INTERNATIONAL TREATYPROVISIONS. IF PUBLICATION SHOULD OCCUR, THE FOLLOWING NOTICESHALL APPLY:
© Copyright 1996 - 2014TIE Kinetix
All Rights Reserved
Document Title
Installation of eVision for UNIX Server and Windows Client
Release 7.0May, 2014

8/19/2019 EVision 7.0 Installation Guide for UNIX
http://slidepdf.com/reader/full/evision-70-installation-guide-for-unix 4/82

8/19/2019 EVision 7.0 Installation Guide for UNIX
http://slidepdf.com/reader/full/evision-70-installation-guide-for-unix 5/82
© 2014 TIE Kinetix Installation of eVision for UNIX Server and Windows Client i
Contents
Chapter 1 Introduction 1-1
Scope of This Document 1-1
Terminology 1-1
System Requirements 1-3
System configuration rules 1-3
Hardware and software requirements 1-6
eVision Net/Server requirements 1-7
eVision Enterprise requirements 1-8Connectivity requirements 1-9
Licensing 1-9
The Next Step 1-9
Chapter 2 First-Time Installation 2-1
Licensing 2-1
Temporary license 2-1
Permanent license 2-1
Choosing a license 2-2
Parts of the Installation Process 2-2
Installing the Database 2-2
Before You Begin 2-2
Completing the pre-installation checklist 2-2
Installing eVision Server 2-3
Extracting eVision Server installation software 2-4
Running the installation script 2-4
Install EDI Standards and Options 2-10
Installing eVision Client 2-11
Running setup.exe 2-11
Welcome 2-11
License agreement 2-12
Customer Information 2-12
Destination folder 2-13
Select features 2-13
Installation progress indicator 2-16

8/19/2019 EVision 7.0 Installation Guide for UNIX
http://slidepdf.com/reader/full/evision-70-installation-guide-for-unix 6/82
i i Installation of eVision for UNIX Server and Windows Client © 2014 TIE Kinetix
Contents
Installation completion and exit 2-16
Restart 2-17
Start menu 2-17
Configuring the eVision Workbench 2-17
Configure Options 2-18eVision Workbench 2-19
Conclusion 2-20
Chapter 3 Upgrading an Existing Installation 3-1
Licensing 3-2
Temporary license 3-3
Permanent license 3-3
Choosing a license 3-3
Before You Begin 3-4
Preparing for an eVision product upgrade 3-4
Upgrading eVision Server 3-4
Extracting eVision Server installation software 3-5
Running the installation script 3-5
Install EDI Standards and Options 3-12
Upgrading eVision Client 3-12
Running setup.exe 3-12
Welcome 3-13
License agreement 3-13
Customer Information 3-14
Destination folder 3-15Select features 3-15
Installation progress indicator 3-18
Installation completion and exit 3-18
Restart 3-19
Testing eVision 3-19
Conclusion 3-20
Chapter 4 Maintenance Issues 4-1
Modifying, Repairing or Removing eVision Client 4-1
Setting Up a Test Environment 4-3
Activating eVision 4-4
Backing Up and Restoring eVision 4-4
Disaster Recovery 4-5

8/19/2019 EVision 7.0 Installation Guide for UNIX
http://slidepdf.com/reader/full/evision-70-installation-guide-for-unix 7/82
© 2014 TIE Kinetix Installation of eVision for UNIX Server and Windows Client i i i
Contents
Appendix A DB Installation Considerations A-1
Overview A-1
Estimating disk space for the database server A-1
Network protocols for the database server A-1
Database security A-1Create a database instance A-1
Test connectivity with the database server A-2
Creating a TNS Name and DSN A-3
Appendix B Requesting a License B-1
My-TIE B-2
Submitting a license request B-2
Checking the status of a license request B-4
Downloading the license file B-6
TIE Kinetix Technical Support B-8

8/19/2019 EVision 7.0 Installation Guide for UNIX
http://slidepdf.com/reader/full/evision-70-installation-guide-for-unix 8/82

8/19/2019 EVision 7.0 Installation Guide for UNIX
http://slidepdf.com/reader/full/evision-70-installation-guide-for-unix 9/82
© 2014 TIE Kinetix Installation of eVision for UNIX Server and Windows Client 1 - 1
Chapter 1 — Introduction
This manual describes how to install eVision™ for UNIX®. TheUNIX version of eVision employs a UNIX system to host theeVision Server and one or more Windows® systems for theeVision Client(s). A database server is also required, which mayrun on the eVision Server, one of the eVision Clients or on itsown UNIX- or Windows-based system.
Electronic versions of all user documentation are present in aroot level folder named Documentation. This folder is present
on the install CD for eVision Client for UNIX and is copied intothe client’s destination folder during the installation process(referred to throughout this document as the “setup program”).
Scope of This Document
This chapter provides an overview of eVision, includingterminology, a list of eVision components, system requirementsand examples of some common eVision system configurations.
Chapter 2, “First-Time Installation” provides step-by-stepinstructions for customers installing an eVision system for the
first time.
Customers using a previous version of eVision will find upgradeinstructions in Chapter 3, “Upgrading an Existing Installation”.
Chapter 4, “Maintenance Issues” provides information on other(less common) procedures such as modifying, repairing orremoving eVision, setting up a test environment, backing upand restoring eVision, and disaster recovery.
Database installation considerations are discussed inAppendix A, “DB Installation Considerations”.
Instructions for requesting an eVision license are presented inAppendix B, “Requesting a License”.
Terminology
database server. The computer on which the databasemanagement software and the eVision database are installed,

8/19/2019 EVision 7.0 Installation Guide for UNIX
http://slidepdf.com/reader/full/evision-70-installation-guide-for-unix 10/82

8/19/2019 EVision 7.0 Installation Guide for UNIX
http://slidepdf.com/reader/full/evision-70-installation-guide-for-unix 11/82
© 2014 TIE Kinetix Installation of eVision for UNIX Server and Windows Client 1 - 3
Introduction
wflaunch. An eVision component, available only on eVisionNet/Server and eVision Enterprise systems, that allowslaunching of eVision workflows from a script running on aremote machine. Also called Workflow Launch Client.
System Requirements
eVision software is designed for a client-server environmentunder the UNIX (eVision Server) and Windows (eVisionClient)operating systems. The network must use TCP/IPprotocol.
Numerous applications, from TIE as well as other softwareproviders, make use of Java code. Each machine on which youplan to install eVision wflaunch or eVision Messenger Clientmust also have either a Java 2 Platform Standard Edition 5.0 or
higher runtime environment (J2SE JRE) or development kit(J2SE JDK) installed.
A complete copy of eVision for UNIX consists of three elements.They may reside on as few as two machines. The eVisionelements are:
eVision Server
• database server
• at least one eVision Client
eVision for UNIX supports the Oracle database, version 10g or
higher. Regardless of the Oracle Server version, the Oracle 10gclient and shared libraries must be installed on the eVisionserver machine.
The eVision Server, the eVision Client, and the relationaldatabase have different configuration requirements when theyare installed on different computers. The requirements aredescribed in this section.
System configuration rules
These rules govern eVision system configuration. Remember
that the eVision Server and the database server are differentcomponents.
You may distribute the eVision Server software, relationaldatabase management system with database files and one ormore copies of eVision Client software over multiple computers.The following rules apply:
8/19/2019 EVision 7.0 Installation Guide for UNIX
http://slidepdf.com/reader/full/evision-70-installation-guide-for-unix 12/82
1 - 4 Installation of eVision for UNIX Server and Windows Client © 2014 TIE Kinetix
Introduction
• An eVision configuration may have only one copy ofeVision Server software installed on one computer.
• An eVision Server can support one or more clients.
• An eVision configuration may have only one copy of
eVision Client software installed per computer.• An eVision Server and its clients must all use the same
instance of the relational database.
• The database server may hold two or more eVisiondatabase instances, but each instance must be linked toa different eVision Server.
• Different eVision Servers cannot switch or sharedatabases.
• The eVision Client has a direct interface with the eVisionServer and the database server.
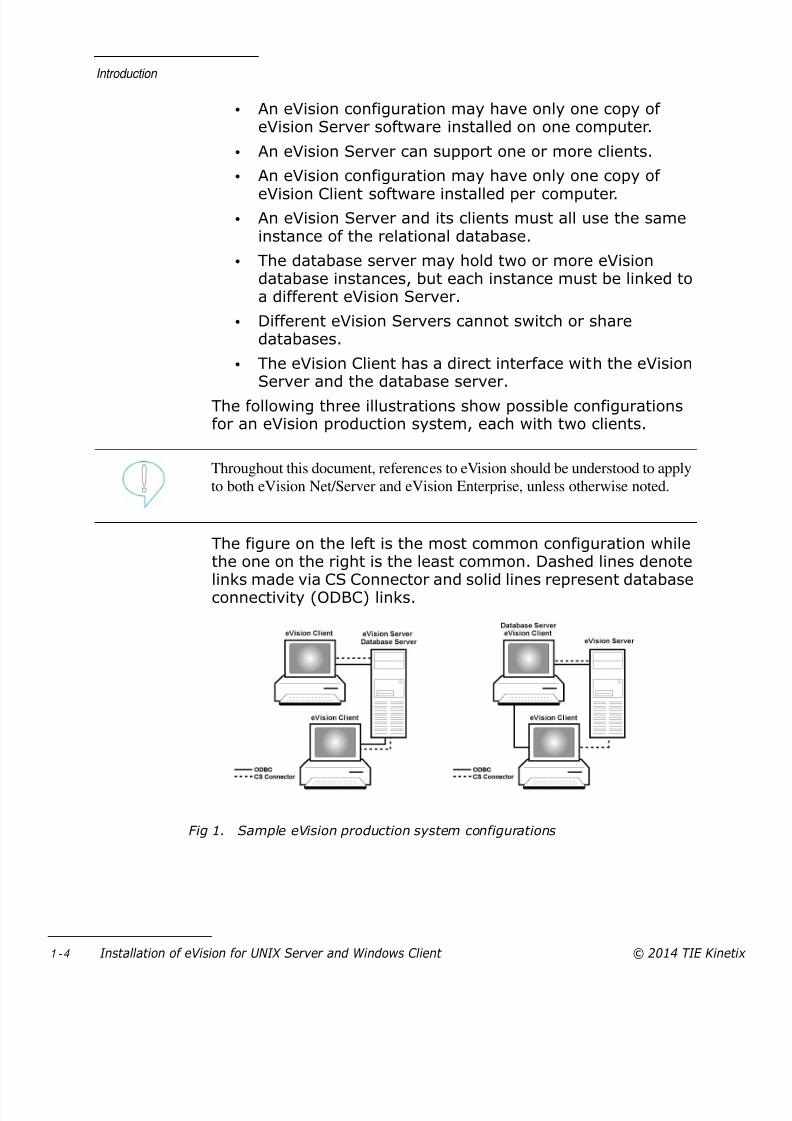
The following three illustrations show possible configurationsfor an eVision production system, each with two clients.
The figure on the left is the most common configuration whilethe one on the right is the least common. Dashed lines denotelinks made via CS Connector and solid lines represent databaseconnectivity (ODBC) links.
Fig 1. Sample eVision production system configurations
Throughout this document, references to eVision should be understood to apply
to both eVision Net/Server and eVision Enterprise, unless otherwise noted.

8/19/2019 EVision 7.0 Installation Guide for UNIX
http://slidepdf.com/reader/full/evision-70-installation-guide-for-unix 13/82
© 2014 TIE Kinetix Installation of eVision for UNIX Server and Windows Client 1 - 5
Introduction
The following illustration shows another possible configurationfor an eVision production system, again with two clients, butwith each software component residing on its own machine.
Fig 2. Another sample eVision production system configuration
Finally, here is a possible configuration using two eVisionServers, one devoted to the production system and the otherto a test system. The database server runs two instances of thedatabase, one for each system.
Fig 3. Sample dual eVision Server system

8/19/2019 EVision 7.0 Installation Guide for UNIX
http://slidepdf.com/reader/full/evision-70-installation-guide-for-unix 14/82
1 - 6 Installation of eVision for UNIX Server and Windows Client © 2014 TIE Kinetix
Introduction
Hardware and software requirements
The hardware requirements listed here may vary according tousage and volume of data, and are guidelines only. When theeVision Server and the database server reside on the same
machine, all requirements are increased.Estimating Disk Space for the eVision Server. eVision needsspace for the database server and space to store the rawelectronic data interchange (EDI) data transmitted andreceived on the eVision Server.
Estimate the amount of EDI data that you will exchange dailyand multiply that by the number of days you will keep the EDIdata online. Because larger amounts of EDI data requireadditional storage space for temporary application file data,multiply the result by 1.5. Add 100 megabytes for programs
and overhead.EXAMPLE: If you send and receive a total of one megabyte(MB) daily and plan to keep the data online for 30 days,calculate as follows:
30 MB monthly turnoverx 1.5
45 MB for all data+ 100 MB for programs and overhead
145 MB total
In this example, you should set your minimum space to 145
MB.
Our example assumes that data is kept for 30 days before it isarchived, although a large organization must archive moreoften than this. Archiving more frequently requires lessdatabase space. Archiving batches, but keeping auditinformation online, requires more database space.
If you are installing the database on a separate server, a goodmethod to approximate your database server storagerequirement is to set the figure at about 70% of the eVisionServer storage requirement. Of course, if you use the databasefor other applications in addition to eVision, your storage

8/19/2019 EVision 7.0 Installation Guide for UNIX
http://slidepdf.com/reader/full/evision-70-installation-guide-for-unix 15/82
© 2014 TIE Kinetix Installation of eVision for UNIX Server and Windows Client 1 - 7
Introduction
requirements will be significantly larger, to accommodate thoseother applications.
eVision Net/Server requirements
eVision Server. This table lists requirements for eVisionNet/Server when the database server resides on anothercomputer.
Database Server. An Oracle 10g (or higher) database isrequired. Since storage requirements vary from database todatabase, we encourage you to refer to your database vendorfor storage requirement specifications. As a general guideline,consider approximately 70% of the space requirement on theeVision Server as a suggested storage requirement value forthe database server.
eVision Client. The eVision Client may run on any of the listedWindows operating systems that meet the requirements listedin this table.
It’s advisable to overestimate the space you think you will need, especially if
you will be unable later to increase your disk capacity dynamically withoutdisrupting the existing applications.
Item Requirement
Operating System HP-UX 11.23 64-bit (PA-RISC or Itanium), Solaris 10 64-bit (SPARC
or Opteron), Red Hat Enterprise Linux 3.0/4.0 32-bit
Processor Recommended: 500MHz or higher
RAM Minimum: 256 MBRecommended: 1+ GB
Mass storage Minimum: 500 MB SCSI (ultra-wide)Recommended: 1+ GB
Client/server
connection
TCP/IP
Item Requirement
Operating System Windows 2008 Server, Windows 2012 Server, Windows
7 or Windows 8SVGA monitor, 800 x 600 pixels.
Processor Minimum: Pentium 233 MHzRecommended: Pentium 500+ MHz

8/19/2019 EVision 7.0 Installation Guide for UNIX
http://slidepdf.com/reader/full/evision-70-installation-guide-for-unix 16/82
1 - 8 Installation of eVision for UNIX Server and Windows Client © 2014 TIE Kinetix
Introduction
eVision Enterprise requirements
eVision Server. This table lists the requirements for the eVisionEnterprise server when the database server is on anothercomputer.
Database Server. An Oracle 10g (or higher) database isrequired. Since storage requirements vary from database todatabase, we encourage you to refer to your database vendorfor storage requirement specifications. As a general guideline,consider approximately 70% of the space requirement on theeVision Server as a suggested storage requirement value forthe database server.
eVision Client. The eVision Client may run on any of the listedWindows operating systems that meet the requirements listedin this table.
RAM Minimum: 64 MBRecommended: 128+ MB
Mass storage 200 MB free disk space
Client/server connection TCP/IP (included with the Windows operating systems)
Item Requirement
Operating System HP-UX 11.23 64-bit (PA-RISC or Itanium), Solaris 10 64-
bit (SPARC or Opteron), Red Hat Enterprise Linux 3.0/4.032-bit
Processor Recommended: Multiprocessor Server 500MHz or higher
RAM Minimum: 256 MB
Recommended: 1+ GB
Mass storage Minimum: 10-35+ GB for higher volumesRecommended: Multiple SCSI Channels
Client/server connection TCP/IP
Item Requirement
Operating System Windows 2008 Server, Windows 2012 Server, Windows
7 or Windows 8SVGA monitor, 800 x 600 pixels.
Processor Minimum: Pentium 233 MHzRecommended: Pentium 500+ MHz
Item Requirement

8/19/2019 EVision 7.0 Installation Guide for UNIX
http://slidepdf.com/reader/full/evision-70-installation-guide-for-unix 17/82
© 2014 TIE Kinetix Installation of eVision for UNIX Server and Windows Client 1 - 9
Introduction
Connectivity requirements
Depending on the specific relational database you use,database connectivity software may also need to be installed.Connectivity software will establish and maintain the actualcommunication with the database. The eVision server currentlyrequires the Oracle 10g client shared library files. Genericsoftware such as ODBC drivers will serve as the bridge betweeneVision Client or eVision Server and the database connectivitysoftware. The ODBC driver configuration that communicateswith Oracle is identified as a data source name (DSN). TheeVision components use the DSNs to communicate directly withthe database.
Licensing
Installation CDs include a 60-day temporary runtime license.The 60-day period begins when the CD is created, not when thesoftware is installed. If the period expires, you may request
another temporary license from TIE Kinetix. Your permanent,machine-specific license must be acquired separately and maybe done before or after the installation is performed.
When eVision is installed, the setup program searches for thelicense file. The file must reside in any “browsable” folder, thatis, it must be in a folder visible to the setup program. The setupprogram copies the license into a default folder where eVisionwill always look for it.
The Next Step
If you are installing eVision for the first time, go directly toChapter 2, “First-Time Installation”. If you are upgrading anexisting eVision system, go to Chapter 3, “Upgrading anExisting Installation”.
RAM Minimum: 64 MBRecommended: 128+ MB
Mass storage 200 MB free disk space
Client/server connection TCP/IP (included with the Windows operating systems)
Item Requirement

8/19/2019 EVision 7.0 Installation Guide for UNIX
http://slidepdf.com/reader/full/evision-70-installation-guide-for-unix 18/82
1 - 1 0 Installation of eVision for UNIX Server and Windows Client © 2014 TIE Kinetix
Introduction
8/19/2019 EVision 7.0 Installation Guide for UNIX
http://slidepdf.com/reader/full/evision-70-installation-guide-for-unix 19/82
© 2014 TIE Kinetix Installation of eVision for UNIX Server and Windows Client 2 - 1
Chapter 2 — First-Time Installation
This chapter assumes that you have not yet installed yourrelational database or the eVision software.
Licensing
To use your eVision software, you must have a license. EveryeVision installation CD comes with a temporary license whichpermits you to use the software until you acquire and install apermanent license.
Temporary license
The supplied temporary license is good for sixty (60) days fromthe time the CD was created, not from the time the software isinstalled. So, for example, if you install your software 53 days
after the CD was created, you will only be able to run eVisionfor seven days. In such a case, you may request anothertemporary license if you have not yet acquired your permanentlicense.
Permanent license
Your permanent license is one created by TIE Kinetix, based oninformation provided by you about the machine which is tofunction as your eVision Server. The license file you will receivecontains information specific to that machine, and that machinealone will be recognized as the eVision Server. For this reason,you should request your permanent license only when yourchoice of machines for the eVision Server is no longer subjectto change.
See Appendix B for details on requesting a permanent license.
Always install the eVision Server before installing eVision Clients. The eVision
services are part of the eVision Server installation, and these services must be
running to properly install and configure the eVision Clients.
8/19/2019 EVision 7.0 Installation Guide for UNIX
http://slidepdf.com/reader/full/evision-70-installation-guide-for-unix 20/82
2 - 2 Installation of eVision for UNIX Server and Windows Client © 2014 TIE Kinetix
First-Time Installation
Choosing a license
During installation, you will be prompted for the license to use.You may select the supplied temporary license, or path to thelocation of your permanent license.
Parts of the Installation Process
The installation process consists of three parts: installing thedatabase, installing eVision Server and installing eVisionClient(s).
Database installation. Since your database is not supplied byTIE Kinetix, its installation is a process distinct from eVisioninstallation. The TIE Kinetix-supplied CD-ROM only containsinstallation software for eVision.
eVision Server installation. The compressed file containing allthe necessary installation files and scripts (ship.cpio on theinstallation CD-ROM) must be copied to the UNIX server and itsfiles extracted. Then, the installation script instEDI must be run.
eVision Client installation. The eVision setup program(setup.exe on the installation CD-ROM) allows you to choose toinstall and configure client components on each eVision Clientmachine.
Installing the Database
Your database administrator should install the database, withdatabase owner access, on the database server. For details,refer to Appendix A, “DB Installation Considerations”.
When the database is installed and running, continue with thefollowing section, “Before You Begin”.
Before You Begin
Completing the pre-installation checklist
Before you install eVision, complete one of the followingchecklists. Later in the installation process, you’ll need theinformation you supply here to configure eVision Server andeVision Client to communicate through ODBC. See your systemadministrator if you need help. After completing the

8/19/2019 EVision 7.0 Installation Guide for UNIX
http://slidepdf.com/reader/full/evision-70-installation-guide-for-unix 21/82
© 2014 TIE Kinetix Installation of eVision for UNIX Server and Windows Client 2 - 3
First-Time Installation
appropriate checklist, continue with “Installing eVision Server”on page 2-3.
Installing eVision Server
To perform this installation you will copy the compressed file to
the UNIX server and extract its contents, then run theinstallation script.
Table 2-1 Selecting the checklist to use
Database Do you have
connectivity?
Checklist to use
Oracle No Table 2-2
Oracle Yes Table 2-3
Table 2-2 Complete if you don’t have connectivity with Oracle database
Response Question
What is the service name?
What network protocol will be used?
What is the host name?
What port number is to be used?
What is the net service name (or TNS)?
Table 2-3 Complete if you have connectivity with Oracle database
Response Question
What is the net service name?
What is your database login ID and password?
What is the name of the eVision Server?
What port ID will you use on the eVision Server?
What is the UNIX username and password?
What port ID will you use on the eVision Server for CSConnector?

8/19/2019 EVision 7.0 Installation Guide for UNIX
http://slidepdf.com/reader/full/evision-70-installation-guide-for-unix 22/82
2 - 4 Installation of eVision for UNIX Server and Windows Client © 2014 TIE Kinetix
First-Time Installation
Extracting eVision Server installation software
1 Connect to the UNIX server using Telnet or a similar utility.
2 Create a directory on the server system where the eVisionsoftware will be installed. We suggest naming it eVision.
3 Extract the installation files from the shipped files on themedia into the directory you just created. To do this, run theCPIO command with the following switches:
cpio –icvBdum < dev/d e v i c e _ f i le n am e
where device_filename specifies a load device, for examplermt0, where the TIE installation media is located. If you’reinstalling on a Linux server, run this CPIO command:
cpio –ivBdum < dev/d e v i c e _ f i le n am e
4 When the files are extracted, read the ver_rel.txt file forversion-specific preinstallation instructions. These includethe required settings for environment variables specific toeach UNIX platform.
5 When you’ve completed the instructions in ver_rel.txt,
continue with the next section.
Running the installation script
In the following section, the text that is bolded represents theprompts displayed by the instEDI script and the regular textidentifies your instructions.
1 Run instEDI from the eVision directory (or EDIhome). Youreceive this prompt:
eVision installation script
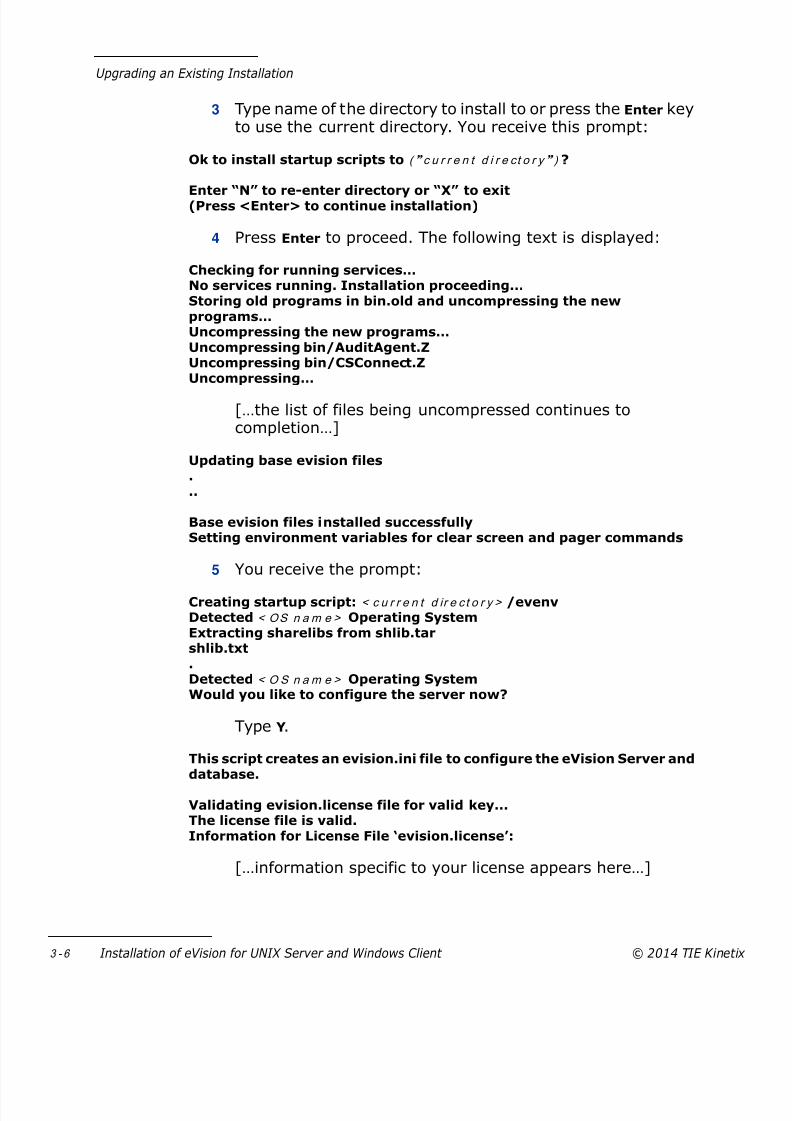
eVision needs a startup script installed in a directory in yourpath. Enter the directory to install to, or hit <Enter> todefault to current directory ( ” c u r r e n t d i r e ct o r y ” ) .
When installing eVision Server software from a CD-ROM, remember that a
CD-ROM from TIE Kinetix is not a mountable device.

8/19/2019 EVision 7.0 Installation Guide for UNIX
http://slidepdf.com/reader/full/evision-70-installation-guide-for-unix 23/82

8/19/2019 EVision 7.0 Installation Guide for UNIX
http://slidepdf.com/reader/full/evision-70-installation-guide-for-unix 24/82
2 - 6 Installation of eVision for UNIX Server and Windows Client © 2014 TIE Kinetix
First-Time Installation
Type Y to replace the existing license with a new one (enterthe complete path to the license file when prompted) or N tokeep the existing license.
6 You receive the following prompt:
Would you like to add e-mail notification settings?
Type Y and respond appropriately to each of the followingprompts, or N and skip to the next step.
Enter the default email address to send mail from : <email address ofsender>Enter the name of the SMTP server you will be using :<mail server name>
Enter the SMTP Port Number (e.g., 25) :<mail server port>
7 You receive the following prompt:
Enter the Port ID for CS Connect [<CS Connector port (default is 2010)>]:
Enter the new Port ID or press Enter to accept the default.
8 You receive the following prompt:
Enter the login name for Database :
Enter your login name.
9 You receive the following prompt:
Enter the Password for the database login :
Enter your login password.
10 You receive the following prompt:
Enter the Access Library Name [ORACLE] :
Enter the Access Library Name or press Enter to accept thedefault.
Some UNIX systems require you to use an escape character ‘\’ to precede the @
symbol in email addresses: john.doe\@mycompany.com

8/19/2019 EVision 7.0 Installation Guide for UNIX
http://slidepdf.com/reader/full/evision-70-installation-guide-for-unix 25/82
© 2014 TIE Kinetix Installation of eVision for UNIX Server and Windows Client 2 - 7
First-Time Installation
11 You receive the following prompt:
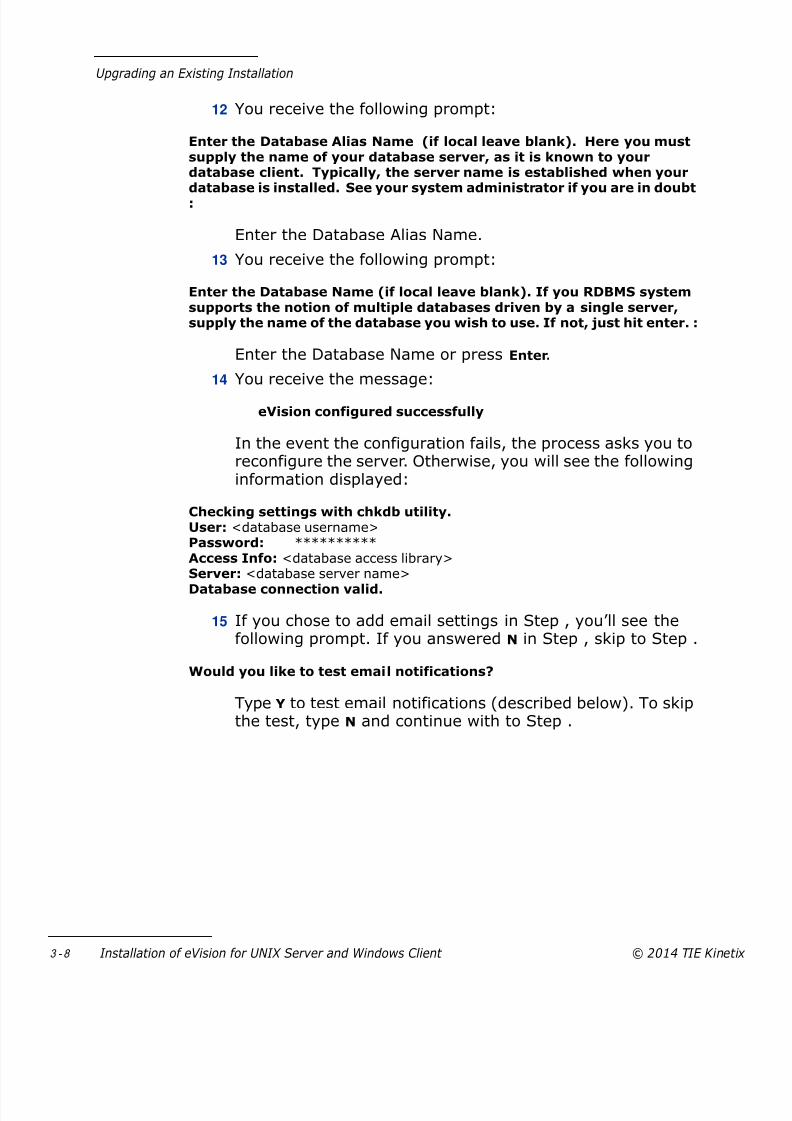
Enter the Database Alias Name (if local leave blank). Here you mustsupply the name of your database server, as it is known to yourdatabase client. Typically, the server name is established when yourdatabase is installed. See your system administrator if you are in doubt:
Enter the Database Alias Name.
12 You receive the following prompt:
Enter the Database Name (if local leave blank). If you RDBMS systemsupports the notion of multiple databases driven by a single server,supply the name of the database you wish to use. If not, just hit enter. :
Enter the Database Name or press Enter.
13 You receive the message:
eVision configured successfully
In the event the configuration fails, the process asks you toreconfigure the server. Otherwise, you will see the followinginformation displayed:
Checking settings with chkdb utility.User: <database username>Password: **********Access Info: <database access library>Server: <database server name>
Database connection valid.
14 If you chose to add email settings in Step , you’ll see thefollowing prompt. If you answered N in Step , skip to Step .
Would you like to test email notifications?
Type Y to test email notifications (described below). To skipthe test, type N and continue with to Step .

8/19/2019 EVision 7.0 Installation Guide for UNIX
http://slidepdf.com/reader/full/evision-70-installation-guide-for-unix 26/82
2 - 8 Installation of eVision for UNIX Server and Windows Client © 2014 TIE Kinetix
First-Time Installation
eVision Mail Notification Settings----------------------------------Mail to: <e-mail address sent from>Mail from: <e-mail address sent from>
Inbox server:Outbox server: <mail server name>SMTP port: <mail server port>POP3 port: 0Tracing enabled: NoTracefile name:
Notification enabled: YesLocal Host: <host name>Checking SMTP Server status:Address: <mail server name and (IP address)Port: <mail server port>
Attempting to connect to SMTP server and send a test mail...Connected...Sent hello from <host name>...
Checking SMTP Server status:Address: <mail server name and (IP address)Port: <mail server port>
Attempting to connect to SMTP server and send a test mail...Connected...Sent hello from <host name>...Set To: and From: fields...Sent message...Shut down connection...Success. Check mailbox.
Was the test message delivered successfully?
Type Y.
Some UNIX systems require you to use an escape character ‘\’ to precede the @
symbol in email addresses: john.doe\@mycompany.com

8/19/2019 EVision 7.0 Installation Guide for UNIX
http://slidepdf.com/reader/full/evision-70-installation-guide-for-unix 27/82
© 2014 TIE Kinetix Installation of eVision for UNIX Server and Windows Client 2 - 9
First-Time Installation
15 Next you’re prompted to allow the SPLOAD process to loadyour database tables.
Loading eVision databases with spload using ‘install’Storing results of database load into file spload.log
Checking database connection…
User: <database username>Password: **********Access Info: <database access library>Server: <database server name>Database connection valid.
16 You will see instructions displayed that are similar to thefollowing:
-----------------------------------------------------------------
SPLOAD is about to examine your database, and prepare it for eVision.
If you are installing eVision to an existing eVision database,no data will be erased or re-initialized.
Please read the screen carefully, as it will tell you what actionswill be taken.
-----------------------------------------------------------------
Do you wish to continue?[Y/N]
Type Y.
17 Next, you see this prompt:
Checking to see if eVision tables are already installed.No eVision tables found. Proceeding with database initialization.
[…a series of database messages appears…]
installing Perlnnnn blocksInstallation complete!
User: <database username>Password: **********Access Info: <database access library>Server: <database server name>Database connection valid.

8/19/2019 EVision 7.0 Installation Guide for UNIX
http://slidepdf.com/reader/full/evision-70-installation-guide-for-unix 28/82
2 - 1 0 Installation of eVision for UNIX Server and Windows Client © 2014 TIE Kinetix
First-Time Installation
18 Next, the script installs the necessary Comm packages.
Server ready to accept COMM install.Installing Comm packages…
[…a series of comm installation messages appears…]Comm Packages installed.
19 You will be prompted, Y/N, for each selected VersionStandard you want to install. Be sure to select only thoseVersions you actually need.
Installation complete.
Enter “evenv” to run eVision via command line or scripts
To run the “evenv” script from any directory,you must add “<current directory>” to your path.
Otherwise, you must change directory to <current directory>before executing this script.
20 Type evenv.
21 Now at the EVENV prompt, start the eVision Audit Agent, CSConnector, and Workflow Maestro services by typing evStart.
• To verify that these services are running, typeshowservices.
• To stop the eVision services, type evStop.• For information on other switches, type the service
name followed by -h.
22 Exit the EVENV script by typing exit.
23 Disconnect from the eVision UNIX server.
Install EDI Standards and Options
If you were shipped EDI Version Standards or other options forthe eVision Server in a separate file, load the software now byentering the cpio command in the format appropriate to the
media. This step is unnecessary if the server Version Standardswere included in your eVision Server software.
If you have EDI version tables to install from other media,install them by typing instTABLES. Under normal installconditions instEDI runs this script. The instTABLES script canalso be used to install tables you originally chose not to install.

8/19/2019 EVision 7.0 Installation Guide for UNIX
http://slidepdf.com/reader/full/evision-70-installation-guide-for-unix 29/82
© 2014 TIE Kinetix Installation of eVision for UNIX Server and Windows Client 2 - 1 1
First-Time Installation
If you have communiction scripts to install, install them bytyping instCOMM. Under normal install conditions instEDI runs this script. The instCOMM script can also be usd to installcommunications scripts you originally chose not to install.
Based on need or purchase of additional functionality, you mayneed to perform some or all of the following steps to installthese function(s) on the eVision Server.
If you have purchased the Status Feedback Loop option foryour SAP system, install the option by typing instAIMSFL. Youmust restart your eVision services after this step.
Installing eVision Client
To perform this installation you must be logged onto eachmachine with Administrator rights. Remember, the eVision
Server must be installed before you install the eVision Client(s).
Running setup.exe
Insert the eVision installation CD-ROM in the drive. The setupprogram autoruns. If it does not, navigate in Windows Explorerto the root of the CD-ROM drive and double-click setup.exe.
Welcome
When the setup program starts, it briefly displays some
information-only dialog boxes and then the InstallShield
®
Wizard prepares itself to run. After this initialization process iscomplete, the Welcome screen displays.
Click Next.

8/19/2019 EVision 7.0 Installation Guide for UNIX
http://slidepdf.com/reader/full/evision-70-installation-guide-for-unix 30/82
2 - 1 2 Installation of eVision for UNIX Server and Windows Client © 2014 TIE Kinetix
First-Time Installation
License agreement
The License Agreement screen appears.
In order to install eVision Client, you must agree to the termsof this license. Select the I accept the terms of the license
agreement radio button and click Next.
Customer Information
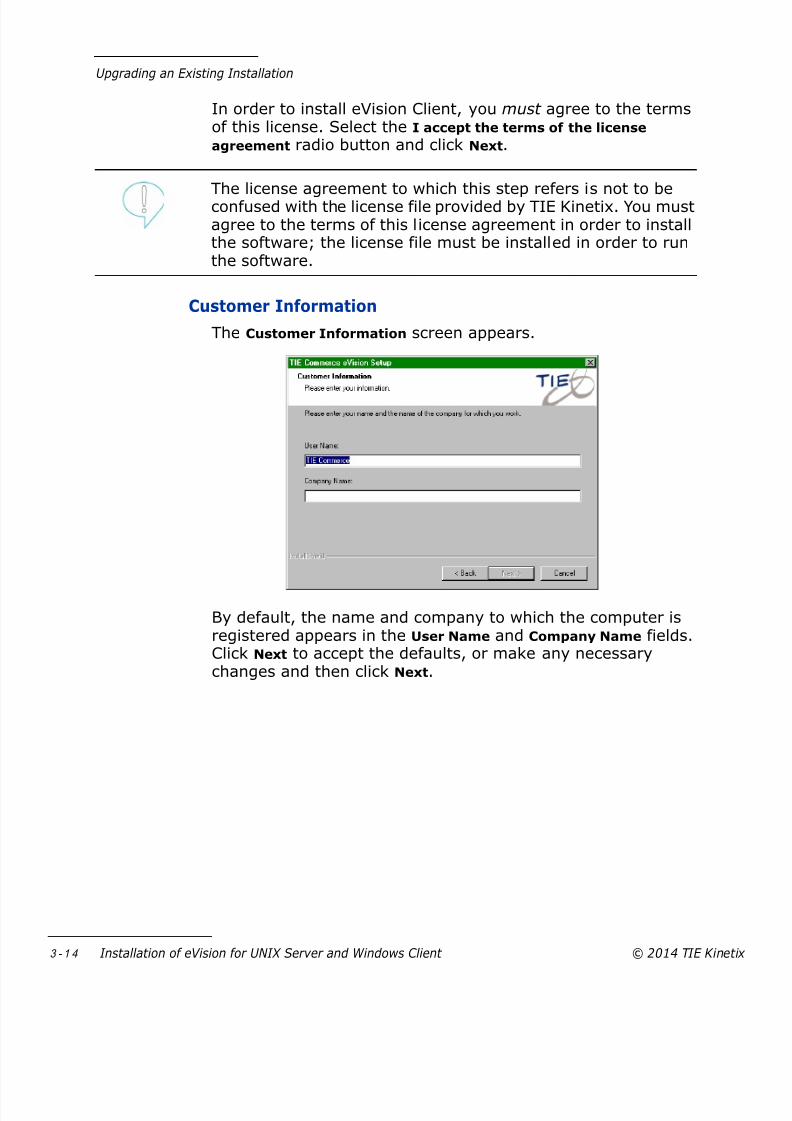
The Customer Information screen appears.
The license agreement to which this step refers is not to beconfused with the license file provided by TIE Kinetix. You mustagree to the terms of this license agreement in order to installthe software; the license file must be installed in order to runthe software.

8/19/2019 EVision 7.0 Installation Guide for UNIX
http://slidepdf.com/reader/full/evision-70-installation-guide-for-unix 31/82

8/19/2019 EVision 7.0 Installation Guide for UNIX
http://slidepdf.com/reader/full/evision-70-installation-guide-for-unix 32/82
2 - 1 4 Installation of eVision for UNIX Server and Windows Client © 2014 TIE Kinetix
First-Time Installation
Client Components. At the minimum, you will installWorkbench Client. Unless you have custom mappingcapabilities of your own, you must also install spEDI_map.
Workflow Launch Client (wflaunch) is available to eVisionNet/Server users. Messenger Client bundles wflaunch withmailboxing features and is available to eVision Enterprise usersonly.
Here’s a summary of the Client Components appropriate for thetwo eVision configurations:
spEDI_map Standards. This set of standards is for the use ofthe eVision Client. You should install the same standards at
eVisionconfiguration
WorkbenchClient
spEDImap MessengerClient
WorkflowLaunch Client
Net/Server √ √ √
Enterprise √ √ √

8/19/2019 EVision 7.0 Installation Guide for UNIX
http://slidepdf.com/reader/full/evision-70-installation-guide-for-unix 33/82
© 2014 TIE Kinetix Installation of eVision for UNIX Server and Windows Client 2 - 1 5
First-Time Installation
each client that you installed (or will install) on the eVisionServer.
Installation of client standards is much less time-consumingthan server standards; we recommend you select them duringthe initial installation.
UNIX Installations. If you use a UNIX machine to control aneVision Server remotely, you may install these UNIX versions(scripts) of eVision components.
The files that are installed are self-extracting files. After theyare copied to the eVision Client you must move them to theUNIX machine that will remotely control the eVision Server.When the files are run from there, they will install themselvesin the proper locations.

8/19/2019 EVision 7.0 Installation Guide for UNIX
http://slidepdf.com/reader/full/evision-70-installation-guide-for-unix 34/82
2 - 1 6 Installation of eVision for UNIX Server and Windows Client © 2014 TIE Kinetix
First-Time Installation
Installation progress indicator
The setup program is ready to begin copying files to thecomputer.
Click the Install button to begin the file copy process.
An installation progress indicator appears as files are copiedfrom the CD-ROM to the computer’s hard drive.
Installation completion and exit
At the completion of the setup program, a screen similar to thefollowing appears.
By default, the option to view the RELEASE NOTES file ischecked. When you click the Finish button, the RELEASE NOTES

8/19/2019 EVision 7.0 Installation Guide for UNIX
http://slidepdf.com/reader/full/evision-70-installation-guide-for-unix 35/82
© 2014 TIE Kinetix Installation of eVision for UNIX Server and Windows Client 2 - 1 7
First-Time Installation
file appears. This file summarizes the current version of eVisionin the following categories: Enhancements and Changes/Fixes.
If you don’t wish to view the RELEASE NOTES file, clear thecheckbox before clicking Finish.
Restart
A dialog box similar to the following appears. We stronglyrecommend you select the default option to restart now.
Start menu
When the setup program is complete, your Start menu will havea new TIE Kinetix folder with shortcuts to the following: eVisionRelease Notes, eVision Workbench, eVision Workbench Help,eVision Workflow Monitor, spEDI*map, spEDI*map Help andUninstall eVision.
Configuring the eVision Workbench
Follow the instructions in this section for each computer onwhich eVision Client is installed.
You can view the RELEASE NOTESfile anytime by• clicking the Windows Start button, then selecting
Programs->TIE Kinetix->eVision Release Notes or
• navigating to the folder in which you installed eVision andopening release_notes.html.

8/19/2019 EVision 7.0 Installation Guide for UNIX
http://slidepdf.com/reader/full/evision-70-installation-guide-for-unix 36/82
2 - 1 8 Installation of eVision for UNIX Server and Windows Client © 2014 TIE Kinetix
First-Time Installation
Start eVision Workbench. You’ll see a message box similar tothe one shown below.
Click OK.
Configure Options
Database Setup. Open the Options dialog box (select Tools--
>Options) and select the Database Setup tab.
Make sure that all fields on this tab match the choices you madeduring the installation of the eVision Server. Make anynecessary changes.
Don’t be concerned about failed tests at this point. Validity test failures are to be
expected, particularly on remote eVision Clients, because the clients have not
yet been fully configured.

8/19/2019 EVision 7.0 Installation Guide for UNIX
http://slidepdf.com/reader/full/evision-70-installation-guide-for-unix 37/82
© 2014 TIE Kinetix Installation of eVision for UNIX Server and Windows Client 2 - 1 9
First-Time Installation
Now select the CS Connector tab.
CS Connector.
• Change eVision Server Name to the correct name.
• If you chose a port ID other than the default 2010 duringinstallation of the eVision Server, change Port ID here tomatch it.
Click OK to close the Options dialog box.
Exit the eVision Workbench.
eVision Workbench
Start eVision Workbench again. Now you should see a messagebox similar to the one shown below.

8/19/2019 EVision 7.0 Installation Guide for UNIX
http://slidepdf.com/reader/full/evision-70-installation-guide-for-unix 38/82
2 - 2 0 Installation of eVision for UNIX Server and Windows Client © 2014 TIE Kinetix
First-Time Installation
Conclusion
This completes the installation process. If you experienceproblems with the installation and cannot resolve the issue withthese instructions, call TIE Kinetix Technical Support at 1-877-
787-7644 or send an email to [email protected].

8/19/2019 EVision 7.0 Installation Guide for UNIX
http://slidepdf.com/reader/full/evision-70-installation-guide-for-unix 39/82
© 2014 TIE Kinetix Installation of eVision for UNIX Server and Windows Client 3 - 1
Chapter 3 — Upgrading an ExistingInstallation
This chapter assumes that you are running a previous versionof eVision and are already aware of all installation and databaseconnectivity issues involved with installing and running theproduct.
Upgrading your eVision software modifies eVision executablesin the eVision directory structure and database table schemas.The upgrade process preserves existing data, maps, and otherdata such as trading partner setups. If there are schemachanges, the upgrade process will export data from theaffected database tables, modify the schema, and reimport thesaved data.
The upgrade installation is almost identical to the first-timeinstallation, with the following exceptions:
• When you upgrade a remote eVision Client, by default theupgrade will be installed in the same folder as the oldsoftware. It should not be installed anywhere else.
We strongly recommend that you have a test eVision Server license, and that you install
the upgrade on your test server with a current copy of your production data. After you
have tested the upgrade and are sure it works, install it on your production system.
In order to upgrade to eVision 5.x, you must be running eVision 4.2, build 521or higher. If you are running an earlier version, you must first upgrade to
version 4.2, build 521 or higher and then upgrade to 5.x.

8/19/2019 EVision 7.0 Installation Guide for UNIX
http://slidepdf.com/reader/full/evision-70-installation-guide-for-unix 40/82
3 - 2 Installation of eVision for UNIX Server and Windows Client © 2014 TIE Kinetix
Upgrading an Existing Installation
• The setup program backs up your BIN directory into adirectory called BIN_<date>, where <date> is thecurrent date. After the upgrade is tested and inproduction, have your system administrator remove thebackup BIN.
• The setup program upgrades the database tables andrebuilds selected tables in the new layout. You’ll beprompted to confirm that you want to execute this step.
• The setup program also upgrades the base workflowsthat shipped with your system to the new format,including all workflows that were installed with yourinitial eVision system. The user’s workflows remainintact.
• It’s not necessary to reinstall any existing standards, but
you may wish to install new standards that wereunavailable in previous versions.
Licensing
To use eVision software, you must have a license. If you are
upgrading existing eVision software, you already have one.
You may be able to continue using your current license, or youmay have to request a new one, depending upon the nature ofthe upgrade.
Always note current directory permissions if they have been altered from the
default as installed values. Directory permissions may be reset to default values
by the upgrade process.
Always note if database tables have special permissions set for users other than
database user creating the tables. These special permissions may be lost if the
table is updated by dropping and reloading the table. Also any new tables added
during upgrade process may require your special permissions to be set.
Always install the eVision Server before installing eVision Clients. The eVision
services are part of the eVision Server installation, and these services must be
running to properly install and configure the eVision Clients.

8/19/2019 EVision 7.0 Installation Guide for UNIX
http://slidepdf.com/reader/full/evision-70-installation-guide-for-unix 41/82
© 2014 TIE Kinetix Installation of eVision for UNIX Server and Windows Client 3 - 3
Upgrading an Existing Installation
• If you are upgrading to a new version of eVision (forexample, from 4.x.x to 5.x.x, or from 5.0.x to 5.1.x), youmust replace your current permanent license with a newone.
• If you are simply upgrading to a newer build of yourcurrent version (for example, 5.0.315 to 5.0.318), youcan continue using your current license.
If you must replace your permanent license, you may use thetemporary license included on the eVision installation CD. Thetemporary license permits you to use the software until youacquire and install your new permanent license.
Temporary license
The supplied temporary license is good for sixty (60) days from
the time the CD was created, not from the time the software isinstalled. So, for example, if you install your software 53 daysafter the CD was created, you will only be able to run eVisionfor seven days. In such a case, you may request anothertemporary license if you have not yet acquired your permanentlicense.
Permanent license
Your permanent license is one created by TIE Kinetix, based oninformation provided by you about the machine which is tofunction as your eVision Server. The license file you will receive
contains information specific to that machine, and that machinealone will be recognized as the eVision Server. For this reason,you should request your permanent license only when yourchoice of machines for the eVision Server is no longer subjectto change.
See Appendix B for details on requesting a permanent license.
Choosing a license
During installation, you will be prompted for the license to use.
You may select the supplied temporary license, or path to thelocation of your permanent license.

8/19/2019 EVision 7.0 Installation Guide for UNIX
http://slidepdf.com/reader/full/evision-70-installation-guide-for-unix 42/82
3 - 4 Installation of eVision for UNIX Server and Windows Client © 2014 TIE Kinetix
Upgrading an Existing Installation
Before You Begin
Preparing for an eVision product upgrade
1 Read through the release_notes.html file contained in the
root directory on the eVision CD-ROM. This document listschanges to the eVision system since the last release.
2 In Workbench, disable all scheduled activity.
3 Exit Workbench and all other processes that connect to theeVision Server.
4 Back up your system, making a complete copy of the eVisiondirectory and the database instance. Make sure the copiesare identical to the originals and that no data was processedfollowing the backup.
5
If you plan to install upgraded communication scripts, youshould copy your mailbox setup information. The best wayto do this depends upon the kind of scripts you’re using:
• if you’re using Perl communication scripts, copy yourcomm\defaults directory.
• otherwise, copy your comm\commpkg\name\vandirectory, where name is your communicationspackage (like Aplus or 3780Plus) and van is your VANsubdirectory.
6 If you have modified any of the scripts supplied with eVisionwithout renaming them, make sure you copy these scriptsto another directory because the setup program willoverwrite them in the eVision script directory . Werecommend renaming the customized versions of thesescripts and using the renamed scripts in production.
7 Similarly, if you have modified any of the standard WorkflowActions or Workflow Objects supplied with eVision, renamethem. During the upgrade process, eVision’s pre-configuredWorkflows are reset to their original parameters.
8 Note that all optional components you use, such aswflaunch, Messenger Client or the SAP status feedback loop,
must be upgraded at the same time as the eVision Server.
Upgrading eVision Server
To perform this installation you will copy the compressed file tothe UNIX server and extract its contents, then run theinstallation script.

8/19/2019 EVision 7.0 Installation Guide for UNIX
http://slidepdf.com/reader/full/evision-70-installation-guide-for-unix 43/82
© 2014 TIE Kinetix Installation of eVision for UNIX Server and Windows Client 3 - 5
Upgrading an Existing Installation
Extracting eVision Server installation software
1 Connect to the UNIX server using Telnet or a similar utility.
2 Create a directory on the server system as a backupdirectory for your existing eVision software. Move all thecontents of the current eVision directory into the backupdirectory.
3 Extract the installation files from the shipped files on themedia into the installation directory. To do this, run the CPIOcommand with the following switches:
cpio –icvBdum < dev/d e v i c e _ f i le n am e
where device_filename specifies a load device, for examplermt0, where the TIE installation media is located. If you’reinstalling on a Linux server, run this CPIO command:
cpio –ivBdum < dev/d e v i c e _ f i le n am e
4 When the files are extracted, read the ver_rel.txt file forversion-specific preinstallation instructions. These includethe required settings for environment variables specific to
each UNIX platform.5 When you’ve completed the instructions in ver_rel.txt,
continue with the next section.
Running the installation script
In the following section, the text that is bolded represents theprompts displayed by the instEDI script and the regular textidentifies your instructions.
1 Stop the eVision services.
2 Run instEDI from the eVision directory (or EDIhome). Youreceive this prompt:
eVision installation script
eVision needs a startup script installed in a directory in yourpath. Enter the directory to install to, or hit <Enter> todefault to current directory ( ” c u r r e n t d i r e ct o r y ” ) .
When upgrading eVision Server software from a CD-ROM, remember that a
CD-ROM from TIE Kinetix is not a mountable device.
8/19/2019 EVision 7.0 Installation Guide for UNIX
http://slidepdf.com/reader/full/evision-70-installation-guide-for-unix 44/82

8/19/2019 EVision 7.0 Installation Guide for UNIX
http://slidepdf.com/reader/full/evision-70-installation-guide-for-unix 45/82
© 2014 TIE Kinetix Installation of eVision for UNIX Server and Windows Client 3 - 7
Upgrading an Existing Installation
6 You receive the prompt:
Would you like to replace it with a a different license file?
Type Y to replace the existing license with a new one (enter
the complete path to the license file when prompted) or N tokeep the existing license.
7 You receive the following prompt:
Would you like to add e-mail notification settings?
Type Y and respond appropriately to each of the followingprompts, or N and skip to the next step.
Enter the default email address to send mail from : <email address ofsender>Enter the name of the SMTP server you will be using :<mail server name>
Enter the SMTP Port Number (e.g., 25) :<mail server port>
8 You receive the following prompt:
Enter the Port ID for CS Connect [<CS Connector port (default is 2010)>]:
Enter the new Port ID or press Enter to accept the default.
9 You receive the following prompt:
Enter the login name for Database :
Enter your login name.
10 You receive the following prompt:
Enter the Password for the database login :
Enter your login password.
11 You receive the following prompt:
Enter the Access Library Name [ORACLE] :
Enter the Access Library Name or press Enter to accept thedefault.
Some UNIX systems require you to use an escape character ‘\’ to precede the @
symbol in email addresses: john.doe\@mycompany.com
8/19/2019 EVision 7.0 Installation Guide for UNIX
http://slidepdf.com/reader/full/evision-70-installation-guide-for-unix 46/82

8/19/2019 EVision 7.0 Installation Guide for UNIX
http://slidepdf.com/reader/full/evision-70-installation-guide-for-unix 47/82
© 2014 TIE Kinetix Installation of eVision for UNIX Server and Windows Client 3 - 9
Upgrading an Existing Installation
eVision Mail Notification Settings----------------------------------Mail to: <e-mail address sent from>Mail from: <e-mail address sent from>
Inbox server:Outbox server: <mail server name>SMTP port: <mail server port>POP3 port: 0Tracing enabled: NoTracefile name:
Notification enabled: YesLocal Host: <host name>Checking SMTP Server status:Address: <mail server name and (IP address)Port: <mail server port>
Attempting to connect to SMTP server and send a test mail...Connected...Sent hello from <host name>...
Checking SMTP Server status:Address: <mail server name and (IP address)Port: <mail server port>
Attempting to connect to SMTP server and send a test mail...Connected...Sent hello from <host name>...Set To: and From: fields...Sent message...Shut down connection...Success. Check mailbox.
Was the test message delivered successfully?
Type Y.
Some UNIX systems require you to use an escape character ‘\’ to precede the @
symbol in email addresses: john.doe\@mycompany.com
8/19/2019 EVision 7.0 Installation Guide for UNIX
http://slidepdf.com/reader/full/evision-70-installation-guide-for-unix 48/82
3 - 1 0 Installation of eVision for UNIX Server and Windows Client © 2014 TIE Kinetix
Upgrading an Existing Installation
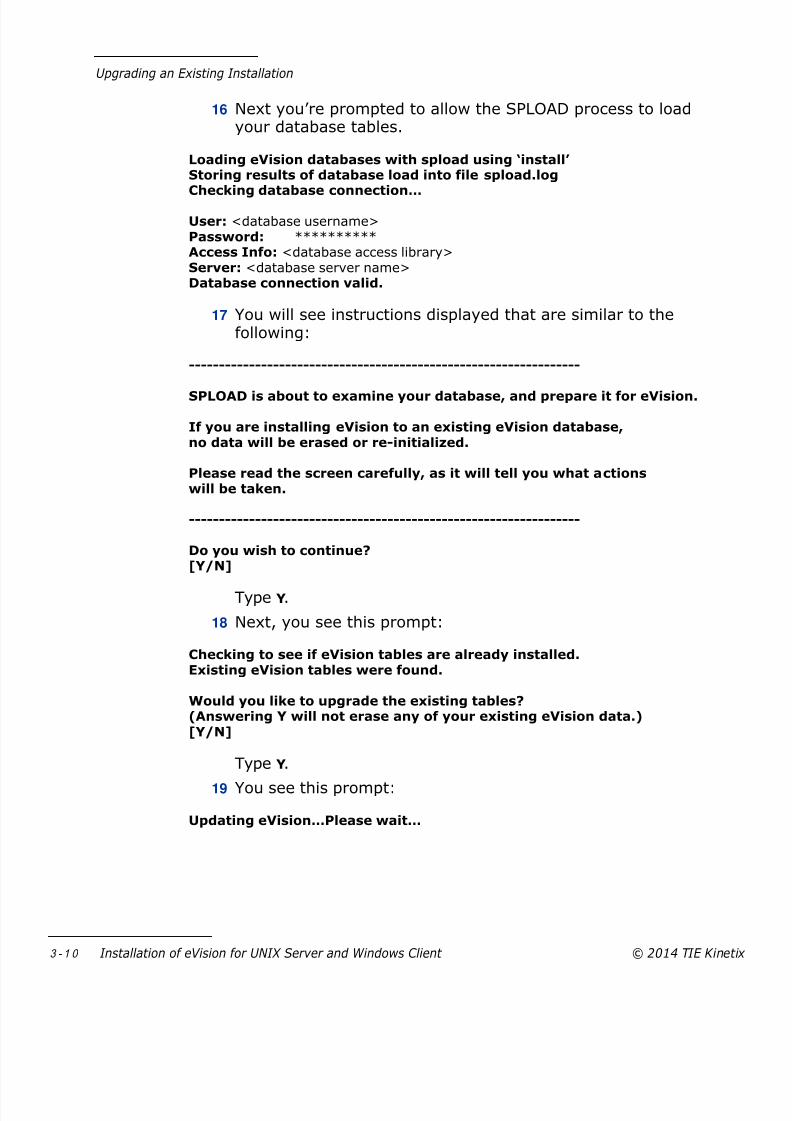
16 Next you’re prompted to allow the SPLOAD process to loadyour database tables.
Loading eVision databases with spload using ‘install’Storing results of database load into file spload.log
Checking database connection…
User: <database username>Password: **********Access Info: <database access library>Server: <database server name>Database connection valid.
17 You will see instructions displayed that are similar to thefollowing:
-----------------------------------------------------------------
SPLOAD is about to examine your database, and prepare it for eVision.
If you are installing eVision to an existing eVision database,no data will be erased or re-initialized.
Please read the screen carefully, as it will tell you what actionswill be taken.
-----------------------------------------------------------------
Do you wish to continue?[Y/N]
Type Y.
18 Next, you see this prompt:
Checking to see if eVision tables are already installed.Existing eVision tables were found.
Would you like to upgrade the existing tables?(Answering Y will not erase any of your existing eVision data.)[Y/N]
Type Y.
19 You see this prompt:
Updating eVision…Please wait…
8/19/2019 EVision 7.0 Installation Guide for UNIX
http://slidepdf.com/reader/full/evision-70-installation-guide-for-unix 49/82
© 2014 TIE Kinetix Installation of eVision for UNIX Server and Windows Client 3 - 1 1
Upgrading an Existing Installation
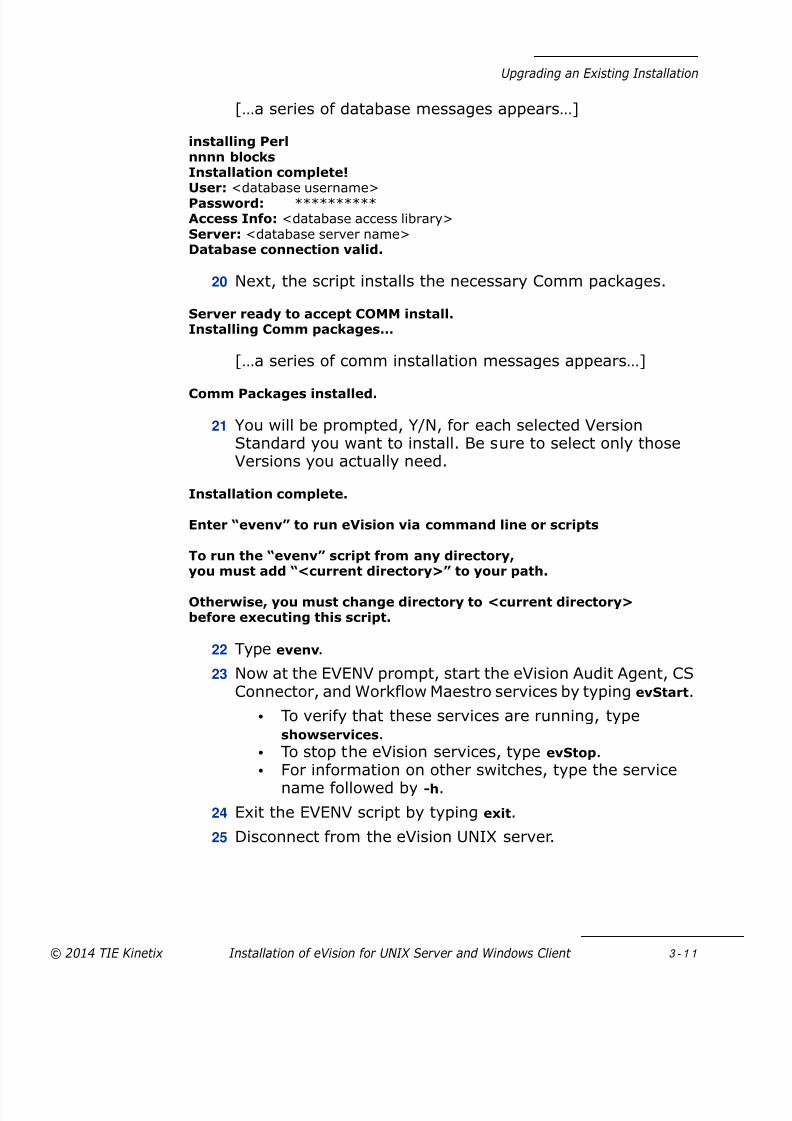
[…a series of database messages appears…]
installing Perlnnnn blocksInstallation complete!User: <database username>Password: **********Access Info: <database access library>Server: <database server name>Database connection valid.
20 Next, the script installs the necessary Comm packages.
Server ready to accept COMM install.Installing Comm packages…
[…a series of comm installation messages appears…]
Comm Packages installed.
21 You will be prompted, Y/N, for each selected VersionStandard you want to install. Be sure to select only thoseVersions you actually need.
Installation complete.
Enter “evenv” to run eVision via command line or scripts
To run the “evenv” script from any directory,you must add “<current directory>” to your path.
Otherwise, you must change directory to <current directory>before executing this script.
22 Type evenv.
23 Now at the EVENV prompt, start the eVision Audit Agent, CSConnector, and Workflow Maestro services by typing evStart.
• To verify that these services are running, typeshowservices.
• To stop the eVision services, type evStop.• For information on other switches, type the service
name followed by -h.
24 Exit the EVENV script by typing exit.
25 Disconnect from the eVision UNIX server.
8/19/2019 EVision 7.0 Installation Guide for UNIX
http://slidepdf.com/reader/full/evision-70-installation-guide-for-unix 50/82
3 - 1 2 Installation of eVision for UNIX Server and Windows Client © 2014 TIE Kinetix
Upgrading an Existing Installation
Install EDI Standards and Options
If you were shipped EDI Version Standards or other options forthe eVision Server in a separate file, load the software now byentering the cpio command in the format appropriate to the
media. This step is unnecessary if the server Version Standardswere included in your eVision Server software.
If you have EDI version tables to install from other media,install them by typing instTABLES. Under normal installconditions instEDI runs this script. The instTABLES script canalso be used to install tables you originally chose not to install.
If you have communiction scripts to install, install them bytyping instCOMM. Under normal install conditions instEDI runs this script. The instCOMM script can also be usd to installcommunications scripts you originally chose not to install.
Based on need or purchase of additional functionality, you mayneed to perform some or all of the following steps to installthese function(s) on the eVision Server.
If you have purchased the Status Feedback Loop option foryour SAP system, install the option by typing instAIMSFL. Youmust restart your eVision services after this step.
Upgrading eVision Client
To perform this installation you must be logged onto each
machine with Administrator rights. Remember, the eVisionServer must be installed before you install the eVision Client(s).
Running setup.exe
Insert the eVision installation CD-ROM in the drive. The setupprogram autoruns. If it does not, navigate in Windows Explorerto the root of the CD-ROM drive and double-click setup.exe.

8/19/2019 EVision 7.0 Installation Guide for UNIX
http://slidepdf.com/reader/full/evision-70-installation-guide-for-unix 51/82
© 2014 TIE Kinetix Installation of eVision for UNIX Server and Windows Client 3 - 1 3
Upgrading an Existing Installation
Welcome
When the setup program starts, it briefly displays someinformation-only dialog boxes and then the InstallShield® Wizard prepares itself to run. After this initialization process is
complete, the Welcome screen displays.
Click Next.
License agreement
The License Agreement screen appears.
8/19/2019 EVision 7.0 Installation Guide for UNIX
http://slidepdf.com/reader/full/evision-70-installation-guide-for-unix 52/82
3 - 1 4 Installation of eVision for UNIX Server and Windows Client © 2014 TIE Kinetix
Upgrading an Existing Installation
In order to install eVision Client, you must agree to the termsof this license. Select the I accept the terms of the license
agreement radio button and click Next.
Customer Information
The Customer Information screen appears.
By default, the name and company to which the computer isregistered appears in the User Name and Company Name fields.Click Next to accept the defaults, or make any necessarychanges and then click Next.
The license agreement to which this step refers is not to beconfused with the license file provided by TIE Kinetix. You mustagree to the terms of this license agreement in order to installthe software; the license file must be installed in order to runthe software.
8/19/2019 EVision 7.0 Installation Guide for UNIX
http://slidepdf.com/reader/full/evision-70-installation-guide-for-unix 53/82

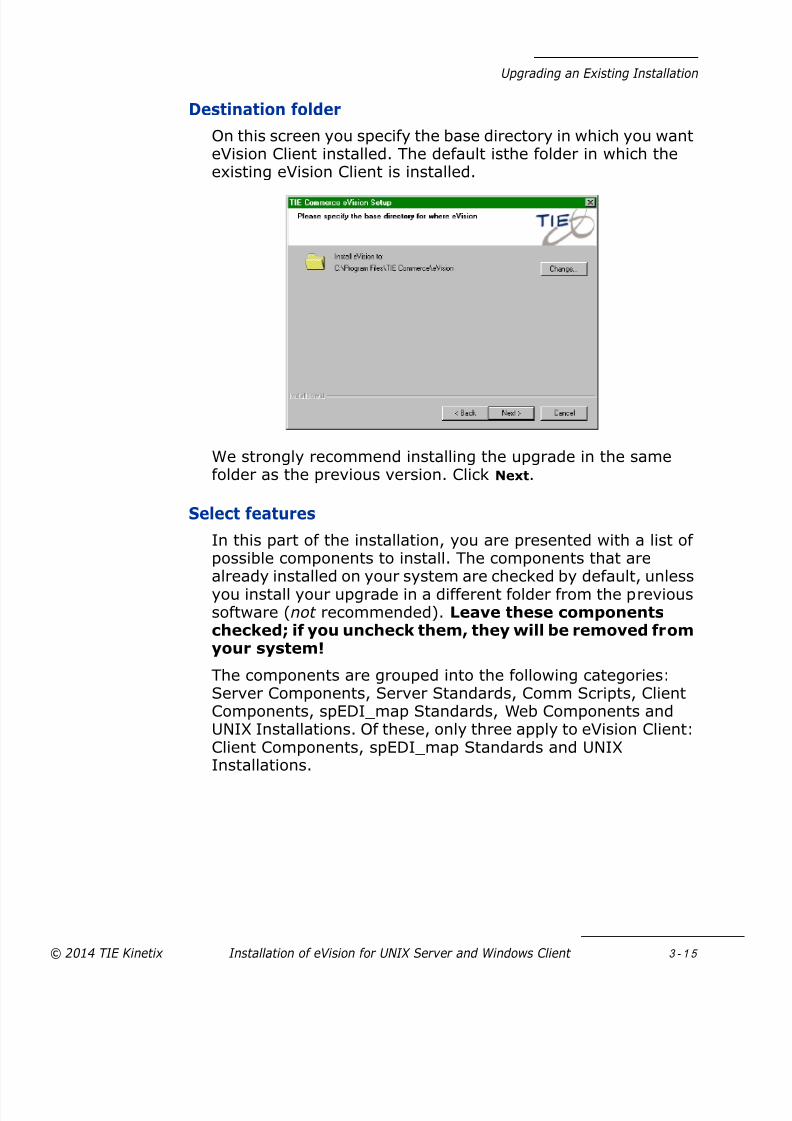
8/19/2019 EVision 7.0 Installation Guide for UNIX
http://slidepdf.com/reader/full/evision-70-installation-guide-for-unix 54/82
3 - 1 6 Installation of eVision for UNIX Server and Windows Client © 2014 TIE Kinetix
Upgrading an Existing Installation
Client Components. At the minimum, you will installWorkbench Client. Unless you have custom mappingcapabilities of your own, you must also install spEDI_map.
Workflow Launch Client (wflaunch) is available to eVisionNet/Server users. Messenger Client bundles wflaunch withmailboxing features and is available to eVision Enterprise usersonly.
Here’s a summary of the Client Components appropriate for thetwo eVision configurations:
spEDI_map Standards. This set of standards is for the use ofthe eVision Client. You should install the same standards at
eVisionconfiguration
WorkbenchClient
spEDImap MessengerClient
WorkflowLaunch Client
Net/Server √ √ √
Enterprise √ √ √

8/19/2019 EVision 7.0 Installation Guide for UNIX
http://slidepdf.com/reader/full/evision-70-installation-guide-for-unix 55/82
© 2014 TIE Kinetix Installation of eVision for UNIX Server and Windows Client 3 - 1 7
Upgrading an Existing Installation
each client that you installed (or will install) on the eVisionServer.
It is not necessary to install existing standards again. If you donot need to add any new standards to your system, you mayskip to the next section.
Installation of client standards is much less time-consumingthan server standards; we recommend you select them duringthe initial installation.
UNIX Installations. If you use a UNIX machine to control aneVision Server remotely, you may install these UNIX versions(scripts) of eVision components.
The files that are installed are self-extracting files. After theyare copied to the eVision Client you must move them to theUNIX machine that will remotely control the eVision Server.

8/19/2019 EVision 7.0 Installation Guide for UNIX
http://slidepdf.com/reader/full/evision-70-installation-guide-for-unix 56/82
3 - 1 8 Installation of eVision for UNIX Server and Windows Client © 2014 TIE Kinetix
Upgrading an Existing Installation
When the files are run from there, they will install themselvesin the proper locations.
Installation progress indicator
The setup program is ready to begin copying files to thecomputer.
Click the Install button to begin the file copy process.
An installation progress indicator appears as files are copiedfrom the CD-ROM to the computer’s hard drive.
Installation completion and exit
At the completion of the setup program, a screen similar to thefollowing appears.

8/19/2019 EVision 7.0 Installation Guide for UNIX
http://slidepdf.com/reader/full/evision-70-installation-guide-for-unix 57/82
© 2014 TIE Kinetix Installation of eVision for UNIX Server and Windows Client 3 - 1 9
Upgrading an Existing Installation
By default, the option to view the RELEASE NOTES file ischecked. When you click the Finish button, the RELEASE NOTESfile appears. This file summarizes the current version of eVisionin the following categories: Enhancements and Changes/Fixes.
If you don’t wish to view the RELEASE NOTES file, clear thecheckbox before clicking Finish.
Restart
A dialog box similar to the following appears. We stronglyrecommend you select the default option to restart now.
Testing eVision
Test your system to make sure it is functioning properly. Forexample, reprocess some sample data before re-enabling theautomation that you have established.
If your tests are unsuccessful and you want to return to aprevious version, please communicate with TIE KinetixKinetixTechnical Support or your authorized TIE reseller beforereverting to an older version.
To revert to an older version
1 Move the upgraded eVision directory to a new location onyour hard drive.
2 Restore your original directory and database instance fromyour backup.
You can view the RELEASE NOTESfile anytime by• clicking the Windows Start button, then selecting
Programs->TIE Kinetix->eVision Release Notes or
• navigating to the folder in which you installed eVision andopening release_notes.html.

8/19/2019 EVision 7.0 Installation Guide for UNIX
http://slidepdf.com/reader/full/evision-70-installation-guide-for-unix 58/82
3 - 2 0 Installation of eVision for UNIX Server and Windows Client © 2014 TIE Kinetix
Upgrading an Existing Installation
3 Reinstall your original system from the previous eVisionCD-ROM using the above procedure.
The new eVision installation created new registry settings, soyou must reestablish all user preferences, such as:
• Toolbar preferences• ODBC connections
• CS Connector locations
• VAN communications setups
Conclusion
This completes the upgrade process. If you experienceproblems with the upgrade and cannot resolve the issue withthese instructions, call TIE Kinetix Technical Support at 1-877-
787-7644 or send an email to [email protected].

8/19/2019 EVision 7.0 Installation Guide for UNIX
http://slidepdf.com/reader/full/evision-70-installation-guide-for-unix 59/82
© 2014 TIE Kinetix Installation of eVision for UNIX Server and Windows Client 4 - 1
Chapter 4 — Maintenance Issues
Modifying, Repairing or Removing eVision Client
After eVision is installed, you may want to add client featuresyou didn’t select during the original installation, such asspEDI*map standards. Or, you may wish to reinstall eVisionClient if you encountered difficulties the first time. You mighteven want to remove eVision Client entirely.
You can take any of these actions by running the setup programsetup.exe again (the program autoruns when you put theinstallation CD-ROM in the drive; otherwise you’ll find it in theCD-ROM’s eVision installation directory).
Modify. Use this option if you want to install additionalfeatures. For example, you may have chosen not to installspEDI*map standards during the initial installation, but nowwant to add them. Or perhaps you’ve just purchased newoptional components and wish to install them. Click Next and
follow the on-screen prompts.

8/19/2019 EVision 7.0 Installation Guide for UNIX
http://slidepdf.com/reader/full/evision-70-installation-guide-for-unix 60/82
4 - 2 Installation of eVision for UNIX Server and Windows Client © 2014 TIE Kinetix
Maintenance Issues
You may also selectively remove components using this option.
If you choose to selectively remove components, select Modify and, at the Select Features screen, clear the checkboxes of thecomponents you want removed.
Repair. Use this option to reinstall eVision with all the samecomponents you selected during the original installation. Yourlicense file, database tables and application preferences remainintact during a Repair.
Remove. Use this option to remove eVision. Remove uninstallsthe eVision application software, but your license file, databasetables and application preferences remain intact.
TIE Kinetix does not recommend selectively removingcomponents. The potential exists for inadvertently deleting a
shared file, which could cause the remaining components tocease working reliably.A cleaner and more reliable way to remove components is toremove eVision entirely and then reinstall, selecting only thosecomponents you need.
Customers upgrading to version 5.0 should note that selectingthe Remove option will NOT automatically revert your system tothe previous version of eVision in a fully operational state. Torevert to a previous version, you must Remove the new version,restore the directory structure and database instance that youpreviously backed up and then install the previous version ofeVision from the installation CD.

8/19/2019 EVision 7.0 Installation Guide for UNIX
http://slidepdf.com/reader/full/evision-70-installation-guide-for-unix 61/82
© 2014 TIE Kinetix Installation of eVision for UNIX Server and Windows Client 4 - 3
Maintenance Issues
Setting Up a Test Environment
A test environment simplifies testing your system and reducesthe risks of data loss. Purchasing a test license is an investmentin system stability.
To set up your test environment
1 Back up your production system, including the database andthe eVision directory. This is a precaution in case youencounter problems while you are creating the test system.
2 Create a new test database instance. For example, youmight use evision_test as the name for your test database.Your database administrator may be able to assist with this.
3 Copy the eVision directory from the production system tothe test system.
4 Set up a DSN for testing and point it to the evision_test withthe new login information.
5 Install eVision on the test system in the same directory towhich you just copied the production system. Be sure to usethe new DSN so that eVision points to the test databasecreated in Step 2. Verify that eVision is running successfullybefore you continue.
6 Copy the eVision database to the test database. Your
database administrator may be able to assist with this.
7 If appropriate, install the eVision upgrade as outlined inChapter 3, “Upgrading an Existing Installation”.
Your test system’s eVision Server must reside on a differentcomputer from that of your production system. Because youare using it for test and development purposes, the test systemneedn’t be as robust as your production system. Ensure youhave128 MB of RAM and reserve at least 2 GB of available harddrive space.If you choose to have your test database instance on the samedatabase server as your production system, we suggest you setit up with a different user name and password. This will reducethe chance of confusion when setting up the ODBC andconfiguring eVision Workbench.

8/19/2019 EVision 7.0 Installation Guide for UNIX
http://slidepdf.com/reader/full/evision-70-installation-guide-for-unix 62/82
4 - 4 Installation of eVision for UNIX Server and Windows Client © 2014 TIE Kinetix
Maintenance Issues
Activating eVision
You can activate eVision and the selected eVision componentsusing the following procedure.
To activate eVision and its components1 After installing the selected components, you are prompted
to restart your computer, either now or at a later time, toactivate eVision and all its components.
2 Select the desired restart option and click Finish.
eVision and its components will not be available until afteryou have restarted your computer.
Backing Up and Restoring eVision
You should always back up your eVision software before youupgrade or modify your system. Backing up your eVisionsoftware prevents data loss or corruption in the event of asystem failure.
To back up your eVision system
1 Back up your eVision directory structure to a server oralternate drive.
2 Make a copy of the eVision database instance and save it toa server or alternate drive. Your database administratormay be able to assist you with this.
To restore your eVision system
1 Copy the eVision directory structure from the backup server
or drive to the drive where the restored eVision will reside.
2 Restore your database instance.
3 Install eVision Server and eVision Client on the restoreddrive. Make sure to point eVision to the backup database.Verify that eVision is running successfully before youcontinue.
A proper backup must include your database files from the eVision database
server and the directory structure from the eVision Server. Be sure to backup all
these eVision resources at the same time. If you do not, the backed-up
components will be out of sync and will not work properly when you restore
them.
8/19/2019 EVision 7.0 Installation Guide for UNIX
http://slidepdf.com/reader/full/evision-70-installation-guide-for-unix 63/82
© 2014 TIE Kinetix Installation of eVision for UNIX Server and Windows Client 4 - 5
Maintenance Issues
4 If appropriate, install the eVision upgrade using theprocedure Chapter 3, “Upgrading an Existing Installation”.
Disaster Recovery
It is important to all recovery scenarios that you have a currentand valid backup of both your eVision Server files and yourdatabase. The two must be in sync. If they are not in sync, anyattempted restoration of the backups will result in errors fromthe database and/or errors from the eVision Server. You areresponsible for maintaining and preserving a timely backup ofyour complete eVision system.
To recover from a disaster or to transfer eVision Server anddatabase to a different machine
1If appropriate, stop the eVision services on the existingmachine to prevent any scheduled processing fromoccurring during the transfer.
2 Create a database instance on the new machine.
3 Copy the eVision tables from the existing database to thenew machine, or restore them from the database backup.
4 Ensure database connectivity from the eVision Server andeVision Client machines to the database server.
5 Copy the entire eVision directory to the new machine, orrestore the eVision Server backup to the new location. Make
sure all sub-directories are included in the copy/restoreprocess.
6 Install eVision. When you are prompted to install databasetables, say No. This will preserve your existing eVision datain the database.
7 Install any other optional components that are currently onyour system (AIM, MPL, etc.).
8 Install your communications modules.
9 Test the new system.

8/19/2019 EVision 7.0 Installation Guide for UNIX
http://slidepdf.com/reader/full/evision-70-installation-guide-for-unix 64/82
4 - 6 Installation of eVision for UNIX Server and Windows Client © 2014 TIE Kinetix
Maintenance Issues

8/19/2019 EVision 7.0 Installation Guide for UNIX
http://slidepdf.com/reader/full/evision-70-installation-guide-for-unix 65/82
© 2014 TIE Kinetix Installation of eVision for UNIX Server and Windows Client A - 1
Appendix A — DB InstallationConsiderations
Your database administrator should install the database, withdatabase owner access, on the database server.
Overview
Estimating disk space for the database server
While an approximation of about 70% of the eVision Serverstorage requirements is a starting point, you should check withyour database administrator for more information on thestorage requirements of your relational database.
Network protocols for the database server
Consider what best meets your needs for data security whenyou select a network protocol.
Database security
You should select the security type that your databaseadministrator recommends.
Create a database instance
Create a database instance in the previously installeddatabase. Name it evision_prod.
Check with your database administrator regarding the level ofsecurity needed to install eVision and to run eVision on aregular basis. To use eVision effectively, all users need Insert,Select, and Delete permissions for the tables in the eVisiondatabase. The tables are created while installing the eVision
This appendix contains information you’ll find helpful in getting eVision set up
to work with your database, but it is not intended as a database installation
guide. Refer to the database vendor’s documentation for instructions on
installing and configuring your database.

8/19/2019 EVision 7.0 Installation Guide for UNIX
http://slidepdf.com/reader/full/evision-70-installation-guide-for-unix 66/82
A - 2 Installation of eVision for UNIX Server and Windows Client © 2014 TIE Kinetix
DB Installation Considerations
server and tables, and the user who creates the databaseduring the installation must have database owner access to thedatabase. This level of security is to be determined at thedatabase level, not the application level.
Test connectivity with the database server
Most relational databases come with utilities that allow a client
to test database connectivity.The following procedure verifies that the database connectivityis correctly set up and that the tables created for the eVisiondatabase can be accessed and manipulated. These conditionsmust be met for a successful eVision server installation. Because the eVision Client machines must access informationfrom the eVision database tables, you must test connectivityfrom each eVision Client machine. If you only have one client,and it is installed on the same machine as the server, you needonly perform the procedure once.
To test connectivity with the database server
1 Launch the query tool on the client PC and connect to thedatabase instance you intend to use for the eVisioninstallation.
2 In a Query window enter the following SQL command:
Create table test (col1 numeric, col2 char(10))
3 Execute the command. It should return a message that thecommand completed successfully.
In order to prevent the transaction log from growing to an unmanageably large
size, be sure to do the following when you configure your database:
• select an appropriate recovery model,
• select an appropriate backup routine and
• select an appropriate backup schedule.
Although eVision users normally need only the default permissions to the
eVision database, you must have database owner or system administrator
permission to the database to install the eVision Server and to run the
WFMaestro service.

8/19/2019 EVision 7.0 Installation Guide for UNIX
http://slidepdf.com/reader/full/evision-70-installation-guide-for-unix 67/82
© 2014 TIE Kinetix Installation of eVision for UNIX Server and Windows Client A - 3
DB Installation Considerations
If the success message does not appear, your databaseadministrator must correct the situation. You may alsoarrange for assistance from TIE Consulting.
4 Open a new query. Enter and execute this command:
Select * from test
You should receive the following message:
col1 col2(0 row(s) affected)
5 In a new query window, enter and execute this command:
drop table test
The query tool should return the message that the command
completed successfully. Your table is now clear of data.
6 Close all windows and quit the query tool.
You have verified that the relational database is accessible tothe machine(s) on which you will install the eVision software.
Creating a TNS Name and DSN
You must have a TNS (or Net Service Name) for eVision to use,and it must be created before the setup program beginscopying files to the Oracle database. The eVision Server and
each eVision Client must be configured to use the TNS.
You must also have a DSN for each eVision Client after the TNShas been created.
Sample procedures are outlined below, using Oracle NetConfiguration Assistant to create the TNS and ODBC DataSource Administrator to create the DSN. Note that these aresample procedures only—other tools may be used.

8/19/2019 EVision 7.0 Installation Guide for UNIX
http://slidepdf.com/reader/full/evision-70-installation-guide-for-unix 68/82
A - 4 Installation of eVision for UNIX Server and Windows Client © 2014 TIE Kinetix
DB Installation Considerations
To create a TNS (eVision Server and eVision Clients):
1 Open the Oracle Net Configuration Assistant. You’ll find it byclicking the Windows Start button, then selecting Programs-
> Oracle-->Configuration and Migration Tools--> Net
Configuration Assistant.
Select Local Net Service Name configuration and click Next.
2 The dialog box changes to this:
Select Add and click Next.

8/19/2019 EVision 7.0 Installation Guide for UNIX
http://slidepdf.com/reader/full/evision-70-installation-guide-for-unix 69/82

8/19/2019 EVision 7.0 Installation Guide for UNIX
http://slidepdf.com/reader/full/evision-70-installation-guide-for-unix 70/82
A - 6 Installation of eVision for UNIX Server and Windows Client © 2014 TIE Kinetix
DB Installation Considerations
5 The dialog box changes to this:
Enter the Host name for your database computer and theport number to use. The standard Oracle port (default) is1521. Click Next.
6 The dialog box changes to this:
At this point, you can test connectivity to your database
(recommended). SelectYes, perform a test
and clickNext
.
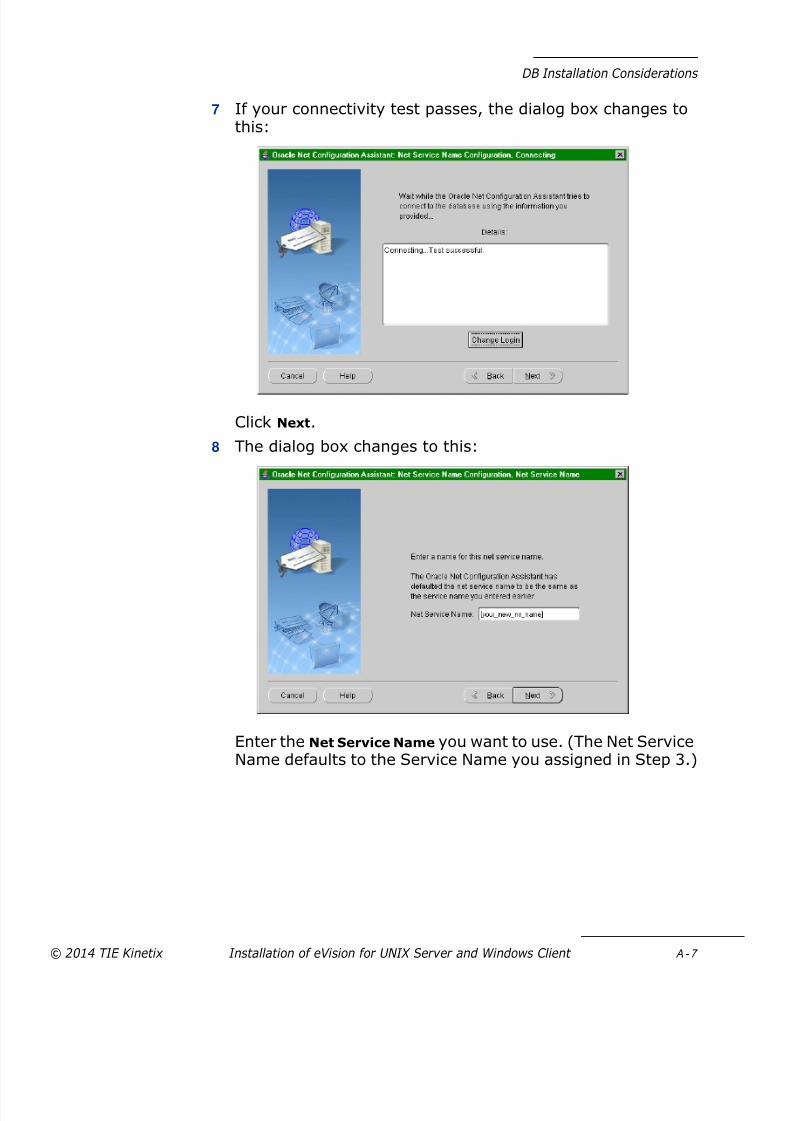
8/19/2019 EVision 7.0 Installation Guide for UNIX
http://slidepdf.com/reader/full/evision-70-installation-guide-for-unix 71/82
© 2014 TIE Kinetix Installation of eVision for UNIX Server and Windows Client A - 7
DB Installation Considerations
7 If your connectivity test passes, the dialog box changes tothis:
Click Next.
8 The dialog box changes to this:
Enter the Net Service Name you want to use. (The Net ServiceName defaults to the Service Name you assigned in Step 3.)

8/19/2019 EVision 7.0 Installation Guide for UNIX
http://slidepdf.com/reader/full/evision-70-installation-guide-for-unix 72/82
A - 8 Installation of eVision for UNIX Server and Windows Client © 2014 TIE Kinetix
DB Installation Considerations
9 The dialog box changes to this:
Unless you want to configure another Net Service Name,select No and click Next.
10 The dialog box changes to this:
The process is complete. Click Next.

8/19/2019 EVision 7.0 Installation Guide for UNIX
http://slidepdf.com/reader/full/evision-70-installation-guide-for-unix 73/82
© 2014 TIE Kinetix Installation of eVision for UNIX Server and Windows Client A - 9
DB Installation Considerations
11 The dialog box changes to this:
Click Finish.
To create a DSN:
1 Open the ODBC Data Source Administrator on the eVisionClient. This dialog box appears during a first-timeinstallation of eVision, but it can also be opened through theWindows Control Panel. By default, the User DSN tab isdisplayed.
Select the System DNS tab and then click the Add button tocreate a new Data Source Name.

8/19/2019 EVision 7.0 Installation Guide for UNIX
http://slidepdf.com/reader/full/evision-70-installation-guide-for-unix 74/82
A - 1 0 Installation of eVision for UNIX Server and Windows Client © 2014 TIE Kinetix
DB Installation Considerations
2 The Create New Data Source dialog box appears.
Scroll down to and select the Oracle driver, then click Finish.
3 The Oracle ODBC Driver Configuration dialog box appears.
First, enter the Data Source Name for the DSN, a Description for it and the TNS Service Name.
4 Complete the information on the five tabs of the dialog box.
5 Click the OK button to complete the DSN creation, or the Test
Connection button to test connectivity.
Your Oracle DSN has been created.
Repeat the process for every eVision Client.
The text that appears in the dialog box fields on this and the following pages are
examples only. You should enter names and other information that are
appropriate to your own system.

8/19/2019 EVision 7.0 Installation Guide for UNIX
http://slidepdf.com/reader/full/evision-70-installation-guide-for-unix 75/82
© 2014 TIE Kinetix Installation of eVision for UNIX Server and Windows Client B - 1
Appendix B — Requesting a License
There are two ways to request an eVision license: login at theTIE Global Customer Portal and submit your request(recommended) or call TIE Kinetix Technical Support. Thesemethods apply whether you are requesting a permanentlicense or an extended temporary license.
If you are requesting a permanent license, you must include your eVision Server
host name with your request. Here’s how to find the machine name: connect to
the UNIX server using Telnet or a similar utility. Type evenv and press theEnter key. Then at the EVENV prompt, type CheckLicense -request. The
system will return a message saying the file licenseRequest.txt has been created.
This file contains the information required to an updated license file.

8/19/2019 EVision 7.0 Installation Guide for UNIX
http://slidepdf.com/reader/full/evision-70-installation-guide-for-unix 76/82

8/19/2019 EVision 7.0 Installation Guide for UNIX
http://slidepdf.com/reader/full/evision-70-installation-guide-for-unix 77/82
© 2014 TIE Kinetix Installation of eVision for UNIX Server and Windows Client B - 3
Requesting a License
The Support Incident page appears.
This page displays the following fields:• Relation - this field is automatically completed by the
system.
• Related Account - Ignore this field.
• Contact Person (1) - When this field is blank, a redexclamation point appears. Click on the icon to the left ofthe exclamation point and then choose your name fromthe drop-down list that appears. If your name does notappear, go to the My Account Data link (2) from the topmenu and edit the contact person information and add
yourself.
• Description (1) - Give a brief description of your request.Specify whether you are requesting a permanent licenseor a temporary one.
• Classification (1) - Select “License” from the drop-downlist.
• Product - Ignore this field.
• Serial Number - Ignore this field.
• Document - Ignore this field.
• Related Request - Ignore this field.
• Question - If you have any additional information toinclude with your request, click the T-Timestamp (3)button (this automatically enters the system date andtime in the Question field) and type in any additional

8/19/2019 EVision 7.0 Installation Guide for UNIX
http://slidepdf.com/reader/full/evision-70-installation-guide-for-unix 78/82
B - 4 Installation of eVision for UNIX Server and Windows Client © 2014 TIE Kinetix
Requesting a License
information (4). If you’re requesting a permanentlicense, be sure to include the licenseRequest.txt fileinformation you noted earlier (page B-1).
When you’ve completed the necessary fields, submit yourrequest by clicking the S-Submit button (5) near the top of thescreen.
You may return to My-TIE at any time to check the status ofyour request, as described in the next section.
Checking the status of a license request
When you return to My-TIE and login, click the Requests link.
The Search:Requests screen appears. Click the S-Search button.

8/19/2019 EVision 7.0 Installation Guide for UNIX
http://slidepdf.com/reader/full/evision-70-installation-guide-for-unix 79/82
© 2014 TIE Kinetix Installation of eVision for UNIX Server and Windows Client B - 5
Requesting a License
The Search:Requests results screen appears. The status ofyour request is displayed in the Status column on the far rightof the table.
For more detailed information, click the Support Incident link in
the appropriate row (the description you entered for yourrequest will help you identify it if you have other requestspending).
The Support Incident page relevant to your license requestappears (below).
Note the Realize box in the center of the screen. The greenborder around this box indicates that your request is beingprocessed.
Later, when your license file is ready for download, the Status column on the Search:Requests results screen will show a
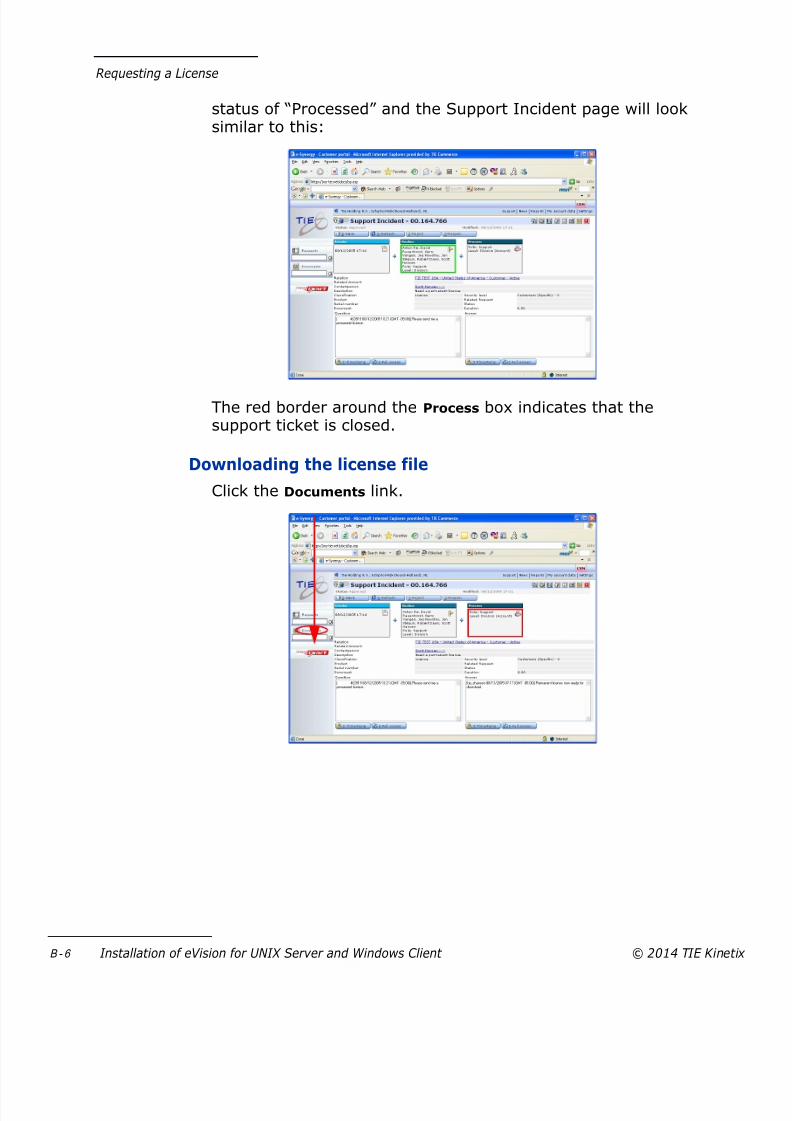
8/19/2019 EVision 7.0 Installation Guide for UNIX
http://slidepdf.com/reader/full/evision-70-installation-guide-for-unix 80/82
B - 6 Installation of eVision for UNIX Server and Windows Client © 2014 TIE Kinetix
Requesting a License
status of “Processed” and the Support Incident page will looksimilar to this:
The red border around the Process box indicates that thesupport ticket is closed.
Downloading the license file
Click the Documents link.

8/19/2019 EVision 7.0 Installation Guide for UNIX
http://slidepdf.com/reader/full/evision-70-installation-guide-for-unix 81/82
© 2014 TIE Kinetix Installation of eVision for UNIX Server and Windows Client B - 7
Requesting a License
The Search:Documents screen appears. Click the S-Search button.
The Search:Documents results screen appears (below).Documents having a Security Level of 1 are available to anyoneusing the Customer Portal, while those having a Security Level of 3 are customer-specific and visible only to the intendedrecipient.

8/19/2019 EVision 7.0 Installation Guide for UNIX
http://slidepdf.com/reader/full/evision-70-installation-guide-for-unix 82/82
Requesting a License
Click on the licence in the Subject column. The license downloadscreen appears:
Click the 9-Download button. The following downloadconfirmation prompt appears:
Click Save and select a destination folder for the license file.
After the download is complete, move the license file to theeVision home directory on the eVision Server.
Finally, restart the eVision services (including Tomcat, if you areusing eVision Web Client).
TIE Kinetix Technical Support
Top Related