


Languages
Pages
Legal


http://www.iaeme.com/IJMET/index.
International Journal of Mechanical Engineering and Technology (IJMET)Volume 8, Issue 7, July 2017, pp.
Available online at http://www.iaeme.com/IJME
ISSN Print: 0976-6340 and ISSN Online: 0976
© IAEME Publication
DEVELOPMENT OF ANDRO
U. Suhasini,
Department of Mechanical Engineering
MLR Institute
Department of Mechanical Engineering,
Institute of Aeronautical
Department of Mechanical Engineering
Vardhaman Coll
ABSTRACT
A variety of mechanical hand designs have been developed in the past few
decades. The majority of the designs were made with the sole purpose of imitating the
human hand and its capabilities; however, none of these designs have been equipped
with all the motions and sensory capabilities of the human hand. The primary goal of
this thesis project was to design a robotic hand with the required amount of degrees
of- freedom and necessary constraints to achieve all the motions of the human hand.
The research of humanoid robot is diverging into the various categories such as
the artificial intelligence,
locomotion and human-robot interaction. As these researches make progress many
researchers have started to make their focus on the human friendly robots, which is
partially inspired by the rapid growth of te
Here design a robot arm PCB board by using PROTEUS software. This software
support up to 14 layers of PCB and it is highly equipped with all the modern tools
which able to make an effective and accurate PCB. We can change the width of tracks,
pads according to the application. Designers can design the custom board shape. The
Output of this software can have different format selectable by the designer. Basic
Mechanical structure is designed by using Solid works software and manufactured by
using Acrylic sheet. Programming the Humanoid robot arm will be done by using Keil
software.
Key words: humanoid robot
Cite this Article: U. Suhasini, K. Chinnamaddaiah, Lakshmipathi
and B Dhanraj. Development of Andro Humanoid Robot ARM
of Mechanical Engineering and Technology
http://www.iaeme.com/IJME
IJMET/index.asp 537 [email protected]
International Journal of Mechanical Engineering and Technology (IJMET) 2017, pp. 537–549, Article ID: IJMET_08_07_061
http://www.iaeme.com/IJMET/issues.asp?JType=IJMET&VType=8&IType=7
6340 and ISSN Online: 0976-6359
Scopus Indexed
DEVELOPMENT OF ANDRO HUMANOID
ROBOT ARM
i, K. Chinnamaddaiah, Lakshmipathi Yerra
Department of Mechanical Engineering,
MLR Institute of Technology, Hyderabad, India
N Santhi Sree
Department of Mechanical Engineering,
Institute of Aeronautical Engineering, Hyderabad, India
B Dhanraj
Department of Mechanical Engineering
Vardhaman College of Engineering, Hyderabad, India
A variety of mechanical hand designs have been developed in the past few
of the designs were made with the sole purpose of imitating the
human hand and its capabilities; however, none of these designs have been equipped
with all the motions and sensory capabilities of the human hand. The primary goal of
to design a robotic hand with the required amount of degrees
freedom and necessary constraints to achieve all the motions of the human hand.
The research of humanoid robot is diverging into the various categories such as
the artificial intelligence, robot hardware development, realization of biped
robot interaction. As these researches make progress many
researchers have started to make their focus on the human friendly robots, which is
partially inspired by the rapid growth of technology.
Here design a robot arm PCB board by using PROTEUS software. This software
support up to 14 layers of PCB and it is highly equipped with all the modern tools
which able to make an effective and accurate PCB. We can change the width of tracks,
s according to the application. Designers can design the custom board shape. The
Output of this software can have different format selectable by the designer. Basic
Mechanical structure is designed by using Solid works software and manufactured by
rylic sheet. Programming the Humanoid robot arm will be done by using Keil
humanoid robot, PCB, ARM.
U. Suhasini, K. Chinnamaddaiah, Lakshmipathi Yerra, N Santhi Sree
Development of Andro Humanoid Robot ARM. International Journal
of Mechanical Engineering and Technology, 8(7), 2017, pp. 537–549.
aeme.com/IJMET/issues.asp?JType=IJMET&VType=8&IType=7
T&VType=8&IType=7
HUMANOID
Lakshmipathi Yerra
Hyderabad, India
A variety of mechanical hand designs have been developed in the past few
of the designs were made with the sole purpose of imitating the
human hand and its capabilities; however, none of these designs have been equipped
with all the motions and sensory capabilities of the human hand. The primary goal of
to design a robotic hand with the required amount of degrees-
freedom and necessary constraints to achieve all the motions of the human hand.
The research of humanoid robot is diverging into the various categories such as
robot hardware development, realization of biped
robot interaction. As these researches make progress many
researchers have started to make their focus on the human friendly robots, which is
Here design a robot arm PCB board by using PROTEUS software. This software
support up to 14 layers of PCB and it is highly equipped with all the modern tools
which able to make an effective and accurate PCB. We can change the width of tracks,
s according to the application. Designers can design the custom board shape. The
Output of this software can have different format selectable by the designer. Basic
Mechanical structure is designed by using Solid works software and manufactured by
rylic sheet. Programming the Humanoid robot arm will be done by using Keil
Yerra, N Santhi Sree
International Journal
asp?JType=IJMET&VType=8&IType=7

Development of Andro Humanoid Robot ARM
http://www.iaeme.com/IJMET/index.
1. INTRODUCTION
Recent research and development has addressed a number of aspects of robotics.
hands have been developed which offer greater dexterity and flexibility, and improvements
have been made in visual sensors as well (earlier generations of visual sensors were designed
for use with television and home video, and did not process info
performance in many robotics applications; as a consequence, solid
into increased use, and developments were also made with fiber optics).
The use of superconducting materials, meanwhile, offers the pos
improvements in the electric motors that drive robotic arms. Attempts have also been made to
develop lighter robotic arms and increase their rigidity.
1.1. Humanoid Robot Arm
The robotic arm is connected by wires that link
brain that controls muscle movement
when you touch things. The wires from the motor cortex allow the wearer to control the
motion of the robot arm, and pressure
cortex give the wearer the sensation that they are touching something.
A robotic arm is a type of
to a human arm; the arm may be the sum tot
complex robot. The links of such a manipulator are connected by joints allowing either
rotational motion (such as in an
links of the manipulator can
kinematic chain of the manipulator is called the
hand.
2. DESIGN PROCEDURES
2.1. Methods
Following is the procedure we
1. Designing of PCB using Protues Software
2. Designing of Mechanical structure by using SOLID WORKS software
2.1.1. Designing of PCB using Proteus Software
Proteus professional is a software combination of ISIS schematic capture program and ARES
PCB layout program. This is a powerful and integrated development environment. Tools in
this suit are very easy to use and these tools are very useful in education an
PCB designing.
Development of Andro Humanoid Robot ARM
IJMET/index.asp 538 [email protected]
Recent research and development has addressed a number of aspects of robotics.
hands have been developed which offer greater dexterity and flexibility, and improvements
have been made in visual sensors as well (earlier generations of visual sensors were designed
for use with television and home video, and did not process information quickly for optimal
performance in many robotics applications; as a consequence, solid-state vision sensors came
into increased use, and developments were also made with fiber optics).
The use of superconducting materials, meanwhile, offers the possibility of substantial
improvements in the electric motors that drive robotic arms. Attempts have also been made to
develop lighter robotic arms and increase their rigidity.
Humanoid Robot Arm
The robotic arm is connected by wires that link up to the wearer’s motor cortex
n that controls muscle movement and sensory cortex, which identifies tactile sensations
when you touch things. The wires from the motor cortex allow the wearer to control the
motion of the robot arm, and pressure sensors in the arm that connect back into the sensory
cortex give the wearer the sensation that they are touching something.
is a type of mechanical arm, usually programmable, with similar functions
; the arm may be the sum total of the mechanism or may be part of a more
. The links of such a manipulator are connected by joints allowing either
rotational motion (such as in an articulated robot) or translational (linear) displacement.
be considered to form a kinematic chain. The terminus of the
kinematic chain of the manipulator is called the end effector and it is analogous to the human
Figure 1 Humanoid Robot Arm
DESIGN PROCEDURES
Following is the procedure we have adopted for Designing our major project
1. Designing of PCB using Protues Software
2. Designing of Mechanical structure by using SOLID WORKS software
Designing of PCB using Proteus Software
Proteus professional is a software combination of ISIS schematic capture program and ARES
PCB layout program. This is a powerful and integrated development environment. Tools in
this suit are very easy to use and these tools are very useful in education an
Recent research and development has addressed a number of aspects of robotics. Robotic
hands have been developed which offer greater dexterity and flexibility, and improvements
have been made in visual sensors as well (earlier generations of visual sensors were designed
rmation quickly for optimal
state vision sensors came
sibility of substantial
improvements in the electric motors that drive robotic arms. Attempts have also been made to
e wearer’s motor cortex the part of the
and sensory cortex, which identifies tactile sensations
when you touch things. The wires from the motor cortex allow the wearer to control the
sensors in the arm that connect back into the sensory
, with similar functions
al of the mechanism or may be part of a more
. The links of such a manipulator are connected by joints allowing either
) or translational (linear) displacement. The
. The terminus of the
and it is analogous to the human
have adopted for Designing our major project
Proteus professional is a software combination of ISIS schematic capture program and ARES
PCB layout program. This is a powerful and integrated development environment. Tools in
this suit are very easy to use and these tools are very useful in education and professional

U. Suhasini, K. Chinnamaddaiah, Lakshmipathi Yerra, N Santhi Sree and B Dhanraj
http://www.iaeme.com/IJMET/index.asp 539 [email protected]
As professional PCB designing software with integrated space based auto router, it
provides features such as fully featured schematic capture, highly configurable design rules,
interactive SPICE circuit simulator, extensive support for power planes, industry standard
CADCAM & ODB++ output and integrated 3D viewer.
2.1.2. Starting New Design
Step 1: Open ISIS software and select New design in File menu
Step 2: A dialogue box appears to save the current design. However, we are creating a new
design file so you can click Yes or No depending on the content of the present file. Then a
Pop-Up appears asking to select the template. It is similar to selecting the paper size while
printing. For now select default or according to the layout size of the circuit.
Figure 2 New Design Window
Step 3: An untitled design sheet will be opened, save it according to your wish, it is better to
create a new folder for every layout as it generates other files supporting your design.
However, it is not mandatory.
Step 4: After opening Proteus you can make any circuit design using Proteus available
components. Make sure that the components you use must have their PCB footprint available
in the package (or in other words, they must have the component packages for ARES). For
further detail use Proteus Help menu.
To Select components, Click on the component mode button.
Figure 3 Component Mode
Step 5: Click On Pick from Libraries. It shows the categories of components available and a
search option to enter the part name. Once finished with the design click on the red button
shown in the figure below. It will generate the Netlist of components and open the ARES
interface.

Development of Andro Humanoid Robot ARM
http://www.iaeme.com/IJMET/index.asp 540 [email protected]
Figure 4 Pick From Libraries
Step 6: Select the components from categories or type the part name in Keywords text box.
Figure 5 Keywords Textbox
Step 7: The selected components will appear in the devices list. Select the component and
place it in the design sheet by left-click.
Components which we are going to use are
• IR LED
• Photodiode
• Resistors
• Potentiometer
• LM358
Step 8: Place all the required components and route the wires i.e, make connections. Once the
basic placement has been completed, the next stage of the PCB design is to route the
connections between all the components. The PCB software then routes the physical
connections on the board according to the netlist from the schematic. To achieve this it will
use the number of layers that are available for connections, creating via holes as required.
Often one layer will be allocated for use as a ground plane, and another as a power plane. The
routing can use a significant amount of computing power. This is particularly true for larger
designs where there may be upwards of three or four thousand components.
Where routing is difficult as a result of high component density, this can result in the routing
taking a significant amount of time.
Either selection mode above the component mode or component mode allows to connect
through wires.

U. Suhasini, K. Chinnamaddaiah, Lakshmipathi Yerra, N Santhi Sree and B Dhanraj
http://www.iaeme.com/IJMET/index.asp 541 [email protected]
Left click from one terminal to other to make connection. Double right-click on the
connected wire or the component to remove connection or the component respectively.
Double click on the component to edit the properties of the components and click on Ok.
Figure 6 PCB Circuit
Step 9: After connecting the circuit, click on the play button to run the simulation. Simulation
can be stepped, paused or stopped at any time.
Step 10: 3D VISUALISATION
The 3D Visualisation Tool (3D Viewer) in ARES provides a way to extrude a layout and
view the board as it would appear in real life. This is extremely useful as a design aid during
board layout.
Figure 7 3D Visualisation
Step 11: Once the ARES is opened, you can perform the manual or auto routing to
interconnect the component and route the traces tracks. You can also make your PCB design
directly in the ARES without going through the Proteus ISIS. (Note: If you don’t require the
simulation part of Proteus, you can directly open the ARES and design your PCB layout by
selecting the desired component packages from the library)
Step 12: The “Track Mode” should be greater or equal to T40. This is because of the while
the Machine is routing with 0.6 mm bit, the layout get enough width for its routing paths.
Also use “Round Through-Hole Pad Mode” and “DIL Pad Mode” in the circuit wherever
required. This increases the copper space for a component pins and helps you get enough
space while soldering.

Development of Andro Humanoid Robot ARM
http://www.iaeme.com/IJMET/index.asp 542 [email protected]
Figure 8 Ares View
Step 13:. From ARES go to the output menu and select CADCAM output (which is the same
as Gerber).
Step 14: From CADCAM output window make sure that Mirror and RS274X is selected.
Now specify the output folder where you want to save the Output GERBER/CADCAM files.
Please note that on the left it shows all the layer that it will export: Top Copper, Bottom
Copper etc. files. You only need to check Bottom Layer and Drill boxes, rest are of no use
here.
Step 15: Now open the folder where you saved your CADCAM/GERBER/EXCELLON
output files. It will contain at least three files: Bottom Layer, Drill and Read-Me files. We just
need Bottom Copper and Drill file.
2.2. Designing of Mechanical Structure by Using Solidworks Software
2.2.1. Designing of Mechanical structure by using SOLID WORKS software
We Designed the robot arm Mechanical structure by using SOLID WORKS by taking the
Dimensions as shown below.
There are three different views namely Drawing view-1 , Drawing view-2 and Drawing
view-3 which helps us to determine the exact structure.

U. Suhasini, K. Chinnamaddaiah, Lakshmipathi Yerra, N Santhi Sree and B Dhanraj
http://www.iaeme.com/IJMET/index.
The Automatic Border tool lets you control every aspect of a sheet format’s border,
including zone layout and border size.
Using the Automatic Border
changes in the Zone Parameters
manually edit the sheet format. You can also include Margin Mask areas where formatting
elements such as labels and dividers are not sho
area on a sheet for notes.
To use the Automatic Border tool:
• In a drawing, click Edit Sheet Format
• Click Automatic Border
• Set options:
o On the first page of the
from the sheet's format. For example, you can delete existing format entities before
creating a new smart border.
o On the second page, define the margins, borders, and zones.
o On the third page, defin
a convenient location for notes. In this example, the margin masked area includes the
upper right zone labels.
• Click
U. Suhasini, K. Chinnamaddaiah, Lakshmipathi Yerra, N Santhi Sree and B Dhanraj
IJMET/index.asp 543 [email protected]
Figure 9 Drawing View-1
tool lets you control every aspect of a sheet format’s border,
including zone layout and border size.
Automatic Border tool, borders and zones automatically update to match
Zone Parameters tab of the Sheet Properties dialog box without having to
manually edit the sheet format. You can also include Margin Mask areas where formatting
elements such as labels and dividers are not shown. This is helpful when you want to mask an
tool:
Edit Sheet Format (Sheet Format toolbar).
(Sheet Format toolbar).
On the first page of the Automatic Border Property Manager, select items to delete
from the sheet's format. For example, you can delete existing format entities before
creating a new smart border.
On the second page, define the margins, borders, and zones.
On the third page, define Margin Mask areas for zone labels and dividers that provide
a convenient location for notes. In this example, the margin masked area includes the
upper right zone labels.
U. Suhasini, K. Chinnamaddaiah, Lakshmipathi Yerra, N Santhi Sree and B Dhanraj
tool lets you control every aspect of a sheet format’s border,
s automatically update to match
dialog box without having to
manually edit the sheet format. You can also include Margin Mask areas where formatting
wn. This is helpful when you want to mask an
Manager, select items to delete
from the sheet's format. For example, you can delete existing format entities before
e Margin Mask areas for zone labels and dividers that provide
a convenient location for notes. In this example, the margin masked area includes the

Development of Andro Humanoid Robot ARM
http://www.iaeme.com/IJMET/index.asp 544 [email protected]
Figure 10 Drawing View-2
Edit Sheet format
You can edit your sheet format from the Command Manager tab or Sheet Format toolbar.
• On the Sheet Format toolbar, click Edit Sheet Format .
• On the Sheet Format Command Manager, click Edit Sheet Format .
• Right-click a blank area and click Edit Sheet Format .
Sheet Scale
You can change the sheet scale from the status bar.
To change the sheet scale of a drawing, in the status bar click Sheet Scale and click a
scale. You can also access the Sheet Properties dialog box from the menu.
Figure 11 Drawing View-3
U. Suhasini, K. Chinnamaddaiah, Lakshmipathi Yerra, N Santhi Sree and B Dhanraj
http://www.iaeme.com/IJMET/index.asp 545 [email protected]
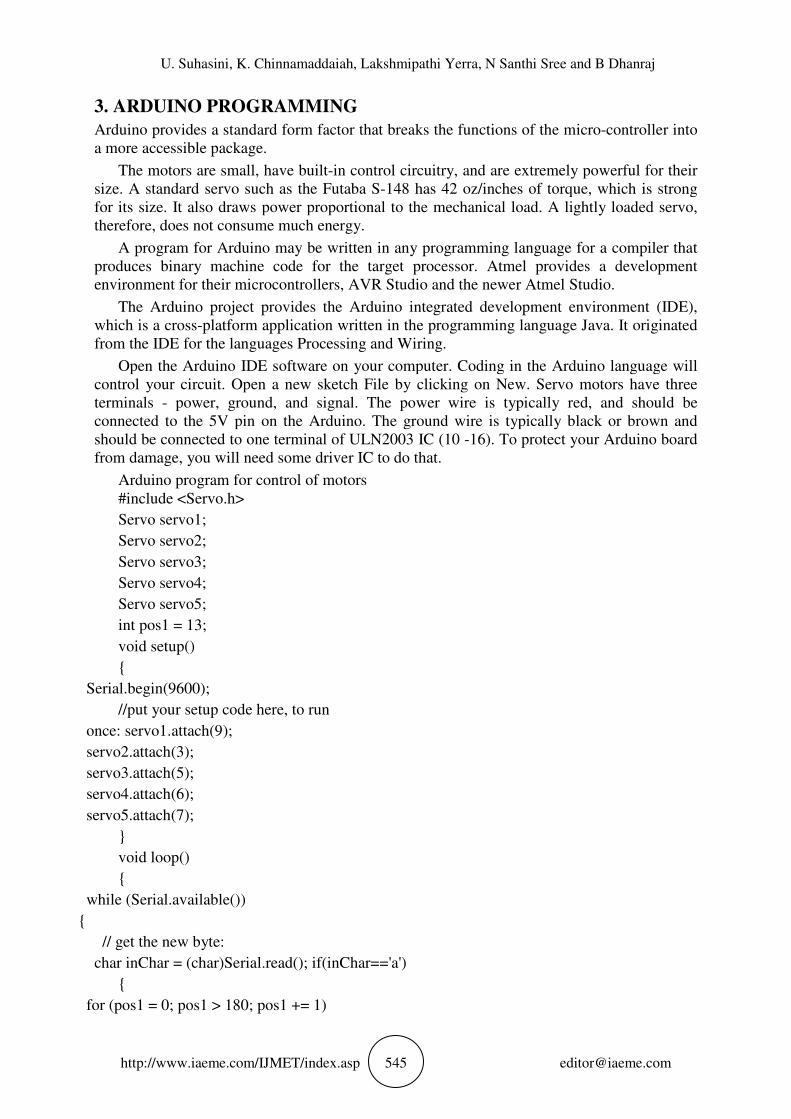
3. ARDUINO PROGRAMMING
Arduino provides a standard form factor that breaks the functions of the micro-controller into
a more accessible package.
The motors are small, have built-in control circuitry, and are extremely powerful for their
size. A standard servo such as the Futaba S-148 has 42 oz/inches of torque, which is strong
for its size. It also draws power proportional to the mechanical load. A lightly loaded servo,
therefore, does not consume much energy.
A program for Arduino may be written in any programming language for a compiler that
produces binary machine code for the target processor. Atmel provides a development
environment for their microcontrollers, AVR Studio and the newer Atmel Studio.
The Arduino project provides the Arduino integrated development environment (IDE),
which is a cross-platform application written in the programming language Java. It originated
from the IDE for the languages Processing and Wiring.
Open the Arduino IDE software on your computer. Coding in the Arduino language will
control your circuit. Open a new sketch File by clicking on New. Servo motors have three
terminals - power, ground, and signal. The power wire is typically red, and should be
connected to the 5V pin on the Arduino. The ground wire is typically black or brown and
should be connected to one terminal of ULN2003 IC (10 -16). To protect your Arduino board
from damage, you will need some driver IC to do that.
Arduino program for control of motors
#include <Servo.h>
Servo servo1;
Servo servo2;
Servo servo3;
Servo servo4;
Servo servo5;
int pos1 = 13;
void setup()
{
Serial.begin(9600);
//put your setup code here, to run
once: servo1.attach(9);
servo2.attach(3);
servo3.attach(5);
servo4.attach(6);
servo5.attach(7);
}
void loop()
{
while (Serial.available())
{
// get the new byte:
char inChar = (char)Serial.read(); if(inChar=='a')
{
for (pos1 = 0; pos1 > 180; pos1 += 1)

Development of Andro Humanoid Robot ARM
http://www.iaeme.com/IJMET/index.asp 546 [email protected]
{
servo1.write(pos1);
delay(100);
}
}
else if(inChar=='b')
{
for (pos1 = 90; pos1 >= 1; pos1 -= 1)
{
servo1.write(pos1);
delay(100);
}
}
else if(inChar=='c')
{
for (pos1 = 0; pos1 > 180; pos1 += 1)
{
servo2.write(pos1);
delay(100);
}
}
else if(inChar=='d')
{
for (pos1 = 90; pos1 >= 1; pos1 -= 1)
{
servo2.write(pos1);
delay(100);
}
}
else if(inChar=='e')
{
for (pos1 = 0; pos1 > 180; pos1 += 1)
{
servo3.write(pos1);
delay(100);
}
}
else if(inChar=='f')
{
for (pos1 = 90; pos1 >= 1; pos1 -= 1)
{
servo3.write(pos1);
delay(100);
}

U. Suhasini, K. Chinnamaddaiah, Lakshmipathi Yerra, N Santhi Sree and B Dhanraj
http://www.iaeme.com/IJMET/index.asp 547 [email protected]
}
else if(inChar=='g')
{
for (pos1 = 0; pos1 > 180; pos1 += 1)
{
servo4.write(pos1);
delay(100);
}
}
else if(inChar=='h')
{
for (pos1 = 90; pos1 >= 1; pos1 -= 1)
{
servo4.write(pos1);
delay(100);
}
}
else if(inChar=='i')
{
for (pos1 = 0; pos1 > 180; pos1 += 1)
{
servo5.write(pos1);
delay(100);
}
}
else if(inChar=='j')
{
for (pos1 = 90; pos1 >= 1; pos1 -= 1)
{
servo5.write(pos1);
delay(100);
}
}
4. ACRYLIC SHEET
Poly(methyl methacrylate) (PMMA), also known as acrylic oracrylic glass as well as by the
trade names Plexiglas, Acrylite, Lucite, and Perspex among several others (see below), is a
transparent thermoplastic often used in sheet form as a lightweight or shatter-resistant
alternative to glass.

Development of Andro Humanoid Robot ARM
http://www.iaeme.com/IJMET/index.asp 548 [email protected]
Figure 12 Acrylic Sheet
4.1. Manufacturing by Using Acrylic Sheet
Robot arm is manufactured by using Acrylic sheet taking thickness of 5mm. Holes are drilled
at the respective positions. All the fingers are assembled and an arm is prepared. This arm
shows the movement of fingers by using Arduino program which is programmed in it.
By changing the input variables we can obtain different finger movements which can be
visualized.
Figure 13 Fingers by using Acrylic Sheet
5. CONCLUSIONS
The objectives of this project has been achieved which was developing the hardware and
software robotic arm. From observation that has been made, it clearly shows that its
movement is precise, accurate, and is easy to control and user friendly to use. The robotic arm
has been developed successfully as the movement of the robot can be controlled precisely.
This robotic arm control method is expected to overcome the problem such as placing or
picking object that away from the user, pick and place hazardous object in a very fast and
easy manner.
REFERENCES
[1] Craig, J. J. Introduction to Robotics: Mechanics and Control. Addison Wesley.
[2] Russell, S. J. & Norvig, P- Artificial Intelligence: A Modern Approach.
[3] Horn, Berthold, K. P- Robot Vision.
[4] Humanoid Robots -Edited by Ben Choi
[5] K. Hirai, M. Hirose, Y. Haikawa, and T. Takenaka, “The Development of Honda
Humanoid Robot”,

U. Suhasini, K. Chinnamaddaiah, Lakshmipathi Yerra, N Santhi Sree and B Dhanraj
http://www.iaeme.com/IJMET/index.asp 549 [email protected]
[6] Hirose M., Takenaka T., Gomi H., Ozawa N.: Honda Humanoid Robot (in Japanese),
Journal of the Robotic Society of Japan, Vol. 15, No. 1, pp. 983- 987, 1997 .
[7] Kapse S. S.,Dr. S. S. Ohol, Design and Development of Modular Humanoid ARM Based
on RC Servo Motor. International Journal of Advanced Research in Engineering and
Technology (IJARET), 4(7), 2013, pp. 156–160
[8] Nitin Kardekar, Dr Sane N K, Effect of Humanoid Shaped Obstacle on the Velocity
Profiles of Flow of Air Curtain. International Journal of Mechanical Engineering and
Technology (IJMET), 3(3), 2012, pp. 511–516
Top Related