XpressConnect Wizard 5.0 Quick Start Guide - Cloudpath · PDF fileXpressConnect Wizard 5.0...
24
XpressConnect TM Wizard Quick Start Guide Version 5.0
Transcript of XpressConnect Wizard 5.0 Quick Start Guide - Cloudpath · PDF fileXpressConnect Wizard 5.0...

XpressConnectTM
Wizard Quick Start Guide
Version 5.0

XpressConnect Wizard 5.0 Quick Start Guide
COPYRIGHT NOTICE
XpressConnect Wizard Quick Start Guide
April 28, 2015, Build Version 5.0
Copyright © 2015 Cloudpath Networks, Inc. All rights reserved.
CLOUDPATH NETWORKS and XPRESSCONNECT are trademarks of Cloudpath Networks, Inc. Other names may be trademarks of their respective owners.

XpressConnect Wizard 5.0 Quick Start Guide
CONTENTS
Copyright Notice ............................................................................................................................................................ 1
Introduction ................................................................................................................................................................... 1
What is the XpressConnect Wizard?.......................................................................................................................... 1
Process Overview....................................................................................................................................................... 2
Key Benefits of The XpressConnect Wizard ............................................................................................................... 2
Reduce user frustration ............................................................................................................................................. 3
Key Features of The XpressConnect Wizard .............................................................................................................. 3
XpressConnect Terminology ...................................................................................................................................... 5
System Requirements ................................................................................................................................................ 6
Administrative Console .................................................................................................................................................. 7
Using the Administrative Console ............................................................................................................................. 7
Creating Wizards ...................................................................................................................................................... 10
Deploying A Wizard ................................................................................................................................................. 16
Testing ......................................................................................................................................................................... 18
Known Issues & Limitations ......................................................................................................................................... 20
XpressConnect Wizard 5.0 Quick Start Guide 1
INTRODUCTION
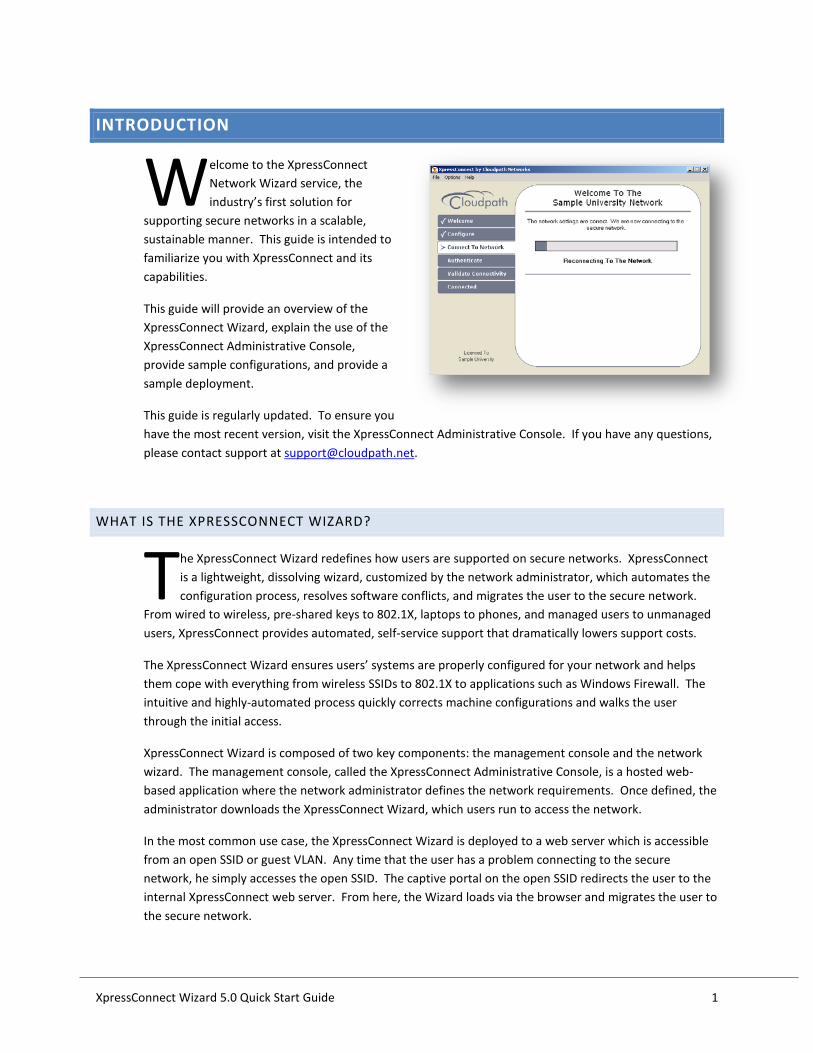
elcome to the XpressConnect Network Wizard service, the industry’s first solution for
supporting secure networks in a scalable, sustainable manner. This guide is intended to familiarize you with XpressConnect and its capabilities.
This guide will provide an overview of the XpressConnect Wizard, explain the use of the XpressConnect Administrative Console, provide sample configurations, and provide a sample deployment.
This guide is regularly updated. To ensure you have the most recent version, visit the XpressConnect Administrative Console. If you have any questions, please contact support at [email protected].
WHAT IS THE XPRESSCONNECT WIZARD?
he XpressConnect Wizard redefines how users are supported on secure networks. XpressConnect is a lightweight, dissolving wizard, customized by the network administrator, which automates the configuration process, resolves software conflicts, and migrates the user to the secure network.
From wired to wireless, pre-shared keys to 802.1X, laptops to phones, and managed users to unmanaged users, XpressConnect provides automated, self-service support that dramatically lowers support costs.
The XpressConnect Wizard ensures users’ systems are properly configured for your network and helps them cope with everything from wireless SSIDs to 802.1X to applications such as Windows Firewall. The intuitive and highly-automated process quickly corrects machine configurations and walks the user through the initial access.
XpressConnect Wizard is composed of two key components: the management console and the network wizard. The management console, called the XpressConnect Administrative Console, is a hosted web-based application where the network administrator defines the network requirements. Once defined, the administrator downloads the XpressConnect Wizard, which users run to access the network.
In the most common use case, the XpressConnect Wizard is deployed to a web server which is accessible from an open SSID or guest VLAN. Any time that the user has a problem connecting to the secure network, he simply accesses the open SSID. The captive portal on the open SSID redirects the user to the internal XpressConnect web server. From here, the Wizard loads via the browser and migrates the user to the secure network.
W
T
XpressConnect Wizard 5.0 Quick Start Guide 2
PROCESS OVERVIEW
As the network administrator:
1. You use the XpressConnect Administrative Console to define the configurations necessary to access the network(s) in your environment.
2. You download the XpressConnect Wizard from the Administrative Console. The Wizard is customized for your environment and for your desired deployment style. The XpressConnect Wizard can be deployed to a web server (accessible from an open SSID, guest VLAN, or the Internet), a CD or USB flash drive, or via Active Directory policy.
3. You modify the captive portal on the open SSID or guest VLAN to provide a link to the web server on which the XpressConnect Wizard is deployed.
Once the XpressConnect Wizard is in place, a user needing assistance:
1. Connects to the open SSID or plugs into the Ethernet jack. 2. Opens a browser, which is redirected by the captive portal to the XpressConnect Wizard. 3. Loads the XpressConnect Wizard in the browser. 4. Is automatically configured for the secure network. 5. Is migrated to the secure network.
After the initial execution of the XpressConnect Wizard, the computer will be configured to automatically reconnect to the secure network in the future. If anything (password changed, configuration changed, new machine) goes wrong while accessing the secure network in the future, the user simply reruns the XpressConnect Wizard rather than visiting the help desk.
KEY BENEFITS OF THE XPRESSCONNECT WIZARD
Increase network security without creating support calls
The XpressConnect Wizard’s ability to migrate users effortlessly to secure networks reduces support concerns related to security. For your users, the wizard ensures that secure networks are as simple to connect to and use as open, unsecured ones. At long last, network security technologies can be adopted “as needed” rather than “when bearable.” As a network administrator, XpressConnect allows you to:
• Enable wireless encryption –With the XpressConnect Wizard, you can now enable wireless encryption without the overhead of manual client configuration. The wizard corrects wireless configurations automatically on each user’s computer and even handles most third-party wireless utilities.
• Enable 802.1X – The XpressConnect Wizard automatically configures PEAP, TTLS, and TLS for the user, and it can install additional software when necessary. Users are also assisted through the initial authentication process.
• Automate Best Practices – The wizard’s automated approach ensures that increased security does not create increased burden. This ability extends beyond wireless and 802.1X, encompassing security best practices such as Windows Update and firewalls. From enabling the Windows Firewall and Windows Update to deploying organization-supplied antivirus packages, XpressConnect Wizard eliminates the manual configuration overhead that frequently leads to non-compliance.

XpressConnect Wizard 5.0 Quick Start Guide 3
REDUCE USER FRUSTRATION
The XpressConnect Wizard provides a fail-safe point of access for the network and typically takes less than one minute to complete its tasks. At the conclusion of the process, the user has been informed of the network capabilities and requirements, the user’s system has been properly configured, and the user has gained connectivity to the secure network. XpressConnect reduces user frustration by:
• Informing the user – The wizard provides mechanisms for explaining to the user the requirements, capabilities, and limitations of each available network, thus reducing the number of support calls caused by incorrect assumptions regarding network access.
• Automating configuration – The XpressConnect Wizard’s ability to configure the user’s system automatically reduces the time required to access the network, and reduces the number of user errors.
• Assisting the user – After configuration, the wizard walks the user through his or her initial access attempt, including the 802.1X authentication process, and verifies connectivity.
• Reverting with one click – A one-click revert process ensures that the user’s system is restored to its original state. This allows users to leave your network as easily as they joined it.
KEY FEATURES OF THE XPRESSCONNECT WIZARD
Helping Hand
Proper configuration is only the beginning. The XpressConnect Wizard is designed to get users connected, not just configured. The wizard walks through the entire migration process, which includes reconnecting to the secure network, assisting with the authentication process, as well as performing connectivity validation. In less than a minute, the migration process is complete, and the user is on his or her way. In the future, the user will typically reconnect automatically to the secure network; however, if anything goes awry, the XpressConnect Wizard is available to once again reconnect them.
Cross Platform Support
After numerous years of the client population being dominated by Windows XP, the number of operating systems that require mainstream support has rapidly increased. In addition, the population of wifi-enabled phones has exploded. The XpressConnect Wizard is designed to simplify the support of this operating system and device array, all in an automated, self-help manner.
802.1X Supplicant Configuration
For wired or wireless access, the XpressConnect Wizard automatically configures the built-in supplicant across various platforms. All settings supported by the supplicant and the selected EAP type are configurable. Automated configuration of the built-in 802.1X supplicant ensures simple 802.1X conversion without the cost or overhead of third-party supplicants. In addition, automated configuration allows advanced security configuration without additional manual steps.

XpressConnect Wizard 5.0 Quick Start Guide 4
Wireless Profile Configuration
The XpressConnect Wizard automatically configures all types of SSIDs, including WPA2-Enterprise and WPA2-PSK SSIDs. For WPA2-PSK, the network key can also be automatically configured without the key being exposed to the user. Automated configuration of wireless profiles makes encrypted SSIDs as easy to use as open SSIDs.
Third-Party Wireless Utility Clean-up
Third-party wireless utilities are a constant support headache. The XpressConnect Wizard effortlessly migrates the user away from most third-party wireless utilities, leaving the built-in wireless manager in control.
Low Stress Credentials
The XpressConnect Wizard contains the ability to prompt the user for credential information before migrating to the secure network. This feature has a number of benefits. First, it allows the user to enter the information without the traditional time-out issues. Second, it allows the credentials to be syntax-checked and formatted prior to submission to the supplicant. Finally, the user is prompted while still connected to the open SSID or guest VLAN. As such, the user can be presented with links to a web-based account creation or password-recovery site during the XpressConnect flow.
Server Certificate Validation Made Easy
The difference between security best practice compliance and non-compliance is often the requirement to perform a few manual keystrokes. Server certificate validation is no exception. Server certificate validation increases 802.1X security greatly, but is infrequently used due to the configuration overhead. The XpressConnect Wizard makes server certificate validation effortless by providing the ability to automatically install certificate authority (CA) certificates, whether custom or public, and to configure the 802.1X profile to enforce server certificate validation.
One-Click Revert
The XpressConnect Wizard provides the ability to revert all modifications with a single click. Users have the option of reverting immediately or after their next Windows login. The user is even able to revert after leaving your network. One-click revert helps guests leave your network as easily as they joined it.
Enable Best Practices
Enabling security best practices has never been so easy. The XpressConnect Wizard provides the ability to verify a number of items related to the Windows Security Center and other security-related settings. It provides the ability to automatically fix many of the potential issues, including enabling the Windows Firewall and Windows Auto Updates as well as installing antivirus and other required software.
Deployment Flexibility
The XpressConnect Wizard can operate as a dissolving agent loaded from the browser, as an application run from a CD or USB key drive, or as an application deployed by GPO and other management tools. The dissolving agent form factor ensures that everyone can easily access the wizard through a browser and is suitable for most environments. The web-based, dissolving agent can be loaded in a variety of manners,
XpressConnect Wizard 5.0 Quick Start Guide 5
including a Java Applet control, an ActiveX control, or via a manual download process. Regardless of the deployment model, the capabilities of wizard are identical.
XPRESSCONNECT TERMINOLOGY
The following description uses the terminology defined below to describe the general use of the XpressConnect Wizard:
An administrator logs into the XpressConnect Administrative Console to modify the configuration settings for the network. Once configured, the administrator downloads a deployment package which contains the XpressConnect Wizard.
Administrator
The term Administrator refers to an individual which has login credentials that allow access to the XpressConnect Administrative Console service.
XpressConnect Administrative Console
The term XpressConnect Administrative Console refers to the management application for XpressConnect. This management application is a hosted service and is provided in a software as a service (SaaS) model. The XpressConnect Administrative Console is used by an account’s administrator to define the network configurations and to download a deployment package containing the XpressConnect Wizard.
Network
The term Network refers to a concept used with the XpressConnect Administrative Console to group configuration settings. Each network contains a single configuration per operating system. In general, a network within XpressConnect represents a physical network within your environment.
Deployment Package
The term Deployment Package refers to a TAR file downloaded from the XpressConnect Administrative Console. The TAR file contains the XpressConnect Wizard.
XpressConnect Wizard
The term XpressConnect Wizard refers to the network access wizard which is downloaded from the XpressConnect Administrative Console and provided to users to automate network access.
XpressConnect Enrollment System
The XpressConnect Enrollment System refers to the new customizable workflow engine from Cloudpath Networks. The Enrollment System partners with the Wizard to provide more control over who is granted network access and how they should be provisioned. During the initial setup of the Enrollment System, you establish a link with the Administrative Console that binds the Enrollment System to your configured networks. After the initial setup, you only need the Administrative Console for changing network parameters. Everything else is managed with the Enrollment System.
Contact Cloudpath Networks for more information about the Enrollment System.

XpressConnect Wizard 5.0 Quick Start Guide 6
SYSTEM REQUIREMENTS
XpressConnect system requirements vary by component. The following system requirements apply to the specified portion of XpressConnect.
User Operating System
The XpressConnect Wizard supports the following operating systems for automated configuration: o Windows XP SP2+ (Home, Professional, and Tablet), Vista (All Versions, x86 & x64), 7 (All
Versions, x86 & x64), 8 and 8.1 (All Versions except Windows Surface RT (see manual configuration), x86 & x64)
o Mac OS X 10.4 (Tiger), 10.5 (Leopard), 10.6 (Snow Leopard), 10.7 (Lion), 10.8 (Mountain Lion), 10.9 (Mavericks), 10.10 (Yosemite)
o Ubuntu 9.04 (Jaunty Jackalope), 9.10 (Karmic Koala), 10.04 (Lucid Lynx), 10.10 (Maverick Meerkat), 11.04 (Natty Narwhal), 11.10 (Oneiric Ocelot), 12.04 (Precise Pangolin), 12.10 (Quantal Quetzal), 13.04 (Raring Ringtail), 13.10 (Saucy Salamander), 14.04 (Trusty Tahr), 14.10 (Utopic Unicorn), 15.04 (Vivid Vervet), and greater
o iOS (iPhone, iPad, iPod Touch) 2, 3, 4, 5, 6, 7, 8, and greater o Android 2.1 (Eclair), 2.2 (Froyo), 2.3 (Gingerbread), 3.0 (Honeycomb), 3.1, 3.2, 4.0 (Ice
Cream Sandwich), 4.1, 4.2, 4.3 (Jelly Bean), 4.4 (KitKat), 5.0 (Lollipop), and greater o Fedora 18, 19, 20, and 21, and greater o Chromium OS
The XpressConnect Wizard supports the following operating systems for manual configuration: o Windows Surface RT o Windows Phone (7 and 8) o Blackberry o Generic OS
For details on additional platform support, contact Cloudpath Networks.
Except when deployed by GPO or other management tools, we recommend that the user have administrator privileges on the machine. Without administrative privileges, some functionality may be limited.
User Browser
When the XpressConnect Wizard is accessed via a web server, the following browsers are supported: o Internet Explorer versions 6 and greater. o Firefox versions 1.5 and greater. o Safari versions 2.0 and greater. o Google Chrome versions 2.0 and greater.
For the best user experience, the following are recommended: o JavaScript; and o Java (version 1.5 or greater) or ActiveX

XpressConnect Wizard 5.0 Quick Start Guide 7
Administrator Browser
The XpressConnect Administrative Console supports the following browsers: o Internet Explorer versions 6 or greater. o Firefox versions 1.5 or greater.
JavaScript must be enabled to use the XpressConnect Administrative Console.
Web Server
When deploying the XpressConnect Wizard to a web server, the following server types are supported. When available, use of a PHP or ASP is recommended. When using an HTML-only package, some functionality is limited.
o PHP o Active Server Pages (ASP) o Java Server Pages (JSP) o HTML (no scripting)
For example, you may use one of the following web servers: o Windows Server 2000 or greater with Internet Information Server (IIS) service enabled. o Windows Server 2000 or greater with Apache or Tomcat. o Linux with Apache or Tomcat.
The web server should meet the minimum requirements for CPU and RAM as specified by the web server manufacturer. A minimum of 50MB of available disk space is recommended.
Cloudpath also offers a hosted option, wherein the XpressConnect Wizard is deployed within the cloud. This option provides the easiest deployment model and supports vanity URLs.
ADMINISTRATIVE CONSOLE
The XpressConnect Administrative Console is used by you, the network administrator, to specify the necessary user configurations as well as to download customized XpressConnect Wizards. The XpressConnect Administrative Console is provided as a hosted service, ensuring it is hassle-free and always up-to-date. To access the XpressConnect Administrative Console, open a browser to http://xpc.cloudpath.net and login using the credentials supplied to you by Cloudpath Networks.
USING THE ADMINISTRATIVE CONSOLE
Tab Overview
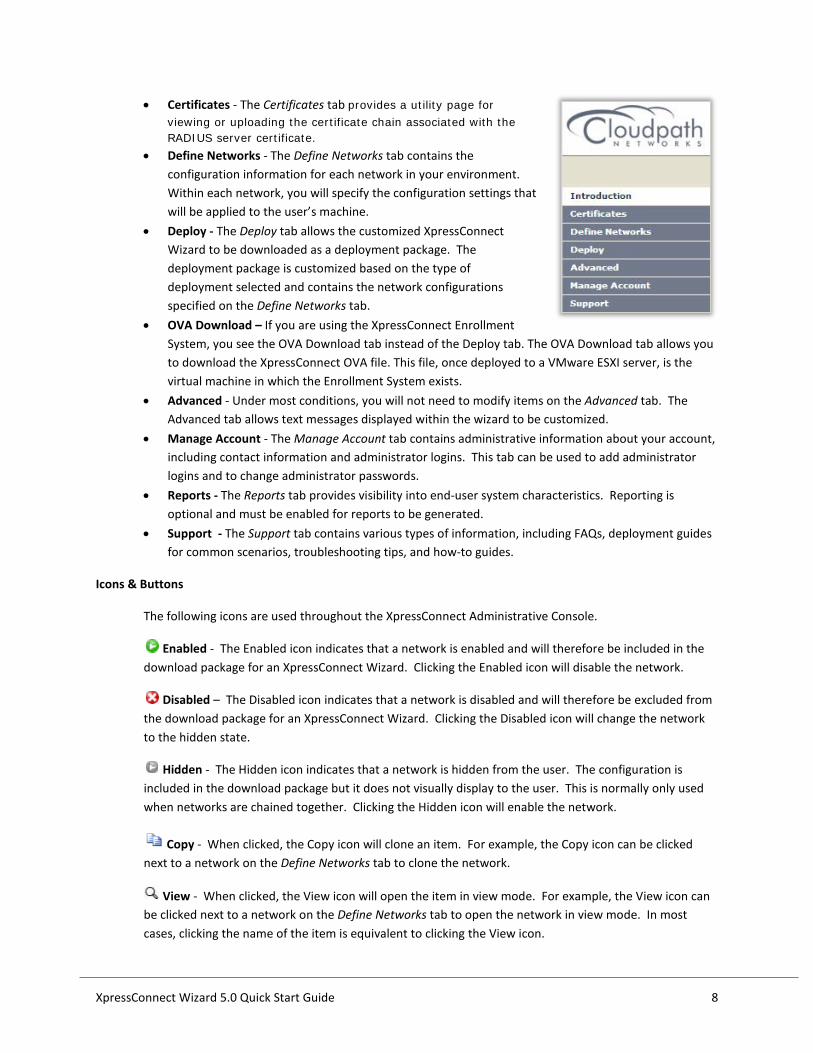
The XpressConnect Administrative Console is navigated using the tabs along the left side of the page. The tabs are:
• Introduction - This tab provides an overview of the Administrative Console and contains a message related to recent XpressConnect Wizard updates.
XpressConnect Wizard 5.0 Quick Start Guide 8
• Certificates - The Certificates tab provides a utility page for viewing or uploading the certificate chain associated with the RADIUS server certificate.
• Define Networks - The Define Networks tab contains the configuration information for each network in your environment. Within each network, you will specify the configuration settings that will be applied to the user’s machine.
• Deploy - The Deploy tab allows the customized XpressConnect Wizard to be downloaded as a deployment package. The deployment package is customized based on the type of deployment selected and contains the network configurations specified on the Define Networks tab.
• OVA Download – If you are using the XpressConnect Enrollment System, you see the OVA Download tab instead of the Deploy tab. The OVA Download tab allows you to download the XpressConnect OVA file. This file, once deployed to a VMware ESXI server, is the virtual machine in which the Enrollment System exists.
• Advanced - Under most conditions, you will not need to modify items on the Advanced tab. The Advanced tab allows text messages displayed within the wizard to be customized.
• Manage Account - The Manage Account tab contains administrative information about your account, including contact information and administrator logins. This tab can be used to add administrator logins and to change administrator passwords.
• Reports - The Reports tab provides visibility into end-user system characteristics. Reporting is optional and must be enabled for reports to be generated.
• Support - The Support tab contains various types of information, including FAQs, deployment guides for common scenarios, troubleshooting tips, and how-to guides.
Icons & Buttons
The following icons are used throughout the XpressConnect Administrative Console.
Enabled - The Enabled icon indicates that a network is enabled and will therefore be included in the download package for an XpressConnect Wizard. Clicking the Enabled icon will disable the network.
Disabled – The Disabled icon indicates that a network is disabled and will therefore be excluded from the download package for an XpressConnect Wizard. Clicking the Disabled icon will change the network to the hidden state.
Hidden - The Hidden icon indicates that a network is hidden from the user. The configuration is included in the download package but it does not visually display to the user. This is normally only used when networks are chained together. Clicking the Hidden icon will enable the network.
Copy - When clicked, the Copy icon will clone an item. For example, the Copy icon can be clicked next to a network on the Define Networks tab to clone the network.
View - When clicked, the View icon will open the item in view mode. For example, the View icon can be clicked next to a network on the Define Networks tab to open the network in view mode. In most cases, clicking the name of the item is equivalent to clicking the View icon.

XpressConnect Wizard 5.0 Quick Start Guide 9
Delete - When clicked, the Delete icon will delete the item. For example, the Delete icon can be clicked next to a network on the Define Networks tab to delete the network.
Edit - When clicked, the Edit icon will open the item in edit mode. For example, the Edit icon can be clicked next to a setting within a network’s configuration to edit the setting.
Add - When clicked, the Add icon will add a new item to the list displayed. For example, a new setting may be added to a network’s configuration by clicking the Add icon.
Move Up – When clicked, the Move Up icon will promote the item to a higher position in the list. For example, a network may be moved to a higher position in the networks list.
Move Down – When clicked, the Move Down icon will demote the item to a lower position in the list. For example, a network may be moved to a lower position in the networks list.
Move – When clicked, the Move icon will move an item to a different location. For example, a network may be moved from one server to another server when multi-server capabilities are enabled.
Additional Information - For network configuration settings, the XpressConnect Administrative Console contains two types of information. The first type is the inline help, which contains XpressConnect-specific information and recommendations. The second type is the additional information. Most settings contain the Additional Information icon, which will open a browser window containing general information about the setting within the operating system. This additional information includes where the setting is located within the operating system’s user interface, the operating system’s supported settings, and general information about how the operating system uses the setting.
Documentation and FAQs
The following locations provide documentation related to XpressConnect:
Quick Start Guide – This document, which is currently being read, contains high-level information and provides a general introduction to XpressConnect.
Support Tab – Within the XpressConnect Administrative Console, the Support tab contains various documents related to XpressConnect. This list includes how-to guides for configuring web servers, a list of recent application updates, as well as FAQs of a variety of topics.
Page Headings – Along the top of each page within the XpressConnect Administrative Console, a description of the current page exists. This description frequently contains a description of the item(s) currently displayed. The page headings display next to the “I” icon.
Inline Help - Throughout the XpressConnect Administrative Console, a plus sign (“+”) will display to the left of field names. To display inline help for a specific field, click the plus sign. Inline help contains a variety of helpful information specific to the selected field, including a description, common use cases, and an explanation of how the field affects the user experience.

XpressConnect Wizard 5.0 Quick Start Guide 10
To dismiss the inline help, click the minus sign (“-“) that appears by the field name.
Administrators & Passwords
Cloudpath Networks will provide you with a single administrator login for the XpressConnect Administrative Console. Additional administrators may be added on the Manage Account tab within the Administrators box. From this same location, you may change user names, passwords, and delete administrators.
CREATING WIZARDS
Planning
The following information should be gathered before configuring XpressConnect. Most settings within XpressConnect directly reflect settings within the operating system. As such, it is advisable to be familiar with how the operating system’s settings need to be configured.
For web deployments, you will need to provide the following information:
IP address of web server that will host the wizard: _________________________ URL of the web server: _______________________________________________ Web server scripting type: PHP ASP JSP HTML Cloud
For 802.1X environments, you will need to provide the following information:
Valid user name and password for RADIUS: ______________ / _____________ Will server certificate validation be enforced? ____________________________
RADIUS server certificate type: Self-Signed Publicly Signed by ______________________ Note: Even if server certificate validation is not enforced, it is advisable to have the CA certificate available. EAP Type: PEAP/MSCHAPv2 TTLS TLS PEAP/TLS
For wireless environments, you will need to provide the following information:
Name of the open SSID (case sensitive): _________________________________ Name of secure (802.1X or PSK) SSIDs (case sensitive): ______________________ Visibility of the secure SSID: SSID is broadcast SSID is hidden Network authentication: WPA WPA2 WPA or WPA2 WPA-PSK WPA2-PSK WPA-PSK or WPA2-PSK Dynamic WEP (802.1X) Static WEP Open Data Encryption: AES TKIP AES or TKIP Protocol Preference (N, A, G, B, else/or/only ) : ________________ Note: Applies to Windows Vista and greater.
Network key for WPA-PSK, WPA2-PSK, and static WEP SSIDs: ________________
XpressConnect Wizard 5.0 Quick Start Guide 11
Understanding Networks within XpressConnect
In XpressConnect, you may define one or more networks, each with its own configuration and behavior settings. Typically, each network within XpressConnect represents a single physical network. For example, one network may represent one secure SSID whereas a second network represents a different secure SSID.
Multiple networks may also be created for logical reasons. For example, you may wish to offer a “minimal” configuration as well as a “recommended” configuration. In this use case, the two networks within XpressConnect represent logic differences in the configuration sets.
When a deployment package is downloaded, the XpressConnect Wizard will contain all the networks. At runtime, the user will be prompted to select the network he is attempting to access. If only a single network is defined within XpressConnect, the user will not be prompted.
Adding a Network
The following steps describe the addition of a network. Adding a new network utilizes a series of steps structured in a wizard. The flow of the new network wizard differs based on the answers provided. The following steps assume an 802.1X-based network is being configured.
1. Click the Define Networks tab to view the list of existing networks.
2. To create a new network, click Add Network in the Networks table. This will start a multi-step wizard for initializing the network.
3. In Step 1, specify the name and provide a description of the new network.
a. Name – The name of the network. If multiple networks exist, this name (along with the description) will be displayed to users to assist them in selecting the network they wish to access.
b. Description – A description of the network. If multiple networks exist, this is displayed to the user along with Name. It is recommended that this description describe the expected users, the requirements of the network and the network’s capabilities. For example:
i. This network is for students and faculty of Sample University. It requires authentication. For login credentials, visit Network Services in Bruning Hall.
ii. This network provides secure, Internet-only wireless access for guests of Sample Corporation.
4. When finished with Step 1, click Next.
XpressConnect Wizard 5.0 Quick Start Guide 12
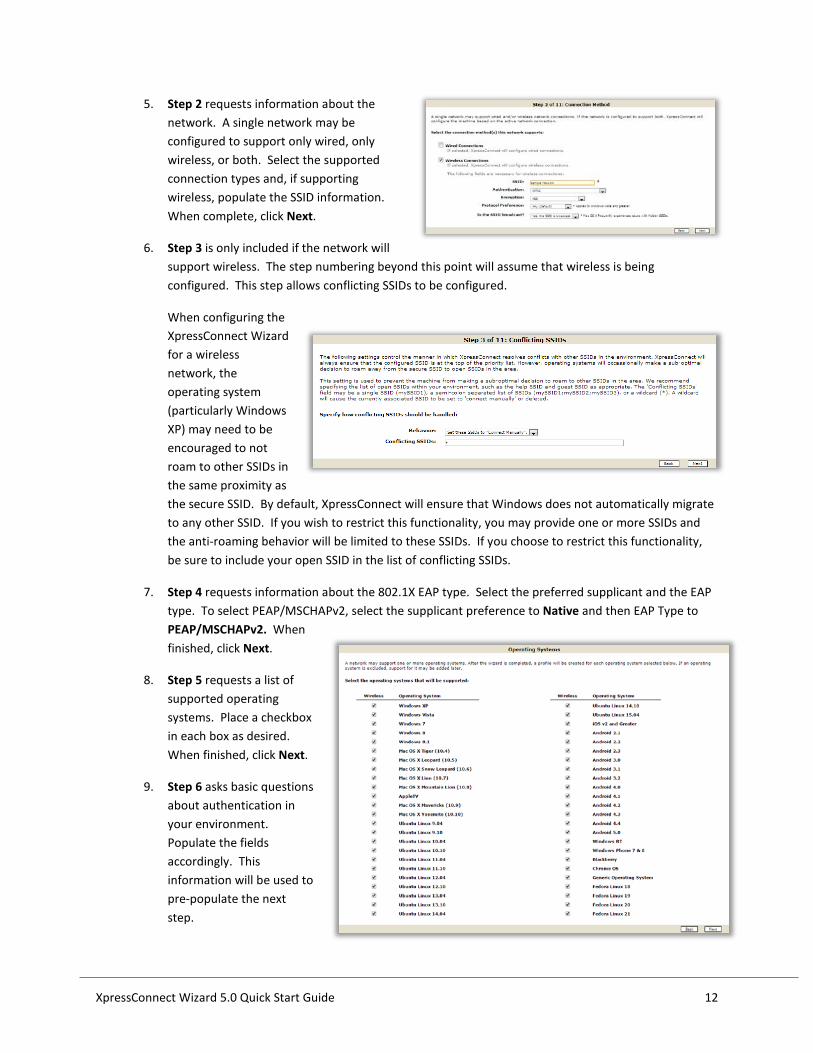
5. Step 2 requests information about the network. A single network may be configured to support only wired, only wireless, or both. Select the supported connection types and, if supporting wireless, populate the SSID information. When complete, click Next.
6. Step 3 is only included if the network will support wireless. The step numbering beyond this point will assume that wireless is being configured. This step allows conflicting SSIDs to be configured.
When configuring the XpressConnect Wizard for a wireless network, the operating system (particularly Windows XP) may need to be encouraged to not roam to other SSIDs in the same proximity as the secure SSID. By default, XpressConnect will ensure that Windows does not automatically migrate to any other SSID. If you wish to restrict this functionality, you may provide one or more SSIDs and the anti-roaming behavior will be limited to these SSIDs. If you choose to restrict this functionality, be sure to include your open SSID in the list of conflicting SSIDs.
7. Step 4 requests information about the 802.1X EAP type. Select the preferred supplicant and the EAP type. To select PEAP/MSCHAPv2, select the supplicant preference to Native and then EAP Type to PEAP/MSCHAPv2. When finished, click Next.
8. Step 5 requests a list of supported operating systems. Place a checkbox in each box as desired. When finished, click Next.
9. Step 6 asks basic questions about authentication in your environment. Populate the fields accordingly. This information will be used to pre-populate the next step.

XpressConnect Wizard 5.0 Quick Start Guide 13
10. Step 7 customizes the look and behavior of the screen when the XpressConnect Wizard prompts for credentials.
a. Login Directions – Most networks have a name for their user name format which they commonly use in communicating with the users. This may be something like “your EID” or “your email address”. If so, the login directions should be updated to state something like:
i. A user name and password are required to access this network. Your user name is your EID.
ii. A user name and password are required to access this network. Your user name is your Sample Corporation email address.
b. Help Link Caption & URL – If you have a web-based account-creation or password-recovery site, the user can be provided a link to these services. This link is displayed while the XpressConnect Wizard prompts for credential before beginning the migration. Typically, the user will still be associated to the open SSID (or guest VLAN) and have access to these services. To configure this link, populate the Help Link Caption field, which is the text displayed, and the Help Link URL field, which is the actual URL that will be opened in the browser.
c. Default User Name – It is recommended to provide a user name hint in the Default User Name field. For example:
i. [Your EID] ii. [Your University Email Address]
11. Step 8 requests information about server certificate validation. You may select to disable or enable server validation. If enabled, you may also specify the public CA or upload your custom CA certificate. If you wish to restrict authentication to a particular server (“Connect to these servers” in Windows), this may be added after the completion of the wizard. In addition to the CA selection, you may specify a server name. When finished, click Next.
12. In Step 9, you may add additional settings to the configuration. For each operating system, select the desired settings and click Next.
XpressConnect Wizard 5.0 Quick Start Guide 14
13. In Step 10, you may modify the behavior of the XpressConnect Wizard after the user has been migrated to the new network. You may specify a URL that will be opened in the browser. You may also control whether or not the revert option displays on the final page.
14. Step 11 is simply a review step. Review the information for correctness and click Done.
15. You are now viewing the populated configuration for the new network.
Fine-Tuning a Network
Networks are added using the multi-step wizard. Based on the answers to a series of questions, the network is pre-populated with typical configurations. At any time, the network configuration may be fine-tuned.
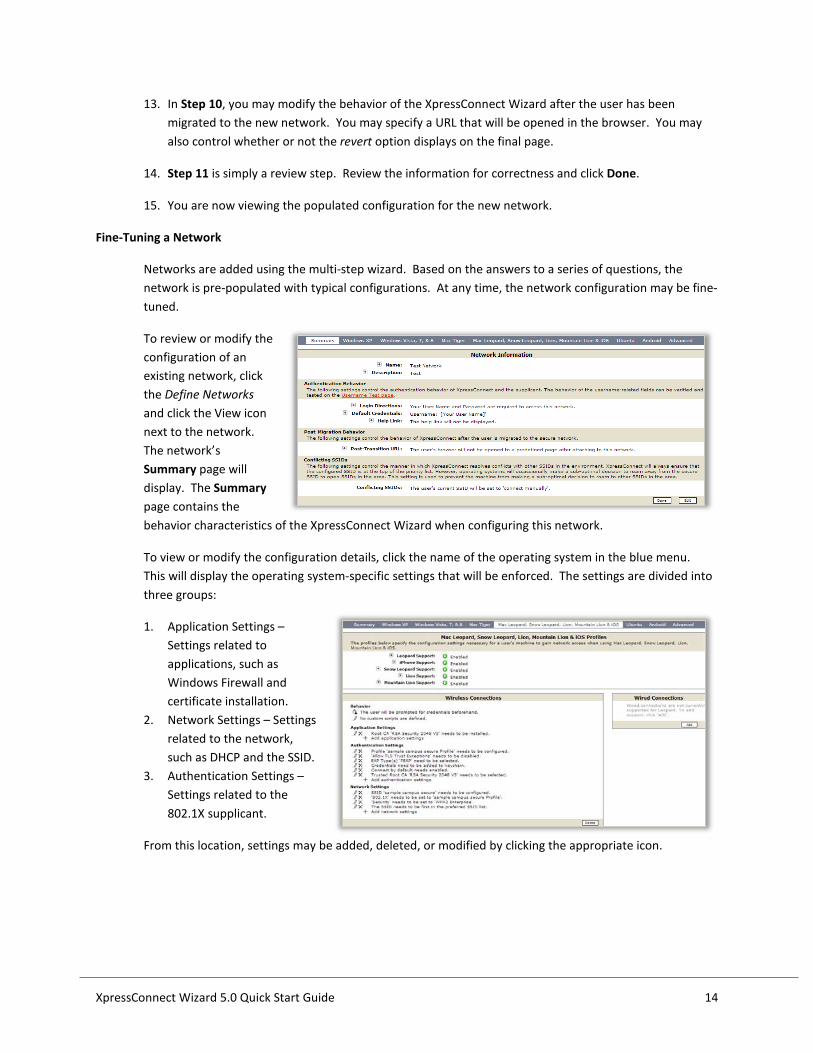
To review or modify the configuration of an existing network, click the Define Networks and click the View icon next to the network. The network’s Summary page will display. The Summary page contains the behavior characteristics of the XpressConnect Wizard when configuring this network.
To view or modify the configuration details, click the name of the operating system in the blue menu. This will display the operating system-specific settings that will be enforced. The settings are divided into three groups:
1. Application Settings – Settings related to applications, such as Windows Firewall and certificate installation.
2. Network Settings – Settings related to the network, such as DHCP and the SSID.
3. Authentication Settings – Settings related to the 802.1X supplicant.
From this location, settings may be added, deleted, or modified by clicking the appropriate icon.

XpressConnect Wizard 5.0 Quick Start Guide 15
Customizing the Appearance
The appearance of the XpressConnect Wizard may be customized to match your organization. There are currently three appearance-related items that may be customized: (1) the Welcome Title, (2) the Web Image, and (3) the Application Logo. Each of these items has a default value, so customization is optional.
Welcome Title – The Welcome Title appears along the top of the wizard and the web pages. There are formatting limitations associated with the title. It may be either one line or two lines long. If the title is two lines, the first line will appear slightly smaller than the second line. To force a line break, use “//” in the title.
To modify the Welcome Title, follow these steps:
1. Log into the XpressConnect Administrative Console. 2. Click the Define Networks tab. 3. In the Visual Settings table, click Edit. 4. In the Welcome Title field, enter the desired title. 5. Click Save.
Web Image – The Web Image appears in the upper-left corner of the web pages which load the XpressConnect Wizard. The following specifications are recommended, but not required, for this image:
• The image should be a JPG or GIF file. • The image should be 231 pixels wide by 116 pixels high.
To upload the image, follow these steps:
1. Log into the XpressConnect Administrative Console. 2. Click the Define Networks tab. 3. Locate the Visual Settings table. 4. In the Web Image field, click the click here link. The File Upload page will display. Browse to the file
and click Save.
Application Logo – The Application Logo appears in the upper-left corner of the XpressConnect Wizard executable. The formatting requirements for the Application Logo are more strict than the Web Image. The following specifications are required for this image:
• The image should be a JPG or GIF file. Transparency is supported for GIF images. • The image should be 177 pixels wide by 62 pixels high.
XpressConnect Wizard 5.0 Quick Start Guide 16
• The image completely fills the empty space, so the following insets are recommended: o 3 pixel inset on the left and the right. o 5 pixel inset on the top and bottom.
• The background color for the image is E6E1CF.
To upload the image, follow these steps:
1. Log into the XpressConnect Administrative Console. 2. Click the Define Networks tab. 3. Locate the Visual Settings table. 4. In the Application Logo field, click the click here link. The File Upload page will display. Browse to the
file and click Save.
DEPLOYING A WIZARD
After the networks are configured and the appearance is customized, it is time to deploy the XpressConnect Wizard. The wizard may be deployed in a variety of ways. This section will describe the available options and the deployment process.
Deployment Models
The XpressConnect Wizard may be deployed in a number of ways, including:
Web Server Deployment – In this model, the XpressConnect Wizard is deployed to a web server within your environment. This is the most commonly used deployment model. In the typical scenario, a user accesses the XpressConnect Wizard via a link on the captive portal of the open SSID or the default/guest VLAN. This deployment model benefits from being always available and always up-to-date.
CD or USB Flash Drive – In this model, the XpressConnect Wizard is placed on a CD or a USB flash drive. This model is convenient for use within the network help desk as well as for mass distribution, such as in a new student packet.
Group Policy – In this model, the XpressConnect Wizard is compiled into an MSI package for deployment via Active Directory group policy. In a managed environment, this is a convenient way to transparently handle the migration.
The Deployment Package
The deployment package is formatted as a compressed TAR (.tar.gz) file. This file can be expended by most ZIP utilities in Windows (such as WinZip or 7Zip) or the tar command in Linux. Once expanded, you may deploy its contents to a destination from which users can run it. The deployment package differs based on the deployment model, but may contain:
• XpressConnect Wizard binary • HTML pages that introduce and load the XpressConnect Wizard. • Java Applet and ActiveX controls that assist in loading the XpressConnect Wizard.

XpressConnect Wizard 5.0 Quick Start Guide 17
• An XML file containing the configuration settings for your environment. • Supporting binaries. If additional pieces of software (such as hotfixes) are to be installed, they may
need to be added to the package manually.
Once deployed, the wizard is self-contained. It does not contact the XpressConnect Administrative Console service in any way. If changes are made in the XpressConnect Administrative Console, a new deployment package will need to be downloaded.
Preparing a Web Server
Guides are available to assist with installation, configuration, and troubleshooting of the web server. For step-by-step guides on installing and configuring a web server for XpressConnect, follow these steps:
1. Log into the XpressConnect Administrative Console 2. Click the Support tab. 3. Depending on your server, select either the IIS Configuration & Troubleshooting guide or the Apache
Configuration & Troubleshooting guide.
How to Deploy to a Web Server
To deploy the XpressConnect Wizard to a web server, follow these steps:
1. Log into the XpressConnect Administrative Console. 2. Click on the Deploy tab. 3. Select Adhoc Deployment. 4. Select the appropriate
deployment option (HTML, PHP, ASP, JSP) based on your web server’s scripting support.
5. When prompted, save the deployment package to your desktop.
6. Copy the deployment package to your web server. 7. Unzip the deployment package to the appropriate directory on the web server.
a. On a Windows server, this file can be unzipped with a utility like 7-Zip (free) or WinZip. b. On Linux, use the command “tar –vzvf XpressConnect.tar.gz”. You will need to replace
“XpressConnect.tar.gz” with the actual file name.
Note about unzipping: We recommend using 7-Zip to unzip the deployment package. It is a free utility available at http://www.7-zip.org. By default, WinZip converts line-endings and will cause problems for Mac users. To change WinZip’s behavior, select WinZip’s Options menu item, select Configuration, and go to the Miscellaneous tab. Uncheck the TAR file smart CR/LF conversion option.
8. To verify the proper configuration of the server, run the Server Verifier applet from http://[Your Server URL]/info/test.html. This applet will check common server configuration issues.

XpressConnect Wizard 5.0 Quick Start Guide 18
The XpressConnect Wizard is now ready to be accessed from the web server. Typically, a captive portal on the open SSID or guest VLAN will be used to direct users to the wizard. The following information is helpful when integrating the wizard into the captive portal: • The captive portal page should be edited to contain a link to the wizard’s web server. The link should
point at page1.html. • The pre-authentication access control list (ACL) on the portal should allow access to the wizard’s web
server. For additional samples of portal integration, visit the Web Portal Configuration Samples link on the Support tab.
How to Deploy to a CD or USB Flash Drive
To deploy the XpressConnect Wizard to a CD or a USB flash drive, follow these steps:
1. Log into the XpressConnect Administrative Console. 2. Click on the Deploy tab. 3. A variety of download options will be presented. Click the CD link. 4. When prompted, save the deployment package to your desktop. 5. Unzip the deployment package to the CD or USB flash drive.
a. On a Windows server, this file can be unzipped with a utility like 7-Zip (free) or WinZip. b. On Linux, use the command “tar –vzvf XpressConnect.tar.gz”. You will need to replace
“XpressConnect.tar.gz” with the actual file name.
Note about unzipping: We recommend using 7-Zip to unzip the deployment package. It is a free utility available at http://www.7-zip.org. By default, WinZip converts line-endings and will cause problems for Mac users. To change WinZip’s behavior, select WinZip’s Options menu item, select Configuration, and go to the Miscellaneous tab. Uncheck the TAR file smart CR/LF conversion option.
The XpressConnect Wizard is now ready to use from the CD or USB flash drive.
TESTING
After configuring the networks within the XpressConnect Administrative Console and deploying the wizard, it is time to test the deployment. If you have a wired environment, follow the Wired Usage steps below. If you have a wireless environment, follow the Wireless Usage steps below.
Wired Usage
This procedure assumes you have deployed the XpressConnect Wizard on a web server. To verify XpressConnect in a wired scenario, use your computer to follow these steps:
1. Ensure that 802.1X is disabled on the computer. On Windows XP SP3 and Vista, this can be done by stopping the Wired AutoConfig service, which is the default state.
2. Use an Ethernet cable to connect the computer to a user port on the switch. 3. Wait for the guest VLAN to be assigned. Verify that the computer receives an IP address on the guest
VLAN.

XpressConnect Wizard 5.0 Quick Start Guide 19
4. Open the browser and query the URL of the wizard. The XpressConnect Wizard introduction page will display.
5. Click the Start button and follow the wizard’s flow. 6. If multiple networks are defined, you will be prompted to select the desired network for
configuration. If so, select the desired network and click Continue. 7. If pre-prompting for credentials is enabled, you will be prompted for your user name and password
before configuration begins. If so, enter your user name and password and click Continue. 8. Under certain conditions, you may be prompted to select your network connection. If so, select the
appropriate wired interface and click OK. 9. The XpressConnect Wizard will begin analyzing and configuring the computer. It will then begin
reconnecting to the secure network. 10. In 802.1X environments, you may be prompted by the supplicant to authenticate. If so, enter your
user name and password and submit them. 11. The wizard will verify that an IP address is received on the secure network. 12. The final screen will appear, confirming that you are connected to the secure network.
a. To view the changes applied to your system, click on the View Modifications link. b. To revert your system to its original state, click the Revert Now link.
To leave changes applied, click Done, and the wizard will close.
Wireless Usage
This procedure assumes you have deployed the XpressConnect Wizard on a web server. To verify XpressConnect in a wireless scenario, use your computer to follow these steps:
1. Ensure that the computer does not have a profile for the secure SSID. 2. Connect the computer to the open SSID. 3. Verify that the computer receives an IP address on the open SSID. 4. Open the browser and query the URL of the wizard. The XpressConnect introduction page will
display. 5. Click the Start button and follow the wizard’s flow. 6. If multiple networks are defined, you will be prompted to select the desired network for
configuration. If so, select the desired network and click Continue. 7. If pre-prompting for credentials is enabled, you will be prompted for your user name and password
before configuration begins. If so, enter your user name and password and click Continue. 8. Under certain conditions, you may be prompted to select your network connection. If so, select the
appropriate wireless interface and click OK. 9. The XpressConnect Wizard will begin analyzing and configuring the computer. It will then begin
reconnecting to the secure network. 10. In 802.1X environments, you may be prompted by the supplicant to authenticate. If so, enter your
user name and password and submit them. 11. The wizard will verify that an IP address is received on the secure network. 12. The final screen will appear, confirming that you are connected to the secure network.
a. To view the changes applied to your system, click on the View Modifications link. b. To revert your system to its original state, click the Revert Now link.
To leave changes applied, click Done, and the wizard will close.

XpressConnect Wizard 5.0 Quick Start Guide 20
KNOWN ISSUES & LIMITATIONS
Vista + UAC + IE7 + Protected Mode + Applet/ActiveX Requests Elevation to Administrator
Vista’s UAC feature contains 3 integrity levels: high is administrative access, medium is the normal user level, and low is used by Internet Explorer (IE) for the new Protected Mode feature. When in Protected Mode, IE and all things initiated by IE (Java Applets, ActiveX controls) are severely limited. To work around this, it is necessary to elevate to the medium level, which is an acceptable practice for signed code. However, Vista only allows elevation requests for the highest possible level, essentially meaning it is all or nothing. If the Java Applet or ActiveX control is used in this configuration and the user is an administrator, it will request elevation to the high level to launch the executable. If the elevation request is denied, XpressConnect will provide the user with other options, such as downloading XpressConnect manually.
Java Applet Loads Old Version
When one version of the XpressConnect Wizard is loaded using a Java Applet and the browser remains open while a new version of the wizard is loaded onto the server, the Java Applet may continue to load the previous version.
This issue is due to caching that occurs within the Java Virtual Machine. Closing all instances of the browser and then retrying will allow the new version to be loaded. Alternatively, the letter “x” may be typed into the Java Console, if visible, to clear the classloader cache.
This scenario typically may appear when a network administrator is upgrading or modifying the XpressConnect Wizard.
Wireless Configuration Service Enters Dysfunctional State on XP SP2
On Windows XP SP2, Windows Wireless Zero Configuration Service can enter an unstable state, particularly if the only SSID is an 802.1X network and the machine is left for a considerable length of time in a state where it is repeatedly attempting to connect.
Side effects include: 1. XpressConnect reports an error code 17002 while configuring the SSID. 2. Within the Windows user interface, selecting “Disable” on the interface does nothing. 3. The interface becomes generally unusable.
These errors are not related to the XpressConnect Wizard. Rather, they are inherent in the service that manages wireless within Windows. The issue appears to be more profound when the SSID is defined to use TLS or PEAP-TLS. It occurs rarely with PEAP/MSCHAPv2.
In most cases, the XpressConnect Wizard will automatically recover the system from this situation. However, the following steps can be used to manually recover:
1. Restart the Wireless Zero Configuration service from the services console. 2. Within the Network Connections screen, right-click on the interface and select “Repair”.

XpressConnect Wizard 5.0 Quick Start Guide 21
Firefox 2.0 Shows Yellow Fields
Yellow text fields are used in the XpressConnect Administrative Console to designate required fields. Firefox 2.0 incorrectly displays random text fields using the yellow background. This is an appearance issue affecting the XpressConnect administrator only; it does not affect the user. The issue is corrected in Firefox 3.0.
Allow XpressConnect to Request Elevation If Needed
On Windows Vista and newer, the XpressConnect Wizard is designed to run as a normal user. If the configuration requires elevation, the wizard will request permission via the Windows UAC prompt. Under most circumstances, the wizard should not be run using the “Run as Administrator” option in the right-click menu.
Server URL Cannot Contain a Space
Due to issues within Java on Mac, the URL to which the XpressConnect Wizard is deployed cannot contain a space.
Google Chrome Bug on Mac May Prevent Authorization
On Mac OS X 10.6 (Snow Leopard), a bug between certain versions of Google Chrome and Mac Java Update may prevent the XpressConnect Wizard from prompting, if necessary, for administrative permissions. If the XpressConnect Wizard detects this, it will request that the user reopen the wizard with Safari.
ABOUT CLOUDPATH
Cloudpath Networks, Inc. provides software solutions and services that simplify the adoption of standards-based security, including WPA2-Enterprise and 802.1X, in diverse BYOD environments. Our goal is to make secure as simple as insecure; simple for network administrators to deploy and simple for users to access.
CONTACT INFORMATION
General Inquiries:[email protected] Support:[email protected] Sales:[email protected] Media:[email protected] Marketing:[email protected] Phone:+1 303.647.1495 (US) +1 866.472.6053 (US) +44 (01) 161.261.1400 (UK) Fax:+1 760.462.4569 Address:1120 W 122nd Ave, Suite 302 Westminster, CO 80234 USA