Xerox DocuPrint NPS/ IPSdownload.support.xerox.com/.../any-os/en/GenNPS-IPS... · Xerox DocuPrint...
200
Xerox DocuPrint NPS/ IPS Guide to Configuring and Managing the System 721P90041 Version 8.0 October 2002
Transcript of Xerox DocuPrint NPS/ IPSdownload.support.xerox.com/.../any-os/en/GenNPS-IPS... · Xerox DocuPrint...

Xerox DocuPrint NPS/IPSGuide to Configuring and Managing the System
721P90041Version 8.0October 2002

Xerox Corporation701 S. Aviation BoulevardEl Segundo, CA 90245
©2002 by Xerox Corporation. All rights reserved.
Copyright protection claimed includes all forms and matters of copyrightable material and information now allowed by statutory or judicial law or hereinafter granted, including without limitation, material generated from the software programs which are displayed on the screen, such as icons, screen displays, looks, etc.
Printed in the United States of America.
Publication number: 721P90041
Xerox® and all Xerox products mentioned in this publication are trademarks of Xerox Corporation. Products and trademarks of other companies are also acknowledged.
Changes are periodically made to this document. Changes, technical inaccuracies, and typographic errors will be corrected in subsequent editions.
Table of contents
Safety . . . . . . . . . . . . . . . . . . . . . . . . . . . . . . . . . . . . . . . . . . . . . . . . . ixLaser safety . . . . . . . . . . . . . . . . . . . . . . . . . . . . . . . . . . . . . . . . . . . . . . . . ixOzone information: U. S. only . . . . . . . . . . . . . . . . . . . . . . . . . . . . . . . . . . xOperation safety: U. S. . . . . . . . . . . . . . . . . . . . . . . . . . . . . . . . . . . . . . . . xOperation safety: Europe . . . . . . . . . . . . . . . . . . . . . . . . . . . . . . . . . . . . .xi
Warning markings . . . . . . . . . . . . . . . . . . . . . . . . . . . . . . . . . . . . . .xiElectrical supply . . . . . . . . . . . . . . . . . . . . . . . . . . . . . . . . . . . . . . xiiVentilation . . . . . . . . . . . . . . . . . . . . . . . . . . . . . . . . . . . . . . . . . . . xiiOperator accessible areas . . . . . . . . . . . . . . . . . . . . . . . . . . . . . . xiiMaintenance . . . . . . . . . . . . . . . . . . . . . . . . . . . . . . . . . . . . . . . . . xiiiBefore cleaning your product . . . . . . . . . . . . . . . . . . . . . . . . . . . . xiii
CE mark: Europe only . . . . . . . . . . . . . . . . . . . . . . . . . . . . . . . . . . . . . . . xiiiRadio and telecommunications equipment directive (Europe only) . . . . xivFor further information . . . . . . . . . . . . . . . . . . . . . . . . . . . . . . . . . . . . . . . xv
Introduction . . . . . . . . . . . . . . . . . . . . . . . . . . . . . . . . . . . . . . . . . . xviiAbout this guide . . . . . . . . . . . . . . . . . . . . . . . . . . . . . . . . . . . . . . . . . . . xvii
Contents . . . . . . . . . . . . . . . . . . . . . . . . . . . . . . . . . . . . . . . . . . . xviiiConventions . . . . . . . . . . . . . . . . . . . . . . . . . . . . . . . . . . . . . . . . . xix
Related publications . . . . . . . . . . . . . . . . . . . . . . . . . . . . . . . . . . . . . . . . xx
1. Using the system interface . . . . . . . . . . . . . . . . . . . . . . . . . . . . . . . 1-1Using the command line interface . . . . . . . . . . . . . . . . . . . . . . . . . . . . . 1-1
Accessing administrator or operator commands . . . . . . . . . . . . 1-2Change Administrator Password . . . . . . . . . . . . . . . . . . . 1-3Change Operator Password . . . . . . . . . . . . . . . . . . . . . . 1-3
Accessing commands from a remote workstation . . . . . . . . . . . . . . . . . 1-4Using telnet remote access . . . . . . . . . . . . . . . . . . . . . . . . . . . . 1-4Using Web-based remote access . . . . . . . . . . . . . . . . . . . . . . . . 1-5
2. Using utility commands . . . . . . . . . . . . . . . . . . . . . . . . . . . . . . . . . 2-1General utility commands . . . . . . . . . . . . . . . . . . . . . . . . . . . . . . . . . . . 2-1
Broadcast message to all execs . . . . . . . . . . . . . . . . . . . . . . . . . 2-1Eject CDROM . . . . . . . . . . . . . . . . . . . . . . . . . . . . . . . . . . . . . . . 2-2Eject Floppy command . . . . . . . . . . . . . . . . . . . . . . . . . . . . . . . . 2-2Format Floppy command . . . . . . . . . . . . . . . . . . . . . . . . . . . . . . 2-2Copy Documents to Floppy command . . . . . . . . . . . . . . . . . . . . 2-3Copy Documents to DOS Floppy command . . . . . . . . . . . . . . . . 2-4
Guide to Configuring and Managing the System iii
Table of contents
Copy Documents to Tape command . . . . . . . . . . . . . . . . . . . . . 2-4Copy Documents to Disk command . . . . . . . . . . . . . . . . . . . . . . 2-5Examine Document command . . . . . . . . . . . . . . . . . . . . . . . . . . 2-6Install Remote Update command . . . . . . . . . . . . . . . . . . . . . . . . 2-7Install Update from Floppy command . . . . . . . . . . . . . . . . . . . . . 2-7Install Update from CDROM command . . . . . . . . . . . . . . . . . . . 2-7List Files on CDROM command . . . . . . . . . . . . . . . . . . . . . . . . . 2-8Print Documents from CDROM command . . . . . . . . . . . . . . . . . 2-8Print Documents from Floppy command . . . . . . . . . . . . . . . . . . 2-9Backup Site Files command . . . . . . . . . . . . . . . . . . . . . . . . . . . . 2-9Restore Site Files command . . . . . . . . . . . . . . . . . . . . . . . . . . 2-10Backup Xerox Files command . . . . . . . . . . . . . . . . . . . . . . . . . 2-10Restore Xerox Files command . . . . . . . . . . . . . . . . . . . . . . . . . 2-11Backup Virtual Printers List command . . . . . . . . . . . . . . . . . . . 2-11Restore Virtual Printers List command . . . . . . . . . . . . . . . . . . . 2-11Set Status Message command . . . . . . . . . . . . . . . . . . . . . . . . . 2-12Reset Job IDs command . . . . . . . . . . . . . . . . . . . . . . . . . . . . . 2-12Show Host ID command . . . . . . . . . . . . . . . . . . . . . . . . . . . . . . 2-13
Managing IPDS tracing . . . . . . . . . . . . . . . . . . . . . . . . . . . . . . . . . . . . 2-13Show IPDS Tracing command . . . . . . . . . . . . . . . . . . . . . . . . . 2-13Start IPDS Tracing command . . . . . . . . . . . . . . . . . . . . . . . . . . 2-13Stop IPDS Tracing command . . . . . . . . . . . . . . . . . . . . . . . . . . 2-14List IPDS Trace Files command . . . . . . . . . . . . . . . . . . . . . . . . 2-14Delete IPDS Trace Files command . . . . . . . . . . . . . . . . . . . . . 2-14
DocuPrint NPS/IPS software licensing . . . . . . . . . . . . . . . . . . . . . . . . 2-15Install Feature License command . . . . . . . . . . . . . . . . . . . . . . . 2-16Install FlexLicense from Floppy command . . . . . . . . . . . . . . . . 2-17Show License Status command . . . . . . . . . . . . . . . . . . . . . . . . 2-17Install License command . . . . . . . . . . . . . . . . . . . . . . . . . . . . . 2-18Copy IOT Fault Data to Disk . . . . . . . . . . . . . . . . . . . . . . . . . . . 2-18
Configure utility . . . . . . . . . . . . . . . . . . . . . . . . . . . . . . . . . . . . . . . . . . 2-19Changeable parameters . . . . . . . . . . . . . . . . . . . . . . . . . . . . . . 2-20Options . . . . . . . . . . . . . . . . . . . . . . . . . . . . . . . . . . . . . . . . . . . 2-23
Printing Configuration Reports: Options 1 and 2 . . . . . . 2-23Reviewing Questions and Answers: Options 3 and 4 . . 2-24Editing Individual Parameters: Option 5 . . . . . . . . . . . . 2-25Reinitializing Software: Option 6 . . . . . . . . . . . . . . . . . . 2-26Saving and Restoring Values: Options 7 and 8 . . . . . . . 2-27Configure Utility example for changing the hostname . . 2-27
Setting up TCP/IP Socket Printing . . . . . . . . . . . . . . . . . . . . . . 2-28Recovering the Job Pool Manager database . . . . . . . . . . . . . . 2-28
Enabling and disabling remote service . . . . . . . . . . . . . . . . . . . . . . . . 2-29Enable modem command . . . . . . . . . . . . . . . . . . . . . . . . . . . . . 2-30Disable modem command . . . . . . . . . . . . . . . . . . . . . . . . . . . . 2-31Enable Remote Shell command . . . . . . . . . . . . . . . . . . . . . . . . 2-31Disable Remote Shell command . . . . . . . . . . . . . . . . . . . . . . . 2-32
iv Guide to Configuring and Managing the System
Table of contents
3. Starting and stopping the system . . . . . . . . . . . . . . . . . . . . . . . . . 3-1Powering on the system . . . . . . . . . . . . . . . . . . . . . . . . . . . . . . . . . . . . 3-1Powering off the system . . . . . . . . . . . . . . . . . . . . . . . . . . . . . . . . . . . . 3-3
Using the Halt System command to stop the system . . . . . . . . . 3-3Using the background menu to stop the system . . . . . . . . . . . . 3-3
Powering the system off and on after a power failure . . . . . . . . . . . . . . 3-5Stopping and starting job processing . . . . . . . . . . . . . . . . . . . . . . . . . . 3-5Restarting the sequencer, IPDS parser, and the system . . . . . . . . . . . 3-5
Restart Sequencer command . . . . . . . . . . . . . . . . . . . . . . . . . . . 3-6Restart IPDS Parser command . . . . . . . . . . . . . . . . . . . . . . . . . 3-6Restart System command . . . . . . . . . . . . . . . . . . . . . . . . . . . . . 3-6
4. DocuPrint NPS/IPS on a Novell network . . . . . . . . . . . . . . . . . . . . 4-1Choosing a Print Server or Remote Printer configuration . . . . . . . . . . . 4-1Configuring DocuPrint NPS/IPS as a PSERVER . . . . . . . . . . . . . . . . . 4-4Configuring DocuPrint NPS/IPS as an RPRINTER . . . . . . . . . . . . . . . . 4-5Supporting DocuPrint NPS/IPS on the Novell file server . . . . . . . . . . . 4-6
5. Setting system defaults. . . . . . . . . . . . . . . . . . . . . . . . . . . . . . . . . . 5-1Setting default media . . . . . . . . . . . . . . . . . . . . . . . . . . . . . . . . . . . . . . . 5-2
Set Default Media command . . . . . . . . . . . . . . . . . . . . . . . . . . . 5-2Show Default Media command . . . . . . . . . . . . . . . . . . . . . . . . . . 5-4
Setting feeder tray attributes . . . . . . . . . . . . . . . . . . . . . . . . . . . . . . . . . 5-4Set Tray and Set Tray Default commands . . . . . . . . . . . . . . . . . 5-5Set Tray <n> Tray <m> command . . . . . . . . . . . . . . . . . . . . . . . 5-7Set Tray <n> Position <m> command . . . . . . . . . . . . . . . . . . . . 5-7Set Tray <n> Purge|No Purge . . . . . . . . . . . . . . . . . . . . . . . . . . 5-8Set Tray From Virtual Printer Media command . . . . . . . . . . . . . 5-8Unset Tray <n> command . . . . . . . . . . . . . . . . . . . . . . . . . . . . . 5-9
Setting stacker groups . . . . . . . . . . . . . . . . . . . . . . . . . . . . . . . . . . . . . 5-10Set Stacker To Group command . . . . . . . . . . . . . . . . . . . . . . . 5-10Unset Stacker command . . . . . . . . . . . . . . . . . . . . . . . . . . . . . 5-10
Setting printer options . . . . . . . . . . . . . . . . . . . . . . . . . . . . . . . . . . . . . 5-11Set Option command . . . . . . . . . . . . . . . . . . . . . . . . . . . . . . . . 5-11List Options command . . . . . . . . . . . . . . . . . . . . . . . . . . . . . . . 5-28Print Options command . . . . . . . . . . . . . . . . . . . . . . . . . . . . . . 5-29
Setting imager parameters . . . . . . . . . . . . . . . . . . . . . . . . . . . . . . . . . 5-29Show Imager Parameters command . . . . . . . . . . . . . . . . . . . . 5-30Change Imager Parameters command . . . . . . . . . . . . . . . . . . 5-30Restore Default Imager Parameters command . . . . . . . . . . . . 5-32
Setting PCL imager parameters . . . . . . . . . . . . . . . . . . . . . . . . . . . . . 5-33Show PCL Imager Parameters . . . . . . . . . . . . . . . . . . . . . . . . . 5-33Change PCL Imager Parameters command . . . . . . . . . . . . . . 5-34Restore Default PCL Imager Parameters command . . . . . . . . 5-35
Setting PCL parameters . . . . . . . . . . . . . . . . . . . . . . . . . . . . . . . . . . . 5-36Change PCL Parameters command . . . . . . . . . . . . . . . . . . . . . 5-36
Guide to Configuring and Managing the System v
Table of contents
Restore Default PCL Parameters command . . . . . . . . . . . . . . 5-40Show PCL Parameters command . . . . . . . . . . . . . . . . . . . . . . 5-41
Example . . . . . . . . . . . . . . . . . . . . . . . . . . . . . . . . . . . . . 5-41
6. Input and output profiles. . . . . . . . . . . . . . . . . . . . . . . . . . . . . . . . . 6-1Profile commands . . . . . . . . . . . . . . . . . . . . . . . . . . . . . . . . . . . . . . . . . 6-1
Show Profiles command . . . . . . . . . . . . . . . . . . . . . . . . . . . . . . . 6-1Create Profile command . . . . . . . . . . . . . . . . . . . . . . . . . . . . . . . 6-2Set Profile command . . . . . . . . . . . . . . . . . . . . . . . . . . . . . . . . . 6-2Delete Input|Output Profile command . . . . . . . . . . . . . . . . . . . . 6-3
Profile parameters . . . . . . . . . . . . . . . . . . . . . . . . . . . . . . . . . . . . . . . . . 6-3
7. Setting the printer controller date and time . . . . . . . . . . . . . . . . . 7-1Show Time command . . . . . . . . . . . . . . . . . . . . . . . . . . . . . . . . . . . . . . 7-1Set Time command . . . . . . . . . . . . . . . . . . . . . . . . . . . . . . . . . . . . . . . . 7-1
8. Checking system status and displaying billing meters . . . . . . . . 8-1List Volumes command . . . . . . . . . . . . . . . . . . . . . . . . . . . . . . . . . . . . . 8-2Show Status command . . . . . . . . . . . . . . . . . . . . . . . . . . . . . . . . . . . . . 8-2Show IPDS Status command . . . . . . . . . . . . . . . . . . . . . . . . . . . . . . . . 8-4Listing and printing sample documents . . . . . . . . . . . . . . . . . . . . . . . . . 8-5
List Sample Documents command . . . . . . . . . . . . . . . . . . . . . . . 8-5Print Sample Document command . . . . . . . . . . . . . . . . . . . . . . . 8-7
List Executives command . . . . . . . . . . . . . . . . . . . . . . . . . . . . . . . . . . . 8-8Display Billing Meters command . . . . . . . . . . . . . . . . . . . . . . . . . . . . . . 8-8Print Billing Report command . . . . . . . . . . . . . . . . . . . . . . . . . . . . . . . 8-11
9. Managing accounting files and logs . . . . . . . . . . . . . . . . . . . . . . . 9-1Maintaining accounting files . . . . . . . . . . . . . . . . . . . . . . . . . . . . . . . . . 9-1
Accounting file versions . . . . . . . . . . . . . . . . . . . . . . . . . . . . . . . 9-2Dump Accounting command . . . . . . . . . . . . . . . . . . . . . . . . . . . 9-7Copy Accounting to Floppy command . . . . . . . . . . . . . . . . . . . . 9-8Delete Accounting command . . . . . . . . . . . . . . . . . . . . . . . . . . . 9-9
Managing DocuPrint NPS/IPS log files . . . . . . . . . . . . . . . . . . . . . . . . . 9-9List Logs command . . . . . . . . . . . . . . . . . . . . . . . . . . . . . . . . . 9-10Show Log command . . . . . . . . . . . . . . . . . . . . . . . . . . . . . . . . . 9-10Copy Logs to Floppy command . . . . . . . . . . . . . . . . . . . . . . . . 9-11Delete Logs command . . . . . . . . . . . . . . . . . . . . . . . . . . . . . . . 9-12Print Log command . . . . . . . . . . . . . . . . . . . . . . . . . . . . . . . . . 9-13
10. Managing PostScript and PCL fonts . . . . . . . . . . . . . . . . . . . . . . 10-1Installing fonts . . . . . . . . . . . . . . . . . . . . . . . . . . . . . . . . . . . . . . . . . . . 10-1
Install Fonts from CDROM command . . . . . . . . . . . . . . . . . . . . 10-2Install Fonts from Floppy command . . . . . . . . . . . . . . . . . . . . . 10-2Install PCLFonts from Floppy command . . . . . . . . . . . . . . . . . 10-3
Deleting fonts . . . . . . . . . . . . . . . . . . . . . . . . . . . . . . . . . . . . . . . . . . . 10-4
vi Guide to Configuring and Managing the System

Table of contents
Listing fonts . . . . . . . . . . . . . . . . . . . . . . . . . . . . . . . . . . . . . . . . . . . . . 10-6List CDROM Fonts command . . . . . . . . . . . . . . . . . . . . . . . . . . 10-6List Floppy Fonts command . . . . . . . . . . . . . . . . . . . . . . . . . . . 10-6List Fonts command . . . . . . . . . . . . . . . . . . . . . . . . . . . . . . . . . 10-7
Print Font List command . . . . . . . . . . . . . . . . . . . . . . . . . . . . . . . . . . . 10-8Print Font Sample command . . . . . . . . . . . . . . . . . . . . . . . . . . . . . . . . 10-8Print PCLFont Sample command . . . . . . . . . . . . . . . . . . . . . . . . . . . . 10-9
11. Managing forms . . . . . . . . . . . . . . . . . . . . . . . . . . . . . . . . . . . . . . . 11-1Print Form List command . . . . . . . . . . . . . . . . . . . . . . . . . . . . . . . . . . 11-1List Forms command . . . . . . . . . . . . . . . . . . . . . . . . . . . . . . . . . . . . . . 11-2Print Form Sample command . . . . . . . . . . . . . . . . . . . . . . . . . . . . . . . 11-3Delete Forms command . . . . . . . . . . . . . . . . . . . . . . . . . . . . . . . . . . . 11-4
12. Using Wizard Mode or UNIX shell . . . . . . . . . . . . . . . . . . . . . . . . 12-1Using Wizard Mode . . . . . . . . . . . . . . . . . . . . . . . . . . . . . . . . . . . . . . . 12-1Using the UNIX shell . . . . . . . . . . . . . . . . . . . . . . . . . . . . . . . . . . . . . . 12-2Mounting a CD-ROM or a floppy diskette . . . . . . . . . . . . . . . . . . . . . . 12-2
Mount CDROM command . . . . . . . . . . . . . . . . . . . . . . . . . . . . 12-2Unmount CDROM command . . . . . . . . . . . . . . . . . . . . . . . . . . 12-3Mount Floppy command . . . . . . . . . . . . . . . . . . . . . . . . . . . . . . 12-3
Creating a telnet greeting message . . . . . . . . . . . . . . . . . . . . . . . . . . 12-4Enabling the lpr security option . . . . . . . . . . . . . . . . . . . . . . . . . . . . . . 12-5Removing orphan data files . . . . . . . . . . . . . . . . . . . . . . . . . . . . . . . . . 12-6
13. Handling DigiPath jobs . . . . . . . . . . . . . . . . . . . . . . . . . . . . . . . . . 13-1Configuring DocuPrint NPS/IPS for XDOD/DigiPath . . . . . . . . . . . . . . 13-1
Configuring NFS for XDOD 3.1 or earlier . . . . . . . . . . . . . . . . . 13-2Configuring the default NFS daemon . . . . . . . . . . . . . . . . . . . . 13-2
Verifying correct installation . . . . . . . . . . . . . . . . . . . . . . . . . . . . . . . . 13-2Removing .gfi directories . . . . . . . . . . . . . . . . . . . . . . . . . . . . . . . . . . . 13-3
14. MICR printing . . . . . . . . . . . . . . . . . . . . . . . . . . . . . . . . . . . . . . . . . 14-1Considerations for MICR printing on NPS/IPS models . . . . . . . . . . . . 14-1Security issues . . . . . . . . . . . . . . . . . . . . . . . . . . . . . . . . . . . . . . . . . . 14-2
15. Performing color calibration. . . . . . . . . . . . . . . . . . . . . . . . . . . . . 15-1Setting color calibrations . . . . . . . . . . . . . . . . . . . . . . . . . . . . . . . . . . . 15-1
When to perform calibration . . . . . . . . . . . . . . . . . . . . . . . . . . . 15-1Evaluating color quality . . . . . . . . . . . . . . . . . . . . . . . . . . . . . . . 15-2Calibration procedure . . . . . . . . . . . . . . . . . . . . . . . . . . . . . . . . 15-2More on the calibration work flow . . . . . . . . . . . . . . . . . . . . . . . 15-5
Print Color Calibration Target command . . . . . . . . . . . . . . . . . . . . . . . 15-6Set ColorTRC command . . . . . . . . . . . . . . . . . . . . . . . . . . . . . 15-9
List Color Calibrations command . . . . . . . . . . . . . . . . . . . . . . . . . . . 15-10Rename Color Calibration command . . . . . . . . . . . . . . . . . . . . . . . . 15-10
Guide to Configuring and Managing the System vii
Table of contents
Delete Color Calibration command . . . . . . . . . . . . . . . . . . . . . . . . . . 15-11Set Default Color Calibration command . . . . . . . . . . . . . . . . . . . . . . 15-11Show Default Color Calibration command . . . . . . . . . . . . . . . . . . . . 15-12
viii Guide to Configuring and Managing the System
Safety
Laser safety
WARNING
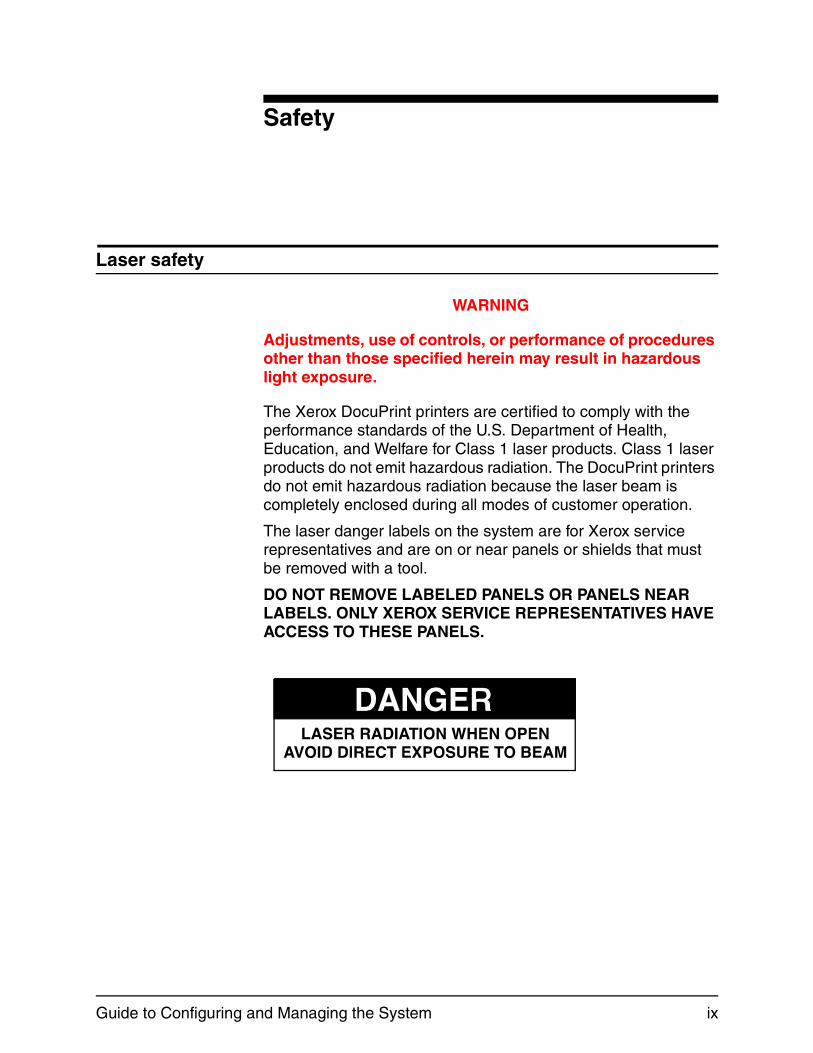
Adjustments, use of controls, or performance of procedures other than those specified herein may result in hazardous light exposure.
The Xerox DocuPrint printers are certified to comply with the performance standards of the U.S. Department of Health, Education, and Welfare for Class 1 laser products. Class 1 laser products do not emit hazardous radiation. The DocuPrint printers do not emit hazardous radiation because the laser beam is completely enclosed during all modes of customer operation.
The laser danger labels on the system are for Xerox service representatives and are on or near panels or shields that must be removed with a tool.
DO NOT REMOVE LABELED PANELS OR PANELS NEAR LABELS. ONLY XEROX SERVICE REPRESENTATIVES HAVE ACCESS TO THESE PANELS.
Guide to Configuring and Managing the System ix
Safety
Ozone information: U. S. only
This product produces ozone during normal operation. The amount of ozone produced depends on copy volume. Ozone is heavier than air. The environmental parameters specified in the Xerox installation instructions ensure that concentration levels are within safe limits. If you need additional information concerning ozone, call 1-800-828-6571 to request the Xerox publication 600P83222, OZONE.
Operation safety: U. S.
Your Xerox equipment and supplies have been designed and tested to meet strict safety requirements. They have been approved by safety agencies, and they comply with environmental standards. Please observe the following precautions to ensure your continued safety.
WARNING
Improper connection of the equipment grounding conductor may result in risk of electrical shock.
• Always connect equipment to a properly grounded electrical outlet. If in doubt, have the outlet checked by a qualified electrician.
• Never use a ground adapter plug to connect equipment to an electrical outlet that lacks a ground connection terminal.
• Always place equipment on a solid support surface with adequate strength for its weight.
• Always use materials and supplies specifically designed for your Xerox equipment. Use of unsuitable materials may result in poor performance and may create a hazardous situation.
• Never move either the printer or the printer controller without first contacting Xerox for approval.
• Never attempt any maintenance that is not specifically described in this documentation.
• Never remove any covers or guards that are fastened with screws. There are no operator-serviceable areas within these covers.
x Guide to Configuring and Managing the System
Safety
• Never override electrical or mechanical interlocks.
• Never use supplies or cleaning materials for other than their intended purposes. Keep all materials out of the reach of children.
• Never operate the equipment if you notice unusual noises or odors. Disconnect the power cord from the electrical outlet and call service to correct the problem.
If you need any additional safety information concerning the equipment or materials Xerox supplies, call Xerox Product Safety at the following toll-free number in the United States:
1-800-828-6571
For customers outside the United States, contact your local Xerox representative or operating company.
Operation safety: Europe
This Xerox product and supplies are manufactured, tested and certified to strict safety regulations, electromagnetic regulations and established environmental standards.
Any unauthorised alteration, which may include the addition of new functions or connection of external devices, may impact the product certification.
Please contact your Xerox representative for more information.
Warning markings
All warning instructions marked on or supplied with the product should be followed.
This WARNING alerts users to areas of the product where there is the possibility of personal damage.
This WARNING alerts users to areas of the product where there are heated surfaces, which should not be touched.
Guide to Configuring and Managing the System xi
Safety
Electrical supply
This product shall be operated from the type of electrical supply indicated on the product’s data plate label. If you are not sure that your electrical supply meets the requirements, please consult your local power company for advice.
This product must be connected to a protective earth circuit. This product is supplied with a plug that has a protective earth pin. This plug will fit only into an earthed electrical outlet. This is a safety feature. Always connect equipment to a properly grounded electrical outlet. If in doubt, have the outlet checked by a qualified electrician.
To disconnect all electrical power to the product, the disconnect device is the power cord. Remove the plug from the electrical outlet.
Ventilation
Slots and opening in the enclosure of the product are provided for ventilation. Do not block or cover the ventilation vents, as this could result in the product overheating.
This product should not be placed in a built-in installation unless proper ventilation is provided, please contact your Xerox representative for advice.
Never push objects of any kind into the ventilation vents of the product.
Operator accessible areas
This product has been designed to restrict operator access to safe areas only. Operator access to hazardous areas is restricted with covers or guards, which would require a tool to remove. Never remove these covers or guards.
WARNING
xii Guide to Configuring and Managing the System

Safety
Maintenance
Any operator product maintenance procedures will be described in the user documentation supplied with the product. Do not carry out any maintenance on the product, which is not described in the customer documentation.
Before cleaning your product
Before cleaning this product, unplug the product from the electrical outlet. Always use materials specifically designated for this product, the use of other materials may result in poor performance and may create a hazardous situation. Do not use aerosol cleaners, they may be flammable under certain circumstances.
CE mark: Europe only
January 1, 1995: Council Directive 73/23/EEC, amended by Council Directive 93/68/EEC, approximation of the laws of the member states related to low voltage equipment.
January 1, 1996: Council Directive 89/336/EEC, approximation of the laws of the member states related to electromagnetic compatibility.
March 9, 1999: Council Directive 99/5/EC, on radio equipment and telecommunications terminal equipment and the mutual recognition of their conformity.
A full declaration of conformity, defining the relevant directives and referenced standards, can be obtained from your Xerox representative.
In order to allow this equipment to operate in proximity to Industrial, Scientific and Medical (ISM) equipment, the external radiation for the ISM equipment may have to be limited or special mitigation measures taken.
This is a Class A product. In a domestic environment this product may cause radio frequency interference, in which case the user may be required to take adequate measures.
Shielded interface cables must be used with this product to maintain compliance with Council Directive 89/36/EEC.
Guide to Configuring and Managing the System xiii

Safety
Radio and telecommunications equipment directive (Europe only)
Certification to 1999/5/EC Radio Equipment and Telecommunications Terminal Equipment Directive:
This Xerox product has been self-certified by Xerox for pan-European single terminal connection to the analog public switched telephone network (PSTN) in accordance with Directive 1999/5/EC.
The product has been designed to work with the national PSTNs and compatible PBXs of the following countries:
In the event of problems, contact your local Xerox representative in the first instance.
This product has been tested to, and is compliant with, TBR21, a specification for terminal equipment for use on analog switched telephone networks in the European Economic area.
The product may be configured to be compatible with other country networks. Please contact your Xerox representative if your product needs to be reconnected to a network in another country. This product has no user-adjustable settings.
NOTE: Although this product can use either loop disconnect (pulse) or DTMF (tone) signaling, it should be set to use DTMF signaling. DTMF signaling provides reliable and faster call setup.
Modification or connection to external control software, or to external control apparatus not authorized by Xerox, invalidates its certification.
Austria Germany Luxembourg Sweden
Belgium Greece Netherlands Switzerland
Denmark Iceland Norway United Kingdom
Finland Ireland Portugal
France Italy Spain
xiv Guide to Configuring and Managing the System

Safety
For further information
For more information on Environment, Health and Safety in relation to this Xerox product and supplies, please contact the following customer help lines:
Europe:+44 1707 353434
USA:1 800 8286571
Canada:1 800 8286571
Guide to Configuring and Managing the System xv

Safety
xvi Guide to Configuring and Managing the System

Introduction
This Xerox DocuPrint NPS/IPS Guide to Configuring and Managing the System provides information on how to perform operations and administration tasks for all DocuPrint NPS/IPS models, including DocuColor 2060 NPS/IPS.
You may be using the DocuPrint NPS/IPS software extension on a DocuPrint EPS 2000 Series system. The 2000 Series printer models that support the extensions are the 100, 115, 135, 155, and 180. These printers are comparable in capabilities to the DocuPrint NPS/IPS models 96, 4635, and 180.
About this guide
This guide is intended for operators and administrators who are responsible for setting up and maintaining DocuPrint NPS/IPS printers.
Users should have an understanding of printer controller operations and, for some tasks, be familiar with basic UNIX commands.
Some of the procedures described in this guide may be performed by the printer operator. For more information on printer operator tasks, refer to the Guide to Managing Print Jobs and the other documents in the Xerox DocuPrint NPS/IPS series.
DocuPrint NPS/IPS provides two interface options: a command line interface that has been used on DocuPrint NPS systems since the release of the product, and a graphical user interface available as of version 8.0. This guide provides the syntax for the command line interface. If you are using the graphical user interface, refer to the on-line help for information on how to navigate the graphical user interface. Regardless of the interface you use, the description of system functionality in this guide applies.
Before using this guide, become familiar with its contents and conventions.
Guide to Configuring and Managing the System xvii

Introduction
Contents
This section lists the contents of this guide:
• Chapter 1, “Using the system interface,” describes the command line interface, the graphical user interface, and remote access.
• Chapter 2, “Using utility commands,” describes the use of a number of utilities such as backup and restore site files, Configure, and other useful commands.
• Chapter 3, “Starting and stopping the system,” describes how to power on and off the system, and how to start and stop job processing, the sequencer, and the system.
• Chapter 4, “DocuPrint NPS/IPS on a Novell network,” contains a brief overview of Novell NetWare, and describes some of the things you must consider before the service representative installs DocuPrint NPS/IPS on a Novell network.
• Chapter 5, “Setting system defaults,” provides information on how to set system defaults, including setting up feeder trays and stacker groups.
• Chapter 6, “Input and output profiles,” describes commands used for DocuPrint NPS/IPS configured with third party input and output devices.
• Chapter 7, “Setting the printer controller date and time,” describes how to set the time on the printer controller.
• Chapter 8, “Checking system status and displaying billing meters,” describes how to check status, print sample documents, and display billing meters.
• Chapter 9, “Managing accounting files and logs,” provides information on how to manage DocuPrint NPS/IPS accounting and log files.
• Chapter 10, “Managing PostScript and PCL fonts,” provides the procedures used to install and maintain fonts on the printer controller.
• Chapter 11, “Managing forms,” describes how to print a list and a sample of forms.
• Chapter 12, “Using Wizard Mode or UNIX shell,” provides guidelines for working in the DocuPrint NPS/IPS Wizard mode and UNIX shell, including some useful procedures performed in UNIX.
xviii Guide to Configuring and Managing the System

Introduction
• Chapter 13, “Handling DigiPath jobs,” describes how to install NFS and how to handle problems that may occur with print jobs submitted from the DigiPath client.
• Chapter 14, “MICR printing,” provides a discussion of MICR issues for the DocuPrint MICR NPS/IPS printers.
• Chapter 15, “Performing color calibration,” describes the process of adjusting color calibrations on full color printers.
Conventions
This guide uses the following conventions:
• All caps and angle brackets: Within procedures, the names of keys are shown in all caps within angle brackets (for example, press <ENTER>).
• Angle brackets: Variable information, or the position of a specified argument in the command syntax, appears in angle brackets (for example, List Fonts <Pattern>).
• Bold: Within procedures, text and numbers that you enter are shown in bold (for example, enter privilege operator).
• The word “enter” within procedures: The two-step process of keying in data and pressing <ENTER> (for example, enter y).
• Italics: Document and library names are shown in italics (for example, the Xerox DocuPrint NPS/IPS Guide to Managing Print Jobs).
• Quotation marks: Keywords you can enter as arguments appear in quotes (for example, “USLetter”).
• Vertical bars: Alternatives to specified arguments are separated by vertical bars (for example, Set Time <Time | Remote Host Name | IP Address>).
NOTE: Notes are hints that help you perform a task or understand the text.
Guide to Configuring and Managing the System xix

Introduction
CAUTION
Cautions alert you to an action that could damage hardware or software.
WARNING
Warnings alert you to conditions that may affect the safety of people.
Related publications
The Xerox DocuPrint NPS/IPS documentation set includes the documents listed below.
NOTE: For a list of IBM reference manuals for IPDS printing, refer to the Solutions Guide for IPDS Printing.
• Guide to Configuring and Managing the System
• Guide to Managing Print Jobs
• Guide to Performing Routine Maintenance
• Guide to Submitting Jobs from the Client
• Guide to Using Page Description Languages
• Installation Planning Guide
• System Overview Guide
• Troubleshooting Guide
• Solutions Guide for IPDS Printing
• Decomposition Service and Tools Guide
• Generic MICR Fundamentals Guide
• Glossary
• Master Index
• Customer Information Quick Reference Card
• Printer Controller Commands Quick Reference Card
• Operator Quick Reference Card
• Submitting your Jobs from Macintosh Quick Reference Card
• Submitting your Jobs from UNIX & DOS Quick Reference Card
xx Guide to Configuring and Managing the System

Introduction
• Submitting your Jobs from Windows NT 4.0 (QuickPrint) Quick Reference Card
• Submitting your Jobs Using Windows NT 4.0 Drivers Quick Reference Card
The documentation set also includes an electronic version, the DocuPrint NPS/IPS Interactive Customer Documentation CD.
Guide to Configuring and Managing the System xxi

Introduction
xxii Guide to Configuring and Managing the System
1. Using the system interface
This chapter describes the user interface for the DocuPrint NPS/IPS printer controller. There are two interface options at the controller: a command line interface and a graphical user interface. This book provides syntax for the command line interface, though it also contains useful information about the system in general. For information about using the graphical user interface, refer to the online help. To change the interface you are using, use the Configure utility.
In addition to the interface at the printer controller, you can access system commands from a remote networked workstation using telnet or a web browser.
Using the command line interface
The command line interface uses natural language and employs typing accelerators such as automatic command completion. Telnet remote access uses the same syntax.
Listing commandsand options
Use the Print Service window to enter the commands. For all commands:
• You can enter ? at the prompt to display all available commands.
• You can enter ? at any point in a command for more information.
Commandshortcuts
You need not enter a command in full—only enough to distinguish it from other commands. For example, you can enter li doc for the List Documents command. After typing enough characters to make a command word unique, use the space bar to complete the word. After typing enough characters to make a command unique, use the <RETURN> key to execute the command.
Guide to Configuring and Managing the System 1-1
Using the system interface
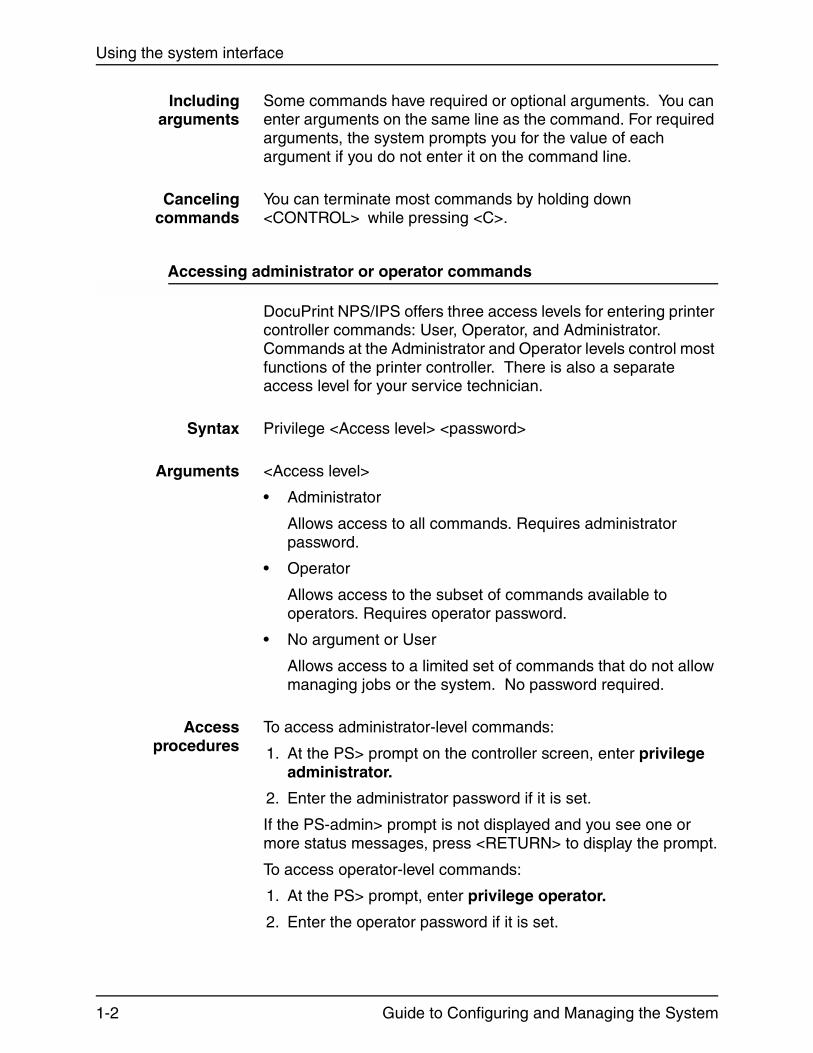
Includingarguments
Some commands have required or optional arguments. You can enter arguments on the same line as the command. For required arguments, the system prompts you for the value of each argument if you do not enter it on the command line.
Cancelingcommands
You can terminate most commands by holding down <CONTROL> while pressing <C>.
Accessing administrator or operator commands
DocuPrint NPS/IPS offers three access levels for entering printer controller commands: User, Operator, and Administrator. Commands at the Administrator and Operator levels control most functions of the printer controller. There is also a separate access level for your service technician.
Syntax Privilege <Access level> <password>
Arguments <Access level>
• Administrator
Allows access to all commands. Requires administrator password.
• Operator
Allows access to the subset of commands available to operators. Requires operator password.
• No argument or User
Allows access to a limited set of commands that do not allow managing jobs or the system. No password required.
Accessprocedures
To access administrator-level commands:
1. At the PS> prompt on the controller screen, enter privilege administrator.
2. Enter the administrator password if it is set.
If the PS-admin> prompt is not displayed and you see one or more status messages, press <RETURN> to display the prompt.
To access operator-level commands:
1. At the PS> prompt, enter privilege operator.
2. Enter the operator password if it is set.
1-2 Guide to Configuring and Managing the System

Using the system interface
If the PS-op> prompt is not displayed and you see one or more status messages, press <RETURN> to display the prompt.
Before you leave the system unattended, return to the User level of commands by entering privilege user at the prompt.
Change Administrator Password
Use the Change Administrator Password command to change the password used to access the Administrator level of commands.
Access level Administrator
Syntax Change Administrator Password
Arguments None. The system prompts you to enter the old, and then a new, Administrator password. The password will not be case-sensitive if you enter it with all lower-case letters. If you use any upper-case letters, the password is case-sensitive.
When changing the password, the system prompts twice for the new password. If uppercase letters are entered at the first prompt, then lowercase on the second prompt, the system will accept the new password, but it will be case sensitive.
When entering a lowercase password to the first prompt, and then an uppercase password to the second prompt, the resulting password is not case sensitive.
Change Operator Password
Use the Change Operator Password command to change the password used to access the operator level of commands. The password is not case-sensitive.
Access level Administrator
Syntax Change Operator Password
Arguments None. The system prompts you to enter the old, and then a new, Operator password. The password is not case-sensitive.
Guide to Configuring and Managing the System 1-3
Using the system interface
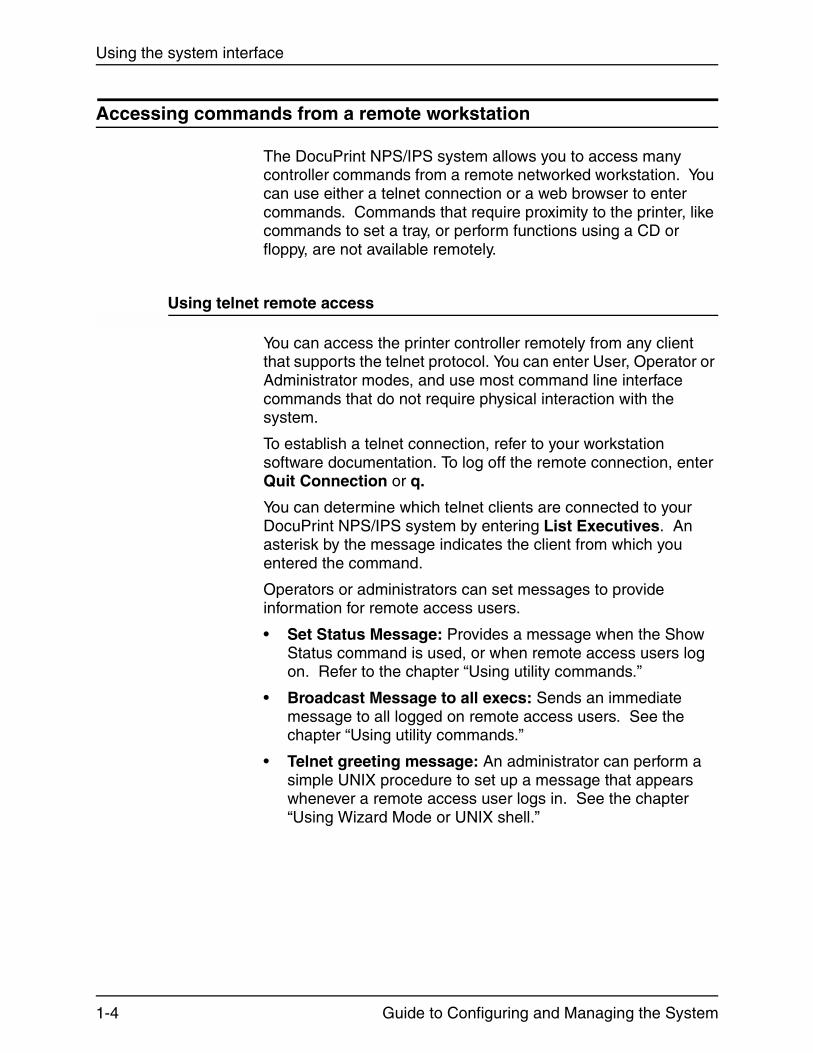
Accessing commands from a remote workstation
The DocuPrint NPS/IPS system allows you to access many controller commands from a remote networked workstation. You can use either a telnet connection or a web browser to enter commands. Commands that require proximity to the printer, like commands to set a tray, or perform functions using a CD or floppy, are not available remotely.
Using telnet remote access
You can access the printer controller remotely from any client that supports the telnet protocol. You can enter User, Operator or Administrator modes, and use most command line interface commands that do not require physical interaction with the system.
To establish a telnet connection, refer to your workstation software documentation. To log off the remote connection, enter Quit Connection or q.
You can determine which telnet clients are connected to your DocuPrint NPS/IPS system by entering List Executives. An asterisk by the message indicates the client from which you entered the command.
Operators or administrators can set messages to provide information for remote access users.
• Set Status Message: Provides a message when the Show Status command is used, or when remote access users log on. Refer to the chapter “Using utility commands.”
• Broadcast Message to all execs: Sends an immediate message to all logged on remote access users. See the chapter “Using utility commands.”
• Telnet greeting message: An administrator can perform a simple UNIX procedure to set up a message that appears whenever a remote access user logs in. See the chapter “Using Wizard Mode or UNIX shell.”
1-4 Guide to Configuring and Managing the System

Using the system interface
Using Web-based remote access
You can access the printer using a Web browser on any client computer that has network access to the printer.
To display the printer home page, enter the printer name or IP address in the Web browser, in the area where you normally enter a URL. The home page displays information about the printer configuration and gives you access to further pages:
• Show status and configuration information.
• List documents using various criteriato help you find the document you need. (Refer to figure 1-1.)
Figure 1-1. Printer home page
If you select the Operator button, a dialog appears where you enter the user name, for example “Operator” and the operator password for the system.
Guide to Configuring and Managing the System 1-5

Using the system interface
1-6 Guide to Configuring and Managing the System

2. Using utility commands
This chapter describes utility commands available to the DocuPrint NPS/IPS system administrator or operator. You use these commands to perform various tasks: eject floppies or CDs, provide information to remote access users, set feature licensing, and back up and restore site files. The Configure utility allows you to change parameters that are initially set during installation. The modem commands allow you to set up and disable the external modem used by remote service technicians.
General utility commands
The following general utility commands are available on the NPS/IPS.
Broadcast message to all execs
Use the Broadcast Message to All Execs command to immediately send a message to all users that are logged on to the printer controller. This can be useful when you need to perform system maintenance and wish to notify remote access users.
Access level Administrator
Syntax Broadcast Message to all execs
Arguments Enter the text message that you wish to broadcast.
Guide to Configuring and Managing the System 2-1

Using utility commands
Eject CDROM
Use the Eject CDROM command to eject a CD-ROM from the drive.
Access level Administrator
Syntax Eject CDROM
Arguments None
NOTE: If you need to use the UNIX procedure to mount a CD-ROM, refer to the “Using Wizard Mode or UNIX shell” chapter.
Eject Floppy command
Use the Eject Floppy command to eject a diskette from the diskette drive.
NOTE: Ultra 60 Controllers require you to use the button on the floppy drive to manually eject the diskette.
Access level Administrator
Syntax Eject Floppy
Arguments None
NOTE: If you need to use the UNIX procedure to mount a floppy, refer to the chapter “Using Wizard Mode or UNIX shell.”
Format Floppy command
Use the Format Floppy command to format a diskette in the diskette drive.
Access level Administrator
Syntax Format Floppy
Arguments None
2-2 Guide to Configuring and Managing the System

Using utility commands
Copy Documents to Floppy command
Use the Copy Documents to Floppy command to copy documents to a floppy diskette. To copy documents:
1. Enter stop printing.
2. Put a diskette into the diskette drive.
3. Enter copy documents to floppy.
See the syntax and arguments below.
4. Enter yes to confirm the document(s) to be copied and to confirm that the diskette is inserted into the diskette drive.
Any selected documents that have not been completely printed, canceled, or aborted are copied to the diskette in UNIX compressed bar format. A file name is generated for each document as a printerName concatenated with the docID and with a .document extension. An .attrs file is also written for each document. This is an ASCII file showing the document attributes as shown in Service Mode. One additional file named printerName.printerStatus is written to the diskette (an ASCII file of the printer status as shown in Service Mode).
NOTE: To list the content of the diskette after using the command, enter bar -tfZ /dev/fd0c in a UNIX shell window. Names that are listed are in relative paths. To copy the data from the diskette to a hard disk drive for further processing, enter bar -xvfZ /dev/fd0c. The files are stored in the current working directory.
Access level Administrator
Syntax Copy Documents to Floppy [<docID(s) | custom specification | all>]
Arguments The following arguments are available:
• <docID(s)>
The document ID for a specific document (or the range of IDs)
• <custom specification>
A custom specification such as sendername=name to copy all the documents with a sendername attribute that matches “name”
Guide to Configuring and Managing the System 2-3
Using utility commands
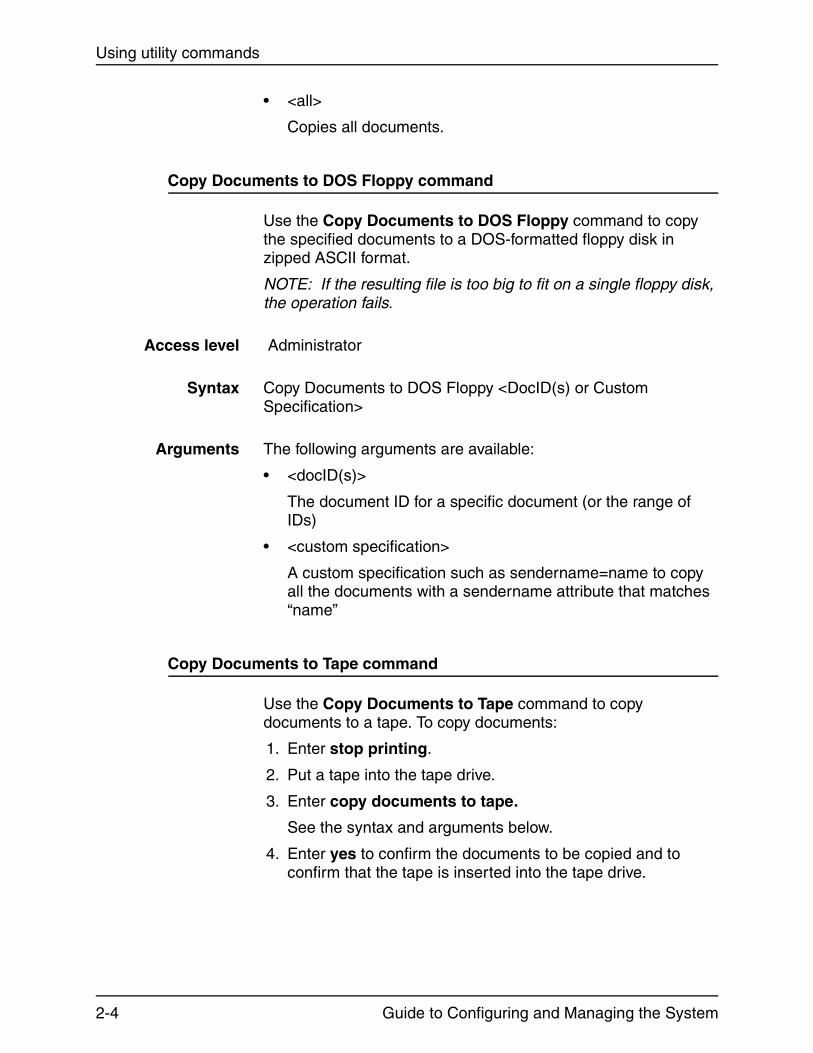
• <all>
Copies all documents.
Copy Documents to DOS Floppy command
Use the Copy Documents to DOS Floppy command to copy the specified documents to a DOS-formatted floppy disk in zipped ASCII format.
NOTE: If the resulting file is too big to fit on a single floppy disk, the operation fails.
Access level Administrator
Syntax Copy Documents to DOS Floppy <DocID(s) or Custom Specification>
Arguments The following arguments are available:
• <docID(s)>
The document ID for a specific document (or the range of IDs)
• <custom specification>
A custom specification such as sendername=name to copy all the documents with a sendername attribute that matches “name”
Copy Documents to Tape command
Use the Copy Documents to Tape command to copy documents to a tape. To copy documents:
1. Enter stop printing.
2. Put a tape into the tape drive.
3. Enter copy documents to tape.
See the syntax and arguments below.
4. Enter yes to confirm the documents to be copied and to confirm that the tape is inserted into the tape drive.
2-4 Guide to Configuring and Managing the System

Using utility commands
Any selected documents that have not been completely printed, canceled, or aborted are copied to the tape in UNIX compressed bar format. A file name is generated for each document as a printerName concatenated with the docID and with a .document extension. A .attrs file is also written for each document. This is an ASCII file showing the document attributes as shown in Service Mode. One additional file named printerName.printerStatus is written to the tape (an ASCII file of the printer status as shown in Service Mode).
NOTE: To list the content of the tape after using the command, enter bar -tfZ /dev/rmt/0 in a UNIX shell window. Names listed are in relative paths. To copy the data from the diskette to a hard drive for further processing, enter bar -xvfZ /dev/rmt/0. The files will be stored in the current working directory.
Access level Administrator
Syntax Copy Documents to Tape [<docID(s) | custom specification | all>]
Arguments The following arguments are available:
• <docID(s)>
The document ID for a specific document (or the range of IDs)
• <custom specification>
A custom specification such as sendername=name to copy all the documents with a sendername attribute that matches “name”
• <all>
Copies all documents.
Copy Documents to Disk command
Use the Copy Documents to Disk command to copy documents to the hard disk directory /var/tmp. To copy documents:
1. Enter stop printing.
2. Enter copy documents to disk.
See the syntax and arguments below.
3. Enter yes to confirm the documents to be copied.
Guide to Configuring and Managing the System 2-5
Using utility commands
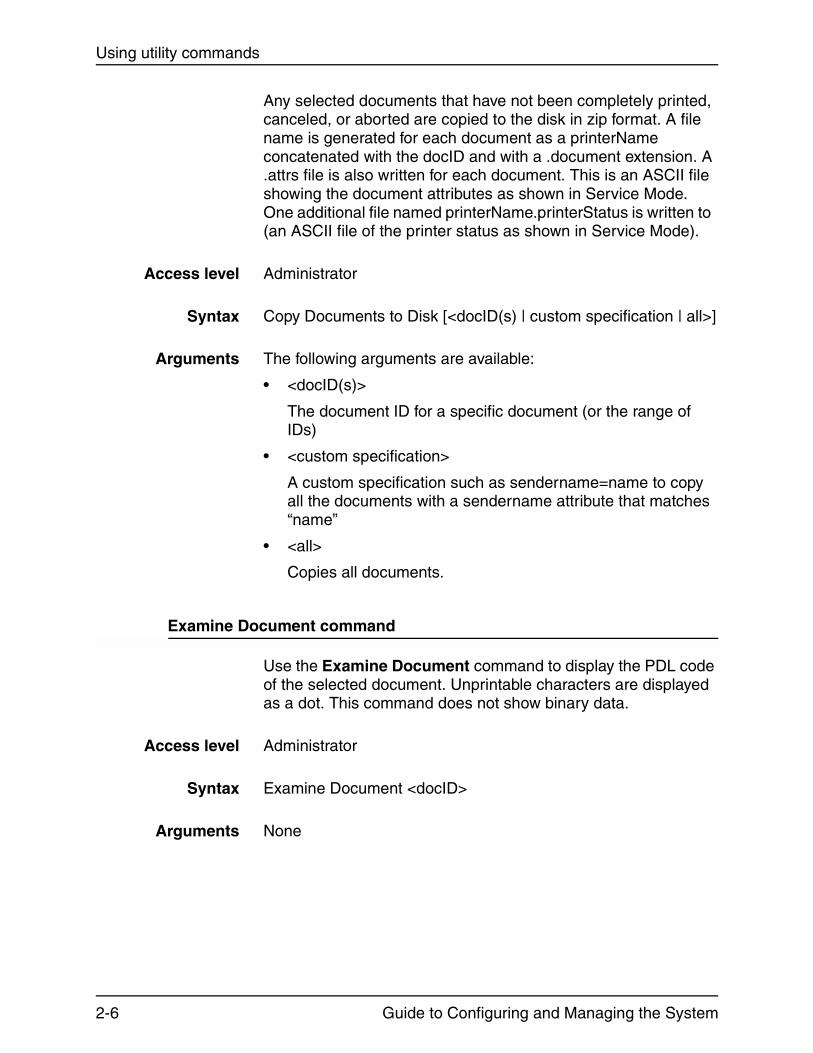
Any selected documents that have not been completely printed, canceled, or aborted are copied to the disk in zip format. A file name is generated for each document as a printerName concatenated with the docID and with a .document extension. A .attrs file is also written for each document. This is an ASCII file showing the document attributes as shown in Service Mode. One additional file named printerName.printerStatus is written to (an ASCII file of the printer status as shown in Service Mode).
Access level Administrator
Syntax Copy Documents to Disk [<docID(s) | custom specification | all>]
Arguments The following arguments are available:
• <docID(s)>
The document ID for a specific document (or the range of IDs)
• <custom specification>
A custom specification such as sendername=name to copy all the documents with a sendername attribute that matches “name”
• <all>
Copies all documents.
Examine Document command
Use the Examine Document command to display the PDL code of the selected document. Unprintable characters are displayed as a dot. This command does not show binary data.
Access level Administrator
Syntax Examine Document <docID>
Arguments None
2-6 Guide to Configuring and Managing the System

Using utility commands
Install Remote Update command
If your printer controller has a modem, the Xerox service technician can transfer a software update to your system from a remote site. Use the Install Remote Update command to initiate the installation process.
Access Level Administrator
Syntax Install Remote Update
Arguments None
NOTE: The UNIX root password is required to perform the update.
Install Update from Floppy command
Use the Install Update from Floppy command to install software upgrades from diskettes.
Access level Administrator
Syntax Install Update From Floppy
Arguments None
NOTE: The UNIX root password is required to perform the update.
Install Update from CDROM command
Use the Install Update from CDROM command to install software upgrades from CD-ROMs.
Access level Administrator
Syntax Install Update from CDROM
Arguments None
NOTE: The UNIX root password is required to perform the update.
Guide to Configuring and Managing the System 2-7

Using utility commands
List Files on CDROM command
Use the List Files on CDROM command to list files on the CDROM in the CDROM drive whose names match the specified pattern.
Access level Administrator
Syntax List Files on CDROM <File(s)>
Arguments <File(s)>
Specifies the name of the document you want to list.
Print Documents from CDROM command
Use the Print Documents from CDROM command to submit a print job for the document or documents in the specified file or files stored on the CDROM, using the specified job attributes.
Access level Administrator
Syntax Print Documents from CDROM <file(s)> <copies> <plex> <media> <VP>
Arguments The following arguments are available:
• <file(s)>
Specifies the name of the document you want to print.
• <copies>
Specifies the number of copies to print.
• <plex>
Specifies simplex, duplex, or tumbleduplex.
• <media>
Specifies the media in the format size:type:color:weight.
• <VP>
Specifies the name of the virtual printer to use.
2-8 Guide to Configuring and Managing the System
Using utility commands
Print Documents from Floppy command
Use the Print Documents from Floppy command to print a PCL, PostScript, or ASCII file that is stored on a DOS-formatted diskette.
Access level Administrator
Syntax Print Documents from Floppy <file(s)> <copies> <plex> <media> <VP>
Arguments The following arguments are available:
• <file(s)>
Specifies the name of the document you want to print.
• <copies>
Specifies the number of copies to print.
• <plex>
Specifies simplex, duplex, or tumbleduplex.
• <media>
Specifies the media in the format size:type:color:weight.
• <VP>
Specifies the name of the virtual printer to use.
NOTE: This command cannot be used to print a document that was copied to the diskette with the Copy Document to Floppy or Copy Document to DOS Floppy commands.
Backup Site Files command
Use the Backup Site Files command to store a copy of the files that may have been customized for your local site on diskette or tape. The files backed up include /var/db/forms and /usr/xgfc/. These directories are used for Decomposition Service forms and VIPP files, respectively.
Access level Administrator
Syntax Backup Site Files
Arguments None
Guide to Configuring and Managing the System 2-9

Using utility commands
CAUTION
The Backup Site Files command does not save unique customer files such as fonts. Use the UNIX tar command to back up these files. Do not use the PCFS commands, because an extension with more than three characters can result in overwriting your existing files.
Restore Site Files command
Use the Restore Site Files command to restore site files from the diskette or tape that you created using the Backup Site Files command.
Access level Administrator
Syntax Restore Site Files
Arguments None
NOTE: The system must be restarted for restored files to be recognized, even though restored items may appear active.
Backup Xerox Files command
Use the Backup Xerox Files command to store a copy of your Xerox files on diskette or tape. The files backed up do not include /var/db/forms and /usr/xgfc/.
Access level Administrator
Syntax Backup Xerox Files
Arguments None
2-10 Guide to Configuring and Managing the System
Using utility commands
CAUTION
The Backup Xerox Files command does not save unique customer files such as fonts. Use the UNIX tar command to back up these files. Do not use the PCFS commands, because an extension with more than three characters can result in overwriting your existing files.
Restore Xerox Files command
Use the Restore Xerox Files command to restore Xerox files from the diskette or tape that you created using the Backup Xerox Files command.
Access level Administrator
Syntax Restore Xerox Files
Arguments None
NOTE: The system must be restarted for restored files to be recognized, even though it may appear that restored items are active.
Backup Virtual Printers List command
Use the Backup Virtual Printers List command to store a copy of your virtual printer configuration on diskette or tape.
Access level Administrator
Syntax Backup Virtual Printers List
Arguments None
Restore Virtual Printers List command
Use the Restore Virtual Printers List command to restore your virtual printer configuration from the diskette or tape that you created using the Backup Virtual Printers List command.
Access level Administrator
Guide to Configuring and Managing the System 2-11

Using utility commands
Syntax Restore Virtual Printers List
Arguments None
Set Status Message command
Use the Set Status Message command to display a message to users each time they access the controller remotely via telnet, or when they use the Show Status command.
Access level Administrator or operator
Syntax Set Status Message <Message>
Arguments <Message>
Enter status message to be displayed to users at login. The message cannot contain line feeds or carriage returns, but can contain quotation marks.
NOTE: The command is not available via remote telnet access. It must be entered at the printer controller.
Reset Job IDs command
The Reset Job IDs command resets the starting point for new job identifiers to the lowest available number.
The highest active or undumped job ID + 1 is the lowest available number.
NOTE: To reset the job ID starting number to 1, you must make sure there are no active jobs, then dump accounting before using this command.
Access level Administrator
Syntax Reset Job IDs
Arguments None
2-12 Guide to Configuring and Managing the System
Using utility commands
Show Host ID command
The Show Host ID command shows the host ID in hexadecimal format. This may be needed when installing licensed software packages such as VIPP.
Access level Administrator
Syntax Show HostID
Arguments None
Managing IPDS tracing
This section describes the procedures you use to collect a trace of an IPDS job. In general, the service representative performs this function. However, you may be asked to perform this task in preparation for a service call.
Trace files are automatically placed in the directory /var/db/ipdstraces.
Show IPDS Tracing command
Use the Show IPDS Tracing command to identify whether IPDS tracing is on or off, and to view the most recent trace output file.
Access level Administrator
Syntax Show IPDS Tracing
Arguments None
Start IPDS Tracing command
Use the Start IPDS Tracing command to begin tracing IPDS jobs, writing the trace to a specified file.
NOTE: You have the option of overwriting an existing file.
Access level Administrator
Guide to Configuring and Managing the System 2-13
Using utility commands
Syntax Start IPDS Tracing <FileName>
Arguments FileName
Specifies the name of the file that the trace is written to.
Stop IPDS Tracing command
Use Stop IPDS Tracing end tracing for IPDS jobs, and showing the most recent output file name.
Access level Administrator
Syntax Start IPDS Tracing
Arguments None
List IPDS Trace Files command
Use List IPDS Trace Files to list all available IPDS trace files.
Access level Administrator
Syntax List IPDS Trace Files
Arguments None
Delete IPDS Trace Files command
Use Delete IPDS Trace Files deletes the IPDS trace files whose names match the specified pattern after confirmation for each file.
Access level Administrator
Syntax Delete IPDS Trace Files <pattern>
Arguments pattern
2-14 Guide to Configuring and Managing the System
Using utility commands
Indicates the pattern of trace files you want to delete. The asterisk (*) character matches any string of characters. You can enter * to delete all trace files, or <pattern>to delete all trace files of the specified pattern.
DocuPrint NPS/IPS software licensing
Your DocuPrint NPS/IPS system utilizes a software licensing string to enable the NPS/IPS printing function. If software is not licensed, queueing is disabled, and the system does not receive jobs for printing.
Other software packages also require licensing. VIPP software requires licensing for production mode. Diagnostic software for the DocuPrint 155/180 NPS/IPS requires an enabling license. If you do not have the required license, an error message is displayed and you are unable to use the software.
The Show License Status command displays the number of days that remain until the licensed software expires. If a license has not been installed, or is due to expire in 30 days, a message is displayed when you use the Show Status command using Administrator privilege.
NOTE: If you have a question about license expiration dates, contact your Xerox representative.
Two commands are available to facilitate licensing. Use the Install Feature License command if you plan to install the license by entering information at the user interface. Use the Install FlexLicense from Floppy command if you plan to install the license by using licensing information on a key diskette.
NOTE: In most cases, the licensing procedure is performed by a Xerox representative. If you plan to assist with loading, the license information will be provided to you by one of the following methods: e-mail, fax, telephone, or floppy.
Guide to Configuring and Managing the System 2-15

Using utility commands
Install Feature License command
Use the Install Feature License command to install the license by entering information at the user interface.
Access level Administrator
Syntax Install Feature License <Name> <Expiration Date> <Key> <IOT Serial No> <HostID>
Arguments The following arguments are available:
• <Name>
Name of the package to be licensed. For example, XRX_iotdiag_basic unlocks the basic diagnostics package for the Model 180. The license name is case-sensitive and must be entered exactly as provided.
• <Expiration Date>
Date the license for your package expires. For example, 07-Mar-2023.
• <Key>
Alphanumeric string used to unlock the package. This number is unique for your system host ID. An example of the key is: XX64FA01XF3EC528X917
• <IOT Serial No>
Serial number for your printer (IOT). Used only for diagnostic licensing, but not for NPS/IPS or VIPP software licensing. An example of the IOT serial number is:7800205. The number of digits in the serial number varies depending on the country.
• <HostID>
Host ID for your system in hex, as displayed using the Show HostID command. An example of a Host ID number is 8088871e. The system inserts this number automatically.
2-16 Guide to Configuring and Managing the System
Using utility commands
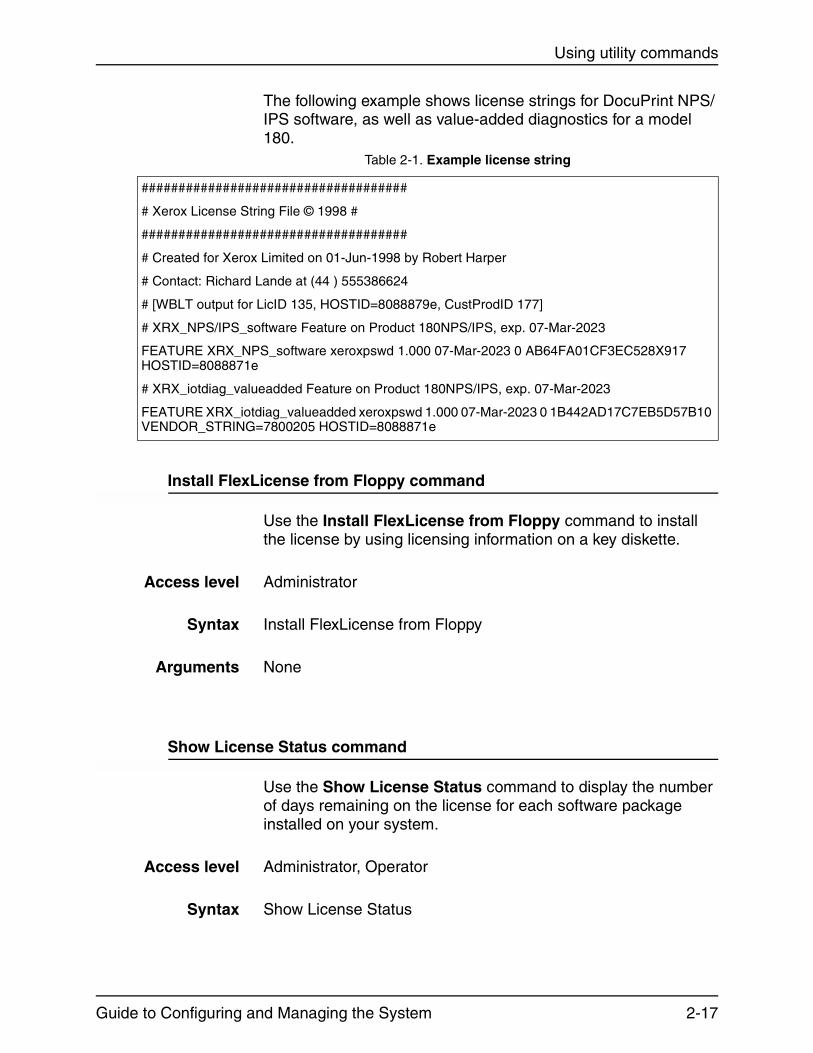
The following example shows license strings for DocuPrint NPS/IPS software, as well as value-added diagnostics for a model 180.
Install FlexLicense from Floppy command
Use the Install FlexLicense from Floppy command to install the license by using licensing information on a key diskette.
Access level Administrator
Syntax Install FlexLicense from Floppy
Arguments None
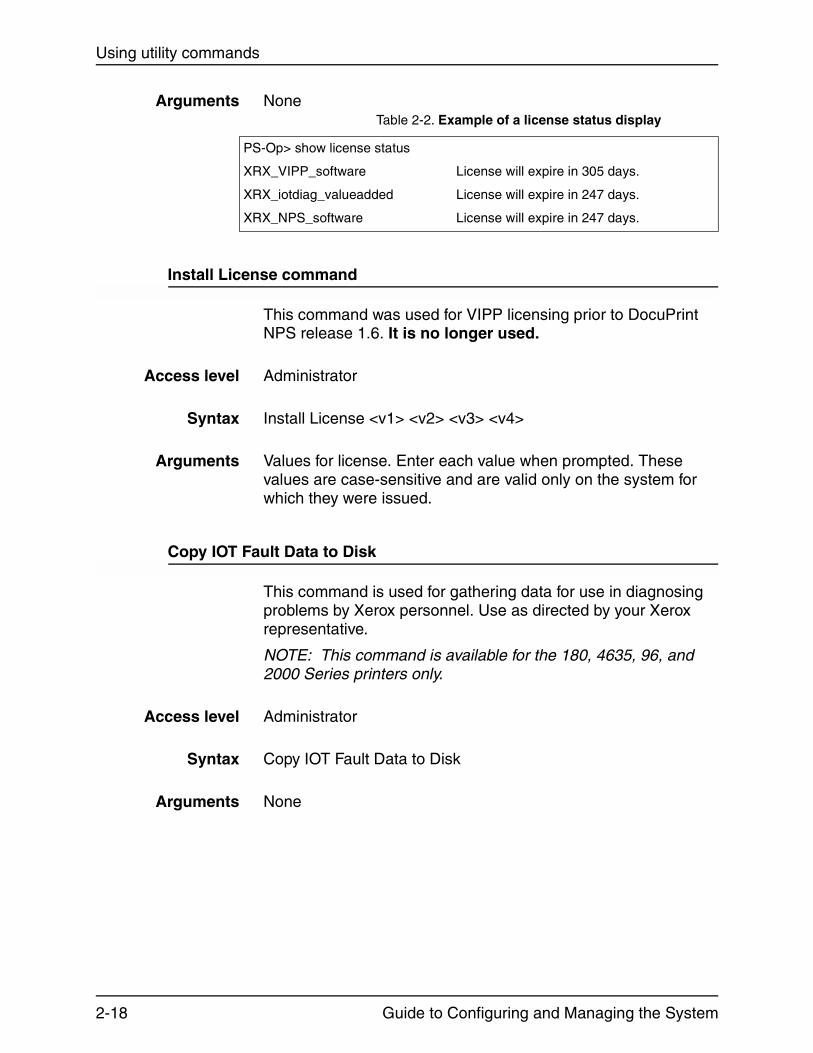
Show License Status command
Use the Show License Status command to display the number of days remaining on the license for each software package installed on your system.
Access level Administrator, Operator
Syntax Show License Status
Table 2-1. Example license string
####################################
# Xerox License String File © 1998 #
####################################
# Created for Xerox Limited on 01-Jun-1998 by Robert Harper
# Contact: Richard Lande at (44 ) 555386624
# [WBLT output for LicID 135, HOSTID=8088879e, CustProdID 177]
# XRX_NPS/IPS_software Feature on Product 180NPS/IPS, exp. 07-Mar-2023
FEATURE XRX_NPS_software xeroxpswd 1.000 07-Mar-2023 0 AB64FA01CF3EC528X917 HOSTID=8088871e
# XRX_iotdiag_valueadded Feature on Product 180NPS/IPS, exp. 07-Mar-2023
FEATURE XRX_iotdiag_valueadded xeroxpswd 1.000 07-Mar-2023 0 1B442AD17C7EB5D57B10 VENDOR_STRING=7800205 HOSTID=8088871e
Guide to Configuring and Managing the System 2-17
Using utility commands
Arguments None
Install License command
This command was used for VIPP licensing prior to DocuPrint NPS release 1.6. It is no longer used.
Access level Administrator
Syntax Install License <v1> <v2> <v3> <v4>
Arguments Values for license. Enter each value when prompted. These values are case-sensitive and are valid only on the system for which they were issued.
Copy IOT Fault Data to Disk
This command is used for gathering data for use in diagnosing problems by Xerox personnel. Use as directed by your Xerox representative.
NOTE: This command is available for the 180, 4635, 96, and 2000 Series printers only.
Access level Administrator
Syntax Copy IOT Fault Data to Disk
Arguments None
Table 2-2. Example of a license status display
PS-Op> show license status
XRX_VIPP_software
XRX_iotdiag_valueadded
XRX_NPS_software
License will expire in 305 days.
License will expire in 247 days.
License will expire in 247 days.
2-18 Guide to Configuring and Managing the System

Using utility commands
Configure utility
The Configure utility allows you to review and update the configuration of your DocuPrint NPS/IPS. Most configuration values supplied during installation can be viewed, printed, and modified long after the installation is complete. Configuration values can also be saved on a diskette for later restoration. When you restore values, the system is automatically reconfigured based on the restored values.
You access the Configure utility at the PS-Admin> prompt Configure. You are prompted for the appropriate password.
NOTE: You can also access this utility in Wizard Mode or from the UNIX shell when you enter Configure.
Access level Administrator
Syntax Configure
You are prompted to enter the UNIX Superuser password.
Arguments The following list of options appears. Enter your selection at the prompt.
• Print report of installation questions and answers for this DocuPrint.
• Print report of all configuration parameter values.
• Review standard installation questions and change answers to some or all.
• Review key system parameters and change values.
• View and change individual parameter values.
• Re-initialize some or all of the DocuPrint software.
• Back up current configuration values.
• Restore configuration values from previous backup.
• Exit the configuration program.
When you exit the Configure utility, you must restart the system.
Guide to Configuring and Managing the System 2-19
Using utility commands
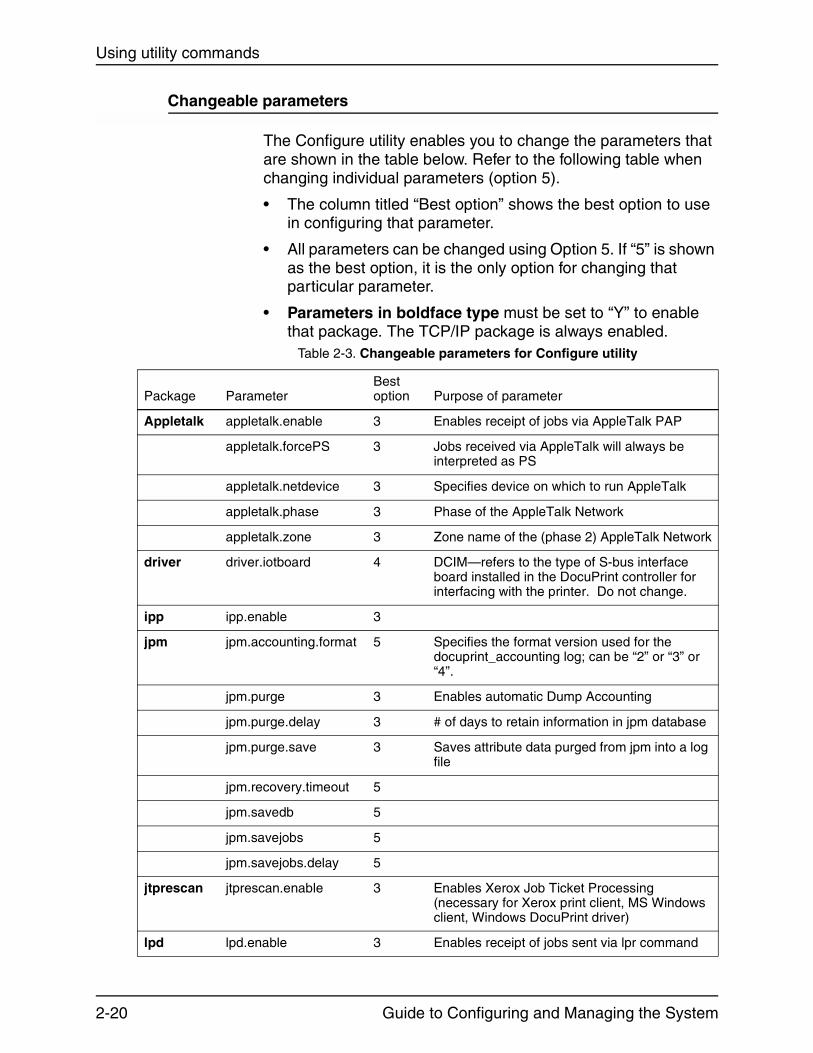
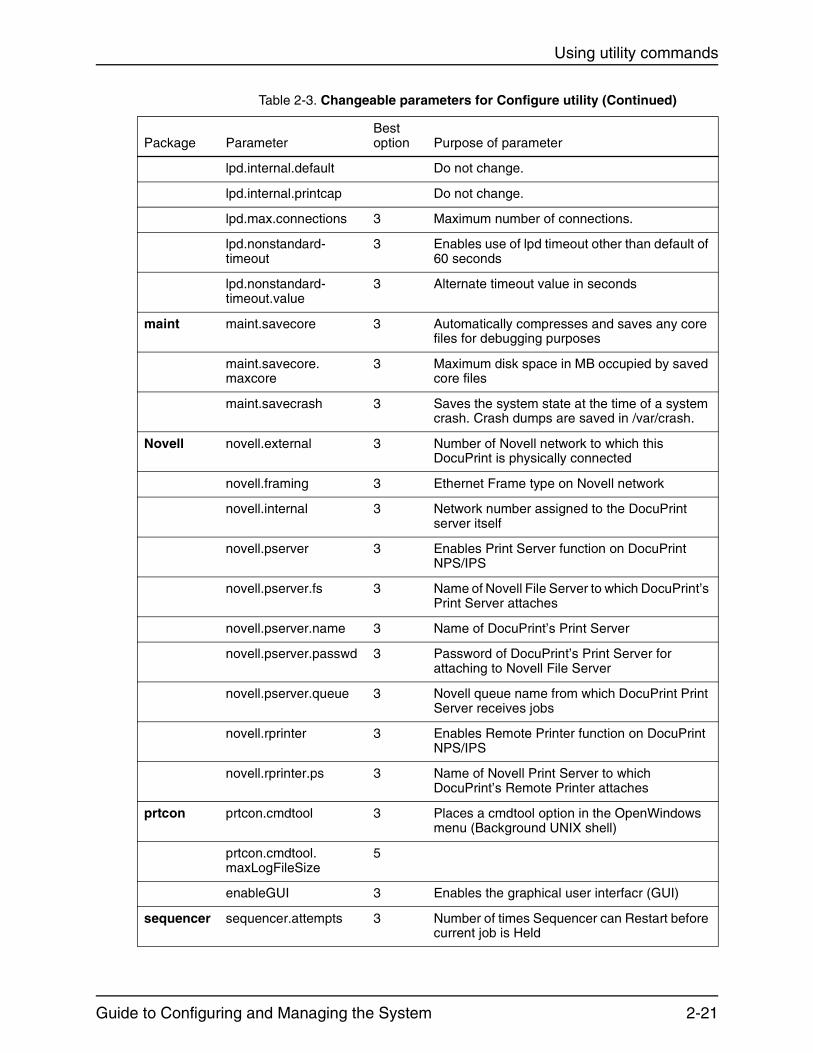
Changeable parameters
The Configure utility enables you to change the parameters that are shown in the table below. Refer to the following table when changing individual parameters (option 5).
• The column titled “Best option” shows the best option to use in configuring that parameter.
• All parameters can be changed using Option 5. If “5” is shown as the best option, it is the only option for changing that particular parameter.
• Parameters in boldface type must be set to “Y” to enable that package. The TCP/IP package is always enabled.
Table 2-3. Changeable parameters for Configure utility
Package ParameterBest option Purpose of parameter
Appletalk appletalk.enable 3 Enables receipt of jobs via AppleTalk PAP
appletalk.forcePS 3 Jobs received via AppleTalk will always be interpreted as PS
appletalk.netdevice 3 Specifies device on which to run AppleTalk
appletalk.phase 3 Phase of the AppleTalk Network
appletalk.zone 3 Zone name of the (phase 2) AppleTalk Network
driver driver.iotboard 4 DCIM—refers to the type of S-bus interface board installed in the DocuPrint controller for interfacing with the printer. Do not change.
ipp ipp.enable 3
jpm jpm.accounting.format 5 Specifies the format version used for the docuprint_accounting log; can be “2” or “3” or “4”.
jpm.purge 3 Enables automatic Dump Accounting
jpm.purge.delay 3 # of days to retain information in jpm database
jpm.purge.save 3 Saves attribute data purged from jpm into a log file
jpm.recovery.timeout 5
jpm.savedb 5
jpm.savejobs 5
jpm.savejobs.delay 5
jtprescan jtprescan.enable 3 Enables Xerox Job Ticket Processing (necessary for Xerox print client, MS Windows client, Windows DocuPrint driver)
lpd lpd.enable 3 Enables receipt of jobs sent via lpr command
2-20 Guide to Configuring and Managing the System
Using utility commands
lpd.internal.default Do not change.
lpd.internal.printcap Do not change.
lpd.max.connections 3 Maximum number of connections.
lpd.nonstandard-timeout
3 Enables use of lpd timeout other than default of 60 seconds
lpd.nonstandard-timeout.value
3 Alternate timeout value in seconds
maint maint.savecore 3 Automatically compresses and saves any core files for debugging purposes
maint.savecore.maxcore
3 Maximum disk space in MB occupied by saved core files
maint.savecrash 3 Saves the system state at the time of a system crash. Crash dumps are saved in /var/crash.
Novell novell.external 3 Number of Novell network to which this DocuPrint is physically connected
novell.framing 3 Ethernet Frame type on Novell network
novell.internal 3 Network number assigned to the DocuPrint server itself
novell.pserver 3 Enables Print Server function on DocuPrint NPS/IPS
novell.pserver.fs 3 Name of Novell File Server to which DocuPrint’s Print Server attaches
novell.pserver.name 3 Name of DocuPrint’s Print Server
novell.pserver.passwd 3 Password of DocuPrint’s Print Server for attaching to Novell File Server
novell.pserver.queue 3 Novell queue name from which DocuPrint Print Server receives jobs
novell.rprinter 3 Enables Remote Printer function on DocuPrint NPS/IPS
novell.rprinter.ps 3 Name of Novell Print Server to which DocuPrint’s Remote Printer attaches
prtcon prtcon.cmdtool 3 Places a cmdtool option in the OpenWindows menu (Background UNIX shell)
prtcon.cmdtool.maxLogFileSize
5
enableGUI 3 Enables the graphical user interfacr (GUI)
sequencer sequencer.attempts 3 Number of times Sequencer can Restart before current job is Held
Table 2-3. Changeable parameters for Configure utility (Continued)
Package ParameterBest option Purpose of parameter
Guide to Configuring and Managing the System 2-21

Using utility commands
sequencer.reserve-pages
3 Size in MB of /var/db/reserve_pages
snmp snmp.enable 3 Enables SNMP agent support
snmp.operator 5
snmp.service 5
snmp.trapv1 5
snmp.trapv2 5
spd spd.enable 3 Enables socket/port printing.
spd.nonstandard-timeout
3
spd.nonstandard-timeout.value
3
spd.port1.printer 3
spd.port1.value 3
spd.port2.enable 3
spd.port2.printer 3
spd.port2.value 3
spd.port3.enable 3
spd.port3.printer 3
spd.port3.value 3
tcpip tcpip.dns 5 Enables use of Domain Name System
tcpip.enablemulti-devices
3 Enables TCP/IP on multiple devices
tcpip.extradevices 3 Specifies devices for the tcpip.extradevices parameter
tcpip.ftp 3 Enables use of File Transfer Protocol to the DocuPrint Server (necessary for downloading new Xerox print client and for DigiPath.)
tcpip.neton 5 Enables general TCP/IP access to the DocuPrint NPS/IPS (weakens security; not recommended, incompatible with xclient)
tcpip.ntp 5 Enables use of Network Time Protocol
tcpip.router 3 IP address of local TCP/IP router
webui webui.enable 3 Enables web UI.
xclient xclient.enable 3 Enables use of the DocuPrint print client
Table 2-3. Changeable parameters for Configure utility (Continued)
Package ParameterBest option Purpose of parameter
2-22 Guide to Configuring and Managing the System

Using utility commands
Options
The Configure utility provides the following options:
Printing Configuration Reports: Options 1 and 2
Options 1 and 2 print two different types of configuration reports:
• Option 1: Prints a report of the routine installation questions, with the answers given.
• Option 2: Prints a report of all the configuration parameters with their names and values.
xgf xgf.forceon Do not change.
xipp xipp.enable 3 Enables special XIPP prescan filter for use with Xerox Documents on Demand (XDOD)
system ACOPaper 5 ACO market region can use either US or metric sized paper
FontDisk 4 Places /imagerfonts on this disk number
FormsDisk 4 Places /var/db/forms and the VIPP (XGF) customer-installed files in /usr/xgf on this disk number
HostName 4 TCP/IP hostname
IOT 4 4050, 4090, 4850, 4890, DP96, 4635, 4180, 92C (Changing this parameter is not supported.)
IPAddress 4 IP Address of DocuPrint server
MarketRegion 4 USCO, XCI, RX, or ACO
NetDevice 4 Ethernet=le0, le1, le2; Token Ring=tr0, tr1, tr2; 100MB Ethernet=hme0, hme1, hme2; Fiber Optic FDDI=nf0, nf1, nf2
Netmask TCP/IP netmask
PrinterName 4 Default PrinterName
ReservePagesDisk 4 Places /var/db/reserve_pages on this disk number
SpoolDisk 4 Places /var/spool on this disk number
TimeZone 4 Timezone from /usr/share/lib/zoneinfo
Table 2-3. Changeable parameters for Configure utility (Continued)
Package ParameterBest option Purpose of parameter
Guide to Configuring and Managing the System 2-23
Using utility commands
The parameters are grouped by package (a package is a named piece of the DocuPrint NPS/IPS software). The parameters at the end of the list are in a special category called “System Parameters.” These are parameters of the entire system, such as the printer type. Each parameter in this report has a name (such as FontDisk or tcpip.ftp) that you use if you want to change the value with Option 5. Each value is enclosed in double-quotation marks. A series of pound signs appears instead of the password values.
When you select Option 1 or 2, Configure prepares a report and submits it to the JPM for printing. At least one tray must also be set, and queueing and printing must be turned on in order for a report to print. The report is delivered to the sample tray. If queueing is turned off, you receive a cryptic error message instead.
Reviewing Questions and Answers: Options 3 and 4
Routine configuration values are supplied in answer to questions posed during the installation process. If you decide to change one of the values on the report printed by Option 1, use Option 3 or 4 as follows:
• Option 3: Review or change standard installation questions. When you choose this option, you are asked if you want to review all the questions. If you enter n, you will be asked for the name of a package (a package is a named piece of the DocuPrint software) from a list. For example, select Novell to review only the Novell questions. Each question is presented along with the current answer in brackets: [Y].
– To keep the current answer, select <ENTER>. If, however, you have an Appletalk Phase 2 network and you want to retain the old zone name, you must retype it when you are prompted for an AppleTalk zone name. Otherwise, you produce an empty zone name.
– To change the value, enter a new answer. You can enter ? for helpful information about the parameter. If you make any changes, you are presented with the list of affected packages and asked to confirm the changes. If you enter y, the system is reconfigured and you are asked to reboot.
• Option 4: Review or change key system parameters. When you choose this option, you are presented with the questions for key system parameters such as the IP address. Each question is presented along with the current answer in brackets: [Y].
2-24 Guide to Configuring and Managing the System

Using utility commands
• To keep the current answer, press <ENTER>.
• To change the value, enter a new answer. Enter ? for helpful information about the parameter. If you make any changes, you are presented with the list of affected packages and asked to confirm the changes. If you enter y, the system is reconfigured and you are asked to reboot.
Editing Individual Parameters: Option 5
All parameters can be changed using Option 5. (Routine parameters can be changed by using Options 3 or 4.)
When you select Option 5 you see a list of parameter names and values, grouped by package name as in the report printed by Option 2. Like the printed report, a series of pound signs appear instead of the password values. A command prompt displays after the names and values are displayed. You can enter any of the following commands:
? Displays the list of commands.
D Redisplays the list of all parameters and values.
DP Displays the list of parameters and values for a particular package only.
M Modifies the value of any parameter.
H Displays helpful information about any parameter.
C Commits any changes made to values.
Q (Quit.) Exits the editing parameters function.
The following guidelines apply:
• You can change the value of any number of parameters, then commit all the changes at once. The relevant parts of the system are reconfigured when you commit the changes.
• The display produced by the D or DP commands places an asterisk next to values that have been changed.
• When you enter the H or M commands, you are asked for a parameter name. Enter the name exactly as it appears in the list.
Guide to Configuring and Managing the System 2-25

Using utility commands
• Most parameter names begin with the name of a package, and many have multiple parts separated by periods (such as tcpip.ftp or maint.savecore.maxcore).
• After you have given a value for a parameter, you may be prompted for values that are needed based on the value that was most recently supplied.
• Not all of the parameters are useful. Some parameters may not have any effect unless another parameter is set to a particular value (for example, the Novell parameters do not have any effect unless novell.rprinter or novell.pserver is set to “Y”).
CAUTION
Some parameters may have harmful effects if certain steps are not taken. Read any instructions that are presented very carefully. Note that the IOT type cannot be changed.
Reinitializing Software: Option 6
If something on the DocuPrint NPS/IPS system (for instance, the Job Pool Manager database) becomes corrupted in ways that the automatic repair software cannot detect or process, you may be able to repair the problem by reinitializing the software.
CAUTION
Reinitializing the software can result in the permanent loss of customer data such as data in the Job Pool Manager, virtual printer definitions, option values, and so forth. Do not use the reinitialize option without careful consideration. Try rebooting to verify that the problem still exists before you reinitialize.
NOTE: If you really do have a software corruption problem, reinitializing may not repair it. Some problems can be repaired only by reinstalling the software directly from the original media (CD-ROM).
To reinitialize the software:
1. Select Option 6.
2. To reinitialize just one package, enter n (the default).
3. Select the name of a package from the list presented, or select <ENTER> to return to the menu.
2-26 Guide to Configuring and Managing the System
Using utility commands
Saving and Restoring Values: Options 7 and 8
To back up the values of the configuration parameters, you must have a formatted diskette available to dedicate only to the backup. It is a good idea to keep copies of the printed reports along with the backup diskette.
To create a backup diskette, perform the following:
1. Insert the diskette.
2. Select Option 7 and follow the prompts.
To restore from a backup diskette, perform the following:
1. Insert the diskette.
2. Select Option 8 and follow the prompts.
After the data are retrieved from the diskette, the system is reconfigured based on the restored values.
• Reboot the system.
• To leave Configure, select Option 9 from the menu. If you selected Option 5, enter Q to return to the main menu, then select Option 9.
NOTE: Whenever the system is reconfigured, Configure terminates with a message that instructs you to reboot. Be sure to restart the system as directed. .
Configure Utility example for changing the hostname
To change the TCP/IP hostname for your system:
1. At the PS-Admin> prompt, Enter stop queueing and wait for any print jobs in progress to complete.
2. Enter Configure.
3. Enter the Superuser password at the prompt.
4. Select option 4.
5. Select enter for any question that is not about the hostname to retain the previous answer.
6. Enter a new host name when prompted.
7. Enter y to confirm the change and reconfigure the system.
8. Enter restart system.
Guide to Configuring and Managing the System 2-27
Using utility commands
Setting up TCP/IP Socket Printing
Socket Printing allows you to set up three separate ports on the DocuPrint NPS/IPS system (for example, 9100, 9101, and 9102). Use the Configuration utility spd package to define the ports. Each port can be configured to submit jobs to the default printer or the user can specify a specific virtual printer. A non-standard timeout value may be specified if required, or if problems that are timeout related occur on the user system.
Print submissions to Socket Printing may be made by using Windows 2000 Network printing, a port 9100 submission tool, or other methods that comply with the Port 9100/Socket Printing TCP standards. The print data may be of any standard type recognized by the system including, PostScript, PCL, and plain text. Once a connection is established to the printer, all data received is considered part of the print data. The job will be submitted after the EOF or connection is closed on the socket. A print job is opened at the controller when a connection is established. If the connection times out, the job will be aborted, but a Job ID will already have been assigned.
Once a connection is established a message is posted to the DocuPrint log with the connection details, including the host IP address and the virtual printer the job will be submitted to on the DocuPrint system. No real-time job error data will be returned to the submitting host about the job.
NOTE: Printing IPDS jobs via socket is not supported.
Recovering the Job Pool Manager database
The Job Pool Manager software manages the database for the jobs. If you see any of the following messages, the database may have become corrupt:
• Message in the DocuPrint Print Service window, after you enter the List Documents command:
***RPC error SunRPCBinding error contacting Job Pool Manager: requested service not available
• Message in the Printing Activity Log Window:
***Error: SunRPCBinding.Error[requested service not available]
• Messages in the log, /var/log/DocuPrint:
2-28 Guide to Configuring and Managing the System

Using utility commands
...ALERT Job Pool Manager: Unrecoverable Database error...
The Job Pool Manager automatically recovers by replacing the corrupted database with a new one. After the recovery, execute the Set Tray and Start Queueing commands, even if the Show Status command indicates the tray setting is normal.
If the Job Pool Manager cannot successfully recover, you can follow these steps to recover the database:
1. At the PS-admin> prompt in the DocuPrint Print Service window, enter Configure.
2. Enter the Superuser password when prompted.
3. Select option 6.
4. Enter n when prompted in order not to initialize all values.
5. Enter jpm when prompted for which package.
6. Enter Y when prompted “Are you sure you want to re-initialize ’jpm’?”
7. Enter restart system.
Enabling and disabling remote service
If your site is set up to use the external modem for service by remote technicians, you need to enable the modem so that the technician can dial into your system. Prior to enabling the modem, be sure to use the Stop All command so that printing and queueing are stopped during the remote service session.
When the remote service session is complete, you can disable the modem and enter the Start All command to resume printing and queueing.
If security is a concern, the modem can be turned off and the cable can be physically disconnected from the system when it is not being used.
NOTE: Depending on the commands that the technician uses, the printer may start up during the remote service session. You should not attempt to operate the system or perform any tasks at the printer during the remote service session. Ensure that everyone working in the printer area knows that the system is undergoing service and that they should not attempt to work with the printer.
Guide to Configuring and Managing the System 2-29

Using utility commands
Enable modem command
After you use the Stop All command to stop printing and queueing, use the Enable Modem command to enable the technician to dial into your system.
NOTE: You may need to physically connect the modem cable and power on the modem prior to enabling it. Connect the modem cable to the A port on the back of the processor.
Ensure that the telephone line is connected to the modem and to the telephone jack.
The modem power cable must be connected to a power outlet and the modem must be powered on.
Access level Administrator
Syntax Enable modem
You are prompted to enter the UNIX root password.
Arguments None
Modem switchsettings
On the bottom of the modem are DIP switches that must be properly set for the modem to function. The recommended settings for the US Robotics Courier V.Everything modem are:
Table 2-4. Modem DIP switch settings
Switch Setting Position
1 OFF UP
2 OFF UP
3 ON DOWN
4 OFF UP
5 OFF UP
6 OFF UP
7 OFF UP
8 ON DOWN
9 ON DOWN
10 OFF UP
2-30 Guide to Configuring and Managing the System

Using utility commands
Disable modem command
Use the Disable Modem command to disable port A for incoming calls. This command terminates the existing modem connection and refuses any future connection. After you use the Disable Modem command, use the Start All command to start printing and queueing.
Access level Administrator
Syntax Disable Modem
You will be prompted to enter the UNIX root password.
Arguments None
NOTE: If it is the policy at your site to disconnect the modem for security reasons, power off the modem and, if required, physically disconnect the modem cable from your system once the remote session is complete.
Enable Remote Shell command
If the Xerox service technician requires access to the UNIX shell on your printer controller while servicing it using the modem, you need to enter this command.
Access level Administrator
Syntax Enable Remote Shell
You are prompted to enter the UNIX root password.
Arguments None
Guide to Configuring and Managing the System 2-31

Using utility commands
CAUTION
Do not use this command unless directed to do so by a Xerox service technician. It allows access to your system software.
Disable Remote Shell command
Use this command to disable access to the UNIX shell once the Xerox service technician has completed the remote service session.
Access level Administrator
Syntax Disable Remote Shell
You are prompted to enter the UNIX root password.
Arguments None
2-32 Guide to Configuring and Managing the System

3. Starting and stopping the system
This chapter describes how to start and stop your DocuPrint NPS/IPS printing system. It addresses the proper methods of powering the system on and off, starting and stopping print jobs, shutting down the system, and dealing with power failures.
If you have a DocuPrint EPS system with the NPS/IPS extension software, and you want to switch between EPS and NPS/IPS, refer to the DocuPrint 2000 Series EPS NPS/IPS Extension Operations Guide.
Powering on the system
Before you power on the system, ensure the following has been completed:
• The printer controller and monitor are connected to dedicated power receptacles.
• The printer cable is connected securely to the connector on the back of the printer controller. If the cable is not connected, make sure the printer and printer controller are powered off. Then connect the cable.
CAUTION
Do not connect the printer cable to the printer controller when either the printer controller or the printer is powered on; you could destroy the interface card in the printer controller.
NOTE: When you restart the system, the software and printer may not be communicating properly. When you enter Show Status, the message "No valid IOT status is available" displays, while the printer itself may display a "Ready to print" message. In this case, you should restart both the printer and the controller.
Guide to Configuring and Managing the System 3-1

Starting and stopping the system
To power on the printer controller:
1. Power on the monitor.
2. Power on the printer controller switch located on the back of the CPU.
NOTE: You should not boot or restart the system unless it is connected to the printer that is powered on with the controller. If you do, tray settings will be lost.
After you turn the printer controller switch to On, the Power On Self Test (POST) runs.The keyboard LEDs flash, and then the boot process begins.
If the printer power switch is in the on position, the printer controller controls when the printer is powered on during the boot process.
CAUTION
Do not perform any actions at the printer until the boot process completes and the DocuPrint Print Service window is displayed.
After the boot process is complete, the DocuPrint user interface (UI) appears.
NOTE: On some types of controller, it takes about a minute before the monitor turns on. Do not restart the boot process during this time.
3-2 Guide to Configuring and Managing the System

Starting and stopping the system
Powering off the system
Power off the system by using the Halt System command in the DocuPrint Print Service window or by selecting [Shutdown] from the background menu.
CAUTION
Do not power off the printer controller without following one of the procedures below to halt the system first. Failure to follow the proper procedures may result in damage to the software and hardware.
Using the Halt System command to stop the system
Follow these steps to use the Halt System command to stop the system:
1. In the DocuPrint Print Service window, at the PS> prompt, enter privilege operator.
2. Enter stop queueing.
3. Enter list documents.
Wait for any documents currently pending or being printed to complete.
4. Enter halt system.
5. Once the OK prompt is displayed, switch off the power using the power switch located on the printer controller CPU unit, or enter power-off at the OK prompt.
Using the background menu to stop the system
Follow these steps to use the workspace pop-up menu to stop the system.
1. In the DocuPrint Print Service window, at the PS> prompt, enter privilege operator.
2. Enter stop queueing to stop queueing.
3. Enter list documents.
Wait for any documents that are pending or being printed to complete.
Guide to Configuring and Managing the System 3-3
Starting and stopping the system
4. Move the cursor to the background area outside any open windows.
5. Press and hold the right mouse button.
6. Select [Shutdown] from the pop-up menu, and release the right mouse button.
7. Select [Confirm].
8. Select [Continue].
9. When the OK prompt is displayed, switch off the power using the power switch located on the printer controller CPU unit, or enter power-off at the OK prompt.
The printer is powered off automatically when the printer controller is powered off. Be sure also to turn off the printer power switch if any equipment is to be disconnected.
3-4 Guide to Configuring and Managing the System

Starting and stopping the system
Powering the system off and on after a power failure
When a power failure occurs, you must power off all of the DocuPrint NPS/IPS system components.
CAUTION
If you do not power off all components, a power surge may damage them when power is restored.
Power the components back on only after power has been restored. To restart your printer after a power failure, refer to “Powering on the system,” in this chapter.
Stopping and starting job processing
Use the Stop and Start commands to control printing and queueing. These commands apply to jobs from all data streams.
Refer to the Guide to Managing Print Jobs chapter “Managing jobs” for detailed information.
NOTE: The very first job to print after a restart or a diagnostics session may take up to 30 to 60 seconds longer than usual. Subsequent jobs print without delay.
Restarting the sequencer, IPDS parser, and the system
If your printer is unresponsive, use the Restart Sequencer, Restart IPDS Parser, or Restart System command. You can use the Restart Sequencer command when a job appears to be “hung.” The job is placed in a Held state. Use Restart IPDS Parser to attempt recovery from a problem with the IPDS parser process.
NOTE: Use the Restart Sequencer or Restart IPDS Parser commands before using the Restart System command, because these commands restart a software module without restarting the entire system.
Guide to Configuring and Managing the System 3-5

Starting and stopping the system
Restart Sequencer command
The Restart Sequencer command restarts the system sequencer without restarting the entire system. It will place the current job in a “Held” status. This is useful if a job appears to be “hung.” Depending on the value of the “sequencer.attempts” in your configuration, you may need to repeat the command to change the job status to “Held.”
NOTE: Sometimes a large job takes a long time to decompose. If the job status is “Being Received” it is not “hung,” a restart of the sequencer is not needed for this job.
Access Administrator or operator
Syntax Restart Sequencer <restart option>
Argument <restart option>
To terminate the Sequencer before the restart, specify “kill.”
Restart IPDS Parser command
Use the Restart IPDS Parser command to restart the IPDS parser so that new option settings can take effect. You can also use this command to recover from a problem with the IPDS parser process.
Access Administrator or operator
Syntax Restart IPDS Parser
Arguments None
Restart System command
The Restart System command reboots and restarts the printer controller. A confirmation is required before this command will execute. The monitor displays the prompt, “Do you really want to restart the system? (Y/N).” Jobs remain in the queue and are processed when the system is fully booted.
3-6 Guide to Configuring and Managing the System

Starting and stopping the system
CAUTION
Restarting the system completely shuts down and reboots the printer controller.
Access Administrator or operator
Syntax Restart System
Arguments None
Guide to Configuring and Managing the System 3-7
Starting and stopping the system
3-8 Guide to Configuring and Managing the System

4. DocuPrint NPS/IPS on a Novell network
This chapter describes how to prepare your system for use on a Novell network, and identifies some of the things you must consider before the service representative configures DocuPrint NPS/IPS for a Novell network.
Before configuring DocuPrint NPS/IPS on a Novell network, first determine whether you want the DocuPrint NPS/IPS to function as a Print Server, a Remote Printer, or both.
Choosing a Print Server or Remote Printer configuration
The following contrasts the Print Server (PSERVER) configuration with the Remote Printer (RPRINTER) configuration for your DocuPrint NPS/IPS.
• The PSERVER configuration uses a licensed connection to a File Server. The RPRINTER configuration connects to a Print Server, and does not require a regular client connection.
• Using the PSERVER configuration, DocuPrint NPS/IPS can obtain job attributes from the Novell queue.
The RPRINTER configuration cannot do this, and this leads to some irregularities such as no job and submitter names, as well as an inability to select duplex through the submission interface.
• The setting of the Novell banner pages switch operates successfully using PSERVER (this toggles the ElideHeader attribute).
If Banner Page is requested with RPRINTER, DocuPrint NPS/IPS prints a Novell-generated ASCII banner page as the first page of a job, and prints the entire job as an ASCII file (500 pages could be generated when requesting a banner page regardless of the actual file contents.)
Guide to Configuring and Managing the System 4-1

DocuPrint NPS/IPS on a Novell network
• With PSERVER, multiple copies are requested as a job attribute; DocuPrint NPS/IPS receives only one copy and prints multiple copies.
With RPRINTER, because most remote printers cannot understand a request for multiple copies, the Print Server sends the job multiple times to print multiple copies, tying up network and DocuPrint NPS/IPS resources as the file is processed.
• With PSERVER, a DocuPrint NPS/IPS can receive jobs from only one print queue on one File Server, but users can submit jobs to different DocuPrint NPS/IPS virtual printers using Novell forms. The administrator uses the PRINTDEF program to create forms with the same name as DocuPrint NPS/IPS virtual printers. Users then select a virtual printer by selecting a form with the same name using the User Tools program in the NetWare Tools folder of Windows, or the -F option in the DOS CAPTURE command.
With RPRINTER, the Print Server can direct jobs to different virtual printers, from multiple queues, possibly on multiple file servers.
• The PSERVER configuration allows the submitter to determine when printing is complete. Jobs are retained in the Novell queue until DocuPrint NPS/IPS completes printing them. This may fill up the queue in some environments.
The RPRINTER configuration informs the submitter only when the job has been submitted, even though it may print days later.
• PSERVER requires that unencrypted login is enabled on the Novell File Server to which PSERVER connects. Regular Novell clients will still use encrypted passwords.
RPRINTER does not require that unencrypted logins be permitted.
4-2 Guide to Configuring and Managing the System

DocuPrint NPS/IPS on a Novell network
The following table lists the differences between DocuPrint NPS/IPS as a print server or as a remote printer.
Table 4-1. Print server and remote printer differences
DocuPrint NPS/IPS as a PSERVERDocuPrint NPS/IPS as an RPRINTER
1 Functions like a Novell print server. 1 Functions like a Novell remote printer.
2 Connects to a Novell file server and consumes a licensed connection.
2 Connects to a Novell print serverwithout consuming a licensed connection.
3 Reads the Novell print queue directly and obtains all the job parameters.
3 Cannot read the Novell print queue; receives only the job data, not the data from the queueentry.
4 Not necessary for the user to disable the print job banner.
4 User must disable the banner for each print job. If not disabled, the job prints incorrectly.
5 No unusual delays in output of print jobs.
5 May be delays in output of print jobs when jobs are not sent back-to-back. The system views the start of a print job as the end of aprevious job.
6 Services only one queue on one file server.
6 May service multiple print queuesthrough the Novell print server.
7 Supports user notification of the end of a print job (completion of printing).
7 Notifies user only when job submission completes (does not notify user of print completion).
8 Can send a job ticket that references one file on the Novell file server to which the DocuPrint NPS/IPS is connected.
8 Cannot reference files on a Novell file server.
Guide to Configuring and Managing the System 4-3
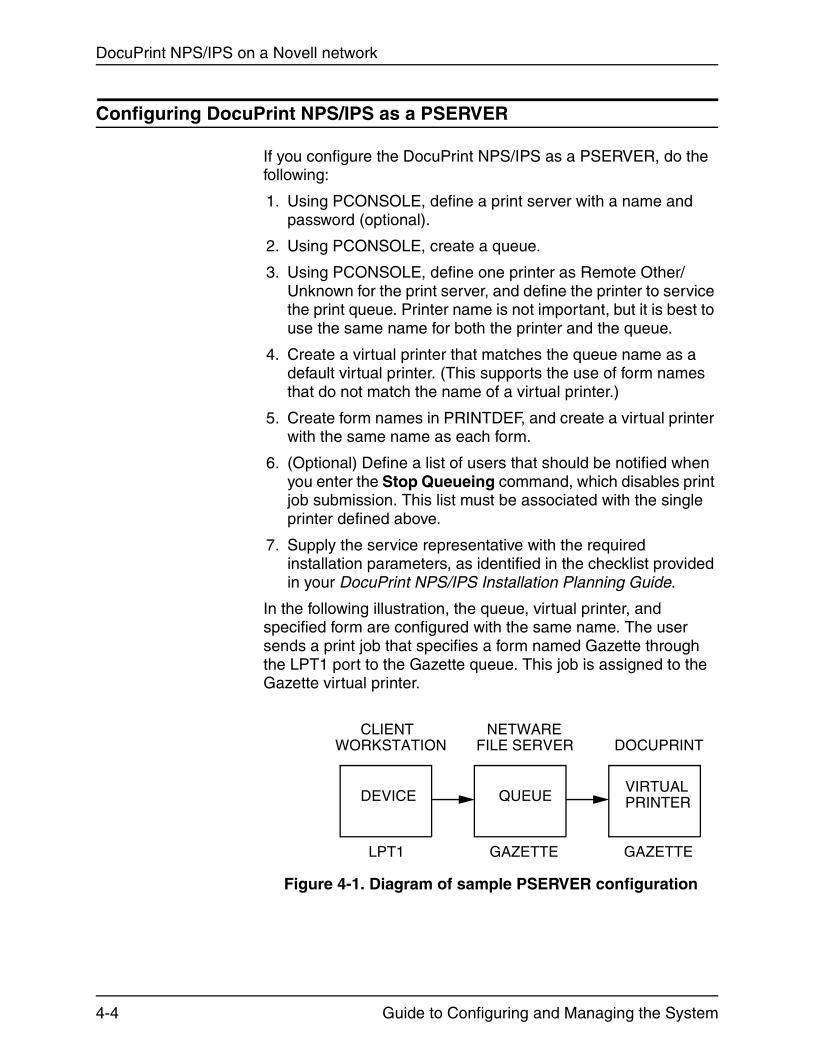
DocuPrint NPS/IPS on a Novell network
Configuring DocuPrint NPS/IPS as a PSERVER
If you configure the DocuPrint NPS/IPS as a PSERVER, do the following:
1. Using PCONSOLE, define a print server with a name and password (optional).
2. Using PCONSOLE, create a queue.
3. Using PCONSOLE, define one printer as Remote Other/Unknown for the print server, and define the printer to service the print queue. Printer name is not important, but it is best to use the same name for both the printer and the queue.
4. Create a virtual printer that matches the queue name as a default virtual printer. (This supports the use of form names that do not match the name of a virtual printer.)
5. Create form names in PRINTDEF, and create a virtual printer with the same name as each form.
6. (Optional) Define a list of users that should be notified when you enter the Stop Queueing command, which disables print job submission. This list must be associated with the single printer defined above.
7. Supply the service representative with the required installation parameters, as identified in the checklist provided in your DocuPrint NPS/IPS Installation Planning Guide.
In the following illustration, the queue, virtual printer, and specified form are configured with the same name. The user sends a print job that specifies a form named Gazette through the LPT1 port to the Gazette queue. This job is assigned to the Gazette virtual printer.
Figure 4-1. Diagram of sample PSERVER configuration
VIRTUALPRINTERQUEUEDEVICE
CLIENTWORKSTATION
NETWAREFILE SERVER DOCUPRINT
LPT1 GAZETTE GAZETTE
4-4 Guide to Configuring and Managing the System
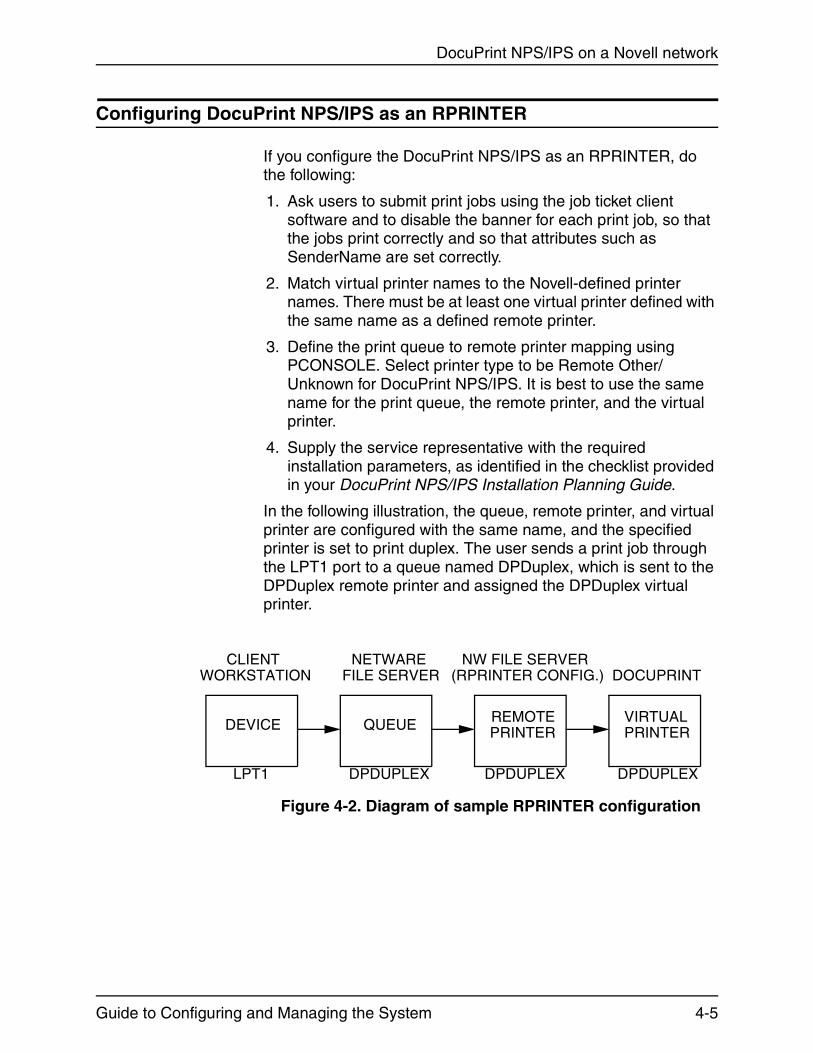
DocuPrint NPS/IPS on a Novell network
Configuring DocuPrint NPS/IPS as an RPRINTER
If you configure the DocuPrint NPS/IPS as an RPRINTER, do the following:
1. Ask users to submit print jobs using the job ticket client software and to disable the banner for each print job, so that the jobs print correctly and so that attributes such as SenderName are set correctly.
2. Match virtual printer names to the Novell-defined printer names. There must be at least one virtual printer defined with the same name as a defined remote printer.
3. Define the print queue to remote printer mapping using PCONSOLE. Select printer type to be Remote Other/ Unknown for DocuPrint NPS/IPS. It is best to use the same name for the print queue, the remote printer, and the virtual printer.
4. Supply the service representative with the required installation parameters, as identified in the checklist provided in your DocuPrint NPS/IPS Installation Planning Guide.
In the following illustration, the queue, remote printer, and virtual printer are configured with the same name, and the specified printer is set to print duplex. The user sends a print job through the LPT1 port to a queue named DPDuplex, which is sent to the DPDuplex remote printer and assigned the DPDuplex virtual printer.
Figure 4-2. Diagram of sample RPRINTER configuration
REMOTEPRINTER
VIRTUALPRINTERQUEUEDEVICE
CLIENTWORKSTATION
NETWAREFILE SERVER
NW FILE SERVER(RPRINTER CONFIG.) DOCUPRINT
LPT1 DPDUPLEX DPDUPLEX DPDUPLEX
Guide to Configuring and Managing the System 4-5

DocuPrint NPS/IPS on a Novell network
Supporting DocuPrint NPS/IPS on the Novell file server
There are a number of tasks you perform on the Novell file server to support the DocuPrint NPS/IPS as either a print server or a remote printer:
• With DocuPrint as a PSERVER you must allow unencrypted password login on the file server. Enter the following command at the file server console prompt and in the AUTOEXEC.NCF file:
set allow unencrypted passwords=on
NOTE: Set this command even if you do not establish a print server password. Novell clients that use encrypted passwords are unaffected by this change and will continue to use encrypted passwords.
• Do not configure the file server to support IPX checksums or NCP packet signatures. Set these options to 0 or 1 so that the server performs these options only when the client requests them. The default value is 1.
• Do not set the watchdog interval to less than one minute. Longer intervals may cause the DocuPrint NPS/IPS to be logged out.
• If the print queue contains 250 jobs on a regular basis, set the Maximum File Locks Per Connection to a value greater than 250. The default value is 250.
• If DocuPrint NPS/IPS is configured as an RPRINTER, define forms using PRINTDEF with names matching virtual printer names.
NOTE: DocuPrint NPS/IPS supports native connection to Novell 3.12 file servers. However, to run DocuPrint NPS/IPS with Novell 4.X servers, the Novell Server must be configured to run Bindery Emulation.
4-6 Guide to Configuring and Managing the System

5. Setting system defaults
This chapter describes the process for setting defaults for print features and system configuration. These default settings allow you to customize the way the system accepts information from host or network, displays information to the user, and handles print jobs without specific overriding instructions.
Before sending print jobs to your NPS/IPS, you need to set system defaults for the various document parameters associated with print jobs. The NPS/IPS provides the following commands for this purpose:
• Set Default Media defines the default media size, type, color, and weight. Show Default Media lists the currently defined default media.
• Set Tray allows you to specify what type of media is loaded in your printer feeder trays. There are several variations of this command.
• Set Stacker to Group and Unset Stacker allow you to define how jobs are delivered to the printer stackers.
• Set Option sets the values of various printing options. You can view the current setting of these options with the List Options command and print them with the Print Options command.
• Change Imager Parameters and Change PCL Imager Parameters adjust the imaging level of print jobs. You can show the current values and restore the defaults.
• Change PCL Parameters allows you to define the environment for PCL printing.
The following sections provide the syntax and arguments for these commands.
Guide to Configuring and Managing the System 5-1
Setting system defaults
Setting default media
The Set Default Media command (administrator or operator level) defines the default media size, type, color, and weight.
The Show Default Media command (administrator, operator, or user level) lists the default media for the printer.
These default settings are applied to media trays by invoking the Set Tray n Default command.
Set Default Media command
Use the Set Default Media command to define the default media size, type, color, and weight for jobs submitted without media specifications. This command may not take effect immediately on jobs already being processed. A Restart Sequencer command is the recommended method for insuring that media has been changed.
Access level Administrator or operator
Syntax Set Default Media <size> <type> <color> <weight>
Arguments The following arguments are available:
• <size>
Sets the size of the default media.
– Acceptable standard size values for the models 4850, 4890, or 92C are: “USLetter,” “USLegal,” “A4.” Acceptable custom paper sizes (n x n specified in millimeters) range from 8 by 10 inches / 203 by 254 mm to 8.5 by 14 inches / 216 by 356 mm.
– Acceptable standard size values for the models 96, 4635, or 180 are: “USLetter,” “USLegal,” “USLedger,” “Tabloid,” “A3,” “A4.” Acceptable custom paper sizes (n x n specified in millimeters) range from 7 by 10 inches / 178 by 254 mm to 17 by 14 inches / 432 by 356 mm).
5-2 Guide to Configuring and Managing the System
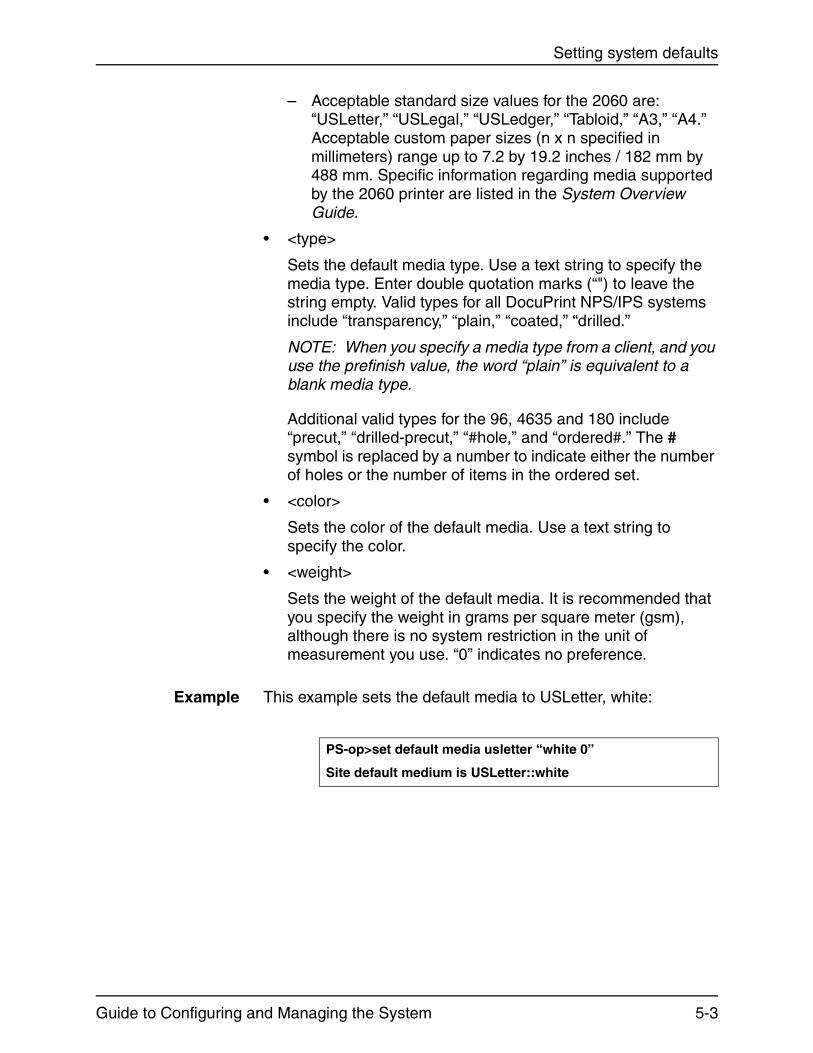
Setting system defaults
– Acceptable standard size values for the 2060 are: “USLetter,” “USLegal,” “USLedger,” “Tabloid,” “A3,” “A4.” Acceptable custom paper sizes (n x n specified in millimeters) range up to 7.2 by 19.2 inches / 182 mm by 488 mm. Specific information regarding media supported by the 2060 printer are listed in the System Overview Guide.
• <type>
Sets the default media type. Use a text string to specify the media type. Enter double quotation marks (“") to leave the string empty. Valid types for all DocuPrint NPS/IPS systems include “transparency,” “plain,” “coated,” “drilled.”
NOTE: When you specify a media type from a client, and you use the prefinish value, the word “plain” is equivalent to a blank media type.
Additional valid types for the 96, 4635 and 180 include “precut,” “drilled-precut,” “#hole,” and “ordered#.” The # symbol is replaced by a number to indicate either the number of holes or the number of items in the ordered set.
• <color>
Sets the color of the default media. Use a text string to specify the color.
• <weight>
Sets the weight of the default media. It is recommended that you specify the weight in grams per square meter (gsm), although there is no system restriction in the unit of measurement you use. “0” indicates no preference.
Example This example sets the default media to USLetter, white:
PS-op>set default media usletter “white 0”
Site default medium is USLetter::white
Guide to Configuring and Managing the System 5-3
Setting system defaults
Show Default Media command
Use the Show Default Media command to show size, type, color, and weight for the default media.
Access level Administrator, operator, user
Syntax Show Default Media
Arguments None
Example This example shows the output of the Show Default Media command:
Setting feeder tray attributes
The Set Tray command and related commands allow you to specify what type of media (that is, paper stock) is loaded in your printer feeder trays. You must use the Set Tray command whenever you change the media in a tray. You can also match the attributes of one tray to those of another tray.
NOTE: The Set Tray command and related commands cannot be used for a tray that is being used by the current job, or while the printer is warming up.
For instructions on loading feeder trays, refer to “Loading paper” in your Guide to Performing Routine Maintenance.
When jobs are submitted to the system, media attributes define the media required. If the requested media is not currently defined for the tray, the job is ineligible. You can use the command List Documents Ineligible to identify jobs waiting for different media. For more information on how media attributes are applied to a job, refer to your Guide to Managing Print Jobs.
PS-op>show default media
Site default medium is USLetter::white:75
5-4 Guide to Configuring and Managing the System

Setting system defaults
Set Tray and Set Tray Default commands
Use the Set Tray command to specify what type of media is loaded in your printer feeder trays.
Before using this command ensure that all trays are in the feed position.
NOTE: If you do not indicate the color or weight, the system uses the values of the default media.
Access level Administrator or operator
Syntax Set Tray <n> <size> <type> <color> <weight>
Set Tray <n> Default
Arguments The following arguments are available:
• <n>
Indicates the number of the paper tray, for example “1” or “2.”
• <size>
Indicates the size of the media. If you specify “default,” the type, color, and weight are set to the default media, and the size matches the tray setting.
Acceptable standard size values for the models 4850, 4890, or 92C are: “USLetter,” “USLegal,” “A4”. Acceptable custom paper sizes (n x n specified in millimeters) range from 8 by 10 inches / 203 by 254 mm to 8.5 by 14 inches / 216 by 356 mm.
Acceptable standard size values for the models 96, 4635, or 180 are: “USLetter,” “USLegal,” “USLedger,” “Tabloid,” “A3,” “A4.” Acceptable custom paper sizes (n x n specified in millimeters range from 7 by 10 inches / 178 by 254 mm to 17 by 14 inches / 432 by 356 mm.
Acceptable standard size values for the 2060 are: “USLetter,” “USLegal,” “USLedger,” “Tabloid,” “A3,” “A4.” Acceptable custom paper sizes (n x n specified in millimeters) range up to 7.2 by 19.2 inches / 182 mm by 488 mm. Specific information regarding media supported by the 2060 printer are listed in the System Overview Guide.
Guide to Configuring and Managing the System 5-5
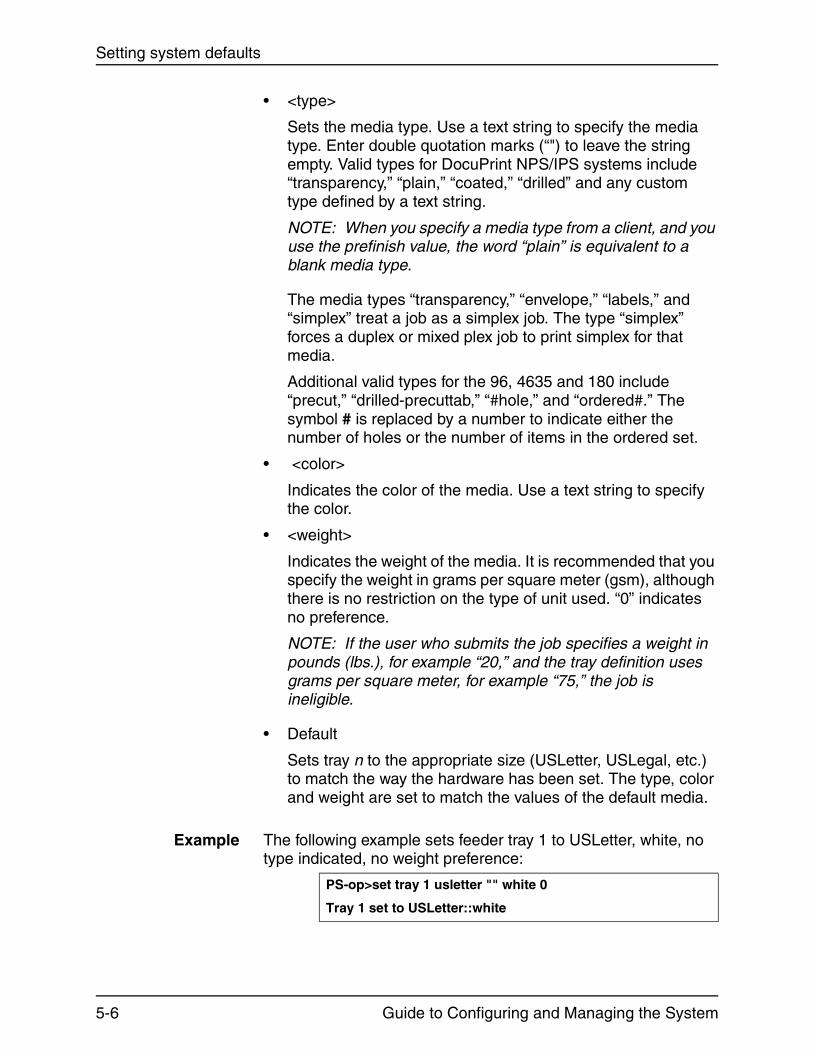
Setting system defaults
• <type>
Sets the media type. Use a text string to specify the media type. Enter double quotation marks (“") to leave the string empty. Valid types for DocuPrint NPS/IPS systems include “transparency,” “plain,” “coated,” “drilled” and any custom type defined by a text string.
NOTE: When you specify a media type from a client, and you use the prefinish value, the word “plain” is equivalent to a blank media type.
The media types “transparency,” “envelope,” “labels,” and “simplex” treat a job as a simplex job. The type “simplex” forces a duplex or mixed plex job to print simplex for that media.
Additional valid types for the 96, 4635 and 180 include “precut,” “drilled-precuttab,” “#hole,” and “ordered#.” The symbol # is replaced by a number to indicate either the number of holes or the number of items in the ordered set.
• <color>
Indicates the color of the media. Use a text string to specify the color.
• <weight>
Indicates the weight of the media. It is recommended that you specify the weight in grams per square meter (gsm), although there is no restriction on the type of unit used. “0” indicates no preference.
NOTE: If the user who submits the job specifies a weight in pounds (lbs.), for example “20,” and the tray definition uses grams per square meter, for example “75,” the job is ineligible.
• Default
Sets tray n to the appropriate size (USLetter, USLegal, etc.) to match the way the hardware has been set. The type, color and weight are set to match the values of the default media.
Example The following example sets feeder tray 1 to USLetter, white, no type indicated, no weight preference:
PS-op>set tray 1 usletter "" white 0
Tray 1 set to USLetter::white
5-6 Guide to Configuring and Managing the System

Setting system defaults
Set Tray <n> Tray <m> command
Use the Set Tray <n> Tray <m> command to set the attributes of tray <n> to the same values as those that were set for tray <m>.
Access level Administrator or operator
Syntax Set Tray <n> Tray <m>
Arguments <n> <m>
Assigns the attributes of tray <m> to tray <n>
Example This example sets the attributes of tray 1 to be the same as those of tray 2:
Set Tray <n> Position <m> command
Use the Set Tray <n> Position <m> command to specify the position, in an ordered set, of the piece of stock at the top of the tray <n> Position <m>
NOTE: This command is generally not required for ordered stock applications, but may be used to save stock.
Before using this command ensure that all trays are in the feed position.
Access level Administrator or operator
Syntax Set Tray <n> Position <m>
Arguments The following arguments are available:
• <n>
Indicates the number of the paper tray. The tray must already have paper type set to “<anything>-ordered#,” where # is the total number of items in a complete set.
PS-op>set tray 1 tray 2
Tray 1 set to match Tray 2
Guide to Configuring and Managing the System 5-7
Setting system defaults
• <m>
Sets the item at the top of tray n to the appropriate order number in the ordered set. The value <m> must not be greater than the number (#) specified in the “ordered#” field of the paper type specified for the tray.
Example This example sets the item at the top of feeder tray 1 to number 3 in the current ordered set:
Set Tray <n> Purge|No Purge
Use the Set Tray <n> Purge|No Purge command to specify whether the tray can be used for paper purging. Use this command when a tray contains preprinted or special stock that you do not want used when the system purges the fuser.
NOTE: Define at least one tray as a purge tray.
Access level Administrator or operator
Syntax Set Tray <n> Purge|No Purge
Arguments <n>
Indicates the number of the paper tray.
You can determine if a tray is currently set to be used for paper purging by using the Show Status command. The text “Purge Allowed” is shown as part of the tray status.
Set Tray From Virtual Printer Media command
Use the Set Tray From Virtual Printer Media command to match the media list for the specified virtual printer against paper sizes in trays. The command prompts you to assign the needed media to specific trays.
The command fails if there is no media list for the virtual printer or if it cannot match all the sizes in the media list to real trays. If you set the same tray to more than one media, the last command overrides earlier commands.
PS-op>set tray 1 position 3
Tray 1 set to Position 3
5-8 Guide to Configuring and Managing the System

Setting system defaults
Access level Administrator or operator
Syntax Set Tray From Virtual Printer Media <VP>
Arguments <VP>
Indicates the virtual printer.
Unset Tray <n> command
If you want the system to ignore a tray, use the Unset Tray command. To restore the tray to active status, use the Set Tray command.
Access level Administrator or operator
Syntax Unset Tray <n>
Arguments <n>
Indicates the number of the paper tray.
NOTE: It may take a moment for the tray to unset.
Guide to Configuring and Managing the System 5-9

Setting system defaults
Setting stacker groups
You can configure stackers into groups.
Set Stacker To Group command
The Set Stacker To Group command allows you to define stacker groups.
Access level Administrator, Operator
Syntax Set Stacker To Group <stacker> <group>
Arguments • <stacker>
Indicates the stacker number. The top tray is “0”. Additional stackers are numbered “1”, “2”, etc., depending on the number of stackers.
• <group>
Indicates the stacker group. The maximum number of stacker groups is the same as the number of stackers, including the top tray.
Unset Stacker command
If you want the system to ignore a stacker, use the Unset Stacker command. To restore the stacker to active status, use the Set Stacker to Group command. Available only for systems with a top tray plus two stackers.
Access level Administrator or operator
Syntax Unset Stacker <n>
Arguments <n>
Indicates the number of the stacker.
NOTE: It may take a moment for the stacker to unset.
5-10 Guide to Configuring and Managing the System
Setting system defaults
Setting printer options
The following commands control the printing options for your NPS/IPS. (Some options may not apply to your printer configuration.) Use Set Option Help to display the available printing options and the information you need to specify values.
Set Option command
The Set Option command assigns values to the printing options you specify. It may take a few minutes for an option to be set after you enter the command. A Restart Sequencer command is recommended for ensuring that an option has been changed.
Access level Administrator
Syntax Set Option <name> <value>
Arguments The following arguments are available:
• <name> <value>
Specifies the name and value of the option you want to set. Choose from the following:
• AdjustX <offset> <units>
Sets the horizontal image shift from the edge of the paper closest to the front of the printer as it is fed. “X” is the physical slow scan direction. For example, for letter or A4 paper, “X” is parallel to the short edge of the paper. For Ledger or A3, “X” is parallel to the long edge of the paper.
<offset> is the amount of the horizontal image shift. The default is 0. This value should normally be zero (0), but can be changed to temporarily compensate for printer misalignments until a service technician can adjust the printer.
<units> refers to the unit of measure used to specify the offset value. The following units are available; the default setting is “mm.”
– pt (points=72.27 to 1 inch)
– bp (big point=72 to 1 inch)
– pi (pica=12 points)
Guide to Configuring and Managing the System 5-11
Setting system defaults
– el (elite=10 points)
– in (inches)
– pu (pixel units =1/300 inch, not pixels)
– fu (furlongs)
– mm (millimeters)
• AdjustY <offset> <units>
Sets the vertical image shift from the edge of the paper closest to the front of the printer as it is fed. “Y” is the physical fast scan direction. For example, for letter or A4 paper, “Y” is parallel to the long edge of the paper. For Ledger or A3, “Y” is parallel to the short edge of the paper.
<offset> is the amount of the vertical image shift. The default is 0. This value should normally be zero (0), but can be changed to temporarily compensate for printer misalignments until a service technician can adjust the printer.
<units> refers to the unit of measure used to specify the offset value. The following units are available; the default setting is “mm.”
– pt (points=72.27 to 1 inch)
– bp (big point=72 to 1 inch)
– pi (pica=12 points)
– el (elite=10 points)
– in (inches)
– pu (pixel units =1/300 inch, not pixels)
– fu (furlongs)
– mm (millimeters)
• AllowElideHeaders <“TRUE” | “FALSE”>
Refers to the suppression of header pages within a group of documents with the same sender name. The default setting is “TRUE.”
• AttributeNameForListDocs <attribute>
Refers to the text attribute to use for the List Documents command. The default setting is “SenderName.”
• BlueHighlight <RGB value for blue>
(4850, 4890, and 92C only) Refers to the RGB value for blue highlight color. The default setting is “R: 0.0, G: 0.0, B: 0.8820001.”
5-12 Guide to Configuring and Managing the System
Setting system defaults
For blue highlight color to print correctly, the default RGB (print) value for this option should not be modified.
• BrownHighlight <RGB value for brown>
(4850, 4890, and 92C only) Refers to the RGB value for brown highlight color. The default setting is “R: 0.65, G: 0.1, B: 0.1.”
For brown highlight color to map correctly, the default RGB (4850, 4890, and 92C only) value for this option should not be modified.
• CardinalHighlight <RGB value for cardinal>
(4850, 4890, and 92C only) Refers to the RGB value for cardinal highlight color. The default setting is “R: 0.7000001, G: 0.03, B: 0.1.”
For cardinal highlight color to print correctly, the default RGB value for this option should not be modified.
• CentsPerHeader <cost per sheet>
Refers to cost per header page. If you enter a value, the cost information appears on the trailer sheet that prints at the end of a job. The default setting is “0.0.”
• CentsPerNormal <cost per sheet>
Refers to cost per document page. If you enter a value, the cost information appears on the trailer sheet that prints at the end of a job. The default setting is “0.0.”
• CentsPerSecond <cost per second>
Refers to cost per document decomposition time. If you enter a value, the cost information appears on the trailer sheet that prints at the end of a job. The default setting is “0.0.”
• CentsPerTrailer <cost per sheet>
Refers to cost per trailer sheet. If you enter a value, the cost information appears on the trailer sheet that prints at the end of a job. The default setting is “0.0.”
• CyanHighlight <RGB value for cyan>
(4850, 4890, and 92C only) Refers to the RGB value for cyan highlight color. The default setting is “R: 0.0, G: 0.8820001, B: 0.8820001.”
For cyan highlight color to print correctly, the default RGB value for this option should not be modified.
Guide to Configuring and Managing the System 5-13

Setting system defaults
• DebugLevel<level>
Refers to the systemwide debug level. The default level is “0,” and the range of allowable values is 0 ... 15. Higher numbers result in more detailed debugging information.
• DefaultCopies <number of copies>
Refers to the number of copies of a document printed when one of the following commands is entered: Print Sample Document, Print Form Sample, Print Form List, Print Options, Print PCLFont Sample, Print Font Sample, and Print Font List. The default setting is “1.”
• DefaultDarkness<level>
Refers to default level for darkness control. The default setting is 0, and the range of allowable values is -1 .. 5.
• DefaultHighlightColorRendering <“pictorial” | “presentation” | “colorToHighlight” | “colorTables”| “automatic”>
(4850, 4890, and 92C only) Refers to the mapping of a three-dimensional color application (such as RGB) to the two-dimensional color application provided with highlight color printing. The default setting is “automatic.”
– pictorial
Use this attribute to avoid color saturation problems with Decomposition Service forms.
Colors with a hue matching the map color are not changed.
Colors with a hue close to the map color are rendered with color, but with a saturation level that decreases as the hue shifts away from the map color.
Colors with a hue complementary to the map color are produced in shades of gray.
– presentation
Refers to the ability to distinguish between different colors. This attribute is a good choice for charts and diagrams, as they typically use distinctly different colors. Colors with a hue that matches the map color will not be changed. There will be discontinuities that may produce undesirable results in pictorial material.
5-14 Guide to Configuring and Managing the System
Setting system defaults
– colorToHighlight
This mapping attribute discards the hue information and preserves the saturation and value of the color application. Fully-saturated colors will turn into a solid highlight color despite which map color is in effect. This is useful for documents that only use spot color for emphasis.
– colorTables
This mapping attribute uses preset color tables to perform the mapping and is provided for compatibility reasons. This is used only for red, green, or blue highlight color toners.
– automatic
This attribute chooses a mapping method on an object-by-object basis; for example, it applies the pictorial mapping for pictures and the presentation mapping for other objects (filled areas, strokes, and text). This is the default.
• DefaultPaperTray <paper tray number>
Refers to the paper tray used for printing test patterns when the Print Test Pattern command is entered. The Print Test Pattern is available only in service mode. The default setting is “1.”
• DefaultPCLLanguageLevel <“PCL5e” | “PCL5c”>
Refers to the default PCL language level to be used for the system. For monochrome printers the setting is PCL 5e. For highlight color printers, use PCL 5c if you want to use the PCL 5c interpreter for printing PCL 5c jobs that specify highlight color. The default is PCL5e.
• DefaultPlex <“simplex” | “duplex” | “tumble duplex”>
Refers to whether documents, including test patterns and sample documents, print simplex, duplex, or tumble duplex. The default setting is “simplex.”
• DefaultPlexChangesDynamic <“TRUE” | “FALSE”>
Refers to whether the system will honor the plex changes specified in the PostScript or PCL code. Set to “True” to honor plex changes within the job. Set to “False” when you want to ignore the plex changes specified in the job’s PostScript or PCL.
Guide to Configuring and Managing the System 5-15

Setting system defaults
• DefaultPSLanguageLevel <“1” | “2”>
Refers to which PostScript Language Level to use. The default setting is “2.”
• DefaultRecoveryOffset <“TRUE” | “FALSE”>
When “True,” a single page is offset from the rest of the job after any jam. When “False,” no sheets are offset. The default is “False.”
• DefaultResolution <“240” | “300” | “600”>
Refers to the printing resolution used for documents, including test patterns and sample documents. 240 dpi is available for Model 180 only; 600 dpi is available for Models 92C, 96, 4635, 180, and 2060 only.
The default setting is “300” for all printers except the 92C and the 2060; their default setting is 600.
On the 96, 4635, 180, 92C NPS/IPS, output resolution is always 600 dpi regardless of the resolution of the input. For these models, if the specified value for the resolution attribute is 300 dpi, the data is decomposed by the controller at 300 dpi, and the print engine interpolates the data to 600 dpi; this provides the fastest processing. When the specified value for the resolution attribute is 600 dpi, the data is decomposed by the controller at 600 dpi; this provides the best quality image. For the 2060, the resolution attribute must be set to 600 dpi.
• DefaultStacker <“0” | “n”>
Refers to the stacker group used. 0 = top trayn = number of the stacker group
The default setting is “1.”
• DefaultStitch <“TRUE” | “FALSE”>
Refers to whether test patterns or sample documents are stitched when the Print Test Pattern or Print Sample Document command is entered. The default setting is “FALSE.”
• DelayDuplexSwitch
Sets the number of duplex sheets with blank backs that can be printed simplex after a switch within the job from duplex to simplex pages. Default value is 0.
5-16 Guide to Configuring and Managing the System
Setting system defaults
• DelaySimplexSwitch
Sets the number of simplex sheets that can be printed duplex with a blank back side after a switch within the job from simplex to duplex pages. After this number of sheets is reached, the printer images only one side of the remaining simplex sheets. Default value is 0.
If a simplex media type is used for the simplex sheets, the delay is ignored and the switch occurs immediately.
• EarlyStaple <“TRUE” | “FALSE”>
Refers to whether stapled jobs printed in ascending page order and exceeding the stapler limit (50 sheets) are delivered early. The default setting is “FALSE.” Used only for systems with stitchers.
• ExportVPsToAppleTalk <“TRUE” | “FALSE”>
Refers to whether newly created virtual printers are automatically exported to AppleTalk for viewing in the users’ Chooser. If “TRUE”, all new virtual printers will be made available for AppleTalk. If “FALSE”, the new virtual printers are not automatically made available. Selected virtual printers can be exported to AppleTalk by using the Set Virtual Printer Flags command. (Refer to the Guide to Managing Print Jobs, “Managing Virtual Printers” chapter.)
• ExtraMessage <message>
Refers to any message that appears in the middle of the header page that prints with the job.
• ForceBlackOnly <“TRUE” | “FALSE”>
(4850, 4890, and 92C only) Refers to whether black-only printing is used with highlight color printers. The default setting is “FALSE.”
• ForceHeaderAlt <“TRUE” | “FALSE”>
Refers to forcing header and trailer sheets to an alternate destination for printers with the bypass transport. The default setting is “FALSE,” meaning that the header and trailer sheets are sent to the bypass transport. When set to “TRUE,” header and trailer pages are sent to the Stacker Group that is not the top tray and not the bypass transport. On 4890, 4850, 92C, and 180 systems, header and trailer pages are sent to stacker group 2. On 4635 and 96 systems, header and trailer pages are sent to stacker group 1.
Guide to Configuring and Managing the System 5-17

Setting system defaults
• ForceReport <“TRUE” | “FALSE”>
Refers to whether a trailer sheet prints at the end of a job. The default setting is “FALSE.”
When the default setting is used, a trailer sheet prints only if there are printing errors or a PostScript file writes to stdout.
• GreenHighlight <RGB value for green>
(4850, 4890, and 92C only) Refers to the RGB value for green highlight color. The default setting is “R: 0.0, G: 0.8820001, B: 0.0.”
For green highlight color to print correctly, the default RGB value for this option should not be modified.
• HeaderMedia <size:type:color:weight>
If the size specified in the HeaderMedia differs from the first media specified for the job, then the sequencer will attempt to match the size of the job’s first media, but match the type, color, and weight of the HeaderMedia option.
If no tray is set that matches the job’s first media size and type, color, and weight of the HeaderMedia, then use the HeaderMedia option without modification.
If the HeaderMedia option matches no tray setting, then use the job’s first media (without modification) for the header media.
– <size>
Indicates the size of the media.
Acceptable standard size values for the models 4850 or 4890 are: “USLetter,” “USLegal,” “A4”. Acceptable custom paper sizes (n x n specified in millimeters) range from 8 by 10 inches / 203 by 254 mm to 8.5 by 14 inches / 216 by 356 mm.
Acceptable standard size values for the models 96, 4635, or 180 are: “USLetter,” “USLegal,” “USLedger,” “Tabloid,” “A3,” “A4.” Acceptable custom paper sizes (n x n specified in millimeters) range from 7 by 10 inches / 178 by 254 mm to 17 by 14 inches / 432 by 356 mm.
5-18 Guide to Configuring and Managing the System
Setting system defaults
Acceptable standard size values for the 2060 are: “USLetter,” “USLegal,” “USLedger,” “Tabloid,” “A3,” “A4.” Acceptable custom paper sizes (n x n specified in millimeters) range up to 7.2 by 19.2 inches / 182 mm by 488 mm. Specific information regarding media supported by the 2060 printer are listed in the System Overview Guide.
– <type>
Sets the media type. Use a text string to specify the media type. Enter double quotation marks (“ ") to leave the string empty. Valid types for all systems include “transparency,” “coated,” and “drilled.”
Additional valid types for the 96, 4635 and 180 include “precut,” “drilled-precut,” “#hole,” and “ordered#.” The symbol # is replaced by a number to indicate either the number of holes or the number of items in the ordered set.
– <color>
Indicates the color of the media. Use a text string to specify the color.
– <weight>
Indicates the weight of the media. It is recommended that you specify the weight in grams per square meter (gsm). “0” indicates no preference.
• HeapLimit <limit in MB>
Refers to the heap limit in MB. The default setting is “100.”
The default value for this option should not normally be modified.
• Help
Displays all available printing options and the information you need to specify values. This command may scroll off the screen when used in some telnet sessions. This is due to line wrap caused by excessively long lines.
• IPDSChannelAddress <value>
Sets the channel address at which this printer will respond when the interface protocol is set to “channel.” (See IPDSInterface option.)
The default setting is “0,” and the range of allowable values is 0 .. FFFF (radix: 16). Displays and accepts its value in hexadecimal format.
Guide to Configuring and Managing the System 5-19
Setting system defaults
• IPDSChannelMode <“SingleTag” | “HighSpeed” | “DataStreaming 1.5” | ”DataStreaming 3” | “DataStreaming 4.5”>
Sets the running mode of the channel interface. Data streaming values are in Mb per second. The default is “SingleTag.”
SingleTag—Single-tag interlock mode. This is the basic channel transfer mode. It is the slowest method of data transfer. Select this mode when no other transfer mode is available on the host.
HighSpeed—High-speed transfer mode. Although it maintains a single-tag interlock mode, this mode provides a higher speed of data transfer than the single-tag mode.
DataStreaming 1.5—Data streaming at 1.5 Mb per second. This mode is faster than either of the two single-tag interlock modes.
Data Streaming 3—Data streaming at 3 Mb per second.
Data Streaming 4.5—Data streaming at 4.5 Mb per second.
• IPDSContinuousEmulation <“TRUE” | “FALSE”>
When set to “TRUE,” changes the printer origin of the page from portrait to landscape, like continuous feed printers. The default setting is “FALSE.”
• IPDSDefaultResolution <“240” | ”300” | “600”>
Sets the resolution at which the IPDS parser requests fonts and accepts IM images. If the virtual printer attribute IPDSResolution is used, then it overrides the IPDSDefaultResolution values. The default setting is “300.”
• IPDSDisableReplicateAndTrim <“TRUE” | “FALSE”>
Changes the sense type model (STM) reply to remove the replicate and trim functionality from the feature list.
A value of FALSE allows replicate and trim, and yields better performance on jobs that use certain types of shading.
A value of TRUE disables replicate and trim, and can cause large uncompressed full-page images to be sent to the printer, which can hurt performance. The benefit is that shading anomalies can sometimes be eliminated by this option.
The default setting is “FALSE.”
5-20 Guide to Configuring and Managing the System

Setting system defaults
• IPDSEndOfSet <“None” | “Markform” | “DGB” | “StackerOffset”>
Sets an IPDS finishing command to trigger the installed finishing device on the printer. The default setting is “None.”
• IPDSGOCAImageResolution <“240” | ”300” | “600”>
Sets the target resolution of any GOCA (graphic object content architecture) raster images that do not contain this information. Can be set independently of job resolution. The default setting is “300.”
NOTE: When a GOCA raster is created, the target resolution is determined, but is not embedded in the data structure. Use this option to provide that information. Jobs that include GOCA images with different resolutions will not print correctly.
• IPDSInterface <“tcp” | “channel”>
Sets the interface protocol to be used. The default setting is “tcp.”
• IPDSJobTimeOut <seconds>
Sets the length of time to wait for data before ending a job that has no other logical end. The default setting is “10,” and the range of allowable values is 1 .. 60.
• IPDSLegacyMode <“TRUE” | “FALSE”>
Some older or unsupported IPDS hosts do not support printers with newer IPDS capabilities, and refuse to connect to a printer that reports these features in the initial connection. IBM PSF for AIX is one such host. If you have one of these hosts, set this option to “TRUE.” This removes the offending features from the initial connection and allows the host to connect to the NPS/IPS printer.
The default setting is “FALSE.”
• IPDSPrinterModel <value>
The hexadecimal code for the printer model, sent to the host during the host’s sense-type-and-model (STM) operation.
This number is displayed on error sheets printed by the IPDS printer, and on the host console when a connection is established.
The default setting is “3935,” and the range of allowable values is 0 .. FFFF (radix: 16).
Guide to Configuring and Managing the System 5-21

Setting system defaults
• IPDSResourceSpace <number of MB>
Sets the size in megabytes of the resource memory space (IPSResMem). The default setting is “32,” and the range of allowable values is 16 .. 1024 (maximum depends on disk size).
NOTE: For jobs with large amounts of resources, try setting the value to 128.
• IPDSStackerSelection <“UseDefaultGroup” | “AllowHostControl”>
Sets the stacker group used for IPDS printing. “AllowHostSelection” sets the system to use the stacker bins requested in the IPDS data stream. “UseDefaultGroup” sets the system to ignore the bins requested in the IPDS data stream, and to use the default stacker group.
• IPDSTcpPortNumber <port number>
Sets the port number at which a host connection is accepted when the interface protocol is set to “tcp.” The default setting is “5001,” and the range of allowable values is 5001 .. 65535.
• LocalConsoleHeight <number of lines>
Refers to the number of lines prior to “(More)” that display on the printer controller. The default setting is “45,” and the range of allowable integer values is 20-100.
• MagentaHighlight <RGB value for magenta>
(4850, 4890, and 92C only) Refers to the RGB value for magenta highlight color. The default setting is “R: 0.8820001, G: 0.0, B: 0.8820001.”
For magenta highlight color to print correctly, the default RGB value for this option should not be modified.
• MaxCopies <number of copies>
Refers to the maximum number of copies of a document that can be printed. The default setting is “1,000.”
• MaxSecondsPerPage <seconds per page>
Refers to how long the printer controller is allowed to decompose a page. The time is measured in CPU seconds, and is approximate. This option only applies to PostScript jobs. The default setting is “600.”
5-22 Guide to Configuring and Managing the System

Setting system defaults
• MinDSC <version number>
Refers to the minimum acceptable DSC (PostScript Document Structuring Convention) version. The default is 2.1.
• NoSaveOutput <“TRUE” | “FALSE”>
Refers to inhibiting paper output for Decomposition Service forms creation. If true, trailer sheets will only be produced in the event of any errors during decomposition. The default setting is “FALSE.”
• OffsetPerCopy <“TRUE” | “FALSE”>
Refers to whether the stacker offsets documents per copy when the OffsetPerCopy attribute is not specified. Does not apply when copies are uncollated. The default setting is “FALSE.”
NOTE: Not all printers can offset output. The option is ignored for those printers.
• OffSetPerJob < “TRUE” | “FALSE”>
Refers to controlling job offsetting. Selecting “FALSE” disables job offsetting if the OffsetPerCopy option and attribute are also False and if the OffsetPerCopy attribute is not set and the jobs do not request offsetting.
NOTE: Not all printers can offset output. The option is ignored for those printers.
• OtherHighlight <RGB value for other highlight color>
(4850, 4890, and 92C only) Refers to the color for the other highlight. The default setting is “R: 0.8820001, G: 0.0, B: 0.0.”
• PQAStacker <number>
Refers to the stacker group where PQA pages are delivered (4850, 4890, and 92C only).
• PrinterLocation <location>
Refers to the physical location of the printer, for example, a room number.
• PrinterMoreInfo <infoURL>
Refers to a user-defined URL that provides information about the printer.
• PrinterName <printer name>
Refers to the name of the printer.
Guide to Configuring and Managing the System 5-23

Setting system defaults
• QuotaPages <number>
Refers to the maximum number of pages (not including header and trailer) that a document can print before the document is canceled by the system. The default is 10,000,000 pages. This number is an approximation.
• QuotaSeconds <number>
Refers to the maximum number of seconds of CPU time that may be used in decomposing a document before the document is cancelled by the system. The default is 86400 seconds. This is an approximation.
• RedHighlight <RGB value for red>
(4850, 4890, and 92C only) Refers to the RGB value for red highlight color. The default setting is “R: 0.8820001, G: 0.0, B: 0.0.”
For red highlight color to print correctly, the default RGB value for this option should not be modified.
• RemoteConsoleHeight <number of lines>
Refers to the number of lines prior to “(More)” that display on the remote console during a telnet session. Lines that have wrapped are not counted. The default setting is “24,” and the range of allowable integer values is 20-100.
• ReportCopies <format for copies>
Refers to the format in which the number of copies printed per document appears on the trailer sheet that prints at the end of a job. You use numbers and predefined characters to indicate the format. The predefined characters are replaced by the actual numbers on the trailer sheet when the document is printed. The predefined characters are as follows:
– %g
Indicates that numbers appear as a string.
• ReportCost <format for cost in dollars>
Refers to the format in which the estimated cost per document appears on the trailer sheet that prints at the end of a job. You use numbers and predefined characters to indicate the format. The predefined characters are replaced by the actual numbers on the trailer sheet when the document is printed. The predefined characters are as follows:
5-24 Guide to Configuring and Managing the System

Setting system defaults
– %g
Indicates that numbers appear as a string.
– %<number>f
Indicates numbers appear with a floating point. For example, “%3.2f” indicates you want the number to appear as a three digit floating point number with two decimal places, such as 2.10.
– %<number>d
Indicates numbers appear as integers. For example, “%2d” indicates you want the number to appear as a two digit integer, such as 32.
• ReportSheets <format for sheets>
Refers to the format in which the number of pages per document appears on the trailer sheet that prints at the end of a job. You use numbers and predefined characters to indicate the format. The predefined characters are replaced by the actual numbers on the trailer sheet when the document is printed. The predefined characters are as follows:
– %g
Indicates that numbers appear as a string.
• ReportTime <format for time in seconds>
Refers to the format in which the document decomposition time appears on the trailer sheet that prints at the end of a job. You use numbers and predefined characters to indicate the format. The predefined characters are replaced by the actual numbers on the trailer sheet when the document is printed. The predefined characters are as follows:
– %g
Indicates that numbers appear as a string.
– %<number>f
Indicates numbers appear with a floating point. For example, “%3.2f” indicates you want the number to appear as a three-digit floating-point number with two decimal places, such as 2.10.
– %<number>d
Indicates numbers appear as integers. For example, “%2d” indicates you want the number to appear as a two-digit integer, such as 32.
Guide to Configuring and Managing the System 5-25
Setting system defaults
• RoyalBlueHighlight <RGB value for royal blue>
(4850, 4890, and 92C only) Refers to the RGB value for royal blue highlight color. The default setting is “R: 0.074, G: 0.0, B: 0.878”.
For royal blue highlight color to print correctly, the default RGB value for this option should not be modified.
• RubyHighlight <RGB value for ruby>
(4850, 4890, and 92C only) Refers to the RGB value for ruby highlight color. The default setting is “R: 0.878, G: 0.0, B: 0.3”.
For ruby highlight color to print correctly, the default RGB value for this option should not be modified.
• SequencerDebugLog< “TRUE” | ”FALSE” >
Refers to whether the debug log for the Sequencer is on or off.
• SiteFontSize <font size in points>
Refers to the size of font you want to use for text that appears on the header page. The default setting is 18 points.
• SiteHeader <message>
Refers to any one line message you want to appear on the upper right corner of the header page. The message may contain approximately 40 to 60 characters using the default SiteFontSize (18 pt text). Anything over that length will be truncated starting at the beginning of the text string. If the default SiteFontSize is changed, the number of characters displayed will change accordingly.
• TrailerMedia <size:type:color:weight>
Refers to the media used for printing the trailer page.
If the size that is specified in the TrailerMedia differs from the first media specified for the job, then the sequencer will attempt to match the size of the job first medium, but match the type, color, and weight of the TrailerMedia option.
If no tray is set that matches the job’s first media size and type, color, and weight of the TrailerMedia, then use the TrailerMedia option without modification.
If the TrailerMedia option matches no tray setting, then use the job first medium (without modification) for the trailer medium.
5-26 Guide to Configuring and Managing the System

Setting system defaults
– <size>
Indicates the size of the media.
Acceptable standard size values for the models 4850 or 4890 are: “USLetter,” “USLegal,” “A4”. Acceptable custom paper sizes (n x n specified in millimeters) range from 8 by 10 inches / 203 by 254 mm to 8.5 by 14 inches / 216 by 356 mm.
Acceptable standard size values for the models 96, 4635, or 180 are: “USLetter,” “USLegal,” “USLedger,” “Tabloid,” “A3,” “A4”. Acceptable custom paper sizes (n by n specified in millimeters) range from 7 by 10 inches / 178 by 254 mm to 17 by 14 inches / 432 by 356 mm.
Acceptable standard size values for the 2060 are: “USLetter,” “USLegal,” “USLedger,” “Tabloid,” “A3,” “A4.” Acceptable custom paper sizes (n x n specified in millimeters) range up to 7.2 by 19.2 inches / 182 mm by 488 mm. Specific information regarding media supported by the 2060 printer are listed in the System Overview Guide.
– <type>
Sets the media type. Use a text string to specify the media type. Enter double quotation marks (“") to leave the string empty. Valid types for all systems include “transparency,” “coated,” and “drilled.”
Additional valid types for the 96, 4635 and 180 include “precut,” “drilled-precut,” “#hole,” and “ordered#.”
– <color>
Indicates the color of the media. Use a text string to specify the color.
– <weight>
Indicates the weight of the media. It is recommended that you specify the weight in grams per square meter (gsm), though there is no restriction on the type of unit. “0” indicates no preference.
• UserFontSize <font size in points>
Refers to the font size you want to use for the user name that appears on the header page. The default setting is 18 points, and the range of allowable integer values is 10-60.
Guide to Configuring and Managing the System 5-27
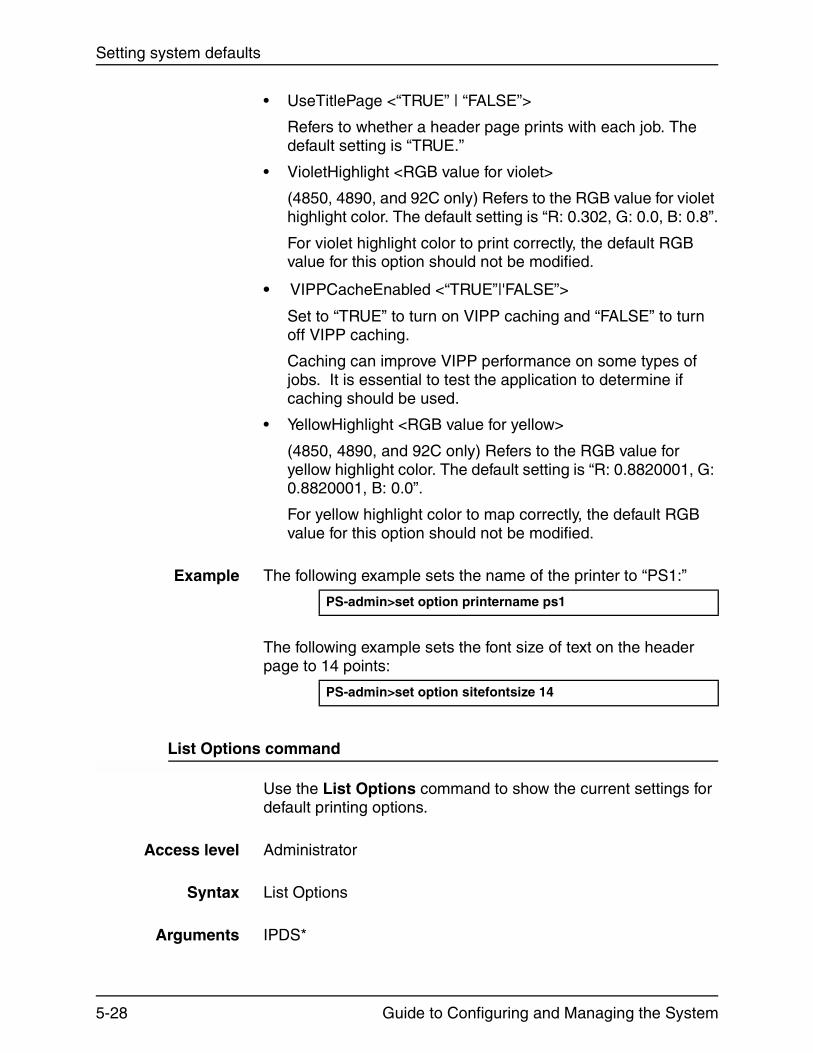
Setting system defaults
• UseTitlePage <“TRUE” | “FALSE”>
Refers to whether a header page prints with each job. The default setting is “TRUE.”
• VioletHighlight <RGB value for violet>
(4850, 4890, and 92C only) Refers to the RGB value for violet highlight color. The default setting is “R: 0.302, G: 0.0, B: 0.8”.
For violet highlight color to print correctly, the default RGB value for this option should not be modified.
• VIPPCacheEnabled <“TRUE”|'FALSE”>
Set to “TRUE” to turn on VIPP caching and “FALSE” to turn off VIPP caching.
Caching can improve VIPP performance on some types of jobs. It is essential to test the application to determine if caching should be used.
• YellowHighlight <RGB value for yellow>
(4850, 4890, and 92C only) Refers to the RGB value for yellow highlight color. The default setting is “R: 0.8820001, G: 0.8820001, B: 0.0”.
For yellow highlight color to map correctly, the default RGB value for this option should not be modified.
Example The following example sets the name of the printer to “PS1:”
The following example sets the font size of text on the header page to 14 points:
List Options command
Use the List Options command to show the current settings for default printing options.
Access level Administrator
Syntax List Options
Arguments IPDS*
PS-admin>set option printername ps1
PS-admin>set option sitefontsize 14
5-28 Guide to Configuring and Managing the System
Setting system defaults
Lists only the options for IPDS printing.
*
Lists all options.
Print Options command
Use the Print Options command to print the default printing options.
Access level Administrator
Syntax Print Options <copies> <plex>
Arguments The following arguments are available:
• <copies>
indicates the number of copies you want to print
• <plex>
indicates whether you want to print the copies in simplex, duplex, or tumble duplex.
Example The following example prints five copies of the default print options in simplex mode:
Setting imager parameters
Imager Parameter commands adjust the imaging level of PostScript, IPDS, and ASCII print jobs only. They control the rendering of lines, fonts, tints, and fine features.
• The Show Imager Parameters command displays the current values of the imager parameters.
• The Change Imager Parameters command changes the current values of the imager parameters for PostScript, IPDS, and ASCII only.
• The Restore Default Imager Parameters command resets the imager parameters to the default values.
PS-admin>print options 5 simplexPrint Options at January 7, 1999 3:31:54 pm PDT submitted as document number 598
Guide to Configuring and Managing the System 5-29
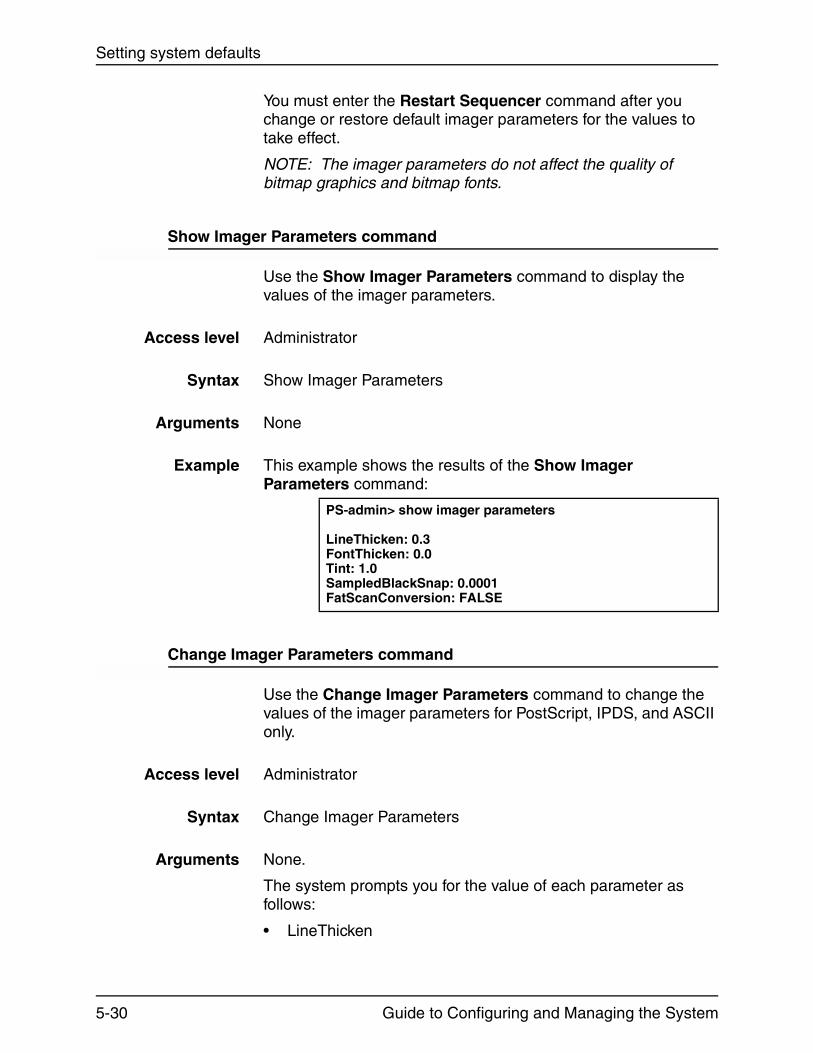
Setting system defaults
You must enter the Restart Sequencer command after you change or restore default imager parameters for the values to take effect.
NOTE: The imager parameters do not affect the quality of bitmap graphics and bitmap fonts.
Show Imager Parameters command
Use the Show Imager Parameters command to display the values of the imager parameters.
Access level Administrator
Syntax Show Imager Parameters
Arguments None
Example This example shows the results of the Show Imager Parameters command:
Change Imager Parameters command
Use the Change Imager Parameters command to change the values of the imager parameters for PostScript, IPDS, and ASCII only.
Access level Administrator
Syntax Change Imager Parameters
Arguments None.
The system prompts you for the value of each parameter as follows:
• LineThicken
PS-admin> show imager parameters
LineThicken: 0.3FontThicken: 0.0Tint: 1.0SampledBlackSnap: 0.0001FatScanConversion: FALSE
5-30 Guide to Configuring and Managing the System
Setting system defaults
Indicates the amount in pixels of thickening you want applied to the lines in a print job. The value for this parameter must be between 0.0 and 100.0.
Recommended values for darkening levels are as follows:
– Slight darkening 1.0
– Medium darkening 2.0
– Heavy darkening 3.5
NOTE: Specifying the 3.5 value for heavy darkening has approximately the same effect as using the thicken document attribute.
• FontThicken
Indicates the amount in pixels of thickening you want applied to the strokes within a font for PostScript, IPDS, and ASCII only. The value for this parameter must be between 0.0 and 100.0.
If you change the FontThicken parameter, examine the output carefully to ensure that the thickening level, as well as the overall image quality, is acceptable. Depending on the font and printer you are using, changing the FontThicken parameter may cause some characters to appear distorted.
Recommended values for darkening levels are as follows:
– Slight darkening 2.0
– Medium darkening 5.0
– Heavy darkening 7.0
NOTE: Specifying the 7.0 value for heavy darkening has approximately the same effect as using the Thicken document attribute.
• Tint
Indicates a value between 0.5 and 1.0, where the smaller the number, the darker the tints become. This parameter only affects the imaging of PostScript, IPDS, and ASCII jobs.
Recommended values for darkening levels are as follows:
– Slight darkening 0.9
– Medium darkening 0.75
– Heavy darkening 0.5
• SampledBlackSnap
Guide to Configuring and Managing the System 5-31
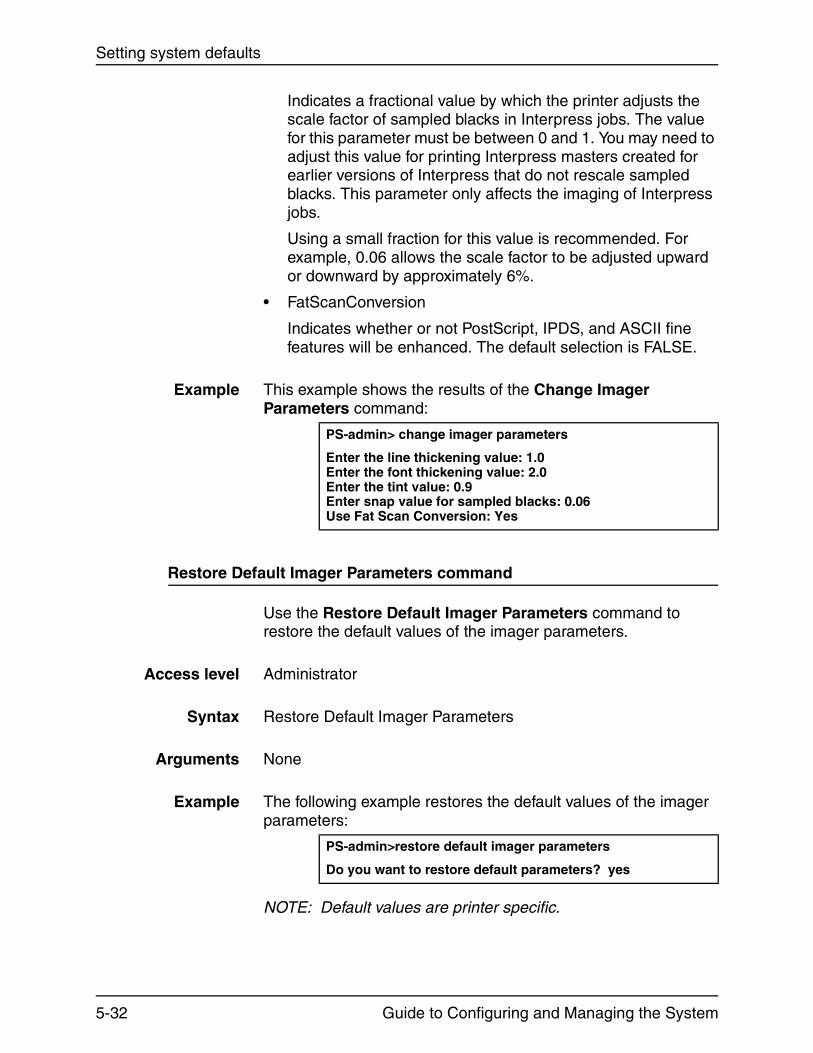
Setting system defaults
Indicates a fractional value by which the printer adjusts the scale factor of sampled blacks in Interpress jobs. The value for this parameter must be between 0 and 1. You may need to adjust this value for printing Interpress masters created for earlier versions of Interpress that do not rescale sampled blacks. This parameter only affects the imaging of Interpress jobs.
Using a small fraction for this value is recommended. For example, 0.06 allows the scale factor to be adjusted upward or downward by approximately 6%.
• FatScanConversion
Indicates whether or not PostScript, IPDS, and ASCII fine features will be enhanced. The default selection is FALSE.
Example This example shows the results of the Change Imager Parameters command:
Restore Default Imager Parameters command
Use the Restore Default Imager Parameters command to restore the default values of the imager parameters.
Access level Administrator
Syntax Restore Default Imager Parameters
Arguments None
Example The following example restores the default values of the imager parameters:
NOTE: Default values are printer specific.
PS-admin> change imager parameters
Enter the line thickening value: 1.0Enter the font thickening value: 2.0Enter the tint value: 0.9Enter snap value for sampled blacks: 0.06Use Fat Scan Conversion: Yes
PS-admin>restore default imager parameters
Do you want to restore default parameters? yes
5-32 Guide to Configuring and Managing the System
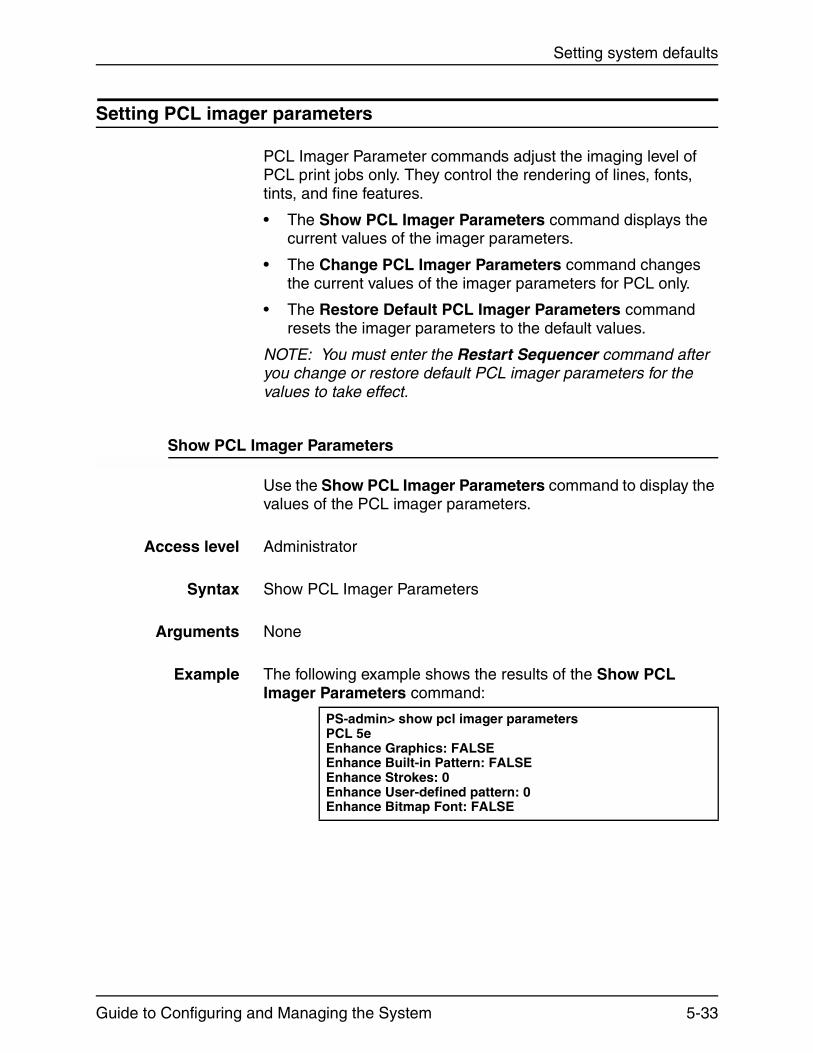
Setting system defaults
Setting PCL imager parameters
PCL Imager Parameter commands adjust the imaging level of PCL print jobs only. They control the rendering of lines, fonts, tints, and fine features.
• The Show PCL Imager Parameters command displays the current values of the imager parameters.
• The Change PCL Imager Parameters command changes the current values of the imager parameters for PCL only.
• The Restore Default PCL Imager Parameters command resets the imager parameters to the default values.
NOTE: You must enter the Restart Sequencer command after you change or restore default PCL imager parameters for the values to take effect.
Show PCL Imager Parameters
Use the Show PCL Imager Parameters command to display the values of the PCL imager parameters.
Access level Administrator
Syntax Show PCL Imager Parameters
Arguments None
Example The following example shows the results of the Show PCL Imager Parameters command:
PS-admin> show pcl imager parametersPCL 5eEnhance Graphics: FALSE Enhance Built-in Pattern: FALSEEnhance Strokes: 0Enhance User-defined pattern: 0Enhance Bitmap Font: FALSE
Guide to Configuring and Managing the System 5-33
Setting system defaults
Change PCL Imager Parameters command
Use the Change PCL Imager Parameters command to change the values of the imager parameters for PCL only.
Access level Administrator
Syntax Change PCL Imager Parameters
Arguments None.
The system prompts you for the value of each parameter as follows:
• Resolution
For the 96, 4635, 180 printer models only, enter the dpi value 300 or 600 at the prompt.
• Raster Graphics enhancement value
Indicates whether you want thickening for raster graphics. Acceptable values are “TRUE” or “FALSE”.
• Built-in pattern enhancement value
Indicates whether you want thickening for patterns. Acceptable values are “TRUE” or “FALSE”.
• HPGL minimum stroke enhancement value
Indicates whether you want to thicken the minimum stroke for HPGL. The value must be a positive integer (from 0 to 255). “0” and “1” indicate that no enhancement is required. Other integers indicate the desired width of the stroke in pixels.
• HPGL user-defined pattern enhancement value
Indicates whether you want thickening for HPGL user-defined patterns. The values are:
“0”=no enhancement
“1=”1D overstrike (shift & OR on X axis)
“2”=2D overstrike (shift & OR on both X and Y axes)
“3”=2X scaling (double pixeling)
• Bitmap font enhancement value
Indicates whether or not you want thickening for bitmap fonts. Acceptable values are “TRUE” or “FALSE”.
On the 92C, 4850, and 4890 models, the system prompts you to change parameters for both PCL 5e and PCL 5c.
5-34 Guide to Configuring and Managing the System
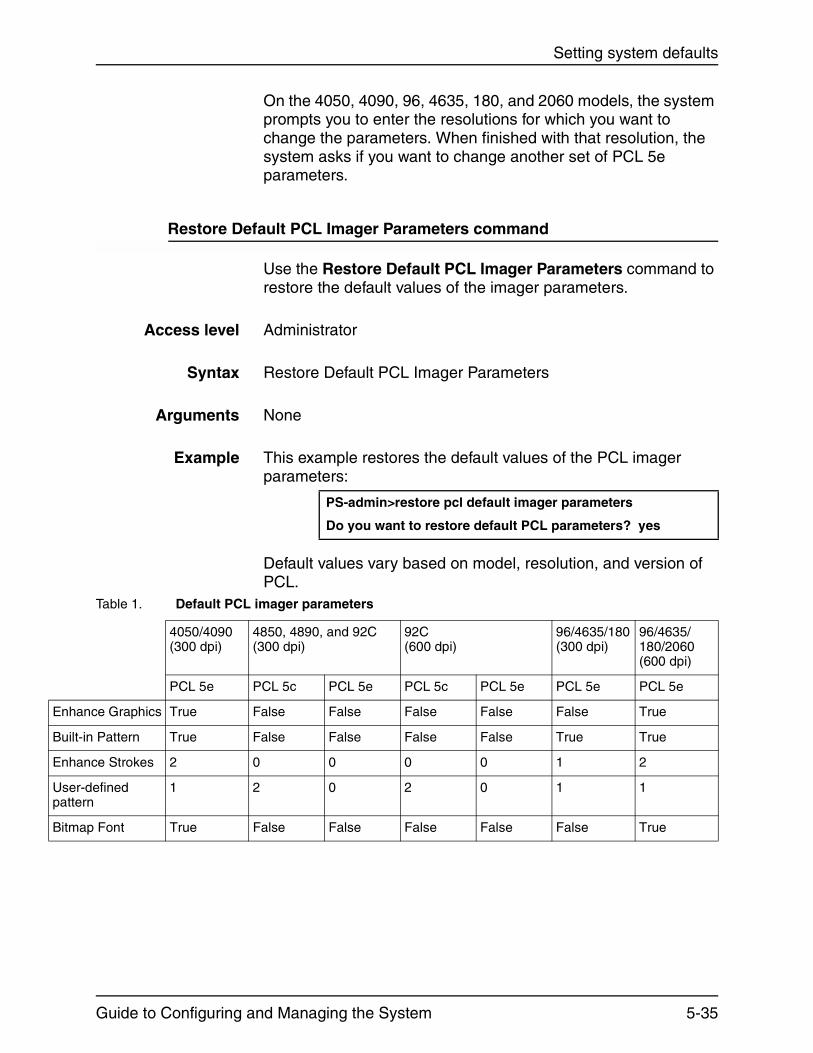
Setting system defaults
Enhan
Built-i
Enhan
User-patter
Bitma
On the 4050, 4090, 96, 4635, 180, and 2060 models, the system prompts you to enter the resolutions for which you want to change the parameters. When finished with that resolution, the system asks if you want to change another set of PCL 5e parameters.
Restore Default PCL Imager Parameters command
Use the Restore Default PCL Imager Parameters command to restore the default values of the imager parameters.
Access level Administrator
Syntax Restore Default PCL Imager Parameters
Arguments None
Example This example restores the default values of the PCL imager parameters:
Default values vary based on model, resolution, and version of PCL.
PS-admin>restore pcl default imager parameters
Do you want to restore default PCL parameters? yes
Table 1. Default PCL imager parameters
4050/4090 (300 dpi)
4850, 4890, and 92C(300 dpi)
92C(600 dpi)
96/4635/180 (300 dpi)
96/4635/180/2060 (600 dpi)
PCL 5e PCL 5c PCL 5e PCL 5c PCL 5e PCL 5e PCL 5e
ce Graphics True False False False False False True
n Pattern True False False False False True True
ce Strokes 2 0 0 0 0 1 2
defined n
1 2 0 2 0 1 1
p Font True False False False False False True
Guide to Configuring and Managing the System 5-35

Setting system defaults
Setting PCL parameters
The Change PCL Parameters command allows you to define the environment for PCL 5 printing.
The Restore Default PCL Parameters command allows you to reset the parameters to the defaults.
The Show PCL Parameters command allows you to view the current settings.
Change PCL Parameters command
Use the Change PCL Parameters command to define the settings you require for PCL 5 printing. Do this before you begin printing your PCL jobs. You can define parameters for:
• Saving the environment—whether you want permanent macros and fonts that you download to be saved to disk for use with PCL jobs
• Specifying edge-to-edge printing—whether you want your PCL jobs to use edge-to-edge printing
• Automatically adding a carriage return (CR) or line feed (LF) to all line endings.
• Specifying a symbol set
NOTE: You must enter the Restart Sequencer command after using the Change PCL Parameters command.
Access level Administrator
Syntax Change PCL Parameters <AutoCR value> <AutoLF value> <Edge to edge value> <Environment save value> <Language> <Symbol set value>
Arguments The following arguments are available:
• <AutoCR value>
Acceptable values are TRUE or FALSE. If TRUE, the system will automatically add a Carriage Return to all line endings. Generally, it should be set to TRUE when printing from UNIX systems. It can also be used if lines are printing in a stair-step pattern. If printing primarily from PCs with DOS or Windows, it should be set to FALSE. The default is FALSE.
5-36 Guide to Configuring and Managing the System
Setting system defaults
• <AutoLF value>
Acceptable values are TRUE or FALSE. If TRUE, the system will automatically add an ASCII line feed (or new line) to all line endings. Generally, it should be set to TRUE when printing from Macintosh systems. It can also be used if lines are printing on top of each other. If printing primarily from PCs with DOS or Windows, it should be set to FALSE. The default is FALSE.
• <Edge to edge values>
Acceptable values are TRUE or FALSE. An entry of TRUE will set the system to use edge to edge printing for PCL jobs. An entry of FALSE means that edge to edge printing will not be used. The value FALSE emulates the HP LaserJet 4, which has default margins on all four edges. The default is FALSE.
NOTE: The 2060 printer cannot print edge to edge.
• <Environment save value>
Acceptable values are TRUE or FALSE. An entry of TRUE will set the system to save downloaded permanent PCL fonts and macros to disk. An entry of FALSE means that downloaded permanent PCL fonts and macros will not be saved to disk. They will be used with the job in which they are downloaded, and will persist until there is a system or sequencer restart. The default is FALSE.
NOTE: There are several important things to be aware of when saving permanent PCL fonts and macros to disk:
– The fonts and macros saved to disk will be retained even after a system or sequencer restart. This is not like an HP LaserJet where the resources would be lost after a restart because they are stored in memory, not on the disk.
– If a font or macro with the same ID as one saved to disk is downloaded (and the EnvironmentSave value is TRUE), it will overwrite the one already on disk. In a network environment, it is important for users who download fonts and macros to be aware of this so that they do not inadvertently overwrite each others’ resources.
– When using the commands to list or print fonts, fonts that have been downloaded will not be listed. Only those that have been installed at the printer controller will be listed.
Guide to Configuring and Managing the System 5-37
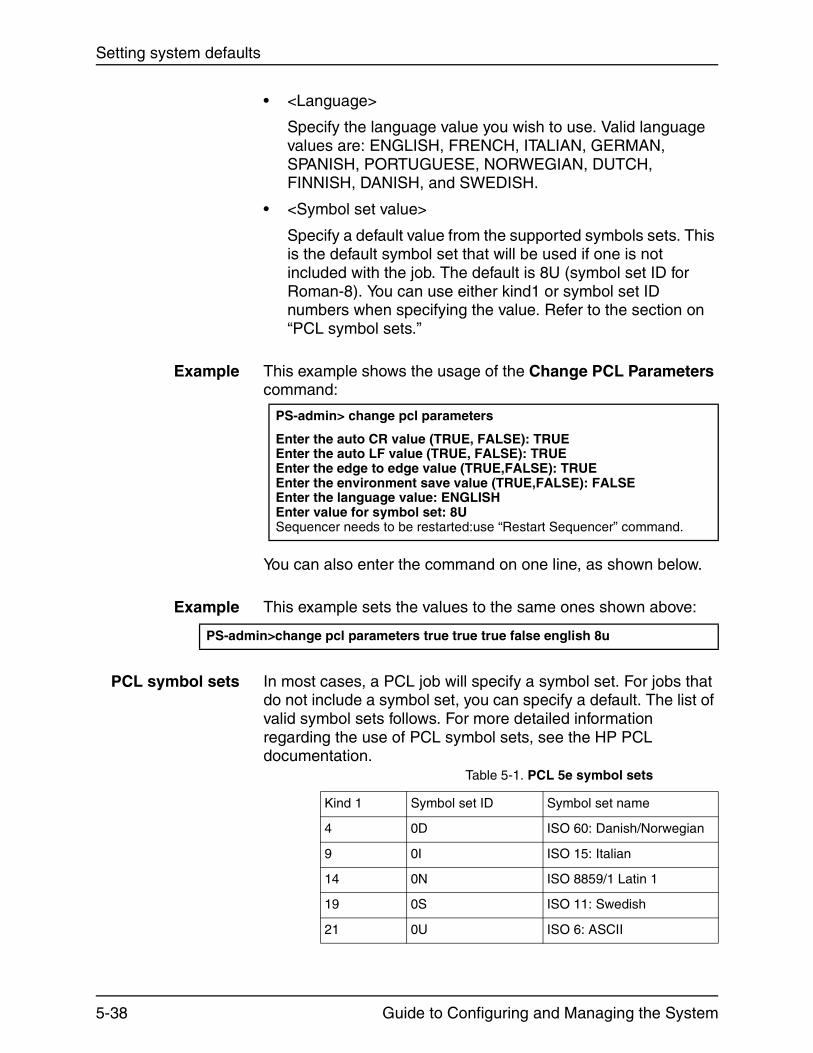
Setting system defaults
• <Language>
Specify the language value you wish to use. Valid language values are: ENGLISH, FRENCH, ITALIAN, GERMAN, SPANISH, PORTUGUESE, NORWEGIAN, DUTCH, FINNISH, DANISH, and SWEDISH.
• <Symbol set value>
Specify a default value from the supported symbols sets. This is the default symbol set that will be used if one is not included with the job. The default is 8U (symbol set ID for Roman-8). You can use either kind1 or symbol set ID numbers when specifying the value. Refer to the section on “PCL symbol sets.”
Example This example shows the usage of the Change PCL Parameters command:
You can also enter the command on one line, as shown below.
Example This example sets the values to the same ones shown above:
PCL symbol sets In most cases, a PCL job will specify a symbol set. For jobs that do not include a symbol set, you can specify a default. The list of valid symbol sets follows. For more detailed information regarding the use of PCL symbol sets, see the HP PCL documentation.
PS-admin> change pcl parameters
Enter the auto CR value (TRUE, FALSE): TRUEEnter the auto LF value (TRUE, FALSE): TRUE Enter the edge to edge value (TRUE,FALSE): TRUEEnter the environment save value (TRUE,FALSE): FALSEEnter the language value: ENGLISHEnter value for symbol set: 8USequencer needs to be restarted:use “Restart Sequencer” command.
PS-admin>change pcl parameters true true true false english 8u
Table 5-1. PCL 5e symbol sets
Kind 1 Symbol set ID Symbol set name
4 0D ISO 60: Danish/Norwegian
9 0I ISO 15: Italian
14 0N ISO 8859/1 Latin 1
19 0S ISO 11: Swedish
21 0U ISO 6: ASCII
5-38 Guide to Configuring and Managing the System
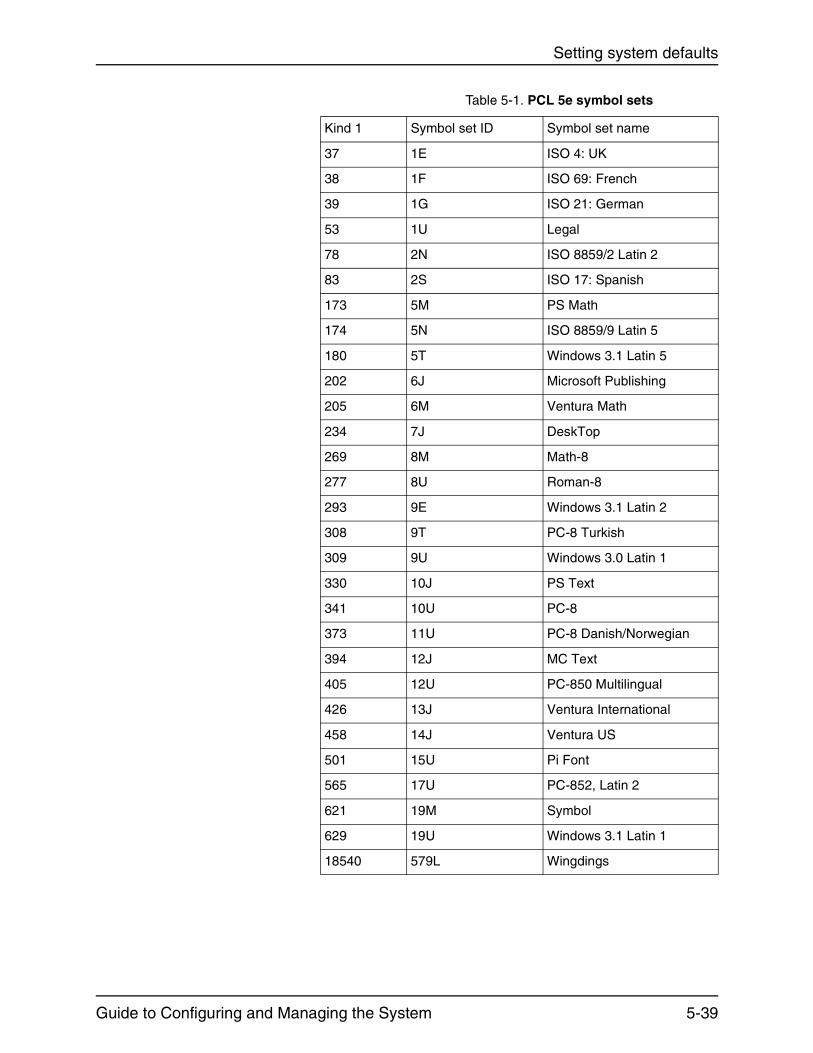
Setting system defaults
37 1E ISO 4: UK
38 1F ISO 69: French
39 1G ISO 21: German
53 1U Legal
78 2N ISO 8859/2 Latin 2
83 2S ISO 17: Spanish
173 5M PS Math
174 5N ISO 8859/9 Latin 5
180 5T Windows 3.1 Latin 5
202 6J Microsoft Publishing
205 6M Ventura Math
234 7J DeskTop
269 8M Math-8
277 8U Roman-8
293 9E Windows 3.1 Latin 2
308 9T PC-8 Turkish
309 9U Windows 3.0 Latin 1
330 10J PS Text
341 10U PC-8
373 11U PC-8 Danish/Norwegian
394 12J MC Text
405 12U PC-850 Multilingual
426 13J Ventura International
458 14J Ventura US
501 15U Pi Font
565 17U PC-852, Latin 2
621 19M Symbol
629 19U Windows 3.1 Latin 1
18540 579L Wingdings
Table 5-1. PCL 5e symbol sets
Kind 1 Symbol set ID Symbol set name
Guide to Configuring and Managing the System 5-39
Setting system defaults
Restore Default PCL Parameters command
Use the Restore Default PCL Parameters command to restore the PCL settings to the defaults. If the PCL5 defaults file has been modified on your system, the defaults may be different from those listed.
NOTE: You must enter the Restart Sequencer command after using the Restore Default PCL Parameters command.
Access level Administrator
Syntax Restore PCL Parameters
• AutoCR: FALSE
• AutoLF: FALSE
• EdgeToEdge: FALSE
• EnvironmentSave: FALSE
• Language: ENGLISH
• SymbolSet: 8U
5-40 Guide to Configuring and Managing the System
Setting system defaults
Show PCL Parameters command
Use the Show PCL Parameters command to display the current PCL settings.
Access level Administrator
Syntax Show PCL Parameters
• AutoCR: TRUE|FALSE
• AutoLF: TRUE|FALSE
• EdgeToEdge: TRUE|FALSE
• EnvironmentSave: TRUE|FALSE
• Language: <LANGUAGE>
• SymbolSet: <value>
NOTE: Even though you can enter a symbol set value using either kind1 or symbol set ID numbers, when you use Show PCL Parameters, only the symbol set ID number is displayed.
Example
This example shows the usage of the Show PCL Parameters command:
PS-admin> show pcl parameters
AutoCR: FALSEAutoLF: FALSEEdgeToEdge: TRUEEnvironmentSave: FALSELanguage: ENGLISHSymbolSet: 8U
Guide to Configuring and Managing the System 5-41

Setting system defaults
5-42 Guide to Configuring and Managing the System

6. Input and output profiles
The Profile commands show, create, and set input and output profiles. You use these commands only if your printer is configured with an optional third party input or output device. (Optional input devices are available only for 96, 4635, and 180 NPS/IPS printers.)
• The Show Profiles command lists the profiles that have been set for your optional input and output devices.
• The Create Profile command creates a profile for your optional input or output device.
• The Set Profile command sets a profile you’ve created for your optional input or output device.
NOTE: You must create a profile before you can set it.
• The Delete Profile command deletes a profile for your optional input or output device.
Profile commands
This section provides the syntax and arguments for the profile commands.
Show Profiles command
Use the Show Profiles command to show profiles for optional input and output devices.
Access level Administrator
Syntax Show <“Input” |“Output”> Profiles
Arguments <“Input” |“Output”>
Specifies that the profile is for an input or output device.
Guide to Configuring and Managing the System 6-1
Input and output profiles
NOTE: If you have set a profile, but “noname” is displayed as the current profile, use the Set Profile command to restore the desired profile.
Create Profile command
Use the Create Profile command to create a profile for an optional input or output device.
Access level Administrator
Syntax Create <“Input” | “Output”> Profile <name> <P1>...<P13>
Arguments <“Input” |“Output”>
Specifies whether the profile is for an input or output device.
<name>
Refers to the name (usually 6–8 characters) you apply to the device
<P1> ... <P13>
Refers to values for the profiles obtained from your Xerox representative or third-party vendor. These values are set in the printer and saved in a file. The system prompts you for 13 values for the output profile.
Set Profile command
Use the Set Profile command to set a profile that you have created for an optional input or output device.
Access level Administrator
Syntax Set < “Input” |“Output”> Profile <name>
Arguments The following arguments are available:
• <“Input” | “Output”>
Specifies whether the profile is for an input or output device
• <name>
6-2 Guide to Configuring and Managing the System

Input and output profiles
Refers to the name you applied to the device when you created a profile for it.
Delete Input|Output Profile command
Use the Delete Input|Output Profile command to delete a profile that you have created for an optional input or output device.
Access level Administrator
Syntax Delete < “Input” |“Output”> Profile <name>
Arguments The following arguments are available:
• <“Input” | “Output”>
Specifies whether the profile is for an input or output device
• <name>
Refers to the name you applied to the device when you created a profile for it.
Profile parameters
Personality profile parameters for your output devices are set during the initial installation of your DocuPrint NPS/IPS, but you can create profiles for optional input and output devices as required using Set Profile parameters.
You can create, then set profile parameters for optional input and output devices as required, by using the following setoutputdevice parameters. You can also set output device parameters for optional output devices. Typically, all values are zero except those for p7, p10, p11, and p12.
The following parameters can be set for device profiles and for output devices:
• <name>
The name (usually 6–8 characters) you assign to the device Profile.
• <p1>
Guide to Configuring and Managing the System 6-3

Input and output profiles
Specifies the minimum time that the printer waits between sheets when delivering them out of the bypass transport. Acceptable values range from 0 to 65535 ms.
• <p2>
Specifies the acceptable time interval between the SHEET EXIT signal and SHEET DELIVERED signal. Acceptable values range from 0 to 12999 ms. (See also <p7>.)
• <p3a>
Specifies the time between sending last page of one set and first page of next set. Acceptable values range from 0 to 65535 ms.
• <p3b>
Specifies the minimum time between two consecutive ends of sets.
• <p4>
Specifies the maximum time between the printer sending an END OF SET signal and the output device responding with a SET DELIVERED signal. Acceptable values range from 0 to 12999 ms.
• <p5>
Specifies the time between the printer sending a CYCLE UP signal and the output device being ready to accept sheets. Acceptable values range from 0 to 65535 ms.
• <p6>
Specifies the mode of operation for the DFA device:
– 0=automatic
– 1=Finishing Function 1 ALWAYS
– 2=Finishing Function 1 NEVER
– 4=Finishing Function 2 ALWAYS
– 8=Finishing Function 2 NEVER
– 4096=always recover to sheet boundaries for failures involving the DFA device
– 8192=always recover to set boundaries for failures involving the DFA device
– 16384=auto restart after DFA full (not currently implemented)
– 32768=1-N (face-down) output.
6-4 Guide to Configuring and Managing the System

Input and output profiles
If you use a DFA connected finishing device on a 96, 4635, or 180 NPS/IPS and you wish to specify 1-N output, add 32768 to the P6 value, and enter the sum of the two numbers.
NOTE: To set more than one function for <p6>, add the appropriate numbers together.
• <p7>
Specifies the status signals supported in the form of a sum of binary values (in parentheses below) specifying which status signals from the output device are used by the printer; for example, 5 specifies that the printer should use the ONLINE and FULL signals (1+4) and ignore the rest.
– ONLINE (1): output device is connected and available
– FAULTED (2): output device has an error and printer must stop delivering sheets to output device immediately (hard stop)
– FULL (4): printer must stop delivering sheets to output device as soon as possible (soft stop)
– SHEET DELIVERED (8): output device has accepted the printed sheet
– SET DELIVERED (16): output device has accepted the entire set
• <p8>
Specifies the sheet exit signal type:
– 0=signal starts on leading edge of sheet
– 1=signal starts on trailing edge of set
• <p9> sheet exit start adjust
Sets the time that the printer waits to send SHEET EXIT and END OF SET signals to the output device. Acceptable values range from -100 to +300 ms.
• <p10>
Sets the pulse width of the SHEET EXIT signal. Acceptable values range from 30 to 110 ms.
• <p11>
Specifies the end of set offset time. Acceptable values range from 0 to 255 ms, with a usual value of 10 ms.
Guide to Configuring and Managing the System 6-5
Input and output profiles
• <p12>
Specifies dead-cycle time before printer shutdown. Allows time for an operator to unload the finisher without printer shutdown. Acceptable values range from 5 to 60 seconds.
NOTE: This parameter applies only to 4050, 4090, 4850, 4890, and 92C printers wtih bypass transports attached and configured.
6-6 Guide to Configuring and Managing the System
7. Setting the printer controller date and time
The Show Time command displays the date and time, and the offset from Greenwich Mean Time. The Set Time command sets the date and time on the printer controller.
CAUTION
This is the only method that you should use to change the date. Do not use UNIX date commands.
Show Time command
Use the Show Time command to display the date and time, and the offset from Greenwich Mean Time.
Access level Administrator, Operator, or User
Syntax Show Time
Arguments None
Set Time command
Use the Set Time command to set the date and time on the printer controller. You can set dates up to (but not including) January 18, 2036, 09:14:05 PST.
CAUTION
Setting the time and date causes the system to reboot.
Access level Administrator or Operator
Syntax Set Time <Time | Remote Host Name | IPAddress>
Guide to Configuring and Managing the System 7-1
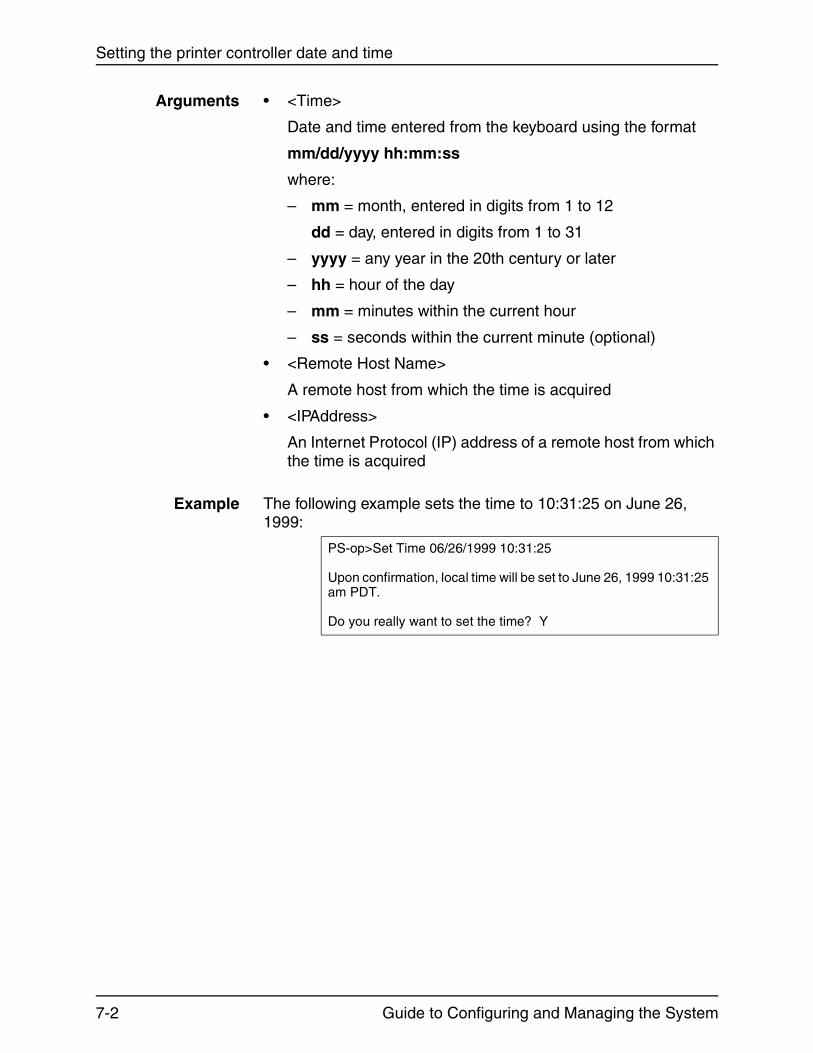
Setting the printer controller date and time
Arguments • <Time>
Date and time entered from the keyboard using the format
mm/dd/yyyy hh:mm:ss
where:
– mm = month, entered in digits from 1 to 12
dd = day, entered in digits from 1 to 31
– yyyy = any year in the 20th century or later
– hh = hour of the day
– mm = minutes within the current hour
– ss = seconds within the current minute (optional)
• <Remote Host Name>
A remote host from which the time is acquired
• <IPAddress>
An Internet Protocol (IP) address of a remote host from which the time is acquired
Example The following example sets the time to 10:31:25 on June 26, 1999:
PS-op>Set Time 06/26/1999 10:31:25
Upon confirmation, local time will be set to June 26, 1999 10:31:25 am PDT.
Do you really want to set the time? Y
7-2 Guide to Configuring and Managing the System

8. Checking system status and displaying billing meters
This chapter describes commands that let you monitor various aspects of printer status, including billing meters.
• The List Volumes command lists the amount of disk space available for each partition of the disk.
• The Show Status command shows the status of the printer. The amount of detail shown depends on the access level from which you issue the command.
• The Show IPDS Status command shows information specific to IPDS printing.
• The Print Sample Documents command allows you to print a sample document to determine system function and view output quality. The List Sample Documents command lists available sample documents.
• The List Executives command lets you determine which clients are connected to your DocuPrint NPS/IPS as remote operators. This command also lists current local sessions.
• The Display Billing Meters command displays the available billing meters.
• The Print Billing Report command prints billing meter data.
The sections in this chapter provide the syntax and arguments for these commands.
Guide to Configuring and Managing the System 8-1
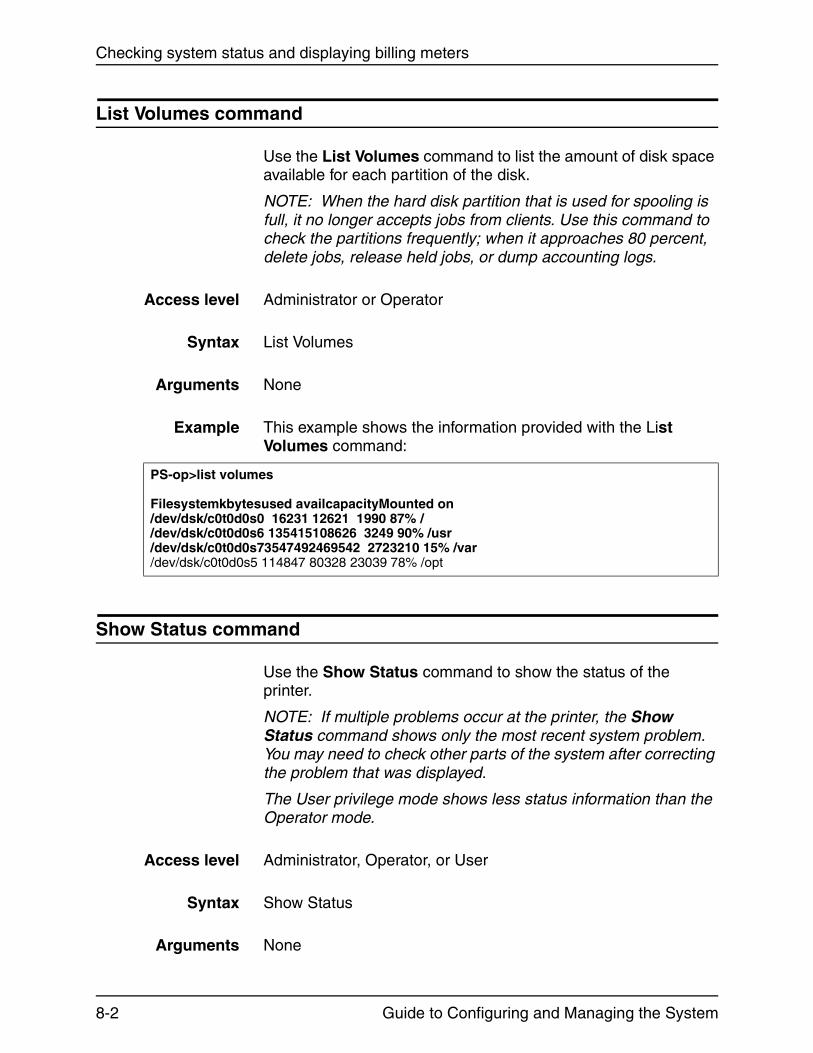
Checking system status and displaying billing meters
List Volumes command
Use the List Volumes command to list the amount of disk space available for each partition of the disk.
NOTE: When the hard disk partition that is used for spooling is full, it no longer accepts jobs from clients. Use this command to check the partitions frequently; when it approaches 80 percent, delete jobs, release held jobs, or dump accounting logs.
Access level Administrator or Operator
Syntax List Volumes
Arguments None
Example This example shows the information provided with the List Volumes command:
Show Status command
Use the Show Status command to show the status of the printer.
NOTE: If multiple problems occur at the printer, the Show Status command shows only the most recent system problem. You may need to check other parts of the system after correcting the problem that was displayed.
The User privilege mode shows less status information than the Operator mode.
Access level Administrator, Operator, or User
Syntax Show Status
Arguments None
PS-op>list volumes
Filesystemkbytesused availcapacityMounted on/dev/dsk/c0t0d0s0 16231 12621 1990 87% //dev/dsk/c0t0d0s6 135415108626 3249 90% /usr/dev/dsk/c0t0d0s73547492469542 2723210 15% /var/dev/dsk/c0t0d0s5 114847 80328 23039 78% /opt
8-2 Guide to Configuring and Managing the System

Checking system status and displaying billing meters
Example The following example shows the information provided by the Show Status command. There are differences in the information that is provided, based on the printer model and configuration.
Table 8-1. Show Status example for 4850
PS-op>Show Status
Printer Type: Xerox/4850, Duplex & Highlight Color capableMedia Loaded: A4::white: Tray 4
UsLetter::blue: Tray 3 USLegal::white: Tray 2 USLetter::white: Tray 1Paper Trays: 1: OK (can feed: standard, transparencies, drilled; can purge)Purge Allowed 2: OK (can feed: standard, transparencies, drilled; can purge) 3: OK (can feed: standard, transparencies, drilled; can purge) 4: OK (can feed: standard, transparencies, drilled; can purge)Stackers: Top: OK, No Offset (can stack: standard, transparencies, drilled) 1: OK, Offset (can stack: standard, drilled) 2: OK, Offset (can stack: standard, drilled)Stacker Groups: 0: Top Tray 1: Stacker 1 2: Stacker 2Message: L035 - IOT in power saver mode. Housings: State: OK, Color:Black State: OK, Color:GreenSpooler status: AvailableFormatter status: AvailablePrinter status: AvailablePrinting is Started.Queuing is Started.SchedulingPolicy:resourceMatch
Guide to Configuring and Managing the System 8-3
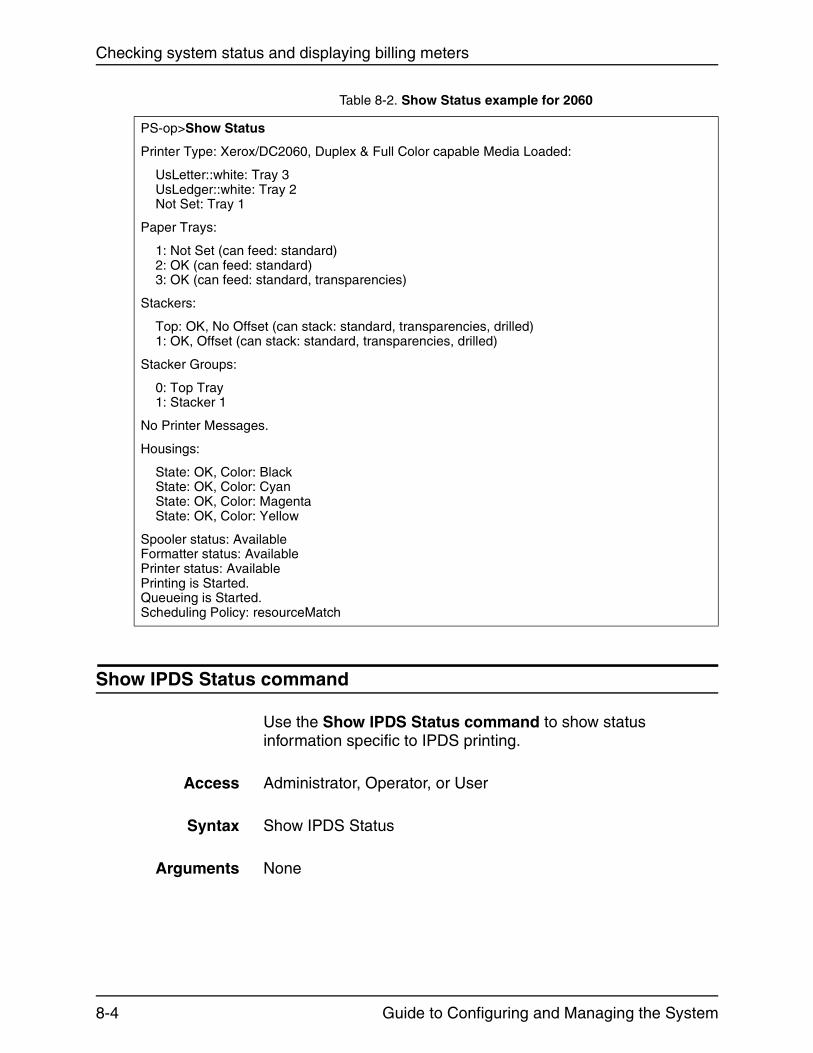
Checking system status and displaying billing meters
Show IPDS Status command
Use the Show IPDS Status command to show status information specific to IPDS printing.
Access Administrator, Operator, or User
Syntax Show IPDS Status
Arguments None
Table 8-2. Show Status example for 2060
PS-op>Show Status
Printer Type: Xerox/DC2060, Duplex & Full Color capable Media Loaded:
UsLetter::white: Tray 3UsLedger::white: Tray 2 Not Set: Tray 1
Paper Trays:
1: Not Set (can feed: standard) 2: OK (can feed: standard) 3: OK (can feed: standard, transparencies)
Stackers:
Top: OK, No Offset (can stack: standard, transparencies, drilled)1: OK, Offset (can stack: standard, transparencies, drilled)
Stacker Groups:
0: Top Tray1: Stacker 1
No Printer Messages.
Housings:
State: OK, Color: BlackState: OK, Color: CyanState: OK, Color: MagentaState: OK, Color: Yellow
Spooler status: AvailableFormatter status: AvailablePrinter status: AvailablePrinting is Started.Queueing is Started.Scheduling Policy: resourceMatch
8-4 Guide to Configuring and Managing the System

Checking system status and displaying billing meters
Example The following example shows the information provided by the Show IPDS Status command.
Listing and printing sample documents
To test the print quality of your printer, you can print sample documents. The List Sample Documents command shows what sample documents are available.
There are some special sample documents that are useful to the operator. The DocuPrintFAQ provides a list of frequently asked questions about DocuPrint NPS/IPS. This document contains information that may help you resolve some problems. The OperatorQRC is a quick reference card with a summary of the steps for performing the most common operator procedures.
List Sample Documents command
Use the List Sample Documents command to list the available sample documents.
NOTE: The Sample button on the printer control panel is not supported.
PS-op>Show IPDS Status
IPDS Tracing is <started | stopped>
The IPDS Virtual Printer is <vp_name>
<VP attribute list>
IPDS Printing is <started | stopped>
The channel is <online | offline>
The IPDS state is <ready | not ready>
The pages outstanding is <n>
Access level Administrator or operator
Syntax List sample documents
Arguments None
Guide to Configuring and Managing the System 8-5
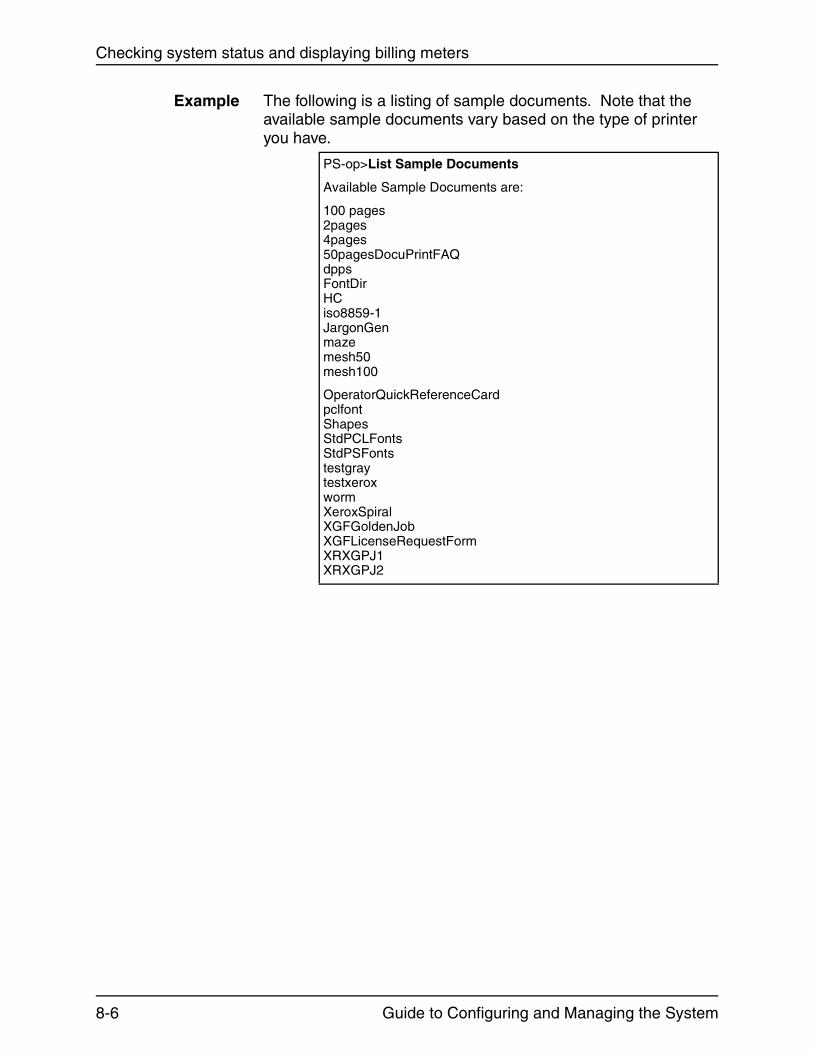
Checking system status and displaying billing meters
Example The following is a listing of sample documents. Note that the available sample documents vary based on the type of printer you have.
PS-op>List Sample Documents
Available Sample Documents are:
100 pages2pages4pages50pagesDocuPrintFAQdppsFontDirHCiso8859-1JargonGenmazemesh50mesh100
OperatorQuickReferenceCardpclfontShapesStdPCLFontsStdPSFontstestgraytestxeroxwormXeroxSpiralXGFGoldenJobXGFLicenseRequestFormXRXGPJ1XRXGPJ2
8-6 Guide to Configuring and Managing the System
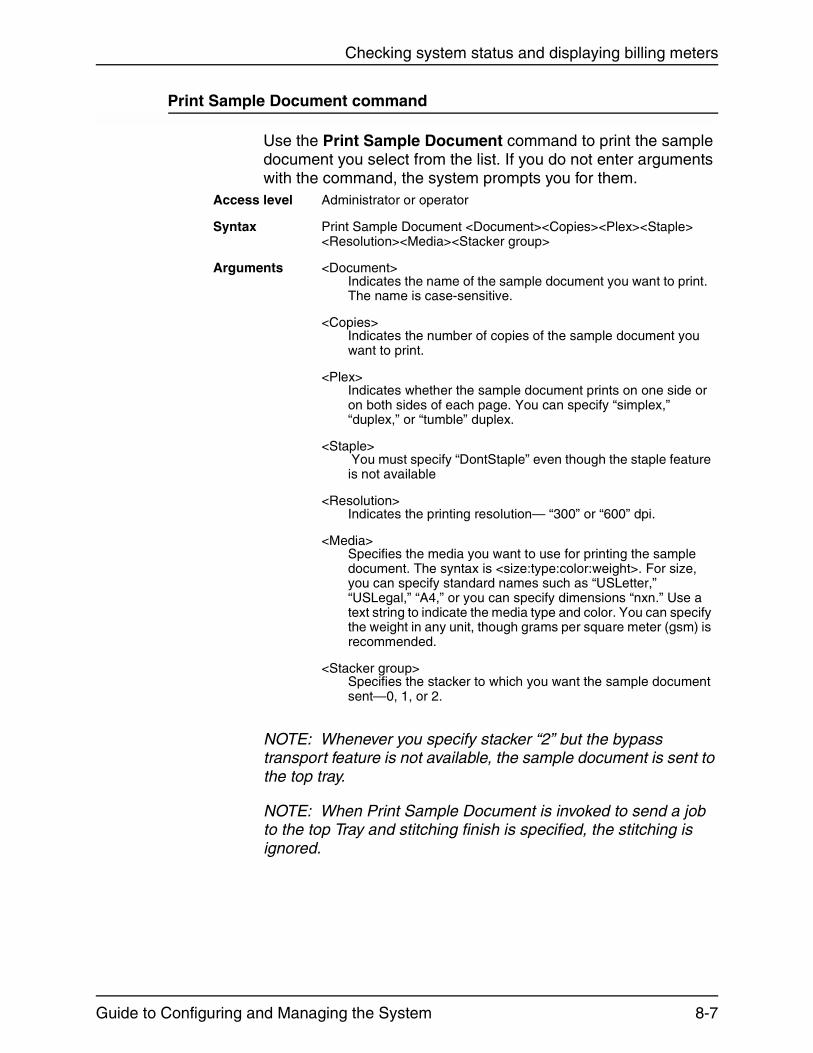
Checking system status and displaying billing meters
Print Sample Document command
Use the Print Sample Document command to print the sample document you select from the list. If you do not enter arguments with the command, the system prompts you for them.
NOTE: Whenever you specify stacker “2” but the bypass transport feature is not available, the sample document is sent to the top tray.
NOTE: When Print Sample Document is invoked to send a job to the top Tray and stitching finish is specified, the stitching is ignored.
Access level Administrator or operator
Syntax Print Sample Document <Document><Copies><Plex><Staple><Resolution><Media><Stacker group>
Arguments <Document>Indicates the name of the sample document you want to print. The name is case-sensitive.
<Copies>Indicates the number of copies of the sample document you want to print.
<Plex>Indicates whether the sample document prints on one side or on both sides of each page. You can specify “simplex,” “duplex,” or “tumble” duplex.
<Staple> You must specify “DontStaple” even though the staple feature is not available
<Resolution>Indicates the printing resolution— “300” or “600” dpi.
<Media>Specifies the media you want to use for printing the sample document. The syntax is <size:type:color:weight>. For size, you can specify standard names such as “USLetter,” “USLegal,” “A4,” or you can specify dimensions “nxn.” Use a text string to indicate the media type and color. You can specify the weight in any unit, though grams per square meter (gsm) is recommended.
<Stacker group>Specifies the stacker to which you want the sample document sent—0, 1, or 2.
Guide to Configuring and Managing the System 8-7

Checking system status and displaying billing meters
List Executives command
Use the List Executives command at the printer controller or at the client when logged on as a remote operator, to determine which clients are connected to your DocuPrint NPS/IPS as remote operators and to list current local sessions. (Refer to “Using remote access” in the “Using the system interface” chapter for more information.)
Access level Administrator or Operator
Syntax List Executives
Arguments None
NOTE: An asterisk indicates the client from which you issued the command. IP addresses for all clients logged on as remote operators are listed. If DNS is enabled on the network, host names are also listed.
Display Billing Meters command
Use the Display Billing Meters command to display the available billing meters. As the printer processes print jobs, it maintains usage data to be displayed on the billing meters. Billing meters are numbers (up to 8 digits) used to track printer activity, such as the number of pages printed.
NOTE: This command is not used for the DocuColor 2060 NPS/IPS. On the DocuColor 2060, use the touchscreen to display billing meters.
Access level Administrator or operator
Syntax Display Billing Meters <All>
NOTE: There are different arguments for this command depending on the printer model you have.
8-8 Guide to Configuring and Managing the System

Checking system status and displaying billing meters
Arguments for 96,4635, and 180
NPS/IPS billingmeters
The following arguments are available when you are using this command with a 96, 4635, or 180 NPS/IPS:
• <All>
Displays all the billing meters.
• <none>
If no argument is entered, only billing meter A is displayed.
• Billing Meter A
The total number of good prints delivered.
• Billing Meter C
The total number of good 3-pitch prints delivered, divided by 100.
• Billing Meter E
The total number of good 4-pitch prints delivered, divided by 100.
• Billing Meter F
The total number of purge sheets delivered, divided by 100.
• Billing Meter H
The total number of good duplex sheets delivered, divided by 100.
• Billing Meter J
The total number of good service prints delivered, divided by 100.
• Billing Meter K
The total number of good prints delivered, divided by 100.
• Billing Meter S1
The total number of good 5-pitch prints delivered, divided by 100.
• Billing Meter S2
The total number of good 6-pitch prints delivered, divided by 100.
• Billing Meter S3
The total number of good 7-pitch prints delivered, divided by 100.
Guide to Configuring and Managing the System 8-9
Checking system status and displaying billing meters
Arguments for4050/4090, 4850/
4890, and 92CNPS/IPS billing
meters
The following arguments are available when you are using this command with billing meters on the 4050/4090, 4850/4890, and 92C NPS/IPS.
• <All>
Displays all the billing meters.
• <none>
If no argument is entered, only billing meter A is displayed.
• Billing Meter A
Counts the number of successfully completed sheets through the paper path. Duplex sheets count as two sheets.
• Billing Meter C
Counts all the sheets fed into the paper path from Tray 1,2,3, or 4.
• Billing Meter E
Counts all the successfully completed sheets delivered to the intended output destination.
• Billing Meter F
Same function as Billing Meter A except that it can be cleared by the system.
• Billing Meter H
Counts all the successfully completed duplex sheets delivered to the intended output destination.
• Billing Meter J
Same function as Billing Meter A except that it counts sheets printed while the printer is in diagnostic mode.
• Billing Meter L
Counts the total number of successfully completed color sheets printed in highlight color. Sheets using black only are recorded by this meter. (Used only for highlight color printers.)
• Billing Meter T
Same function as Billing Meter A.
8-10 Guide to Configuring and Managing the System
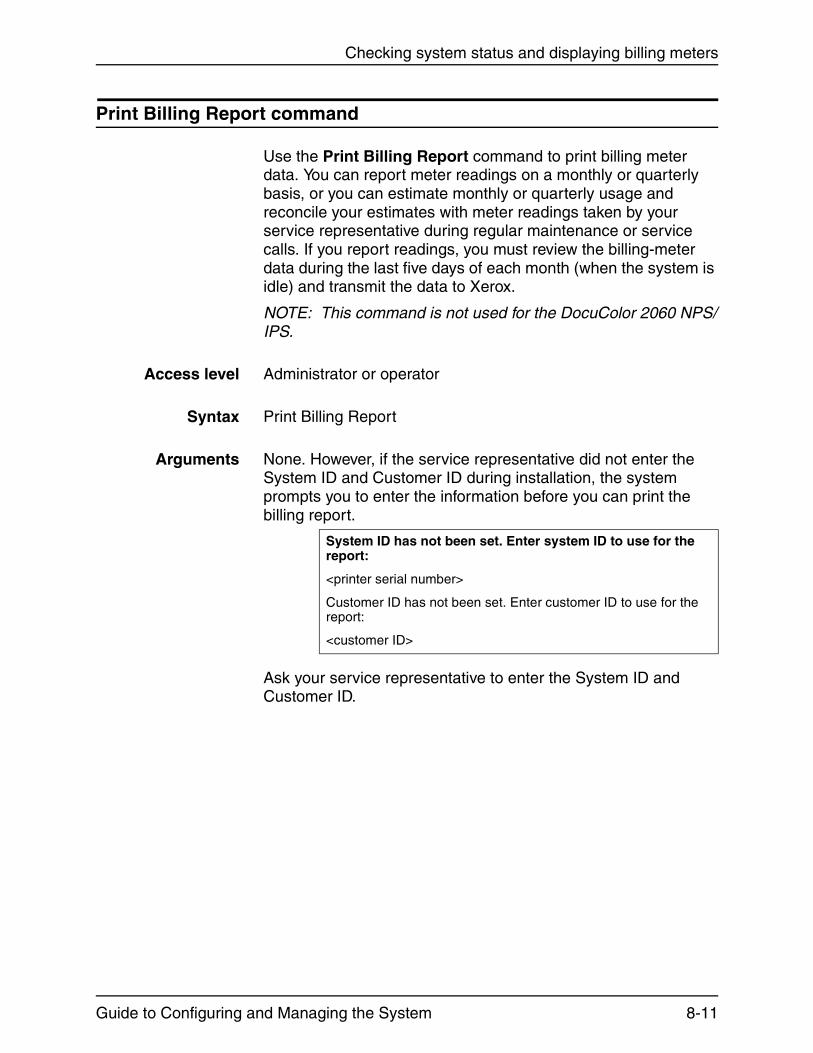
Checking system status and displaying billing meters
Print Billing Report command
Use the Print Billing Report command to print billing meter data. You can report meter readings on a monthly or quarterly basis, or you can estimate monthly or quarterly usage and reconcile your estimates with meter readings taken by your service representative during regular maintenance or service calls. If you report readings, you must review the billing-meter data during the last five days of each month (when the system is idle) and transmit the data to Xerox.
NOTE: This command is not used for the DocuColor 2060 NPS/IPS.
Access level Administrator or operator
Syntax Print Billing Report
Arguments None. However, if the service representative did not enter the System ID and Customer ID during installation, the system prompts you to enter the information before you can print the billing report.
Ask your service representative to enter the System ID and Customer ID.
System ID has not been set. Enter system ID to use for the report:
<printer serial number>
Customer ID has not been set. Enter customer ID to use for the report:
<customer ID>
Guide to Configuring and Managing the System 8-11

Checking system status and displaying billing meters
Examples The examples show sample billing reports:
Xerox DocuPrint 4850Customer Billing Report
Date: 01/07/97Time: 19:50CUSTOMER ID: dptestMACHINE ID: 11W030919
***Base System ConfigurationMachine type - 4850
Printer Characteristics
- Speed: 50 ppm- Paper path: duplex- Resolution: 300 spi- Finisher: 2-tray Normal- Default Order:1 to N- Feeders:
- Feeder 1: UsLetter::white- Feeder 2: UsLetter::white- Feeder 3: UsLetter::white- Feeder 4: UsLetter::white
- Dry Ink Housings: 2
GOOD IMPRESSIONS SUCCESSFULLY DELIVERED: 120182BLK XEROGRAPHIC MODE IMPRESSIONS: 19215H/L XEROGRAPHIC MODE IMPRESSIONS: 100967SHEETS PRINTED IN IOT DIAGNOSTIC MODE: 29306GOOD IMPRESSIONS SUCCESSFULLY DELIVERED IN NORMAL/DIAGNOSTIC MODES: 120182
8-12 Guide to Configuring and Managing the System

Checking system status and displaying billing meters
Xerox DocuPrint 4635Customer Billing Report
Date: 01/07/97Time: 18:54CUSTOMER ID: dptestMACHINE ID: 6D5002013
***Base System ConfigurationMachine type - 4635
Printer Characteristics
- Speed: 135 ppm- Paper path: duplex- Resolution: 600, 300 spi- Finisher: 2-tray Normal- Default; Order:1 to N- Feeders:
- Feeder 1: UsLetter::white:75- Feeder 2: A4::white:75- Feeder 3: 420x297::white:75- Feeder 4: UsLedger::white
GOOD IMPRESSIONS SUCCESSFULLY DELIVERED: 2478635
SHEETS PRINTED IN IOT DIAGNOSTIC MODE: 362
Guide to Configuring and Managing the System 8-13

Checking system status and displaying billing meters
8-14 Guide to Configuring and Managing the System

9. Managing accounting files and logs
The DocuPrint NPS/IPS printer controller maintains accounting files and log files to help you in system administration. You should periodically review these files and delete those that you do not need. The sections in this chapter provide the commands necessary for these tasks.
Maintaining accounting files
Accounting files consist of a list of records of printed jobs. You can use these files for statistical analysis or billing. There are several different versions of accounting files you can use.
NOTE: Basic accounting information (such as the date of job submission, the number of pages printed, and the time it took to print them) is in the lower-left corner of the Job Messages sheet that prints at the end of a job.
For billing purposes, the accounting file maintains the sender name (user name); the name is shown both in the accounting log and on the banner page.
When the recipient name attribute is present, the recipient name string is placed both in the “large print” user name field and in the recipient name field on the banner page (the sender name is placed in the “small print” user name field). When the recipient name attribute is not present, only the sender name is shown (in large print) on the banner page.
Guide to Configuring and Managing the System 9-1

Managing accounting files and logs
The following example shows a portion of an accounting file (version 2).
Each job record consists of the version number and the values for various fields associated with the job. Each field is surrounded by quotes. Fields for which no values have been set are shown as “<absent>.”
Accounting file versions
There are four versions of the accounting file, referred to as “version 2,” “version 3,” “version 4,” and ”version 5”. They are nearly the same.
• Version 2 is the default format that has been used on all NPS/IPS systems prior to release 1.6.1.
• Version 3 logs 13 more attributes than version 2, and it displays multiple media.
• Version 4 logs all version 3 values plus exception page values in addition to cycle exceptions.
• Version 5 logs all version 4 values plus accounting information for the CumulativePagesDone, Cumulative CopiesDone, and CumulativeBlankBacksAdded attributes.
The version is selected during installation or by using the Configure utility to change the jpm.accounting.format parameter. The version that your system is using is indicated by the number “2” or “3” at the beginning of a line.
Job record fieldsfor versions 2 and
3
The order and meaning of the fields in a job record for both versions 2 and 3 is shown below. They are the same except for the media attribute.
2 “146” “devans” “.login” “<absent>” “ASCII”“<absent>” “1” “<absent>” “<absent>” “<absent>” “<absent>” “<absent>” “<absent>” “<absent>” “rushmore” “720224170” “720224187” “1160” “2” “<absent>”“216,279,,white,0” "birdie" “<absent>” “0” “0” <absent>” “<absent>” “Unix lpr” “<absent>” “<absent>”2 “145” “mullen” “28-8-2.ps” “<absent>” “PS” “<absent>” “1” “<absent>” “<absent>” “<absent>” “<absent>” “<absent>” “<absent>” “<absent>” “rushmore” “720223319” “720223340” “3050” “6” “<absent>” “216,279,white,0” "durango" "<absent>" "0" "0" "<absent>" "<absent>" "Unix lpr" "<absent>" "<absent>"
JobID=<job ID number>Refers to the job ID number
9-2 Guide to Configuring and Managing the System

Managing accounting files and logs
page
page
page
level DS
.
inted.
ide of
ait or
“n” is
SenderName=<sender name>Refers to the job sender name that appears on the header that prints with the document.
DocumentName=<document name>Refers to the document name that appears on the header that prints with the job.
DocumentDate=<document date>Refers to the document date that appears on the header that prints with the job.
DocumentFormat=<“PS” | “PS2” | “ASCII” | “PCL” | “PCL5e” | “PCL5c” | “IPDSSOCK” | “IPDSTRACE”>
Refers to whether the format of the document is PostScript1, PostScript level 2, ASCII, PCL 5e or 5c, IPDS, or an IPtrace.
CopyCount=<number of copies>Refers to how many copies of the document were printed
Priority=<priority number>Refers to the job priority.
PageRange=<first page number, last page number>Refers to the range of pages of the document that were pr
Plex=<number>Refers to whether the document printed simplex (on one seach page) or duplex (on both sides of each page).
———
“1” =simplex“2” =duplex“3” =tumble duplex
Orientation=<number>Refers to whether the orientation of the document is portrlandscape.
————
“0” =portrait“1” =landscape“2” =inversePortrait“3” =inverseLandscape
Resolution=<“240” | “300” | “600”>Refers to the printing resolution
OutputBin=<“0” | “n” >Refers to the stacker group used for the document, wherethe number of the stacker group, for example:———
“0” =Sample Tray (top tray)“1” =Stacker group 1“2” =Stacker group 2
HighlightColor=<number>Refers to the highlight color used in the document.
————
“0” =no highlight color“2” =red“3” =green“4” =blue
————
“5” =cyan“6” =magenta“7” =yellow“8” =cardinal
Guide to Configuring and Managing the System 9-3
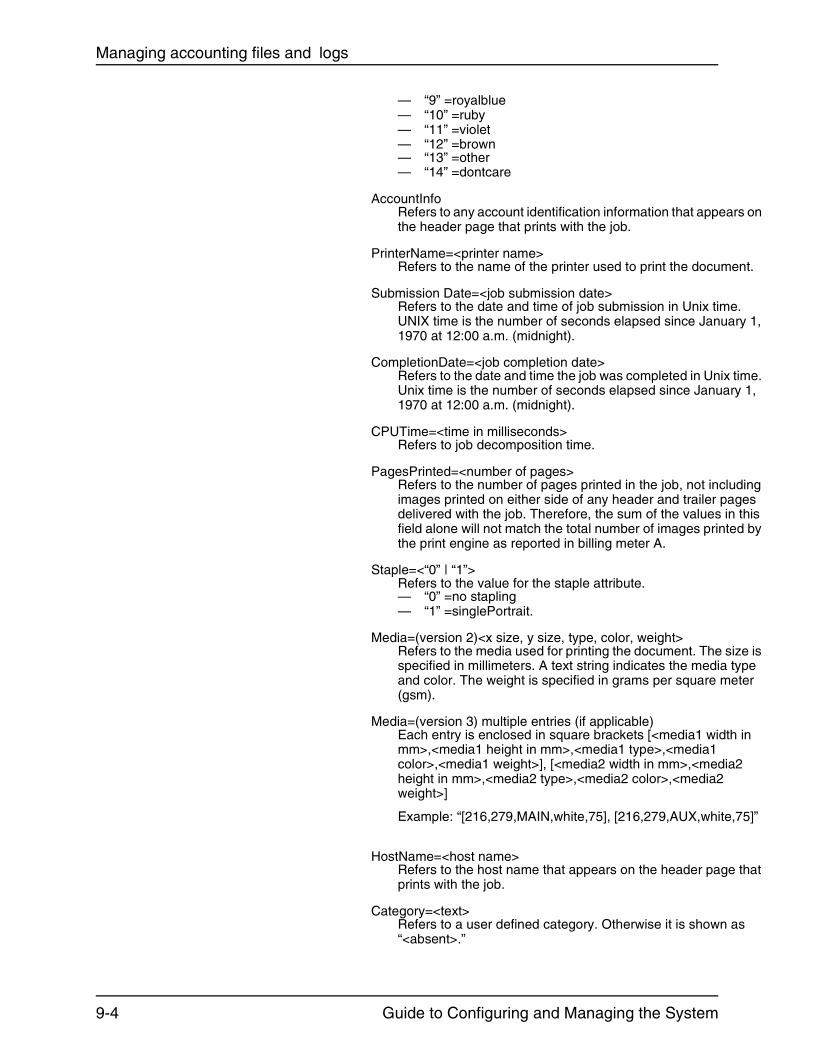
Managing accounting files and logs
rs on
ent.
e. ry 1,
time. ry 1,
ding ges this d by
ize is type eter
in
2
,75]”
that
as
————
“9” =royalblue“10” =ruby“11” =violet“12” =brown
——
“13” =other“14” =dontcare
AccountInfoRefers to any account identification information that appeathe header page that prints with the job.
PrinterName=<printer name>
Refers to the name of the printer used to print the docum
Submission Date=<job submission date> Refers to the date and time of job submission in Unix tim
UNIX time is the number of seconds elapsed since Janua1970 at 12:00 a.m. (midnight).
CompletionDate=<job completion date>Refers to the date and time the job was completed in Unix Unix time is the number of seconds elapsed since Janua1970 at 12:00 a.m. (midnight).
CPUTime=<time in milliseconds>Refers to job decomposition time.
PagesPrinted=<number of pages>
Refers to the number of pages printed in the job, not incluimages printed on either side of any header and trailer padelivered with the job. Therefore, the sum of the values infield alone will not match the total number of images printethe print engine as reported in billing meter A.
Staple=<“0” | “1”>Refers to the value for the staple attribute.——
“0” =no stapling“1” =singlePortrait.
Media=(version 2)<x size, y size, type, color, weight>Refers to the media used for printing the document. The sspecified in millimeters. A text string indicates the media and color. The weight is specified in grams per square m(gsm).
Media=(version 3) multiple entries (if applicable)Each entry is enclosed in square brackets [<media1 widthmm>,<media1 height in mm>,<media1 type>,<media1 color>,<media1 weight>], [<media2 width in mm>,<mediaheight in mm>,<media2 type>,<media2 color>,<media2 weight>]
Example: “[216,279,MAIN,white,75], [216,279,AUX,white
HostName=<host name>
Refers to the host name that appears on the header pageprints with the job.
Category=<text>Refers to a user defined category. Otherwise it is shown “<absent>.”
9-4 Guide to Configuring and Managing the System

Managing accounting files and logs
that
heet
Additional jobrecord fields in
version 3
The order and meaning of the additional fields in a job record for version 3 is as follows:
CancelRequest=<“0” | “1” | “2”>Refers to whether the job was canceled.— “0” =noCancelRequest— “1” =cancelRequestedByOperator— “2” =cancelRequestedByUser.
CompletionStatus=<“0” | “1” | “2” | “3” | “4” | “5” | “6”>
Refers to how the print job completed.— “0” =completed— “1” =cancelledByOperator— “2” =cancelledByUser— “3” =completedWithWarnings— “4” =completedWithErrors— “5” =rejected— “6” =aborted
Message=<message>
Refers to any message that appears on the header pageprints with the job.
ObjectSize=<size in bytes>
Refers to the size of the document file in bytes.
Submitter=<“Unix lpr” | “absent”>Indicates if the job was submitted using lpr print utilities. Otherwise, the field is shown as “<absent>.”
DocEndMessage=<message>Refers to any message that appears on the Job Message sthat prints at the end of a job.
MapColor=<number>Refers to the map color that is used in the document.
————
“0” =no highlight color“2” =red“3” =green“4” =blue
————
“5” =cyan“6” =magenta“7” =yellow“8” =cardinal
————
“9” =royalblue“10” =ruby“11” =violet“12” =brown
——
“13” =other“14” =dontcare
ASCIIFontName=<text>Refers to the name of the font used for ASCII jobs.
ASCIIFontSize=<number>Refers to the size of the font used for ASCII jobs.
Disposition=<text>
Guide to Configuring and Managing the System 9-5

Managing accounting files and logs
rvice
sed.
<end
rt ht in
], etc.
other.
other.
tion
Refers to the disposition type used for Decomposition Sejobs.
HighlightColorRendering=<number>Refers to the type of HighlightColorRendering algorithm u— “0”=Pictorial— “1”=Presentation— “2”=ColorToHighlight— “3”=ColorTables— “4”=Automatic— “5”=defaultRendering
ExceptionPages=multiple entriesEach entry is enclosed in square brackets [ <start page>-page>, <media1 width in mm>, <media1 height in mm>, <media1 type>, <media1 color>, <media1 weight>], [ <stapage>-<end page>, <media2 width in mm>, <media2 heigmm>, <media2 type>, <media2 color>, <media2 weight>
Example: “[1-2,216, 279,MAIN,white,75], [3-4,216,279,AUX,white,75]”
ElideHeader=numberRefers to the use of the ElideHeader attribute.
— “0”=False— “1”=True
BackgroundForm=textRefers to the use of a background form.
ForwardedTo=[IP address] (DocID)Refers to jobs forwarded from one NPS/IPS system to an
ForwardedFrom=[IP address] (DocID)Refers to jobs forwarded from one NPS/IPS system to an
CycleForms=numberRefers to the cycling of background forms for DecomposiService.
AutoTabShift=numberRefers to the use of the AutoTabShift attribute.
— “0”=False— “1”=True
MICR mode=numberRefers to MICR printing.
— “0”=False— “1”=True
Halftone=numberRefers to the use of the Halftone attribute.
— “0”=defaultHalftone— “1”=Course— “2”=Medium— “3”=Fine— “4”=ExtraFine
9-6 Guide to Configuring and Managing the System
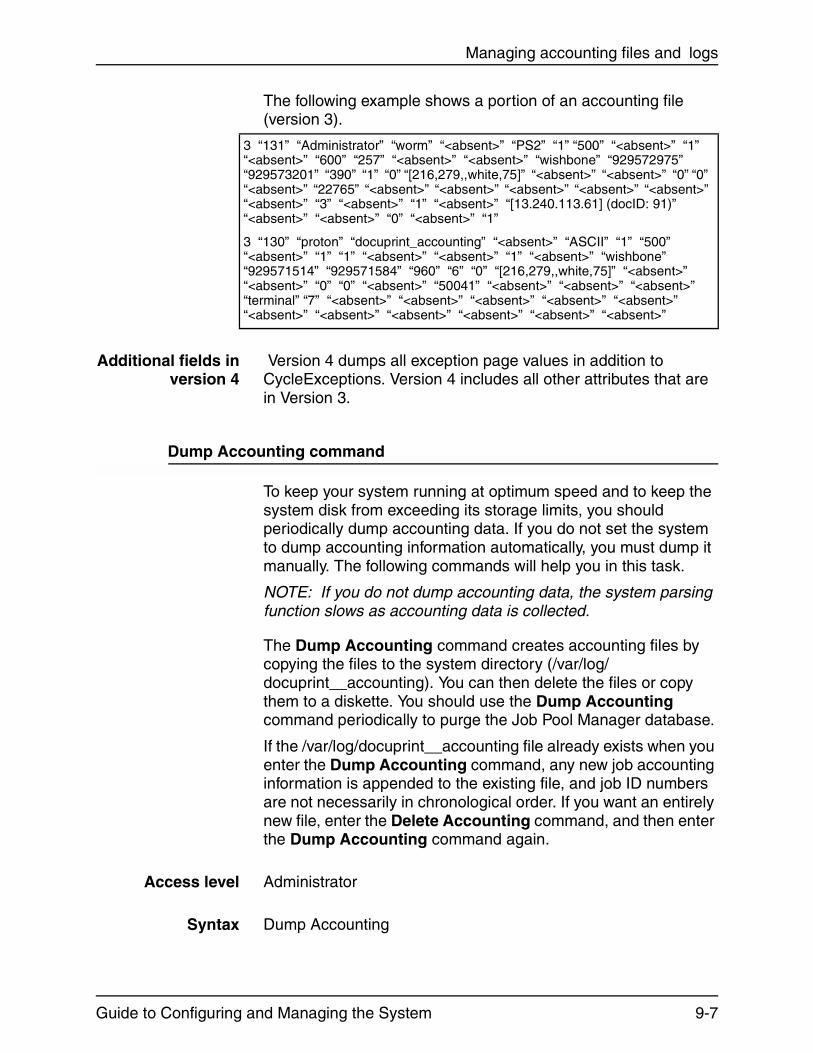
Managing accounting files and logs
The following example shows a portion of an accounting file (version 3).
Additional fields inversion 4
Version 4 dumps all exception page values in addition to CycleExceptions. Version 4 includes all other attributes that are in Version 3.
Dump Accounting command
To keep your system running at optimum speed and to keep the system disk from exceeding its storage limits, you should periodically dump accounting data. If you do not set the system to dump accounting information automatically, you must dump it manually. The following commands will help you in this task.
NOTE: If you do not dump accounting data, the system parsing function slows as accounting data is collected.
The Dump Accounting command creates accounting files by copying the files to the system directory (/var/log/docuprint__accounting). You can then delete the files or copy them to a diskette. You should use the Dump Accounting command periodically to purge the Job Pool Manager database.
If the /var/log/docuprint__accounting file already exists when you enter the Dump Accounting command, any new job accounting information is appended to the existing file, and job ID numbers are not necessarily in chronological order. If you want an entirely new file, enter the Delete Accounting command, and then enter the Dump Accounting command again.
Access level Administrator
Syntax Dump Accounting
3 “131” “Administrator” “worm” “<absent>” “PS2” “1” “500” “<absent>” “1” “<absent>” “600” “257” “<absent>” “<absent>” “wishbone” “929572975” “929573201” “390” “1” “0” “[216,279,,white,75]” “<absent>” “<absent>” “0” “0” “<absent>” “22765” “<absent>” “<absent>” “<absent>” “<absent>” “<absent>” “<absent>” “3” “<absent>” “1” “<absent>” “[13.240.113.61] (docID: 91)” “<absent>” “<absent>” “0” “<absent>” “1”
3 “130” “proton” “docuprint_accounting” “<absent>” “ASCII” “1” “500” “<absent>” “1” “1” “<absent>” “<absent>” “1” “<absent>” “wishbone” “929571514” “929571584” “960” “6” “0” “[216,279,,white,75]” “<absent>” “<absent>” “0” “0” “<absent>” “50041” “<absent>” “<absent>” “<absent>” “terminal” “7” “<absent>” “<absent>” “<absent>” “<absent>” “<absent>” “<absent>” “<absent>” “<absent>” “<absent>” “<absent>” “<absent>”
Guide to Configuring and Managing the System 9-7

Managing accounting files and logs
Arguments None
Example This example copies and purges print-job data. Note that you must enter y to confirm the command.
Copy Accounting to Floppy command
Use the Copy Accounting to Floppy command to copy accounting files to a floppy diskette. Be sure to use the Dump Accounting command first.
NOTE: The Copy Accounting To Floppy command copies accounting data to a diskette in compressed bar format. To list the contents of the diskette after using the command, enter bar -tfZ /dev/fd0c in a Unix shell window. Names that are listed are in absolute paths. To copy the data from the diskette to a hard drive for further processing, enter bar -xvfZ /dev/fd0c. The destinations of these data files are the paths as stored on the diskette.
Access level Administrator
Syntax Copy Accounting to Floppy
Arguments None
Example This example copies accounting data to a floppy diskette. Note that you must enter yes to confirm that a diskette is inserted.
PS-admin>Dump AccountingAre you sure? YDumping accounting data. This may take a while. . . . . . . dump complete.
PS-admin>copy accounting to floppyFloppy disk inserted? (“No” to quit):
yes
Copying accounting data. This may take a while. . . . . . . copy complete.
9-8 Guide to Configuring and Managing the System
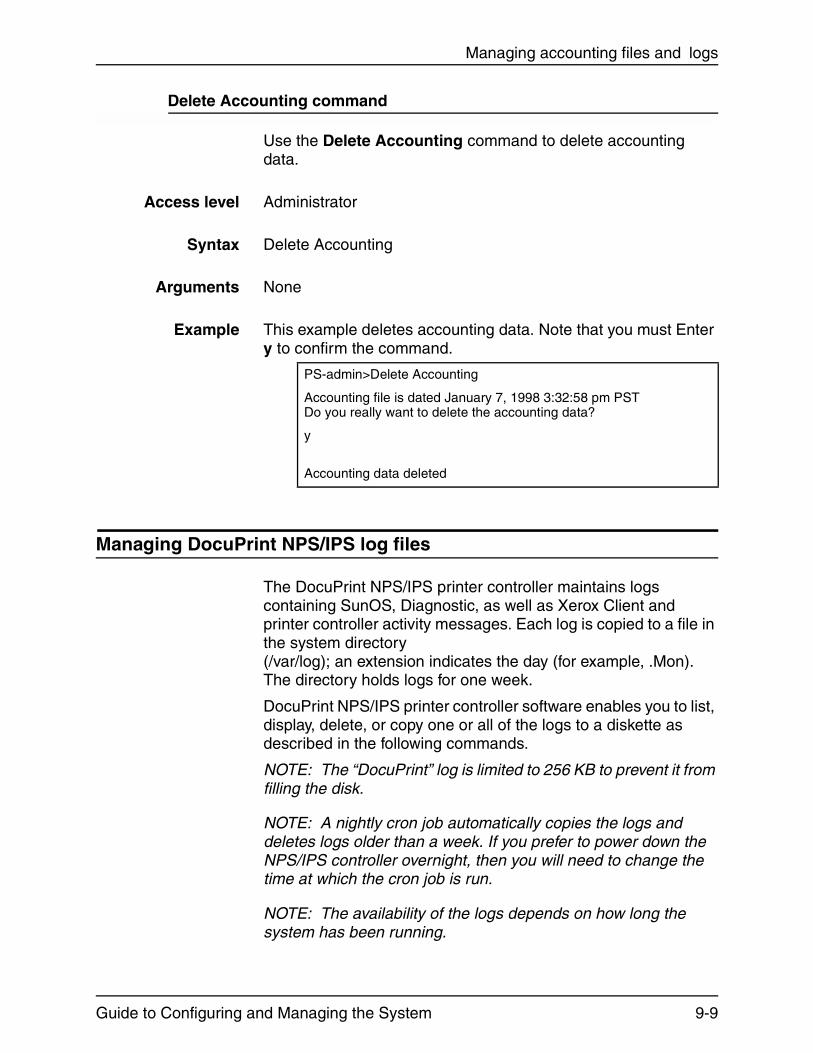
Managing accounting files and logs
Delete Accounting command
Use the Delete Accounting command to delete accounting data.
Access level Administrator
Syntax Delete Accounting
Arguments None
Example This example deletes accounting data. Note that you must Enter y to confirm the command.
Managing DocuPrint NPS/IPS log files
The DocuPrint NPS/IPS printer controller maintains logs containing SunOS, Diagnostic, as well as Xerox Client and printer controller activity messages. Each log is copied to a file in the system directory (/var/log); an extension indicates the day (for example, .Mon). The directory holds logs for one week.
DocuPrint NPS/IPS printer controller software enables you to list, display, delete, or copy one or all of the logs to a diskette as described in the following commands.
NOTE: The “DocuPrint” log is limited to 256 KB to prevent it from filling the disk.
NOTE: A nightly cron job automatically copies the logs and deletes logs older than a week. If you prefer to power down the NPS/IPS controller overnight, then you will need to change the time at which the cron job is run.
NOTE: The availability of the logs depends on how long the system has been running.
PS-admin>Delete Accounting
Accounting file is dated January 7, 1998 3:32:58 pm PSTDo you really want to delete the accounting data?
y
Accounting data deleted
Guide to Configuring and Managing the System 9-9
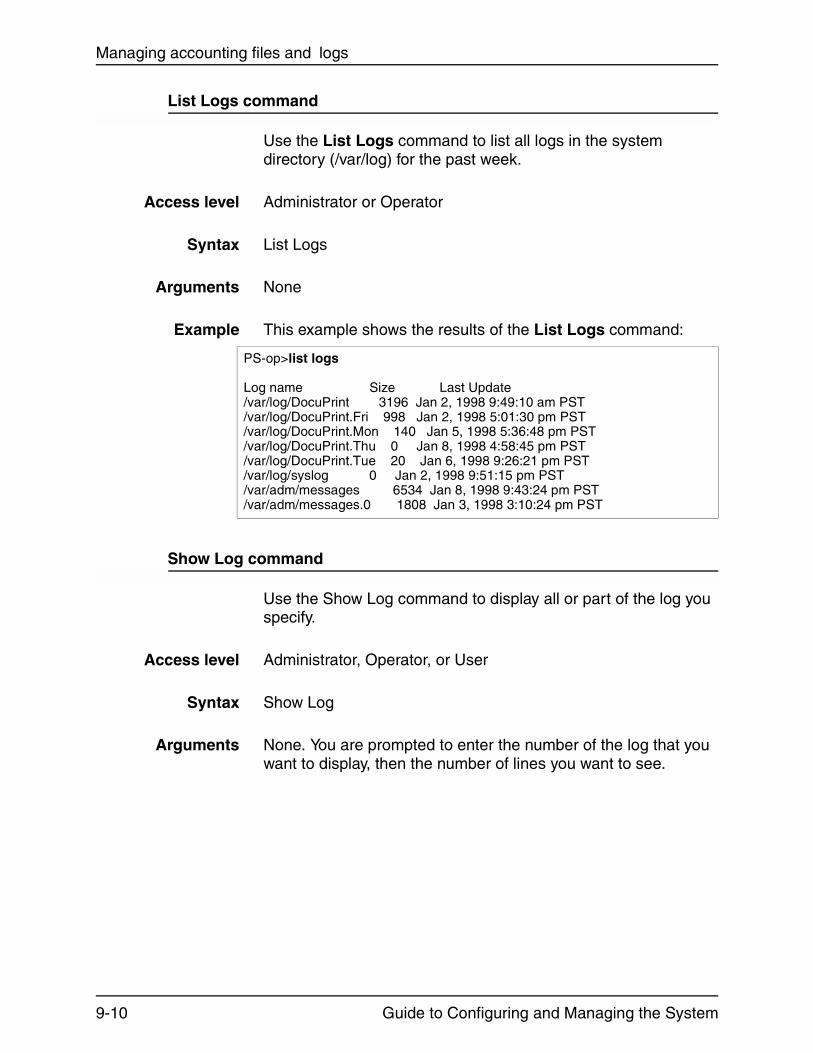
Managing accounting files and logs
List Logs command
Use the List Logs command to list all logs in the system directory (/var/log) for the past week.
Access level Administrator or Operator
Syntax List Logs
Arguments None
Example This example shows the results of the List Logs command:
Show Log command
Use the Show Log command to display all or part of the log you specify.
Access level Administrator, Operator, or User
Syntax Show Log
Arguments None. You are prompted to enter the number of the log that you want to display, then the number of lines you want to see.
PS-op>list logs
Log name Size Last Update/var/log/DocuPrint 3196 Jan 2, 1998 9:49:10 am PST/var/log/DocuPrint.Fri 998 Jan 2, 1998 5:01:30 pm PST/var/log/DocuPrint.Mon 140 Jan 5, 1998 5:36:48 pm PST/var/log/DocuPrint.Thu 0 Jan 8, 1998 4:58:45 pm PST/var/log/DocuPrint.Tue 20 Jan 6, 1998 9:26:21 pm PST/var/log/syslog 0 Jan 2, 1998 9:51:15 pm PST/var/adm/messages 6534 Jan 8, 1998 9:43:24 pm PST/var/adm/messages.0 1808 Jan 3, 1998 3:10:24 pm PST
9-10 Guide to Configuring and Managing the System

Managing accounting files and logs
Example This example shows the last two lines of log 2:
Copy Logs to Floppy command
Use the Copy Logs To Floppy command to copy the log you select—or all the logs—to a floppy diskette.
NOTE: Copying logs to a diskette does not delete them from the system.
NOTE: The Copy Logs To Floppy command copies logs in Unix compressed bar format. To list the content of the diskette after using the command, enter bar -tfZ /dev/fd0c in a Unix shell window. Names listed are in absolute paths. To copy the data from the diskette to a hard drive for further processing, enterbar -xvfZ /dev/fd0c. The destinations of these data files are the paths as stored on the diskette.
Access level Administrator
Syntax Copy Logs to Floppy
Arguments None. You are prompted to select the log that you want to copy.
PS-admin>Show Log 1 Quit 2 /var/log/DocuPrint 3 /var/log/DocuPrint.sequencer 4 /var/log/DocuPrint.sequencer.Thu 5 /var/log/DocuPrint.Thu 6 /var/log/syslog 7 /var/adm/messages 8 /usr/spool/xerox/log/NPS/IPS/.log.Thu
Enter choice number: 2
Enter number of lines from the end to show (or “All”): 2
Wed Jan 28 10:29:10 1997 INFO rushmore-duplex: LaserWriter@*
AppleTalk: Shutting down
Wed Jan 28 10:29:10 1997 INFO closed Job Pool Manager: Database
Guide to Configuring and Managing the System 9-11
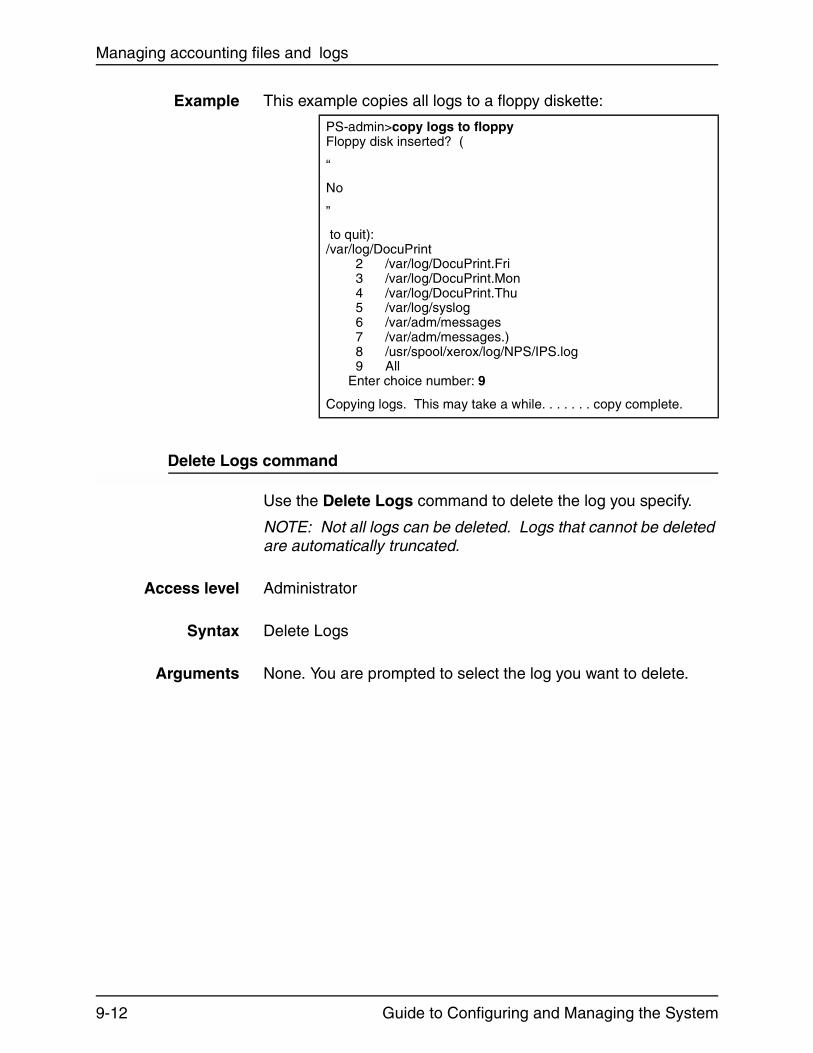
Managing accounting files and logs
Example This example copies all logs to a floppy diskette:
Delete Logs command
Use the Delete Logs command to delete the log you specify.
NOTE: Not all logs can be deleted. Logs that cannot be deleted are automatically truncated.
Access level Administrator
Syntax Delete Logs
Arguments None. You are prompted to select the log you want to delete.
PS-admin>copy logs to floppyFloppy disk inserted? (
“
No
”
to quit):/var/log/DocuPrint 2 /var/log/DocuPrint.Fri 3 /var/log/DocuPrint.Mon 4 /var/log/DocuPrint.Thu 5 /var/log/syslog 6 /var/adm/messages 7 /var/adm/messages.) 8 /usr/spool/xerox/log/NPS/IPS.log 9 All Enter choice number: 9
Copying logs. This may take a while. . . . . . . copy complete.
9-12 Guide to Configuring and Managing the System

Managing accounting files and logs
Example This example deletes log 5. Note that you must enter yes to confirm the command:
Print Log command
Use the Print Log command to print all of the log that you specify.
Access level Administrator or Operator
Syntax Print Log
Arguments None. You are prompted to select the log you want to print and then the number of copies and plex of the document.
Example The following example prints one copy of log 6 in simplex mode
PS-admin>delete logs 1 Quit 2 /var/log/DocuPrint 3 /var/log/DocuPrint.sequencer 4 /var/log/DocuPrint.sequencer.Thu 5 /var/log/DocuPrint.Thu 6 /var/log/syslog 7 /var/adm/messages 8 /usr/spool/xerox/log/NPS/IPS/.log.Thu 9 All Enter choice number: 5Do you really want to delete /var/log DocuPrint.Thu? yes
Log deleted
PS-admin>print log 1 Quit 2 /var/log/DocuPrint 3 /var/log/DocuPrint.sequencer 4 /var/log/DocuPrint.sequencer.Thu 5 /var/log/DocuPrint.Thu 6 /var/log/syslog 7 /var/adm/messages 8 /usr/spool/xerox/log/NPS/IPS/.log.TueEnter choice number: 6Enter the number of copies to print: 1Enter plex (Simplex, Duplex, Tumble): simplex
/var/log/syslog submitted as document number 594
Guide to Configuring and Managing the System 9-13
Managing accounting files and logs
9-14 Guide to Configuring and Managing the System

10. Managing PostScript and PCL fonts
You can install fonts on the printer controller from a CD-ROM or a floppy diskette, and you can delete installed PostScript and PCL fonts from the printer controller.
You can list the fonts on a CD-ROM or floppy diskette (for example, before you install them). You can also list the fonts on the printer controller. You can print any of these lists of fonts, and you can print samples of the fonts installed on the printer controller.
You can terminate the commands for installing and listing fonts by pressing the Control-C or DEL keys.
NOTE: There is a default font for IPDS jobs supplied with the system. Otherwise, fonts are downloaded with the job.
For more information about fonts, refer to the Xerox DocuPrint NPS/IPS Guide to Using PDL. For information regarding MICR fonts, see the Generic MICR Fundamentals Guide.
Installing fonts
Before you install fonts, enter the Stop Printing command and then enter the List Documents command to ensure that there are no jobs being processed. Use the following commands to install fonts, as appropriate:
• Install Fonts from CDROM
• Install Fonts from Floppy
• Install PCL Fonts from Floppy
After you install the fonts, enter the Restart Sequencer and Start Printing commands.
Guide to Configuring and Managing the System 10-1
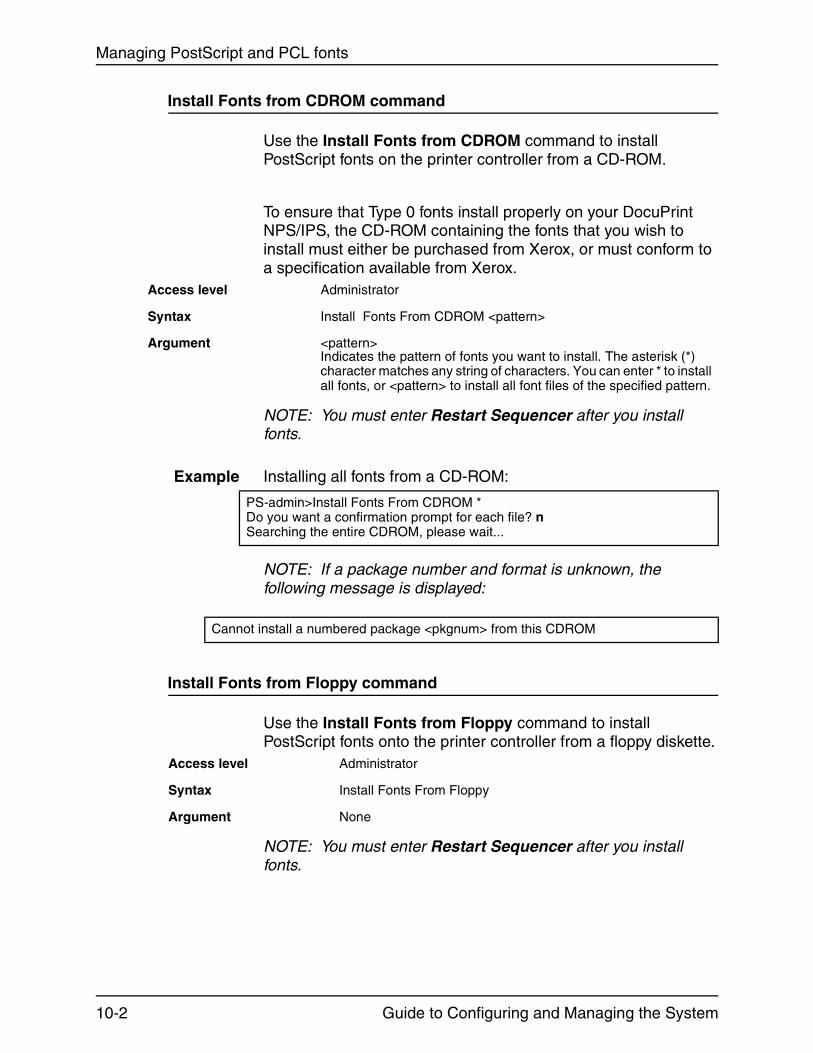
Managing PostScript and PCL fonts
Install Fonts from CDROM command
Use the Install Fonts from CDROM command to install PostScript fonts on the printer controller from a CD-ROM.
To ensure that Type 0 fonts install properly on your DocuPrint NPS/IPS, the CD-ROM containing the fonts that you wish to install must either be purchased from Xerox, or must conform to a specification available from Xerox.
NOTE: You must enter Restart Sequencer after you install fonts.
Example Installing all fonts from a CD-ROM:
NOTE: If a package number and format is unknown, the following message is displayed:
Install Fonts from Floppy command
Use the Install Fonts from Floppy command to install PostScript fonts onto the printer controller from a floppy diskette.
NOTE: You must enter Restart Sequencer after you install fonts.
Access level Administrator
Syntax Install Fonts From CDROM <pattern>
Argument <pattern>Indicates the pattern of fonts you want to install. The asterisk (*) character matches any string of characters. You can enter * to install all fonts, or <pattern> to install all font files of the specified pattern.
PS-admin>Install Fonts From CDROM * Do you want a confirmation prompt for each file? nSearching the entire CDROM, please wait...
Cannot install a numbered package <pkgnum> from this CDROM
Access level Administrator
Syntax Install Fonts From Floppy
Argument None
10-2 Guide to Configuring and Managing the System
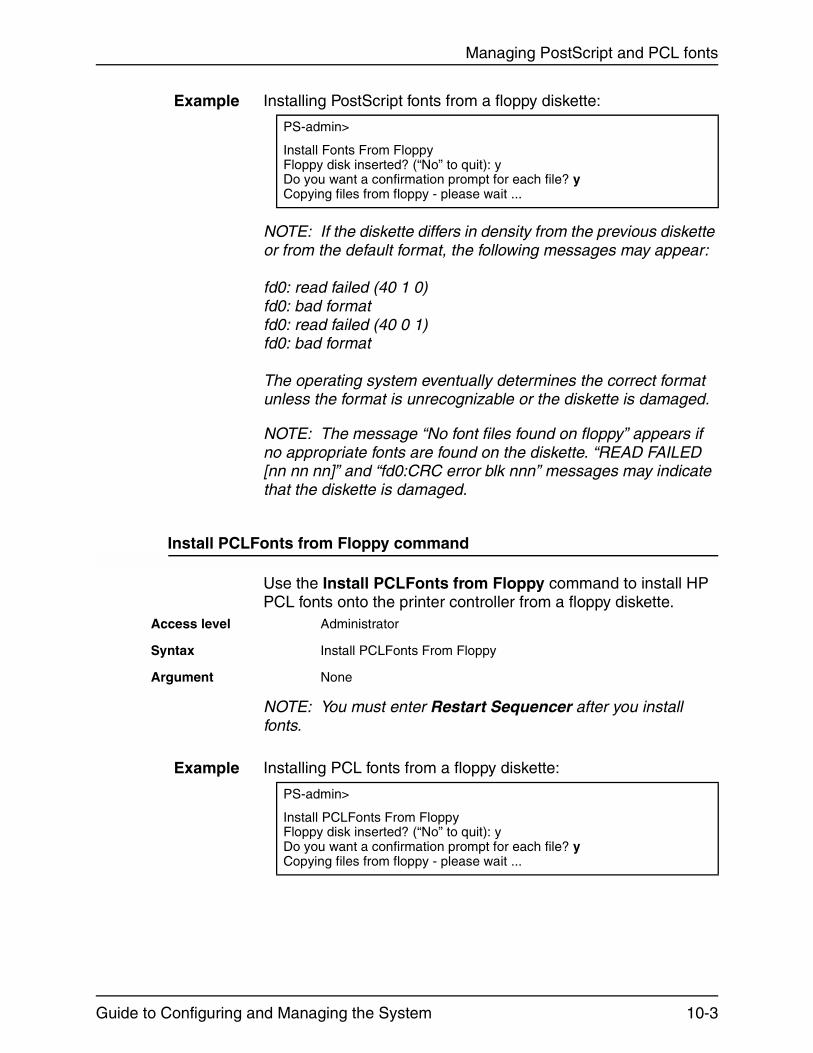
Managing PostScript and PCL fonts
Example Installing PostScript fonts from a floppy diskette:
NOTE: If the diskette differs in density from the previous diskette or from the default format, the following messages may appear:
fd0: read failed (40 1 0)fd0: bad formatfd0: read failed (40 0 1)fd0: bad format
The operating system eventually determines the correct format unless the format is unrecognizable or the diskette is damaged.
NOTE: The message “No font files found on floppy” appears if no appropriate fonts are found on the diskette. “READ FAILED [nn nn nn]” and “fd0:CRC error blk nnn” messages may indicate that the diskette is damaged.
Install PCLFonts from Floppy command
Use the Install PCLFonts from Floppy command to install HP PCL fonts onto the printer controller from a floppy diskette.
NOTE: You must enter Restart Sequencer after you install fonts.
Example Installing PCL fonts from a floppy diskette:
PS-admin>
Install Fonts From FloppyFloppy disk inserted? (“No” to quit): yDo you want a confirmation prompt for each file? yCopying files from floppy - please wait ...
Access level Administrator
Syntax Install PCLFonts From Floppy
Argument None
PS-admin>
Install PCLFonts From FloppyFloppy disk inserted? (“No” to quit): yDo you want a confirmation prompt for each file? yCopying files from floppy - please wait ...
Guide to Configuring and Managing the System 10-3
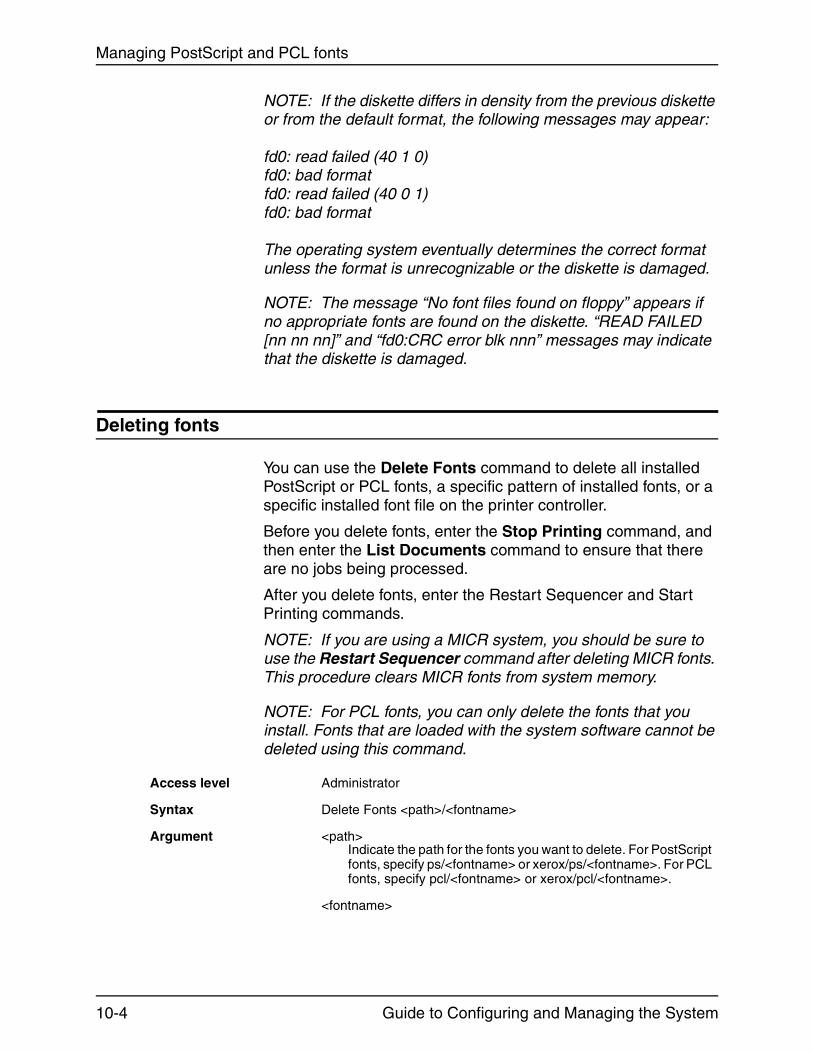
Managing PostScript and PCL fonts
NOTE: If the diskette differs in density from the previous diskette or from the default format, the following messages may appear:
fd0: read failed (40 1 0)fd0: bad formatfd0: read failed (40 0 1)fd0: bad format
The operating system eventually determines the correct format unless the format is unrecognizable or the diskette is damaged.
NOTE: The message “No font files found on floppy” appears if no appropriate fonts are found on the diskette. “READ FAILED [nn nn nn]” and “fd0:CRC error blk nnn” messages may indicate that the diskette is damaged.
Deleting fonts
You can use the Delete Fonts command to delete all installed PostScript or PCL fonts, a specific pattern of installed fonts, or a specific installed font file on the printer controller.
Before you delete fonts, enter the Stop Printing command, and then enter the List Documents command to ensure that there are no jobs being processed.
After you delete fonts, enter the Restart Sequencer and Start Printing commands.
NOTE: If you are using a MICR system, you should be sure to use the Restart Sequencer command after deleting MICR fonts. This procedure clears MICR fonts from system memory.
NOTE: For PCL fonts, you can only delete the fonts that you install. Fonts that are loaded with the system software cannot be deleted using this command.
Access level Administrator
Syntax Delete Fonts <path>/<fontname>
Argument <path>Indicate the path for the fonts you want to delete. For PostScript fonts, specify ps/<fontname> or xerox/ps/<fontname>. For PCL fonts, specify pcl/<fontname> or xerox/pcl/<fontname>.
<fontname>
10-4 Guide to Configuring and Managing the System
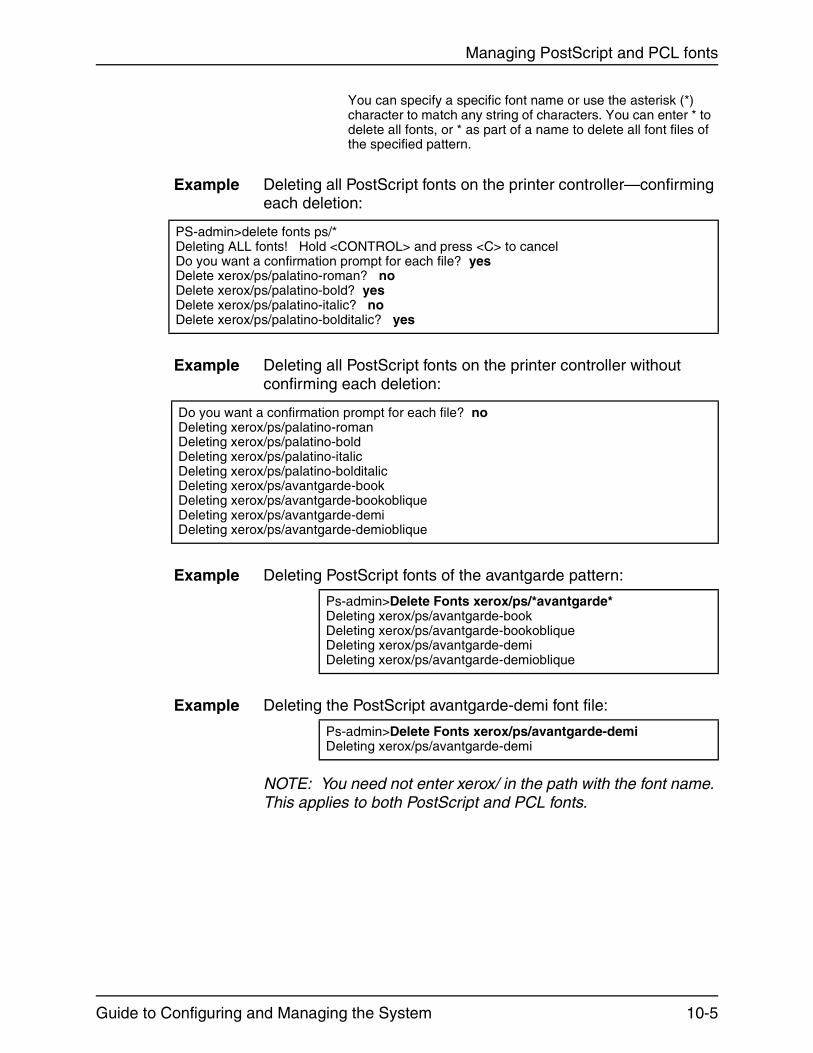
Managing PostScript and PCL fonts
Example Deleting all PostScript fonts on the printer controller—confirming each deletion:
Example Deleting all PostScript fonts on the printer controller without confirming each deletion:
Example Deleting PostScript fonts of the avantgarde pattern:
Example Deleting the PostScript avantgarde-demi font file:
NOTE: You need not enter xerox/ in the path with the font name. This applies to both PostScript and PCL fonts.
You can specify a specific font name or use the asterisk (*) character to match any string of characters. You can enter * to delete all fonts, or * as part of a name to delete all font files of the specified pattern.
PS-admin>delete fonts ps/*Deleting ALL fonts! Hold <CONTROL> and press <C> to cancelDo you want a confirmation prompt for each file? yesDelete xerox/ps/palatino-roman? noDelete xerox/ps/palatino-bold? yesDelete xerox/ps/palatino-italic? noDelete xerox/ps/palatino-bolditalic? yes
Do you want a confirmation prompt for each file? noDeleting xerox/ps/palatino-romanDeleting xerox/ps/palatino-boldDeleting xerox/ps/palatino-italicDeleting xerox/ps/palatino-bolditalicDeleting xerox/ps/avantgarde-bookDeleting xerox/ps/avantgarde-bookobliqueDeleting xerox/ps/avantgarde-demiDeleting xerox/ps/avantgarde-demioblique
Ps-admin>Delete Fonts xerox/ps/*avantgarde*Deleting xerox/ps/avantgarde-bookDeleting xerox/ps/avantgarde-bookobliqueDeleting xerox/ps/avantgarde-demiDeleting xerox/ps/avantgarde-demioblique
Ps-admin>Delete Fonts xerox/ps/avantgarde-demiDeleting xerox/ps/avantgarde-demi
Guide to Configuring and Managing the System 10-5
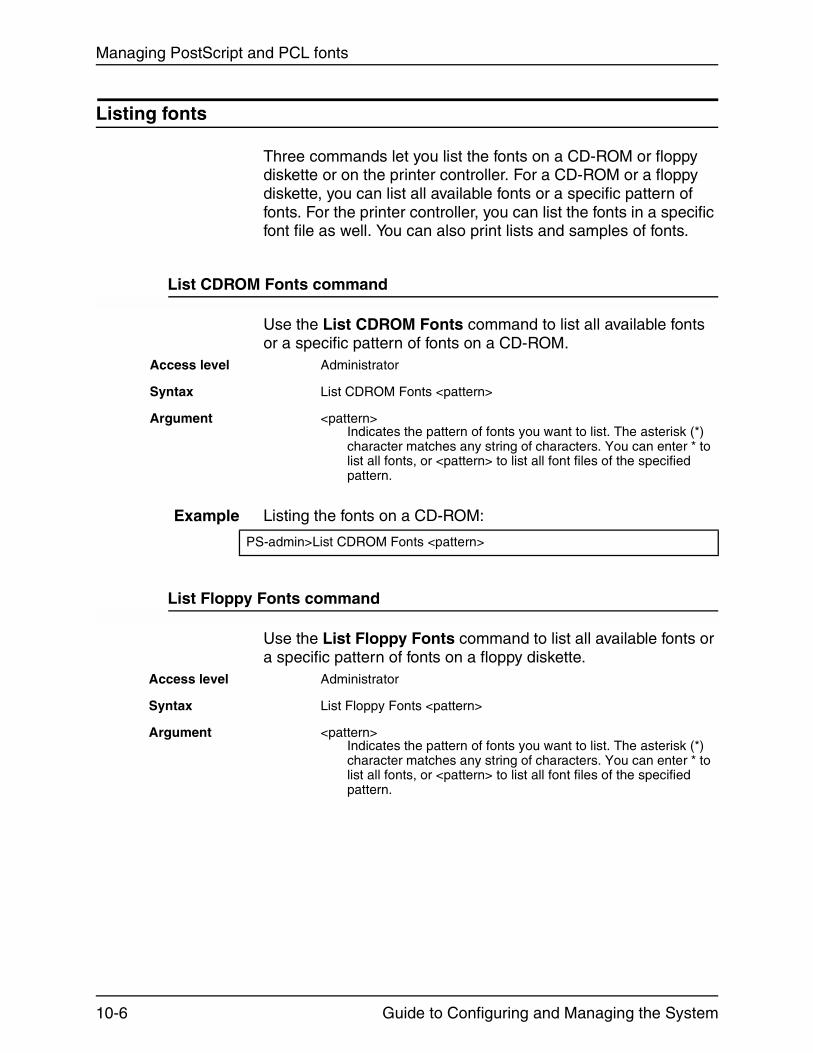
Managing PostScript and PCL fonts
Listing fonts
Three commands let you list the fonts on a CD-ROM or floppy diskette or on the printer controller. For a CD-ROM or a floppy diskette, you can list all available fonts or a specific pattern of fonts. For the printer controller, you can list the fonts in a specific font file as well. You can also print lists and samples of fonts.
List CDROM Fonts command
Use the List CDROM Fonts command to list all available fonts or a specific pattern of fonts on a CD-ROM.
Example Listing the fonts on a CD-ROM:
List Floppy Fonts command
Use the List Floppy Fonts command to list all available fonts or a specific pattern of fonts on a floppy diskette.
Access level Administrator
Syntax List CDROM Fonts <pattern>
Argument <pattern>Indicates the pattern of fonts you want to list. The asterisk (*) character matches any string of characters. You can enter * to list all fonts, or <pattern> to list all font files of the specified pattern.
PS-admin>List CDROM Fonts <pattern>
Access level Administrator
Syntax List Floppy Fonts <pattern>
Argument <pattern>Indicates the pattern of fonts you want to list. The asterisk (*) character matches any string of characters. You can enter * to list all fonts, or <pattern> to list all font files of the specified pattern.
10-6 Guide to Configuring and Managing the System

Managing PostScript and PCL fonts
Example Listing all fonts on a floppy diskette:
List Fonts command
Use the List Fonts command to list all available fonts, a specific pattern of fonts, or a specific font file on the printer controller.
Example Listing all fonts currently installed on the printer controller:
Example Listing all fonts of the avantgarde pattern:
PS-admin>List floppy fontsFloppy disk inserted? ("No" to quit): yFiles On Floppy:cob___.afmcob___.infcob___.pfbcobo___.afmcobo___.infcobo___.pfbcom___.afmcom___.infcom___.pfb(More)
Access level Administrator, operator, and user
Syntax List Fonts <path> <pattern>
Argument <pattern>Indicates the pattern of fonts you want to list. The asterisk (*) character matches any string of characters. You can enter * to list all fonts, or <pattern> to list all font files of the specified pattern.
<path>Use /ps for PostScript fonts or /pcl for PCL fonts.
PS-admin>list fonts/ps/ *xerox/ps/palatino-romanxerox/ps/palatino-boldxerox/ps/palatino-italicxerox/ps/palatino-bolditalicxerox/ps/avantgarde-bookxerox/ps/avantgarde-bookobliquexerox/ps/avantgarde-demixerox/ps/avantgarde-demioblique(More)
PS-admin>list fonts ps/avantgarde*xerox/ps/avantgarde-bookxerox/ps/avantgarde-bookobliquexerox/ps/avantgarde-demixerox/ps/avantgarde-demioblique
Guide to Configuring and Managing the System 10-7

Managing PostScript and PCL fonts
Example Listing all fonts in the xerox/ps/avantgarde-demi file:
Print Font List command
Use the Print Font List command to print a list of specific fonts or of all available fonts on the printer controller.
Example Printing 17 copies of a list of avantgarde fonts in simplex mode:
Print Font Sample command
Use the Print Font Sample command to print samples of the PostScript fonts installed on the printer controller.
PS-admin>list fonts xerox/ps/avantgarde-demixerox/ps/avantgarde-demi
Access level Administrator or operator
Syntax Print Font List <pattern> <copies> <plex>
Argument <pattern>Indicates the pattern of fonts you want to print. The asterisk (*) character matches any string of characters. You can enter * to print all fonts, or <pattern> to print all font files of the specified pattern.
<copies>Specifies how many copies of the list you want to print
<plex>Specifies simplex, duplex, or tumbleduplex
PS-admin>print font list ps/avantgarde* 17 simplex
Access level Administrator or operator
Syntax Print Font Sample <name> <pointSize> <numChars> <copies>
Argument <name>Specifies the name of the font.
<point size>Specifies the point size of the font you want to sample. Use a number between 6.0 and 24.0.
<numChars>Specifies the number of characters to print (“128” or “256”).
<copies>Specifies how many copies of the sample you want to print.
10-8 Guide to Configuring and Managing the System
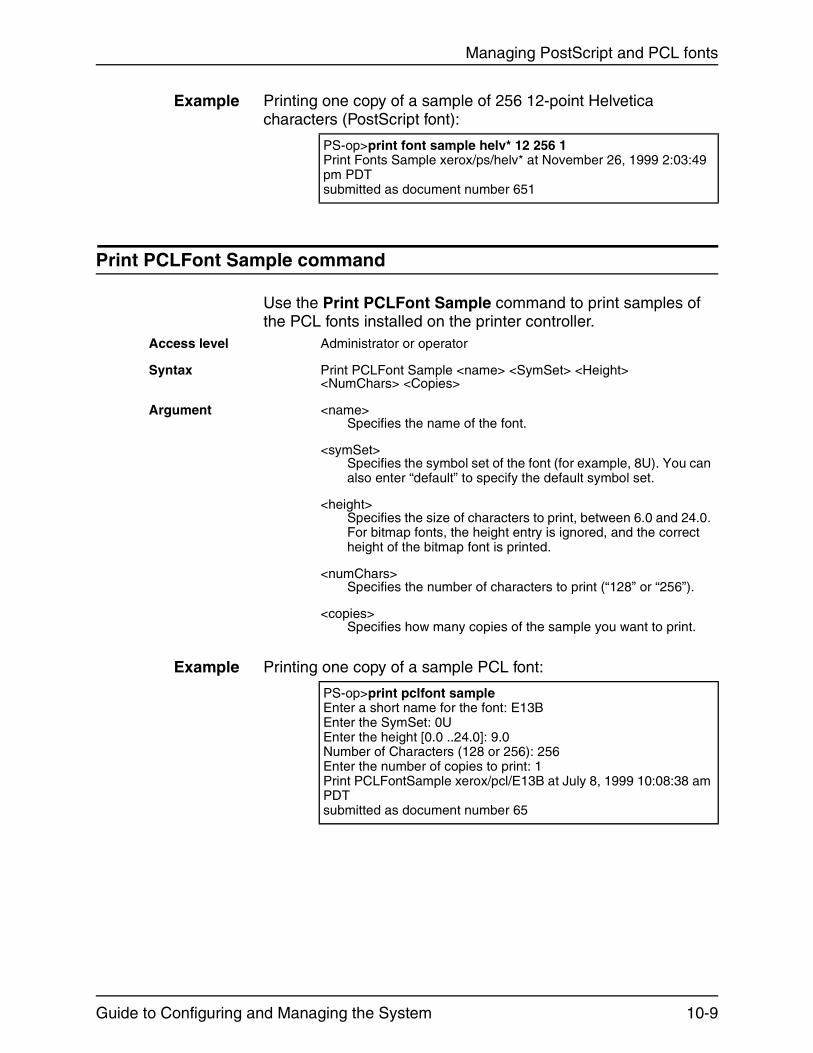
Managing PostScript and PCL fonts
Example Printing one copy of a sample of 256 12-point Helvetica characters (PostScript font):
Print PCLFont Sample command
Use the Print PCLFont Sample command to print samples of the PCL fonts installed on the printer controller.
Example Printing one copy of a sample PCL font:
PS-op>print font sample helv* 12 256 1Print Fonts Sample xerox/ps/helv* at November 26, 1999 2:03:49 pm PDTsubmitted as document number 651
Access level Administrator or operator
Syntax Print PCLFont Sample <name> <SymSet> <Height> <NumChars> <Copies>
Argument <name>Specifies the name of the font.
<symSet>Specifies the symbol set of the font (for example, 8U). You can also enter “default” to specify the default symbol set.
<height>Specifies the size of characters to print, between 6.0 and 24.0. For bitmap fonts, the height entry is ignored, and the correct height of the bitmap font is printed.
<numChars>Specifies the number of characters to print (“128” or “256”).
<copies>Specifies how many copies of the sample you want to print.
PS-op>print pclfont sample Enter a short name for the font: E13BEnter the SymSet: 0UEnter the height [0.0 ..24.0]: 9.0Number of Characters (128 or 256): 256Enter the number of copies to print: 1Print PCLFontSample xerox/pcl/E13B at July 8, 1999 10:08:38 am PDTsubmitted as document number 65
Guide to Configuring and Managing the System 10-9

Managing PostScript and PCL fonts
10-10 Guide to Configuring and Managing the System
11. Managing forms
A form is a print-ready file that can be printed on demand, and, if desired, merged with variable data. A form may consist of one or more pages that can be used selectively. Forms are created using the Decomposition Service capability. There are various types of forms, each with different characteristics.
This chapter provides the syntax and arguments of these commands:
• Print Form List prints a list of available forms.
• Print Form Sample prints a copy of a specified form.
• Delete Forms removes forms from the system.
For more information on creating and working with forms, refer to the Decomposition Service and Tools Guide.
NOTE: When using Decomposition Service forms with IPDS jobs, you should test the application, as output may not be as expected.
For more information on using forms and Decomposition Service, refer to the Decomposition Service and Tools Guide.
Print Form List command
Use the Print Form List command to print a list of available forms.
Access level Administrator or Operator
Syntax Print Form List <pattern> <copies> <plex>
Arguments The following arguments are available:
Guide to Configuring and Managing the System 11-1
Managing forms
• <pattern>
Indicates the pattern of form names that you want to list. The asterisk (*) character matches any string of characters. You can enter * to list all forms, or <pattern> to list all form files of the specified pattern.
• <copies>
Specifies how many copies of the list you want to print.
• <plex>
Specifies the print mode (simplex, duplex, or tumble duplex).
Example This example prints one copy of a list of all forms in simplex mode:
List Forms command
Use the List Forms command to display a list of available forms.
Access level Administrator or Operator
Syntax List Forms <pattern>
Arguments <pattern>
Indicates the pattern of form names that you want to list. The asterisk (*) character matches any string of characters. You can enter * to list all forms, or <pattern> to list all form files of the specified pattern.
Example This example lists all the available forms:
PS-op>print form listEnter the form name pattern: *Enter the number of copies to print: 1Enter plex (Simplex, Duplex, Tumble): SimplexPrint Forms List * at January 7, 1998 3:28:11 pm PST submitted as document number 595
PS-admin>list formsEnter the form name pattern: *Name Pages Format Date Createdsfca 6 SaveMaskG4 June 14, 1998 12:55:39 pm PDT
11-2 Guide to Configuring and Managing the System

Managing forms
Print Form Sample command
Use the Print Form Sample command to print a copy of the specified form(s).
Access level Administrator or Operator
Syntax Print Form Sample <pattern> <copies> <plex>
Arguments The following arguments are available:
• <pattern>
Indicates the pattern of forms that you want to print. The asterisk (*) character matches any string of characters. You can enter * to print all forms, or <pattern> to print all form files of the specified pattern.
• <copies>
Specifies how many copies of the forms you want to print.
• <plex>
Specifies the print mode (simplex, duplex, or tumble duplex).
• <media>
Specifies the media in the format size:type:color:weight.
NOTE: The media that is specified for the form must match the size of the form that was saved.
Example This example prints one copy of all sample forms in simplex mode:
PS-op>print form sampleEnter the form name pattern: *Enter the number of copies to print: 1Enter plex (Simplex, Duplex, Tumble): Simplex
Enter media specification: USLetter::whitePrint Forms Sample * at January 7, 1998 3:28:11 pm PST submitted as document number 595
Guide to Configuring and Managing the System 11-3

Managing forms
Delete Forms command
Use the Delete Forms command to delete forms that are installed on the system. The system prompts you with the option of confirming the deletion of each form pattern.
Access level Administrator
Syntax Delete Forms <pattern>
Argument <pattern>
Indicates the pattern of forms that you want to delete. The asterisk (*) character matches any string of characters. You can enter * to delete all forms, or <pattern> to delete all form files of the specified pattern.
11-4 Guide to Configuring and Managing the System
12. Using Wizard Mode or UNIX shell
This chapter provides guidelines for working in Wizard Mode and in the UNIX shell from the background menu. It discusses procedures that may be accessed through Wizard Mode or the UNIX shell—setting a telnet greeting for remote access users, enabling the lpr security option, recovering the Job Pool Manager database, and removing orphan data files.
The following procedures discuss possible uses of Wizard Mode; however, it should be noted that Wizard Mode is not recommended on the DocuPrint. Instead, the UNIX Command Tool can be enabled at installation and accessed from the background menu when desired.
Using Wizard Mode
The following are guidelines for working in the Wizard Mode.
• Use the <BACKSPACE> key to delete a character. Do not use the <DEL> key.
• Do not use vi commands in Wizard Mode.
To use the vi command at the printer controller, you may use either of these two methods:
– Use the background menu to start a command tool.
– If the command tool is not available on the background menu:
1. Enter Wizard mode.
2. Enter cmdtool & to start a command tool.
3. Launch a second command tool from the first, and exit the first command tool. Use the second command tool to execute shell commands.
NOTE: The DocuPrint NPS/IPS user interface may appear to hang until you exit the first command tool.
Guide to Configuring and Managing the System 12-1

Using Wizard Mode or UNIX shell
You can use the above steps and the su command to access root privileges. Do not use the su command before starting a command tool and use the su command only when necessary.
• If you are accessing the printer controller remotely through Telnet, do not start any window-based tools, such as cmdtool, in Wizard Mode. If you do, the window opens on the printer controller not on the client workstation, and the client workstation appears locked up. To restore the prompt at the client workstation, quit the tool from the printer controller.
CAUTION
Use the su command only when necessary. It is possible to damage system software, requiring a reinstallation of software.
Using the UNIX shell
In most instances, you can use the UNIX shell from the background menu instead of Wizard Mode.
You can select the shell from the background menu when UNIX command tool is enabled during installation.
You can use any available editor (such as vi or textedit) from the UNIX command tool.
Mounting a CD-ROM or a floppy diskette
In order to access files or functions on a CD-ROM or a floppy diskette, you must first mount the medium, using one of the commands described in the following sections.
Mount CDROM command
Obtain a command tool from the background menu and enter the UNIX superuser password. (The UNIX directory /cdrom must exist before running this command.)
Access level UNIX superuser
Syntax CDROM Mounter mount
12-2 Guide to Configuring and Managing the System
Using Wizard Mode or UNIX shell
Arguments None.
NOTE: This method for mounting the CDROM is not necessary for installing fonts. The font installation commands automatically mount the CDROM.
Unmount CDROM command
Obtain a command tool from the background menu and enter the UNIX superuser password. (The UNIX directory /cdrom must exist before running this command.)
Access level UNIX superuser
Syntax CDROM Mounter umount
Arguments None.
Mount Floppy command
This command mounts a DOS-formatted floppy diskette.
Obtain a command tool from the background menu and enter the su command, when prompted enter UNIX superuser password. Enter mount /pcfs.
Access level UNIX superuser
Syntax mount /pcfs
mount -r /pcfs if the diskette is write-protected.
Arguments None.
NOTE: This method for mounting the diskette is not necessary for installing fonts. The font installation commands automatically mount the diskette.
Guide to Configuring and Managing the System 12-3

Using Wizard Mode or UNIX shell
Creating a telnet greeting message
An administrator can create an ASCII
greeting message that client workstations display when users telnet to the DocuPrint printer controller:
1. Use a UNIX editor in a UNIX shell at the printer controller to create the message and name the file “greeting”.
2. Add the greeting file to the /var/db directory at the printer controller. The greeting file must be resident on the system and not a symbolic link.
The DocuPrint system searches for a file named /var/db/greeting whenever a telnet connection is made to the printer controller, and the client workstation displays the greeting message.
NOTE: The printer controller does not display the greeting message.
Example Following is an example of a greeting message a client workstation can display when a telnet connection is made.
>
telnet <DocuPrint printer controller>Trying xx.xx.xx.xx. . .Connected to dpserverEscape character is'^]' .DocuPrint System Administration <DocuPrint printer controller>
This system is restricted to legitimate company business purposes and is subject to audit. The unauthorized access, use or modification of this computer system or the data contained therein or in transit to or from, is a criminal violation of federal & state law.
DocuPrint version: 7.1: Mon July 3 12:34:58 PDT 2000 Copyright (C) 1983-2000 by Xerox Corporation. All rights reserved.
12-4 Guide to Configuring and Managing the System
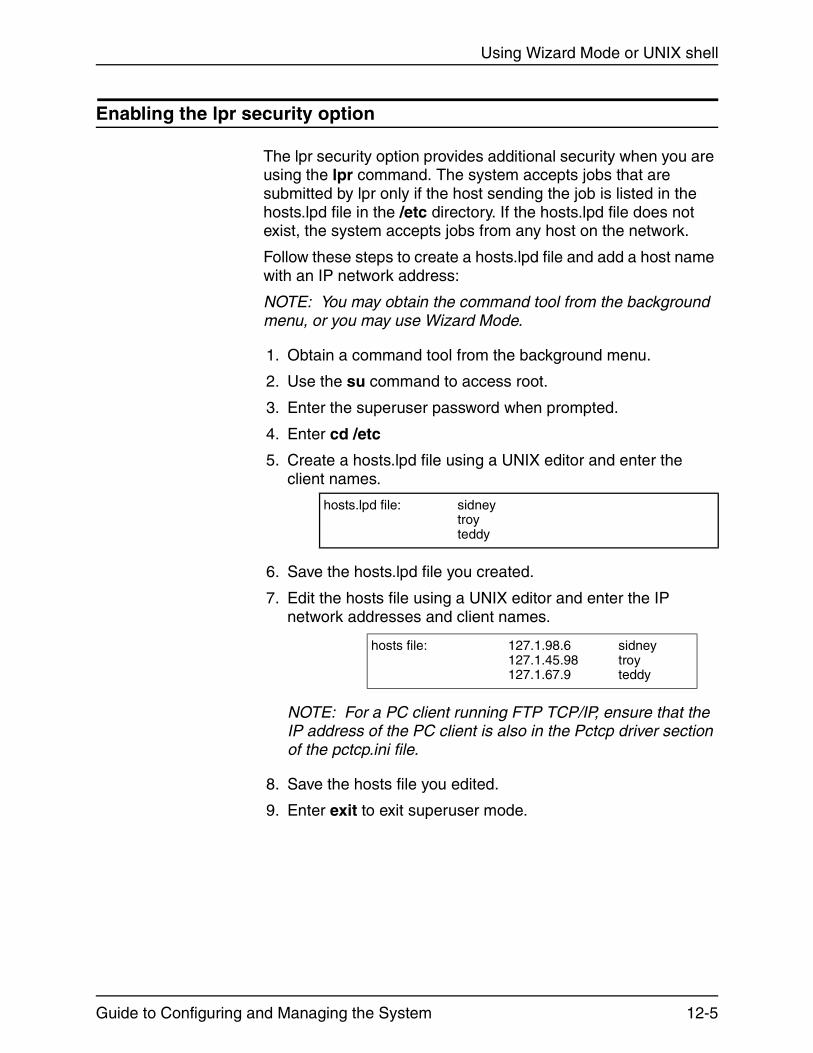
Using Wizard Mode or UNIX shell
Enabling the lpr security option
The lpr security option provides additional security when you are using the lpr command. The system accepts jobs that are submitted by lpr only if the host sending the job is listed in the hosts.lpd file in the /etc directory. If the hosts.lpd file does not exist, the system accepts jobs from any host on the network.
Follow these steps to create a hosts.lpd file and add a host name with an IP network address:
NOTE: You may obtain the command tool from the background menu, or you may use Wizard Mode.
1. Obtain a command tool from the background menu.
2. Use the su command to access root.
3. Enter the superuser password when prompted.
4. Enter cd /etc
5. Create a hosts.lpd file using a UNIX editor and enter the client names.
6. Save the hosts.lpd file you created.
7. Edit the hosts file using a UNIX editor and enter the IP network addresses and client names.
NOTE: For a PC client running FTP TCP/IP, ensure that the IP address of the PC client is also in the Pctcp driver section of the pctcp.ini file.
8. Save the hosts file you edited.
9. Enter exit to exit superuser mode.
hosts.lpd file: sidneytroyteddy
hosts file: 127.1.98.6127.1.45.98127.1.67.9
sidneytroyteddy
Guide to Configuring and Managing the System 12-5
Using Wizard Mode or UNIX shell
Removing orphan data files
Orphan data files are files that do not belong to any existing job. They are left in the /var/spool/xerox/netqreq directory if the printer controller crashes or is rebooted while clients are submitting jobs. Remove orphan data files from the directory only if Xerox Client Software is enabled. To remove these files:
NOTE: You may obtain the command tool from the background menu, or you may use Wizard Mode.
1. At the PS-admin> prompt In the DocuPrint Print Service window, enter stop queueing.
2. Obtain a command tool from the background menu.
3. Enter cd /var/spool/xerox/netqreq to access the netqreq directory.
4. Enter ls -lt to display a list of files sorted by date.
5. Review the list to see if any source files (files that do not start with “X”) are dated earlier than the last reboot.
If such files exist, use the grep <sourcefilename> * command to determine if they are orphan files. If this command does not return any text, remove the files using the rm <sourcefilename> command.
6. Enter exit if you are in Wizard Mode and return to the Administrator level of commands.
7. Enter start queueing.
12-6 Guide to Configuring and Managing the System

13. Handling DigiPath jobs
This chapter describes how to install NFS for DigiPath/XDOD jobs, and provides instructions for handling problems with print jobs from XDOD/DigiPath clients.
NOTE: The system administrator must enable FTP on the DocuPrint NPS/IPS to print from XDOD 4.0. During installation, or using Configure, answer “yes” to “Enable FTP (Required to retrieve print clients with FTP from other machines on the network)?”
Configuring DocuPrint NPS/IPS for XDOD/DigiPath
NOTE: DocuPrint does not support NFS except in conjunction with XDOD/DigiPath products.
To enable some DocuPrint NPS/IPS features, you must specify certain options when you install DocuPrint NPS/IPS printer controller software. During installation, the installation script displays the following prompt:
Set up XIPP prescan filter for XDOD clients (Y or N) [n]:
Enter y (or yes) at this prompt.
You should also set up a separate subdirectory on DocuPrint NPS/IPS for each application that transfers files to it. The name of the subdirectory should match the <appName> used in the pathname to transfer files to DocuPrint NPS/IPS, as described in
“Importing the DocuPrint directory.”
Use an installation script to create the <appName> subdirectory (or subdirectories). Run this script after normal DocuPrint NPS/IPS installation is successfully completed. You cannot use NFS to create these subdirectories on DocuPrint.
Guide to Configuring and Managing the System 13-1
Handling DigiPath jobs
Configuring NFS for XDOD 3.1 or earlier
At system startup, you must start an NFS service and export the appropriate subdirectories.
A daemon, running on the DocuPrint NPS/IPS printer controller, provides NFS services. You must start this NFS daemon because the standard DocuPrint NPS/IPS configuration does not run an NFS daemon for system security reasons. To start the appropriate service:
• If the computer that is transferring files to the printer controller over NFS is a Unix system, use the default NFS daemon. See “Configuring the default NFS daemon” for information on configuring this daemon.
• If the computer that is transferring files is not a Unix system, you may need to place an appropriate daemon on the printer controller to be started each time the server is restarted. Refer to “Using an alternate NFS daemon” for more information.
Configuring the default NFS daemon
A DocuPrint NPS/IPS system acts as an NFS server using a standard Sun NFS daemon. This daemon should operate with client systems that are also running Unix, unless XDOD/Digipath third-party daemons are not supported by the client.
On a Solaris system, the file is called /etc/dfs/dfstab. As long as the appropriate file exists, the default NFS daemon is started each time the printer controller is restarted.
Verifying correct installation
If resubmitting the job does not resolve your problem with an XDOD/Digipath job, verify that the system was installed and configured correctly:
CAUTION
Do not add the XDMS subdirectory manually.
• Verify that xipp is enabled for XDOD/Digipath by performing the following:
1. At the PS-Admin> prompt, enter Configure.
13-2 Guide to Configuring and Managing the System

Handling DigiPath jobs
2. Enter the superuser password.
3. Select Option 5.
4. Look for the line that says xipp.enable: “Y”.
• If you are running SunOS 4.1.x, verify that the Beame & Whiteside NFS daemon (bwnfsd) is running for XDOD/Digipath installations prior to 4.0. To do so, obtain a command tool from the background menu and enter the following command:ps -axc | grep bwnfsd | grep -v grep.
– If the bwnfsd is running, a line describing the daemon is displayed.
– If the bwnfsd is not running, restart the system, then try the verification again. If the daemon is still not running, contact your service representative.
Removing .gfi directories
If a job submitted from an XDOD client was canceled or aborted, the partially complete .gfi directory is not automatically deleted from the /var/spool/data/xdms directory. To remove unwanted .gfi directories:
1. In the DocuPrint Print Service window, at the PS> prompt, enter privilege administrator.
2. Enter stop all to stop printing and queueing.
3. Obtain a command tool from the background menu.
NOTE: Using Wizard Mode to delete unwanted .gfi directories is not recommended.
4. Enter cd /var/spool/data/xdms.
5. Enter pwd to verify you are in the /var/spool/data/xdms directory.
6. Use the su command to access root.
7. Enter the superuser password.
8. Enter ls -lt to display a list of subdirectories sorted by date.
9. Enter rm -r <name>.gfi to remove each .gfi directory with a date earlier than the current date.
10.Enter exit to exit superuser mode.
11.Select quit to close the command tool window.
Guide to Configuring and Managing the System 13-3
Handling DigiPath jobs
13-4 Guide to Configuring and Managing the System
14. MICR printing
The 96, 4635, and 180 MICR NPS/IPS systems produce a magnetic ink character recognition (MICR) line on negotiable and turnaround documents such as checks and bills. The MICR NPS/IPS models print documents using magnetic ink and special fonts to create machine-readable information that allows for quick document processing.
Although, MICR is generally used to print accounting and routing information on blank checks and other negotiable documents, the magnetic encoding capabilities can be used for any printed output.
For more information on creating MICR documents and using MICR tools, refer to the Generic MICR Fundamentals Guide, provided with your NPS/IPS.
Considerations for MICR printing on NPS/IPS models
The MICR fonts are supplied with the printer. PostScript and PCL versions of the fonts are provided on a 3.5 inch floppy diskette.
MICR fontdescription
Xerox provides a set of 300 dpi PostScript and PCL E13B MICR fonts for use on the DocuPrint MICR NPS/IPS models. These fonts can be loaded onto a DocuPrint NPS/IPS system using the font installation commands described in the Guide to Configuring and Managing the System.
Xerox provides a set of 300 dpi E13B and CMC7 fonts that can be loaded on a variety of hosts for IPDS printing.
It is critical that the MICR font character raster patterns and metrics not be modified in any way and that no new characters are added. The MICR fonts supplied with the NPS/IPS must be used in order for the Xerox MICR Guarantee to be valid. The Xerox supplied MICR fonts are required to optimize the quality of the MICR line and to ensure excellent performance.
Guide to Configuring and Managing the System 14-1

MICR printing
PostScript font The PostScript version of the E13B font is:
PostScriptFont file name: e13b.ps (internal name, E13B)
Point size: 9.12
Font type: Type 3
The internal name E13B and point size, 9.12, is used to select the Xerox PostScript MICR fonts.
PCL font The HP PCL escape sequences that are used to select the Xerox E13B MICR fonts are:
E13B:
ESC >&100<ESC > (0U < Esc >(s0p8.00h9.00v0s0b0T
Security issues
NPS/IPS MICR printers do not offer the same security or audit features found on printers like the 4635 MX LPS.
To enhance security, you will need to delete MICR fonts after use, and install them before the next use.
Refer to the Generic MICR Fundamentals Guide for more information.
Clearing memory After all PostScript and PCL MICR jobs have been printed and the MICR fonts have been deleted off of the DocuPrint NPS/IPS disk, if there is concern related to access of residual contents of MICR fonts in memory on the DocuPrint NPS/IPS system, the sequencer should be restarted.
Although it is extremely difficult to retrieve contents in memory, using the Restart Sequencer command clears all fonts in memory and force the PostScript and PCL interpreters to reload fonts into memory for the next job.
14-2 Guide to Configuring and Managing the System
MICR printing
Clearing jobs To confirm that there are no MICR jobs left on the DocuPrint NPS/IPS system, enter the List Documents command to list “Held” and “Ineligible” documents. If these documents have already been successfully printed and are duplicate jobs, they should be deleted by using the Cancel Documents command. If the document still needs to be printed, use the appropriate procedures to determine the cause of the problem and take the actions to correct the problem. Though the MICR jobs are still shown when the List Documents command is used to list all or completed jobs, as long as the document status is “Complete,” only the attributes of the jobs have been kept. The job itself has been deleted from the spool area.
Guide to Configuring and Managing the System 14-3

MICR printing
14-4 Guide to Configuring and Managing the System

15. Performing color calibration
This chapter describes the procedure and commands for performing color calibration for your DocuColor 2060 NPS/IPS.
A color calibration consists of a set of files that include an International Color Consortium (ICC) standard profile. For information on the standard, see www.color.org.
Setting color calibrations
Calibration is essential to ensuring good color quality for your documents. The purpose of calibration is to measure how the DocuColor 2060 is printing the requested colors and to then make any corrections that are required.
A color calibration is created at startup using the BuildProfile argument to the Print Color Calibration Target command. Calibrations may also be made for different requirements (for example: media category, CMYK, or emulation).
To calibrate your system, you use the DTP41 spectrophotometer from X-rite. Accompanying this device is a manual, and a color strip that has the same serial number as your DTP41.
NOTE: You should be very careful to keep the color strip in a safe place. If you lose it, it is expensive to replace, and it may take some time to obtain the replacement. The strip is unique for each spectrophotometer.
When to perform calibration
Calibration can be performed daily, or at any time when there is the possibility that the printer colors may have changed from what they were in an earlier calibration. Some of the reasons why printers need color calibration are:
• Uncalibrated equipment produces unpredictable, unreliable image quality and color reproduction.
Guide to Configuring and Managing the System 15-1

Performing color calibration
• Toner colors are not absolutely pure, so the calibration procedure helps the system adjust the mix of toners to correspond to a standard color sample.
You must calibrate whenever service is performed on your system, or when you replace toner.
A recommendation for determining if the system needs calibration is to print a copy of the “colorcurves” sample document immediately after calibration. Keep the printed pages in a folder as an example. Each day, before beginning printing, print the “colorcurves” sample document again and compare it to the initial one. When color drifts, perform another calibration. To print colorcurves, enter Print Sample Document colorcurves and other parameters as appropriate.
Evaluating color quality
Use the colorcurves sample document as a standard for evaluating output and to determine if calibration is required. This document was designed for this purpose, and, since it never changes, is useful as a means of comparing color at different times.
To judge calibration, the most important measure is gray balance. The first page of the colorcurves sample document has a series of color and gray bars on the top half of the page. Look at the bottom four bars—there are two pairs of gray bars. When the printer is calibrated properly, the bottom two bars should match each other, and the two bars above them (third and fourth from the bottom) should match each other as well. If they do not, this is a good indication that you should calibrate the printer.
Another way to judge color quality is to check to see that the color bars are dark on the left and lighter on the right of the page. The very top bar should be red.
The second page of the colorcurves document is not useful for judging calibration. The third page has color bars like the first page. These should match in the same way as those on the first page.
Calibration procedure
In order to properly predict, manage, and minimize color variables, hardware and software must be calibrated when the system is first installed, and periodically as color shifts.
15-2 Guide to Configuring and Managing the System

Performing color calibration
In general, it is recommended that you use high quality paper, of the whitest white, when you perform the calibration procedure.
You may calibrate the system for different types of paper, creating several calibration files. If you do this, you should keep a record of the calibration file name and its purpose. Delete any calibration files you no longer need.
It takes about 15 to 30 minutes to calibrate the printer. You can calibrate while printing, though there may be minor impact on performance.
Use the List Color Calibrations command and the Show Color Calibrations command for details regarding the settings for existing calibrations.
You may wish to print the colorcurves sample document before performing calibration to use as a comparison. If you do this, use the same type of paper you intend to use for the calibration.
To calibrate the printer, use the following procedure:
1. Ensure that the X-rite DTP41 device is connected to serial port B on the controller.
2. Follow the DTP41 instructions for calibrating that instrument. In general, you take the color strip that is provided with the device and insert it.
3. At the printer controller, enter the command:
Print Color Calibration Target <Type>
Use either TRC or BuildProfile as the <Type>. This prints a calibration target and displays a feedback window on the controller. The command returns the name assigned to this color calibration; for example:
Color Calibration 20010409-16 at April 9, 2001 11:02:15 am PDT submitted as document number 22
The name is composed of the date in the format YYYYMMDD, followed by an index number. The feedback window also shows the name. You can rename the calibration when it is complete.
If you use BuildProfile instead of TRC, the system builds ICC profiles and CRD files that can be used by job creators. You should use BuildProfile at least once before beginning production, and whenever the printer receives service.
For more information on this command and its arguments, refer to the command description in this chapter.
Guide to Configuring and Managing the System 15-3
Performing color calibration
4. After the command is executed, the printer prints several sheets with calibration target strips. A different color pattern is printed each time you use this command. Each strip is numbered and has a double line that you use as a guide to insert the strip properly into the DTP41.
Take the calibration target sheets printed, and scan each of the numbered strips into the DTP41. Insert them as described in the X-rite manual, and press the black button on the instrument. In general, you line up the double line on the strip with the lines on the DTP41. It may help to place a piece of matching card stock under the sheet as you insert it into the DTP41.
NOTE: Do not put a sheet with color strips under the sheet you are currently scanning, as the color can show through and affect the calibration.
Refer to the feedback window for information as to which strip number to insert. If there is an error, insert the strip again. If you insert the strips in the wrong order, it is not necessary to restart—refer to the feedback window to view which strip to insert next. If you accidentally insert the same strip twice, the system will average the data.
To abort this procedure at any time, close the feedback window.
5. After a successful calibration, you can make that calibration the default. At the controller, enter the command Set Default Color Calibration <name>. For example:
Set Default Color Calibration 20010409-16
6. After setting the default calibration, restart the sequencer using the Restart Sequencer command.
Once you have successfully completed the calibration procedure, discard the pages with the calibration target strips as they can never be used again.
15-4 Guide to Configuring and Managing the System

Performing color calibration
More on the calibration work flow
A color calibration is created at startup using the BuildProfile argument to the Print Color Calibration Target command. (Calibrations may also be made for different requirements: media category, CMYK emulation, etc.) The BuildProfile argument builds a calibration that has several components, including a TRC, an ICC profile that can be distributed to workstation clients, and PostScript CRD files. From time to time, the printer color drifts, and calibration is needed to correct the color. Use the Print Color Calibration Target command with the TRC argument to build a new TRC. Then use the Set ColorTRC command to associate the new TRC with the profile that has already been distributed to users. If you do this, ICC profile users do not need to get a new ICC profile when the printer is calibrate only to correct printer color drift.
You may have several calibrations that you use for different document types. It is possible to set a new TRC for a profile where the TRC and the profile were created with different settings (for example, halftone or media). The most conservative approach is to not associate TRCs with profiles that were created with different settings, but reasonable results may be obtained when they are mixed.
Use the List Color Calibrations command and the Show Color Calibration command for details regarding the settings for existing calibrations.
Guide to Configuring and Managing the System 15-5
Performing color calibration
Print Color Calibration Target command
Use Print Color Calibration Target to print color calibration targets of the selected type to the specified media.
NOTE: A different color pattern is printed every time you use this command. Once the calibration procedure is complete, the pages with the strips should be discarded.
Access level Administrator
Syntax Print Color Calibration Target <type> <CMYK emulation type> <media category> <media> <halftone><patches_to_average>
Argument The following arguments are available:
• <type>
There are three calibration types you can print using the Print Color Calibration Target command:
– TRC
Builds a calibration, adjusting the tone reproduction curves for cyan, magenta, yellow, and black for gray balance and linear lightness (L* in CIELAB) response.
– BuildProfile
Builds a calibration as above. In addition, this argument constructs an ICC profile that describes the response of the printer using the current calibration. The resulting file can be used with operating systems (such as Windows 98, Windows 2000, or MacOS) or applications that include support for ICC printer profiles. Use this argument at least once before beginning production. The profile file can be transferred to the client workstation using ftp. The profile files are located in the directory /var/db/colortables. Though the workstation users do not need to transfer a new profile file every time the printer is calibrated, they should be informed that the ICC profiles are available for their use.
– Check
Prints the measured response (using the current calibration) in both text and graphical forms. Does not build a calibration.
15-6 Guide to Configuring and Managing the System

Performing color calibration
• <CMYK emulation type>
Required when using the BuildProfile argument; specifies a standard ink set on which to base a new profile. Allowed values are:
– Density
– EuroscaleCoated
– GrayBal
– JapanStd
– Photo5
– SWOPemulation
– USSheetfedCoated
– USWebCoated (recommended value to use for most applications)
NOTE: Many of these values are commonly found in ICC profiles provided in applications like Adobe PhotoShop. USWebCoated is similar to SWOPemulation, though the black is generally darker on USWebCoated. The system default is based on USWebCoated. In general, most organizations should select one CMYK emulation type for calibration and use it consistently. Those who use ICC profiles should be sure to specify a calibration with the same CMYK emulation type as the ICC profile they have.
• <media category>
Required. Specifies a general media type used for the calibration, without regard to size. This information helps you to track the type of paper used for the calibration. This can be useful since the characteristics affect the calibration.
Available values are: Unspecified, Plain, Gloss, HighGloss, Matte, Bright, VeryBright, UltraBright, BrightGloss, VeryBrightGloss, UltraBrightGloss, BrightHighGloss, VeryBrightHighGloss, UltraBrightHighGloss, BrightMatte
• <media>
Use the optional <media> argument to specify the media to use for the calibration. In general, you should use a high-quality, smooth, white paper.
Guide to Configuring and Managing the System 15-7

Performing color calibration
Coated paper has the advantage that the color measurements have less noise, so a good calibration can be done with a smaller number of patches. To use coated paper, you must put the paper into tray 3, set the coated/uncoated indicator to coated, and set the weight properly.
If you omit the media argument, the system default media is used.
• <halftone>
Defaults to “defaultHalftone”. Available values are:
– defaultHalftone: (equivalent to mediumLine)
– coarse: 150 cluster dot
– medium: 200 cluster dot
– mediumLine: 200 line screen (default for the DocuColor 2060)
– fine: 300 line screen
– extraFine: 600 line screen
• <patches_to_average>
When the color patches are measured, there is some amount of noise in the measured values. By printing each patch color several times and averaging the results together, the effect of this random noise is diminished and a more accurate measured value is obtained. This naturally results in a more accurate calibration. The cost of doing this is in the additional operator time required to scan the larger number of patches.
With uncoated paper, the paper fibers tend to show through the image, thereby increasing the measurement noise. For a calibration on uncoated paper, use a value or 2 or more for the <patches_to_average> argument. This prints more patches, averaging the measurements, which helps compensate for measurement noise.
In general, a value of 2 provides a good result.
The optional <patches_to_average> argument defaults to 1.
15-8 Guide to Configuring and Managing the System

Performing color calibration
Set ColorTRC command
Use Set ColorTRC when correcting an existing calibration for printer color drift or to set the TRC back to the one that was created when the profile was built or where the destination and source profile names are the same.
You may have several calibrations that you use for different document types. It is possible to set a new TRC for a profile where the TRC and the profile were created with different settings (for example, halftone or media).
Access level Administrator
Syntax Set ColorTRC <destination profile name> <source TRC or profile name>
Argument The following arguments are available:
• <destination profile name>
Name of the profile for which you want to change the TRC.
• <source TRC or profile name>
Name of the TRC or profile containing a TRC which you want to associate with the destination profile.
Guide to Configuring and Managing the System 15-9
Performing color calibration
List Color Calibrations command
Use List Color Calibrations to display all color calibrations whose name matches the specified pattern.
Access level Administrator
Syntax List Color Calibrations <pattern>
Argument <pattern>
Use an asterisk (*) as a wild card character for the pattern. Default for <pattern> is * which lists all calibrations.
Rename Color Calibration command
The calibration name generated by the system is composed of the date in the format YYYYMMDD, followed by an index number. Use Rename Color Calibration to rename a specified color calibration using a naming convention you prefer. You can rename the default calibration.
Access level Operator or Administrator
Syntax Rename Color Calibration <name> <new name>
Argument <name>
Use ? for <name> to show a list of valid calibration names.
<new name>
Enter the new name.
15-10 Guide to Configuring and Managing the System

Performing color calibration
Delete Color Calibration command
Use Delete Color Calibration to delete a specified color calibration.
Access level Administrator
Syntax Delete Color Calibrations <name>
Argument <name>
Use ? for <name> to show a list of valid calibration names. You cannot delete the default calibration.
Set Default Color Calibration command
Use Set Default Color Calibration to make the specified color calibration the default.
Access level Administrator
Syntax Set Default Color Calibration <name>
Argument <name>
Use ? for <name> to show a list of valid calibration names. There is a system default calibration.
NOTE: After setting the default color calibration, you must restart the sequencer.
Guide to Configuring and Managing the System 15-11

Performing color calibration
Show Default Color Calibration command
Use Show Default Color Calibration to display the default color calibration.
Access level Administrator
Syntax Show Default Color Calibration
Argument None
15-12 Guide to Configuring and Managing the System
Index
Aaccess, remote 1-4accounting file versions 9-2accounting files
copying to floppy 9-8deleting 9-9maintaining 9-1–9-9purging 9-7
administratoraccessing commands 1-2changing password 1-3
ASCII greeting message 12-4.attrs file 2-3
Bbackground menu 3-3backing up
site files 2-9virtual printers list 2-11Xerox files 2-10
Backup Site Files command 2-9Backup Virtual Printers List command 2-11Backup Xerox Files command 2-10banner pages 4-1bar compression 2-3, 2-5, 2-6billing
meterdisplaying 8-8printing, data 8-11
report, printing 8-11booting the controller 3-2broadcast message
utility command 2-1Broadcast Message to All Execs command
2-1Broadcast message to all execs command
2-1browser based access 1-5
Ccalibration
evaluating output 15-2
when to perform 15-1canceling commands 1-2CD-ROM
ejecting 2-2installing 10-2installing software updates from 2-7listing files on 2-8printing files from 2-8
CE mark xiiiChange Administrator Password command
1-3Change Imager Parameters command 5-30Change PCL Imager Parameters command
5-34changing imager parameters 5-30changing password
administrator 1-3operator 1-3
changing PCL imager parameters 5-34color
evaluating output 15-2when to calibrate 15-1
color calibrationprocedure 15-2work flow 15-5
commandsadministrator, accessing 1-2canceling 1-2Configure utility 2-19–2-29copying
accounting data to floppy 9-8documents to floppy 2-3, 2-4, 2-5logs 9-11
deletingaccounting files 9-7, 9-9fonts 10-4forms 11-4logs 9-12
entering 1-1installing
fonts from disk 10-2PCL fonts from disk 10-3
Guide to Configuring and Managing the System INDEX-1

INDEX
licensing 2-15–2-18listing 1-1
CDROM fonts 10-6floppy fonts 10-6fonts 10-6logs 9-10
operator, accessing 1-2printing
font list 10-8font sample 10-8form samples 11-3PCL font sample 10-9
shortcuts 1-1telnet 1-4terminating 1-2utility 2-1–2-13
compressionbar 2-3, 2-5, 2-6
configurationchoosing remote printer or print server
4-1–4-3differences between RPRINTER and
PSERVER 4-1–4-3configuration reports
printing 2-23Configure utility
changeable parameters 2-20options 2-23
Configure utility commands 2-19–2-29configuring
NFS daemon 13-2configuring as PSERVER 4-4configuring as RPRINTER 4-5controller
powering on 3-2conventions xixCopy Accounting to Floppy command 9-8Copy Documents to DOS Floppy command
2-4Copy Documents to Floppy command 2-3Copy Documents to Tape command 2-4, 2-5Copy IOT Fault Data to Disk command 2-18Copy Logs to Floppy command 9-11copying
documents to diskette 2-3documents to DOS diskette 2-4Documents to Floppy command 2-3, 2-4,
2-5logs 9-11
print-job data 9-8to tape 2-4, 2-5
copying to diskette 2-3correcting color calibration 15-9corruption problems
database 2-28software 2-26
Create Input Profile command 6-2Create Output Profile command 6-2Create Profiles command 6-2creating profiles 6-2
Ddatabase
corruption 2-28date, setting 7-1defaults
media, setting 5-2options, listing 5-28
Delete Accounting command 9-9Delete Color Calibration command 15-10,
15-11Delete Fonts command 10-4Delete Forms command 11-4Delete Logs command 9-12delete output profile command 6-3deleting
accounting files 9-9fonts 10-4forms 11-4logs 9-12
Deleting Input|Output profiles 6-3diagnostic data, gathering 2-18Disable Modem command 2-31Disable Remote Shell command 2-32diskette
copying documents to 2-3copying documents to DOS 2-4ejecting 2-2formatting 2-2installing licenses from 2-17installing software updates from 2-7listing files on 2-3printing documents from 2-9
diskettescontents, listing 2-3ejecting 2-2formatting 2-2
Display Billing Meters command 8-8
INDEX-2 Guide to Configuring and Managing the System

INDEX
displayingdate 7-1logs 9-10PDL code 2-6time 7-1
displaying PDL code 2-6documentation xxDump Accounting command 9-7
EEject CD-ROM command 2-2Eject CDROM command 2-2Eject Floppy command 2-2ejecting a CD-ROM 2-2ejecting a diskette 2-2Enable Modem command 2-30Enable Remote Shell command 2-31enabling
lpr security option 12-5entering commands 1-1Examine Document command 2-6
Ffeeder tray attributes, setting 5-4file locks
setting maximum 4-6file server support 4-6files
accounting, maintaining 9-1–9-9backing up 2-9backing up Xerox 2-10NPS log, maintaining 9-9restoring backed-up site 2-10restoring Xerox 2-11
floppysee diskette
floppy, see disketteFont Thicken parameter 5-31fonts
deleting 10-4HP PCL 10-3installing 10-2list, printing 10-8listing
all available 10-7disk 10-6printer controller 10-6
sample, printing 10-8fonts, PCL
sample, printing 10-9Format Floppy command 2-2formatting
diskette 2-2forms
deleting 11-4managing 11-1printing samples 11-3
Ggfi directories, removing 13-3graphical user interface 1-1GUI, enable or disable 2-21
HHalt System command 3-3host ID
showing 2-13HP PCL fonts, installing 10-3
Iimager parameters 5-29–5-32imager parameters, PCL 5-33–5-35input profiles 6-1–6-6Install Feature License command 2-16Install FlexLicense from Floppy command
2-17Install Fonts from CDROM command 10-2Install Fonts from Floppy command 10-2Install License command (obsolete) 2-18Install PCL Fonts from Floppy command
10-3Install Remote Update command 2-7Install Update from CDROM command 2-7Install Update from Floppy command 2-7installing
fonts 10-2NFS 13-1verifying
XDOD/DigiPath 13-2
Jjob IDs
resetting 2-12job processing
stopping and starting 3-5
KKill command 3-6
Guide to Configuring and Managing the System INDEX-3

INDEX
Llaser safety ixlicenses
diagnostic 2-15displaying remaining days 2-17installing feature 2-16installing from diskette 2-17showing status 2-17
licenses, software 2-15licensing commands 2-15–2-18List CDROM Fonts command 10-6List Color Calibrations command 15-10List Executives command 1-4, 8-8List Files on CDROM command 2-8List Floppy Fonts command 10-6List Fonts command 10-6, 10-7List Forms command 11-2List Logs command 9-10List Options command 5-28List Sample Documents command 8-5List Volumes command 8-2listing
default options 5-28files on CD ROM 2-8files on diskette 2-3files on tape 2-5fonts
disk 10-8printer controller 10-8
logs 9-10listing commands 1-1logging in 4-2, 4-6logs
copying to floppy 9-11deleting 9-12displaying 9-10listing 9-10printing 9-13
lprsecurity option, enabling 12-5
Mmagnetic ink character recognition see
MICRMaximum File Locks
setting 4-6media setting default 5-7messages
telnet 1-4
MICRfonts
clearing from memory 14-2deleting 14-2
fonts for NPS 14-1security 14-2tasks for NPS 14-1
modemconnecting 2-30disabling 2-31enabling 2-29switch settings 2-30
Mount CDROM command 12-2, 12-3Mount Floppy command 12-3
NNFS
configuring 13-2installing 13-1
Novell network 4-1NPS log files, maintaining 9-9
Ooperation safety, Europe xi, xiiioperation safety, U. S. x, xioperator
accessing commands 1-2changing password 1-3
optionsdefault, listing 5-28
orphan data files, removing 12-6output profiles 6-1–6-6ozone production information x
Pparser, IPDS
restarting 3-6password
changing administrator 1-3changing operator 1-3
PCL fonts, installing 10-3PCL parameters
changing 5-36restoring default 5-40, 5-41setting 5-36
PCL symbol sets 5-38PCONSOLE 4-4PDL
displaying code 2-6
INDEX-4 Guide to Configuring and Managing the System
INDEX
PDL code, displaying 2-6Personality Profile parameters 6-3power outage
powering off and on after 3-5powering off
system 3-3powering off after power failure 3-5powering on
controller 3-2system 3-1
Print Billing Report command 8-11Print Color Calibration Target command
15-6Print Documents from CDROM command
2-8Print Documents from Floppy command 2-9Print Font List command 10-8Print Font Sample command 10-8Print Form List command 11-1Print Form Sample command 11-3print job data, copying 9-8Print Log command 9-13Print Options command 5-29Print PCLFont Sample command 10-9Print Sample Document command 8-7PRINTDEF command 4-6PRINTDEF program 4-2printer diagnostics 2-18printing
billing meter data 8-11font list 10-8font sample 10-8form samples 11-3options 5-11PCL font sample 10-9sample documents 8-5–8-7showing status 8-2stopping 3-3
printing configuration reports 2-23printing documents from diskette 2-9printing files from CD ROM 2-8procedures
gfi directories, removing 13-3Profile parameters 6-3–6-6profiles 6-1–6-6
creating 6-2setting 6-2showing 6-2
PSERVER
choosing 4-1–4-3configuring system as 4-4
publications xx
Rrebooting
controller 3-6reinitializing software 2-26remote access 1-4
broadcast message 2-1web based 1-5
remote access, using 1-4remote device
enabling 2-29remote disabling Unix shell 2-32remote enabling Unix shell 2-31removing
gfi directories 13-3orphan data files 12-6
Reset Job IDs 2-12Reset Job IDs command 2-12Restart IPDS Parser command 3-6Restart Sequencer command 3-6Restart System command 3-6restarting
controller 3-6IPDS parser 3-6
Restore Default Imager Parameters command 5-32
Restore Default PCL Imager Parameters command 5-35
Restore Site Files command 2-10Restore Virtual Printers List command 2-11Restore Xerox Files command 2-11restoring
virtual printers list 2-11restoring backed-up site files 2-10restoring Xerox files 2-11RPRINTER
choosing 4-1–4-3configuring system as 4-5
Ssafety
hotline numbers xilaser ixoperation x–xiii
sample documents, printing 8-5–8-7security option, lpr 12-5
Guide to Configuring and Managing the System INDEX-5

INDEX
Security, MICR 14-2sequencer
restarting 3-5Set color calibrations 15-1, 15-6, 15-10,
15-11, 15-12Set Default Color Calibration command
15-11Set Default Media command 5-2set input profile command 6-2, 6-3Set Option command 5-11set output profile command 6-2Set Profiles command 6-2, 6-3Set Status Message command 2-12Set Time command 7-1Set Tray Purge|No Purge 5-8Set Tray <n> Tray <m> command 5-7Set Tray command 5-4, 5-5Set Tray Default command 5-5Set tray from virtual printer media 5-8setting
default media 5-7feeder tray attributes 5-4imager parameters 5-29imager parameters, PCL 5-33printer options 5-29profiles 6-2
setting stacker groups 5-10shortcuts, command 1-1Show Default Color Calibration command
15-12Show Default Media command 5-4Show Host ID 2-13Show Host ID command 2-13Show Imager Parameters command 5-30Show IPDS Tracing command 2-13Show License Status command 2-15, 2-17Show Log command 9-10Show PCL Imager Parameters command
5-33Show Profiles command 6-1Show Status command 8-2Show Time command 7-1shutting down the system 3-3Socket Printing, TCP/IP 2-28software
corruption problems 2-26licensis 2-15reinitializing 2-26
software updates 2-7
installing from CD-ROM 2-7installing from diskette 2-7
spooling, checking available space 8-2Start command 3-5Start IPDS Tracing command 2-13starting
system 3-1status message
setting telnet 1-4status messages
setting 2-12Stop command 3-5Stop IPDS Tracing command 2-14Stop Queuing command 4-4stopping
system 3-1stopping and starting job processing 3-5stopping the system
using background menu 3-3using Halt System command 3-3
symbol sets, PCL 5-38system status, checking 8-1–8-8
Ttape
copying documents to 2-4, 2-5listing files on 2-5
TCP/IPSocket Printing 2-28
telephone line, modem 2-30telnet
broadcast message, sending 1-4greeting message 1-4listing clients 1-4logging on and off 1-4messages 1-4using 1-4
Telnet greeting message 12-4terminating commands 1-2time, setting 7-1Trace command 2-13trace file
viewing 2-13tracing, IPDS 2-13
showing 2-13starting 2-13
tracing, IPDSstopping 2-14transferring software updates 2-7
INDEX-6 Guide to Configuring and Managing the System

INDEX
UUNIX
compressed bar format 2-3shell, using 12-2
Unix compressed bar format 2-3, 2-5, 2-6Unix shell
disabling remote 2-32disabling remotely 2-32enabling remotely 2-31
unresponsive printer 3-5Unset Tray 5-9, 5-10updates
software 2-7updates, software
installing from CD-ROM 2-7installing from diskette 2-7
utility commands 2-1–2-13
VVIPP cache capability 5-28virtual printers 4-2, 4-6
backing up list of 2-11restoring list of 2-11
Wweb based access 1-5wizard mode, using 12-1
XXerox files
restoring backed up 2-11Xerox files, backing up 2-10
Guide to Configuring and Managing the System INDEX-7