WordPress | StudioPress User Guide
37
-
Upload
janet-holst-morrow -
Category
Documents
-
view
233 -
download
5
description
Mountain Ash WordPress | StudioPress User Guide, still have questions let us know.
Transcript of WordPress | StudioPress User Guide
Table of ContentsTable of ContentsWordPress & StudioPress Together Create a Dynamic CMS . . . . . pg. 1
Login to the Admin Panel . . . . . . . . . . . . . . . . . . . pg. 2
WordPress Dashboard . . . . . . . . . . . . . . . . . . . . . . pg. 3
WordPress Editor . . . . . . . . . . . . . . . . . . . . . . . pg. 4
Genesis SEO . . . . . . . . . . . . . . . . . . . . . . . . . . pg. 7
Genesis Layout Settings . . . . . . . . . . . . . . . . . . . . pg. 8
Editor Quick Tags . . . . . . . . . . . . . . . . . . . . . . . pg. 9
WordPress Posts . . . . . . . . . . . . . . . . . . . . . . . . pg. 12
WordPress Timestamps . . . . . . . . . . . . . . . . . . . . . pg. 15
WordPress Pages . . . . . . . . . . . . . . . . . . . . . . . . pg. 16
Adding a Link to a Page or Post . . . . . . . . . . . . . . . . pg. 19
Uploading/Inserting Media (Old WP Versions) . . . . . . . . . . pg. 20
Adding Media to Page or Post (New WP Versions . . . . . . . . . pg. 23
Images Sizes . . . . . . . . . . . . . . . . . . . . . . . . . pg. 26
NextGen Photo Gallery . . . . . . . . . . . . . . . . . . . . . pg. 28
User Profile . . . . . . . . . . . . . . . . . . . . . . . . . pg. 33
Important Note . . . . . . . . . . . . . . . . . . . . . . . . pg. 34
pg. 2
pg. 1
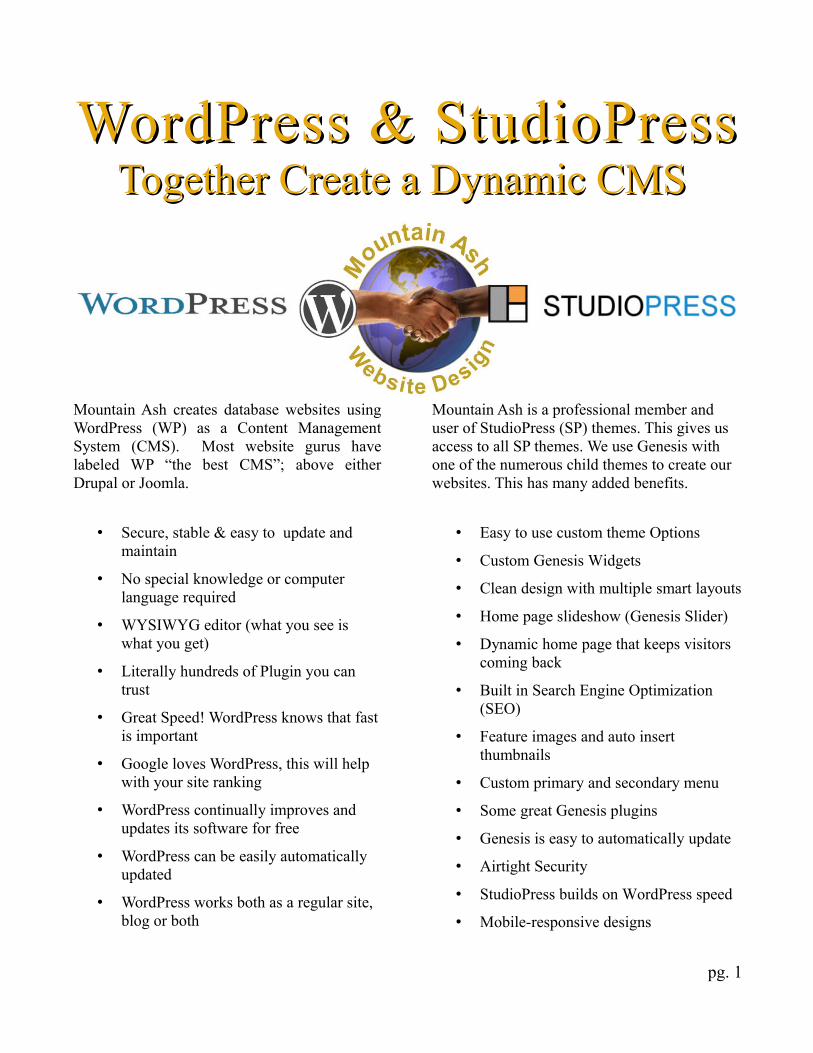
WordPress & StudioPressWordPress & StudioPressTogether Create a Dynamic CMSTogether Create a Dynamic CMS
Mountain Ash creates database websites using WordPress (WP) as a Content Management System (CMS). Most website gurus have labeled WP “the best CMS”; above either Drupal or Joomla.
• Secure, stable & easy to update and maintain
• No special knowledge or computer language required
• WYSIWYG editor (what you see is what you get)
• Literally hundreds of Plugin you can trust
• Great Speed! WordPress knows that fast is important
• Google loves WordPress, this will help with your site ranking
• WordPress continually improves and updates its software for free
• WordPress can be easily automatically updated
• WordPress works both as a regular site, blog or both
Mountain Ash is a professional member and user of StudioPress (SP) themes. This gives us access to all SP themes. We use Genesis with one of the numerous child themes to create our websites. This has many added benefits.
• Easy to use custom theme Options
• Custom Genesis Widgets
• Clean design with multiple smart layouts
• Home page slideshow (Genesis Slider)
• Dynamic home page that keeps visitors coming back
• Built in Search Engine Optimization (SEO)
• Feature images and auto insert thumbnails
• Custom primary and secondary menu
• Some great Genesis plugins
• Genesis is easy to automatically update
• Airtight Security
• StudioPress builds on WordPress speed
• Mobile-responsive designs
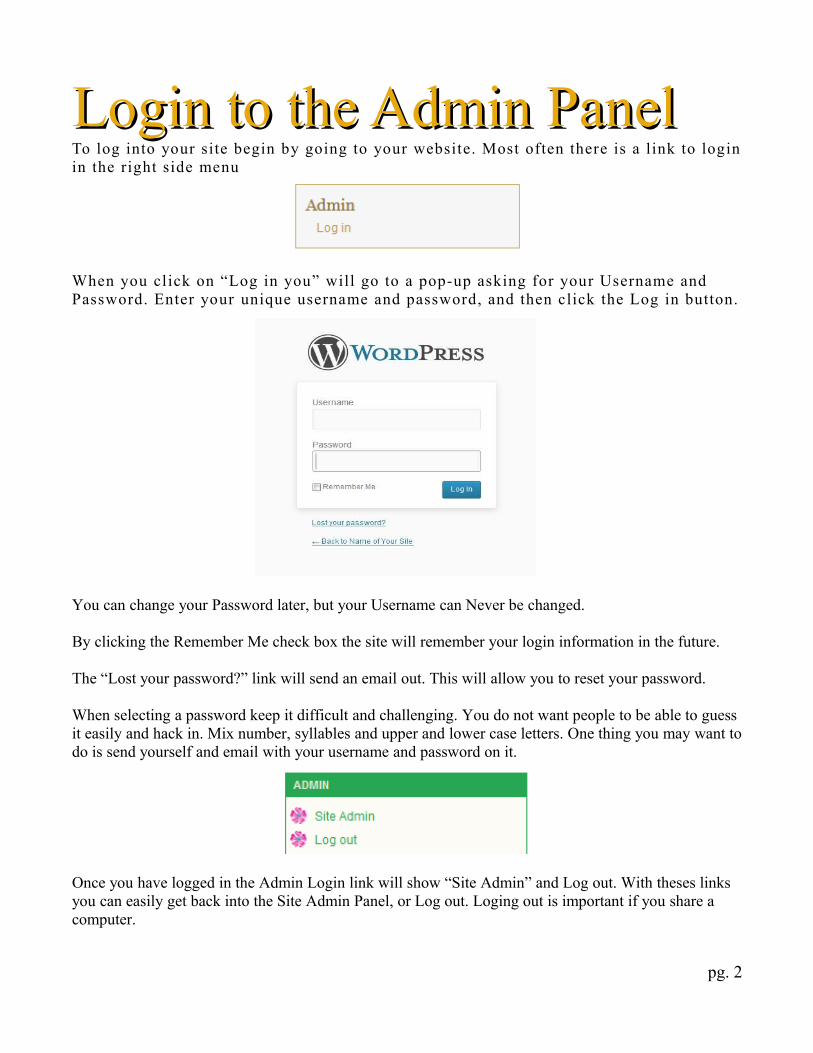
Login to the Admin PanelLogin to the Admin PanelTo log into your site begin by going to your website. Most often there is a l ink to login in the right side menu
When you click on “Log in you” will go to a pop-up asking for your Username and Password. Enter your unique username and password, and then click the Log in button.
You can change your Password later, but your Username can Never be changed. By clicking the Remember Me check box the site will remember your login information in the future. The “Lost your password?” link will send an email out. This will allow you to reset your password. When selecting a password keep it difficult and challenging. You do not want people to be able to guess it easily and hack in. Mix number, syllables and upper and lower case letters. One thing you may want to do is send yourself and email with your username and password on it.
Once you have logged in the Admin Login link will show “Site Admin” and Log out. With theses links you can easily get back into the Site Admin Panel, or Log out. Loging out is important if you share a computer.
pg. 2

WordPress DashboardWordPress Dashboard
On the Admin Menu only one area can be open at a time. To make it easier to display the menu I have them all open at once. This is something you will not be able to do. Only one of the dark gray headers, with the sub-menu under it, will show at a t ime.
pg. 3

WordPress EditorWordPress EditorRight Column Options for Page
Below is the easy to use WP editor. This images shows the page options to the right.
The most important features will be covered later. For example the Quick Tags and Timestamp... This is just a quick look at the editor. Most of it is self explanatory.
Keep the Title short; one or two words. Remember that this will be come part of the URL for that page. The title will also be added to the top and side menu, so it is important that it does not take up too much room.
The Add Media button is used to add photos and to link pdfs and other documents to the page. This will be covered in its own section.
pg. 4

Right Column Options for Posts
Below is the easy to use WP editor. This images shows the post options to the right.
The most important features will be covered later. For example the Quick Tags and Timestamp... This is just a quick look at the editor. Most of it is self explanatory.
Keep the Title short; one or two words. Remember that this will be come part of the URL for that page. The title will also be added to the top and side menu, so it is important that it does not take up too much room.
The Add Media button is used to add photos and to link pdfs and other documents to the page. This will be covered in its own section.
Select the categories you want your post to appear in. Yes, you may select more than one.
pg. 5

A Closter Look This is what you get when you click on Edit next to Publish Immediately.
This is great us use for posts if you want to write an article or blog post, and have it publish at a given date and time. You can be away on vacation, and it will still publish like clock work.
Below is the Help drop down. You can see you have a number of selections
Below is the Screen Options drop down.
Below are the two Page Attribute drop downs. Obviously the “Parent” will be different according to your pages.
pg. 6

Genesis SEOGenesis SEO
Custom Document Title: Meta Tag Title – This is the title that will appear on Search EnginesCustom Post/Page Meta Description: This is the description that will appear on Search EnginesCustom Post/Page Meta Keywords, comma separated: These are words that visitors might enter in a search engine to look for this type of page or post. (Keep it relavent, or the Search Engine can classify you as a spammerCustom Canonical URL: This is what google.com refers to as your, best or official URL.
• www.example.com • example.com/ • www.example.com/index.php
Custom Redirect URL: This will not apply for the majority of sites, as a redirect will not be required.Robots Meta Settings: Each of these would restrict access or to the page or post by search engine bots. Do not check these if you want the page/post indexed, followed and archived.Custom Tracking/Conversion Code: Will not apply to the majority of users.
pg. 7
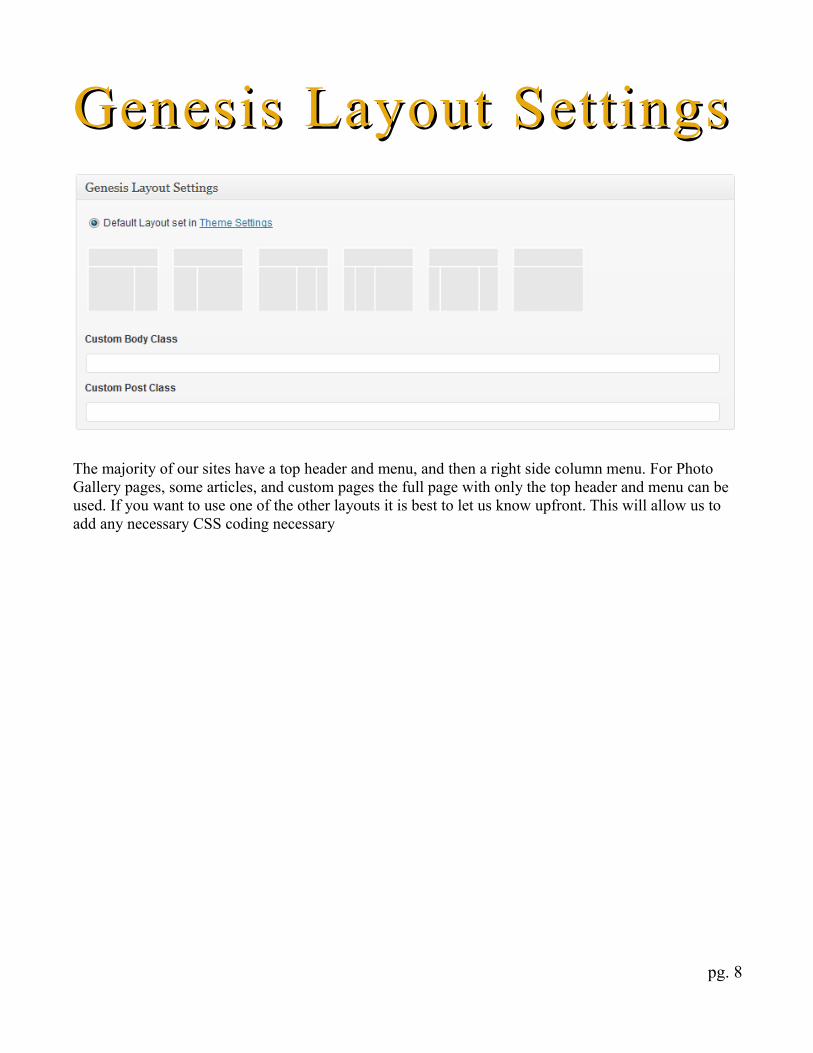
Genesis Layout SettingsGenesis Layout Settings
The majority of our sites have a top header and menu, and then a right side column menu. For Photo Gallery pages, some articles, and custom pages the full page with only the top header and menu can be used. If you want to use one of the other layouts it is best to let us know upfront. This will allow us to add any necessary CSS coding necessary
pg. 8

Editor Quick TagsEditor Quick TagsFirst Row
B – <strong></strong> HTML tag for strong emphasis of text (i.e. bold).
I –<em></em> HTML tag for emphasis of text (i.e. italicize).
ABC – <del></del> HTML tag to label text considered deleted from a post. Most browsers display as striked through text.
– <ul></ul> HTML tag will insert an unordered list, or wrap the selected text in same. An unordered list will typically be a bulleted list of items.
– <ol></ol> HTML tag will insert a numbered list, or wrap the selected text in same. Each item in an ordered list are typically numbered.
– <blockquote></blockquote> HTML tag that ‘indents’ text to distinguish quoted or cited text.
– Left align text
– Center align text
– Right align text
- Create Link (Further instructions to follow)
–Remove Link (Further instructions to follow)
– <!--more--> WordPress tag that breaks a post into "teaser" and content sections. Type a few paragraphs, insert this tag, then compose the rest of your post. On your blog you'll see only those first paragraphs with a hyperlink ((more...)), which when followed displays the rest of the post's content.
– Spell check, the down arrrow allows you to select different languages…
– Full screen
– We call this the Kitchen Sink. It makes the second line of icons appear or disapear… (see editor graphic above)
– This icon is used in conjunction with your photo gallery program. You can use this to add a picture from your gallery to a page or post, by clicking on the Picture tab. I recommend against using the Gallery or Album tabs.
pg. 9

Second Row
When you click on this the following drop down window appears.
• Address is used to pull an address together and in italic format.
• Preformatted is usually a slightly smaller different font.
• Preformatted Heading 1 <h1>Your text goes here</h1>: This is the main header for each page. The size and color will be formatted via CSS to match your website.
• Heading 2 <h2>Your text goes here</h2>: This is perfect for sub-headers on your page. The size and color will be formatted via CSS to match your website. There is a dashed line above and below the header to set it apart.
• Heading 3 – 6 <h3>Your text goes here</h3>: Each heading gets progressively smaller. They are all bold, and can be used to set apart subheadings. The size and color will be formatted via CSS to match your website.
– <u></u> Underline
– Justify (align both left and right)
– When you click on this the following drop down window appears.
The left graphic is the dropdown. The second is what you get when you select more. From these two windows you can select the color you want your font to appear.
– Use this icon to insert text that you have copyed from another program or site.
– Use this icon to insert text from MS Word. It will remove all of the ‘bad’ coding that MS Word uses.
– Removes formating: be careful using this, as it can remove
pg. 10

– Insert embedded media. I recommend you do not use this.
– This has a number of custom characters that you can insert into your text.
– Outdent, will remove the following indent from all or part of a previously indented section.
– Indents the text 30 pixels per click; 30, 60, 90…
– Undo
– Redo
– Basic instructions and hot keys
Visual tab – this is what you should be using to create your posts and pages 95% of the time
Text tab – This will show you the text & html code for your site. There are a few times it comes in handy. (Further instructions on a one-to-one basis.)
pg. 11

WordPress PostsWordPress PostsEditing a Post
To edit a current post click on Posts in the left menu. You should now see a number of options:
Click on Posts. This will show you all your current posts. You can have multiple category for your blogs: (For example: Janet's Thoughts, Upcoming News, Bill's Rants...) With StudioPress the home page is created by using multiple categories. This keeps your home page fresh, as it changes every time you add a new post. The top write-up and picture of the home page is a post under the category, “Welcome”.
This is where you would go if you want to change or update the home page top post. Do not add any other posts to this category. Only one post will show up at the top under “Welcome”. I usually recommend going to the original post and updating it, as needed.
Categories
The Categories will already be set. However if you want to add a new category or change the name of one click here.
To change the name of a category mouse over it. The select Edit. To delete the category click on Delete. If you want to set-up a new category give it a simple one to two word name. The Slug will fill in automatically. Description is not required, but can be added if you want.
pg. 12
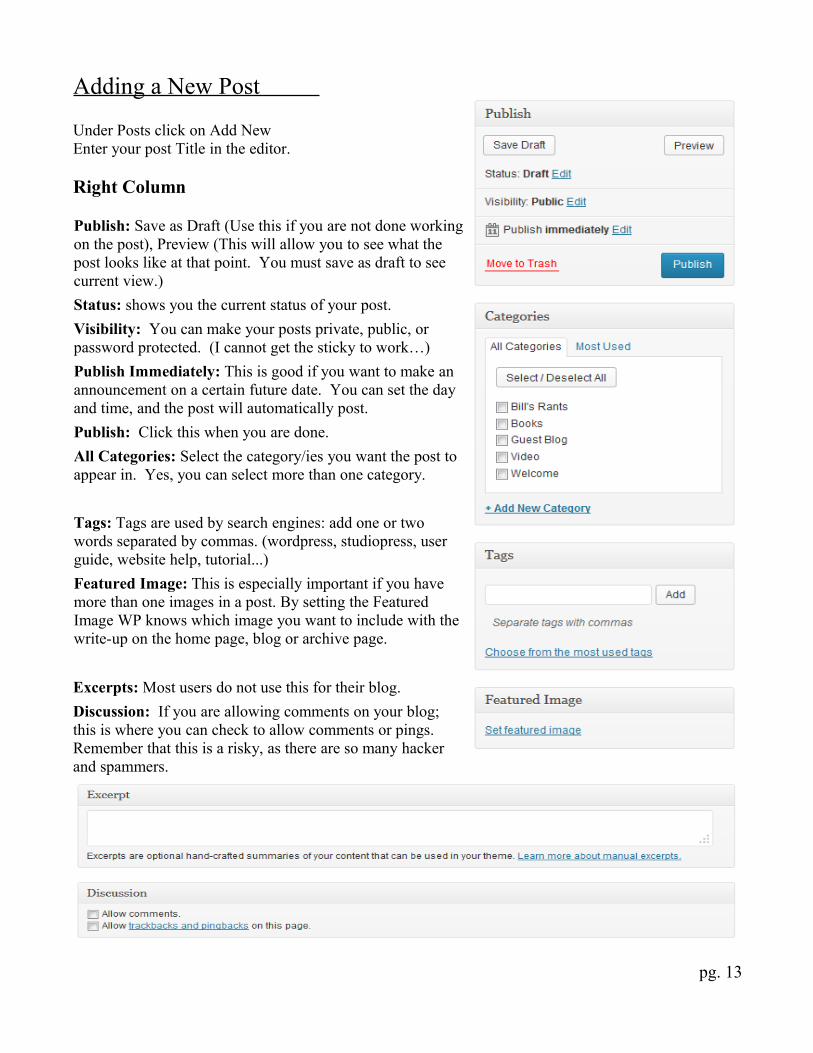
Adding a New Post
Under Posts click on Add NewEnter your post Title in the editor.
Right Column
Publish: Save as Draft (Use this if you are not done working on the post), Preview (This will allow you to see what the post looks like at that point. You must save as draft to see current view.)
Status: shows you the current status of your post.
Visibility: You can make your posts private, public, or password protected. (I cannot get the sticky to work…)
Publish Immediately: This is good if you want to make an announcement on a certain future date. You can set the day and time, and the post will automatically post.
Publish: Click this when you are done.
All Categories: Select the category/ies you want the post to appear in. Yes, you can select more than one category.
Tags: Tags are used by search engines: add one or two words separated by commas. (wordpress, studiopress, user guide, website help, tutorial...)
Featured Image: This is especially important if you have more than one images in a post. By setting the Featured Image WP knows which image you want to include with the write-up on the home page, blog or archive page.
Excerpts: Most users do not use this for their blog.
Discussion: If you are allowing comments on your blog; this is where you can check to allow comments or pings. Remember that this is a risky, as there are so many hacker and spammers.
pg. 13

Custom Fields: With older WP and StudioPress this field was used a lot more. For example if you wanted to set a thumbnail. Now this is filled by the Featured Images. There are still a few special needs clients have that require the use of Custom Fields. This will be handled on a case by case basis.
Slug: I really like this feature, and recommend it if your Title is going to be longer than two words. In the space you type what you want the specific post or page URL to be. For example here I entered special_name. Don't use blanks. Normally the URL is the website domain name followed by the post or page title. This gives you a way to add a special, short name up front.
pg. 14

Post TimestampsPost TimestampsFor your other posts/blogs the last post will show up on top, and they will get progressively older as they go down. The order in which they are placed is determined by the Timestamp. Using the Timestamp is one way to change the order in which posts are viewed.
If you want to move the position of your post you need to make changes to the Timestamp. New posts always appear at the top, with older ones appearing below it, and the oldest is always last.
To get around this you can change the Post Timestamp. This does not show up on the posts, but it can control the position of the posts. With the newest date being at the top and the rest of the posts descending according to their date.
So if you want the post to appear at the bottom, rather than the top, simply set the Post Timestamp to a date older than the bottom post.
In the right column you will see: Published On and then a date. Go under edit, and change the date and time. To make an older post show up at the top change the date to the current day and time… To drop it further back give it an older date and time…
This can take some tweaking is you want the posts in a specific order.
pg. 15
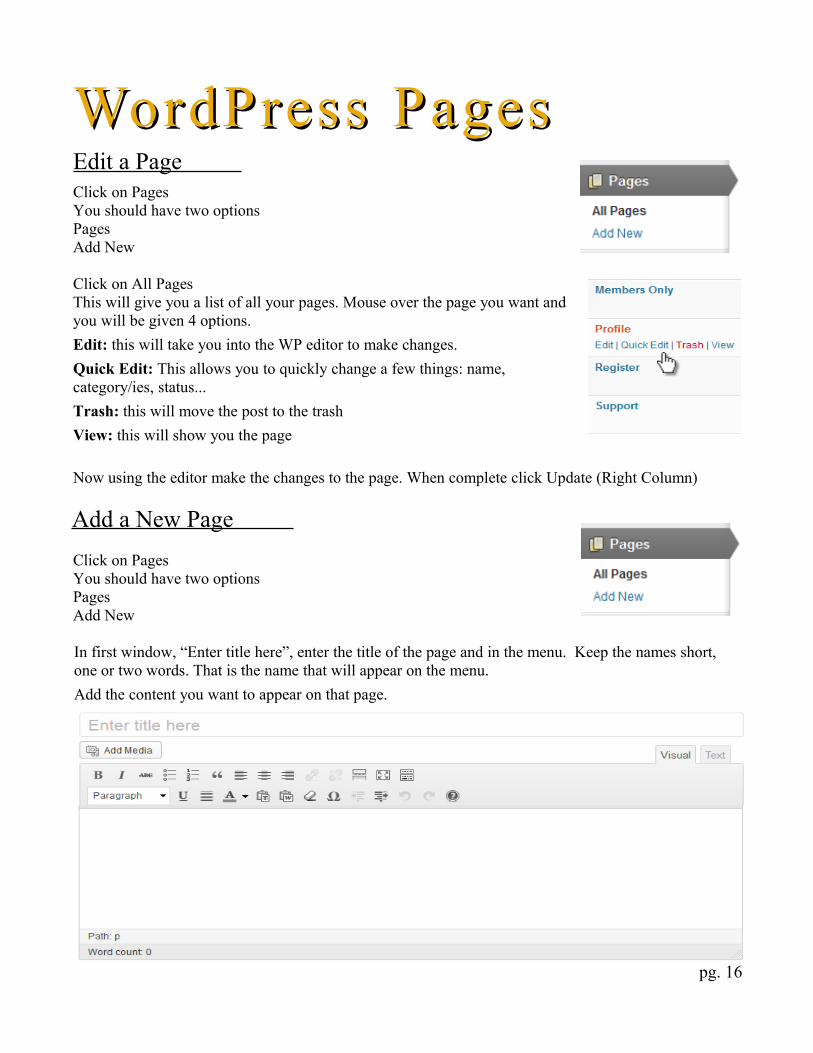
WordPress PagesWordPress PagesEdit a Page Click on PagesYou should have two optionsPagesAdd New
Click on All PagesThis will give you a list of all your pages. Mouse over the page you want and you will be given 4 options.
Edit: this will take you into the WP editor to make changes.
Quick Edit: This allows you to quickly change a few things: name, category/ies, status...
Trash: this will move the post to the trash
View: this will show you the page
Now using the editor make the changes to the page. When complete click Update (Right Column)
Add a New Page
Click on PagesYou should have two optionsPagesAdd New
In first window, “Enter title here”, enter the title of the page and in the menu. Keep the names short, one or two words. That is the name that will appear on the menu.
Add the content you want to appear on that page.
pg. 16

Right Column
Publish: Save as Draft (Use this if you are not done working on the post), Preview (This will allow you to see what the post looks like at that point. You must save as draft to see current view.)
Status: shows you the current status of your post.
Visibility: You can make your posts private, public, or password protected. (I cannot get the sticky to work…)
Publish Immediately: This is good if you want to make an announcement on a certain future date. You can set the day and time, and the post will automatically post.
Publish: Click this when you are done.
Page Attributes Below are the two Page Attribute drop downs. Obviously the “Parent” will be different according to your pages.
pg. 17

Custom Fields: With older WP and StudioPress this field was used a lot more. For example if you wanted to set a thumbnail. Now this is filled by the Featured Images.
There are still a few special needs clients have that require the use of Custom Fields. This will be handled on a case by case basis.
Slug: I really like this feature, and recommend it if your Title is going to be longer than two words. In the space you type what you want the specific post or page URL to be. For example here I entered special_name. Don't use blanks. Normally the URL is the website domain name followed by the post or page title. This gives you a way to add a special, short name up front.
pg. 18

Adding a Link | Page or PostAdding a Link | Page or Post - – Create Link <a href="http://example.com">Link Name Here</a> HTML tag to create a hyperlink.
• Write the name you want visitors to see.
• Hightlight the name
• Click the link image
• A pop-up will window will appear
• Enter the URL (Note that http:// must appear before the URL. This is way it is already in the window. Be sure that if you paste a URL in the window that the http:// does not apear twice.
• Next to Title you can enter a name. This is used for Search Engines and for blind visitors.
• If the link is for another website check Open link in a new window/tab. This will prevent visitors from leaving your website.
• If the link is for another website check Open link in a new window/tab. This will prevent visitors from leaving your website.
• Click Insert
– Remove Link, will remove a link that you have previously added.
pg. 19
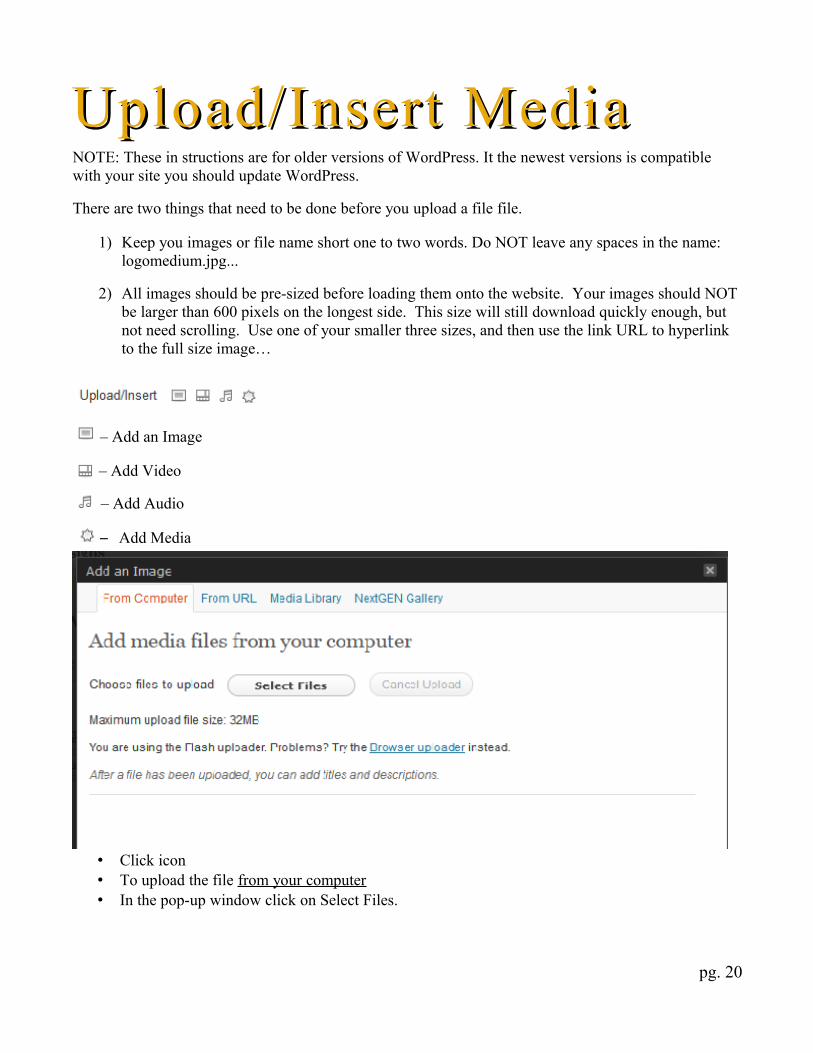
Upload/Insert MediaUpload/Insert MediaNOTE: These in structions are for older versions of WordPress. It the newest versions is compatible with your site you should update WordPress.
There are two things that need to be done before you upload a file file.
1) Keep you images or file name short one to two words. Do NOT leave any spaces in the name: logomedium.jpg...
2) All images should be pre-sized before loading them onto the website. Your images should NOT be larger than 600 pixels on the longest side. This size will still download quickly enough, but not need scrolling. Use one of your smaller three sizes, and then use the link URL to hyperlink to the full size image…
– Add an Image
– Add Video
– Add Audio
– Add Media
• Click icon• To upload the file from your computer• In the pop-up window click on Select Files.
pg. 20
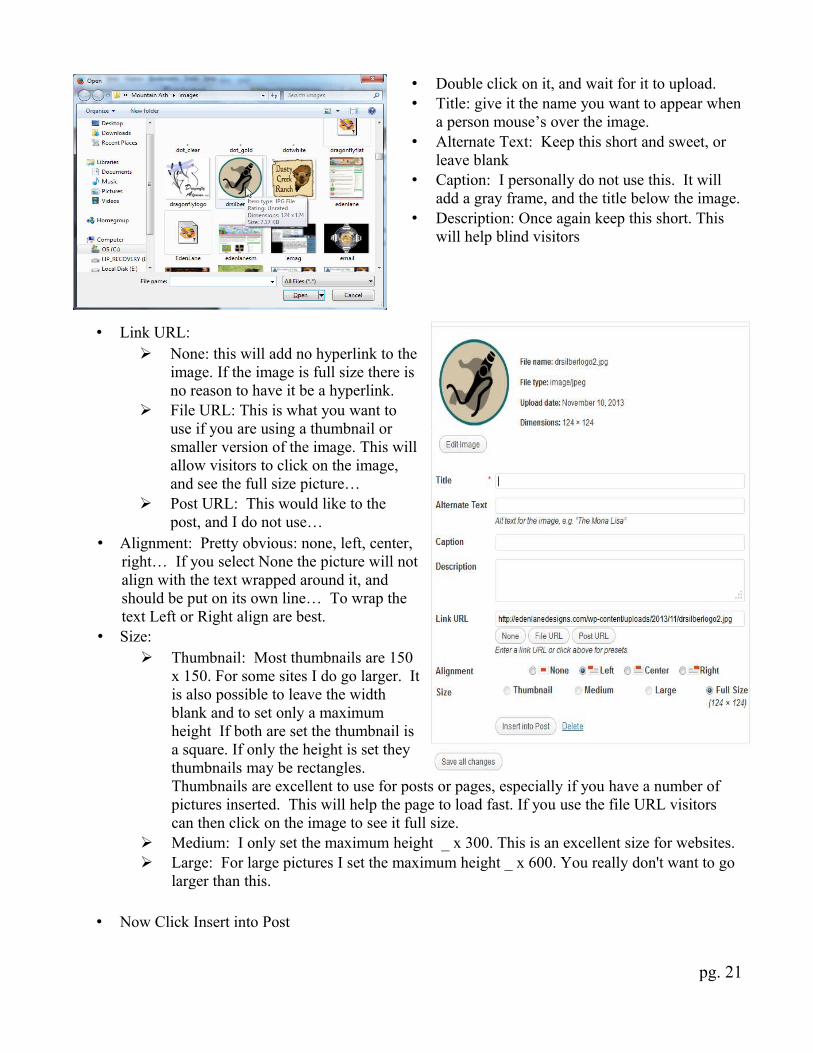
• Double click on it, and wait for it to upload.• Title: give it the name you want to appear when
a person mouse’s over the image.• Alternate Text: Keep this short and sweet, or
leave blank• Caption: I personally do not use this. It will
add a gray frame, and the title below the image.• Description: Once again keep this short. This
will help blind visitors
• Link URL:➢ None: this will add no hyperlink to the
image. If the image is full size there is no reason to have it be a hyperlink.
➢ File URL: This is what you want to use if you are using a thumbnail or smaller version of the image. This will allow visitors to click on the image, and see the full size picture…
➢ Post URL: This would like to the post, and I do not use…
• Alignment: Pretty obvious: none, left, center, right… If you select None the picture will not align with the text wrapped around it, and should be put on its own line… To wrap the text Left or Right align are best.
• Size:➢ Thumbnail: Most thumbnails are 150
x 150. For some sites I do go larger. It is also possible to leave the width blank and to set only a maximum height If both are set the thumbnail is a square. If only the height is set they thumbnails may be rectangles. Thumbnails are excellent to use for posts or pages, especially if you have a number of pictures inserted. This will help the page to load fast. If you use the file URL visitors can then click on the image to see it full size.
➢ Medium: I only set the maximum height _ x 300. This is an excellent size for websites.➢ Large: For large pictures I set the maximum height _ x 600. You really don't want to go
larger than this.
• Now Click Insert into Post
pg. 21

Insert Image that has Already Been Uploaded to Your Site
• To add an image that has already been uploaded to the site:• Click on Media Library• Locate the image you want to insert• Click on Show• Now follow the above steps **
Insert Other Media
Follow the same instructions above.
This icon is best wen you want to upload a WM Word, Excel, or PDF, or similar file. These files are inserted as links.
The link name will be the title. The Link URL should be File URL.
When done click Insert into Post/Page
- Add Video: This takes up a lot of memory, and takes a long time to load. I personally videos be inserted from youtube.com
- Add Audio: I don’t recommend this…
pg. 22

AAdd Media to Page or Postdd Media to Page or PostNOTE: These instructions are for the newer version of WordPress.
There are two things that need to be done before you upload a file file.
1) Keep you images or file name short one to two words. Do NOT leave any spaces in the name: logomedium.jpg...
2) All images should be pre-sized before loading them onto the website. Your images should NOT be larger than 600 pixels on the longest side. This size will still download quickly enough, but not need scrolling. Use one of your smaller three sizes, and then use the link URL to hyperlink to the full size image…
• Click icon• To upload the file from your computer
• In the pop-up window click on Select Files.• Double click on it, and wait for it to upload.
pg. 23

• Title: give it the name you want to appear when a person mouse’s over the image.
• Alternate Text: Keep this short and sweet, or leave blank
• Caption: I personally do not use this. It will add a gray frame, and the title below the image.
• Description: Once again keep this short. This will help blind visitors
• Link URL:➢ None: this will add no
hyperlink to the image. If the image is full size there is no reason to have it be a hyperlink.
➢ File URL: This is what you want to use if you are using a thumbnail or smaller version of the image. This will allow visitors to click on the image, and see the full size picture…
➢ Post URL: This would like to the post, and I do not use…
• Alignment: Pretty obvious: none, left, center, right… If you select None the picture will not align with the text wrapped around it, and should be put on its own line… To wrap the text Left or Right align are best.
• Size:➢ Thumbnail: Most thumbnails are 150 x 150. For some sites I do go larger. It is also
possible to leave the width blank and to set only a maximum height If both are set the thumbnail is a square. If only the height is set they thumbnails may be rectangles. Thumbnails are excellent to use for posts or pages, especially if you have a number of pictures inserted. This will help the page to load fast. If you use the file URL visitors can then click on the image to see it full size.
➢ Medium: I only set the maximum height _ x 300. This is an excellent size for websites.➢ Large: For large pictures I set the maximum height _ x 600. You really don't want to go
larger than this.
pg. 24

Insert Image that has Already Been Uploaded to Your Site
• To add an image that has already been uploaded to the site:
• Click on Media Library• Locate the image you want to insert• Click on Show• Now follow the above steps
Insert Other Media Follow the same instructions above.
This icon is best wen you want to upload a WM Word, Excel, or PDF, or similar file.
These files are inserted as links. The link name will be the title. The Link URL should be File URL.
When done click Insert into Post/Page
pg. 25
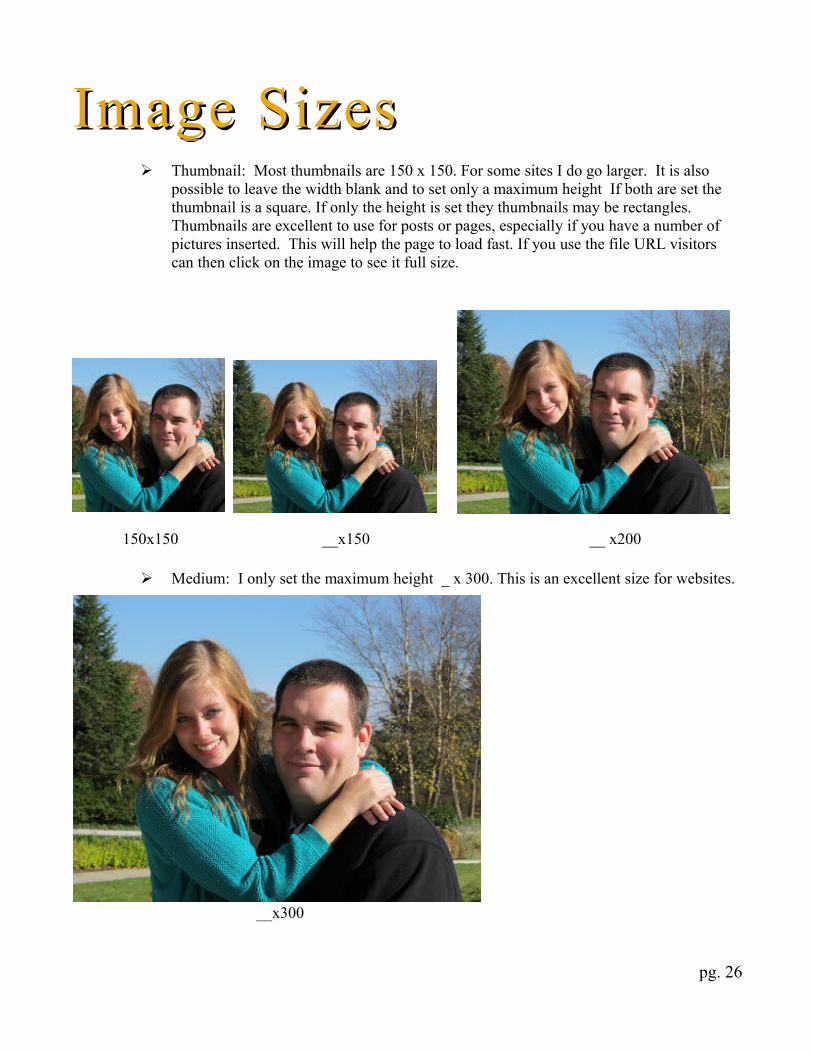
Image SizesImage Sizes➢ Thumbnail: Most thumbnails are 150 x 150. For some sites I do go larger. It is also
possible to leave the width blank and to set only a maximum height If both are set the thumbnail is a square. If only the height is set they thumbnails may be rectangles. Thumbnails are excellent to use for posts or pages, especially if you have a number of pictures inserted. This will help the page to load fast. If you use the file URL visitors can then click on the image to see it full size.
150x150 __x150 __ x200
➢ Medium: I only set the maximum height _ x 300. This is an excellent size for websites.
__x300
pg. 26
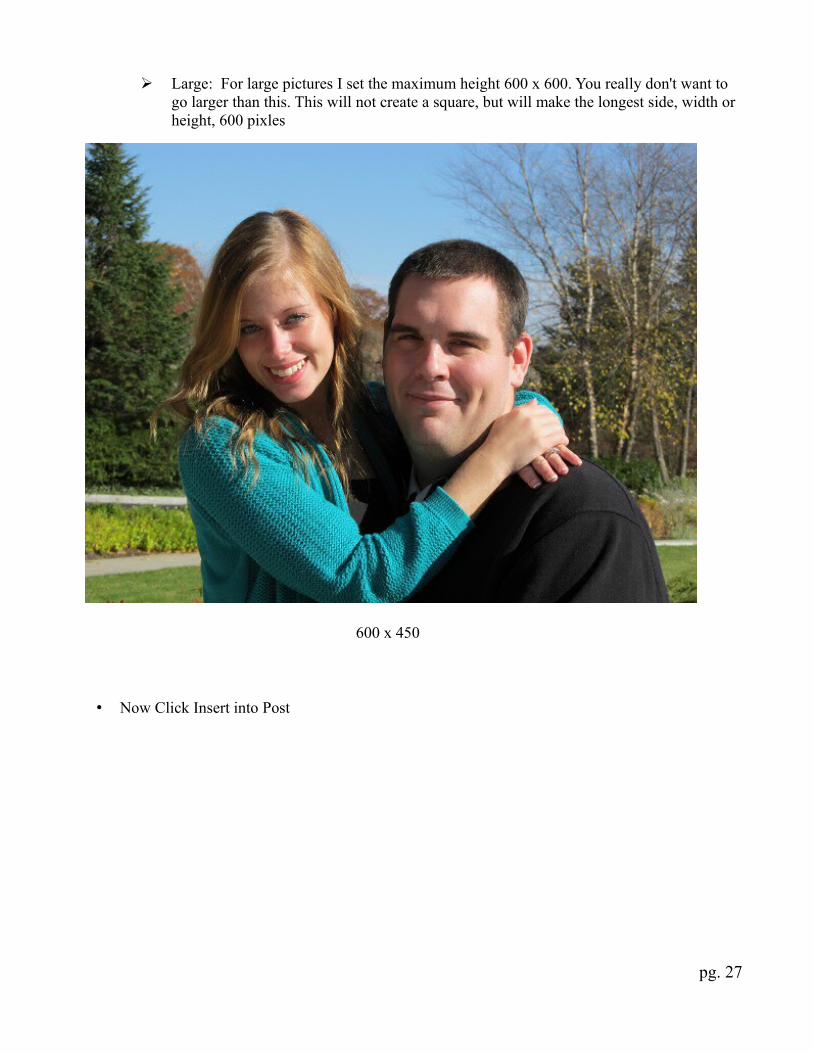
➢ Large: For large pictures I set the maximum height 600 x 600. You really don't want to go larger than this. This will not create a square, but will make the longest side, width or height, 600 pixles
600 x 450
• Now Click Insert into Post
pg. 27

NextGen Photo GalleryNextGen Photo GalleryAt the bottom of the left menu you will see Gallery:
Add Gallery/Images
Add new gallery• Enter New Gallery Name• Click Add gallery
Upload Images• Click Browse to search your computer• Locate the image you want to upload
pg. 28
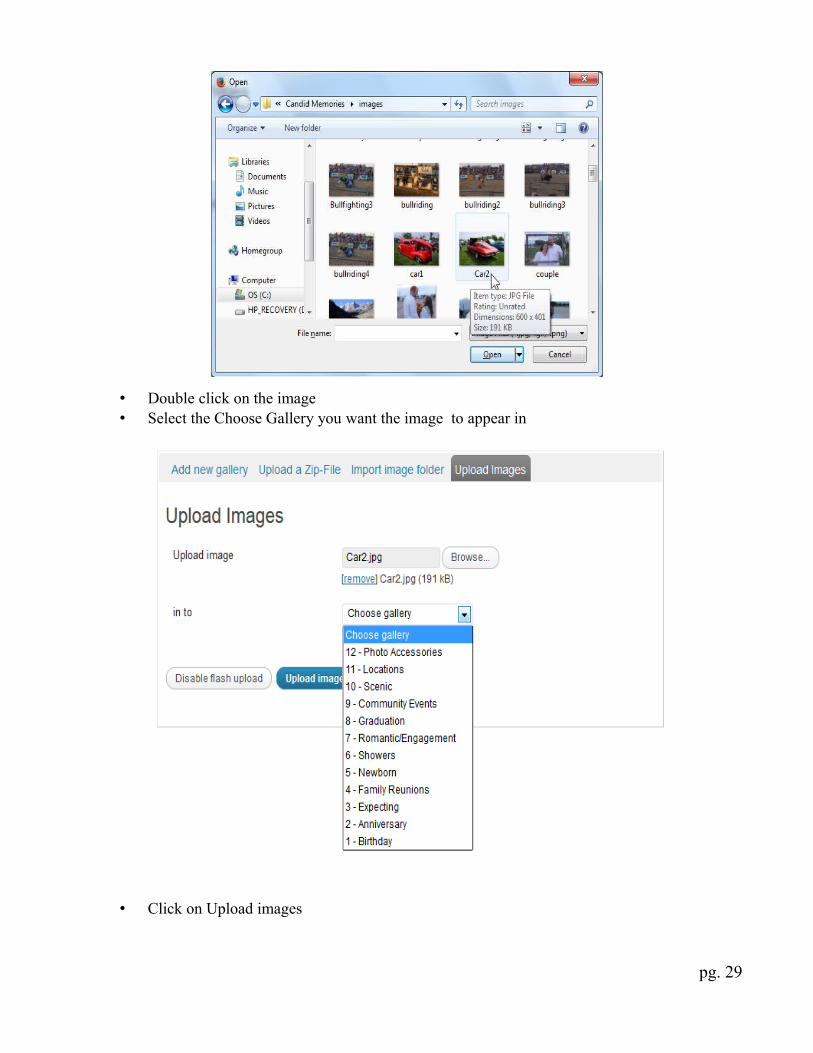
• Double click on the image• Select the Choose Gallery you want the image to appear in
• Click on Upload images
pg. 29
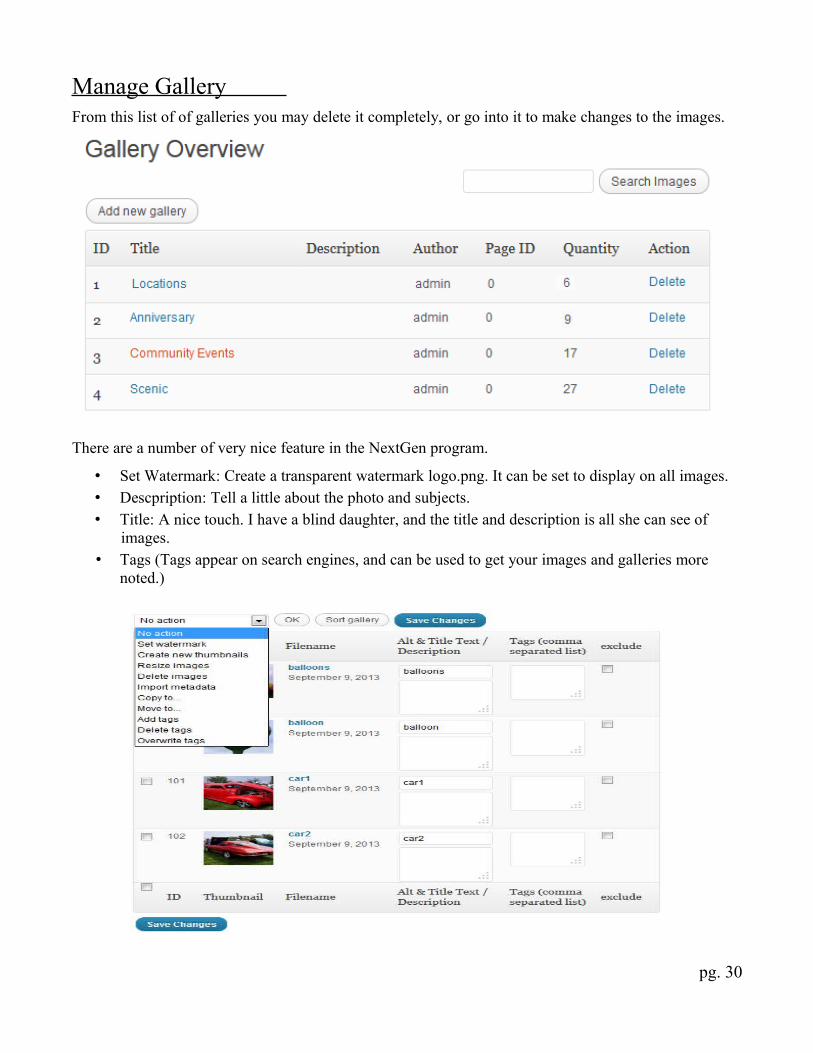
Manage Gallery From this list of of galleries you may delete it completely, or go into it to make changes to the images.
There are a number of very nice feature in the NextGen program.
• Set Watermark: Create a transparent watermark logo.png. It can be set to display on all images.• Descpription: Tell a little about the photo and subjects.• Title: A nice touch. I have a blind daughter, and the title and description is all she can see of
images.• Tags (Tags appear on search engines, and can be used to get your images and galleries more
noted.)
pg. 30
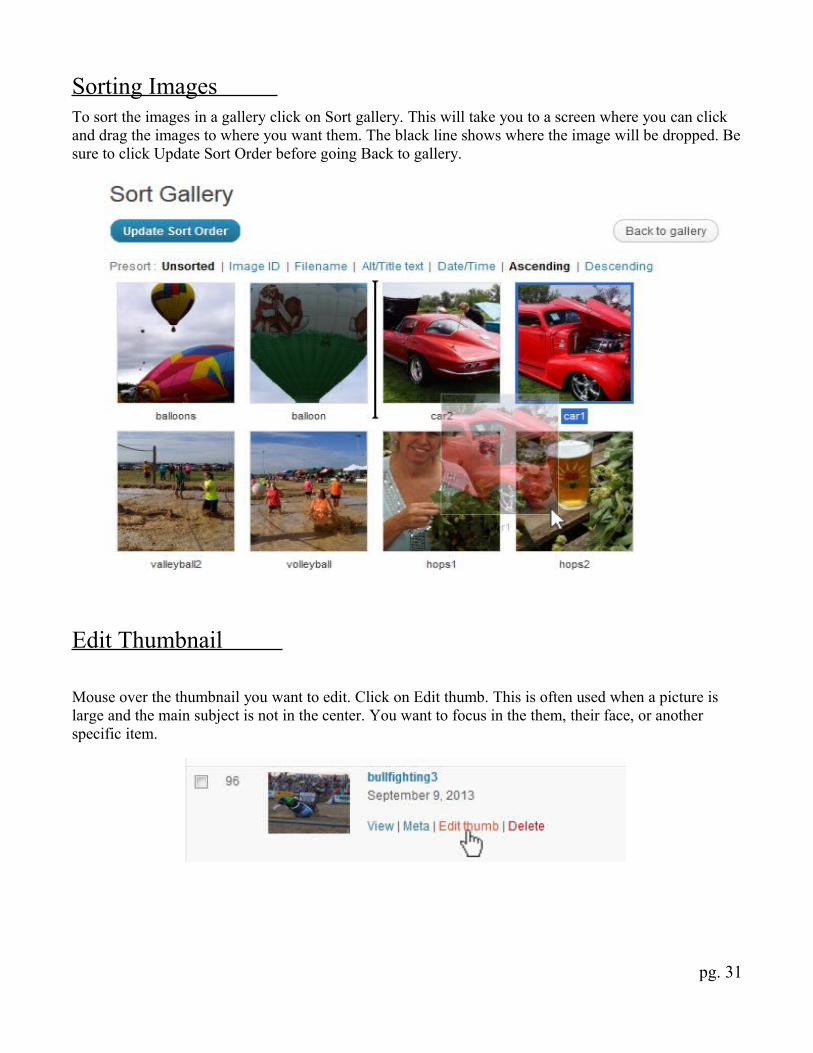
Sorting Images To sort the images in a gallery click on Sort gallery. This will take you to a screen where you can click and drag the images to where you want them. The black line shows where the image will be dropped. Be sure to click Update Sort Order before going Back to gallery.
Edit Thumbnail
Mouse over the thumbnail you want to edit. Click on Edit thumb. This is often used when a picture is large and the main subject is not in the center. You want to focus in the them, their face, or another specific item.
pg. 31

Use your mouse to draw a square on the focus of the image. Thumbnails are squares with this program. When do be sure to click Update.
pg. 32

User ProfileUser ProfileYou can change your profile information:In the to menu click on ProfileName, Nickname, Email, Website, Phone Number, Fax, and Address may be changed. Some of these fields are required others are not.
pg. 33
IImportant Notemportant NoteThis is over view of WordPress & StudioPress. If you read through this brochure it will give you a good start on understanding how to use these program. It is impossible to cover everything, so I am sure that you will have questions as you work on your site.
Please let me know if you have any questions. I’m always here to help out.
Thank you,Janet MorrowMountain Ash Webwww.mountainash.org
pg. 34
pg. 35
T h a n k y o u