
with Claire Shaeffer 6FREE - Sew · PDF filewith Claire Shaeffer. 2. Claire Shaeffer is...
17
1 presents 6 FREE SEWING GUIDES Stitch to Stage Lingerie Guards The Fly Zipper Matching Patterned Fabrics Button Stem Darts Sew Professional with Claire Shaeffer
Transcript of with Claire Shaeffer 6FREE - Sew · PDF filewith Claire Shaeffer. 2. Claire Shaeffer is...

1
presents
6FREESEWINGGUIDES
Stitch to Stage
Lingerie Guards
The Fly Zipper
Matching Patterned Fabrics
Button Stem
Darts
Sew Professionalwith Claire Shaeffer

2
Claire Shaeffer is internationally known for her knowledge and ex-pertise on haute couture sewing techniques and the author of many books about couture, including the much-loved book Couture Sewing Techniques. Expand your skills and introduce high-fashion finishes into your sewing repertoire by following her step-by-step tutorials. First, learn how to differentiate haute couture from ready-to-wear apparel in Claire’s in-depth article “Stitch to Stage,” which takes an inside look at designer garments. Then follow along as Claire demystifies and clearly explains several couture sewing techniques, including tips for matching a patterned fabric along the center front of a jacket, an illustrated guide to sewing a more flattering and less bulky fly placket and several methods for perfectly balancing a dart to eliminate ridges at the stitching line. These simple yet elegant couture details transform each garment that you sew into an artistic creation to be proud of.
Stitch to Stage ........................................ PAGE 3
Lingerie Guards ...................................... PAGE 7
The Fly Zipper ......................................... PAGE 9
Matching Patterned Fabrics ................... PAGE 11
Button Stem .......................................... PAGE 13
Darts ...................................................... PAGE 15
Sew Professionalwith Claire Shaeffer
TABLE OF CONTENTS
6FREESEWINGGUIDES

3
COUTURE IS THE ENGINE thatpulls the fashion train. It’s the primaryvehicle for getting publicity. In France,the term “haute couture” is regulatedby the Chambre syndicale de la coutureparisienne and restricted to couturehouses in Paris that have workroomswith a minimum of twenty employees.(DesignersValentino,Armani and RalphRucci are not full members of theChambre syndicale, but they make coutureand are invited to participate in the fash-ion shows.) In America, any business candescribe its fashions as couture. ManyFrench and American designers describetheir RTW collections as couture eventhough they’re actually RTW.
The luxury of couture doesn’t comecheap. There are big differences in the
time required to make couture garmentsversus expensive RTW; naturally, thisis reflected in the prices. For couture,a basic skirt requires 40 to 50 hours;a day dress, 70 to 100 hours; a suit,100 to 150 hours; and an eveningor wedding gown, up to 1000 hours.Costs begin at several thousand dollarsand may go up to $200,000. RTWcosts range from several hundreddollars to $25,000.
Creating CoutureCouture isn’t available in stores. Sinceeach garment is designed and made forthe individual who orders it, the differ-ences begin long before the garmentsare made. Generally, the client selects adesign from the current collection, and
in many instances, can ask for changes inthe neckline or sleeves and sometimesthe fabric itself. For special occasiongarments, the client may meet with thecouturier to plan a one-off or one-of-a-kind design.The client can also tell thevendeuse (salesperson) what type of gar-ments she needs for the season and letthe vendeuse make all of the selections.Once the design is ordered, it’s given tothe premier or premiere, the head of theworkroom, who will make the garment.In France there are two different ateliers(workrooms): flou for dressmaking andtailleur for tailoring. In Italy, the work-rooms are determined by fabric weight.In dressmaking, light- and mediumweightfabrics are used to make dresses, blousesand skirts. Many times they’re soft or
Fashion pages will soon be filled with reports of the semi-annual couture showsin Paris. Most reports will feature unique designs that will cause you to wonderwho’d ever wear such outlandish fashions. In fact, many designs will never bepurchased. So why do designers create them?
Stitch[an inside look at couture]
StitchtoStage CLAIRE SHAEFFERtoStage

Note: The term “couture” instead ofhaute couture is used in this article.“RTW” is used to indicate ready-to-wear.[
draped designs. In tailoring, wools, linens,cottons and silk suitings are used forsuits, tailored dresses and skirts.A couture workroom consists of a fewstraight-stitch machines and severallarge tables where the mains (seamstressesand tailors) sew.The premiere selects apremiere main (first hand) in the work-room to make the pattern and supervisethe garment construction.The firsthand supervises several people whohave different skill levels and differentareas of expertise to make the design.A couture pattern is made by drapingmuslin on a dress form that’s padded tothe client’s measurements.The design isproportioned to fit the client’s bodyattractively; if the client has an asym-metrical figure, the design is adjusted.To accomplish this, various elements,such as the width of the collar orpockets, are adjusted to improve theillusion of a symmetrical figure. Duringconstruction, the garment is fit on theclient or on the dress form by thepremiere main and/or premiere.The design itself can be unusual and/orvery complex since there’s no need toconsider if or how it can be altered tofit other customers.Often the fabrics for couture and RTW aresimilar in quality, but couture materialsare produced in limited quantities, andthe couturier sometimes works withtextile manufacturers to develop exclusivefabrics. Fabric patterns are positioned sothey’re most attractive on the garment.It’s not unusual for fabrics to be cutapart and sewn back together toenhance the design or create specialeffects. Embroideries are designed and
proportioned for each garment and theclient’s figure, even though the fabricwaste may be considerable.Couture designs are made by hand withan incredible amount of hand sewing.In addition to the hand sewing that’seasily seen on finished garments, allconstruction marks—stitching lines forseams, darts, pleats and notches—aremarked with thread.The garment maybe basted several times before beingmachine stitched. In fact, it’s not unusualfor a garment to be completely bastedtogether for the first fitting.After thefitting, the basting stitches are removedand the pieces are laid flat, correctionsmade, pockets applied, etc.Seam allowances are generally wideand may not be precise widths; some-times one is very wide and the other isquite narrow.This isn’t a problem sincethe marked stitching lines, instead ofthe cut edges, are used as a guide toassemble the garment.
Manufacturing RTWRTW is available in stores and can beworn immediately. It’s designed for themanufacturer’s target customer withspecific body measurements. It mustappeal to many customers, fit a varietyof figure types and sizes, fall into aspecific price range and reflect themanufacturer’s image.From beginning to end, the cost ofRTW is related to its construction andquality. If the proposed design is tooexpensive to produce as originallyplanned, the designer must considerways to lower the cost without sacrificingquality or compromising the design.
This is usually done by reducing thenumber of buttons or pleats, changingor eliminating collars or pockets, or usingless expensive construction techniques.A quality manufacturer will never cutsections off-grain to save fabric.Unlike a couture workroom, a RTWfactory has many different sewingmachines: straight stitch machines, blindhemmers and overlock machines. Ifthey manufacture large quantities, theyalso have button-sew and buttonholemachines and coverstitch machines forknits. High-end manufacturers have afew hand finishers to sew hems, buttons,and hooks and eyes, as well as finishbindings; they rarely have a buttonholemachine.This is the reason why manyexpensive ready-made designs havebound buttonholes or buttonholesmade on a home-sewing machine.In RTW, many techniques are done bymachine. Narrow hems are finishedwith a hemmer foot or machine-rolledhems instead of hand-rolled hems.Linings are sewn in by machine. Somelinings are bagged (stitched completelyby machine and turned through anopening in the sleeve lining); otherlinings are finished by hand along asmall section on the hem.RTW seam allowances are precisely cutso the raw edges can be matched andthe seams stitched without basting. Seamallowances for enclosed seams are only¼” wide. Narrow seam widths requirea little less fabric, but the primary reasonsseams are narrow are so they can bestitched quickly and accurately withlittle trimming. RTW garments havelittle hand finishing. Z
4

Behind
Can you look at finished garments and tell the differencebetween couture and RTW? You can if you know what to lookfor.7 The label provides a lot of information. Couture labels are alwayssewn in by hand (A). Most are simple with just the name of the cou-ture house; i.e., Christian Dior, Chanel or Yves Saint Laurent. Somealso have a number, which is helpful when dating garments. There’s nosize listed, and only more recent garments list the fabric content.
7 Seams on RTW today are usually finished with serging. On oldergarments, pinking or turned and stitched finishes were frequentlyused. On couture, hand overcasting is used most often because it’sflattest and least conspicuous.
7 Better RTW dresses are generally lined to make them attractive onthe hanger. Couture dresses are generally underlined instead (B).When made of soft fabrics, they’re rarely lined because it mightinterfere with the drape of the design. Since the seams areexposed, many think the inside looks unfinished.
7 Waistbands on couture skirts and trousers generally have a sepa-rate lightweight silk facing, which is hand sewn to the bands withwrong sides together at the upper and lower edges of the band.
7 Linings are machine stitched into jackets on RTW. In couture they’rehand sewn, and the fullness at the upper edge of the sleeve lining isnot as smooth as on RTW. RTW linings are usually quality rayon orinexpensive silk. Couture linings are usually made from silk and manyare made from silk charmeuse.
7 The fly-zipper application on RTW is completely machine stitched;the application in couture is quite different. First the fly opening ismachine stitched before the zipper is applied. Then the zipper issewn into the opening by hand. This couture application is easy andyou don’t have to worry about breaking a needle when you stitchover the zipper teeth.
7 Couture skirts sometimes have two zippers instead of a single long
THESEAMSChanel labelsewn by hand
Silk jacquardDior dressunderlined withsilk charmeuse
A
B
5

zipper so they won’t show below the jacket hem.7 Underpinnings, such as corselettes and petticoats, are frequentlysewn into couture eveningwear.
7 Purchased shoulder pads are used in RTW; in couture they’re hand-made from cotton batting and sometimes oddly shaped.
7 Machine stitched buttonholes are never used in couture; instead,buttonholes are hand embroidered even when they’re hidden underfly pockets or on the inside (C).
7 On RTW garments, topstitching is usually applied through all layersafter the garment edge or section is finished. In couture, edges aretopstitched, and then the lining is hand sewn in place (D).
7 On RTW, stand collars are cut with a concave curve so they hugthe neck. In couture, collars are cut straight, and then steamed andeased into the desired curve. The advantage is that fabric patterns,such as plaids and stripes, are more attractive when shaped into acurve. (See the photo on page 56.)
7 Couture dresses with center-front openings often have a veryconvoluted opening because a button/buttonhole or zipper placketbelow the waist at the center front rarely looks attractive when yousit. To eliminate this, the opening below the waist is moved to theside seam and the skirt waist is snapped to the bodice betweenthe side seam and center front (E).
7 To create special effects on couture garments, fabrics are some-times manipulated without regard to cost and waste (F).
Claire Shaeffer designs couture patterns for Vogue. The authorof numerous books, including Couture Sewing Techniques, sheteaches haute couture workshops in Palm Springs, CA.
Hand-embroidered buttonholeon Yves Saint Laurent jacket
Chanel jacket withtopstitching on bothjacket wool and woolfacing—then sewntogether by hand
Yves SaintLaurent dresswith fly-placketopening onbodice andcenter front
Yves Saint Laurent blouse—pleated to create smallerhoundstooth pattern on back
E
F
C
D
Yves Saint Laurent blouse—pleated to create smallerhoundstooth pattern on back
6

HOWTO
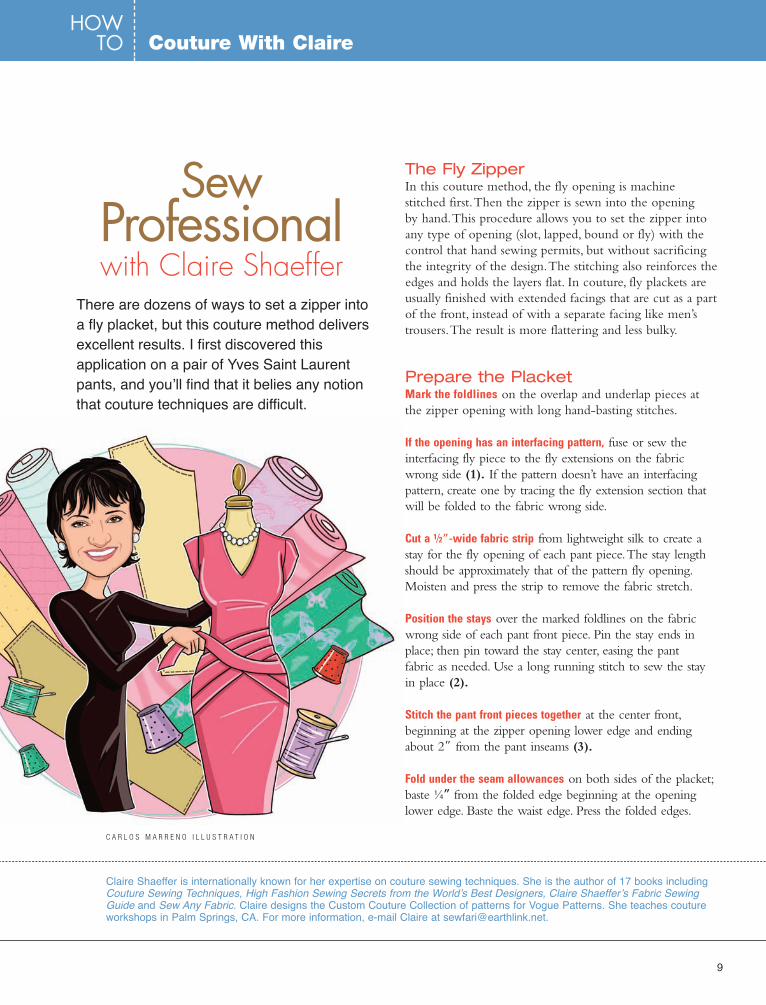
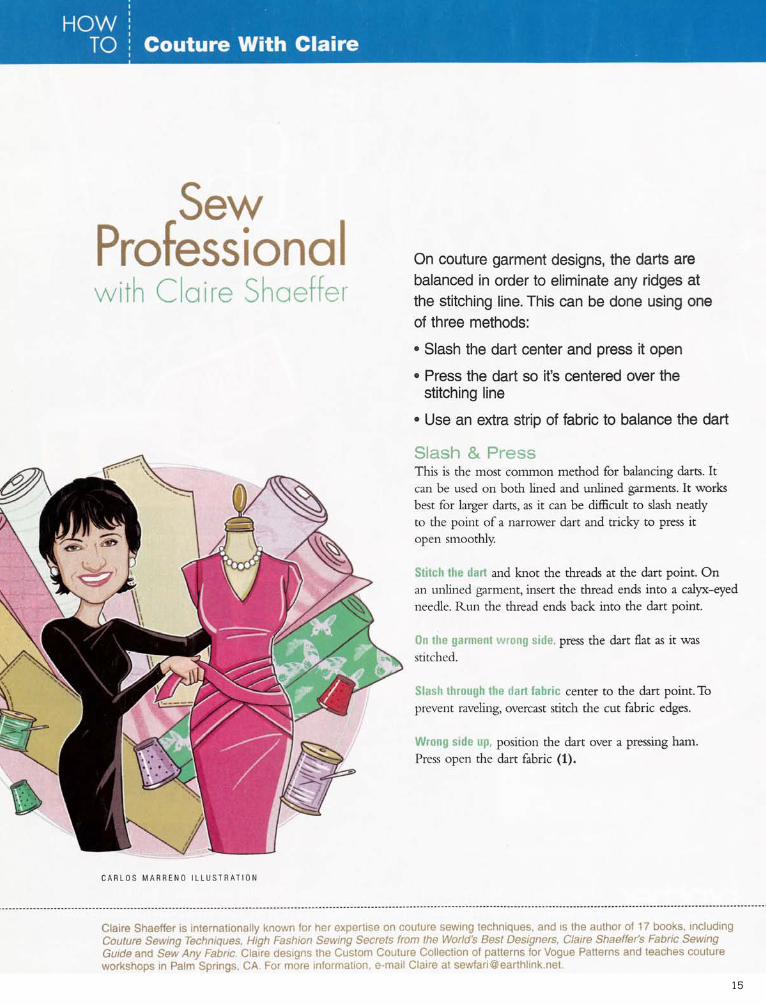
Claire Shaeffer is internationally known for her expertise on couture sewing techniques. She is the author of 17 books includingCouture Sewing Techniques, High Fashion Sewing Secrets from the World’s Best Designers, Claire Shaeffer’s Fabric SewingGuide and Sew Any Fabric. Claire designs the Custom Couture Collection of patterns for Vogue Patterns. She teaches coutureworkshops in Palm Springs, CA. For more information, e-mail Claire at [email protected].
SewProfessional
with Claire Shaeffer
C A R L O S M A R R E N O I L L U S T R A T I O N
Couture With Claire
Lingerie GuardsLingerie guards control the straps of undergarments toprevent them from showing or falling off the shoulders.They’re also used to control the upper part of the bodice toprevent the shoulder seams from shifting and sliding andthe neckline from gaping. Lingerie guards are made of rib-bon, narrow silk tubes, seam binding or thread.
Lingerie guards are usually located at the shoulders, butthey can be placed at any strategic location. Garments withnarrow shoulder straps can have guards at the corners ofthe neckline on the front and back as well as at the topof the shoulders.
PlacementTo facilitate dressing, a snap is always located near theneck edge with the other end of the lingerie guard nearthe shoulder.
On regular-width shoulder seams, place the lingerieguard at the center of the shoulder seam. For a narrowshoulder strap, place the snap about ¼” from the neckedge. For a wide neckline, place the guard near the neckedge. For cut-away armholes, place the guard nearer theshoulder edge.
Thread GuardsThread a needle with a single strandof waxed thread.
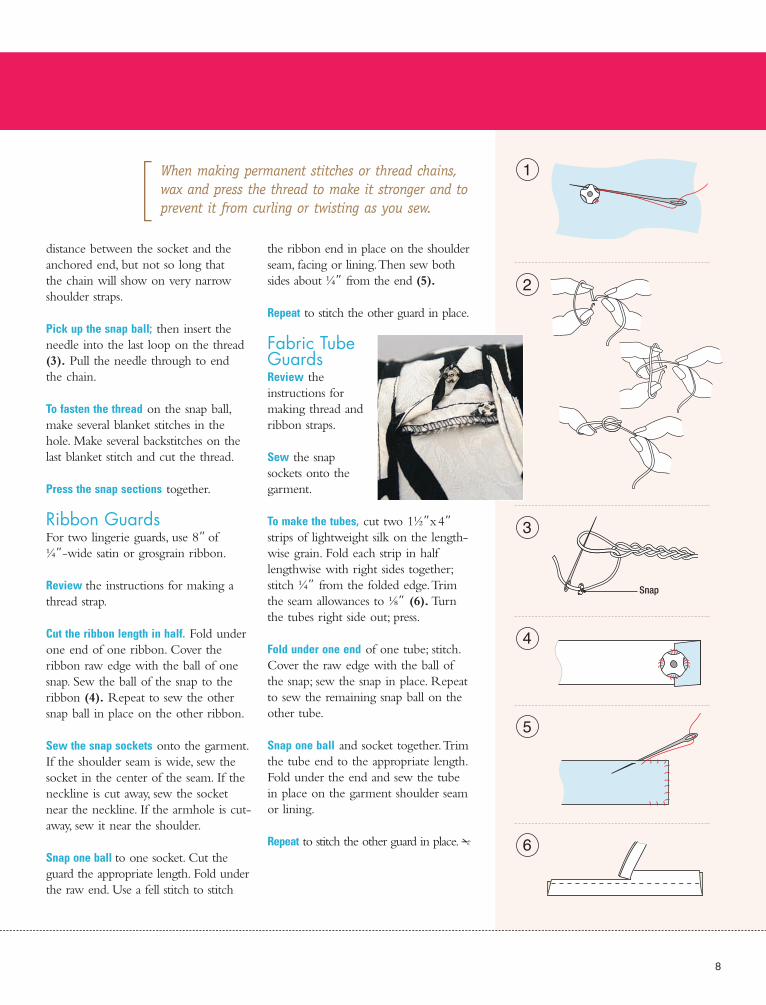
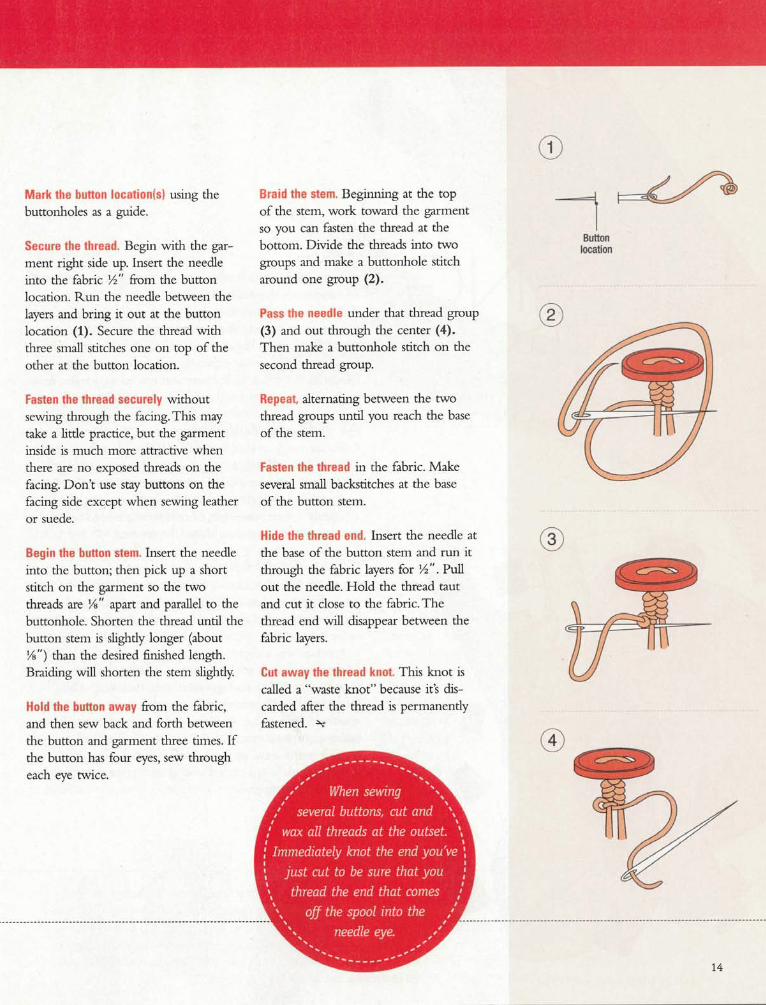
Sew the snap socket to the garmentseam allowance, facing or lining.Sew two or three stitches in thefirst hole, then run the needlebetween the fabric layers and bringit out of the next hole (1).
Anchor the end of the thread about 1” to 2” from thesnap socket.
Use your fingers to make a thread chain (2). To avoidunattractive dips on the shoulders when the garment isworn, make the thread chain about ¼” longer than the
7
distance between the socket and theanchored end, but not so long thatthe chain will show on very narrowshoulder straps.
Pick up the snap ball; then insert theneedle into the last loop on the thread(3). Pull the needle through to endthe chain.
To fasten the thread on the snap ball,make several blanket stitches in thehole. Make several backstitches on thelast blanket stitch and cut the thread.
Press the snap sections together.
Ribbon GuardsFor two lingerie guards, use 8” of¼”-wide satin or grosgrain ribbon.
Review the instructions for making athread strap.
Cut the ribbon length in half. Fold underone end of one ribbon. Cover theribbon raw edge with the ball of onesnap. Sew the ball of the snap to theribbon (4). Repeat to sew the othersnap ball in place on the other ribbon.
Sew the snap sockets onto the garment.If the shoulder seam is wide, sew thesocket in the center of the seam. If theneckline is cut away, sew the socketnear the neckline. If the armhole is cut-away, sew it near the shoulder.
Snap one ball to one socket. Cut theguard the appropriate length. Fold underthe raw end. Use a fell stitch to stitch
the ribbon end in place on the shoulderseam, facing or lining.Then sew bothsides about ¼” from the end (5).
Repeat to stitch the other guard in place.
Fabric TubeGuardsReview theinstructions formaking thread andribbon straps.
Sew the snapsockets onto thegarment.
To make the tubes, cut two 1½”x4”strips of lightweight silk on the length-wise grain. Fold each strip in halflengthwise with right sides together;stitch ¼” from the folded edge.Trimthe seam allowances to ⅛” (6). Turnthe tubes right side out; press.
Fold under one end of one tube; stitch.Cover the raw edge with the ball ofthe snap; sew the snap in place. Repeatto sew the remaining snap ball on theother tube.
Snap one ball and socket together.Trimthe tube end to the appropriate length.Fold under the end and sew the tubein place on the garment shoulder seamor lining.
Repeat to stitch the other guard in place. Z
When making permanent stitches or thread chains,wax and press the thread to make it stronger and toprevent it from curling or twisting as you sew.
1
2
3
4
5
6
Snap
[
8
Claire Shaeffer is internationally known for her expertise on couture sewing techniques. She is the author of 17 books includingCouture Sewing Techniques, High Fashion Sewing Secrets from the World’s Best Designers, Claire Shaeffer’s Fabric SewingGuide and Sew Any Fabric. Claire designs the Custom Couture Collection of patterns for Vogue Patterns. She teaches coutureworkshops in Palm Springs, CA. For more information, e-mail Claire at [email protected].
SewProfessionalwith Claire Shaeffer
C A R L O S M A R R E N O I L L U S T R A T I O N
The Fly ZipperIn this couture method, the fly opening is machinestitched first.Then the zipper is sewn into the openingby hand.This procedure allows you to set the zipper intoany type of opening (slot, lapped, bound or fly) with thecontrol that hand sewing permits, but without sacrificingthe integrity of the design.The stitching also reinforces theedges and holds the layers flat. In couture, fly plackets areusually finished with extended facings that are cut as a partof the front, instead of with a separate facing like men’strousers.The result is more flattering and less bulky.
Prepare the PlacketMark the foldlines on the overlap and underlap pieces atthe zipper opening with long hand-basting stitches.
If the opening has an interfacing pattern, fuse or sew theinterfacing fly piece to the fly extensions on the fabricwrong side (1). If the pattern doesn’t have an interfacingpattern, create one by tracing the fly extension section thatwill be folded to the fabric wrong side.
Cut a 1⁄2”-wide fabric strip from lightweight silk to create astay for the fly opening of each pant piece.The stay lengthshould be approximately that of the pattern fly opening.Moisten and press the strip to remove the fabric stretch.
Position the stays over the marked foldlines on the fabricwrong side of each pant front piece. Pin the stay ends inplace; then pin toward the stay center, easing the pantfabric as needed. Use a long running stitch to sew the stayin place (2).
Stitch the pant front pieces together at the center front,beginning at the zipper opening lower edge and endingabout 2” from the pant inseams (3).
Fold under the seam allowances on both sides of the placket;baste ¼” from the folded edge beginning at the openinglower edge. Baste the waist edge. Press the folded edges.
There are dozens of ways to set a zipper intoa fly placket, but this couture method deliversexcellent results. I first discovered thisapplication on a pair of Yves Saint Laurentpants, and you’ll find that it belies any notionthat couture techniques are difficult.
HOWTO Couture With Claire
9

Prepare the ZipperPress the zipper tape to remove anyfolds. If the zipper is longer than theopening, measure beginning at theupper edge and mark the finishedlength.At the marked length, stitcha thread bar over the zipper teeth.
Cut off the zipper ½” to 1” belowthe thread bar.
Overcast-stitch or bind the zipperlower edge.
Set the ZipperOn the right pant front (overlap) piece,mark the fly stitching line using threadtracing or chalk.With the fabric rightside up, stitch along the marked line,ending at the crotch seamline (4). Pullthe threads through to the wrong sideusing a calyx-eyed needle. Knot andtrim the thread ends.
On the left pant front (underlap), stitchclose to the folded edge, keeping theoverlap piece folded out of the way(5). Press.
With the zipper and garment right sideup, position the closed zipper long edgeunder the underlap opening edge sothat the zipper stop is ⅛” below thewaist seamline and the zipper teeth areclose to the folded edge. Baste thezipper in place (6).
With the fabric wrong side up, use shortrunning stitches to sew the zipper inplace permanently.
Lap the right front piece over the leftfront piece, matching the centers. Bastethrough all thicknesses close to theoverlap fold.
Position the pant front pieces wrong sideup. Baste the remaining zipper tape tothe facing extension on the overlapwithout sewing through the overlapfront (7). To avoid catching the overlapfront, slip a narrow clear ruler betweenthe facing extension and the pant front.
Use short running stitches to hand-sewclose to the zipper teeth. Use fell stitch-es at the zipper tape edges to sew thetape flat against the extensions.
To reinforce the opening lower edge,make a tiny bar tack on the face sideand cover it with buttonhole stitches.
Remove all basting stitches. Z
1
2
3
4
5
6
7
Fly placketslap rightover left.Aesthetically,this is oftenmore pleasingfor women’spants becauseit continuesthe line of ablouse closure.
2”
10

Claire Shaeffer is internationally known for her expertise on couture sewing techniques. She is the author of 17 books includingCouture Sewing Techniques, High Fashion Sewing Secrets from the World’s Best Designers, Claire Shaeffer’s Fabric SewingGuide and Sew Any Fabric. Claire designs the Custom Couture Collection of patterns for Vogue Patterns. She teaches coutureworkshops in Palm Springs, CA. For more information, e-mail Claire at [email protected].
SewProfessionalwith Claire Shaeffer
C A R L O S M A R R E N O I L L U S T R A T I O N
Matching patterned fabrics at seams andopenings can be a challenge, but flawlessprofessional results are worth the extra effort.Learn the techniques for matching the patternat the center front of a jacket and for piecinga patterned fabric.
Front & Center
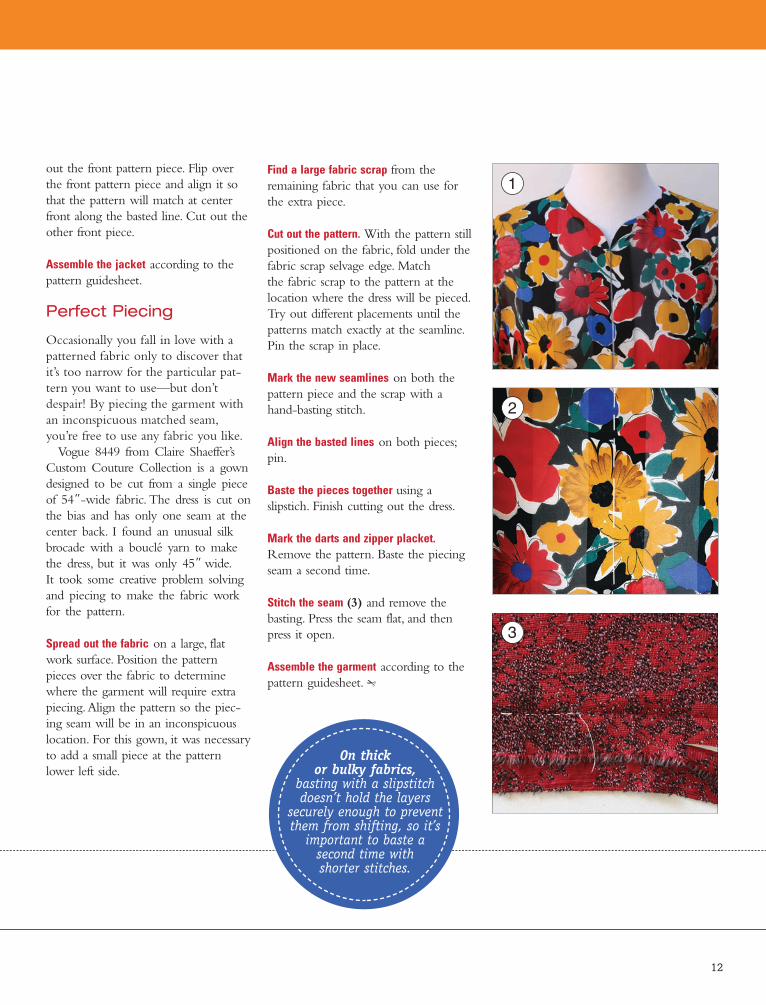
Choose a relatively simple jacket pattern, such as thegarment featured at right (1). The silk jacket has no centerfront buttons or buttonholes, so the fabric’s pretty patterncan remain uninterrupted.This jacket is unlined, light-weight and easy to pack—the perfect accessory for a blackdress or pants.
Examine the chosen fabric to determine where the patternrepeats.The featured jacket’s fabric has two patterns tocontend with: an alternating chiffon and satin weave stripeas well as an allover floral pattern.The fabric has even repeatsin both the vertical and horizontal directions, but on thecrossgrain, different flowers appear on the satin stripes. Itwas important that the satin stripe fall at the jacket openingrather than the chiffon in order to provide body and stability.
On the vertical stripes, the flowers are always the same, sothe center of one satin stripe was marked with a handbasting stitch (2). This step would also apply when workingwith a plaid or vertical stripe.
Cut out the jacket front paper pattern piece. Mark the patterncenter front.Align the pattern center front with the bastedline.Add seam allowances or extended facings before cutting
HOWTO Couture With Claire
11
out the front pattern piece. Flip overthe front pattern piece and align it sothat the pattern will match at centerfront along the basted line. Cut out theother front piece.
Assemble the jacket according to thepattern guidesheet.
Perfect Piecing
Occasionally you fall in love with apatterned fabric only to discover thatit’s too narrow for the particular pat-tern you want to use—but don’tdespair! By piecing the garment withan inconspicuous matched seam,you’re free to use any fabric you like.
Vogue 8449 from Claire Shaeffer’sCustom Couture Collection is a gowndesigned to be cut from a single pieceof 54”-wide fabric. The dress is cut onthe bias and has only one seam at thecenter back. I found an unusual silkbrocade with a bouclé yarn to makethe dress, but it was only 45” wide.It took some creative problem solvingand piecing to make the fabric workfor the pattern.
Spread out the fabric on a large, flatwork surface. Position the patternpieces over the fabric to determinewhere the garment will require extrapiecing.Align the pattern so the piec-ing seam will be in an inconspicuouslocation. For this gown, it was necessaryto add a small piece at the patternlower left side.
Find a large fabric scrap from theremaining fabric that you can use forthe extra piece.
Cut out the pattern. With the pattern stillpositioned on the fabric, fold under thefabric scrap selvage edge. Matchthe fabric scrap to the pattern at thelocation where the dress will be pieced.Try out different placements until thepatterns match exactly at the seamline.Pin the scrap in place.
Mark the new seamlines on both thepattern piece and the scrap with ahand-basting stitch.
Align the basted lines on both pieces;pin.
Baste the pieces together using aslipstich. Finish cutting out the dress.
Mark the darts and zipper placket.Remove the pattern. Baste the piecingseam a second time.
Stitch the seam (3) and remove thebasting. Press the seam flat, and thenpress it open.
Assemble the garment according to thepattern guidesheet. Z
1
2
3
On thickor bulky fabrics,
basting with a slipstitchdoesn’t hold the layers
securely enough to preventthem from shifting, so it’s
important to baste asecond time withshorter stitches.
12

13
14
15

16

Get inspired and start creating incredible new designs with a subscription to
• Stitch amazing gifts for your family and friends
• Create a fl attering fashion-savvy outfi t
• Transform your home with colorful pillows, curtains, duvets and more
• Save time with the latest tips from the pros• Save money with discounts on exclusive designer patterns
Whether you’re an eager beginner or a seasoned
expert, you’ll fi nd every issue of Sew News a
perfect mix of pure inspiration, practical tips and
techniques, and stimulating projects for adding
your own personal touch to every piece you
create – from fashion and accessories to gifts
and home décor.
sewnews.com
SWEET VALENTINE DECORATIONS—FREE patterns included! (P. 50)
10 PLUS-SIZE FIT TIPS + PATTERN REVIEW
Fit & FashionTips, Tricks & Techniques25
Create Your
Signature Style with
DesignerDetails8 zipper rosettes
8 lace overlays
8 needle-felted
flourishes
TOP TRENDS
for Spring
Your fit questions answered
Basic draping principles
Choosing the right pattern size
Ease explained
Fashion sketching 101
Simple pattern manipulation
+
&
Enter our FIRST-EVER
Style StarCONTEST WIN
BIG! (P. 38)
February/March 2011
DISPLAY UNTIL 3/14/11
$5.99 US / $6.99 CAN
sew NEWS
12/15/10 2:44:25 PM
Reach our Subscriber Services Center:www.sewnews.com/subscriberservices
800-289-6397 (U.S.) / 386-597-4387 (Int’l) • [email protected] News Subscriber Services • P.O. Box 433054 • Palm Coast, FL • 32143
Subscribe to Sew News magazine, the trusted sewing source
It’s quick and easy! Visit www.SewNews.com/Subscribe
Discover how to:
sewnews.com
LENTTTIIINNNNE DECORATIONS—FREE patterns included! (P. 50)
g 101ationmanipulamaaninipippululaatatitioon
&
Enter our
FIRST-EVER
Style StarCONTESTStyle SStyle S
&&W&&W&& IIIIIIIIIINNIINNINININNNNNNNNNNNNNNNNNNNNNNNNNNIINNNNNNNNNNIIIIIININININNNNNNN&B&&B&BB&&BIG!GIIGIGIGIGIGGIGGGGGGGGGGGGGGIGGGGGIGGGGGGGGGIGIGG!G!G!IGIGIIGGGGGGGGGGGGGGGGGGGGGGGGGGGGGIG!!!!!!IGIGIIGGGGGGGGGGGGIGGGGG!!!!! (P. 388883838883333888)))))))
DISPLAY UNTIL 3/14/11
$5.99 US / $6.99 CAN
April/May 2011
RUFFLE TECHNIQUES STRAIGHT FROM THE RUNWAY (P. 60)
6 GREAT MOTHER’S DAY GIFT IDEAS
Make aSplashwith REVERSIBLE RAINWEAR
Figure- FlatteringPatterns
to Inspire Your Spring STYLE
+Quick Fixes for MACHINETENSION TROUBLES
EXPERT TIPSfor KNIT SEWING SUCCESS Create for a Cause:14 Charitiesto sew for
step-by-step tutorial inside!
How to Fit the PERFECTPANTS ORGANIZEOffice Supplies in under an hour!
Create interlocking scallops
along a skirt placket. (P. 40)
10
15
2/3/11 11:15:25 AM
www.sewnews.com/subscribe