Wireless Workshop - MikroTik · Wireless Workshop MUM 2012 – New Orleans ... • If the bridge...
76
Wireless Workshop MUM 2012 – New Orleans Uldis Cernevskis MikroTik
Transcript of Wireless Workshop - MikroTik · Wireless Workshop MUM 2012 – New Orleans ... • If the bridge...
Wireless Workshop
MUM 2012 – New Orleans
Uldis Cernevskis
MikroTik
Topics
• Quickset for Wireless
• Transparent wireless links
• Useful configuration settings and features
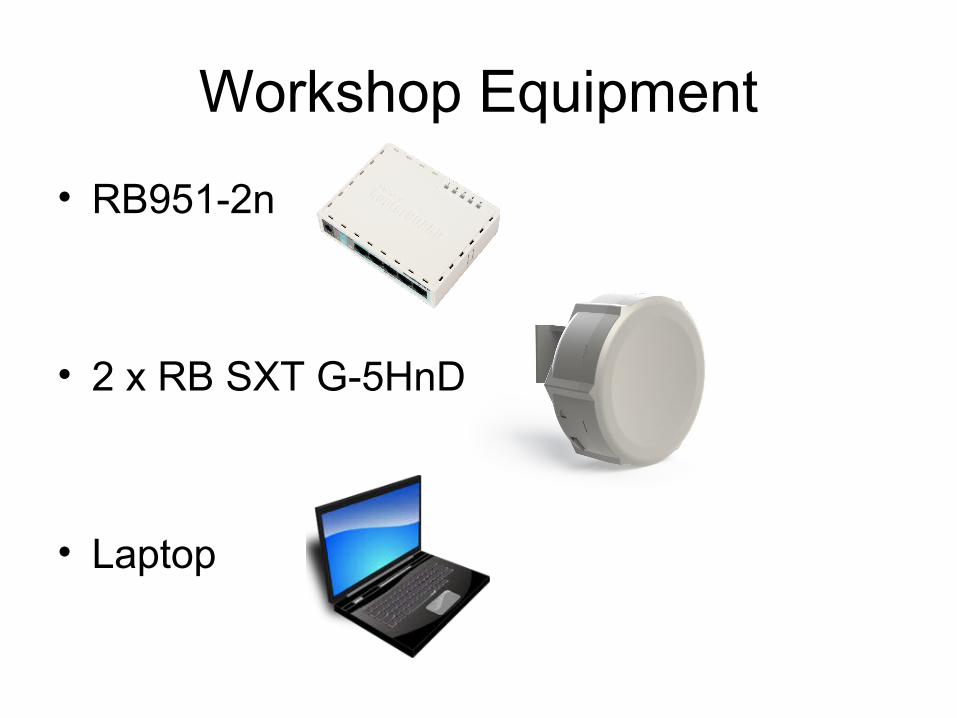
Workshop Equipment
• RB951-2n
• 2 x RB SXT G-5HnD
• Laptop
Quickset
• Few clicks to setup MikroTik router
• AP and CPE modes
• Point to Point Bridge mode (starting from RouterOS v5.21)
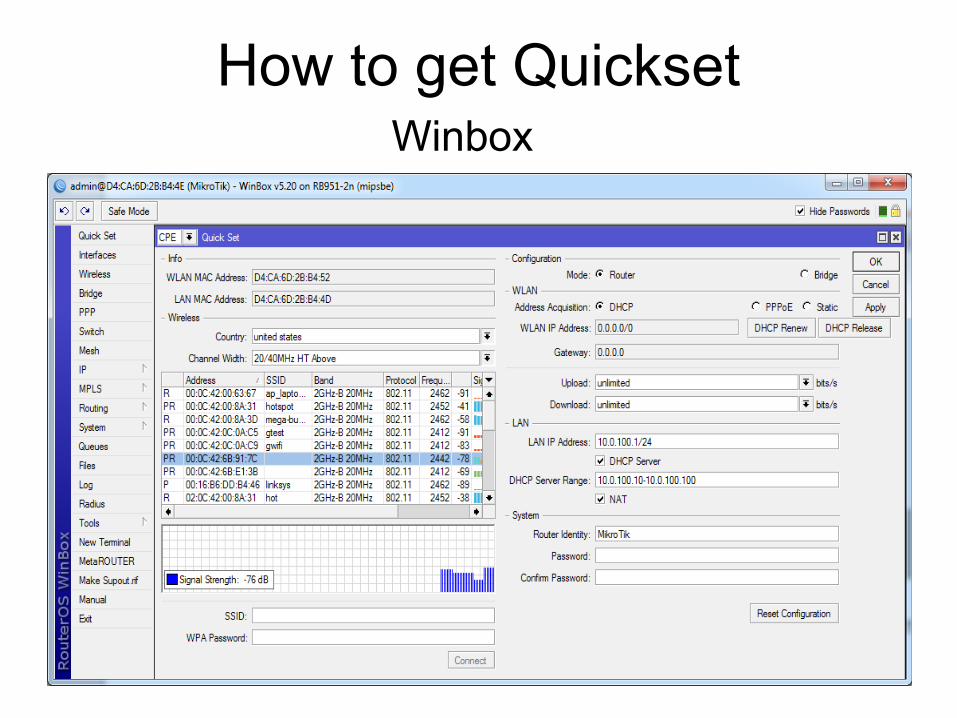
How to get QuicksetWinbox
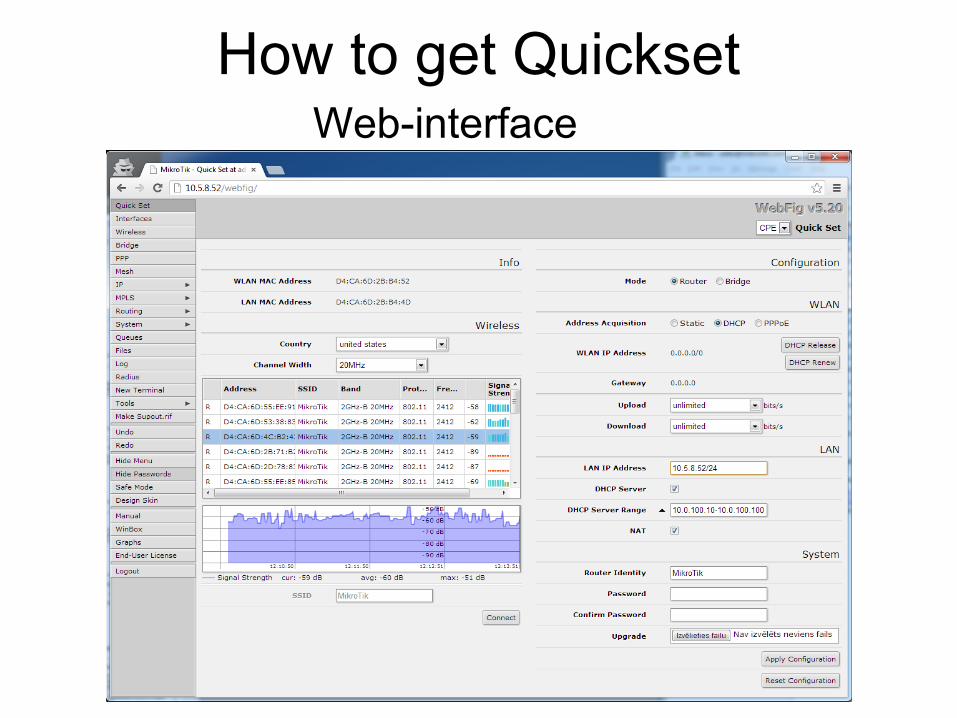
How to get QuicksetWeb-interface
Quickset feature support
• RB SXT
• RB Groove
• RB Metal
• RB 711, RB 411
• Other RouterBoards (using first wireless interface)
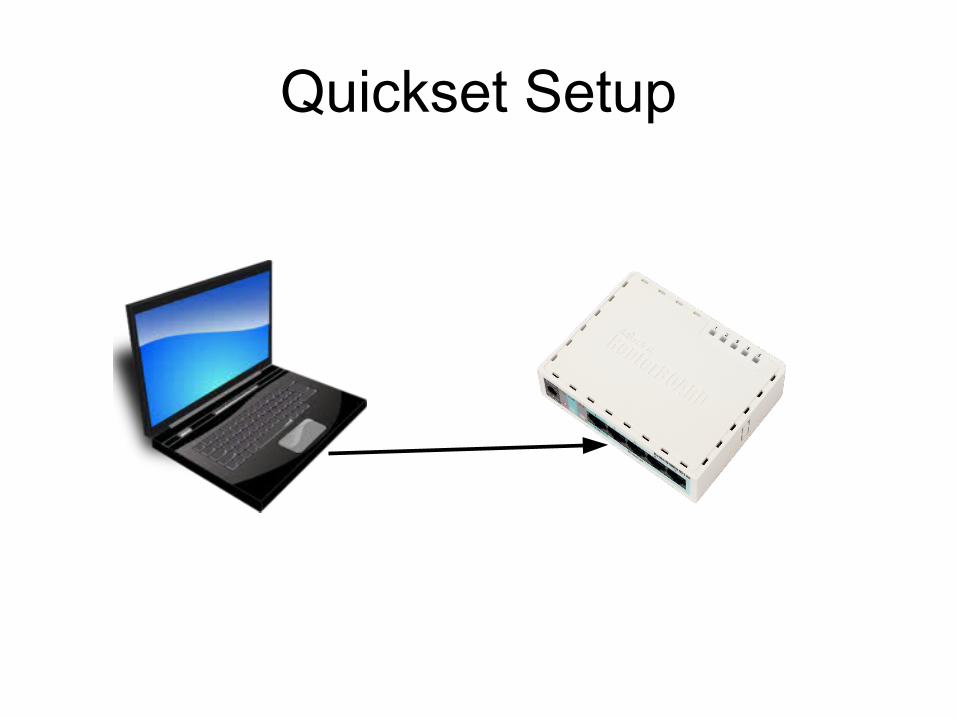
Quickset Setup
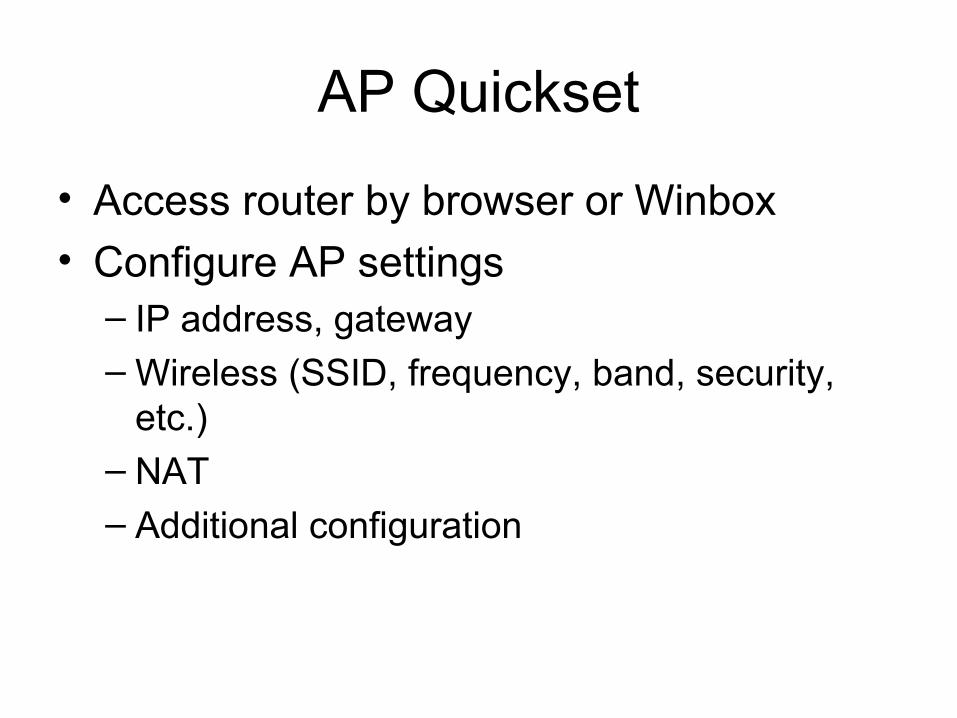
AP Quickset
• Access router by browser or Winbox
• Configure AP settings– IP address, gateway– Wireless (SSID, frequency, band, security,
etc.)– NAT– Additional configuration
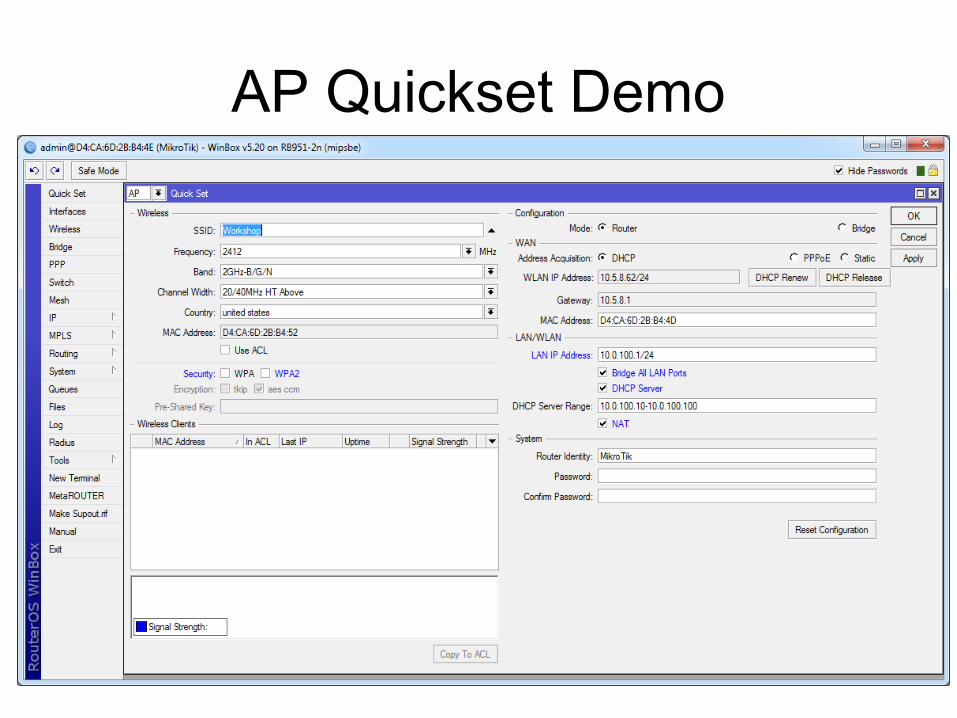
AP Quickset Demo
AP Quickset Demo
• SSID “Workshop”
• IP 10.0.100.1
• Login demo and no password
CPE Quickset
• Access router by browser or Winbox
• Configure CPE settings:– Router or Bridge– IP address, gateway– Wireless (SSID, band, security)
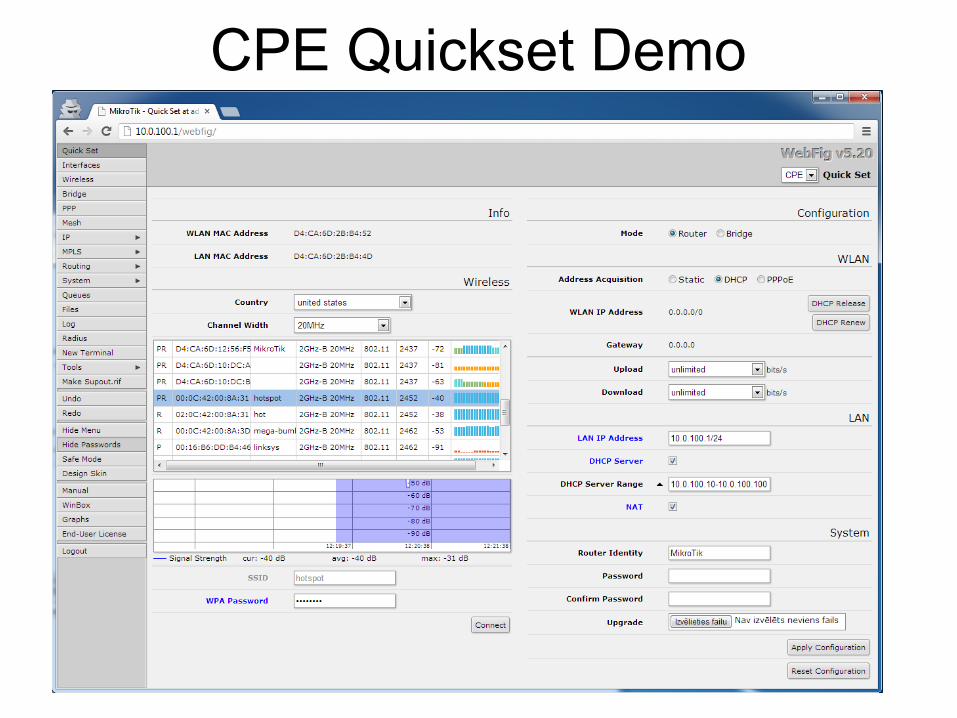
CPE Quickset Demo
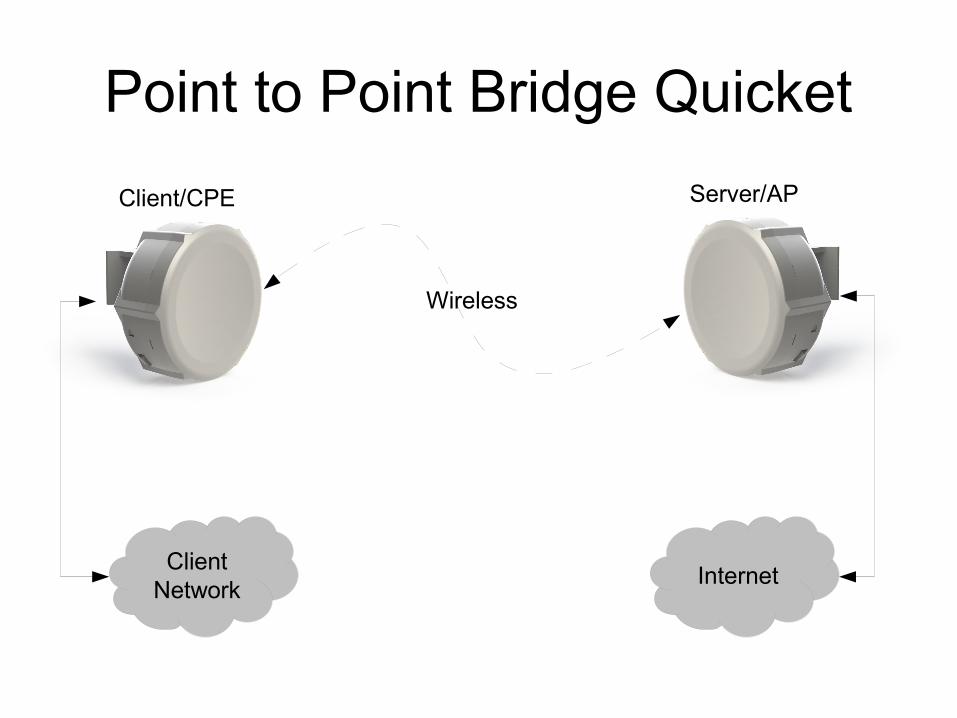
Point to Point Bridge Quicket
Wireless
Server/APClient/CPE
ClientNetwork
Internet
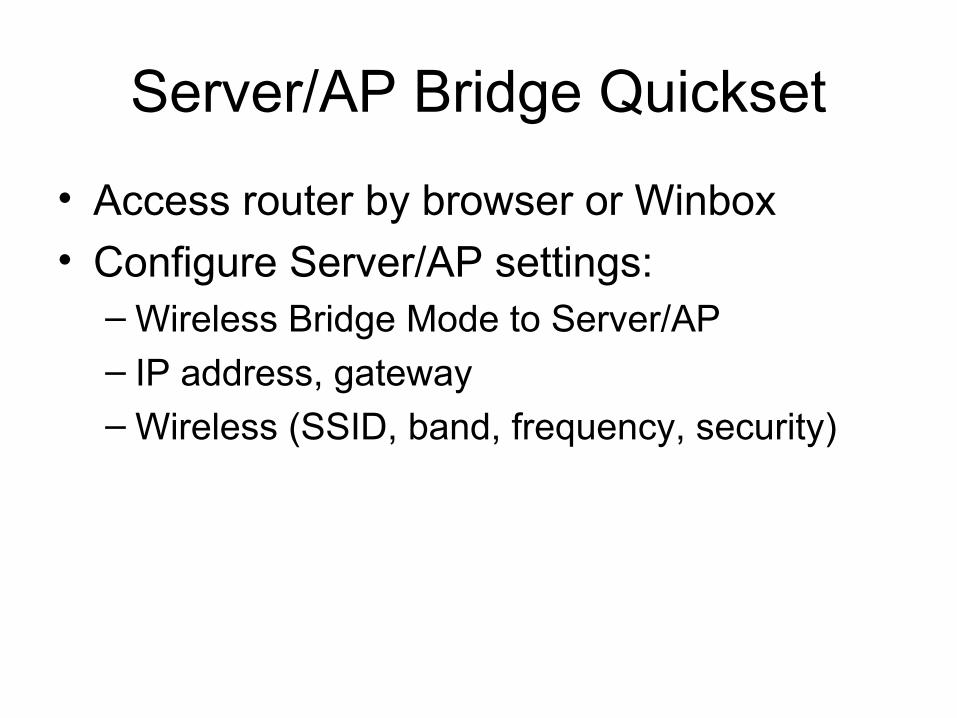
Server/AP Bridge Quickset
• Access router by browser or Winbox
• Configure Server/AP settings:– Wireless Bridge Mode to Server/AP– IP address, gateway– Wireless (SSID, band, frequency, security)

Server/AP Bridge Quickset Demo
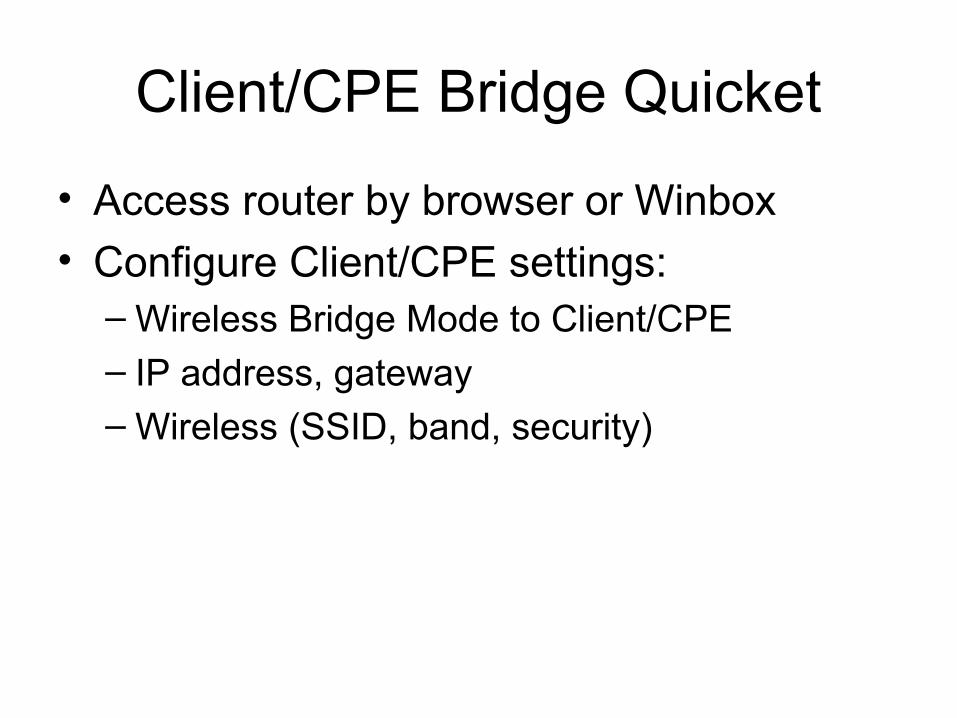
Client/CPE Bridge Quicket
• Access router by browser or Winbox
• Configure Client/CPE settings:– Wireless Bridge Mode to Client/CPE– IP address, gateway– Wireless (SSID, band, security)
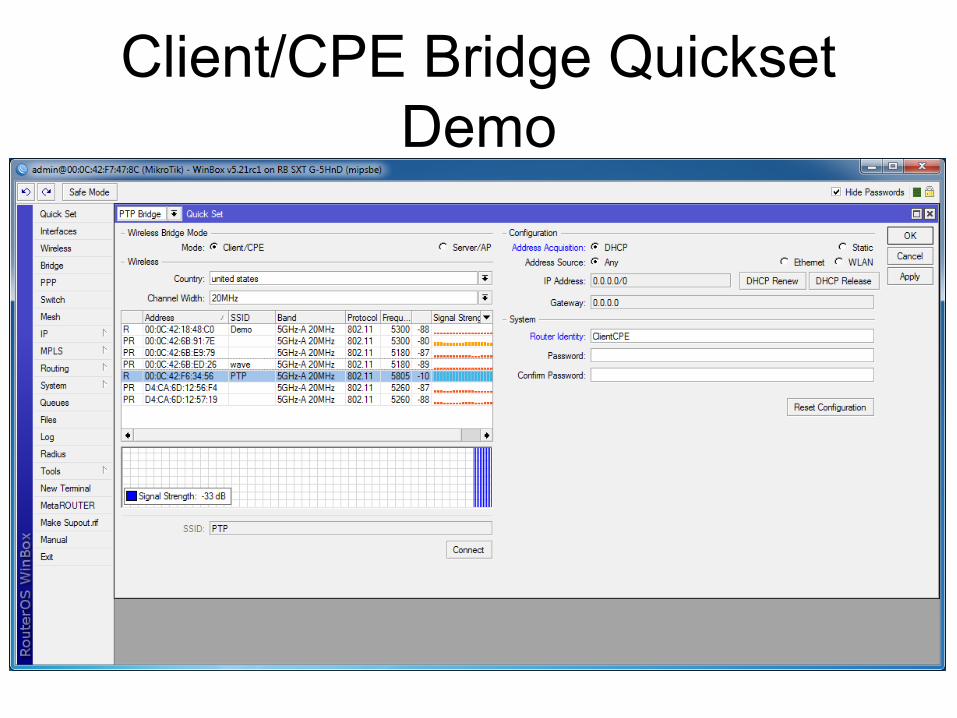
Client/CPE Bridge Quickset Demo
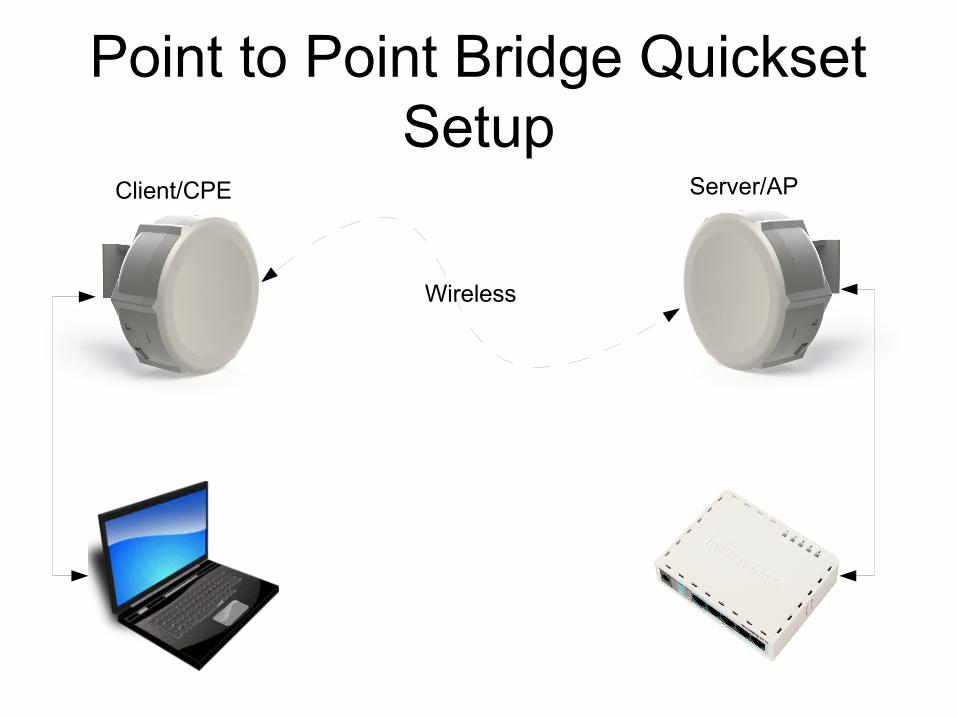
Point to Point Bridge Quickset Setup
Wireless
Server/APClient/CPE
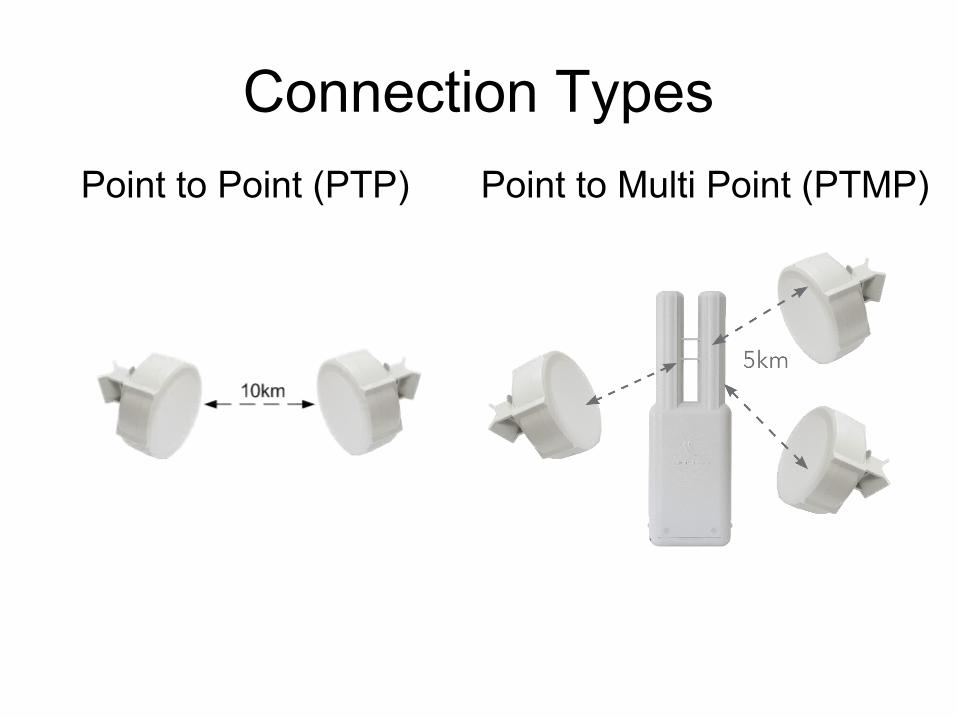
Connection Types
Point to Point (PTP) Point to Multi Point (PTMP)
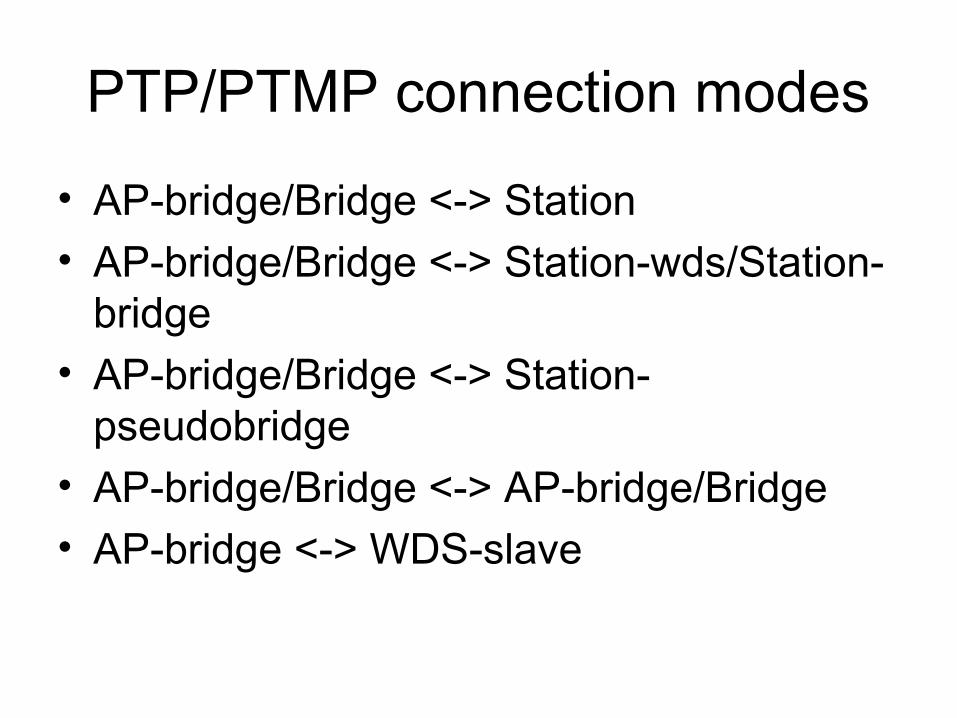
PTP/PTMP connection modes
• AP-bridge/Bridge <-> Station
• AP-bridge/Bridge <-> Station-wds/Station-bridge
• AP-bridge/Bridge <-> Station-pseudobridge
• AP-bridge/Bridge <-> AP-bridge/Bridge
• AP-bridge <-> WDS-slave
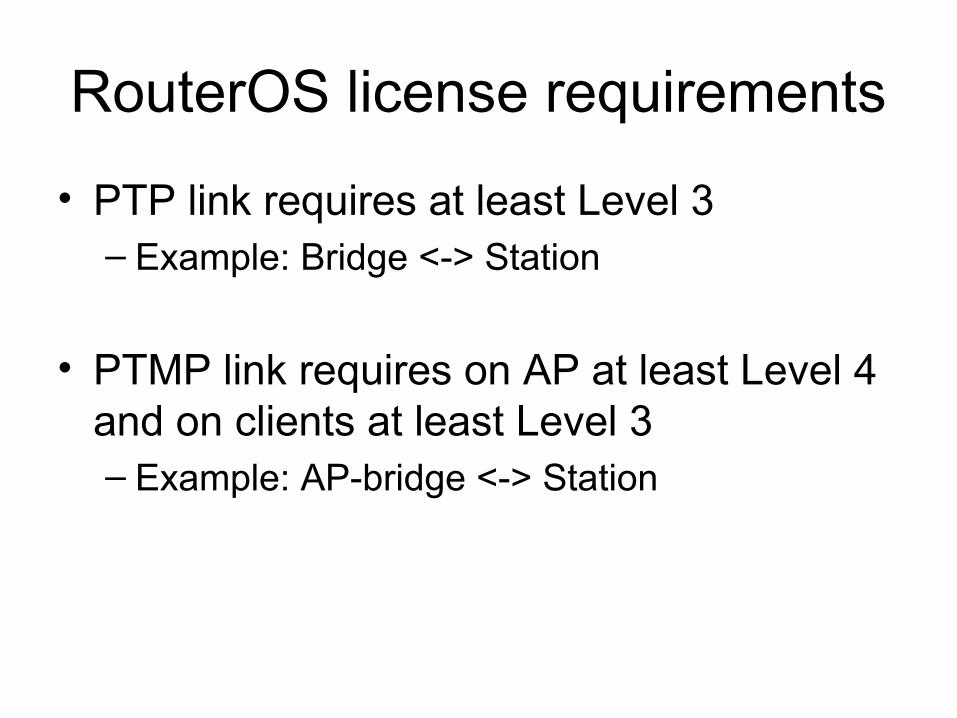
RouterOS license requirements
• PTP link requires at least Level 3– Example: Bridge <-> Station
• PTMP link requires on AP at least Level 4 and on clients at least Level 3 – Example: AP-bridge <-> Station
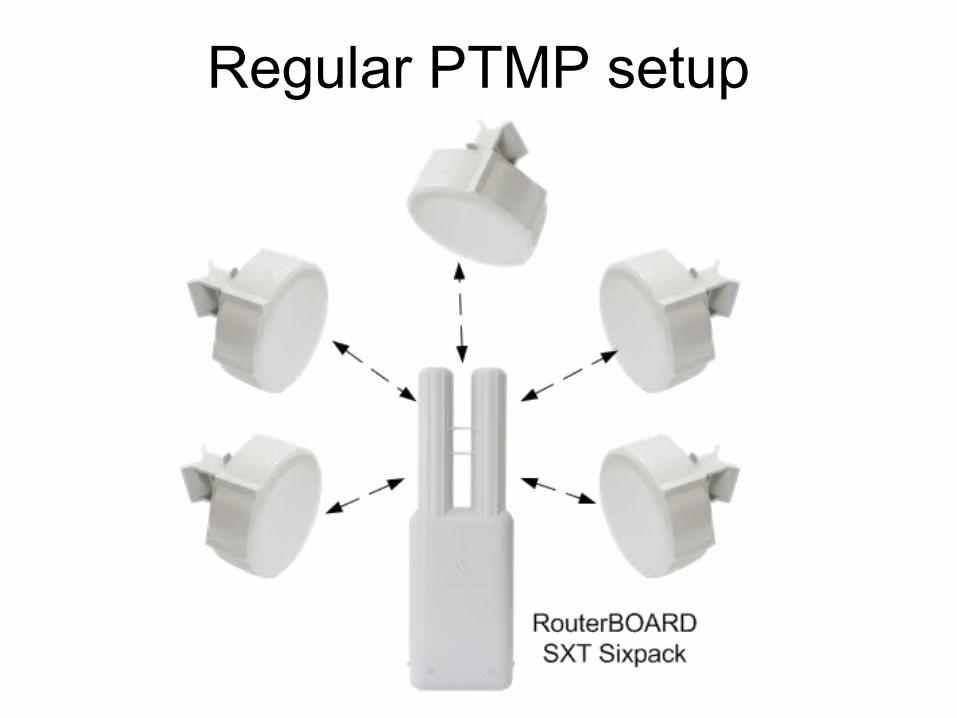
Regular PTMP setup

Wireless Setup Type - Routing
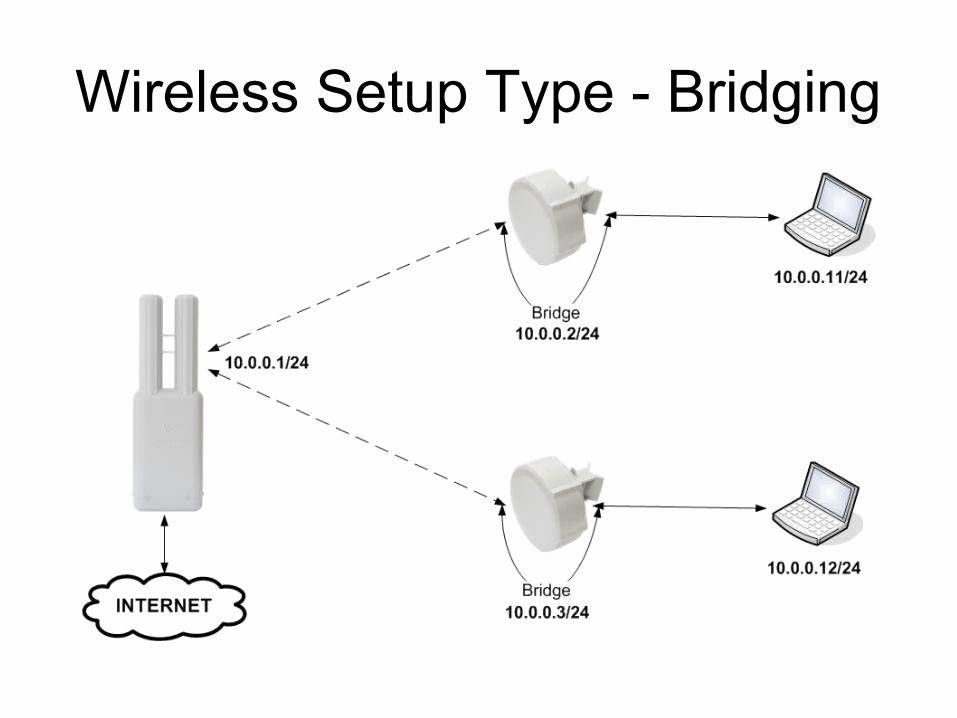
Wireless Setup Type - Bridging
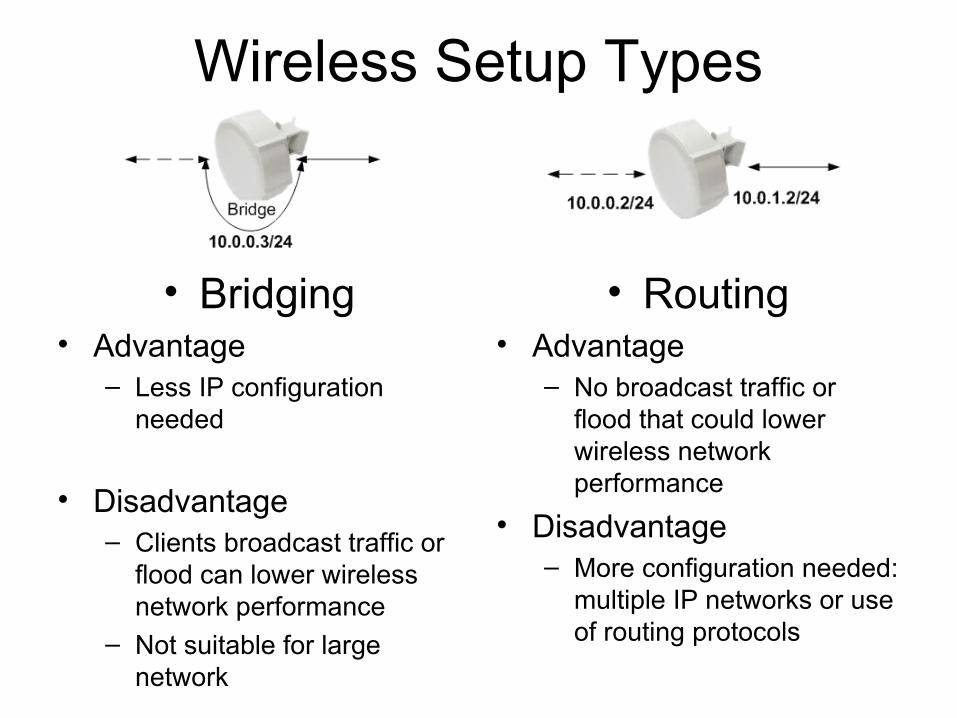
Wireless Setup Types
• Bridging• Advantage
– Less IP configuration needed
• Disadvantage– Clients broadcast traffic or
flood can lower wireless network performance
– Not suitable for large network
• Routing• Advantage
– No broadcast traffic or flood that could lower wireless network performance
• Disadvantage– More configuration needed:
multiple IP networks or use of routing protocols
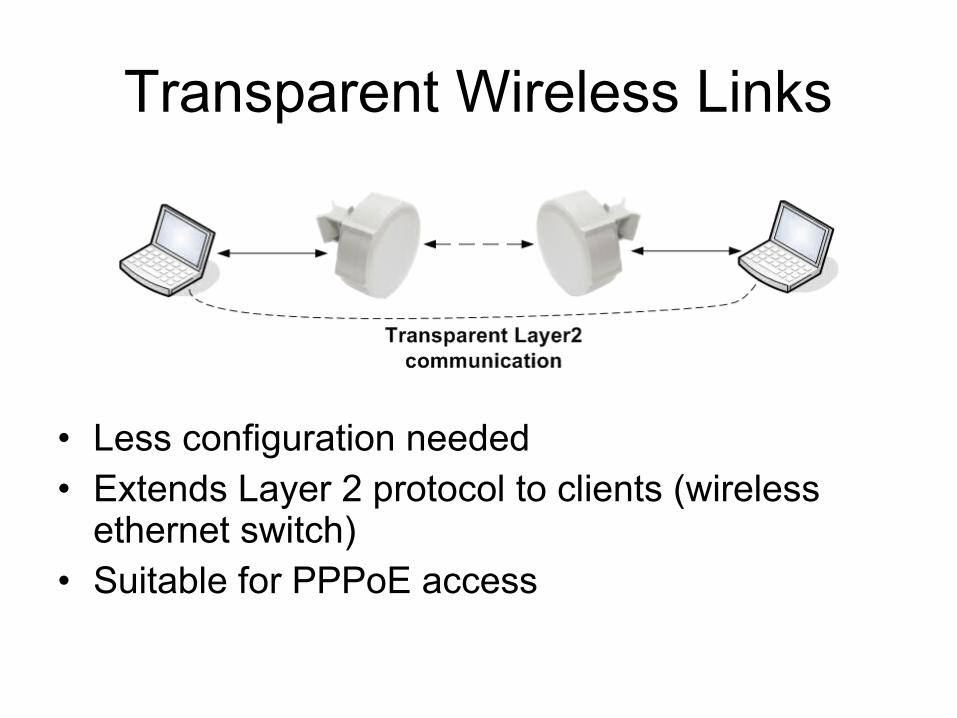
Transparent Wireless Links
• Less configuration needed• Extends Layer 2 protocol to clients (wireless
ethernet switch)• Suitable for PPPoE access
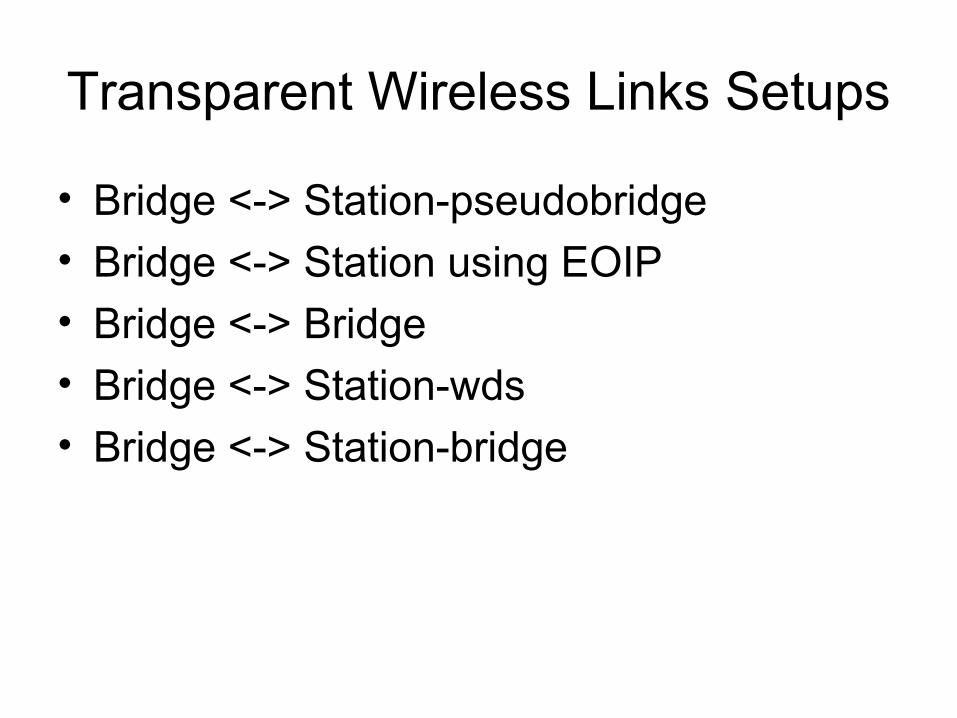
Transparent Wireless Links Setups
• Bridge <-> Station-pseudobridge
• Bridge <-> Station using EOIP
• Bridge <-> Bridge
• Bridge <-> Station-wds
• Bridge <-> Station-bridge
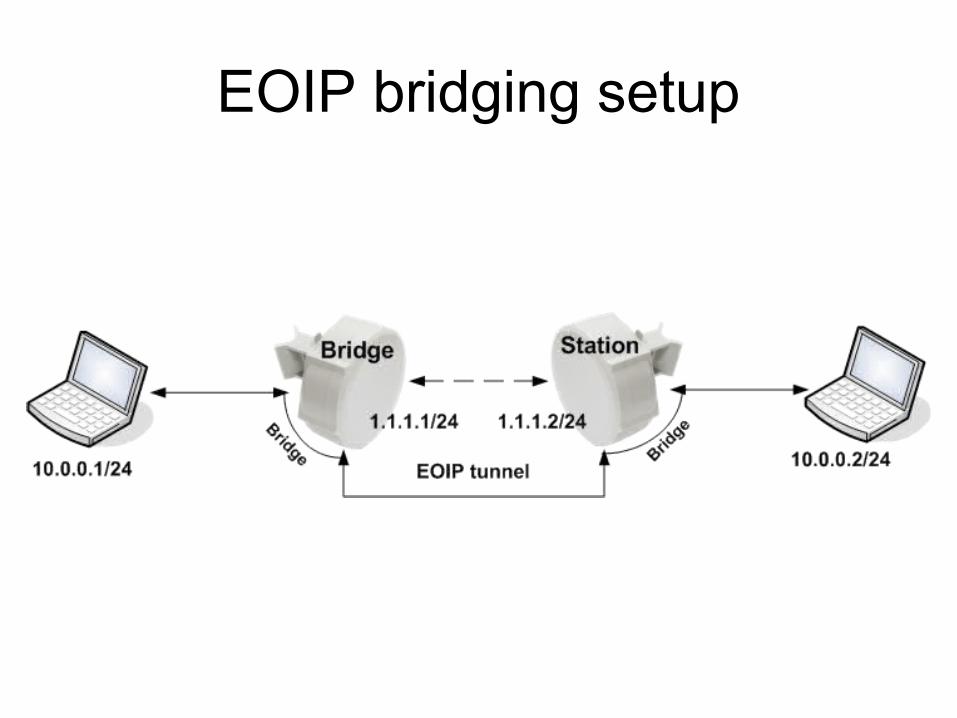
EOIP bridging setup
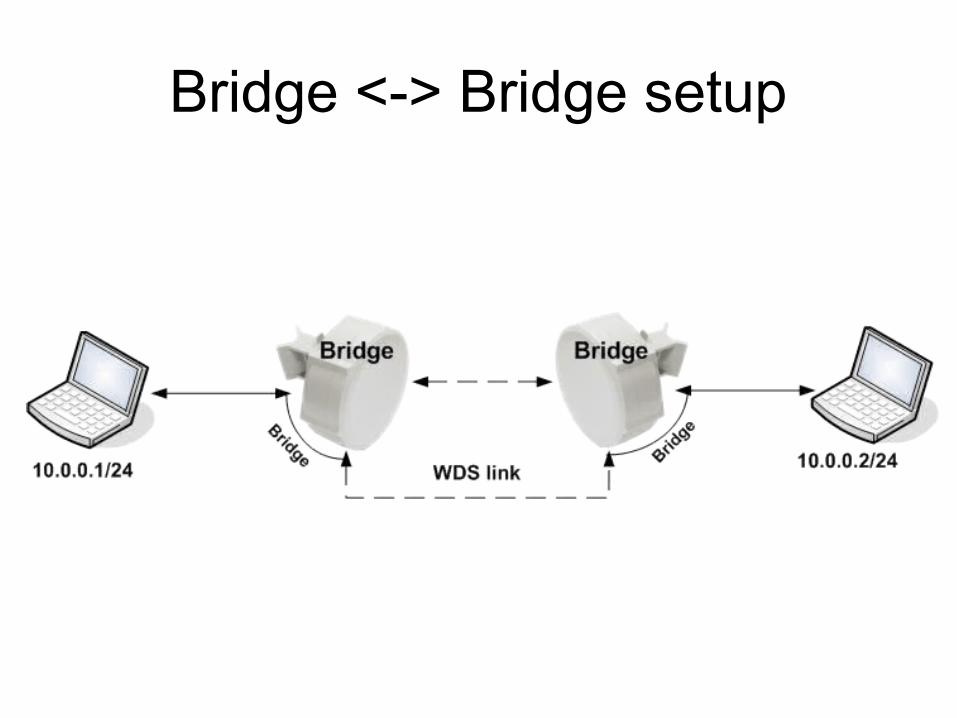
Bridge <-> Bridge setup
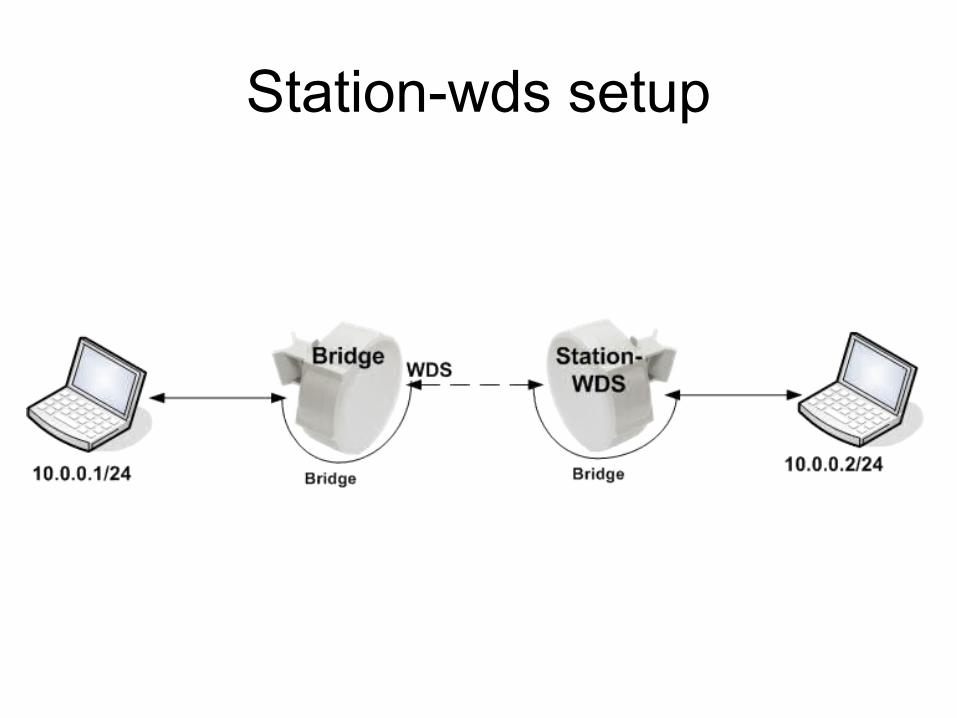
Station-wds setup
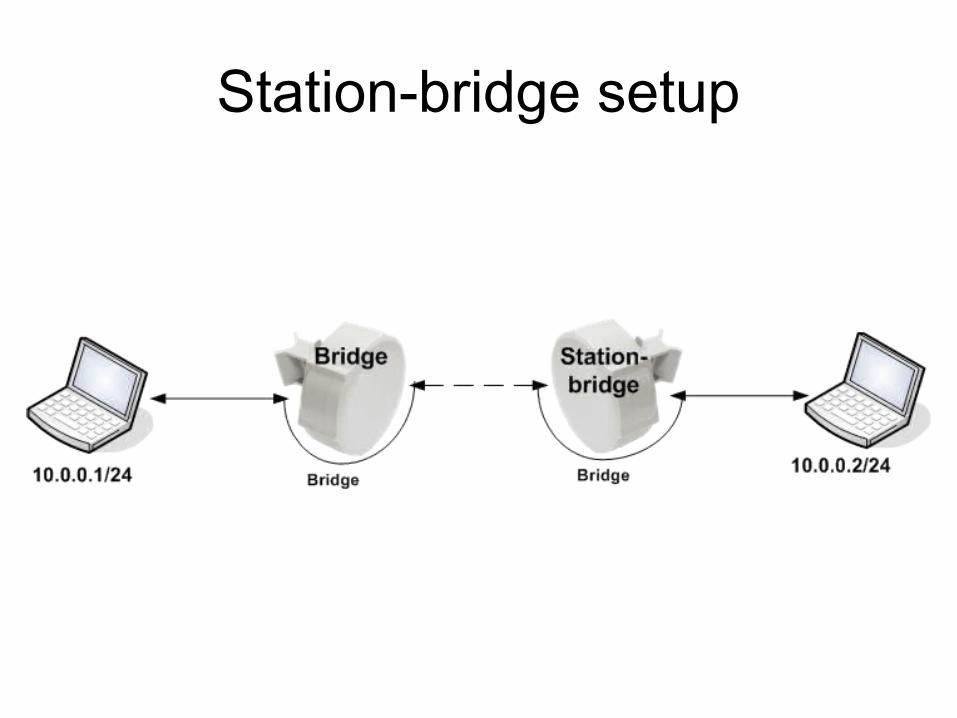
Station-bridge setup
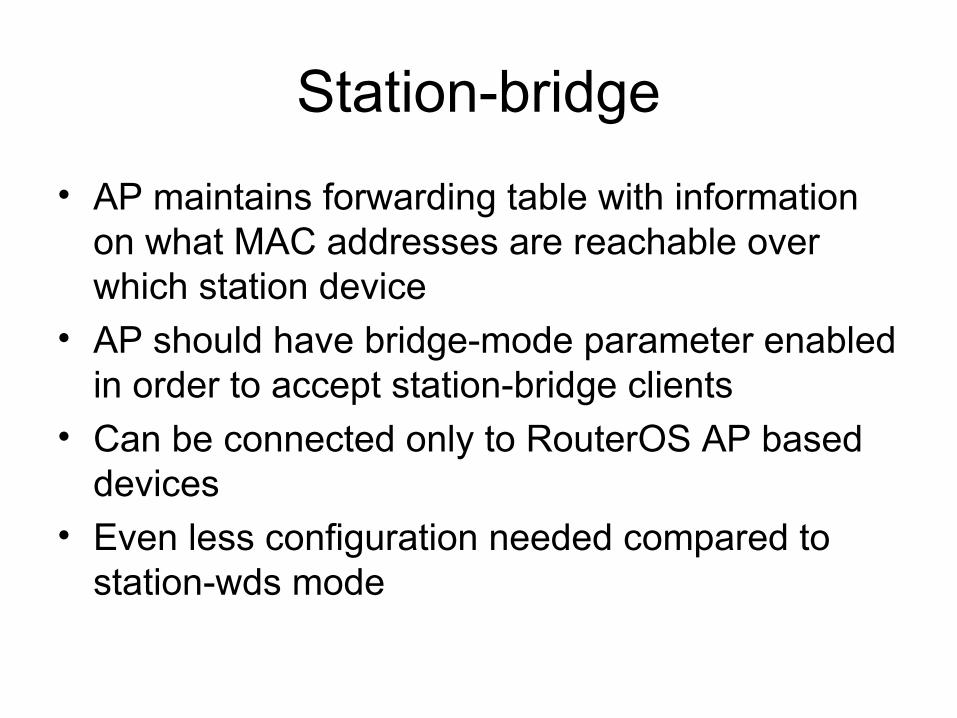
Station-bridge
• AP maintains forwarding table with information on what MAC addresses are reachable over which station device
• AP should have bridge-mode parameter enabled in order to accept station-bridge clients
• Can be connected only to RouterOS AP based devices
• Even less configuration needed compared to station-wds mode
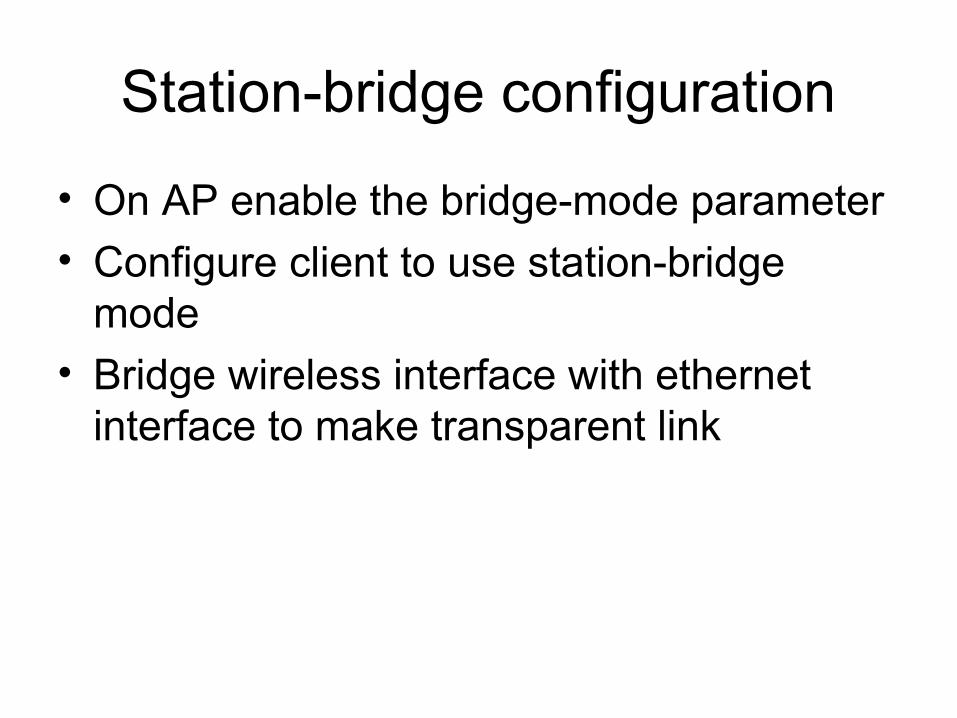
Station-bridge configuration
• On AP enable the bridge-mode parameter
• Configure client to use station-bridge mode
• Bridge wireless interface with ethernet interface to make transparent link
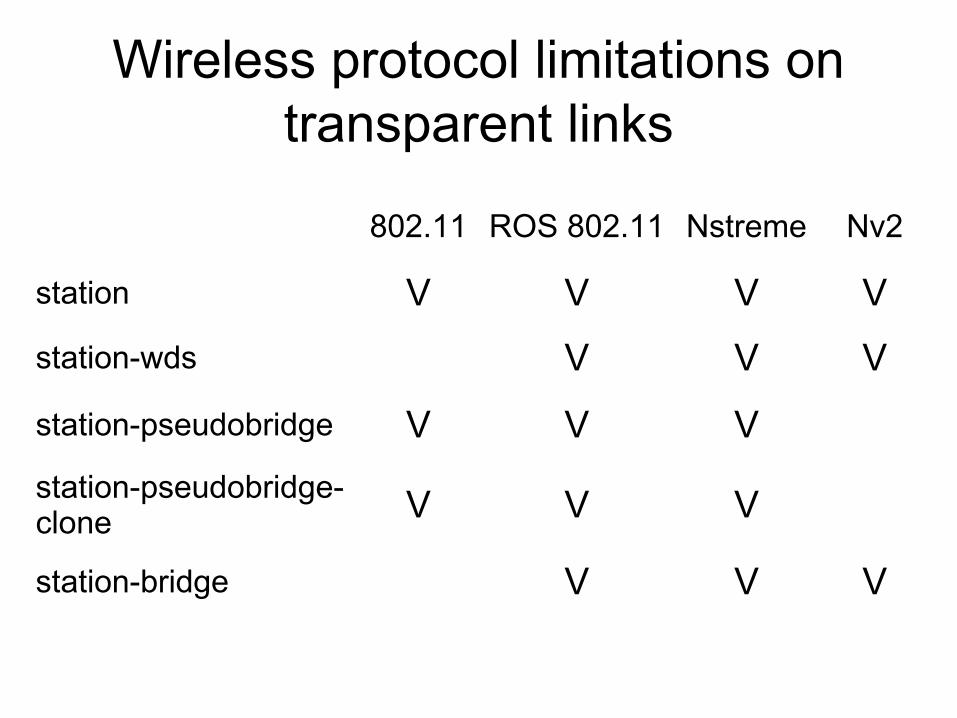
Wireless protocol limitations on transparent links
802.11 ROS 802.11 Nstreme Nv2
station V V V V
station-wds V V V
station-pseudobridge V V V
station-pseudobridge-clone V V V
station-bridge V V V
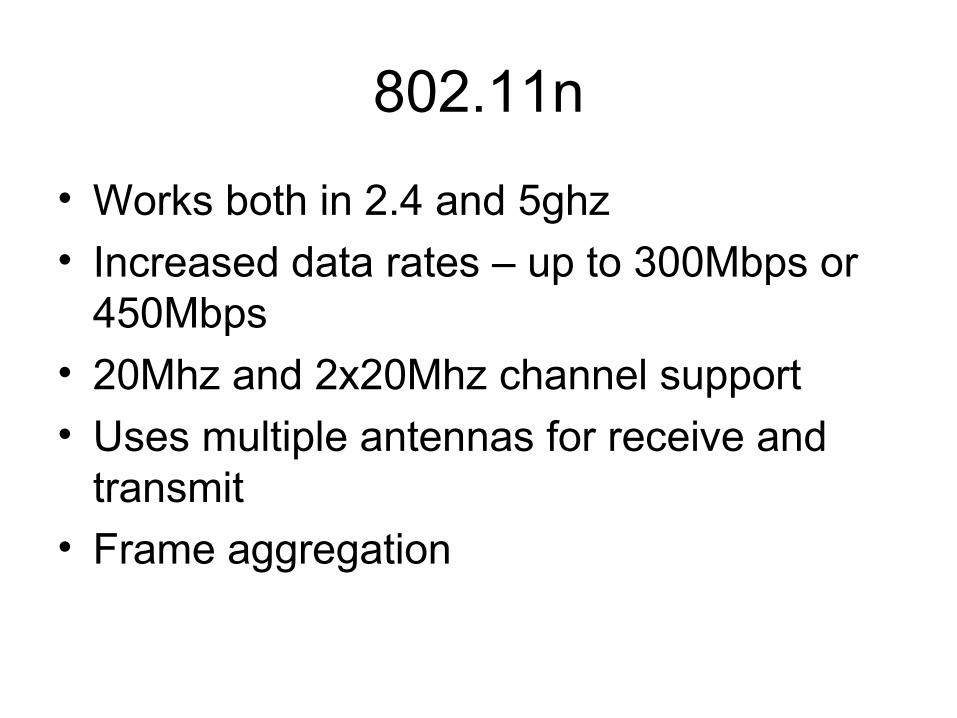
802.11n
• Works both in 2.4 and 5ghz
• Increased data rates – up to 300Mbps or 450Mbps
• 20Mhz and 2x20Mhz channel support
• Uses multiple antennas for receive and transmit
• Frame aggregation
802.11n 2x20Mhz channel option
• Adds additional 20Mhz channel to existing channel
• Channel placed below or above the main channel frequency
• Adds support for higher data-rates – 150Mbps/300Mbps/450Mbps
• Backwards compatible with 20Mhz clients – connection made to the main channel
• Not compatible with legacy 40Mhz Turbo mode
Upgrade legacy wireless link to 802.11n?
• We recommend to upgrade your legacy wireless links to 802.11n even if you have one antenna:– Higher data-rate than legacy wireless, data-
rates up to 65Mbps or 150Mbps– Real UDP traffic up to 125Mbps– No need to change antennas or board – only
wireless card
802.11n and WDS
• 802.11n frame aggregation can’t be used together with WDS
• Max transmit speed drops from 220Mbps to 160Mbps using WDS (UDP traffic)
• Station-bridge has the same speed limitations as Station-wds
• Avoid using WDS or use Nstreme/Nv2 wireless protocol to overcome this limitation
802.11n Outdoor Setup
• For 2 chain operation suggested to use different polarization for each chain
• When dual-polarization antennas are used isolation of the antenna recommended to be at least 25db
• If possible test each chain/antenna separately before using both chains at the same time
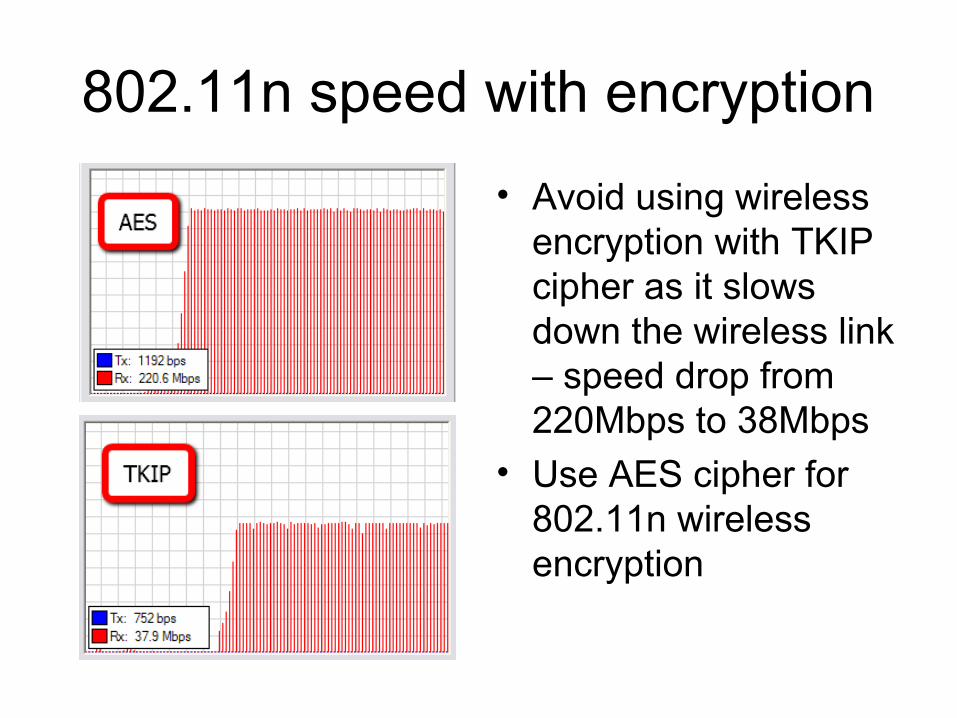
802.11n speed with encryption
• Avoid using wireless encryption with TKIP cipher as it slows down the wireless link – speed drop from 220Mbps to 38Mbps
• Use AES cipher for 802.11n wireless encryption
AR9300 wireless support
• 3 antenna connector support for 3x3 MIMO setup
• Up to 3 Spatial Streams
• Up to MCS 23 – data-rate up to 450Mbps
• UDP transfer up to 328Mbps
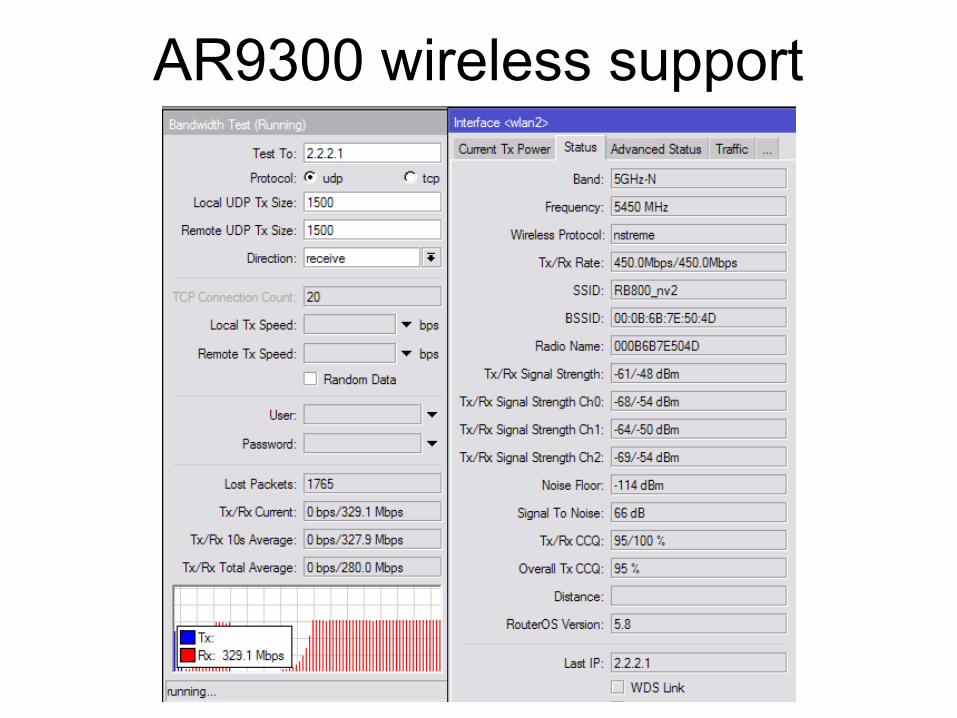
AR9300 wireless support

Hidden node issue
• In PTMP setups when client doesn’t see other clients traffic and sends at the same time AP gets “collisions” – lowers performance
• Use hw-protection CTS/RTS or “CTS to self”
• Use Nstreme or Nv2 protocol
NV2
• Proprietary wireless protocol developed by MikroTik
• Based on TDMA (Time Division Multiple Access) media access technology
• Works on Atheros chipset cards:– AR5413 and newer chipset cards (R52)– N chipset cards (R52n,R52Hn)
• Supported from RouterOS v5
TDMA benefits
• More throughput
• Lower latency
• Suited well for Point-to-MultiPoint networks
• Solves hidden node problems
Nv2 compatibility and coexistence with other wireless protocols
• Only RouterOS devices will be able to participate in Nv2 network
• Only RouterOS devices will see Nv2 AP when scanning
• Nv2 network will disturb other networks in the same channel
• Nv2 network may be affected by any (Nv2 or not) other networks in the same channel
• Nv2 enabled device will not connect to any other TDMA based network
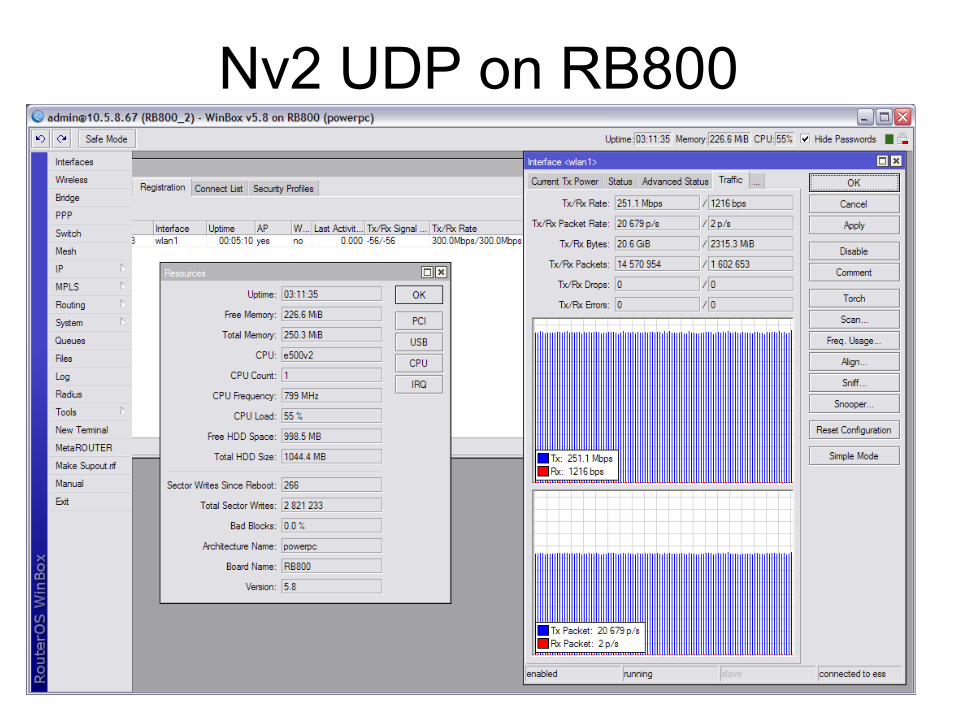
Nv2 UDP on RB800
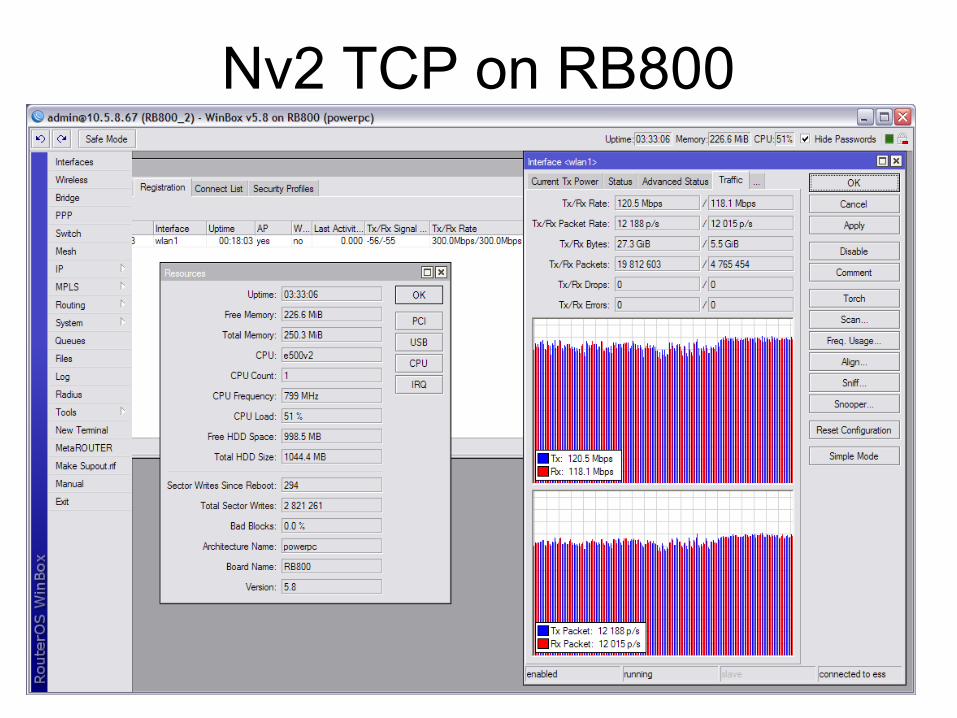
Nv2 TCP on RB800
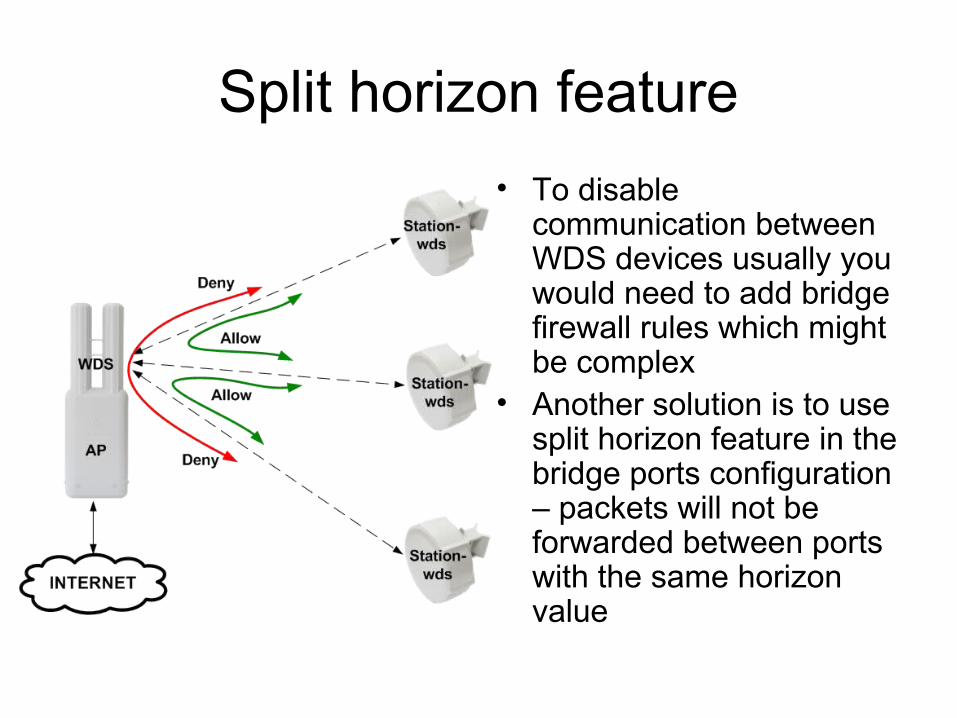
Split horizon feature
• To disable communication between WDS devices usually you would need to add bridge firewall rules which might be complex
• Another solution is to use split horizon feature in the bridge ports configuration – packets will not be forwarded between ports with the same horizon value
Split horizon feature
• Create bridge interface• Add internet access interface to the bridge port• Add each WDS interface to the bridge port and
specify the same horizon value, for example 1• If you wish to allow communication from every
WDS clients to a specific WDS client then add that specific WDS to the bridge port without horizon value
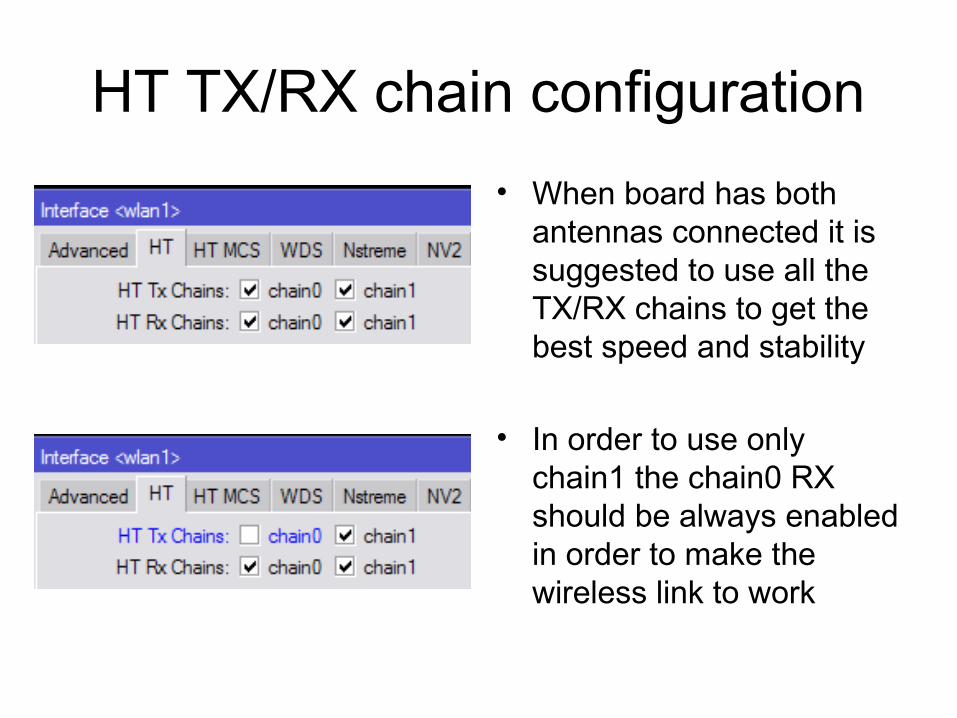
HT TX/RX chain configuration
• When board has both antennas connected it is suggested to use all the TX/RX chains to get the best speed and stability
• In order to use only chain1 the chain0 RX should be always enabled in order to make the wireless link to work
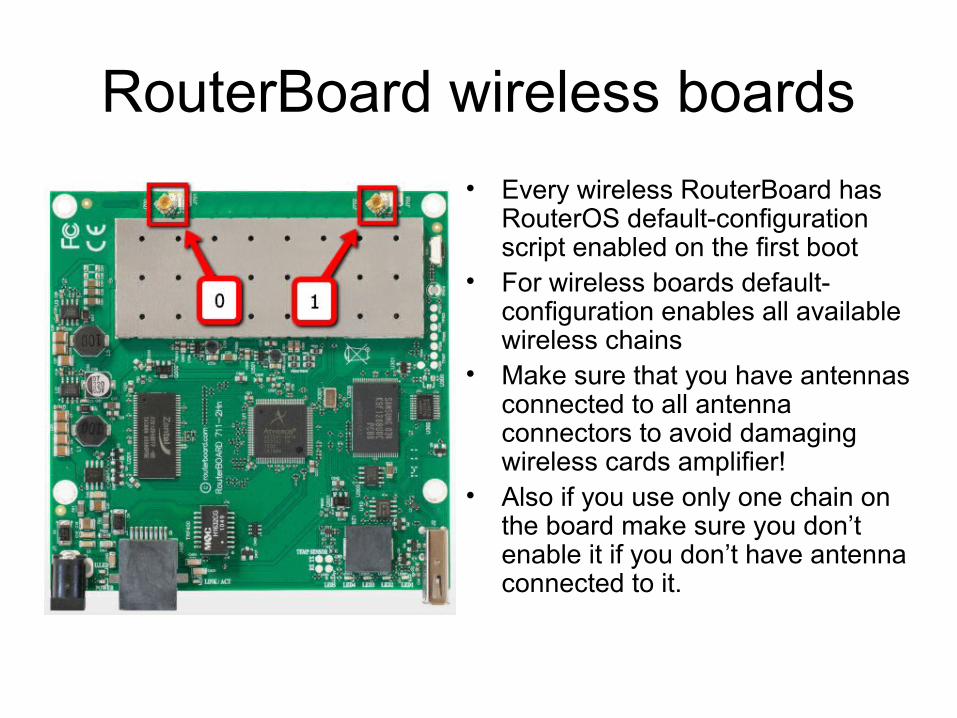
RouterBoard wireless boards
• Every wireless RouterBoard has RouterOS default-configuration script enabled on the first boot
• For wireless boards default-configuration enables all available wireless chains
• Make sure that you have antennas connected to all antenna connectors to avoid damaging wireless cards amplifier!
• Also if you use only one chain on the board make sure you don’t enable it if you don’t have antenna connected to it.
WPA2 Private Pre Shared Key
• Allows to specify for a MAC address different pre-shared key from the pre-shared key in the security profile
• It is possible to specify for each MAC address different pre-shared key
• Increases the security level of the AP
• Can be given also by RADIUS
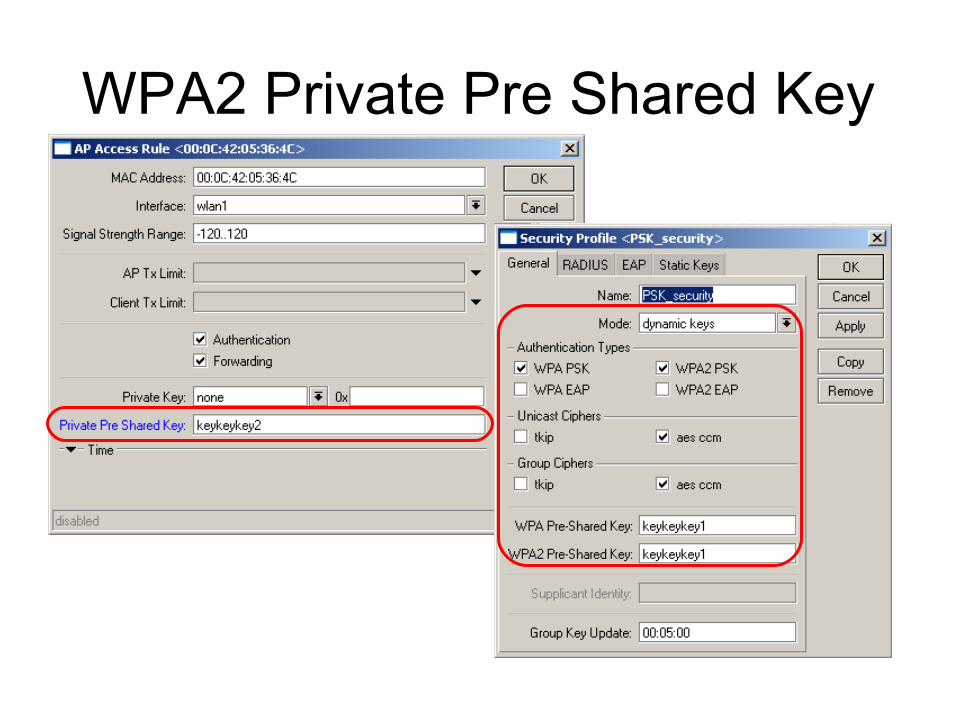
WPA2 Private Pre Shared Key
Rate-selection – legacy
• Rate-selection default value for RouterOS versions older than v5.9
• Works when wireless link is good in all data-rates
• Doesn’t switch so well from B standard to G standard data-rates
• Doesn't switch from A/G to N data rates where frame aggregation can be used
• Doesn’t switch from 20mhz to 40mhz in N data-rates, for example, when mcs13-15 doesn’t work stable
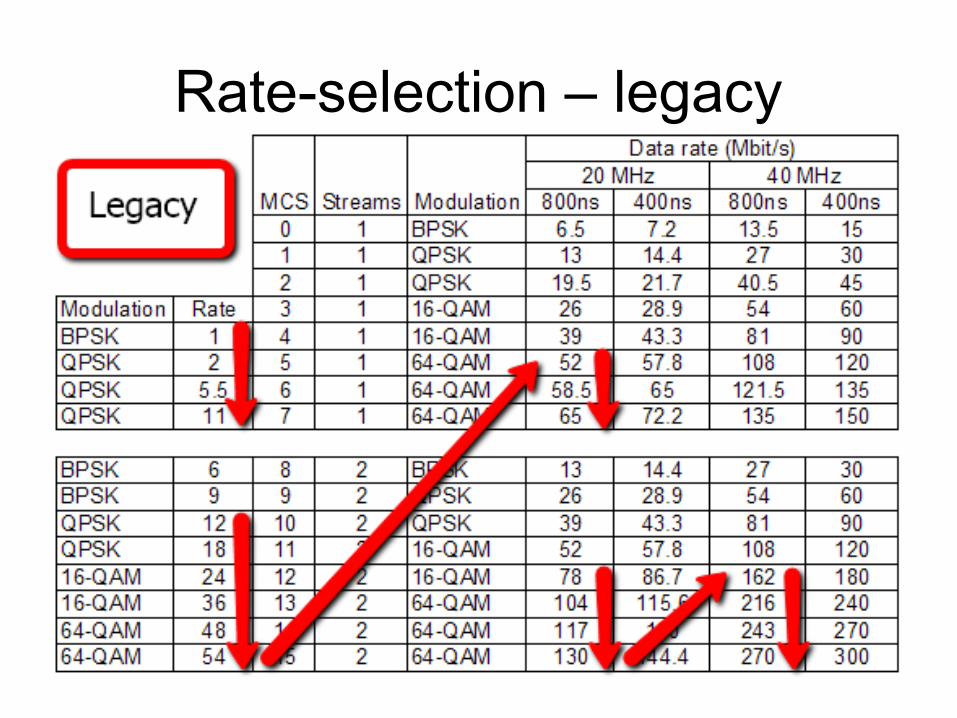
Rate-selection – legacy
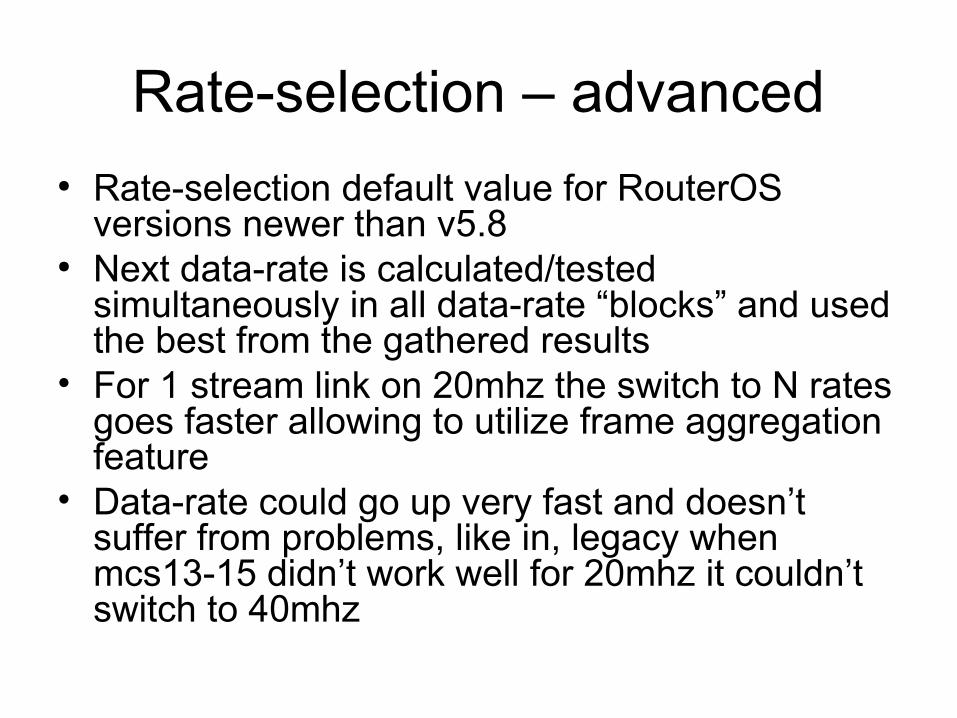
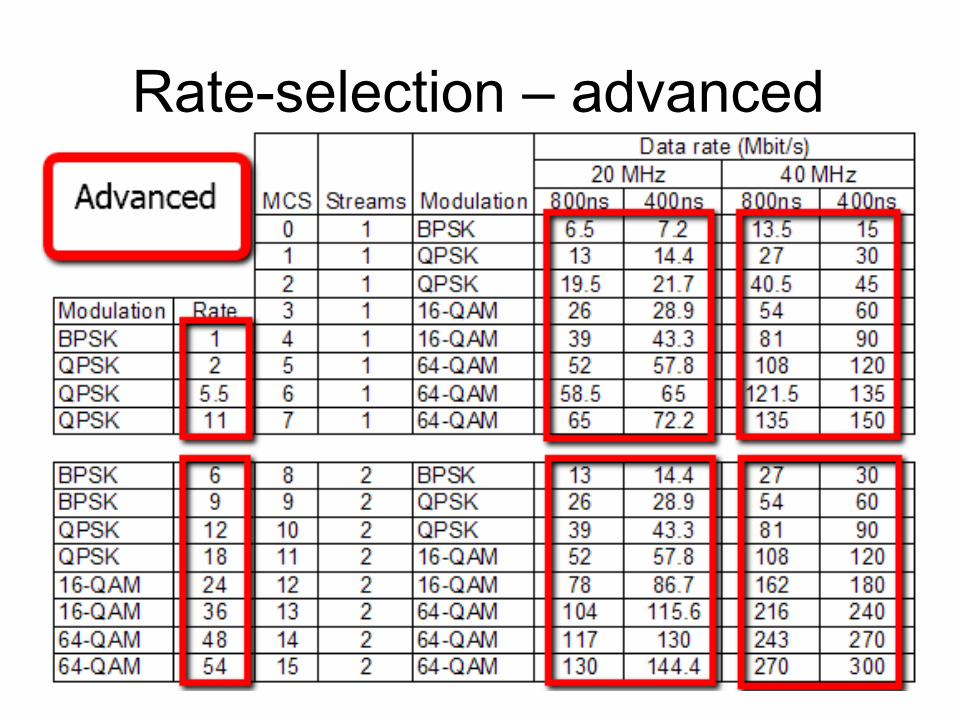
Rate-selection – advanced● Rate-selection default value for RouterOS
versions newer than v5.8● Next data-rate is calculated/tested
simultaneously in all data-rate “blocks” and used the best from the gathered results
• For 1 stream link on 20mhz the switch to N rates goes faster allowing to utilize frame aggregation feature
• Data-rate could go up very fast and doesn’t suffer from problems, like in, legacy when mcs13-15 didn’t work well for 20mhz it couldn’t switch to 40mhz
Rate-selection – advanced
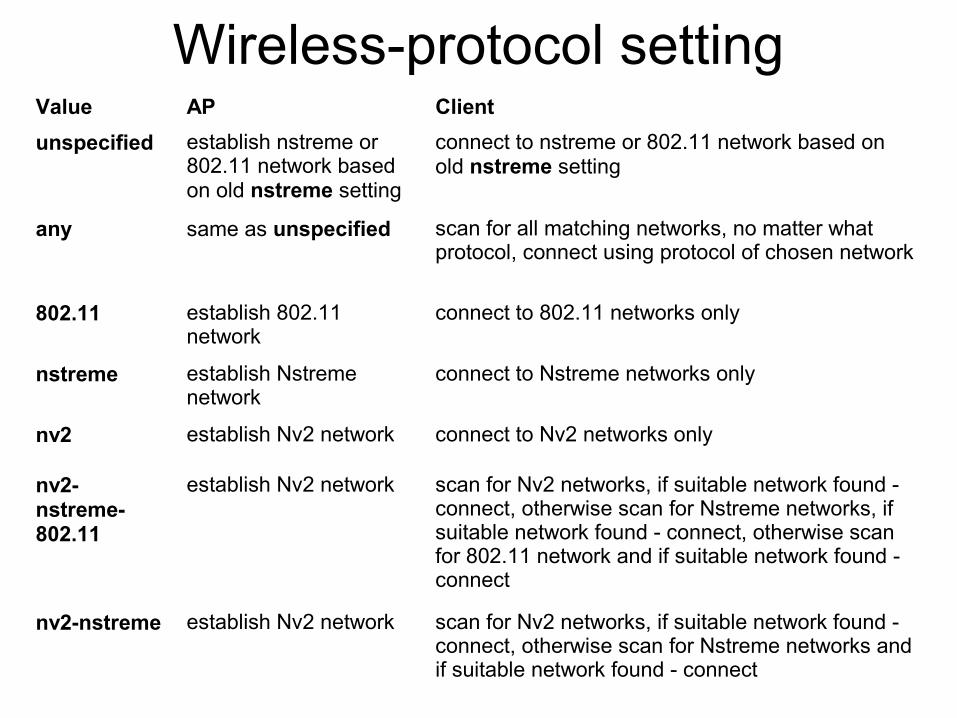
Wireless-protocol settingValue AP Client
unspecified establish nstreme or 802.11 network based on old nstreme setting
connect to nstreme or 802.11 network based on old nstreme setting
any same as unspecified scan for all matching networks, no matter what protocol, connect using protocol of chosen network
802.11 establish 802.11 network
connect to 802.11 networks only
nstreme establish Nstreme network
connect to Nstreme networks only
nv2 establish Nv2 network connect to Nv2 networks only
nv2-nstreme-802.11
establish Nv2 network scan for Nv2 networks, if suitable network found - connect, otherwise scan for Nstreme networks, if suitable network found - connect, otherwise scan for 802.11 network and if suitable network found - connect
nv2-nstreme establish Nv2 network scan for Nv2 networks, if suitable network found - connect, otherwise scan for Nstreme networks and if suitable network found - connect
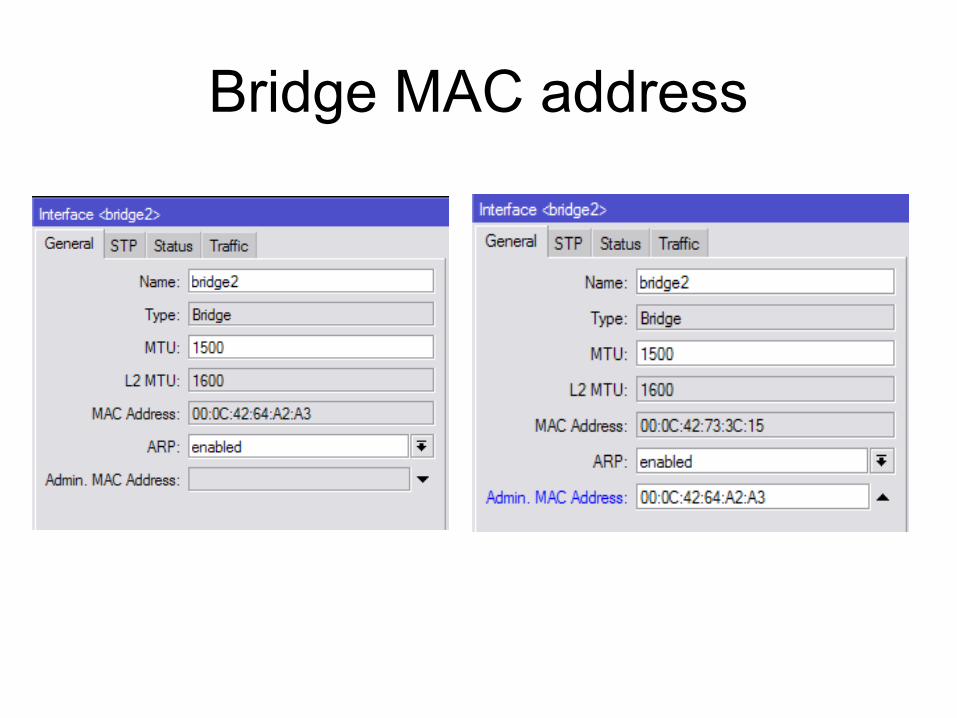
Bridge MAC address
• Bridge MAC address is taken from the first added and running bridge port interface
• If the bridge port gets invalid the bridge takes MAC address from the next active bridge port
• When the first bridge port gets active again the MAC address of bridge is changed back to first ports MAC address
• Bridge MAC address changes could cause IP connectivity to bridge IP address
• Use Admin MAC setting to lock the MAC address to one specific that do not change
Bridge MAC address
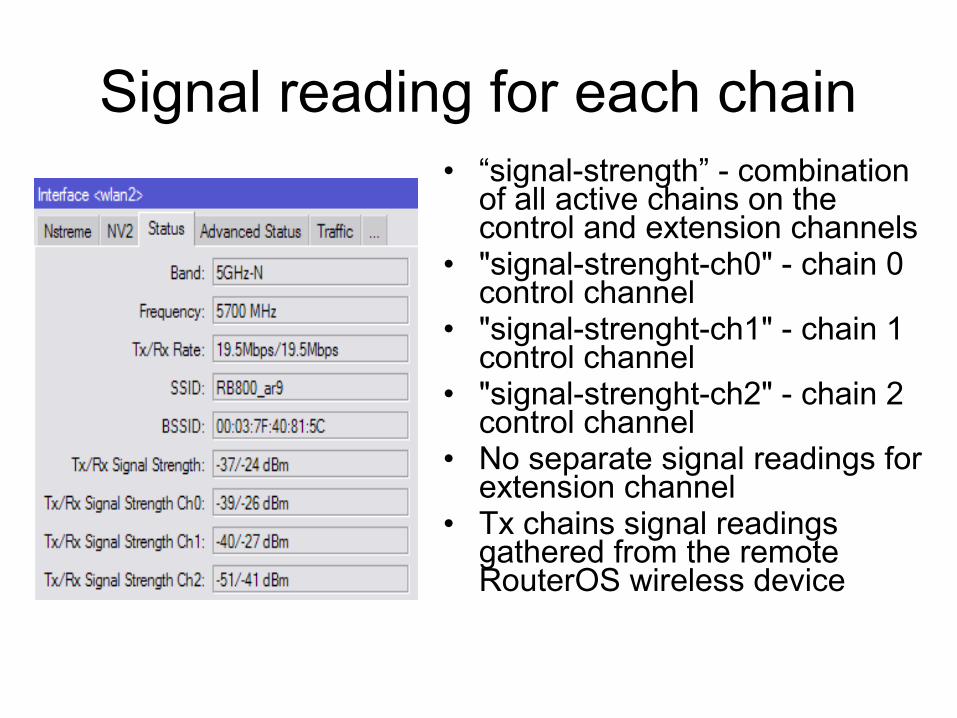
Signal reading for each chain• “signal-strength” - combination
of all active chains on the control and extension channels
• "signal-strenght-ch0" - chain 0 control channel
• "signal-strenght-ch1" - chain 1 control channel
• "signal-strenght-ch2" - chain 2 control channel
• No separate signal readings for extension channel
• Tx chains signal readings gathered from the remote RouterOS wireless device
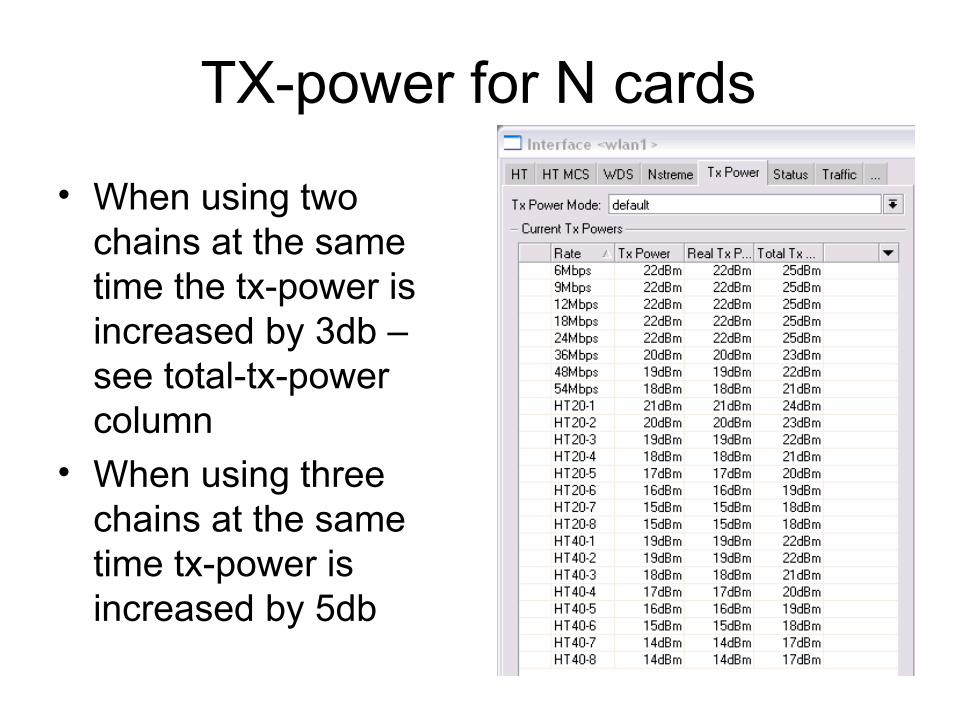
TX-power for N cards
• When using two chains at the same time the tx-power is increased by 3db – see total-tx-power column
• When using three chains at the same time tx-power is increased by 5db
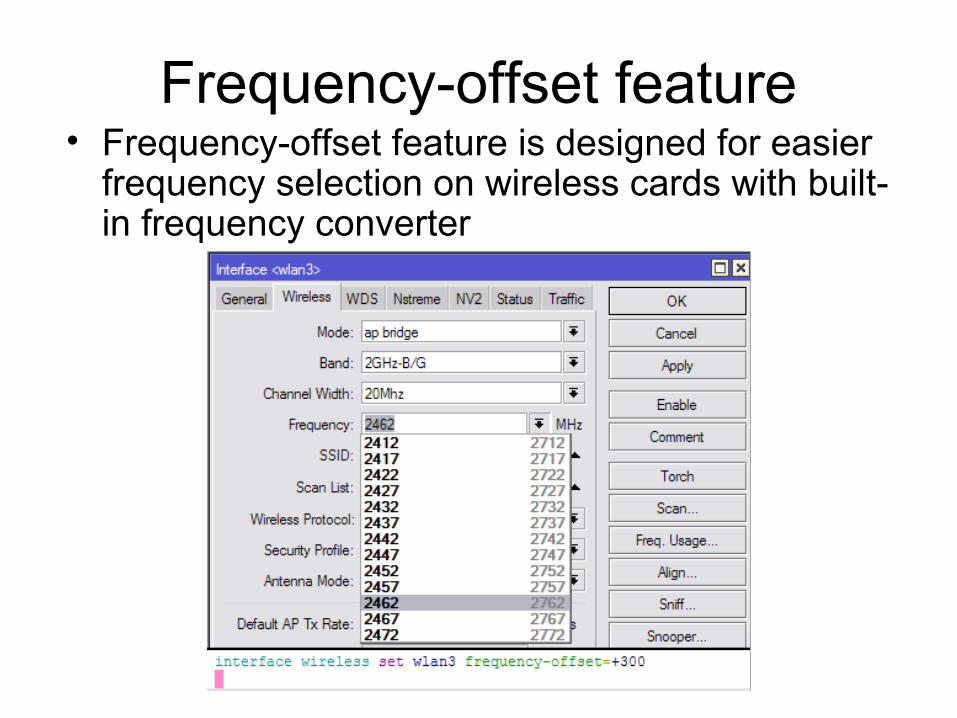
Frequency-offset feature• Frequency-offset feature is designed for easier
frequency selection on wireless cards with built-in frequency converter
Antenna-mode selection for RB751U and RB751G
• RB 751U and RB751G has 3 built-in wireless antennas– Chain0:
• one antenna for TX• one antenna for RX
– Chain1: • one antenna for TX/RX• MMCX connector for external antenna
• Note that enabling the external antenna disables the built-in Chain1 antenna

Antenna-mode selection for RB751U and RB751G
Spectral Scan/History
• Uses RouterOS• Uses Atheros Merlin 802.11n chipset
wireless cards• Frequency span depending on card:
– 5ghz: 4790-6085mhz– 2ghz: 2182-2549mhz
• Scan with 10mhz frequency increments for improved data quality
• Audio monitor
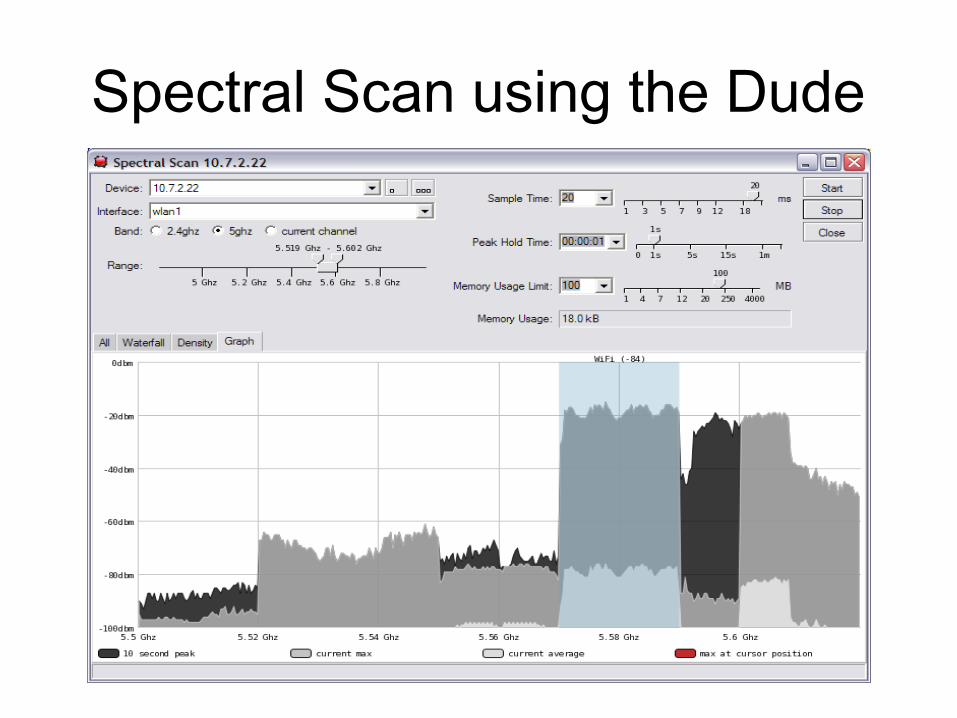
Spectral Scan using the Dude
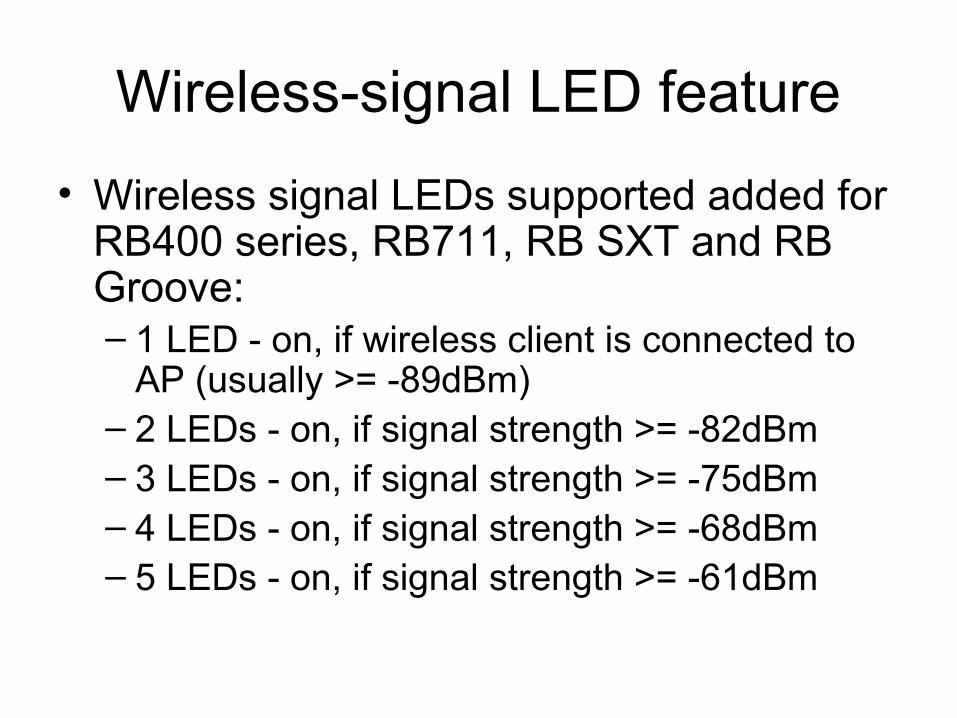
Wireless-signal LED feature
• Wireless signal LEDs supported added for RB400 series, RB711, RB SXT and RB Groove:– 1 LED - on, if wireless client is connected to
AP (usually >= -89dBm) – 2 LEDs - on, if signal strength >= -82dBm – 3 LEDs - on, if signal strength >= -75dBm – 4 LEDs - on, if signal strength >= -68dBm – 5 LEDs - on, if signal strength >= -61dBm
Wireless-status LED
• Used for RB751/RB751G– ON when no activity– Blinks when there is TX/RX traffic (interval
depends on traffic activity – minimal 100ms)– OFF for 1s and ON for 2s – no wireless
connection made to the wireless card
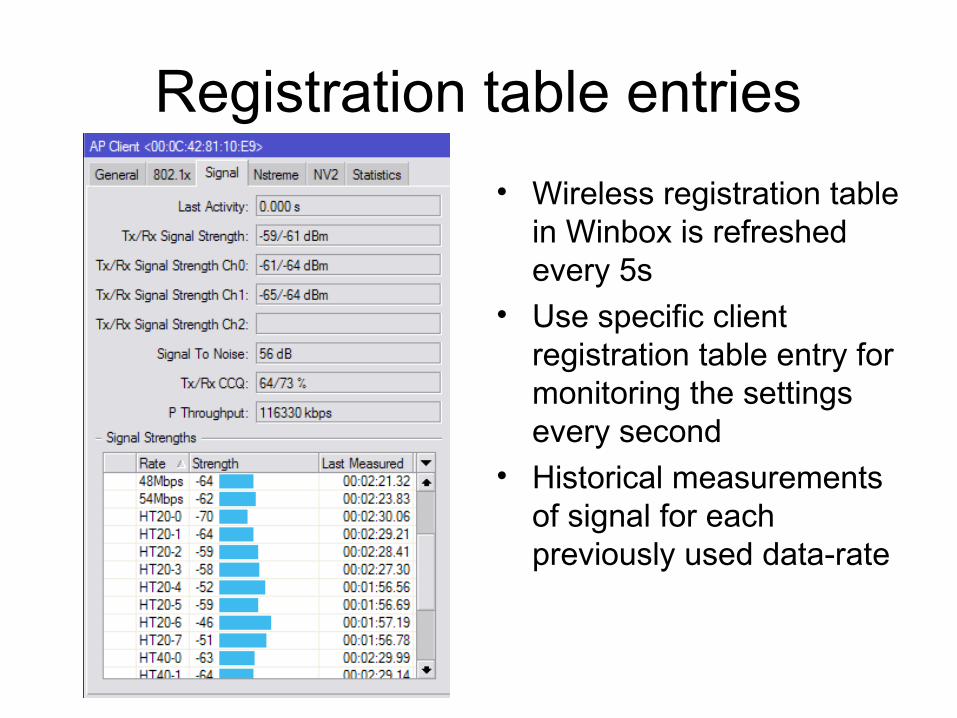
Registration table entries
• Wireless registration table in Winbox is refreshed every 5s
• Use specific client registration table entry for monitoring the settings every second
• Historical measurements of signal for each previously used data-rate
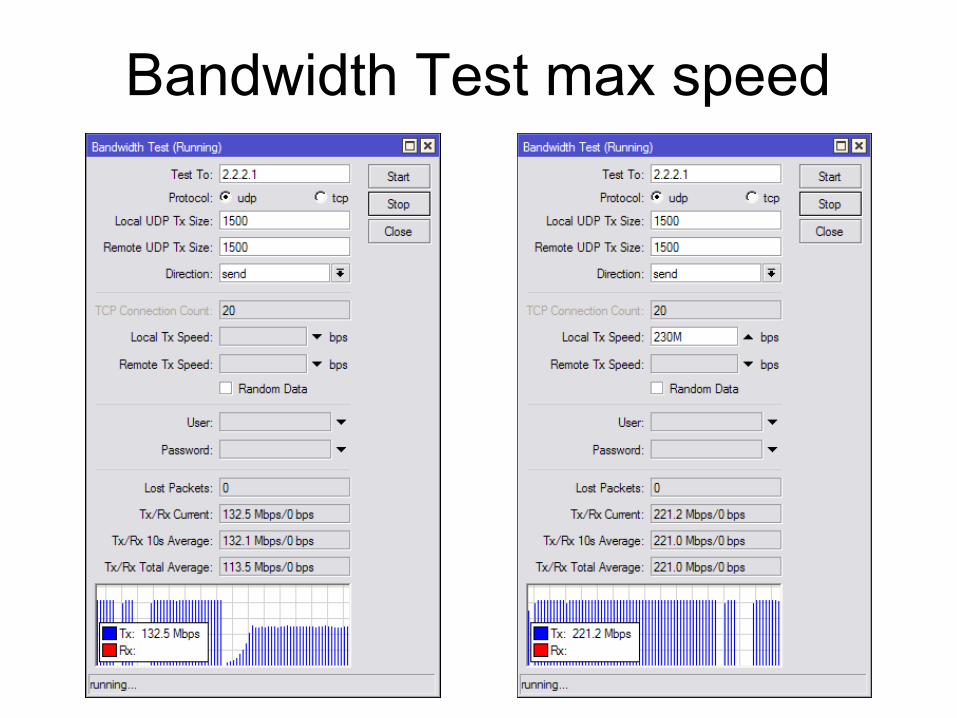
Bandwidth Test max speed
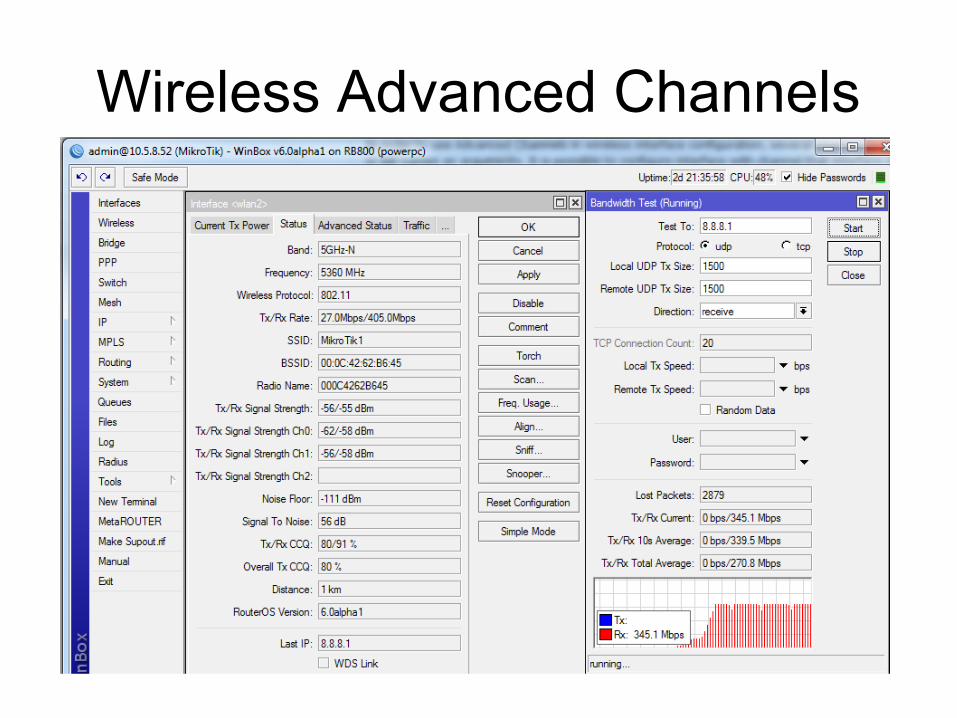
Wireless Advanced Channels
• Located under 'interface wireless channels'• Custom center frequency support with 0.5Mhz step• Custom channel width range from 2.5-30mhz with 0.5mhz step• Only Atheros AR92xx support and center frequency range
2192-2734mhz and 4800-6100mhz• Custom 'scan-list' feature• Support added in RouterOS v6• Superchannel licenese required to use advanced channels
Wireless Advanced Channels
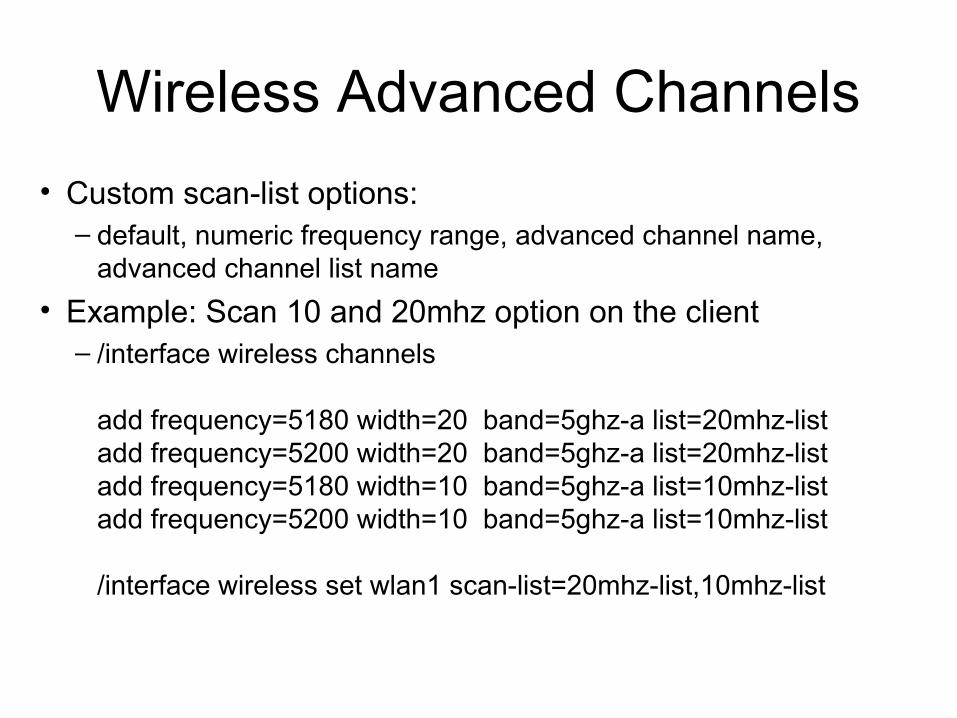
• Custom scan-list options:– default, numeric frequency range, advanced channel name,
advanced channel list name
• Example: Scan 10 and 20mhz option on the client– /interface wireless channels
add frequency=5180 width=20 band=5ghz-a list=20mhz-listadd frequency=5200 width=20 band=5ghz-a list=20mhz-listadd frequency=5180 width=10 band=5ghz-a list=10mhz-listadd frequency=5200 width=10 band=5ghz-a list=10mhz-list
/interface wireless set wlan1 scan-list=20mhz-list,10mhz-list
Wireless Advanced Channels