Windows XP 101: Using Windows XP Professional in the Classroom.
10
Windows XP 101: Using Windows XP Professional in the Classroom
-
Upload
sybil-ann-king -
Category
Documents
-
view
226 -
download
0
Transcript of Windows XP 101: Using Windows XP Professional in the Classroom.
Windows XP 101:Using Windows XP Professional in the ClassroomWindows XP 101:Using Windows XP Professional in the Classroom
Showing or Hiding System Icons
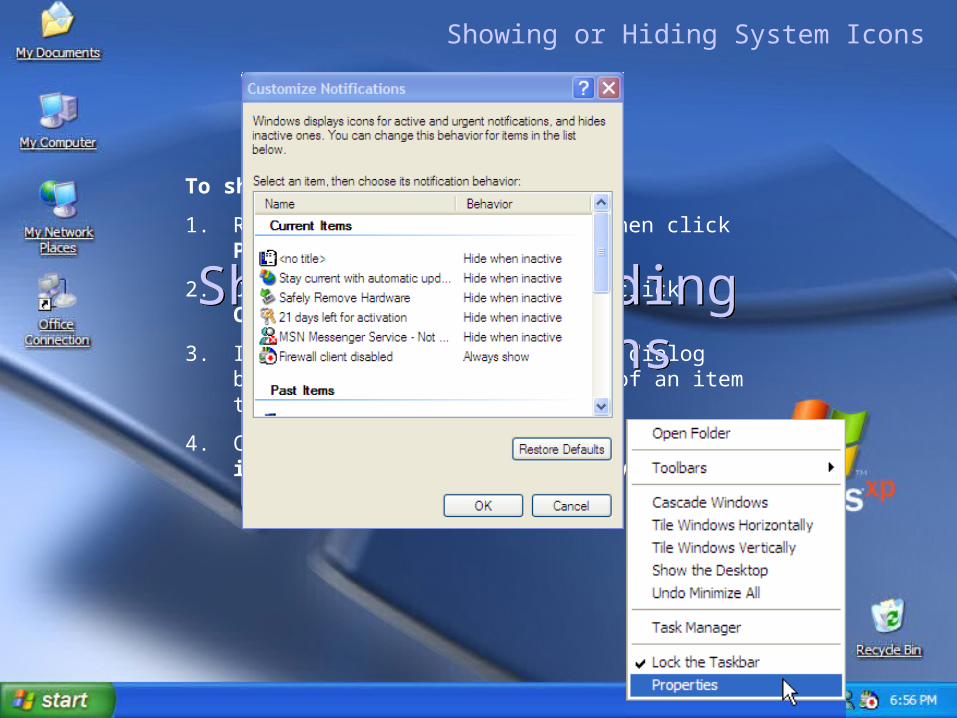
To show or hide System icons
1. Right-click the taskbar, and then click Properties.
2. On the Notification area tab, click Customize.
3. In the Customize Notifications dialog box, right-click the Behavior of an item that you want to show or hide.
4. Click the down arrow to either Hide when inactive, Always hide, or Always show.
Showing or Hiding System Icons
Showing or Hiding System Icons
Organizing Your Lesson Plans, Pictures, and Other Classroom Files
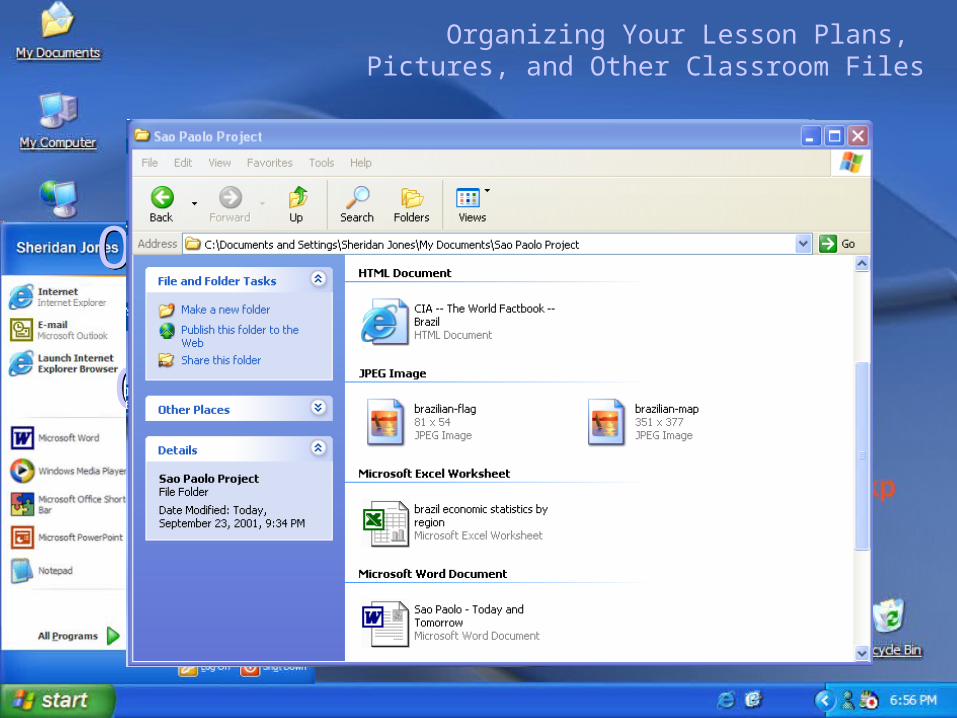
To list documents by type, and then organize into groups:
1. On the Start menu, click My Documents, and then open the folder containing the documents you want to view.
2. On the View menu, click Arrange Icons by Type.
3. On the Arrange Icons By Type menu, select Show In Groups.
Organizing Your Lesson Plans, Pictures, and Other
Classroom Files
Organizing Your Lesson Plans, Pictures, and Other
Classroom Files
Changing the Viewing Options in My Pictures
Changing the Viewing Options in My Pictures
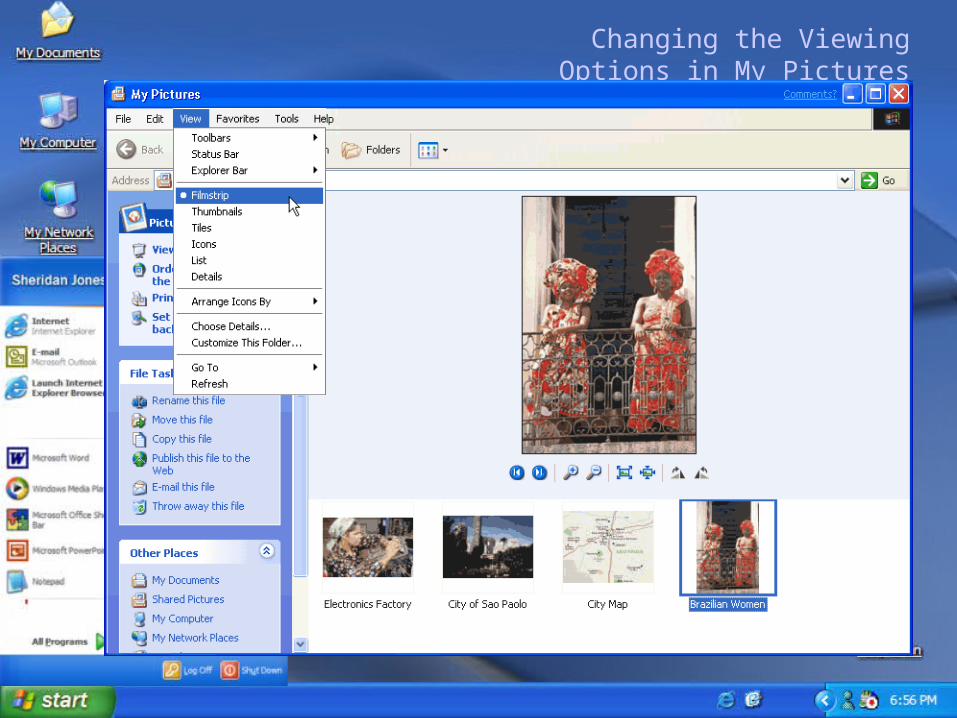
1. On the Start menu, click My Pictures.
2. On the View menu, click Filmstrip.
Changing the Viewing Options in My Pictures
Changing the Viewing Options in My Pictures
E-mail Project Pictures
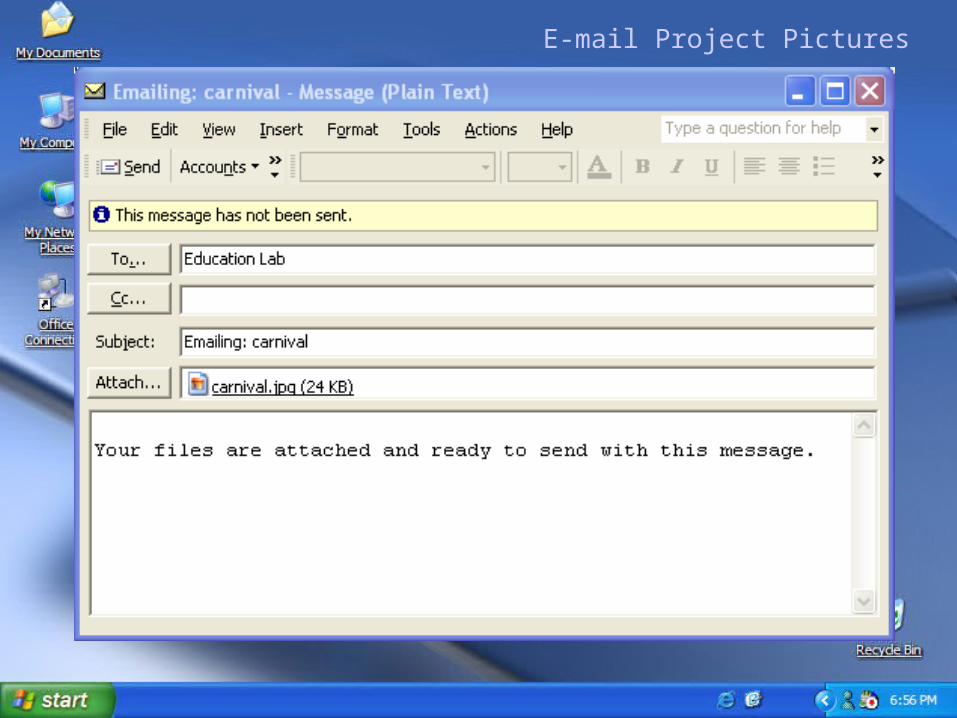
To E-mail Project Pictures
1. In the File and Folder menu on the sidebar, select e-mail this file
2. Choose make all my pictures smaller, click OK.
3. Picture automatically is attached to default email client.E-mail Project PicturesE-mail Project Pictures
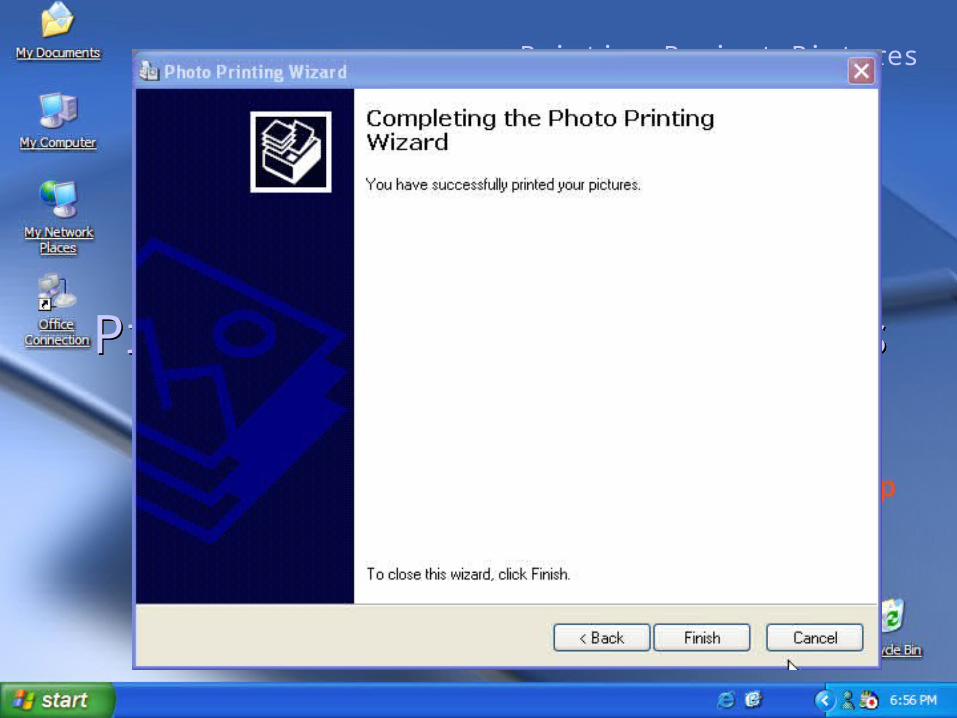
Printing Project Pictures
To Print Project Pictures
1. In the Picture Tasks menu on the sidebar, select Print This Picture
2. Click Next on Photo Printing Wizard.
3. Select pictures you wish to print, click Next.
4. Choose the printer you wish to print to, click Next.
5. In Layout Selection, select the 4 x 6 in, 3-up option.
6. Click Next.
7. Click Finish.
Printing Project PicturesPrinting Project Pictures
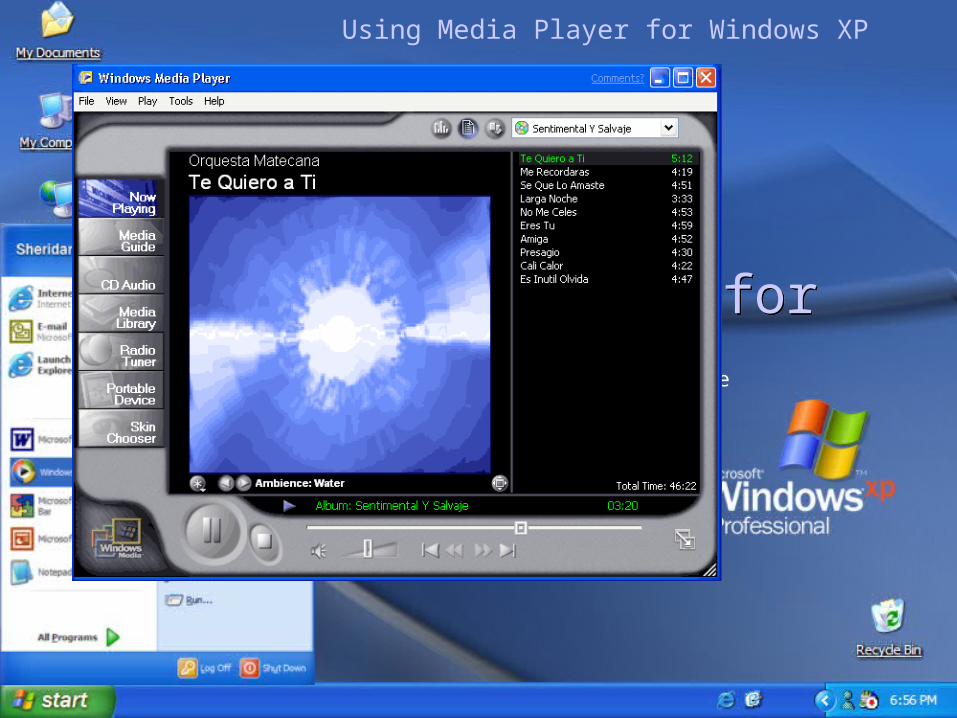
Using Media Player for Windows XP
Using Media Player for Windows XP
Using Media Player for Windows XP
To use Media Player for Windows XP
1. On the Start menu, click Windows Media Player.
2. Place a CD in your CD-ROM drive.
3. Click the Now Playing tab to view information about your CD. If your CD does not start automatically, click the Play icon.
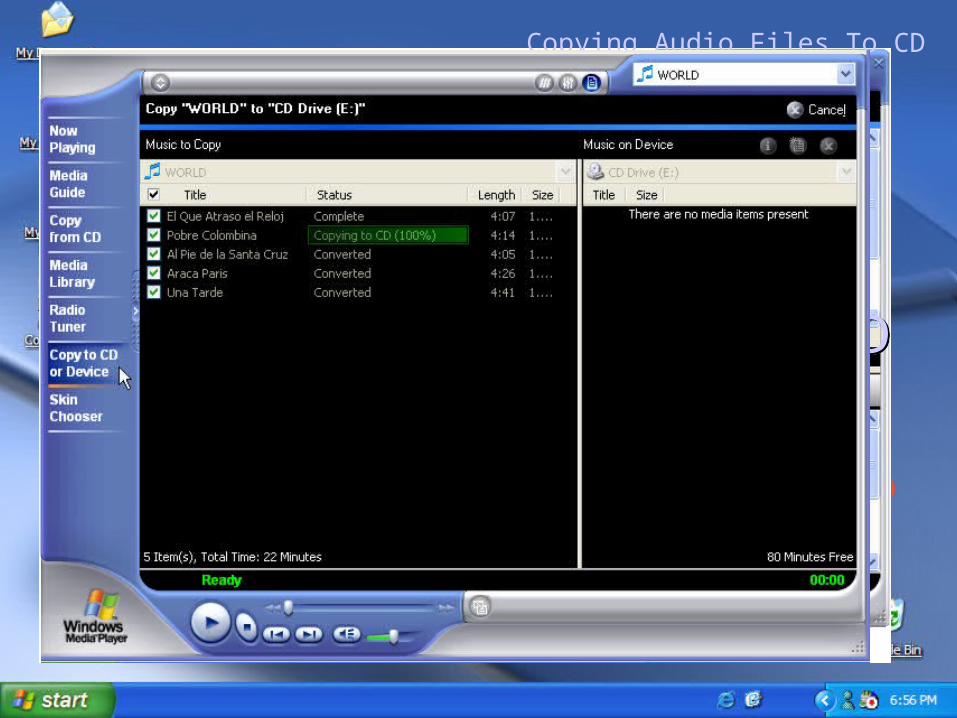
Copying Audio Files To CD
To Copy Audio Files To CD
1. In Windows Media Player, Choose Copy to CD or Device.
2. Choose audio files to burn to CD, click Okay.
Copying Audio Files To CDCopying Audio Files To CD
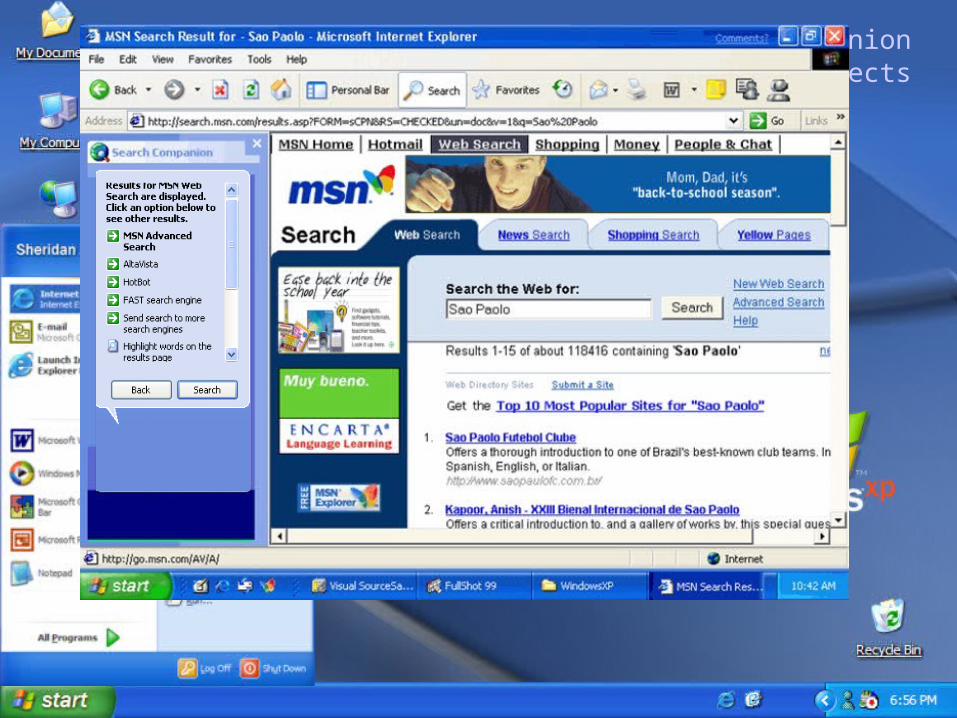
Using the Search Companion For Classroom
Projects
Using the Search Companion For Classroom
Projects
Using the Search Companion For Classroom Projects
To use the Search Companion
1. On the Start menu, click Internet Explorer.
2. Click the Search icon on the toolbar to open Search Companion.
3. Type Sao Paolo in the text box, and then click Search.
4. Select Automatically Send Your Search To Other Search Engines