Windows Thread Synchronization
190
www.installsetupconfig.com 1 Windows Thread Synchronization What do we have in this session? Process and Thread Revisited Atomicity Windows Thread States Wait Functions Single-object Wait Functions Multiple-object Wait Functions Alertable Wait Functions Registered Wait Functions Wait Functions and Time-out Intervals Wait Functions and Synchronization Objects Wait Functions and Creating Windows Synchronization Objects Events Mutex and Semaphore Interprocess Synchronization Object Names Object Inheritance Object Duplication Other Synchronization Mechanisms Synchronization and Overlapped Input and Output Asynchronous Procedure Calls Synchronization Internals Critical Section Objects Condition Variables Slim Reader/Writer (SRW) Locks One-Time Initialization One-Time Initialization: Synchronous Mode One-Time Initialization: Asynchronous Mode Interlocked Variable Access The Interlocked API Interlocked Singly Linked Lists Timer Queues Concurrency and Race Conditions Race Condition Program Example The WaitForMultipleObjects() Example Waiting for Multiple Objects Example
Transcript of Windows Thread Synchronization

www.installsetupconfig.com
1
Windows Thread Synchronization
What do we have in this session?
Process and Thread Revisited
Atomicity
Windows Thread States
Wait Functions
Single-object Wait Functions
Multiple-object Wait Functions
Alertable Wait Functions
Registered Wait Functions
Wait Functions and Time-out Intervals
Wait Functions and Synchronization Objects
Wait Functions and Creating Windows
Synchronization Objects
Events
Mutex and Semaphore
Interprocess Synchronization
Object Names
Object Inheritance
Object Duplication
Other Synchronization Mechanisms
Synchronization and Overlapped Input and Output
Asynchronous Procedure Calls
Synchronization Internals
Critical Section Objects
Condition Variables
Slim Reader/Writer (SRW) Locks
One-Time Initialization
One-Time Initialization: Synchronous Mode
One-Time Initialization: Asynchronous Mode
Interlocked Variable Access
The Interlocked API
Interlocked Singly Linked Lists
Timer Queues
Concurrency and Race Conditions
Race Condition Program Example
The WaitForMultipleObjects() Example
Waiting for Multiple Objects Example

www.installsetupconfig.com
2
Using Named Objects Program Examples
First Process
Second Process Program Example
Using Event Objects Program Example
Using Mutex Objects Program Example
Another Mutex Program Example
Using Semaphore Objects Program Example
Another Semaphore Program Example
Six philosophers with six chopsticks
Starvation Issue
The Six philosophers with Semaphore Program Example
Using Waitable Timer Objects Program Example
Using Waitable Timers with an Asynchronous Procedure Call Program Example
Using Critical Section Objects Program Example
Another Critical Section Program Example
More Critical Section Program Examples
Using Condition Variables Program Example
Using One-Time Initialization Program Example
The Synchronous Example
Asynchronous Example
Using Singly Linked Lists Program Example
Using Timer Queues Program Example
The Interlocked Functions Program Example 1
The Interlocked Functions Program Example 2
The Interlocked Functions Program Example 3
Extra Synchronization Related working Program Examples
Creating a Single Thread Program Example
Cancelling a Thread Program Example
The Multithread without any synchronization Program Example
Synchronization with Interlocked Exchange Program Example
Some Notes for IA64
Synchronization with Spinlocks Program Example
Synchronization Using Mutexes Program Example
Synchronization with Critical Sections Program Example
Synchronization Using Semaphores Program Example
Terminal Server and Naming Semaphore Objects
Thread Scheduling and Prioritizing
Managing Thread Priorities in Windows
Windows Scheduling Program Example
Thread Scheduling Program Example
Managing Multiple Threads Program Example

www.installsetupconfig.com
3
Multiple Threads Example
More: Synchronization Reference
Introduction
There are a variety of ways to coordinate multiple threads of execution in multithreading
environment. The functions described in this section provide mechanisms that threads can use to
synchronize access to a shared and limited resource.
Let say in multithreaded environment, a process has 4 threads which need to access and manipulate
a single shared, global variable X. Threads need authority before they can interact with X. Let say
that everyone needs to access X to complete their tasks, but there is only one X. Assuming from the
following Figure, Thread 5 and Thread 6 already finished accessing X.
If a thread wants to use X, it must first becomes the authority of X. It must also agree with all the
threads that it has the right to use X. While this thread is using X, all other threads must wait/sleep
for their turn. If multiple threads all want to access and use X at the same time, there must be a
mechanism to ensure that only one thread can access X at a time.
A process space
Thread 1
Thread 2
Thread 3
Thread 4
X
Thread 5
Thread 6
A process space
Thread 1
Thread 2
Thread 3
Thread 4
X
Thread 5
Thread 6

www.installsetupconfig.com
4
This kind of activity is called "locking" for threads. There are a lot of ways to support how to use the
shared resources such as critical sections, mutexes and semaphores, events, and atomic operations.
To synchronize access to a resource, we can use one of the synchronization objects in one of the
wait functions. The state of a synchronization object is either signaled or nonsignaled. The wait
functions allow a thread to block its own execution until a specified nonsignaled object is set to the
signaled state.
Process and Thread Revisited
Processes are used to separate the different applications that are executing at a specified time on a
single computer. The operating system does not execute processes, but threads do. A thread is a unit
of execution. The operating system allocates processor time to a thread for the execution of the
thread's tasks. A single process can contain multiple threads of execution. Each thread maintains its
own exception handlers, scheduling priorities, and a set of structures that the operating system uses
to save the thread's context if the thread cannot complete its execution during the time that it was
assigned to the processor. The context is held until the next time that the thread receives processor
time. The context includes all the information that the thread requires to seamlessly continue its
execution. This information includes the thread's set of processor registers and the call stack inside
the address space of the host process.
Atomicity
In programming, an atomic action is one that effectively happens all at once. An atomic action
cannot stop in the middle: it either happens completely, or it doesn't happen at all. No side effects of
an atomic action are visible until the action is complete.
We have already seen that an increment expression, such as i++, does not describe an atomic action.
Even very simple expressions can define complex actions that can be decomposed into other actions.
However, there are actions that you can specify as an atomic:
1. Reads and writes are atomic for reference variables and for most primitive variables (all
types except long and double).
2. Reads and writes are atomic for all variables declared volatile (including long and double
variables).
Atomic actions cannot be interleaved, so they can be used without fear of thread interference.
However, this does not eliminate all need to synchronize atomic actions, because memory
consistency errors are still possible.
Using volatile variables reduces the risk of memory consistency errors, because any write to a
volatile variable establishes a happens-before relationship with subsequent reads of that same
variable. This means that changes to a volatile variable are always visible to other threads. What's
www.installsetupconfig.com
5
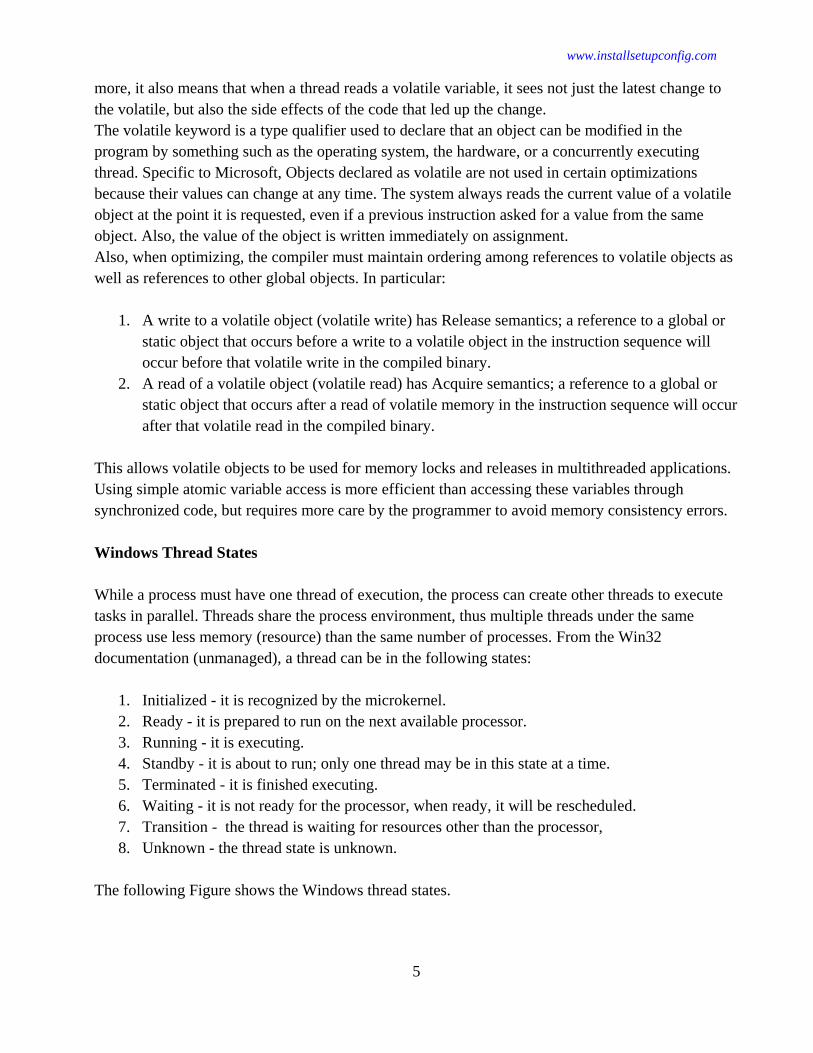
more, it also means that when a thread reads a volatile variable, it sees not just the latest change to
the volatile, but also the side effects of the code that led up the change.
The volatile keyword is a type qualifier used to declare that an object can be modified in the
program by something such as the operating system, the hardware, or a concurrently executing
thread. Specific to Microsoft, Objects declared as volatile are not used in certain optimizations
because their values can change at any time. The system always reads the current value of a volatile
object at the point it is requested, even if a previous instruction asked for a value from the same
object. Also, the value of the object is written immediately on assignment.
Also, when optimizing, the compiler must maintain ordering among references to volatile objects as
well as references to other global objects. In particular:
1. A write to a volatile object (volatile write) has Release semantics; a reference to a global or
static object that occurs before a write to a volatile object in the instruction sequence will
occur before that volatile write in the compiled binary.
2. A read of a volatile object (volatile read) has Acquire semantics; a reference to a global or
static object that occurs after a read of volatile memory in the instruction sequence will occur
after that volatile read in the compiled binary.
This allows volatile objects to be used for memory locks and releases in multithreaded applications.
Using simple atomic variable access is more efficient than accessing these variables through
synchronized code, but requires more care by the programmer to avoid memory consistency errors.
Windows Thread States
While a process must have one thread of execution, the process can create other threads to execute
tasks in parallel. Threads share the process environment, thus multiple threads under the same
process use less memory (resource) than the same number of processes. From the Win32
documentation (unmanaged), a thread can be in the following states:
1. Initialized - it is recognized by the microkernel.
2. Ready - it is prepared to run on the next available processor.
3. Running - it is executing.
4. Standby - it is about to run; only one thread may be in this state at a time.
5. Terminated - it is finished executing.
6. Waiting - it is not ready for the processor, when ready, it will be rescheduled.
7. Transition - the thread is waiting for resources other than the processor,
8. Unknown - the thread state is unknown.
The following Figure shows the Windows thread states.

www.installsetupconfig.com
6
While the current operating condition (execution state) of the thread can be one of the following:
1. Unknown
2. Other
3. Ready
4. Running
5. Blocked
6. Suspended Blocked
7. Suspended Ready
From the managed (.NET) documentation, a thread is always in at least one of the possible states in
the ThreadState enumeration, and can be in multiple states at the same time. The ThreadState
enumeration members are:
Member name Description
Running The thread has been started, it is not blocked, and there is no pending
ThreadAbortException()
StopRequested The thread is being requested to stop. This is for internal use only.
SuspendRequested The thread is being requested to suspend.
Background
The thread is being executed as a background thread, as opposed to a
foreground thread. This state is controlled by setting the
Thread..::.IsBackground property.
Ready
Waiting Transition
Standby
Running
Terminated
Picked to run Switching
Preempted
Unblock
Stop/terminate
Unblock/Resume Resource
available
Runnable States
Not Runnable States
Resource available
Resource unavailable
Block/
Suspend
Windows Thread States
Scheduler

www.installsetupconfig.com
7
Unstarted The Thread..::.Start method has not been invoked on the thread.
Stopped The thread has stopped.
WaitSleepJoin
The thread is blocked. This could be the result of calling Thread..::.Sleep or
Thread..::.Join, of requesting a lock — for example, by calling
Monitor..::.Enter or Monitor..::.Wait — or of waiting on a thread
synchronization object such as ManualResetEvent.
Suspended The thread has been suspended.
AbortRequested
The Thread..::.Abort method has been invoked on the thread, but the thread has
not yet received the pending System.Threading..::.ThreadAbortException that
will attempt to terminate it.
Aborted The thread state includes AbortRequested and the thread is now dead, but its
state has not yet changed to Stopped.
ThreadState enumeration defines a set of all possible execution states for threads. Once a thread is
created, it is in at least one of the states until it terminates. Threads created within the common
language runtime (CLR) are initially in the Unstarted state, while external threads that come into the
runtime are already in the Running state. An Unstarted thread is transitioned into the Running state
by calling Start(). Not all combinations of ThreadState values are valid; for example, a thread cannot
be in both the Aborted and Unstarted states. The following table shows the example of the actions
that cause a change of state.
Action ThreadState
A thread is created within the common language runtime. Unstarted
A thread calls Start() Unstarted
The thread starts running. Running
The thread calls Sleep() WaitSleepJoin
The thread calls Wait() on another object. WaitSleepJoin
The thread calls Join() on another thread. WaitSleepJoin
Another thread calls Interrupt() Running
Another thread calls Suspend() SuspendRequested
The thread responds to a Suspend() request. Suspended
Another thread calls Resume() Running
Another thread calls Abort() AbortRequested
The thread responds to a Abort() request. Stopped
A thread is terminated. Stopped
In addition to the states noted above, there is also the Background state, which indicates whether the
thread is running in the background or foreground.
A thread can be in more than one state at a given time. For example, if a thread is blocked on a call
to Wait(), and another thread calls Abort() on the blocked thread, the blocked thread will be in both
the WaitSleepJoin and the AbortRequested states at the same time. In this case, as soon as the thread

www.installsetupconfig.com
8
returns from the call to Wait() or is interrupted, it will receive the ThreadAbortException() to begin
aborting.
In this tutorial we will concentrate on the running state. When there are more than one threads, we
need mechanisms to synchronize the threads so that all the threads will be served 'equally' by
processor(s) and all the threads will have a fair access to the shared and limited resources.
Wait Functions
The wait functions allow a thread to block its own execution. The wait functions do not return until
the specified criteria have been met. The type of wait function determines the set of criteria used.
When a wait function is called, it checks whether the wait criteria have been met. If the criteria have
not been met, the calling thread enters the wait state until the conditions of the wait criteria have
been met or the specified time-out interval elapses. There are four types of wait functions:
1. single-object
2. multiple-object
3. alertable
4. registered
Single-object Wait Functions
The SignalObjectAndWait(), WaitForSingleObject(), and WaitForSingleObjectEx() functions
require a handle to one synchronization object. These functions return when one of the following
occurs:
1. The specified object is in the signaled state.
2. The time-out interval elapses. The time-out interval can be set to INFINITE to specify that
the wait will not time out.
The SignalObjectAndWait() function enables the calling thread to atomically (atomic operation - an
operation that can't be interrupted is called) set the state of an object to signaled and wait for the
state of another object to be set to signaled.
Multiple-object Wait Functions
The WaitForMultipleObjects(), WaitForMultipleObjectsEx(), MsgWaitForMultipleObjects(), and
MsgWaitForMultipleObjectsEx() functions enable the calling thread to specify an array containing
one or more synchronization object handles. These functions return when one of the following
occurs:

www.installsetupconfig.com
9
1. The state of any one of the specified objects is set to signaled or the states of all objects have
been set to signaled. You control whether one or all of the states will be used in the function
call.
2. The time-out interval elapses. The time-out interval can be set to INFINITE to specify that
the wait will not time out.
The MsgWaitForMultipleObjects() and MsgWaitForMultipleObjectsEx() function allow you to
specify input event objects in the object handle array. This is done when you specify the type of
input to wait for in the thread's input queue. For example, a thread could use
MsgWaitForMultipleObjects() to block its execution until the state of a specified object has been set
to signaled and there is mouse input available in the thread's input queue. The thread can use the
GetMessage() or PeekMessage() function to retrieve the input.
When waiting for the states of all objects to be set to signaled, these multiple-object functions do not
modify the states of the specified objects until the states of all objects have been set signaled. For
example, the state of a mutex object can be signaled, but the calling thread does not get ownership
until the states of the other objects specified in the array have also been set to signaled. In the
meantime, some other thread may get ownership of the mutex object, thereby setting its state to
nonsignaled.
When waiting for the state of a single object to be set to signaled, these multiple-object functions
check the handles in the array in order starting with index 0, until one of the objects is signaled. If
multiple objects become signaled, the function returns the index of the first handle in the array
whose object was signaled.
Alertable Wait Functions
The MsgWaitForMultipleObjectsEx(), SignalObjectAndWait(), WaitForMultipleObjectsEx(), and
WaitForSingleObjectEx() functions differ from the other wait functions in that they can optionally
perform an alertable wait operation. In an alertable wait operation, the function can return when
the specified conditions are met, but it can also return if the system queues an I/O completion
routine or an APC for execution by the waiting thread.
Registered Wait Functions
The RegisterWaitForSingleObject() function differs from the other wait functions in that the wait
operation is performed by a thread from the thread pool. When the specified conditions are met, the
callback function is executed by a worker thread from the thread pool.
By default, a registered wait operation is a multiple-wait operation. The system resets the timer
every time the event is signaled (or the time-out interval elapses) until you call the
UnregisterWaitEx() function to cancel the operation. To specify that a wait operation should be
executed only once, set the dwFlags parameter of RegisterWaitForSingleObject() to
WT_EXECUTEONLYONCE.
www.installsetupconfig.com
10
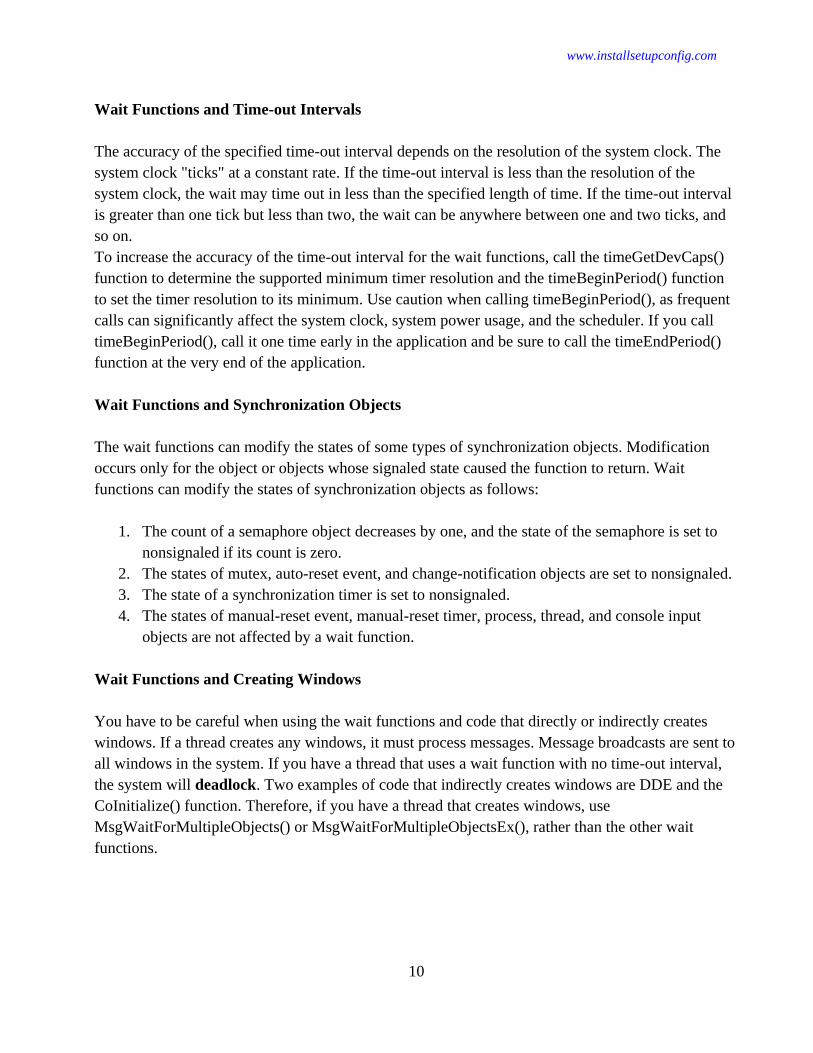
Wait Functions and Time-out Intervals
The accuracy of the specified time-out interval depends on the resolution of the system clock. The
system clock "ticks" at a constant rate. If the time-out interval is less than the resolution of the
system clock, the wait may time out in less than the specified length of time. If the time-out interval
is greater than one tick but less than two, the wait can be anywhere between one and two ticks, and
so on.
To increase the accuracy of the time-out interval for the wait functions, call the timeGetDevCaps()
function to determine the supported minimum timer resolution and the timeBeginPeriod() function
to set the timer resolution to its minimum. Use caution when calling timeBeginPeriod(), as frequent
calls can significantly affect the system clock, system power usage, and the scheduler. If you call
timeBeginPeriod(), call it one time early in the application and be sure to call the timeEndPeriod()
function at the very end of the application.
Wait Functions and Synchronization Objects
The wait functions can modify the states of some types of synchronization objects. Modification
occurs only for the object or objects whose signaled state caused the function to return. Wait
functions can modify the states of synchronization objects as follows:
1. The count of a semaphore object decreases by one, and the state of the semaphore is set to
nonsignaled if its count is zero.
2. The states of mutex, auto-reset event, and change-notification objects are set to nonsignaled.
3. The state of a synchronization timer is set to nonsignaled.
4. The states of manual-reset event, manual-reset timer, process, thread, and console input
objects are not affected by a wait function.
Wait Functions and Creating Windows
You have to be careful when using the wait functions and code that directly or indirectly creates
windows. If a thread creates any windows, it must process messages. Message broadcasts are sent to
all windows in the system. If you have a thread that uses a wait function with no time-out interval,
the system will deadlock. Two examples of code that indirectly creates windows are DDE and the
CoInitialize() function. Therefore, if you have a thread that creates windows, use
MsgWaitForMultipleObjects() or MsgWaitForMultipleObjectsEx(), rather than the other wait
functions.

www.installsetupconfig.com
11
Synchronization Objects
A synchronization object is an object whose handle can be specified in one of the wait
functions to coordinate the execution of multiple threads. More than one process can have a
handle to the same synchronization object, making interprocess synchronization possible. The
following object types are provided exclusively for synchronization.
Type Description
Event
Notifies one or more waiting threads that an event has occurred. Events are a way of
signaling one thread from another, allowing one thread to wait or sleep until it’s
signaled by another thread.
Mutex Can be owned by only one thread at a time, enabling threads to coordinate mutually
exclusive access to a shared resource.
Semaphore
Maintains a count between zero and some maximum value, limiting the number of
threads that are simultaneously accessing a shared resource. A semaphore is a mutex
that multiple threads can access. It’s like having multiple tokens. Mutex is exactly the
same as a semaphore with semaphore value 1.
Waitable
timer Notifies one or more waiting threads that a specified time has arrived.
Events
Events are a way of signaling one thread from another, allowing one thread to wait or sleep until it’s
signaled by another thread. The following example shows two threads using an event: Thread A on
the left is producing data, and Thread B on the right is consuming data.
The producing thread, Thread A generates some data and puts it in a shared working space. In this
example, the consuming thread, Thread B is sleeping on the event (waiting for the event to trigger).
Thread A Thread B
Event
Shared working space

www.installsetupconfig.com
12
Once the producing thread has finished writing data, it triggers the event.
This signals the consuming thread, Thread B, thereby waking it up.
Once the consuming thread, Thread B has woken up, it starts doing work. The assumption is that the
producing thread will no longer touch the data.
Thread A Thread B
Event
Shared working space
Data Data Data
Data Data Data Thread A Thread B
Event
Shared working space
Data Data Data Thread A Thread B
Event
Shared working space

www.installsetupconfig.com
13
Mutex and Semaphore
A mutex works like a critical section. You can think of a mutex as a lock that must be grabbed
before execution can continue. Here is an example of three threads that all want access to a shared
resource.
Each of the three threads tries to grab the mutex, but only one thread will be successful.
Data Data Data Thread A Thread B
Event
Shared working space
Protected resource
Thread A
Thread B
Thread C
Mutex
Protected resource
Thread A
Thread B
Thread C
Mutex
Takes
www.installsetupconfig.com
14
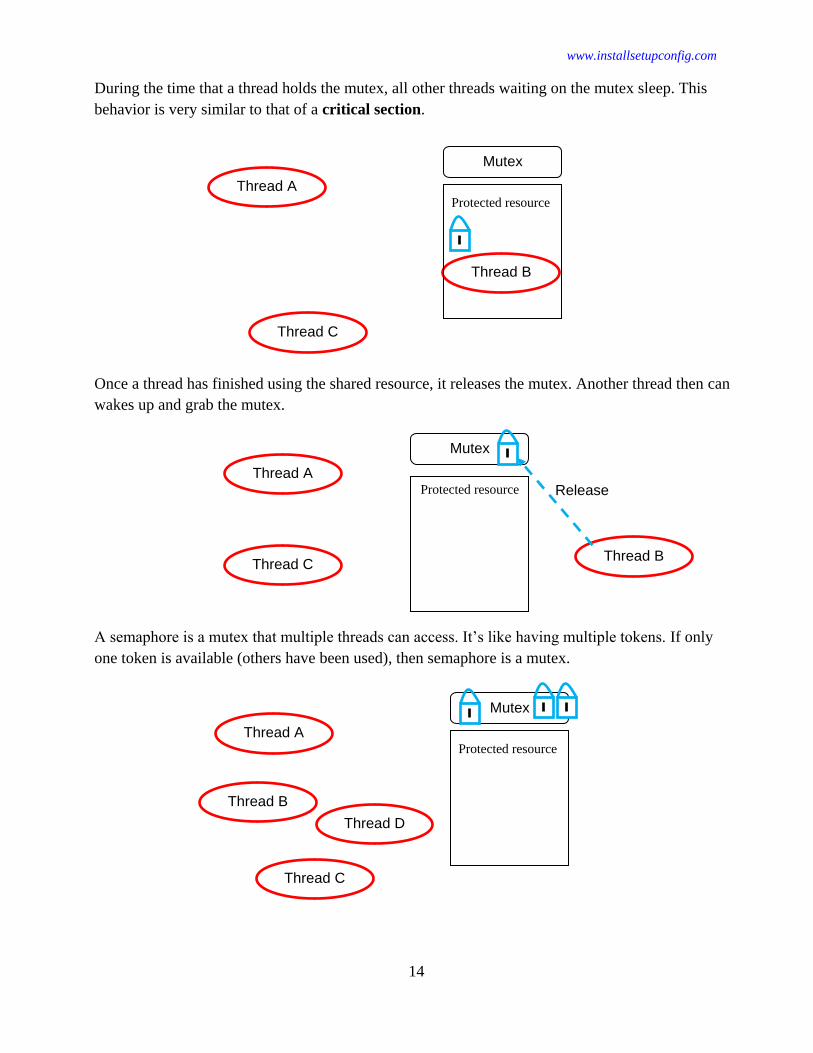
During the time that a thread holds the mutex, all other threads waiting on the mutex sleep. This
behavior is very similar to that of a critical section.
Once a thread has finished using the shared resource, it releases the mutex. Another thread then can
wakes up and grab the mutex.
A semaphore is a mutex that multiple threads can access. It’s like having multiple tokens. If only
one token is available (others have been used), then semaphore is a mutex.
Protected resource
Thread A
Thread B
Thread C
Mutex
Protected resource
Thread A
Thread B Thread C
Mutex
Release
Protected resource
Thread A
Thread B
Thread C
Mutex
Thread D

www.installsetupconfig.com
15
Though available for other uses, the following objects can also be used for synchronization.
Object Description
Change
notification
Created by the FindFirstChangeNotification() function, its state is set to signaled
when a specified type of change occurs within a specified directory or directory
tree.
Console input
Created when a console is created. The handle to console input is returned by the
CreateFile() function when CONIN$ is specified, or by the GetStdHandle()
function. Its state is set to signaled when there is unread input in the console's input
buffer, and set to nonsignaled when the input buffer is empty.
Job
Created by calling the CreateJobObject() function. The state of a job object is set to
signaled when all its processes are terminated because the specified end-of-job time
limit has been exceeded.
Memory
resource
notification
Created by the CreateMemoryResourceNotification() function. Its state is set to
signaled when a specified type of change occurs within physical memory.
Process Created by calling the CreateProcess() function. Its state is set to nonsignaled while
the process is running, and set to signaled when the process terminates.
Thread
Created when a new thread is created by calling the CreateProcess(),
CreateThread(), or CreateRemoteThread() function. Its state is set to nonsignaled
while the thread is running, and set to signaled when the thread terminates.
In some circumstances, you can also use a file, named pipe, or communications device as a
synchronization object; however, their use for this purpose is discouraged. Instead, use
asynchronous I/O and wait on the event object set in the OVERLAPPED structure. It is safer to use
the event object because of the confusion that can occur when multiple simultaneous overlapped
operations are performed on the same file, named pipe, or communications device. In this situation,
there is no way to know which operation caused the object's state to be signaled.
Interprocess Synchronization
Multiple processes can have handles to the same event, mutex, semaphore, or timer object, so these
objects can be used to accomplish interprocess synchronization. The process that creates an object
can use the handle returned by the creation function (CreateEvent(), CreateMutex(),
CreateSemaphore(), or CreateWaitableTimer()). Other processes can open a handle to the object by
using its name, or through inheritance or duplication.
Object Names
Named objects provide an easy way for processes to share object handles. After a process has
created a named event, mutex, semaphore, or timer object, other processes can use the name to call

www.installsetupconfig.com
16
the appropriate function (OpenEvent(), OpenMutex(), OpenSemaphore(), or OpenWaitableTimer())
to open a handle to the object. Name comparison is case sensitive.
The names of event, semaphore, mutex, waitable timer, file-mapping, and job objects share the same
name space. If you try to create an object using a name that is in use by an object of another type,
the function fails and GetLastError() returns ERROR_INVALID_HANDLE. Therefore, when
creating named objects, use unique names and be sure to check function return values for duplicate-
name errors.
If you try to create an object using a name that is in use by an object of same type, the function
succeeds, returning a handle to the existing object, and GetLastError() returns
ERROR_ALREADY_EXISTS. For example, if the name specified in a call to the CreateMutex()
function matches the name of an existing mutex object, the function returns a handle to the existing
object. In this case, the call to CreateMutex() is equivalent to a call to the OpenMutex() function.
Having multiple processes use CreateMutex() for the same mutex is therefore equivalent to having
one process that calls CreateMutex() while the other processes call OpenMutex(), except that it
eliminates the need to ensure that the creating process is started first. When using this technique for
mutex objects, however, none of the calling processes should request immediate ownership of the
mutex. If multiple processes do request immediate ownership, it can be difficult to predict which
process actually gets the initial ownership.
A Terminal Services environment has a global name space for events, semaphores, mutexes,
waitable timers, file-mapping objects, and job objects. In addition, each Terminal Services client
session has its own separate name space for these objects. Terminal Services client processes can
use object names with a "Global\" or "Local\" prefix to explicitly create an object in the global or
session name space. Fast user switching is implemented using Terminal Services sessions (each user
logs into a different session). Kernel object names must follow the guidelines outlined for Terminal
Services so that applications can support multiple users.
Windows 2000: If Terminal Services is not running, the "Global\" and "Local\" prefixes are
ignored. The remainder of the name can contain any character except the backslash character.
Synchronization objects can be created in a private namespace.
Object Inheritance
When you create a process with the CreateProcess() function, you can specify that the process
inherit handles to mutex, event, semaphore, or timer objects using the SECURITY_ATTRIBUTES
structure. The handle inherited by the process has the same access to the object as the original
handle. The inherited handle appears in the handle table of the created process, but you must
communicate the handle value to the created process. You can do this by specifying the value as a
command-line argument when you call CreateProcess(). The created process then uses the
GetCommandLine() function to retrieve the command-line string and convert the handle argument
into a usable handle.
Object Duplication
www.installsetupconfig.com
17
The DuplicateHandle() function creates a duplicate handle that can be used by another specified
process. This method of sharing object handles is more complex than using named objects or
inheritance. It requires communication between the creating process and the process into which the
handle is duplicated. The necessary information (the handle value and process identifier) can be
communicated by any of the interprocess communication methods, such as named pipes or named
shared memory.
Other Synchronization Mechanisms
The following are other synchronization mechanisms that available in Windows APIs:
1. Overlapped input and output
2. Asynchronous procedure calls
3. Critical section objects
4. Condition variables
5. Slim reader/writer locks
6. One-time initialization
7. Interlocked variable access
8. Interlocked singly linked lists
9. Timer queues
10. The MemoryBarrier macro
Synchronization and Overlapped Input and Output
You can perform either synchronous or asynchronous (also called overlapped) I/O operations on
files, named pipes, and serial communications devices. The WriteFile(), ReadFile(),
DeviceIoControl(), WaitCommEvent(), ConnectNamedPipe(), and TransactNamedPipe() functions
can be performed either synchronously or asynchronously. The ReadFileEx() and WriteFileEx()
functions can be performed only asynchronously.
When a function is executed synchronously, it does not return until the operation has been
completed. This means that the execution of the calling thread can be blocked for an indefinite
period while it waits for a time-consuming operation to finish. Functions called for overlapped
operation can return immediately, even though the operation has not been completed. This enables a
time-consuming I/O operation to be executed in the background while the calling thread is free to
perform other tasks. For example, a single thread can perform simultaneous I/O operations on
different handles, or even simultaneous read and write operations on the same handle.
To synchronize its execution with the completion of the overlapped operation, the calling thread
uses the GetOverlappedResult() function or one of the wait functions to determine when the
overlapped operation has been completed. You can also use the HasOverlappedIoCompleted()
macro to poll for completion.

www.installsetupconfig.com
18
To cancel all pending asynchronous I/O operations, use the CancelIoEx() function and provide an
OVERLAPPED structure that specifies the request to cancel. Use the CancelIo() function to cancel
pending asynchronous I/O operations issued by the calling thread for the specified file handle.
Overlapped operations require a file, named pipe, or communications device that was created with
the FILE_FLAG_OVERLAPPED flag. When a thread calls a function (such as the ReadFile()
function) to perform an overlapped operation, the calling thread must specify a pointer to an
OVERLAPPED structure. (If this pointer is NULL, the function return value may incorrectly
indicate that the operation completed.) All of the members of the OVERLAPPED structure must be
initialized to zero unless an event will be used to signal completion of an I/O operation. If an event
is used, the hEvent member of the OVERLAPPED structure specifies a handle to the allocated event
object. The system sets the state of the event object to nonsignaled when a call to the I/O function
returns before the operation has been completed. The system sets the state of the event object to
signaled when the operation has been completed. An event is needed only if there will be more than
one outstanding I/O operation at the same time. If an event is not used, each completed I/O
operation will signal the file, named pipe, or communications device.
When a function is called to perform an overlapped operation, the operation might be completed
before the function returns. When this happens, the results are handled as if the operation had been
performed synchronously. If the operation was not completed, however, the function's return value
is FALSE, and the GetLastError() function returns ERROR_IO_PENDING. A thread can manage
overlapped operations by either of two methods:
1. Use the GetOverlappedResult() function to wait for the overlapped operation to be
completed.
2. Specify a handle to the OVERLAPPED structure's manual-reset event object in one of the
wait functions and then call GetOverlappedResult() after the wait function returns. The
GetOverlappedResult() function returns the results of the completed overlapped operation,
and for functions in which such information is appropriate; it reports the actual number of
bytes that were transferred.
When performing multiple simultaneous overlapped operations on a single thread, the calling thread
must specify an OVERLAPPED structure for each operation. Each OVERLAPPED structure must
specify a handle to a different manual-reset event object. To wait for any one of the overlapped
operations to be completed, the thread specifies all the manual-reset event handles as wait criteria in
one of the multiple-object wait functions. The return value of the multiple-object wait function
indicates which manual-reset event object was signaled, so the thread can determine which
overlapped operation caused the wait operation to be completed.
It is safer to use a separate event object for each overlapped operation, rather than specify no event
object or reuse the same event object for multiple operations. If no event object is specified in the
OVERLAPPED structure, the system signals the state of the file, named pipe, or communications
device when the overlapped operation has been completed. Thus, you can specify these handles as
synchronization objects in a wait function, though their use for this purpose can be difficult to

www.installsetupconfig.com
19
manage because, when performing simultaneous overlapped operations on the same file, named
pipe, or communications device, there is no way to know which operation caused the object's state
to be signaled.
A thread should not reuse an event with the assumption that the event will be signaled only by that
thread's overlapped operation. An event is signaled on the same thread as the overlapped operation
that is completing. Using the same event on multiple threads can lead to a race condition in which
the event is signaled correctly for the thread whose operation completes first and prematurely for
other threads using that event. Then, when the next overlapped operation completes, the event is
signaled again for all threads using that event, and so on until all overlapped operations are
complete.
Be careful when reusing OVERLAPPED structures. If an application reuses OVERLAPPED
structures on multiple threads and calls GetOverlappedResult() with the bWait parameter set to
TRUE, the application must ensure that the associated event is set before the application reuses the
structure. This can be accomplished by using the WaitForSingleObject() function after calling
GetOverlappedResult() to force the thread to wait until the operation completes. Note that the event
object must be a manual-reset event object. If an autoreset event object is used, calling
GetOverlappedResult() with the bWait parameter set to TRUE causes the function to be blocked
indefinitely.
Asynchronous Procedure Calls
An asynchronous procedure call (APC) is a function that executes asynchronously in the context of
a particular thread. When an APC is queued to a thread, the system issues a software interrupt. The
next time the thread is scheduled, it will run the APC function. An APC generated by the system is
called a kernel-mode APC. An APC generated by an application is called a user-mode APC. A
thread must be in an alertable state to run a user-mode APC.
Each thread has its own APC queue. An application queues an APC to a thread by calling the
QueueUserAPC() function. The calling thread specifies the address of an APC function in the call to
QueueUserAPC(). The queuing of an APC is a request for the thread to call the APC function.
When a user-mode APC is queued, the thread to which it is queued is not directed to call the APC
function unless it is in an alertable state. A thread enters an alertable state when it calls the
SleepEx(), SignalObjectAndWait(), MsgWaitForMultipleObjectsEx(), WaitForMultipleObjectsEx(),
or WaitForSingleObjectEx() function. If the wait is satisfied before the APC is queued, the thread is
no longer in an alertable wait state so the APC function will not be executed. However, the APC is
still queued, so the APC function will be executed when the thread calls another alertable wait
function.
Note that the ReadFileEx(), SetWaitableTimer(), and WriteFileEx() functions are implemented
using an APC as the completion notification callback mechanism.
Synchronization Internals

www.installsetupconfig.com
20
When an I/O request is issued, a structure is allocated to represent the request. This structure is
called an I/O request packet (IRP). With synchronous I/O, the thread builds the IRP, sends it to the
device stack, and waits in the kernel for the IRP to complete. With asynchronous I/O, the thread
builds the IRP and sends it to the device stack. The stack might complete the IRP immediately, or it
might return a pending status indicating that the request is in progress. When this happens, the IRP
is still associated with the thread, so it will be canceled if the thread terminates or calls a function
such as CancelIo(). In the meantime, the thread can continue to perform other tasks while the device
stack continues to process the IRP. There are several ways that the system can indicate that the IRP
has completed:
1. Update the overlapped structure with the result of the operation so the thread can poll to
determine whether the operation has completed.
2. Signal the event in the overlapped structure so a thread can synchronize on the event and be
woken when the operation completes.
3. Queue the IRP to the thread's pending APC so that the thread will execute the APC routine
when it enters an alertable wait state and return from the wait operation with a status
indicating that it executed one or more APC routines.
4. Queue the IRP to an I/O completion port, where it will be executed by the next thread that
waits on the completion port.
Threads that wait on an I/O completion port do not wait in an alertable state. Therefore, if those
threads issue IRPs that are set to complete as APCs to the thread, those IPC completions will not
occur in a timely manner; they will occur only if the thread picks up a request from the I/O
completion port and then happens to enter an alertable wait.
Critical Section Objects
A critical section object provides synchronization similar to that provided by a mutex object, except
that a critical section can be used only by the threads of a single process. Event, mutex, and
semaphore objects can also be used in a single-process application, but critical section objects
provide a slightly faster, more efficient mechanism for mutual-exclusion synchronization (a
processor-specific test and set instruction). Like a mutex object, a critical section object can be
owned by only one thread at a time, which makes it useful for protecting a shared resource from
simultaneous access. Unlike a mutex object, there is no way to tell whether a critical section has
been abandoned.
A critical section is a piece of code that only one thread can execute at a time. If multiple threads try
to enter a critical section, only one can run and the others will sleep. Imagine you have three threads
that all want to enter a critical section.

www.installsetupconfig.com
21
Only one thread can enter the critical section; the other two have to sleep. When a thread sleeps, its
execution is paused and the OS will run some other thread.
Once the thread in the critical section exits, another thread is woken up and allowed to enter the
critical section.
It’s important to keep the code inside a critical section as small as possible. The larger the critical
section the longer it takes to execute, making the wait time longer for any additional threads that
want access.
Critical Section
Thread A
Thread B
Thread C
Critical Section
Thread A
Thread B
Thread C
Critical Section
Thread A
Thread B
Thread C

www.installsetupconfig.com
22
Starting with Windows Server 2003 with Service Pack 1 (SP1), threads waiting on a critical section
do not acquire the critical section on a first-come, first-serve basis. This change increases
performance significantly for most code. However, some applications depend on FIFO ordering and
may perform poorly or not at all on current versions of Windows (for example, applications that
have been using critical sections as a rate-limiter). To ensure that your code continues to work
correctly, you may need to add an additional level of synchronization. For example, suppose you
have a producer thread and a consumer thread that are using a critical section object to synchronize
their work. Create two event objects, one for each thread to use to signal that it is ready for the other
thread to proceed. The consumer thread will wait for the producer to signal its event before entering
the critical section, and the producer thread will wait for the consumer thread to signal its event
before entering the critical section. After each thread leaves the critical section, it signals its event to
release the other thread.
Windows Server 2003 and Windows XP/2000: Threads that are waiting on a critical section are
added to a wait queue; they are woken and generally acquire the critical section in the order in
which they were added to the queue. However, if threads are added to this queue at a fast enough
rate, performance can be degraded because of the time it takes to awaken each waiting thread.
The process is responsible for allocating the memory used by a critical section. Typically, this is
done by simply declaring a variable of type CRITICAL_SECTION. Before the threads of the
process can use it, initialize the critical section by using the InitializeCriticalSection() or
InitializeCriticalSectionAndSpinCount() function.
A thread uses the EnterCriticalSection() or TryEnterCriticalSection() function to request ownership
of a critical section. It uses the LeaveCriticalSection() function to release ownership of a critical
section. If the critical section object is currently owned by another thread, EnterCriticalSection()
waits indefinitely for ownership. In contrast, when a mutex object is used for mutual exclusion, the
wait functions accept a specified time-out interval. The TryEnterCriticalSection() function attempts
to enter a critical section without blocking the calling thread.
When a thread owns a critical section, it can make additional calls to EnterCriticalSection() or
TryEnterCriticalSection() without blocking its execution. This prevents a thread from deadlocking
itself while waiting for a critical section that it already owns. To release its ownership, the thread
must call LeaveCriticalSection() one time for each time that it entered the critical section. There is
no guarantee about the order in which waiting threads will acquire ownership of the critical section.
A thread uses the InitializeCriticalSectionAndSpinCount() or SetCriticalSectionSpinCount()
function to specify a spin count for the critical section object. Spinning means that when a thread
tries to acquire a critical section that is locked, the thread enters a loop, checks to see if the lock is
released, and if the lock is not released, the thread goes to sleep. On single-processor systems, the
spin count is ignored and the critical section spin count is set to 0 (zero). On multiprocessor systems,
if the critical section is unavailable, the calling thread spins dwSpinCount times before performing a
wait operation on a semaphore that is associated with the critical section. If the critical section
becomes free during the spin operation, the calling thread avoids the wait operation.

www.installsetupconfig.com
23
Any thread of the process can use the DeleteCriticalSection() function to release the system
resources that are allocated when the critical section object is initialized. After this function is
called, the critical section object cannot be used for synchronization.
When a critical section object is owned, the only other threads affected are the threads that are
waiting for ownership in a call to EnterCriticalSection(). Threads that are not waiting are free to
continue running.
Condition Variables
Condition variables are synchronization primitives that enable threads to wait until a particular
condition occurs. Condition variables are user-mode objects that cannot be shared across processes.
Condition variables enable threads to atomically release a lock and enter the sleeping state. They can
be used with critical sections or slim reader/writer (SRW) locks. Condition variables support
operations that "wake one" or "wake all" waiting threads. After a thread is woken, it re-acquires the
lock it released when the thread entered the sleeping state. For Windows Server 2003 and
Windows XP/2000, condition variables are not supported. The following are the condition variable
functions.
Condition variable function Description
InitializeConditionVariable() Initializes a condition variable.
SleepConditionVariableCS() Sleeps on the specified condition variable and releases the
specified critical section as an atomic operation.
SleepConditionVariableSRW() Sleeps on the specified condition variable and releases the
specified SRW lock as an atomic operation.
WakeAllConditionVariable() Wakes all threads waiting on the specified condition variable.
WakeConditionVariable() Wakes a single thread waiting on the specified condition variable.
The following pseudocode demonstrates the typical usage pattern of condition variables.
CRITICAL_SECTION CritSection;
CONDITION_VARIABLE ConditionVar;
void PerformOperationOnSharedData()
{
EnterCriticalSection(&CritSection);
// Wait until the predicate is TRUE
while(TestPredicate() == FALSE)
{
SleepConditionVariableCS(&ConditionVar, &CritSection, INFINITE);
}
// The data can be changed safely because we own the critical
// section and the predicate is TRUE
ChangeSharedData();

www.installsetupconfig.com
24
LeaveCriticalSection(&CritSection);
// If necessary, signal the condition variable by calling
// WakeConditionVariable or WakeAllConditionVariable so other
// threads can wake
}
For example, in an implementation of a reader/writer lock, the TestPredicate() function would verify
that the current lock request is compatible with the existing owners. If it is, acquire the lock;
otherwise, sleep.
Condition variables are subject to spurious wakeups (those not associated with an explicit wake) and
stolen wakeups (another thread manages to run before the woken thread). Therefore, you should
recheck a predicate (typically in a while loop) after a sleep operation returns.
You can wake other threads using WakeConditionVariable() or WakeAllConditionVariable() either
inside or outside the lock associated with the condition variable. It is usually better to release the
lock before waking other threads to reduce the number of context switches.
It is often convenient to use more than one condition variable with the same lock. For example, an
implementation of a reader/writer lock might use a single critical section but separate condition
variables for readers and writers.
Slim Reader/Writer (SRW) Locks
Slim reader/writer (SRW) locks enable the threads of a single process to access shared resources;
they are optimized for speed and occupy very little memory.
Reader threads read data from a shared resource whereas writer threads write data to a shared
resource. When multiple threads are reading and writing using a shared resource, exclusive locks
such as a critical section or mutex can become a bottleneck if the reader threads run continuously
but write operations are rare. SRW locks provide two modes in which threads can access a shared
resource:
1. Shared mode grants shared read-only access to multiple reader threads, which enables them
to read data from the shared resource concurrently. If read operations exceed write
operations, this concurrency increases performance and throughput compared to critical
sections.
2. Exclusive mode grants read/write access to one writer thread at a time. When the lock has
been acquired in exclusive mode, no other thread can access the shared resource until the
writer releases the lock.
A single SRW lock can be acquired in either mode; reader threads can acquire it in shared mode
whereas writer threads can acquire it in exclusive mode. There is no guarantee about the order in
which threads that request ownership will be granted ownership; SRW locks are neither fair nor
FIFO.

www.installsetupconfig.com
25
An SRW lock is the size of a pointer. The advantage is that it is fast to update the lock state. The
disadvantage is that very little state information can be stored, so SRW locks cannot be acquired
recursively. In addition, a thread that owns an SRW lock in shared mode cannot upgrade its
ownership of the lock to exclusive mode. The following are the SRW lock functions.
SRW lock function Description
AcquireSRWLockExclusive() Acquires an SRW lock in exclusive mode.
AcquireSRWLockShared() Acquires an SRW lock in shared mode.
InitializeSRWLock() Initialize an SRW lock.
ReleaseSRWLockExclusive() Releases an SRW lock that was opened in exclusive mode.
ReleaseSRWLockShared() Releases an SRW lock that was opened in shared mode.
SleepConditionVariableSRW() Sleeps on the specified condition variable and releases the
specified lock as an atomic operation.
One-Time Initialization
Components are often designed to perform initialization tasks when they are first called, rather than
when they are loaded. The one-time initialization functions ensure that this initialization occurs only
once even when multiple threads may attempt the initialization.
Many applications use the interlocked functions to ensure that only one thread performs the
initialization. It is better to use the one-time initialization functions for the following reasons:
1. They are optimized for speed.
2. They create the appropriate barriers on processor architectures that require them.
3. They support both locked and parallel initialization.
4. They avoid internal locking so the code can operate asynchronously or synchronously.
The initialization process is managed through a one-time initialization structure. This structure
contains data and state information.
One-Time Initialization: Synchronous Mode
The following steps describe one-time initialization in synchronous mode.
1. Initially, the data stored with the initialization structure is NULL.
2. When the first thread successfully calls the InitOnceBeginInitialize() function (without the
INIT_ONCE_ASYNC flag), one-time initialization begins. Subsequent threads that attempt
this initialization are blocked until this initialization completes or fails; if the first thread fails
the next thread is allowed to attempt the initialization and so on. The calling thread should
create a synchronization object and specify it in the lpContext parameter of the
InitOnceComplete() function.

www.installsetupconfig.com
26
Alternatively, the first thread can call the InitOnceExecuteOnce() function to begin one-time
initialization and execute the InitOnceCallback() callback function. The callback function
should return a handle to the synchronization object in its lpContext parameter.
3. If the initialization succeeds, the lpContext handle is stored in the initialization structure.
Subsequent initialization attempts return this context data. If the initialization fails, the data
is NULL.
One-Time Initialization: Asynchronous Mode
The following steps describe one-time initialization in asynchronous mode.
1. Initially, the data stored with the initialization structure is NULL.
2. When the first thread successfully calls the InitOnceBeginInitialize() function with the
INIT_ONCE_ASYNC flag, one-time initialization begins. Concurrent attempts to initiate
initialization do not change the state, but proceed as expected. Each thread should create a
synchronization object and return it in the lpContext parameter of the InitOnceComplete()
function. One thread will succeed in the completion attempt and the others must clean up
their initialization.
3. If initialization succeeds, the lpContext handle is stored in the initialization structure.
Subsequent initialization attempts return this context data.
Interlocked Variable Access
Applications must synchronize access to variables that are shared by multiple threads. Applications
must also ensure that operations on these variables are performed atomically (performed in their
entirety or not at all.)
Simple reads and writes to properly-aligned 32-bit variables are atomic operations. In other words,
you will not end up with only one portion of the variable updated; all bits are updated in an atomic
fashion. However, access is not guaranteed to be synchronized. If two threads are reading and
writing from the same variable, you cannot determine if one thread will perform its read operation
before the other performs its write operation.
Simple reads and writes to properly aligned 64-bit variables are atomic on 64-bit Windows. Reads
and writes to 64-bit values are not guaranteed to be atomic on 32-bit Windows. Reads and writes to
variables of other sizes are not guaranteed to be atomic on any platform.
The Interlocked API
The interlocked functions provide a simple mechanism for synchronizing access to a variable that is
shared by multiple threads. They also perform operations on variables in an atomic manner. The
threads of different processes can use these functions if the variable is in shared memory.

www.installsetupconfig.com
27
The InterlockedIncrement() and InterlockedDecrement() functions combine the steps involved in
incrementing or decrementing a variable into an atomic operation. This feature is useful in a
multitasking operating system, in which the system can interrupt one thread's execution to grant a
slice of processor time to another thread. Without such synchronization, two threads could read the
same value, increment it by 1, and store the new value for a total increase of 1 instead of 2. The
interlocked variable-access functions protect against this kind of error.
The InterlockedExchange() and InterlockedExchangePointer() functions atomically exchange the
values of the specified variables. The InterlockedExchangeAdd() function combines two operations:
adding two variables together and storing the result in one of the variables.
The InterlockedCompareExchange(), InterlockedCompare64Exchange128(), and
InterlockedCompareExchangePointer() functions combine two operations: comparing two values
and storing a third value in one of the variables, based on the outcome of the comparison.
The InterlockedAnd(), InterlockedOr(), and InterlockedXor() functions atomically perform AND,
OR, and XOR operations, respectively.
There are functions that are specifically designed to perform interlocked variable access on 64-bit
memory values and addresses, and are optimized for use on 64-bit Windows. Each of these
functions contains "64" in the name; for example, InterlockedDecrement64() and
InterlockedCompareExchangeAcquire64().
Most of the interlocked functions provide full memory barriers on all Windows platforms. There are
also functions that combine the basic interlocked variable access operations with the acquire and
release memory access semantics supported by certain processors. Each of these functions contains
the word "Acquire" or "Release" in their names; for example, InterlockedDecrementAcquire() and
InterlockedDecrementRelease(). Acquire memory semantics specify that the memory operation
being performed by the current thread will be visible before any other memory operations are
attempted. Release memory semantics specify that the memory operation being performed by the
current thread will be visible after all other memory operations have been completed. These
semantics allow you to force a protected region and release semantics when leaving it.memory
operations to be performed in a specific order. You should use acquire semantics when entering.
Interlocked Singly Linked Lists
An interlocked singly linked list (SList) eases the task of insertion and deletion from a linked list.
SLists are implemented using a nonblocking algorithm to provide atomic synchronization, increase
system performance, and avoid problems such as priority inversion and lock convoys.
SLists are straightforward to implement and use in 32-bit code. However, it is challenging to
implement them in 64-bit code because the amount of data exchangeable by the native interlocked
exchange primitives is not double the address size, as it is in 32-bit code. Therefore, SLists enable
porting high-end scalable algorithms to Windows.
Applications can use SLists by calling the InitializeSListHead() function to initialize the head of the
list. To insert items into the list, use the InterlockedPushEntrySList() function. To delete items from
the list, use the InterlockedPopEntrySList() function. The following table lists the SList functions.

www.installsetupconfig.com
28
Function Description
InitializeSListHead() Initializes the head of a singly linked list.
InterlockedFlushSList() Flushes the entire list of items in a singly linked list.
InterlockedPopEntrySList() Removes an item from the front of a singly linked list.
InterlockedPushEntrySList() Inserts an item at the front of a singly linked list.
QueryDepthSList() Retrieves the number of entries in the specified singly linked list.
Timer Queues
The CreateTimerQueue() function creates a queue for timers. Timers in this queue, known as timer-
queue timers, are lightweight objects that enable you to specify a callback function to be called
when the specified due time arrives. The wait operation is performed by a thread in the thread pool.
To add a timer to the queue, call the CreateTimerQueueTimer() function. To update a timer-queue
timer, call the ChangeTimerQueueTimer() function. You can specify a callback function to be
executed by a worker thread from the thread pool when the timer expires.
To cancel a pending timer, call the DeleteTimerQueueTimer() function. When you are finished with
the queue of timers, call the DeleteTimerQueueEx() function to delete the timer queue. Any pending
timers in the queue are canceled and deleted.
Concurrency and Race Conditions
Race condition happens in many cases not just for threads and processes. A race condition occurs
when two threads access a shared variable at the same time (concurrent). The first thread reads or
accesses the variable, and at the 'same' time the second thread reads the same value from the
variable. Then the first thread and second thread perform their operations such as write, on the same
value, and they race to see which thread can write the value last to the shared variable. The value of
the thread that writes its value last is preserved, because the thread is writing over the value that the
previous thread wrote and of course the first thread which wrote first will have incorrect result
though the process was completed successfully.
Each thread is allocated a predefined period of time to execute on a processor using such as round
robin, interleaving and other methods. When the time slice that is allocated for the thread expires,
the thread's context is saved until its next turn on the processor (context switching), and the
processor begins the execution of the next thread.
The reason for this is that the operating system decides which thread gets executed first. The order
and timing in which the threads start are not all that important. So, a thread that is given 'least
priority' for example, by the operating system gets executed last. The most common symptom of a
race condition is unpredictable values of variables that are shared between multiple threads. This
results from the unpredictability of the order in which the threads execute. Sometime one thread
wins, and sometime the other thread wins. At other times, execution works correctly. Also, if each
thread is executed separately, the variable value behaves correctly. The race condition is a well
known problem that is very difficult to debug. The following Figure tries to demonstrate the race

www.installsetupconfig.com
29
condition, showing some possible interleaving of threads will results in an undesired final
computation values.
Can you imagine the result if there are more than two threads which are racing each other to access
the shared resources such as in multithreading?
Race Condition Program Example
The following code example tries to demonstrate the race condition (without any synchronization
mechanism).
Create a new empty Win32 console application project. Give a suitable project name and change the
project location if needed.
Shared var = 10
Thread A reads Thread B reads
Shared var = 20 Shared var = 15
Shared var = 20
Shared var = 15
Write/update to
20 (Add 10)
Re-write/update
to 15 (Add 5)
Final value
20 or 25? 15 or 25? Expected final value?

www.installsetupconfig.com
30
Then, add the source file and give it a suitable name.
Next, add the following source code.

www.installsetupconfig.com
31
#include <windows.h>
#include <stdio.h>
const DWORD numThreads = 4;
DWORD WINAPI helloFunc(LPVOID arg)
{
// The call to the wprintf() will affect the thread time execution
wprintf(L"Retard program, I'm thread %u\n", GetCurrentThreadId());
// This is a dummy sleep to simulate tasks to be completed.
// The value also will affect the thread time execution
// You may want to test different Sleep() values...
Sleep(1000);
return 0;
}
int wmain()
{
HANDLE hThread[numThreads];
DWORD dwThreadID, dwEvent, i;
for(int i=0;i<numThreads;i++)
{
hThread[i] =
CreateThread(NULL,0,(LPTHREAD_START_ROUTINE)helloFunc,(LPVOID)dwThreadID,0,&dwTh
readID);
if(hThread[i] != NULL)
wprintf(L"CreateThread() is OK, thread ID is %u\n",
dwThreadID);
else
wprintf(L"CreateThread() failed, error %u\n",GetLastError());
}
// Waits until one or all of the specified objects are
// in the signaled state or the time-out interval elapses.
// 3rd param - TRUE, the function returns when the state of all objects in
the lpHandles array is signaled.
// If FALSE, the function returns when the state of any one of
// the objects is set to signaled. In the latter case, the return value
// indicates the object whose state caused the function to return.
// 4th param - If INFINITE, the function will
// return only when the specified objects are signaled.
dwEvent = WaitForMultipleObjects(numThreads,hThread,FALSE,INFINITE);
wprintf(L"\n");
switch (dwEvent)
{
// hThread[0] was signaled
case WAIT_OBJECT_0 + 0:
// TODO: Perform tasks required by this event
wprintf(L"First event was signaled...\n");
break;
// hThread[1] was signaled
case WAIT_OBJECT_0 + 1:
// TODO: Perform tasks required by this event

www.installsetupconfig.com
32
wprintf(L"Second event was signaled...\n");
break;
// hThread[2] was signaled
case WAIT_OBJECT_0 + 2:
// TODO: Perform tasks required by this event
wprintf(L"Third event was signaled...\n");
break;
// hThread[3] was signaled
case WAIT_OBJECT_0 + 3:
// TODO: Perform tasks required by this event
wprintf(L"Fourth event was signaled...\n");
break;
case WAIT_TIMEOUT:
wprintf(L"Wait timed out...\n");
break;
// Return value is invalid.
default:
wprintf(L"Wait error %d\n", GetLastError());
ExitProcess(0);
}
wprintf(L"\n");
for(i = 0;i<4;i++)
{
if(CloseHandle(hThread[i]) != 0)
wprintf(L"Closing the hThread[%d] handle is OK...\n", i);
else
wprintf(L"Failed to close the hThread[%d] handle, error
%u...\n", GetLastError());
}
return 0;
}
Build and run the project. The following are the sample outputs when the program was run many
times.

www.installsetupconfig.com
33
The following are sample outputs when we change the Sleep(1000); to the smaller value,
Sleep(500);

www.installsetupconfig.com
34
By editing the following part, the output should be clearer.
…
… for(int i=0;i<numThreads;i++)
{
hThread[i] =
CreateThread(NULL,0,(LPTHREAD_START_ROUTINE)helloFunc,(LPVOID)dwThreadID,0,&dwTh
readID);
if(hThread[i] != NULL)
wprintf(L"CreateThread() is OK, #%d thread ID is %u\n", i,
dwThreadID);
else
wprintf(L"CreateThread() failed, error %u\n",GetLastError());
}
…
…
The following screenshot is a sample output.

www.installsetupconfig.com
35
Next, add/edit some part of the code as shown below, demonstrating the threads is doing some tasks
on the global variable x.
#include <windows.h>
#include <stdio.h>
// Global variable
// May use the 'volatile' keyword instead of 'const' to avoid
// the compiler optimization especially for the Release version
const DWORD numThreads = 4;
DWORD x = 0;
DWORD WINAPI helloFunc(DWORD arg)
{
// The call to the wprintf() will affect the thread time execution
wprintf(L"Thread %u, arg = %u\n", GetCurrentThreadId(), arg);
// Try updating the global variable, x
x = x + arg;
wprintf(L"x = %u\n", x);
// This is a dummy sleep to simulate tasks to be completed.
// The value also will affect the thread time execution
// You may want to test different Sleep() values...
Sleep(1000);
return 0;
}
int wmain()
{
HANDLE hThread[numThreads];
DWORD dwThreadID, dwEvent, i;
for(int i=0;i<numThreads;i++)
{
hThread[i] =
CreateThread(NULL,0,(LPTHREAD_START_ROUTINE)helloFunc,(LPVOID)i,0,&dwThreadID);
if(hThread[i] != NULL)
wprintf(L"CreateThread() is OK, #%d thread ID is %u\n", i,
dwThreadID);

www.installsetupconfig.com
36
else
wprintf(L"CreateThread() failed, error %u\n",GetLastError());
}
// Waits until one or all of the specified objects are
// in the signaled state or the time-out interval elapses.
// 3rd param - TRUE, the function returns when the state of all objects in
the lpHandles array is signaled.
// If FALSE, the function returns when the state of any one of
// the objects is set to signaled. In the latter case, the return value
// indicates the object whose state caused the function to return.
// 4th param - If INFINITE, the function will
// return only when the specified objects are signaled.
dwEvent = WaitForMultipleObjects(numThreads,hThread,FALSE,INFINITE);
wprintf(L"\n");
switch (dwEvent)
{
// hThread[0] was signaled
case WAIT_OBJECT_0 + 0:
// TODO: Perform tasks required by this event
wprintf(L"First event was signaled...\n");
break;
// hThread[1] was signaled
case WAIT_OBJECT_0 + 1:
// TODO: Perform tasks required by this event
wprintf(L"Second event was signaled...\n");
break;
// hThread[2] was signaled
case WAIT_OBJECT_0 + 2:
// TODO: Perform tasks required by this event
wprintf(L"Third event was signaled...\n");
break;
// hThread[3] was signaled
case WAIT_OBJECT_0 + 3:
// TODO: Perform tasks required by this event
wprintf(L"Fourth event was signaled...\n");
break;
case WAIT_TIMEOUT:
wprintf(L"Wait timed out...\n");
break;
// Return value is invalid.
default:
wprintf(L"Wait error %d\n", GetLastError());
ExitProcess(0);
}
wprintf(L"\n");
for(i = 0;i<4;i++)
{
if(CloseHandle(hThread[i]) != 0)
wprintf(L"Closing the hThread[%d] handle is OK...\n", i);
else
wprintf(L"Failed to close the hThread[%d] handle, error
%u...\n", GetLastError());
}
return 0;

www.installsetupconfig.com
37
}
Rebuild and re-run the program several times. The following screenshots show the sample outputs.

www.installsetupconfig.com
38

www.installsetupconfig.com
39

www.installsetupconfig.com
40
Can you see the 'funny' outputs mainly the values of the global variable x? The outputs are not
consistent, non-deterministic and time sensitive. Sometimes the outputs are in the sequence as
expected; however, many times the outputs are not as expected. Keep in mind that the program
(thread execution) runs without 'error'.
Concurrency, Deadlocks and Livelocks
Liveness

www.installsetupconfig.com
41
A concurrent application's ability to execute in a timely manner is known as its liveness. The most
common kind of liveness problems in this case are deadlock, starvation and livelock.
A deadlock occurs when two threads each lock a different variable at the same time and then try to
lock the variable that the other thread already locked. As a result, each thread stops executing and
waits for the other thread to release the variable. Because each thread is holding the variable that the
other thread wants, nothing occurs, and the threads remain deadlocked.
As an example, deadlock happens when a thread A is holding or locking shared resource and need
other resource to continue while thread B is locking or holding the other shared resource needed by
thread A while requesting the shared resource which hold by thread A. In simple word, a thread that
holds one resource that requested by others and at the same time request resources hold by the other
party and at the end two or more threads stop and wait for each other. Incorrect use of
synchronization primitives such as mutex and semaphores objects can lead to deadlock. Deadlocks
can be considered as a specific kind of race condition.
A common symptom of deadlock is that the program or group of threads stops responding. This is
also known as a hang. At least two threads are each waiting for a variable that the other thread
locked. The threads do not proceed, because neither thread will release its variable until it gets the
other variable. The whole program can hang if the program is waiting on one or both of those
threads to complete execution.
This type of deadlock is commonly encountered in multithreaded applications. A process with two
or more threads can enter deadlock when the following three conditions hold:
1. Threads that are already holding locks request new locks.
2. The requests for new locks are made concurrently.
3. Two or more threads form a circular chain in which each thread waits for a lock which is
held by the next thread in the chain.
Here is another simple example of a deadlock condition:
Thread A
Resource 1
Thread B
Resource 2
Hold Hold Request
Request
Continue
Continue

www.installsetupconfig.com
42
1. Thread 1 holds lock A and requests lock B.
2. Thread 2 holds lock B and requests lock A.
A deadlock can be just a potential deadlock or an actual deadlock and they are distinguished as
follows:
1. A potential deadlock does not necessarily occur in a given run, but can occur in any
execution of the program depending on the scheduling of threads and the timing of lock
requests by the threads.
2. An actual deadlock is one that occurs during the execution of a program. An actual deadlock
causes the threads involved to hang, but may or may not cause the whole process to hang.
Deadlock Example - The Dining Philosophers
The following Figure shows the arrangement of the Philosophers around the table with bowls and
chopsticks.
Five philosophers, numbered zero to four, are sitting at a round table, thinking. As time passes,
different individuals become hungry and decide to eat. There is a platter of noodles on the table but
each philosopher only has one chopstick to use. In order to eat, they must share chopsticks. The
chopstick to the left of each philosopher (as they sit facing the table) has the same number as that
philosopher. Each philosopher first reaches for his own chopstick which is the one with his number.
When he has his assigned chopstick, he reaches for the chopstick assigned to his neighbor. After he
has both chopsticks, he can eat. After eating, he returns the chopsticks to their original positions on
the table, one on either side. The process is repeated until there are no more noodles to be eaten.
p0
c0
c1
c2
c3
c4
p1
p2
p3
p4

www.installsetupconfig.com
43
An actual deadlock occurs when every philosopher is holding his own chopstick and waiting for the
one from his neighbor to become available:
1. Philosopher zero is holding chopstick zero, but is waiting for chopstick one.
2. Philosopher one is holding chopstick one, but is waiting for chopstick two.
3. Philosopher two is holding chopstick two, but is waiting for chopstick three.
4. Philosopher three is holding chopstick three, but is waiting for chopstick four.
5. Philosopher four is holding chopstick four, but is waiting for chopstick zero.
In this situation, nobody can eat and the philosophers are in a deadlock.
Deadlock and Critical Section Program Example
The following program example uses critical section to demonstrate the deadlock situation. Keep in
mind that other synchronization objects also will demonstrates the deadlock situation if not used
properly.
Create a new empty Win32 console application project. Give a suitable project name and change the
project location if needed.
Then, add the source file and give it a suitable name.

www.installsetupconfig.com
44
Next, add the following source code.
#include <windows.h>
#include <stdio.h>
// Global var
CRITICAL_SECTION csA, csB;
LONG WINAPI ThreadFunc(LONG);
int main(void)
{
HANDLE hThread;
DWORD dwThreadID;
wprintf(L"The current process ID is %u\n", GetCurrentProcessId());
// The main thread, Thread1...
wprintf(L"The current thread ID is %u\n", GetCurrentThreadId());
wprintf(L"\n");
// Initializes a critical section objects
// This function does not return a value
InitializeCriticalSection(&csA);
InitializeCriticalSection(&csB);
// Creates a thread to execute within the virtual address space of the
calling process (main()).
hThread =
CreateThread(NULL,0,(LPTHREAD_START_ROUTINE)ThreadFunc,NULL,0,&dwThreadID);

www.installsetupconfig.com
45
if(hThread != NULL)
wprintf(L"CreateThread() is OK, thread ID is %u\n", dwThreadID);
else
wprintf(L"CreateThread() failed, error %u\n", GetLastError());
// Closes the open thread handle.
if(CloseHandle(hThread) != 0)
wprintf(L"hThread handle was successfully closed!\n");
else
wprintf(L"Failed to close hThread handle, error %u\n",
GetLastError());
wprintf(L"\n");
// While true...
while(1)
{
// Waits for ownership of the specified critical section object.
// The function returns when the calling thread is granted
ownership.
// This function does not return a value.
EnterCriticalSection(&csA);
wprintf(L"Thread1 (%u) has entered Critical Section A but not B.\n",
GetCurrentThreadId());
EnterCriticalSection(&csB);
wprintf(L"Thread1 (%u) has entered Critical Section A and B!\n",
GetCurrentThreadId());
// Releases ownership of the specified critical section object.
// This function does not return a value.
LeaveCriticalSection(&csB);
wprintf(L"Thread1 (%u) has left Critical Section B but still owns
A.\n", GetCurrentThreadId());
LeaveCriticalSection(&csA);
wprintf(L"Thread1 (%u) has left both critical sections, A and
B...\n", GetCurrentThreadId());
Sleep(50);
};
return 0;
}
LONG WINAPI ThreadFunc(LONG lParam)
{
// The child thread, Thread2...
// While true
while(1)
{
EnterCriticalSection(&csB);
wprintf(L"Thread2 (%u) has entered Critical Section B but not
A.\n", GetCurrentThreadId());
EnterCriticalSection(&csA);
wprintf(L"Thread2 (%u) has entered Critical Section B and
A!\n", GetCurrentThreadId());
LeaveCriticalSection(&csA);
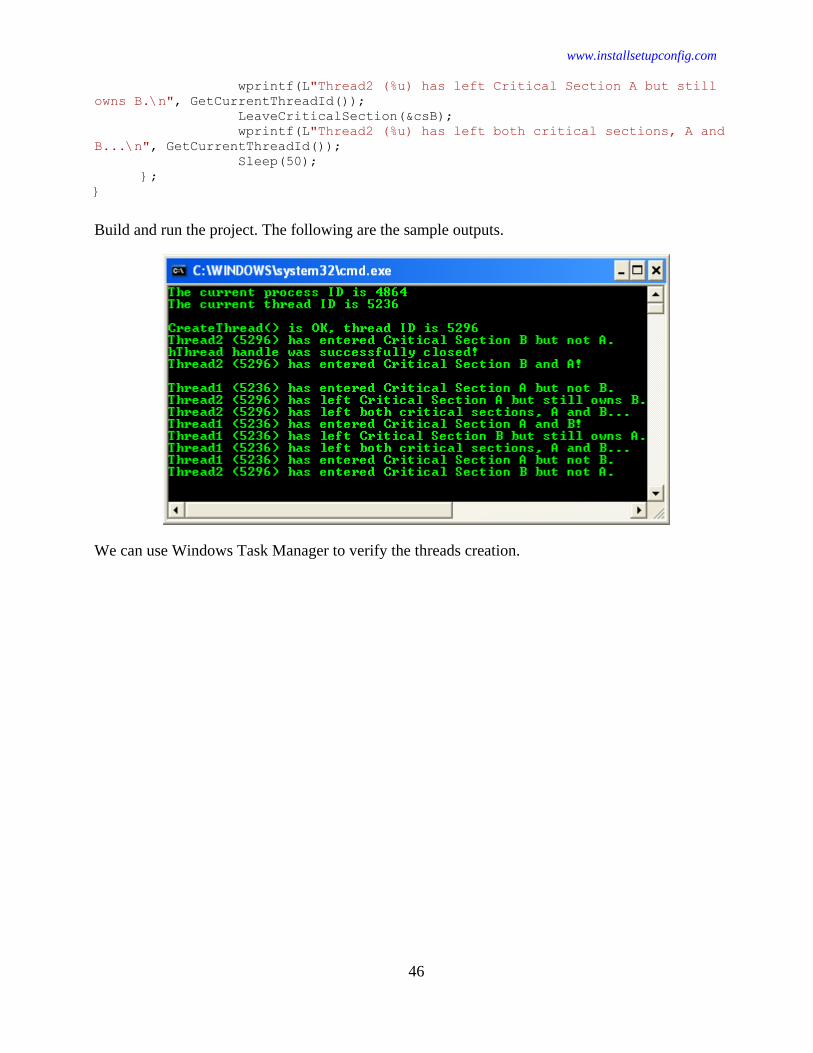
www.installsetupconfig.com
46
wprintf(L"Thread2 (%u) has left Critical Section A but still
owns B.\n", GetCurrentThreadId());
LeaveCriticalSection(&csB);
wprintf(L"Thread2 (%u) has left both critical sections, A and
B...\n", GetCurrentThreadId());
Sleep(50);
};
}
Build and run the project. The following are the sample outputs.
We can use Windows Task Manager to verify the threads creation.

www.installsetupconfig.com
47
The following is another sample output.

www.installsetupconfig.com
48
Thread 1 has claimed critical section A and is suspended because it is waiting to enter critical
section B, whereas Thread 2 owns critical section B and waits for Thread 1 to release critical section
A, which will never happen, of course, because Thread 1 will not release critical section A before
Thread 2 has released critical section B, which will never happen, of course and these processes
repeat.
Starvation
Starvation describes a situation where a thread is unable to gain regular access to shared resources
and is unable to make progress. This happens when shared resources are made unavailable for long
periods by "greedy" threads. For example, suppose an object provides a synchronized method that
often takes a long time to return. If one thread invokes this method frequently, other threads that also
need frequent synchronized access to the same object will often be blocked.
Livelock
A thread often acts in response to the action of another thread. If the other thread's action is also a
response to the action of another thread, then livelock may result. As with deadlock, livelocked

www.installsetupconfig.com
49
threads are unable to make further progress. However, the threads are not blocked; they are simply
too busy responding to each other to resume work.
A livelock happens when a request for an exclusive lock to use the shared resource is repeatedly
denied because a series of overlapping shared locks keeps interfering and at the end two or more
threads continue to execute, but make no progress in completing their tasks.
Synchronization objects can be used to solve the race condition and deadlock. The solutions always
refer to the code that using safe thread. These issues should be more obvious in the multithreaded
programming.
Student Worksheets
Program Examples on Using Synchronization Objects
The following examples demonstrate how to use the synchronization objects:
1. The WaitForSingleObject()
2. The WaitForMultipleObjects()
3. Again, waiting for Multiple Objects
4. Using Named Objects
5. Using Event Objects
6. Using Mutex Objects
7. Another Mutex Example
8. Using Semaphore Objects
9. Another Semaphore Example
10. Six people with six chopsticks
11. Using Waitable Timer Objects
12. Using Waitable Timers with an Asynchronous Procedure Call
13. Using Critical Section Objects
14. Another Critical Section Program Example
15. More Critical Section Example
16. Using Condition Variables
17. Using One-Time Initialization
18. Synchronous Example
19. Asynchronous Example
20. Using Singly Linked Lists
21. Using Timer Queues
22. The Interlocked Functions Example 1
23. The Interlocked Functions Example 2
24. The Interlocked Functions Example 3

www.installsetupconfig.com
50
When you try the following program examples, observing the outputs, consider the following
information.
1. Multithread means the ability of an OS to support multiple threads of execution within a single
process (in this case, there should be many Program Counters (PC) in the code segment).
2. The traditional program is one thread per process where the main thread starts with main()
process.
3. Keep in mind that only one thread (or PC) is allowed to execute the code segment of the
program at any time.
4. A thread is an execution path in the code segment while OS provides an individual PC for each
execution path.
5. Thread is a kernel object which can be owned by several owners.
6. Each thread when created is owned by two owners, the creator and the thread itself. So, the
reference count is two.
7. Context switching may occurs in the middle of printf()/wprintf() command which may result a
race condition. Context switching may occur in any time.
8. In multithreading, typically we do not have the ability to control the output sequences or
scheduling.
9. The multithreading program becomes concurrent and nondeterministic. Same input to a
concurrent program may generate different outputs.
10. Using many global variables and static variables may result those threads to race each other
hence better to avoid using global variables among threads.
The wait functions are used to block a thread from executing till a kernel object reaches a certain
state. The wait function blocks when the object is in an unsignaled state and resumes when the
object reaches a signaled state.
The signal and unsignaled states are dependent on the object. For example, the unsignaled state of a
thread is when the thread has not yet terminated and in signaled state when it terminates.
The WaitForSingleObject() and WaitForMultipleObjects() are both wait functions. The
WaitForSingleObject() function is passed a handle to single kernel object. The function blocks till
the single kernel object is signaled.
The WaitForMultipleObjects() is used to block on a group of kernel objects. This function can
block till either one of the group of kernel objects is signaled or when all the kernel objects are
signaled. Both functions can accept a time out value. If an object does not reach a signaled state
within a certain amount of time (time out value) both functions return and execution resumes.
The following program demonstrates a primary thread blocking (waiting) till a child thread has
finished execution.
The WaitForSingleObject() Example

www.installsetupconfig.com
51
Create a new empty Win32 console application project. Give a suitable project name and change the
project location if needed.
Then, add the source file and give it a suitable name.

www.installsetupconfig.com
52
Next, add the following source code.
//Primary thread waits till child thread terminates
#include <windows.h>
#include <stdio.h>
//Thread counts till PassVal
void ThreadMain(LONG PassVal)
{
LONG i;
for(i=0;i<PassVal;i++)
{
wprintf(L"ThreadMain() - count #%d\n",i);
}
}
// Main process & thread
int wmain(void)
{
DWORD ThreadID, dwRet;
HANDLE hTh;
// Creates a thread to execute within the virtual address space of the
calling process
hTh=CreateThread(NULL,0,(LPTHREAD_START_ROUTINE)ThreadMain,(LPVOID)10,0,&ThreadI
D);

www.installsetupconfig.com
53
if(hTh==NULL)
{
wprintf(L"CreateThread() failed, error %u\n", GetLastError());
return 1;
}
else
wprintf(L"CreateThread() is OK, thread ID %u\n", ThreadID);
// Blocks/wait till thread terminates
// Waits until the specified object is in the signaled state or
// the time-out interval elapses.
// The INFINITE parameter make the function return only when the object is
signaled
wprintf(L"Waiting the child thread terminates/signaled...\n");
dwRet = WaitForSingleObject(hTh,INFINITE);
wprintf(L"WaitForSingleObject() returns value is 0X%.8X\n", dwRet);
switch(dwRet)
{
case WAIT_ABANDONED:
wprintf(L"Mutex object was not released by the thread that\n"
L"owned the mutex object before the owning thread
terminates...\n");
break;
case WAIT_OBJECT_0:
wprintf(L"The child thread state was signaled!\n");
break;
case WAIT_TIMEOUT:
wprintf(L"Time-out interval elapsed, and the child thread's state is
nonsignaled.\n");
break;
case WAIT_FAILED:
wprintf(L"WaitForSingleObject() failed, error %u\n",
GetLastError());
ExitProcess(0);
}
if(CloseHandle(hTh) != 0)
wprintf(L"hTh's child thread handle was closed succcessfully!\n");
else
wprintf(L"Failed to close hTh child thread handle, error %u\n",
GetLastError());
wprintf(L"Main process & thread ready to exit...\n");
return 0;
}
Build and run the project. The following screenshot is a sample output.

www.installsetupconfig.com
54
The WaitForMultipleObjects() Example
In the next program, a primary threads starts up three threads. Each of threads prints out its name
and some numbers. The primary thread waits till the first thread terminates.
Create a new empty Win32 console application project. Give a suitable project name and change the
project location if needed.
Then, add the source file and give it a suitable name.

www.installsetupconfig.com
55
Next, add the following source code.
// The main thread waits till the first child terminates
#include <windows.h>
#include <stdio.h>
#define THREADCOUNT 3
/////Thread counts till MaxValue
void ThreadMain(WCHAR * ThreadInfo)
{
WCHAR Name[20];
DWORD MaxValue = 5, i;
swscanf_s(ThreadInfo,L"%S %d", Name, sizeof(Name), &MaxValue,
sizeof(MaxValue));
for(i=0;i<MaxValue;++i)
{
wprintf(L"%S - pass #%d\n", Name, i);
}
}
//Main
int wmain(void)
{
HANDLE hThr[THREADCOUNT];
DWORD i, dwRet;
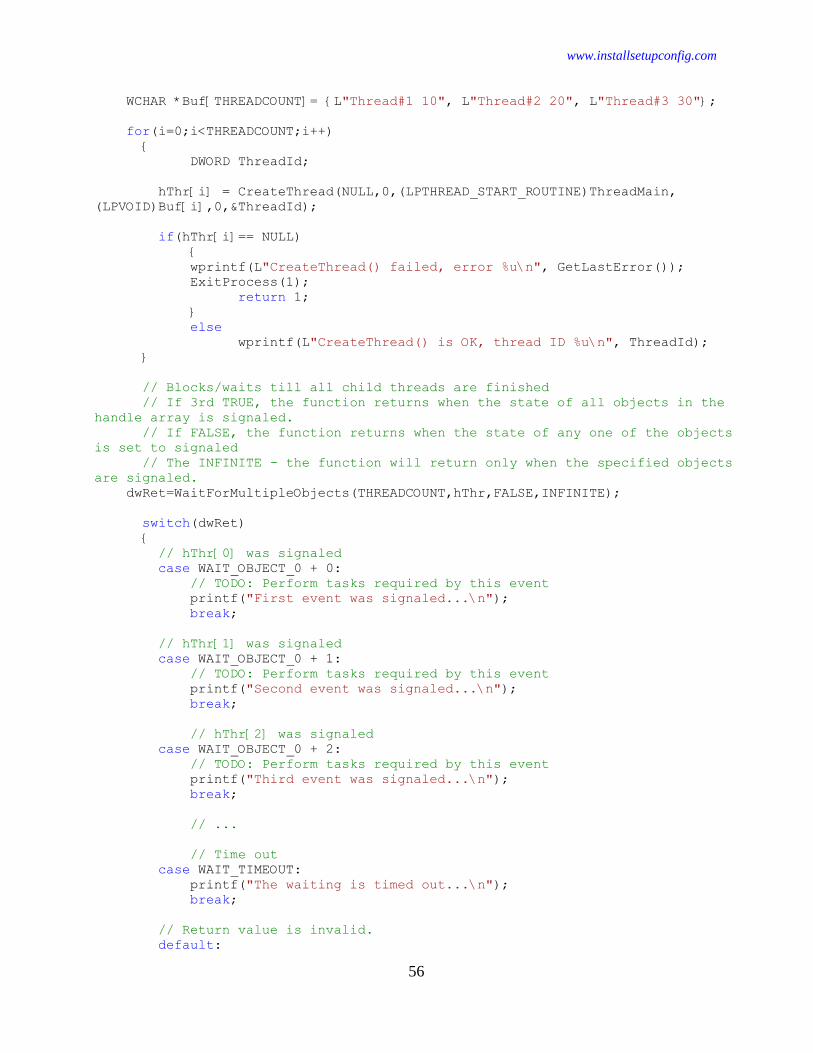
www.installsetupconfig.com
56
WCHAR *Buf[THREADCOUNT]= {L"Thread#1 10", L"Thread#2 20", L"Thread#3 30"};
for(i=0;i<THREADCOUNT;i++)
{
DWORD ThreadId;
hThr[i] = CreateThread(NULL,0,(LPTHREAD_START_ROUTINE)ThreadMain,
(LPVOID)Buf[i],0,&ThreadId);
if(hThr[i]== NULL)
{
wprintf(L"CreateThread() failed, error %u\n", GetLastError());
ExitProcess(1);
return 1;
}
else
wprintf(L"CreateThread() is OK, thread ID %u\n", ThreadId);
}
// Blocks/waits till all child threads are finished
// If 3rd TRUE, the function returns when the state of all objects in the
handle array is signaled.
// If FALSE, the function returns when the state of any one of the objects
is set to signaled
// The INFINITE - the function will return only when the specified objects
are signaled.
dwRet=WaitForMultipleObjects(THREADCOUNT,hThr,FALSE,INFINITE);
switch(dwRet)
{
// hThr[0] was signaled
case WAIT_OBJECT_0 + 0:
// TODO: Perform tasks required by this event
printf("First event was signaled...\n");
break;
// hThr[1] was signaled
case WAIT_OBJECT_0 + 1:
// TODO: Perform tasks required by this event
printf("Second event was signaled...\n");
break;
// hThr[2] was signaled
case WAIT_OBJECT_0 + 2:
// TODO: Perform tasks required by this event
printf("Third event was signaled...\n");
break;
// ...
// Time out
case WAIT_TIMEOUT:
printf("The waiting is timed out...\n");
break;
// Return value is invalid.
default:

www.installsetupconfig.com
57
printf("Waiting failed, error %d...\n", GetLastError());
ExitProcess(0);
}
/*
if(dwRet>=WAIT_OBJECT_0 && dwRet<WAIT_OBJECT_0+THREADCOUNT)
{
printf("The first thread terminated with index: %u\n",dwRet-
WAIT_OBJECT_0);
}
*/
// close all handles to threads
for(i=0;i<THREADCOUNT;i++)
{
if(CloseHandle(hThr[i]) != 0)
wprintf(L"hTr's handle was closed successfully!\n");
else
wprintf(L"Failed to close hTr's handle, error %u\n",
GetLastError());
}
ExitProcess(0);
return 0;
}
Build and run the project. The following screenshot is a sample output.

www.installsetupconfig.com
58
Waiting for Multiple Objects Example
The following example uses the CreateEvent() function to create two event objects and the
CreateThread() function to create a thread. It then uses the WaitForMultipleObjects() function to
wait for the thread to set the state of one of the objects to signaled using the SetEvent() function.
Create a new empty Win32 console application project. Give a suitable project name and change the
project location if needed.

www.installsetupconfig.com
59
Then, add the source file and give it a suitable name.
Next, add the following source code.

www.installsetupconfig.com
60
#include <windows.h>
#include <stdio.h>
HANDLE ghEvents[2];
DWORD WINAPI ThreadProc( LPVOID );
void main()
{
HANDLE hThread;
DWORD i, dwEvent, dwThreadID;
// Create two event objects
wprintf(L"Creating event objects...\n");
for (i = 0; i < 2; i++)
{
ghEvents[i] = CreateEvent(
NULL, // default security attributes
FALSE, // auto-reset event object
FALSE, // initial state is nonsignaled
NULL); // unnamed object
if (ghEvents[i] == NULL)
{
wprintf(L"CreateEvent() #%d failed, error %d\n", i,
GetLastError() );
ExitProcess(0);
}
else
wprintf(L"CreateEvent() #%d is OK!\n", i);
}
// Create a thread
wprintf(L"Creating a thread...\n");
hThread = CreateThread(
NULL, // default security attributes
0, // default stack size
(LPTHREAD_START_ROUTINE) ThreadProc,
NULL, // no thread function arguments
0, // default creation flags
&dwThreadID); // receive thread identifier
if( hThread == NULL )
{
printf("CreateThread() failed, error %d\n", GetLastError());
return;
}
else
wprintf(L"CreateThread() is OK!\n");
// Wait for the thread to signal one of the event objects
wprintf(L"Waiting the thread to signal one of the event objects...\n");
dwEvent = WaitForMultipleObjects(
2, // number of objects in array
ghEvents, // array of objects
FALSE, // wait for any object

www.installsetupconfig.com
61
5000); // five-second wait
// The return value indicates which event is signaled
switch (dwEvent)
{
// ghEvents[0] was signaled
case WAIT_OBJECT_0 + 0:
// TODO: Perform tasks required by this event
wprintf(L"First event was signaled...\n");
break;
// ghEvents[1] was signaled
case WAIT_OBJECT_0 + 1:
// TODO: Perform tasks required by this event
wprintf(L"Second event was signaled...\n");
break;
case WAIT_TIMEOUT:
wprintf(L"Wait timed out...\n");
break;
// Return value is invalid.
default:
wprintf(L"Wait failed with error %d\n", GetLastError());
ExitProcess(0);
}
// Close event handles
wprintf(L"Closing the event handles...\n");
for (i = 0; i < 2; i++)
{
if(CloseHandle(ghEvents[i]) != 0)
wprintf(L"Event's handle #%d was successfully closed...\n",
i);
else
wprintf(L"Fail to close event's handle #%d, error %d\n", i,
GetLastError());
}
}
DWORD WINAPI ThreadProc( LPVOID lpParam )
{
// Set one event to the signaled state
if ( !SetEvent(ghEvents[0]) )
{
wprintf(L"SetEvent() failed, error %d\n", GetLastError());
return -1;
}
else
wprintf(L"SetEvent() is OK!\n");
return 1;
}
Build and run the project. The following screenshot is a sample output.

www.installsetupconfig.com
62
Using Named Objects Program Examples
The following example illustrates the use of object names by creating and opening a named mutex.
First Process
The first process uses the CreateMutex() function to create the mutex object. Note that this function
succeeds even if there is an existing object with the same name.
Create a new empty Win32 console application project. Give a suitable project name and change the
project location if needed.
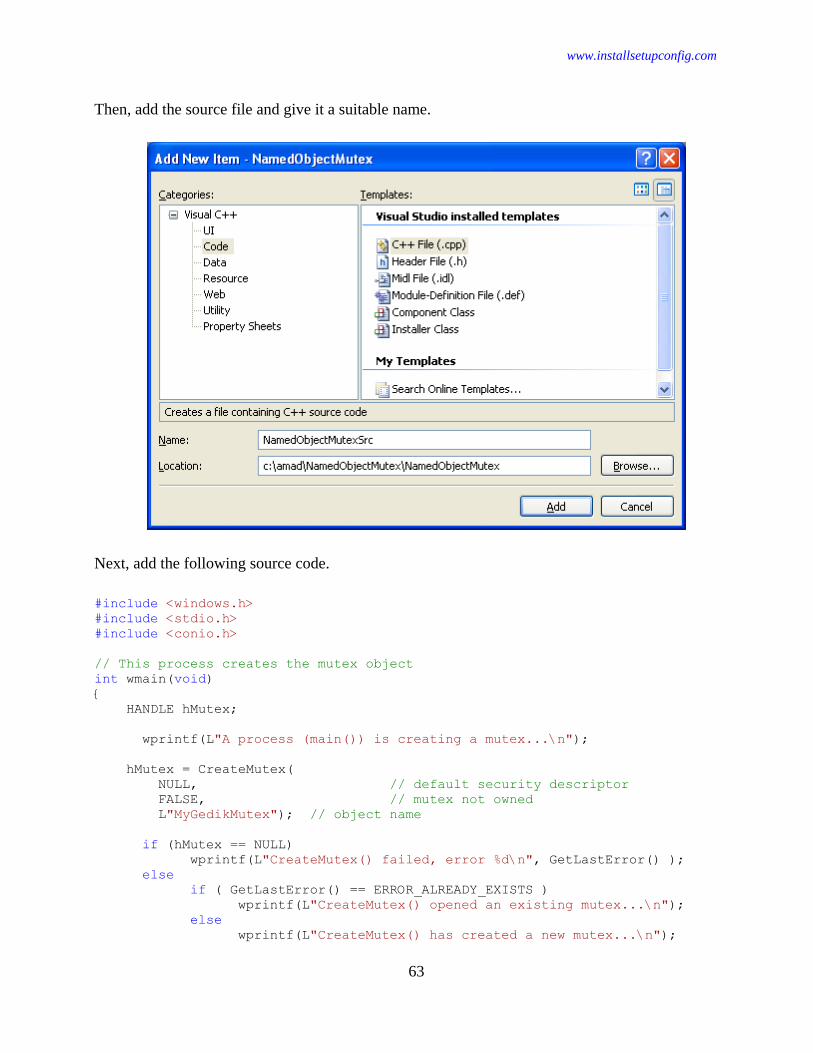
www.installsetupconfig.com
63
Then, add the source file and give it a suitable name.
Next, add the following source code.
#include <windows.h>
#include <stdio.h>
#include <conio.h>
// This process creates the mutex object
int wmain(void)
{
HANDLE hMutex;
wprintf(L"A process (main()) is creating a mutex...\n");
hMutex = CreateMutex(
NULL, // default security descriptor
FALSE, // mutex not owned
L"MyGedikMutex"); // object name
if (hMutex == NULL)
wprintf(L"CreateMutex() failed, error %d\n", GetLastError() );
else
if ( GetLastError() == ERROR_ALREADY_EXISTS )
wprintf(L"CreateMutex() opened an existing mutex...\n");
else
wprintf(L"CreateMutex() has created a new mutex...\n");

www.installsetupconfig.com
64
// Keep this process around until the second process is run
wprintf(L"Waiting the second process to open the existing mutex...\n");
_getwch();
if(CloseHandle(hMutex) != 0)
wprintf(L"Mutex's handle closed successfully!\n");
else
wprintf(L"Failed to close the mutex's handle, error %d\n",
GetLastError());
return 0;
}
Build and run the project. The following screenshot is a sample output.
Second Process Program Example
The second process uses the OpenMutex() function to open a handle to the existing mutex. This
function fails if a mutex object with the specified name does not exist. The access parameter
requests full access to the mutex object, which is necessary for the handle to be used in any of the
wait functions.
Create a new empty Win32 console application project. Give a suitable project name and change the
project location if needed.

www.installsetupconfig.com
65
Then, add the source file and give it a suitable name.
Next, add the following source code.

www.installsetupconfig.com
66
#include <windows.h>
#include <stdio.h>
// This process opens a handle to a mutex created by another process
int wmain(void)
{
HANDLE hMutex;
hMutex = OpenMutex(
MUTEX_ALL_ACCESS, // request full access
FALSE, // handle not inheritable
L"MyGedikMutex"); // object name
if (hMutex == NULL)
wprintf(L"OpenMutex() failed, error %d\n", GetLastError() );
else
wprintf(L"OpenMutex() successfully opened the mutex...\n");
if(CloseHandle(hMutex) != 0)
wprintf(L"CloseHandle() is OK!\n");
else
wprintf(L"CloseHandle() failed with error %d\n", GetLastError());
return 0;
}
Firstly, re-run the previous program, then this program. The following screenshot is a sample output.
Using Event Objects Program Example
Applications can use event objects in a number of situations to notify a waiting thread of the
occurrence of an event. For example, overlapped I/O operations on files, named pipes, and
communications devices use an event object to signal their completion.
The following example uses event objects to prevent several threads from reading from a shared
memory buffer while a master thread is writing to that buffer. First, the master thread uses the
CreateEvent() function to create a manual-reset event object whose initial state is nonsignaled. Then
it creates several reader threads. The master thread performs a write operation and then sets the
event object to the signaled state when it has finished writing.
Before starting a read operation, each reader thread uses WaitForSingleObject() to wait for the
manual-reset event object to be signaled. When WaitForSingleObject() returns, this indicates that
the main thread is ready for it to begin its read operation.

www.installsetupconfig.com
67
Create a new empty Win32 console application project. Give a suitable project name and change the
project location if needed.
Then, add the source file and give it a suitable name.

www.installsetupconfig.com
68
Next, add the following source code.
#include <windows.h>
#include <stdio.h>
#define THREADCOUNT 4
HANDLE ghWriteEvent;
HANDLE ghThreads[THREADCOUNT];
DWORD WINAPI ThreadProc(LPVOID);
void CreateEventsAndThreads(void)
{
int i;
DWORD dwThreadID;
// Create a manual-reset event object. The write thread sets this
// object to the nonsignaled state when it finishes writing to a shared
buffer.
ghWriteEvent = CreateEvent(
NULL, // default security attributes
TRUE, // manual-reset event
FALSE, // initial state is nonsignaled
L"MyWriteEventGedik" // object name
);
if (ghWriteEvent == NULL)
{

www.installsetupconfig.com
69
wprintf(L"CreateEvent() failed, error %d\n", GetLastError());
return;
}
else
wprintf(L"CreateEvent() is OK...\n");
// Create multiple threads to read from the buffer.
for(i = 0; i < THREADCOUNT; i++)
{
// TODO: More complex scenarios may require use of a parameter
// to the thread procedure, such as an event per thread to
// be used for synchronization.
ghThreads[i] = CreateThread(
NULL, // default security
0, // default stack size
ThreadProc, // name of the thread function
NULL, // no thread parameters
0, // default startup flags
&dwThreadID);
if (ghThreads[i] == NULL)
{
wprintf(L"CreateThread() failed, error %d\n", GetLastError());
return;
}
else
wprintf(L"CreateThread() for thread #%d is OK!\n", i);
}
}
void WriteToBuffer(void)
{
// TODO: Write to the shared buffer.
wprintf(L"Main thread writing to the shared buffer...\n");
// Set ghWriteEvent to signaled
if (! SetEvent(ghWriteEvent) )
{
wprintf(L"\nSetEvent() failed, error %d\n", GetLastError());
return;
}
else
wprintf(L"\nSetEvent() is OK!\n");
}
void CloseEvents()
{
// Close all event handles (currently, only one global handle).
if(CloseHandle(ghWriteEvent) != 0)
wprintf(L"Closing the ghWriteEvent's handle is OK\n");
else
wprintf(L"Fail to close ghWriteEvent's handle, error %d\n",
GetLastError());
}
void main()
{
DWORD dwWaitResult;

www.installsetupconfig.com
70
wprintf(L"The main() process started...\n");
wprintf(L" With thread #%d\n", GetCurrentThreadId());
// TODO: Create the shared buffer
// Create events and THREADCOUNT threads to read from the buffer
CreateEventsAndThreads();
// At this point, the reader threads have started and are most
// likely waiting for the global event to be signaled. However,
// it is safe to write to the buffer because the event is a
// manual-reset event.
WriteToBuffer();
wprintf(L"The main thread waiting for threads to exit...\n");
// The handle for each thread is signaled when the thread is terminated.
dwWaitResult = WaitForMultipleObjects(
THREADCOUNT, // number of handles in array
ghThreads, // array of thread handles
TRUE, // wait until all are signaled
INFINITE);
switch (dwWaitResult)
{
// All thread objects were signaled
case WAIT_OBJECT_0:
wprintf(L"All threads ended, cleaning up for application
exit...\n");
break;
// An error occurred
default:
wprintf(L"WaitForMultipleObjects failed (%d)\n", GetLastError());
return;
}
// Close the events to clean up
CloseEvents();
}
DWORD WINAPI ThreadProc(LPVOID lpParam)
{
DWORD dwWaitResult;
wprintf(L"Thread %d waiting for the write event...\n",
GetCurrentThreadId());
dwWaitResult = WaitForSingleObject(
ghWriteEvent, // event handle
INFINITE); // indefinite wait
switch (dwWaitResult)
{
// Event object was signaled
case WAIT_OBJECT_0:
//
// TODO: Read from the shared buffer
//

www.installsetupconfig.com
71
wprintf(L"Thread %d reading from buffer...\n",
GetCurrentThreadId());
break;
// An error occurred
default:
wprintf(L"WaitForSingleObject() error %d\n", GetLastError());
return 0;
}
// Now that we are done reading the buffer, we could use another
// event to signal that this thread is no longer reading. This
// example simply uses the thread handle for synchronization (the
// handle is signaled when the thread terminates.)
wprintf(L"Thread %d exiting...\n", GetCurrentThreadId());
return 1;
}
Build and run the project. The following screenshot is a sample output.
Using Mutex Objects Program Example
You can use a mutex object to protect a shared resource from simultaneous access by multiple
threads or processes. Each thread must wait for ownership of the mutex before it can execute the
code that accesses the shared resource. For example, if several threads share access to a database,
the threads can use a mutex object to permit only one thread at a time to write to the database.
The following example uses the CreateMutex() function to create a mutex object and the
CreateThread() function to create worker threads.

www.installsetupconfig.com
72
When a thread of this process writes to the database, it first requests ownership of the mutex using
the WaitForSingleObject() function. If the thread obtains ownership of the mutex, it writes to the
database and then releases its ownership of the mutex using the ReleaseMutex() function.
This example uses structured exception handling to ensure that the thread properly releases the
mutex object. The __finally block of code is executed no matter how the __try block terminates
(unless the __try block includes a call to the TerminateThread() function). This prevents the mutex
object from being abandoned inadvertently.
If a mutex is abandoned, the thread that owned the mutex did not properly release it before
terminating. In this case, the status of the shared resource is indeterminate, and continuing to use the
mutex can obscure a potentially serious error. Some applications might attempt to restore the
resource to a consistent state; this example simply returns an error and stops using the mutex.
Create a new empty Win32 console application project. Give a suitable project name and change the
project location if needed.
Then, add the source file and give it a suitable name.

www.installsetupconfig.com
73
Next, add the following source code.
#include <windows.h>
#include <stdio.h>
#define THREADCOUNT 2
HANDLE ghMutex;
DWORD WINAPI WriteToDatabase( LPVOID );
void wmain()
{
HANDLE aThread[THREADCOUNT];
DWORD ThreadID;
int i;
DWORD Ret;
// Create a mutex with no initial owner
ghMutex = CreateMutex(
NULL, // default security attributes
FALSE, // initially not owned
NULL); // unnamed mutex
if (ghMutex == NULL)
{
wprintf(L"CreateMutex() failed, error %d\n", GetLastError());
return;
}

www.installsetupconfig.com
74
else
wprintf(L"CreateMutex() is Ok\n");
// Create worker threads
wprintf(L"Creating the worker threads...\n");
for( i=0; i < THREADCOUNT; i++ )
{
aThread[i] = CreateThread(
NULL, // default security attributes
0, // default stack size
(LPTHREAD_START_ROUTINE) WriteToDatabase,
NULL, // no thread function arguments
0, // default creation flags
&ThreadID); // receive thread identifier
if( aThread[i] == NULL )
{
wprintf(L"CreateThread() failed, error: %d\n", GetLastError());
return;
}
else
wprintf(L"CreateThread() #%i is OK\n", i);
}
// Wait for all threads to terminate
// WAIT_OBJECT_0, WAIT_ABANDONED_0, WAIT_TIMEOUT, WAIT_FAILED
Ret = WaitForMultipleObjects(THREADCOUNT, aThread, TRUE, INFINITE);
wprintf(L"WaitForMultipleObjects() return value is %d\n", Ret);
// Close thread and mutex handles
for( i=0; i < THREADCOUNT; i++ )
{
if(CloseHandle(aThread[i]) != 0)
wprintf(L"Thread %d handle was successfully closed...\n",
GetCurrentThreadId());
else
wprintf(L"Failed to close thread %d handle...\n",
GetCurrentThreadId());
}
CloseHandle(ghMutex);
}
DWORD WINAPI WriteToDatabase(LPVOID lpParam )
{
DWORD dwCount=0, dwWaitResult;
// Request ownership of mutex.
while( dwCount < 20 )
{
dwWaitResult = WaitForSingleObject(
ghMutex, // handle to mutex
INFINITE); // no time-out interval
switch (dwWaitResult)
{
// The thread got ownership of the mutex
case WAIT_OBJECT_0:

www.installsetupconfig.com
75
__try {
// TODO: Write to the database
wprintf(L"Thread %d writing to database, count #%d\n",
GetCurrentThreadId(), dwCount);
dwCount++;
}
__finally {
// Release ownership of the mutex object
if (! ReleaseMutex(ghMutex))
{
// Handle error.
}
}
break;
// The thread got ownership of an abandoned mutex
// The database is in an indeterminate state
case WAIT_ABANDONED:
return FALSE;
}
}
return TRUE;
}
Build and run the project. The following screenshot is a sample output.

www.installsetupconfig.com
76
Another Mutex Program Example
The following program demonstrates an unnamed mutex object used to have mutual exclusive
access to a global variable shared between three threads. The main thread first creates a mutex
object and two child threads. Each child threads basically try getting the ownership of the unnamed
mutex object. When owner ship is acquired by one of the child threads, it sets and resets the shared
global variable. When the main thread acquires ownership of the mutex object, it prints out the
value of the shared global variable. The output should always print the out value of the shared
global variable.
Create a new empty Win32 console application project. Give a suitable project name and change the
project location if needed.

www.installsetupconfig.com
77
Then, add the source file and give it a suitable name.
Next, add the following source code.

www.installsetupconfig.com
78
// Example of Unnamed Mutex object
#include <windows.h>
#include <stdio.h>
// Global shared hMutex Object
HANDLE hMutex;
DWORD SharedVal = 0;
////////////// Thread counts till MaxValue
void ThreadMain(void)
{
static DWORD count = 0;
for(;;)
{
// wait for ownership
WaitForSingleObject(hMutex,INFINITE);
SharedVal += 20;
// sleep for 100ms
Sleep(100);
// So, each iteration will add 1 (20 - 19) for each thread...
SharedVal -= 19;
if(ReleaseMutex(hMutex) != 0)
wprintf(L" ThreadMain() - ReleaseMutex() is OK!\n");
else
wprintf(L" ThreadMain() - ReleaseMutex() failed, error %u\n",
GetLastError());
count++;
wprintf(L"Count value #%d\n", count);
}
}
///////////////////////////////////////////////
int wmain(void)
{
HANDLE hThr;
DWORD dwThreadId, i;
// unnamed mutex object
hMutex=CreateMutex(NULL,FALSE,NULL);
if(hMutex != NULL)
wprintf(L"CreateMutex() is OK!\n");
// Create Two Threads, a thread to execute within
// the virtual address space of the calling process
hThr=CreateThread(NULL,0,(LPTHREAD_START_ROUTINE)ThreadMain,NULL,0,&dwThreadId);
if(hThr != NULL)
wprintf(L" CreateThread() is OK! Thread ID %u\n", dwThreadId);
else
wprintf(L" CreateThread() failed, error %u!\n", GetLastError());
if(CloseHandle(hThr) != 0)
wprintf(L" CreateThread() hThr handle was closed successfully!\n");
else

www.installsetupconfig.com
79
wprintf(L" Failed to close hThr handle, error %u!\n",
GetLastError());
hThr=CreateThread(NULL,0,(LPTHREAD_START_ROUTINE)ThreadMain,NULL,0,&dwThreadId);
if(hThr != NULL)
wprintf(L" CreateThread() is OK! Thread ID %u\n", dwThreadId);
else
wprintf(L" CreateThread() failed, error %u!\n", GetLastError());
if(CloseHandle(hThr) != 0)
wprintf(L" CreateThread() hThr handle was closed successfully!\n");
else
wprintf(L" Failed to close hThr handle, error %u!\n",
GetLastError());
for(i = 0;i < 5;i++)
{
// Wait for ownership
WaitForSingleObject(hMutex,INFINITE);
wprintf(L"#%d Value of SharedVal = %d\n", i, SharedVal);
if(ReleaseMutex(hMutex) != 0)
wprintf(L" main() - ReleaseMutex() is OK!\n");
else
wprintf(L" main() - ReleaseMutex() failed, error %u\n",
GetLastError());
}
return 0;
}
Build and run the project. The following screenshot is a sample output.
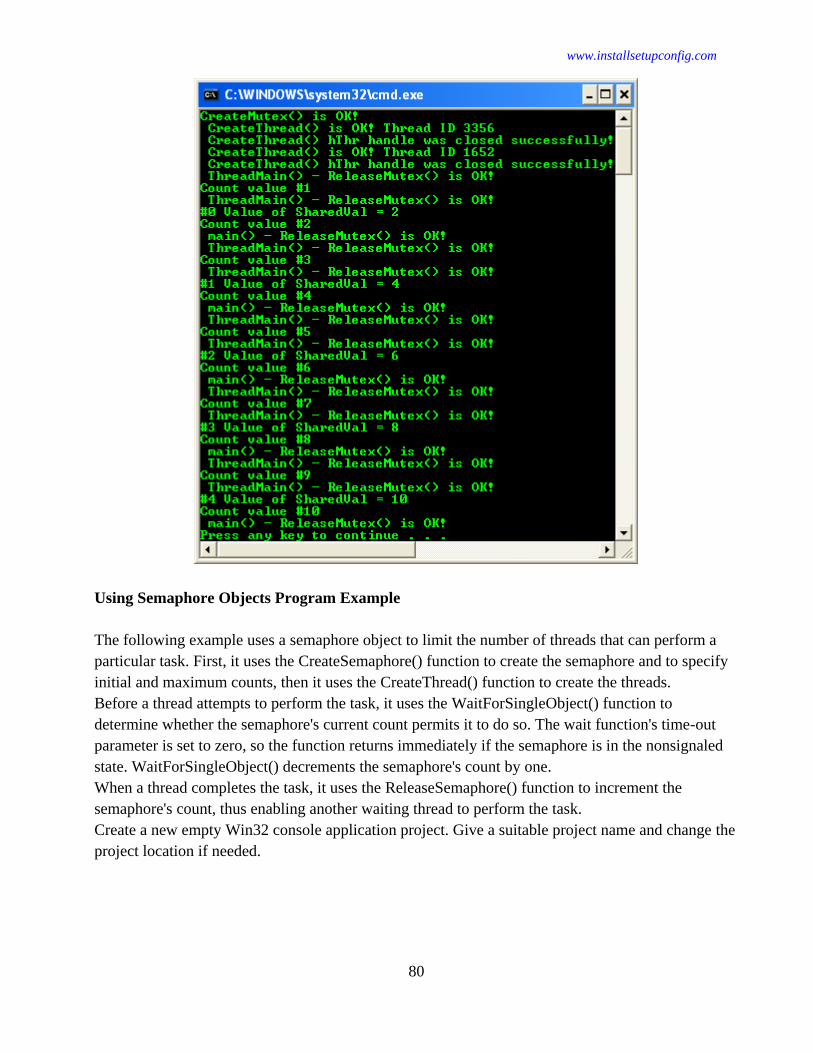
www.installsetupconfig.com
80
Using Semaphore Objects Program Example
The following example uses a semaphore object to limit the number of threads that can perform a
particular task. First, it uses the CreateSemaphore() function to create the semaphore and to specify
initial and maximum counts, then it uses the CreateThread() function to create the threads.
Before a thread attempts to perform the task, it uses the WaitForSingleObject() function to
determine whether the semaphore's current count permits it to do so. The wait function's time-out
parameter is set to zero, so the function returns immediately if the semaphore is in the nonsignaled
state. WaitForSingleObject() decrements the semaphore's count by one.
When a thread completes the task, it uses the ReleaseSemaphore() function to increment the
semaphore's count, thus enabling another waiting thread to perform the task.
Create a new empty Win32 console application project. Give a suitable project name and change the
project location if needed.

www.installsetupconfig.com
81
Then, add the source file and give it a suitable name.

www.installsetupconfig.com
82
Next, add the following source code.
#include <windows.h>
#include <stdio.h>
#define MAX_SEM_COUNT 10
#define THREADCOUNT 12
HANDLE ghSemaphore;
DWORD WINAPI ThreadProc(LPVOID);
void wmain()
{
HANDLE aThread[THREADCOUNT];
DWORD ThreadID;
int i;
// Create a semaphore with initial and max counts of MAX_SEM_COUNT
ghSemaphore = CreateSemaphore(
NULL, // default security attributes
MAX_SEM_COUNT, // initial count
MAX_SEM_COUNT, // maximum count
NULL); // unnamed semaphore
if (ghSemaphore == NULL)
{
wprintf(L"CreateSemaphore() error %d\n", GetLastError());
return;
}
else
wprintf(L"CreateSemaphore() is OK\n");
// Create worker threads
for( i=0; i < THREADCOUNT; i++ )
{
aThread[i] = CreateThread(
NULL, // default security attributes
0, // default stack size
(LPTHREAD_START_ROUTINE) ThreadProc,
NULL, // no thread function arguments
0, // default creation flags
&ThreadID); // receive thread identifier
if( aThread[i] == NULL )
{
wprintf(L"CreateThread() error %d\n", GetLastError());
return;
}
else
wprintf(L"Thread %d with ID %d was created...\n", i,
ThreadID);
}
// Wait for all threads to terminate
wprintf(L"Waiting all the threads to terminate...\n");

www.installsetupconfig.com
83
WaitForMultipleObjects(THREADCOUNT, aThread, TRUE, INFINITE);
// Close thread and semaphore handles
for( i=0; i < THREADCOUNT; i++ )
{
if(CloseHandle(aThread[i]) != 0)
wprintf(L"Handle to thread %i was closed!\n", i);
else
wprintf(L"Failed to close the thread %i handle, error %d\n",
i, GetLastError());
}
if(CloseHandle(ghSemaphore) != 0)
wprintf(L"Handle to Semaphore object was closed!\n", i);
else
wprintf(L"Failed to close the Semaphore object handle, error %d\n",
GetLastError());
}
DWORD WINAPI ThreadProc(LPVOID lpParam)
{
DWORD dwWaitResult;
BOOL bContinue=TRUE;
while(bContinue)
{
// Try to enter the semaphore gate
dwWaitResult = WaitForSingleObject(
ghSemaphore, // handle to semaphore
0L); // zero-second time-out interval
switch (dwWaitResult)
{
// The semaphore object was signaled.
case WAIT_OBJECT_0:
// TODO: Perform task
wprintf(L"Thread %d: wait succeeded...\n",
GetCurrentThreadId());
bContinue=FALSE;
// Simulate thread spending time on task
Sleep(5);
// Release the semaphore when task is finished
if (!ReleaseSemaphore(
ghSemaphore, // handle to semaphore
1, // increase count by one
NULL) ) // not interested in previous count
{
wprintf(L"ReleaseSemaphore error %d\n", GetLastError());
}
break;
// The semaphore was nonsignaled, so a time-out occurred.
case WAIT_TIMEOUT:
wprintf(L"Thread %d: wait timed out...\n",
GetCurrentThreadId());
break;

www.installsetupconfig.com
84
}
}
return TRUE;
}
Build and run the project. The following screenshots are the sample outputs.

www.installsetupconfig.com
85
Another Semaphore Program Example
Create a new empty Win32 console application project. Give a suitable project name and change the
project location if needed.

www.installsetupconfig.com
86
Then, add the source file and give it a suitable name.

www.installsetupconfig.com
87
Next, add the following source code.
#include <windows.h>
#include <stdio.h>
#include <wchar.h>
// handle to semaphore
HANDLE hSem=NULL;
///////////////// Thread Code //////////////////////////
void ChildThread(char *name)
{
BOOL bContinue=TRUE;
DWORD dwWaitResult;
while(bContinue)
{
// Waits until the specified object is in the signaled state or
// the time-out interval elapses.
// INFINITE - the function will return only when the object is
signaled.
// Try to enter the semaphore gate.
dwWaitResult = WaitForSingleObject(
hSem, // handle to semaphore
INFINITE);
switch (dwWaitResult)
{
// The semaphore object was signaled.
case WAIT_OBJECT_0:
// TODO: Perform task
wprintf(L"Thread %d, %S: wait succeeded\n",
GetCurrentThreadId(), name);
bContinue=FALSE;
// Simulate thread spending time on task
wprintf(L"%S is working!\n", name);
Sleep(100);
break;
// The semaphore was nonsignaled, so a time-out occurred.
case WAIT_TIMEOUT:
wprintf(L"Thread %d: wait timed out\n", GetCurrentThreadId());
break;
}
}
}
/////// Create Threads ////////////
// returns TotalCount of Children created
int CreateChildren(void)
{
int i;
char
*ThreadNames[7]={"ThreadA","ThreadB","ThreadC","ThreadD","ThreadE","ThreadF",
"ThreadG"};
for(i=0;i<7;++i)

www.installsetupconfig.com
88
{
HANDLE hThred;
DWORD dwThreadID;
hThred=CreateThread(NULL,0,(LPTHREAD_START_ROUTINE)ChildThread,(LPVOID)ThreadNam
es[i],0,&dwThreadID);
if(hThred!=NULL)
{
wprintf(L"CreateThread() is OK, ID is %d, %S\n", dwThreadID,
ThreadNames[i]);
if(CloseHandle(hThred) != 0)
wprintf(L" hThred handle was closed successfully!\n");
else
wprintf(L"Failed to close hThred handle, error %d\n",
GetLastError());
}
else
wprintf(L"CreateThread() failed with error %d",
GetLastError());
}
return i;
}
////// Main //////
int main(void)
{
int TotalChildren;
// Creates or opens a named or unnamed (anonymous) semaphore object.
hSem=CreateSemaphore(NULL,0,7,NULL);
if(hSem==NULL)
{
wprintf(L"CreateSemaphore() failed, error %u\n", GetLastError());
return 1;
}
else
wprintf(L"CreateSemaphore() is OK, got the handle to the Semaphore
object...\n");
TotalChildren = CreateChildren();
wprintf(L"Total Child Threads: %d\n",TotalChildren);
// unblock all the threads
// Increases the count of the specified semaphore object by a specified
amount.
if(ReleaseSemaphore(hSem,7,NULL) != 0)
wprintf(L"ReleaseSemaphore() is OK\n");
else
wprintf(L"ReleaseSemaphore() failed, error %d\n", GetLastError());
if(CloseHandle(hSem) != 0)
wprintf(L"hSem handle was closed!\n");
else

www.installsetupconfig.com
89
wprintf(L"Failed to close the hSem handle! Error %d\n",
GetLastError());
ExitProcess(0);
return 0;
}
Build and run the project. The following screenshot is a sample output.
Six philosophers with six chopsticks
The dining table has 6 people with 6 chopsticks (may use different people and chopsticks number).
Six people sit around a table with a single chop stick between each two adjacent people. A single
bowl is placed in front of each of them. Two chopsticks (on his left and right) must be in hand in
order to eat noodle. After he eats a bit of rice, he puts the chop sticks down for some time and
thinks for another amount of time. He repeats this process over and over again. As can be seen,
there are only six chop sticks.
Deadlock is obviously possible in this case. For instance, each of them grabs a chopstick on his
right. But, he cannot eat as there is no longer any chopstick to his left. So, each diner waits for a
left chopstick that may never arrive.

www.installsetupconfig.com
90
Starvation Issue
Imagine that two diners are quick thinkers and quick eaters. They think faster and get hungry faster.
Assume that, they are sitting down in the opposite chairs as shown below.
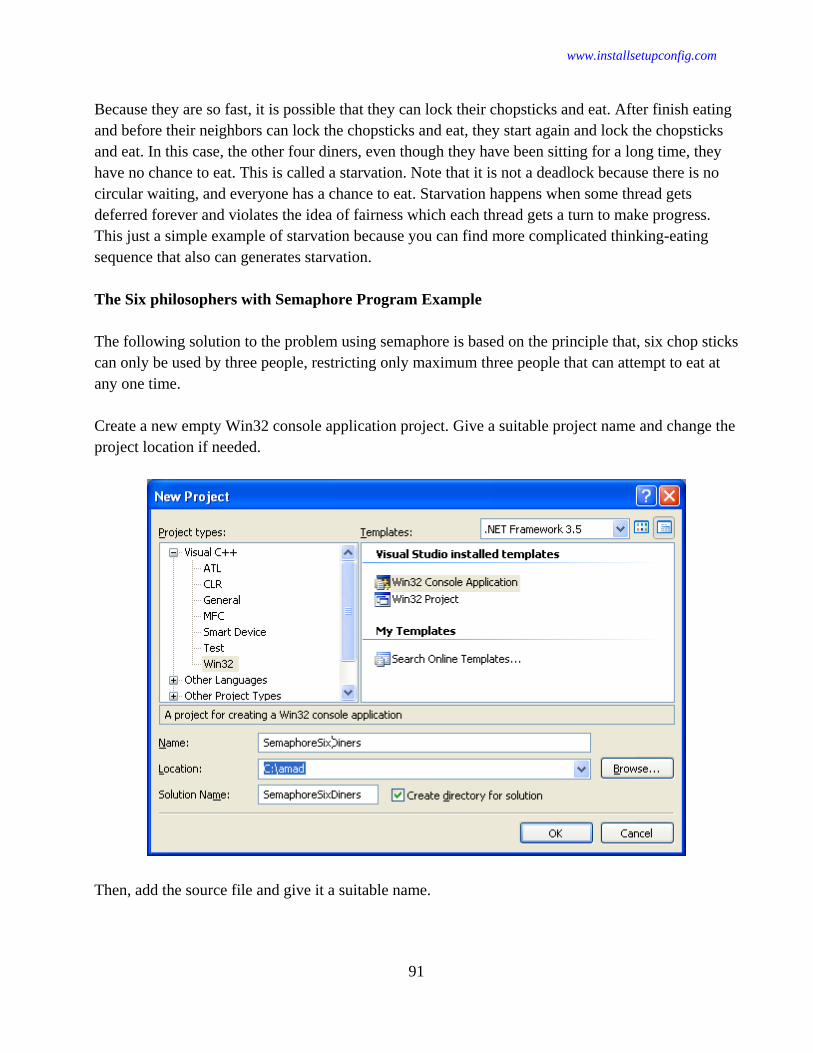
www.installsetupconfig.com
91
Because they are so fast, it is possible that they can lock their chopsticks and eat. After finish eating
and before their neighbors can lock the chopsticks and eat, they start again and lock the chopsticks
and eat. In this case, the other four diners, even though they have been sitting for a long time, they
have no chance to eat. This is called a starvation. Note that it is not a deadlock because there is no
circular waiting, and everyone has a chance to eat. Starvation happens when some thread gets
deferred forever and violates the idea of fairness which each thread gets a turn to make progress.
This just a simple example of starvation because you can find more complicated thinking-eating
sequence that also can generates starvation.
The Six philosophers with Semaphore Program Example
The following solution to the problem using semaphore is based on the principle that, six chop sticks
can only be used by three people, restricting only maximum three people that can attempt to eat at
any one time.
Create a new empty Win32 console application project. Give a suitable project name and change the
project location if needed.
Then, add the source file and give it a suitable name.
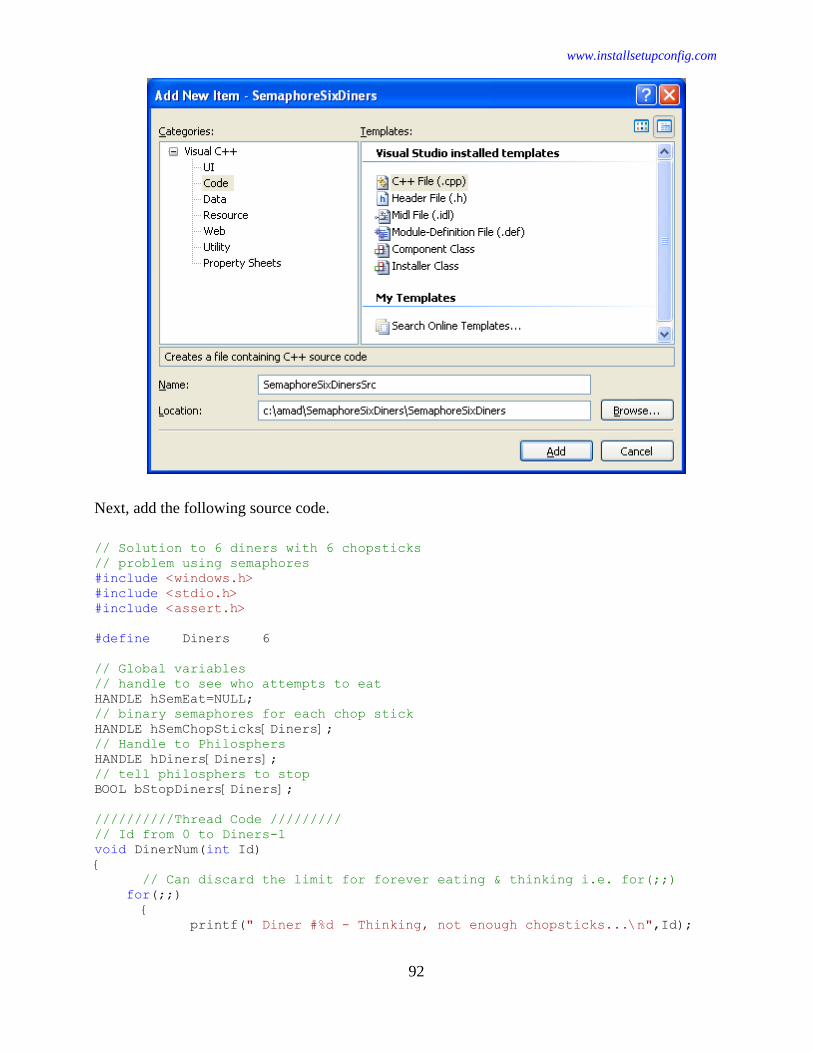
www.installsetupconfig.com
92
Next, add the following source code.
// Solution to 6 diners with 6 chopsticks
// problem using semaphores
#include <windows.h>
#include <stdio.h>
#include <assert.h>
#define Diners 6
// Global variables
// handle to see who attempts to eat
HANDLE hSemEat=NULL;
// binary semaphores for each chop stick
HANDLE hSemChopSticks[Diners];
// Handle to Philosphers
HANDLE hDiners[Diners];
// tell philosphers to stop
BOOL bStopDiners[Diners];
//////////Thread Code /////////
// Id from 0 to Diners-1
void DinerNum(int Id)
{
// Can discard the limit for forever eating & thinking i.e. for(;;)
for(;;)
{
printf(" Diner #%d - Thinking, not enough chopsticks...\n",Id);

www.installsetupconfig.com
93
if(bStopDiners[Id] == TRUE)
{
ExitThread(0);
}
// Wait till turn to eat/signalled
WaitForSingleObject(hSemEat,INFINITE);
// Pick chopsticks
WaitForSingleObject(hSemChopSticks[Id],INFINITE);
WaitForSingleObject(hSemChopSticks[(Id+1)%Diners],INFINITE);
printf(" Diner #%d - Eating with two chopsticks...\n",Id);
// Put down chopsticks
ReleaseSemaphore(hSemChopSticks[(Id+1)%Diners],1,NULL);
ReleaseSemaphore(hSemChopSticks[Id],1,NULL);
// Release the right to eat
ReleaseSemaphore(hSemEat,1,NULL);
}
}
//////////// Create the diners /////////////
void CreateDiners(void)
{
int i;
for(i=0;i<Diners;++i)
{
DWORD dwThreadID;
// set flag off for stopping
bStopDiners[i]=FALSE;
hDiners[i]=CreateThread(NULL,0,(LPTHREAD_START_ROUTINE)DinerNum,(LPVOID)i,
0,&dwThreadID);
assert(hDiners[i]!=NULL);
}
}
////////////CreateSemaphores//////////
void CreateSemaphores(void)
{
int i;
// create eating semaphore
// Initial and max are set to 3
hSemEat = CreateSemaphore(NULL,Diners/2,Diners/2,NULL);
assert(hSemEat!=NULL);
for(i=0;i<Diners;++i)
{
hSemChopSticks[i]=CreateSemaphore(NULL,1,1,NULL);
assert(hSemChopSticks[i]!=NULL);
}

www.installsetupconfig.com
94
}
///////////////////
void AttemptToStop(void)
{
int i;
printf("\n=====Attempting to stop all threads=========\n\n");
for(i=0;i<Diners;++i)
{
bStopDiners[i]=TRUE;
}
// wait for all threads to finish
WaitForMultipleObjects(Diners,(CONST HANDLE *)hDiners,TRUE,INFINITE);
}
/////////Close All Handles//////////
void CloseAllHandles(void)
{
int i;
for(i=0;i<Diners;++i)
{
CloseHandle(hDiners[i]);
CloseHandle(hSemChopSticks[i]);
}
CloseHandle(hSemEat);
}
///// Main //////////
int wmain(void)
{
CreateSemaphores();
CreateDiners();
AttemptToStop();
CloseAllHandles();
ExitProcess(0);
return 0;
}
Build and run the project. The following screenshot is a sample output.

www.installsetupconfig.com
95
Using Waitable Timer Objects Program Example
The following example creates a timer that will be signaled after a 10 second delay. First, the code
uses the CreateWaitableTimer() function to create a waitable timer object. Then it uses the
SetWaitableTimer() function to set the timer. The code uses the WaitForSingleObject() function to
determine when the timer has been signaled.
Create a new empty Win32 console application project. Give a suitable project name and change the
project location if needed.
Then, add the source file and give it a suitable name.

www.installsetupconfig.com
96
Next, add the following source code.
#include <windows.h>
#include <stdio.h>
int wmain()
{
HANDLE hTimer = NULL;
// Uused to represent a 64-bit signed integer value
// or very large number...
LARGE_INTEGER liDueTime;
liDueTime.QuadPart = -100000000LL;
// Create an unnamed waitable timer.
hTimer = CreateWaitableTimer(NULL, TRUE, NULL);
if (NULL == hTimer)
{
wprintf(L"CreateWaitableTimer() failed, error %d\n", GetLastError());
return 1;
}
else
wprintf(L"CreateWaitableTimer() is OK, unnamed waitable timer was
created\n");
// Set a timer to wait for 10 seconds.
if (!SetWaitableTimer(hTimer, &liDueTime, 0, NULL, NULL, 0))
{

www.installsetupconfig.com
97
wprintf(L"SetWaitableTimer() failed, error %d\n", GetLastError());
return 2;
}
else
wprintf(L"SetWaitableTimer() is OK, waiting for 10 seconds...\n");
// Wait for the timer.
if (WaitForSingleObject(hTimer, INFINITE) != WAIT_OBJECT_0)
wprintf(L"WaitForSingleObject() failed, error %d\n", GetLastError());
else
wprintf(L"WaitForSingleObject() - timer was signaled...\n");
return 0;
}
Build and run the project. The following screenshot is a sample output.
Using Waitable Timers with an Asynchronous Procedure Call Program Example
The following example associates an asynchronous procedure call (APC) function, also known as a
completion routine, with a waitable timer when the timer is set. The address of the completion
routine is the fourth parameter to the SetWaitableTimer() function. The fifth parameter is a void
pointer that you can use to pass arguments to the completion routine.
The completion routine will be executed by the same thread that called SetWaitableTimer(). This
thread must be in an alertable state to execute the completion routine. It accomplishes this by calling
the SleepEx() function, which is an alertable function.
Each thread has an APC queue. If there is an entry in the thread's APC queue at the time that one of
the alertable functions is called, the thread is not put to sleep. Instead, the entry is removed from the
APC queue and the completion routine is called.
If no entry exists in the APC queue, the thread is suspended until the wait is satisfied. The wait can
be satisfied by adding an entry to the APC queue, by a timeout, or by a handle becoming signaled. If
the wait is satisfied by an entry in the APC queue, the thread is awakened and the completion
routine is called. In this case, the return value of the function is WAIT_IO_COMPLETION.
After the completion routine is executed, the system checks for another entry in the APC queue to
process. An alertable function will return only after all APC entries have been processed. Therefore,
if entries are being added to the APC queue faster than they can be processed, it is possible that a
call to an alertable function will never return. This is especially possible with waitable timers, if the
period is shorter than the amount of time required to execute the completion routine.

www.installsetupconfig.com
98
When you are using a waitable timer with an APC, the thread that sets the timer should not wait on
the handle of the timer. By doing so, you would cause the thread to wake up as a result of the timer
becoming signaled rather than as the result of an entry being added to the APC queue. As a result,
the thread is no longer in an alertable state and the completion routine is not called. In the following
code, the call to SleepEx() awakens the thread when an entry is added to the thread's APC queue
after the timer is set to the signaled state.
Create a new empty Win32 console application project. Give a suitable project name and change the
project location if needed.
Then, add the source file and give it a suitable name.

www.installsetupconfig.com
99
Next, add the following source code.
#include <windows.h>
#include <stdio.h>
#define _SECOND 10000000
// struct
typedef struct _MYDATA {
TCHAR *szText;
DWORD dwValue;
} MYDATA;
// callback function
void CALLBACK TimerAPCProc(
LPVOID lpArg, // Data value
DWORD dwTimerLowValue, // Timer low value
DWORD dwTimerHighValue ) // Timer high value
{
MYDATA *pMyData = (MYDATA *)lpArg;
static int i= 1;
wprintf(L"TimerAPCProc() #%d callback function\nMessage: %s\nValue: %d\n\n",
i, pMyData->szText, pMyData->dwValue);
i++;
MessageBeep(0);
}
void wmain( void )
{

www.installsetupconfig.com
100
HANDLE hTimer;
BOOL bSuccess;
__int64 qwDueTime;
LARGE_INTEGER liDueTime;
MYDATA MyData;
MyData.szText = L"This is my data";
MyData.dwValue = 100;
hTimer = CreateWaitableTimer(
NULL, // Default security attributes
FALSE, // Create auto-reset timer
L"MyTimer"); // Name of waitable timer
if (hTimer != NULL)
{
wprintf(L"CreateWaitableTimer() should be fine...\n");
__try
{
// Create an integer that will be used to signal the timer
// 5 seconds from now.
qwDueTime = -5 * _SECOND;
// Copy the relative time into a LARGE_INTEGER.
liDueTime.LowPart = (DWORD) ( qwDueTime & 0xFFFFFFFF );
liDueTime.HighPart = (LONG) ( qwDueTime >> 32 );
bSuccess = SetWaitableTimer(
hTimer, // Handle to the timer object
&liDueTime, // When timer will become signaled
2000, // Periodic timer interval of 2 seconds
TimerAPCProc, // Completion routine
&MyData, // Argument to the completion routine
FALSE ); // Do not restore a suspended system
if (bSuccess)
{
wprintf(L"SetWaitableTimer() should be OK! Waiting to
signal...\n\n");
for ( ; MyData.dwValue < 1000; MyData.dwValue += 100 )
{
SleepEx(
INFINITE, // Wait forever
TRUE ); // Put thread in an alertable state
}
}
else
{
wprintf(L"SetWaitableTimer() failed with error %d\n",
GetLastError());
}
}
__finally
{
if(CloseHandle(hTimer) != 0)
wprintf(L"hTimer handle was closed successfully!\n");
else
wprintf(L"Failed to clode hTimer handle, error %d",
GetLastError());
}

www.installsetupconfig.com
101
}
else
{
wprintf(L"CreateWaitableTimer() failed with error %d\n", GetLastError());
}
}
Build and run the project. The following screenshot is a sample output.
Using Critical Section Objects Program Example
The following example shows how a thread initializes, enters, and releases a critical section. It uses
the InitializeCriticalSectionAndSpinCount(), EnterCriticalSection(), LeaveCriticalSection(), and
DeleteCriticalSection() functions.
Create a new empty Win32 console application project. Give a suitable project name and change the
project location if needed.

www.installsetupconfig.com
102
Then, add the source file and give it a suitable name.

www.installsetupconfig.com
103
Next, add the following source code.
#include <windows.h>
#include <stdio.h>
// Global variable
CRITICAL_SECTION CriticalSection;
int wmain()
{
DWORD Ret = 0;
//...
// Initialize the critical section one time only.
// Initializes a critical section object and sets the spin count for the
// critical section. Spinning means that when a thread tries to acquire
// a critical section that is locked, the thread enters a loop, checks
// to see if the lock is released, and if the lock is not released,
// the thread goes to sleep.
wprintf(L"Initializing the critical section...\n");
Ret = InitializeCriticalSectionAndSpinCount(&CriticalSection, 0x80000400);
// This function always returns a nonzero value..
wprintf(L"InitializeCriticalSectionAndSpinCount() return value is %d\n",
Ret);
//...
// Release resources used by the critical section object.
// Releases all resources used by an unowned critical section object.
// This function does not return a value.
wprintf(L"Deleting the critical section...\n");
DeleteCriticalSection(&CriticalSection);
}
// ThreadProc() Callback Function
// An application-defined function that serves as the starting address for a
thread.
DWORD WINAPI ThreadProc( LPVOID lpParameter )
{
//...
// Request ownership of the critical section.
// Waits for ownership of the specified critical section object.
// The function returns when the calling thread is granted ownership.
// This function does not return a value.
wprintf(L"Entering the critical section...\n");
EnterCriticalSection(&CriticalSection);
// Access the shared resource.
wprintf(L"Accessing and using the shared resources...\n");
// Release ownership of the critical section.
// This function does not return a value.
wprintf(L"Leaving the critical section...\n");
LeaveCriticalSection(&CriticalSection);
//...
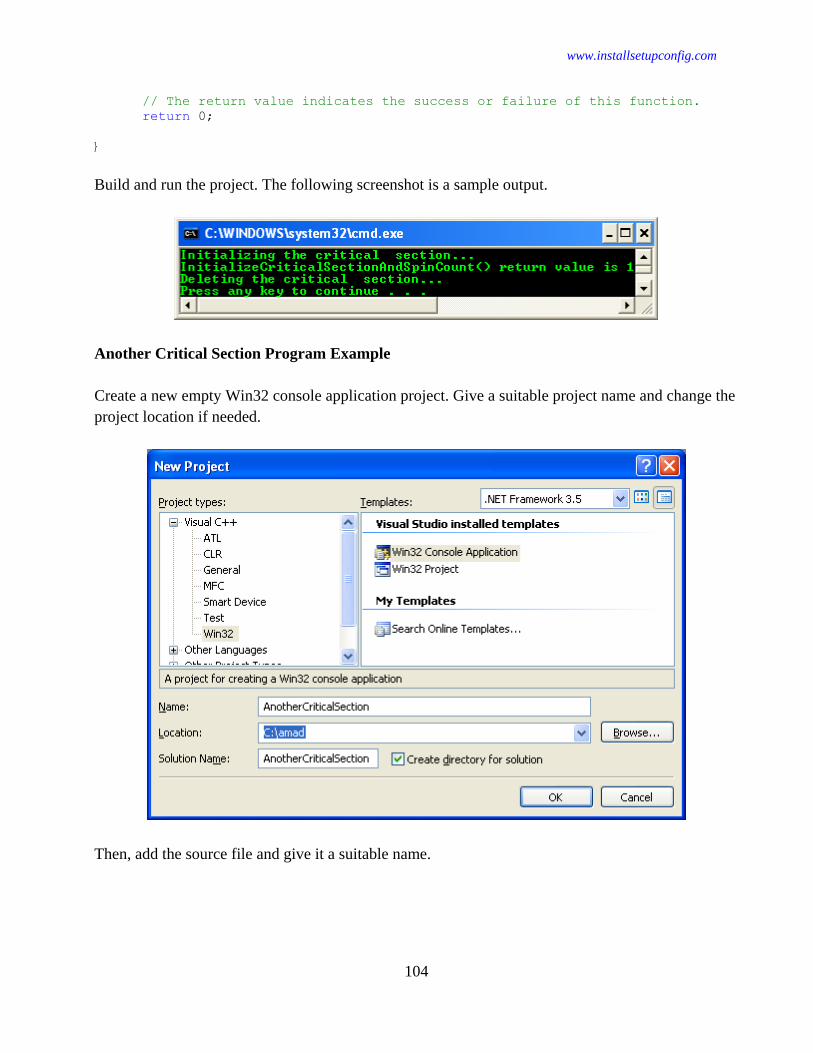
www.installsetupconfig.com
104
// The return value indicates the success or failure of this function.
return 0;
}
Build and run the project. The following screenshot is a sample output.
Another Critical Section Program Example
Create a new empty Win32 console application project. Give a suitable project name and change the
project location if needed.
Then, add the source file and give it a suitable name.

www.installsetupconfig.com
105
Next, add the following source code.
// The following program demonstrates an example of using an critical section
object
#include <windows.h>
#include <stdio.h>
// Global variable
CRITICAL_SECTION criticalSectionSample;
///////////// Thread Main ///////////////////////
void ThreadMain(char *threadNum)
{
// Waits for ownership of the specified critical section object.
// The function returns when the calling thread is granted
ownership.
// This function does not return a value.
wprintf(L"\nEnterCriticalSection() - entering the critical
section...\n");
EnterCriticalSection(&criticalSectionSample);
wprintf(L"%S in critical section, using the shared
resource...\n",threadNum);
// Releases ownership of the specified critical section object.
// This function does not return a value.
wprintf(L"\nLeaveCriticalSection() - Leaving the critical
section...\n");
LeaveCriticalSection(&criticalSectionSample);
}

www.installsetupconfig.com
106
/////////////Creating A Child//////////////
HANDLE CreateChildTh(char *threadNum)
{
HANDLE hThread;
DWORD dwId;
hThread =
CreateThread(NULL,0,(LPTHREAD_START_ROUTINE)ThreadMain,(LPVOID)threadNum,0,&dwId
);
if(hThread)
{
wprintf(L"CreateThread() is OK, ID num %d...\n", dwId);
return hThread;
}
else
{
wprintf(L"CreateThread() failed, error %d\n", GetLastError());
return NULL;
}
}
////////////// The main() ///////////////////////
int main(void)
{
HANDLE hThreadHandle[3];
DWORD dwEvent, i;
// Initializes a critical section object.
// This function does not return a value.
wprintf(L"Initializing the critical section...\n");
InitializeCriticalSection(&criticalSectionSample);
hThreadHandle[0] = CreateChildTh("ChildThread1");
hThreadHandle[1] = CreateChildTh("ChildThread2");
hThreadHandle[2] = CreateChildTh("ChildThread3");
// Waits until one or all of the specified objects are
// in the signaled state or the time-out interval elapses.
dwEvent = WaitForMultipleObjects(3,hThreadHandle,TRUE,INFINITE);
switch (dwEvent)
{
// hThreadHandle[0] was signaled
case WAIT_OBJECT_0 + 0:
// TODO: Perform tasks required by this event
wprintf(L"First event was signaled.\n");
break;
// hThreadHandle[1] was signaled
case WAIT_OBJECT_0 + 1:
// TODO: Perform tasks required by this event
wprintf(L"Second event was signaled.\n");
break;
// hThreadHandle[2] was signaled
case WAIT_OBJECT_0 + 2:
// TODO: Perform tasks required by this event

www.installsetupconfig.com
107
wprintf(L"Third event was signaled.\n");
break;
case WAIT_TIMEOUT:
wprintf(L"Wait timed out...\n");
break;
// Return value is invalid.
default:
wprintf(L"Wait error %d\n", GetLastError());
ExitProcess(0);
}
for(i = 0;i<3;i++)
{
if(CloseHandle(hThreadHandle[i]) != 0)
wprintf(L"Closing the hThreadHandle[%d] handle is OK...\n", i);
else
wprintf(L"Failed to close the hThreadHandle[%d] handle, error
%d...\n", GetLastError());
}
// Releases all resources used by an unowned critical section object.
// This function does not return a value.
wprintf(L"DeleteCriticalSection() - Releasing all resources used\n by an
unowned critical section object...\n");
DeleteCriticalSection(&criticalSectionSample);
return 0;
}
Build and run the project. The following screenshot is a sample output.

www.installsetupconfig.com
108
More Critical Section Program Examples
Create a new empty Win32 console application project. Give a suitable project name and change the
project location if needed.
Then, add the source file and give it a suitable name.

www.installsetupconfig.com
109
Next, add the following source code.
// Program example which all the threads attempt to enter the critical section
of code
// If they can not enter, they just printout that they are waiting to enter the
critical section code.
#include <windows.h>
#include <stdio.h>
// Global var
// The critical section object
CRITICAL_SECTION criticalSec;
///////////// Thread Main ///////////////////////
void ThreadMain(char *name)
{
// Attempts to enter a critical section without blocking.
// If the call is successful, the calling thread takes ownership of
the critical section
// If the critical section is successfully entered or the current
thread already
// owns the critical section, the return value is nonzero.
// If another thread already owns the critical section, the return
value is zero.
if(TryEnterCriticalSection(&criticalSec) == 0)
{
wprintf(L"%S is waiting...\n", name);
}

www.installsetupconfig.com
110
else
{
// critical section is mine...
wprintf(L"%S in critical section, using shared
resource...\n",name);
// Use the shared resource here...
// Releases ownership of the specified critical section
object.
// Enabling another thread to become the owner and gain access
to the protected resource
// The thread must call LeaveCriticalSection once for each
time that it entered the critical section
// This function does not return a value.
wprintf(L"Leaving the critical section...\n");
LeaveCriticalSection(&criticalSec);
}
}
/////////////// Create A Child//////////////
HANDLE CreateChildTh(char *threadNum)
{
HANDLE hThread;
DWORD dwId;
hThread=CreateThread(NULL,0,(LPTHREAD_START_ROUTINE)ThreadMain,(LPVOID)threadNum
,0,&dwId);
if(hThread != NULL)
{
wprintf(L"\nCreateThread() is OK, thread ID %d\n", dwId);
return hThread;
}
else
{
wprintf(L"CreateThread() failed, error %d\n", GetLastError());
return NULL;
}
}
////////////////////Main (process & thread)////////////////////
int main(void)
{
DWORD i;
DWORD dwEvent;
HANDLE hThread[7];
wprintf(L"Initializing the critical section...\n");
InitializeCriticalSection(&criticalSec);
hThread[0]=CreateChildTh("ChThread1");
hThread[1]=CreateChildTh("ChThread2");
hThread[2]=CreateChildTh("ChThread3");
hThread[3]=CreateChildTh("ChThread4");
hThread[4]=CreateChildTh("ChThread5");
hThread[5]=CreateChildTh("ChThread6");
hThread[6]=CreateChildTh("ChThread7");

www.installsetupconfig.com
111
// Waits until one or all of the specified objects are
// in the signaled state or the time-out interval elapses.
dwEvent = WaitForMultipleObjects(7,hThread,TRUE,INFINITE);
switch (dwEvent)
{
// hThread[0] was signaled
case WAIT_OBJECT_0 + 0:
// TODO: Perform tasks required by this event
wprintf(L"First event was signaled.\n");
break;
// hThread[1] was signaled
case WAIT_OBJECT_0 + 1:
// TODO: Perform tasks required by this event
wprintf(L"Second event was signaled.\n");
break;
// hThread[2] was signaled
case WAIT_OBJECT_0 + 2:
// TODO: Perform tasks required by this event
wprintf(L"Third event was signaled.\n");
break;
// hThread[3] was signaled
case WAIT_OBJECT_0 + 3:
// TODO: Perform tasks required by this event
wprintf(L"Fourth event was signaled.\n");
break;
// hThread[4] was signaled
case WAIT_OBJECT_0 + 4:
// TODO: Perform tasks required by this event
wprintf(L"Fifth event was signaled.\n");
break;
// hThread[5] was signaled
case WAIT_OBJECT_0 + 5:
// TODO: Perform tasks required by this event
wprintf(L"Sixth event was signaled.\n");
break;
// hThread[6] was signaled
case WAIT_OBJECT_0 + 6:
// TODO: Perform tasks required by this event
wprintf(L"Seventh event was signaled.\n");
break;
case WAIT_TIMEOUT:
wprintf(L"Wait timed out...\n");
break;
// Return value is invalid.
default:
wprintf(L"Wait error %d\n", GetLastError());
ExitProcess(0);
}

www.installsetupconfig.com
112
wprintf(L"\n");
for(i = 0;i<7;i++)
{
if(CloseHandle(hThread[i]) != 0)
wprintf(L"hThread[%i] handle was closed successfully!\n", i);
else
wprintf(L"Failed to close the hThread[%i] handle! Error %d\n",
i, GetLastError());
}
wprintf(L"Delete the critical section...\n");
DeleteCriticalSection(&criticalSec);
return 0;
}
Build and run the project. The following screenshot is a sample output.
Using Condition Variables Program Example

www.installsetupconfig.com
113
The following code implements a producer/consumer queue. The queue is represented as a bounded
circular buffer, and is protected by a critical section. The code uses two condition variables: one
used by producers (BufferNotFull) and one used by consumers (BufferNotEmpty).
The code calls the InitializeConditionVariable() function to create the condition variables. The
consumer threads call the SleepConditionVariableCS() function to wait for items to be added to the
queue and the WakeConditionVariable() function to signal the producer that it is ready for more
items. The producer threads call SleepConditionVariableCS() to wait for the consumer to remove
items from the queue and WakeConditionVariable() to signal the consumer that there are more items
in the queue. For Windows Server 2003 and Windows XP/2000: Condition variables are not
supported.
Create a new empty Win32 console application project. Give a suitable project name and change the
project location if needed.
Then, add the source file and give it a suitable name.

www.installsetupconfig.com
114
Next, add the following source code.
#include <windows.h>
#include <stdlib.h>
#include <stdio.h>
#define BUFFER_SIZE 10
#define PRODUCER_SLEEP_TIME_MS 500
#define CONSUMER_SLEEP_TIME_MS 2000
LONG Buffer[BUFFER_SIZE];
LONG LastItemProduced;
ULONG QueueSize;
ULONG QueueStartOffset;
ULONG TotalItemsProduced;
ULONG TotalItemsConsumed;
CONDITION_VARIABLE BufferNotEmpty;
CONDITION_VARIABLE BufferNotFull;
CRITICAL_SECTION BufferLock;
BOOL StopRequested;
DWORD WINAPI ProducerThreadProc(PVOID p)
{
ULONG ProducerId = (ULONG)(ULONG_PTR)p;
while (true)
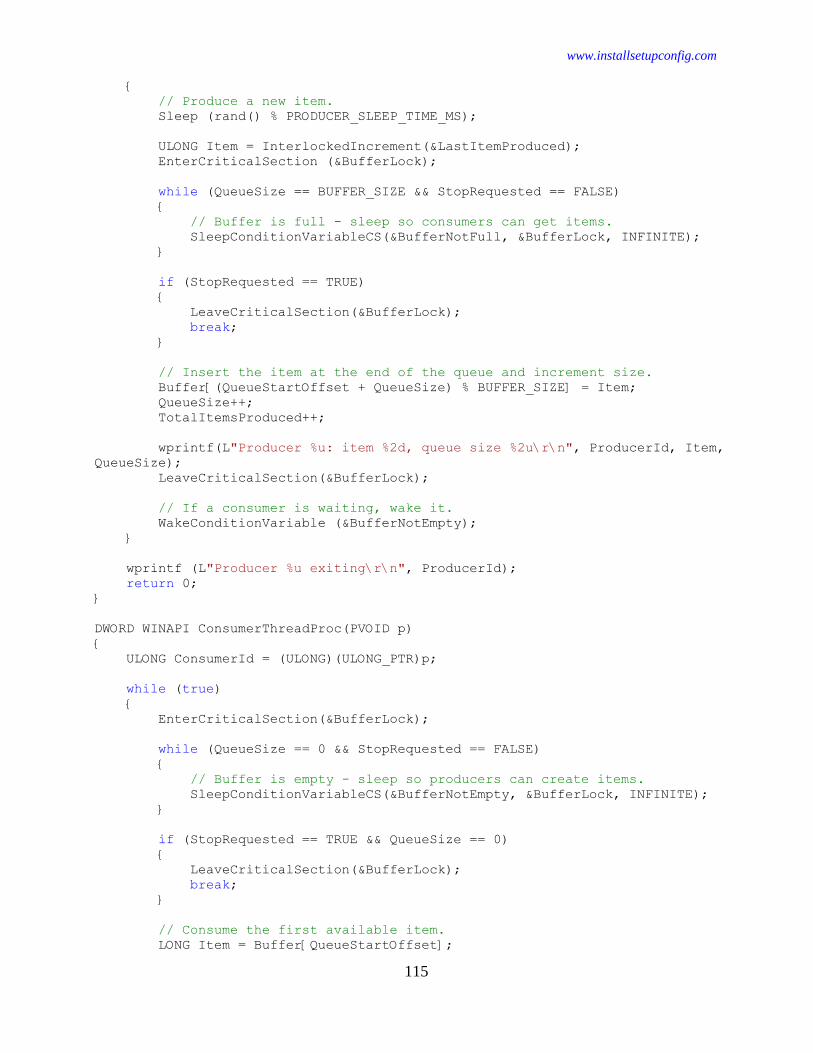
www.installsetupconfig.com
115
{
// Produce a new item.
Sleep (rand() % PRODUCER_SLEEP_TIME_MS);
ULONG Item = InterlockedIncrement(&LastItemProduced);
EnterCriticalSection (&BufferLock);
while (QueueSize == BUFFER_SIZE && StopRequested == FALSE)
{
// Buffer is full - sleep so consumers can get items.
SleepConditionVariableCS(&BufferNotFull, &BufferLock, INFINITE);
}
if (StopRequested == TRUE)
{
LeaveCriticalSection(&BufferLock);
break;
}
// Insert the item at the end of the queue and increment size.
Buffer[(QueueStartOffset + QueueSize) % BUFFER_SIZE] = Item;
QueueSize++;
TotalItemsProduced++;
wprintf(L"Producer %u: item %2d, queue size %2u\r\n", ProducerId, Item,
QueueSize);
LeaveCriticalSection(&BufferLock);
// If a consumer is waiting, wake it.
WakeConditionVariable (&BufferNotEmpty);
}
wprintf (L"Producer %u exiting\r\n", ProducerId);
return 0;
}
DWORD WINAPI ConsumerThreadProc(PVOID p)
{
ULONG ConsumerId = (ULONG)(ULONG_PTR)p;
while (true)
{
EnterCriticalSection(&BufferLock);
while (QueueSize == 0 && StopRequested == FALSE)
{
// Buffer is empty - sleep so producers can create items.
SleepConditionVariableCS(&BufferNotEmpty, &BufferLock, INFINITE);
}
if (StopRequested == TRUE && QueueSize == 0)
{
LeaveCriticalSection(&BufferLock);
break;
}
// Consume the first available item.
LONG Item = Buffer[QueueStartOffset];

www.installsetupconfig.com
116
QueueSize--;
QueueStartOffset++;
TotalItemsConsumed++;
if (QueueStartOffset == BUFFER_SIZE)
{
QueueStartOffset = 0;
}
wprintf(L"Consumer %u: item %2d, queue size %2u\r\n", ConsumerId, Item,
QueueSize);
LeaveCriticalSection(&BufferLock);
// If a producer is waiting, wake it
// Min Vista, server 2008
WakeConditionVariable (&BufferNotFull);
// Simulate processing of the item
Sleep (rand() % CONSUMER_SLEEP_TIME_MS);
}
wprintf(L"Consumer %u exiting\r\n", ConsumerId);
return 0;
}
void wmain(int argc, const wchar_t* argv[])
{
InitializeConditionVariable(&BufferNotEmpty);
InitializeConditionVariable(&BufferNotFull);
InitializeCriticalSection(&BufferLock);
DWORD id;
HANDLE hProducer1 = CreateThread (NULL, 0, ProducerThreadProc, (PVOID)1, 0,
&id);
HANDLE hConsumer1 = CreateThread (NULL, 0, ConsumerThreadProc, (PVOID)1, 0,
&id);
HANDLE hConsumer2 = CreateThread (NULL, 0, ConsumerThreadProc, (PVOID)2, 0,
&id);
_putws(L"Press enter to stop...");
getchar();
EnterCriticalSection(&BufferLock);
StopRequested = TRUE;
LeaveCriticalSection(&BufferLock);
WakeAllConditionVariable(&BufferNotFull);
WakeAllConditionVariable(&BufferNotEmpty);
WaitForSingleObject(hProducer1, INFINITE);
WaitForSingleObject(hConsumer1, INFINITE);
WaitForSingleObject(hConsumer2, INFINITE);
wprintf(L"TotalItemsProduced: %u, TotalItemsConsumed: %u\r\n",
TotalItemsProduced, TotalItemsConsumed);
}

www.installsetupconfig.com
117
Build and run the project. The following screenshot is a sample output when running on Windows
XP Pro SP2.
Using One-Time Initialization Program Example
The following examples demonstrate the use of the one-time initialization functions.
The Synchronous Example
The g_InitOnce global variable is the one-time initialization structure. The OpenEventHandleSync()
function returns a handle to an event that is created only once, or INVALID_HANDLE_VALUE. It
calls the InitOnceExecuteOnce() function to execute the initialization code contained in the
InitHandleFunction() callback function. InitHandleFunction() calls the CreateEvent() function to
create the event and returns the event handle in the lpContext parameter. If the callback function
succeeds, OpenEventHandleAsync() returns the event handle returned in lpContext; otherwise, it
returns INVALID_HANDLE_VALUE.
Create a new empty Win32 console application project. Give a suitable project name and change the
project location if needed.

www.installsetupconfig.com
118
Then, add the source file and give it a suitable name.
Next, add the following source code.

www.installsetupconfig.com
119
// Min Vista/Server 2008
#define _WIN32_WINNT 0x0600
#include <windows.h>
#include <stdio.h>
// Global variable
INIT_ONCE g_InitOnce;
BOOL CALLBACK InitHandleFunction (
PINIT_ONCE InitOnce,
PVOID Parameter,
PVOID *lpContext)
{
HANDLE hEvent;
hEvent = CreateEvent(NULL, TRUE, TRUE, NULL);
if (NULL == hEvent)
{
wprintf(L"CreateEvent() failed, error %d\n", GetLastError());
return FALSE;
}
else
{
wprintf(L"CreateEvent() is OK\n");
*lpContext = hEvent;
return TRUE;
}
}
HANDLE OpenEventHandleSync()
{
PVOID lpContext;
BOOL bStatus;
bStatus = InitOnceExecuteOnce(&g_InitOnce, InitHandleFunction, NULL,
&lpContext);
if (bStatus)
{
wprintf(L"InitOnceExecuteOnce() is OK...\n");
return (HANDLE)lpContext;
}
else
{
wprintf(L"InitOnceExecuteOnce() failed, error %d\n", GetLastError());
return (INVALID_HANDLE_VALUE);
}
}
int wmain()
{
OpenEventHandleSync();
return 0;
}
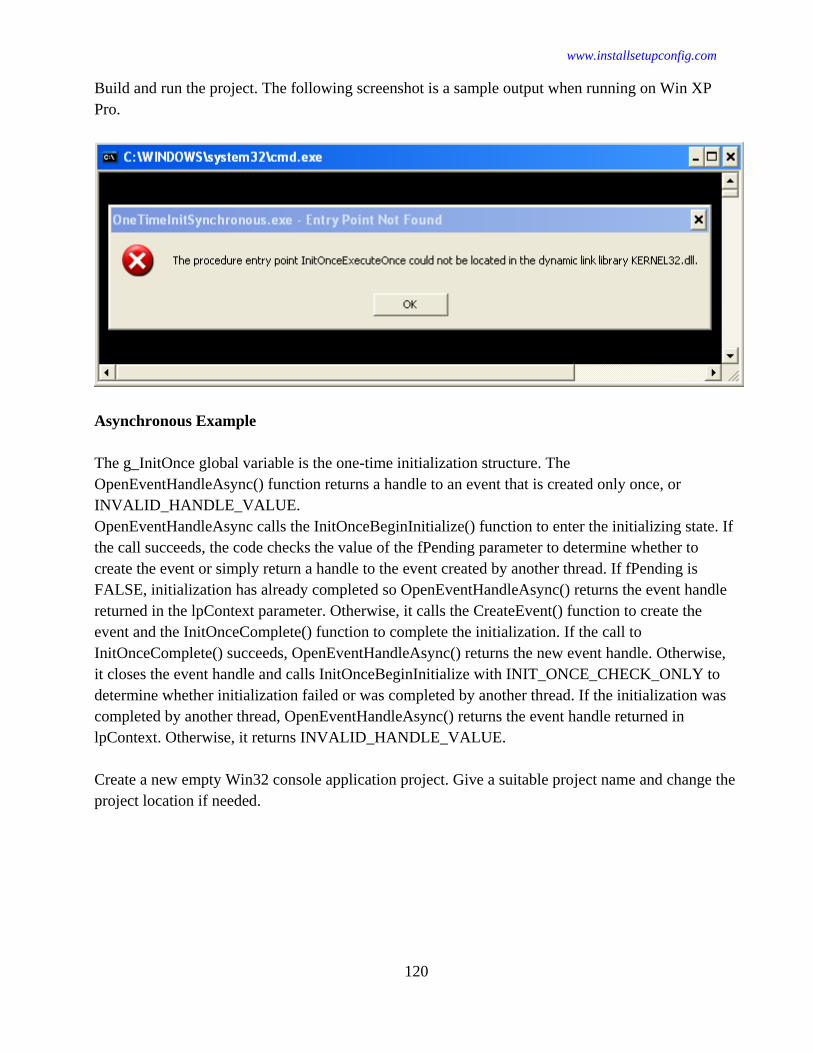
www.installsetupconfig.com
120
Build and run the project. The following screenshot is a sample output when running on Win XP
Pro.
Asynchronous Example
The g_InitOnce global variable is the one-time initialization structure. The
OpenEventHandleAsync() function returns a handle to an event that is created only once, or
INVALID_HANDLE_VALUE.
OpenEventHandleAsync calls the InitOnceBeginInitialize() function to enter the initializing state. If
the call succeeds, the code checks the value of the fPending parameter to determine whether to
create the event or simply return a handle to the event created by another thread. If fPending is
FALSE, initialization has already completed so OpenEventHandleAsync() returns the event handle
returned in the lpContext parameter. Otherwise, it calls the CreateEvent() function to create the
event and the InitOnceComplete() function to complete the initialization. If the call to
InitOnceComplete() succeeds, OpenEventHandleAsync() returns the new event handle. Otherwise,
it closes the event handle and calls InitOnceBeginInitialize with INIT_ONCE_CHECK_ONLY to
determine whether initialization failed or was completed by another thread. If the initialization was
completed by another thread, OpenEventHandleAsync() returns the event handle returned in
lpContext. Otherwise, it returns INVALID_HANDLE_VALUE.
Create a new empty Win32 console application project. Give a suitable project name and change the
project location if needed.
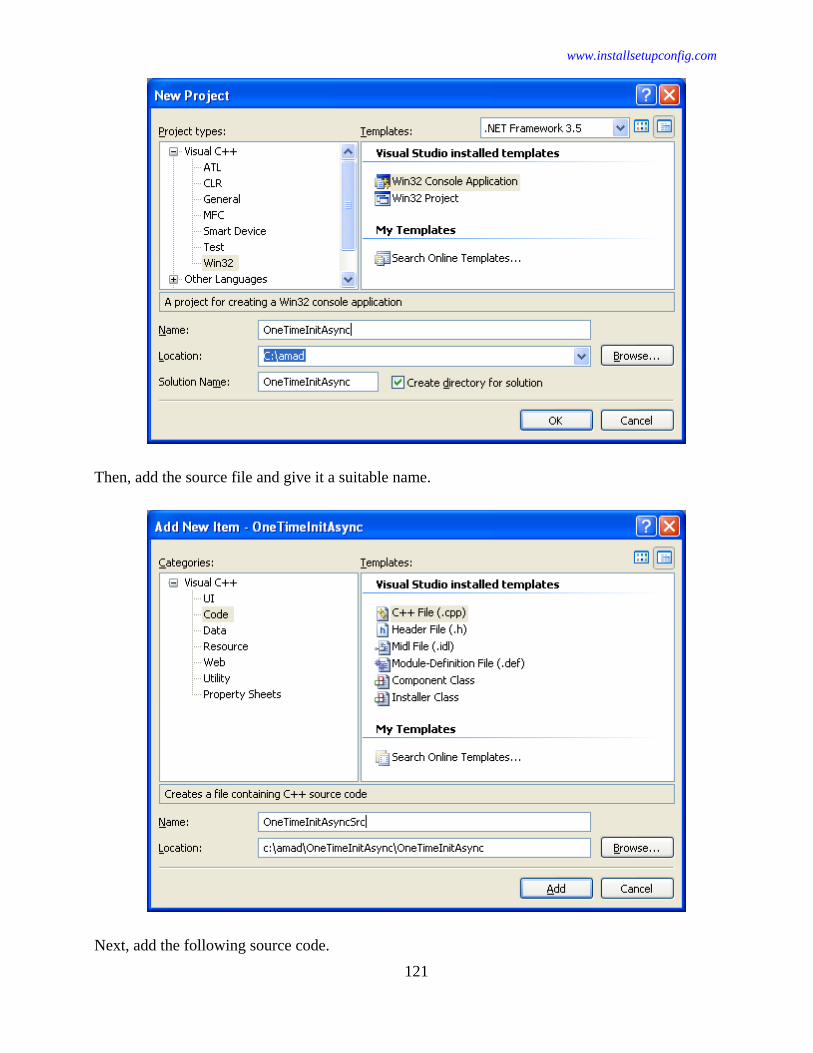
www.installsetupconfig.com
121
Then, add the source file and give it a suitable name.
Next, add the following source code.

www.installsetupconfig.com
122
// Min Vista/server 2008
// http://msdn.microsoft.com/en-us/library/aa383745%28VS.85%29.aspx
#define _WIN32_WINNT 0x0600
#include <windows.h>
#include <stdio.h>
// Global variable
INIT_ONCE g_InitOnce;
HANDLE OpenEventHandleAsync()
{
PVOID lpContext;
BOOL fStatus;
BOOL fPending;
HANDLE hEvent;
fStatus = InitOnceBeginInitialize(&g_InitOnce, INIT_ONCE_ASYNC, &fPending,
&lpContext);
if (!fStatus)
{
wprintf(L"InitOnceBeginInitialize() with INIT_ONCE_ASYNC failed!\n");
return (INVALID_HANDLE_VALUE);
}
else
wprintf(L"InitOnceBeginInitialize() with INIT_ONCE_ASYNC specified
should be fine!\n");
// Initialization has already completed.
if (!fPending)
{
wprintf(L"InitOnceBeginInitialize() with INIT_ONCE_ASYNC specified
failed!\n");
return (HANDLE)lpContext;
}
else
wprintf(L"Initialization has already completed...\n");
hEvent = CreateEvent(NULL, TRUE, TRUE, NULL);
if (hEvent == NULL)
{
wprintf(L"CreateEvent() failed, error %u\n", GetLastError());
return (INVALID_HANDLE_VALUE);
}
else
wprintf(L"CreateEvent() is OK!\n");
fStatus = InitOnceComplete(&g_InitOnce, INIT_ONCE_ASYNC, (PVOID)hEvent);
if (fStatus)
{
wprintf(L"InitOnceComplete() should be fine!\n");
return hEvent;
}
else
wprintf(L"InitOnceComplete() failed, error %u!\n", GetLastError());

www.installsetupconfig.com
123
// Initialization has already completed. Free the local event.
CloseHandle(hEvent);
// Retrieve the final context data.
fStatus = InitOnceBeginInitialize(&g_InitOnce,
INIT_ONCE_CHECK_ONLY,
&fPending,
&lpContext);
if (fStatus && !fPending)
{
wprintf(L"InitOnceBeginInitialize() with INIT_ONCE_CHECK_ONLY specified
& !fPending is OK!\n");
return (HANDLE)lpContext;
}
else
{
wprintf(L"InitOnceBeginInitialize() with INIT_ONCE_CHECK_ONLY
failed!\n");
return INVALID_HANDLE_VALUE;
}
}
int wmain()
{
OpenEventHandleAsync();
return 0;
}
Build and run the project. The following screenshot is a sample output when run on Windows XP
Pro SP2.
Using Singly Linked Lists Program Example
The following example uses the InitializeSListHead() function to initialize a singly linked list and
the InterlockedPushEntrySList() function to insert 10 items. The example uses the
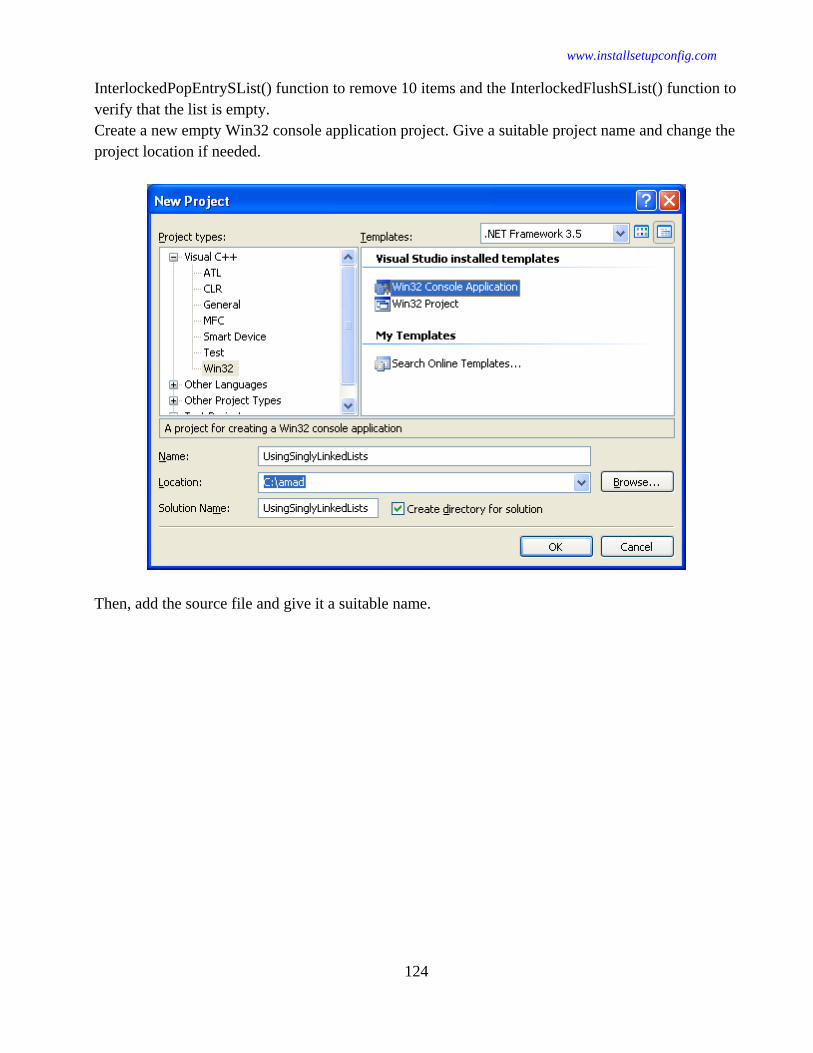
www.installsetupconfig.com
124
InterlockedPopEntrySList() function to remove 10 items and the InterlockedFlushSList() function to
verify that the list is empty.
Create a new empty Win32 console application project. Give a suitable project name and change the
project location if needed.
Then, add the source file and give it a suitable name.

www.installsetupconfig.com
125
Next, add the following source code.
#include <windows.h>
#include <malloc.h>
#include <stdio.h>
// Structure to be used for a list item; the first member is the
// SLIST_ENTRY structure, and additional members are used for data.
// Here, the data is simply a signature for testing purposes.
typedef struct _PROGRAM_ITEM {
SLIST_ENTRY ItemEntry;
ULONG Signature;
} PROGRAM_ITEM, *PPROGRAM_ITEM;
int wmain( )
{
ULONG Count;
PSLIST_ENTRY pFirstEntry, pListEntry;
PSLIST_HEADER pListHead;
PPROGRAM_ITEM pProgramItem;
// Initialize the list header.
pListHead = (PSLIST_HEADER)_aligned_malloc(sizeof(SLIST_HEADER),
MEMORY_ALLOCATION_ALIGNMENT);
if( NULL == pListHead )
{
wprintf(L"Memory allocation failed, error %d\n");
return -1;
}

www.installsetupconfig.com
126
else
wprintf(L"Memory was allocated, initializing the list header...\n");
InitializeSListHead(pListHead);
// Insert 10 items into the list.
for( Count = 1; Count <= 10; Count += 1 )
{
pProgramItem = (PPROGRAM_ITEM)_aligned_malloc(sizeof(PROGRAM_ITEM),
MEMORY_ALLOCATION_ALIGNMENT);
if( NULL == pProgramItem )
{
wprintf(L"Memory allocation failed, error %d\n");
return -1;
}
else
wprintf(L"Memory allocated, inserting item #%d\n", Count);
pProgramItem->Signature = Count;
pFirstEntry = InterlockedPushEntrySList(pListHead, &(pProgramItem-
>ItemEntry));
}
// Remove 10 items from the list and display the signature.
wprintf(L"\n\nRemoving the 10 items from the list & displaying the
signature...\n");
for( Count = 10; Count >= 1; Count -= 1 )
{
pListEntry = InterlockedPopEntrySList(pListHead);
if( NULL == pListEntry )
{
wprintf(L"List is empty...\n");
return -1;
}
else
wprintf(L"InterlockedPopEntrySList() is OK, removing an item
#%d...\n", Count);
pProgramItem = (PPROGRAM_ITEM)pListEntry;
wprintf(L" Signature is %d\n", pProgramItem->Signature);
// This example assumes that the SLIST_ENTRY structure is the
// first member of the structure. If your structure does not
// follow this convention, you must compute the starting address
// of the structure before calling the free function.
_aligned_free(pListEntry);
}
// Flush the list and verify that the items are gone.
pListEntry = InterlockedFlushSList(pListHead);
pFirstEntry = InterlockedPopEntrySList(pListHead);
if (pFirstEntry != NULL)
{
wprintf(L"Error %d: List is not empty...\n", GetLastError());
return -1;
}

www.installsetupconfig.com
127
else
wprintf(L"Flushing the list, the list is empty...\n");
// Frees a block of memory that was allocated with _aligned_malloc
// or _aligned_offset_malloc.
_aligned_free(pListHead);
return 1;
}
Build and run the project. The following screenshot is a sample output.
Using Timer Queues Program Example
The following example creates a timer routine that will be executed by a thread from a timer queue
after a 10 second delay. First, the code uses the CreateEvent() function to create an event object that
is signaled when the timer-queue thread completes. Then it creates a timer queue and a timer-queue
timer, using the CreateTimerQueue() and CreateTimerQueueTimer() functions, respectively. The
code uses the WaitForSingleObject() function to determine when the timer routine has completed.
Finally, the code calls DeleteTimerQueue() to clean up.

www.installsetupconfig.com
128
Create a new empty Win32 console application project. Give a suitable project name and change the
project location if needed.
Then, add the source file and give it a suitable name.
Next, add the following source code.

www.installsetupconfig.com
129
#include <windows.h>
#include <stdio.h>
HANDLE gDoneEvent;
void CALLBACK TimerRoutine(PVOID lpParam, BOOLEAN TimerOrWaitFired)
{
if (lpParam == NULL)
{
wprintf(L"TimerRoutine() lpParam is NULL\n");
}
else
{
// lpParam points to the argument; in this case it is an int
wprintf(L"Timer routine called. Parameter is %d.\n", *(int*)lpParam);
}
SetEvent(gDoneEvent);
}
int wmain()
{
HANDLE hTimer = NULL;
HANDLE hTimerQueue = NULL;
int arg = 1234;
// Use an event object to track the TimerRoutine execution
gDoneEvent = CreateEvent(NULL, TRUE, FALSE, NULL);
if (NULL == gDoneEvent)
{
wprintf(L"CreateEvent() failed, error %d\n", GetLastError());
return 1;
}
else
wprintf(L"CreateEvent() is OK!\n");
// Create the timer queue.
hTimerQueue = CreateTimerQueue();
if (NULL == hTimerQueue)
{
wprintf(L"CreateTimerQueue() failed, error %d\n", GetLastError());
return 2;
}
else
wprintf(L"CreateTimerQueue() - timer queue was successfully
created!\n");
// Set a timer to call the timer routine in 10 seconds.
if (!CreateTimerQueueTimer( &hTimer, hTimerQueue,
(WAITORTIMERCALLBACK)TimerRoutine, &arg , 10000, 0, 0))
{
wprintf(L"CreateTimerQueueTimer() failed, error %d\n", GetLastError());
return 3;
}
else
// TODO: Do other useful work here

www.installsetupconfig.com
130
wprintf(L"CreateTimerQueueTimer() - call timer routine in 10
seconds...\n");
// Wait for the timer-queue thread to complete using an event
// object. The thread will signal the event at that time.
if (WaitForSingleObject(gDoneEvent, INFINITE) != WAIT_OBJECT_0)
wprintf(L"WaitForSingleObject() failed, error %d\n", GetLastError());
else
wprintf(L"WaitForSingleObject() is OK!\n");
if(CloseHandle(gDoneEvent) != 0)
wprintf(L"gDoneEvent handle was closed succeffuly!\n");
else
wprintf(L"Failed to close gDoneEvent handle, error %d\n",
GetLastError());
// Delete all timers in the timer queue.
if (!DeleteTimerQueue(hTimerQueue))
wprintf(L"DeleteTimerQueue() failed, error %d\n", GetLastError());
else
wprintf(L"DeleteTimerQueue() - deleting all timers in the timer
queue...\n");
return 0;
}
Build and run the project. The following screenshots are sample outputs.
The Interlocked Functions Program Example 1
The interlocked group of functions offers a low-level synchronization between threads that share
common memory. The interlocked functions are InterlockedIncrement(), InterlockedDecrement(),
InterlockedExchange(), InterlockedCompareExchange(), and InterlockedExchangeAdd(). The

www.installsetupconfig.com
131
functions are more efficient in execution than other synchronization functions and do not deal with
any kernel objects. The drawback in using them is that higher primitives such as mutex,
semaphore, and event objects have to be written.
The following program uses an interlocked increment to keep track of the total number of printouts
made by two threads.
Create a new empty Win32 console application project. Give a suitable project name and change the
project location if needed.
Then, add the source file and give it a suitable name.

www.installsetupconfig.com
132
Next, add the following source code.
// InterlockedIncrement Example
// The interlocked functions provide a simple mechanism for synchronizing access
// to a variable that is shared by multiple threads.
// This function is atomic with respect to calls to other interlocked functions.
#include <windows.h>
#include <stdio.h>
// Global var
volatile LONG TotalCountOfOuts = 0;
///////////// Thread Main ///////////////////////
void ThreadMain(void)
{
static DWORD i;
DWORD dwIncre;
for(;;)
{
wprintf(L" Standard output print, pass #%u\n", i);
// Increments (increases by one) the value of the specified 32-bit
// variable as an atomic operation.
// To operate on 64-bit values, use the InterlockedIncrement64
function.
dwIncre = InterlockedIncrement((LPLONG)&TotalCountOfOuts);
// The function returns the resulting incremented value.
wprintf(L" Increment value is %u\n", dwIncre);

www.installsetupconfig.com
133
Sleep(100);
i++;
}
}
///////////////////// Create A Child//////////////
void CreateChildThread(void)
{
HANDLE hThread;
DWORD dwId;
hThread =
CreateThread(NULL,0,(LPTHREAD_START_ROUTINE)ThreadMain,(LPVOID)NULL,0,&dwId);
if(hThread != NULL)
wprintf(L"CreateThread() is OK, thread ID %u\n", dwId);
else
wprintf(L"CreateThread() failed, error %u\n", GetLastError());
if(CloseHandle(hThread) != 0)
wprintf(L"hThread's handle was closed successfully!\n");
else
wprintf(L"CloseHandle() failed, error %u\n", GetLastError());
}
/////// Main /////
int wmain(void)
{
CreateChildThread();
CreateChildThread();
for(;;)
{
// 500/100 (from ThreadMain())= 5; Then 5 x 2 threads = 10.
Sleep(500);
wprintf(L"Current count of the printed lines by child threads = %u\n",
TotalCountOfOuts);
}
return 0;
}
Build and run the project. The following screenshot is a sample output.

www.installsetupconfig.com
134
The Interlocked Functions Program Example 2
The next program prints out the total number of threads that are currently in a certain critical section
of code. When a thread is entering the critical section, it uses InterlockedIncrement() to increase a
global variable. When the thread is about to leave the critical section code, it uses the function
InterlockedDecrement() to decrease the global variable. There are only three threads that could be
in the critical section.
If you replace the InterlockedIncrement() function with a regular increment statement and the
InterlockedDecrement() function for a decrement statement, you will start to see weird numbers for
the total number of threads in the critical section.
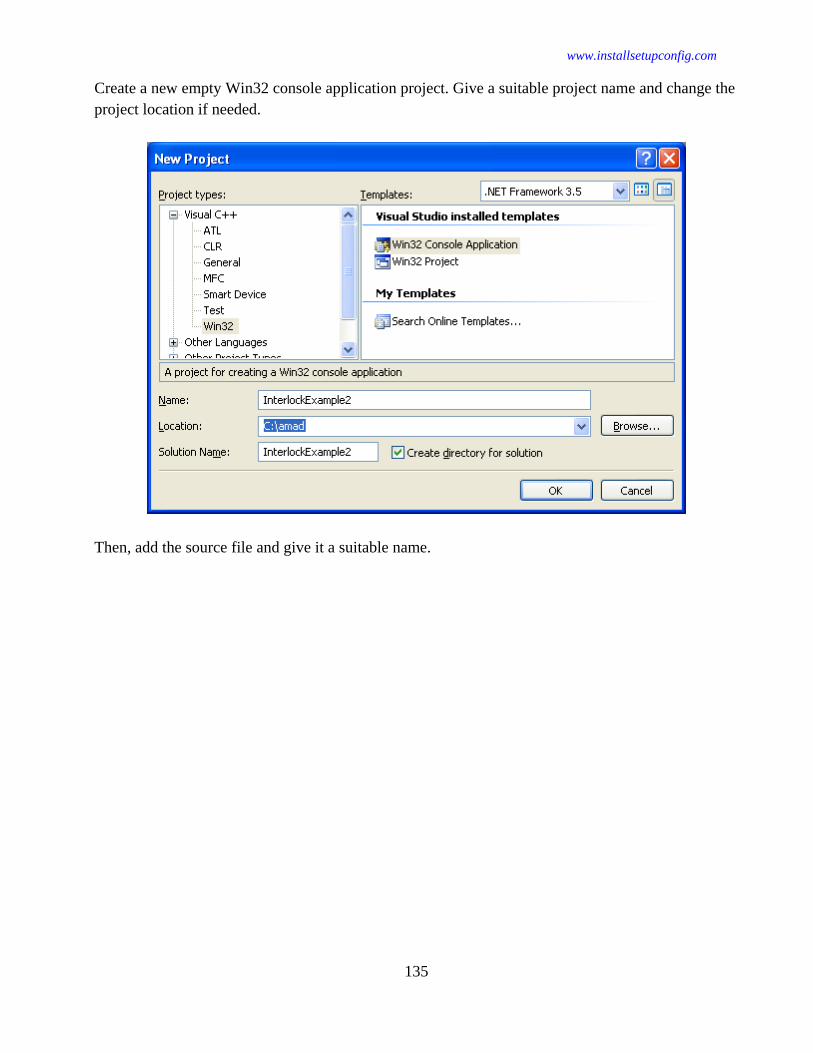
www.installsetupconfig.com
135
Create a new empty Win32 console application project. Give a suitable project name and change the
project location if needed.
Then, add the source file and give it a suitable name.

www.installsetupconfig.com
136
Next, add the following source code.
// InterlockedIncrement() and InterlockedDecrement() program example
#include <windows.h>
#include <stdio.h>
volatile LONG TotalThreadCount = 0;
////// Thread Main /////////
void ThreadMain(void)
{
DWORD dwIncre, dwDecre;
for(;;)
{
// A critical section begins
// Increments (increases by one) the value of the specified 32-bit
variable as an atomic operation.
// The function returns the resulting incremented value.
dwIncre = InterlockedIncrement((LPLONG)&TotalThreadCount);
wprintf(L"InterlockedIncrement() - Increment value is %u\n",
dwIncre);
// Dummy, time to complete task...
// Should be random
// Sleep(100);
// critical section ends

www.installsetupconfig.com
137
// Decrements (decreases by one) the value of the specified 32-bit
variable as an atomic operation.
// The function returns the resulting decremented value.
dwDecre = InterlockedDecrement((LPLONG)&TotalThreadCount);
wprintf(L"InterlockedDecrement() - Decrement value is %u\n",
dwDecre);
// Another dummy, giving some time, should be random
// Sleep(rand()%1000);
}
}
///////// Create A Child //////////////
void CreateChildThread(void)
{
HANDLE hThread;
DWORD dwId;
hThread =
CreateThread(NULL,0,(LPTHREAD_START_ROUTINE)ThreadMain,(LPVOID)NULL,0,&dwId);
if(hThread != NULL)
wprintf(L"CreateThread() is OK, thread ID is %u\n", dwId);
else
wprintf(L"CreateThread() failed, error %u\n", GetLastError());
wprintf(L"\n");
if(CloseHandle(hThread) != 0)
wprintf(L"hThread's handle closed successfully!\n");
else
wprintf(L"Failed to close hThread's handle, error %u\n",
GetLastError());
wprintf(L"\n");
}
///// Main ////////
int wmain(void)
{
DWORD Count;
CreateChildThread();
CreateChildThread();
CreateChildThread();
// May test larger range...
for(Count = 0;Count < 5; Count++)
{
wprintf(L" Total number of threads in critical section = %u\n",
TotalThreadCount);
}
return 0;
}
Build and run the project. The following screenshot is a sample output.

www.installsetupconfig.com
138
The Interlocked Functions Program Example 3
The next program demonstrates how mutual exclusion can be achieved by using the
InterlockedIncrement() and the InterlockedDecrement() functions. The code makes sure that only
one thread is executing the critical section of code at any time. The problem is that the threads may

www.installsetupconfig.com
139
become starved. A starved thread is one in which there is no guarantee that the thread will actually
enter the critical section, just waiting, hence cannot complete its task.
Create a new empty Win32 console application project. Give a suitable project name and change the
project location if needed.
Then, add the source file and give it a suitable name.

www.installsetupconfig.com
140
Next, add the following source code.
// Example demonstrating the mutual exclusion (MutEx)
#include <windows.h>
#include <stdio.h>
// Global var, no need for volatile
LONG TotalThreadCount = 0;
///// Thread Main ///////
void ThreadMain(char *threadName)
{
DWORD i;
// Let give some limit...
for(i = 0;i < 10;i++)
{
while( InterlockedIncrement((LPLONG)&TotalThreadCount) !=1 )
{
InterlockedDecrement((LPLONG)&TotalThreadCount);
}
// Critical section code should be here
wprintf(L"%S, in critical section, doing my task...\n", threadName);
// May give some time to simulate the task need to be completed
Sleep(1000);

www.installsetupconfig.com
141
// Critical section ends
InterlockedDecrement((LPLONG)&TotalThreadCount);
}
}
/////////// Create A Child //////////////
void CreateChildThread(char *name)
{
HANDLE hThread;
DWORD dwId;
hThread =
CreateThread(NULL,0,(LPTHREAD_START_ROUTINE)ThreadMain,(LPVOID)name,0,&dwId);
if(hThread != NULL)
wprintf(L"CreateThread() is OK, thread id is %u\n", dwId);
else
wprintf(L"CreateThread() failed, error %u\n", GetLastError());
if(CloseHandle(hThread) != 0)
wprintf(L"hThread handle closed successfully!\n");
else
wprintf(L"Failed to clode hThread handle, error %u\n",
GetLastError());
wprintf(L"\n");
}
//////////////////// Main ///////////////////////
int wmain(void)
{
CreateChildThread("ThreadBodoA");
CreateChildThread("ThreadBodoB");
CreateChildThread("ThreadBodoC");
CreateChildThread("ThreadBodoD");
ExitThread(0);
return 0;
}
Build and run the project. The following screenshot is a sample output.

www.installsetupconfig.com
142
Extra Synchronization Related working Program Examples
In Windows, threads are created using the CreateThread() function, which requires:
1. The stack size of the thread.
2. The security attributes of the thread.
3. The address at which to begin execution of a procedure.
4. A pointer to a variable to be passed to the thread.

www.installsetupconfig.com
143
5. Flags that control the creation of the thread.
6. An address to store the system-wide unique thread identifier.
After a thread is created, the thread identifier can be used to manage the thread (like get and set the
priority of thread) until it has terminated. The next example demonstrates how you should use the
CreateThread function to create a single thread.
Creating a Single Thread Program Example
Create a new empty Win32 console application project. Give a suitable project name and change the
project location if needed.
Then, add the source file and give it a suitable name.

www.installsetupconfig.com
144
Next, add the following source code.
#include <Windows.h>
#include <stdio.h>
WCHAR message[] = L"Hello World";
DWORD WINAPI thread_function(LPVOID arg)
{
wprintf(L"thread_function() has started. Sent argument was \"%s\"\n",
arg);
// Simulate on doing some job...
Sleep(3000);
// Copy a string to the global variable of the current process
wprintf(L"Thread %u is modifying the global variable Message...\n",
GetCurrentThreadId());
wcscpy_s(message, sizeof(message), L"Bye!");
// Return with an integer for verification
return 100;
}
void wmain()
{
HANDLE a_thread;
DWORD a_threadId;
DWORD thread_result;
wprintf(L"Current process ID is %u\n", GetCurrentProcessId());
wprintf(L"Current thread (main()) ID is %u\n", GetCurrentThreadId());
wprintf(L"Global variable of the current process, Message is now
\"%s\"\n", message);
wprintf(L"\n");
// Create a new thread.

www.installsetupconfig.com
145
a_thread = CreateThread(NULL, 0, thread_function, (LPVOID)message,
0,&a_threadId);
if (a_thread == NULL)
{
wprintf(L"CreateThread() failed, error %u\n", GetLastError());
exit(EXIT_FAILURE);
}
else
{
wprintf(L"Current process ID is %u\n", GetCurrentProcessId());
wprintf(L"CreateThread() is OK, thread ID is %u\n", a_threadId);
}
wprintf(L"\nWaiting for thread %u to finish...\n\n", a_threadId);
if (WaitForSingleObject(a_thread, INFINITE) != WAIT_OBJECT_0)
{
wprintf(L"WaitForSingleObject(), failed, error %u\n",
GetLastError());
exit(EXIT_FAILURE);
}
else
wprintf(L"WaitForSingleObject()is OK! Some event should be
signaled!\n");
wprintf(L"Current thread ID is %u\n", GetCurrentThreadId());
wprintf(L"\n");
// Retrieves the termination status of the specified thread.
// If the function succeeds, the return value is nonzero.
// If the function fails, the return value is zero.
GetExitCodeThread(a_thread, &thread_result);
wprintf(L"Thread joined, it returned %d\n", thread_result);
wprintf(L"Global variable of the current process, Message\n"
L"modified by thread %u is now \"%s\"\n", a_threadId, message);
wprintf(L"\n");
if(CloseHandle(a_thread) != 0)
wprintf(L"a_thread handle was closed successfully!\n");
else
wprintf(L"Failed to close a_thread handle, error %u\n",
GetLastError());
exit(EXIT_SUCCESS);
}
Build and run the project. The following screenshot is a sample output.

www.installsetupconfig.com
146
Cancelling a Thread Program Example
Create a new empty Win32 console application project. Give a suitable project name and change the
project location if needed.
Then, add the source file and give it a suitable name.

www.installsetupconfig.com
147
Next, add the following source code.
#include <Windows.h>
#include <stdio.h>
DWORD WINAPI thread_function(LPVOID arg)
{
wprintf(L"thread_function() is running. Argument received was \"%s\"\n",
arg);
for(int i = 0; i < 10; i++)
{
wprintf(L"Thread is running pass #%d, ID %u...\n", i,
GetCurrentThreadId());
// Give enough time...
Sleep(1000);
}
return 100;
}
void wmain()
{
HANDLE a_thread;
DWORD thread_result, dwThreadId;
WCHAR message[] = L"Hello World";
wprintf(L"Current process ID is %u\n", GetCurrentProcessId());
wprintf(L"Current thread (main()) ID is %u\n", GetCurrentThreadId());
wprintf(L"\n");

www.installsetupconfig.com
148
// Create a new thread.
a_thread = CreateThread(NULL, 0, thread_function, (LPVOID)message, 0,
&dwThreadId);
if (a_thread == NULL)
{
wprintf(L"CreateThread() failed, error %u", GetLastError());
exit(EXIT_FAILURE);
}
else
wprintf(L"CreateThread() is OK! Thread ID is %u\n", dwThreadId);
// Give enough time, else deadlock
Sleep(3000);
// If the function succeeds, the return value is nonzero.
// If the function fails, the return value is zero.
if (!TerminateThread(a_thread, 0))
{
wprintf(L"TerminateThread() - Thread cancellation failed! error
%u\n", GetLastError());
exit(EXIT_FAILURE);
}
else
wprintf(L"TerminateThread() - Cancelling thread %u\n", dwThreadId);
wprintf(L"\n");
wprintf(L"Waiting for thread %u to finish...\n", dwThreadId);
if(WaitForSingleObject(a_thread, INFINITE) != WAIT_OBJECT_0)
{
wprintf(L"WaitForSingleObject(), failed, error %u\n",
GetLastError());
exit(EXIT_FAILURE);
}
else
wprintf(L"WaitForSingleObject()is OK! Some event should be
signaled!\n");
wprintf(L"\n");
// If the function succeeds, the return value is nonzero.
// If the function fails, the return value is zero.
if(GetExitCodeThread(a_thread, &thread_result) != 0)
wprintf(L"GetExitCodeThread() is OK!, Exit code %u\n",
thread_result);
else
wprintf(L"GetExitCodeThread() failed, error %u\n", GetLastError());
if(CloseHandle(a_thread) != 0)
wprintf(L"a_thread handle was closed successfully!\n");
else
wprintf(L"Failed to close a_thread handle, error %u\n",
GetLastError());
exit(EXIT_SUCCESS);
}
Build and run the project. The following screenshot is a sample output.

www.installsetupconfig.com
149
The execution may be hanging. Can you find the reason?
When verifying the condition using Windows Task Manager, we can see a single thread is still
running.

www.installsetupconfig.com
150
The Multithread without any synchronization Program Example
Create a new empty Win32 console application project. Give a suitable project name and change the
project location if needed.

www.installsetupconfig.com
151
Then, add the source file and give it a suitable name.
Next, add the following source code.
#include <Windows.h>
#include <stdio.h>

www.installsetupconfig.com
152
// Global variable
WCHAR message[] = L"Hello I'm a Thread";
DWORD WINAPI thread_function(LPVOID arg)
{
int count2;
wprintf(L"thread_function() is running. Argument received was: %s\n",
arg);
wprintf(L"\n");
for (count2 = 0; count2 < 10; count2++)
{
Sleep(1000);
wprintf(L"X-");
}
Sleep(3000);
return 0;
}
int wmain()
{
HANDLE a_thread;
DWORD a_threadId;
DWORD thread_result;
int count1;
wprintf(L"The process ID is %u\n", GetCurrentProcessId());
wprintf(L"The main() thread ID is %u\n", GetCurrentThreadId());
wprintf(L"\n");
// Create a new thread...
a_thread = CreateThread(NULL, 0, thread_function, (LPVOID)message,
0,&a_threadId);
if (a_thread == NULL)
{
wprintf(L"CreateThread() - Thread creation failed, error %u\n",
GetLastError());
exit(EXIT_FAILURE);
}
else
wprintf(L"CreateThread() is OK, thread ID is %u\n", a_threadId);
wprintf(L"Entering loop...\n");
for (count1 = 0; count1 < 10; count1++)
{
Sleep(1000);
wprintf(L"Y-");
}
wprintf(L"\n\nWaiting for thread %u to finish...\n", a_threadId);
if (WaitForSingleObject(a_thread, INFINITE) != WAIT_OBJECT_0)
{
wprintf(L"WaitForSingleObject() - Thread join failed! Error %u\n",
GetLastError());
exit(EXIT_FAILURE);
}
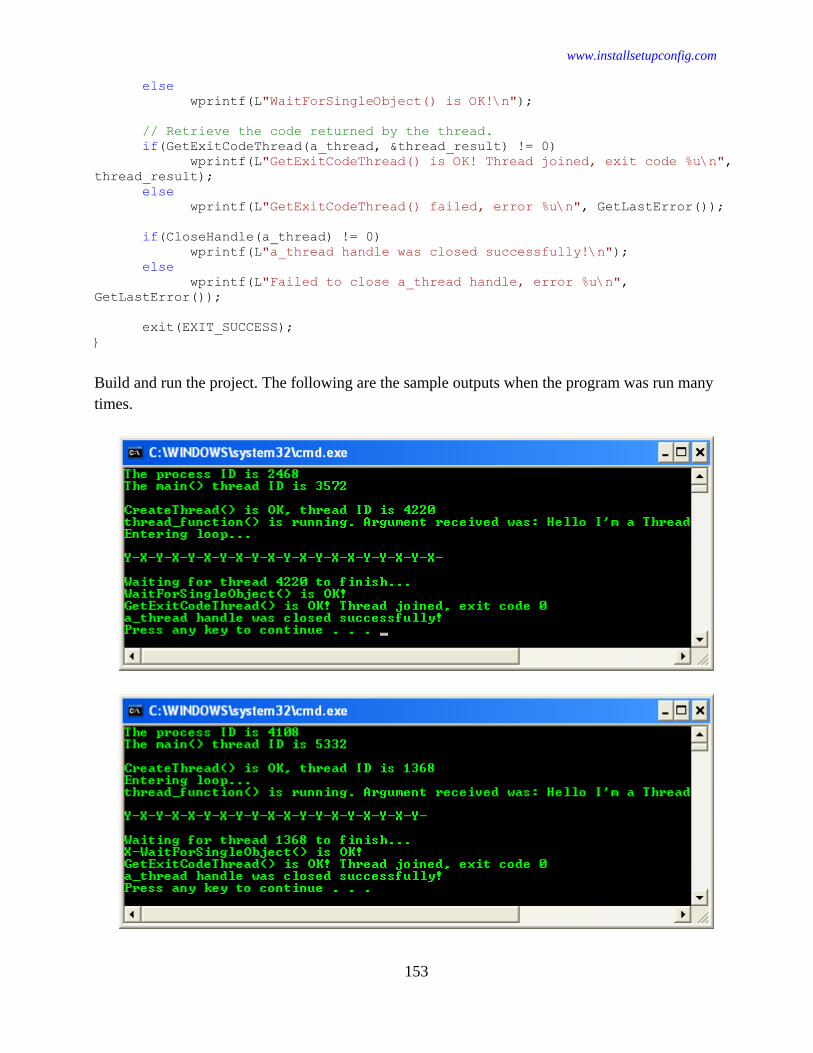
www.installsetupconfig.com
153
else
wprintf(L"WaitForSingleObject() is OK!\n");
// Retrieve the code returned by the thread.
if(GetExitCodeThread(a_thread, &thread_result) != 0)
wprintf(L"GetExitCodeThread() is OK! Thread joined, exit code %u\n",
thread_result);
else
wprintf(L"GetExitCodeThread() failed, error %u\n", GetLastError());
if(CloseHandle(a_thread) != 0)
wprintf(L"a_thread handle was closed successfully!\n");
else
wprintf(L"Failed to close a_thread handle, error %u\n",
GetLastError());
exit(EXIT_SUCCESS);
}
Build and run the project. The following are the sample outputs when the program was run many
times.

www.installsetupconfig.com
154
No actual synchronization between the main thread and child thread is performed; each thread prints
different characters. The sequence of the characters printed to the output may be different in each
execution.
Once again, it is not possible to predict the output from these examples. In most applications,
unpredictable results are an undesirable feature. Consequently, it is important that you take great
care in controlling access to shared resources in threaded code.
There are a variety of ways to coordinate multiple threads of execution. To synchronize access to a
resource, use one of the synchronization objects in one of the wait functions.
The wait functions allow a thread to block its own execution. The wait functions do not return until
the specified criteria have been met. A synchronization object is an object whose handle can be
specified in one of the wait functions to coordinate the execution of multiple threads. More than one
process can have a handle to the same synchronization object, making interprocess synchronization
possible.
Synchronization with Interlocked Exchange Program Example
A simple form of synchronization is to use what is known as an interlocked exchange. An
interlocked exchange performs a single operation that cannot be preempted.
The functions InterlockedExchange(), InterlockedCompareExchange(), InterlockedDecrement(),
InterlockedExchangeAdd(), and InterlockedIncrement() provide a simple mechanism for
synchronizing access to a variable that is shared by multiple threads. The threads of different
processes can use this mechanism if the variable is in shared memory. The InterlockedExchange()
function atomically exchanges a pair of values. The function prevents more than one thread from
using the same variable simultaneously.
The variable pointed to by the target parameter must be aligned on a 32-bit boundary. These
functions will fail on multiprocessor x86 systems and any non-x86 systems. Because this is not the
case in the example, the example has limited value; but it does illustrate the use of the
InterlockedExchange() functions. The InterlockedExchange() function should not be used on
memory allocated with the PAGE_NOCACHE modifier.

www.installsetupconfig.com
155
The following example demonstrates the usage of InterlockedExchange() for synchronizing the
shared resource or global variable.
Create a new empty Win32 console application project. Give a suitable project name and change the
project location if needed.
Then, add the source file and give it a suitable name.

www.installsetupconfig.com
156
Next, add the following source code.
#include <Windows.h>
#include <stdio.h>
// Shared global variables
LONG new_value = 1;
WCHAR message[] = L"Hello I'm a Thread";
DWORD WINAPI thread_function(PVOID arg)
{
int count2;
wprintf(L"thread_function() is running. Argument sent was: %s\n", arg);
wprintf(L"\nEntering child loop...\n");
for (count2 = 0; count2 < 10; count2++)
{
Sleep(1000);
wprintf(L" (Y-%d)", new_value);
// Sets a 32-bit variable to the specified value as an atomic
operation.
// The function returns the initial value of the Target, parameter
1.
InterlockedExchange(&new_value, 1);
}
Sleep(3000);
return 0;
}

www.installsetupconfig.com
157
void wmain()
{
HANDLE a_thread;
DWORD a_threadId;
DWORD thread_result;
int count1;
wprintf(L"The process ID is %u\n", GetCurrentProcessId());
wprintf(L"The main() thread ID is %u\n", GetCurrentThreadId());
wprintf(L"\n");
// Create a new thread.
a_thread = CreateThread(NULL, 0, thread_function, (PVOID)message, 0,
&a_threadId);
if (a_thread == NULL)
{
wprintf(L"CreateThread() - Thread creation failed, error %u\n",
GetLastError());
exit(EXIT_FAILURE);
}
else
wprintf(L"CreateThread() is OK! Thread ID is %u\n", a_threadId);
wprintf(L"\nEntering main() loop...\n");
for (count1 = 0; count1 < 10; count1++)
{
// Give ample time...
Sleep(1000);
printf("(X-%d)", new_value);
// Sets a 32-bit variable to the specified value as an atomic
operation.
// The function returns the initial value of the Target, parameter
1.
InterlockedExchange(&new_value, 2);
}
wprintf(L"\n\nWaiting for thread %u to finish...\n", a_threadId);
if (WaitForSingleObject(a_thread, INFINITE) != WAIT_OBJECT_0)
{
wprintf(L"Thread join failed! Error %u", GetLastError());
exit(EXIT_FAILURE);
}
else
wprintf(L"WaitForSingleObject() is OK, an object was
signalled...\n");
// Retrieve the code returned by the thread.
if(GetExitCodeThread(a_thread, &thread_result) != 0)
wprintf(L"GetExitCodeThread() is OK! Thread joined, exit code %u\n",
thread_result);
else
wprintf(L"GetExitCodeThread() failed, error %u\n", GetLastError());
if(CloseHandle(a_thread) != 0)
wprintf(L"a_thread handle was closed successfully!\n");
else

www.installsetupconfig.com
158
wprintf(L"Failed to close a_thread handle, error %u\n",
GetLastError());
exit(EXIT_SUCCESS);
}
Build and run the project. The following screenshot is a sample output.
Some Notes for IA64
1. The InterlockedExchange() function generates a full memory barrier (or fence) and performs
the exchange operation. This ensures the strict memory access ordering that is necessary, but
it can decrease performance. To operate on 64-bit memory locations and values, use the
InterlockedExchange64() function.
LONGLONG InterlockedExchange64(
LONGLONG volatile* Target,
LONGLONG Value
);
2. The variable pointed to by the Target parameter must be aligned on a 64-bit boundary.
3. Be cautious about the variable pointed to by the Target parameter and the Value parameter;
they must be of the data type longlong.
Synchronization with Spinlocks Program Example
In the previous example, as noted, you still have no synchronization between the two threads. The
output may still be out of order. One simple mechanism that offers synchronization is to implement
a spinlock. To accomplish this, a variant of the Interlocked function called
InterlockedCompareExchange() is used.

www.installsetupconfig.com
159
The InterlockedCompareExchange() function performs an atomic comparison of the specified
values and exchanges the values, based on the outcome of the comparison. The function prevents
more than one thread from using the same variable simultaneously. The
InterlockedCompareExchange() function performs an atomic comparison of the destination value
with the comperand (third parameter) value. If the destination value is equal to the comperand value,
the exchange value is stored in the address specified by destination, otherwise no operation is
performed.
The variables for InterlockedCompareExchange() must be aligned on a 32-bit boundary; otherwise,
this function will fail on multiprocessor x86 systems and any non-x86 systems.
This function and all other functions of the InterlockedExchange() and InterlockedExchange64()
family should not be used on memory allocated with the PAGE_NOCACHE modifier because this
may cause hardware faults on some processor architectures. To ensure ordering between reads and
writes to PAGE_NOCACHE memory, use explicit memory barriers in your code.
Create a new empty Win32 console application project. Give a suitable project name and change the
project location if needed.
Then, add the source file and give it a suitable name.

www.installsetupconfig.com
160
Next, add the following source code.
#include <Windows.h>
#include <stdio.h>
// Shared global variables
LONG run_now = 1;
WCHAR message[] = L"Hello I'm a Thread";
DWORD WINAPI thread_function(LPVOID arg)
{
int count2;
wprintf(L"thread_function() is running. Argument sent was: %s\n", arg);
wprintf(L"Entering child loop...\n");
wprintf(L"\n");
for (count2 = 0; count2 < 10; count2++)
{
if (InterlockedCompareExchange(&run_now, 1, 2) == 2)
wprintf(L"X-2 ");
else
Sleep(1000);
}
Sleep(2000);
return 0;
}
void wmain()
{
HANDLE a_thread;
DWORD a_threadId;

www.installsetupconfig.com
161
DWORD thread_result;
int count1;
wprintf(L"The process ID is %u\n", GetCurrentProcessId());
wprintf(L"The main() thread ID is %u\n", GetCurrentThreadId());
wprintf(L"\n");
// Create a new thread.
a_thread = CreateThread(NULL, 0, thread_function, (PVOID)message,
0,&a_threadId);
if (a_thread == NULL)
{
wprintf(L"CreateThread() - Thread creation failed, error %u\n",
GetLastError());
exit(EXIT_FAILURE);
}
else
wprintf(L"CreateThread() is OK, thread ID is %u\n", a_threadId);
wprintf(L"Entering main() loop...\n");
for (count1 = 0; count1 < 10; count1++)
{
// The function returns the initial value of the Destination
(parameter 1).
if (InterlockedCompareExchange(&run_now, 2, 1) == 1)
wprintf(L"Y-1");
else
Sleep(3000);
}
wprintf(L"\n");
printf("\nWaiting for thread %u to finish...\n", a_threadId);
if (WaitForSingleObject(a_thread, INFINITE) != WAIT_OBJECT_0)
{
wprintf(L"Thread join failed! Error %u", GetLastError());
exit(EXIT_FAILURE);
}
else
wprintf(L"WaitForSingleObject() is OK, an object was
signalled...\n");
// Retrieve the code returned by the thread.
if(GetExitCodeThread(a_thread, &thread_result) != 0)
wprintf(L"GetExitCodeThread() is OK! Thread joined, exit code %u\n",
thread_result);
else
wprintf(L"GetExitCodeThread() failed, error %u\n", GetLastError());
if(CloseHandle(a_thread) != 0)
wprintf(L"a_thread handle was closed successfully!\n");
else

www.installsetupconfig.com
162
wprintf(L"Failed to close a_thread handle, error %u\n",
GetLastError());
exit(EXIT_SUCCESS);
}
Build and run the project. The following are the sample outputs when the program was run many
times.
Spinlocks work well for synchronizing access to a single object, but most applications are not this
simple. Moreover, using spinlocks is not the most efficient means for controlling access to a shared
resource. Running a While loop in the user mode while waiting for a global value to change wastes
CPU cycles unnecessarily. A mechanism is needed that does not waste CPU time while waiting to
access a shared resource.

www.installsetupconfig.com
163
When a thread requires access to a shared resource (for example, a shared memory object), it must
either be notified or scheduled to resume execution. To accomplish this, a thread must call an
operating system function, passing parameters to it that indicate what the thread is waiting for. If the
operating system detects that the resource is available, the function returns and the thread resumes.
If the resource is unavailable, the system places the thread in a wait state, making the thread non-
schedulable. This prevents the thread from wasting any CPU time. When a thread is waiting, the
system permits the exchange of information between the thread and the resource. The operating
system tracks the resources that a thread needs and automatically resumes the thread when the
resource becomes available. The execution of the thread is synchronized with the availability of the
resource. Mechanisms that prevent the thread from wasting CPU time include:
1. Mutexes
2. Critical sections
3. Semaphores
Windows includes all three of these mechanisms, and UNIX provides both semaphores and
mutexes. These three mechanisms are described in the following sections.
Synchronization Using Mutexes Program Example
A mutex is a kernel object that provides a thread with mutually exclusive access to a single resource.
The state of a mutex object is set to signaled when it is not owned by any thread, and nonsignaled
when it is owned. Only one thread at a time can own a mutex object, whose name comes from the
fact that it is useful in coordinating mutually exclusive access to a shared resource.
Any thread of the calling process can specify the mutex-object handle in a call to one of the wait
functions. The single-object wait functions return when the state of the specified object is signaled.
When the state of the mutex is signaled, one waiting thread is granted ownership, the state of the
mutex changes to nonsignaled, and the wait function returns. The owning thread uses the
ReleaseMutex function to release its ownership.
The next example looks at the use of mutexes to coordinate access to a shared resource and to
handshake between two threads.
Create a new empty Win32 console application project. Give a suitable project name and change the
project location if needed.

www.installsetupconfig.com
164
Then, add the source file and give it a suitable name.
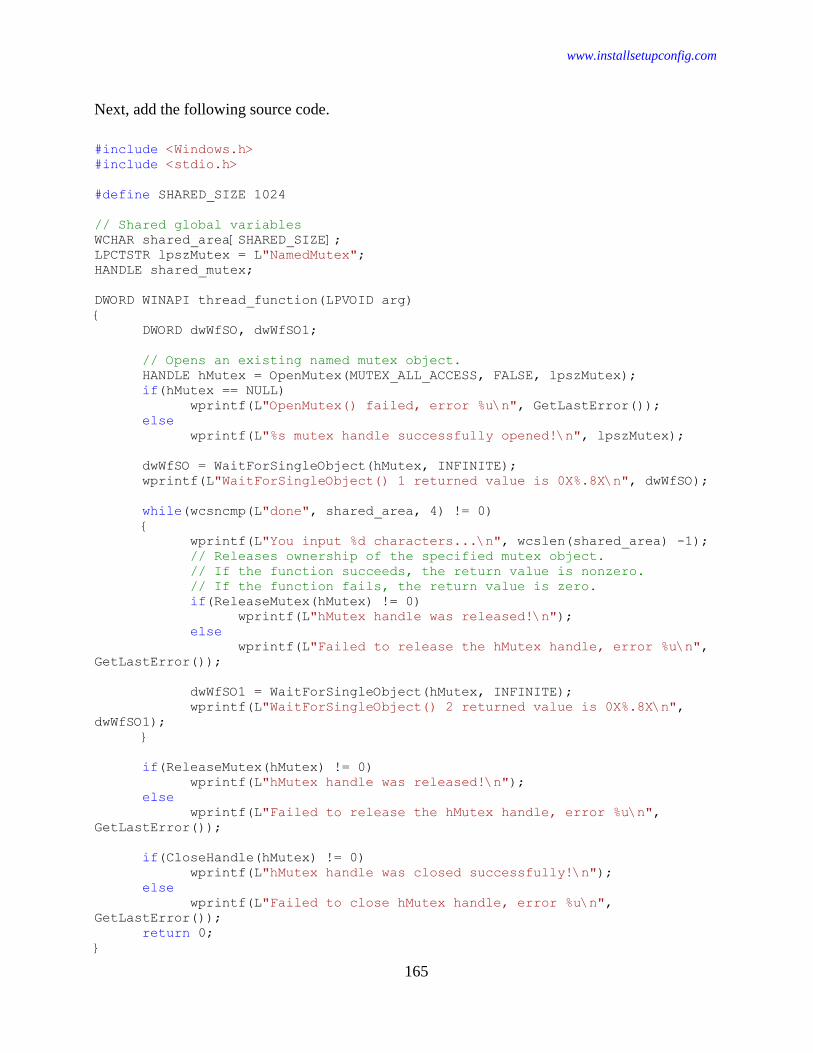
www.installsetupconfig.com
165
Next, add the following source code.
#include <Windows.h>
#include <stdio.h>
#define SHARED_SIZE 1024
// Shared global variables
WCHAR shared_area[SHARED_SIZE];
LPCTSTR lpszMutex = L"NamedMutex";
HANDLE shared_mutex;
DWORD WINAPI thread_function(LPVOID arg)
{
DWORD dwWfSO, dwWfSO1;
// Opens an existing named mutex object.
HANDLE hMutex = OpenMutex(MUTEX_ALL_ACCESS, FALSE, lpszMutex);
if(hMutex == NULL)
wprintf(L"OpenMutex() failed, error %u\n", GetLastError());
else
wprintf(L"%s mutex handle successfully opened!\n", lpszMutex);
dwWfSO = WaitForSingleObject(hMutex, INFINITE);
wprintf(L"WaitForSingleObject() 1 returned value is 0X%.8X\n", dwWfSO);
while(wcsncmp(L"done", shared_area, 4) != 0)
{
wprintf(L"You input %d characters...\n", wcslen(shared_area) -1);
// Releases ownership of the specified mutex object.
// If the function succeeds, the return value is nonzero.
// If the function fails, the return value is zero.
if(ReleaseMutex(hMutex) != 0)
wprintf(L"hMutex handle was released!\n");
else
wprintf(L"Failed to release the hMutex handle, error %u\n",
GetLastError());
dwWfSO1 = WaitForSingleObject(hMutex, INFINITE);
wprintf(L"WaitForSingleObject() 2 returned value is 0X%.8X\n",
dwWfSO1);
}
if(ReleaseMutex(hMutex) != 0)
wprintf(L"hMutex handle was released!\n");
else
wprintf(L"Failed to release the hMutex handle, error %u\n",
GetLastError());
if(CloseHandle(hMutex) != 0)
wprintf(L"hMutex handle was closed successfully!\n");
else
wprintf(L"Failed to close hMutex handle, error %u\n",
GetLastError());
return 0;
}

www.installsetupconfig.com
166
int wmain()
{
HANDLE a_thread;
DWORD a_threadId, dwMWfSO1, dwMWfSO2;
DWORD thread_result;
// Create a mutex with no initial owner
shared_mutex = CreateMutex( NULL, TRUE, lpszMutex );
if (shared_mutex == NULL)
{
wprintf(L"CreateMutex() - Mutex initialization failed, error %u\n",
GetLastError());
exit(EXIT_FAILURE);
}
else
wprintf(L"CreateMutex() is OK! A Mutex was created
successfully!\n");
// Create a new thread.
a_thread = CreateThread(NULL, 0, thread_function, (LPVOID)NULL,
0,&a_threadId);
if (a_thread == NULL)
{
wprintf(L"CreateThread() - Thread creation failed, error %u",
GetLastError());
exit(EXIT_FAILURE);
}
else
wprintf(L"CreateThread() is OK, thread ID is %u\n", a_threadId);
wprintf(L"\nInput some text. Enter 'done' to finish\n");
wprintf(L"\n");
while(wcsncmp(L"done", shared_area, 4) != 0)
{
fgetws(shared_area, SHARED_SIZE, stdin);
if(ReleaseMutex(shared_mutex) != 0)
wprintf(L"shared_mutex handle was released!\n");
else
wprintf(L"Failed to release the shared_mutex handle, error
%u\n", GetLastError());
dwMWfSO1 = WaitForSingleObject(shared_mutex, INFINITE);
wprintf(L"WaitForSingleObject() 3 returned value is 0X%.8X\n",
dwMWfSO1);
wprintf(L"\n");
}
if(ReleaseMutex(shared_mutex) != 0)
wprintf(L"shared_mutex handle was released!\n");
else
wprintf(L"Failed to release the shared_mutex handle, error %u\n",
GetLastError());
wprintf(L"Waiting for thread to finish...\n");

www.installsetupconfig.com
167
dwMWfSO2 = WaitForSingleObject(a_thread, INFINITE);
wprintf(L"WaitForSingleObject() 4 returned value is 0X%.8X\n", dwMWfSO1);
if(dwMWfSO2 != WAIT_OBJECT_0)
{
wprintf(L"WaitForSingleObject() failed, thread join failed, error
%u\n", GetLastError());
exit(EXIT_FAILURE);
}
else
wprintf(L"WaitForSingleObject() 4 is OK!\n");
// Retrieve the code returned by the thread.
if(GetExitCodeThread(a_thread, &thread_result) != 0)
wprintf(L"GetExitCodeThread() is OK! Thread joined, exit code %u\n",
thread_result);
else
wprintf(L"GetExitCodeThread() failed, error %u\n", GetLastError());
if(CloseHandle(shared_mutex) != 0)
wprintf(L"shared_mutex handle was closed successfully!\n");
else
wprintf(L"Failed to close shared_mutex handle, error %u\n",
GetLastError());
return 0;
}
Build and run the project. The following screenshot is a sample output.

www.installsetupconfig.com
168
Synchronization with Critical Sections Program Example
Another mechanism for solving this simple scenario is to use a critical section. A critical section is
similar to InterlockedExchange except that you have the ability to define the logic that takes place as
an atomic operation.
Critical section objects provide synchronization similar to that provided by mutex objects, except
that critical section objects can be used only by the threads of a single process. Critical section
objects provide a slightly faster, more efficient mechanism for mutual-exclusion synchronization (a
processor-specific test and set instruction) as compared to event, mutex, and semaphore objects,
which can also be used in a single-process application. There is no guarantee about the order in
which threads will obtain ownership of the critical section; however, the system will be fair to all
threads. Unlike a mutex object, there is no way to tell whether a critical section has been abandoned.
The process is responsible for allocating the memory used by a critical section. Typically, this is
done by just declaring a variable of type CRITICAL_SECTION. Before the threads of the process

www.installsetupconfig.com
169
can use it, initialize the critical section and then request ownership of a critical section. If the critical
section object is currently owned by another thread, the process waits indefinitely for ownership. In
contrast, when a mutex object is used for mutual exclusion, the wait functions accept a specified
time-out interval. The TryEnterCriticalSection function attempts to enter a critical section without
blocking the calling thread.
A thread uses the InitializeCriticalSectionAndSpinCount or SetCriticalSectionSpinCount functions
to specify a spin count for the critical section object. On single-processor systems, the spin count is
ignored and the critical section spin count is set to 0. On multiprocessor systems, if the critical
section is unavailable, the calling thread will spin dwSpinCount times before performing a wait
operation on a semaphore associated with the critical section. If the critical section becomes free
during the spin operation, the calling thread avoids the wait operation.
Any thread of the process can release the system resources that were allocated when the critical
section object was initialized. After this function has been called, the critical section object can no
longer be used for synchronization.
Create a new empty Win32 console application project. Give a suitable project name and change the
project location if needed.
Then, add the source file and give it a suitable name.

www.installsetupconfig.com
170
Next, add the following source code.
#include <Windows.h>
#include <stdio.h>
// Shared global variables
CRITICAL_SECTION g_cs;
WCHAR message[] = L"Hello I'm new Thread";
DWORD WINAPI thread_function(LPVOID arg)
{
int count2;
wprintf(L"thread_function() is running. Argument received was: %s\n",
arg);
wprintf(L"Child thread entering critical section, doing job & leaving
critical section...\n");
wprintf(L"\n");
for (count2 = 0; count2 < 10; count2++)
{
// Waits for ownership of the specified critical section object.
// The function returns when the calling thread is granted
ownership.
// This function does not return a value.
EnterCriticalSection(&g_cs);
wprintf(L"Y ");
// Releases ownership of the specified critical section object.
// This function does not return a value.
LeaveCriticalSection(&g_cs);
}

www.installsetupconfig.com
171
Sleep(4000);
return 0;
}
int wmain()
{
HANDLE a_thread;
DWORD a_threadId;
DWORD thread_result;
int count1;
// Some info
wprintf(L"The current process ID is %u\n", GetCurrentProcessId());
wprintf(L"The main thread ID is %u\n", GetCurrentThreadId());
wprintf(L"\n");
// Initializes a critical section object.
// This function does not return a value.
InitializeCriticalSection(&g_cs);
// Create a new thread.
a_thread = CreateThread(NULL, 0, thread_function, (LPVOID)message, 0,
&a_threadId);
if (a_thread == NULL)
{
wprintf(L"CreateThread() - Thread creation failed, error %u\n",
GetLastError());
exit(EXIT_FAILURE);
}
else
wprintf(L"CreateThread() is OK, thread ID is %u\n", a_threadId);
wprintf(L"main() thread entering critical section, doing job & leaving
critical section...\n");
wprintf(L"Entering main() loop...\n");
for (count1 = 0; count1 < 10; count1++)
{
EnterCriticalSection(&g_cs);
wprintf(L" X");
LeaveCriticalSection(&g_cs);
}
Sleep(3000);
wprintf(L"\n\nWaiting for thread %u to finish...\n", a_threadId);
if (WaitForSingleObject(a_thread, INFINITE) != WAIT_OBJECT_0)
{
wprintf(L"WaitForSingleObject() - Thread join failed, error %u",
GetLastError());
exit(EXIT_FAILURE);
}
else
wprintf(L"WaitForSingleObject() is OK! An object was signaled\n");
// Retrieve the code returned by the thread.
if(GetExitCodeThread(a_thread, &thread_result) != 0)

www.installsetupconfig.com
172
wprintf(L"GetExitCodeThread() is OK! Thread joined, exit code %u\n",
thread_result);
else
wprintf(L"GetExitCodeThread() failed, error %u\n", GetLastError());
if(CloseHandle(a_thread) != 0)
wprintf(L"a_thread handle was closed successfully!\n");
else
wprintf(L"Failed to close a_thread handle, error %u\n",
GetLastError());
// Releases all resources used by an unowned critical section object.
// This function does not return a value.
wprintf(L"Deleting critical section resources...\n");
DeleteCriticalSection(&g_cs);
exit(EXIT_SUCCESS);
}
Build and run the project. The following are the sample outputs when the program was run many
times.
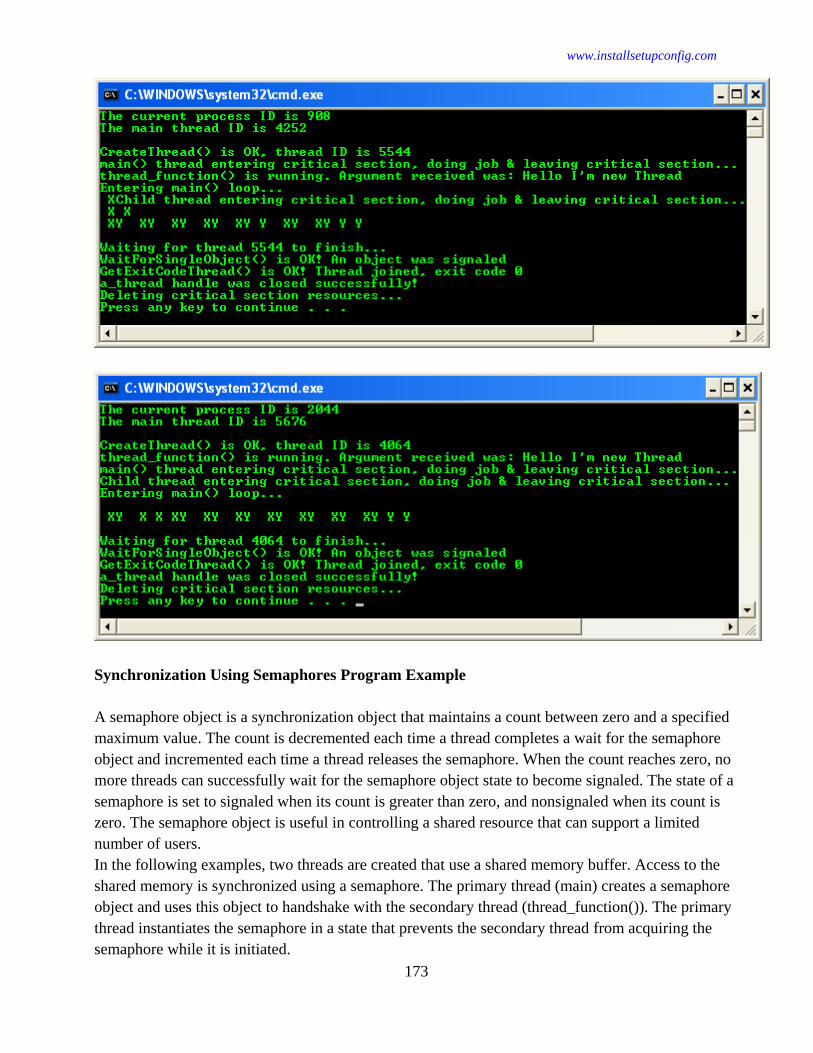
www.installsetupconfig.com
173
Synchronization Using Semaphores Program Example
A semaphore object is a synchronization object that maintains a count between zero and a specified
maximum value. The count is decremented each time a thread completes a wait for the semaphore
object and incremented each time a thread releases the semaphore. When the count reaches zero, no
more threads can successfully wait for the semaphore object state to become signaled. The state of a
semaphore is set to signaled when its count is greater than zero, and nonsignaled when its count is
zero. The semaphore object is useful in controlling a shared resource that can support a limited
number of users.
In the following examples, two threads are created that use a shared memory buffer. Access to the
shared memory is synchronized using a semaphore. The primary thread (main) creates a semaphore
object and uses this object to handshake with the secondary thread (thread_function()). The primary
thread instantiates the semaphore in a state that prevents the secondary thread from acquiring the
semaphore while it is initiated.

www.installsetupconfig.com
174
After the user types in text at the console and presses ENTER, the primary thread relinquishes the
semaphore. The secondary thread then acquires the semaphore and processes the shared memory
area. At this point, the main thread is blocked waiting for the semaphore and will not resume until
the secondary thread has relinquished control by calling ReleaseSemaphore.
In UNIX, the semaphore object functions of sem_post and sem_wait are all that are required to
perform handshaking. With Windows, you must use a combination of WaitForSingleObject() and
ReleaseSemaphore() in both the primary and the secondary threads in order to facilitate
handshaking. The two solutions are also very different from a syntactic standpoint. The primary
difference between their implementations is with the API calls that are used to manage the
semaphore objects.
One aspect of CreateSemaphore() that you need to be aware of is the last argument in its parameter
list. This is a string parameter specifying the name of the semaphore. You should not pass a NULL
for this parameter. All the kernel objects, including semaphores, are named. All kernel object names
are stored in a common namespace except if it is a server running Microsoft Terminal Server, in
which case there will also be a namespace for each session. If the namespace is global, one or more
unassociated applications could attempt to use the same name for a semaphore. To avoid namespace
contention, applications should use some unique naming convention. One solution would be to base
your semaphore names on globally unique identifiers (GUIDs).
Terminal Server and Naming Semaphore Objects
As mentioned earlier, Terminal Server has multiple namespaces for kernel objects. There is one
global namespace, which is used by kernel objects that are accessible by any and all client sessions
and is usually populated by services. Additionally, each client session has its own namespace to
prevent namespace collisions between multiple instances of the same application running in
different sessions.
In addition to the session and global namespaces, Terminal Server also has a local namespace. By
default, the named kernel objects of an application reside in the session namespace. It is possible,
however, to override what namespace will be used. This is accomplished by prefixing the name with
Global\ or Local\. These prefix names are reserved by Microsoft, are case-sensitive, and are ignored
if the computer is not operating as a Terminal Server.
Create a new empty Win32 console application project. Give a suitable project name and change the
project location if needed.

www.installsetupconfig.com
175
Then, add the source file and give it a suitable name.
Next, add the following source code.
#include <Windows.h>
#include <stdio.h>

www.installsetupconfig.com
176
#define SHARED_SIZE 1024
// Shared global variables
WCHAR shared_area[SHARED_SIZE];
LPCTSTR lpszSemaphore = L"NamedSemaphoreGedik";
HANDLE sem_t;
DWORD WINAPI thread_function(LPVOID arg)
{
LONG dwSemCount, dwWFSO1, dwWFSO2;
HANDLE hSemaphore = OpenSemaphore( SYNCHRONIZE |SEMAPHORE_MODIFY_STATE,
FALSE, lpszSemaphore );
dwWFSO1 = WaitForSingleObject(hSemaphore, INFINITE);
// Value 0 means object has been signaled...
wprintf(L"WaitForSingleObject() 1 returned value is 0X%.8X\n", dwWFSO1);
while(wcsncmp(L"done", shared_area, 4) != 0)
{
wprintf(L"You input %d characters\n", wcslen(shared_area) -1);
// Increases the count of the specified semaphore object by a
specified amount.
// If the function succeeds, the return value is nonzero.
// If the function fails, the return value is zero.
if(ReleaseSemaphore(hSemaphore, 1, &dwSemCount) != 0)
wprintf(L"ReleaseSemaphore() - hSemaphore handle has been
released...\n");
else
wprintf(L"Failed to release hSemaphore handle, error %u\n",
GetLastError());
dwWFSO2 = WaitForSingleObject(hSemaphore, INFINITE);
wprintf(L"WaitForSingleObject() 2 returned value is 0X%.8X\n",
dwWFSO2);
}
if(ReleaseSemaphore(hSemaphore, 1, &dwSemCount) != 0)
wprintf(L"ReleaseSemaphore() - hSemaphore handle has been
released...\n");
else
wprintf(L"Failed to release hSemaphore handle, error %u\n",
GetLastError());
if(CloseHandle(hSemaphore) != 0)
wprintf(L"hSemaphore handle was closed successfully!\n");
else
wprintf(L"Failed to close hSemaphore handle, error %u\n",
GetLastError());
return 0;
}
int wmain()
{
HANDLE a_thread;
DWORD a_threadId, dwMWFSO1, dwMWFSO2;
DWORD thread_result;
LONG dwSemCount;

www.installsetupconfig.com
177
// Some info
wprintf(L"The main() process ID is %u\n", GetCurrentProcessId());
wprintf(L"The main() thread ID is %u\n", GetCurrentThreadId());
wprintf(L"\n");
// Creates or opens a named semaphore object.
sem_t = CreateSemaphore( NULL, 0, 1, lpszSemaphore );
if (sem_t == NULL)
{
wprintf(L"CreateSemaphore() - Semaphore initialization failed, error
%u\n", GetLastError());
exit(EXIT_FAILURE);
}
else
wprintf(L"CreateSemaphore() is OK!\n");
// Create a new thread.
a_thread = CreateThread(NULL, 0, thread_function, (LPVOID)NULL,
0,&a_threadId);
if (a_thread == NULL)
{
wprintf(L"CreateThread() - Thread creation failed, error %u\n",
GetLastError());
exit(EXIT_FAILURE);
}
else
wprintf(L"CreateThread() is OK! Thread ID is %u\n", a_threadId);
wprintf(L"\nInput some text. Enter 'done' to finish\n\n");
while(wcsncmp(L"done", shared_area, 4) != 0)
{
fgetws(shared_area, SHARED_SIZE, stdin);
if(ReleaseSemaphore(sem_t, 1, &dwSemCount) != 0)
wprintf(L"ReleaseSemaphore() - sem_t handle has been
released...\n");
else
wprintf(L"Failed to release sem_t handle, error %u\n",
GetLastError());
dwMWFSO1 = WaitForSingleObject(sem_t, INFINITE);
wprintf(L"WaitForSingleObject() 3 returned value is 0X%.8X\n",
dwMWFSO1);
wprintf(L"\n");
}
wprintf(L"\nWaiting for thread to finish...\n");
dwMWFSO2 = WaitForSingleObject(a_thread, INFINITE);
wprintf(L"WaitForSingleObject() 4 returned value is 0X%.8X\n", dwMWFSO2);
if (dwMWFSO2 != WAIT_OBJECT_0)
{
wprintf(L"WaitForSingleObject() 4 - Thread join failed, error %u",
GetLastError());
exit(EXIT_FAILURE);
}

www.installsetupconfig.com
178
else
wprintf(L"WaitForSingleObject() 4 should be OK!\n");
// Retrieve the code returned by the thread.
if(GetExitCodeThread(a_thread, &thread_result) != 0)
wprintf(L"GetExitCodeThread() is OK! Thread joined, exit code %u\n",
thread_result);
else
wprintf(L"GetExitCodeThread() failed, error %u\n", GetLastError());
if(CloseHandle(a_thread) != 0)
wprintf(L"a_thread handle was closed successfully!\n");
else
wprintf(L"Failed to close a_thread handle, error %u\n",
GetLastError());
return 0;
}
Build and run the project. The following screenshot is a sample output.
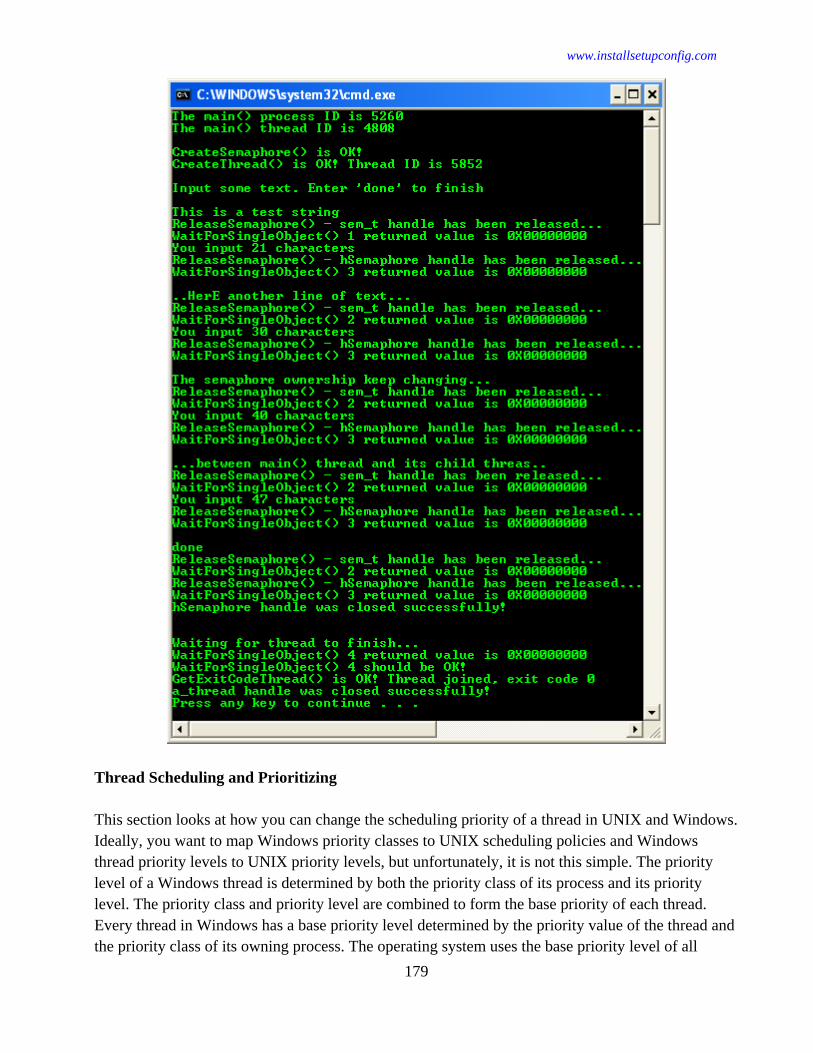
www.installsetupconfig.com
179
Thread Scheduling and Prioritizing
This section looks at how you can change the scheduling priority of a thread in UNIX and Windows.
Ideally, you want to map Windows priority classes to UNIX scheduling policies and Windows
thread priority levels to UNIX priority levels, but unfortunately, it is not this simple. The priority
level of a Windows thread is determined by both the priority class of its process and its priority
level. The priority class and priority level are combined to form the base priority of each thread.
Every thread in Windows has a base priority level determined by the priority value of the thread and
the priority class of its owning process. The operating system uses the base priority level of all

www.installsetupconfig.com
180
executable threads to determine which thread gets the next slice of CPU time. Threads are scheduled
in a round-robin fashion at each priority level, and scheduling of threads at a lower level will only
take place when there are no executable threads at a higher level.
UNIX offers both round-robin and FIFO scheduling algorithms, whereas Windows uses only round-
robin. This does not mean that Windows is less flexible; it just means that any fine-tuning that was
performed on thread scheduling in UNIX has to be implemented differently when using Windows.
Table Z lists the base priority levels for combinations of priority class and priority value for
Windows.
Table Z: Process and Thread Priority for Windows
Process Priority Class Thread Priority Level
1 IDLE_PRIORITY_CLASS THREAD_PRIORITY_IDLE
1 BELOW_NORMAL_PRIORITY_CLASS THREAD_PRIORITY_IDLE
1 NORMAL_PRIORITY_CLASS THREAD_PRIORITY_IDLE
1 ABOVE_NORMAL_PRIORITY_CLASS THREAD_PRIORITY_IDLE
1 HIGH_PRIORITY_CLASS THREAD_PRIORITY_IDLE
2 IDLE_PRIORITY_CLASS THREAD_PRIORITY_LOWEST
3 IDLE_PRIORITY_CLASS THREAD_PRIORITY_BELOW_NORMAL
4 IDLE_PRIORITY_CLASS THREAD_PRIORITY_NORMAL
4 BELOW_NORMAL_PRIORITY_CLASS THREAD_PRIORITY_LOWEST
5 IDLE_PRIORITY_CLASS THREAD_PRIORITY_ABOVE_NORMAL
5 BELOW_NORMAL_PRIORITY_CLASS THREAD_PRIORITY_BELOW_NORMAL
5 Background
NORMAL_PRIORITY_CLASS THREAD_PRIORITY_LOWEST
6 IDLE_PRIORITY_CLASS THREAD_PRIORITY_HIGHEST
6 BELOW_NORMAL_PRIORITY_CLASS THREAD_PRIORITY_NORMAL
6 Background
NORMAL_PRIORITY_CLASS THREAD_PRIORITY_BELOW_NORMAL
7 BELOW_NORMAL_PRIORITY_CLASS THREAD_PRIORITY_ABOVE_NORMAL
7 Background
NORMAL_PRIORITY_CLASS THREAD_PRIORITY_NORMAL
7 Foreground NORMAL_PRIORITY_CLASS THREAD_PRIORITY_LOWEST
8 BELOW_NORMAL_PRIORITY_CLASS THREAD_PRIORITY_HIGHEST
8 NORMAL_PRIORITY_CLASS THREAD_PRIORITY_ABOVE_NORMAL
8 Foreground NORMAL_PRIORITY_CLASS THREAD_PRIORITY_BELOW_NORMAL
8 ABOVE_NORMAL_PRIORITY_CLASS THREAD_PRIORITY_LOWEST
9 NORMAL_PRIORITY_CLASS THREAD_PRIORITY_HIGHEST
9 Foreground NORMAL_PRIORITY_CLASS THREAD_PRIORITY_NORMAL
9 ABOVE_NORMAL_PRIORITY_CLASS THREAD_PRIORITY_BELOW_NORMAL
10 Foreground NORMAL_PRIORITY_CLASS THREAD_PRIORITY_ABOVE_NORMAL
10 ABOVE_NORMAL_PRIORITY_CLASS THREAD_PRIORITY_NORMAL
11 Foreground NORMAL_PRIORITY_CLASS THREAD_PRIORITY_HIGHEST

www.installsetupconfig.com
181
11 ABOVE_NORMAL_PRIORITY_CLASS THREAD_PRIORITY_ABOVE_NORMAL
11 HIGH_PRIORITY_CLASS THREAD_PRIORITY_LOWEST
12 ABOVE_NORMAL_PRIORITY_CLASS THREAD_PRIORITY_HIGHEST
12 HIGH_PRIORITY_CLASS THREAD_PRIORITY_BELOW_NORMAL
13 HIGH_PRIORITY_CLASS THREAD_PRIORITY_NORMAL
14 HIGH_PRIORITY_CLASS THREAD_PRIORITY_ABOVE_NORMAL
15 HIGH_PRIORITY_CLASS THREAD_PRIORITY_HIGHEST
15 HIGH_PRIORITY_CLASS THREAD_PRIORITY_TIME_CRITICAL
15 IDLE_PRIORITY_CLASS THREAD_PRIORITY_TIME_CRITICAL
15 NORMAL_PRIORITY_CLASS THREAD_PRIORITY_TIME_CRITICAL
15 BELOW_NORMAL_PRIORITY_CLASS THREAD_PRIORITY_TIME_CRITICAL
15 ABOVE_NORMAL_PRIORITY_CLASS THREAD_PRIORITY_TIME_CRITICAL
16 REALTIME_PRIORITY_CLASS THREAD_PRIORITY_IDLE
17 REALTIME_PRIORITY_CLASS -7
18 REALTIME_PRIORITY_CLASS -6
19 REALTIME_PRIORITY_CLASS -5
20 REALTIME_PRIORITY_CLASS -4
21 REALTIME_PRIORITY_CLASS -3
22 REALTIME_PRIORITY_CLASS THREAD_PRIORITY_LOWEST
23 REALTIME_PRIORITY_CLASS THREAD_PRIORITY_BELOW_NORMAL
24 REALTIME_PRIORITY_CLASS THREAD_PRIORITY_NORMAL
25 REALTIME_PRIORITY_CLASS THREAD_PRIORITY_ABOVE_NORMAL
26 REALTIME_PRIORITY_CLASS THREAD_PRIORITY_HIGHEST
27 REALTIME_PRIORITY_CLASS 3
28 REALTIME_PRIORITY_CLASS 4
29 REALTIME_PRIORITY_CLASS 5
30 REALTIME_PRIORITY_CLASS 6
31 REALTIME_PRIORITY_CLASS THREAD_PRIORITY_TIME_CRITICAL
Managing Thread Priorities in Windows
The Windows API provides a number of functions for managing thread priorities, including the
following:
1. GetThreadContext(). This function returns the execution context of the specified thread. The
following is an example showing the thread context:
CONTEXT context;
WCHAR szBuffer[128];
Context.ContextFlags = CONTEXT_FULL | CONTEXT_DEBUG_REGISTERS;
GetThreadContext(GetCurrentThread(),&context);
wprintf(L"CS=%X, EIP=%X, FLAGS=%X, DR1=%X\n",context.SegCs, context.Eip,
context.EFlags,context.Dr1);

www.installsetupconfig.com
182
2. GetThreadPriority(). This function returns the assigned thread priority level for the specified
thread. To see how thread priority affects the system, a simple test, such as the one that follows,
could be added to a simple Windows application:
SetThreadPriority(GetCurrentThread(),
THREAD_PRIORITY_LOWEST);
DWORD dwTicks = GetTickCount();
long i, j;
for(i = 0; i < 200000; i ++)
for(j = 0; j < 2000; j ++)
wprintf(L"Test time=%ld\n", GetTickCount() – dwTicks);
Adjusting the thread priority should yield different time deltas.
3. GetThreadPriorityBoost(). This function retrieves the priority boost control state of the specified
thread. Threads have dynamic priority, which is the priority that the scheduler uses to identify
which thread will execute. Initially, the priority of a thread is the same as its base priority, but
the system may increase or decrease the priority to maintain thread responsiveness. Only threads
with a priority between 0 and 15 are eligible for dynamic priority boost. The system boosts the
dynamic priority of a thread to enhance its responsiveness as follows:
a. When a process that uses NORMAL_PRIORITY_CLASS is brought to the
foreground, the scheduler boosts the priority class of the process associated with the
foreground window so that it is equal to or greater than the priority class of any
background processes. The priority class returns to its original setting when the
process is no longer in the foreground. In Microsoft Windows, the user can control
the boosting of processes that use NORMAL_PRIORITY_CLASS through Control
Panel.
b. When a window receives input, such as timer messages, mouse messages, or
keyboard input, the scheduler boosts the priority of the thread that owns the window.
c. When the wait conditions for a blocked thread are satisfied, the scheduler boosts the
priority of the thread. For example, when a wait operation associated with disk or
keyboard I/O finishes, the thread receives a priority boost.
4. SetThreadIdealProcessor(). This function specifies the preferred processor for a specific thread.
The system schedules threads on the preferred processor when possible.
5. SetThreadPriority(). This function changes the priority level for a thread.
6. SetThreadPriorityBoost(). This function enables or disables dynamic priority boosts by the
system.
Windows Scheduling Program Example

www.installsetupconfig.com
183
In following example, the thread priority level is set to the lowest level within the given policy or
class. When using the Windows API, it is accomplished by a call to SetThreadPriority().
Thread Scheduling Program Example
Create a new empty Win32 console application project. Give a suitable project name and change the
project location if needed.
Then, add the source file and give it a suitable name.
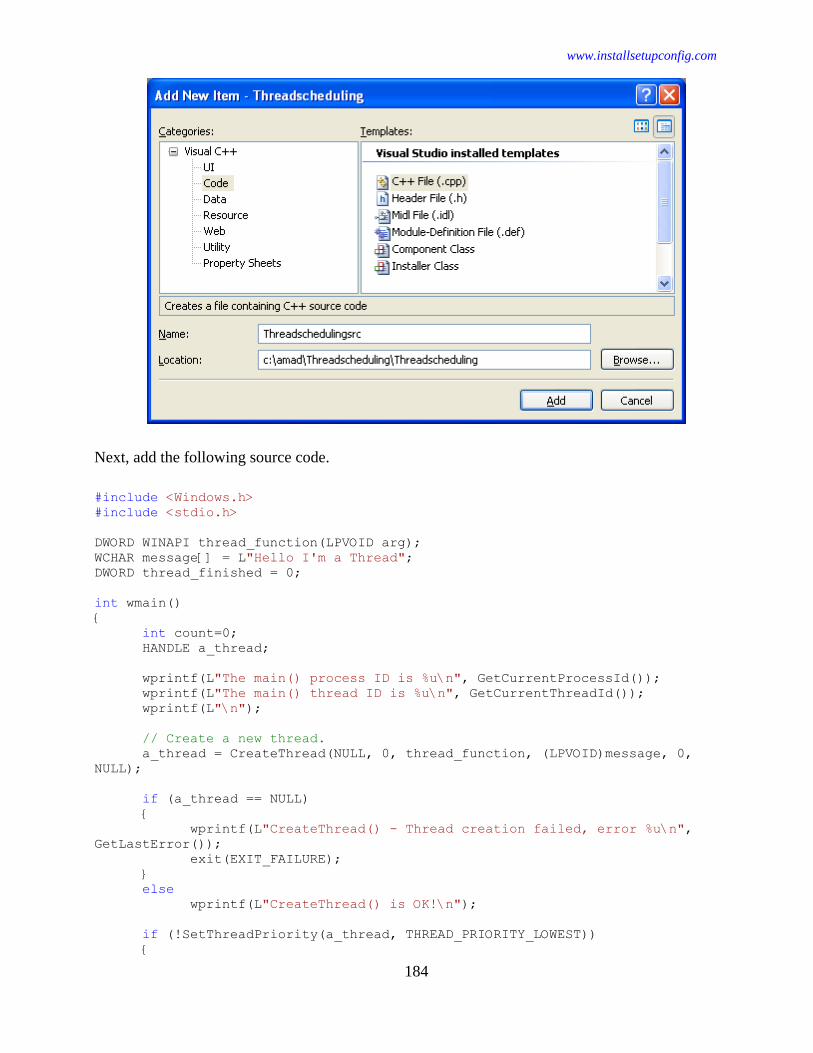
www.installsetupconfig.com
184
Next, add the following source code.
#include <Windows.h>
#include <stdio.h>
DWORD WINAPI thread_function(LPVOID arg);
WCHAR message[] = L"Hello I'm a Thread";
DWORD thread_finished = 0;
int wmain()
{
int count=0;
HANDLE a_thread;
wprintf(L"The main() process ID is %u\n", GetCurrentProcessId());
wprintf(L"The main() thread ID is %u\n", GetCurrentThreadId());
wprintf(L"\n");
// Create a new thread.
a_thread = CreateThread(NULL, 0, thread_function, (LPVOID)message, 0,
NULL);
if (a_thread == NULL)
{
wprintf(L"CreateThread() - Thread creation failed, error %u\n",
GetLastError());
exit(EXIT_FAILURE);
}
else
wprintf(L"CreateThread() is OK!\n");
if (!SetThreadPriority(a_thread, THREAD_PRIORITY_LOWEST))
{

www.installsetupconfig.com
185
wprintf(L"SetThreadPriority(..., THREAD_PRIORITY_LOWEST) - Setting
schedule priority failed, error %u\n", GetLastError());
exit(EXIT_FAILURE);
}
else
wprintf(L"SetThreadPriority(...,THREAD_PRIORITY_LOWEST) is OK!\n");
if(CloseHandle(a_thread) != 0)
wprintf(L"a_thread handle was successfully closed!\n");
else
wprintf(L"Failed to close a_thread handle, error %u\n",
GetLastError());
while(!thread_finished)
{
wprintf(L"Waiting for thread to finished count %d\n", ++count);
Sleep(1000);
}
wprintf(L"Well, the other thread finished, bye!\n");
exit(EXIT_SUCCESS);
}
DWORD WINAPI thread_function(LPVOID arg)
{
wprintf(L"thread_function() is running. Arg received was %s, thread ID is
%u\n", arg, GetCurrentThreadId());
Sleep(4000);
wprintf(L"Second thread, ID %u setting finished flag, and exiting
now...\n", GetCurrentThreadId());
thread_finished = 1;
return 100;
}
Build and run the project. The following screenshot is a sample output.

www.installsetupconfig.com
186
In the preceding Windows example, the priority level of the thread is adjusted to the lowest level
within the priority class of the owning process. If you want to change the priority class as well as the
priority level, insert the following code just before the SetThreadPriority call:
SetPriorityClass(GetCurrentProcess(), PriorityClass);
Where, PriorityClass will be one of the values shown in Table Y. Table Y summarizes how to
change the scheduling priority for a thread and priority class for the owning process.
Table Y: PriorityClass Values
PriorityClass Meaning
ABOVE_NORMAL_PRIORITY_CLASS
Windows Server™ 2003 and Windows® XP: Indicates
a process that has priority above
NORMAL_PRIORITY_CLASS but below
HIGH_PRIORITY_CLASS.
BELOW_NORMAL_PRIORITY_CLASS
Windows Server 2003 and Windows XP: Indicates a
process that has priority above
IDLE_PRIORITY_CLASS but below
NORMAL_PRIORITY_CLASS.
HIGH_PRIORITY_CLASS
Specify this class for a process that performs time-
critical tasks that must be executed immediately. The
threads of the process preempt the threads of normal or
idle priority-class processes. An example is the Task
List, which must respond quickly when called by the
user, regardless of the load on the operating system.
Use extreme care when using the high-priority class
because a high-priority class application can use nearly
all available CPU time.
IDLE_PRIORITY_CLASS
Specify this class for a process whose threads run only
when the system is idle. The threads of the process are
preempted by the threads of any process running in a
higher priority class. An example is a screen saver. The
idle-priority class is inherited by child processes.
NORMAL_PRIORITY_CLASS Specify this class for a process with no special
scheduling needs.
REALTIME_PRIORITY_CLASS
Specify this class for a process that has the highest
possible priority. The threads of the process preempt
the threads of all other processes, including the
operating system processes, which may be performing
important tasks. For example, a real-time process that

www.installsetupconfig.com
187
executes for more than a very brief interval can prevent
disk caches from flushing or can cause the mouse to be
unresponsive.
Managing Multiple Threads Program Example
In the next two examples, numerous threads are created that terminate at random times. Their
termination and display messages are then caught to indicate their termination status.
Multiple Threads Example
Create a new empty Win32 console application project. Give a suitable project name and change the
project location if needed.
Then, add the source file and give it a suitable name.

www.installsetupconfig.com
188
Next, add the following source code.
#include <Windows.h>
#include <stdio.h>
#include <time.h>
#define NUM_THREADS 5
DWORD WINAPI thread_function(LPVOID arg)
{
int t_number = *(int *)arg;
int rand_delay;
wprintf(L"thread_function() is running. Arg received was %u, thread ID is
%u\n", t_number, GetCurrentThreadId());
// Seed the random-number generator with
// current time so that the numbers will
// be different each time function is run.
srand((unsigned)time(NULL));
// random time delay from 1 to 10
rand_delay = 1 + (rand() % 10);
Sleep(rand_delay*1000);
wprintf(L"Bye from thread #%d, ID %u\n", t_number, GetCurrentThreadId());
wprintf(L"\n");
return 100;
}
int wmain()
{
HANDLE a_thread[NUM_THREADS];
int multiple_threads, j;

www.installsetupconfig.com
189
for(multiple_threads = 0; multiple_threads < NUM_THREADS;
multiple_threads++)
{
// Create a new thread.
a_thread[multiple_threads] = CreateThread(NULL, 0,
thread_function,(LPVOID)&multiple_threads, 0,NULL);
if (a_thread[multiple_threads] == NULL)
{
wprintf(L"CreateThread() - Thread creation failed, error
%u\n", GetLastError());
exit(EXIT_FAILURE);
}
Sleep(1000);
}
wprintf(L"Waiting for threads to finish...\n");
for(multiple_threads = NUM_THREADS - 1; multiple_threads >= 0;
multiple_threads--)
{
if (WaitForSingleObject(a_thread[multiple_threads],INFINITE) ==
WAIT_OBJECT_0)
{
wprintf(L"WaitForSingleObject() - Another thread
signaled...\n");
}
else
{
wprintf(L"WaitForSingleObject() failed, error %u\n",
GetLastError());
}
}
wprintf(L"\n");
for(j=0;j<NUM_THREADS;j++)
{
if(CloseHandle(a_thread[j]) != 0)
wprintf(L"a_thread[%u] handle was successfully closed!\n", j);
else
wprintf(L"Failed to close a_thread[%u] handle, error %u\n", j,
GetLastError());
}
wprintf(L"All done!\n");
exit(EXIT_SUCCESS);
}
Build and run the project. The following screenshot is a sample output.

www.installsetupconfig.com
190
More: Synchronization Reference
The following constructs are used with synchronization in Windows:
1. Synchronization Functions
2. Synchronization Structures
3. Synchronization Macros