Wild West Themed - questexperiences.com
40
Transcript of Wild West Themed - questexperiences.com


Wild West Themed Treasure Hunts for
Pre-Readers
An e-book/treasure hunt by Joe Dean

Save an ADDITIONAL 20% NOW on ALL of our Western Themed Downloads!!!
A complete Western Themed A TON of creative ideas to A classic game with an Old Treasure Hunt help make your Wild West West Theme AMAZING!
Planning a treasure hunt for those too young
to read!
When prompted for the coupon code, simply enter: west1849
http://www.creativetreasurehunts.com

Western Themed Treasure Hunts for Pre-Readers
This fun kit describes multiple ways for holding a Western themed treasure hunt for those children who haven’t quite mastered the skill of reading well enough to take on a normal treasure hunt with written clues. Along with the instructions for each, you’ll find numerous images to be used instead of written clues. Have fun!
Each hunt format below describes a different way of hiding the clues and
setting up a treasure hunt. Each format can use any of the image groups that follow (Western objects, household objects, outdoor/park and colors.) It is
probably a good idea to keep to a single group for your hunt, not mixing
and matching colors with objects, etc. The reasons are two-fold. The first is that it will be a lot easier for the child to understand what he/she will need to do if they can get into a ‘groove’ of consistent thinking. Secondly, if you only use one set, then you can use a different set another time. Of course these are only suggestions. Along with each set/group of images are some instructions on how to use them specifically. It is strongly recommended that you read ALL the instructions for each format and image group before you decide on anything. Remember to have fun with it!
Lastly, we’ve provided some quick and painless Western treasure hunt activities when you’re in a hurry and need a quick activity. Images for these hunts follow each set of instructions.

Treasure Hunt Formats The formats for any child who hasn’t quite mastered the skill of reading should be kept very simple so that they can feel clever and successful. They all work on the basic principle of finding one clue, which will lead you to finding another, etc. You can use as many as you’d like to make the hunt last as long as you’d like. Please note that you do not have to use ALL of the images provided in any given set. Each format below can work with any of the image sets provided. Simplest Format
In this format, the child will be given the entire stack of clues/images that you’ve chosen. They will then go to every location to collect different items of your choice. They could find small pieces of candy, small gifts or other items that the child will enjoy collecting.
1. Begin by selecting images from one of the four groups
2. Hide candy or gifts at each of the locations designated by the images you’ve chosen.
3. When you are ready to send the child/children on the hunt, simply give them the stack of images and send them off.
Basic Format
This format is a straight one clue to another to another (like a linked train) until a final destination is reached.
1. Begin by choosing one of the four image groups provided.

2. Select from that group which images you want to use for your hunt (all of them are also possible if you’d like.)
3. Choose one of the images to set aside. This will be the first clue for the child.
4. Next choose another image from your set and hide it where the first clue tells the child to go. For example, if you plan on giving the child the refrigerator clue in the beginning as the first clue, then this second image should be hidden in/around the refrigerator.
5. Next choose another image from your set and hide it where the child will go using the previous clue (the clue in the refrigerator using the above example.)
6. Repeat this process until you’ve used all the images. 7. At the final location (instead of another clue) you can put
a small goodie bag, a gift a certificate, anything you’d like to help the child feel like they did a great job!
Basic – with Cut Clue Pieces This format is similar to the Basic described above, except this time each image is cut into several pieces. When the child finds a clue, they must first piece together the puzzle to figure out what the image is. Of course, this wouldn’t work as well for the color images. The number of pieces you choose to cut the clues into will vary on your own discretion based on the age and ability of the child/children participating. To set this hunt format up, cut the images into pieces and put each image puzzle pieces set into a separate ziplock sandwich bag. If you’ve opted to cut the images into very small pieces, be sure to write on a small piece of paper what the image is and put it in the bag also. This will make it easier to set up the hunt (of course, being sure to remove the piece
of paper when you hide the actual clue baggie.)
Medium Level – Collection of Images With this format, the child/children will begin with some puzzle pieces to put together when, once assembled, will reveal several images. They will then search out those items, finding a new puzzle piece at each image location from the puzzle. This is then repeated the desired number of times until the hunt is complete.
1. Begin by selecting the pages you’d like to use in your hunt (being sure that you have ALL the items on the pages to utilize in the hunt – or else cutting around the image(s) that you do not plan on using.)
2. Choose one image from a remaining page and at that location (designated by the image) hide the final prize/reward for the hunt.
3. Now cut this image into six pieces 4. Choose a page from the stack you’ve chosen (if you’ve
chosen to use more than one sheet) and hide the six pieces from Step 3 at each of the six locations on the sheet.
5. Now cut this sheet into six pieces (preferably in such a way as to cut through images making it a puzzle to figure out versus whole images to collect.)
6. Now hide a different puzzle piece in each of the locations on another page of your choice.
7. Repeat this process as many times as you like.
8. To begin the hunt, hand six pieces of a sheet to the child
and allow them to fit them together. They will then go to
the six locations per the puzzle they just put together, finding a

new puzzle piece at each of those. They will then go to the six locations as designated by this new puzzle to find six more pieces. This is repeated until they’ve gone through all of the sheets you chosen to use.
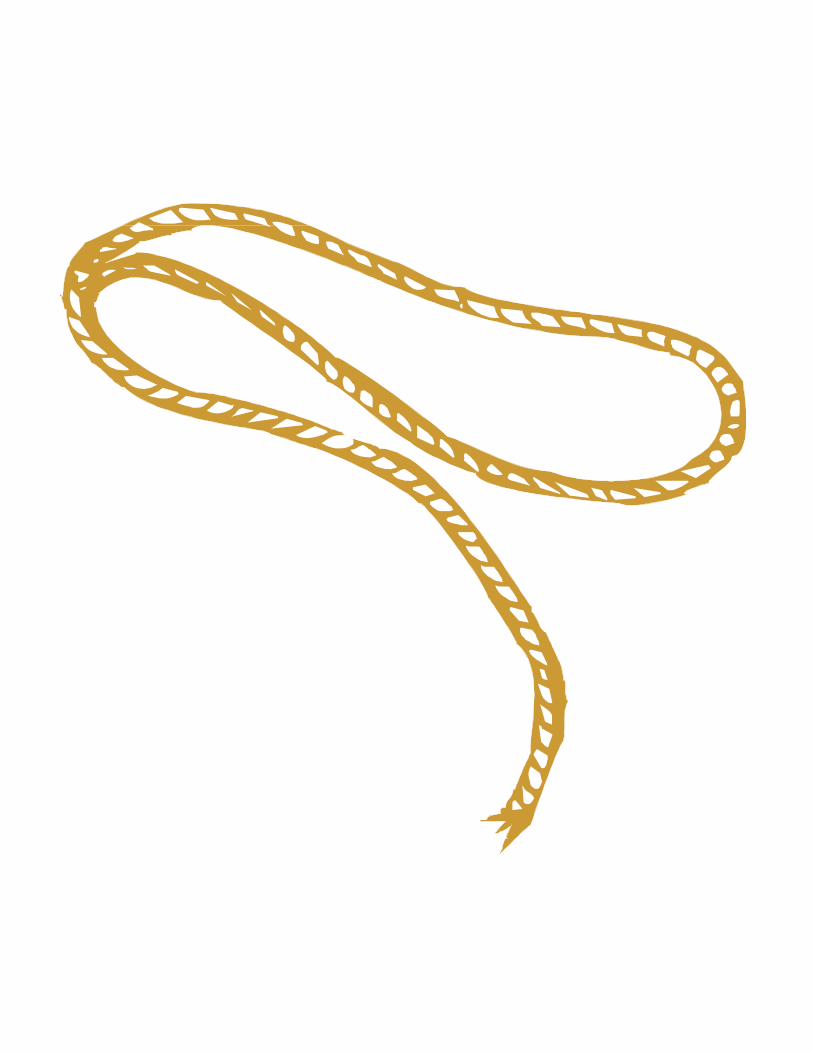
Alternate Formats As an alternative, you might consider giving the child a stack of household images (each one cut out.) At ONE of the locations only, hide the image of the gold bars. At a different location, hide the black caped villain. The child will then get to choose which location (from the stack of household items) to look first. Their goal is to find the gold image before they find the villain. This format can be repeated, enabling the child to have multiple tries until they are successful in finding the gold image first. As an activity for several children, make several copies of three images of your choice (each cut individually and stack according to kind), preferably choosing from the last group of images. Hide each image of one kind in VERY easily found places, worth 1 point. Choose a different set of images for 2 points, hiding each in a little harder place than the first ones. Hide the remaining images in the most difficult places (appropriate to the age group), assigning them 3 points each. A variation on this is to assign different age groups different images (so that the very young is assigned the out in the open in images, etc.) For the Very Young For those little ones who are too young to problem solve, they can still have fun with the Western images. Take a skein of yarn and stretch it all throughout the house (under tables,
behind chairs and other fun places.) Along the way, place different cut out Western images ON the yarn (preferably out of sight such as behind the chair, etc.) Allow the child to begin with one end of the yarn and follow it all along its path (crawling under the tables, etc.) picking up the fun images on the way until they reach the end of the hunt.

Colors
This set is very simple. Each clue refers to something else in the room/location that matches that color. The child will then find the object of that color to get a different clue. For example, if they begin with the color green, they’ll know that they’re next clue is behind/under/around something green. However, there might be several green things in the room…they’ll have fun searching about for all things green until they find the next clue/color. It is suggested with this set to limit the ‘playing area’ to a finite large room or couple of rooms. Too large a space could overwhelm the child and make it easy to skim the room and miss a lot of items in the color they are looking for.


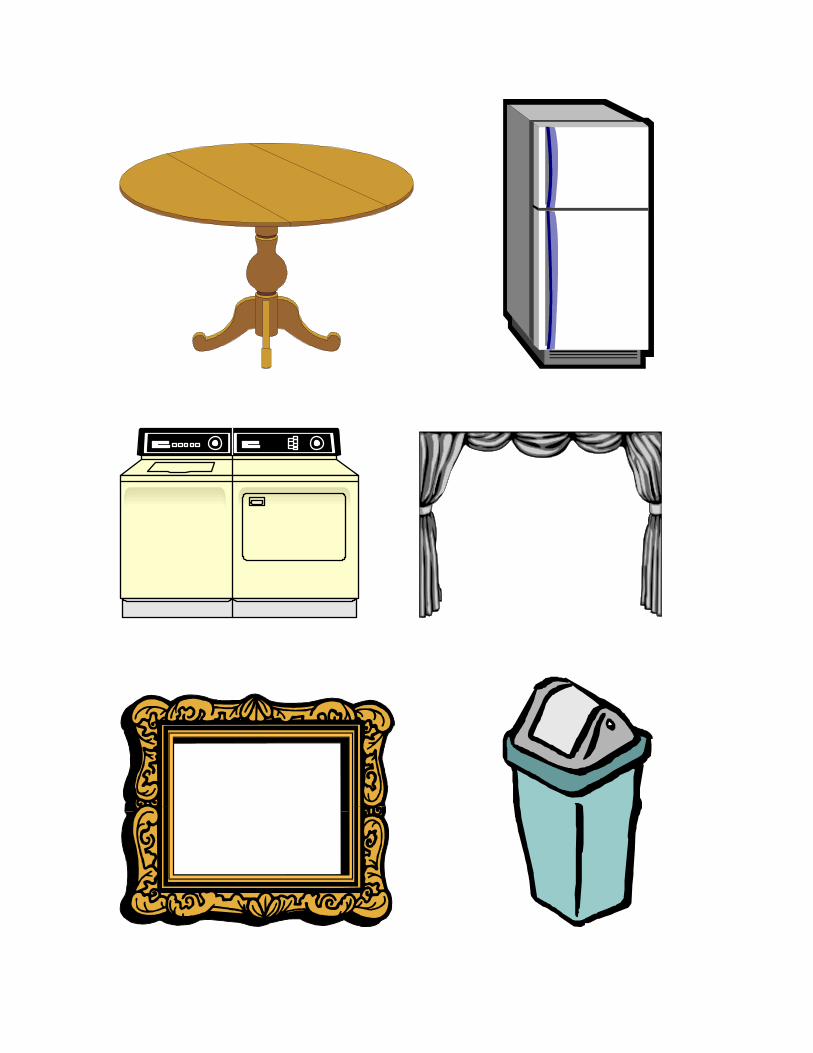
Household Items/Furniture
Similar to the colors section prior, the clues lead to items, not to items that are of a specific color, though, but to the actual item. With these kinds of images, it enables the hunt to be spread over a much larger area (unlike what is possible with the colors images.) Not all the images have to be used. Choose as many as you like from the images provided based on the playing area you’ve set up for the child/children.


.

Outdoor/Park Images Similar to the household items section prior, except these items are typically found outdoors. Not all the images have to be used. Choose as many as you like from the images provided based on the playing area you’ve set up for the child/children.


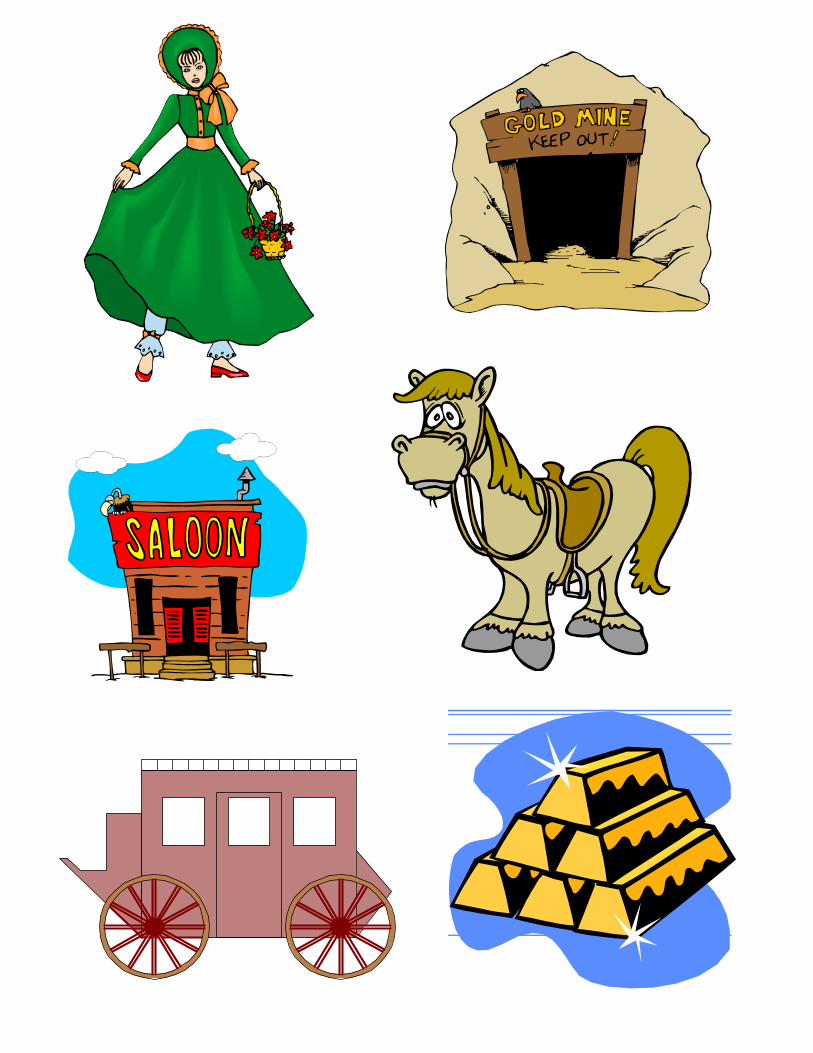
Western Items
These can be used in an identical fashion as the Household Items/Furniture section above, only these items are all things related to the a Western theme, decorations you might have around, etc. If you really have your heart set on this collection but don’t have many of the items, ask around to friends and family to see what other items you can round up for the hunt. Unlike with the colors, it’s not such a ‘big deal’ if you throw in some of the household items with the Western ones.
An alternate way to use these is to make two copies of
each image. They begin with one copy (say of the gold mine) and then they must search about for that image in the house. Once they find it, there is another image…they must then look for ITS match…and so on.


Fun Western Treasure Hunt
Games
Crunched for time? Not feeling very creative at the moment? Not a problem! On the next several pages we’ve provided several Western themed treasure hunt games that are simple to set up and simple to implement!

Gold Rush! Have the kids go on an exciting hunt for prospector’s gold! Make enough copies of the next page to suit your needs for the game (once you’ve read the following instructions and have taken into consideration the number and age of the children playing you’ll have a good idea for the number of copies you’ll need.) Also make ONE copy of the bars of gold image that follows the page of gold mine entrances. Cut out all of the gold mine entrances and put them in a pile. Within a designated area (an area easily explained to the children so that they will know what is ‘out of bounds’) hide all of the entrances and the bars of gold (making sure that the bars of gold image is hidden VERY well – in consideration of the age group.) When you say ‘GO!’ the children will begin their frantic search for gold. Remind them that there were lots of gold mines in the Old West that never brought a fortune. For every mine entrance they find, they receive one point. The game is over NOT when all of the entrances are found, but rather when the bars of gold image is found. The finder of the bars of gold receives an additional five points. Everyone’s points are then added up to determine a winner. This game can be repeated for multiple winners.


Westward Ho! On each of the following eight pages you’ll find a unique, essential parts of settler heading west. You’ll need TWO copies of each – enough for each participant to be assigned a pair. If there are more than eight children participating, then you can either have two different rounds of the game or group the children up into teams. Take one of each of the Western images and set them to the side. These will each be hidden just before the activity begins. Take each of the other copies and cut them into several pieces (making sure that each image sheet is cut into the same NUMBER of pieces for the sake of fairness.) Put each set of pieces in its own ziplock bag, all ready to be put together by a child. When you are ready for the activity, hide all of the baggies of puzzle pieces in one room and all of the whole image sheets in another. When you say ‘GO!’ each child will begin searching for a baggie of puzzle pieces. Once they’ve found one, they are to quickly put the puzzle pieces together. Once all the pieces are put together (and verified by an adult) they will go into the other room and begin looking for their respective Western item (the whole sheet.) If they find someone else’s image, they are to leave it be without giving any indication of their discovery. The first person/team to find their whole image, wins.


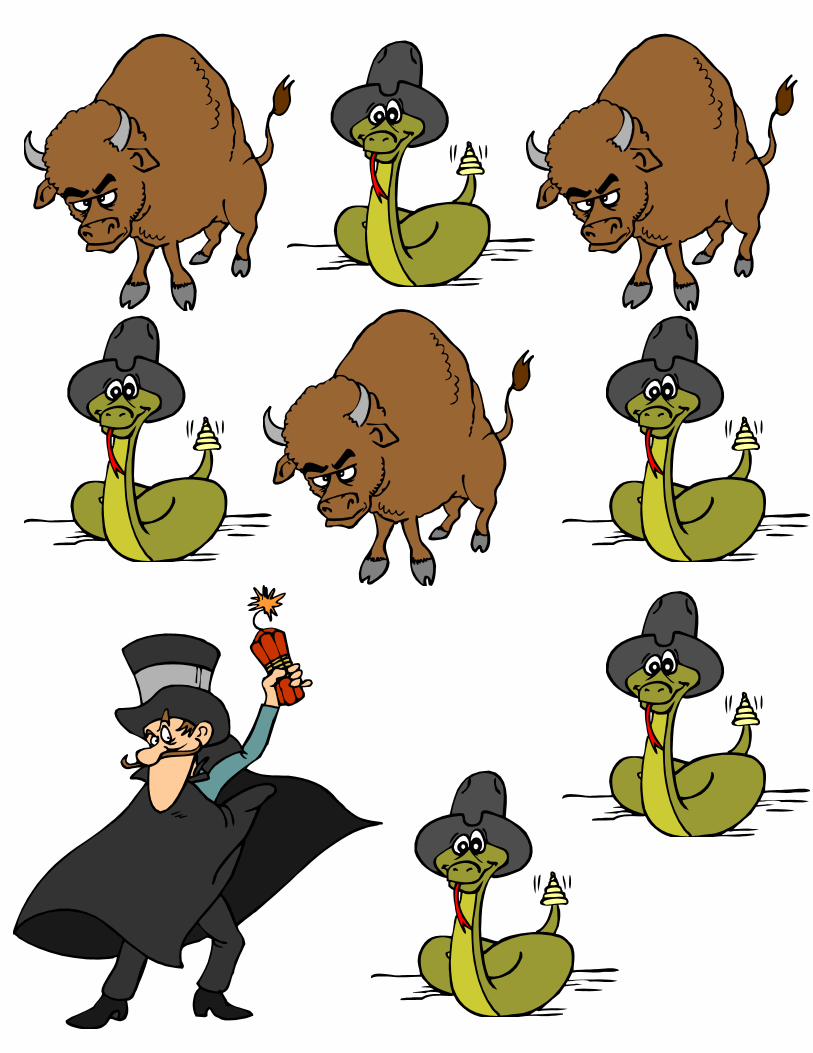
Dangers in the West! In this quick hunt, the children will have fun making the west safe for settlers coming across on the Oregon Trail. Begin by making as many copies of the next page as needed. The number of copies that you make will depend on how many children are participating and how long you’d like the hunt to last. To set up the hunt, cut out all of images. Separate the three kinds of images – snakes, wild bison and villains. On the backsides of the snakes, write a large number 1. On the backs of the bison, write the number 2. On the backs of the villain(s) write the number 3. Hide the snakes the easiest. Hide the bison in a little more challenging places to find. Hide the villain(s) in the hardest places, but still ‘findable’ to your participating age group. Explain to the children that crossing the US on the Oregon Trail was a dangerous journey. Their job is to clear the way for the settlers to cross. Explain that there are snakes and herds of wild bison. Also explain that there were also villains and bandits who hid and waited to surprise attack the settlers. Finally, explain to them the point values of each image. Be sure to tell them HOW MANY of each image are hidden (so that you know when to end the hunt) and that the hunt is over when all of them are found. The children will then count up all their points to see who was the most successful at paving the way for the settlers.