©Whistle and Ivy. All rights reserved. Redistribution is ... · All rights reserved....
10
©Whistle and Ivy. All rights reserved. Redistribution is strictly prohibited.
Transcript of ©Whistle and Ivy. All rights reserved. Redistribution is ... · All rights reserved....
©Whistle and Ivy. All rights reserved. Redistribution is strictly prohibited.

©Whistle and Ivy. All rights reserved. Redistribution is strictly prohibited.
©Whistle and Ivy. All rights reserved. Redistribution is strictly prohibited.
Mini Granny Square Pouch
What you need: - Medium Weight Yarn - Comfy Worsted in Sea Foam, Rose Hip, Whisker - G Hook - 2 Buttons - Needle and thread Gauge: 8 sts = 2” Abbreviations: American Terms Ch – Chain St – Stitch Sc – Single Crochet Dc – Double Crochet Sk – Skip Granny Squares: Make 15 Start with magic ring, using 1st color. 1. Sc 8 in the ring (8 sts) Join 2nd color. (you can alternate 1st and 2nd color for variety) 2. Ch 2. *2 dc, ch 1, 2 dc - all in same st. Sk next st* work 4 times. (20 sts) Join 3rd color. 3. Ch 2. Dc in same st. Dc in next st. *2 dc, ch 1, 2 dc - all in next st. Dc 3* work 3 times. 2 dc, ch 1, 2 dc – all in next st. Dc in last st. Tie off. (32 sts) Take 12 squares and sew them
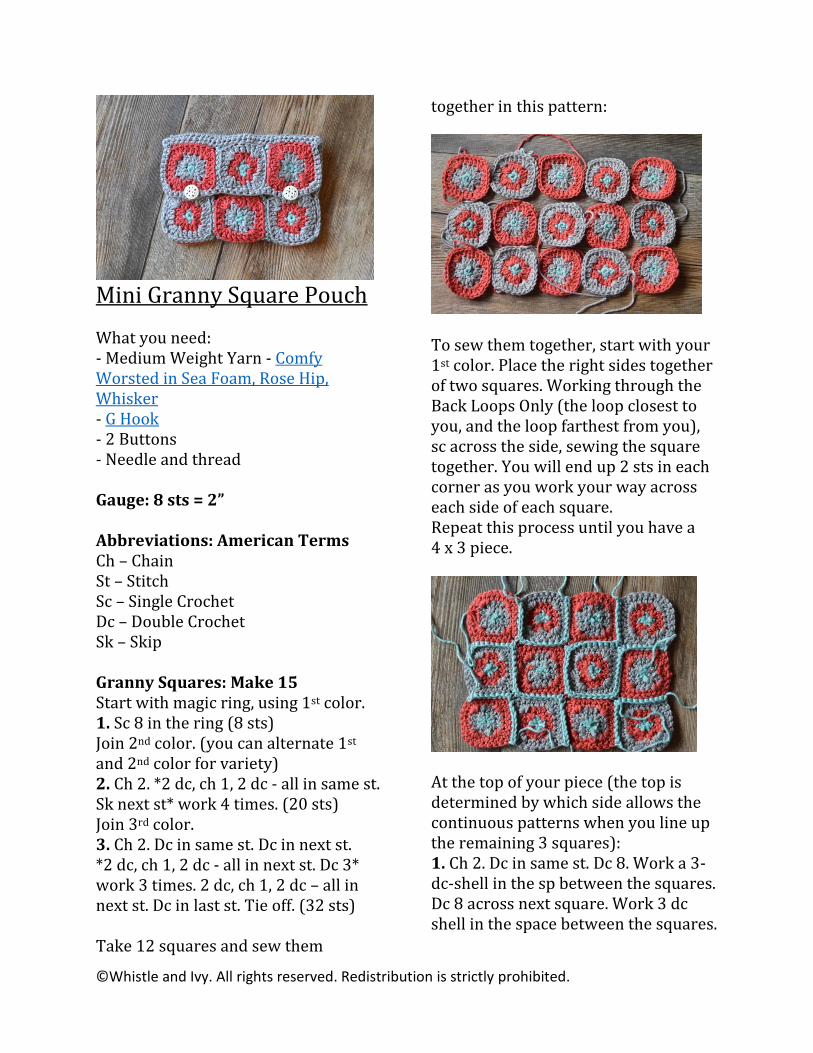
together in this pattern:
To sew them together, start with your 1st color. Place the right sides together of two squares. Working through the Back Loops Only (the loop closest to you, and the loop farthest from you), sc across the side, sewing the square together. You will end up 2 sts in each corner as you work your way across each side of each square. Repeat this process until you have a 4 x 3 piece.
At the top of your piece (the top is determined by which side allows the continuous patterns when you line up the remaining 3 squares): 1. Ch 2. Dc in same st. Dc 8. Work a 3-dc-shell in the sp between the squares. Dc 8 across next square. Work 3 dc shell in the space between the squares.
©Whistle and Ivy. All rights reserved. Redistribution is strictly prohibited.
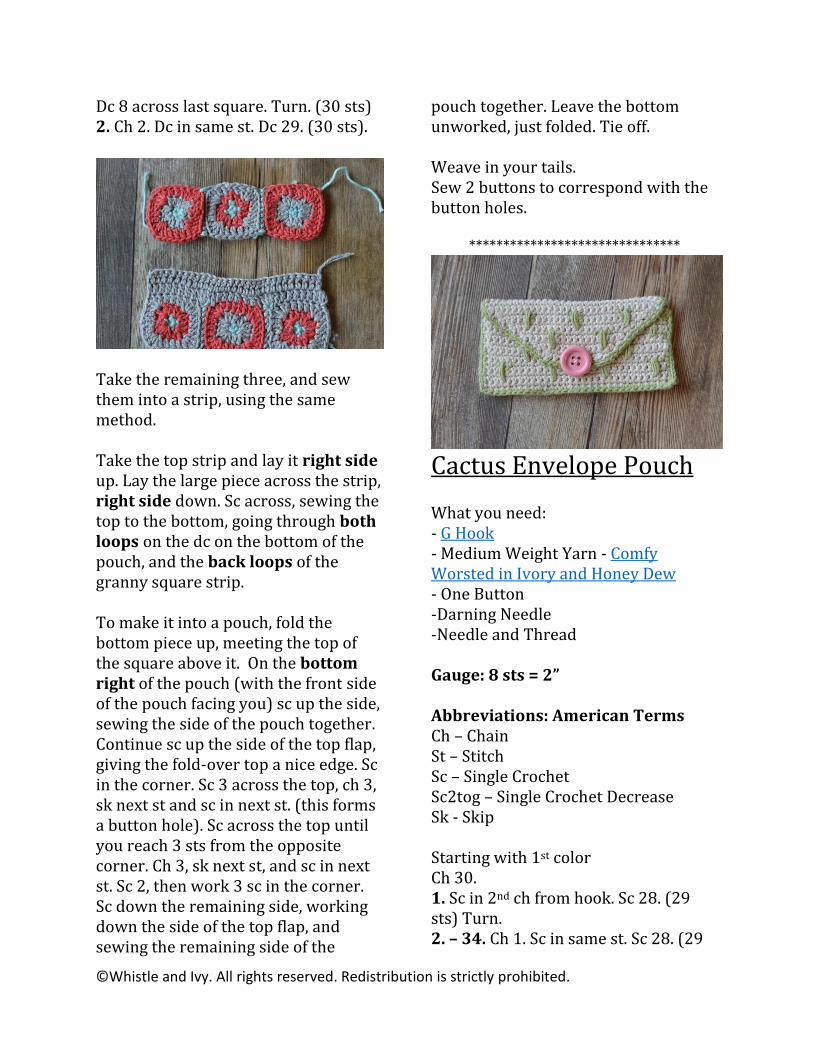
Dc 8 across last square. Turn. (30 sts) 2. Ch 2. Dc in same st. Dc 29. (30 sts).
Take the remaining three, and sew them into a strip, using the same method. Take the top strip and lay it right side up. Lay the large piece across the strip, right side down. Sc across, sewing the top to the bottom, going through both loops on the dc on the bottom of the pouch, and the back loops of the granny square strip. To make it into a pouch, fold the bottom piece up, meeting the top of the square above it. On the bottom right of the pouch (with the front side of the pouch facing you) sc up the side, sewing the side of the pouch together. Continue sc up the side of the top flap, giving the fold-over top a nice edge. Sc in the corner. Sc 3 across the top, ch 3, sk next st and sc in next st. (this forms a button hole). Sc across the top until you reach 3 sts from the opposite corner. Ch 3, sk next st, and sc in next st. Sc 2, then work 3 sc in the corner. Sc down the remaining side, working down the side of the top flap, and sewing the remaining side of the
pouch together. Leave the bottom unworked, just folded. Tie off. Weave in your tails. Sew 2 buttons to correspond with the button holes.
*******************************
Cactus Envelope Pouch What you need: - G Hook - Medium Weight Yarn - Comfy Worsted in Ivory and Honey Dew - One Button -Darning Needle -Needle and Thread Gauge: 8 sts = 2” Abbreviations: American Terms Ch – Chain St – Stitch Sc – Single Crochet Sc2tog – Single Crochet Decrease Sk - Skip Starting with 1st color Ch 30. 1. Sc in 2nd ch from hook. Sc 28. (29 sts) Turn. 2. – 34. Ch 1. Sc in same st. Sc 28. (29
©Whistle and Ivy. All rights reserved. Redistribution is strictly prohibited.
sts) Turn. 35. Ch 1. Sc2tog. Sc 25. Sc2tog. (27 sts)Turn. 36. Ch 1. Sc2tog. Sc 23. Sc2tog. (25 sts)Turn. 37. Ch 1. Sc2tog. Sc 21. Sc2tog. (23 sts)Turn. 38. Ch 1. Sc2tog. Sc 19. Sc2tog. (21 sts)Turn. 39. Ch 1. Sc2tog. Sc 17. Sc2tog. (19 sts)Turn. 40. Ch 1. Sc2tog. Sc 15. Sc2tog. (17 sts)Turn. 41. Ch 1. Sc2tog. Sc 13. Sc2tog. (15 sts)Turn. 42. Ch 1. Sc2tog. Sc 11. Sc2tog. (13 sts)Turn. 43. Ch 1. Sc2tog. Sc 9. Sc2tog. (11 sts) Turn. 44. Ch 1. Sc2tog. Sc 7. Sc2tog. (9 sts) Turn. 45. Ch 1. Sc2tog. Sc. Ch 4. Sk 3 sts. Sc in next st. Sc2tog (this row makes the button hole). Tie off. Embroidering Cacti: Start one row down and one row in on the long flat side, with pointed side on the bottom. Work 3 embroidery back stitches up and down in the same stitches, making the thick trunk of the cactus. Make the arms by going diagonally across the sc st right next to the top of the trunk. Then work a stitch up to finish the arm. Repeat for other side. For the repeat pattern, work the cacti in an alternating pattern by going over 4 sts and going down from the same row.
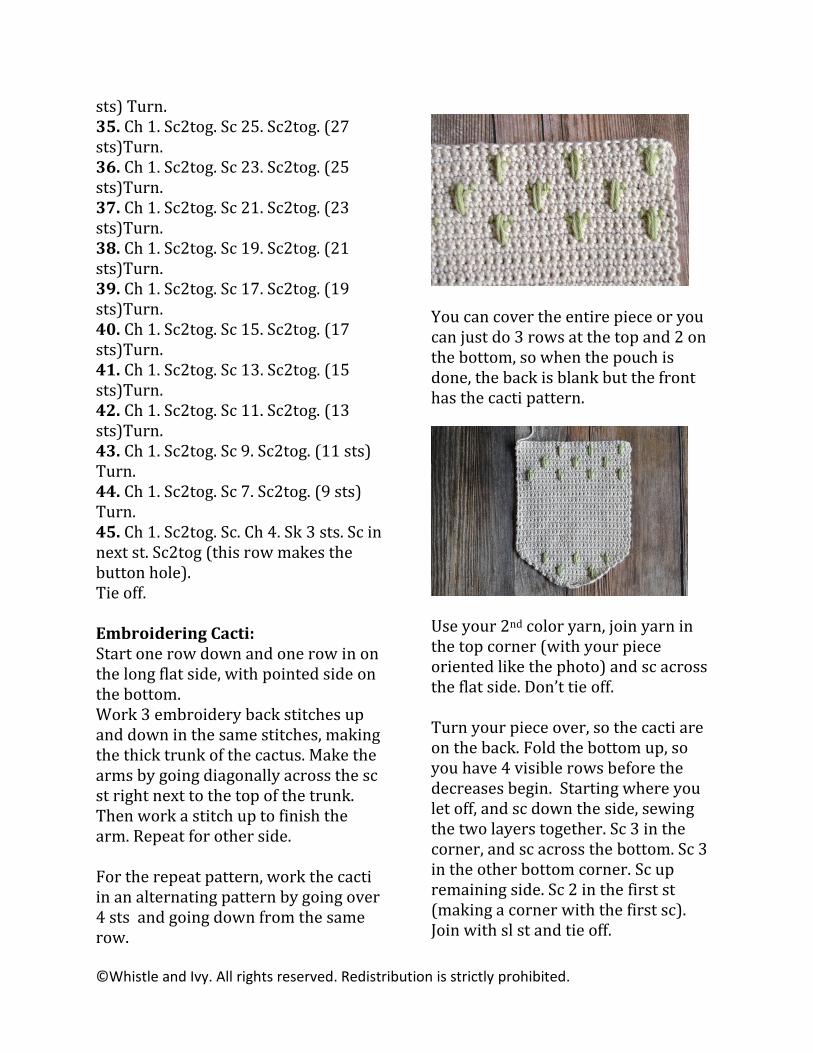
You can cover the entire piece or you can just do 3 rows at the top and 2 on the bottom, so when the pouch is done, the back is blank but the front has the cacti pattern.
Use your 2nd color yarn, join yarn in the top corner (with your piece oriented like the photo) and sc across the flat side. Don’t tie off. Turn your piece over, so the cacti are on the back. Fold the bottom up, so you have 4 visible rows before the decreases begin. Starting where you let off, and sc down the side, sewing the two layers together. Sc 3 in the corner, and sc across the bottom. Sc 3 in the other bottom corner. Sc up remaining side. Sc 2 in the first st (making a corner with the first sc). Join with sl st and tie off.
©Whistle and Ivy. All rights reserved. Redistribution is strictly prohibited.
With the flap open, and with the front of the pouch facing down (away from you), join yarn at the bottom of the flap, where the two layers end andyou just have the one layer (this will put the right sides of the stitches facing the same way as the rest of the pouch). Sc all across the flap, and to the other side. Tie off. Sew a button to correspond with the button hole.
*****************************
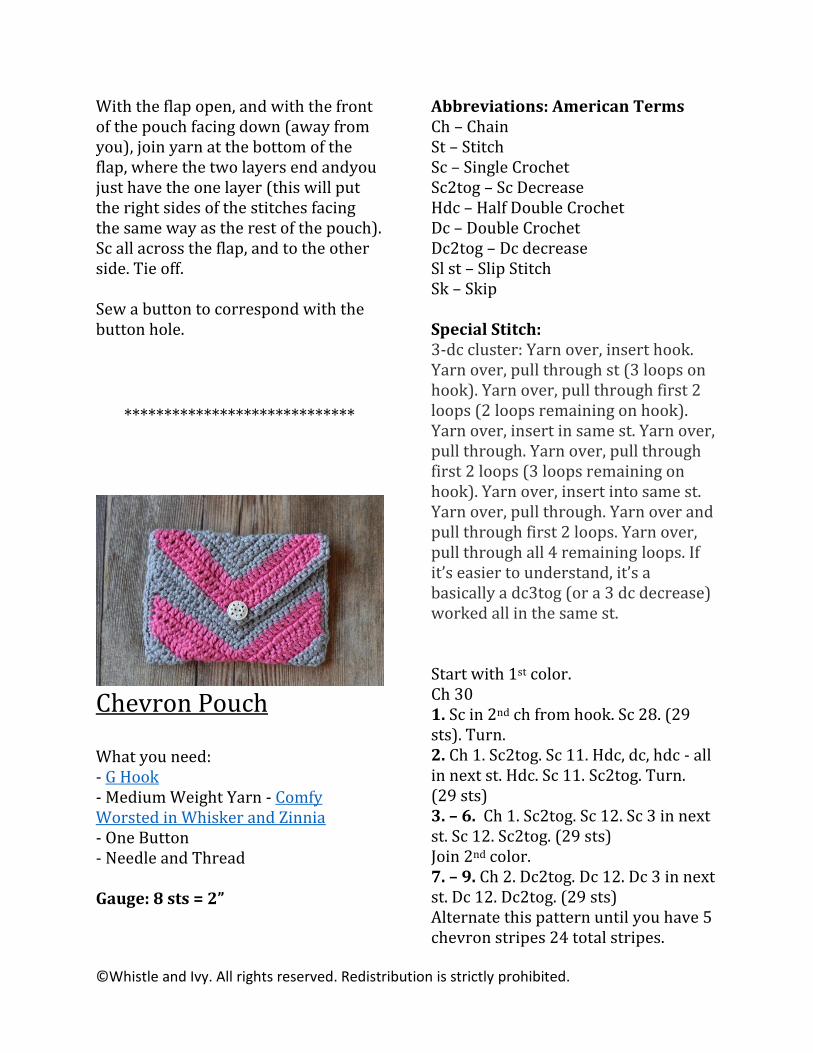
Chevron Pouch What you need: - G Hook - Medium Weight Yarn - Comfy Worsted in Whisker and Zinnia - One Button - Needle and Thread Gauge: 8 sts = 2”
Abbreviations: American Terms Ch – Chain St – Stitch Sc – Single Crochet Sc2tog – Sc Decrease Hdc – Half Double Crochet Dc – Double Crochet Dc2tog – Dc decrease Sl st – Slip Stitch Sk – Skip Special Stitch: 3-dc cluster: Yarn over, insert hook. Yarn over, pull through st (3 loops on hook). Yarn over, pull through first 2 loops (2 loops remaining on hook). Yarn over, insert in same st. Yarn over, pull through. Yarn over, pull through first 2 loops (3 loops remaining on hook). Yarn over, insert into same st. Yarn over, pull through. Yarn over and pull through first 2 loops. Yarn over, pull through all 4 remaining loops. If it’s easier to understand, it’s a basically a dc3tog (or a 3 dc decrease) worked all in the same st. Start with 1st color. Ch 30 1. Sc in 2nd ch from hook. Sc 28. (29 sts). Turn. 2. Ch 1. Sc2tog. Sc 11. Hdc, dc, hdc - all in next st. Hdc. Sc 11. Sc2tog. Turn. (29 sts) 3. – 6. Ch 1. Sc2tog. Sc 12. Sc 3 in next st. Sc 12. Sc2tog. (29 sts) Join 2nd color. 7. – 9. Ch 2. Dc2tog. Dc 12. Dc 3 in next st. Dc 12. Dc2tog. (29 sts) Alternate this pattern until you have 5 chevron stripes 24 total stripes.
©Whistle and Ivy. All rights reserved. Redistribution is strictly prohibited.
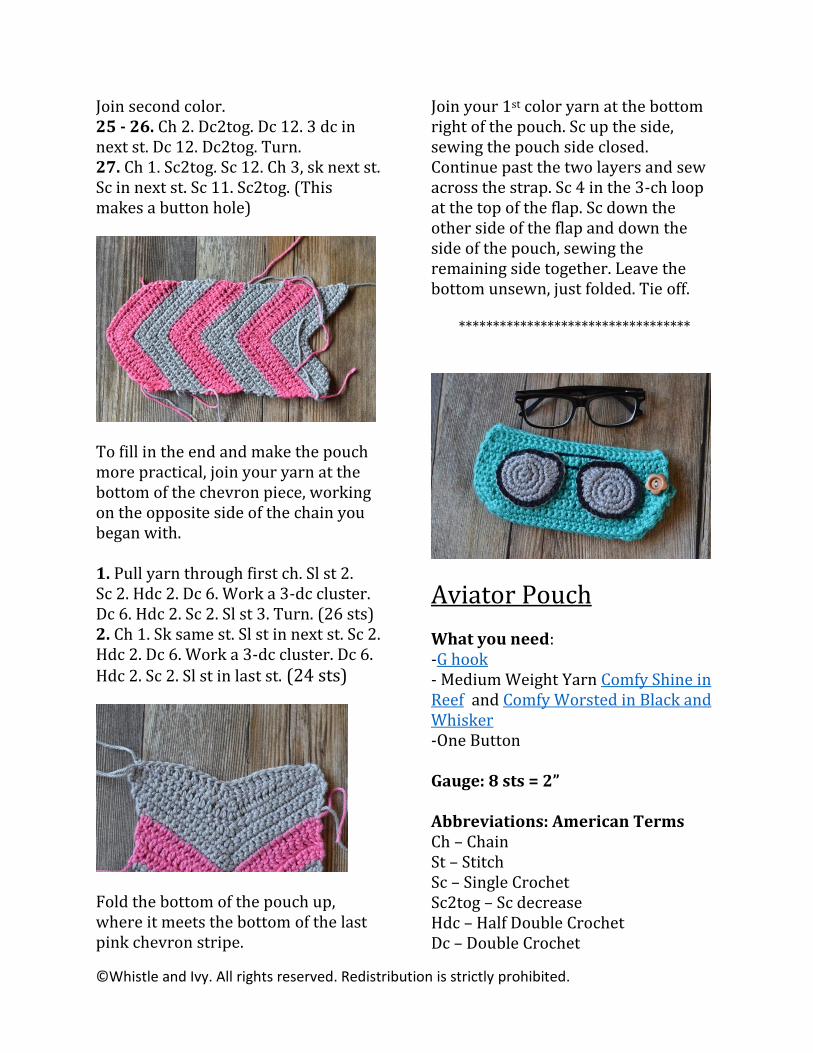
Join second color. 25 - 26. Ch 2. Dc2tog. Dc 12. 3 dc in next st. Dc 12. Dc2tog. Turn. 27. Ch 1. Sc2tog. Sc 12. Ch 3, sk next st. Sc in next st. Sc 11. Sc2tog. (This makes a button hole)
To fill in the end and make the pouch more practical, join your yarn at the bottom of the chevron piece, working on the opposite side of the chain you began with. 1. Pull yarn through first ch. Sl st 2. Sc 2. Hdc 2. Dc 6. Work a 3-dc cluster. Dc 6. Hdc 2. Sc 2. Sl st 3. Turn. (26 sts) 2. Ch 1. Sk same st. Sl st in next st. Sc 2. Hdc 2. Dc 6. Work a 3-dc cluster. Dc 6. Hdc 2. Sc 2. Sl st in last st. (24 sts)
Fold the bottom of the pouch up, where it meets the bottom of the last pink chevron stripe.
Join your 1st color yarn at the bottom right of the pouch. Sc up the side, sewing the pouch side closed. Continue past the two layers and sew across the strap. Sc 4 in the 3-ch loop at the top of the flap. Sc down the other side of the flap and down the side of the pouch, sewing the remaining side together. Leave the bottom unsewn, just folded. Tie off.
**********************************
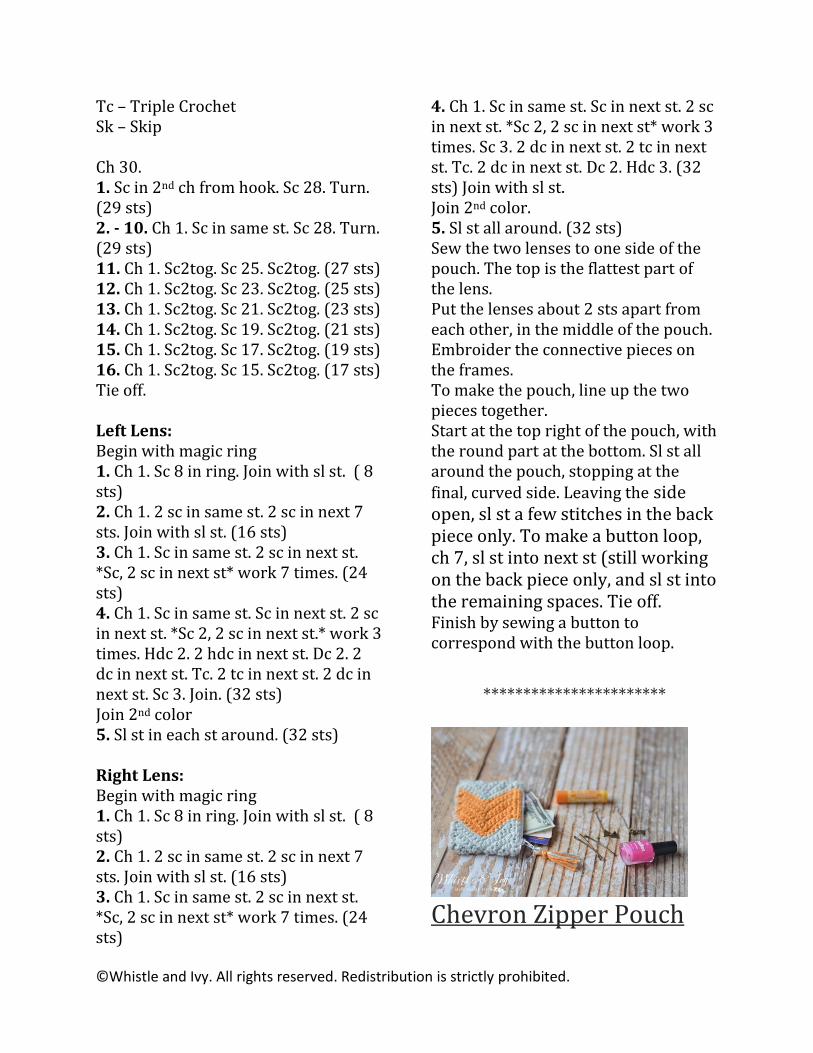
Aviator Pouch What you need: -G hook - Medium Weight Yarn Comfy Shine in Reef and Comfy Worsted in Black and Whisker -One Button Gauge: 8 sts = 2” Abbreviations: American Terms Ch – Chain St – Stitch Sc – Single Crochet Sc2tog – Sc decrease Hdc – Half Double Crochet Dc – Double Crochet
©Whistle and Ivy. All rights reserved. Redistribution is strictly prohibited.
Tc – Triple Crochet Sk – Skip Ch 30. 1. Sc in 2nd ch from hook. Sc 28. Turn. (29 sts) 2. - 10. Ch 1. Sc in same st. Sc 28. Turn. (29 sts) 11. Ch 1. Sc2tog. Sc 25. Sc2tog. (27 sts) 12. Ch 1. Sc2tog. Sc 23. Sc2tog. (25 sts) 13. Ch 1. Sc2tog. Sc 21. Sc2tog. (23 sts) 14. Ch 1. Sc2tog. Sc 19. Sc2tog. (21 sts) 15. Ch 1. Sc2tog. Sc 17. Sc2tog. (19 sts) 16. Ch 1. Sc2tog. Sc 15. Sc2tog. (17 sts) Tie off. Left Lens: Begin with magic ring 1. Ch 1. Sc 8 in ring. Join with sl st. ( 8 sts) 2. Ch 1. 2 sc in same st. 2 sc in next 7 sts. Join with sl st. (16 sts) 3. Ch 1. Sc in same st. 2 sc in next st. *Sc, 2 sc in next st* work 7 times. (24 sts) 4. Ch 1. Sc in same st. Sc in next st. 2 sc in next st. *Sc 2, 2 sc in next st.* work 3 times. Hdc 2. 2 hdc in next st. Dc 2. 2 dc in next st. Tc. 2 tc in next st. 2 dc in next st. Sc 3. Join. (32 sts) Join 2nd color 5. Sl st in each st around. (32 sts) Right Lens: Begin with magic ring 1. Ch 1. Sc 8 in ring. Join with sl st. ( 8 sts) 2. Ch 1. 2 sc in same st. 2 sc in next 7 sts. Join with sl st. (16 sts) 3. Ch 1. Sc in same st. 2 sc in next st. *Sc, 2 sc in next st* work 7 times. (24 sts)
4. Ch 1. Sc in same st. Sc in next st. 2 sc in next st. *Sc 2, 2 sc in next st* work 3 times. Sc 3. 2 dc in next st. 2 tc in next st. Tc. 2 dc in next st. Dc 2. Hdc 3. (32 sts) Join with sl st. Join 2nd color. 5. Sl st all around. (32 sts) Sew the two lenses to one side of the pouch. The top is the flattest part of the lens. Put the lenses about 2 sts apart from each other, in the middle of the pouch. Embroider the connective pieces on the frames. To make the pouch, line up the two pieces together. Start at the top right of the pouch, with the round part at the bottom. Sl st all around the pouch, stopping at the final, curved side. Leaving the side open, sl st a few stitches in the back piece only. To make a button loop, ch 7, sl st into next st (still working on the back piece only, and sl st into the remaining spaces. Tie off. Finish by sewing a button to correspond with the button loop.
***********************
Chevron Zipper Pouch
©Whistle and Ivy. All rights reserved. Redistribution is strictly prohibited.
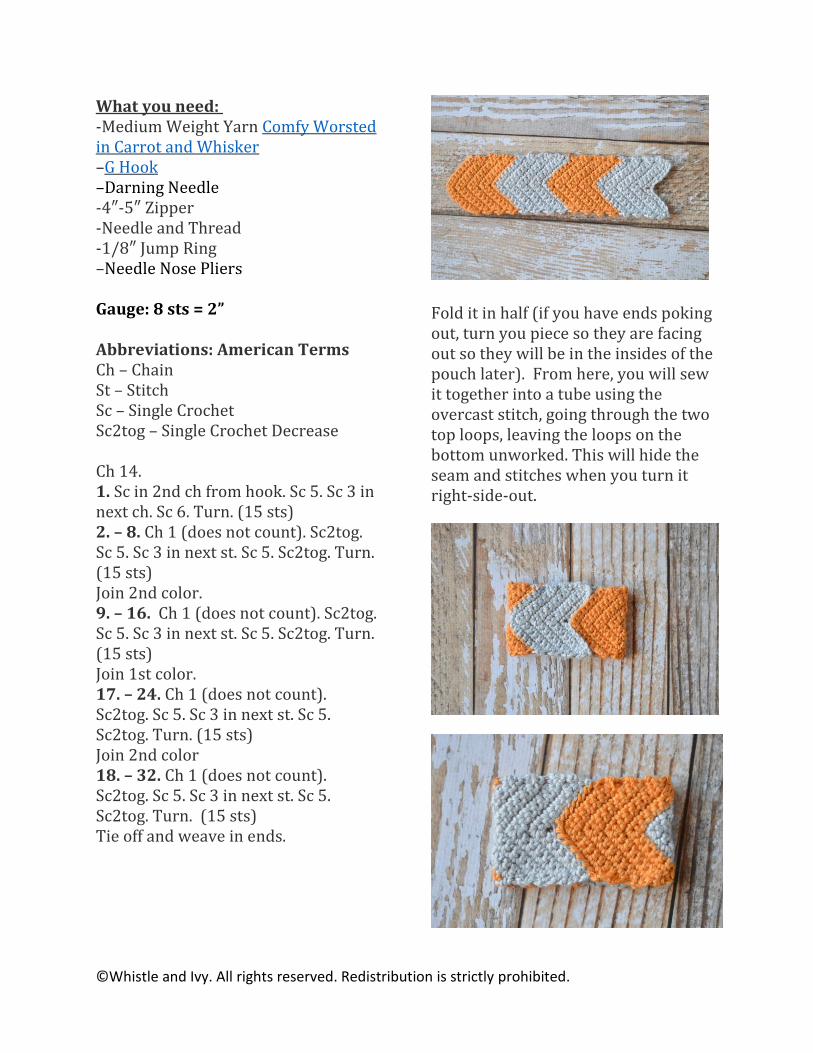
What you need: -Medium Weight Yarn Comfy Worsted in Carrot and Whisker –G Hook –Darning Needle -4″-5″ Zipper -Needle and Thread -1/8″ Jump Ring –Needle Nose Pliers Gauge: 8 sts = 2” Abbreviations: American Terms Ch – Chain St – Stitch Sc – Single Crochet Sc2tog – Single Crochet Decrease Ch 14. 1. Sc in 2nd ch from hook. Sc 5. Sc 3 in next ch. Sc 6. Turn. (15 sts) 2. – 8. Ch 1 (does not count). Sc2tog. Sc 5. Sc 3 in next st. Sc 5. Sc2tog. Turn. (15 sts) Join 2nd color. 9. – 16. Ch 1 (does not count). Sc2tog. Sc 5. Sc 3 in next st. Sc 5. Sc2tog. Turn. (15 sts) Join 1st color. 17. – 24. Ch 1 (does not count). Sc2tog. Sc 5. Sc 3 in next st. Sc 5. Sc2tog. Turn. (15 sts) Join 2nd color 18. – 32. Ch 1 (does not count). Sc2tog. Sc 5. Sc 3 in next st. Sc 5. Sc2tog. Turn. (15 sts) Tie off and weave in ends.
Fold it in half (if you have ends poking out, turn you piece so they are facing out so they will be in the insides of the pouch later). From here, you will sew it together into a tube using the overcast stitch, going through the two top loops, leaving the loops on the bottom unworked. This will hide the seam and stitches when you turn it right-side-out.
©Whistle and Ivy. All rights reserved. Redistribution is strictly prohibited.
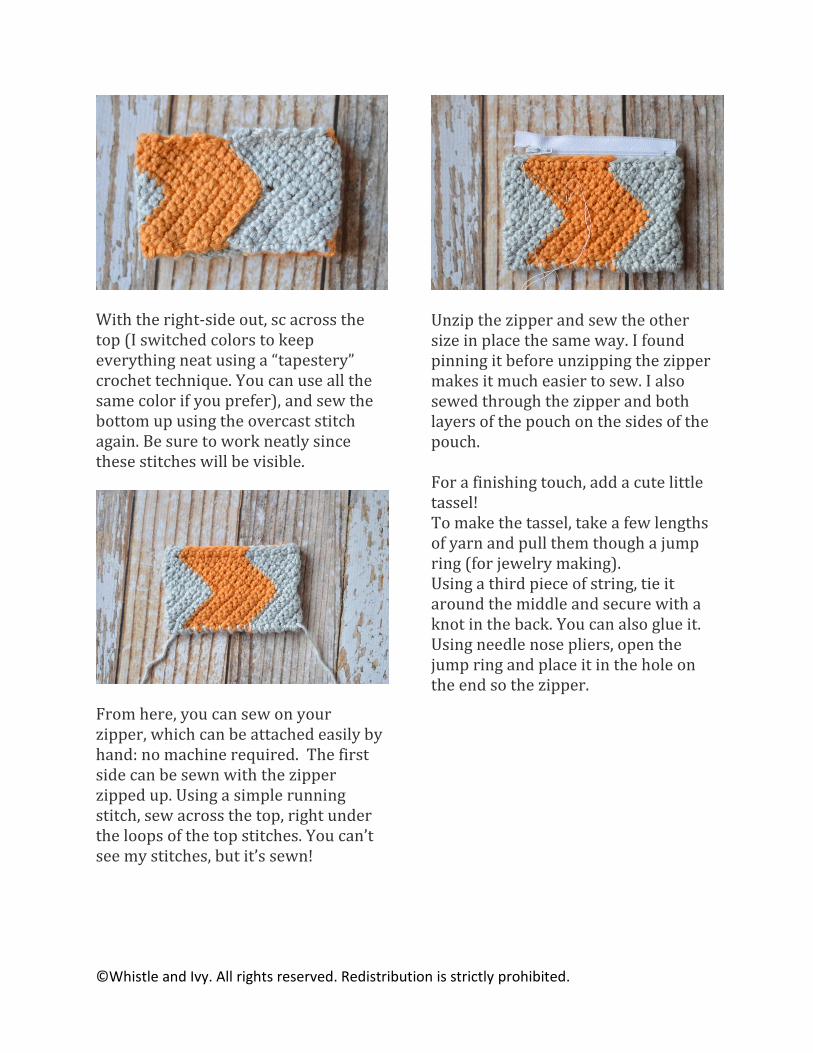
With the right-side out, sc across the top (I switched colors to keep everything neat using a “tapestery” crochet technique. You can use all the same color if you prefer), and sew the bottom up using the overcast stitch again. Be sure to work neatly since these stitches will be visible.
From here, you can sew on your zipper, which can be attached easily by hand: no machine required. The first side can be sewn with the zipper zipped up. Using a simple running stitch, sew across the top, right under the loops of the top stitches. You can’t see my stitches, but it’s sewn!
Unzip the zipper and sew the other size in place the same way. I found pinning it before unzipping the zipper makes it much easier to sew. I also sewed through the zipper and both layers of the pouch on the sides of the pouch. For a finishing touch, add a cute little tassel! To make the tassel, take a few lengths of yarn and pull them though a jump ring (for jewelry making). Using a third piece of string, tie it around the middle and secure with a knot in the back. You can also glue it. Using needle nose pliers, open the jump ring and place it in the hole on the end so the zipper.