Welcome to the Healthy Homes University manual!Lung and Blood Institute Start by taking the Diskus®...
186
Welcome to the Healthy Homes University manual! This book is a collection of important information which we hope families will use as a supplement to our program. It contains educational material for a variety of topics related to asthma and home safety. It is our goal to educate families on the importance of a healthy home, and we urge families to use this manual as a reference for years to come! Healthy Homes University Timeline: Introductory Visit (1 hr.) 1 st day Baseline Visit (2 hrs.) 7-14 days after 1 st visit 3 Month Site Visit (1 hr.) 3 months after baseline visit 6 Month Site Visit (1 hr.) 6 months after baseline visit 12 Month Site Visit (*some families) (1 hr.) 12 months after baseline visit If you have any questions or comments, please feel free to contact us! Sincerely, Courtney and Linda Courtney L. Wisinski Linda Stewart MI Dept. of Community Health Healthy Homes Section P.O. Box 30195 Lansing, MI 48909 Phone: (517) 335-8252 Phone: (517) 335-8867 Fax: (517) 335-8800 Email: [email protected] [email protected]
Transcript of Welcome to the Healthy Homes University manual!Lung and Blood Institute Start by taking the Diskus®...

Welcome to the Healthy Homes University manual!
This book is a collection of important information which we hope families will use as a supplement to our program. It contains educational material for a variety of topics related to asthma and home safety. It is our goal to educate families on the importance of a healthy home, and we urge families to use this manual as a reference for years to come! Healthy Homes University Timeline:
Introductory Visit (1 hr.) 1st day Baseline Visit (2 hrs.) 7-14 days after 1st visit 3 Month Site Visit (1 hr.) 3 months after baseline visit 6 Month Site Visit (1 hr.) 6 months after baseline visit 12 Month Site Visit (*some families) (1 hr.) 12 months after baseline visit
If you have any questions or comments, please feel free to contact us! Sincerely, Courtney and Linda
Courtney L. Wisinski Linda Stewart MI Dept. of Community Health Healthy Homes Section P.O. Box 30195 Lansing, MI 48909
Phone: (517) 335-8252 Phone: (517) 335-8867
Fax: (517) 335-8800 Email: [email protected]


Asthma is a lifelong (chronic) breathing problem caused by swelling (inflammation) of the airways in the lungs. It cannot be cured, but it can be prevented and controlled. When you have asthma, your airways are super sensitive, or “twitchy.” They may react to many things. These things are called triggers. People who have asthma may wheeze or complain of feeling “tight” in the chest. They may also cough a lot when their asthma is not under control.
• During an asthma attack or flare-up, three things happen
to the airways to restrict breathing: 1. The inner lining of the airways swells and becomes irritated. 2. The muscles around the airways tighten and make the airways
smaller. 3. More mucus (thick fluid) is produced and the airways become
clogged.
• Because children have smaller airways, the above factors can cause more restriction to breathing than in an adult.
Who Gets Asthma?
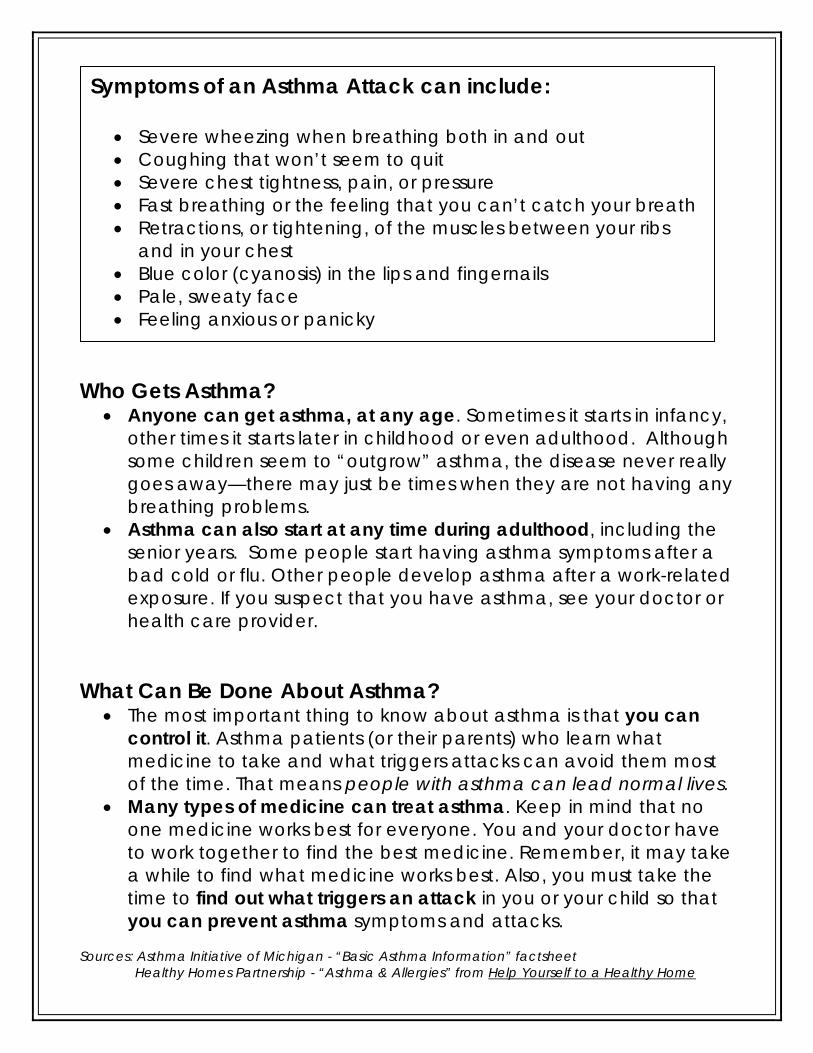
• Anyone can get asthma, at any age. Sometimes it starts in infancy, other times it starts later in childhood or even adulthood. Although some children seem to “outgrow” asthma, the disease never really goes away—there may just be times when they are not having any breathing problems.
• Asthma can also start at any time during adulthood, including the senior years. Some people start having asthma symptoms after a bad cold or flu. Other people develop asthma after a work-related exposure. If you suspect that you have asthma, see your doctor or health care provider.
What Can Be Done About Asthma?
• The most important thing to know about asthma is that you can control it. Asthma patients (or their parents) who learn what medicine to take and what triggers attacks can avoid them most of the time. That means people with asthma can lead normal lives.
• Many types of medicine can treat asthma. Keep in mind that no one medicine works best for everyone. You and your doctor have to work together to find the best medicine. Remember, it may take a while to find what medicine works best. Also, you must take the time to find out what triggers an attack in you or your child so that you can prevent asthma symptoms and attacks.
Sources: Asthma Initiative of Michigan - “Basic Asthma Information” factsheet Healthy Homes Partnership - “Asthma & Allergies” from Help Yourself to a Healthy Home
Symptoms of an Asthma Attack can include:
• Severe wheezing when breathing both in and out • Coughing that won’t seem to quit • Severe chest tightness, pain, or pressure • Fast breathing or the feeling that you can’t catch your breath • Retractions, or tightening, of the muscles between your ribs
and in your chest • Blue color (cyanosis) in the lips and fingernails • Pale, sweaty face • Feeling anxious or panicky

!SIGNS that an asthma attackis starting...ACT FAST!
Warning signsand Symptoms for Asthma
Asthma attacks or episodes hardly ever happenwithout warning.The warning signs for an attack arenot the same for everyone.They may be mild, and maynot seem to be related to asthma.Warning signs maystart 24 to 48 hours before an asthma attack begins,and should be treated as early asthma symptoms.
You and your doctor or asthma counselor shouldinclude your warning signs on your Asthma Action Plan.
By knowing your warning signs and treating them quickly, you may be able to avoid an asthma attack.
Think back to your last asthma attack. Did you haveany of the signs below? Check off the warning signs that have happened to you, and show them to yourdoctor and family.
EARLY WARNING SIGNS
❒ Itchy chin
❒ A cough that doesn’t go away,especially at night
❒ Itchy, scratchy, or sore throat
❒ Waking up at night
❒ Dark circles under eyes
❒ Runny, stuffy or congested nose
❒ Increased tiredness
❒ Peak flow readings in the“Yellow Zone”
❒ Mood change - grouchy or extra quiet
❒ Thirst
❒ Itchy, glassy or watery eyes
❒ Rubbing nose a lot
❒ Sneezing
❒ Stomach ache
❒ Headache
❒ Fever
❒ Feeling restless
❒ Change in face color—pale or flushed
❒ Throat clearing
❒ Eczema flare-up
❒ Other:
DANGER SIGNS! Asthma isout of control....
❒ Bluish, gray or dusky color tolips and nail beds
❒ Trouble walking
❒ Trouble talking—can’t speak in whole sentences
❒ Skin between ribs or above breastbone sucks in when breathing
❒ Fast heartbeat or pulse
❒ Peak flow reading in the“Red Zone”
❒ Nostrils flare when breathing
❒ Quick-relief medications do not work
❒ Other:
❒ Cough
❒ Wheeze
❒ It feels hard to breathe out
❒ Chest feels “tight” or hurts
❒ Breathing faster than normal
❒ Get out of breath easy
❒ Drop in peak flow readings
❒ Other:
If you experience
any of the
warning signs above,
follow your Asthma
Action Plan
and contact your
doctor if necessary.

Is yourAsthma Under Control?
?DO YOU OR YOUR CHILD…
Miss school or work because of asthma?•
Have trouble being active or exercising because of asthma?
•Sometimes need to go to an urgent care facility
or to the emergency room because of asthma?•
Take your “quick-relief inhaler” more than two times a week?
•Awaken at night with asthma symptoms
more than two times a month?•
Refill your “quick-relief inhaler” more than two times a year?
•If you answered “Yes” to any of these questions, yourasthma is NOT UNDER CONTROL. Talk to your
doctor about your (or your child’s) asthma today!
The Rules of Two is a registered trademark of the Baylor Health Care System

The right medications can control asthma. • Asthma medications are very safe and effective. • Asthma medication is non-addictive. • It is very important to use each asthma medication in the correct way. • Some asthma medications must be taken every day in order for them to work. • Asthma medications do not lose their effectiveness over time.
There are two main kinds of asthma medications:
1. Quick relief medications 2. Long-term medications
Other names for these medications include:
• Rescue medications • Rescue inhalers • Relievers • Openers • Bronchodilators
Other names for these medications include:
• Preventer medications • Controller medications • Anti-inflammatory medications • Corticosteroid medications
Quick relief medications are mainly used to treat an asthma “attack” (or episode). These types of medications usually come in the form of a spray or powder that is inhaled into the lungs through an inhaler. Quick relief medications open airways quickly during an asthma attack and help stop coughing, wheezing and troubled breathing; however, they work only for a short time (3 to 4 hours).
Long-term medications are inhaled steroids. They are the major drugs used in the control of asthma. They usually come in the form of a spray or powder that is inhaled into the lungs through an inhaler, but may also come in the form of a liquid for use with a nebulizer. When taken every day, they work continuously to reduce or prevent swelling of the airways and help make the lungs react less strongly to irritants and triggers.

Examples: prednisone, prednisolone, dexamethasone and methylprednisolone
• Oral corticosteroids are often used with bronchodilators (or “rescue medication”) to treat moderate to severe asthma flare-ups. A doctor will usually prescribe them in “short bursts” of 5 days up to 14 days. This is the best way to reduce inflammation and get a child’s asthma back under control.
• It is very important to finish taking the entire prescription of oral corticosteroids! If they are used for more than a week or two, the dose should be gradually reduced so your child’s body can increase its own natural steroids again. Follow the doctor’s instructions on how to gradually reduce dosage!
Do Asthma Medications Have Side Effects?
• Quick relief medications may have some side effects. Many people experience these common reactions to quick relief medications: shaking, faster heartbeat, nervousness and restlessness.
• Long-term medications:
o There are some misconceptions about the use of inhaled and oral steroids. Some people think of them as the same drugs athletes abuse (anabolic steroids), which are drugs that cause unhealthy side effects. Inhaled or oral steroids taken for asthma control are NOT the same as steroids taken by athletes.
o Using inhaled steroids at the dose levels that are prescribed for asthma does NOT cause weak bones, growth suppression, weight gain, or cataracts which are all associated with high doses of anabolic steroids.
o They do have some side effects that are not
considered serious, which may include a hoarse voice, sore throat, or mild throat infection (thrush). These side effects can be minimized by rinsing out the mouth after every dose of inhaled steroid and by using a spacer.
o Oral corticosteroids are more likely to cause side effects than inhaled
corticosteroids because they are carried to all parts of the body. Inhaled corticosteroids only go to the lungs. The possibility for side effects is low when a “short burst” (5-14 days) of oral steroids is used. Side effects might include increased appetite, mood changes or trouble sleeping.

Proper Storage of Asthma Medications
• Always read the package inserts of the medication and follow the specific instructions for storage of the medication.
• Store inhalers at room temperature • Liquid medications for the nebulizer should not be refrigerated. • Store medications away from sunlight. • Be careful not to leave inhalers or other asthma medication in the car. Extreme
hot or cold temperatures can cause the medication to become ineffective. • Some asthma medications come in special foil wrappers. These medications
must be used only within a certain period of time once the foil pouches are opened. Also, these specially wrapped medications sometimes must be kept in their foil wrappers for storage. For foil-wrapped medications, it is important to keep track of when the foil pouch was opened.
* If you have questions about the storage of a specific medication, review the instructions or contact a pharmacist at your local drug store for more information.
Sources: “Asthma Medication”, Asthma Information Handbook for Early Care and Education Providers,
“Oral Corticosteroids”, Palo Alto Medical Foundation website at: http://www.pamf.org/asthma/medications/oral/corticosteroids.html

Your Asthma Control Plan is Just for You
With the right asthma control plan, most people with asthma can leadnormal, active lives. The asthma control plan your doctor prescribed isjust for you. Some people with asthma may have to take medicine every day. Other people with asthma may only need to take medicineas needed.
Two Types of Medicine
There are two types of asthma medications—long-term control medicine to prevent asthma attacks, and quick-relief medicine to use during an asthma attack and when you have asthma symptoms.
Long-term Control Medicine to Prevent Asthma
Some people with asthma will need to take medicine every day to prevent asthma attacks from starting. These may be:anti-inflammatory medicines, methylxanthines (theophylline), and long-acting beta2-agonists. It’s important to take your medicines just as your doctor tells you to, even if you are not feeling symptoms.
• Anti-inflammatory medicines are used to prevent asthma attacks. They prevent and reduce swelling of the airways and buildup of mucus, so breathing is easier.
Some common anti-inflammatory medicines are:• cromolyn sodium - sold under the name INTAL®
• nedocromil sodium – sold under the name TILADE®
• leukotriene modifiers - sold under the names ACCOLATE®,SINGULAIR® and ZYFLO®
• and inhaled corticosteroids – sold under the names AEROBID®,AZMACORT®, BECLOVENT®, FLOVENT®,VANCERIL®,PULMICORT TURBUHALER®, and PULMICORT RESPULSES®.
All of these medications must be taken regularly (not just during an asthma episode) for them to work well and prevent asthma episodes. Your doctor will tell you how often you need to take anti-inflammatory medicine.
NOTE: Anti-inflammatories are not intended to be used to provide rapid relief of symptoms. These drugs are long-actingagents that cannot relieve symptoms once they have begun.
• Methylxanthine (theophylline) is used to prevent asthma attacks. It helps to keep the airways relaxed and open, sobreathing is easier. Some common brand names for theophylline areTHEOLAIR and THEODUR®. Your doctor will tell you how often you need to take theophylline.
• Long-acting beta2-agonists are sometimes used to keep daily asthma symptoms under control (especially at night) and preventasthma episodes. They relax the muscles surrounding your airways,allowing them to open more fully so you can breathe more freely.Some common brand names for long-acting beta2-agonists areSEREVENT® and FORADIL®. Your doctor will tell you how often you need to take long-acting beta2-agonists.
NOTE: Long-acting bronchodilators should never be used to treat sudden symptoms. They cannot act fast enought to provide relief.
UnderstandingAsthma Medications
• Quick-relief Medicine to Use During an Asthma Episode
Short-acting beta2-agonists are most often used during an asthmaepisode.Your doctor will tell you when and how to use beta2-ago-nists.They quickly relax the muscles of the airways to make breathingeasier. Short-acting beta2-agonists are usually inhaled and can startworking in 5 to 15 minutes. Common names for short-acting beta2-agonists are:
• Albuterol (sold under the names PROVENTIL® and VENTOLIN®)
• Metaproterenol (sold under the names METAPREL®
and ALUPENT®)• Terbutaline (sold under the names BRICANYL® and
BRETHAIRE®)
• Pirbuterol (sold under the name MAXAIR™ AUTOHALER™)
NOTE: If you find that you are using a short-acting drug morethan 2 or 3 times per week, this may be a sign that your asthmais not under control. You should talk with your doctor aboutbetter long-term asthma control techniques.
• Anticholinergic drugs, such as ATROVENT®, may be an alternative if you cannot tolerate inhaled short-acting beta2-agonists.These drugs work by expanding your air passages and may alsodecrease mucus gland secretions, making it easier to breathe.
• Oral corticosteroids, such as Prednisone, are tablets orliquids that are swallowed (NOT inhaled) and they may be used dur-ing severe asthma attacks. Some people think that the corticos-teroids used to treat asthma are the same steroids that weight liftersand other athletes use to build muscles. This is not true.The steroids used to treat asthma are completely different from theones used to build muscle. Your doctor will tell you when and how you need to use corticosteroids.
• Over-the-Counter MedicationsNOTE: Over-the-counter asthma medications do not containthe same ingredients as prescribed asthma medications.Theyhave many more side effects, and may actually worsen yourasthma sypmtoms.Tell your doctor if you use non-prescribedasthma medications for breathing trouble.
Taking Asthma MedicationsIt is important to remember which medicines to take daily, to
prevent asthma attacks, and which to take during asthma attacks,when you have asthma symptoms.Your doctor will provide you withan asthma control plan that is right for you. Be sure to ask your doctor or asthma counselor any questions you have about your medications.
Some other medicines may interact with your asthma medicine,so always talk to your doctor before you take any medicines thatyour doctor has not prescribed. Each medicine you take may haveside effects. Report any side effects to your doctor.
Asthma medicines should be taken as ordered by your doctor.Some people are afraid that they will become addicted to their asthma medicines.This is not true. Others are concerned that if medicine is taken all the time, it will no longer work.This is rare andit can be managed.Talk to your doctor if you think this is happening.

• Experts recommend using an asthma action plan as part of asthma
treatment. Following a written asthma action plan can help your child do normal everyday activities (such as sleeping, playing, or exercising) without having any asthma symptoms.
• Each person's asthma is different, so each action plan will be, too. • An important part of any action plan is the instructions for what needs
to be done during an asthma flare-up. If your child goes to school, this may include permission for him or her to take rescue medication at school. The action plan should also clearly tell you when to seek emergency care.
• Many action plans use the "zone system," which is based on the red,
yellow, and green colors of a traffic light. Action plans use symptoms, peak flow readings, or both to help you figure out what zone your child is in:
o The green zone, or safety zone, explains how
to manage your child's asthma on a daily basis, when he or she is feeling good.
o The yellow zone, or caution zone, explains how to look for signs that your child's asthma is getting worse. It also tells you which medications to add to bring your child's asthma back under control.
o The red zone, or danger zone, explains what to do when a flare-up or attack is severe.
The color system makes it easy for kids and parents to quickly figure out which zone the child is in after finding out their peak flow meter reading. Your child's "personal best" peak flow reading is an important measurement to write on the plan so that you'll have something to compare the new numbers to. Asthma action plans may also include:
An asthma action plan (also called a management plan) is a written plan that you develop with your child's doctor to help control your child's asthma.

• Emergency phone numbers and locations of emergency care facilities
t to do when
• dosages of all your child's medications and when and
's important to have all of this information in one place so that you - as
• Your child's action plan should also go everywhere your child goes.
• an with your child's doctor at least once a
eed
• A list of triggers that bother your child and how to avoid those triggers • If your child should take medicine before exercising • A list of early flare-up symptoms to watch for and wha
they happen The names andhow they should be used
Itwell as your child's teachers, relatives, and caregivers - can do the right thing if they have an asthma flare up.
Keep a copy at home in a well-known spot and give one to the school nurse, teachers, or anyone else who cares for your child. Offer to discuss the plan, so your child's caregivers will be sure to follow the plan exactly. You should review the plyear or more frequently if symptoms seem to happen more often than they used to. Your child's plan may need changes as the dosages for his or her medicines change. The plan might also nto be updated if your child doesn't seem to need his or her rescue medications as often. Any time your child's action plan is changed,you should give new copies to anyone who has one.
*If your child does NOT have an Asthma Action Plan, take the following page with you during your next doctor’s visit and ask your doctor to help you make an Asthma Action Plan for your child. It could save their life!

Asthma Triggers
Asthma Action Plan
DANGER (RED) Take these medicines and call your doctor.
Name Date of Birth Effective Date
Doctor Parent/Guardian
Doctor’s Office Phone Number: Day Parent’s Phone
Emergency Contact After Parent Contact Phone
Student is able to self medicateYes No
/ / to / /
Medicine How Much to Take When to Take It
For asthma with exercise, take:
Medicine How Much to Take When to Take It
Get help from a doctor now! Do not be afraid of causing a fuss. Your doctor will want to see you right away. It is IMPORTANT!If you cannot contact your doctor, go directly to the emergency room. DO NOT WAIT. Make an appointment with your primarycare provider within two days of an ER visit or hospitalization.
Medicine How Much to Take When to Take It
IF QUICK RELIEVER/YELLOW ZONE MEDICINE IS NEEDED MORE THAN 2-3 TIMES A WEEK,
THEN CALL YOUR DOCTOR.
First
Next
GO (GREEN) Use these medicines every day.
CAUTION (YELLOW) Continue with green zone medicine and ADD:
Check all items that trigger your asthma and things that could make your asthma worse:
r Chalk dust r Ozone alert days r Foodsr Cigarette Smoke and second hand smoke r Pests-rodents and cockroachesr Colds/Flu r Pets-animal danderr Dust mites, dust, stuffed animals, carpet r Plants, flowers, cut grass, pollenr Exercise r Strong odors, perfumes, r Otherr Sudden temperature change r cleaning productsr Mold r Wood Smoke
Asthma Action Plan
Doctor’s Signature/Stamp
for healthy lungs
AsthmaInitiative ofMichigan
www.GetAsthmaHelp.org
The colors of a traffic light will help you use your asthma medicines. Also pay attention to symptoms
Green means GO ZONEUse preventive medicine
Yellow means CAUTIONZONE! Add prescribed yellow zone medicine
Red means DANGER ZONE!Get help from a doctor
-
-
-
Adapted from the original design by the Pediatric Asthma Coalition of New Jersey
You have ALL of these:• Breathing is good
• No cough or wheeze
• Sleep through the night
• Can work or play
You have ANY of these:• First sign of a cold
• Exposure to known trigger
• Cough
• Mild wheeze
• Tight chest
• Coughing at night
Your asthma isgetting worse fast:• Medicine is not helping
within 15-20 minutes
• Breathing is hard and fast
• Nose opens wide
• Ribs show
• Lips and/or fingernails blue
• Trouble walking and talking
Peakflow above
And/orPeak
flow from
to
And/orPeak
flow below


Please feel free to tear out the following pages (Child Care Asthma/Allergy Action Card, and Asthma Education Checklist) and fill them out.
• When you give a copy of the Asthma Action Plan to your child’s school, also give them the Child Care Asthma/Allergy Action Card to keep on file so that they have even more information about your child’s asthma.
• Use the Asthma Education Checklist to help you ask your child’s doctor the right questions during your next visit.

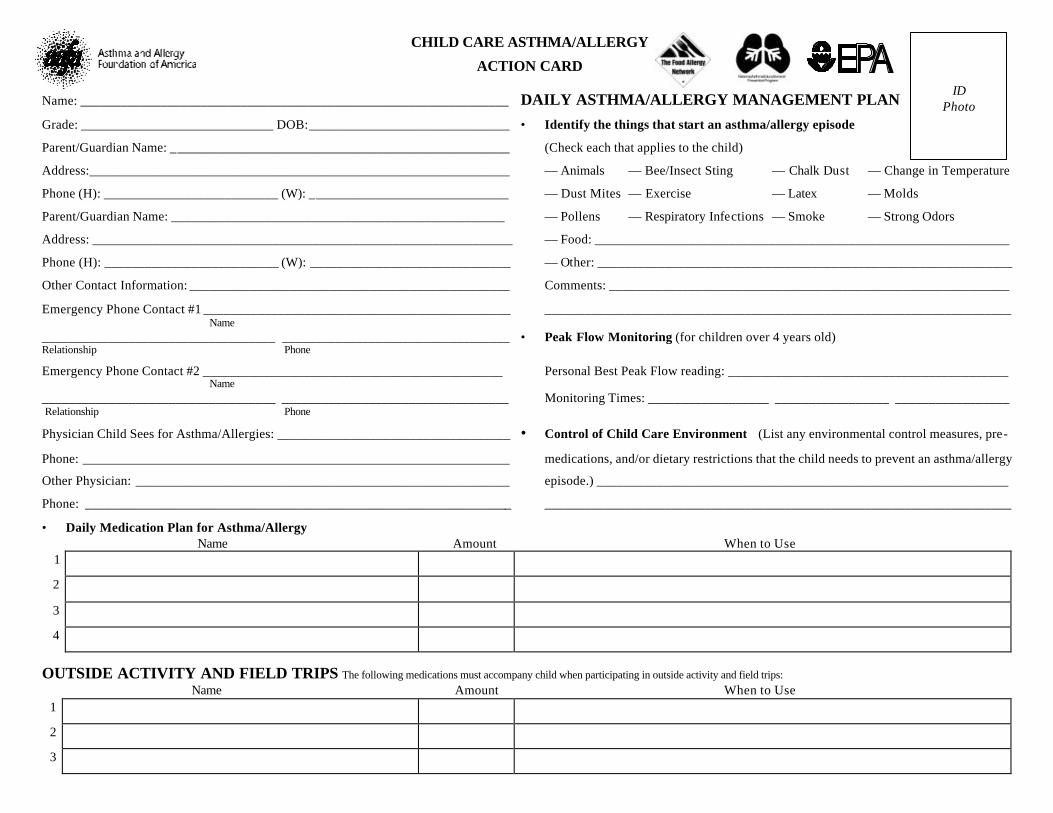
CHILD CARE ASTHMA/ALLERGY
ACTION CARD Name: ____________________________________ ____________________________ DAILY ASTHMA/ALLERGY MANAGEMENT PLAN
Grade: _____________________________ DOB:______________________________ • Identify the things that start an asthma/allergy episode
Parent/Guardian Name: ___________________________________________________ (Check each that applies to the child)
Address:_______________________________________________________________ — Animals — Bee/Insect Sting — Chalk Dust — Change in Temperature
Phone (H): __________________________ (W): ______________________________ — Dust Mites — Exercise — Latex — Molds
Parent/Guardian Name: __________________________________________________ — Pollens — Respiratory Infections — Smoke — Strong Odors
Address: _______________________________________________________________ — Food: ______________________________________________________________
Phone (H): __________________________ (W): ______________________________ — Other: ______________________________________________________________
Other Contact Information: ________________________________________________ Comments: ____________________________________________________________
Emergency Phone Contact #1 ______________________________________________ ______________________________________________________________________ Name ___________________________________ __________________________________ • Peak Flow Monitoring (for children over 4 years old) Relationship Phone
Emergency Phone Contact #2 _____________________________________________ Personal Best Peak Flow reading: __________________________________________ Name ___________________________________ __________________________________ Monitoring Times: __________________ _________________ _________________ Relationship Phone
Physician Child Sees for Asthma/Allergies: ___________________________________ • Control of Child Care Environment (List any environmental control measures, pre-
Phone: ________________________________________________________________ medications, and/or dietary restrictions that the child needs to prevent an asthma/allergy
Other Physician: ________________________________________________________ episode.) ______________________________________________________________
Phone: ________________________________________________________________ ______________________________________________________________________
• Daily Medication Plan for Asthma/Allergy Name Amount When to Use
1 2 3 4
OUTSIDE ACTIVITY AND FIELD TRIPS The following medications must accompany child when participating in outside activity and field trips: Name Amount When to Use
1 2 3
ID Photo

ASTHMA EMERGENCY PLAN ALLERGY EMERGENCY PLAN Emergency action is necessary when the child has symptoms such as ______________ • Child is allergic to: _____________________________________________________
______________________________________________________________________ _____________________________________________________________________
or has a peak flow reading at or below _______________________________________ _____________________________________________________________________
• Steps to take during an asthma episode: • Steps to take during an allergy episode:
1. Check peak flow reading (if child uses a peak flow meter). 1. If the following symptoms occur, give the medications listed below.
2. Give medications as listed below. 2. Contact Emergency help and request epinephrine.
3. Check for decreased symptoms and/or increased peak flow reading. 3. Contact the child’s parent/guardian.
4. Allow child to stay at child care setting if: ______________________________
________________________________________________________________
5. Contact parent/guardian • Symptoms of an allergic reaction include :
6. Seek emergency medical care if the child has any one of the following: (Physician, please circle those that apply)
• Emergency Asthma Medications: • Emergency Allergy Medications: Name Amount When to Use Name Amount When to Use 1 1 2 2 3 3 4 4
• Special Instructions: • Special Instructions: __________________________________________________________________ ______________________________________________________________________
__________________________________________________________________ ______________________________________________________________________
______________________________________________________ _______________________________________________________ _____________________________________________________________ Physician’s Signature Date Parent/Guardian’s Signature Date Child Care Provider’s Signature Date
IF THIS HAPPENS, GET EMERGENCY HELP NOW!
→ No improvement minutes after initial treatment with medication. → Peak flow at or below _______________. → Hard time breathing with: Ø Chest and neck pulled in with breathing. Ø Child hunched over. Ø Child struggling to breathe.
→ Trouble walking or talking. → Stops playing and cannot start activity again. → Lips or fingernails are gray or blue.
→Mouth/Throat: itching & swelling of lips, tongue, mouth, throat; throat tightness; hoarseness; cough →Skin: hives; itchy rash; swelling →Gut: nausea; abdominal cramps; vomiting; diarrhea →Lung*: shortness of breath; coughing; wheezing →Heart: pulse is hard to detect; “passing out” *If child has asthma, asthma symptoms may also need to be treated.

This form is to help you and your doctor talk about asthma. Please fill it out and hand it to your doctor. Thank you.
Patient’s Name: _____________________________________________ Date: _____/_____/_____
1.What questions do you have about asthma? Please check all that apply.
❒ What is asthma?
❒ What causes asthma?
❒ What triggers an asthma attack?
❒ How do the following affect asthma? Please check those you have questions about.
❒ Allergies (pollens, feathers, mold, animals, food, dust) ❒ Smoking
❒ Changes in weather ❒ Sports and exercise ❒ Sleeping
❒ Stress and excitement ❒ Illness (cold, flu) ❒ Paints and cleaners
❒ Do I/my child need to limit exercise and sports because of asthma?
❒ What changes can I make at home to help my/my child’s asthma?
❒ What are the warning signs of an asthma attack?
❒ How do I know when to go to the emergency room?
❒ What medications are there to treat my/my child’s asthma?
❒ How and when should I/my child take asthma medication?
❒ What are the side effects of my/my child’s medication?
❒ What new treatments are available for asthma?
❒ How is a peak flow meter used?
❒ How often should I/my child come in for asthma check-ups?
❒ What should I tell my/my child’s school/employer about asthma?
❒ What can I do to better manage my/my child’s asthma?
❒ Will I/my child always have asthma?
❒ Where can I get information about asthma?
❒ Other: _____________________________________________________________________?
2.What ways do you learn best? Please check all that apply.
❒ One-on-one questions/answers
❒ Resource/lending library
❒ Video
❒ Telephone/hotline
❒ Internet
❒ Computer programs
❒ Written materials (pamphlets, books)
❒ Workshops/presentations
❑ Support groups
❑ Other: _____________________________________
What additional questions or concerns do you have about your asthma? (Please use other side if needed).
Asthma Education Checklist


Clean Your Inhaler as Needed
The inhaler should be cleaned often to prevent buildup thatwill clog the inhaler.
1. Once a day, clean the inhaler and cap by rinsing them in warm running water. Let them dry before you use it again.
2. Twice a week wash the plastic mouthpiece with mild dishwashing soap and warm water. Rinse and dry it well before putting it back.
Know When to Replace Your Inhaler
If the canister is new, it is full.The number of puffs a canister contains is listed on the label. Do NOT put your canister in water to see if it is empty. This does not work.
For a medicine you take each day: take the number ofpuffs in the canister when it is full, and divide it by the num-ber of puffs you take every day. This will tell you how manydays your inhaler will last. For example:
Your inhaler canister has 200 puffs in it, you are told to take8 puffs total every day.
25 days8 puffs per day ) 200 puffs in canister
So this canister will last 25 days. If you started using thisinhaler on May 1, replace it on or before May 25.You canwrite the date on your canister.
For quick-relief medicine take as needed and count each puff.
How to Use yourMetered-Dose Inhaler
the Right WayUsing a metered-dose inhaler is a good way to take
asthma medicines.There are few side effects because themedicine goes right to the airways inside the lungs.A spacer or valved-holding chamber attached to the inhalercan help make your inhaler easier to use and more effective.For patients taking inhaled steroids, a valved-holding cham-ber or spacer may help prevent irritation to the mouth.
For the next 2 weeks, read these steps aloud as you do them or ask someone to read them to you. Ask yourdoctor or asthma counselor to check how well you areusing your inhaler.
Use your inhaler in one of the two ways pictured to theright (A or B).
STEPS FOR USING YOUR INHALER
Getting ready1. Take off the cap and shake the inhaler
2. Breathe out all the way
3. Hold your inhaler the way your doctor or asthma counselor said (A or B)
Breathe in slowly4. As you start breathing in slowly through your mouth,
press down on the inhaler one time. If you are using a spacer or valved-holding chamber, first press down on the inhaler. Within 5 seconds, begin to breathe in slowly.
5. Keep breathing in slowly, as deeply as you can.
Hold your breath6. Hold your breath as you count to 10 slowly, if you can.
7. For inhaled quick-relief medicine (beta2-agonists), wait about 1 minute between puffs. There is no need to wait between puffs for other medicines.
B. Hold inhaler 1 to 2inches in front of yourmouth (about thewidth of two fingers).
A. Preferred: Use a spacer/holding chamber.These come in many shapes and can be useful to any patient.
Adapted from the Practical Guide for the Diagnosis andManagement of Asthma, NIH Publication No. 97-4053,October 1997, National Institutes of Health, NationalHeart, Lung and Blood Institute

Start by taking the Diskus® out of the box and foil andwriting the “Pouch opened” and “Use by” dates on thelabel of the inhaler.The “Use by” date is one monthfrom date of opening.
1. OPEN
When the inhaler is removed from the box, it will be“closed.” To open it, hold the outer case in one hand andput the thumb of your other hand on the thumb grip.Push your thumb away from you as far as it will go.
2. SLIDE
Hold the inhaler with the mouthpiece facing you. Slide the lever away from you as far as it will go until you hearand/or feel a click.The inhaler is now ready to use.
3. INHALE
• Hold the inhaler away from your mouth.Breathe out as far as is comfortable. Never blow into your Diskus®.
• Put the mouthpiece to your lips. Breathe in steadily and deeply— through the inhaler, not through your nose.
• Remove the inhaler from your mouth.• Hold your breath for about ten seconds, or for as
long as is comfortable.• Breathe out slowly.
4. CHECK the dose indicator
The dose indicator on top of the inhaler tells you how many doses are left.
5. CLOSE
To close the inhaler, put your thumb in the thumbgrip,and slide the thumbgrip back towards you, as far as itwill go.When you close the inhaler, it clicks shut.Thelever automatically goes back to its starting position andis reset. It is now ready to be used again.
Diskus® tips:
• Never breathe out into the inhaler.
• Never try to take the inhaler apart.
• Always use the inhaler in a level,horizontal position.
• Never wash the mouthpiece or any part of the inhaler—keep it dry.
• Always store the Diskus® in a dry place.
How to Use aDiskus® Dry Powder Inhaler
The Advair Diskus® is a registered trademark of GlaxoSmithKline
6. STORE
Store your Diskus® atroom temperature, 68°to 77° F, in a dry placeaway from direct heat or sunlight. Keep out of reach ofchildren.The inhaler should be thrown away one monthafter it is taken from the foil pouch, or after every med-ication blister has been used (when the dose indicatorreads “0”), whichever comes first.

HOW TO USE A NEBULIZER
Read the instructions that came with your nebulizer sincethere are many types of nebulizers available.
GENERAL INSTRUCTIONS
1. Measure the correct amount of normal saline solution using a clean eyedropper. Put it into the plastic attach-ment cup. If your medicine is premixed, do not add normal saline. Add it to the cup, then go to step 3.
2. Measure the correct amount of medicine using a clean eyedropper. Put it into the cup with the saline solution.
3. Fasten the mouthpiece to the T-shaped part of the nebulizer.Then fasten this unit to the cup, or fasten the mask to the cup. For a child over the age of two, use a mouthpiece unit because it will give more medicine than a mask.
4. Put the mouthpiece in your mouth and seal your lips tightly around it, or place the mask on your face.
5. Make sure the air tubing has been connected to the machine and the nebulizer. Turn on the machine.
6. Take slow, deep breaths in through your mouth.
7. Hold each breath 1-2 seconds before breathing out.
8. Continue untilthere is no more medicine in the cup (about 10 minutes).
9. Store the medi-cine as directedafter each use.
10. Clean the nebulizer after each use.
CLEANING A NEBULIZER
Regularly cleaning the nebulizer is important because a dirty nebulizermay cause an infection. A goodcleaning routine also keeps the nebulizer from clogging up andhelps it last longer.
After each use:
1. Remove the mask or mouth-piece and T-shaped part from the cup. Rinse the mask or mouthpiece and T-shaped part in warm running water for 30 seconds.
2. Rinse the eyedropper in warm running water for 30 seconds.
• If possible, use distilled or sterile water for rinsing.• The tubing should not be washed or rinsed.
3. After rinsing, shake off excess water. Air-dry pieces on a clean cloth or paper towel.
4. Put the mask or mouthpiece and T-shaped part, cup, and tubing back together and connect the device to the machine. Run the machine for 10-20 seconds to dry the inside of the nebulizer.
5. Disconnect the tubing from the machine. Store the parts in a zip-lock bag.
Once every day when used:
1. Follow steps 1 through 5 above using mild dishwashing soap to clean the parts.
2. Be sure to dry all parts completely.
Once every week when used:
1. After washing with mild dishwashing soap, soak the parts in a solution made of one part distilled white vinegar and two parts distilled water for 30 minutes.
2. Throw out the vinegar water solution after use.Do not reuse it.
Never put the compressed air machine in water.Clean the surface of the machine with a damp cloth as needed.
Adapted from Nebulizers Information Sheet,Astra Zeneca
All About Nebulizers
A nebulizer is a compressed air machine that turns liquid asthma medicine into a fine mistyou can easily breathe. Nebulizers are good for young children, people who have troubleusing metered dose inhalers, and people who have severe asthma. Nebulizers come in manyforms. Your nebulizer may not look like the one pictured here, but they all work in aboutthe same way.


Your Peak Flow Zones
Your peak flow zones are based on your personal best peakflow number.The zones will help you check your asthma andtake the right actions to keep it controlled.The colors usedwith each zone come from the traffic light.
Ask your doctor to write an Asthma Action Plan for youthat tells you:
• The peak flow numbers for your green, yellow, and red zones. Mark the zones on your peak flow meter with colored tape or a marker.
• The medicines you should take while in each peak flow zone.
How to Use YourPeak Flow Meter
A peak flow meter helps you check how well yourasthma is controlled. Peak flow meters are mosthelpful for people with moderate or severe asthma.
This guide will tell you:• how to find your personal best peak flow number• how to use your personal best number to set
your peak flow zones • how to take your peak flow• when to take your peak flow to check your
asthma each day
STARTING OUT
Find Your Personal Best Peak Flow Number
It is important to find out your personal best peak flownumber. Each person’s asthma is different, so your personalbest peak flow number may be different from another person’spersonal best number.
To find your personal best peak flow number, take your peakflow each day for two to three weeks.Your asthma should beunder good control during this time.Take your peak flow asclose to the times listed below as you can. (These times fortaking your peak flow are only for finding your personal bestpeak flow.To check your asthma, each day you should takeyour peak flow in the morning.)
• Between noon and 2:00 p.m. each day.• Each time you take your quick-relief medicine to relieve
symptoms. Measure your peak flow after you take your medicine.
• Any other time your doctor or asthma counselor suggests.
Write down thenumber you get foreach peak flow read-ing.The highest peakflow number you had during the two to three weeks is yourpersonal best.Yourpersonal best canchange over time.Ask your doctor when to check for anew personal best.
GREEN ZONE
(80-100 percent of your personal best) signals good
control.Take your usual dailylong-term-control medicines,if you take any. Keep takingthese medicines even when
you are in the yellow or red zones.
YELLOW ZONE
(50-79 percent of your personal best) signals
caution: your asthma is getting worse. Add quick
relief medicines.You might need to increase other asthma medicines as
directed by your doctor.
RED ZONE
(below 50 percent of your personal best)
signals medical alert! Add or
increase quick-relief medicines and call your
doctor now.
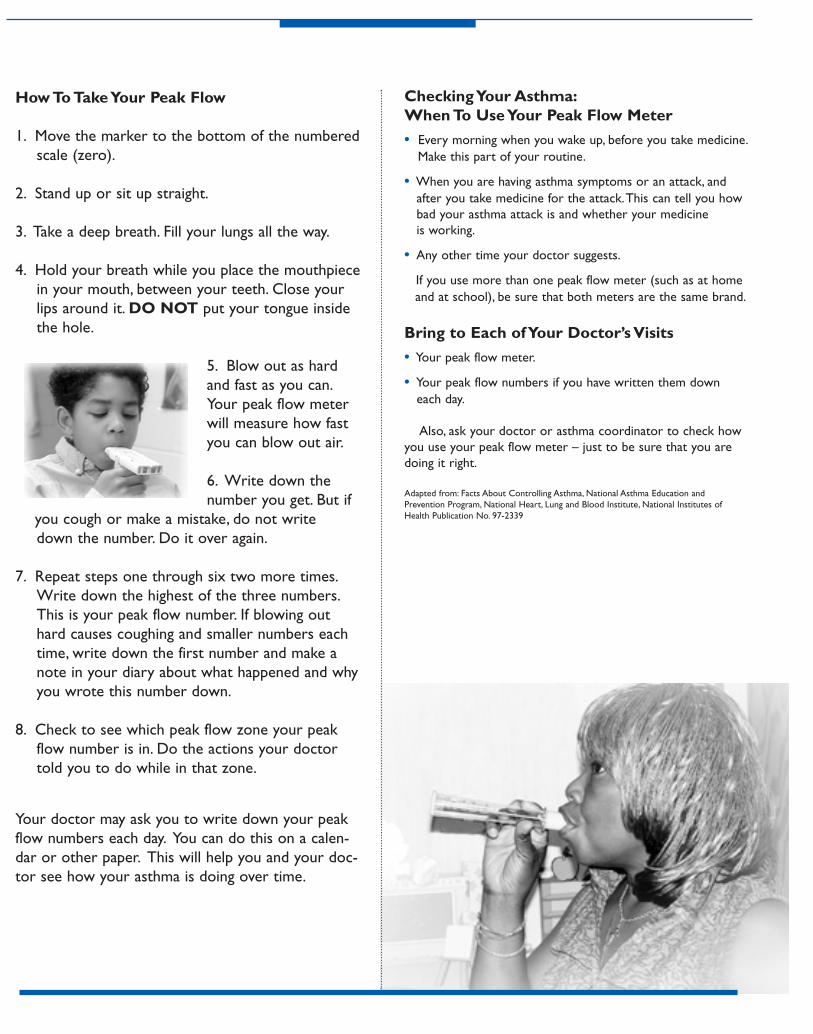
How To Take Your Peak Flow
1. Move the marker to the bottom of the numberedscale (zero).
2. Stand up or sit up straight.
3. Take a deep breath. Fill your lungs all the way.
4. Hold your breath while you place the mouthpiecein your mouth, between your teeth. Close your lips around it. DO NOT put your tongue inside the hole.
5. Blow out as hardand fast as you can.Your peak flow meterwill measure how fastyou can blow out air.
6. Write down thenumber you get. But if
you cough or make a mistake, do not write down the number. Do it over again.
7. Repeat steps one through six two more times.Write down the highest of the three numbers.This is your peak flow number. If blowing out hard causes coughing and smaller numbers each time, write down the first number and make a note in your diary about what happened and whyyou wrote this number down.
8. Check to see which peak flow zone your peak flow number is in. Do the actions your doctor told you to do while in that zone.
Your doctor may ask you to write down your peakflow numbers each day. You can do this on a calen-dar or other paper. This will help you and your doc-tor see how your asthma is doing over time.
Checking Your Asthma:When To Use Your Peak Flow Meter
• Every morning when you wake up, before you take medicine.Make this part of your routine.
• When you are having asthma symptoms or an attack, and after you take medicine for the attack.This can tell you how bad your asthma attack is and whether your medicine is working.
• Any other time your doctor suggests.
If you use more than one peak flow meter (such as at home and at school), be sure that both meters are the same brand.
Bring to Each of Your Doctor’s Visits
• Your peak flow meter.
• Your peak flow numbers if you have written them down each day.
Also, ask your doctor or asthma coordinator to check howyou use your peak flow meter – just to be sure that you aredoing it right.
Adapted from: Facts About Controlling Asthma, National Asthma Education and Prevention Program, National Heart, Lung and Blood Institute, National Institutes ofHealth Publication No. 97-2339

Asthma Symptoms and Peak Flow Diary
____________ My predicted peak flow _____________ My personal best peak flow
_________ My Green (Good Control) Zone __________ My Yellow (Caution) Zone __________ My Red (Danger) Zone80-100% of personal best 50–79% of personal best below 50% of personal best
Date:a.m. p.m. a.m. p.m. a.m. p.m. a.m. p.m. a.m. p.m. a.m. p.m. a.m. p.m.
DIRECTIONS
1. Take your peak flow reading every morning (a.m.) when you wake up. If the morning reading is less than 80% of your personal best, you should measure your peak flow more than once a day to check your progress.Try to take your peak flow readings at the same time each day. If you take an inhaled beta2-agonist medicine, take your peak flow readingbefore taking that medicine.Write down the highest reading of three tries in the box that says “peak flow reading.”
2. Look at the box at the top of this sheet to see whether your number is in the Green,Yellow, or Red Zone.
3. In the space below the date and time, put an “X” in the box that matches the symptoms you have when you record your peak flow reading; see description of symptom categories on the right.
4. Look at your Asthma Action Plan for what to do when your number is in one of the zones or when you have asthma symptoms.
5. Put an “X” in the box beside “medicine used to stop symptoms” if you took extra asthma medicine to stop your symptoms.
6. If you made any visit to your doctor’s office, emergency depart-ment, or hospital for treatment of an asthma episode, put an “X”in the box marked “urgent visit to the doctor.” Tell your doctor if you went to the emergency department or hospital.
No symptoms = No symptoms (wheeze, cough, chesttightness, or shortness of breath) even with normalphysical activity.
Mild symptoms = Symptoms during physical activity,but none at rest. It does not keep you from sleeping orbeing active.
Moderate symptoms = Symptoms while at rest;symptoms may keep you from sleeping or being active.
Severe symptoms = Severe symptoms at rest(wheeze may be absent); symptoms cause problemswalking or talking; muscles in neck or between ribs arepulled in when breathing
Nurses: Partners in Asthma Care, National Asthma Education and PreventionProgram, National Heart, Lung, and Blood Institute. NIH Publication No. 95-3308.1995. revised 1997.
Peak FlowReading
No AsthmaSymptoms
Mild AsthmaSymptoms
Moderate AsthmaSymptoms
Serious AsthmaSymptoms
Medicine Used to Stop Symptoms
Urgent Visitto the Doctor


What is a PFT? A pulmonary function test (PFT) is a series of different breathing tests led by a trained pulmonary function technologist, usually done at a hospital or clinic. There are national standards and guidelines that help make sure
that everyone does and interprets pulmonary function tests in the same way. To learn about your lung health, your doctor may want you to have several pulmonary function tests done including spirometry, lung volumes, diffusing capacity, and arterial blood gases. Most of these breathing tests are done by blowing into a tube while sitting in a chair.
Before you have PFTs, you may get specific instructions on how to get ready for the tests, such as:
• Wear loose clothing which will not restrict your ability to breathe deeply.
• Avoid large meals prior to your test time which will make it more comfortable for you to breathe deeply.
• Don’t use your inhalers for (up to) 4 days before the test, if possible. At your appointment:
• The equipment will be set up for you after being cleaned and disinfected, including a clean mouthpiece.
• The technologist will tell you what to do before each test. Listen carefully and follow the coaching from the technologist. If you don’t understand what to do, ask him or her to tell you in a different way.
Spirometry is a painless study of air volume and flow rate within the lungs. It is a very common test to help you and your doctor understand your asthma better, and check how it is improving with treatment. It may be recommended that you have spirometry done at the beginning of your care, again as treatments are started, and at least every year for continuing care.

• Spirometry measures how much air
you can inhale (breathe in) and exhale (breathe out) as well as how fast you can exhale. For this test, you may be asked to breathe quickly, forcefully, or slowly. The test is always repeated at least three times and often more to be sure that the test is reliable.
• Forced vital capacity (FVC) – this test measures the amount of air
exhaled from full inspiration to full expiration (empty). You will be asked to breathe in as deeply as you can and immediately blow out as hard and fast as you can until you feel you cannot blow out any longer. With the help of a computer, the FVC effort will make a graph called a “flow volume curve” or “flow volume loop.” This graph will look different for everyone. The measurements taken from this test are key in helping your doctor diagnose asthma.
• Your doctor may order a bronchodilator to be given as part of
spirometry. A bronchodilator is an inhaled medication that may dilate, or open up, your airways. Spirometry is often done before and after the bronchodilator to show any response to the medicine. Your response may help your doctor find out what kind and how much, if any, airway disease you may have, and whether you need medication to improve your breathing.
The doctor may also order tests that measure your lung volumes. There are eight separate volumes of air that can be measured during the lung volumes test. The three most commonly used ways of measuring lung volumes are:
• Body Box – also known as plethysmography, is done while sitting in an enclosed clear chamber while asked to perform a series of very small panting breaths. This is the most accurate way to measure lung volumes.
• Nitrogen Washout – done by normal breathing of pure oxygen while exhaled gas is collected and analyzed
• Helium dilution – done by normal breathing of gas mixture of helium and oxygen
People with asthma may show changes in their lung volumes. This can help the doctor diagnose and treat asthma.

Diffusing capacity of the lungs measures how well gases such as oxygen move from the lungs into the blood. There are several ways to measure this, but the most common way is the ten second single breath-hold technique. Results of this test can tell your doctor about the amount of damage or abnormality that is present where the air and the blood meet. While this test does not specifically test for asthma, it may help your doctor to diagnose you correctly.
This is a blood test that may be ordered with your PFTs to give your doctor even more information about your lung health. ABGs can show how well your lungs are getting oxygen into your blood and carbon dioxide out of your blood. For this test, a sample of blood is drawn from your artery, from your wrist or elbow area. What can we learn from PFTs?
• A doctor will look over the results of your PFTs and see how you are doing by comparing them to predicted values normal for a person your age, height, weight, and sex. Height is important because taller people may have bigger lungs. There are many things that can change the results in PFTs. These include not only the health of your lungs but also the skill of the person testing you, your effort, differences in equipment, and differences in hospital or clinic procedures. A medical diagnosis is not likely to be made from PFTs alone.
• A PFT may be repeated as often as your doctor thinks it is needed. PFTs can check for change in lung health over time. Contact your insurance company to see how often PFTs are covered for you.
Source: “Pulmonary Function Tests (PFTs)” factsheet, Asthma Initiative of Michigan


Asthma triggers are allergens and irritants that aggravate the lungs and can cause asthma attacks. One of the best ways to prevent an asthma attack is to help a child avoid things that trigger his/her asthma. There are many different triggers, and not every child has the same ones. For some children, a single trigger can set off an asthma attack. For others, several triggers can add up to cause an asthma attack. It is very important to find out what triggers your child’s asthma so that you can reduce or remove as many asthma triggers as you can from your home.
Some common indoor triggers are listed below. Which ones do you have in your home?
□ Tobacco Smoke □ Dust Mites □ Pets □ Pests (mice, cockroaches, etc.) □ Mold □ Air Scents (air fresheners, candles, etc.) □ Pesticides □ Combustion Sources (wood-burning stoves, fireplaces, kerosene heaters, etc.) □ Cleaning Products
Some other triggers are listed below. Which ones make your child’s asthma worse? □ Exercise □ Food Allergies □ Stress or Excitement □ Seasonal Allergies (pollen, mold, etc.) □ Cold Air (Winter) or Hot, Humid Air (Summer) □ Plants □ Air Pollution (car exhaust, dust particles, etc.)
□ Colds, Viruses, and Infections


Secondhand Tobacco
Smoke and Children’s
Health
Is Secondhand Smoke Dangerous? Yes! This smoke is a mixture of gases and fine particles containing more than 4,000 chemicals. Many of these can cause harmful health effects. For example, secondhand smoke contains over 50 chemicals known to cause cancer, such as benzene, chromium, and formaldehyde. Other toxic chemicals in secondhand smoke include cyanide and carbon monoxide. Children may be exposed to secondhand smoke in homes and daycare, at outdoor smoking areas, in cars, and anywhere that people are smoking.
CHEMICALS FOUND IN SECONDHAND SMOKE
COMMON USES
ARSENIC RAT POISON
BENZENE FUEL
ACETONE NAIL POLISH
METHANOL ANTIFREEZE
NICOTINE INSECTICIDE
AMMONIA WINDOW/TOLIET CLEANER
CARBON MONOXIDE AUTO EXHAUST
CYANIDE GAS CHAMBER
FORMALDEHYDE PRESERVES TISSUE
CADMIUM BATTERIES
BUTANE LIGHTER FLUID
What Is Secondhand Smoke? In January 2006, the California Air Resources Board added secondhand tobacco smoke to its list of “toxic air contaminants.” The Board based its decision on scientific studies that link secondhand smoke to heart disease, asthma, other respiratory diseases, and cancer among nonsmokers. Secondhand smoke is also known as environmental tobacco smoke (ETS), passive smoke, or involuntary smoke. It is released into the air when tobacco products burn or when smokers exhale. Cigarettes, cigars, and pipes all can produce toxic secondhand smoke. This information summarizes some of the findings from a recent comprehensive review of hundreds of studies of secondhand smoke by the California EPA’s Office of Environmental Health Hazard Assessment (OEHHA).
Is Secondhand Smoke More
Harmful to Children? Yes! Children are more likely than adults to suffer health effects from secondhand smoke because: • Children breathe in more air than adults for their size and weight. • Children’s bodies continue to grow and develop as they get older and taller. During this time of growth, they can be more sensitive to the effects of secondhand smoke. It is especially dangerous to their developing lungs and immune systems.
Lung Development The lungs continue to develop throughout childhood.
There is some evidence that exposure to secondhand smoke during childhood interferes with lung development.
Damage to the lungs during this period can affect lung function (how well the lungs work) for the rest of a child’s
life.
Chronic Respiratory Symptoms Many of the chemicals in secondhand smoke are powerful
respiratory irritants for both children and adults.
Secondhand smoke can cause chronic symptoms like cough, phlegm, and wheezing, especially in infants and
younger children. Children exposed to secondhand smoke have more visits to doctors for these complaints.

Asthma Asthma is a chronic health condition whose symptoms include coughing, wheezing, and shortness of breath. Asthma
has become very common in children. In the U.S., it is the number one reason children are admitted to hospitals.
Secondhand smoke has been shown to cause new
cases of asthma in children who did not have asthma before. It also has been shown to make children’s
existing asthma worse. Children with asthma
who are exposed to secondhand smoke have more severe symptoms, use more medication, and miss
more days of school than those not exposed.
Although many causes of asthma are not fully
understood, secondhand smoke is one important cause and it is avoidable. Each year in California,
secondhand smoke may cause up to 31,000 asthma attacks in children.
COMMON WARNING SIGNS OF ASTHMA
Coughing Tired
Wheezing Weak
Tight Chest Dizzy
Crankiness Feeling sick
Restless Snoring
Not sleeping well Congested nose
Pale Watery eyes
Difficulty breathing Dry mouth
Stomach ache/nausea Clammy skin
Loss of appetite Headache
Raised shoulders Other: ______________
Immune System Damage & Infections Infants and young children who are exposed to
secondhand smoke are at higher risk for infections. This may be the result of damage to their
developing immune systems.
Secondhand smoke has been shown to cause lower
respiratory infections in children, including pneumonia and bronchitis. These infections can be
especially severe and even life-threatening in children who already have chronic illnesses such as
asthma or cystic fibrosis. Secondhand smoke also has been shown to cause ear infections in children.
Ear infections are more frequent and last longer in
children exposed to secondhand smoke.
Each year in California, children’s exposure to secondhand smoke results in more than 50,000
doctor visits for ear infections. Surgery may be
necessary if children do not respond to other medical treatments. Ear infections are also the most
common cause of hearing loss in children.
Sudden Infant Death Syndrome (SIDS) Sudden Infant Death Syndrome (SIDS), also called crib death, is the leading cause of death in children
aged one month to one year. The causes of SIDS are not completely understood. However, it is
known that the risk of SIDS is higher in infants
exposed to secondhand smoke. Statewide, as many as 21 children may die each year from SIDS
that is related to secondhand smoke.
Are Developing Babies at Risk During
Pregnancy? Yes! Secondhand smoke can affect a pregnant woman’s
developing baby. Babies born to mothers who are
exposed to secondhand smoke tend to weigh less than babies not exposed. They are also more likely
to be born early (preterm). Each year in California, secondhand smoke is estimated to cause as many
as 4,700 early births.
The following foods contain vitamin C and vitamin A (Beta-Carotene) and minerals.
These protect the lungs of children and adults.
VITAMIN C VITAMIN A
oranges cabbage parsley melons strawberries parsley tomatoes spinach
lemons, limes tomatoes cilantro apricots
grapefruit chili peppers carrots pumpkin melon kiwis squash chili peppers sweet potatoes
Recipe for Healthier Lungs

Can Secondhand Smoke Increase the Risk of
Cancer? Yes! Secondhand smoke has been linked to lung cancer, nasal sinus
cancer, and breast cancer. Cancer-causing chemicals may increase
lifetime risk of cancer when exposure occurs during childhood, more so than in adulthood. About 3000 people die each year in the U.S.
from lung cancer caused by secondhand smoke.
RESOURCES: Office of Environmental Health Hazard Assessment (OEHHA), California Environmental Protection Agency: www.oehha.ca.gov Fresh Air for Little Noses: A guide on how to develop smoke-free policies at preschools and childcare centers, American Lung Association of the Easy Bay, 1997.
Is Secondhand Smoke Related to Breast Cancer?
Yes! Breast cancer is a major cause of disease and death in women. Although
a family history of breast cancer has
been identified as a risk factor for breast cancer, the causes of the
disease are not completely understood.
However, recent studies have found that secondhand smoke is one cause
of breast cancer in younger women, before the age of menopause (below
age 50). Related studies have shown
that the breast may be especially sensitive to toxic chemicals during
times of development and change, such as puberty.
Therefore, it is particularly important for young women to avoid exposure to
secondhand smoke when their breasts are developing, since chemicals in the
smoke may cause changes that ultimately result in breast cancer.
Breast cancer is less common in young women than in older women, so only a
small portion of breast cancer may result from secondhand smoke. Still,
women (especially girls going through
puberty) should avoid exposure to secondhand smoke since it remains
one of the few preventable causes of breast cancer.
MORE INFORMATION: • Smokers Helpline (1-800-NO-BUTTS) www.californiasmokershelpline.org/ • U.S. Centers for Disease Control www.cdc.gov/tobacco/ets.htm • U.S. EPA – What to do about secondhand smoke www.epa.gov/smokefree/pubs/etsbro.html • OEHHA Report: www.oehha.ca.gov/air/environmental_tobacco/ • California Clean Air Project (CCAP) http://ccap.etr.org • Breathe California of Sacramento – Emigrant Trails www.sacbreathe.org

Myth #1: “Quitting may be hard for other people, but I can do it any time I want to.” Nicotine is one of the most addictive substances on earth, and most people who try to quit cigarettes will have a hard time breaking its hold, according to the National Institute on Drug Abuse. The chemical goes directly from the lungs to the brain and stimulates the production of dopamine, a chemical that makes you feel happy. Although nicotine can make you feel more animated and energetic when you start smoking, your body will need more and more of it to feel the same way later on. If you do quit, you may find the craving to light up almost unbearable, and you're likely to get headaches and feel tired, sleepy, hungry, or irritable. In fact, 35 million people attempt to quit smoking every year, but only 7 percent of them actually succeed. But that doesn't mean you can't do it: 2.5 million people quit smoking every year. The most successful quitters use support groups, nicotine replacement therapy (gum or patches), or a combination of approaches. Many of them have to try more than once to quit altogether. Myth #2: “Smoking doesn't hurt anybody but me.” The dangers of secondhand smoke are well documented. If you light up, you're exposing your children, spouse, and other family members to substances that can cause lung cancer, heart disease, asthma, and other diseases. Secondhand smoke kills an estimated 35,000 to 65,000 nonsmokers each year. Up to 62,000 will die from heart disease, and about 3,000 will die from lung cancer, according to the National Cancer Institute. Tobacco smoke in the environment also makes nonsmokers more susceptible to ear infections, asthma attacks, and other respiratory problems.

If you're pregnant and smoking, you run a higher risk of having a miscarriage or a stillborn infant. Your baby also runs a higher risk of dying from Sudden Infant Death Syndrome, or SIDS. That's why one of the most important things you can do to ensure a safe pregnancy -- along with avoiding alcohol and getting prenatal care -- is to stop smoking. Myth #3: “Cigar smoking and chewing tobacco are safe because you don't inhale.” It's not only cigarette smoke that can kill you. Overall cancer death rates among men who smoke cigars are 34 percent higher than cancer death rates among nonsmokers, according to the American Lung Association. Cigar smokers have higher death rates from chronic obstructive pulmonary disease and are 4 to 10 times more likely to die from cancers of the throat, mouth, lips, larynx, and esophagus than nonsmokers. People who chew tobacco don't get off lightly either. If you chew tobacco, you're more likely to get oral cancer, which affects the tongue, lips, cheeks, and gums. Moreover, a 1995 study of 6,300 smokeless tobacco users showed that they were twice as likely as nonusers to die of heart disease. As with cigarette smoking, the sooner you quit, the better your chance of escaping these diseases. Myth #4: “Smoking or chewing tobacco can lower blood pressure.” No one knows where this one started, but many people believe that smoking or chewing tobacco actually helps them relax by lowering their blood pressure. This myth has no scientific merit. In 1998, a group of researchers in Stockholm, Sweden studied 135 healthy people who had never been diagnosed with high blood pressure. But after their blood pressure was measured, scientists found that those who smoked or chewed tobacco had higher pressure than those who didn't.

Myth #5: “Smoking improves your mood.” Some people believe smoking lifts the spirits, but it can sink your mood. If you're already down or depressed, cigarettes can put you at higher risk for clinical depression, hyperactivity, and attention deficit disorder, according to a recent report in the journal Pediatrics. Teens who smoke are four times as likely to be depressed as teens who don't. Myth #6: “If I smoke only a few cigarettes a day, that's okay.” Smoking isn't safe even if you're smoking one cigarette a day. Every cigarette contains about 1 to 2 milligrams of nicotine, and it reaches your brain 10 seconds after you inhale. Immediately after that first puff, you'll get a rush of adrenaline that may increase your blood pressure, your heart rate, and your breathing. Myth #7: “If I smoke only filtered, menthol, or low-tar cigarettes, I'll be safe.” Smokers who puff on only one or a few cigarettes a day or smoke low-tar cigarettes have a tendency to take more drags on the few cigarettes they allot themselves each day because they sense they're getting less nicotine and need to fill that craving. Despite the filters, nicotine and other dangerous chemicals still get through when you smoke. People who smoke filtered or low-tar brands may inhale even more deeply, thereby getting more carbon monoxide and other substances into their lungs. Myth #8: “Lung cancer is the only disease I have to worry about from smoking.”
Unfortunately, this isn't the case. Smoking causes a number of other lung diseases, including emphysema, a degenerative disease that makes breathing more and more difficult. Smoking also increases your risk of heart disease, particularly if you have high blood pressure or high cholesterol, and aggravates many digestive disorders as well. It can also cause cancer of the mouth, larynx (voice box), and esophagus.

Smoking also plays a role in cancer of the pancreas, kidney, bladder, and, in women, cancer of the cervix. Myth #9: “If I stop smoking, I'll definitely gain weight.” It's true that many smokers gain weight once they stop smoking. Many of them substitute eating for the oral gratification that comes from puffing on a cigarette. On average, quitters gain only 5 to 10 pounds. But once you've stopped smoking, the weight gain doesn't have to be permanent. In fact, if you exercise, you may not only lose the weight you've gained, you may increase the stamina and lung capacity you lost when you were smoking. To help you keep the weight off, replace smoking with other activities besides eating: chewing gum, doodling, sucking on a straw, or just stretching and breathing deeply. And one last myth, perhaps the most important one of all: Myth #10: “I've smoked for years, so it won't help me to stop now.” If you smoke, you're cutting years off your life. A 35-year-old man, for instance, will live about five years longer just by quitting smoking, according to the National Institute on Drug Abuse. The same holds true for women. The good news is that as soon as you stop smoking, you may not only begin to breathe easier, you will start to reverse many of the other damaging health effects of smoking, too. You can't turn back the clock, but if you quit smoking for a decade or more, your risk of cancer is much lower and your risk of heart disease may be almost the same as someone who has never smoked. Source: http://www.ahealthyme.com/topic/smokingmyths
1. If you smoke, the BEST thing you can do for yourself and your family is
to QUIT! If you are ready to quit smoking, ask Healthy Homes University for a “Smoker’s Quit Kit”, or contact the Michigan Department of Community Health at 1-800-537-5666 and they will send you one for free.
2. Protect your children from tobacco smoke at all times. Until you quit,
do not smoke around your children. Smoke outdoors, and have other family members or visitors of your household do the same.
3. If you smoke outside, wear a “smoking jacket” or similar article of
clothing which you can take off before you go back inside. After you go back into the house, wash your hands.
4. Until you quit, do not smoke where children can see you. If children
see you smoke, they may come to believe that smoking is a healthy behavior.
5. Choose a child care provider whose home is smoke-free. Licensed
child care centers are required by law to be smoke-free. However, unlicensed child care providers are not required to have a smoke-free home. The law only requires that they do not smoke when children are present. It is up to you to find out if people smoke at the home where your child is in care. If smoking is allowed in the home, you have the right to look for healthier child care options for your child.
6. Choose not to smoke in your car, and do not permit others to do so.
Source: “A Note for Parents on Smoking Around Children”, Michigan Department of Community Health

Besides improving the health of your child with asthma and the rest of your family, quitting will have many benefits for you as well!
Here are just a few reasons why you should quit:
• 20 minutes after quitting: Your heart rate and blood pressure decrease. The body temperature in your hands and feet increases.
• 8 hours after quitting: The carbon monoxide level in your blood drops to normal. The oxygen level in your blood increases to normal.
• 24 hours after quitting: Your chance of a heart attack decreases. • 48 hours after quitting: Your nerve endings start regrowing. Your
ability to smell and taste improves. • 2 weeks to 3 months after quitting: Your circulation improves and
your lung function increases. Walking becomes easier. • 1 to 9 months after quitting: Coughing, sinus congestion, tiredness,
and shortness of breath all decrease. Cilia (tiny hair-like structures that move mucus out of the lungs) regain normal function in the lungs, which helps to clean the lungs, and reduce infections.
• 1 year after quitting: Your risk of heart disease is half that of a smoker's.
• 5 years after quitting: Your stroke risk is reduced to that of people who have never smoked.
• 10 years after quitting: Your risk of lung cancer is about half that of a smoker's. The risk of cancer of the mouth, throat, esophagus, bladder, cervix, and pancreas decrease. Your risk of a stomach ulcer decreases.
• 15 years after quitting: Your risk of heart disease is similar to people who have never smoked. Your risk of death returns to nearly the level of people who have never smoked.
Sources: American Cancer Society website: http://www.cancer.org
American Lung Association website: http://www.lungusa.org

Nicotine addiction is the physical dependence of your body to the powerful chemical nicotine which is in all cigarettes. If you use tobacco and you want to quit for your health and the health of others, help is available.
• You can order the Michigan Department of Community Health’s Smoker’s Quit Kit.
The Smoker’s Quit Kit will give you straight, useful advice to help you quit and stay cigarette free. It offers you real tips on how to prepare to quit, what to expect, how to stay on track once you have quit, and how to adjust to life as a non-smoker. To order a free Smoker’s Quit Kit or an Expectant Mother’s Quit Kit call 1-800-537-5666, or ask someone from Healthy Homes University.
• A cessation program (or a quit smoking program) is an important part of the
quitting process. Types of cessation programs include: -Group Programs -Telephone Cessation Programs -One-on-one Counseling Programs -Twelve-step Programs -Self-Help Programs -Inpatient Programs -Computer-based / Internet Programs
You can call the Ingham County Health Department (Health Promotion Office) at (517) 887-4315 for available smoking cessation programs in the Lansing area.
• Telephone-based cessation counseling provides tobacco product users with support in counseling. A free call to the Michigan Department of Community Health's “I Can Quit” helpline 1-800-480-QUIT (7848) can help you stop smoking. It provides up to seven sessions with a personal health coach who will call and work with you in the comfort of your home or office to develop your personal plan to successfully quit smoking.
• Prescription and Over-the-Counter Tobacco Cessation Medications. The Food
and Drug Administration has approved six medications to assist smokers in quitting. Five are nicotine replacement therapies that relieve withdrawal symptoms. They include nicotine gum, patch, nasal spray, inhaler, and lozenge. The sixth medication, bupropion SR (sustained release), is a non-nicotine medication that is thought to decrease the urge to smoke by affecting the same chemical messengers in the brain that are affected by nicotine.

Type Form Common Brand Name(s) Availability
Nicotine Replacement Therapy Gum Nicorette Over-the-counter
(OTC)
Patch Nicoderm, Habitrol, Prostep, Nicotrol
OTC and prescription
Inhaler Nicotrol Prescription Nasal Spray Nicotrol Prescription Lozenge Commit OTC
Bupropion (Non-nicotine medication) Pill Zyban, Wellbutrin Prescription
• Helpful Websites for Smoking Cessation Other helpful resources are cessation web sites. Here is a list of web sites that offer information about quitting, and two that offer computer-based cessation programs. - Michigan Department of Community Health: www.michigan.gov/mdch/0,1607,7-132-2940_3182_22973--,00.html Gives information on how to order Quit Kits (self-help materials) to help stop tobacco use and information on smoking around children. Contains Michigan’s Guide to Stop Smoking Programs, which lists cessation programs by county. -American Lung Association (Freedom from Smoking): www.lungusa.org/ffs/index.html American Lung Association’s cessation program, which can be done online for free. - Dr. Koop Online: http://www.drkoop.com/ency/93/002032.html Contains facts, information and research to help people stop smoking. - Massachusetts Dept. of Health: www.trytostop.org Massachusetts Department of Health’s online cessation program called Quit Wizard. It is completely private and free. - Mayo Clinic: http://www.mayoclinic.org/nicotine-rst/ Contains facts, information and research about quitting - Smoke free Families (Pregnancy): www.smokefreefamilies.org/ Contains facts, information regarding smoking and pregnancy Source: Asthma Initiative of Michigan (AIM) – “Tobacco Smoke and Asthma” website located at: http://www.getasthmahelp.org/tobacco.asp


What are Dust Mites? • Dust mites are tiny insects that are invisible to the naked eye.
They are microscopic, eight-legged creatures that are always in close contact with us, but they are not parasitic and do not bite. They don't burrow under the skin or live in skin follicles.
• Every home has dust mites. They feed on human skin flakes and are found in mattresses, pillows, carpets, upholstered furniture, bedcovers, clothes, stuffed toys, fabric, and fabric-covered items.
hy are they unhealthy for my child with asthma?
or asthma triggers. As the dust
en
• in the house, they mainly live in the s,
hat can I do to protect my child from dust mites?
W• Dust mite allergies are one of the most common indo
mites build up in your home, so do their body parts and droppings. Body parts and droppings from dust mites can trigger asthma attacks in individuals with dust mite allergies, and exposure to dust mites can even cause asthma in children who havenever shown asthma symptoms. Symptoms associated with dust mite allergies include sneezing, itchy, watery eyes, nasal stuffiness, runny nose, stuffy ears, respiratory problems, and eczema. Many people notice these symptoms whdust is stirred up during cleaning activities. Although dust mites are found in every roombedroom (in mattresses, pillows, and bedding). In your child’s mattress and pillowthere are millions of dust mites! Your child spends a lot of time in close contact with dust mites when they are sleeping, so it is very important to protect your child from dust mites as best you can.
W
Use pillow covers and mattress covers in your child’s room
ones
Wash all bedding (sheets, blankets) in hot water (above 130 degrees) once a
to protect their bedding from dust mites. This keeps existing dust mites trapped inside, and prevents newfrom getting in.
week.
If you or your child are sensitive to house dust, you know that even a single whiff of dusty air can trigger allergy and asthma symptoms. But dust itself probably isn’t the cause of your misery. Instead, dust mites—microscopic creatures that live in dust—
are most likely to blame!

Pillows and bedding should not contain feathers. Besides holding dust mites,
If possible, replace wall-to-wall carpets in bedrooms with bare floors (linoleum, tile
t is
Replace heavy, lined curtains or drapes with washable window coverings. Wash
Dust all surfaces often, including lampshades and windowsills, with a damp cloth.
Use a damp mop or rag to remove dust from bare floors and surfaces. This traps
Vacuum fabric-covered furniture with the HEPA vacuum attachment to reduce
Get rid of stuffed animals in your child’s room, OR replace traditional stuffed
to
Keep clutter under control. Toys and books should be stored in enclosed
live.
Keep all clothing in drawers and closets. Keep drawers and closets closed.
Since dust mites love humid environments, try to keep indoor humidity low (less
Regularly change filters on furnaces, heaters, air conditioners, and HEPA air filters.
feather pillows and blankets can be asthma triggers as well.
or wood). If you cannot get rid of your carpeting, vacuum often with the HEPA vacuum. Try not to vacuum while your child is in the room, because the dust thastirred up in the air can affect your child’s asthma.
window coverings in hot water. Use plain window shades instead of mini-blinds.
the dust mites rather than stirring them up in the air.
dust mites. If possible, use leather furniture.
animals with washable stuffed animals. Wash the stuffed animals in hot water(above 130 degrees), OR put them in a plastic bag and freeze them overnightkill dust mites.
bookshelves, drawers, or closets. This gives the dust mites fewer places to
than 50 %). Use air conditioning or a dehumidifier if you have one.

BEING A PET OWNER IS NEVER EASY. While pets bring us joy and companionship on a daily basis, they also require training, veterinary care, time, love, attention, and even tolerance. Tolerance is especially necessary when a pet owner is allergic to his or her companion animal.
Source: The Humane Society website, http://www.hsus.org/pets/pet_care/allergies_to_pets/
All cats and dogs are allergenic (allergy-causing) to people who are allergic to animals. Cats tend to be more allergenic than dogs for allergic people, although some people are more sensitive to dogs than cats. Contrary to popular belief, there are no "non-allergenic" breeds of dogs or cats; even hairless breeds may be highly allergenic. Dogs with soft, constantly-growing hair—the Poodle or the Bichon Frise, for example—may be less irritating to some individuals, although this may be because they are bathed and groomed more often. One dog or cat of a particular breed may be more irritating to an individual allergy sufferer than another animal of that same breed. The source of irritation to pet-allergic humans? Glands in the animal's skin secrete tiny allergy-triggering proteins, called allergens, that linger in the animal's fur but also float easily in the air. Allergens are present in the animal's saliva and urine, too, and may become airborne when saliva dries on the fur. The severity of reaction to these allergens varies from one person to the next, ranging from mild sniffling and sneezing to life-threatening asthma, and can be complicated by simultaneous allergies to other irritants in the environment.
If your or a family member's allergies are simply miserable, but not life-threatening, take these steps to reduce the symptoms: • Create an "allergy free" zone in the
home—preferably the bedroom—and keep the pet out of it. Use a high-efficiency HEPA air cleaner (available at almost any home and garden store or discount department store) in the bedroom. Use dust mite covers for the mattress and pillows because allergen particles brought into the room on clothes and other objects can accumulate in them.
• Use HEPA air cleaners throughout the
rest of the home, and try to avoid using things that catch dust and dander such as cloth curtains, blinds, and carpeted floors. Clean often to remove dust and dander, and wash things such as couch covers and pillows, curtains, and pet beds.
• Bathing your pet on a weekly basis
can reduce the level of allergens on fur by as much as 84 percent. Even cats can become accustomed to being bathed; check with your veterinarian or a good book on pet care for directions about how to bathe your pet properly.

• Don't be quick to blame the family pet for allergies. Ask your allergist to specifically test for allergies to pet dander—it may not be your pet that is causing allergies after all. Also, many people with allergies are sensitive to more than one allergen. So if you're allergic to dust, insecticides, pollen, cigarette smoke, and cat dander, you'll need to reduce the overall allergens in your home by concentrating on getting rid of all of the allergens, not just the pet allergy.
• Immunotherapy (allergy shots) can
improve symptoms but cannot get rid of them entirely. They work by gradually making a person less sensitive to the pet allergens. Allergy-causing proteins are injected under the person's skin, which causes the body to produce antibodies (protective proteins) which keep the pet allergen from causing an allergic reaction. Patients are usually given one shot per week for a few weeks to months (depending on how bad the allergy is). Then they can decrease dosage to one shot per month.
There are additional treatments for allergies to pets, such as steroidal and antihistamine nose sprays and antihistamine pills. For people with asthma, there are multiple medications, sprays, and inhalers available to help decrease symptoms of pet allergies. It is important to find an allergist who understands your commitment to living with your pet. A combination of approaches—medical control of symptoms, good housecleaning methods, and immunotherapy (allergy shots)—is most likely to allow an allergic person to live with pets. Of course, if you do not currently have a pet and are considering getting one, and know you or one of your family members is allergic to pets or has asthma, be sure to consider carefully whether you/they can live with the allergy or asthma symptoms before you bring a new pet home. Except in the case of children, who sometimes outgrow allergies, few people with allergies become accustomed to pets to whom they are allergic.
Too many allergic owners get pets without thinking through the difficulties of living with
them. And too often, they end up giving up the pets, a decision that is difficult for the owner and can be life-threatening for the pet. Before you get a pet for your family, make sure it will not make anyone’s asthma or allergy symptoms worse!
Source: The Humane Society website, http://www.hsus.org/pets/pet_care/allergies_to_pets/

Ap
A Healthy Home is A Pest Free Home. Keep Your Home Pest Free.Integrated Pest Management (IPM) is a safe way to help get rid of cockroaches, mice, rats, ants, and other pests. IPM uses environmental change to help get rid of these pests and reduces the need for poisons or pesticides, which can be dangerous to your family’s health.
Residents, landlords, and pest control contractors all have a role in IPM.
Prevent Pests from Entering Your Home
Repair or replace torn window screens
Fill and seal holes, cracks, and gaps Install or repair weather stripping around doors and windows Report conditions that need attention to maintenance or your landlord.
What to Expect of Your Landlord
A home free of leaks, cracks, holes, and torn window screens A home free of pests Outdoor trashcans with covers (to discourage rodents and other animals) Clean out empty apartments Help follow these guidelines to get rid of any pests
What To Expect of Your Pest Control Contractor
Check every room of your home Check drawers, closets, cabinets Leave traps in high pest areas Remove old traps and bait
Prevent Pests in the Kitchen Keep all food in sealed plastic or glass containers Use a covered wastebasket for trash Take the trash out every night Clean cooking grease from stove, walls, and cabinets Keep sink clear of dirty dishes and water Clean floors often, especially around refrigerator and stove Clean pet bowls between meals; don’t leave food or water out overnight Replace worn, cracked refrigerator seals
Prevent Pests in the Bedroom
DO NOT allow eating in the bedroom Remove dirty plates, food, and wrappers Repair flaking paint, loose or curling wallpaper Get rid of clutter in closets, underbeds Place dirty laundry in a bag or hamper
Prevent Pests in the Bathroom
Repair leaks around the sink, toilet, & tub Seal openings around the toilet and pipes
Home SAFE – System for an Asthma Free Environment Pests like cockroaches and rodents, and the chemicals used to treat them, are triggers for
asthma.
Prevent Pests around Water Repair leaks under the sink Keep the sink dry when not in use
Reduce Places that Pests Can Hide
Reduce clutter, especially in closets, cupboards, and cabinets Recycle or throw away unused bags, paper, and newspaper
Prevent Pests from Returning
Vacuum roach and rodent feces Vacuum cabinets where pests are found Give everything a good soapy wash! (especially inside cabinets and drawers) Keep basements, attics, stairwells, and hallways clean and free of clutter Seal infested food, traps and vacuum bags in a plastic bag and put outdoors in a closed trash can
For more information, contact the Center for Asthma Education,
Management and PolicyDetroit Department of Health and
Wellness Promotion,1151 Taylor, Room 506A Detroit, MI
48202313-876-0154 (phone)

SAFE PEST CONTROLU.S. Department of Housing and Urban Development • Office of Healthy Homes and Lead Hazard Control
Did you know...?■ Many pesticides for home use are toxic?■ There are alternative pest management methods that limit the use of
toxic substances? ■ Mice, cockroaches, and cockroach "dust” can trigger asthma attack?
What is it?Integrated pest management (IPM) is a way to remove pests, like cock-
roaches, mice, and rats from a home. IPM is a common sense approach that:■ Denies pests food, water, shelter and a way to enter the home. ■ Uses baits and powders, such as gel baits, traps and borate powder.
Why use IPM? ■ IPM is safer. IPM does not use as many harmful pesticides as traditional
pest control.- Avoiding pesticides is especially important in homes. Pesticides cancontain long lasting, toxic chemicals or lung irritants that cause asthmaattacks. Children are among those most vulnerable to exposure. IPMstrategies apply pesticides only as needed and use the least hazardouspesticides to control pests.
continued on back
www.hud.gov/offices/lead
“For years, cockroaches have defeatedour best efforts to get rid of them. We sprayed and sprayed, but theyalways came back. Now we under-stand there are better methods andproducts that really work”Environmental Health Watch

www.hud.gov/offices/lead
SAFE PEST CONTROLU.S. Department of Housing andUrban Development
Office of Healthy Homes andLead Hazard Control
If needed, call a pest control professional who uses IPM practices. If you have taken all the steps described above and still have a pest problem, you may need a professional to help.■ If you live in an apartment or rent a home, speak to your landlord or
property manager about using an IPM professional. Talk to other tenantsabout the importance of IPM for long-term solutions to your building’spest problems.
■ IPM professionals utilize various methods to identify, monitor, and solvethe pest problem without using lots of pesticides.
For more information…Visit HUD’s website at www.hud.gov/offices/lead for more information
about addressing health hazards in homes or to learn if HUD has a HealthyHomes program in your community. From this website, you can download acopy of “Help Yourself to A Healthy Home” for more practical steps you cantake to make your home a healthy home. Other Federal ResourcesUS Centers for Disease Control and Prevention www.cdc.gov/od/oc/childhealthUS Environmental Protection Agency www.epa.gov/children
Other ResourcesEnvironmental Health Watch has several resources on IPM and cockroach controlwww.ehw.orgChildren’s Environmental Health Coalition’s HeatlheHouse also has several resources on using IPM in the homewww.checnet.org/healthehouse/
■ IPM works better. IPM is better at keeping the roaches and other pestsaway for long periods of time compared to spraying of pesticides or otherpoisons. IPM works by addressing the cause of the problem and taking along-term approach to reducing pests. Using pesticides can cause pests tobuild up a resistance to the poison so that the chemicals do not work aswell over time, and do not stop the pests from coming back to your home.
What you can doLook. Pay attention to where there are pests in your home, how they enter,and how many there are. By watching and tracking pests in your home, youcan better decide what actions to take.Keep a clean home. Keeping a clean house is the best way to keep pestsout. Some important things to pay attention to are:■ Clean-up food and drink spills right away. ■ Remove clutter (such as cardboard boxes or paper) so pests have fewer
places to hide.■ Put food in tightly sealed containers, such as plastic with tight lids. Do not
leave open containers of food on counters or in cabinets. Put pet fooddishes away overnight.
■ Keep trash in a closed container and take it out frequently—every day ifpossible. Don’t let trash pile up outside.
■ Fix plumbing or other water leaks. Pests need water sources to survive.■ Seal cracks and holes. Use a caulk gun to seal cracks around baseboards,
shelves, pipes, sinks, and bathroom fixtures.
Use roach baits properly and only if necessary. Place baitsout of the reach of children and pets. ■ Put the bait close to the pests’ hiding places. It must be closer than other
sources of food.■ Good spots for baits are next to walls, baseboards, under sinks, in cabinets
and near plumbing fixtures. Place baits in areas of roach activity.■ Do not spray any pesticides. This will keep the pests away from the baits.
Non-toxic traps can be part of an IPM strategy.
Place baits near baseboards, out of reach from children.
Photo by: January E. Jones, Improving Kids’ Environment
Photo by: January E. Jones, Improving Kids’ Environment

Bats eat hundreds of insects, including mosquitoes, each night but they are not good to have in the house. Inspect the outside of your home for openings larger than a quarter of an inch in height and seal them. If bats are in your home, light your attic or offer a “bat house” away from areas where your family spends time. Always avoid direct contact with bats.
Carpenter ants often excavate wet or damaged wood. Fix the problem that is causing the moist wood and replace damaged wood. Baits for carpenter ants are available.
They feed on untreated fibers, food stains, perspiration, and oils. Clean all clothes before storing them; put clothes in tightly closed plastic bags. The oil in cedar wood will repel clothes moths, but may not kill them.
Get rid of places cockroaches could hide (stacks of cardboard, paper bags, and clutter in warm, moist locations); empty garbage every evening (roaches feed at night); keep drawers, counters, and stovetops clean; store food in the refrigerator instead of on the counter; empty refrigerator defrost pan often.
Here are some basic ways to control specific types of common household pests using IPM techniques. You can see that homeowners can accomplish many of the steps on their own. Your pest control technician will have more information.

Vacuum regularly and place anything infested with fleas outdoors in a trash bin. Treat pets with fleas under the advice of your veterinarian. Insect growth regulators, available in some flea control formulations, prevent fleas from maturing to adults.
Fix screens; get rid of breeding areas like garbage, grass piles, etc.; hang fly paper to trap flies.
Keep nuts, dried fruits, flour, and cereal products in glass or plastic containers with tightly closing lids. “Pantry pest” pheromone traps catch only males.
Close all openings in your home’s foundation that are larger than a quarter of an inch wide; use a snap trap or glue board to catch mice; keep an energetic cat as a pet.
Prevent water from collecting in low spots in the yard, old trees, garbage cans, pool covers, rain gutters, tires, sandbox toys, and potted plant saucers. Replace bird bath water every few days; keep window and door screens tight and in place until winter.
Scoop them into a container and empty them outside, or use a fly swatter to get rid of them in your house. Most spiders are beneficial, killing many kinds of insects.
Know the difference between termites and carpenter ants. Termites have thick waists and straight antennae; ants have thin, pinched waists and “bent elbow” antennae. The best controls are designing homes to exclude termites, reducing moisture, and hiring a professional to use baits. Source: “Secrets to a Pest Free Home”, Richard C. Burton, www.1-800-pestcontrol.com

6
Preventing Pests
PESTS SEEK PLACES TO LIVE that satisfy basic needs for air,moisture, food, and shelter. The best way to control pests is to try toprevent them from entering your home or garden in the first place.You can do this by removing the elements that they need to survive.Take the following preventive actions:
Indoor Preventionu Remove water. All living things, including pests, need water for
survival. Fix leaky plumbing, and do not let water accumulateanywhere in or around your home. For example, do not leaveany water in trays under your houseplants, under yourrefrigerator, or in buckets overnight. Remove or dry out water-damaged and wet materials. Even dampness or high humiditycan attract pests.
u Remove food. Store your food in sealedglass or plastic containers, and keep yourkitchen clean and free from cooking greaseand oil. Do not leave food in pet bowls onthe counter or floor for long periods of time.Put food scraps or refuse in tightly covered,animal-proof garbage cans, and empty yourgarbage frequently.
u Remove or block off indoor pest hiding places. Caulk cracksand crevices to control pest access. Bathe pets regularly andwash any mats or surfaces they lie on to control fleas. Avoidstoring newspapers, paper bags, and boxes for longperiods of time. Also, check for pests in packages orboxes before carrying them into your home.
u Block pest entryways. Install screens on all floordrains, windows, and doors to discouragecrawling and flying pests fromentering your home. Makesure any passagewaysthrough the floor are blocked.Place weatherstrippingon doors and windows.Caulk and seal openingsin walls. Keep doors shut when not in use.
Pests need water to survive. Fixleaky pipes.
Store food in sealed containers.
Preventing Pests

7
Outdoor Preventionu Remove or destroy outdoor pest hiding places. Remove piles
of wood from under or around your home to avoid attractingtermites and carpenter ants. Destroy diseased plants, treeprunings, and fallen fruit that may harbor pests. Rake fallenleaves. Keep vegetation, shrubs, and wood mulch at least18 inches away from your house.
u Remove breeding sites. Clean up pet droppingsfrom your yard; they attract flies that can spreadbacteria. Do not accumulate litter or garbage;it draws mice, rats, and otherrodents. Drain off or sweep awaystanding puddles of water; wateris a breeding place for mosquitosand other pests. Make sure drainpipes and other water sourcesdrain away from your house.
u Take proper care of all outdoor plants. These include flowers,fruit and shade trees, vegetable and other plants, and yourlawn. Good plant health care reduces pest control needs�healthy plants resist pests better than do weak plants. Plant atthe best time of year to promote healthy growth. Use mulchto reduce weeds and maintain even soil temperature andmoisture. Water adequately. Native flowers, shrubs, andtrees often are good choices because they adapt well to localconditions and require minimal care.
Gardeningu Select healthy seeds and seedlings that are known to resist
diseases and are suited to the climate where you live. Strongseeds are likely to produce mature plants with little needfor pesticides.
u If your garden is large, alternate rows of different kinds ofplants. Pests that prefer one type of vegetable (carrots, forexample) may not spread to every one of your carrot plants ifother vegetables (not on the pests� diet) are planted in theneighboring rows.
u Don�t plant the same crop in the same spot year after year.That way your plants are not as vulnerable to pests that survivethe winter.
u Make sure your garden plot has good drainage. Raised bedswill improve drainage, especially of clay soils. If a heavy claysoil becomes compacted, it does not allow air and water toget to the roots easily, and plants struggle to grow. To loosen
Preventing Pests
Remove breeding sites.Clean up litter or garbage.

30
Poisoned by Pesticides:Don�t Let This Happento Your Child!A 5-year-old boy drinks from a bottle of bleach that hefound under the bathroom sink.
A 3-year-old girl tries to spray her hair the waymommy does, but sprays an aerosol disinfectantin her eyes instead.
A baby who has just begun to crawl eats greenpebbles from behind the sofa. They look like
candy, but are really rat poison.
These accidents could happen to your children orto children visiting your home if you don�t storepesticides out of their reach or if you don�t read thelabel carefully before using the pesticide product.
The dangers are real. In 1993 alone, an estimated80,000 children were exposed to or poisoned bya household pesticide product that was used orstored incorrectly.
Whether or not you have young children in your home, take thefollowing precautions to protect all children from unintentionalpesticide poisonings or exposures:
u Always store pesticides out of children�s reach, in a lockedcabinet or garden shed. Installing child-proof safety latchesor padlocks on cupboards and cabinets is a good idea. Safetylatches are available at your local hardware store or buildingsupply warehouse.
u Before applying pesticides�indoors or outdoors�removechildren and their toys, along with any pets and their toys,from the area. Keep them away from the area that has beentreated until the pesticide has dried and for at least the lengthof time recommended on the pesticide label.
u If you are interrupted while applying a pesticide�by a phonecall, for example�be sure to close the pesticide containerproperly and put it out of reach of any child who may comeinto the area while you are gone.
Poisoned by Pesticides: Don�t Let This Happen to Your Child!
Where do you store your pesticides?
A 1992 nationwide study conductedby EPA revealed that almost half(approximately 47 percent) of surveyedhouseholds with children under the ageof 5 had at least one pesticide storedwithin their reach.
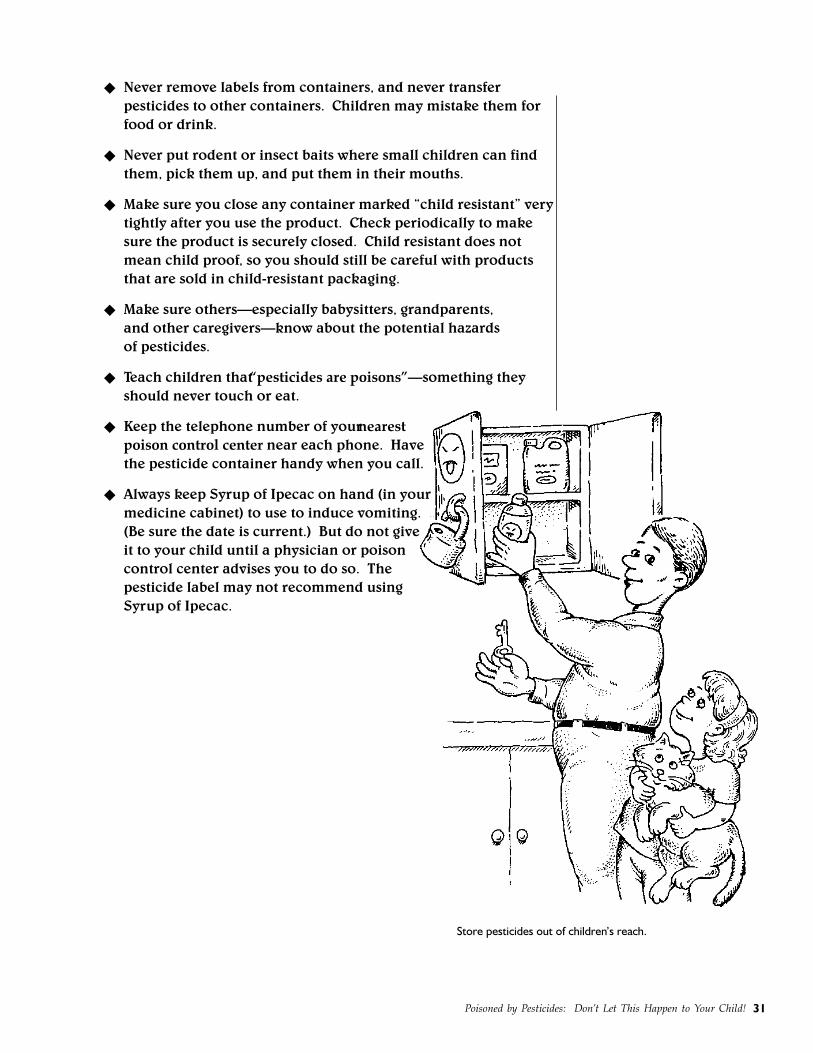
31
u Never remove labels from containers, and never transferpesticides to other containers. Children may mistake them forfood or drink.
u Never put rodent or insect baits where small children can findthem, pick them up, and put them in their mouths.
u Make sure you close any container marked �child resistant� verytightly after you use the product. Check periodically to makesure the product is securely closed. Child resistant does notmean child proof, so you should still be careful with productsthat are sold in child-resistant packaging.
u Make sure others�especially babysitters, grandparents,and other caregivers�know about the potential hazardsof pesticides.
u Teach children that �pesticides are poisons��something theyshould never touch or eat.
u Keep the telephone number of your nearestpoison control center near each phone. Havethe pesticide container handy when you call.
u Always keep Syrup of Ipecac on hand (in yourmedicine cabinet) to use to induce vomiting.(Be sure the date is current.) But do not giveit to your child until a physician or poisoncontrol center advises you to do so. Thepesticide label may not recommend usingSyrup of Ipecac.
Poisoned by Pesticides: Don�t Let This Happen to Your Child!
Store pesticides out of children�s reach.

33
First Aid for Pesticide PoisoningWhen you realize a pesticide poisoning has occurred or is occurring,try to determine what the victim was exposed to and what part ofthe body was affected before you take action�taking the rightaction is as important as taking immediate action. If the person isunconscious, having trouble breathing, or having convulsions, ACTFAST! Speed is crucial. Give needed first aid immediately. Call 911or your local emergency service. If possible, have someone else callfor emergency help while you give first aid. If the person is awake orconscious, not having trouble breathing, and not having convulsions,read the label for first aid instructions. Call a doctor, a poison controlcenter, a local emergency service (911), or the National Pesticide Tele-communications Network (toll free at 1-800-858-7378). Give first aid.
Read the Statement of Practical Treatment section on the productlabel. The appropriate first aid treatment depends on the kind ofpoisoning that has occurred. Follow these general guidelines:
u Swallowed poison. A conscious victim should drink a smallamount of water to dilute the pesticide. Always keep Syrupof Ipecac on hand (in your medicine cabinet) to use to inducevomiting. Be sure the date on the bottle is current. Inducevomiting only if a poison control center or physician advisesyou to do so, or if instructions on the pesticide label say so.If there is no label available to guide you, do not inducevomiting. Never induce vomiting if the victim is unconsciousor is having convulsions.
u Poison on skin. Drench skin with water for at least15 minutes. Remove contaminated clothing. Washskin and hair thoroughly with soap and water.Dry victim and wrap in blanket. Later,discard contaminated clothing orthoroughly wash it separatelyfrom other laundry.
u Chemical burn on skin.Drench skin with water forat least 15 minutes. Removecontaminated clothing. Coverburned area immediately withloose, clean, soft cloth. Donot apply ointments, greases,powders, or other drugs. Later,discard contaminated clothingor thoroughly wash it separatelyfrom other laundry.
Handling a Pesticide Emergency
If a poisoning has occurred, call for help, and be ready to readinformation from the pesticide label.

34
u Poison in eye. Hold eyelid open and wash eye quickly andgently with clean cool running water from the tap or a hosefor 15 minutes or more. Use only water; do not use eye drops,chemicals, or drugs in the eye. Eye membranes absorb pesticidesfaster than any other external part of the body, and eye damagecan occur in a few minutes with some types of pesticides.
u Inhaled poison. If the victim is outside, move or carry thevictim away from the area where pesticides were recentlyapplied. If the victim is inside, carry or move the victim tofresh air immediately. If you think you need protection like arespirator before helping the victim, call the Fire Departmentand wait for emergency equipment before entering the area.Loosen the victim�s tight clothing. If the victim�s skin is blueor the victim has stopped breathing, give artificial respiration(if you know how) and call 911 for help. Open doors andwindows so no one else will be poisoned by fumes.
What To Do After First Aidu First aid may precede but should not replace professional
medical treatment. After giving first aid, call 911 or your localemergency service immediately. Have the pesticide label at handwhen you call.
u Take the pesticide product container with its label to thedoctor�s office or emergency room where the victim will betreated. Carry the container in your trunk or flatbed away fromthe passengers in your vehicle. The doctor needs to know whatactive ingredient is in the pesticide before prescribing treatment.This information is on the label, which sometimes also includesa telephone number to call for additional treatment information.
Another good resource in a pesticide emergency is NPTN,the National Pesticide Telecommunications Network, atoll-free telephone service that operates Monday throughFriday, from 6:30 a.m.� 4:30 p.m. Pacific time (9:30 a.m.�7:30 p.m. Eastern time). NPTN provides information onpesticides and how to recognize and respond to pesticidepoisonings. If necessary, staff at NPTN can transfer yourcall directly to a local poison control center. Call NPTN tollfree at 1-800-858-7378.
NPTN staff answer questions about animal poisonings, too. To keepyour pets from being poisoned, follow label directions on flea andtick products carefully. If you are concerned about the chemicalsused in these products, consult your veterinarian.
Handling a Pesticide Emergency
National PesticideTelecommunications Network
(NPTN)
Call Toll Free 1-800-858-7378
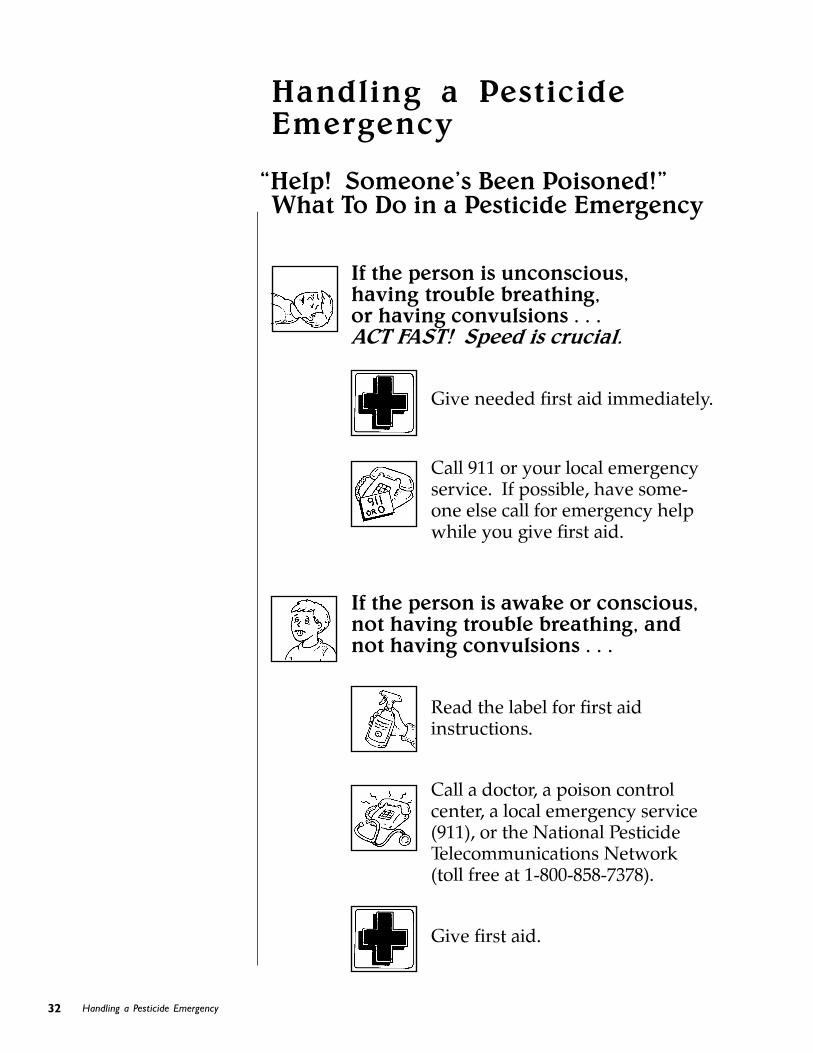
32
Handling a PesticideEmergency
Handling a Pesticide Emergency
If the person is unconscious,having trouble breathing,or having convulsions . . .ACT FAST! Speed is crucial.
Give needed first aid immediately.
Call 911 or your local emergencyservice. If possible, have some-one else call for emergency helpwhile you give first aid.
If the person is awake or conscious,not having trouble breathing, andnot having convulsions . . .
Read the label for first aidinstructions.
Call a doctor, a poison controlcenter, a local emergency service(911), or the National PesticideTelecommunications Network(toll free at 1-800-858-7378).
Give first aid.
�Help! Someone�s Been Poisoned!�What To Do in a Pesticide Emergency
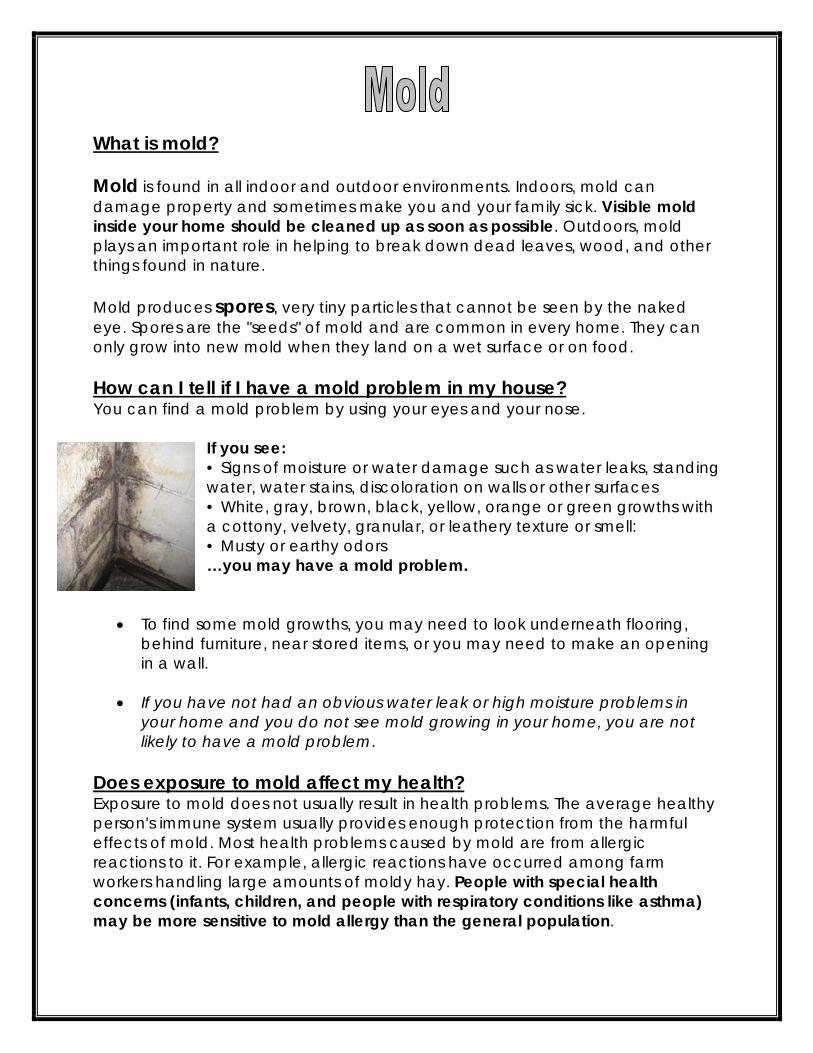
What is mold? Mold is found in all indoor and outdoor environments. Indoors, mold can damage property and sometimes make you and your family sick. Visible mold inside your home should be cleaned up as soon as possible. Outdoors, mold plays an important role in helping to break down dead leaves, wood, and other things found in nature. Mold produces spores, very tiny particles that cannot be seen by the naked eye. Spores are the "seeds" of mold and are common in every home. They can only grow into new mold when they land on a wet surface or on food. How can I tell if I have a mold problem in my house? You can find a mold problem by using your eyes and your nose.
If you see: • Signs of moisture or water damage such as water leaks, standing water, water stains, discoloration on walls or other surfaces • White, gray, brown, black, yellow, orange or green growths with a cottony, velvety, granular, or leathery texture or smell: • Musty or earthy odors …you may have a mold problem.
• To find some mold growths, you may need to look underneath flooring,
behind furniture, near stored items, or you may need to make an opening in a wall.
• If you have not had an obvious water leak or high moisture problems in
your home and you do not see mold growing in your home, you are not likely to have a mold problem.
Does exposure to mold affect my health? Exposure to mold does not usually result in health problems. The average healthy person's immune system usually provides enough protection from the harmful effects of mold. Most health problems caused by mold are from allergic reactions to it. For example, allergic reactions have occurred among farm workers handling large amounts of moldy hay. People with special health concerns (infants, children, and people with respiratory conditions like asthma) may be more sensitive to mold allergy than the general population.

The most common health problems due to mold exposure are: • runny nose • sinus congestion • eye irritation • cough and congestion • sore throat • sneezing • upper respiratory infections • headaches • worsening asthma • fatigue
How can I prevent mold from growing in my home? The best way you can prevent exposure to mold is to control moisture.
• Promptly attend to leaking pipes, flooded basements, roof leaks, and other ways that water can get into your home. • Run exhaust fans in showers, baths, indoor pool areas, and cooking areas to allow moisture and steam to escape outdoors. • Not all moisture problems are the result of leaks, condensation, or floods. Humidity levels above 60 percent for an extended time period can create conditions for mold growth. In humid months, try using an air conditioner or dehumidifier to keep the humidity in your home below 50 percent. • Humidifiers increase the moisture in your home. If you use a humidifier, be sure that it is set properly to prevent excessive humidity. • Be sure your clothes dryer is vented outdoors. If the humidity in your home is high, avoid drying clothing indoors on drying lines or racks. • Clean bathrooms with mold-killing products like bleach mixed with water, or Simple Green. Be sure to read the product label first to see if there are any health precautions or recommendations for the product that you are using. NEVER mix chemicals. • Insulate water pipes and install chimney liners to limit condensation. • Use storm windows to limit indoor window condensation. • Cover crawlspaces with a vapor barrier (like plastic sheeting) and ventilate to prevent moisture build-up. • Use area rugs that can be washed often. A vapor barrier may be necessary under carpet that is installed over concrete. • Have your heating and cooling systems inspected and serviced regularly. Source: Michigan Department of Community Health - “Mold Information for the Public”
These are common health problems that can be caused by many health conditions. See your doctor if you feel that exposure to mold is
making you sick.

How can I clean up mold? 1. Locate and fix the water leak or moisture problem. If you do not do this first, the mold will continue to grow even after you clean it. 2. Wear disposable rubber gloves, goggles that don't have ventilation holes, and a respirator available at your local hardware store (ask for a N-95 or HEPA cartridge type) to reduce your exposure to mold spores. If you have respiratory problems (like asthma or emphysema) or the area is large (over two square feet), check with your doctor before starting cleanup or have someone else do the cleanup. 3. Be sure the area is well ventilated. Open windows and doors and use fans to create a path of fresh air directly from the cleanup area through the closest door or window leading to the outdoors. Avoid blowing mold spores through the rest of the house. 4. When mold is growing on porous material (for example, ceiling tiles, leather, cloth, drywall, plaster, paneling, wood products, paper, carpet, or padding) you must remove the material, put it in a bag, and throw it away. When removing drywall, cut at least 12 inches beyond the area of visible mold. Hard (non-porous) material such as glass, plastic, or metal does not need to be thrown out. It can be cleaned and disinfected. 5. Use bleach mixed in hot water (1 cup of bleach in 10 cups of water) or Simple Green solution to scrub non-porous areas like glass, plastic, tile, metal, or cement. (You can also try this method on walls and window sills.) Use a stiff brush or cleaning pad on block walls or uneven surfaces. Do not use pure bleach – it will make the problem worse. Avoid getting the bleach solution on areas you don't want to clean. Wear old clothing – bleach can ruin clothes. NEVER mix bleach with any solution containing ammonia – this can create deadly fumes. 6. Thoroughly rinse the area with hot water. Using a wet-dry vacuum is an easy way to pick up excess water. Remove the filter so that it doesn't get wet and create a place for mold to grow. 7. Allow the area to completely dry. This can take two or three days. Raising the room temperature and running a dehumidifier in the area will help. 8. Vacuum your home thoroughly with a HEPA vacuum. If you have a HEPA air purifier, turn it on because this will also help remove mold spores from the air inside your home. 9. If you still have mold odors after cleaning and ventilating, it is possible the mold is hidden within walls or behind wall coverings. It is important that these areas are found and either cleaned or replaced. 10. If you have mold damage caused by sewage or other contaminated water, call in a contractor who has experience in cleaning up this kind of building damage. 11. If you choose to hire a contractor to do cleanup, make sure the contractor has experience in cleaning up mold. Check the contractor's references. *The State of Michigan does not certify or license contractors for mold removal. It is up to you to use your best judgment when hiring a contractor.


While there are many effective household cleaning products available in your local supermarket or discount store, you may see some surprising ingredients if you read the label closely.
Many of these products contain harmful chemicals such as chlorine bleach, ammonia, petrochemicals, and volatile organic compounds (VOC's). It is risky to have these chemicals in your home in the case of accidental ingestion or physical contact. Breathing the fumes of some chemicals, especially over time, can be bad for your health. Also, small amounts of residual product can be left on surfaces or in the air after cleaning, which affects your home's air quality.
Disposal of Leftover Toxic Cleaning Products It is important to properly dispose of any leftover toxic cleaning products after switching to nontoxic cleaning products. Improper disposal, such as pouring them down the drain, on the ground outside, into storm sewers, or throwing them out in the trash can pollute the environment and can be a threat to human health. Many communities have places to safely dispose of toxic cleaning products, known also as "household hazardous waste." Check with your local environmental, health, or solid waste agency for information. The EPA suggests the following options for disposing of your toxic cleaning products:
• See if your community has a facility that collects household hazardous waste year-round.
• Check to see if there are certain days in your area for collecting solid waste at a central location.
• You may be able to drop off certain products at local businesses for recycling or proper disposal.
• Always read product labels for proper disposal instructions.
(see following page for a list of non-toxic cleaning recipes that you can make at home)
Important reasons to consider using non-toxic cleaning products:
• Protect children and pets from accidental poisoning (since non-toxic cleaning products are natural, they are not dangerous if swallowed).
• Protect yourself (or the person who cleans the house) from contact with
the harmful ingredients in many cleaning products.
• Protect your home's indoor air quality.


Non-Toxic Cleaning Recipes
Tub and sink cleaner: Baking soda,, liquid oil soap (i.e. Murphy’s liquid oil soap)
• Sprinkle baking soda on porcelain fixtures and rub with a wet rag.
• Add a little soap to the rag for more cleaning power.
• Rinse surfaces well to avoid leaving a film. Window and mirror cleaner: White vinegar, water
• Pour ¼ cup of white vinegar in a spray bottle and fill to the top with water.
• Spray on surfaces and wipe with a lint-free rag
• Outdoor windows: use a sponge and wash with warm water with a few drops of liquid Murphy’s soap. Rinse well with a squeegee and dry.
Linoleum floor cleaner: White vinegar, water
• Mop using a mixture of ½ cup vinegar in a bucket of warm water (The vinegar odor will dissipate after floor dries.)
All purpose cleaners (tile, linoleum, woodwork, etc.) liquid oil soap
• Add a few drops of liquid soap to a wet cloth and rub surface briskly.
Oven Cleaner: Baking soda, water, liquid oil soap
• Mix 1 cup of baking soda with enough water to make a paste.
• Apply to oven surfaces and let stand a little while (preferably overnight).
• Use a scouring pad for scrubbing most surfaces.
• After cleaned, put a few drops of liquid soap on a sponge and wash sides and top of oven.
• Do NOT use on self-cleaning ovens! Drain Cleaner: Baking soda, white vinegar, boiling water
• This recipe to free minor clogs and prevent future clogs.
• Pour ½ cup of baking soda down the drain first, add ½ cup vinegar.
• Let it fizz for 10-15 minutes.
• Poor down a teakettle full of boiling water. Repeat if necessary.
• If clog is stubborn, use a plunger. If very stubborn, use a mechanical snake.
Grease Cutter: Baking soda liquid oil soap, vinegar, water
• Mix ½ tsp baking soda, ¼ to ½ tsp liquid soap, 3 tbls vinegar and 2 cups of hot water in a spray bottle.
• Spray and scrub. Wipe clean.
Dish soap: non-phosphate soap
• TIP: Try using only half the amount of automatic dishwashing detergent. It should make little to no difference.
Tile Floor Cleaners: Vinegar, hot water
• Mix 1 cup of vinegar with 1 pail of hot water and apply to floors.
• Wipe clean. Wood Floor Cleaners: liquid oil soap, water
• Mix 1/8 cup of liquid soap with 1 gallon of water and apply to wood floors.
• Wipe clean. OR
• Mix ¼ cup olive oil, ¼ cup vinegar and a drop or two of lemon oil and apply to wood floors.
• Wipe clean. Floor Wax: lemon juice, linseed oil
• Mix 1 part lemon juice and 2 parts food-grade linseed oil and apply with a rag.
• Let rest overnight until the floor is dry.
• Buff completely smooth. Pot and Pan Cleaner: baking soda, salt, water
• Mix 3 tbls of baking soda, salt and water ni a small bowl to form a paste.
• Use a sponge to apply the paste to the pan. • Let dry then rinse with hot water.
Toilet bowl cleaner: baking soda
• Sprinkle baking soda in and around toilet bowl.
• Let sit for a few minutes then scrub clean Scouring Powder: baking soda, vinegar
• Mix 1 cup baking soda and ¼ cup vinegar in a small bowl.
• Rub on surfaces with a damp sponge.
• Let stand for a few minutes then rinse well. Soft Scrubber: baking soda, liquid oil soap
• Mix ¼ cup baking soda and liquid oil soap to form a paste.
• Apply with sponge and wipe clean.

Carpet Deodorizer: baking soda
• Sprinkle one box of baking soda over carpet and let rest overnight.
• Vacuum. Carpet Stain Remover: club soda
• Apply to stain and scrub. OR
• Mix ¼ vinegar and ¼ cup water and rub on carpet.
• Rinse with water. Wood Furniture: linseed, vinegar and lemon juice
• Mix 1/8 cup linseed, 1/8 cup vinegar and ¼ cup lemon juice.
• Rub into wood using a soft cloth. Leather cleaner: olive oil, lemon juice
• Mix ¼ cup of olive oil and a few drops of lemon juice.
• Saturate cloth and apply. Vinyl cleaner: vinegar, liquid oil soap, water
• Mix ¼ cup vinegar, ¼ tsp. liquid oil soap and water.
• Saturate cloth and apply. Laundry Soap: use non-phosphate liquid detergents or laundry soaps Laundry bleach: lemon juice
• Add ¼ cup of lemon juice to laundry Laundry starch: cornstarch, cold water
• Mix 1 tbls. Cornstarch and 1 pint cold water in a spray bottle and shake to dissolve cornstarch.
AIR FRESHENERS General fresheners:
• Place of couple tbls. of baking soda in a dish and leave on counter.
OR
• Place slices of your favorite citrus fruit (lemon, grapefruit or orange) in a pot.
• Add enough water to cover the fruit.
• Simmer over low heat for an hour or two. OR
• Boil some cinnamon and cloves in water. Kitchen and cooking odors:
• Boil 1 tbls. white vinegar and 1 cup of water in a small pot. OR
• Place pure vanilla on a cotton ball in a small saucer. Place where needed
• NOTICE: vanilla contains alcohol and should be kept away from children
PEST CONTROLS Ants:
• Crumble and place dried bay leaves in doorways and window seals to eliminate ants. OR
• Wash countertops with equal parts of vinegar and water. OR
• Find where ants are entering and squeeze lemon juice in the hole or crack
• Put the peeling around the entrance. Cockroaches:
• Mix equal parts of powdered sugar and baking soda and sprinkle where cockroaches might live.
Houseflies:
• Scratch the skin of an orange and leave out.
• Hang a cluster of cloves
• Flies are repelled by both of these ingredients. METAL CLEANER Aluminum cleaners: Cream of tarter, vinegar
• Mix 2 tbls. cream of tarter and vinegar to make a stiff paste.
• Rub on metal and let dry.
• Wash paste off with hot water and dry with a cloth. Copper Cleaner: White vinegar, water, salt
• Mix a tablespoon of vinegar and a tablespoon of salt and apply to the surfaces with a rag.
• Rinse thoroughly with water afterwards to avoid corrosion. Do NOT use on lacquered finishes
Chrome Cleaner: baking soda, water
• Mix 3 tbls. baking soda and water to make a paste.
• Apply to metal and rinse. Silver Cleaner: baking soda, aluminum foil, water.
• Put foil in the bottom of a big pan.
• Add 2 to 3 inches of water (enough to cover the silver), 1 tbls. baking soda and salt.
• Bring to a boil.
• Add silver pieces and boil 2 to 3 minutes.
• Remove from pan, rinse well and dry. Stainless steel cleaner (baking soda, water)
• Mix 3 tbls. baking soda and water to make a paste.
• Apply with a scouring pad.
• Rinse well to remove all residue.
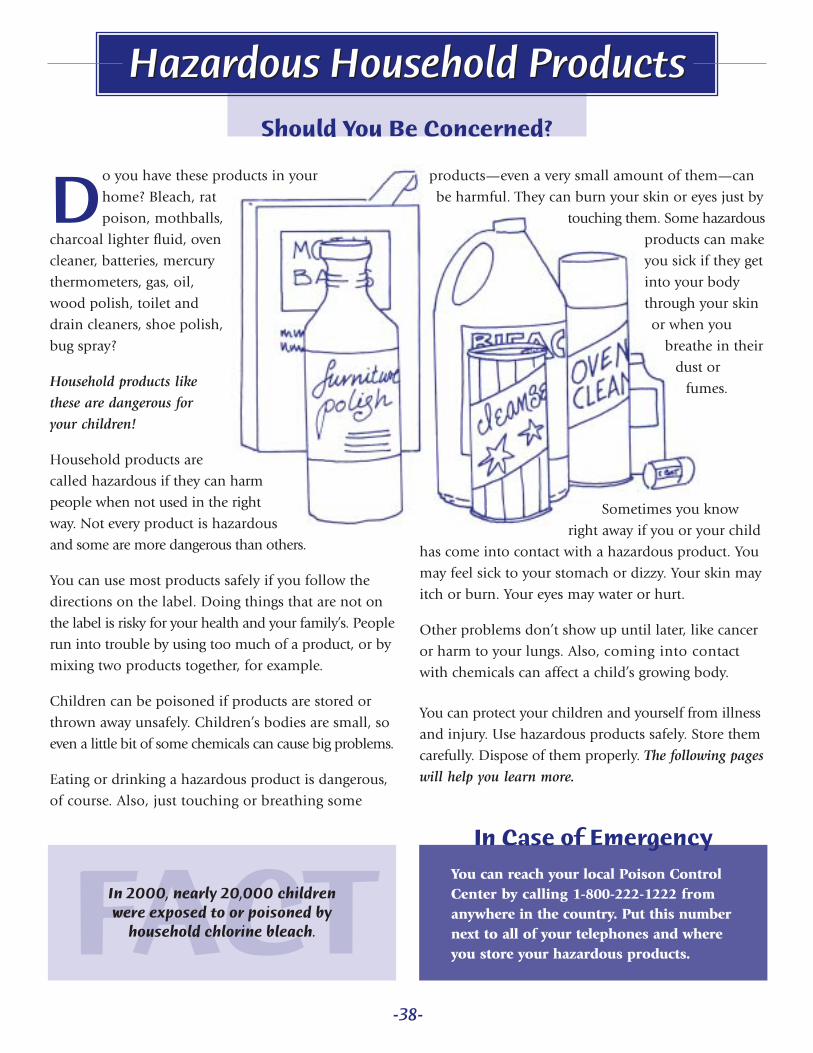
Do you have these products in your
home? Bleach, rat
poison, mothballs,
charcoal lighter fluid, oven
cleaner, batteries, mercury
thermometers, gas, oil,
wood polish, toilet and
drain cleaners, shoe polish,
bug spray?
Household products like
these are dangerous for
your children!
Household products are
called hazardous if they can harm
people when not used in the right
way. Not every product is hazardous
and some are more dangerous than others.
You can use most products safely if you follow the
directions on the label. Doing things that are not on
the label is risky for your health and your family’s. People
run into trouble by using too much of a product, or by
mixing two products together, for example.
Children can be poisoned if products are stored or
thrown away unsafely. Children’s bodies are small, so
even a little bit of some chemicals can cause big problems.
Eating or drinking a hazardous product is dangerous,
of course. Also, just touching or breathing some
products—even a very small amount of them—can
be harmful. They can burn your skin or eyes just by
touching them. Some hazardous
products can make
you sick if they get
into your body
through your skin
or when you
breathe in their
dust or
fumes.
Sometimes you know
right away if you or your child
has come into contact with a hazardous product. You
may feel sick to your stomach or dizzy. Your skin may
itch or burn. Your eyes may water or hurt.
Other problems don’t show up until later, like cancer
or harm to your lungs. Also, coming into contact
with chemicals can affect a child’s growing body.
You can protect your children and yourself from illness
and injury. Use hazardous products safely. Store them
carefully. Dispose of them properly. The following pages
will help you learn more.
Hazardous Household ProductsShould You Be Concerned?
Hazardous Household Products
-38-
FACTIn 2000, nearly 20,000 children were exposed to or poisoned by
household chlorine bleach.
In Case of Emergency
You can reach your local Poison ControlCenter by calling 1-800-222-1222 from anywhere in the country. Put this numbernext to all of your telephones and whereyou store your hazardous products.

Use SafelyDo you use hazardous household products safely?
• Read the label.
That is one of
the most
important steps
in using
products.
• Look for
words like
caution, warning, flammable, harmful, danger,poison. These
tell you that a product
may be hazardous. If
you see these words on a label, take extra care.
• Look for special instructions on the label such as:
“Work in well ventilated area.” This means work
outside or with the windows open. The fumes can
make you sick if you do not have enough fresh air.
• “Wear protective clothing.” This means wear goggles
or safety glasses, gloves, long sleeves, or other
coverings. The right clothing can prevent burns or
keep chemicals from going into your body through
the skin.
• Never mix products unless the label says it is safe
to do it. For example, never mix products containing
chlorine bleach with products containing ammonia.
You will make a deadly gas by mixing these together.
• Keep children and pets away while you use
hazardous products.
• Always put the cap back on and put away the product
right after you finish using it.
• Never leave the product or container where children
can see it or reach it.
• Don’t eat, drink, or smoke when using hazardous
products.
• Be ready in case there’s an accident: Put the Poison
Control Center telephone number, 800/222-1222,
where you can find it quickly in case of an emergency.
Tape it to the wall by your kitchen phone, for example.
• Buy Syrup of Ipecac at your local drugstore and
keep it handy. This medicine makes a person throw
up. But only use it when a doctor or the Poison
Control Center tells you. Sometimes throwing up
makes the poisoning worse.
Use LessCan you cut down on the hazardous products in
your home?
• Do you buy only what you need, so you don’t
have extras?
• Prevent or reduce pest problems so you don’t
need chemicals to kill them. Wash dishes and
wipe counters often. Keep the
garbage area tidy.
• If you’re pregnant, don’t use
hazardous products if
something else will do the job.
• Think about using tools or
products known to be safe:
Use a plunger to unclog
sinks instead of chemicals.
Clean with baking soda
(for scrubbing) or
vinegar (for
cutting grease).
Hazardous Household Products
-39-
?Questions to Ask

Hazardous Household Products
Store SafelyDo you store hazardous household products safely?
• Keep them away from children. A locked, secure
place is best.
• Store them in the package, can, or bottle they came
in. Never put them in another container (especially
one for food or drink)! This helps prevent poisoning
and keeps the label instructions with the product.
• Keep containers and packages dry. Close them tightly.
• Set containers inside a plastic bucket in case of leaks.
• Store products at least 150 feet away from your
well, cistern, or water pump. This will protect your
water supply and your health.
• Keep products away from heat, sparks, or fire.
• Store batteries and flammable chemicals like gasoline
in the shade, away from direct sunlight.
Safe DisposalHow do you get rid of leftover products?
• Share the extra with someone who will use it up.
• Take leftovers to a community hazardous waste
collection point. Ask your local or state health
department where this is.
• Some products—like pesticides—are very
hazardous. You will even need to be careful
how you dispose of the container. The label
will tell you what to do.
• Never dump or burn hazardous
products on your property. Dumping
or burning them near a water supply
is very dangerous.
• Never burn hazardous wastes in a barrel or stove.
Burning may let off toxic gases and make
hazardous ash and smoke. And, it’s against the law
in many states.
• Recycle used motor oil or antifreeze. Many
communities have places for you to do this.
• Mercury is a threat to health. Products that have
mercury in them are fluorescent bulbs, thermometers,
thermostats, and blood pressure meters. Call your
local trash department or health department to
find out where to recycle products with mercury.
-40-
?Questions to Ask

-41-
Hazardous Household Products
Here are some ways to protect yourfamily’s health.
• Buy only what you need to do the job.
• Use products known to be safe when possible.
• Read and follow directions on product
labels—always!
• Post the Poison Control Center telephone
number next to the phone.
• Never mix two products together unless you
are certain it is safe to do so.
• Never mix bleach and ammonia
• Keep all hazardous products, including
bleach, in a cabinet out of reach of children.
• Buy products in childproof containers.
• Keep hazardous products in their original
containers.
• Give leftover products to someone else
to use.
• Find out about your community’s hazardous
waste collection points.
• Recycle products that you can—oil, antifreeze,
products with mercury.
• Never burn or dump leftover products or
containers.
ACTION STEPS
When In Doubt, Check It Out!
✆• Call your local Poison Control Center 800/222-1222
• Call your local Cooperative Extension office
• Call your local or state health department
• Contact the Consumer Products Safety Commission:
800/638-2772—www.cpsc.gov
• Contact Healthy Indoor Air for America’s Homes:
406/994-3451 or visit the website at
www.montana.edu/wwwcxair/
• The Home*A*Syst handbook gives more details
about this and other healthy home topics
608/262-0024—www.uwex.edu/homeasyst
• EPA’s Consumer Labeling Initiative
—www.epa.gov/opptintr/labeling/index.htm
Notes
This chapter was adapted from “Managing Hazardous Household Products,” by Elaine Andrews, University of Wisconsin Cooperative Extension. In
Home*A*Syst, An Environmental Risk-Assessment Guide for the Home, ©1997 Regents of the University of Wisconsin System. All rights reserved.

• One of the most important things for an asthmatic to do is to vacuum regularly. Carpeting, upholstered furniture, drapes, and even hard floors accumulate and hold asthma triggers like dust mites and pet dander. Using a HEPA vacuum cleaner to remove asthma triggers from these locations is very important.
• One of the things an asthmatic needs to look for in a vacuum cleaner is a
good filtration system. Vacuums typically have either true HEPA filters or HEPA type filters. True HEPA filters eliminate at least 99.97% of particles from the air that are 0.3 microns in size or larger. Looking at the chart below, you will see that the HEPA vacuum can filter everything except viruses from the air when you vacuum your home.
Microns
50 40 30 20 10 5 1 0.5 0.1 0.05 0.01
Pollen
Mold Spores
Lint
Dust Bacteria Smog Insecticide Dusts Tobacco Smoke Viruses
• A HEPA vacuum has a high quality filtration system that gets rid of asthma
triggers that get stirred up while you vacuum your floor. Normal vacuums do not filter the air – the asthma triggers that get stirred up remain in the air and can make a person with asthma sick. For this reason, a HEPA vacuum is very important for a healthy home.
• With your HEPA vacuum, you can vacuum carpet, hardwood floors, furniture, ceilings/walls, curtains – just make sure you use the proper settings and attachments! Refer to the instruction manual if you have questions.
• REMEMBER to check the front filter about once a month to see if it is getting dirty. Eventually, you will need to buy a replacement filter at the store. If you keep using a filter that is very dirty, the HEPA vacuum will not work properly.

HEPA Vacuum – Tips To Remember:
• Vacuum your home with the HEPA vacuum once a week or more often if you can. Each time you vacuum, you are getting rid of asthma triggers in your home and helping your child stay healthy.
• Use the HEPA vacuum (on Bare Floor setting) to clean non-
carpeted floors (wood, linoleum, etc.) instead of dry sweeping. This will help prevent dust and debris from being stirred up in the air.
• Check the vacuum filter bag once a month, and put a new bag in
when it gets close to the fill line.
• Check the HEPA filter (front of vacuum) each time you change the filter bag. REPLACE the HEPA filter at least 2 times each year, or after every 6 filter bag changes. *Note: Changing the filter bag often will extend the life of the more expensive HEPA filter!
• Use setting other than “Low” because the lowest setting often
brings the vacuum too close to the carpet and can damage your carpeting/floor.
• Do not vacuum up water or wash the HEPA filter! It can cause mold
to grow in the vacuum and you will not be able to use it anymore.
What Do We Mean By “Scents”? When we talk about scents, we mean fragrances, aromas or perfumes – anything that adds a smell to something else.
• Scents can usually be found in personal care products, such as perfumes, aftershaves, colognes, shampoos and conditioners, soaps, body lotions and deodorants.
• Scents are also found in household items, such as air fresheners, deodorizers,
candles, some laundry detergents, fabric softeners and cleaning products.
• Scents can also be found in the workplace (e.g. cleaning products, adhesives, caulking).
DID YOU KNOW? More than 80% of the ingredients in fragrances have never been tested for their harmful effects on humans.
How Can Scented Products Affect My Child’s Health?
• Chemicals used to add scents to products can cause serious health problems for some people, especially for people with lung diseases such as asthma. Being near a scented product – perfume, scented candles or even laundry detergent – can make some people sick.
• People most severely affected by fragrances are those with asthma, allergies, migraine headaches, dermatitis (skin sensitivity), and rhinitis (sinus sensitivity).
• Fragrance chemicals can enter the body through the nose by inhalation, through the mouth by ingestion, or the skin by absorption (contact). These chemicals can affect the lungs, nose, skin, eyes, and brain.
Examples of what this means: Lungs: Studies have shown that shortness of breath or asthma-like symptoms can be caused by fragrances. Most of the fragrance chemicals consist of volatile organic compounds (VOCs), which are known to be respiratory irritants. Nose: Since the nose is a chemical receptor, people exposed to scents can be affected with sneezing and sinus problems. Skin: The number one cause of adverse skin reactions to cosmetics and laundry products is fragrance. The skin reactions to fragrance chemicals can produce rashes, hives, dermatitis, or eczema. Brain: Inhaling fragrances can cause circulatory changes and electrical activity in the brain. These changes can trigger migraine headaches, the inability to concentrate, dizziness, and fatigue.

While some people could be only mildly affected by scents, others could have severe
ome common symptoms include:
• shortness of breath
r weak
symptoms
More serious symptoms include:
• kidney/liver damage ominal pain
roblems concentrating
ain
reactions. S
• chest tightness • watery eyes • headaches • feeling dizzy • feeling tired o• nausea • cold-like
• nausea/vomiting/abd• anxiety • having p• feeling confused • loss of appetite • feeling depressed• seizures • muscle p• numbness
hat Exactly is in Scents?
DID YOU KNOW? It is estimated that 72% of people with asthma have more asthma symptoms and/or asthma attacks when they are around fragrances.
W
• Scents are made from a mixture of natural and man-made chemicals. A typical
• Scented products contain several toxic chemicals that constantly turn into vapor
oxins
• One commonly used chemical is diethyl phthalate, which is used to make scents
ragrance products also add to air and water pollution in our environment!
fragrance can contain between 100 to 350 ingredients. The problem with scentedproducts is not so much the smell itself as the chemicals that produce the smell.
in the air and attach themselves to hair, clothing, and surroundings. Most (95%) of the chemicals used are synthetic compounds made from petroleum. These include chemicals made from benzene, aldehydes and many other known tand sensitizers.
last longer. It can cause allergic skin reactions and is classified as a skin sensitizer and a reproductive toxin, which means that it harms a person’s reproductive system!
F

What You Can Do At Home:
• Use fragrance-free household cleaning products. Or better still, make your own,
• s. To find safer personal care products
using a list of non-toxic cleaning recipes. Use fragrance-free personal care producton the web, visit the Skin Deep Database, a site that assesses and compares the safety of many brands of shampoos, skin creams, baby wipes, etc. Visit: http://www.cosmeticsdatabase.com/index.php?nothanks=1
• system, open
• nted products in your bedroom.
weather.
le amount of fragrance. No one more
• Keep nd soaps in sealed containers or a cupboard with a door that
Keep your home well ventilated. If you don’t have an air exchangea window to get fresh air in and stale air out. Or put a fan in a window to draw air out and open another window so that air circulation is increased. If you choose to wear perfumes:
-Don't keep perfumes or sce-Wear a lighter fragrance (or no fragrance at all), during warmFragrance intensifies with heat. -Make sure you wear a reasonabthan an arm's length away from you should be able to smell your fragrance. detergents a
closes completely. Make sure the room they are stored in is well ventilated.
DID YOU KNOW? You should always buy products that say “Fragrance-Free” on the label. Products that say “Scent-Free” or “Unscented” may still contain some masking fragrances.


If you are one of the millions of Americans with seasonal allergies, you know that a serious allergy is nothing to sneeze at!
Seasonal allergies, usually called “hay fever,” have little to do with hay and nothing to do with fevers! Farmers coined the phrase at the turn of the century because they saw the same symptoms year after year during harvest season. Your doctor will probably use the medical term “allergic rhinitis.” Seasonal allergies or hay fever is like having a cold, but without germs. Like a cold, hay fever can cause sleepless nights, non-stop sneezing, tiredness, and nasal congestion. During hay fever season, the tissues lining your nose become inflamed, causing congestion or that stuffy feeling. Other common symptoms include:
• Sneezing, often with a Runny Nose • Scratchy Throat • Red, Itchy Eyes • Postnasal Drip and Coughing • Dark Circles under the eyes • Constant rubbing of the nose
People with seasonal allergies have allergic reactions to plant pollens or mold spores. These allergy-causing things are called “allergens.” • Weeds, grasses, and trees all release tiny grains of pollen. Plants
produce most of their pollen during the spring and fall months. What plants you are allergic to, and when those plants pollinate will determine when you start to sneeze. Trees release their pollen earliest in the season. Grasses come next, followed by weeds. Ragweed – the most common plant allergen – makes late summer and fall especially miserable for people who are allergic to its pollen.
Different people are allergic to the pollen of different plants, but people who develop allergies to one plant are very likely to develop allergies to others as well. The most common plants which produce allergenic pollen and the time of year that they pollinate are listed in the following chart:

Trees Grasses Weeds Early Spring to Early Summer
Late Spring to Late Summer
Late Summer to Early Fall
ash birch cedar cypress elm hickory maple oak poplar sycamore walnut
bermuda blue orchard red top rye sweet vernal timothy
cockleweed pigweed ragweed Russian thistle sagebrush tumbleweed
Source: National Allergy Supply, Inc., “Pollen Allergies and Minimizing Symptoms” www.natlallergy.com • Outdoor mold spores are also common allergens that cause hay fever. Like
pollen, these tiny particles are carried in the air and breathed in. Molds live in damp, dark places – in soil, on rotting wood, in grain bins, on fallen leaves, etc. Molds usually appear after the spring thaw, are at their highest levels in the late summer and fall months, and may hang around until the late fall.
Since pollen grains and mold spores are tiny enough to be carried in the air, wind easily spreads them over a wide area. In fact, ragweed pollen can travel 500 miles! So beware of hot, dry, windy weather – your hay fever symptoms may get worse. The good news is that rainy, cloudy days usually reduce pollen allergy symptoms because the particles get washed away. The bad news is that mold growth increases after rainy weather. If your hay fever is worse when the weather is rainy, chances are you are more allergic to mold spores than to plant pollen.
Pollen and mold counts measure the amount of outside allergens in the air. Wherever you live, you can keep track of daily pollen and mold counts in the weather section of the newspaper, on the radio, on television, or online (see Air Quality section of HHU manual). Keep in mind that by the time they are published or announced, pollen and mold counts are at least a day old. Because weather affects the amount of allergens in the air, these counts may change greatly from day to day. Still, pollen and mold counts will give you a general idea of what the air holds for allergy sufferers.

The first step is to figure out what you are allergic to. Start by keeping notes on when and where you notice allergy symptoms. (Your calendar can be a handy place to keep notes on daily symptoms.) If your allergies only bother you during the spring or fall, you are probably allergic to pollens and molds. Your doctor can look at your notes and do tests to figure out what you are allergic to. Together, you can work out a treatment plan which can include three things: avoiding or reducing contact with allergens, taking medicines, and, for some people, getting allergy shots (immunotherapy). Medicines for Allergies Non-prescription antihistamines and decongestants are the most common medicines used for allergies. • Antihistamines help relieve your sneezing, itching, and runny nose, especially
when taken on a regular basis. For example, if you start taking an antihistamine each day at the beginning of pollen season, you will probably reduce severe allergy symptoms. Because some antihistamines dry out mucous membranes, they may cause a dry mouth. Many non-prescription antihistamines also cause drowsiness and should be used with caution due to this side effect.
Non-sedating antihistamines, sometimes called second generation antihistamines, are similar in many ways to the other antihistamines. Currently, these medicines need a doctor’s prescription. One major difference is that non-sedating antihistamines do not make you drowsy. Topical antihistamines, nasal sprays or eye drops, are effective in treating some symptoms (itchy nose and eyes).
• Decongestant Pills, Nasal Sprays, and Nose Drops
reduce stuffiness by shrinking swollen membranes in the nose. Side effects may include sleeplessness, a nervous, jittery feeling, a fast heartbeat, and a fast pulse.
*If you have high blood pressure (hypertension), a heart
condition, thyroid disease, diabetes, or prostate or thyroid problems, check with your doctor before taking decongestants. *It is also important to remember that using a non-prescription nasal decongestant spray more than three days in a row may cause the swelling and stuffiness in your nose to become worse, even after you stop using the medicine. This is called a “rebound” reaction.

• Corticosteroid nasal sprays (Some brand names are: Beconase, Vancenase, Nasacort, Nasalide, and Nasonex) help reduce the inflammation that causes nasal congestion without the chance of the “rebound” effect found in non-prescription nasal sprays. They also relieve itching and sneezing. They are the most effective medicines for seasonal allergies (allergic rhinitis). They work best if you start using them two weeks before the allergy season starts and continue using them throughout the season. Common side effects may include sneezing, and a burning feeling or an irritation in the nose and throat.
• Oral Corticosteroids may be used for 3-7 days to gain rapid control of severe
symptoms. Corticosteroid nasal sprays are used thereafter to maintain control of the symptoms.
*Please note that corticosteroids are NOT the same thing as anabolic steroids, which some athletes use to build muscles. Corticosteroid medicines are very safe and effective when used at recommended doses.
New prescription drugs are approved periodically. If the prescription you are taking is not on this list, ask your doctor which category (above) it falls into.
• Allergy Shots Although allergy shots may help control hay fever, you will need to receive a shot every 1 to 4 weeks over a period of 3 to 5 years. Your symptoms would probably be less severe during the first allergy season after your shots were started. Allergy shots are helpful for many patients, but may not work for everyone. Ask your doctor whether you should receive allergy shots.
You should see a doctor for your Seasonal Allergies if:
You can’t avoid your allergens and non-prescription allergy medicines don’t work.
You are taking non-prescription allergy medicines for more than 3 months (total) in a year.
You have bad side effects from your non-prescription allergy medicines.
Your have allergies all year round.
Your symptoms are severe.
Source: “Seasonal Allergies: Pollens and Mold”, Asthma and Allergy Foundation of America

If possible, keep home and car windows closed and use air conditioning when the pollen count or humidity is high, especially on windy days and between 9:00 a.m. and sundown.
Use a dehumidifier, especially in the basement, to keep air inside your home dry and prevent mold growth.
Minimize outdoor activities on days when the pollen or mold counts are high, or on windy days when pollen and mold spores are blown about.
Use a paper mask to cover your nose and mouth when mowing the lawn or raking leaves/grass, because these activities stir up pollens and molds.
Dry sheets and clothing in a dryer if possible; Avoid hanging them outside to dry during allergy season – pollens and mold collect on them.
Take a shower after spending time outdoors to remove pollen and mold that may be on your skin and hair, especially before going to sleep.
Wash and brush outdoor pets often – their fur collects pollen and mold spores when they spend a lot of time outdoors.
Take your vacations to areas that have less pollen and mold, like the beach.
Take allergy medicines as prescribed by a doctor, in the correct dosage. Do not take more medication to get rid of severe symptoms after you have already taken the correct dosage.


Symptoms of Food Allergy
For some people, an allergic reaction to a food may be uncomfortable but not serious. For other people, an allergic reaction to a food can be scary and even life-threatening.
The most common signs and symptoms of a true food allergy include:
• Tingling in the mouth • Hives, itching or eczema • Swelling of the lips, face, tongue and throat, or other parts of the
body • Wheezing, nasal congestion or trouble breathing • Abdominal pain, diarrhea, nausea or vomiting • Dizziness, lightheadedness or fainting
Signs and symptoms of a food allergy usually develop within a few minutes to an hour after eating the food.
In a severe allergic reaction to food — called anaphylaxis — you may have more extreme symptoms including these life-threatening signs and symptoms:
• Constriction of airways, including a swollen throat or a lump in your throat, that makes it difficult to breathe
• Shock, with a severe drop in blood pressure • Fast heartbeat • Dizziness, lightheadedness or loss of consciousness
Emergency treatment is very important for treating anaphylaxis. Food anaphylaxis causes thousands of emergency room visits and as many as 200 deaths in the United States each year. *Speak to your doctor about whether your child needs an EpiPen, which is used for allergic emergencies. It is very important to learn how to use it properly! If your child’s doctor prescribes an EpiPen, read the EpiPen patient insert.


Why is clean air important? The short and long-term effects of air pollution on the environment are varied and profound. Acid rain, global warming, smog, and the depletion of the ozone layer are just a few of the most alarming results of pollution. Air pollution also poses a significant human health risk, causing serious respiratory and other illnesses.1
Can air pollution make asthma symptoms worse and trigger attacks? If you or your child has asthma, have you ever noticed symptoms get worse when the air is polluted? Air pollution can make it harder to breathe, and it can cause symptoms like coughing, wheezing, chest discomfort, and a burning feeling in the lungs. Two key air pollutants can affect asthma. One is ozone (found in smog). The other is particle pollution, or particulate matter (found in haze, smoke, and dust). When ozone and particle pollution are in the air, people with asthma are more likely to have symptoms. How can I find out how clean the outside air is? The Air Quality Index, or AQI, is an easy way to understand how clean the outside air is. It is a simple tool that provides a color-coded “picture” of current air pollution levels and health effects. The AQI allows people to take action to protect their health when we have more air pollution than we should. What air pollutants are reported by the AQI? AQI pollutants include fine particles, ground-level ozone, carbon monoxide, sulfur dioxide, and nitrogen dioxide. Air monitor data is collected every hour. A computer analyzes the information and automatically determines how clean the air is. The AQI tells people whether the air they breathe is currently “good,” “moderate,” “unhealthy for sensitive groups,” “unhealthy,” “very unhealthy,” or “hazardous”. During summer months, ground-level ozone is most likely to be the pollutant that has the most effect on the AQI. How can I find out what today’s AQI is?
partment of Environmental Quality (DEQ) The AQI is available on the Michigan De“Michigan’s Air” web page. Go to http://www.deqmiair.org. The color-coded map of Michigan shows AQI locations across the state. The AQI is updated every hour throughout the day. You can also choose to view detailed AQI numerical values and the controlling pollutant at each monitor location. If you do not have accessthe Internet, you can call the DEQ Environmental Assistance Center during office hours at 1-800-662-9278. Ask that your call be forwarded to the Air Quality Division.
to
2

How can I find out how clean the air will be tomorrow or the next day? irectly to the
ine ,”
hat air pollutants are reported by EnviroFlash? nd fine particulate matter.
elect, as
t as
EnviroFlash is a service that automatically delivers air quality forecasts dpublic. It provides information so people can adjust their daily activities when poor air conditions are expected. People enrolled in EnviroFlash get the information theychoose to receive via computer, e-mail, or a cell phone with text messaging capability. Using the same scale found in the AQI, DEQ meteorologists determwhether the air quality level for the next few days is likely to be “good,” “moderate“unhealthy for sensitive groups,” “unhealthy,” “very unhealthy,” or “hazardous”. WForecast pollutants include ground-level ozone aEnviroFlash automatically sends the forecast message at the air quality you swell as notice when an “Action!” day (air quality advisory) is announced. Those with small children and people with cardio-pulmonary health problems (such as asthma) may choose to be notified when the air is predicted to be unhealthy for sensitive groups. People who work or exercise strenuously are also in this category due to increased deep respiration. People who do not have health risks and who are noconcerned about outdoor air quality may choose to be notified only when the forecast is “unhealthy” or worse.
ow do I sign up for EnviroFlash? lready available at DEQ’s website
HCurrent air quality information is ahttp://www.deqmiair.org and AIRNow’s website http://www.airnow.gov. EnviroFlash is an additional service that sends air information directly to your computer or cell phone. To sign up, go to www.michigan.gov/deqair and click on the EnviroFlash icon. Then, click on “Enroll in EnviroFlash” and follow the steps as instructed.
3

What steps can I take to protect my child’s health from air pollution?
1. Get to know how sensitive your child is to air pollution. • Notice their asthma symptoms when they are physically active. Do they
happen more often when the air is more polluted? If so, they may be sensitive to air pollution.
• Also, notice any asthma symptoms that begin after they have been outdoors in polluted air. Air pollution can make them more sensitive to indoor asthma triggers like mold and dust mites. If they are more sensitive than usual to indoor asthma triggers, it could be due to the air pollution outdoors.
2. Know when and where air pollution may be bad. • Ozone is often worst on hot summer days, especially in the afternoons
and early evenings. • Particle pollution can be bad any time of year, even in winter. It can be
especially bad when the weather is calm, allowing air pollution to build up. Particle levels can also be high:
-Near busy roads, during rush hour, and around factories. -When there is smoke in the air from wood stoves, fireplaces, or burning leaves or other vegetation.
3. Get up-to-date information from the Air Quality Index (http://www.deqmiair.org) and sign up for air quality forecasts from EnviroFlash (http://www.michigan.gov/deqair).
4. Plan activities when and where pollution levels are lower. 5. Control your child’s activity level when the air is polluted. Try to have them
slow down if they are active outdoors. This will reduce how much pollution they breathe.
6. If they get asthma symptoms when the air is polluted, stop their activity. Find another, less intense activity.
7. Keep their quick-relief medicine on hand when they are active outdoors. 8. Consult their health provider if they have symptoms when the air is polluted.
1 Source: “Air Pollution Effects” web site, US Environmental Protection Agency: http://www.epa.gov/ebtpages/airairpollutioneffects.html 2 Source: “Air Quality Index” fact sheet, Michigan Department of Environmental Quality. 3 Source: Michigan DEQ EnviroFlash website found at http://www.michigan.gov/deq/0,1607,7-135-3310_4195-101321--,oo.html

TTHHEE AAIIRR QQUUAALLIITTYY IINNDDEEXX What is the Air Quality Index?
The Air Quality Index, or AQI, is an easy way to understand how clean the outside air is. It is a simple tool that provides a color coded “picture” of current air pollution levels and health effects. A daily AQI allows people to take action to protect their health when we have more air pollution than we should.
What air pollution is reported by the AQI?
AQI pollutants include fine particles, ground-level ozone, carbon monoxide, sulfur dioxide and nitrogen dioxide. Air monitor data is collected every hour. A computer analyzes the information and automatically determines how clean the air is. The AQI tells people whether the air they breathe is currently “good”, “mmooddeerraattee”, “unhealthy for sensitive groups”, “unhealthy”, “very unhealthy” or “hazardous”. Fine particles or ground-level ozone are the pollutants most likely to control the AQI. How bad is our air? Has the AQI ever reached “hazardous” levels in Michigan?
Michigan’s air quality usually falls in the “good” or “mmooddeerraattee” air quality range. Sometimes, the AQI will reach the orange “unhealthy for sensitive groups” level. Michigan hardly ever experiences air quality concentrations in the “unhealthy” range. The AQI here has never reached hazardous levels. How does the AQI work?
Air monitors analyze air samples. Each sample is given a numerical value. If a location monitors more than one kind of air pollutant, the one with the highest value (worst air measured) becomes the AQI. An AQI number above 100 means a pollutant has reached unhealthy levels.
Why report the AQI?
Back in 1976, the federal Clean Air Act required state and local communities to communicate air quality information in a consistent manner. The index was updated in 1999 to provide better information about health risks linked with air pollution. Today’s air quality is reported the same way across the country.
How is the updated index different?
The AQI added a category called “unhealthy for sensitive groups” to better protect children, people with lung disease or asthma, and others who are more sensitive to air pollution than the general public. An AQI forecast has also been added. It allows air agencies to notify the public ahead of time when poor air quality is predicted. These improvements help people to better protect their health – they can avoid prolonged, strenuous activity or reduce physical exertion when there is too much pollution in the air. People can also reduce air pollution levels by driving less and using products that conserve energy.
How can I find out what today’s AQI is?
The current AQI is available on the DEQ “Air” webpage. Go to www.michigan.gov/deqair. Mouse click on the AQI icon. The color-coded map shows monitor locations across the state. Index values are updated every hour during the day. You can also choose to view a detailed summary of AQI numerical values and the controlling pollutant for each monitor location. If you don’t have access to the Internet, you can call the DEQ Environmental Assistance Center during office hours at 1-800-662-9278. Another choice is the AIRNow webpage at www.airnow.gov for national and regional AQI information.
What is EnviroFlash?
EnviroFlash is a new service that automatically sends out e-mail or text messages of AQI forecasts. Participants receive air quality messages at the health level they select. (Most people choose the “orange” level.) It also includes information when air quality “Action! Day” advisories are issued. For more information and to enroll, go to the DEQ “Air “ webpage and click on the EnviroFlash icon.

TTHHEE AAIIRR QQUUAALLIITTYY IINNDDEEXX CCOOLLOORRSS AANNDD HHEEAALLTTHH SSTTAATTEEMMEENNTTSS
AQI Color, Category
& Value
PARTICULATE MATTER
OZONE CARBON MONOXIDE
SULFUR DIOXIDE NITROGEN DIOXIDE
(µg/m3) 24-hour (ppm) 8-hour / 1-hr (ppm) 8-hour (ppm) 24-hour (ppm) 1-hour
GREEN: Good 1- 50
None
None
None
None
None
YELLOW: Moderate 51- 100
People who are unusually sensitive to air pollution should consider reducing prolonged or heavy exertion.
People who are unusually sensitive to air pollution should consider limiting prolonged outdoor exertion.
None
None
None
ORANGE: Unhealthy For Sensitive Groups 101- 150
People with heart or lung disease, older adults, and children should reduce prolonged or heavy exertion.
Active children and adults, and people with lung disease, such as asthma, should reduce prolonged or heavy outdoor exertion.
People with cardiovascular disease, such as angina, should limit heavy exertion and avoid sources of CO, such as heavy traffic.
People with asthma should consider limiting outdoor exertion.
None
RED: Unhealthy 151- 200
People with heart or lung disease, older adults, and children should avoid prolonged or heavy exertion. Everyone else should reduce prolonged or heavy exertion.
Active children and adults, and people with respiratory disease, such as asthma, should avoid prolonged or heavy outdoor exertion; everyone else, especially children, should reduce prolonged outdoor exertion.
People with cardiovascular disease, such as angina, should limit moderate exertion and avoid sources of CO, such as heavy traffic.
Children, asthmatics, and people with heart or lung disease should limit outdoor exertion.
None
PURPLE: Very Unhealthy 201- 300
People with heart or lung disease, older adults, and children should avoid all physical activity outdoors. Everyone else should avoid prolonged or heavy exertion.
Active children and adults, and people with respiratory disease, such as asthma, should avoid all outdoor exertion; everyone else, especially children should limit outdoor exertion.
People with cardiovascular disease, such as angina, should avoid exertion and sources of CO, such as heavy traffic.
Children, asthmatics, and people with heart or lung disease should avoid outdoor exertion; everyone else should limit outdoor exertion.
Children and people with respiratory disease, such as asthma, should limit heavy outdoor exertion.
MAROON: Hazardous 301- 500
Everyone should avoid all outdoor exertion; people with heart or lung disease, older adults, and children should remain indoors.
Everyone should avoid all outdoor exertion.
People with cardiovascular disease, such as angina, should avoid exertion and sources of CO, such as heavy traffic; everyone else should limit heavy exertion.
Children, asthmatics, and people with heart or lung disease should remain indoors; everyone else should avoid outdoor exertion.
Children and people with respiratory disease, such as asthma, should limit moderate or heavy outdoor exertion.
FOR MORE INFORMATION ON THE AQI, CONTACT THE AIR QUALITY DIVISION INTERNET WEBSITE: www.michigan.gov/deqair Telephone: 517-373-7023 Air Quality Division Jennifer M. Granholm, Governor
Michigan Department of Environmental Quality Steven E. Chester, Director
MDEQ TOLL FREE NUMBER: 1-800-662-9278 MAY 2005


Should People With Asthma Exercise? YES. People with asthma should definitely exercise, just like people without asthma. Experts think it is important for people with asthma to get regular exercise to make their lungs stronger. Basically, the fitter you are, the better your lungs work. The better your lungs work, the fewer problems you will have with your asthma. The fewer problems you have with your asthma, the better you’ll feel and the more you’ll be able to do. There are many ways to get exercise. Find an activity that you like, and work with your doctor to keep your asthma under control. What Is Exercise-Induced Asthma (EIA)? When asthma is triggered only by physical activity, it is called exercise-induced asthma (EIA). Just as with other asthma triggers, a person who is triggered into an asthma attack by exercise has airways that narrow and tighten after they begin to exercise. The main cause of EIA is the cold, dry air that is breathed into the lungs during exercise. When people are very active or exercising, they breathe quickly, shallowly, and through the mouth. This means that the air reaching the lungs has missed the warming and humidifying effects that happen when you breathe more slowly through your nose, like when you are at rest. If a person has EIA, their lungs are very sensitive to this sudden change in temperature and humidity of air. Their lungs become irritated, and this triggers asthma symptoms. What are the Symptoms of Exercise-Induced Asthma? Symptoms of EIA include wheezing, tightness or pain in the chest, coughing, and in some cases, prolonged shortness of breath after exercising. A child may have exercise-induced asthma if he or she:
• Feels out of breath or tired easily during or after play/exercise • Coughs when he or she comes inside from playing outdoors • Takes a long time to catch their breath after running for more than a few
minutes without stopping
Having asthma does not mean you or your child cannot be active. Many people who have asthma will have symptoms, like coughing and wheezing, when they are active. Other people have asthma that is triggered by exercise (Exercise-Induced Asthma, or EIA). In both cases, symptoms of asthma can almost always be prevented. People can often avoid these symptoms by keeping their asthma under control with long-term control asthma medications, or by taking their quick-relief (rescue) inhaler before they exercise. Your child’s doctor can help create a written Asthma Action Plan that includes ways to control their asthma triggered by exercise so they can stay active.

Children with exercise-induced asthma often begin experiencing symptoms 5 to 10 minutes after they start exercising. Symptoms usually are the worst 5 to 10 minutes after stopping the activity and may take up to an hour or longer to subside. Some people with EIA even have symptoms for hours after they exercise. Also, even though symptoms often appear while the child is active, sometimes they appear only after the activity has stopped. Remember: There is a difference between someone with EIA and someone who is not physically fit and is simply out of breath after exercising. A person who is not physically fit can catch his or her breath within minutes, while it takes much longer for a person with EIA to recover from physical activity. How is EIA Diagnosed by a Doctor? If your child’s doctor suspects EIA, he or she may ask a lot of questions about the family’s asthma and allergy history and about your child’s symptoms and what has triggered them in the past. They may ask your child to do a breathing test after exercising. The exercising can be done in the office on a treadmill or exercise bike, after your child has run outside for 6 to 8 minutes, or after participating in whichever activity has triggered the EIA in the past. How is EIA Treated?
If your child has EIA, their doctor may recommend that they take medication before exercise or activities. Talk to your doctor about what (if any) medication your child should take before exercising. If your child still has breathing trouble during exercise, their medication dosages may need to be changed for better control. Also, let your child’s doctor know of any changes in your child’s breathing trouble.

It is very important for you and your family to eat healthy. Good nutrition not only helps make your child’s asthma better—it helps your family stay free from many other health problems like colds and flus, heart disease, and cancer.
Eating healthy is easier than you might think! The U.S. Department of Agriculture’s My Pyramid plan is a helpful tool to see if your family is eating right. It also can give you ideas on how to add more healthy foods into your family’s diet. Here is some helpful information from MyPyramid.gov:
What foods are in the Grain group?
Any food made from wheat, rice, oats, cornmeal, barley or another cereal grain is a grain product. Bread, pasta, oatmeal, breakfast cereals, tortillas, and grits are examples of grain products.
Grains are divided into 2 groups: Whole Grains and Refined Grains.
• Whole Grains contain the entire grain kernel, and are very healthy for you. Examples include:
o Whole wheat flour o Cracked wheat o Oatmeal o Whole cornmeal o Brown rice o Popcorn
• Refined Grains have been processed to give them a finer texture and longer
shelf-life, but this removes fiber, iron, and many B vitamins, so unless they are “enriched”, they are not as healthy as whole grains. Examples include:
o White flour o White bread o White rice o Tortillas o Pasta o Crackers

How many servings of Grains should my family eat?
The amount of grains you need to eat depends on your age, gender, and level of physical activity. Recommended daily amounts are listed in the chart. Most Americans eat enough grains, but few are whole grains. At least ½ of all the grains eaten should be whole grains.
Daily recommendation*
Daily minimum amount of whole grains
Children 2-3 years old 3 ounce equivalents* 1 ½ ounce equivalents* 4-8 years old 4 – 5 ounce equivalents* 2 – 2 ½ ounce equivalents* Girls 9-13 years old 5 ounce equivalents* 3 ounce equivalents* 14-18 years old 6 ounce equivalents* 3 ounce equivalents* Boys 9-13 years old 6 ounce equivalents* 3 ounce equivalents* 14-18 years old 7 ounce equivalents* 3 ½ ounce equivalents* Women 19-30 years old 6 ounce equivalents* 3 ounce equivalents* 31-50 years old 6 ounce equivalents* 3 ounce equivalents* 51+ years old 5 ounce equivalents* 3 ounce equivalents* Men 19-30 years old 8 ounce equivalents* 4 ounce equivalents* 31-50 years old 7 ounce equivalents* 3 ½ ounce equivalents* 51+ years old 6 ounce equivalents* 3 ounce equivalents*
*What counts as an ounce equivalent in the chart? In general, 1 slice of bread, 1 cup of ready-to-eat cereal, or ½ cup of cooked rice, cooked pasta, or cooked cereal can be considered as 1 ounce equivalent from the grains group. So for example, a woman should have 3 servings of grains every day. Tips to include more Grains in your family’s diet: • Eat wheat bread instead of white bread. • Try brown rice or whole-wheat pasta instead of white rice and pasta. Try brown rice
stuffing in baked green peppers and whole-wheat macaroni and cheese. • Use whole wheat or oat flour for up to half the flour in pancakes, waffles, muffins, or
other flour-based recipes. • Use whole-grain bread or cracker crumbs in meatloaf. • Try rolled oats or crushed, unsweetened whole grain cereal as breading for baked
chicken, fish, or pork. • Freeze leftover cooked brown rice or barley. Heat and serve it later as a quick side
dish. • Snack on ready-to-eat whole grain cereals like Cheerios. • Try a whole-grain snack chip, like baked tortilla chips. • Popcorn, a whole grain, can be a healthy snack with little or no added salt and
butter. • Add whole-grain flour or oatmeal when making cookies or other baked goods. • Teach older children to read the ingredient list on food labels and choose foods
with whole grains at the top of the list.

What foods are in the Vegetable group?
Any vegetable or 100% vegetable juice is a member of the vegetable group. Vegetables may be raw or cooked; fresh, frozen, canned, or dried; and may be whole, cut-up, or mashed.
There are 5 groups of vegetables: o Dark green vegetables like broccoli, collard greens, green leafy lettuce, spinach,
and kale o Orange vegetables like acorn and butternut squash, carrots, sweet potatoes, and
pumpkin o Dry beans and peas like black beans, kidney beans, pinto beans, split peas and
chickpeas o Starchy vegetables like corn, potatoes, and green peas o Other vegetables include artichokes, asparagus, beets, cabbage, cauliflower,
celery, cucumbers, eggplant, green beans, peppers, iceberg lettuce, onions, tomatoes, turnips, wax beans, and zucchini
How many vegetables should my family eat every day? You should eat vegetables from all of the groups, but you do not need to eat vegetables from each group every day. However, over one week, try to eat the amounts listed in each group. Here are the amounts you should eat every week:
Dark green vegetables
Orange Vegetables
Dry beans
and peas
Starchy vegetables
Other vegetables
AMOUNT PER WEEK**
Children 2–3 years old 1 cup ½ cup ½ cup 1 ½ cups 4 cups 4–8 years old 1 ½ cups 1 cup 1 cup 2 ½ cups 4 ½ cups Girls 9–13 years
old 2 cups 1 ½ cups 2 ½ cups 2 ½ cups 5 ½ cups
14–18 years old
3 cups 2 cups 3 cups 3 cups 6 ½ cups
Boys 9–13 years
old 3 cups 2 cups 3 cups 3 cups 6 ½ cups
14–18 years old
3 cups 2 cups 3 cups 6 cups 7 cups
Women 19–30 years
old 3 cups 2 cups 3 cups 3 cups 6 ½ cups
31–50 years old
3 cups 2 cups 3 cups 3 cups 6 ½ cups
51+ years old 2 cups 1 ½ cups 2 ½ cups 2 ½ cups 5 ½ cups Men 19–30 years
old 3 cups 2 cups 3 cups 6 cups 7 cups
31–50 years old
3 cups 2 cups 3 cups 6 cups 7 cups
51+ years old 3 cups 2 cups 3 cups 3 cups 6 ½ cups
* In general, 1 cup of raw or cooked vegetables or vegetable juice, or 2 cups of raw leafy greens can be considered as 1 cup from the vegetable group.

Tips to include more Vegetables in your family’s diet: • Buy fresh vegetables when they are in season. They cost less and will have the best
flavor. • Stock up on frozen vegetables for quick and easy cooking in the microwave. • Buy vegetables that are easy to prepare. Pick up pre-washed bags of salad greens
and add baby carrots or grape tomatoes for a salad in minutes. Buy packages of veggies such as baby carrots or celery sticks for quick snacks.
• Use a microwave to quickly “zap” vegetables. White or sweet potatoes can be baked quickly this way.
• Vary your veggie choices to keep meals interesting for your family. • Try crunchy vegetables: either raw or lightly steamed. • Prepare more foods from fresh ingredients to lower the amount of salt you take in.
Most salt in a person’s diet comes from packaged or processed foods. • Plan some meals around a vegetable main dish, such as a vegetable stir-fry or
vegetable soup. • Include a green salad with your dinner every night. • Shred carrots or zucchini into meatloaf, casseroles, quick breads, and muffins. • Order a veggie pizza with toppings like mushrooms, green peppers, and onions,
and ask for extra veggies. • Use pureed, cooked vegetables like potatoes to thicken stews, soups and gravies.
These add flavor, nutrients, and texture. • Many vegetables taste great with a dip or dressing. Try a low-fat salad dressing with
raw broccoli, red and green peppers, celery sticks or cauliflower. • Keep a bowl of cut-up vegetables in a see-through food container in the
refrigerator. Try carrot and celery sticks, broccoli, cucumber slices, or red or green pepper strips.
• Wash vegetables before preparing or eating them. Under clean, running water, rub vegetables with your hands to remove dirt and bacteria on the surface.
Vegetable tips for children: • Set a good example for children by eating vegetables with meals and as snacks. • Let children decide on the dinner vegetables or what goes into salads. • Depending on their age, children can help shop for, clean, peel, or cut up
vegetables. • While shopping, allow children to pick a new vegetable for the family to try. • Use cut-up vegetables as part of afternoon snacks. • Children often prefer foods served separately. So, rather than mixed vegetables try
serving two vegetables separately.

What foods are in the Fruit group?
Any fruit or 100% fruit juice counts as part of the fruit group. Fruits may be fresh, canned, frozen, or dried, and may be whole, cut-up, or pureed.
Some common Fruits include:
o Apples o Oranges o Bananas o Pears o Strawberries o Raisins o Cherries o Pineapple o Grapes o Fruit Cocktail o Watermelon o 100% Fruit Juice
How many Fruits should my family eat every day? The amount of fruit you need to eat depends on age, gender, and amount of physical activity. Recommended daily amounts are shown in the chart.
Daily recommendation* Children 2-3 years old 1 cup* 4-8 years old 1 to 1 ½ cups* Girls 9-13 years old 1 ½ cups* 14-18 years old 1 ½ cups* Boys 9-13 years old 1 ½ cups* 14-18 years old 2 cups* Women 19-30 years old 2 cups* 31-50 years old 1 ½ cups* 51+ years old 1 ½ cups* Men 19-30 years old 2 cups* 31-50 years old 2 cups* 51+ years old 2 cups*
* In general, 1 cup of fruit or 100% fruit juice, or ½ cup of dried fruit can be considered as 1 cup from the fruit group. Tips to include more Fruits in your family’s diet:
• Keep a bowl of whole fruit on the table, counter, or in the refrigerator. • Buy fresh fruits when they are in season. They cost less and will have the best
flavor. • Buy fruits that are dried, frozen, and canned (in water or juice) as well as fresh,
so that you always have a supply at home. • Try to eat whole or cut-up fruit rather than juice, so you get more dietary fiber. • When buying canned fruits, get fruit canned in 100% fruit juice or water rather
than syrup.

• At breakfast, put bananas or strawberries on your cereal; add blueberries to pancakes; drink 100% orange or grapefruit juice. Or, try a fruit mixed with low-fat or fat-free yogurt.
• For dessert, have baked apples, pears, or a fruit salad. • As a snack, spread peanut butter on apple slices or top frozen yogurt with
berries or slices of kiwi fruit. • Many fruits taste great with a dip or dressing. Try low-fat yogurt or pudding as a
dip for fruits like strawberries or melons. • Make a fruit smoothie by blending fat-free or low-fat milk or yogurt with fresh or
frozen fruit. Try bananas, peaches, strawberries, or other berries. Fruit tips for children:
• Set a good example for children by eating fruit everyday with meals or as snacks.
• Depending on their age, children can help shop for, clean, peel, or cut up fruits. • While shopping, allow children to pick out a new fruit to try later at home. • Offer raisins or other dried fruits instead of candy. • Pack a juice box (100% juice) in children’s lunches instead of soda or other
sugar-sweetened beverages. • At fast food restaurants, choose fruit options if possible, such as sliced apples,
mixed fruit cup, or 100% fruit juice.
What foods are included in the milk, yogurt, and cheese (Milk) group?
All fluid milk products and many foods made from milk are part of this food group. Foods made from milk that retain their calcium content are part of the group, while foods made from milk that have little to no
calcium, such as cream cheese, cream, and butter, are not. Some common foods in the Milk group are:
• All types of milk (skim, 1%, 2%, Whole) • Flavored milks (chocolate, strawberry) • Lactose-free milk • Puddings made with milk • Yogurt • Frozen yogurt • Ice cream • Cheese

How much food from the Milk group should my family eat every day? The amount of food from the Milk Group you need to eat depends on age. Recommended daily amounts are shown in the chart.
Daily recommendation Children 2-3 years old 2 cups* 4-8 years old 2 cups* Girls 9-13 years old 3 cups* 14-18 years old 3 cups* Boys 9-13 years old 3 cups* 14-18 years old 3 cups* Women 19-30 years old 3 cups* 31-50 years old 3 cups* 51+ years old 3 cups* Men 19-30 years old 3 cups* 31-50 years old 3 cups* 51+ years old 3 cups*
*In general, 1 cup of milk or yogurt, 1 ½ ounces of natural cheese, or 2 ounces of processed cheese can be considered as 1 cup from the milk group.
Tips to include more Milk products in your family’s diet:
• Serve milk as a drink at meals. • Add fat-free or low-fat milk instead of water to oatmeal and hot cereals. • Use fat-free or low-fat milk when making condensed cream soups (such as
cream of tomato). • Have fat-free or low-fat yogurt as a snack. • Make a dip for fruits out of yogurt. • Make fruit-yogurt smoothies in the blender. • For dessert, make chocolate or butterscotch pudding with fat-free or low-fat
milk. • Top casseroles, soups, stews, or vegetables with shredded low-fat cheese.
Tips for people who choose not to have milk products:
• If you or someone in your family cannot have milk because of lactose intolerance, the best way to get the health benefits of milk is to choose lactose-free products within the milk group, such as cheese, yogurt, or lactose-free milk. Or, take the enzyme lactase before having milk products.
• If you or someone in your family chooses not to have milk products, they can get calcium other ways:
o Buy calcium-fortified juices, cereals, breads, soy beverages, or rice beverages
o Try canned fish (sardines, salmon with bones), soybeans and other soy products (soy-based beverages, soy yogurt, tempeh), some other dried beans, and some leafy greens (collard and turnip greens, kale, bok choy). The amount of calcium that can be absorbed from these foods varies.

What foods are included in the meat, poultry, fish, dry beans, eggs, and nuts (Meat & Beans) group?
All foods made from meat, poultry, fish, dry beans or peas, eggs, nuts, and seeds are considered part of this group.
Most meat and poultry choices should be lean or low-fat. Fish, nuts, and seeds contain healthy oils, so choose these foods often. Some common choices in the Meat and Beans group are:
• Meats: lean cuts of beef, ham, lamb, pork, veal Lean ground meats: beef, pork, lamb Game meats: venison (deer), bison (buffalo), rabbit
• Poultry: chicken, duck, goose, turkey, ground chicken and turkey • Eggs • Dry Beans and Peas: black beans, black-eyed peas, chickpeas, kidney beans,
lentils, lima beans, pinto beans, split peas, tofu, white beans • Nuts and Seeds: almonds, cashews, hazelnuts, mixed nuts, peanuts, peanut
butter, pecans, pistachios, pumpkin seeds, sesame seeds, sunflower seeds, walnuts
• Fish: catfish, cod, flounder, halibut, herring, mackerel, pollock, salmon, snapper, trout, tuna, walleye
Shellfish: clams, crab, crayfish, lobster, mussels, oysters, scallops, shrimp
Canned fish: anchovies, clams, tuna, sardines How much food from the Meat & Beans group should my family eat every day? The amount of food from the Meat and Beans Group you need to eat depends on age, gender, and level of physical activity. Most Americans eat enough food from this group, but need to choose leaner meats and eat a variety of foods in this group. Recommended daily amounts are shown in the following chart.

Daily recommendation* Children 2-3 years old 2 ounce equivalents* 4-8 years old 3 – 4 ounce equivalents* Girls 9-13 years old 5 ounce equivalents* 14-18 years old 5 ounce equivalents* Boys 9-13 years old 5 ounce equivalents* 14-18 years old 6 ounce equivalents* Women 19-30 years old 5 ½ ounce equivalents* 31-50 years old 5 ounce equivalents* 51+ years old 5 ounce equivalents* Men 19-30 years old 6 ½ ounce equivalents* 31-50 years old 6 ounce equivalents* 51+ years old 5 ½ ounce equivalents*
*In general, 1 ounce of meat, poultry or fish, ¼ cup cooked dry beans, 1 egg, 1 tablespoon of peanut butter, or ½ ounce of nuts or seeds can be considered as 1 ounce equivalent from the meat and beans group. Tips to include more foods from the Meat & Beans group in your family’s diet:
• Start with a lean choice: o The leanest beef cuts include round steaks and roasts (round eye, top
round, bottom round, round tip), top loin, top sirloin, and chuck shoulder and arm roasts.
o The leanest pork choices include pork loin, tenderloin, center loin, and ham.
o Choose extra lean ground beef. The label should say “90% lean” or higher. You may be able to find ground beef that is 93% or 95% lean.
o Buy skinless chicken parts, or take off the skin before cooking. o Boneless skinless chicken breasts and turkey cutlets are the leanest poultry
choices. o Choose lean turkey, roast beef, ham, or low-fat luncheon meats for
sandwiches instead of luncheon meats with more fat, such as regular bologna or salami.
o Trim away all of the visible fat from meats and poultry before cooking. o Broil, grill, roast, poach, or boil meat, poultry, or fish instead of frying. o Drain off any fat that appears during cooking. o Prepare foods without high fat sauces or gravies.
• Choose fish more often for lunch or dinner. Look for fish that have a lot of omega-3 fatty acids, such as salmon, trout, and herring. Some ideas are:
Salmon steak or filet Salmon loaf Grilled or baked trout
• Choose dry beans or peas as a main dish or part of a meal more often. Some choices are:
Chili with kidney or pinto beans Split pea, lentil, minestrone, or white bean soups Baked beans Rice & Beans
• Try nuts as a snack, on salads, or in main dishes. Some ideas are: Add slivered almonds to steamed vegetables. Sprinkle a few nuts on top of low-fat ice cream or frozen yogurt. Add walnuts or pecans to a green salad instead of cheese or meat.

Food safety tips for working with raw meat: • Always keep raw meat separate from cooked food and ready-to-eat food like
fruits and vegetables. • Do not wash or rinse meat or poultry. • Wash cutting boards, knives, utensils and counter tops with hot soapy water
after preparing each food item and before going on to the next one. • Store raw meat, poultry and seafood on the bottom shelf of the refrigerator so
juices don’t drip onto other foods. • Cook foods to a safe temperature to make sure bacteria are killed. Use a meat
thermometer, which measures the temperature of cooked meat and poultry, to make sure that the meat is cooked all the way through.
USDA Safe Internal Temperatures:
• Steaks & Roasts: 145 °F • Fish: 145 °F • Pork: 160 °F • Ground Beef: 160 °F • Egg Dishes: 160 °F • Chicken Breasts: 165 °F • Whole Poultry: 165 °F
• Refrigerate or freeze perishable food, prepared food, and leftovers within 2
hours. • Plan ahead to defrost foods. Never defrost food on the kitchen counter at room
temperature. Defrost food by putting it in the refrigerator, putting air-tight packaged food in cold tap water, or defrosting on a plate in the microwave.
• Do not eat raw or partially cooked eggs or foods containing raw eggs and raw or undercooked meat and poultry. These may make you very sick.
Sources: US Department of Agriculture – www.mypyramid.gov
US Department of Agriculture – “Is It Done Yet?” brochure located at: http://www.fsis.usda.gov/Is_It_Done_Yet/Brochure_Text/index.asp

BEDROOM
Install smoke alarms outside bedrooms and on every level of the home. For added protection, consider installing smoke alarms in each bedroom. Test them at least once a month and change batteries at least once a year.
Practice fire escape routes and identify an outside meeting
place.
Place a baby to sleep on his or her back in a crib with no pillows or soft bedding underneath.
Use a crib that meets national safety standards and has a snug-
fitting mattress.
Never use an electric blanket in the bed or crib of a small child or infant.
Keep small toys, balloons, and small balls away from young
children.
Check age labels for appropriate toys. Make sure toy storage chests have safety lid supports.
To prevent small children from accidentally being strangled, use
pull-cord wind-ups for miniblinds and avoid strings on children’s toys and pacifiers.
Install carbon monoxide (CO) alarms outside bedrooms to
prevent CO poisoning.

BATHROOM
To prevent poisonings, lock away all medicines and vitamins, even those with child-resistant packaging.
Have syrup of ipecac on hand (it causes vomiting in the event that
someone accidentally ingests poison), but use only at the recommendation of a poison control center or physician.
Never leave a young child alone in the bathroom, especially in a
bath.
Before bathing a child, always test bath water with your wrist or elbow to make sure it's not too hot.
To prevent scalds, set the water heater thermostat to 120º F and
install anti-scald devices.
Make sure bathtubs and showers have non-slip surfaces (bath mat) and grab bars.
Keep electrical appliances, like hair dryers and curling irons, out of
the reach of children and away from water.

KITCHEN
Keep knives, plastic bags, lighters, and matches locked away from children.
Avoid fires and burns by never leaving cooking food unattended,
turning pot handles to the back of the stove, and keeping hot liquids and foods away from the edges of tables and counters.
Make sure you and your children know the STOP, DROP, and ROLL
procedure in case their clothes catch on fire (lie on the ground, cover face with hands, and roll until the flames are out).
Keep appliance cords unplugged and tied up. Replace any frayed
cords and wires.
Securely strap young children in high chairs, swings, and other juvenile products.
Do not give young children hard, round foods that can get stuck in
their throats — like hard candies, nuts, grapes, popcorn, carrots, and raisins.
Avoid scald burns by keeping children away from the hot water taps
on drinking water coolers.

LIVING AREAS
To prevent asthma attacks, eliminate sources of mold, dust, and insects, such as cockroaches. If you have a pet, keep it and its bedding clean, and keep the pet off the furniture.
If you must smoke, avoid smoking in the house, and especially around
children.
Make sure furnaces, fireplaces, wood-burning stoves, space heaters, and gas appliances are vented properly and inspected annually.
Use safety gates to block stairways (and other danger areas), safety plugs to
cover electrical outlets, and safety latches for drawers and cabinets.
Install window guards (on windows that are not fire emergency exits).
To prevent falls, keep hallways and stairways well-lit and use non-slip backing for area rugs.
Keep cleaning solutions, pesticides, and other potentially dangerous
substances in their original, labeled containers, and out of the reach of children.
Test homes built before 1978 for lead paint. Call 1-888-LEADLIST for certified
inspectors. Ask your doctor or health department if your child should be tested for lead.
If you have guns or rifles in your home, store the firearms and ammunition in
separate containers and lock them out of the reach of children.
Learn First Aid and Cardiopulmonary Resuscitation(CPR). You can do this at your local Red Cross.
Keep an updated list of emergency telephone numbers, including your local
poison control center, physician and hospital emergency room, next to every phone in your home.
Have your home tested for radon. If levels are above EPA’s recommended
level, call the National Radon Helpline at 1-800-557-2366 to find out about ways to reduce the levels.
Make sure your family knows what to do during a natural disaster. In an
earthquake, drop to the floor and get under something sturdy for cover. During a tornado, take shelter in a basement or an interior room without windows. During a hurricane, stay away from windows. Have handy supplies such as canned food, flashlights, and bottled water.

Did you know that your chances of getting
hurt at home are much higher than they are
at work or school? The leading causes of
death in the home are falls, drowning, fires, poisoning,
suffocation, choking, and guns. The good news is that
there are simple steps you can take to protect yourself
and your family. This section will help you ask
questions to find out if your home is a safe place to
live and how to make it even safer.
Very young children and older adults
are the most likely to get hurt at
home. Keep people’s age in
mind when thinking about how
to keep your home safe.
Falls kill more people than any
other type of accident beside
car crashes. Most falls happen
at home. Most people trip
and fall at floor level, not
going up or down stairs.
Falls can be worse for
adults than for chil-
dren. They fall
faster and harder
than children.
Their bones are
weaker, so they
break more
easily too.
Young children are curious and get into everyday
things that can hurt or even kill them. Over half of
them become sick or die from eating or drinking
common items like medicine, makeup, and plants.
Children like to play with these things because
they can look or smell good.
For over a decade, the number of
people who die in fires has gone
down. Yet fires are still one of the
main causes of death in the home.
Older adults are most at risk because
they may not be able to respond to an
alarm or get out of a building quickly.
Choking and suffocation also cause many
deaths in the home. When a person
chokes, something like a piece of food has
gotten stuck in their throat and stopped their
breathing. Suffocation happens when a person’s
nose, mouth, or throat is blocked and they can’t
breathe. If someone stops breathing long enough
they can suffer brain damage or die. Children under
age four and older adults are the most likely to die
from choking. People can choke on food, or
something not meant to be eaten at all, like a
button or a coin. Sheets, blankets, and plastic
bags can suffocate people who get caught in them.
Home SafetyShould You Be Concerned?
Home Safety
FACTIn the U.S., more than one million children age five and under
are poisoned each year.
-48-

-49-
Drowning kills more than 1,000 children ages 14 and
under each year. For every child who drowns, another
20 children go to the hospital or emergency room
because they almost drowned.
It takes just a few easy, fairly low-cost steps to keep
your children safe from many everyday dangers. The
questions below and on the next page will help you
find safety problems at home. Page 51 will give you
ideas about what to do. Remember, making your
home safer for everybody may mean taking more
than one step.
Home Safety
Slips, Trips, and Falls• Do you keep your floors—especially hallways and
stairs—free of things that might make people slip
or trip?
• Are your stairs in good shape?
• Are there throw rugs in your home?
• Do you know the safe way to carry big loads?
• Is your home well lighted?
Is Your Home Poison-Proof?To poison-proof your home, look through each room
through the eyes of a child. Is anything that can hurt
your child within her or his reach?
Any room can have something in it that can hurt a
child: the kitchen, bathroom, bedrooms, living room,
basement, garage, or laundry room. Most poisonous
products are where people keep cleaning supplies.
(See the chapters on Hazardous Household Products
page 38 and Pesticides page 42 for more information.)
?Questions to Ask

Fires and Burns• Does your house or apartment have at least one
smoke alarm?
• Where do you store matches and lighters?
• Have you talked about fire safety with your children?
• Do you have a fire exit plan in case your home
catches fire?
• Do you use space heaters safely?
Choking • Do you keep a close eye on young children at
meals and at playtime?
• Do you pick out toys that are right for your child’s age?
Young children like to put things in their mouths.
Balloons, toys, and toy parts that are small enough to
fit into a child’s mouth may cause choking. You also
may not be able to get them out if they get stuck.
Watch Out Around Water• Do you have a pool or does your child go swimming
a lot?
• Does the pool you use have a fence around it?
• Do you ever leave toys in the pool?
• Does your child run around the pool?
• Do you ever visit lakes, beaches, or rivers?
• Do you watch your young children in the bathtub?
Pools are very dangerous for infants and toddlers. A
toddler who falls in may die or get brain damage.
Toddlers love to play in the water. But they don’t know
that even shallow water can hurt or kill them. Running
children can fall down and hurt themselves badly.
Children need to be watched around water at all times.
Home Safety
-50-
FACTCarbon monoxide is deadly gas you can’t see or smell. It comes fromcombustion appliances like gas heaters,furnaces, stoves or dryers. Car exhaustalso has carbon monoxide. See the chapter on carbon monoxide on page 23 tolearn how to protectyour family fromthis hiddendanger.
To protectyour family, putin a carbonmonoxide alarm!
?Questions to Ask

-51-
Home Safety
ACTION STEPSPrevent Slips, Trips, & Falls• Keep your floors clear of anything that may
cause tripping. Pick up hazards such as
toys, shoes and magazines.
• Clean up spills right away so people
won’t slip.
• Repair any stairs that are cracked or worn.
• If there are rugs in your home, use non-skid
mats and throw rugs.
• When carrying large or heavy loads, make
sure you can see where you’re going. Ask
for help if you need it.
• Keep your home well lit so you can see
where you’re walking at night.
Other tips
• Don’t use chairs or tables as makeshift ladders.
• Wear shoes with non-skid soles and put
young children in non-skid socks.
• Teach your children not to run indoors or
jump down stairs.
• Teach your children and other family
members about the dangers of falling and
how to stay safe.
Poison-Proof Your HomeUse this guide to poison-proof your home
room-by-room:
• KitchenYour kitchen is one of the most dangerous
places for a child. Drain openers, detergents,
oven cleaners, and other cleaners can hurt
you and your children. Put safety latches on
all cabinets and drawers with harmful
products. Even better, put them in a place
that children can’t reach. Children often get
into dangerous products while someone is
using them. If you can, keep your children
out of the room while you’re cleaning.
• BathroomThings in your medicine chest—like medicine,
makeup, mouthwash, first aid supplies,
deodorants and cleaners can hurt children.
Keep these out of their reach. Put a safety
latch on your medicine chest.
• BedroomKeep medicine, medications, perfumes,
makeup, and cigarettes out of children’s reach.
• Living RoomThings to look for in the living room are:
liquor, cigarettes, furniture polish, lamp oil,
and some plants. Keep these out of reach.
• Garage, Basement, and Laundry RoomThese are some of the most dangerous
places in your home. There are lots of
chemicals and poisons in them that can hurt
or kill a child: bleach, anti-freeze, gasoline,
kerosene, car polishes, car batteries, paints,
paint removers, mothballs, bug spray, road
salt, and more. It’s safest to keep children
out of these places altogether.
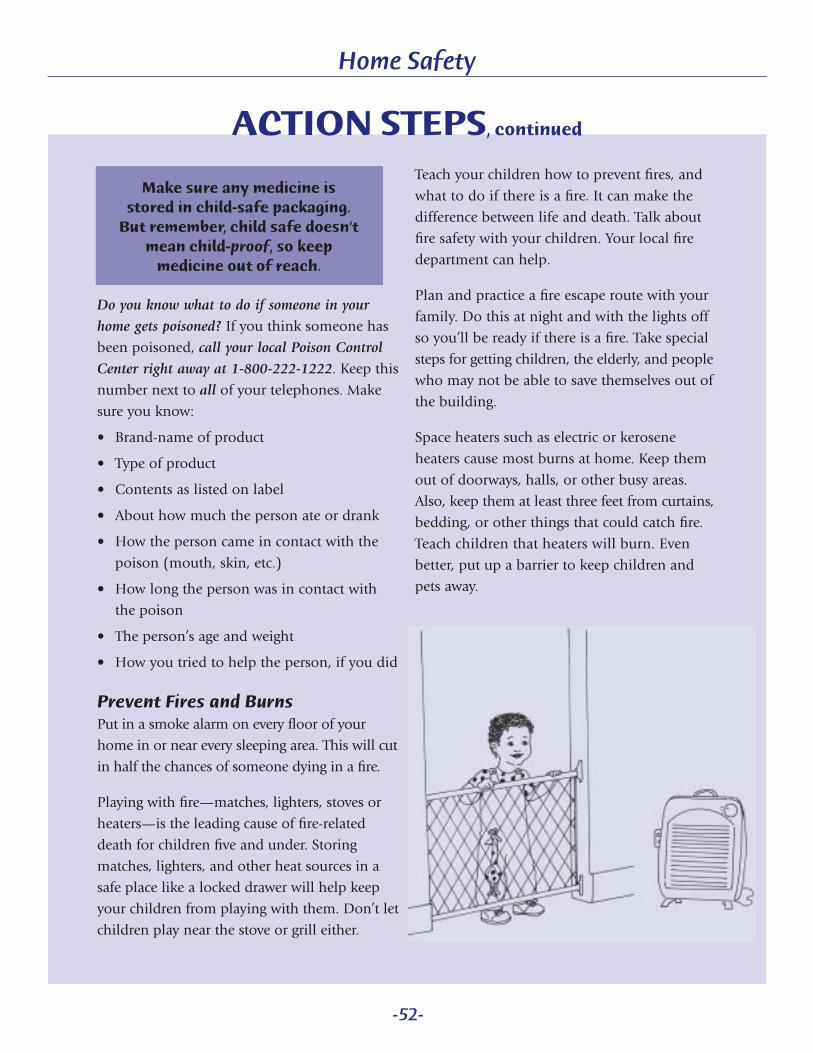
-52-
Home Safety
ACTION STEPS, continued
Make sure any medicine is stored in child-safe packaging.
But remember, child safe doesn’tmean child-proof, so keep
medicine out of reach.
Do you know what to do if someone in your
home gets poisoned? If you think someone has
been poisoned, call your local Poison Control
Center right away at 1-800-222-1222. Keep this
number next to all of your telephones. Make
sure you know:
• Brand-name of product
• Type of product
• Contents as listed on label
• About how much the person ate or drank
• How the person came in contact with the
poison (mouth, skin, etc.)
• How long the person was in contact with
the poison
• The person’s age and weight
• How you tried to help the person, if you did
Prevent Fires and BurnsPut in a smoke alarm on every floor of your
home in or near every sleeping area. This will cut
in half the chances of someone dying in a fire.
Playing with fire—matches, lighters, stoves or
heaters—is the leading cause of fire-related
death for children five and under. Storing
matches, lighters, and other heat sources in a
safe place like a locked drawer will help keep
your children from playing with them. Don’t let
children play near the stove or grill either.
Teach your children how to prevent fires, and
what to do if there is a fire. It can make the
difference between life and death. Talk about
fire safety with your children. Your local fire
department can help.
Plan and practice a fire escape route with your
family. Do this at night and with the lights off
so you’ll be ready if there is a fire. Take special
steps for getting children, the elderly, and people
who may not be able to save themselves out of
the building.
Space heaters such as electric or kerosene
heaters cause most burns at home. Keep them
out of doorways, halls, or other busy areas.
Also, keep them at least three feet from curtains,
bedding, or other things that could catch fire.
Teach children that heaters will burn. Even
better, put up a barrier to keep children and
pets away.

-53-
Home Safety
ACTION STEPS, continued
Prevent Choking and SuffocationEveryday foods can cause choking. Hot dogs, nuts,
popcorn, and hard candy can easily get stuck in
a small child’s throat. Don’t let your young
children eat them. Even drinks, like formula,
milk, or juice can make babies choke if they
drink them lying down, especially from a bottle.
Make sure children drink sitting up. Keep a close
eye on the young children in your home.
Don’t let your children play with balloons.
Other household items that can cause problems
are coins, marbles, and buttons, so keep your
floor picked up. Finally, don’t let children play
near cars or old appliances. They can suffocate
and die if they become trapped in a car trunk
or old refrigerator.
Young children can get tangled up and
suffocate in curtains, window blind cords, and
extension cords. Plastic bags and covers are also
dangerous. Don’t tie toys or pacifiers to chil-
dren’s clothes. Very small children should not
wear jewelry around their necks.
Toys with small parts or long cords may strangle
or cause a child under the age of four to choke.
Read a toy’s package to make sure it’s right for
your child.
Watch Out Around WaterIf you have or use a pool—Watch children
under the age of 12 at all times around pools.
Make sure they walk on the pool deck.
All pools, hot tubs, and spas should have a
fence at least five feet high, with a self-closing,
self-latching gate around them. It’s important
that this fence be one that children cannot
climb. Don’t think of your home as part of the
fence, because children can open doors to get
to a pool.
Take all toys out of the pool area after swimming
so children won’t go back into the water and
play by themselves.
Children should wear life jackets or vests
while on docks or at beaches or rivers. Never
let a child swim alone!
Never leave a young child alone in the bathtub.
Children can drown in only a couple inches
of water.

Home Safety
When In Doubt, Check It Out!
✆
-54-
• Your local county Extension Office
—look in your telephone book
• Your local or state health department
—look in your telephone book
• For information on product recalls: The Consumer
Products Safety Commission at 800/638-2772
—www.cpsc.gov
• National SAFE KIDS Campaign, 202/662-0600
—www.safekids.org, 1301 Pennsylvania Avenue, NW,
Ste. 1000, Washington DC 20004
• The American Red Cross—www.redcross.org
• National Safety Council, 612/285-1121
—www.nsc.org
Notes
This chapter was written by Ron Jester, University of Delaware Cooperative Extension. ©2002 University of Wisconsin Extension. All Rights Reserved.
ACTION STEPS, continued
Other Safety Concerns• Older children and adults should learn first
aid and CPR (Cardiopulmonary Resuscitation)
so they can help if someone gets hurt. Your
local Red Cross offers classes.
• Never let children ride on equipment such
as lawn tractors. They may get hurt if they
fall off.
• Get safety gear like helmets and kneepads
for children riding bicycles, in-line skates,
ATVs, scooters, and skateboards. Set a good
example by wearing safety gear yourself.
• Store guns safely—unloaded and locked up.
• When traveling by car, make sure that
children under 12 ride in the back seat. Use
car seats for infants and toddlers under 40
pounds. Use booster seats for children until
they are eight years old.


Sources: Massachusetts Office of the State Fire Marshal, Department of Fire Services, “Home Fire Escape Drills”; Washington Office of the State Fire Marshal, “Fire Drills in the Home”

A fire can get out of control in seconds, can double in size every minute, and can overcome an entire home in just five minutes. There’s no time for planning during a fire emergency. Take time today and make a plan for escaping a fire. If a fire starts in your home, your primary goal should be to get out as quickly as possible.
Install Smoke Alarms - Smoke alarms are your best early warning system in the event of fire. Install smoke alarms on every level of your home, including the basement and in each sleeping area.
Be Prepared, Plan Your Escape
Draw a floor-plan of your home on the grid provided. Draw two ways out of every room. Discuss the escape routes with every member of your home.
If there are babies, older adults, or family members with physical disabilities, make sure that someone will assist them in the fire drill and in the event of an emergency.
Agree on a meeting place outside the home where everyone can gather after escaping a fire to wait for the fire department. This gives you a chance to count people and inform the fire department if anyone is missing or trapped inside.
Know the emergency phone number to call after you escape. Call from a neighbor's home or a cell phone once you are safely outside.
Check to see if all windows that are part of the escape plan open easily and have not been painted shut.
To slow the fire’s spread, make sure to close all doors behind you as you exit rooms in the home.
If someone is missing, tell the fire department dispatcher when you call. Firefighters have the skills and equipment to perform rescues.
Teach your children not to hide from firefighters or other emergency responders – they are there to help!
Be sure your street number is clearly visible from the road. If not, paint it on the curb or install house numbers to make sure that emergency responders could find your home.

Practice – Practice your plan at least once a year.
A home fire drill can be fun! Pick a person to be in charge.
in the household participates. be
one in the family should re
re
hem as they exit. e.
ut carefully! , stay out. Going back into the
Sound the alarm (on the smoke alarm) to be sure everyoneknows what it sounds like. Make sure everyone living
Make sure each family member can open door locks andwindow latches. If not, someone else in the family needs toresponsible for them during a fire. When you hold your fire drill, everypractice crawling on their hands and knees low under whethe smoke would be – one to two feet above the ground whethe air is cooler and non-toxic during a fire. Remind everyone to close all doors behind t
Follow your escape plan and go directly to your meeting plac Pretend that some ways are blocked and practice using the second way out. Get out quickly, b
Once you are out of the homehome during a fire could be deadly!
REMEMBER:
hen the smoke alarm sounds,
• Roll out of bed, onto the floor. Stay low beneath the smoke.
heat with the back of your hand. clear (if
• lls
• pen it. If you can safely reach the
.
W
• Crawl to the door. • Check the door for• If the door is cool, open the door slowly. If the coast is
you do not see fire or smoke nearby), crawl to escape. Signal others by calling out and banging on doors or wa
• Do not open a hot door! Place a towel or blanket under thedoor to keep smoke out. Crawl to the window and oground (1st floor), exit the window. Sometimes you can safely exit a 2nd floor window by using a fire escape ladder or by hanging down from the windowsill and letting yourself dropOtherwise, shout and signal for help. A firefighter’s first priorityis to rescue people.


Home Fire Escape PlanHome Fire Escape PlanHome Fire Escape Plan
Use the space below to create your home fire escape plan.
Memorize your fire department’semergency phone number and write it here:
• Draw a floor plan or a map of your home. Show all doors and windows.• Mark two ways out of each room.• Mark all of the smoke alarms with . Smoke alarms should be in each sleeping room, outside each sleeping area, and on every level of the home.• Pick a family meeting place outside where everyone can meet.• Remember, practice your plan at least twice a year!
Check out www.sparky.org for fire safety games and activities.Sparky® is a trademark of NFPA.
Grown-ups: Children don’t always awake when the smoke alarm sounds. Know what your child will do before a fire occurs. Get more information on smoke alarms and escape planning at www.nfpa.org/factsheets.


Protect Yourself and Your Family Today!
In the event of a fire, properly installed and maintained smoke alarms will give an early warning alarm to your household. This alarm could save your own life and
those of your loved ones by giving you time to escape.
Why Should My Home Have Smoke Alarms? In the event of a fire, a smoke alarm can save your life and those of your loved ones. They are a very important way to prevent house and apartment fire deaths by giving an early warning signal -- so you and your family can escape. Smoke alarms are one of the best safety devices you can buy and install to protect yourself, your family, and your home. Where Do I Put Them? Smoke alarms should be installed on every level of your home, including the basement. Many deadly fires begin late at night or in the early morning. For extra safety, install smoke alarms both inside and outside sleeping areas. Since smoke and many deadly gases rise, installing your smoke alarms at the proper level will provide you with the earliest warning possible. Always follow the manufacturer’s installation instructions. Where Would I Get Smoke Alarms? Healthy Homes University provides and installs smoke alarms for your home during the baseline visit. Also, many hardware, home supply, or general merchandise stores carry smoke alarms. If you are not sure where to buy one in your community, call your local fire department (on a non-emergency telephone number) and they will give you some suggestions. Some fire departments offer smoke alarms for little or no cost. Are Smoke Alarms Hard to Install? If your smoke alarms are hard wired (wired into the electrical system), you will need to have a qualified electrician do the initial installation or install replacements. For battery powered smoke alarms, all you will need for installation is a screw driver. Some brands are self adhesive and will easily stick to the wall or ceiling where they are placed. For all smoke alarm installations, be sure you follow the manufacturer’s instructions because there are differences between the various brands. If you are uncomfortable standing on a ladder, ask a relative or friend for help. Some fire departments will install a smoke alarm in your home for you. Call your local fire department (on a non-emergency telephone number) if you have problems installing a smoke alarm. *Helpful Tip: Pick a holiday or your birthday and replace the batteries each year on that day.

How Do I Keep My Smoke Alarm Working? • If you have a smoke alarm with batteries:
o Smoke Alarms powered by long-lasting batteries are designed for the entire unit to be replaced according to manufacturer’s instructions.
o HHU families: For standard, battery-powered smoke alarms, the batteries need to be replaced at least once per year and the whole unit should be replaced every 8-10 years.
• In hard-wired, battery back-up smoke alarms, the batteries need to be checked every month, and replaced at least once per year. The entire unit should be replaced every 8-10 years.
IMPORTANT: If your smoke alarm starts making a "chirping" noise, replace the batteries and reset it.
What if the Alarm Goes Off While I’m Cooking? Then it’s doing its job. Do not disable your smoke alarm if it goes off due to cooking or other non-fire causes. You may not remember to put the batteries back in the alarm after cooking. Instead clear the air by waving a towel near the alarm, leaving the batteries in place. The alarm may need to be moved to a new location if it goes off every time you cook. Some of the newer models have a “hush” button that silences these types of false alarms for about 10 seconds while you clear the air.
How Long will my Smoke Alarm Last? Most alarms installed today last about 8-10 years. After this time, the entire unit should be replaced. It is a good idea to write the date of purchase with a marker on the inside of your alarm so you will know when to replace it. Some of the newer alarms already have a date written inside. In any event, always follow the manufacturer’s instructions for replacement.
The U.S. Fire Administration would like to remind you of some important fire safety and prevention information.
• Plan and practice fire escape plans several times a year. • Make sure your whole family knows when and how to call emergency
telephone numbers. • Make sure you have a working fire extinguisher and learn how to use it. • Install carbon monoxide detectors. • Consider installing residential fire sprinklers in your home. • Contact your local fire department on a non-emergency phone number if you
need help or have questions about fire safety in your home. Source: US Fire Administration “Smoke Alarms” factsheet located at: http://www.usfa.dhs.gov/citizens/all_citizens/home_fire_prev/alarms/
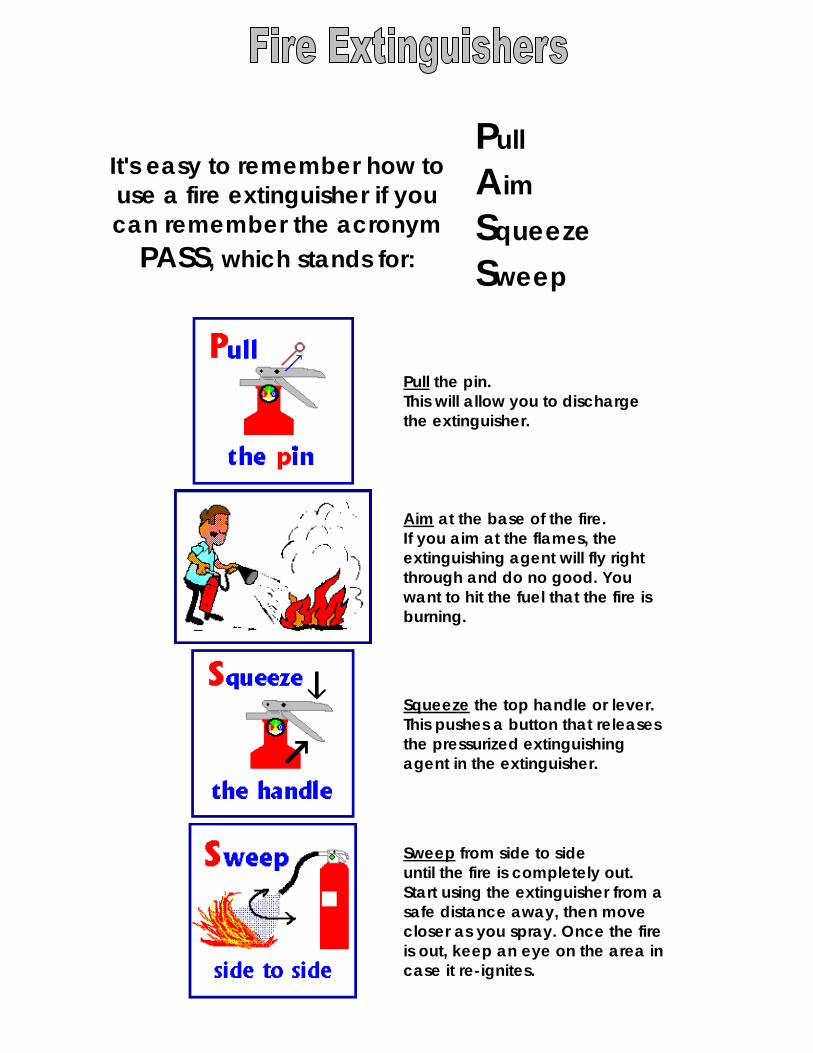
Pull Aim Squeeze Sweep
It's easy to remember how to use a fire extinguisher if you can remember the acronym
PASS, which stands for:
Pull the pin. This will allow you to discharge the extinguisher.
Aim at the base of the fire. If you aim at the flames, the extinguishing agent will fly right through and do no good. You want to hit the fuel that the fire is burning.
Squeeze the top handle or lever. This pushes a button that releases the pressurized extinguishing agent in the extinguisher.
Sweep from side to side until the fire is completely out. Start using the extinguisher from a safe distance away, then move closer as you spray. Once the fire is out, keep an eye on the area in case it re-ignites.


This Is Fire!A Factsheet on the Nature of Fire
HomelandSecurity
March 2006
E very day Americans experience the horror of fire. But most people don’t understand fire. Only when we know the true nature of fire can we prepare ourselves and our families. Each year more than 4,000 Americans die and 20,000 are injured in fires, many of which
could be prevented.
The U. S. Fire Administration (USFA), a part of the U. S. Department of Homeland Security, believes that fire deaths can be reduced by teaching people the basic facts about fire. Below are some simple facts that explain the particular characteristics of fire.
Fire is FAST!There is liTTle Time! In less than 30 seconds a small flame
can get completely out of control and
turn into a major fire. It only takes
minutes for thick black smoke to fill
a house. In minutes, a house can be
engulfed in flames. Most fires occur in
the home when people are asleep. If
you wake up to a fire, you won’t have
time to grab valuables because fire
spreads too quickly and the smoke is
too thick. There is only time to escape.
Fire is HOT!heaT is more ThreaTening Than flames. A fire’s heat alone can kill. Room
temperatures in a fire can be 100
degrees at floor level and rise to 600
degrees at eye level. Inhaling this super
hot air will scorch your lungs. This
heat can melt clothes to your skin. In
five minutes a room can get so hot
that everything in it ignites at once:
this is called flashover.
Fire is DARK!fire isn’T brighT, iT’s piTch black. Fire starts bright, but quickly produces
black smoke and complete darkness.
If you wake up to a fire you may
be blinded, disoriented and unable
to find your way around the home
you’ve lived in for years.
Fire is DEADLY! smoke and Toxic gases kill more people Than flames do. Fire uses up the oxygen you need and
produces smoke and poisonous gases
that kill. Breathing even small amounts
of smoke and toxic gases can make
you drowsy, disoriented and short of
breath. The odorless, colorless fumes
can lull you into a deep sleep before
the flames reach your door. You may
not wake up in time to escape.
Fire Safety Tipsin The evenT of a fire, remember Time is The biggesT enemy and every second counTs!Escape first, then call for help. Develop
a home fire escape plan and designate
a meeting place outside. Make sure
everyone in the family knows two
ways to escape from every room.
Practice feeling your way out with
your eyes closed. Never stand up in a
fire, always crawl low under the smoke
and try to keep your mouth covered.
Never return to a burning building for
any reason; it may cost you your life.
Finally, having a working smoke alarm
dramatically increases your chances
of surviving a fire. And remember to
practice a home escape plan frequently
with your family.
For more information contact:The U. S. Fire Administration
16825 South Seton AvenueEmmitsburg, MD 21727
orVisit the USFA Web site:
www.usfa.fema.gov
E

HomelandSecurity
March 2006
ore than 4,000 Americans die each year in fires and 20,000 are injured. An overwhelming number of fires occur in the home. There are timetested ways to prevent and survive a fire. It’s not a question of luck. It’s a matter of planning ahead.
EvEry HomE SHould HavE at lEaSt onE Working SmokE alarmBuy a smoke alarm at any hardware or discount store. It’s inexpensive protection for you and your family. Install a smoke alarm on every level of your home. A working smoke alarm can double your chances of survival. Test it monthly, keep it free of dust and replace the battery at least once a year. Smoke alarms themselves should be replaced after ten years of service, or as recommended by the manufacturer.
PrEvEnt ElEctrical FirESNever overload circuits or extension cords. Do not place cords and wires under rugs, over nails or in high traffic areas. Immediately shut off and unplug appliances that sputter, spark or emit an unusual smell. Have them professionally repaired or replaced.
uSE aPPliancES WiSElyWhen using appliances follow the manufacturer’s safety precautions. Overheating, unusual smells, shorts and sparks are all warning signs that appliances need to be shut off, then replaced or repaired. Unplug appliances when not in use. Use safety caps to cover all unused outlets, especially if there are small children in the home.
altErnatE HEatErS• Portable heaters need their space.
Keep anything combustible at least three feet away.
• Keep fire in the fireplace. Use fire screens and have your chimney cleaned annually. The creosote buildup can ignite a chimney fire that could easily spread.
• Kerosene heaters should be used only where approved by authorities. Never use gasoline or campstove fuel. Refuel outside and only after the heater has cooled.
aFFordablE HomE FirE SaFEty SPrinklErSWhen home fire sprinklers are used with working smoke alarms, your chances of surviving a fire are greatly increased. Sprinklers are affordable they can increase property value and lower insurance rates.
Plan your EScaPEPractice an escape plan from every room in the house. Caution everyone to stay low to the floor when escaping from fire and never to open doors that are hot. Select a location where everyone can meet after escaping the house. Get out then call for help.
caring For cHildrEnChildren under five are naturally curious about fire. Many play with matches and lighters. Tragically, children set over 20,000 house fires every year. Take the mystery out of fire play by teaching your children that fire is a tool, not a toy.
caring For oldEr PEoPlEEvery year over 1,200 senior citizens die in fires. Many of these fire deaths could have been prevented. Seniors are especially vulnerable because many live alone and can’t respond quickly.
For more information contact:The U. S. Fire Administration
16825 South Seton AvenueEmmitsburg, MD 21727
orVisit the USFA Web site:
www.usfa.fema.gov
Working Together for Home Fire SafetyA Factsheet on Home Fire Prevention
MM

HomelandSecurity
March 2006
lectrical fires in our homes claim the lives of 485 Americans each year and injure 2,305 more. Some of these fires are caused by electrical system failures and appliance defects, but many more are caused by the misuse and poor maintenance of electrical appliances,
incorrectly installed wiring, and overloaded circuits and extension cords.
The U. S. Fire Administration (USFA) would like consumers to know that there are simple steps you can take to prevent the loss of life and property resulting from electrical fires.
THE PROBLEMDuring a typical year, home electrical problems account for 67,800 fires, 485 deaths, and $868 million in property losses. Home electrical wiring causes twice as many fires as electrical appliances.
THE FACTSDecember is the most dangerous month for electrical fires. Fire deaths are highest in winter months which call for more indoor activities and increase in lighting, heating, and appliance use. Most electrical wiring fires start in the bedroom.
THE CAUSEElEctrical Wiring
•Mostelectricalfiresresultfromproblems with “fixed wiring” such as faulty electrical outlets and old wiring. Problems with cords and plugs, such as extension and appliance cords, also cause many home electrical fires.
•Inurbanareas,faultywiringaccountsfor 33% of residential electrical fires.
•Manyavoidableelectricalfirescanbe traced to misuse of electric cords, such as overloading circuits, poor maintenance and running the cords under rugs or in high traffic areas.
HomE appliancEs
•Thehomeappliancesmostofteninvolved in electrical fires are electric stoves and ovens, dryers, central heating units, televisions, radios and record players.
safEty prEcautions •Routinelycheckyourelectrical
appliances and wiring.
•Frayedwirescancausefires.Replaceall worn, old or damaged appliance cords immediately.
•Useelectricalextensioncordswiselyand don’t overload them.
•Keepelectricalappliancesawayfromwet floors and counters; pay special care to electrical appliances in the bathroom and kitchen.
•Whenbuyingelectricalapplianceslook for products that are evaluated by a nationally recognized laboratory, such as Underwriters Laboratories (UL).
•Don’tallowchildrentoplaywithoraround electrical appliances like space heaters, irons and hair dryers.
•Keepclothes,curtainsandotherpotentially combustible items at least three feet from all heaters.
•Ifanappliancehasathree-prongplug,useitonlyinathree-slotoutlet.Neverforceittofitintoatwo-slotoutlet or extension cord.
•Neveroverloadextensioncordsor
wallsockets.Immediatelyshutoff,then professionally replace, light switches that are hot to the touch and lights that flicker. Use safety closures to“child-proof”electricaloutlets.
•Checkyourelectricaltoolsregularlyforsignsofwear.Ifthecordsarefrayed or cracked, replace them. Replaceanytoolifitcausesevensmall electrical shocks, overheats, shorts out or gives off smoke or sparks.
Finally, having a working smoke alarm dramatically increases your chances of surviving a fire. And remember to practice a home escape plan frequently with your family.
For more information contact:The U. S. Fire Administration
16825 South Seton AvenueEmmitsburg, MD 21727
orVisittheUSFAWebsite:
www.usfa.fema.gov
On the Safety CircuitA Factsheet on Home Electrical Fire Prevention
EE

HomelandSecurity
March 2006
very day Americans experience the tragedy of fire. Each year more than 4,000 Americans die in fires and 20,000 are injured. Figures show that each year about 150 people are killed and
$200 million in property is destroyed in fires attributed to children playing with fire.
The U. S. Fire Administration (USFA) encourages parents to teach children at an early age about the dangers of fireplay in an effort to prevent child injuries, fire deaths and firesetting behavior in the future. Below are some facts about children and fire safety.
Curious Kids set FiresChildren under five are curious about fire. Often what begins as a natural exploration of the unknown can lead to tragedy.
• Children of all ages set over 35,000 fires annually. Approximately 8,000 of those fires are set in homes.
• Children make up 15-20% of all fire deaths.
• At home, children usually play with fire in bedrooms, in closets and under beds. These are “secret” places where there are a lot of things that catch fire easily.
• Too often, child firesetters are not given proper guidance and supervision by parents and teachers. Consequently, they repeat their firesetting behavior.
PraCtiCe Fire saFety in your Home• Supervise young children closely. Do
not leave them alone even for short periods of time.
• Keep matches and lighters in a secured drawer or cabinet.
• Have your children tell you when they find matches and lighters.
• Check under beds and in closets for burned matches, evidence your child may be playing with fire.
• Develop a home fire escape plan, practice it with your children and designate a meeting place outside.
• Take the mystery out of fire play by teaching children that fire is a tool, not a toy.
• Teach children the nature of fire. It is FAST, HOT, DARK and DEADLY!
• Teach children not to hide from firefighters, but to get out quickly and call for help from another location.
• Show children how to crawl low on the floor, below the smoke, to get out of the house and stay out in the case of fire.
• Demonstrate how to stop, drop to the ground and roll if their clothes catch fire.
• Install smoke alarms on every level in your home.
• Familiarize children with the sound of your smoke alarm.
• Test the smoke alarm each month and replace the battery at least once a year.
• Replace the smoke alarm every ten years, or as recommended by the manufacturer.
• Finally, having a working smoke alarm dramatically increases your chances of surviving a fire. And remember to practice a home escape plan frequently with your family.
For more information contact:The U. S. Fire Administration
16825 South Seton AvenueEmmitsburg, MD 21727
orVisit the USFA Web site:
www.usfa.fema.gov
Curious Kids Set FiresA Factsheet for Teaching Children Fire Safety
EE

HomelandSecurity
March 2006
ach year fires occurring during the holiday season claim the lives of over 400 Americans, injure 1,650 more, and cause over $990 million in damage.
According to the U. S. Fire Administration (USFA), there are simple life-saving steps you can take to ensure a safe and happy holiday. By following some of the outlined precautionary tips, individuals can greatly reduce their chances of becoming a holiday fire casualty.
Preventing Christmas tree FiresSpecial fire safety precautions need to be taken when keeping a live tree in the house. A burning tree can rapidly fill a room with fire and deadly gases.
Selecting a tree for the holidayNeedles on fresh trees should be green and hard to pull back from the branches, and the needle should not break if the tree has been freshly cut. The trunk should be sticky to the touch. Old trees can be identified by bouncing the tree trunk on the ground. If many needles fall off, the tree has been cut too long, has probably dried out, and is a fire hazard.
caring for your treeDo not place your tree close to a heat source, including a fireplace or heat vent. The heat will dry out the tree, causing it to be more easily ignited by heat, flame or sparks. Be careful not to drop or flick cigarette ashes near a tree. Do not put your live tree up too early or leave it up for longer than two weeks. Keep the tree stand filled with water at all times.
diSpoSing of your treeNever put tree branches or needles in a fireplace or woodburning stove. When the tree becomes dry, discard it promptly. The best way to dispose of your tree is by taking it to a recycling center or having it hauled away by a community pick-up service.
holiday lightsMaintain your holiday lightSInspect holiday lights each year for frayed wires, bare spots, gaps in the insulation, broken or cracked sockets, and excessive kinking or wear before putting them up. Use only lighting listed by an approved testing laboratory.
do not overload electrical outletSDo not link more than three light strands, unless the directions indicate it is safe. Connect strings of lights to an extension cord before plugging the cord into the outlet. Make sure to periodically check the wires - they should not be warm to the touch.
do not leave holiday lightS on unattended
holiday deCorationsuSe only nonflaMMable decorationS
All decorations should be nonflammable or flame-retardant and placed away from heat vents.
never put Wrapping paper in a fireplace
It can result in a very large fire, throw-ing off dangerous sparks and embersthat may result in a chimney fire.
artificial chriStMaS treeS
If you are using a metallic or artificial tree, make sure it is flame retardant.
Candle Careavoid uSing lit candleS
If you do use them, make sure they are in stable holders and place them where they cannot be easily knocked down. Never leave the house with candles burning.
never put lit candleS on a tree
Do not go near a Christmas tree with an open flame - candles, lighters or matches.
Finally, as in every season, have working smoke alarms installed on every level of your home, test them monthly and keep them clean and equipped with fresh batteries at all times. Know when and how to call for help. And remember to practice your home escape plan.
For more information contact:The U. S. Fire Administration
16825 South Seton AvenueEmmitsburg, MD 21727
orVisit the USFA Web site:
www.usfa.fema.gov
A Season for Sharing in Fire SafetyA Factsheet on Holiday Fire Prevention
EE


Asbestos is the name of a group of minerals that can separate into long and thin fibers. The fibers are so small that you cannot see them.
Where is Asbestos Found?
1. Internal walls, cement boarding, artex wall coverings 2. Ground contamination – all types of asbestos materials found in ground 3. Underground ducting – insulation on pipework or debris, packing 4. Basement – pipework, gaskets, boilers, calorifiers, cement ceiling panels 5. Roof voids – paper lining, loose fill insulation, pipework, cement water tanks 6. External walls – wall coverings, cement, soffit boards 7. Under floor – ducting pipework 8. Floor coverings – vinyl floor tiles, promenade tiles 9. Internal walls – Cement, artex wall coverings 10. Chimney stacks or risers – cement flues, cement board linings 11. Roof coverings – cement corrugated sheeting, slates, felt coverings, rainwater gutters 12. Miscellaneous products – toilet cisterns, lift shaft linings, fire blankets In the Homes of Workers
• Workers who are exposed to asbestos in the workplace may bring asbestos fibers home on their clothes, shoes, and bodies. So, people who live in their households could also be exposed to asbestos. Even handling and washing a worker’s clothes could expose someone to asbestos.
In Consumer Products Asbestos can be found in consumer products, but mostly in:
• building materials • friction products • heat-resistant fabrics

Older homes and buildings may have asbestos-containing products such as attic insulation, fireproofing materials, gypsum wallboard, and lightweight aggregate construction materials (like concrete blocks). In the Workplace Asbestos can be found in the workplace of any of the following:
• Brake repair mechanic
• Vermiculite processing plant
• Carpenter • Welder • Demolition worker • Insulation installer • Dry wall finisher • Miner • Electrician • Pipe or steam fitter • Roofer • Plumber • Shipyard worker
Asbestos fibers may be released into the air when asbestos-containing material is disturbed during product use, demolition work, building or home maintenance, repair, and remodeling. In general, exposure happens only when the asbestos-containing material is disturbed in a way that releases particles and fibers into the air. Asbestos-containing material will not harm you if it is left undisturbed and the fibers are not released into the air. Since asbestos fibers may cause harmful health effects in people who are exposed, all new uses of asbestos have been banned in the United States by the U.S. Environmental Protection Agency.
How to Reduce the Risk for your Family
Materials containing asbestos that are not disturbed or deteriorated do not, in general, cause a health risk and can be left alone. If you think you may be exposed to asbestos in your home, contact your state or local health department or the regional offices of the Environmental Protection Agency (EPA) to find out how to test your home for asbestos and how to locate a company that is trained to remove or contain the asbestos fibers.

Asbestos & Your Health
Health Effects of Asbestos Exposure: • Asbestos can cause health problems when it is breathed into
the lungs. When you are exposed for a long time (many years), the amount of fibers in your lungs increases. Asbestos fibers in lung tissue over time may result in lung diseases such as pleural disease (affects the lining of the lungs and chest wall), asbestosis (scarring of lung tissue), lung cancer, or mesothelioma (a type of cancer). Diseases caused by asbestos do not show up immediately—they can show up many years after exposure.
IMPORTANT:
• Being exposed to asbestos does not mean you will develop health problems! Asbestos has been used widely in the United States. Nearly everyone has been exposed to very low levels of asbestos at some time in their life. However, most people do not become ill from such exposures.
• A doctor can help you find out if you have health problems from asbestos exposure.
When Asbestos fibers (below) are breathed into the lungs over
many years, they can cause health problems including cancer.

How to find out if you have been exposed to Asbestos
• Asbestos-related conditions can be difficult to diagnose.
Healthcare providers usually use an in-depth medical history to figure out if a person may have asbestos exposure and related health conditions. This means they look at a person’s medical, work, cultural, and environmental history.
• If a doctor suspects an asbestos-related health condition, he
or she can use a number of things to help make the actual diagnosis. Some of these things are physical examinations, chest x-rays, and pulmonary function tests. Your doctor may also refer you to a specialist who treats diseases caused by asbestos.
Medical Tests to Show Asbestos Exposure:
• Low levels of asbestos fibers can be measured in urine, feces, mucus, or lung washings. High levels of asbestos fibers in tissue can show that you have been exposed, but cannot show whether you will have any health problems from the exposure.
• An in-depth history, physical exam, and medical tests are needed to identify asbestos-related disease. Chest x-rays are the best way to see lung changes caused by asbestos exposure. Lung function tests and CAT scans can also help doctors diagnose asbestos-related disease.
What to do if you have been exposed to Asbestos
Take Action
• Tell Your Doctor. Even if you don’t feel sick right away, tell your doctor if you think you might have been exposed to asbestos at work or in your home. Most people don’t show any signs or symptoms of asbestos-related disease for 10 to 20 years or more after exposure. Only a doctor can tell if you have any health problems due to asbestos exposure. Your doctor may refer you to a specialist who treats diseases caused by asbestos.
• Show this fact sheet to your doctor. The information might be helpful in evaluating your health risk.
• Quit smoking. If you are a smoker, quit smoking. Smoking combined with asbestos exposure greatly increases the risk of getting lung cancer.
• Get regular influenza (flu) and pneumonia shots. Regular shots help reduce the chance of lung infections.
Remember: Asbestos is well recognized as a carcinogen (cancer-causing). It can cause lung cancer, mesothelioma, and other diseases. The people at highest risk are those with very heavy exposure, usually over many years on the job. Smoking acts together with asbestos to greatly increase the risk of lung cancer. While asbestos use is much less common now than it was years ago, there is still a potential for exposure in older buildings and products. If you suspect you have asbestos in your home, contact your local health department to find out how to test your home for asbestos and how to locate a company that is trained to remove or contain the asbestos fibers. Sources: “Asbestos Exposure and Your Health”, Agency for Toxic Substances and Disease Registry (ATSDR), December 2006 http://www.atsdr.cdc.gov/asbestos/asbestos/health_effects/ The American Cancer Society fact sheet on Asbestos: http://www.cancer.org/docroot/PED/content/PED_1_3X_Asbestos.asp?sitearea=PED
Contacts: For more information on asbestos exposure and your health: 1-800-CDC-INFO (1-800-232-4676) or visit: www.atsdr.cdc.gov/asbestos Ingham County Health Department – Bureau of Environmental Health: (517) 887-4312 Asbestos at Work: Michigan Department of Labor & Economic Growth Michigan Occupational Safety & Health Administration Construction Safety & Health Division - Asbestos Program 7150 Harris Drive P. O. Box 30671 Lansing, Michigan 48909-8171
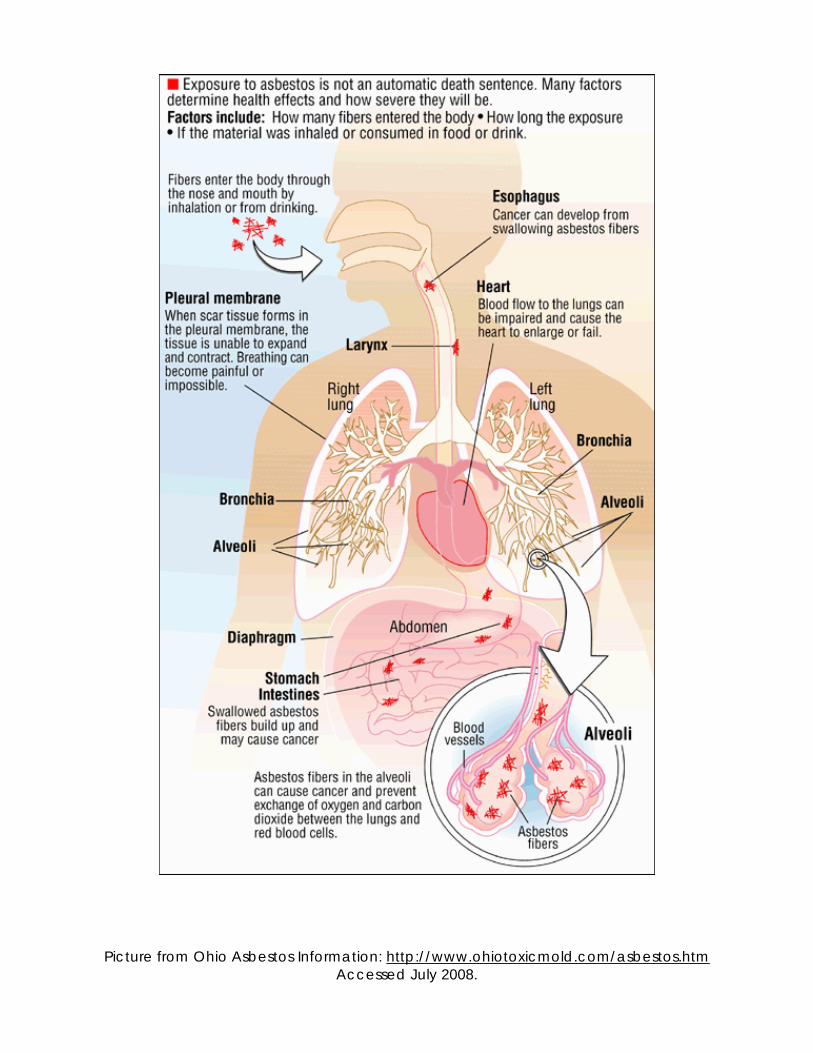
Picture from Ohio Asbestos Information: http://www.ohiotoxicmold.com/asbestos.htmAccessed July 2008.

Protect Your Family and Yourself from Carbon Monoxide Poisoning
Carbon Monoxide Can Be Deadly You can’t see or smell carbon monoxide, but at high levels it can kill a person in minutes. Carbon monoxide (CO) is produced whenever any fuel such as gas, oil, kerosene, wood, or charcoal is burned. If appliances that burn fuel are maintained and used properly, the amount of CO produced is usually not dangerous. However, if appliances are not working properly or are used incorrectly, you can have dangerous levels of CO in your home. Hundreds of people die accidentally every year from CO poisoning caused by malfunctioning or improperly used fuel-burning appliances. Even more people die from CO produced by idling cars. Fetuses, infants, elderly people, and people with anemia or with a history of heart or respiratory disease can be at an even higher risk. Be safe. Practice the DO’s and DON’Ts of carbon monoxide.
CO Poisoning Symptoms Know the symptoms of CO poisoning. At moderate levels, you or your family can get severe headaches, become dizzy, mentally confused, nauseated (sick to your stomach), or faint. You can even die if CO stays at this level for a long time. Low levels can cause shortness of breath, mild nausea, and mild headaches, and may have longer-term effects on your health. Since many of these symptoms are similar to those of the flu, food poisoning, or other illnesses, you may not think that CO poisoning could be the cause.
Play it Safe If you have symptoms that you think could be from CO poisoning, or if your CO detector goes off: DO GET FRESH AIR IMMEDIATELY Leave the house and call the fire department to alert them that your detector went off and you may have CO in your home. DO GO TO AN EMERGENCY ROOM and tell the physician you suspect CO poisoning. If you have CO poisoning, it can often be diagnosed by a blood test done soon after exposure. DO Be prepared to answer the following questions for the doctor:
• Do your symptoms occur only in the house? Do they disappear or decrease when you leave home and reappear when you return?
• Is anyone else in your household complaining of similar symptoms? Did everyone’s symptoms appear about the same time?
• Are you using any fuel-burning appliances in the home?
• Has anyone inspected your appliances lately? Are you certain they are working properly?

Prevention is the Key to Avoiding Carbon Monoxide Poisoning
DO have your fuel-burning appliances -- including oil and gas furnaces, gas water heaters, gas ranges and ovens, gas dryers, gas or kerosene space heaters, fireplaces, and wood stoves -- inspected by a trained professional at the beginning of every heating season. Make certain that the flues and chimneys are connected, in good condition, and not blocked.
DO choose appliances that vent their fumes to the outside whenever possible, have them properly installed, and maintain them according to manufacturers’ instructions.
DO read and follow all of the instructions that accompany any fuel-burning device. If you cannot avoid using an unvented gas or kerosene space heater, carefully follow the cautions that come with the device. Use the proper fuel and keep doors to the rest of the house open. Crack a window to ensure enough air for ventilation and proper fuel-burning.
DO call EPA’s IAQ INFO Clearinghouse (1-800- 438-4318) or the Consumer Product Safety Commission (1-800-638-2772) for more information on how to reduce your risks from CO and other combustion gases and particles.
DON’T idle the car in the garage -- even if the garage door to the outside is open. Fumes can build up very quickly in the garage and living area of your home.
DON’T use a gas oven to heat your home, even for a short time.
DON’T ever use a charcoal grill indoors – even in a fireplace.
DON’T use a gas or kerosene space heater inside a home, garage, cabin, or other enclosed space.
DON’T sleep in a room with a gas or kerosene space heater running.
DON’T use any gasoline-powered engines (mowers, weed trimmers, snow blowers, chain saws, small engines or generators) in enclosed spaces.
DON’T ignore symptoms, especially if more than one person is feeling them. You could lose consciousness and die if you do nothing.

If the CO detector alarm goes off:
1. Make sure it is your CO detector and not your smoke detector. 2. Check to see if any member of the household is experiencing
symptoms of CO poisoning. If they are, get them out of the house immediately and seek medical attention. Tell the doctor that you suspect CO poisoning.
3. Call the Fire Department to report suspected CO in your home. 4. After inspection by the fire department, have a qualified technician
inspect your fuel-burning appliances and chimneys to make sure they are operating correctly and that there is nothing blocking the fumes from being vented out of the house.
Source: US Environmental Protection Agency - “Protect Your Family and Yourself from Carbon Monoxide Poisoning” factsheet

July 2006 http://www.cdc.gov/co Page 1 of 3
Questions and Answers What is carbon monoxide? Carbon monoxide, or CO, is an odorless, colorless gas that can cause sudden illness and death. Where is CO found? CO is found in combustion fumes, such as those produced by cars and trucks, small gasoline engines, stoves, lanterns, burning charcoal and wood, and gas ranges and heating systems. CO from these sources can build up in enclosed or semi-enclosed spaces. People and animals in these spaces can be poisoned by breathing it. What are the symptoms of CO poisoning? The most common symptoms of CO poisoning are headache, dizziness, weakness, nausea, vomiting, chest pain, and confusion. High levels of CO ingestion can cause loss of consciousness and death. Unless suspected, CO poisoning can be difficult to diagnose because the symptoms mimic other illnesses. People who are sleeping or intoxicated can die from CO poisoning before ever experiencing symptoms. How does CO poisoning work? Red blood cells pick up CO quicker than they pick up oxygen. If there is a lot of CO in the air, the body may replace oxygen in blood with CO. This blocks oxygen from getting into the body, which can damage tissues and result in death.
Who is at risk from CO poisoning? All people and animals are at risk for CO poisoning. Certain groups — unborn babies, infants, and people with chronic heart disease, anemia, or respiratory problems — are more susceptible to its effects. Each year, more than 500 Americans die from unintentional CO poisoning, and more than 2,000 commit suicides by intentionally poisoning themselves.

Questions and Answers (continued from previous page)
July 2006 http://www.cdc.gov/co Page 2 of 3
How can I prevent CO poisoning from my home appliances? • Have your heating system, water heater and any other gas, oil, or coal burning appliances serviced
by a qualified technician every year.
• Do not use portable flameless chemical heaters (catalytic) indoors. Although these heaters don't have a flame, they burn gas and can cause CO to build up inside your home, cabin, or camper.
• If you smell an odor from your gas refrigerator's cooling unit have an expert service it. An odor from the cooling unit of your gas refrigerator can mean you have a defect in the cooling unit. It could also be giving off CO.
• When purchasing gas equipment, buy only equipment carrying the seal of a national testing agency, such as the American Gas Association or Underwriters' Laboratories.
• Install a battery-operated CO detector in your home and check or replace the battery when you change the time on your clocks each spring and fall.
How do I vent my gas appliances properly?
• All gas appliances must be vented so that CO will not build up in your home, cabin, or camper.
• Never burn anything in a stove or fireplace that isn’t vented.
• Have your chimney checked or cleaned every year. Chimneys can be blocked by debris. This can cause CO to build up inside your home or cabin.
• Never patch a vent pipe with tape, gum, or something else. This kind of patch can make CO build up in your home, cabin, or camper.
• Horizontal vent pipes to fuel appliances should not be perfectly level. Indoor vent pipes should go up slightly as they go toward outdoors. This helps prevent CO or other gases from leaking if the joints or pipes aren't fitted tightly.

Questions and Answers (continued from previous page)
July 2006 http://www.cdc.gov/co Page 3 of 3
How can I heat my house safely or cook when the power is out? • Never use a gas range or oven for heating. Using a gas range or oven for heating can cause a build
up of CO inside your home, cabin, or camper.
• Never use a charcoal grill or a barbecue grill indoors. Using a grill indoors will cause a build up of CO inside your home, cabin, or camper unless you use it inside a vented fireplace.
• Never burn charcoal indoors. Burning charcoal — red, gray, black, or white — gives off CO.
• Never use a portable gas camp stove indoors. Using a gas camp stove indoors can cause CO to build up inside your home, cabin, or camper.
• Never use a generator inside your home, basement, or garage or near a window, door, or vent. How can I avoid CO poisoning from my vehicle?
• Have a mechanic check the exhaust system of my car every year. A small leak in your car's exhaust system can lead to a build up of CO inside the car.
• Never run a car or truck in the garage with the garage door shut. CO can build up quickly while your car or truck is running in a closed garage. Never run your car or truck inside a garage that is attached to a house and always open the door to any garage to let in fresh air when running a car or truck inside the garage.
• If you drive a vehicle with a tailgate, when you open the tailgate, you also need to open vents or windows to make sure air is moving through your car. If only the tailgate is open CO from the exhaust will be pulled into the car.

Improper burner adjustmentsHidden blockage or damage in chimneys
Only a trained service technician can detect hidden problems and correct these conditions!
CO poisoning symptoms have been experienced when you are home, but they lessen or disappear when you are away from home.
Warnings...Never leave a car running in a garage even with the garage door open.Never run a generator in the home, garage, or crawlspace. Opening doors and windows or
••
•
•
•
Carbon monoxide clues you can see...Rusting or water streaking on vent/chimneyLoose or missing furnace panelSootingDebris or soot falling from chimney, fireplace, or appliancesLoose or disconnected vent/chimney, fireplace or applianceLoose masonry on chimneyMoisture inside of windows
Carbon monoxide clues you cannot see...Internal appliance damage or malfunctioning components
••••
•
••
•
using fans will NOT prevent CO build-up in the home. When running a generator outdoors, keep it away from open windows and doors.Never burn charcoal in homes, tents, vehicles, or garages.Never install or service combustion appliances without proper knowledge, skills, and tools.Never use a gas range, oven, or dryer for heating.Never put foil on bottom of a gas oven because it interferes with combustion.Never operate an unvented gas-burning appliance in a closed room or in a room in which you are sleeping.
•
•
•
•
•
Loose or disconnectedvent/chimney connections
Loose masonryon chimney
Roomheater
Malfunctioningrange
CO from using a charcoal grill,or exhaust from an autoor generator in a garage
Foil on bottom of gas oven
Generator exhaust in home,basement or crawlspace Loose or missing
furnace panel
Fireplace
Sooting
Debris or sootfalling from chimney,
fireplace or appliance
Moistureinside ofwindows
Malfunctioningfurnace
Malfunctioningwater heater
Rusting or water streakingon vent/chimney
Sources of and Clues to a Possible Carbon Monoxide(CO) Problem


What causes lead poisoning?
• Many things in our everyday lives put infants, children and adults in danger of lead poisoning. Lead-based paint was used in many homes built before 1978. The older the home, the more likely that windows, cupboards, doors, porches, and outdoor surfaces contain lead-based paint.
• Children are most often poisoned by lead dust and lead paint in older
homes. Lead dust can come from repairing areas with lead paint, opening and closing windows, and through normal wear and tear of painted areas. Lead dust settles onto the floor and gets on children's hands and toys. It enters their bodies when they put their hands or toys into their mouths.
• We now realize just how dangerous lead is. There are things you can do to
keep your children safe from lead poisoning. How can I tell if my child has been lead poisoned? A lead-poisoned child may seem healthy and not have any signs of lead poisoning. Or, they could have any of the following signs:
• Learning and behavior problems • Tiredness • Headaches • Hearing problems • Weight loss • Hyperactivity • Irritability
When should my child be tested for lead poisoning? Many children have blood lead tests as part of their regular care by a doctor or clinic. These tests are important for children who live or spend time in older houses which may have lead paint. Children should be tested for lead poisoning at one and two years of age or more often depending on their contact with sources of lead.

How do I get my child tested for lead poisoning?
• Ask your family doctor or pediatrician to do a blood lead test on your child at 12 months and 24 months of age. Medicaid insurance will pay for the cost of the test if your child is enrolled. If you have private insurance, coverage may vary. The cost of a blood lead test which is sent to the Michigan Department of Community Health Lead Laboratory for analysis is $11.
• If your child needs a blood lead test, but your insurance will not pay for it, or
you cannot afford to pay for it, the fee can be waived with permission from the laboratory.
• You can also call the Ingham County Health Department Communicable
Disease Department at 517-887-4308 and they can tell you where in your community you can get a free or reduced cost blood lead test.
How can I determine if my child should be tested?
• Does the child now (or in the recent past) live in or often visit a house built before 1950 with peeling or chipping paint? This could include a day care, preschool, or home of a relative.
YES NO DON’T KNOW
• Does the child now (or in the recent past) live in or often visit a house built before 1978 that has been remodeled within the last year?
YES NO DON’T KNOW
• Does the child have a brother or sister (or playmate) with lead poisoning?
YES NO DON’T KNOW
• Does the child live with an adult whose job or hobby involves lead?
YES NO DON’T KNOW
• Does the child's family use any home remedies that may contain lead?
YES NO DON’T KNOW
If you answered NO to every question, this means your child is at LOW RISK for lead poisoning. If you answered YES or DON’T KNOW to any of these questions, this means your child is at HIGH RISK for lead poisoning. The only way to know for sure is to have your child tested. Talk to your child's doctor to schedule a blood test. Show the doctor this questionnaire so he or she knows why your child is at risk.
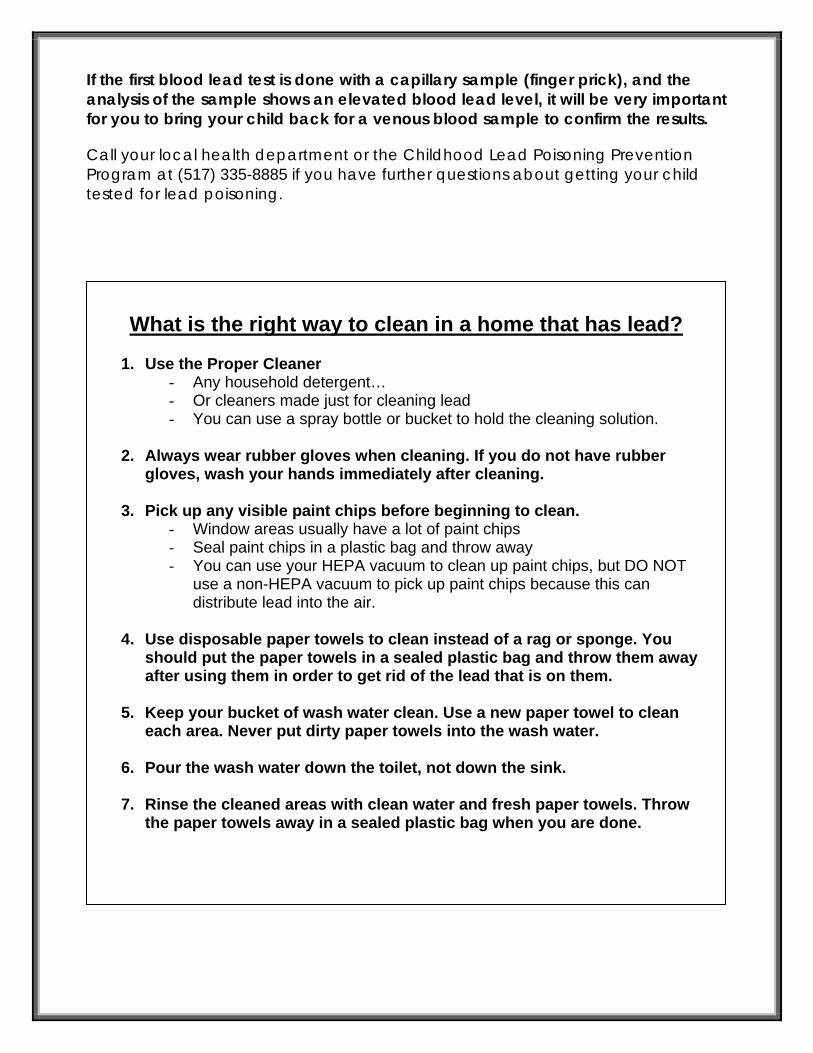
If the fanalysis of the sample shows an elevated blood lead level, it will be very important
r you to bring your child back for a venous blood sample to confirm the results.
sted for lead poisoning.
irst blood lead test is done with a capillary sample (finger prick), and the
fo Call your local health department or the Childhood Lead Poisoning Prevention Program at (517) 335-8885 if you have further questions about getting your child te
What is the right way to clean in a home that has lead?
1. Use the Proper Cleaner
- Any household detergent… - Or cleaners made just for cleaning lead - You can use a spray bottle or bucket to hold the cleaning solution.
2. Always wear rubber gloves when cleaning. If you do not have rubber
gloves, wash your hands immediately after cleaning.
3. Pick up any visible paint chips before beginning to clean. - Window areas usually have a lot of paint chips - Seal paint chips in a plastic bag and throw away - You can use your HEPA vacuum to clean up paint chips, but DO NOT
use a non-HEPA vacuum to pick up paint chips because this can distribute lead into the air.
4. Use disposable paper towels to clean instead of a rag or sponge. You
should put the paper towels in a sealed plastic bag and throw them away after using them in order to get rid of the lead that is on them.
5. Keep your bucket of wash water clean. Use a new paper towel to clean
each area. Never put dirty paper towels into the wash water.
6. Pour the wash water down the toilet, not down the sink.
7. Rinse the cleaned areas with clean water and fresh paper towels. Throw the paper towels away in a sealed plastic bag when you are done.

What do lead test results mean?
If bloo …
d lead level is… A child needs
0-9 mcg/dL* No further action. Rescreen as recommended.
10-14 mcg/dL Follow-up testing within 3 months.
15-19 mcg/dL Follow-up testing within 2 months.
20-44 mcg/dL Me . Inspection for and removal of
dical evaluation and care
lead hazards in the child’s environment.
45-69 mcg/dL Medical evaluation and care. In f
All started within 48 hours:
spection for and removal olead hazards in the child’s
environment. 70 mcg/dL or higher—Medical Emergency and treatment. Inspection for
and removal of lead hazards
Immediate: Hospitalization
in the child’s environment.
• “mcg/dL” means “micrograms” of lea
ource: Michigan Department of Community Health - “Questions and Answers bout Childhood Lead Poisoning” factsheet located at: ttp://www.michigan.gov/mdch/0,1607,7-132-2940_2955_2983-19536--,00.html
d per “deciliter” of blood.
Sah

IMPORTANT!
Lead From Paint, Dust, andSoil Can Be Dangerous If Not
Managed Properly
FACT: Lead exposure can harm young children and babies even before theyare born.
FACT: Even children who seem healthy canhave high levels of lead in their bodies.
FACT: People can get lead in their bodies bybreathing or swallowing lead dust, or byeating soil or paint chips containinglead.
FACT: People have many options for reducinglead hazards. In most cases, lead-basedpaint that is in good condition is not ahazard.
FACT: Removing lead-based paint improperlycan increase the danger to your family.
If you think your home might have lead hazards, read this pamphlet to learn some
simple steps to protect your family.
1

7
If you suspect that your house has leadhazards, you can take some immediatesteps to reduce your family’s risk:
� If you rent, notify your landlord ofpeeling or chipping paint.
� Clean up paint chips immediately.
� Clean floors, window frames, windowsills, and other surfaces weekly. Use amop or sponge with warm water and ageneral all-purpose cleaner or a cleanermade specifically for lead. REMEMBER:NEVER MIX AMMONIA AND BLEACHPRODUCTS TOGETHER SINCE THEYCAN FORM A DANGEROUS GAS.
� Thoroughly rinse sponges and mopheads after cleaning dirty or dustyareas.
� Wash children’s hands often, especial-ly before they eat and before nap timeand bed time.
� Keep play areas clean. Wash bottles,pacifiers, toys, and stuffed animals regularly.
� Keep children from chewing windowsills or other painted surfaces.
� Clean or remove shoes beforeentering your home to avoidtracking in lead from soil.
� Make sure children eat nutritious, low-fat meals high in iron and calcium, such asspinach and dairy products.Children with good diets absorbless lead.
What You Can Do Now To Protect Your Family

Many houses and apartments built before 1978 havepaint that contains high levels of lead (called lead-based paint). Lead from paint, chips, and dust can
pose serious health hazards if not taken care of properly.
OWNERS, BUYERS, and RENTERS areencouraged to check for lead (see page 6)before renting, buying or renovating pre-1978 housing.
Federal law requires that individuals receive certain information before renting, buying, or renovating pre-1978 housing:
LANDLORDS have to disclose known infor-mation on lead-based paint and lead-basedpaint hazards before leases take effect.Leases must include a disclosure aboutlead-based paint.
SELLERS have to disclose known informa-tion on lead-based paint and lead-basedpaint hazards before selling a house. Salescontracts must include a disclosure aboutlead-based paint. Buyers have up to 10days to check for lead.
RENOVATORS disturbing more than 2 squarefeet of painted surfaces have to give youthis pamphlet before starting work.
Are You Planning To Buy, Rent, or Renovatea Home Built Before 1978?

2
People can get lead in their body if they:
� Breathe in lead dust (especially duringrenovations that disturb painted surfaces).
� Put their hands or other objects covered with lead dust in their mouths.
� Eat paint chips or soil that containslead.
Lead is even more dangerous to childrenunder the age of 6:
� At this age children’s brains and nervoussystems are more sensitive to the dam-aging effects of lead.
� Children’s growing bodies absorb morelead.
� Babies and young children often puttheir hands and other objects in theirmouths. These objects can have leaddust on them.
Lead is also dangerous to women ofchildbearing age:
� Women with a high lead level in theirsystem prior to pregnancy would exposea fetus to lead through the placentaduring fetal development.
Lead Gets in the Body in Many Ways
Childhoodleadpoisoningremains amajorenvironmen-tal healthproblem inthe U.S.
Even childrenwho appearhealthy canhave danger-ous levels oflead in theirbodies.

3
Lead’s Effects
It is important to know that even exposureto low levels of lead can severely harm children.
In children, lead can cause:
� Nervous system and kidney damage.
� Learning disabilities, attention deficitdisorder, and decreased intelligence.
� Speech, language, and behavior problems.
� Poor muscle coordination.
� Decreased muscle and bone growth.
� Hearing damage.
While low-lead exposure is most common, exposure to high levels of lead can have devastating effects onchildren, including seizures, uncon-sciousness, and, in some cases, death.
Although children are especially susceptible to lead exposure, lead can be dangerous for adults too.
In adults, lead can cause:
� Increased chance of illness duringpregnancy.
� Harm to a fetus, including brain damage or death.
� Fertility problems (in men and women).
� High blood pressure.
� Digestive problems.
� Nerve disorders.
� Memory and concentration problems.
� Muscle and joint pain.
Brain or Nerve Damage
Slowed Growth
HearingProblems
ReproductiveProblems(Adults)
DigestiveProblems
Lead affectsthe body inmany ways.
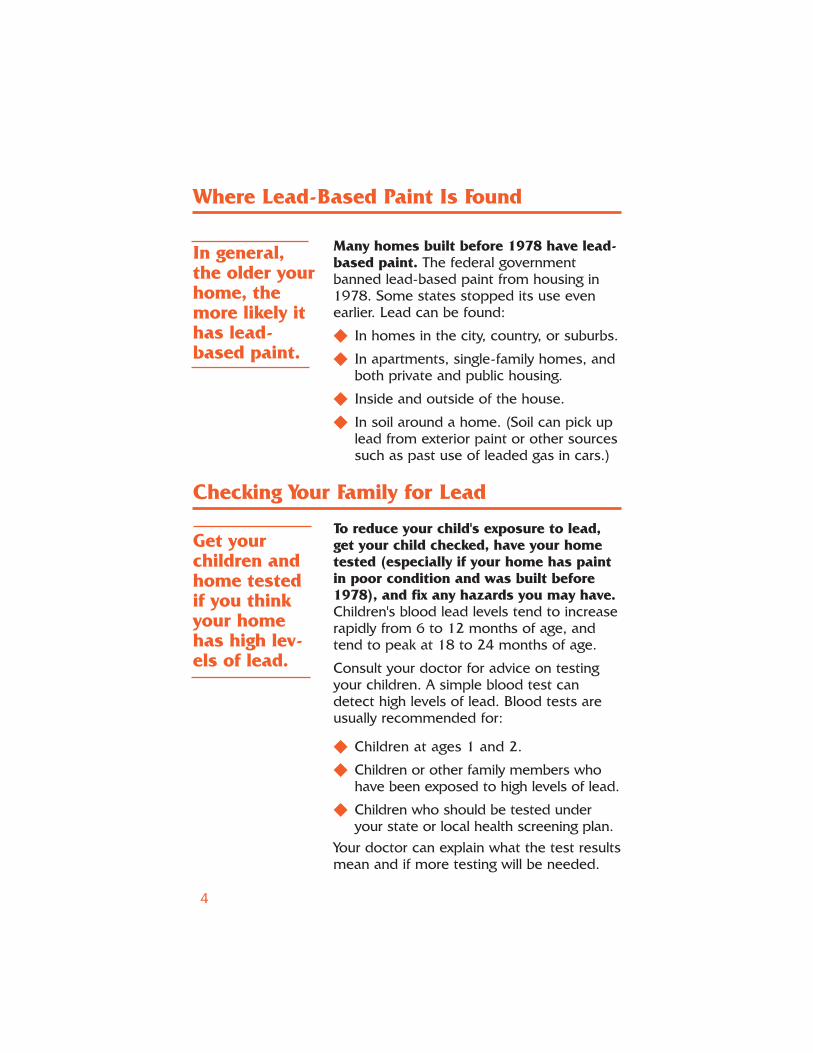
4
Many homes built before 1978 have lead-based paint. The federal governmentbanned lead-based paint from housing in1978. Some states stopped its use evenearlier. Lead can be found:
� In homes in the city, country, or suburbs.
� In apartments, single-family homes, andboth private and public housing.
� Inside and outside of the house.
� In soil around a home. (Soil can pick uplead from exterior paint or other sourcessuch as past use of leaded gas in cars.)
To reduce your child's exposure to lead,get your child checked, have your hometested (especially if your home has paintin poor condition and was built before1978), and fix any hazards you may have.Children's blood lead levels tend to increaserapidly from 6 to 12 months of age, andtend to peak at 18 to 24 months of age.
Consult your doctor for advice on testingyour children. A simple blood test candetect high levels of lead. Blood tests areusually recommended for:
� Children at ages 1 and 2.
� Children or other family members whohave been exposed to high levels of lead.
� Children who should be tested underyour state or local health screening plan.
Your doctor can explain what the test resultsmean and if more testing will be needed.
Get yourchildren andhome testedif you thinkyour homehas high lev-els of lead.
Checking Your Family for Lead
Where Lead-Based Paint Is Found
In general,the older yourhome, themore likely ithas lead-based paint.

Lead-based paint is usually not a hazard ifit is in good condition, and it is not on animpact or friction surface, like a window. Itis defined by the federal government aspaint with lead levels greater than or equalto 1.0 milligram per square centimeter, ormore than 0.5% by weight.
Deteriorating lead-based paint (peeling,chipping, chalking, cracking or damaged)is a hazard and needs immediate attention.It may also be a hazard when found on sur-faces that children can chew or that get alot of wear-and-tear, such as:
� Windows and window sills.
� Doors and door frames.
� Stairs, railings, banisters, and porches.
Lead dust can form when lead-based paint is scraped, sanded, orheated. Dust also forms when painted surfaces bump or rub togeth-er. Lead chips and dust can get on surfaces and objects that peopletouch. Settled lead dust can re-enter the air when people vacuum,sweep, or walk through it. The following two federal standards havebeen set for lead hazards in dust:
� 40 micrograms per square foot (µg/ft2) and higher for floors,including carpeted floors.
� 250 µg/ft2 and higher for interior window sills.
Lead in soil can be a hazard when children play in bare soil orwhen people bring soil into the house on their shoes. The followingtwo federal standards have been set for lead hazards in residentialsoil:
� 400 parts per million (ppm) and higher in play areas of bare soil.
� 1,200 ppm (average) and higher in bare soil in the remainder ofthe yard.
The only way to find out if paint, dust and soil lead hazards exist isto test for them. The next page describes the most common meth-ods used.
Lead frompaint chips,which youcan see, andlead dust,which youcan’t alwayssee, can bothbe serious hazards.
Identifying Lead Hazards
5
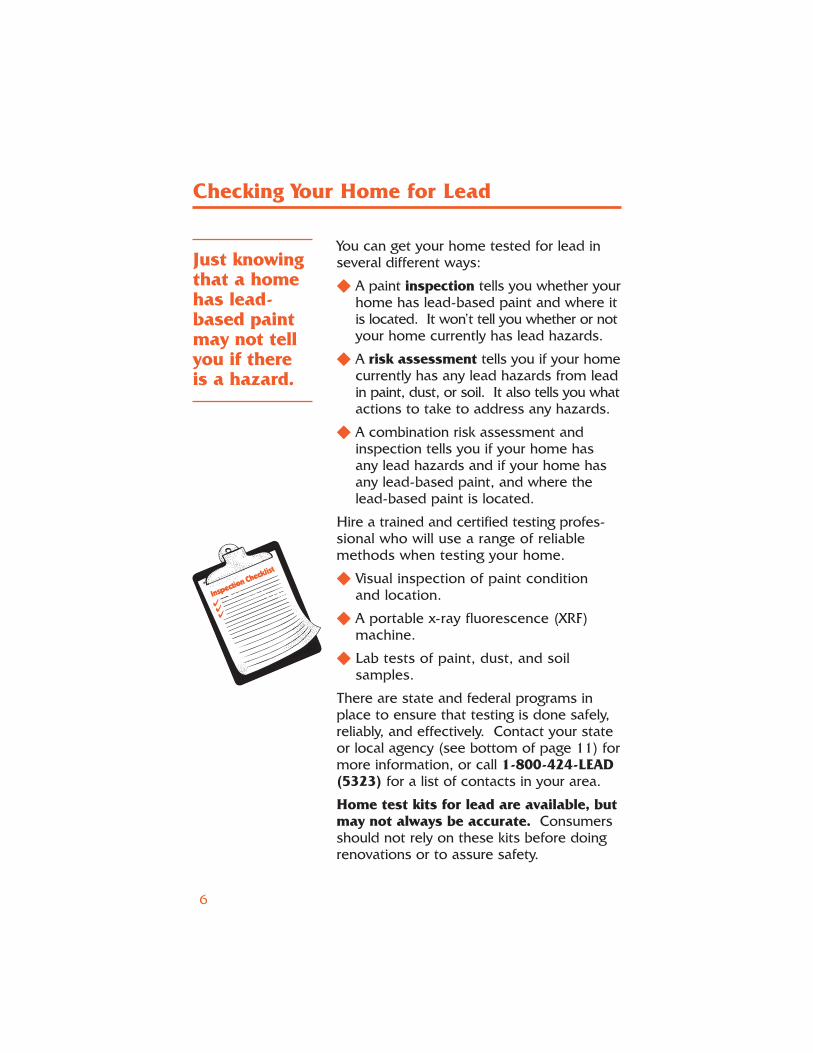
6
You can get your home tested for lead inseveral different ways:
� A paint inspection tells you whether yourhome has lead-based paint and where itis located. It won’t tell you whether or notyour home currently has lead hazards.
� A risk assessment tells you if your homecurrently has any lead hazards from leadin paint, dust, or soil. It also tells you whatactions to take to address any hazards.
� A combination risk assessment andinspection tells you if your home has any lead hazards and if your home hasany lead-based paint, and where thelead-based paint is located.
Hire a trained and certified testing profes-sional who will use a range of reliablemethods when testing your home.
� Visual inspection of paint condition and location.
� A portable x-ray fluorescence (XRF)machine.
� Lab tests of paint, dust, and soilsamples.
There are state and federal programs inplace to ensure that testing is done safely,reliably, and effectively. Contact your stateor local agency (see bottom of page 11) formore information, or call 1-800-424-LEAD(5323) for a list of contacts in your area.
Home test kits for lead are available, butmay not always be accurate. Consumersshould not rely on these kits before doingrenovations or to assure safety.
Checking Your Home for Lead
Just knowingthat a homehas lead-based paintmay not tellyou if there is a hazard.
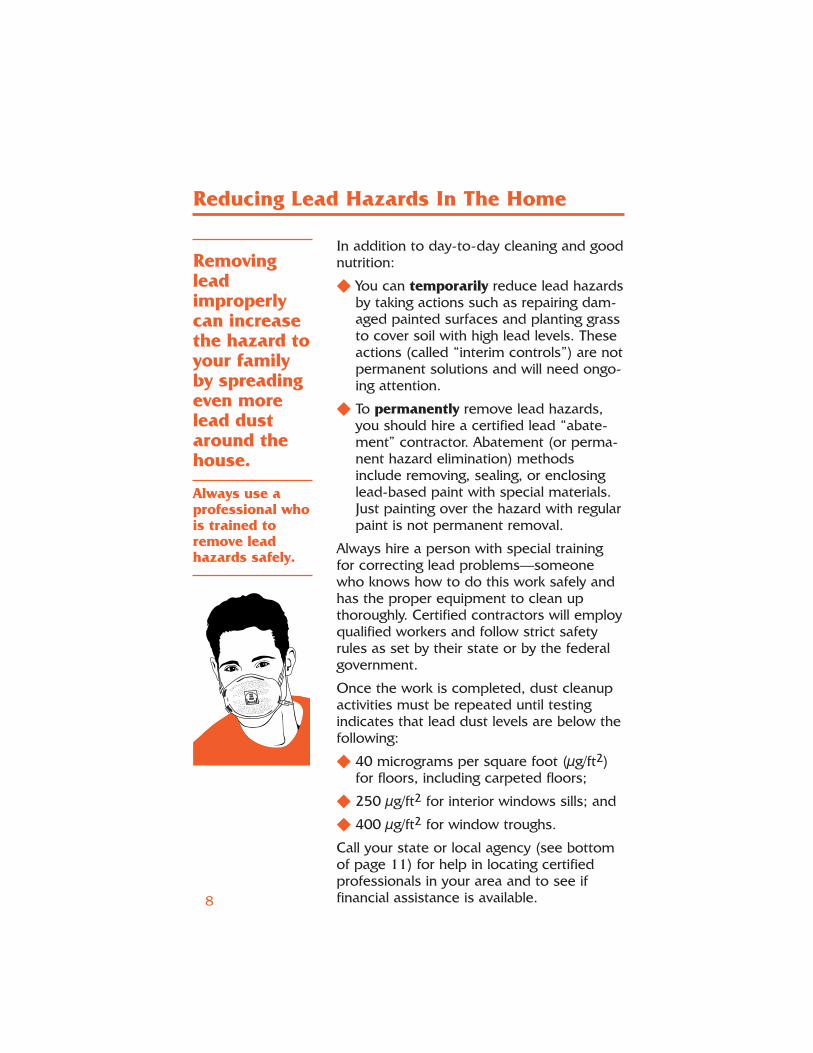
8
In addition to day-to-day cleaning and goodnutrition:
� You can temporarily reduce lead hazardsby taking actions such as repairing dam-aged painted surfaces and planting grassto cover soil with high lead levels. Theseactions (called “interim controls”) are notpermanent solutions and will need ongo-ing attention.
� To permanently remove lead hazards,you should hire a certified lead “abate-ment” contractor. Abatement (or perma-nent hazard elimination) methodsinclude removing, sealing, or enclosinglead-based paint with special materials.Just painting over the hazard with regularpaint is not permanent removal.
Always hire a person with special trainingfor correcting lead problems—someonewho knows how to do this work safely andhas the proper equipment to clean up thoroughly. Certified contractors will employqualified workers and follow strict safetyrules as set by their state or by the federalgovernment.
Once the work is completed, dust cleanupactivities must be repeated until testingindicates that lead dust levels are below thefollowing:
� 40 micrograms per square foot (µg/ft2)for floors, including carpeted floors;
� 250 µg/ft2 for interior windows sills; and
� 400 µg/ft2 for window troughs.
Call your state or local agency (see bottomof page 11) for help in locating certifiedprofessionals in your area and to see iffinancial assistance is available.
Reducing Lead Hazards In The Home
Removingleadimproperlycan increasethe hazard toyour familyby spreadingeven morelead dustaround thehouse.
Always use a professional whois trained toremove lead hazards safely.

Take precautions before your contractor oryou begin remodeling or renovating any-thing that disturbs painted surfaces (suchas scraping off paint or tearing out walls):
� Have the area tested for lead-basedpaint.
� Do not use a belt-sander, propanetorch, high temperature heat gun, dryscraper, or dry sandpaper to removelead-based paint. These actions createlarge amounts of lead dust and fumes.Lead dust can remain in your homelong after the work is done.
� Temporarily move your family (espe-cially children and pregnant women)out of the apartment or house until the work is done and the area is prop-erly cleaned. If you can’t move yourfamily, at least completely seal off thework area.
� Follow other safety measures toreduce lead hazards. You can find outabout other safety measures by calling 1-800-424-LEAD. Ask for the brochure“Reducing Lead Hazards WhenRemodeling Your Home.” This brochureexplains what to do before, during, and after renovations.
If you have already completed renova-tions or remodeling that could havereleased lead-based paint or dust, getyour young children tested and followthe steps outlined on page 7 of thisbrochure.
Remodeling or Renovating a Home WithLead-Based Paint
If not conductedproperly, certain typesof renova-tions canrelease leadfrom paintand dust intothe air.
9

10
� Drinking water. Your home might haveplumbing with lead or lead solder. Callyour local health department or watersupplier to find out about testing yourwater. You cannot see, smell, or tastelead, and boiling your water will not getrid of lead. If you think your plumbingmight have lead in it:
• Use only cold water for drinking andcooking.
• Run water for 15 to 30 secondsbefore drinking it, especially if youhave not used your water for a fewhours.
� The job. If you work with lead, youcould bring it home on your hands orclothes. Shower and change clothesbefore coming home. Launder your workclothes separately from the rest of your family’s clothes.
� Old painted toys and furniture.
� Food and liquids stored in lead crystalor lead-glazed pottery or porcelain.
� Lead smelters or other industries thatrelease lead into the air.
� Hobbies that use lead, such as makingpottery or stained glass, or refinishingfurniture.
� Folk remedies that contain lead, such as“greta” and “azarcon” used to treat anupset stomach.
Other Sources of Lead
While paint, dust,and soil are themost commonsources of lead,other leadsources also exist.

11
The National Lead Information CenterCall 1-800-424-LEAD (424-5323) to learnhow to protect children from lead poisoningand for other information on lead hazards.To access lead information via the web, visitwww.epa.gov/lead andwww.hud.gov/offices/lead/.
EPA’s Safe Drinking Water HotlineCall 1-800-426-4791 for information aboutlead in drinking water.
Consumer Product Safety Commission (CPSC) Hotline
To request information on lead inconsumer products, or to report anunsafe consumer product or a prod-uct-related injury call 1-800-638-2772, or visit CPSC's Web site at:www.cpsc.gov.
Health and Environmental AgenciesSome cities, states, and tribes havetheir own rules for lead-based paintactivities. Check with your local agency tosee which laws apply to you. Most agenciescan also provide information on finding alead abatement firm in your area, and onpossible sources of financial aid for reducinglead hazards. Receive up-to-date addressand phone information for your local con-tacts on the Internet at www.epa.gov/leador contact the National Lead InformationCenter at 1-800-424-LEAD.
For More Information
For the hearing impaired, call the Federal Information Relay Service at 1-800-877-8339 to access any of
the phone numbers in this brochure.

The Ingham County Health Department provides short and long term radon test kits to Ingham County residents at a minimal cost. Testing for radon in your home is quick and easy. You should test your home in the winter. The test kit should be placed in the lowest level of the home (basement or first floor) about 20 inches above the floor, and you should keep the test kit away from drafts, high heat, high humidity, and exterior walls. Short term tests only take 2 or 3 days to complete. The instructions will tell you where to mail the sample. Contact the Ingham County Health Department Bureau of Environmental Health to purchase a radon test kit for your home. They usually cost around $10. Follow all instructions included in the kit. After you mail in your sample, you will receive your home’s test results by mail. If the level is higher than 4, call the Ingham County Health Department or Healthy Homes University for help with reducing the radon level in your home.
Ingham County Health Department Bureau of Environmental Health
5303 S. Cedar St. Lansing, MI 48911
(517) 887-4312

A Citizen’s GuideTo RadonThe Guide To ProtectingYourself And Your FamilyFrom Radon
Printed on Recycled Paper (50% Post-Consumer Content)www.epa.gov/radon/pubs/citguide.html

2
EPA Recommends:
Test your home for radon—it’s easy andinexpensive.
Fix your home if your radon level is4 picocuries per liter (pCi/L) or higher.
Radon levels less than 4 pCi/L still pose arisk, and in many cases may be reduced.
Radon isestimated
to causethousands oflung cancer
deaths in theU.S. each year.
*Radon is estimated to cause about 21,000 lung cancer deaths per year, accordingto EPA’s 2003 Assessment of Risks from Radon in Homes (EPA 402-R-03-003). Thenumbers of deaths from other causes are taken from the Centers for DiseaseControl and Prevention’s 1999-2001 National Center for Injury Prevention andControl Report and 2002 National Safety Council Reports.
30,000
deathsper year
10,000
Drownings
2
HomeFires
Falls inthe Home
21,000
U.S. EPA 402-K-07-009, Revised May 2007
A Citizen’s Guide to Radon
17,400
8,000
3,9002,800
RADON* DrunkDriving

3
Radon is a cancer-causing, radioactive gas.You can’t see radon. And you can’t smell it or taste it. But it may be aproblem in your home.
Radon is estimated to cause many thousands of deaths each year. That’sbecause when you breathe air containing radon, you can get lung cancer. Infact, the Surgeon General has warned that radon is the second leading causeof lung cancer in the United States today. Only smoking causes more lungcancer deaths. If you smoke and your home has high radon levels, yourrisk of lung cancer is especially high.
Radon can be found all over the U.S.Radon comes from the natural (radioactive) breakdown of uranium in soil,rock and water and gets into the air you breathe. Radon can be found allover the U.S. It can get into any type of building—homes, offices, andschools—and result in a high indoor radon level. But you and your familyare most likely to get your greatest exposure at home, where you spend mostof your time.
You should test for radon.Testing is the only way to know if you and your family are at risk fromradon. EPA and the Surgeon General recommend testing all homes belowthe third floor for radon. EPA also recommends testing in schools.
Testing is inexpensive and easy—it should only take a few minutes of yourtime. Millions of Americans have already tested their homes for radon (seepage 5).
You can fix a radon problem.Radon reduction systems work and they are not too costly. Some radonreduction systems can reduce radon levels in your home by up to 99%. Evenvery high levels can be reduced to acceptable levels.
New homes can be built with radon-resistant features.Radon-resistant construction techniques can be effective in preventing radonentry. When installed properly and completely, these simple and inexpensivetechniques can help reduce indoor radon levels in homes. In addition,installing them at the time of construction makes it easier and less expensiveto reduce radon levels further if these passive techniques don’t reduce radonlevels to below 4 pCi/L. Every new home should be tested after occupancy,even if it was built radon-resistant. If radon levels are still in excess of 4pCi/L, the passive system should be activated by having a qualified mitigatorinstall a vent fan. For more explanation of radon resistant constructiontechniques, refer to EPA publication, Building Radon Out: A Step-by-Step Guideon How to Build Radon-Resistant Homes (see page 15).
OVER
VIEW
3U.S. EPA 402-K-07-009, Revised May 2007
A Citizen’s Guide to Radon

4
RADON GETS IN THROUGH:
1. Cracks in solid floors.
2. Construction joints.
3. Cracks in walls.
4. Gaps insuspended floors.
5. Gaps aroundservice pipes.
6. Cavities inside walls.
7. The water supply.
HOW DOES RADON GET INTO YOUR HOME?Radon is a radioactive gas. It comes from the natural decay of uraniumthat is found in nearly all soils. It typically moves up through the groundto the air above and into your home through cracks and other holes in thefoundation. Your home traps radon inside, where it can build up. Anyhome may have a radon problem. This means new and old homes, well-sealed and drafty homes, and homes with or without basements.
Radon from soil gas is the main cause of radon problems. Sometimesradon enters the home through well water (see page 8). In a small numberof homes, the building materials can give off radon, too. However, buildingmaterials rarely cause radon problems by themselves.
Any home mayhave a radon
problem.
Nearly 1 out of every 15 homes in the U.S. is estimated to have elevatedradon levels. Elevated levels of radon gas have been found in homes in yourstate. Contact your state radon office (see back cover) for generalinformation about radon in your area. While radon problems may bemore common in some areas, any home may have a problem. The onlyway to know about your home is to test.
Radon can also be a problem in schools and workplaces. Ask your stateradon office (see back cover) about radon problems in schools, daycare andchildcare facilities, and workplaces in your area (also visit www.epa.gov/radon).
A Citizen’s Guide to Radon
U.S. EPA 402-K-07-009, Revised May 2007

5
HOW TO TEST YOUR HOMEYou can’t see radon, but it’s not hard to find out if you have a radonproblem in your home. All you need to do is test for radon. Testing is easyand should only take a few minutes of your time.
The amount of radon in the air is measured in “picocuries per liter ofair,” or “pCi/L.” Sometimes test results are expressed in Working Levels(WL) rather than picocuries per liter (pCi/L) (4 pCi/L equals 0.016 WL).There are many kinds of low-cost “do it yourself” radon test kits you canget through the mail and in some hardware stores and other retail outlets.If you prefer, or if you are buying or selling a home, you can hire a qualifiedtester to do the testing for you. You should first contact your state radonoffice about obtaining a list of qualified testers. You can also contact aprivate radon proficiency program for lists of privately certified radonprofessionals serving your area. For links and more information, visitwww.epa.gov/radon/proficiency.html.
There are Two General Ways to Test for Radon:SHORT-TERM TESTING:The quickest way to test is with short-term tests. Short-term tests remain in yourhome for two days to 90 days, depending on the device. “Charcoal canisters,” “alphatrack,” “electret ion chamber,” “continuous monitors,” and “charcoal liquidscintillation” detectors are most commonly used for short-term testing. Becauseradon levels tend to vary from day to day and season to season, a short-term test isless likely than a long-term test to tell you your year-round average radon level. If youneed results quickly, however, a short-term test followed by a second short-term testmay be used to decide whether to fix your home (see also page 7 under Home Sales).
LONG-TERM TESTING:Long-term tests remain in your home for more than 90 days. “Alpha track” and“electret” detectors are commonly used for this type of testing. A long-term test willgive you a reading that is more likely to tell you your home’s year-round average radonlevel than a short-term test.
How To Use a Test Kit:Follow the instructions that come with your test kit. If you are doing ashort-term test, close your windows and outside doors and keep themclosed as much as possible during the test. Heating and air conditioningsystem fans that re-circulate air may be operated. Do not operate fans orother machines which bring in air from outside. Fans that are part of aradon-reduction system or small exhaust fans operating only for shortperiods of time may run during the test. If you are doing a short-term testlasting just 2 or 3 days, be sure to close your windows and outside doors atleast 12 hours before beginning the test, too. You should not conduct
Testing is easyand should onlytake a fewminutes ofyour time.
A Citizen’s Guide to Radon
U.S. EPA 402-K-07-009, Revised May 2007

6
short-term tests lasting just 2 or 3 days during unusually severe storms or periods ofunusually high winds. The test kit should be placed in the lowest lived-in level of thehome (for example, the basement if it is frequently used, otherwise the first floor). Itshould be put in a room that is used regularly (like a living room, playroom, den, orbedroom) but not your kitchen or bathroom. Place the kit at least 20 inches above thefloor in a location where it won’t be disturbed—away from drafts, high heat, highhumidity, and exterior walls. Leave the kit in place for as long as the package says. Onceyou’ve finished the test, reseal the package and send it to the lab specified on the packageright away for analysis. You should receive your test results within a few weeks.
EPA Recommends the Following Testing Steps:
Step 1. Take a short-term test. If your result is 4 pCi/L or higher, take a follow-up test (Step 2) to be sure.
Step 2. Follow up with either a long-term test or a second short-term test:
• For a better understanding of your year-round averageradon level, take a long-term test.
• If you need results quickly, take a second short-term test.
The higher your initial short-term test result, the more certain you canbe that you should take a short-term rather than a long-term follow uptest. If your first short-term test result is more than twice EPA’s 4 pCi/Laction level, you should take a second short-term test immediately.
Step 3. • If you followed up with a long-term test: Fix your home if your long-term test result is 4 pCi/L or more.
• If you followed up with a second short-term test: The higher yourshort-term results, the more certain you can be that you should fixyour home. Consider fixing your home if the average of your first andsecond test is 4 pCi/L or higher (see also page 7 under Home Sales).
A Citizen’s Guide to Radon

7
WHAT YOUR TEST RESULTS MEANThe average indoor radon level is estimated to be about 1.3 pCi/L, andabout 0.4 pCi/L of radon is normally found in the outside air. The U.S.Congress has set a long-term goal that indoor radon levels be no morethan outdoor levels. While this goal is not yet technologically achievablein all cases, most homes today can be reduced to 2 pCi/L or below.
Sometimes short-term tests are less definitive about whether or notyour home is above 4 pCi/L. This can happen when your results are closeto 4 pCi/L. For example, if the average of your two short-term test resultsis 4.1 pCi/L, there is about a 50% chance that your year-round average issomewhat below 4 pCi/L. However, EPA believes that any radon exposurecarries some risk—no level of radon is safe. Even radon levels below 4 pCi/Lpose some risk, and you can reduce your risk of lung cancer by loweringyour radon level.
If your living patterns change and you begin occupying a lower level ofyour home (such as a basement) you should retest your home on that level.
Even if your test result is below 4 pCi/L, you may want to test againsometime in the future.
RADON AND HOME SALES
More and more, home buyers and renters are asking about radon levels before they buy or rent a home.Because real estate sales happen quickly, there is often little time to deal with radon and other issues. Thebest thing to do is to test for radon NOW and save the results in case the buyer is interested in them. Fix aproblem if it exists so it won’t complicate your home sale. If you are planning to move, call your state radonoffice (see back page) for EPA's pamphlet “Home Buyer’s and Seller’s Guide to Radon,” which addresses somecommon questions (www.epa.gov/radon/pubs/realestate.html). You can also use the results of two short-termtests done side-by-side (four inches apart) to decide whether to fix your home.
During home sales:
• Buyers often ask if a home has been tested, and if elevated levels were reduced.
• Buyers frequently want tests made by someone who is not involved in the home sale. Your state radonoffice (see back cover) can assist you in identifying a qualified tester.
• Buyers might want to know the radon levels in areas of the home (like a basement they plan to finish) thatthe seller might not otherwise test.
Today many homes are built to help prevent radon from coming in. Building codes in your state or local areamay require these radon-resistant construction features. If you are buying or renting a new home, ask theowner or builder if it has radon-resistant features. The EPA recommends building new homes with radon-resistant features in high radon potential (Zone 1) areas. Even if built radon-resistant, every new home shouldbe tested for radon after occupancy. If you have a test result of 4 pCi/L or more, you can have a qualifiedmitigator easily add a vent fan to an existing passive system for about $300 and further reduce the radon levelin your home. For more information, refer to the EPA’s Map of Radon Zones and other useful EPA documentson radon-resistant new construction (see publications on page 15), or visit www.epa.gov/radon.
Test your homenow and saveyour results. Ifyou find highradon levels, fixyour home beforeyou decide tosell it.
A Citizen’s Guide to Radon
U.S. EPA 402-K-07-009, Revised May 2007

8
RADON IN WATERThere are two main sources for theradon in your home’s indoor air,the soil and the water supply.Compared to radon entering thehome through water, radonentering your home through thesoil is usually a much larger risk.
The radon in your water supplyposes an inhalation risk and aningestion risk. Research has shownthat your risk of lung cancer frombreathing radon in air is muchlarger than your risk of stomachcancer from swallowing water withradon in it. Most of your risk fromradon in water comes from radon
If you’ve testedthe air in your
home and founda radon problem,
and your watercomes from a
well, have yourwater tested.
released into the air when water is used for showering and other householdpurposes.
Radon in your home’s water is not usually a problem when its source issurface water. A radon in water problem is more likely when its source isground water, e.g., a private well or a public water supply system that usesground water. If you are concerned that radon may be entering your homethrough the water and your water comes from a public water supply,contact your water supplier.
If you’ve tested your private well and have a radon in water problem, itcan be fixed. Your home’s water supply can be treated in two ways. Point-of-entry treatment can effectively remove radon from the water before itenters your home. Point-of-use treatment devices remove radon from yourwater at the tap, but only treat a small portion of the water you use and arenot effective in reducing the risk from breathing radon released into the airfrom all water used in the home.
For more information, call EPA’sDrinking Water Hotline at (800) 426-4791or visit www.epa.gov/safewater/radon.html. Ifyour water comes froma private well, you canalso contact yourstate radon office.
A Citizen’s Guide to Radon

9
RADON AND HOMERENOVATIONS
If you are planningany major structuralrenovation, such asconverting an unfin-ished basement areainto living space, it isespecially important totest the area for radonbefore you begin therenovation. If yourtest results indicate aradon problem, radon-resistant techniquescan be inexpensivelyincluded as part of therenovation. Becausemajor renovations canchange the level ofradon in any home,always test again afterwork is completed.
HOW TO LOWER THE RADON LEVELIN YOUR HOMESince there is no known safe level of radon, there can always be somerisk. But the risk can be reduced by lowering the radon level in yourhome.
There are several proven methods to reduce radon in your home, but theone primarily used is a vent pipe system and fan, which pulls radon frombeneath the house and vents it to the outside. This system, known as a soilsuction radon reduction system, does not require major changes to yourhome. Sealing foundation cracks and other openings makes this kind ofsystem more effective and cost-efficient. Similar systems can also beinstalled in houses with crawl spaces. Radon contractors can use othermethods that may also work in your home. The right system depends onthe design of your home and other factors.
Ways to reduce radon in your home are discussed in EPA’s Consumer’sGuide to Radon Reduction. You can get a copy from your state radon office,or view it online at www.epa.gov/radon/pubs.
The cost of reducing radon in your home depends on how your homewas built and the extent of the radon problem. Most homes can be fixed forabout the same cost as other common home repairs. The average housecosts about $1,200 for a contractor to fix, although this can range from about$800 to about $2,500. The cost is much less if a passive system was installedduring construction.
A Citizen’s Guide to Radon

10
Lowering high radon levels requires technical knowledge and specialskills. You should use a contractor who is trained to fix radon problems. Aqualified contractor can study the radon problem in your home and helpyou pick the right treatment method.
Check with your state radon office for names of qualified or state certi-fied radon contractors in your area. You can also contact private radonproficiency programs for lists of privately certified radon professionals inyour area. For more information on private radon proficiency programs,visit www.epa.gov/radon/proficiency.html. Picking someone to fix your radonproblem is much like choosing a contractor for other home repairs—youmay want to get references and more than one estimate.
If you are considering fixing your home’s radon problem yourself, you shouldfirst contact your state radon office for guidance and assistance.
You should also test your home again after it is fixed to be sure thatradon levels have been reduced. Most soil suction radon reduction systemsinclude amonitor that willindicate whetherthe system isoperatingproperly. Inaddition, it’s agood idea toretest your homeevery two yearsto be sure radonlevels remainlow.
Most homes canbe fixed for
about the samecost as other
common homerepairs.
Note: This diagram is a composite view of several mitigation options.The typical mitigation system usually has only one pipe penetrationthrough the basement floor; the pipe may also be installed on theoutside of the house.
A Citizen’s Guide to Radon
U.S. EPA 402-K-07-009, Revised May 2007

11
THE RISK OF LIVING WITH RADONRadon gas decays into radioactive particles that can get trapped inyour lungs when you breathe. As they break down further, theseparticles release small bursts of energy. This can damage lung tis-sue and lead to lung cancer over the course of your lifetime. Noteveryone exposed to elevated levels of radon will develop lung cancer.And the amount of time between exposure and the onset of the diseasemay be many years.
Like other environmental pollutants, there is some uncertainty aboutthe magnitude of radon health risks. However, we know more aboutradon risks than risks from most other cancer-causing substances. Thisis because estimates of radon risks are based on studies of cancer inhumans (underground miners).
Smoking combined with radon is an especially serious health risk.Stop smoking and lower your radon level to reduce your lung cancerrisk.
Children have been reported to have greater risk than adults ofcertain types of cancer from radiation, but there are currently noconclusive data on whether children are at greater risk than adultsfrom radon.
Your chances of getting lung cancer from radon depend mostly on:
• How much radon is in your home
• The amount of time you spend inyour home
• Whether you are a smoker or haveever smoked
Scientists aremore certainabout radon risksthan risks frommost othercancer-causingsubstances.
A Citizen’s Guide to Radon
U.S. EPA 402-K-07-009, Revised May 2007
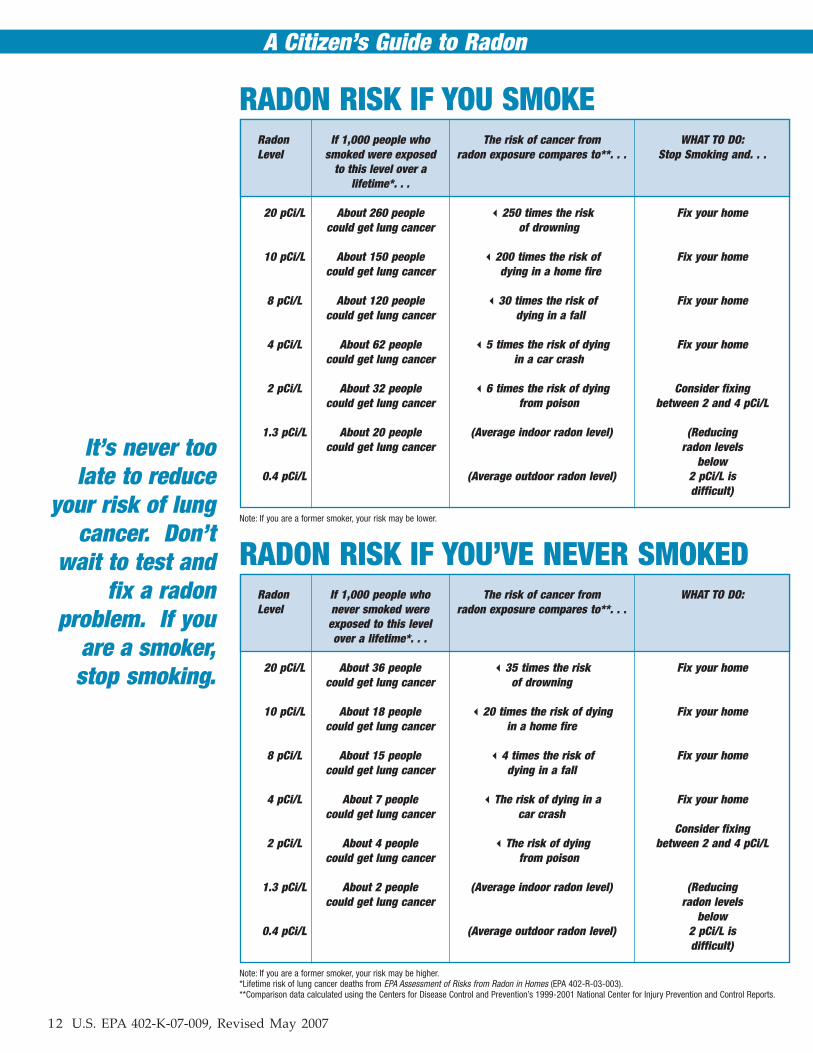
12
RADON RISK IF YOU SMOKE
RADON RISK IF YOU’VE NEVER SMOKED
RadonLevel
20 pCi/L
10 pCi/L
8 pCi/L
4 pCi/L
2 pCi/L
1.3 pCi/L
0.4 pCi/L
If 1,000 people whosmoked were exposed
to this level over alifetime*. . .
About 260 peoplecould get lung cancer
About 150 peoplecould get lung cancer
About 120 peoplecould get lung cancer
About 62 peoplecould get lung cancer
About 32 peoplecould get lung cancer
About 20 peoplecould get lung cancer
The risk of cancer fromradon exposure compares to**. . .
250 times the risk of drowning
200 times the risk of dying in a home fire
30 times the risk of dying in a fall
5 times the risk of dying in a car crash
6 times the risk of dying from poison
(Average indoor radon level)
(Average outdoor radon level)
WHAT TO DO:Stop Smoking and. . .
Fix your home
Fix your home
Fix your home
Fix your home
Consider fixingbetween 2 and 4 pCi/L
(Reducingradon levels
below2 pCi/L isdifficult)
Note: If you are a former smoker, your risk may be lower.
It’s never toolate to reduce
your risk of lungcancer. Don’t
wait to test andfix a radon
problem. If youare a smoker,stop smoking.
RadonLevel
20 pCi/L
10 pCi/L
8 pCi/L
4 pCi/L
2 pCi/L
1.3 pCi/L
0.4 pCi/L
If 1,000 people whonever smoked wereexposed to this levelover a lifetime*. . .
About 36 peoplecould get lung cancer
About 18 peoplecould get lung cancer
About 15 peoplecould get lung cancer
About 7 peoplecould get lung cancer
About 4 peoplecould get lung cancer
About 2 peoplecould get lung cancer
The risk of cancer fromradon exposure compares to**. . .
35 times the riskof drowning
20 times the risk of dyingin a home fire
4 times the risk ofdying in a fall
The risk of dying in acar crash
The risk of dying from poison
(Average indoor radon level)
(Average outdoor radon level)
WHAT TO DO:
Fix your home
Fix your home
Fix your home
Fix your home
Consider fixingbetween 2 and 4 pCi/L
(Reducingradon levels
below2 pCi/L isdifficult)
Note: If you are a former smoker, your risk may be higher.*Lifetime risk of lung cancer deaths from EPA Assessment of Risks from Radon in Homes (EPA 402-R-03-003).**Comparison data calculated using the Centers for Disease Control and Prevention’s 1999-2001 National Center for Injury Prevention and Control Reports.
A Citizen’s Guide to Radon
U.S. EPA 402-K-07-009, Revised May 2007

13
RADONMYTHS
MYTH: Scientistsaren’t sure radon
really is a problem.
FACT: Although some scientists dispute the precise number ofdeaths due to radon, all major health organizations (like theCenters for Disease Control, the American Lung Associationand the American Medical Association) agree with estimatesthat radon causes thousands of preventable lung cancerdeaths every year. This is especially true among smokers,since the risk to smokers is much greater than to non-smokers.
MYTH: Radon testing isdifficult, time
consuming andexpensive.
FACT: Radon testing is easy. You can test your home yourself orhire a qualified radon test company. Either approach takesonly a small amount of time and effort.
MYTH: Radon test kits arenot reliable and are
difficult to find.
FACT: Reliable test kits are available from qualified radon testersand companies. Reliable testing devices are also availableby phone or mail-order, and can be purchased in hardwarestores and other retail outlets. Call your state radon office(see back cover or visit www.epa.gov/radon) for help inidentifying radon testing companies.
MYTH: Homes withradon problems
can’t be fixed.
FACT: There are simple solutions to radon problems in homes.Hundreds of thousands of homeowners have already fixedradon problems in their homes. Radon levels can be readilylowered for about $800 to $2,500 (with an average cost of$1,200). Call your state radon office (see back cover) forhelp in identifying qualified mitigation contractors.
MYTH: Radon only affectscertain kinds of homes.
FACT: House construction can affect radon levels. However, radoncan be a problem in homes of all types: old homes, newhomes, drafty homes, insulated homes, homes withbasements, homes without basements. Local geology,construction materials, and how the home was built areamong the factors that can affect radon levels in homes.
A Citizen’s Guide to Radon
U.S. EPA 402-K-07-009, Revised May 2007

14
MYTH: Radon is only aproblem in certain
parts of the country.
FACT: High radon levels have been found in every state. Radonproblems do vary from area to area, but the only way toknow your radon level is to test.
MYTH: A neighbor’stest result is a good
indication of whether yourhome has a problem.
FACT: It’s not. Radon levels can vary greatly from home to home.The only way to know if your home has a radon problem isto test it.
MYTH: Everyoneshould test theirwater for radon.
FACT: Although radon gets into some homes through water, it isimportant to first test the air in the home for radon. If yourwater comes from a public water system that uses groundwater, call your water supplier. If high radon levels arefound and the home has a private well, call the Safe DrinkingWater Hotline at (800) 426-4791 for information on testingyour water.
MYTH: It’s difficult to sellhomes where radonproblems have been
discovered.
FACT: Where radon problems have been fixed, home sales havenot been blocked or frustrated. The added protection issometimes a good selling point.
MYTH: I’ve lived in myhome for so long, it
doesn’t make senseto take action now.
FACT: You will reduce your risk of lung cancer when you reduceradon levels, even if you’ve lived with a radon problem for along time.
MYTH: Short-term testscan’t be used for
making a decisionabout whether to fix
your home.
FACT: A short-term test followed by a second short-term test* canbe used to decide whether to fix your home. However, thecloser the average of your two short-term tests is to 4 pCi/L,the less certain you can be about whether your year-roundaverage is above or below that level. Keep in mind thatradon levels below 4 pCi/L still pose some risk. Radon levelscan be reduced in most homes to 2 pCi/L or below.*If the radon test is part of a real estate transaction, the result of two short-termtests can be used in deciding whether to mitigate. For more information, see EPA’s“Home Buyer’s and Seller’s Guide to Radon.”
A Citizen’s Guide to Radon
U.S. EPA 402-K-07-009, Revised May 2007

15
FORFURTHER
INFORMATION
www.epa.gov/iaq/whereyoulive.htmlCheck the above Web site for a listingof your EPA regional office.
EPA Regional Offices
1-800-SOS-RADON (767-7236)1-800-SOS-RADON (767-7236)1-800-SOS-RADON (767-7236)1-800-SOS-RADON (767-7236)1-800-SOS-RADON (767-7236)Operated by the National Safety Council inpartnership with EPA to order radon testkits.
1-800-55RADON (557-2366)1-800-55RADON (557-2366)1-800-55RADON (557-2366)1-800-55RADON (557-2366)1-800-55RADON (557-2366)Operated by the National Safety Council inpartnership with EPA, for live help with radonquestions.
1-800-644-69991-800-644-69991-800-644-69991-800-644-69991-800-644-6999Radon Fix-It Hotline, operated by the NationalSafety council in partnership with EPA forinformation on how to mitigate your home.
1-866-528-31871-866-528-31871-866-528-31871-866-528-31871-866-528-3187Radon Hotline in Spanish, operators can bereached 9:00 a.m. to 5:00 p.m. to assistwith information about radon, or ordering aradon test kit.
1-800-426-47911-800-426-47911-800-426-47911-800-426-47911-800-426-4791Safe Drinking Water Hotline, operated undercontract to EPA. For information on testing,treament, radon in water, and drinkingwater standards.
Hotlines
EPA Radon Web Sitewww.epa.gov/radonEPA radon page includes links topublications, hotlines, privateproficiency programs and more.
EPA PublicationsRadon publications in print can bedownloaded via the EPA radon websiteat www.epa.gov/radon/pubs
Radon publications may be orderedthrough the National Service Centerfor Environmental Publications (NSCEP)by calling 1-800-490-9198, by visitingthe NSCEP website at www.epa.gov/ncepihom, or by e-mail at [email protected]
A Citizen’s Guide to Radon
U.S. EPA 402-K-07-009, Revised May 2007

16
This document was prepared by the United States Environmental Protection Agency,Indoor Environments Division (6609J), Washington, D.C. 20460
U.S. EPA 402-K-07-009, Revised May 2007
Call your state radon office for additional help with any of your radon questions. Up-to-date information on how to contact your state radon office isalso available on EPA’s Web site at www.epa.gov/iaq/whereyoulive.html, or call EPA’s toll free Indoor Air Quality Information Clearinghouse (IAQ INFO) at(800) 438-4318 to obtain the current listing.
State Radon Offices (www.epa.gov/iaq/whereyoulive.html)
AlabamaAlaskaArizonaArkansasCaliforniaColoradoConnecticutDelawareDistrict of ColumbiaFloridaGeorgiaHawaiiIdahoIllinoisIndianaIowaKansasKentuckyLouisianaMaineMaryland (EPA Region 3)MassachusettsMichiganMinnesotaMississippiMissouri
Local-Toll334-206-5391907-474-7201602-255-4845501-661-2301916-449-5674303-692-3420860-509-7367302-739-4731202-535-2999850-245-4288404-651-5120808-586-4700208-332-7319217-782-1325317-233-7147515-281-4928785-296-1560502-564-4856225-925-7042207-287-5676215-814-2086413-586-7525517-335-8037651-215-0909601-987-6893573-751-6160
MontanaNebraskaNevadaNew HampshireNew JerseyNew MexicoNew YorkNorth CarolinaNorth DakotaOhioOklahomaOregonPennsylvaniaPuerto RicoRhode IslandSouth CarolinaSouth DakotaTennesseeTexasUtahVermontVirginiaWashingtonWest VirginiaWisconsinWyoming
Local-Toll406-841-5280402-471-0594775-687-5394 x275603-271-4674609-984-5425505-827-1093518-402-7556919-571-4141701-328-5188614-644-2727405-702-5165503-731-4014 x664717-783-3594787-274-7815401-222-2438803-898-3893605-773-3151615-687-7000512-834-6688801-536-4250802-865-7730804-786-5932360-236-3253304-558-6772608-267-4795307-777-6015
Toll-Free800-582-1866800-478-8324
800-482-5400800-745-7326800-846-3986
800-464-4357
800-543-8279800-745-0037
800-445-8647800-325-1245800-272-9723800-383-5992800-693-5343
800-256-2494800-232-0842
800-RADON95800-723-6642800-798-9050800-626-7739800-628-9891
Toll-Free800-546-0483800-334-9491
800-852-3345 x4674800-648-0394
800-458-1158 x27556
800-252-6325800-523-4439
800-23RADON
800-768-0362800-438-3367800-232-1139800-572-5548800-458-0145800-439-8550800-468-0138
800-922-1255888-569-7236800-458-5847
U.S. EPA Assessment of Risksfrom Radon in Homes
In June 2003, the EPA revised its risk estimates for radonexposure in homes. EPA estimates that about 21,000 annuallung cancer deaths are radon related. EPA also concluded thatthe effects of radon and cigarette smoking are synergistic, sothat smokers are at higher risk from radon. EPA’s revisedestimates are based on the National Academy of Sciences 1998BEIR VI (Biological Effects of Ionizing Radiation) Report whichconcluded that radon is the second leading cause of lungcancer after smoking.
A Citizen’s Guide to Radon
Tribal Radon Program OfficesHopi Tribe (Arizona)Inter-Tribal Council of AmericaNavajo Nation
928-734-3100602-307-1509928-871-7672
Surgeon GeneralHealth Advisory
“Indoor radon is the second-leadingcause of lung cancer in the United
States and breathing it overprolonged periods can present a
significant health risk to families allover the country. It’s important toknow that this threat is completelypreventable. Radon can be detected
with a simple test and fixed throughwell-established venting techniques.”
January 2005

If you find a bat in your home and think someone may have come in contact with it, call the Ingham County Health Department (517-887-4308) as soon as possible for instructions on what to do.
What is Rabies?
Rabies is an infectious viral disease that affects the nervous system (brain, spinal cord, and nerves) of humans and other animals. It usually results in death for people who are not treated after being exposed. However, if it is treated, people usually make a full recovery. Tens of thousands of people are successfully treated each year after being bitten by an animal that may have rabies. A few people die of rabies each year in the United States, usually because they do not understand that they can get rabies from the bite of a wild animal and they do not seek medical care.
People get rabies from the bite of an animal with rabies (a rabid animal). Any wild animal, like a bat, raccoon, skunk, fox, or coyote can have rabies and give the disease to people. It is also possible, but not as common, that people may get rabies if infectious material from a rabid animal, such as saliva from their mouth, gets directly into the person’s eyes, nose, mouth, or a wound.
How do People Get Rabies?
How is Rabies Treated in a Person?
If a person has been bitten or scratched by an animal that is thought to have rabies, they should first clean the area immediately with soap and water if possible to reduce the chance of infection. Then, they should go to their health care provider or emergency room as soon as possible. If they are thought to be at risk of rabies, they will receive an injection (shot) at the site of the bite or scratch, as well as one in their arm. They will receive four more shots over the next four weeks. The idea of getting shots is uncomfortable for some people, but going through this treatment is much better than the risk of developing rabies!

If you are bitten by a bat — or if infectious material (such as saliva) from a bat gets into your eyes, nose, mouth, or a wound — wash the affected area with soap and water if possible and get medical care immediately. Whenever possible, the bat should be captured and sent to a laboratory for rabies testing. Contact the Ingham County Health Department for information in this situation. People usually know when they have been bitten by a bat. However, because bats have small teeth which may leave marks that are not easily seen, there are situations in which you should seek medical advice even without seeing an obvious bite wound. For example, if you wake up and find a bat in your room, see a bat in the room of an unattended child, or see a bat near a mentally impaired or intoxicated (drunk) person, seek medical advice and have the bat tested.
What Should I Do if I Come in Contact with a Bat?
When can I Be Sure that I Have NOT Been Exposed to Rabies?
• If you simply see a bat (or other wild animal) nearby
• If you come into contact with bat (or other wild animal) feces, urine, or blood
• If you see a bat in a place in your home that where it would have no chance of contact with a human (such as the attic or crawlspace)
• Touching a stick or other material that a bat (or other wild animal) has touched
• Touching a bat (or other wild animal) on its fur
In all of these examples, you are not likely to have been exposed to rabies.
If you think your pet or domestic animal has been bitten by a bat, contact a veterinarian or your local health department for assistance immediately and have the bat tested for rabies if possible. Remember to keep vaccinations current for cats, dogs, and other animals.
What Should I Do if my Pet is Exposed to a Bat?

How can I Keep Bats out of my House?
Bats should always be prevented from entering rooms of your home. For help with “bat-proofing” your home, contact an animal-control or wildlife conservation agency. If you choose to do the “bat-proofing” yourself, here are some suggestions. Carefully examine your home for holes that might allow bats to enter. Any openings larger than ¼ inch by ½ inch should be caulked or plugged. Use window screens, chimney caps, and draft-guards beneath doors to attics; fill electrical and plumbing holes with stainless steel wool or caulking; and ensure that all doors to the outside close tightly. You can prevent bats from roosting in attics or buildings by covering outside entry points. Observe where the bats exit at dusk and keep them from getting back in (“exclude” them) by loosely hanging clear plastic sheeting or bird netting over these areas. Bats can crawl out and leave, but cannot get back in. After the bats have left (allow a few days), the openings can be permanently sealed. During summer, many young bats are unable to fly. If you exclude adult bats during this time, the young may be trapped inside and die or make their way into living quarters. Thus, if possible, avoid exclusion from May through August. Most bats leave in the fall or winter to hibernate, so these are the best times to “bat-proof” your home.
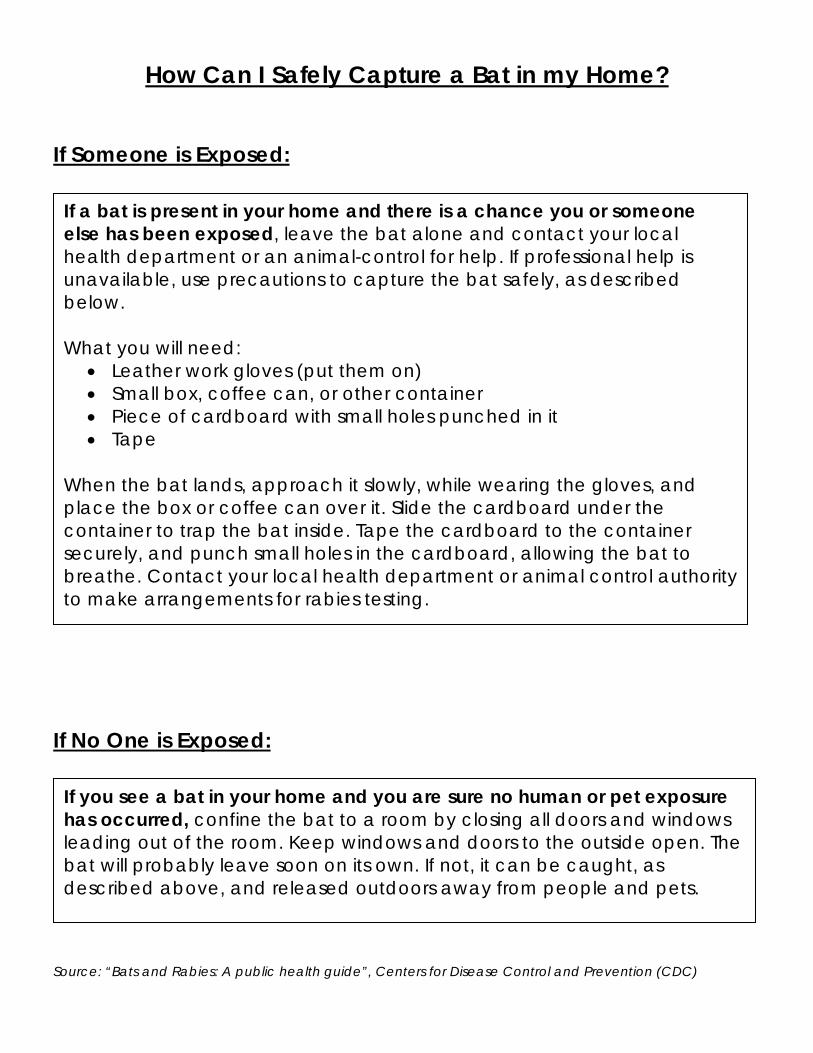
How Can I Safely Capture a Bat in my Home?
If Someone is Exposed:
If a bat is present in your home and there is a chance you or someone else has been exposed, leave the bat alone and contact your local health department or an animal-control for help. If professional help is unavailable, use precautions to capture the bat safely, as described below. What you will need:
• Leather work gloves (put them on) • Small box, coffee can, or other container • Piece of cardboard with small holes punched in it • Tape
When the bat lands, approach it slowly, while wearing the gloves, and place the box or coffee can over it. Slide the cardboard under the container to trap the bat inside. Tape the cardboard to the container securely, and punch small holes in the cardboard, allowing the bat to breathe. Contact your local health department or animal control authority to make arrangements for rabies testing.
If No One is Exposed:
If you see a bat in your home and you are sure no human or pet exposure has occurred, confine the bat to a room by closing all doors and windows leading out of the room. Keep windows and doors to the outside open. The bat will probably leave soon on its own. If not, it can be caught, as described above, and released outdoors away from people and pets.
Source: “Bats and Rabies: A public health guide”, Centers for Disease Control and Prevention (CDC)