
WELCOME TO GUIDING ELEMENTS - AIR · WELCOME TO. GUIDING ELEMENTS - AIR. Welcome to the fourth, ......
25
WELCOME TO GUIDING ELEMENTS - AIR Welcome to the fourth, and final, Guiding Elements “Camp in a Box” - Air. These four camps are based on the elements earth, fire, water and air. The elements are very dependent on each other - fire requires earth for the source (wood), air for oxygen and water for safety. Air is all around us, but did you know that air pushes against you all the time? You cannot feel the air pushing in on you because your body pushes outwards with the same force as the air. Without air we could not live. We cannot see it or smell it, but we can feel it when it moves - which is the wind. Just like water, air has many uses. Sailing boats have large sails which catch the wind to push them through the water. Windmills harness the power of the wind to grind wheat into flour or make electricity. In this package you will find the program outline and a wide variety of activities, games and crafts to choose from. As well, there are menu and recipe suggestions, a campfire, Guides Own and a kit list. Build your camp to suit your season of the year, building or campsite, number of girls and available time. Pick those activities that work the best for you and your girls and remember to be flexible. Adapt this package to have fun learning about the Air all around us. Remember to use the most current Safe Guide forms, available from the website. Your Camping, Music and Program Advisers and your local trainers are there to help you with planning any part of your camp or if you have any questions or concerns. There is an interactive crest order form available on the web site at www.bc-girlguides.org. The crests are $1.00 each for units in BC. An evaluation form has been included for you to complete after your camp and the BC Camping Committee would greatly appreciate hearing from you. Your suggestions and comments are very useful in the creation of future camp packages. We love receiving pictures, so please send some of those along too! The most important thing is flexibility and adapting this package to work for your camp. Please use your wonderful creativity as required! Most of all have fun at camp! BC Camping Committee Created 2013 If you received this resource as a printed copy please check the BC Girl Guide website to ensure it is the most recent version. This copy was revised in October 2013.
-
Upload
nguyenkiet -
Category
Documents
-
view
219 -
download
2
Transcript of WELCOME TO GUIDING ELEMENTS - AIR · WELCOME TO. GUIDING ELEMENTS - AIR. Welcome to the fourth, ......

WELCOME TO
GUIDING ELEMENTS - AIR
Welcome to the fourth, and final, Guiding Elements “Camp in a Box” - Air.
These four camps are based on the elements earth, fire, water and air. The elements are very dependent on each other - fire requires earth for the source (wood), air for oxygen and water for safety.
Air is all around us, but did you know that air pushes against you all the time? You cannot feel the air pushing in on you because your body pushes outwards with the same force as the air. Without air we could not live. We cannot see it or smell it, but we can feel it when it moves - which is the wind. Just like water, air has many uses. Sailing boats have large sails which catch the wind to push them through the water. Windmills harness the power of the wind to grind wheat into flour or make electricity.
In this package you will find the program outline and a wide variety of activities, games and crafts to choose from. As well, there are menu and recipe suggestions, a campfire, Guides Own and a kit list. Build your camp to suit your season of the year, building or campsite, number of girls and available time. Pick those activities that work the best for you and your girls and remember to be flexible. Adapt this package to have fun learning about the Air all around us.
Remember to use the most current Safe Guide forms, available from the website. Your Camping, Music and Program Advisers and your local trainers are there to help you with planning any part of your camp or if you have any questions or concerns.
There is an interactive crest order form available on the web site at www.bc-girlguides.org. The crests are $1.00 each for units in BC. An evaluation form has been included for you to complete after your camp and the BC Camping Committee would greatly appreciate hearing from you. Your suggestions and comments are very useful in the creation of future camp packages. We love receiving pictures, so please send some of those along too! The most important thing is flexibility and adapting this package to work for your camp. Please use your wonderful creativity as required! Most of all have fun at camp! BC Camping Committee Created 2013
If you received this resource as a printed copy please check the BC Girl Guide website to ensure it is the most recent version. This copy was revised in October 2013.

Guiding Elements–Air, October 2013 Page 2 of 25 May be printed/copied for use within Girl Guides of Canada–Guides du Canada.
GUIDING ELEMENTS -AIR
CONTENTS
Welcome – from BC Camping Committee page 1
Contents 2
Program Guideline 3
Program Activities & Details 5
Menu & Recipes 9
Graces 26
Campfire 27
Guide’s Own 28
Kit List 30
Evaluation Form 31

Guiding Elements–Air, October 2013 Page 3 of 25 May be printed/copied for use within Girl Guides of Canada–Guides du Canada.
PROGRAM GUIDELINE
FRIDAY EVENING
5:00 Company dinner (spaghetti, garlic bread, salad)
Or 6:00 Arrive at camp (dinner prior to arrival or bag dinner brought to camp) set up camp camp boundaries, rules, fire drill, patrol duties Dream catchers Make name tags Sing-a-long Mug Up
10:00 Bedtime
SATURDAY
7:30 Breakfast/Patrol duties
9:00 Flag ceremony
9:15 - 10:45 Round Robin
10:45 snack
11:00 break into 2 groups. Each group lays a trail for the other to follow. Repeat
12:00 Lunch using buddy burners Clean up Patrol duties Stone soup prep
1:30 quiet time
2:00 craft
2:45 snack
4:00 wide game
5:00 dinner prep dinner patrol duties
7:00 - 8:30 Geocaching, navigation, weather forecastng with guest speaker
8:30 Night Game Mug Up Campfire
10:30 Bed time

Guiding Elements–Air, October 2013 Page 4 of 25 May be printed/copied for use within Girl Guides of Canada–Guides du Canada.
SUNDAY 8:00 Breakfast
Patrol duties Girls pack up gear Break camp
10:00 Guides’ Own Camp site clean up Closing: present crests and take a group photo!
11:00 Parents pick up girls

Guiding Elements–Air, October 2013 Page 5 of 25 May be printed/copied for use within Girl Guides of Canada–Guides du Canada.
PROGRAM ACTIVITIES Choose your activities to suit the time of year, sit, number of Guides and your preferences.
Suggestions for Patrol Names wind / breeze / tornado / cyclone / twister / storm / gust / chinook / hurricane / north wind / south wind / west wind / east wind
ROUND ROBIN AIR ACTIVITIES During the round robin, you will have time for 6 to10 of the activities provided. Design and Test a Parachute
Learn about air resistance while making an awesome parachute! Design one that can fall slowly to the ground before putting it to the test, making modifications as you go. What you'll need:
A plastic bag or light material Scissors String A small object to act as the weight, a little action figure would be perfect
Instructions: Cut out a large square from your plastic bag or material. Trim the edges so it looks like an octagon (an eight sided shape). Cut a small whole near the edge of each side. Attach 8 pieces of string of the same length to each of the holes. Tie the pieces of string to the object you are using as a weight. Hopefully your parachute will descend slowly to the ground, giving your weight a comfortable landing. Use a chair or find a high spot to drop your parachute and test how well it worked, remember that you want it to drop as slow as possible. What's happening? When you release the parachute the weight pulls down on the strings and opens up a large surface area of material that uses air resistance to slow it down. The larger the surface area the more air resistance and the slower the parachute will drop. Cutting a small hole in the middle of the parachute will allow air to slowly pass through it rather than spilling out over one side, this should help the parachute fall straighter.
----------------------------------------------------------- Feather hat craft – materials: leather lacing, coloured pony beads, feathers, small safety pin Instructions – Put one small and one big feather on the end of a leather lacing. Then put 2 Pony beads over top to the feathers. Knot end of leather lacing so the beads don’t fall off. Thread 2 pony beads on the other end of the leather lacing. Tie the lacing around a 2nd 2 feathers and slide the pony bead down over the feather stem. Use the safety pin to attach it all to your camp hat.

Guiding Elements–Air, October 2013 Page 6 of 25 May be printed/copied for use within Girl Guides of Canada–Guides du Canada.
Blowing Up Balloons With CO2 Chemical reactions make for some great experiments. Make use of the carbon dioxide given off by a baking soda and lemon juice reaction by funneling the gas through a soft drink bottle. Blowing up balloons was never so easy! What you'll need:
Balloon About 40 ml of water (a cup is about 250 ml so you don't need much) Soft drink bottle Drinking straw Juice from a lemon 1 teaspoon of baking soda
Instructions: Before you begin, make sure that you stretch out the balloon to make it as easy as possible to inflate. Pour the 40 ml of water into the soft drink bottle. Add the teaspoon of baking soda and stir it around with the straw until it has dissolved. Pour the lemon juice in and quickly put the stretched balloon over the mouth of the bottle. What's happening? If all goes well then your balloon should inflate! Adding the lemon juice to the baking soda creates a chemical reaction. The baking soda is a base, while the lemon juice is an acid, when the two combine they create carbon dioxide (CO2). The gas rises up and escapes through the soft drink bottle, it doesn't however escape the balloon, pushing it outwards and blowing it up. If you don't have any lemons then you can substitute the lemon juice for vinegar.
---------------------------------------------------------------- Warm Air Needs More Room As its temperature rises, air starts to act a little differently. Find out what happens to a balloon when the air inside it heats up with this fun science experiment for kids. What you'll need:
Empty bottle Balloon Pot of hot water (not boiling)
Instructions: Stretch the balloon over the mouth of the empty bottle. Put the bottle in the pot of hot water, let it stand for a few minutes and watch what happens. What's happening? As the air inside the balloon heats up it starts to expand. The molecules begin to move faster and further apart from each other. This is what makes the balloon stretch. There is still the same amount of air inside the balloon and bottle, it has just expanded as it heats up. Warm air therefore takes up more space than the same amount of cold air, it also weighs less than cold air occupying the same space. You might have seen this principle in action if you've flown in or watched a hot air balloon.

Guiding Elements–Air, October 2013 Page 7 of 25 May be printed/copied for use within Girl Guides of Canada–Guides du Canada.
Exploding Canister This experiment can be a bit messy so you may want to save this one for a nice day and do it outside. Materials you will need:
Spoon Newspaper White Vinegar Baking Soda Pipette (optional) Film canister with a pop on lid
Steps: 1. Spread out some newspaper on the surface where you will be conducting your experiment. 2. Use your spoon (spatula) to place a spoonful of baking soda in the empty fill canister (have the lid
ready to be placed on the pot). 3. Either pour some vinegar in the film canister or use a pipette (for less mess). Very Quickly - press
the film canister lid on the pot (make sure it is in place and secure), turn it upside down very quickly and place it on the newspaper. Stand back and watch what happens.
If you get the timing right the film pot will shoot up in the air and make a loud popping sound. Try doing this experiment with different amounts of baking soda and white vinegar to see what different results you get. This experiment explodes due to the pressure of the gas build up inside (chemical reaction) the container.
-----------------------------------------------------------
Lemon Diver Materials you will need:
water lemon knife scissors balloon rubber Band Mason Jar or Jam Jar
This is magic! Girls should do this experiment with an adult (allow the adult to cut the lemon peel from the lemon). Steps:
1. Cut the tip (neck) of the balloon off. 2. Allow an adult to cut the lemon peel away from the lemon. Using a large cut of lemon peel,
make the shape of a scuba diver, boat, fish or missile. 3. Fill the jar with water all the way to the top of the jar. 4. Place the lemon peel in the jar of water. 5. Stretch the balloon to cover the entire top of the mason jar and use the rubber band to seal it in
place on the mouth of the jar. Make sure that the balloon is stretched tightly across the top and that it is not loose or sagging.
6. Using your finger, gently press down on the lid (balloon cover) and watch your lemon dive to the bottom of the jar.
7. When you release your finger, watch as the lemon returns to the top of the jar.
What happens to the lemon when you press your finger on the lid of the jar? The pressure from your finger squashes the tiny air bubbles in the lemon peel allowing water in which makes the lemon peel heavier and causes it to dive down. When you remove your finger, the air in the lemon peel expands again allowing it to float to the top (as it becomes light again)

Guiding Elements–Air, October 2013 Page 8 of 25 May be printed/copied for use within Girl Guides of Canada–Guides du Canada.
Wind socks Materials:
• cardboard or heavy paper • glue • string • crepe paper streamers • paper punch
Directions:
Roll a rectangular piece of cardboard into a tube shape and glue or staple.
On one end of the tube punch 3 holes. Loop a piece of string or yarn through each hole. Tie the 3 pieces of string together. On the other end of the tube glue approx. 5 streamers. Have fun observing the wind!
Make wind socks in different colors and sizes and compare the different sizes and see which ones "catch" the wind the best!
------------------------------------------------------ Pinwheels Materials:
• Cardstock paper or flexible plastic • Pencil • Ruler • Pushpin or straight pin • Paint, crayons, etc to decorate paper
Instructions:
Using a ruler draw a 6- to 8-inch square with a pencil. Draw on the square in an "X" shape, coming in from the corners of the square. Stop the
lines of the X about 1 inch from the center of the square. Cut out the square and the X lines. Decorate the paper as desired. Allow any decorations to dry before moving on to the
next step. Bend the top left corner of the square into the center. Skip the next corner and bend the
next corner into the middle. Repeat the process moving in a clockwise direction until every other corner is bent into the middle of the pinwheel.
Stick a pushpin or straight pin through the paper in the middle of the pinwheel. Stick the pin into a pencil eraser or drinking straw. Blow on the paper to make the pinwheel turn.
--------------------------------------------------------- Sail boats- use scraps of Styrofoam, straws and paper to construct sailing boats. Fill an outdoor pool and have races.

Guiding Elements–Air, October 2013 Page 9 of 25 May be printed/copied for use within Girl Guides of Canada–Guides du Canada.
Beaded Wind Chimes Materials
• Paper cup • Pipe cleaner • Strings • Big beads • Small bells • Metal shank button or metal washer • Drinking straws • Poster paint or acrylic paint • Paint brushes • Scissors • Hole punch
Instructions: 1. Trim a paper cup to a height of approximately 2 to 3 inches. 2. Punch 4 evenly-spaced holes around the cup's mouth. 3. Paint the paper cup with poster paint and make your own designs. You may even finger paint if
you like. Use acrylic paint if the surface of your paper cup is glossy or waxy.
4. Cut 4 equal lengths of string approximately 12 inches long. Cut a 5th string that is 2 inches longer.
5. Tie a small bell at the end of 4 of the strings. Set the 5th string aside for the pendulum. 6. Cut drinking straws into ¾ to 1-inch long pieces. 7. String beads and drinking straws through each of the 4 strings. Leave an allowance of 1.5 to 2
inches at the top of each string. 8. Attach the beaded strings around the painted paper cup by securing the top end of each string
around the punched-out holes. 9. To make the pendulum, trim a pipe cleaner to around 6 inches and make a loop on one end. 10. Tie one end of the 5th string through the loop on the pipe cleaner. 11. Attach a metal shank button or metal washer on the other end of the string. 12. Punch a small hole at the center of the paper cup base. 13. Attach the pendulum to the wind chimes by inserting the end of the pipe cleaner through the
hole at the center of the paper cup. Pull all the way through, the loop on the pipe cleaner serves as a stopper.
14. Check if the metal button or washer is at the same level as the bells. 15. Loop the pipe cleaner on top to make the wind chimes' handle. 16. Hang the wind chimes where it can catch a soft breeze.

Guiding Elements–Air, October 2013 Page 10 of 25 May be printed/copied for use within Girl Guides of Canada–Guides du Canada.
Wind gauge Materials:
• stick • hole punch • scissors • crepe paper • newspaper • light cloth • heavy cloth
Instructions: Cut equal size strips of crepe paper, newspaper, light
cloth and heavy cloth Attach one of each of the strips to the stick. Place this in a place that will catch the wind. 1 or all of the strips will move, depending on the strength of the wind.
--------------------------------------------------
AIR EXPERIMENTS Indoor Tornado Experiment Do tornadoes make you dizzy? Do their spinning, twirling winds make you wonder how they work? Well, shake up a mini-tornado of your own with this wild indoor tornado activity and study its spiraling vortex of currents without fear. Material
• Clear mayonnaise jar • Water • Food coloring • Liquid dish soap • Vinegar
Instructions
1. Fill an ordinary glass mayonnaise jar about two-thirds of the way with water. Add a few drops of food coloring (any color) to the water.
2. Add a teaspoon of liquid dish soap and a teaspoon of vinegar. Screw the lid on good and tight to prevent leaks and extreme messes.
3. Give the jar a good, hard shake, then give it a twist to set the liquid inside spinning.
4. What you'll see is a tiny bottled vortex that looks just like a miniature tornado. Watch the spinning mini-tornado closely and you may even gain insight into the real thing.

Guiding Elements–Air, October 2013 Page 11 of 25 May be printed/copied for use within Girl Guides of Canada–Guides du Canada.
Air Pressure Experiments Blow me Out Materials:
• A Lighter or Matches • Tea-Light Candle (Small) • Tall Round Container (Salt Container)
Instructions: 1. Place the candle just behind the round container. 2. Light the candle. 3. Blow against the round container from the front and at candlelight level. What did you think would happen? This works the same with liquids. The fluid or air tends to flow (follow) the contour of the round container. When the flow of air meets on the other side of the container, they join together to blow out the candle.
------------------------------------------------- Killer Straw Materials:
Raw Potato Plastic Drinking Straws
Instructions:
1. Place the potato on a table top. 2. Hold the straw at the top (without covering the hole). 3. Try to stab the straw into the potato. 4. Next, hold your thumb over the hole in the top of another straw. 5. Try to stab this straw into the potato.
What happens: 1. The open-ended straw bends and only a little bit of the straw penetrates the potato. 2. The closed straw (with your thumb over the top of the straw) cuts deeply into the potato.
The air trapped inside the straw gives the straw enough strength to penetrate the skin of the potato. As the straw enters the potato, the potato plug compresses the air inside the straw, increasing the air pressure, and strengthening the straw.
--------------------------------------------------------

Guiding Elements–Air, October 2013 Page 12 of 25 May be printed/copied for use within Girl Guides of Canada–Guides du Canada.
Paper Plunge Materials:
Clear Glass Big Clear Bowl of Cold Water Scrunched/crumpled up piece of Paper
Instructions: 1. Fill the bowl with water. 2. Scrunch or crumple up the piece of paper. 3. Push the paper into the bottom of the glass so that it cannot fall out. 4. Turn the glass upside down and plunge it straight down into the bowl of water.
What happens to the paper? Where is the water level in the glass?
How this works - The air inside the glass takes up space and pushes. The paper stays dry because the water can only get into the glass by squashing the air inside it. Air can be squashed, or compressed, a little, but then it pushes back and prevents the water from reaching the paper. What happens to air’s push when you heat it up?
Air’s pressure or air’s pushing power changes when it is heated. -----------------------------------------------------------
Magic Coins Materials:
• Bowl of cold water • Coin (bigger than the bottle opening) • Glass Coke Bottle (with a small opening/mouth)
Instructions:
1. Fill a bowl with some cold water. 2. Place the bottle neck and coin in the bowl of water to chill them.
This helps to make an airtight seal when you place the coin on the top of the bottle.
3. Place the coin on the top of the bottle. 4. Wrap your hands around the bottle and wait for several seconds.
What happens to the coin?
5. Remove your hands from the bottle and wait. What happens to the coin now? Why does the coin jump? When you hold the bottle with your hands, the air inside the bottle heats up. The warm air pushes harder than the cool air that is outside the bottle so it forces the coin up. When the air inside the bottle cools down the coin will stop jumping.

Guiding Elements–Air, October 2013 Page 13 of 25 May be printed/copied for use within Girl Guides of Canada–Guides du Canada.
Blowing soap bubbles Material:
• Dish Soap (liquid) or baby shampoo • bowl • water • spoon • sugar or corn syrup (to make the bubbles bigger)
Instructions:
1. Pour dish soap or baby shampoo into a bowl or cup 2. Add water. Use trial and error to see how much soap you will
need that works best for you. 3. Add an optional thickener such as sugar or corn syrup. Be
careful though, as adding too much will make the suds too heavy for bubble formation. 4. Stir the solution gently until contents completely mix. 5. Take your bubble mix outside and blow as many bubbles as you'd like.
Note: that storing the solution for one day can actually lead to better bubbles. Tips for blowing great bubbles:
1. If you don't have a ready-made "bubble wand", you can make a loop out a thin wire - just twist a round end on your wire to blow the bubbles through. You can even make it heart-shaped, square or use other shapes if you're clever enough to bend it well.
2. Plastic six-pack rings make excellent bubble wands. Just dip them in a large, shallow pan filled with bubble solution and wave the rings around to make large bubbles.
3. A wire coat hanger can make a very large bubble wand. To make a bubble wand, just round the triangular loop out into a circle (not really necessary, but it looks better). Shape the hook of the hanger into a handle. Wrap with tape if desired. Use pipe cleaners to help maintain the bubble film in the loop. Wrap the pipe cleaners around the wire loop. You'll want roughly one wrap of pipe cleaner per inch (2.5 cm) of loop wire. At the end of the pipe cleaner, fold about a quarter of an inch (6 mm) of the cleaner sharply into a hook using needle-nose pliers. Do the same to the next pipe cleaner, hook the hooks together and crimp with the pliers. Keep wrapping until the entire loop with a helix of pipe cleaners. Secure all ends by crimping together as before. The pipe cleaners form a reservoir which supplies plenty of bubble juice to the growing bubble. With a little practice, big, quivery, impressive, ten-inch-or-so (25 cm) bubbles will form.
4. If you haven't got a pan that is large enough to dip a large bubble wand loop, just take a suitably large cardboard box, cut it into a shallow tray shape that is large enough for your bubble-wand's loop. Slide this tray into a large plastic bag, such as a garbage bag. Push the plastic down into the tray and completely cover the cardboard. Dump in a supply of bubble mixture and start bubbling.
5. Try to find an alcohol-free detergent, as this provides the best results. If you can't find an alcohol-free detergent, pour some ordinary detergent into a bowl and let it stand overnight to let the alcohol evaporate.
6. Distilled water works better than average tap water which can contain minerals which slightly interfere with bubbles.
7. Bubbles last longer on humid days. Dry air is death to (water-based) bubbles. 8. Letting the bubble solution sit for a day before use can improve the bubbles it makes. 9. To make a paper bubble cone, roll up a piece of paper into a cone shape and trim the larger end to
be smooth. Dip into bubble solution (let it sit for 30 sec in the solution the first time) and then blow into the smaller end. Lots of bubble solution gets stored in the layers of paper, leading to really big bubbles!!!

Guiding Elements–Air, October 2013 Page 14 of 25 May be printed/copied for use within Girl Guides of Canada–Guides du Canada.
Air Facts What is air? Air is a mixture of different gases that covers the Earth in a layer over 400 miles high. This layer is called the atmosphere. It contains roughly 78% nitrogen, 21% oxygen, and smaller amounts of argon, hydrogen, carbon dioxide, and others. Why is air so important? Air is needed by almost all the living things living on Earth. Most plants and animals take in air, use the oxygen in it and give out another gas, carbon dioxide. This process is called respiration. Air also protects life on Earth by absorbing harmful ultraviolet solar radiation and reducing temperature extremes between day and night. What are greenhouse gases? Gases such as carbon dioxide, water vapour and methane that allow incoming sunlight to pass through but absorb heat radiated back from the Earth's surface are called greenhouse gases. If the atmosphere contains more of these gases, it traps more heat and warms up. This is known as global warming. What is air pollution? Air pollution is the contamination of air by the discharge of harmful substances. One type of air pollution is the release of particles into the air from burning fuel for energy. Natural phenomena such as the eruption of a volcano also causes air pollution. Why is air pollution such a serious problem? Air pollution can cause many health problems such as burning eyes, cancer, birth defects, brain damage, or even death. Air pollution can also damage the environment and property such as trees, lakes and buildings. How can we reduce air pollution? There are many ways to reduce air pollution. A simple way is by using less electricity. Another way to reduce air pollution is to make fewer journeys by car. Walk, cycle or use public transport whenever possible. Air pollution is not political. It is in countries the world over. Air pollution from China has been tracked to the Central Valley of California! Air pollution has been around a long time. The Great Smog of 1952 in London killed at least 8,000 people. Air pollution around cities is clearly visible from space. The wind helps plants and trees grow by moving seeds around. The highest documented wind speeds ever were in a 1999 tornado at 318 miles per hour. Wind can be used to create electricity through wind power. People have been harnessing wind energy since as early as 5000 BC. Wind blowing is caused by warmer air rising. Wind power is the cheapest renewable energy source.
Guiding Elements–Air, October 2013 Page 15 of 25 May be printed/copied for use within Girl Guides of Canada–Guides du Canada.
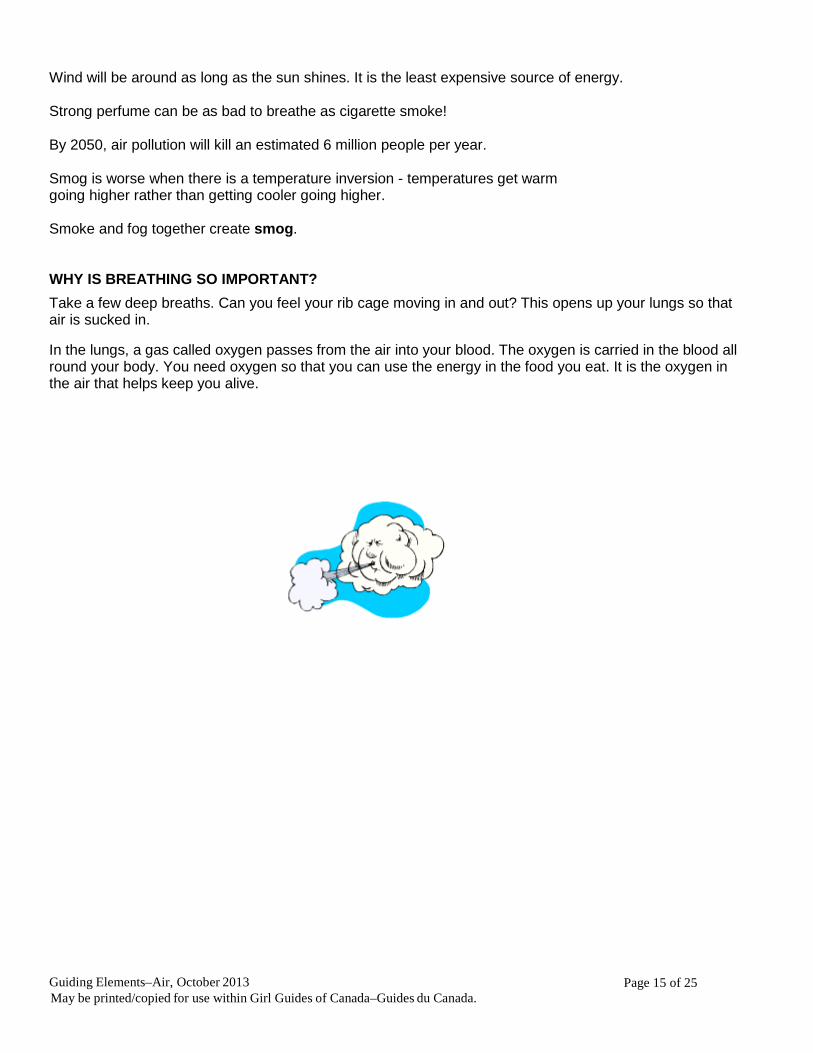
Wind will be around as long as the sun shines. It is the least expensive source of energy. Strong perfume can be as bad to breathe as cigarette smoke! By 2050, air pollution will kill an estimated 6 million people per year. Smog is worse when there is a temperature inversion - temperatures get warm going higher rather than getting cooler going higher. Smoke and fog together create smog. WHY IS BREATHING SO IMPORTANT?
Take a few deep breaths. Can you feel your rib cage moving in and out? This opens up your lungs so that air is sucked in.
In the lungs, a gas called oxygen passes from the air into your blood. The oxygen is carried in the blood all round your body. You need oxygen so that you can use the energy in the food you eat. It is the oxygen in the air that helps keep you alive.

Guiding Elements–Air, October 2013 Page 16 of 25 May be printed/copied for use within Girl Guides of Canada–Guides du Canada.
NIGHT GAMES Materials: three or four flashlights To Play: Gather all the girls in one spot. Send three or four girls out into the play area with their flashlights. These are the "fireflies". These girls can either walk around the play area or stay in one spot, but either way they must flick their flashlight on-off, on-off, like a firefly. The rest of the girls must try and catch a firefly by stalking up to her. If one of the fireflies sees or hears a stalker, she may stop flashing her light for 30 seconds. Once all the fireflies have been captured, the game is repeated with new girls as fireflies.
------------------------------------------------- Night Lines Materials: In advance, make up 8 cards per team, with a design on the card in light reflecting tape. Mac tack or laminate the cards in advance so as to be able to use the game again! The designs could be three lines, 2 triangles, 4 rectangles, one circle, etc. The cards must be hidden, in a certain area while no one else is watching. Each team must have a flashlight. To Play:, Each team is assigned a kind of card that they are looking for. The boundaries of the game must be described to all the players. Each team sends out one member at a time, with the flashlight to find, and bring back one of their cards. (At that time they may find cards of the other teams, but should just leave them undisturbed.) When the first team member finds one card, she returns and hands the flashlight over to the next member of their team. Each player takes a turn to find one card for her team. The first team to find all their cards wins.
----------------------------------------------
Elements History: This game was played by British settlers and soldiers in 1812. It was a way to teach natural science. Equipment: Bean bag or Frisbee Formation: circle Directions: Select a person to go into the middle of the circle. The person in the middle calls out one of four words: EARTH, WATER, AIR or FIRE. The person in the middle throws the bean bag/frisbee to someone in the circle. The person catching the bean bag must name something living in the element called out e.g. Earth - bear; Water - shark; Air - pigeon. If FIRE is called out the person catching it says nothing and returns it to the person in the middle as soon as possible. You have 10 seconds to give an answer, and no repeats! If you can't answer, you go in the middle. Variations: Select a continent before the game starts; all answers must come from that continent. Or, go through the alphabet for living nature names.

Guiding Elements–Air, October 2013 Page 17 of 25 May be printed/copied for use within Girl Guides of Canada–Guides du Canada.
MENU/RECIPES Always remember all allergies and special dietary needs that you have in your group. Breakfasts:
Oatmeal / toast / fruit Eggs / sausage or bacon / toast / fruit
Lunch:
Bunwiches - sliced meat / cheese / lettuce / tomato / pickles Dinner:
Stone Soup / buns (If you have large appetites in your group, you may need to add extra protein with the addition of chicken kebabs or meatballs)
Snacks:
Fruit leather Fresh fruit crackers and cheese veggies & dip cookies
Beverages:
herbal teas fruit juices
Mug Up:
Instant chicken noodle soup Hot Chocolate Hot Apple Cider
A note about patrol cooking with Guides:
Patrol cooking does take more time than having a camp cook but it is a very worthwhile activity for the girls. In this day and age of fast food and microwave everything, some girls have not had the opportunity to do any cooking, never mind over the fire, on a buddy burner or in a box. Practice ahead of time at unit meetings or on a day hike. Plan on having one adult per patrol for keeping an eye on things and assisting as needed, but let the girls do as much as possible.

Guiding Elements–Air, October 2013 Page 18 of 25 May be printed/copied for use within Girl Guides of Canada–Guides du Canada.
Recipes: Breakfasts: Oatmeal - is a standard camp breakfast. Use the instant packages or the basic of one cup dry oats to 2 cups water - serves 3-4 campers. Add raisins, apple, dried fruit to taste. Serve with brown sugar and milk. Eggs - cook as you like! Add what your girls will enjoy eating. Lunch: Shish Kebobs (per patrol)
1 ½ lb cubed beef, chicken or pork 1 onion cut into chunks 1 can pineapple chunks 1 green/red pepper cut into chunks half a pound mushrooms salt and pepper 12 cherry tomatoes Italian dressing long bamboo skewers (soaked in water ½ day) or metal skewers
Alternate pieces of vegetables and meat on eight long skewers – brush with dressing. Cook over hot coals until done - 20 minutes depending on the type of meat used – turn frequently. Serve over rice! Then slide it carefully off the skewer and into an open bun or onto your plate. Note: to ensure the meat is well cooked it can be pre cooked. Desserts: Soup Can Fondue:
Materials - (for each girl or pair of girls): 1 empty, clean soup can - bottom still on 1 can piercer 1 tea light candle 1 large foil tart shell wooden skewers chocolate chips small pieces of fruit (nuts, cookie etc.) for fonduing
To Make: Pierce a ring of holes on the sides, just up from the bottom and just down from the top of the soup can
- to allow air in and out. Set the tea light in the bottom of the can, lightable with a long match
or long lighter. Or place the tin over the lit candle, with the bottom up.
Place the tart shell over the open top end of the soup can, once the candle is lit, or on the flat bottom of the upturned can.
Put a few chocolate chips into the shell to start melting with the heat coming up from the candle. Add more until there is a nice “puddle” of chocolate.
Put pieces of fruit, nuts, cookie or whatever you would like, onto a skewer and dip into your chocolate fondue. Enjoy!
Guiding Elements–Air, October 2013 Page 19 of 25 May be printed/copied for use within Girl Guides of Canada–Guides du Canada.
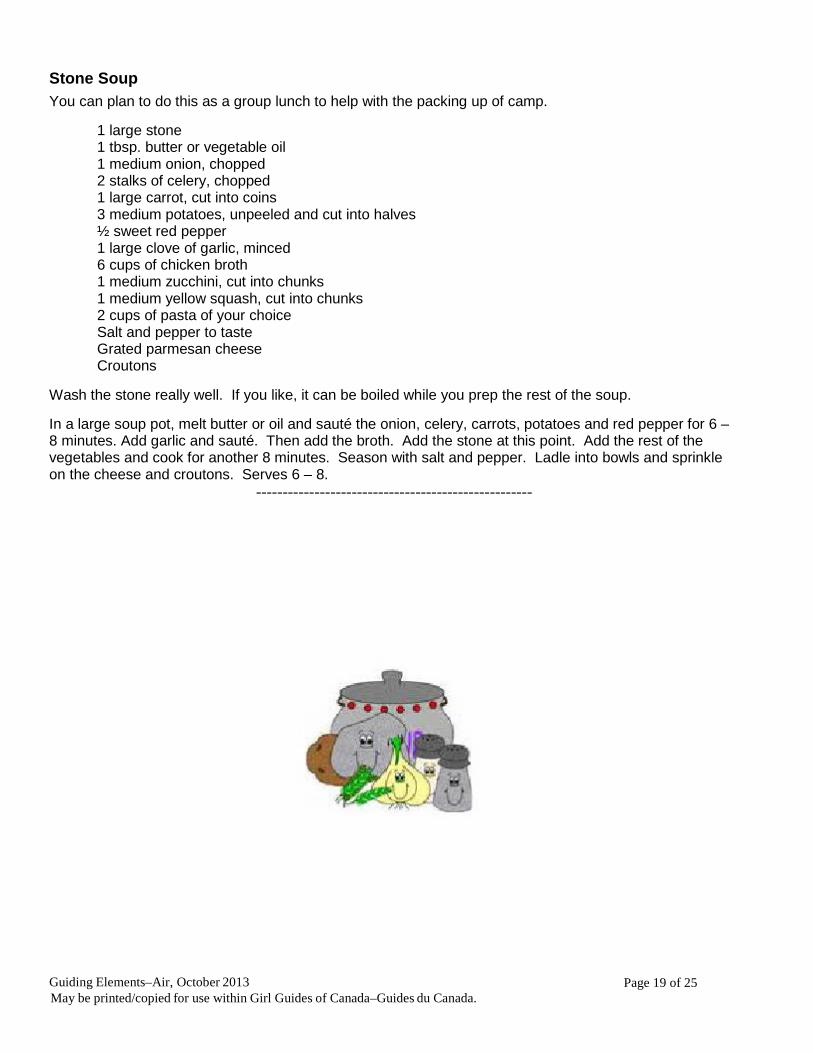
Stone Soup You can plan to do this as a group lunch to help with the packing up of camp.
1 large stone 1 tbsp. butter or vegetable oil 1 medium onion, chopped 2 stalks of celery, chopped 1 large carrot, cut into coins 3 medium potatoes, unpeeled and cut into halves ½ sweet red pepper 1 large clove of garlic, minced 6 cups of chicken broth 1 medium zucchini, cut into chunks 1 medium yellow squash, cut into chunks 2 cups of pasta of your choice Salt and pepper to taste Grated parmesan cheese Croutons
Wash the stone really well. If you like, it can be boiled while you prep the rest of the soup.
In a large soup pot, melt butter or oil and sauté the onion, celery, carrots, potatoes and red pepper for 6 – 8 minutes. Add garlic and sauté. Then add the broth. Add the stone at this point. Add the rest of the vegetables and cook for another 8 minutes. Season with salt and pepper. Ladle into bowls and sprinkle on the cheese and croutons. Serves 6 – 8.
----------------------------------------------------

Guiding Elements–Air, October 2013 Page 20 of 25 May be printed/copied for use within Girl Guides of Canada–Guides du Canada.
One version of the story of Stone Soup - embellish as you wish!
One day a man went to a village and all the people were hiding. There was a farmer that came and the man asked the farmer why everyone was hiding. The farmer said that all the people of village were hungry and the children were weak.
The man went to the lake and filled a pot with water. He added a stone to the pot full of water and brought it to the village. He put it on a fire to cook.
The farmer asked him what he was making. The man told him it was Stone Soup. The farmer said that he had never heard of Stone Soup and asked if he could have some. The man said only if you give me a vegetable, so the farmer gave him a potato.
Along came another villager and he asked the man what he was making. The man said it was Stone Soup. The villager said that he had never heard of Stone Soup and asked if he could have some. The man said only if he would give him a vegetable. The villager added a carrot to the soup.
A woman came along and asked what the man was making. He said he was making Stone Soup. The woman asked if she could have some. The man said only if he she would give him a vegetable, so she added her onion to the soup.
All the people in the village started to smell the stone soup and came to see what the man was cooking. They all added their vegetables to the soup. After a while, the soup pot was filled with many wonderful flavours and the entire village had a feast.
Everybody thanked the stranger and he was there for many days to feed them the Stone Soup.
After the stranger left, the village people decided to try the same thing and they worked together to make many feasts.

Guiding Elements–Air, October 2013 Page 21 of 25 May be printed/copied for use within Girl Guides of Canada–Guides du Canada.
GRACES
Each District should have an “Arts to Go” box that includes a CD with music that may help you with song ideas. Ask your Commissioner, Camping or Program Adviser! World Hunger Grace Johnny Appleseed Shawn's Grace words: Shawn Bird ©2000 for free use within Guiding. Tune: Fire's Burning
We're thankful, we're thankful For friendships, for friendships And for good food, and for good food And hands that prepared it.
Neath These Tall Green Trees Tune: Michael Row the Boat Ashore
Neath these tall green trees we stand, alleluia Asking blessing from thy hand, alleluia Thanks we give to thee above, alleluia For our health and strength and love, alleluia.
God is Great Tune: Rock Around the Clock by Max C. Freedman and Jimmy DeKnight, ©1953
God is great, God is good, Now we're gonna thank him for our food: We're gonna thank him morning, noon and night, We're gonna thank him cause he's out of sight. Amen Amen Amen Amen Amen
Alleluh (Praise Ye the Lord) Note: Divide group into two groups, the first stands and sings the Alleujah's and sits back down while the second stands to sing "Praise ye the Lord!"
Allelu, Allelu, Allelu, Allelujiah Praise ye the Lord Allelu, Allelu, Allelu, Allelujiah Praise ye the Lord. Praise ye the Lord, Allelujiah Praise ye the Lord, Allelujiah Praise ye the Lord, Allelujiah Praise ye the Lord (everyone stands up)

Guiding Elements–Air, October 2013 Page 22 of 25 May be printed/copied for use within Girl Guides of Canada–Guides du Canada.
CAMPFIRE We suggest having a sing a long Friday evening with the girls choosing the songs. Saturday evening can be a more traditional campfire. The girls can plan their own ceremony based on an air theme or look on the internet for ideas.
Opening (one or two of the following): Tall Trees (Songs for Canadian Girl Guides) Australian Campfire Opening (Jubilee Song Book) Fire’s Burning (Jubilee Song Book) Light the Wood (Jubilee Song Book) Rounds (choose one or two): One Bottle Pop (Great Rounds Songbook) Black Socks (Great Rounds Songbook) Kookaburra (Canciones de Nuestra Cabana) Teh Merry Go Round (Jubilee Song Book) Light Hearted (choose one or two): Ging Gang Gooli (Campfire Activities) Horsey Horsey (Jubilee Song Book) Action Songs (choose one or two): Zulu Warrior (Jubilee Song Book) Auntie Monica (Jubilee Song Book) The Window (Campfire Activities) Swimming Hole (Campfire Activities) The Chinese Fan (Jubilee Song book) Light Hearted (choose one or two): Suitors (Jubilee Song Book) Cuckoo (Jubilee Song Book) Tongo (Jubilee Song Book) Quiet Songs (choose one or two): Ira Congo (Jubilee Song Book) Linger (Campfire Activities) Land of the Silver Birch (Jubilee Song Book) Vespers: Softly Falls (Jubilee Song Book) Go Well and Safely (Canciones de Nuestra Cabana) Taps

Guiding Elements–Air, October 2013 Page 23 of 25 May be printed/copied for use within Girl Guides of Canada–Guides du Canada.
GUIDES’ OWN/REFLECTIONS A Guides’ Own is a very special type of ceremony and can be held the night before closing camp or the morning before leaving camp. A Guides’ Own is a not a replacement for a church service or other religious ceremony. It is a time for reflection and being thankful. A Guides’ Own can be held in a camp’s Chapel or the girls may select a special area at camp.
Wind blowing through the trees Wind blowing the snow around Wind throwing the leaves Wind brushing the grass Wind push with all its might against the rock Wind push the kite Wind causing friction to the air plane Wind breaking leafs from the tree Wind blowing the paper bag through the air logan dillie
A light wind swept over the corn, and all nature laughed in the sunshine. Anne Bronte Anger is a wind which blows out the lamp of the mind. Robert Green Ingersoll I find the great thing in this world is not so much where we stand, as in what direction we are moving: To reach the port of heaven, we must sail sometimes with the wind and sometimes against it, but we must sail, and not drift, nor lie at anchor. Marjorie Holmes I love the feeling of the fresh air on my face and the wind blowing through my hair. Evel Knievel
‘A breeze came wandering from the sky, light as the whispers of a dream; He put the overhanging grasses by, and softly stooped to kiss the stream, The pretty stream, the flattered stream, The shy, yet unreluctant stream of wind’
William Cullen Bryant Who Has Seen The Wind?
Who has seen the wind? Neither I nor you. But when the leaves hang trembling, The wind is passing through. Who has seen the wind? Neither you nor I. But when the trees bow down their heads, The wind is passing by.
Christina Georgina Rossetti

Guiding Elements–Air, October 2013 Page 24 of 25 May be printed/copied for use within Girl Guides of Canada–Guides du Canada.
Participant Kit List Everyone should always wear uniform to and from camps. Please keep in mind that items may need to be added or deleted depending on the time of year and whether you are indoors or out! Remember to LABEL everything clearly in case it gets misplaced. If it’s irreplaceable please leave it at home. Bring two pieces of luggage only: a bedroll and a small duffle bag that the girl can carry (No garbage bags). Your daughter should help pack her gear or she will not know where to find things while at camp. Clothing • warm pyjamas (a tracksuit works well) • pants (1 pair) (NO blue jeans) • t-shirts (2) • sweatshirt or pullover (1) (not the one to sleep in) • socks (3) • extra socks to wear to bed (1) • underwear (3) • sturdy shoes for walking/hiking (NO open-toed shoes) • warm jacket with hood • raingear (MUST) including boots • camp hat (MUST) • plastic bag for dirty laundry • inside shoes or slippers (must have hard soles) • toque and gloves or mitts Gear • sleeping bag (suitable for time of year) Note: theme-styled bags tend to be thin and do not provide adequate insulation. • extra blanket • sleeping mat—closed-cell foam or self-inflating thermal mat (Blow-up air mattresses are not suitable or reliable.) • ground sheet (an old shower curtain, piece of tarp or any kind of plastic big enough for the sleeping mat to fit on) • small pillow (optional) • sleeping buddy (small, optional) Dishes • Unbreakable plate, mug, cup, bowl, fork, knife and spoon in a mesh bag (because the dishes hang to drip dry) • Label all dishes and cutlery with the girl’s name or initials using nail polish or permanent marker. Tape will fall off when the dishes are washed. Make sure the permanent marker is actually permanent! Personal Items These may be packed in an ice cream bucket with name in permanent marker – no tape! • hand towel, face cloth, soap, tooth brush and paste, etc. • hair brush and ties (long hair must be tied back at all times) • small package of tissues • water bottle Miscellaneous • camera • whistle • personal first aid kit • sunscreen (no spray) • bug lotion (no spray) • sit-upon or folding camp chair • water bottle • flashlight with new batteries, plus a spare set (in a labeled zip lock bag) Medications: To be given to the first aider upon arrival at camp. Place all medications (prescription and over-the-counter) in a zip-lock plastic bag clearly labeled with the girl’s name. All medication (prescription and over the counter) must be in the original container and clearly labeled with dispensing instructions. Please leave at home:
• all sleeveless tops (spaghetti-strap tops, tank tops, etc.) • all open-toed shoes • all electronic devices, including cell phones

Guiding Elements–Air, October 2013 Page 25 of 25 May be printed/copied for use within Girl Guides of Canada–Guides du Canada.
GUIDER EVALUATION FORM - AIR Please share with us what you liked about “Camp in a Box” and anything that we could improve on for next time! Thanks for your input! WHAT DID YOU LIKE BEST? ______________________________________________________________________________ ______________________________________________________________________________ ______________________________________________________________________________ WHAT WORKED / DIDN’T WORK FOR YOU? ______________________________________________________________________________ ______________________________________________________________________________ ______________________________________________________________________________ WHAT COULD WE IMPROVE ON FOR NEXT TIME? ______________________________________________________________________________ ______________________________________________________________________________ ______________________________________________________________________________ COMMENTS! ______________________________________________________________________________ ______________________________________________________________________________ ______________________________________________________________________________ Please send your pictures to us at our e-mail site - listed below. Please return to: BC Camping Committee 1476 West 8th Ave. Vancouver, BC V6H 1E1 or e-mail to: [email protected]