Web Site: Field Phone: 650-712-4423
10
1 August 2013 Next Meeting: August 21st, 2013 AMA Chartered Club # 139 Web Site: http://flypcc.org/ Field Phone: 650-712-4423 President Mike Solaegui 415-314-6261 [email protected] Vice President Oliver Salles 650-375-1960 N.A. Secretary Dennis Lowry 415-285-4496 [email protected] Treasurer Greg Romine 650-736-7230 [email protected] Field Safety Officer / Webmaster Matt Abrams 415-370-3323 [email protected] Membership Chairman Ellsworth Crowell 650-591-0851 N.A. Editor/Flight Proficiency Chairman Brian Chan 650-867-8813 [email protected] WHAT’S HAPPENING @ PCC No More Bees (or were them Hornets?) The hive was surgically removed and no one was hurt. There were no bees in sight last two weekends at PCC. The field is safe again (from Bees ONLY!) NEW TOILET IS HERE We have a new out-house, with running water! Thanks to all parties that involved to get the new outhouse installed. The situation was touch and go (so to speak) for a couple weeks for a few members have nothing to go on!! Thanks, Mike S, Mike K. JULY MEETING MINUTES Dennis Lowry PCC Monthly Meeting Minute Notes July 17 2013 Short meeting and even shorter minutes. My favorite plane, a Park Master was the raffle prize. 91 active members. Treasury is fine. Ticks will be sprayed Wednesday morning the 31st.
Transcript of Web Site: Field Phone: 650-712-4423
1
August 2013 Next Meeting: August 21st, 2013 AMA Chartered Club # 139
Web Site: http://flypcc.org/ Field Phone: 650-712-4423
President Mike Solaegui 415-314-6261 [email protected] Vice President Oliver Salles 650-375-1960 N.A. Secretary Dennis Lowry 415-285-4496 [email protected] Treasurer Greg Romine 650-736-7230 [email protected] Field Safety Officer / Webmaster Matt Abrams 415-370-3323 [email protected] Membership Chairman Ellsworth Crowell 650-591-0851 N.A. Editor/Flight Proficiency Chairman
Brian Chan 650-867-8813 [email protected]
WHAT’S HAPPENING @ PCC
No More Bees (or were them Hornets?) The hive was surgically removed and no one was hurt. There were no bees in sight last two weekends at PCC. The field is safe again (from Bees ONLY!)
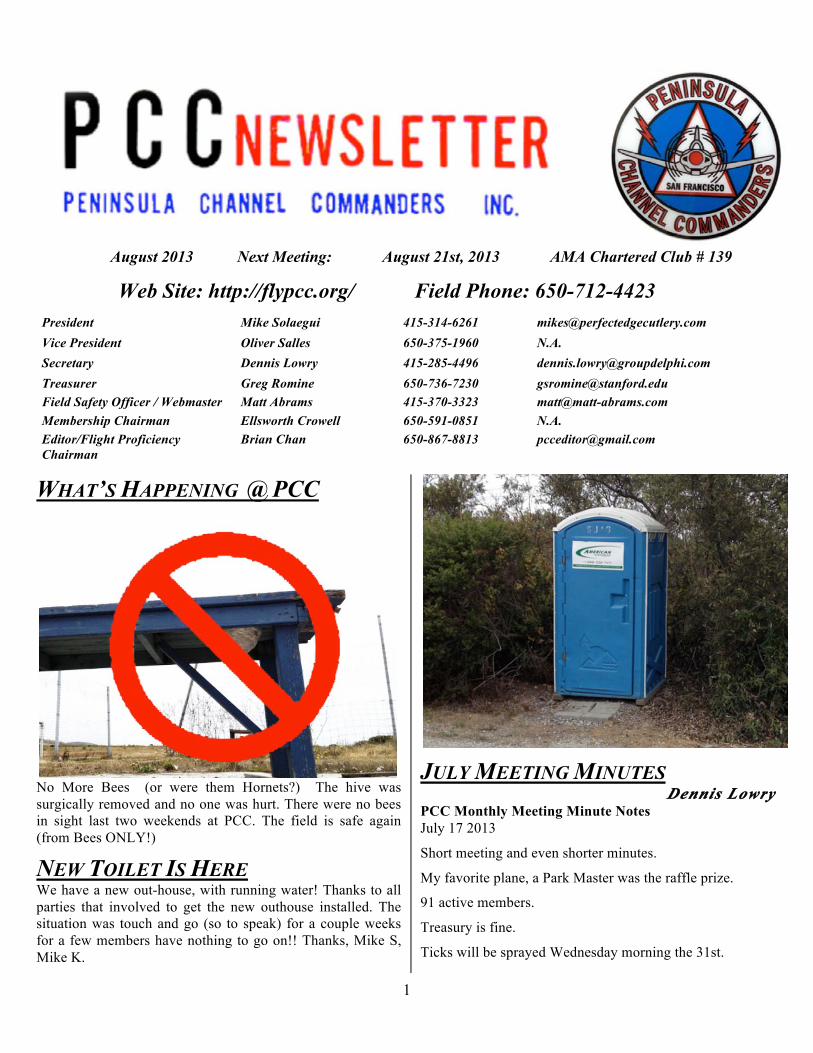
NEW TOILET IS HERE We have a new out-house, with running water! Thanks to all parties that involved to get the new outhouse installed. The situation was touch and go (so to speak) for a couple weeks for a few members have nothing to go on!! Thanks, Mike S, Mike K.
JULY MEETING MINUTES Dennis Lowry
PCC Monthly Meeting Minute Notes July 17 2013 Short meeting and even shorter minutes. My favorite plane, a Park Master was the raffle prize. 91 active members. Treasury is fine. Ticks will be sprayed Wednesday morning the 31st.

2
No safety issues. Neil did a very nice job displaying a biplane with story boards, Warren Olsen flew that plane out of the British field that was spoken of. Eric showed progress on a slope plane he designed.
Mike Solaegui for Dennis.
FIELD CAMERA Steve Williams
It happened couple times in the last few months, the field camera was not updating. After several phone calls to our web master and the service provider, it was determined that the field phone in the frequency pin container was knocked off hook. The weather information will not be uploaded to the server when the phone is off hooked!!!
Make sure the handset is placed properly when you are finished with the call.
Weather information will not be uploaded on our web site if the phone is off hooked.
UPCOMING EVENTS August 3 Swap Meet @ SCCMAS, Morgan Hill, Ca 17 Swap Meet, Gold Country Flyers, Ione, Ca Tom Minger 209-296-0622 17 Fun Fly@ Livermore Flying Electrons, Livermore, Ca 21 PCC Meeting, 7:30 p.m., Dave Chetcuti Rm, Millbrae 24 Pattern @ Tomcats, SCCMAS, Morgan Hill, Ca September 2 Labor Day 14 FunFly @ Tomcats, SCCMAS, Morgan Hill, Ca 18 PCC Meeting, 7:30 p.m., Dave Chetcuti Rm, Millbrae
October 14 Columbus Day 16 PCC Meeting, 7:30 p.m., Dave Chetcuti Rm, Millbrae 19-20 HMB Art & Pumpkin Fest. 31 Halloween More details information at: http://www.ncrcs.com/ If you know any event that you would like me to post it here, please email the information to me, [email protected]
GREETINGS FROM SANTA ROSA Jake Chichilitti
As some of you may know I was the lucky recipient of Ellsworth's Goldberg Chipmunk last year. After installing a new battery and a little clean up it has taken to the air again.
I flew it at my new club field with the Wine Country Flyers. Julio, one of my club mates was taking pictures that day and got some nice shots.
Thank you Ellsworth for a great looking and great flying model. I hope to keep it in the air for a long time to come.
Most of the activity up here is electric, so I warn the guys when I get to the field that I will be making some noise.
Of all the clubs fields I have flown at, PCC is by far the best one.
Jake
P.S. The little Zero is one I designed and built while I was still living in Belmont. I had to wait until I moved to test fly it. It goes like a bandit with a Norvel .061 engine.
(Look what's behind Jake! I'll bet those guys will land out once in a while when the grapes are ready!! Ed.)
Jake @ Wine Country Flyers flying field, see the vine in the background?
3
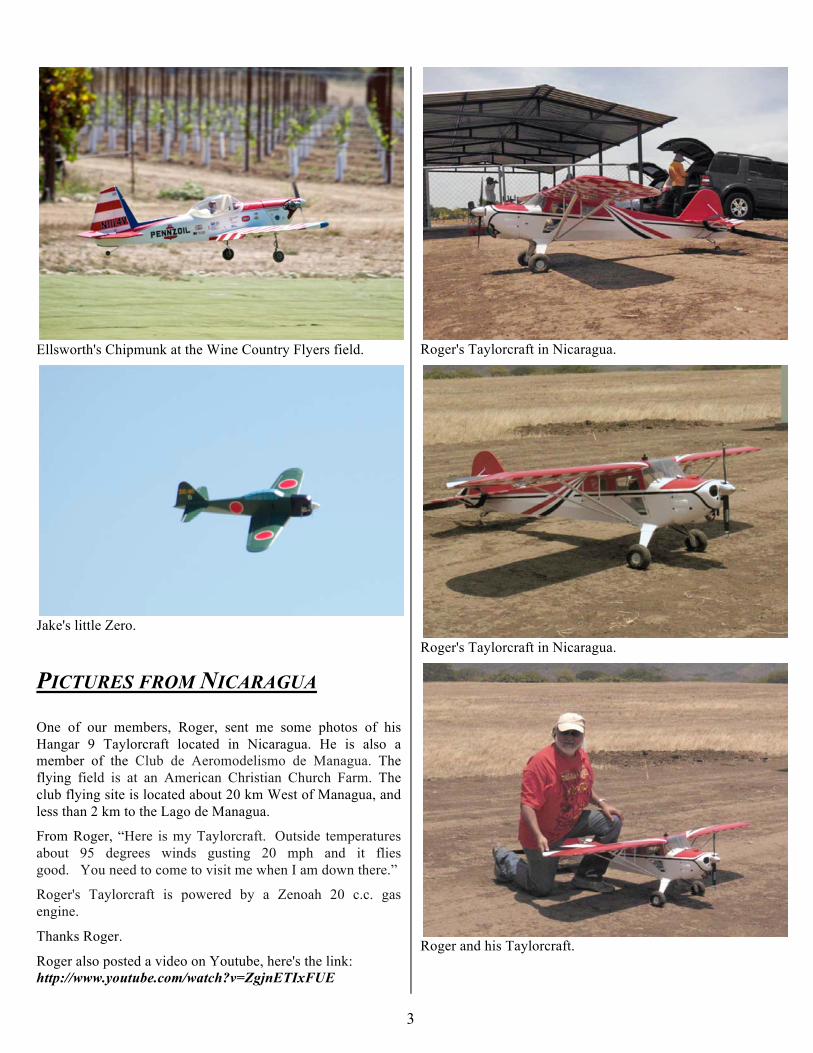
Ellsworth's Chipmunk at the Wine Country Flyers field.
Jake's little Zero.
PICTURES FROM NICARAGUA
One of our members, Roger, sent me some photos of his Hangar 9 Taylorcraft located in Nicaragua. He is also a member of the Club de Aeromodelismo de Managua. The flying field is at an American Christian Church Farm. The club flying site is located about 20 km West of Managua, and less than 2 km to the Lago de Managua.
From Roger, “Here is my Taylorcraft. Outside temperatures about 95 degrees winds gusting 20 mph and it flies good. You need to come to visit me when I am down there.”
Roger's Taylorcraft is powered by a Zenoah 20 c.c. gas engine.
Thanks Roger.
Roger also posted a video on Youtube, here's the link: http://www.youtube.com/watch?v=ZgjnETIxFUE
Roger's Taylorcraft in Nicaragua.
Roger's Taylorcraft in Nicaragua.
Roger and his Taylorcraft.

4
WHY MAINTAIN OUR RADIO SYSTEMS? Bruce Devisser
There are many cliché’s we can use to describe why preventive maintenance should be performed on our radio systems:
An Ounce of Prevention… A Stitch in Time… “It worked fine last time…” “I shoulda’ checked that…” But nothing says it better than
"HEADS UP – I DON’T HAVE IT!" Preventive Maintenance… PAY$ OFF, because the plane and radio equipment you save is your own. And do we need a reminder about safety as additional motivation???
Modern Radio Control systems have reached an incredible level of sophistication in design, performance, and reliability – any modeler who flew before the 1960’s (who can still remember those times!) understands well the improvements that have come our way. So then why is it that we still see competent pilots, with proven models, experiencing crashes due to loss of radio function?
There are lots of reasons I can think of that are NOT actual radio system failures, including uncharged batteries, industrial radio interference, improper installations in our models, and the infrequent but all-too-common fellow modeler switching on their transmitter on your channel. Even with all of those human and environmental factors potentially crashing our models, we still have a very reliable radio link and control system – properly installed and maintained RC systems provide consistently solid performance.
So, why bother spending time to check your radio systems? Very simply – because it is something you can do that will decrease the possibility that an actual failure in your RC system will occur.
Another reason is that we often mistreat our equipment – leaving it in the hot sun, or overnight in the car during sub-zero weather, or we store it in a shed or garage that is not
insulated, and of course we use it a lot! All of these contribute to aging of the system components, wiring, switches, etc..
What do we need to inspect and maintain? Batteries Transmitters Receivers Servos Auxiliary Equipment and EVERYTHING! Batteries NiCads (Nickel Cadmium batteries) are still the most prevalent type for standard transmitter and receiver use, as
they are relatively inexpensive, they last a long time (typically 5-6 years) if properly cared for, and they are fairly resistant to casual bumps and drops that occur during use. NiMHs (Nickel Metal Hydride batteries) have become very popular as replacements for NiCads due to their higher power density – they pack more power into the same size package – they have similar charge and discharge characteristics, ruggedness, and are lighter in weight for equivalent power output. Of course there is a downside – they are a bit more expensive.
The newest rechargeable battery type is Lithium Polymer or LiPo’s. These cells have fantastic capacity due to their very high energy density, or power per unit of area, and they are very light in weight. They have different cell voltages (3.7 volts per cell compared to 1.2 for NiCads), they operate differently, and above all, require extremely diligent attention to charging and discharging to avoid destroying the cells, and most important – fire! Yes, these cells can easily start a fire. These cells will be covered in detail in a separate article.
The most important maintenance activity for any rechargeable battery is proper charge level maintenance. One can go to extremes with scheduled charge/discharge cycling, tracking and recording each pack’s capacity over time, and using a high-end charger with a computer interface. While there is merit in doing everything you can to ensure proper battery performance and maximum reliability, it isn’t always practical for sport flyers. Cycling every 3-6 months, physical inspection once a year, and proper charging/discharging will provide a high level of service from your batteries.
Cycling must be done properly; discharge the pack completely but don’t go lower than 1.0 volts per cell; e.g. for a 4-cell receiver pack 4.0 volts; then charge at C/10 rate (slow charge) for 16 hours – this will balance the individual cell charge levels in the pack. Now cycle the pack - discharge and then slow or fast charge and repeat 2 to 3 times, each time recording the discharge value; you should achieve at least the rated capacity of the pack by the 2nd cycling – if not, replace it. If your packs are more than a year old you should also check the overnight self-discharge; after cycling and a full charge, do a discharge and note the capacity – if it is not 90% of the capacity measured in cycling, replace the pack, as it is deteriorating chemically and is likely to fail under use.
The physical condition of your pack is also important – the cell casings, cable, and connectors. Check for evidence of cell venting, which is seen as a white powder by the seal around the positive (button) end. This is sometimes difficult if the pack has an opaque plastic shrink sleeve over it, however, you may see whitish streaks where the sleeve ends. Next check for dents in the cells – these can cause cell failure and indicate the pack (or at least the dented cell) will need to be replaced.
Check the cable insulation for nicks, cracking or pinches; then check the connector by looking inside the plastic housing at the actual contact for stretching or excessive wear – any of
5
these mean it is time for a new cable and/or connector. Finally, even a fairly new pack can be damaged by mishandling or a rough landing, so it is worth the effort to check it.
Transmitters Right now you are thinking “hey, I’m not a radio technician, what can I do to maintain a transmitter”? There are several simple maintenance checks you can perform to ensure proper operation, however, if you aren’t handy or comfortable with electronic innards, ask one of your clubmates who is to asisst you; watching and learning what is done will lead to a better understanding of your equipment. The first is the battery – whether you are a competition or a sport flyer, following the battery maintenance procedures are important. Some flyers tend to fast field charge their batteries, or change packs during the day if they fly a lot of hours; others never remove the battery, seldom use more than half of it’s capacity and usually only charge with the factory slow charger at home – both cases need checking.
The Antenna and it’s mounting are a weak link in our transmitters due to their exposure to the elements, our regular manipulation of them and the occasional whack against an immovable object - they can fail partially or completely leading to intermittent or complete loss of control. Check your fixed antenna at the bottom segement tomake sure it is secured to it’s mount; if it feels loose, open the case - check the securing nut at it’s base, the antenna lead terminal and the lead itself; once loosened the lead can end up wrapped around the post and eventually break, so check it carefully.
Slowly extend your antenna one section at a time, checking for a tight fit at each joint and worn chrome plating – if you find either it’s time to replace it; while you have it out, carefully clean it using a soft cloth dampened with Isopropyl Alcohol; don’t pour alcohol on the Antenna as it can run down into the radio.
Removeable antennas can have loose mounting nuts more easily than fixed antennas simply due to the insertion and removal stresses, so it’s worth checking inside as above; also, clean the threaded stud at the base while you have it out.
Those two sticks, also called gimbals, poking up at you need cleaning and checking inside and out. Clean with a soft rag, cotton-tipped sticks, and alcohol; check by moving very slowly with as little pressure as possible – you are looking for any stickiness or resistance – if you find a problem use a swab dampened with alcohol to remove gunk or debris from the mechanism.
Look inside the back of the unit at the gimbals; older radios have ‘pots’ (variable resistors that control the transmitter) that move with the sticks, and the wires attached to them can become frayed and even break off; recently this has been discovered as the reason for some cases of intermittent radio failure or glitching. In newer radios only the shaft of the pot is
moveable, but you still should check the security of the wiring, as vibration (like driving to a contest) can cause failure also.
And don’t forget to cycle the battery and test it while you’re at it!
All switches should be checked for proper operation (no sticking or gritty feel when operated), check inside the box for cracked bodies, and especially check any sliding power switch with care – make sure when it is fully in the on position that light pressure applied to the top, or light tapping nearby on the case, does not cause the switch to open; of course any negative indications should be repaired by a qualified technician.
Transmitters with pluggable frequency modules need special attention to their connectors for sufficient contact pressure, cleanliness, and security. Older Futaba modules have a known problem of loose connector pins – this is worth a close look by someone who knows the problem as it is not obvious to the untrained eye. Any module should be pulled out and the connector pins cleaned with that alcohol-dampened cloth.
Receivers Generally if it hasn’t been crashed, has been properly mounted, and has not given any performance problems, then a visual inspection combined with removal and reinsertion of the servo plugs, and checking the crystal for security (if accessible form the outside) is enough of a check. Even if you are an electronics whiz, no reason to even open the case. However, I do recommend a tune-up by a qualified repair station every 3-4 years for high-end receivers; it’s worth $35 or so to get it tuned and checked.
The visual inspection includes the antenna for cleanliness, integrity, and original length; the connectors for cleanliness and straight pins; the crystal for good fit and make sure the rubber boot is put back (if equipped).
You also should pay attention to the mounting - foam rubber is the best (only!) way to isolate the receiver from the airframe; other materials just are not as good.
Servos
These are like Receivers in many ways, except they have moving parts that wear out. This is usually obvious by slop in the output arm movement in extreme cases, noisy movement, excessive buzzing around neutral, or rough operation at some point in the travel. A good test is to disconnect the linkage, grasp the output arm gently, and operate the servo through it’s full range, checking for smooth action. Note that it is possible to induce rough operation by the way you move the transmitter controls, so it is best to use a Servo Exerciser.
Visually inspect for cable and connector condition, good control arm fit, loose or missing screws, and wrong mounting holes. This last item is often overlooked, but in models with a
6
lot of time on them, or powered models, they can wear to the point of failure, causing a crash.
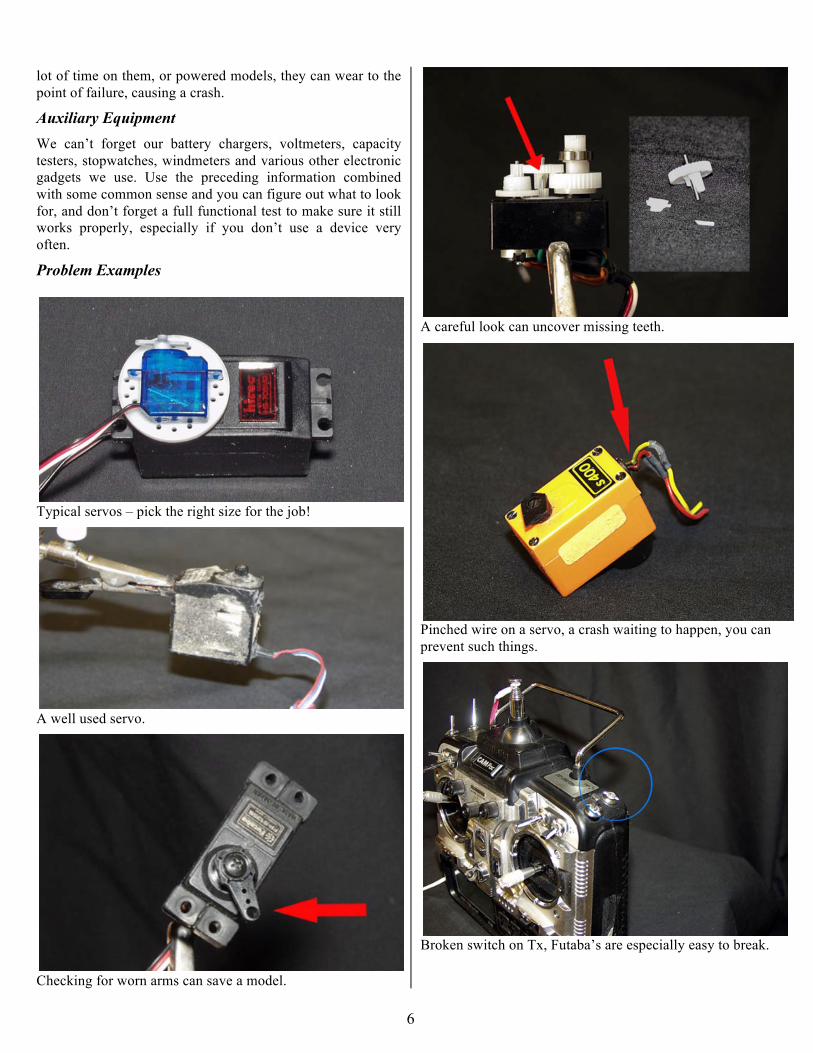
Auxiliary Equipment We can’t forget our battery chargers, voltmeters, capacity testers, stopwatches, windmeters and various other electronic gadgets we use. Use the preceding information combined with some common sense and you can figure out what to look for, and don’t forget a full functional test to make sure it still works properly, especially if you don’t use a device very often.
Problem Examples
Typical servos – pick the right size for the job!
A well used servo.
Checking for worn arms can save a model.
A careful look can uncover missing teeth.
Pinched wire on a servo, a crash waiting to happen, you can prevent such things.
Broken switch on Tx, Futaba’s are especially easy to break.
7
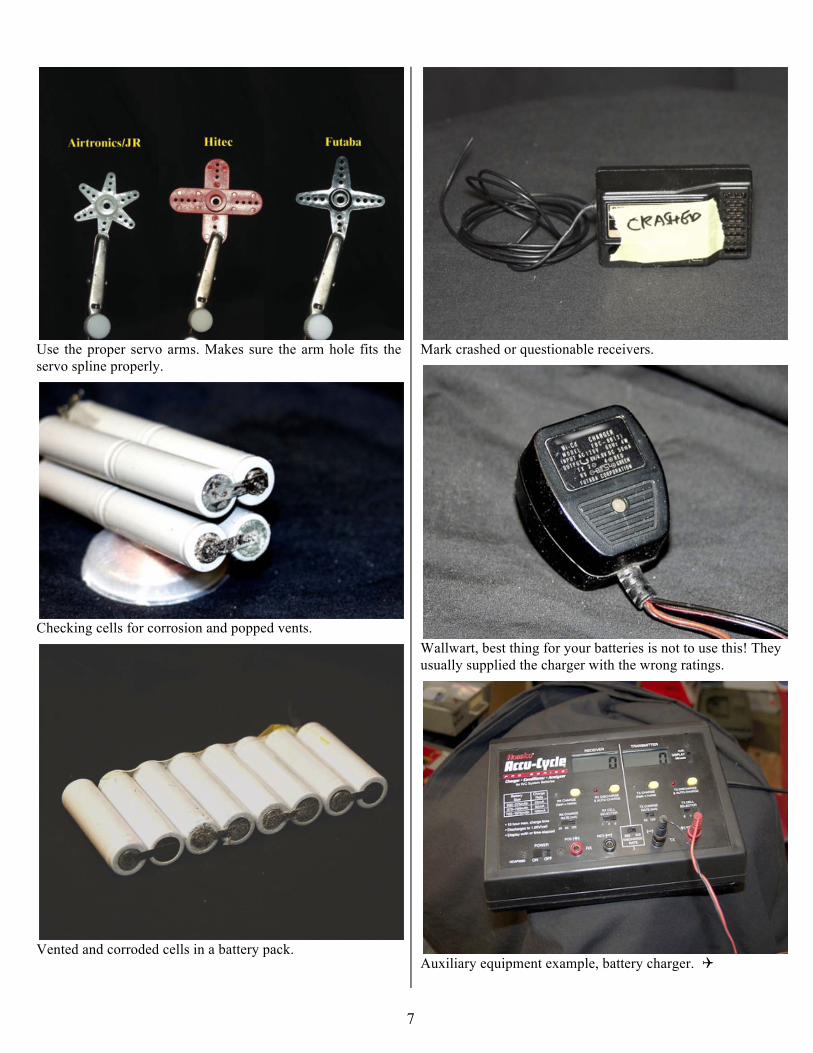
Use the proper servo arms. Makes sure the arm hole fits the servo spline properly.
Checking cells for corrosion and popped vents.
Vented and corroded cells in a battery pack.
Mark crashed or questionable receivers.
Wallwart, best thing for your batteries is not to use this! They usually supplied the charger with the wrong ratings.
Auxiliary equipment example, battery charger.
8
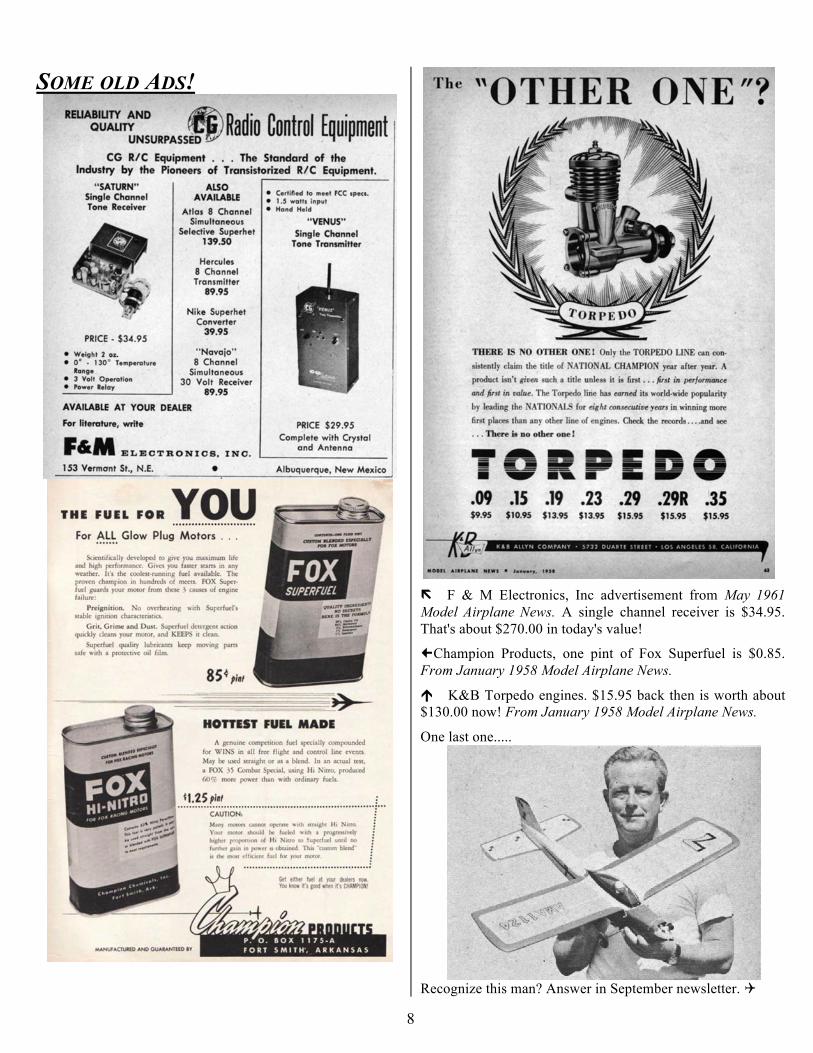
SOME OLD ADS!
F & M Electronics, Inc advertisement from May 1961 Model Airplane News. A single channel receiver is $34.95. That's about $270.00 in today's value!
Champion Products, one pint of Fox Superfuel is $0.85. From January 1958 Model Airplane News.
K&B Torpedo engines. $15.95 back then is worth about $130.00 now! From January 1958 Model Airplane News.
One last one.....
Recognize this man? Answer in September newsletter.

9
George is Mike's latest student.
The other Mike with his .40 size Lanier Stinger.
Brian's SebArt Katana 120s. NeuMotor1515/2y, 10s5000 lipo, 22 X 12 Carbon Mejzlik propeller.
Three heads (Brian, Ken and Mike) got together and fixed the mower. A grounded power wire caused a short and blown the fuse. All is well now.
Mickey and his new pal, Mike at SACRC.
10
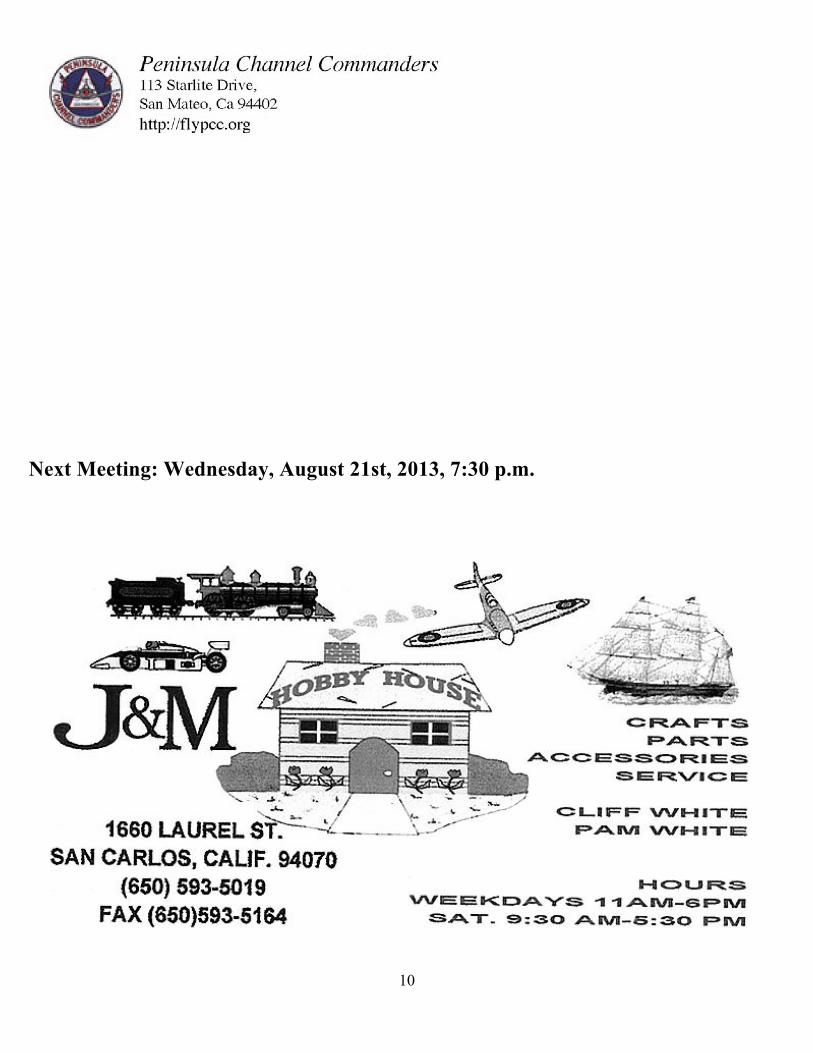
Next Meeting: Wednesday, August 21st, 2013, 7:30 p.m.


![20200430170752[4423] - FSG Tacherting](https://static.fdocuments.in/doc/165x107/6246e7d4ae622b024800c6b8/202004301707524423-fsg-tacherting.jpg)