Voltage Sensor Experiment Guide · This sensor can be used to measure low voltage AC and DC...
5
Voltage Sensor Experiment Guide
Transcript of Voltage Sensor Experiment Guide · This sensor can be used to measure low voltage AC and DC...

Voltage Sensor
Experiment Guide

Voltage Sensor
Introduction:
Part of the Eisco series of hand held sensors, the voltage sensor allows students to record and graph data in experiments on the go.
This sensor measures voltages across various resistive, capacitive and inductive components, as well as those of photovoltaic cells, batteries and power supplies. This sensor can also be used to measure electrode potentials and to investigate the charging and discharging of capacitors. When used in conjunction with the, the dependence of the current flowing on the applied voltage can be studied in various electric circuits. This sensor can be used to measure low voltage AC and DC circuits. With its 4 mm plugs, it can easily be connected into electric circuits. It can also measure, using a step-down transformer, the AC voltage of the main supply and check its frequency 50/60 Hz (the input is limited to ±20 V).
Sensor Specs:
Range -20 - 20 V | 0.01 V resolution | 3000 max sample rate

ACTIVITY – Lemon Cell Battery
General Background:
The electrochemical cell is a device that creates electrical energy from chemical reactions. The cell is made up of two half-cells which each consist of an electrode (a conductor of electricity) and an electrolyte (a substance that allows migrations of ions between the electrodes). Electrons flows from the negatively charged electrode, called the anode, to the positively charged electrode, called the cathode.
In the presence of the acidic lemon juice, the electrode forming the anode (negatively charged electrode) will react in a process called oxidation. For instance, if using the Zinc Electrode, the zinc atoms will dissolve in the solution as electrically charged zinc ions, leaving two negatively charged electrons behind in the metal for each zinc atom.
If one of the electrodes in the lemon has more free electrons than the other, then those electrons will flow from the first strip to the second through a conducting path. The path is the wire connecting the electrodes, not the electrolyte. In this activity the path is through the Eisco Voltage Sensor, allowing us to measure the potential difference (the voltage) between the two electrodes.
When using the carbon rod as one of the electrodes, the carbon rod does not interact with the acid in the battery. In this case it remains neutrally charged, however since it remains more positively charged than the anodes which are negatively charged, it acts as the cathode in the cell. The carbon rod is a good conductor of electricity, and allows electrons to flow through the circuit back into the electrolytic solution.
Required Materials:
Eisco Voltage Sensor & Handheld Unit Eisco Electrodes for Student Cell – Aluminum, Copper, Iron, Nickel, Zinc, and Carbon Rod [PH0927A,D,E,G,I,J] 2 – 4mm alligator clips Paring knife, scalpel or other blade
Procedure
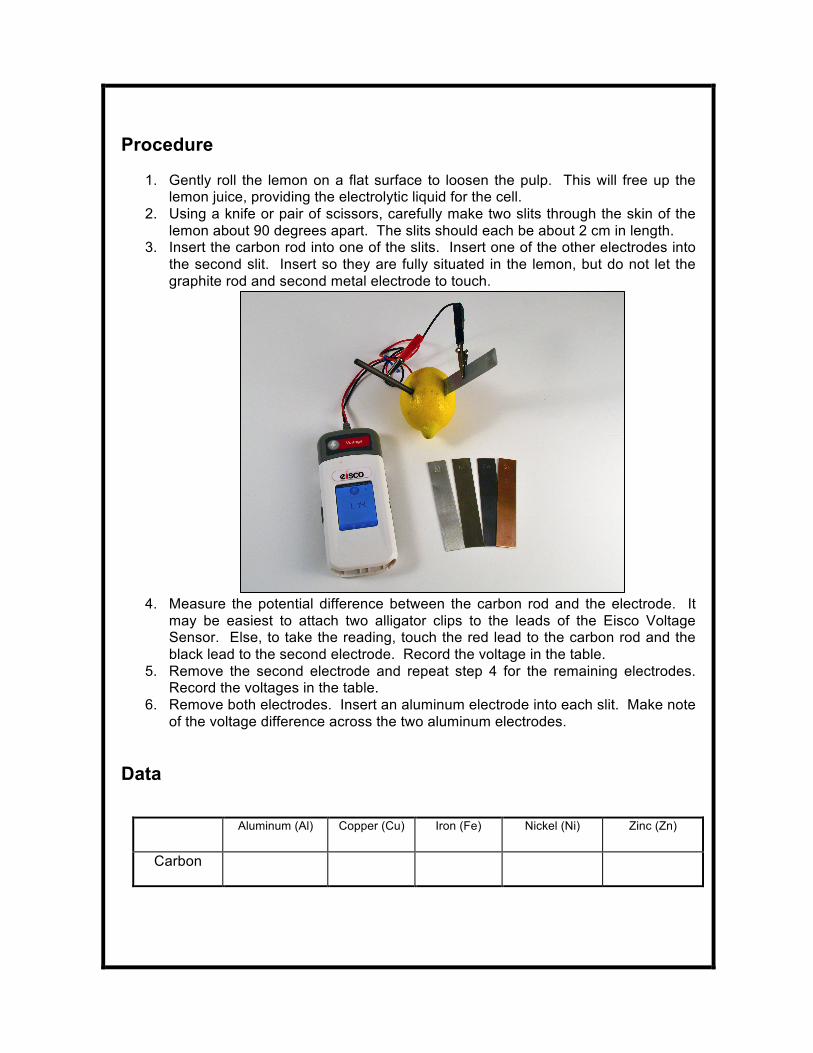
1. Gently roll the lemon on a flat surface to loosen the pulp. This will free up the lemon juice, providing the electrolytic liquid for the cell.
2. Using a knife or pair of scissors, carefully make two slits through the skin of the lemon about 90 degrees apart. The slits should each be about 2 cm in length.
3. Insert the carbon rod into one of the slits. Insert one of the other electrodes into the second slit. Insert so they are fully situated in the lemon, but do not let the graphite rod and second metal electrode to touch.
4. Measure the potential difference between the carbon rod and the electrode. It
may be easiest to attach two alligator clips to the leads of the Eisco Voltage Sensor. Else, to take the reading, touch the red lead to the carbon rod and the black lead to the second electrode. Record the voltage in the table.
5. Remove the second electrode and repeat step 4 for the remaining electrodes. Record the voltages in the table.
6. Remove both electrodes. Insert an aluminum electrode into each slit. Make note of the voltage difference across the two aluminum electrodes.
Data
Aluminum (Al) Copper (Cu) Iron (Fe) Nickel (Ni) Zinc (Zn)
Carbon
Questions
1. Is the Carbon rod the cathode or the anode? Are the metal electrodes the cathode or the anode? How can you tell?
2. Why didn’t the voltage sensor record any voltage (or negligible voltage) for the two aluminum electrodes?
Extension
With several electrodes and lemons, one can try to achieve a higher voltage than from a single lemon. Attach as many lemon cells together using extra 4mm connecting leads (with alligator clips) in series to attain a larger voltage. To attach in series, connect the carbon lead (positive terminal) to another lemon’s metal electrode (negative terminal) so all the lemons are in a line. Then connect the Eisco Voltage Sensor to each free end of the lemon battery. The potential difference will be the combined voltage of each of the lemons.
Sample Results
These are examples of possible results. Due to the many variables involved, exact reproduction is unlikely, but students should find similar trends.
Aluminum (Al) Copper (Cu) Iron (Fe) Nickel (Ni) Zinc (Zn)
Carbon 1.02 V 0.16 0.64 0.44 1.18
Aluminum – Aluminum Cell – 0.02 V
Answers to Questions
1. The Voltage Sensor reads a positive potential difference (voltage) between the Carbon electrode and each of the metal electrodes. Thus the Carbon rod is more positively charged than each of the metal electrodes. By definition the Carbon rod is the cathode and the metal electrodes are the anodes of the cell.
2. The oxidation of each of the aluminum electrodes by the acids in the lemon juice will produce nearly equivalent amounts of free electrons on the electrodes. Since this will result in a very equivalent charge of each of the electrodes, the potential difference, i.e. the voltage, will be very nearly zero.