VisNetic MailFlow Product Documentation · v6.5 . Contents Contents 2 What's ... Securable Object...
68
VisNetic MailFlow Product Documentation VisNetic MailFlow Admin Guide
Transcript of VisNetic MailFlow Product Documentation · v6.5 . Contents Contents 2 What's ... Securable Object...

VisNetic MailFlow Product Documentation
VisNetic MailFlow Admin Guide

V I S N E T I C M A I L F L O W P R O D U C T D O C U M E N T A T I O N
VisNetic MailFlow Admin Guide
VisNetic MailFlow Email [email protected] http://www.visnetic.com/
v6.5

Contents
Contents 2
What's New in MailFlow 6.5 5
System Requirements 6
Email Services 6
Database Services 7
Web Services 8
Service Distribution 8
Clients 10
Requirements Summary 10
Installation 12
Checklist 12
Installing 12
Verifying Prerequisites 12
Select Database Server 13
Configuring VisNetic MailFlow 13
Web Server 14
Built-in Administrator Account 14
Registration 14
Optional Components 14
Uninstalling 14
Overview 15
Administration Roll-up 15
Administrators Group 15
Administration Tool 15
Agents & Groups 17
Authentication 17
Agent Configuration 17
Group Configuration 18
Additional Agent Information 18
Signatures 18
Active Sessions 19
Access Control 19
IP Access 19
Preferences 19
Alerting 20
Alerting 20
Integrated Alerts 21
Age Alerts 22
Watermark Alerts 22
Database Maintenance 24
Settings 24
Archives 25
Backups 25
Deleted Items 25
General Configuration 26
Settings 26
Agent Audit 26
Office Hours 26
Scheduled Reports 26
Ticket Settings 26
System Defaults 28
Email Verification 30
Bulk Settings 31
Agents 31
TicketBoxes 31
Custom Routing Rules 32
Message Sources 32
Message Destinations 32
System Email Address 32
Registration 33
Logging 34
Logging 34
Levels Of Severity 34
Log Event Categories 35
Debug Log Categories 35
Server Clustering 37
Adding Servers to the Cluster 37
Global Server Properties 38
Individual Server Properties 38
Server Tasks 38
Message Handling 40
Message Sources 40
Message Destinations 42

Default Routing Rule 44
Custom Routing Rules 45
Processing Rules 49
Inbound Orphans / Queue 49
Outbound Queue / Orphans 49
Remote Reply 49
Scheduled Tasks 51
Auto Messages 51
Auto Responses 52
Security 54
Access Control Model 54
Securable Object Categories 54
Default Access Control 56
Access Control Rights 56
Custom Access Control 56
IP Access Restrictions 56
Other Restrictions 57
Effective Rights 57
TicketBoxes 58
TicketBoxes 58
Custom Ticket Fields 61
Bulk Actions 62
Auto Ticket Actions 62
TicketBox Views 62
TicketBox Headers and Footers 63
TicketBox Owners 63
Customization 63
Contact Properties 63
Contact Groups 63
Global Dictionary 64
Ticket Categories 64
Outbound Message Approval 66

4
Overview
Welcome to VisNetic MailFlow.
isNetic MailFlow is a powerful email Customer Relationship Management solution, designed specifically to address the needs of small to medium sized businesses. With VisNetic MailFlow, your company can meet and exceed your customers' service and support expectations. VisNetic MailFlow allows
you to:
Distribute, process, and track messages sent to generic email inboxes such as sales@, support@, and info@
Access the entire email history of any customer inquiry - instantly
Enhance response quality and speed with robust workflow management
Manage service quality where it matters most - at the point of customer contact
Increase customer satisfaction and maximize profit potential
VisNetic MailFlow does all of this while enabling your organization to gain important operational insights, protect and secure critical business email correspondence with centralized storage and administration, and reduce service and support costs through improved employee productivity and efficiency.
Chapter
1
V

A D M I N G U I D E
5
What's New in MailFlow 6.5
Support for foreign character sets (charsets) allows messages written in languages that utilize non ASCII characters (Chinese, Japanese, etc…) to be saved and replied to. Message Subject, Body and Email Address Real Names are supported. Agent Session database synchronization allows multiple Web Servers or an IIS Web Garden to provide the Web based Agent interface. This functionality makes VisNetic MailFlow Load Balance and Cluster friendly. Global Office Hours have been extended to add Custom Office Hours for Message Sources / Destinations and Custom Routing Rules. This allows each object to process on its own schedule either during or outside custom defined Office Hours. Support for SQL Real Text Search has been added to Ticket Search on Message and Ticket Subject and Message Body. Ticket searches using “contains” on Subject and Body can optionally utilize this new feature, which greatly reduces the time required to perform the search. Ticket Search has also been extended to allow the search of Custom Ticket Fields. Database Maintenance can now be scheduled to be performed on specified days of the week, which allows for weekly maintenance in addition to daily. All this and more is available in the new VisNetic MailFlow 6.5! A complete list of Enhancements & Resolved Defects are listed in the VisNetic MailFlow Release Notes: http://www.visnetic.com/support/releasenotes/index.aspx Welcome to MailFlow 6.5!
A D M I N G U I D E
6
System Requirements
This chapter discusses system requirements for installing VisNetic MailFlow.
Email Services
n order to effectively route and manage inbound email messages, VisNetic MailFlow must first be able to retrieve them. One of the great advantages of VisNetic MailFlow is its ability to retrieve email from any standard POP3 email
account; regardless of where it is hosted or what mail server platform is used.
In VisNetic MailFlow, each individual POP3 email account is known as a message source. Message sources can reside anywhere, and VisNetic MailFlow will support an unlimited number.
For example, if your organization relies on a local ISP for Internet connectivity, you might also rely on them for email. In this case, you're likely to have one or more "generic" POP3 email accounts (e.g. [email protected], [email protected], etc.) hosted by your ISP. This is easily supported by VisNetic MailFlow; create one message source for each POP3 email account, using the email server address (i.e. mail.yourisp.net) along with the username & password for the POP3 email account.
When VisNetic MailFlow collects messages from these POP3 accounts, it will route them either according to the specialized routing rules you create, or will direct them into a TicketBox with a matching default email address.
Another common scenario is one in which the organization deploying VisNetic MailFlow has a dedicated mail server running internally. Again, this could be any mail server platform, including Kerio Connect, Microsoft Exchange, or any other that supports collection of email messages via POP3 (nearly all do).
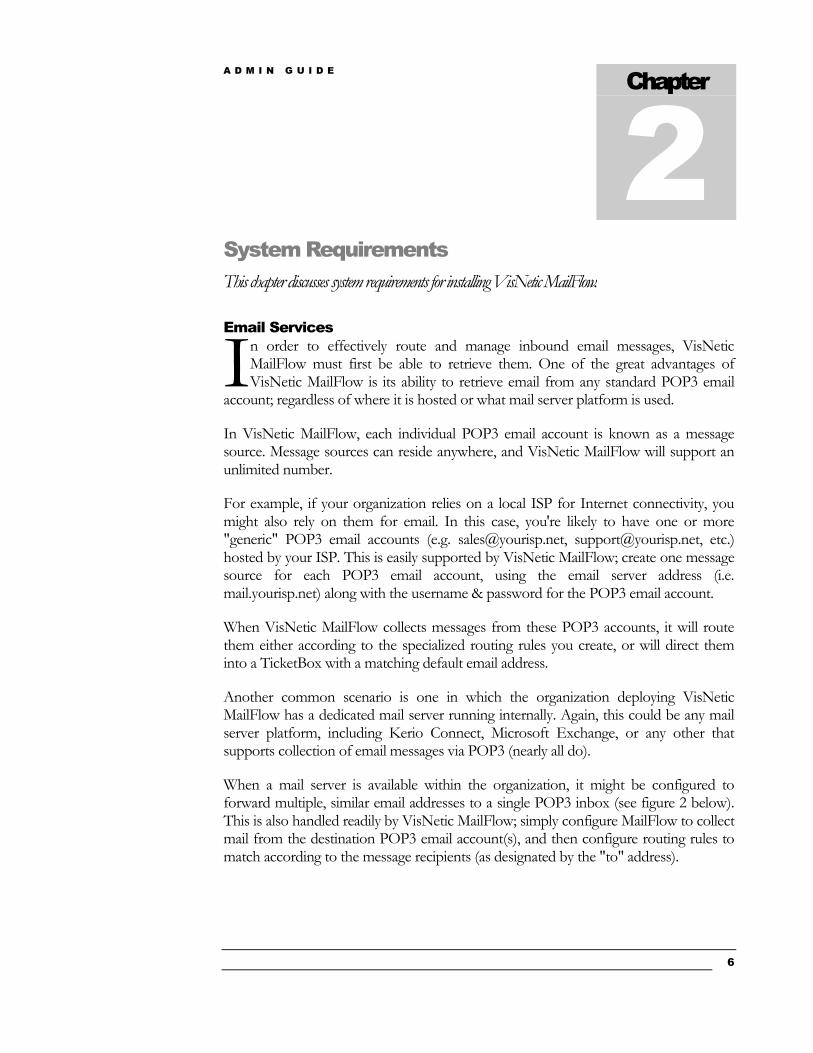
When a mail server is available within the organization, it might be configured to forward multiple, similar email addresses to a single POP3 inbox (see figure 2 below). This is also handled readily by VisNetic MailFlow; simply configure MailFlow to collect mail from the destination POP3 email account(s), and then configure routing rules to match according to the message recipients (as designated by the "to" address).
Chapter
2
I

A D M I N G U I D E
7
Figure 1 Mail Forwarding Scenario
Other, more complex forwarding scenarios are also handled gracefully by VisNetic MailFlow.
Database Services
VisNetic MailFlow stores nearly all of its data, including messages and configuration data, in an ODBC-compliant database. This means that a database server platform must be available at all times in order for VisNetic MailFlow to function.
VisNetic MailFlow presently supports two database platforms, one of which is available for free:
Microsoft SQL Server 7, 2000, 2005, 2008, 2012 or 2014
Microsoft Data Engine (MSDE) 7 or 2000
Microsoft SQL Express 2005, 2008, 2012 or 2014
Microsoft MSDE and SQL Express are free and an ideal choice for organizations without an existing SQL Server license. SQL Express and MSDE are lightweight versions of the MS SQL Server database engine that are suitable for smaller VisNetic MailFlow deployments (3-6 Agents, with light to moderate email loads).
For organizations with six or more VisNetic MailFlow users and moderate to heavy email loads, Microsoft SQL Server is recommended.
Please note that it's also fairly simple for an organization to start out using the MSDE or SQL Express versions of the database, and then upsize to MS SQL Server at a later time (when email volume warrants it). Microsoft offers a free, easy-to-use migration tool for this very purpose.

A D M I N G U I D E
8
Regardless of which of these database platforms is used, the VisNetic MailFlow product installer makes configuration of the database seamless and simple. There's also no need to interact directly with the database server once VisNetic MailFlow is installed; it transparently manages the database connection and provides backup, archiving, and purging functionality directly from within the VisNetic MailFlow administration console.
Finally, the VisNetic MailFlow database can be run on the same machine as the VisNetic MailFlow Engine, or anywhere on the local network accessible to it. The VisNetic MailFlow product installer supports both scenarios.
Web Services
VisNetic MailFlow's powerful, intuitive interface is entirely web-based. This allows end users and administrators to access VisNetic MailFlow from any location that has an Internet connection. VisNetic MailFlow currently supports Microsoft Internet Information Services (IIS) 6.0 or greater.
Microsoft IIS 6.0 runs on the Windows 2003 Server platform and IIS 7.0 on Windows 2008 Server, IIS 8.0 on Windows Server 2012. We recommend that you choose the web server platform that best suits your internal security and budgetary guidelines.
As with the database server platform, VisNetic MailFlow will configure your web server of choice during the product installation. No additional configuration is required once the installation is completed.
Please note that the VisNetic MailFlow server engine must be installed on the same machine as the web server.
Service Distribution
Only the web server and the VisNetic MailFlow server engine must be run together on the same machine. The database server may be installed on any part of the network directly accessible to the VisNetic MailFlow engine, though a fast connection (e.g. 10Mbs or greater) is recommended for maximum performance. Mail services can be provided by any mail server platform, and can be hosted locally (on the same machine or network) or anywhere on the Internet.
It is also entirely feasible to run any combination of the web server, mail server, database server, and VisNetic MailFlow server components on the same computer. Here are a couple of common deployment scenarios:

A D M I N G U I D E
9
Figure 1 VisNetic MailFlow Deployment Scenario #1
In the scenario illustrated by figure 1 above, the primary services are all run on the same machine, while an ISP accessible via the Internet provides email services.
Figure 2 VisNetic MailFlow Deployment Scenario #2
In figure 2, the VisNetic MailFlow server engine and the web server are installed on the same machine, while the database server and corporate email server are installed on separate machines on the same local area network.

A D M I N G U I D E
10
These are but two examples; other service distribution scenarios are certainly possible.
Clients
VisNetic MailFlow requires end users and administrators accessing the system to use Microsoft Internet Explorer 5.5 or later, Google Chrome, or Apple Safari.
There are no additional client requirements; any Windows operating system supporting this web browser will work.
Requirements Summary
This section provides a summary of requirements for VisNetic MailFlow.
VisNetic MailFlow Server
Operating System: Windows 2003 Server, Windows 2008 Server or Windows 2012 Server.
o Non-Server operating systems (Windows 2000, XP Pro, Windows 7 and Windows 8) are compatible for evaluation but not recommended for production.
Memory: 2GB minimum, 4 GB or more recommended
CPU: Current CPU Technology recommended
Disk Space:
o 70MB Hard Disk space for VisNetic MailFlow installation files
o Additional disk space for email attachment files
o Additional disk space for logging, dependent upon configuration
Web Server: Microsoft IIS 6.0 or greater
Database Requirements
Either of the following:
o Microsoft SQL Server 7, 2000, 2005, 2008, 2012 or 2014
o Microsoft Data Engine (MSDE) 7, 2000 or SQL Express 2005,2008,2012 or 2014
Storage requirements:
o Avg. 4kb per message per thread stored in database (e.g.; 1000 threads in a month with 4 messages per thread = 16MB)

A D M I N G U I D E
11
Client Requirements
Web Browser: Microsoft Internet Explorer 5.5 or greater, Google Chrome, or Apple Safari.
Operating System: Any operating system that supports Internet Explorer, Google Chrome, or Apple Safari.
Disk Space: No additional software components are installed on the client

A D M I N G U I D E
12
Installation
This chapter describes the process of installing VisNetic MailFlow.
Checklist
efore you start the installation program, please read the following checklist. You will need administrative access to install VisNetic MailFlow. If you will be using an existing MSSQL server, you will need the sa password. You will have the option to configure a message source and destination. You can defer this
step until after installation.
SQL Server Admin (sa) password (if using an existing MSSQL server)
POP3 account information, including:
o POP3 server hostname or address
o TCP/IP Port (usually 110 / SSL 995)
o Account name and password
SMTP account information, including:
o SMTP server hostname or address
o TCP/IP Port (usually 25 / SSL 465)
o Account name and password if using SMTP Auth.
Installing
To begin installation, execute the install program (vmfsetup_en.exe). You will be presented with a welcome dialog. Clicking next will step you through the system requirements page, release notes, and end user license agreement.
Verifying Prerequisites
After accepting the license agreement, the installer will check the system for a compatible web server. You must have a compatible web server installed before running the VisNetic MailFlow installation.
Chapter
3
B

A D M I N G U I D E
13
The install searches for available MSSQL servers. You can manually specify the SQL instance as needed. i.e. ‘’SERVER\SQLEXPRESS”
Compatible web browsers are verified. If Internet Explorer, Google Chrome, or Safari are not found, then a dialog will appear asking whether you will attempt to connect to VisNetic MailFlow from this computer. If you answer yes, you will have the option to be redirected to the Internet Explorer download site and installation will exit.
Select Database Server
After you fill in the name and company of the user and select the installation folder, you will be asked for the authentication mode used to connect to the SQL server:
** SQL Server Authentication or Mixed Access is recommended **
If you choose Windows Authentication, you must use the account you are currently logged in with. You can use the administration tool to change the login credentials to any valid NT user that can access the database after installation.
The next option is to select the MSSQL server in which to create the VisNetic MailFlow database. If you installed MSDE, then SQL Server should be: "SERVER\MAILFLOW." where SERVER is the name of the Windows 2000 computer. If you installed SQL Express, then the SQL Server should be: ‘’SERVER\SQLEXPRESS” where SERVER is the name of the Windows computer MailFlow is being installed to. If you selected Windows Authentication, then you will be asked for the password for the currently logged-in NT user.
The authentication credentials are verified by attempting to connect to the specified MSSQL Server.
Configuring VisNetic MailFlow
You have the option to setup an email server and create a TicketBox in the installer. If you decide not to configure VisNetic MailFlow during installation, you can perform this task later.
The first step in configuring VisNetic MailFlow is to define a POP3 message source to collect email messages from. You will need a server hostname or IP address and account information. For mail servers requiring a secure connection enable the “Use SSL/TLS option, specifying port 995. Click on the Test Login button to attempt a POP3 connection and verify the settings. If the Active checkbox remains checked, then the engine will start downloading mail from this message source into VisNetic MailFlow. The default interval for checking mail is 2 minutes.
The next step is to define a TicketBox to hold Tickets. More TicketBoxes can be created later. Enter a name and a description for the first TicketBox. You can also set the starting ticket ID number for all TicketBoxes.

A D M I N G U I D E
14
Now you can define a rule to route newly created Tickets into the TicketBox defined in the previous step. Enter an email address to match and a description of the rule. There are many other routing rule options that can be configured later
The last step is to define a SMTP message destination. Enter a server hostname or IP address to deliver mail to. The default port is 25 and the default interval for sending mail is once a minute. If you enable SMTP Auth, then you will need to enter a username and password. For mail servers requiring a secure connection, enable the “Secure Connection option, selecting either the “Use SSL/TLS” or “STARTTLS” option, changing the port to 465 or 587. Hosted Microsoft Exchange, Office 365, Exchange 2010, 2012 commonly requires the “STARTTLS” option and an alternate port. Check with your provider for the required port. See Chapter 11 for additional configuration information with Office365.
Web Server
You must select the installed Web Servers to use with VisNetic MailFlow. The next step is to configure the parameters of the newly created website. If you select "Create as Virtual Directory of existing website", then you will have to select which website to create the virtual directory in. The directory name will be "MailFlow." If you create a new website, then you will need to select the domain name or host and the IP addresses and port.
Built-in Administrator Account
You will need to set a password and email address for the built-in administrator account. Use this account to login to VisNetic MailFlow to finish configuration.
Registration
The next step is to copy the application files to the target directory, and to create the website and database. The final step is to enter a registration key. You can enter a registered key or enable a 30-day evaluation.
Optional Components
You have the option to download some additional components to your VisNetic MailFlow server. These components are the Adobe SVG and Acrobat plug-ins for Internet Explorer. The SVG plug-in is required to view the graphs in the reports. The Acrobat reader is required to view documentation. When these components are downloaded through the installer, they can then be distributed to users through the VisNetic MailFlow website.
Uninstalling
To uninstall VisNetic MailFlow, navigate to Add/Remove Programs in the control panel. Select VisNetic MailFlow and click on the Change/Remove button. You will be asked whether you want to remove the VisNetic MailFlow database and website.

A D M I N G U I D E
15
Overview
This chapter describes how to access the administration functions.
Administration Roll-up
o login to VisNetic MailFlow, enter the URL for the website configured in installation into a supported web browser. On the VisNetic MailFlow server, there is a shortcut titled "Login to MailFlow" in the "VisNetic MailFlow"
program group. You will be presented with the login page. Enter "Admin" in the username field. Enter the password for the built-in administrator account in the password field and hit Enter or click on the Login button.
The first time a user logs in, the preferences page appears in the right pane. Refer to the chapter on Agent Preferences in the user guide for more information. Subsequent logins will take the user directly to the "My Tickets" page.
The left pane contains three "roll-ups". Click on the title (e.g. "Administration") to "unroll" the administration section and display links to the administration pages. All administrative functions except ODBC connection settings can be configured from this menu.
Administrators Group
The built-in administrator account cannot be disabled or removed from the administrators group. Agents in the administrators group have access to the administration roll-up. Agents that are not a member of this group do not have the administration roll-up in their left pane and cannot access these pages.
Administration Tool
If VisNetic MailFlow cannot access the database, you will need to run the Administration Tool on the VisNetic MailFlow server, which can be launched through a shortcut titled "Administration Tool" in the "VisNetic MailFlow" program group. This tool provides these functions:
Modify the ODBC connection parameters, including:
o Name of SQL server that houses the VisNetic MailFlow database
o VisNetic MailFlow Database name
Chapter
4
T

A D M I N G U I D E
16
o Authentication Mode (SQL Server or Windows Authentication)
o Account information (username, password, and domain)
Enable or disable the Force HTTPS Option. Enabling this option without an operating SSL web site can lock you out of VisNetic MailFlow. If this happens, you can disable the option with this tool.
Set the password for the built-in administrator account.
If you are logged in to an NT account with administrative access, then you can immediately access these functions. Otherwise, you must first enter the username and password of a valid VisNetic MailFlow user in the administrators group.

A D M I N G U I D E
17
Agents & Groups
This chapter describes agent and group configuration.
Authentication
isNetic MailFlow users must have an Agent account to login. To create or modify agents, click on Agents shortcut under Agents & Groups in the administration roll-up. Users can set their own agent preferences, but cannot modify their own agent configuration unless they belong to the administrators group.
The built-in administrator account is a special account. It cannot be made inactive or removed from the administrators group. It is not included in the user size calculation used for licensing. If you are evaluating VisNetic MailFlow and your 30 days is up, then the only account that can login is the built-in administrator. If you forget the built-in administrator password, you can set it using the Administration Tool (see chapter 4).
Users can login using a password stored in the VisNetic MailFlow database, on the NT domain controller, or in VisNetic MailServer ODBC data source. The method used depends on the type of agent account. Local users store their passwords in the database in an encrypted form. To change an agent's password, clear the password field and enter the new password. This is required because eight asterisks (*) are returned in lieu of the agent's password for security reasons.
NT users authenticate against the NT domain controller as determined by the NT Domain configured for the agent. You can browse the NT user accounts by clicking on the NT Users button.
Agent Configuration
The fields in the edit agent page are described below:
Local or NT User – Indicates whether the User is authenticated against the local database or the defined NT Domain.
User Name - Used to login with
Full Name – Name displayed
Chapter
5
V

A D M I N G U I D E
18
Password - Used to authenticate (only present for local users)
Domain - Used to locate domain controller (only present for NT users)
Escalates Tickets To - Choose another Agent or an Escalation Group to assume ownership of Tickets escalated by this user.
Outbound Message Approval From - Choose another Agent or Group to provide outbound message approval for this Agent. (See chapter on Outbound Message Approval)
Agent Status - If Active, the agent can login. If Inactive, the agent cannot login and no more Tickets will be assigned to them.
Require Get Oldest - If yes, then the agent cannot browse Tickets contained in TicketBoxes. They must use the Get Oldest button to take ownership of Tickets. If no, then the agent can freely browse TicketBoxes.
Default Email Address – The default email address that will be utilized in outbound messages drafted by this Agent. Alternative email addresses may be presented as options during the message composition process.
Group Configuration
VisNetic MailFlow provides the ability to define groups of agents. Groups can be used to define access control rules, for sharing signatures, and for sending alerts. There are two special pre-defined groups, the Everyone Group and the Administrators Group.
The Everyone Group always contains all agents. It cannot be edited or deleted. The Administrator Group always contains the built-in administrator agent, but can also include other agents.
Groups can also be defined as Escalation Groups, which can then be assigned to individual Agents as the Escalation object.
Additional Agent Information
Define additional properties associated with this Agent. Available properties include the system default properties and any properties added within the Administration Contacts, Contact Properties dialog.
Signatures
The default signature is automatically inserted into new messages. Group signatures are available to all agents in the group.

A D M I N G U I D E
19
Active Sessions
This page shows information about the users who are logged in to VisNetic MailFlow. It lists the IP address they connected from and the most recent time a page was requested from the server.
Access Control
Access Controls allow specific permissions to be placed upon actions performed by Agents or Groups. Permissions based on items such as TicketBoxes, Contacts, Preferences, and Standard Responses can be further controlled by Agent or Group.
Access Control under Agent configuration applies to that particular agent and what level of access other agents or groups have to that agent. Custom rights may be established by selecting the “Use Custom Rights” radio button.
IP Access
IP Access Restrictions allow Agents/Groups to authenticate to the VisNetic MailFlow server from specified IP addresses only. By default, no IP restrictions are set, allowing Agents/Groups to log into VisNetic MailFlow across any connected network interface.
This feature is best utilized when restricting Agents from accessing VisNetic MailFlow from locations outside of the office, or when access from specific external locations is required.
Preferences
General Agent preferences are primarily those which relate to how the Agent interacts with the VisNetic MailFlow system. Preferences details are found in the VisNetic MailFlow Agent Guide.

A D M I N G U I D E
20
Alerting
This chapter describes the available alerting options.
Alerting
VisNetic MailFlow has the ability to notify Administrators and Agents of key events. There are two types of configurable Alerts, 1) Administrator configured Alerts and 2) Agent configured Alerts.
The Administrator configured alerts are defined within the Administration section and include message delivery errors, ticket age alerts and more. Administrators can choose who is notified and specify the delivery method. Click on the Alerts shortcut to view the alert settings.
By default, several key alert configurations are enabled to notify the Administrator of specific VisNetic MailFlow system events.
Agent configured alerts are defined within the Agent’s Preferences, My Alerts tab and include Inbound Message to Owned Ticket, Inbound Message from Owned Contact, Ticket assigned to you, Outbound Message Requires Approval, Outbound message Approved, and Outbound Message Returned.
Integrated Alerts configuration options:
Alert on Event – the event that will trigger the Alert.
For – used by Ticket-based alerts: Ticket Age, Low Watermark, and High Watermark
Method – signifies whether the Alert will be Internal (left menu “Alerts” option) or External via an email address not associated with VisNetic MailFlow
o External – of the Alert is External, the recipient email address must be specified
o Internal – the receiving Agent or Group must be selected
Chapter
6

A D M I N G U I D E
21
Administrator configured Alerts can be sent internally to an Agent or Group, Agent configured Alerts are only sent to the agent that defined them. With internal delivery, the alert messages appear in the Alerts window, which can be accessed from agent shortcuts in the left-hand pane. Alerts can also be sent to an external email address. A recipient email address is required for this method of delivery.
Integrated Alerts
Event Description
Ticket Age Period of time after ticket is created or re-opened
Low WaterMark When the number of open Tickets exceeds the Low WaterMark threshold for the TicketBox
High WaterMark When the number of open Tickets exceeds the High
WaterMark threshold for the TicketBox
Product Registration Events relating to product registration
Disk Full When disk full error occurs saving a file to disk
Inbound Delivery Events that occur while receiving messages
Outbound Delivery Events that occur while sending messages
Critical Error Errors that prevent the system from functioning
Inbound Message to Owned Ticket
When a new Inbound Message is received and placed in a Ticket owned by the Agent
Inbound Message from
Owned Contact
When a new Inbound Message is received from a
Contact owned by the Agent
Ticket assigned to you When a Ticket is assigned to the Agent, either automatically by the system or by another Agent
Outbound Message Requires Approval
If an Agent has been assigned the responsibility to approve another Agent's Outbound Messages, an Alert can be triggered to notify the Agent that an Outbound Message requires their review and approval
Outbound Message
Approved
If an Agent's Outbound Messages require approval by
another Agent, an Alert can be triggered to notify an Agent that their Outbound Message has been approved
Outbound Message Returned
If an Agent's Outbound Messages require approval by another Agent, an Alert can be triggered to notify an Agent that their Outbound Message has been returned
and they need to review, modify and resend the message

A D M I N G U I D E
22
Age Alerts
Notification after a Ticket is created or re-opened with no response from the Agent after a specified period of time.
General Information
Description – description shown is list of Age Alerts
Enabled – enables the Alert
Results – number of times the Alert has been satisfied
Created By – Agent who created the Alert
Last Edited By – Agent who modified the Alert
Alert On
Messages In – TicketBox or Ticket Category being monitored by this Alert
Send Alert – period of time after Ticket is created or re-opened before the Alert will be sent
Alert To
Method – Internal or External notification. Internal will send Alert to Agent’s “Alerts” shortcut. External sends the notification to the specified email address. The Alert includes the Ticket Subject and Ticket ID
Watermark Alerts
Notification after the number of open Tickets exceeds the High or Low value.
General Information
Description – description shown is list of Watermark Alerts
Enabled – enables the Alert
Results – number of times the Alert has been satisfied
Created By – Agent who created the Alert
Last Edited By – Agent who modified the Alert

A D M I N G U I D E
23
Alert On
Messages In – TicketBox or Ticket Category being monitored by this Alert
High Watermark – send alert after the number of open Tickets reaches this value
Low Watermark – send alert when the number of open Tickets decreases to this value
Alert To
Method – Internal or External notification. Internal will send Alert to Agent’s “Alerts” shortcut. External sends the notification to the specified email address. The Alert includes the Ticket Subject and Ticket ID

A D M I N G U I D E
24
Database Maintenance
This chapter describes how to manage your VisNetic MailFlow database
Settings
atabase Maintenance allows VisNetic MailFlow to maintain and backup its internal data structures at scheduled intervals or through manual intervention. Database Maintenance provides operations to minimize the current
"working" data set and protect data from permanent loss.
To configure database maintenance, click on the shortcut to Settings under Database Maintenance in the administration roll-up. You can schedule daily database maintenance to run automatically on specified days of the week at the designated time of day, or you can make it run immediately. Keep in mind that agents will not be able to access VisNetic MailFlow while database maintenance is running.
Backing up the database saves the contents of the database and all attachments in a compressed file with a proprietary format.
Archiving the database stores Tickets older than specified time period in a compressed file with a proprietary format. The Archive Cut Off Interval (ticket age) is determined by last time the ticket was opened or when the most recent message was added to the ticket. The way this function works depends on what will be removed from the database:
Tickets and Messages - completely removes older Tickets from the database. No trace of the Tickets remains in the database.
Messages - removes all messages and attachments from the database, but leaves the ticket, ticket notes, and system ticket events. You can access the messages from the archive through the system ticket events if the archived file remains on the system. (Recommended)
Nothing - leaves the database alone. This option is primarily for running database maintenance now. If this option is enabled for daily maintenance, older Tickets may be archived multiple times.
Chapter
7
D

A D M I N G U I D E
25
Purging old records automatically removes items that are older than the specified time interval. You can remove the following types of records:
Tickets - purges closed Tickets older than the cut-off interval
Trash - removes trash records older than the cut-off interval
Standard Response Usage - removes standard response usage data older than the cut-off interval.
Alerts - removes any alerts older than the cut-off interval
Contacts without Tickets - removes contact records that have no associated Tickets
Archives
The Archives page provides a listing of all archive files generated by the VisNetic MailFlow database maintenance. The listing includes the Archive filename, date of creation, the number of inbound and outbound messages it contains, and the size of the file. Archive files that are copied to the archive folder will also appear, so that you can import archives from other systems. Please note that the system will be unavailable to agents while importing an archive.
Backups
The Backups screen provides a listing of all backup files generated by the VisNetic MailFlow database maintenance. Restoring a 2.x backup will merge the backup file with the current contents of the database. Please note that the system will be unavailable to agents while restoring a backup.
Deleted Items
Deleted Items is the repository for Tickets, messages, contacts, and standard responses that have been deleted by an agent. This ensures that items are not permanently removed from VisNetic MailFlow prior to administrative approval, and provides an opportunity to restore items deleted by mistake.

A D M I N G U I D E
26
General Configuration
This chapter describes the general configurations settings within VisNetic MailFlow.
Settings
eneral Configuration settings include: Agent Audit, Office Hours, Scheduled Reports, Ticket Settings, System Defaults and Contact Email Verification.
Agent Audit
Enable/Disable the Agent Audit feature and set the Agent activities that should be written to the Agent Activity Log for later reporting. Ensure the appropriate security is set for the Agent Audit reporting on the Default Access Control panel. The default is all options enabled.
Office Hours
Define Office Hours. Office Hours are currently configurable for Message Sources and Message Destinations.
Global Office Hours is the foundation for what will become an extensive list of improvements to provide timely delivery and assignment of tickets. Future releases will bring office hours to ticket routing, agent availability and more.
Enabling the feature allows you to control the hours email is delivered to and from VisNetic MailFlow, improving reporting accuracy.
Scheduled Reports
Enabling this option allows Agents with sufficient access control the ability to schedule reports to run at a predetermined time.
Ticket Settings
Ticket Search for GetOldest Agents – Allow Agents that have the GetOldest option enabled to search for Tickets that they do not own. The default is disabled.
Chapter
8
G

A D M I N G U I D E
27
Ticket Search Timeout - Set the number of seconds to wait for the database query to finish when performing ticket searches. The default is 60 seconds
Max Ticket Lock Time - Set the maximum number of minutes a Ticket can be locked before the system will automatically unlock it. Set to 0 to disable the feature, set to 20 > minutes. The default setting is 60 minutes.
Ticket List Date - Set the date to be used in Ticket Lists (such as "My Tickets").
o Utilize latest Ticket Open Date as Ticket List Date - This is the default option and utilizes the "OpenTimeStamp" of the Ticket, which is initially set to the Date/Time the Ticket is created and then updated each time a Ticket changes from some other Ticket State to "Open". As an example, if a Ticket is closed during the process of an Agent replying to a Ticket with an Outbound Message and that message is replied to, when the reply is received by MailFlow the Ticket State is changed from "Closed" to "Open" which will cause the Ticket List Date to be changed to the Date/Time the Ticket was re-opened.
o Utilize latest Inbound/Outbound Message or Ticket Note as Ticket List Date - When this option is selected, the Date/Time utilized will be the latest of all Inbound/Outbound Messages and Ticket Notes.
o Utilize first Inbound Message Date as Ticket List Date -When this option is selected, the Date/Time of the first Inbound Message will be utilized as the Ticket List Date. If additional Inbound Messages are added to the Ticket, the Ticket List Date will revert back to the Default option for that Ticket (Utilize latest Ticket Open Date as Ticket List Date). This option is useful when MailFlow is utilized as an Email Archive System, as the Ticket Date/Time will correspond with the Inbound Message Date/Time regardless of when MailFlow actually collected the Inbound Message via the Message Source.
Read / Unread Messages & Notes - Use cutoff date to enable read/unread of messages and notes - If enabled, the system will ignore the read/unread status of any messages or notes generated on or before the cutoff date specified. As an example, if you enable the option and set the cutoff date to 10/01/2012 (October 01, 2012) any messages or notes that were created on or before 10/01/2005 will not have a read/unread status and you will not be able to set the read/unread status.
o Enable left menu unread ticket counts for "My Tickets" - If enabled, the number of tickets with unread items (messages or notes) in the Agent's "My Tickets" will be indicated, in addition to the total number

A D M I N G U I D E
28
of tickets. The unread count is the first number in the parentheses, the total number of tickets is the second. As an example, (2/4) indicates two tickets with unread items of four total tickets.
o Enable left menu unread ticket counts for "Public Ticket Boxes" - If enabled, the number of tickets with unread items (messages or notes) in "Public Ticket Boxes" will be indicated, in addition to the total number of tickets. The unread count is the first number in the parentheses, the total number of tickets is the second. As an example, (2/4) indicates two tickets with unread items of four total tickets.
o Enable left menu unread ticket counts for "Agent Views" - If enabled, the number of tickets with unread items (messages or notes) in "Agent Views" will be indicated, in addition to the total number of tickets. The unread count is the first number in the parentheses, the total number of tickets is the second. As an example, (2/4) indicates two tickets with unread items of four total tickets.
Ticket Tracking- Set where VisNetic MailFlow’s Ticket Tracking Data will be inserted. The default is Place Ticket Tracking Data in Subject of Outbound Messages.
Ticket Assignment – Disable manual Ticket Assignment from one Agent to another Agent if the target Agent is in any of the defined statuses. Override the setting for members of the Administrators Group or if an Agent is in one of the defined statuses and is assigning ownership of the Ticket to themselves.
System Defaults
Message Composition - Set the default action for “Close Ticket after Send” and “Route Replies to Me”. The default may be immediately applied at the Agent or Group level.
Date Entry Format - Set the Date format to be utilized by date selectors. The default is MM/DD/YYYY.
Left Menu Count Updates - Set the frequency that Tickets Counts displayed in the left menu are automatically updated. The default is 30 seconds.
SMTP Host Name – Set the hostname to be used when MailFlow connects to SMTP servers to deliver outbound messages and to verify Contact Email Addresses. The default is ComputerName.Domain of the MailFlow server.
Maximum Threads - Set the maximum number of processing threads to be used by the different MailFlow services. Increasing the number of threads utilized by the services may increase MailFlow performance; however additional

A D M I N G U I D E
29
system and database resources will be utilized, which may have an adverse effect. The default is 5 threads.
Request Queue Size - Set the size of the IIS request queue. Requests placed in the queue are processed by an available ISAPI Extension Thread. When the Extension Thread finishes processing the request it sends a response to the web browser that initiated the request. Increasing the size of the queue in addition to the increasing the number of ISAPI Extension Threads may improve performance; however additional system and database resources will be utilized, which may have an adverse effect. The default size of the queue is 32.
Queued Request Reload - Set the number of queued requests that when reached will cause the ISAPI Extension to request an Application Pool Reload. If the request queue fills up and requests become backlogged there may be an issue with the ISAPI Extension Threads that are processing the request queue. Restarting the application pool causes the ISAPI Extension to reload which should clear the issue.
Session Timeout - Set the time in minutes before an Agents Session will expire due to inactivity. Enable automatic left menu Ticket updates to keep the session alive even if no other Agent activity is evident.
Left Menu Updates – Allow the automatic Left Menu Ticket Count updates to keep the Agent’s session alive. The default is enabled.
Save Agent Sessions to Database – By default Agent Sessions are saved to the Sessions.xml file in the IIS data folder. Enable this option to have the session data saved to the MailFlow database instead. If Session Sharing is enabled, this option is automatically enabled. The default is disabled.
Save Session Frequency - Set the frequency (in seconds) that the session data is saved to the database. The default is 60 seconds.
Share Agent Sessions – Share Agent Sessions with other web servers or within an IIS Web Garden. This option is utilized to synchronize Agent Session data when load balancing or IIS clustering is being used. The default is disabled.
Session Sync Frequency - Set the frequency (in seconds) that the session data is synchronized between the servers. The default is 30 seconds.
Status Sync Frequency - Set the frequency (in seconds) that Agent Status is synchronized between the servers. The default is 30 seconds.

A D M I N G U I D E
30
Email Verification
Enabled – Enable or disable the Contact Email Verification system within MailFlow.
Verify Every [xx] Days – Automatically verify email addresses every [xx] days. This process runs in the background and tests the email addresses associated with MailFlow Contacts against the mail server that hosts email for the domain portion of the address.
The MailFlow system performs a Mail Exchange (MX) DNS lookup for the domain then makes a connection to the server that is returned by DNS and checks to see if the email address is a valid recipient on that server.
If the server responds positively MailFlow then checks to see if a randomly generated email alias at the same domain is also valid. This tells MailFlow if the server is a Gateway catch-all for the domain, meaning it will accept mail for any alias at the domain.
Based on its’ findings MailFlow can mark the address as verified or failed and subsequent actions on that email address can be taken by the system.
Mark as Failed if No MX – Mark the email address as failed if DNS does not return and MX record for the domain. The default is enabled.
Add Domain to Bypass if Gateway – If the server is determined to be a Gateway (catch-all) server for the domain, add the domain to the bypass so that email addresses for that domain will no longer be tested.
Remove from MyContacts – The system can remove the email address from Agents MyContacts when the address fails verification the defined number of times. The default is 0 which is Never remove.
Delete Address – The system can mark the email address and contact as deleted if the address fails verification the defined number of times. The default is 0 which is Never delete.
Decrement Failure Count – Decrease the failure count by 1 if the email address is used in an outbound message. Using the email address in an outbound message signifies that the sending Agent believes the address is valid. If the message fails to be delivered to the email address the system can be set to increase the failure count (see Increment Failure Count). The default is enabled.
Increment Failure Count – Increase the failure count by the defined value if the email address is used in an outbound message but the server defined within Message Destinations rejects the email address as invalid. This setting when used in conjunction with Decrement Failure Count will ensure invalid email

A D M I N G U I D E
31
addresses are marked as failed when they are used in outbound messages. The default is 2.
SMTP Session Timeout – Set the number of seconds MailFlow will wait for the server being tested to respond. The default is 10 seconds.
Verification Bypass – Email Addresses and Domains entered in the Bypass will not be automatically verified.
Bulk Settings
eneral Configuration bulk settings include: Agents, TicketBoxes, Custom Routing Rules, Message Sources and Message Destinations. For more information about the individual settings, see the section in this Guide for the
particular object (Agents, TicketBoxes, etc…).
Agents
Select Agent – Select the Agent, Agents or Agent Groups that the selected settings will be applied to. Use the left ctrl and shift keys in conjunction with the left mouse button to select one or more items. You must select at least 2 Agents or 1 Group to apply the settings to.
Apply Button – Select the target Agents or Groups, select the settings to be applied, define the values for the selected settings then click the Apply button to apply the settings.
Settings – Check the box to the left of the Setting or Settings you want to apply to the defined Agents. Set the value of the Setting that will be applied to the defined Agents.
TicketBoxes
Select TicketBox – Select the TicketBoxes that the selected settings will be applied to. Use the left ctrl and shift keys in conjunction with the left mouse button to select more than one item. You must select at least 2 TicketBoxes to apply the settings to.
Apply Button – Select the target TicketBoxes, select the settings to be applied, define the values for the selected settings then click the Apply button to apply the settings.
Settings – Check the box to the left of the Setting or Settings you want to apply to the defined TicketBoxes. Set the value of the Setting that will be applied to the TicketBoxes.
G

A D M I N G U I D E
32
Custom Routing Rules
Select Routing Rule – Select the Routing Rules that the selected settings will be applied to. Use the left ctrl and shift keys in conjunction with the left mouse button to select more than one item. You must select at least 2 Routing Rules to apply the settings to.
Apply Button – Select the target Routing Rules, select the settings to be applied, define the values for the selected settings then click the Apply button to apply the settings.
Settings – Check the box to the left of the Setting or Settings you want to apply to the defined Routing Rules. Set the value of the Setting that will be applied to the Routing Rules.
Message Sources
Select Message Source – Select the Message Sources that the selected settings will be applied to. Use the left ctrl and shift keys in conjunction with the left mouse button to select more than one item. You must select at least 2 Message Sources to apply the settings to.
Apply Button – Select the target Message Sources, select the settings to be applied, define the values for the selected settings then click the Apply button to apply the settings.
Settings – Check the box to the left of the Setting or Settings you want to apply to the defined Message Sources. Set the value of the Setting that will be applied to the Message Sources.
Message Destinations
Select TicketBox – Select the Message Destinations that the selected settings will be applied to. Use the left ctrl and shift keys in conjunction with the left mouse button to select more than one item. You must select at least 2 Message Destinations to apply the settings to.
Apply Button – Select the target Message Destinations, select the settings to be applied, define the values for the selected settings then click the Apply button to apply the settings.
Settings – Check the box to the left of the Setting or Settings you want to apply to the defined Message Destinations. Set the value of the Setting that will be applied to the Message Destinations.
System Email Address
The System Email Address is an email address assigned to the VisNetic MailFlow system itself. This email address will appear within the "from" field of email messages

A D M I N G U I D E
33
used to deliver external Alert notifications and Anti-Virus message bounces/notifications.
Because of its use within bounce and notification email messages, the defined System Email Address should be a valid, Internet-routable email address.
Registration
You can enter a registered key or enable a 30-day evaluation. The Registration area provides expire date and license size and allowed number of MailFlow servers.

A D M I N G U I D E
34
Logging
This chapter describes the available logging options.
Logging
isNetic MailFlow provides an integrated log viewing facility to allow administrators to view events logged by the system. MailFlow logs can be written to the file system of the individual MailFlow servers, to a network
UNC or to the MailFlow database.
Logging Options can be configured by selecting the Logging Options shortcut from the left-hand navigation pane.
To modify Logging Options
1. To log to the database, select the "Log to Database" option by placing a checkmark in the corresponding box.
2. To set the log path, enter the entire folder path, excluding the trailing slash. UNC paths must begin with \\. You cannot log to a mapped drive, you must enter the UNC.
3. Set the number of days to retain the logs, enter "0" (zero) to retain them indefinitely.
4. Place a checkmark in each corresponding box for level of severity and category you wish to log information on.
5. Click Save.
Levels Of Severity
Category Description
Informational Successful operations
Warning Event that did not cause an error, but may indicate future errors
Error Failed operations
Critical Error An error that critically impacts the operation of VisNetic MailFlow
Chapter
9
V

A D M I N G U I D E
35
DeBug Should only be enabled at the request of a VisNetic MailFlow Support Engineer.
Log Event Categories
Category Description
Outbound Messaging Events that occur while sending to message destinations
Inbound Messaging Events that occur while checking message sources
Message Processing Events that occur in message processing that are neither inbound nor outbound specific
Routing Rules Events that occur while routing inbound messages into TicketBoxes
Database Maintenance Events that occur in database maintenance operations
Security Violation When a user requests data that he does not have access to
Authentication Agent logins, logouts, and session time-outs
Product Registration Events relating to product registration
Tickler Processing Tickets set to automatically reopen on some date
Reporter Scheduled reports logging
Database Monitor Logging for tasks that occur in the DB monitor thread of
the MailFlow Engine Service
Worker Thread Logging for tasks that occur in the Worker thread of the MailFlow Engine Service
Debug Log Categories
Category Description
MailFlow Engine Service Debug logging for the MailFlow Engine Service
Message Processing Debug logging for the mail components (message collection and delivery)
Web Components Debug logging for the ISAPI filter
Library Components Debug logging for shared library components (registration key analysis, etc...)

A D M I N G U I D E
36
When the File System Logs shortcut is selected within the left-hand navigation pane, the right-hand pane will display a summary listing of available VisNetic MailFlow log files. The summary information includes the log file name, date it was last modified, and file size.
When the Database Logs shortcut is selected within the left-hand navigation pane, the right-hand pane will display a summary listing of available VisNetic MailFlow logs. The summary information includes the date, server and number of entries.
Double-click on a log, or select a log and click on the View button to see the contents. When viewing large data sets, use the paging buttons at the bottom of the screen to move between pages.
You can change your filtering options and click the Filter button to refresh the listing. Or you can double-click on a log entry to view the text in a pop-up window. Alternatively, you can select the log entry and click View. You can filter on severity, component, category, and time. Log entries always are presented in reverse chronological order.

A D M I N G U I D E
37
Server Clustering
This chapter describes how to setup Server Clustering in VisNetic MailFlow
MailFlow supports any number of licensed servers, configured to utilize the same MailFlow database, to provide Agent Web Services and to perform background server tasks, such as inbound message collection via Message Sources, outbound message delivery via Message Destinations, message routing, etc...
If multiple servers are defined, it is imperative that certain system settings be modified to utilize a shared network file system, these setting include the following:
Inbound Attachment Folder - set within the MailFlow Servers dialog, Global Server Properties
Outbound Attachment Folder - set within the MailFlow Servers dialog, Global Server Properties
Path for Backup Files - set within Database Maintenance, Settings Path for Archive Files - set within Database Maintenance, Settings
Note: The above paths must be set utilizing the UNC format (\\servername\sharename), a mapped drive letter can NOT be utilized.
Note: The MailFlowEngine Service and Web Services (Application Pool) must be set to utilize a login name that has read/write/create/delete access to the defined network shares.
Adding Servers to the Cluster
MailFlow Servers are added to the cluster during installation, they can also be added by specifying the database login credentials via the MailFlow Administration Tool Windows application. After defining and testing the database login credentials in the Windows Tool, cycle the relevant MailFlowEngine service and the server will be added to the cluster.
Chapter
10

A D M I N G U I D E
38
Once the Server is added to the cluster and is listed in the MailFlow Servers, Servers list, it can be assigned Server Tasks to perform. To delete a Server, select it from the list and then select the "Delete" toolbar button.
To enable Agent Session sharing between MailFlow servers, go to Administration, General Configuration, Settings, System Defaults, Agent Session section.
Global Server Properties
Inbound Attachment Folder - the folder where Inbound Message Attachments are stored.
Outbound Attachment Folder - the folder where Outbound Message Attachments are stored.
Note: A directory structure utilizing the Year/Month/Day will be created within the above defined folders.
Individual Server Properties
Description - Set by the installer or MailFlowEngine Service when the Server is added to the cluster (this is the Windows Server Name and cannot be modified).
Type - Master or Secondary, determines whether this server is a Master or Secondary server. Only one Master server can exist within a MailFlow Cluster.
Spool Folder - the folder that is utilized during outbound message creation and delivery.
Temp Folder - the folder that is utilized during inbound message processing.
Note: The Spool and Temp Folders must be local paths accessible to this server only.
Server Tasks
Database Maintenance - Only one server within the cluster can be set to perform the automated Database Maintenance tasks, such as database backup, archiving, etc...
Message Destinations - Multiple servers within the cluster can be set to perform the Message Destinations (outbound delivery) task. Assign the configured Message Destinations that this server will process by selecting the "Assign" button.

A D M I N G U I D E
39
Message Router - Only one server within the cluster can be set to perform the Message Routing task.
Message Sources - Multiple servers within the cluster can be set to perform the Message Sources (inbound collection) task. Assign the configured Message Sources that this server will process by selecting the "Assign" button.
Scheduled Reports - Only one server in the cluster can bet set to perform the Scheduled Reports task.
Ticket Monitor - Only one server in the cluster can bet set to perform the Ticket Monitor task. This task sends TicketBox based auto responders, checks Age and Watermark Alerts and other Ticket and TicketBox based functions.

A D M I N G U I D E
40
Message Handling
This chapter shows how to collect, send, and route email.
Message Sources
essages Sources represent the email accounts from which VisNetic MailFlow collects mail for routing and re-distribution throughout the system. VisNetic MailFlow supports any number of message sources, which
are accessed using the standard POP3 message retrieval protocol. These POP3 email accounts might be hosted by your Internet Service Provider (ISP), Hosting Provider or on a local mail server on your local area network.
Click on the link to Message Sources in the Message Handling section of the administration roll-up to view a summary of each message source that's currently defined within the system. From here you can create, edit and delete message sources. Note that you cannot define your first message source until at least one message destination has been created.
Click on the Check Mail button to force all defined message sources to check for new messages.
Each message source is defined by the following parameters:
Enabled - allows VisNetic MailFlow to collect from account; if disabled, messages will not be collected from specified account
Process – specify when this Message Source processes, either Always, During or Outside Office Hours. If During or Outside Office Hours is selected the System Default Office Hours are utilized. To specify Custom Office Hours for this Message Source, select the “Set Hours” button.
Server Address - location of mail server to collect messages from; specify hostname or IP address
Description – friendly name, for reference only
Port - TCP/IP port that mail server is listening on
Chapter
11
M

A D M I N G U I D E
41
Use SSL/TLS – for secure message retrieval
User Name - account to collect messages from
Password - associated password to access account
Use APOP - check this box if the mail server you are collecting from supports authenticated POP
Leave Copies on Server - check this box if you wish to leave messages on the server after collecting AND if the mail server supports UIDL, optionally set the number of days to leave the messages on the server
Ignore Duplicate Messages - check this box if you want the system to identify duplicate messages collected by the same Message Source and to not route those messages, the duplicate messages will be left in the Inbound Orphans queue
Only Collect During Office Hours – used in conjunction with Office Hours (General Configuration / Settings / Office Hours. If enabled messages will only be collected during defined office hours
Use “Reply To:”email address as contact address – messages collected with this option enabled will use the Reply To address header as the contact address. Enabling this feature in beneficial when the sending unit is doing so on the behalf of another sender, perhaps in the case of an email generated from an online form.
Check Interval - specifies how often VisNetic MailFlow will check the account
Connection Timeout - amount of time VisNetic MailFlow will wait for a response from the Message Source before timing out
Max Message Size - maximum size of individual message and attachments; if exceeded, VisNetic MailFlow will not retrieve message
Zip Attachments Threshold – if the number of attachments equals or exceeds this setting all message attachments will be added to a zip file which will then be added to the message as an attachment
Message Source Server – select the MailFlow server that will process this Message Source. The selected MailFlow Server must have the “Message Sources” server task enabled
Message Destination - each Message Source must be associated to a Message Destination to help ensure the efficient flow of messages in and out of the organization

A D M I N G U I D E
42
You can verify authentication credentials for message sources by clicking on the Test Login button.
Message Destinations
Message destinations represent the SMTP email servers through which outbound messages are delivered to their recipients. Any Message Destination defined must support the SMTP protocol standard, and must be directly accessible to the VisNetic MailFlow host computer. For example, a message destination could be a mail server hosted by your ISP, or hosting provider, or one hosted somewhere on your local area network.
Message destinations are also intrinsically linked to message sources - each message source must have an associated message destination in order to successfully deliver outbound email received by that message source. One message destination can also be flagged as the "default", which means that defined message sources will use it for outbound message delivery by default.
Click on the link to message destinations in the message handling section of the administration roll-up to view a summary of each message destination that's currently defined within the system. From here you can create, edit and delete message destinations.
Click on the Send Mail button will force all defined message destinations to send queued up messages.
Delivery Failures are messages that experience a permanent SMTP delivery failure. This might be due to an email addressed to an unknown local user within a valid domain, or the connection to the SMTP server could not be made within the retry interval. These failed messages will be held in the Delivery Failures and can be processed in a batch by an administrator, rather than having each individual agent attempt to re-send. Click the View Failed button to the current list of failed messages for the selected message destination.
Each message source is defined by the following parameters:
Enabled - allows VisNetic MailFlow to deliver to this mail server; if disabled, messages cannot be sent to this server for delivery
Process – specify when this Routing Rule processes, either Always, During or Outside Office Hours. If During or Outside Office Hours is selected the System Default Office Hours are utilized. To specify Custom Office Hours for this Routing Rule, select the “Set Hours” button.
Server Address - location of mail server to send messages to for final delivery; specify FQDN or IP address

A D M I N G U I D E
43
Description – friendly name, for reference only
Port - TCP/IP port that mail server is listening on (default 25 – SSL 465)
Secure Connection – enables either SSL/TLS authentication or STARTTLS, commonly used by hosted Microsoft Exchange providers.
Use SMTP Auth - check this box if the mail server you are delivering to supports SMTP Auth
User Name - account to collect messages from
Password - associated password to access account
Delivery Interval - specifies how often VisNetic MailFlow will deliver queued messages to this server
Connection Timeout - amount of time VisNetic MailFlow will wait for a response from the Message Destination before timing out
Max Message Size - maximum size of individual message and attachments; if exceeded, VisNetic MailFlow will not deliver message; agent will be notified if size is exceeded
Retry Send – the amount of time temporary message delivery failures will be re-attempted, in minutes. Once this time is exceeded, such messages are failed permanently
Message Destination Server – Select the MailFlow Server that will process this Message Destination. The selected MailFlow Server must have the “Message Destinations” server task enabled
Linked To Message Sources – messages collected from these Message Sources will use this Message Destination when sending an outbound message
Note for Hosted Exchange / Office365 users. The account information used to authenticate your Message Destination must be the same email address as the From: address of the outbound message. If you have a Message Destination in MailFlow configured to authenticate to Office 365 as the user [email protected] but the outbound message is from a different email address then you will receive the error 550 5.7.1 Client does not have permissions to send as this sender.

A D M I N G U I D E
44
To resolve this issue you must add your MailFlow From: email addresses to the Office 365 account that is configured in the Message Destination. You can follow the steps at this link to add them: http://support.microsoft.com/kb/2600912 Go to the section titled "How to support multiple email addresses" and follow the steps in "Method 2: Add proxy addresses". Example: If you have a TicketBox in MailFlow with an email address of [email protected] you need to add the [email protected] email address as a Proxy Address to the [email protected] Office 365 account. This will allow outbound email From: [email protected] to be sent via the [email protected] Office 365 account.
Default Routing Rule
The default routing rule is the routing rule that takes effect when no Custom Routing Rules match an inbound message. The default routing rule can be used to assign both ownership and TicketBox location for an un-handled inbound email message.
Click on the link to default routing rule in the message handling section of the administration roll-up to view the default routing rule. Click on Save to make the changes go into effect.
Ticket Settings
Select the default option for when an inbound message does not contain MailFlow’s Ticket Tracking Data. The default setting is Search in the TicketBox for a Ticket with matching subject and contact and is the preferred option in most cases. You might consider selecting “Create a new Ticket” if you often receive messages from the same sender, using the same subject. This is common with online web forms.
Assign Ownership
From the default agent drop-down box, choose which agent should act as the default owner for any Tickets created by the entry of new messages into the VisNetic MailFlow system. Setting this to "NONE" will effectively cause there to be no default ownership of such Tickets (e.g. they will be "unassigned").
Next, select the radio button next to the routing option that best suits your default ownership assignment requirements. For example, you may wish for the system to assign un-handled inbound messages to the default agent only if another agent doesn't already own the associated message contact.
Finally, the system will prohibit the assignment of Tickets if the Agent is in any of the selected statuses. If the target Agent cannot be assigned ownership because of status

A D M I N G U I D E
45
the system will attempt to assign the Ticket to the Default Agent, if the Ticket can’t be assigned to the Default Agent because of status the system will set the Owner to None.
If the Ticket Owner is in one of the selected statuses when a new message is received for the Ticket the Owner can be set to None.
Assign to TicketBox
From the default TicketBox drop-down box, choose which TicketBox should receive Tickets that are otherwise un-handled by custom routing rules. The default option is to route such Tickets to the built-in "Unassigned" system TicketBox.
Next, select the radio button next to the routing option that best suits your requirements. The default routing rule can assign un-handled Tickets directly to the "Unassigned" TicketBox, or it can prefer to assign it to a TicketBox with a matching email address (if one exists).
Assign to Category
Tickets that are otherwise un-handled by custom routing rules may be assigned a Ticket Category. The default option is to assign to the “Unassigned” Ticket Category.
Custom Routing Rules
Custom routing rules are created in order to provide specific ticket routing instructions for inbound messages that match their associated criteria. Custom routing rules can be used to sort Tickets into specific TicketBoxes, assign ticket ownership to specific agents, set ticket priority, provide automatic message responses, and much more.
Click on the link to Custom Routing Rules in the Message Handling section of the administration roll-up to edit the custom routing rules. You can create, edit, and delete routing rules from this page. You can also adjust the order by which the rules are evaluated. The routing engine processes the rules in order starting with the lowest order number. The first rule to match is processed. If no defined custom routing rule matches an inbound message, the default routing rule is used to determine ticket ownership and the destination TicketBox. Click on Save to make changes to the order go into effect.
Rule Information
Description - descriptor shown in Routing Rules list window
Enabled - allows VisNetic MailFlow to process inbound messages against specified rule
Do Processing Rules – allows VisNetic MailFlow to process inbound messages against available Processing Rules. Processing Rules are similar to Routing Rules and are used to automatically assign a Ticket to a Ticket Category

A D M I N G U I D E
46
Hit Count – how many times this Custom Routing Rule has been used to process an inbound message
Matching
Matching will occur when all defined criteria are met, as an example, if you specify a To: Address and a From: Address in the same Routing Rule, the rule will not be satisfied unless the specified To: and From: addresses match the inbound message header To: and From: addresses.
If multiple match items are defined in the same field, the OR operator will be used, as an example, if you specify "[email protected]" and "[email protected]" in the To: Address field of the same Routing Rule, the rule will be satisfied if either of those addresses are in the inbound message To: header.
Message Source - message source to process rule against
(To) Address - email address as specified in the To field from the message originator; if multiple defined, match will occur if any one is met
(From) Address - email address of message originator; if multiple defined, match will occur if any one is met
Match Text - allows matching of text in Subject, Message Body, Headers, or combinations thereof. Uses Regular Expression Syntax. With RegEx enabled, you can specify a match on multiple words by separating them with a “|” As example matching on the words MailFlow and Purchase in the Subject you would define MailFlow | Purchase and the rule would be satisfied if both words are present in the Subject.
Learn more about RegEx at: http://www.regular-expressions.info/tutorial.html
Automatic Processing
When a match occurs, automated action can be performed prior to Destination handling. Messages can be automatically responded to or forwarded to an Email address
Auto Reply
Enable – allow Auto Response to be sent
Place Copy of Auto Reply in Ticket – a copy of the auto reply outbound message will be added as a message in the Ticket
Respond With – Select your Auto Reply from the Standard Response Library
Reply From – specify the From address of the Auto Reply
A D M I N G U I D E
47
Close Ticket – close Ticket after sending Auto Reply
Alert
Enable – allow Alert to be sent
Send Alert To – specify the Agent or Group that will be alerted when this Routing Rule is satisfied
Alert Text – the message of the alert
Forward Copy
Enable – forward copy of the message
Quote Original Message – if selected the forwarded message will take the form of a standard message forward, including placing an “Original Message” section in the body of the forwarded message (otherwise the forward will be treated as a redirected message)
Place Copy of Forwarded Message in Ticket – a copy of the forwarded message will be placed in the Ticket
Allow Remote Reply from Forwarded Address – with this option enabled, a copy of the inbound message will be forwarded to Agents that have specified a Remote Reply Address under their Agent configuration. Enabling this option allows an Agent to reply to this Forwarded message from outside of MailFlow using a standard email client such as Outlook or Apple Mail. The Agent’s reply will route back to MailFlow, adding the reply to the Ticket with MailFlow then sending an outbound message to the original sender
Send individual message to each To: Address – a unique singularly addressed message is created for each recipient in the To: field.
Forward(To) - sends a copy of the message to an email address
Foward(CC) - sends a carbon copy of the message to an email address
Forward(From) - allows you to forward the message as if it appears direct from the originator or from an Agent email address
Destination
When a routing rule matches, messages can be acted upon by moving to a TicketBox, priority level of ticket set, agent ownership assigned, or removed from the system.
Shred

A D M I N G U I D E
48
Enable – enabling this option will delete message to waste basket or permanently delete
Ticket Settings
Ticket Priority - importance of ticket when rule matches
Ticket Category – category assigned when rule matches
If Inbound Message does not contain Ticket Tracking Data - The default setting is Search in the TicketBox for a Ticket with matching subject and contact and is the preferred option in most cases. You might consider selecting “Create a new Ticket” if you often receive messages from the same sender, using the same subject. This is common with online web forms.
Assign Ownership
Assign to Agent - ownership of ticket
Assign to selected Agents via Round Robin – an even distribution of Tickets between selected Agents. Maintains an even workload distribution and also helpful in “commissioned” work places, ensuring new opportunities are distributed fairly
Do not assign Tickets to Agents with Status – the system will prohibit the assignment of Tickets if the Agent is in any of the selected statuses. If the target Agent cannot be assigned ownership because of status the system will attempt to assign the Ticket to the Default Agent, if the Ticket can’t be assigned to the Default Agent because of status the system will set the Owner to None.
If Ticket Owner has Status – if the Ticket Owner has any of the selected statuses when a new message is received for the Ticket, set the Ticket Owner to None.
Assign to TicketBox
Default TicketBox – messages matching the rule will be assigned to the default TicketBox if enabled
Assign to these TicketBoxes per the defined percentages – assign new inbound messages per the percentage (of 100%) to the selected TicketBox. Effective in a “commissioned” workplace where new opportunities are distributed fairly. TIP: Use in conjunction with Custom Access Controls to limit TicketBox access to select Agents. Percentages must be whole numbers 33%, 33%, 34%.

A D M I N G U I D E
49
Processing Rules
Processing Rules simplify inbound Message routing and work in conjunction with the Default or Custom Routing Rules and used to assign the Ticket Category based on Text Matching of the inbound message. Processing Rules are enabled on a per Custom Routing Rule basis.
Description – description shown in Processing Rules list window
Action – specify to what Category the matching message should be assigned to
Hit Count – number of times the Processing Rule has been satisfied
Match Text - allows matching of text in Subject, Message Body, Headers, or combinations thereof. Uses Regular Expression Syntax. With RegEx enabled, you can specify a match on multiple words by separating them with a “|” As example matching on the words MailFlow and Purchase in the Subject you would define MailFlow | Purchase and the rule would be satisfied if both words are present in the Subject.
Learn more about RegEx at: http://www.regular-expressions.info/tutorial.html
Inbound Orphans / Queue
Outbound Queue / Orphans
Inbound Orphans - inbound orphans are inbound messages with a TicketID=0 (not processed through Routing Rules) but they are not in the Inbound Message Queue
Inbound Queue – messages collected by the Message Source, awaiting routing
Outbound Queue – outbound messages to be processed by Message Destinations
Outbound Orphans – outbound message with a TicketID=0, most system generated messages (alerts, auto replies, etc.) are outbound orphans
Remote Reply
VisNetic MailFlow 5 introduced a feature titled “Remote Reply”. The feature allows select Agents the ability to reply to Tickets using a standard email client including Microsoft Outlook, Apple Mail, etc., and have their reply added to the message thread within the MailFlow Ticket.
The feature forwards a copy of the inbound message to the Agent’s “Remote Reply” email address. The Agent then replies to the message, automatically threading the reply into the Ticket, with the outbound message sent from MailFlow.

A D M I N G U I D E
50
It is necessary for a MailFlow administrator to define the “Remote Reply” email address, that when enabled, will forward a copy of the inbound message to the Agent.
A. New VisNetic MailFlow Installations – The Remote Reply Address is already a Contact Property. Proceed to Step 1.
B. VisNetic MailFlow Upgrade Installations – The Admin must go to Administration / Contacts / Contact Properties. Select the New button. Enter the words Remote Reply Address.
Step 1. Defining the Remote Reply email address for each Agent.
With the Remote Reply Address contact field available, go to Administration / Agents & Groups. Select Agents, then select the Agent you wish to enable this feature for. Select Edit. Scroll-down under Edit Agent to the Additional Agent Information section. Select Remote Reply Address from the drop-down and enter the email address where the Agent would like to receive inbound messages. Repeat Step 1 for each Agent.
Step 2. Configuring the Custom Routing Rules.
Select the Custom Routing Rule that will satisfy the condition when the inbound message should be forwarded to the remote reply address. Select the Automatic Processing tab. Go to the Forward Copy section. Enable the section. Enable “Allow Remote Reply from Forwarded Addresses”. Enter your list of email addresses as defined in Step 1.
In the Forward (From) section, select the “Name and Email Defined Below” option from the drop-down box. Add a descriptive From name, i.e. Company Support. This will be the real-name portion of the email address. In the From Email Address field, enter the default email address of the TicketBox the routing rule applies to. Save the rule.
This configuration will deliver the inbound message to the TicketBox, forwarding a copy to the Agent’s Remote Reply Address. Agents may choose to reply to the message from within MailFlow or a standard email client. When replying via an email client, the Agent’s reply will be added to the thread of messages within the Ticket. The Agent’s reply will then be sent from MailFlow to the original sender.
Important – The Remote Reply feature allows the Agent to reply to messages from outside of MailFlow however the State (closed, on-hold, etc.) of the message cannot be set remotely, all messages are left Open. When replying remotely the Agent should take caution to confirm another Agent has not already replied to the Ticket. MailFlow’s “Locked Ticket” feature does not apply to remote email addresses.

A D M I N G U I D E
51
Scheduled Tasks
This chapter describes the Auto Message and Auto Response options of VisNetic MailFlow
Auto Messages
Auto Messages are new outbound Email messages that can be sent to MailFlow Contacts based on the status of existing Tickets that are assigned to particular TicketBoxes or Ticket Categories. Auto Messages can be configured to send at a time frame associated with the Creation or Closing of a Ticket and can be threaded within the other messages associated with the Ticket or can optionally cause the creation of a new Ticket.
Enabling an Auto Message will apply to applicable Tickets from that point forward.
General Information
Description – brief description of the Auto Message for easy reference when viewing Auto Message listing
Enabled – enable or disable this Auto Message
Recipient
Send To – enter the percentage of Tickets in the relevant TicketBox or Ticket Category to send this Auto Message to
Sending
Send Message – set the amount of time to wait until after the Ticket is Created or Closed before sending this Auto Message
Send Message - select the message from the Standard Response Library to send
Chapter
12

A D M I N G U I D E
52
From – select the From Email Address to use in the Auto Message or define your own
Ticket
Create a New Ticket for Message – you can optionally create a new Ticket, utilizing the defined parameters
Auto Responses
Auto Responses are replies to inbound Email messages that can be sent to MailFlow Contacts based on the status of existing Tickets that are assigned to particular TicketBoxes or Ticket Categories. Auto Responses can be configured to send at a time frame associated with the Creation or Closing of a Ticket and will be threaded within the other messages associated with the Ticket.
General Information
Description – brief description of the Auto Response for easy reference when viewing Auto Response listing
Enabled – enable or disable this Auto Response
Recipient
Send To – enter the percentage of Tickets in the relevant TicketBox or Ticket Category to send this Auto Response to
Sending
Send Message – set the amount of time to wait until after the Ticket is Created or Closed before sending this Auto Response
Send Message - select the message from the Standard Response Library to send
Quote original message – select this option to quote the original inbound message in the Auto Response
Place Copy of Auto Reply in Ticket – select this option to place a copy of the outbound auto reply in the Ticket
Close Ticket after Reply – if you are responding to a message in an open Ticket, you can close the Ticket after sending the response
From – select the From Email Address to use in the Auto Response or define your own

A D M I N G U I D E
53
Message Header / Footer – you can optionally include a pre-defined Message Header and/or Footer in the Auto Response

A D M I N G U I D E
54
Security
This chapter describes how to implement a security policy.
Access Control Model
isNetic MailFlow provides a secure environment where all members of the organization can perform their job functions through the same interface without being able to view or modify privileged information. Implementing a security policy involves customizing access control lists to securable objects.
VisNetic MailFlow uses a least restrictive security model. If everyone is granted full access to an object, then creating read-only access for a particular agent will have no effect. To restrict access for one agent, lower the access level to read-only for everyone, and create a group that contains everyone but the particular agent, and grant the group full access.
Securable Object Categories
Object Controls Access to: Custom ACLs?
Agents Tickets owned by the agent, agent views, agent preferences
yes
TicketBoxes Tickets in the TicketBox yes
Contacts The Contact Editor no
Groups Group signatures1 yes
Standard Responses
Standard Response Editor no
Ticket Categories Tickets assigned to the Ticket Category yes
Standard Reports Left menu Reports section (Allow/Deny) no
1 Note that access to a group only affects group properties, such as signatures, and does not provide access to all agents in the group.
Chapter
13
V

A D M I N G U I D E
55
Scheduled Reports
Left menu Scheduled Reports option, schedule, view, edit, delete
yes
Auto Ticket Open
The option to set a Ticket to automatically reopen from a Closed state (Allow/Deny)
no
Agent Audit The Agent Audit reporting option (Allow/Deny) no
Delete Drafts Agents can delete Draft outbound messages that they create (Allow/Deny)
yes
Agent Preferences
Left Menu Preferences section (Allow/Deny) no
Preferences / General Tab
General Tab access (Allow/Deny) no
Preferences / TicketBoxes Tab
TicketBoxes Tab access (Allow/Deny) no
Preferences / Agent Views Tab
Agent Views Tab access (Allow/Deny) no
Preferences / Signatures Tab
Signature Tab access (Allow/Deny) no
Preferences / My Dictionary Tab
My Dictionary Tab access (Allow/Deny) no
Preferences / My Folders Tab
My Folders Tab access (Allow/Deny) no
Preferences / My Alerts Tab
My Alerts Tab access (Allow/Deny) no
Preferences / My Contacts Tab
My Contacts Tab access (Allow/Deny) no
Route Replies to Me
Route Replies to Me on outbound messages no
Close Ticket After Send
Close Ticket After Send on outbound messages no
Request Read Receipt
Request Read Receipt from recipient no
Request Delivery Confirmation
Request Delivery Confirmation from recipient’s mail server
no

A D M I N G U I D E
56
Default Access Control
Click on the shortcut to Default Access Control in the administrative roll-up to display the list of securable object categories. Click once to select a category and click Edit, or double-click the category to bring up the default access control list. This access control list applies to all objects in the category that don't have a Custom Access Control list defined.
Access Control Rights
Right Grants these privileges:
None / Deny no access
Read read-only access
List the ability to enumerate objects in this category2
Edit read and write access to the objects
Delete / Allow
full access, including the ability to delete objects of this type
Agents in the administrators group have full access to everything. The Everyone group also has full access by default. The first step in implementing a security policy is to lower the privileges granted to the Everyone group. The next step is to grant access to the agents and or groups that need them.
Custom Access Control
Default access control definitions allow you to define access control lists for all objects in a category, but there are always exceptions. Custom access control lists override the default access control lists for a particular object. Click on the shortcut to Custom Access Control in the administrative roll-up to display the list of custom access control lists.
To remove a Custom Access Control, select the Use Default Right radio button then Save your change.
IP Access Restrictions
You can restrict the IP addresses that agents can login from. Click on the shortcut to IP access restrictions in the administrative roll-up to display the list of IP access restrictions. Separate restrictions are combined using the least restrictive model, just
2 If an agent has only list access to a TicketBox, then the agent can move Tickets to that TicketBox, but cannot view the contents of that TicketBox.

A D M I N G U I D E
57
like access control. Granting the Everyone group authorization to login from the IP range: 0.0.0.0 to 255.255.255.255 will override all other restrictions.
Other Restrictions
There are two security-related options that are configured from the other restrictions page:
Force HTTPS - If enabled, only SSL clients will be allowed access to VisNetic MailFlow. Please note that this setting can be undone with the administration tool.
Session IP locking - If enabled, then agents cannot login from more than one IP address at a time.
Effective Rights
The Effective Rights dialog is useful for determining the rights that a defined Agent or Group has to another Object in the system. To get the Effective Right select the Agent or Group and the target Object and then the “Get Rights” button from the toolbar. The Effective Right will be listed below the list of System Objects.

A D M I N G U I D E
58
TicketBoxes
This chapter describes VisNetic MailFlow TicketBoxes.
TicketBoxes
icketboxes are like folders. They provide a way to organize and group Tickets. The needs of your company’s organizational structure will determine the TicketBoxes to be created. For example, there may be a Sales TicketBox for
sales related correspondence, a support TicketBox for customer support requests, and an info TicketBox for product or service information requests.
Tickets are created when a message is received that is not associated with any existing ticket. Both custom and default routing rules can specify which TicketBox to create the new ticket in. Any agent with edit access to the TicketBox the ticket resides in can take ownership of the ticket or move it to another TicketBox. Tickets that are owned by the agent appear in their "My Tickets" view. Note that "My Tickets" is not a TicketBox.
To configure TicketBoxes, click on the TicketBoxes link on the administration rollup under TicketBoxes. You will be presented with a list of TicketBoxes defined in the system. You can edit a TicketBox by double-clicking a row or create new TicketBoxes with the new button.
Name - TicketBox name that will appear to agents
Default Email Address - address that is associated with this TicketBox (e.g. [email protected] for General Sales TicketBox). This email address can be the From: address when composing messages in this TicketBox. Routing rules compare this value with the To: address of inbound messages.
Default Email Address Name – the real name that will be utilized in the From: address when composing messages in this TicketBox (e.g. “Sales Department” <[email protected]>).
Description - brief description of TicketBox for easy reference when viewing TicketBox listings.
Chapter
14
T

A D M I N G U I D E
59
Owner – utilized by Custom Routing Rules when percentage based TicketBox assignment is enabled. In addition to the specified TicketBoxes within the routing rule Assign to TicketBox section, any TicketBoxes with a common owner will also be considered.
Reply-To Email Address – the email address to place in the outbound message Reply-To header for outbound messages assigned to Tickets in this TicketBox.
Return-Path Email Address – the email address to place in the outbound message Return-Path header for outbound messages assigned to Tickets in this TicketBox.
Message Destination – the Message Destination that is used for an Outbound Message is determined by the Message Source the Inbound Message replied to is collected from. Within Message Sources there is a select box to indicate which Message Destination should be used for messages collected by the Message Source. If the system cannot link to a specified Message Destination, it will use the Default Message Destination as defined in the list of Message Destinations.
This select box allows you to set a Message Destination at the TicketBox so that all messages sent from this TicketBox will use the specified Message Destination. If no Message Destination is defined, the default Message Destination will be used. The purpose for defining a Message Destination can be linked to the requirements of some mail servers, i.e Exchange which requires the account specified in the SMTP Auth section of the Message Destination to be able to send mail on behalf of all of the different From: email addresses in the VisNetic MailFlow system.
Enable Age Alerting - trigger alert delivery when a ticket remains open longer than the value specified in Age Alerting Threshold. Recipients of the Alert are defined under Alerting/Integrated Alerts
Age Alerting Threshold - if a ticket remains open longer, a ticket age alert is sent
AutoReply with Standard Response - when enabled, an automated response is sent to the originator when a newly created ticket remains open longer than the AutoReply Threshold. Automatic replies will only be sent for the first inbound message in the ticket. If the ticket contains any outbound messages, no auto reply is will be sent.
Standard Response - allows you select which Standard Response to sent to the message originator in auto replies.

A D M I N G U I D E
60
AutoReply Threshold - automated response will be sent when ticket in exceeds time specified here; threshold of 0 sends automated response within a minute of creating the new ticket.
Quote Original Message - includes a quoted copy of the original message into the automated response
Place Copy of Auto Reply in Ticket – a copy of the outbound message (auto Reply) will be added to the message string of the Ticket
Close Ticket Upon Reply - changes ticket state to closed when auto reply is sent
Require Get Oldest - requires that agents retrieve a ticket first before performing any action (e.g. reply, forward); ensures oldest messages are answered first. When this is set, agents cannot browse the Tickets.
Require TicketCategory - requires that agents select a TicketCategory during message composition. If a TicketCategory is not selected the outbound message cannot be sent or saved.
Use Global Unread Mode – ticket read/unread status will be determined globally (if any Agent has read an object it will apply to all Agents)
Enable MultiMail for New Outbound Messages – the message composition window will include the following options for New Outbound Messages (not replies or forwards).
o Send individual message to each To: Address – a unique singularly addressed message is created for each recipient in the To: field.
o Create a new Ticket for each Message – a unique Ticket is created for each message.
o Omit Ticket Tracking Data – Ticket tracking data [xxxxxx:yyyyy] is not included in the outbound messages. In order for replies to be associated back to the original Ticket the Tickets must be in a non-closed state.
Send Low Watermark Alert when open ticket count exceeds - when the number of open Tickets in the TicketBox exceed this value, a Low Watermark alert will be sent. Indicating 0 in this field disables Low Watermarks for this TicketBox. Recipients of the alert is set under Alerting / Integrated Alerts
Send High Watermark Alert when open ticket count exceeds - when the number of open Tickets in the TicketBox exceed this value, a High Watermark

A D M I N G U I D E
61
alert will be sent. Indicating 0 in this field disables this function. Works well in conjunction with Low Watermark alert to provide 2nd stage notification. Recipients of the alert is set under Alerting / Integrated Alerts
TicketBox Header - applies text as defined in selected header to beginning of outbound messages (originating from this TicketBox)
TicketBox Footer - applies text as defined in selected header to end of outbound messages (originating from this TicketBox)
o TicketBox headers and footers provide a way to automatically insert text all messages sent from a ticket. TicketBox headers are inserted before the body of the message and footers are appended to the end of the message. Please note that viewing the outbound message in VisNetic MailFlow will not show the TicketBox headers and footers.
Default From Address Format – outbound messages have three options
o “TicketBox Email Name”<TicketBox Email Address>
o “Agent Name”<TicketBox Email Address>
o “Agent Name”<Agent Email Address>
Ticket Linking – ticket linking includes three options
o Do not allow Ticket Linking – Tickets in this TicketBox cannot be added to Ticket Links
o Allow Ticket Linking to other Tickets in this TicketBox – Tickets in this TicketBox can be linked to other Tickets in this TicketBox
o Allow Ticket Linking to Tickets in any TicketBox – Tickets in this TicketBox can be linked to Tickets in any other TicketBox
Additional TicketBox Email Addresses – additional email addresses that will be available as the From: address during message composition.
Custom Ticket Fields
Custom Ticket Fields are defined within the Tickets section of the administration menu. From this configuration interface, you can associate a custom Ticket Field with one or many TicketBoxes. Custom Ticket Fields can be set within message composition windows and also within the Ticket Properties dialog. If the IV flag is set, the Custom Ticket Field can be listed within any Ticket lists, such as “My Tickets”. Select the Columns toolbar button within the Ticket list and then select the relevant Custom Ticket Field to display.

A D M I N G U I D E
62
Custom Ticket Fields – custom ticket fields that will be associated with this TicketBox. Custom Ticket Fields are defined within the Tickets section of the administration menu.
o IE = Is Enabled for this TicketBox
o IR = Is Required to be populated before outbound messages can be sent from this TicketBox
o IV = Is Viewable in Ticket Lists, such as “My Tickets”, Agents must enable the Custom Ticket Field column view by selecting the “Columns” toolbar button
o SD = Set Default when new Tickets are created (requires the Default Value field be populated)
o Default Value is the value to set the field to when new Tickets are created (requires the SD flag be set)
Bulk Actions
Simultaneously perform actions on multiple Tickets.
Move all Tickets to TicketBox – allows you to move all Tickets that reside in this TicketBox to another TicketBox; useful when changing your organization's TicketBox architecture
Set Ticket State / If Ticket State is – change the state of all Tickets in the TicketBox
Delete all Tickets from this TicketBox – deletes all Tickets from TicketBox
Auto Ticket Actions
Auto Ticket Actions automates various actions on Tickets – with dozens of options there’s sure to be a benefit to your workflow.
Example: Your support group is waiting on a reply from the customer, and the Agent has left the Ticket open in the Support TicketBox. Perhaps you allow 48 hours for the customer to reply, after which time the Ticket is automatically closed.
Actionable events include; Tickets that are created, opened, closed, escalated, moved, or reassigned. Inbound message added, outbound message added, and adding a Note are also events capable of triggering an action after a specified period of time.
TicketBox Views
Selected Agents will automatically have the TicketBox added to their TicketBox View the next time they login.

A D M I N G U I D E
63
TicketBox Headers and Footers
TicketBox headers and footers provide a way to automatically insert text all messages sent from a ticket. TicketBox headers are inserted before the body of the message and footers are appended to the end of the message. Please note that viewing the outbound message in VisNetic MailFlow will not show the TicketBox headers and footers.
TicketBox Owners
TicketBox Owners are utilized when determining which TicketBox to assign a new Ticket to within Custom Routing Rules, when the TicketBox assignment is set to Distribution by Percentage.
To add a TicketBox Owner, select the "New" toolbar button, add a unique description and "Save". To edit an existing TicketBox Owner, select the Owner from the list of Owners and select the "Edit" button.
To assign a TicketBox Owner to a TicketBox, create a new or edit an existing TicketBox and set the Owner in the resulting dialog.
Customization
This chapter describes how to customize VisNetic MailFlow
Contact Properties
Custom contact properties allow custom data fields to be added to any contact record within the system.
For example, if you created a custom contact property called "Partner ID", that field could then be added to any contact records in the system. Custom contact property fields can also be searched during contact search operations.
Once the new contact property has been defined, you can add correlative fields to any contact record. You can also add custom contact property fields to agent records.
If the value entered in a custom contact field starts with http:// or https:// a Go button will be added to the right of the value. If an Agent selects the Go button a new browser window will open to the URL specified in the contact field.
Contact Groups
Contact Groups can be configured at the system (global) level where they are accessible to all Agents configured in the system.
Contact Groups are searchable from the Message Composition window where the resulting group can be added as an addressee to an outbound message. Once the

A D M I N G U I D E
64
message is Saved or Sent the system replaces the group name with the email addresses included in the group.
Contact Group names must be unique in the system.
Global Dictionary
The VisNetic MailFlow global dictionary can be used to add custom entries to the global spell-check dictionary. Unlike entries added to per-agent dictionaries, the words contained within the global dictionary will be in effect for all agents during spell-check operations.
Ticket Categories
In VisNetic MailFlow, Tickets (which contain sent and received messages) are housed within TicketBoxes. The TicketBoxes will normally be set up to reflect the needs of your company’s organizational structure – for example, there may be a sales TicketBox for sales related correspondence, a support TicketBox for customer support requests, and an info TicketBox for product or service information requests.
An Agent's primary job is to monitor one or more TicketBoxes.
In addition to Ticket classification by TicketBox, Tickets can also be classified by Ticket Category. Like TicketBoxes, Ticket Categories will normally be set up to reflect the needs of your company's organizational structure. You must have at least View rights to a Ticket Category in order to see Tickets assigned to that Category.
Ticket lists, such as MyTickets, Public TicketBoxes and the Ticket Search results dialog can be sorted by Ticket Category. To sort by Ticket Category, click the Ticket Category Ticket list header.
To add a new Ticket Category
o Click the New toolbar button in the Ticket Categories window
o Enter a name for the new Ticket Category in the Description field
o Click the Save toolbar button
Once the new Ticket Category has been defined, you can automatically set new Tickets to a Category within Custom and the Default Routing Rule, Processing Rules and manually via the Ticket Properties dialog from the My Tickets, Ticket Boxes or Ticket Search Results pages. You can also set the Ticket Category during message composition.
Note: Once a Ticket Category is defined and a ticket is set to that Category, the Ticket Category cannot be deleted. To delete a Ticket Category, you must first set all Tickets that are set to that Category to some other Category.

A D M I N G U I D E
65

A D M I N G U I D E
66
Outbound Message Approval
This chapter describes how to setup Outbound Message Approval in VisNetic MailFlow
Individual Agents can be set to require Outbound Message Approval either by another Agent or Group of Agents. This feature allows supervisory personnel the opportunity to review an Agent's outbound correspondence before the message is released for delivery to the recipient.
An approving Agent can either release (approve) the message for delivery, edit and send, or return it to the authoring Agent for edit and resend. Ticket Notes can be utilized to instruct the authoring Agent what needs to be changed in the Outbound Message before it can be released/approved.
The entire approval/return process can be logged via Agent Audit and/or Ticket Events Logging.
Outbound Message Approval Components
The Outbound Message Approval feature utilizes the following MailFlow components:
Agent Configuration - Enable/Disable individual Agents to require Outbound Message Approval and define the approving Agent or Group.
My Alerts - Define Agent Alerts to be notified when an Outbound Message requires approval (for approving Agents), when an Outbound Message has been approved (released) or when an Outbound Message has been returned (Agents requiring outbound approval).
Approval Queue - An "Approval Queue" will appear in the left menu of Agents that are configured to approve Outbound Messages for other Agents. The Queue will also be visible if an Agent belongs to a Group that is configured to provide Outbound approval for an Agent.
Chapter
16

A D M I N G U I D E
67
Agent Audit Logging - Agent Audit Logging can be enabled to log Outbound Message approval (release) and return events.
Ticket Event Logging - Outbound Message approval (release) and return events are logged to Ticket History and displayed within Ticket Events.
Outbound Message Approval Configuration
Agent Configuration options:
This Agent Requires Outbound Message Approval From Agent - the Agent that will provide Outbound Message Approval
This Agent Requires Outbound Message Approval From Group - the Group of Agents that will provide Outbound Message Approval.
My Alerts configuration options:
Alert On Event - the event that will trigger the Alert. Alert To Method - signifies whether the Alert will be Internal (left menu
"Alerts" option) or External via email. Alert To Recipient - if the Alert is External, the recipient email address.
Approval Queue options:
Contacts - view Contacts associated with the Ticket the Outbound Message belongs to.
Notes - add/edit Ticket Notes associated with the Ticket the Outbound Message belongs to.
Return Message - return the Outbound Message to the authoring Agent. Release Message - release the message for delivery to the recipient. Edit Message – edit message and release for delivery to the recipient.
Note: Returned Outbound Messages will be placed in the authoring Agent's "Drafts".
Note: All Agents within the defined Outbound Message Approval Group can receive notification (via My Alerts) that an Outbound Message requires approval, however only an individual Agent within that Group can perform an action on the approval request. Once an action is taken (message is released or returned) by an Agent within the approval Group, all corresponding Alerts for that Outbound Message will be cleared for all other Agents within the defined approval Group. The Outbound Message will also be removed from the Approval Queue.