content.ccilearning.comcontent.ccilearning.com/7300-1-00-00/Content/IC3... · Web viewAs you move...
144
Unit 4 7300-1 v1.00 2009 CCI Learning Solutions Inc. 139 U n i t O b j e c t i v e s Lesson Topic 16 Creating Documents 17 Manipulating Text 18 Formatting Text 19 Setting Tabs and Indents 20 Proofing Your Document 21 Formatting the Document 22 Printing Documents 23 Working with Headers and Footers 24 Using Publishing Format Tools 25 Working with Graphics 26 Working with Tables 27 Working with Others This unit includes the knowledge and skills required to perform functions specific to creating documents with a word processor (as opposed to common functions such as those identified in Unit 3: Common Elements). Topics include paragraph formatting (i.e., line spacing, indenting and creating bulleted or numbered lists), document formatting (i.e., headers and footers), applying styles and other automatic formatting options, creating tables, applying borders and shading to text and tables, and inserting graphics into documents. Using Microsoft Office Word 2007
Transcript of content.ccilearning.comcontent.ccilearning.com/7300-1-00-00/Content/IC3... · Web viewAs you move...

Unit 4
7300-1 v1.00 © 2009
CCI Learning Solutions Inc. 139
Unit Objectives
Lesson Topic16 Creating Documents
17 Manipulating Text
18 Formatting Text
19 Setting Tabs and Indents
20 Proofing Your Document
21 Formatting the Document
22 Printing Documents
23 Working with Headers and Footers
24 Using Publishing Format Tools
25 Working with Graphics
26 Working with Tables
27 Working with Others
This unit includes the knowledge and skills required to perform functions specific to creating documents with a word processor (as opposed to common functions such as those identified in Unit 3: Common Elements). Topics include paragraph formatting (i.e., line spacing, indenting and creating bulleted or numbered lists), document formatting (i.e., headers and footers), applying styles and other automatic formatting options, creating tables, applying borders and shading to text and tables, and inserting graphics into documents.
Using Microsoft Office Word 2007

Unit 4: Using Microsoft Offi
ce Word 2007
L e s s o n 1 6 C r e a t i n g D o c u m e n t s
Lesson 16 Creating Documents
ObjectivesIn this lesson, you will learn to create, save, open, close, and switch between documents. On successful completion, you will be able to:
enter text add or delete text move around in the document save a document for the first time save changes to a previously saved document
save a document with a new name save a document in a different file format close a document open one or more documents switch between multiple documents
Skills
2-1.1.3 Navigate around open files2-1.2.1 Create files2-1.2.2 Open files2-1.2.3 Switch between open documents2-1.2.4 Save files in specified locations/formats2-1.2.5 Close files2-1.3.1 Insert text and numbers into a file2-2.1.3 Display the ruler2-2.1.6 Display non-printing characters and identify on-screen formatting information2-2.1.16 Identify common uses for word processing (such as creating short documents like letters and memos,
long documents like reports and books, and specialized documents such as Web pages and blog entries) and identify elements of a well-organized document
Entering and Editing Text2-1.1.3 2-1.3.1 2-2.1.3 2-2.1.6 2-2.1.16
Typing involves using the keyboard to input text onto the screen. Editing includes such things as inserting and deleting single characters, words, or multiple lines of text, correcting typographic errors, and inserting or deleting blank lines between paragraphs.
The following are some basic concepts of typing and editing text:
Insertion PointThe insertion point displays as a vertical blinking bar that shows where Word will insert typed text and pasted items. It moves to the right as you type.
Typing TextWord is set by default to “insert” text; this means you can move the insertion point anywhere in the document and Word will insert the text you type to the right of that point. As you type, any existing text will be “pushed” to the right.
Deleting TextThere are two ways to delete text one character at a time. You can press the key to delete one character at a time to the right of the cursor, or the key to delete one character at a time to the left.
140 7300-1 v1.00 © 2009 CCI Learning Solutions Inc.

Unit 4: Using Microsoft Offi
ce Word 2007
C r e a t i n g D o c u m e n t s L e s s o n 1 6
Word WrapWhen you have typed enough words to fill a line, Word will automatically shift the insertion point to the beginning of the next line. This is called wrapping text. If you are in the middle of a word that is too long for the line, Word will shift the whole word to the beginning of the next line.
Ending Word Wrap/Blank LinesWhen you are finished typing text for a line or paragraph, you can press the key one or more times. Word will insert as many blank line spaces as you want and shift the insertion point to the beginning of the line below the last blank line.
These concepts are applicable to all word processing programs, regardless of the software vendor. One benefit of word processing programs is the ability to create documents ranging from short letters or memos to larger, more complex documents like manuscripts, Web pages, and brochures.
Another benefit of word processing programs is that you can give your documents a professional look by applying a variety of design elements, and you can incorporate these elements into a style or template to make sure you use them consistently. Well-planned design elements can also help you organize information so that the reader can identify different components of your document at a glance. For instance, a header or footer with a page number can indicate for your reader that they are reading Section 2.1 of a report, which is on page 10 out of a total of 50 pages in the document. Spacing options can make reading large amounts of text easier, apply bullets to make lists more “scannable,” or use numbers to put points in order of priority. You can use the Table feature to create forms, add borders or shading to specific areas of the form, and set the form up for online data entry.
Another way to organize topics in the document is to create an outline, similar to a table of contents. The Outline feature in Word provides an overview of your document so you can ensure the information is organized in a logical order; this feature also provides the flexibility for you to move topics around in a document.
Because these design features and organization tools are readily available, there may be a temptation to make design errors, such as choosing a color scheme which makes the text hard to read, using uppercase letters too often, or using too much text on a page. Use the simple rule—if it is difficult for you to read, it will be difficult for your audience.
Displaying Formatting CodesThe (Show/Hide ¶) button allows you to show or hide non-printing characters, which can help you identify what you have inserted into the document. These characters only appear on the screen; they do not print. Some common non-printing characters include:
¶ Represents every time you press .
Represents every time you press .
Represents every time you press .
Represents a soft page break (when you type enough text to fill a page); this is only visible in Draft view.
Represents a manual or hard page break (when you activate the command to end the page at this location and move to the next page).
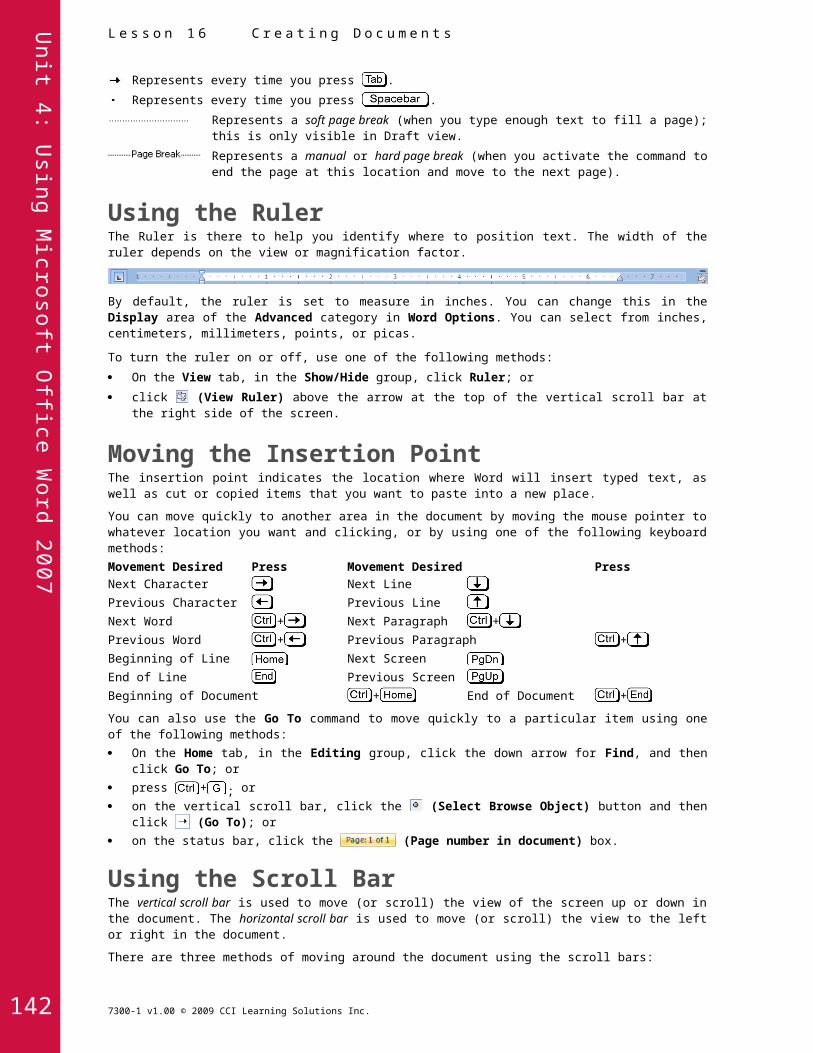
Using the RulerThe Ruler is there to help you identify where to position text. The width of the ruler depends on the view or magnification factor.
By default, the ruler is set to measure in inches. You can change this in the Display area of the Advanced category in Word Options. You can select from inches, centimeters, millimeters, points, or picas.
To turn the ruler on or off, use one of the following methods:
On the View tab, in the Show/Hide group, click Ruler; or
click (View Ruler) above the arrow at the top of the vertical scroll bar at the right side of the screen.
7300-1 v1.00 © 2009
CCI Learning Solutions Inc. 141
Unit 4: Using Microsoft Offi
ce Word 2007
L e s s o n 1 6 C r e a t i n g D o c u m e n t s
Moving the Insertion Point The insertion point indicates the location where Word will insert typed text, as well as cut or copied items that you want to paste into a new place.
You can move quickly to another area in the document by moving the mouse pointer to whatever location you want and clicking, or by using one of the following keyboard methods:Movement Desired Press Movement Desired Press Next Character Next Line Previous Character Previous Line Next Word + Next Paragraph +Previous Word + Previous Paragraph +Beginning of Line Next Screen End of Line Previous Screen Beginning of Document + End of Document +
You can also use the Go To command to move quickly to a particular item using one of the following methods: On the Home tab, in the Editing group, click the down arrow for Find, and then click Go To; or press + ; or on the vertical scroll bar, click the (Select Browse Object) button and then click (Go To); or on the status bar, click the (Page number in document) box.
Using the Scroll BarThe vertical scroll bar is used to move (or scroll) the view of the screen up or down in the document. The horizontal scroll bar is used to move (or scroll) the view to the left or right in the document.
There are three methods of moving around the document using the scroll bars: Click the scroll bar arrows to move the scroll box up and down or left and right; or click the arrow either side of the scroll box; or drag the scroll box.
If you are working in a document with numerous pages or with headings a ScreenTip will appear showing the page numbers or heading text as you move the vertical scroll box up or down.
Exercise1 Start Microsoft Office Word, if not already active, and then type the following text:
Today’s Date¶¶New Customer Info¶
John SmithStretch Your Workout300 168th StreetNew York, NY [email protected]¶¶Called to ask about what we do.¶
Mentioned there has been a lot of discussion from employees regarding “going green” but not sure what that means.¶
Wants to set up meeting with one of our consultants to discuss this information.¶
2 On the Home tab, in the Paragraph group, click (Show/Hide ¶) to display the formatting codes.
3 Leave the document on screen for the next exercise.
142 7300-1 v1.00 © 2009 CCI Learning Solutions Inc.
Note: Press whenever you see the ¶ symbol and + whenever you see the symbol. These symbols are formatting codes you will use to affect the text shown in this exercise.

Unit 4: Using Microsoft Offi
ce Word 2007
C r e a t i n g D o c u m e n t s L e s s o n 1 6
Working with Documents2-1.2.1 2-1.2.2 2-1.2.3 2-1.2.4 2-1.2.5
It is important to save your documents frequently as you work on them. This ensures that if something unexpected happens, like a power outage, you will have a recently saved version of your work so you will not have to redo it. You can save files to any location on the local drive, a network drive, or a portable media device such as a USB flash drive. Once you have saved a file, you can retrieve or open it from any of these locations. You can also have multiple documents active on the screen, including new documents that you have not saved yet.
Saving DocumentsWhen you save a document, Word automatically assigns a .docx extension to the end of the file name; you can also save the file in a different format, if needed. By default, Word will navigate to the Documents folder the first time you activate the Save command on a new document. You can save the document to that location or any other location you choose. Once you navigate to another location, Word will display that location each time you save or open a file, until you change locations.
To save a document, use one of the following methods:
Click the Office Button and then click Save or Save As; or
point at Save As to display a submenu with common file types for selection; or
on the Quick Access toolbar, click the (Save) button; or
press + .
The first time you save a document, you will see the Save As dialog box. Word will also automatically insert the first line of text in the document into the File name field, on the assumption that this will be the title of the document. Type over this selection to create whatever file name you want.
File names can be up to 255 characters long, including the drive and path (such as C:\Documents\Draft Proposals\ January 29 Proposal to ABC Company.docx). Consider how descriptive you want your file names to be and try to build in file management preferences whenever you save files.
How often you save a document depends on how important the document is and how much work (or time) would be required to re-create it. It is recommended that you save your document frequently, even with a small number of changes, in order to prevent loss of data; and if you’re not sure whether you’ll need a certain document again, err on the side of caution and save it.
Saving an Existing DocumentWhen you make changes to an existing document, you have two options for saving:
Save the contents on screen using the same file name. This option replaces the original saved document file with the updated changes.
Save the contents on screen to a document with a different name. This keeps the original saved document intact and creates a separate, new version of the document as well.
To save a document with a different name, use Save As in the Office Button menu.
7300-1 v1.00 © 2009
CCI Learning Solutions Inc. 143

Unit 4: Using Microsoft Offi
ce Word 2007
L e s s o n 1 6 C r e a t i n g D o c u m e n t s
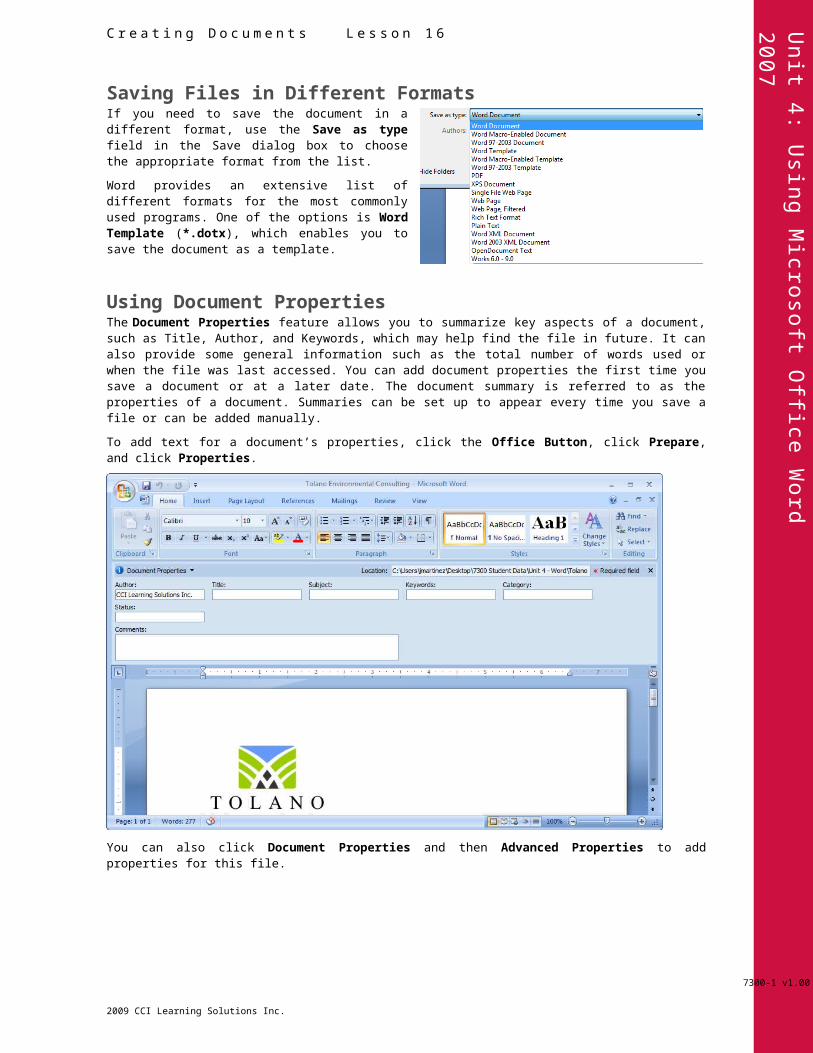
Saving Files in Different Formats If you need to save the document in a different format, use the Save as type field in the Save dialog box to choose the appropriate format from the list.
Word provides an extensive list of different formats for the most commonly used programs. One of the options is Word Template (*.dotx), which enables you to save the document as a template.
Using Document Properties The Document Properties feature allows you to summarize key aspects of a document, such as Title, Author, and Keywords, which may help find the file in future. It can also provide some general information such as the total number of words used or when the file was last accessed. You can add document properties the first time you save a document or at a later date. The document summary is referred to as the properties of a document. Summaries can be set up to appear every time you save a file or can be added manually.
To add text for a document’s properties, click the Office Button, click Prepare, and click Properties.
You can also click Document Properties and then Advanced Properties to add properties for this file.
144 7300-1 v1.00 © 2009 CCI Learning Solutions Inc.
Unit 4: Using Microsoft Offi
ce Word 2007
C r e a t i n g D o c u m e n t s L e s s o n 1 6
ExerciseA set of data files is provided with this courseware; refer to the Preface for instructions on accessing these files. Wherever you see - Student at the end of the existing file name in a step, replace this with your own name or initials to help you identify your own files and keep the original files intact.
1 With the previous document on screen, click the (Save) button on the Quick Access toolbar.
2 Navigate to the location for the student data files.
3 Examine the File name field near the bottom of the Save As dialog box.
Notice how Word highlights the existing text there. When saving a file for the first time, Word automatically fills this field with all the characters in the first line of text until it encounters a paragraph mark (¶). The exception to this is if it detects a specific type of character, such as the apostrophe in the text, Today’s Date.
4 With the text still highlighted, type: Stretch Your Workout Notes - Student and then click Save.
Suppose you want to add some information to the file so you can search this file at a later date.
5 Click the Office Button, click Prepare, and then click Properties.
6 Type the following information as shown in the following:
7 Click the arrow for Document Properties and then click Advanced Properties.
8 Click the Summary tab and then in the Company field, type: Tolano Environmental Consulting.
9 Click OK when done.
10 On the far right of the Document Properties panel, click the Close button.
11 On the Quick Access toolbar, click (Save).
7300-1 v1.00 © 2009
CCI Learning Solutions Inc. 145

Unit 4: Using Microsoft Offi
ce Word 2007
L e s s o n 1 6 C r e a t i n g D o c u m e n t s
Starting a New Document When you start Word, a blank document appears on the screen. Once Word is open, you can easily create a new blank document with no formatting, or choose from a variety of templates provided in Word that will help you lay out particular types of documents, such as invitations, meeting agendas, or business memos.
To create a new document, use one of the following methods:
For a new blank document, click the Office Button, click New, click Blank document, and then click Create, or
press + .
To choose from the variety of pre-designed templates for the new document, click the Office Button, click New, choose one of the templates from the options in the left pane, and click Create.
Each time you start a new document, a document number will automatically appear in the title bar. For example, if you have three new Word documents open and you create another new one, Word will assign it the number “4” and the title bar will display “Document4.” Document numbering resets back to Document1 each time you start a new session of Word. Use this generic name as a reminder that you have not saved the file with a descriptive and memorable name yet.
Exercise1 Press + to create a new document.
There are now two documents on your screen: Stretch Your Workout Notes - Student and a new blank document.
2 Click the Office Button and then click New.
3 In the list of templates, click Installed Templates.
4 In the list of Installed Templates, find and then click Equity Fax.
5 Click Create.
6 At the beginning of the form, type: Tolano Environmental Consulting.
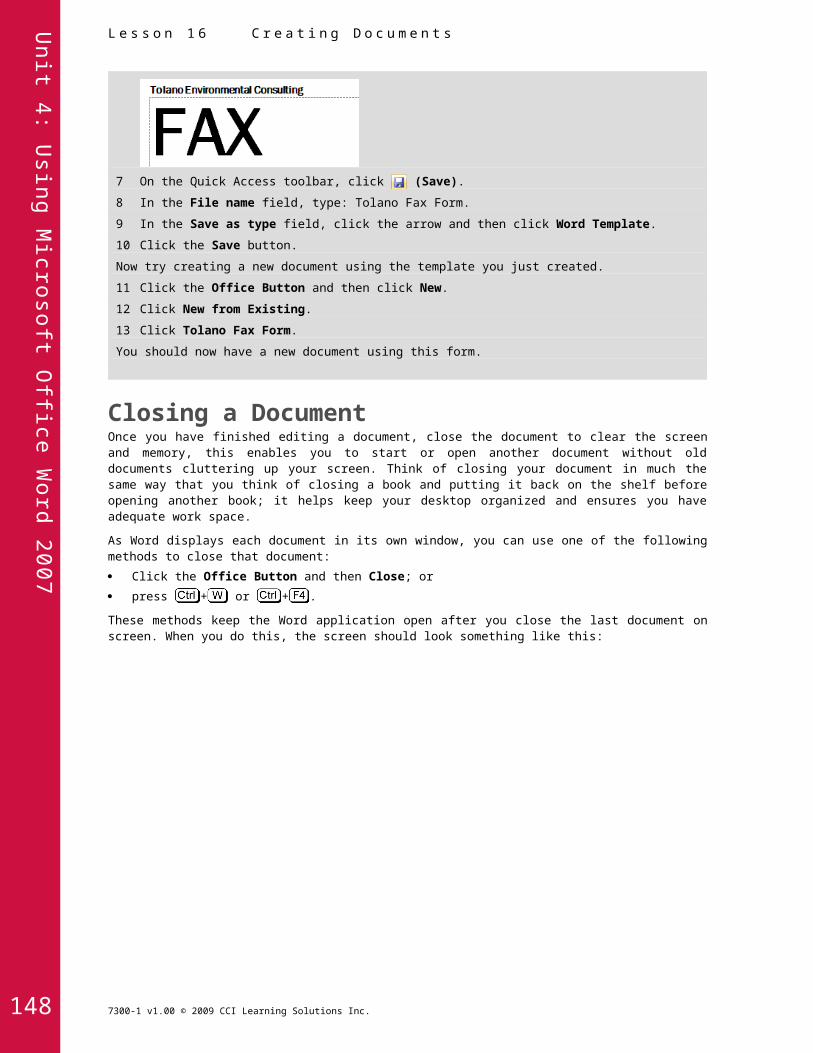
7 On the Quick Access toolbar, click (Save).
146 7300-1 v1.00 © 2009 CCI Learning Solutions Inc.

Unit 4: Using Microsoft Offi
ce Word 2007
C r e a t i n g D o c u m e n t s L e s s o n 1 6
8 In the File name field, type: Tolano Fax Form.
9 In the Save as type field, click the arrow and then click Word Template.
10 Click the Save button.
Now try creating a new document using the template you just created.
11 Click the Office Button and then click New.
12 Click New from Existing.
13 Click Tolano Fax Form.
You should now have a new document using this form.
Closing a Document Once you have finished editing a document, close the document to clear the screen and memory, this enables you to start or open another document without old documents cluttering up your screen. Think of closing your document in much the same way that you think of closing a book and putting it back on the shelf before opening another book; it helps keep your desktop organized and ensures you have adequate work space.
As Word displays each document in its own window, you can use one of the following methods to close that document:
Click the Office Button and then Close; or
press + or + .
These methods keep the Word application open after you close the last document on screen. When you do this, the screen should look something like this:
If you want to close the Word application completely, simply click (Close).If you add or change something in a new or existing document and then try to close it without saving, Word will provide the following prompt to give you the option of saving before you close:
7300-1 v1.00 © 2009
CCI Learning Solutions Inc. 147
Unit 4: Using Microsoft Offi
ce Word 2007
L e s s o n 1 6 C r e a t i n g D o c u m e n t s
Exercise1 Press + and then click No to not save the copy of the Tolano Fax Form.
The document that was on your screen should disappear. However, you should have at least two other documents active; look on your taskbar to see how many documents you have open on the screen.
2 Click Close to close the next document.
3 Click the Office Button and then click Close to close this document.
4 Close any remaining documents on the screen.
You should have a blank Word application screen displayed.
Opening a DocumentOnce a file is saved, you can open it from wherever it is located and transfer it to the screen for further processing. You can open as many documents as needed; the only limitation is the amount of memory available on your system to handle multiple documents.
Use one of the following methods to open a document:
Click the Office Button and then click on a file name from the list of recent documents; or
click the Office Button, then click Open; or
press + or + .
Once the Open dialog box displays, you can navigate in the dialog box using the mouse or keyboard to display the files or folders, and then use one of the following methods to open one of the documents:
Click the file name; or
point at the file name to select it, and then click Open or press ; or
if the file is stored in a different location, navigate to the location and then use one of the above methods.
As you open documents, Word will display the files in the same order as you opened them, with the most recent at the top of the list. As you reach the maximum number of files that show in this list, the oldest will be dropped from the list. You can click the pin icon at the right of the file name to keep this file on the list, no matter how many files are opened.
148 7300-1 v1.00 © 2009 CCI Learning Solutions Inc.

Unit 4: Using Microsoft Offi
ce Word 2007
C r e a t i n g D o c u m e n t s L e s s o n 1 6
Exercise1 Click the Office Button and in the Recent Documents list, click Stretch Your Workout Notes - Student.
2 Press + and then from your student data files, click Tolano Environmental Consulting.
3 Click the Office Button and then click Open.
4 From your student data files, click Tolano Environmental Consulting Employee List.
You should now have three documents open.
Switching Between Documents When you have multiple documents open on screen, you can switch between them quickly and easily by using one of the following methods:
On the View tab, in the Window group, click Switch Windows; or
click the button for the required document on the taskbar; or
if Word is in Restore Down view, the open documents may display in a cascading layout, as shown in the following screen capture. If that is the case, click the title bar on the document you want to switch to.
7300-1 v1.00 © 2009
CCI Learning Solutions Inc. 149

Unit 4: Using Microsoft Offi
ce Word 2007
L e s s o n 1 6 C r e a t i n g D o c u m e n t s
Exercise1 On the taskbar, click the Stretch Your Workout Notes - Student button.
Notice Word has switched to this document so you can make changes.
2 Click the Tolano Environmental Consulting button on the taskbar.
You now can view this document.
3 On the View tab, in the Window group, click Switch Windows and then click Tolano Environmental Consulting Employee List.
4 Press + to create a new blank document.
Notice how Word does not close any documents for you and in fact, you have a new button on the taskbar for this new document.
5 Close all documents.
SummaryIn this lesson, you learned how to create, save, open, close, and switch between documents. You should now be able to:
enter text add or delete text move around in the document save a document for the first time save changes to a previously saved
document
save a document with a new name save a document in a different file format close a document open one or more documents switch between multiple documents
Review Questions 1. It is important to save a document so you can use it later as well as to save the time it would take to
re-create it later.a. True b. False
2. The Save As command should be used whenever you want to save a file with a new or different name.a. True b. False
3. Which option best describes why you would open the document properties?a. To add information to help you find this document laterb. To see how many words were used in the documentc. To see when the document was created or last modifiedd. Any of the above
4. Which method would you use to open a document?a. Click the Office Button and then click Open.b. On the Quick Access toolbar, click .c. Press + .d. Select from Recent Documents.e. a, b, or cf. a, c, or d
5. There is only one file type saved with Word documents and it is .docx.a. True b. False
150 7300-1 v1.00 © 2009 CCI Learning Solutions Inc.

Unit 4: Using Microsoft Offi
ce Word 2007
M a n i p u l a t i n g T e x t L e s s o n 1 7
Lesson 17 Manipulating TextObjectivesIn this lesson, you will learn how to select text and then use different tools to manipulate it. On successful completion, you will be able to:
select specific amounts of text use the selection bar change the view adjust the zoom percentage
edit text use the Undo, Redo, and Repeat actions use the Cut, Copy, and Paste actions use the Office Clipboard
Skills
2-1.1.5 Change views (draft/normal, print-layout/page-layout, etc.)2-1.1.6 Change magnification level (zoom)2-1.3.2 Perform simple editing2-1.3.3 Use the Undo, Redo and Repeat commands
Selecting Text2-1.3.2
Selecting text is a fundamental step in Word. It is one of the initial steps required to format, move, copy, or otherwise manipulate text.
Selecting or highlighting text enables you to tell Word what parts of the text you want to work on. Once text has been selected, the selection stays in place until you de-select it; this allows you to apply multiple actions to that selection. The only exception is when you delete or replace the selection with new text.
If you inadvertently make the wrong selection or you wish to remove the selection, click anywhere in that document window or press any arrow direction key to de-select, and then begin the selection procedure again.
7300-1 v1.00 © 2009
CCI Learning Solutions Inc. 151

Unit 4: Using Microsoft Offi
ce Word 2007
L e s s o n 1 7 M a n i p u l a t i n g T e x t
Selecting Consecutive TextYou can select text using the mouse or keyboard, and occasionally you may want to use a combination of mouse and keyboard to select larger pieces of text.
To select text using the mouse, position the mouse pointer at the beginning of the text to be selected and then drag to highlight the text. You can increase or decrease the selection as long as you hold down the mouse button. You can highlight forwards or backwards from the starting point.
To select text using the keyboard, position the insertion point, hold down , and then press the arrow keys to move the insertion point to highlight the text. Release when the text is highlighted.
To select a word, double-click the word. To select a sentence, hold and click anywhere within the sentence. To select a paragraph, triple-click anywhere within that paragraph.
To select the entire document, use one of the following methods:
On the Home tab, in the Editing group, click Select and then click Select All; or
press + .
Selecting Non-Consecutive TextYou can select text anywhere in the document, regardless of whether the text is consecutive or not. To select multiple pieces of text, you must select the first piece of text and then press and hold as you select the next piece of text. Press and hold to continue selecting more pieces of text anywhere in the document.
Using the Selection BarAnother way to select larger amounts of text is with the selection bar. The selection bar is located in the white area at the left edge of the text, in the area that is the left margin. When the mouse pointer is positioned in the selection bar, it changes to a right pointing arrow as seen in the following:
152 7300-1 v1.00 © 2009 CCI Learning Solutions Inc.

Unit 4: Using Microsoft Offi
ce Word 2007
M a n i p u l a t i n g T e x t L e s s o n 1 7
You can use any of the following methods to make selections using the selection bar:
To select a line of text, click at the left of the line of text.
To select a paragraph, double-click at the left of the paragraph.
To select an entire document, triple-click anywhere in the selection bar, or press the key and click anywhere in the selection bar.
Exercise1 Open the Tolano Environmental Consulting document.
2 In the first paragraph, double-click the Tolano text.
This word is now selected on the screen.
3 Press the key and then click at the end of the word Consulting.
Notice your selection has now extended to include the next two words.
4 Move the mouse pointer to the selection bar area, point at the second paragraph, and double-click.
The entire paragraph is now selected.
5 Click anywhere in the document to turn off the selection.
6 In the Services area of the document, move the mouse pointer to the beginning of the word Carbon.
7 Click and drag to select the words Carbon footprint.
8 Press and then, in the fifth point, drag to select the words Green ethics.
9 Continue to press as you drag to select the word Strategies five lines down.
Notice that you have several words selected but these are not sequential in the document.
10 Click anywhere to de-select all text.
Customizing the View 2-1.1.5 2-1.1.6
You can adjust how a document displays by selecting the appropriate option using the View tab.
Print LayoutDisplays file contents as if you sent this to print; this is the only view in which the vertical ruler will display.
Full Screen Reading
7300-1 v1.00 © 2009
CCI Learning Solutions Inc. 153

Unit 4: Using Microsoft Offi
ce Word 2007
L e s s o n 1 7 M a n i p u l a t i n g T e x t
Adapts document contents to the size of your monitor to show only the document, similar to reading a book; this usually occurs when viewing a Word attachment in an e-mail.
Web LayoutAdjusts text and other elements, such as pictures, as if using a Web design program to create the Web page.
OutlineCollapses a document to display certain types of text, such as headings, to assist in organizing content flow.
DraftDisplays the document to the full width of the screen with only the horizontal ruler visible; this is the best view for manipulating text through editing and simple formatting.
An alternative to using the View tab is to use one of the view buttons located at the bottom right of the screen.
Exercise1 Open the Tolano Environmental Consulting Employee List document.
2 On the View tab, in the Document Views group, click Draft.
Notice that you can still view the text, but the vertical ruler and page edges no longer display. This view enables you to focus on changes to the text.
3 On the status bar, click the (Print Layout) view button.
The vertical ruler and page edges appear again in the document.
4 On the status bar, click the (Full Screen Reading) view button.
Word now displays the first two pages of this document in Full Screen mode, enabling you to see more of the document for reading as well as layout and design.
5 Click the Close button at the top right of the screen to close the Full Screen Reading view.
Adjusting the Zoom You can adjust the text display on the screen using the Zoom feature, the View tab, Zoom level, or the Zoom slider on the status bar.
The ability to enlarge the text display can be very useful when you are working with a small font size, whereas the ability to reduce the display is useful when you are working with landscape or horizontal orientation.
You can set the zoom percentage anywhere from 10% to 500%, or you can have Word automatically adjust the magnification so that you can see the entire width of the page or text on screen. When changing the view, the position of the insertion point will determine the zoom area.
Keep in mind that the Zoom feature only controls the screen display. The amount of text that displays when you change the zoom percentage is based on the display settings and size of your monitor. For example, if you have a 19" monitor or larger, you may see more of a document at 50% magnification than someone who has a 17", monitor, but less than someone using a 21" monitor. Changing the magnification has no effect on the document printout.
Exercise1 Switch to the Tolano Environmental Consulting document.
154 7300-1 v1.00 © 2009 CCI Learning Solutions Inc.
1
3
2
4
1
2
Zoom Level
Zoom Slider
3
4
Zoom Out
Zoom In

Unit 4: Using Microsoft Offi
ce Word 2007
M a n i p u l a t i n g T e x t L e s s o n 1 7
2 Click the arrow in the Zoom slider on the status bar and drag to approximately 50%.
The document view on the screen is now reduced by the specified amount.
3 Using the technique in step 2, change the magnification to 100%.
4 Change the magnification to approximately 200%.
5 Click Zoom Out to reduce the magnification by 10%. Then use the same button to decrease the magnification to 110%.
6 Close the document without saving.
7300-1 v1.00 © 2009
CCI Learning Solutions Inc. 155

Unit 4: Using Microsoft Offi
ce Word 2007
L e s s o n 1 7 M a n i p u l a t i n g T e x t
Editing Text 2-1.3.2 2-1.3.3
Editing is the process of adding, deleting, or changing text. Before you can edit any piece of text, you need to select it to indicate that another action will follow for this selection of text.
There are numerous ways to change existing text:
Select the text and type the new text; the new text will replace the old text.
To delete a few characters, use the or keys.
To delete a large amount of text, select the text and then press the key.
Note: When the Overtype feature is active, you can change existing text automatically with whatever you type. This feature is not active by default and can be set in the Word Options mode; turn on the Use overtype mode option in the Editing options of the Advanced category.
Be careful when making editing changes with selected text. The moment you press a key or click on an option, the selected text is replaced with that action.
Using Undo Any time you perform an action and then need to reverse the action (such as adding, deleting, or formatting text, inserting page breaks, and so on), you can activate Undo by using one of the following methods:
In the Quick Access toolbar, click (Undo) to undo the last action or command performed. Repeat to continue undoing commands in the reverse order to which you performed them; or
press + to undo the last action performed and repeat this key sequence to undo each action in reverse order; or
click the down arrow for the Undo button to display a list of the last 100 consecutive actions performed. You can select any item on the list to undo that command and all the commands performed since then. (You can only undo sequential actions using this method, in the illustration shown; if you choose to undo the “Bold”, then you must also undo the “Clear” and “Italic”—you cannot undo selective actions.
Using Redo If you change your mind after undoing an action, you can redo or repeat the action using one of the following methods:
In the Quick Access toolbar, click (Redo/Repeat); or
press + .
Note: Depending on the action, Word changes the button to show Repeat or Redo appropriately. For instance, if you delete text, the ScreenTip for this button shows as Redo, whereas if you type text, the ScreenTip shows as Repeat Typing.
This feature is to the reverse of the Undo feature. It will redo the action in the same sequence as it was performed, although it will only redo one action at a time.
Exercise1 Ensure the Tolano Environmental Consulting Employee List is active on the screen.
2 Double-click the text, Tolano to select this text. Then press the key.
3 Three lines down from the title text, double-click the text, Head.
4 Press and then click the word, Office.
Notice how the selection only includes the two words, and not the brackets on either side of this text.
156 7300-1 v1.00 © 2009 CCI Learning Solutions Inc.

Unit 4: Using Microsoft Offi
ce Word 2007
M a n i p u l a t i n g T e x t L e s s o n 1 7
5 Click at the left of the left bracket and drag across to select the text, (Head Office).
6 Press to remove this text.
7 On the Quick Access toolbar, click (Undo Clear).
The last piece of text appears in the document once more.
8 On the Quick Access toolbar, click (Redo Clear).
The text is removed again.
9 On the Quick Access toolbar, click the arrow for Undo.
There should be two Clear entries there for the actions performed in this exercise. The more actions you change in the document, the more items appear in this list.
10 Close this document without saving.
Using Cut, Copy, and Paste 2-1.3.2
Occasionally you may want to insert text into your document from another document, or another location in the current document. Instead of retyping the information, you can use the Cut, Copy, and Paste commands.
Cut Cuts or removes the item from its current location and places it in the Clipboard.
Copy Copies the item from its current location and places it in the Clipboard.
Paste Inserts an item from the Clipboard into a document to the immediate left of the Insertion Point.
Word uses the Clipboard to temporarily store any cut or copied items such as text or graphics. You can then paste these items wherever you choose and paste them into place.
To cut or move an item, first select the item and then use one of the following methods:
On the Home tab, in the Clipboard group, click ; or
press + ; or
right-click the item and then click Cut in the shortcut menu; or
drag the selected item to the new location.
To copy an item, first select the item and then use one of the following methods:
On the Home tab, in the Clipboard group, click ; or
press + ; or
right-click the item and then click Copy in the shortcut menu.
To paste an item, first place the insertion point where you want to paste the item and then use one of the following methods:
On the Home tab, in the Clipboard group, click Paste; or
press + ; or
right-click the item and then click Paste in the shortcut menu.
Once you paste an item, you will see the (Paste Options) button appear at the bottom right of the pasted item. When you point at this item, the button displays an arrow; if you click on this arrow, you will see options available regarding this item. These options will vary depending on what the pasted item is.
Using the Office Clipboard While the traditional Windows Clipboard offers the ability to store only one item, Word offers the ability to store and retrieve up to 24 items. It also shows you the contents of the Clipboard, along with an icon representing the software program that each item came from.
7300-1 v1.00 © 2009
CCI Learning Solutions Inc. 157

Unit 4: Using Microsoft Offi
ce Word 2007
L e s s o n 1 7 M a n i p u l a t i n g T e x t
To display the Clipboard task pane, on the Home tab, in the Clipboard group, click the Dialog box launcher.Paste All Pastes all items currently in the Clipboard in the same order as they appear in the Clipboard.
Clear All Clears all items from the Clipboard.
Options Allows you to select options as to how the Clipboard will work.
One advantage of using the Microsoft Office Suite is that the Clipboard can collect up to 24 items to be used by any of the Office programs. This is useful when you need data from several files. For instance, perhaps you are working on a report (in Word) and you want to insert some text from another report (also in Word), as well as a chart containing some numbers (from an Excel file), and some other data from a recent presentation you made (in PowerPoint). You can collect items from any of these programs up to the maximum of 24 items and then paste these items into the Word report. As you collect new items, previous items accumulated on the Clipboard will be replaced by the newer ones.
To paste an item into the current location in the document, click that item on the Clipboard.
As you move the mouse pointer over various items on the Clipboard, a drop-down arrow will appear to the right of the item; when you click that arrow, a menu will appear offering you various options. Use Delete when you want to delete this item only from the Clipboard. If you want to paste only this item into the current location, use Paste in this shortcut menu or simply click the item in the Clipboard.
You can use the Paste Special command to insert an item (such as a link from the current document to another one) or an object that you create in another program (such as a chart or graph from Excel). To activate the Paste Special command, on the Home tab, in the Clipboard group, click the arrow for Paste, and then click Paste Special.
Exercise1 Create a new blank document, and then type the following text:
2 On the Quick Access toolbar, click (Save). Change the name for the file to be Trade Show Presentation - Student and then click Save.
3 Click the Office Button and then click Open.
4 Navigate to the student data files location, if not already there, and then click Tolano Environmental Consulting.
5 Select all the bulleted list of items under the heading, Services.
6 On the Home tab, in the Clipboard group, click .
158 7300-1 v1.00 © 2009 CCI Learning Solutions Inc.

Unit 4: Using Microsoft Offi
ce Word 2007
M a n i p u l a t i n g T e x t L e s s o n 1 7
7 On the taskbar, click the button for the Trade Show Presentation - Student document.
8 On the Home tab, in the Clipboard group, click the Dialog box launcher to display the Clipboard pane.
Notice the bulleted points copied from the Tolano document now appear in the Clipboard.
9 Ensure the cursor is on the line below the text typed previously, then in the Clipboard, click the entry to paste it into your document.
Your new document now contains all the new bullet points.
10 Below the points, type: Locations and press .
11 On the taskbar, switch to the Tolano Environmental Consulting document.
12 Select all the text starting from Tolano employs 100 … to just before the Web address, and then on the Home tab, in the Clipboard group, click .
13 Switch to the new document.
Notice the Clipboard now has two entries.
14 Ensure the cursor is on the line below the Locations text and then click the new entry in the Clipboard.
Your document should then appear similar to the following:
15 Point at the Paste Options button and then click the arrow to see the options available.
16 Click Match Destination Formatting.
Notice how Word now applies the formatting used in the new blank document instead of the formatting from the original Tolano document.
17 Close the Clipboard, and then save and close the Trade Show Presentation – Student document, and close the Tolano Environmental Consulting document.
7300-1 v1.00 © 2009
CCI Learning Solutions Inc. 159

Unit 4: Using Microsoft Offi
ce Word 2007
L e s s o n 1 7 M a n i p u l a t i n g T e x t
SummaryIn this lesson, you learned how to select text and then use different tools to manipulate it. You should now be able to:
select specific amounts of text use the selection bar change the view adjust the zoom percentage
edit text use the Undo, Redo, or Repeat actions use the Cut, Copy, and Paste actions use the Office Clipboard
Review Questions 1. You need to select text before you can perform any action on that text.
a. True b. False
2. Which of the following view modes allows you to see the document as it will appear when it prints?a. b. c. d.e.
3. Which option will activate the Cut command?a. On the Home tab, in the Editing group, click Cut.b. On the Home tab, in the Clipboard group, click Cut.c. Press + .d. Any of the abovee. b or c
4. Which option will activate the Copy command?a. Press + .b. On the Home tab, in the Clipboard group, click Copy.c On the Home tab, in the Editing group, click Copy.d. Any of the abovee. a or b
5. Which option will activate the Paste command?a. On the Home tab, in the Editing group, click Paste.b. On the Home tab, in the Clipboard group, click Paste.c Press + .d. Click the item from the Office Clipboard.e. Any of the abovef. b, c, or d
160 7300-1 v1.00 © 2009 CCI Learning Solutions Inc.

Unit 4: Using Microsoft Offi
ce Word 2007
F o r m a t t i n g T e x t L e s s o n 1 8
Lesson 18 Formatting TextObjectivesIn this lesson you will learn how to apply format features to text, including changing the appearance or position of the text. On successful completion, you will be able to:
format to text characters align text
use the Format Painter tool
Skills
2-1.3.6 Perform simple text formatting
Formatting Text Characters 2-1.3.6
Character formatting refers to any feature that changes the appearance of characters on the screen and in print. You can control the following aspects of character formatting:
Font Describes the typeface of characters on the screen and in print.
Font Size Refers to the height of the characters. (Remember, as characters get taller, they also grow wider.)
Character Formatting
Refers to the special stylized variations applied to plain characters to make them stand out from other text. They include bold, italics, and various kinds of underlines.
Effects Refers to special effects you can add to the text, such as strikethrough, superscript or subscript, shadowshadow, SMALL CAPS, and so on.
You can apply formatting to text as you type it or after you have typed it. It can be easier and a better use of time to wait until all the text in your document has been typed and edited before you format it. This way, you do not need to remember to turn formatting features on and off (often finding afterward that you need to go through the document again and check that you have done everything consistently).
There are several ways to apply formatting to text characters:
On the Home tab, in the Font group, click the appropriate formatting button; or
use the formatting options in the Font dialog box; or
press the appropriate keyboard shortcut for the formatting option you want to use; or
right-click in the document, and then click Font; or
on the Mini toolbar, click the appropriate option.
Many common character formatting features are on the Home tab, in the Font group. The Mini toolbar appears only when text is selected and contains specific, common features for formatting characters and paragraphs.
You can turn most formatting features on and off by clicking the corresponding button. When a feature is active, it appears in a different color from the other buttons. An arrow beside any button indicates that you can select additional options for this feature. The Font group only includes text formatting features while the Mini toolbar includes features that affect paragraphs and pages of text, such as centering text between the left and right margins, increasing and decreasing indents, and so on. The Mini toolbar includes the most common or frequently used formatting features.
When you want to remove all formatting options from selected text, on the Home tab, in the Font group, click Clear Formatting.
7300-1 v1.00 © 2009
CCI Learning Solutions Inc. 161

Unit 4: Using Microsoft Offi
ce Word 2007
L e s s o n 1 8 F o r m a t t i n g T e x t
Using the Font Command The Font dialog box contains both basic and additional choices to enhance text. Use this dialog box to access formatting options not available in the Font group or the Mini toolbar, or to apply several options at the same time. These formatting options can also be applied to selected text or as you type.
To access the Font dialog box, use one of the following methods:
On the Home tab, in the Font group, click the Dialog box launcher; or
press + .
Exercise1 Open the UK Green Companies document and then save it as UK Green Companies - Student.
2 Select the entire title and then on the Home tab, in the Font group, click the arrow for Font. Scroll in the list and select a font of your choice.
3 With the title still selected, on the Home tab, in the Font group, click the arrow for Font Size and then click 18.
4 With the title still selected, on the Home tab, in the Font group, click (Bold).
5 In the paragraph below the British Telecom (BT) heading, select the 2 in the word, CO2.
6 On the Home tab, in the Font group, click the Dialog box launcher to display the Font dialog box.
7 In the Effects area, click Subscript and then click OK.
Notice how the text now shows as CO2. You could also have used the Subscript button in the Font group to achieve this appearance.
8 Press + to move quickly to the top of the document and then select the title again.
9 Press + to quickly display the Font dialog box.
10 In the Effects area, click Shadow.
Suppose you do not want this option as it is not as clear to see in the document.
11 In the Effects area, click Emboss.
12 Click the arrow for Font color and then choose a color of your choice to preview how this affects the text with the previous effect chosen. Choose another color if preferred.
13 Click OK to exit when you are finished.
14 Save the document.
162 7300-1 v1.00 © 2009 CCI Learning Solutions Inc.

Unit 4: Using Microsoft Offi
ce Word 2007
F o r m a t t i n g T e x t L e s s o n 1 8
Aligning Text Alignment refers to the way the text is lined up vertically on the page. You can easily change the alignment in your document using one of the four following options:
Align Left Aligns text to the left margin with a ragged or uneven edge on the right side of the text; this is commonly known as ragged-right alignment.
Center Aligns text exactly between the left and right margins to an imaginary line down the middle of the page; the text has ragged edges on both the left and right sides.
Align Right Aligns text to the right margin with ragged left edges.
Justify Aligns text so the left and right edges of the text are flush with the margins and each line of text is evenly spaced out between the margins, except for the last line of each paragraph.
Remember that all paragraph formatting affects the entire paragraph.
As with other types of formatting, text can be aligned as you type it into the document or formatting can be applied to existing text. When changing the alignment of existing text, position the mouse pointer anywhere within the paragraph and then choose the alignment you want for the whole paragraph.
You can select alignment options using one of the following methods:
On the Home tab, in the Paragraph group, click the Dialog box launcher to display the Paragraph dialog box. Select the Indents and Spacing tab, click the arrow for Alignment, and click the appropriate alignment; or
on the Home tab, in the Paragraph group, click the appropriate alignment button; or
press one of the following keyboard shortcuts:
Align Left +Center +Align Right +Justify +
Exercise1 With UK Green Companies - Student active on screen, select the title again, if necessary.
2 On the Home tab, in the Paragraph group, click (Center).
The title is now centered on this line between the left and right margins.
3 Save the document again.
Using the Format PainterThe Format Painter enables you to apply the same formatting options from one piece of text to another in the document without having to perform each formatting selection individually every time. When this feature is active, the mouse pointer changes to .
To apply formatting from one piece of text to another, on the Home tab, in the Clipboard group, click and then click the piece of text to which you want formatting features applied.
7300-1 v1.00 © 2009
CCI Learning Solutions Inc. 163
3 4
1 21
2
Align Text Left
Align Text Right
3
4
Center
Justify

Unit 4: Using Microsoft Offi
ce Word 2007
L e s s o n 1 8 F o r m a t t i n g T e x t
To apply formatting features to several pieces of text, on the Home tab, in the Clipboard group, double-click and then click each occurrence of text to which you want formatting features applied. When
you have finished applying the formatting to each piece of text, click to turn it off.
Exercise1 With UK Green Companies - Student active on the screen, select the first subheading, Big Green Smile.
2 On the Home tab, in the Font group, click (Bold) and then click the arrow for Font color and then click a color of your choice. Click the arrow for Font Size and click 12.
3 On the Home tab, in the Clipboard group, double-click the .
4 Select the next heading, Sky.
Word has now applied the same formatting options set in step 2 to this piece of text.
5 Repeat step 4 for each of the remaining headings, British Telecom (BT) and Greencare H2O.
6 Click the to turn it off.
7 Save and close the document.
SummaryIn this lesson, you learned how to apply formatting features to text, including changing the appearance or position of the text. You should now be able to:
format to text characters align text
use the Format Painter tool
Review Questions1. Character formatting is the process of changing the appearance and position of text characters.
a. True b. False
2. Another method to change the font instead of using the Home tab or the Font dialog box is:a. Quick Access toolbarb. Formatting toolbarc. Mini toolbard. There is no other method
3. While the Font group on the Home tab contains some of the more commonly used formatting features, there are more effects you can apply to text in the Font dialog box.a. True b. False
4. Which of the following alignment buttons would you use to center text?a. c.b. d.
5. Why would you double-click on the Format Painter button?a. To apply the formatting features to multiple pieces of textb. To apply the formatting features to one piece of textc. To add the formatting features to a new styled. You only need to click once on the Format Painter to use it.
164 7300-1 v1.00 © 2009 CCI Learning Solutions Inc.

Unit 4: Using Microsoft Offi
ce Word 2007
S e t t i n g T a b s a n d I n d e n t s L e s s o n 1 9
Lesson 19 Setting Tabsand Indents
ObjectivesIn this lesson, you will learn what indents and tab settings are and how they can affect the position and appearance of paragraphs. On completion of this lesson, you will be able to:
identify tab settings or positions identify different types of tab settings set a tab position change a tab position
identify different types of indents set an indent adjust an indent add bullets and numbering
Skills
2-2.1.2 Indent text2-2.1.4 Use tabs2-2.1.6 Display non-printing characters and identify on-screen formatting information2-2.1.7 Create and modify bulleted and numbered lists (single-level and multi-level)
Understanding Tab Settings2-2.1.4 2-2.1.6
Setting tabs or stops is similar to aligning text; the difference is that setting tabs allows you to align information at specific intervals across the document so that text is lined up in columns.
Most font types are proportionally spaced; that is, they only use as much space for each character as needed, which makes it difficult to create aligned columns using spaces. Using the appropriate tab alignment options in Word is faster and produces better results than aligning columns using spaces.
Click in the Tab Selector box to choose the alignment type; a ScreenTip will appear defining that character and how it will align your tabbed columns:
Left Aligns text along the left edge of the column with characters shifting right as you type; this is the default setting.
Center Centers text along an imaginary line down the middle of the column, with characters shifting evenly to the left and right as you type.
7300-1 v1.00 © 2009
CCI Learning Solutions Inc. 165
1 Left TabTab Selector Box 2 3 Right TabCenter Tab 4 Decimal Tab5
1 2 3 4 5

Unit 4: Using Microsoft Offi
ce Word 2007
L e s s o n 1 9 S e t t i n g T a b s a n d I n d e n t s
Right Aligns all text along the right edge of the column with characters shifting left as you type.
Decimal Aligns columns of numbers to a decimal point: text shifts to the left of the decimal point until you type the decimal point, and then text shifts to the right of the decimal point.
Bar Displays a small vertical line as a separator between the previous and next column of information.
Left tab settings exist at every 0.5" by default. Press the key to move from one column to the next when typing text.
You can set new tab settings before typing, or apply them to existing text. Select the text first before adding or changing tab settings to existing text. Tab settings remain in effect until you change them.
Use the (Show/Hide ¶) feature to display every time you press the key. If text doesn’t line up with the tab stops you’ve set, seeing your tab stops can help you determine why and correct the problem.
The ruler is the fastest way of setting and adjusting tabs; however, you can use the Tabs dialog box to set precise tab positions or dot leaders. To set and adjust tab positions or dot leaders using the Tabs dialog box, use one of the following methods:
On the Home tab, in the Paragraph group click the Dialog box launcher and then click the Tabs button in the lower left corner; or
double-click a tab character on the ruler to take you directly to the Tabs dialog box.
For a precise positioning for the tab setting on the ruler, press and hold the key as you click on the ruler where the tab setting will be placed.
Setting tabs on the ruler requires you only to click on the Tab Selector box until the required tab alignment character displays and then click in the ruler where the tab stop is to be placed.
The items in the Tab Selector box will cycle through each time you click on the box. To go to another character, you will need to click the box until that character appears.
When clicking on the ruler to place the tab stop, position your mouse close to the measurement mark in the ruler. A vertical dash line will appear to verify the tab stop as you click in the ruler to set the tab stop.
If you do not want the tab alignment character, click the tab character on the ruler and drag it down off the ruler.
If you need to adjust a tab alignment character, click the tab character and drag it to the new measurement.
If you need to set a new tab alignment character, click the Tab Selector box to choose the required tab alignment character, and then click in the ruler where you want to place this new tab character. You may need to delete the existing tab character, as required.
Exercise1 Create a new blank document and then save it as US Greenhouse Gas Emissions - Student.
2 Type: US Greenhouse Gas Emissions for the title and press .
3 Type: By Economic Sectors for the subtitle and press twice.
4 Ensure the ruler is displayed by clicking (View Ruler) at the top of the vertical scroll bar.
5 Then with the mouse cursor pointing at the Tab Selector box, click once to change the tab alignment character. As you do not want this character, click two more times to display , the decimal tab alignment character.
6 Position the mouse cursor approximately at 3.5″ (0.9 cm), and then click the ruler.
There should now be a decimal tab character at this location in the ruler.
7 On the ruler, click at 4.5″ (11 cm), 5.2″ (13.5 cm), and 6.1″ (15.5 cm).
166 7300-1 v1.00 © 2009 CCI Learning Solutions Inc.

Unit 4: Using Microsoft Offi
ce Word 2007
S e t t i n g T a b s a n d I n d e n t s L e s s o n 1 9
8 Type the rest of the information into the document so it appears similar to the following:
9 Save the document.
Notice the figures line up in the appropriate columns by the decimal character. The report looks good although you can add space between the columns of figures by adjusting the tab settings. As you have already typed the text in, you must select the text before changing the tab settings.
10 Select the line starting with the years and drag to the last figure for Total Emissions.
11 On the ruler, drag the first tab setting to the left by approximately 1″ (2.5cm).
12 Drag the decimal tab character for the 2005 column and then the 2006 column to the left to add more space between the columns.
13 Select the first two lines (titles) and on the Home tab, in the Font group, click (Bold). Then press + to center the two lines.
14 Select the line with the years for the report and bold these as well.
15 Save and close the document.
Working with Indents2-2.1.2 2-2.1.6
An indented paragraph is one that aligns along a temporary left and/or right margin. Indents are useful for identifying new paragraphs, or emphasizing items such as quotations or subparagraphs. You can create the following kinds of indents:
Left Indent Indents from the left margin; often used with lists.
Right Indent Indents from the right margin; often used with left indents to set off block quotations.
First Line Indent Indents only the first line of the paragraph by a set amount from the left margin.
Hanging Indent Aligns the first line of a paragraph with the margin while the rest of the paragraph aligns by a set amount further in from the left margin. This style is commonly used for bibliographies and for bulleted and numbered lists.
Using the Indent MarkersJust as you can use the ruler to set tab stops quickly and easily, you can use it to set and adjust indents using the following indent markers:
7300-1 v1.00 © 2009
CCI Learning Solutions Inc. 167
5
1 Hanging IndentSelector Box 2 3 Right IndentFirst Line Indent 4 Left Indent5
1 2 3 4

Unit 4: Using Microsoft Offi
ce Word 2007
L e s s o n 1 9 S e t t i n g T a b s a n d I n d e n t s
ScreenTips identify the different indent types as you hover over the corresponding markers.
Use one of the following methods to create a specific type of indent:
Click the Tab Selector box until the appropriate indent marker displays, and then click the ruler at the desired location; or
click on the appropriate indent marker on the ruler and drag it to the desired location.
Using the Paragraph CommandYou can set precise paragraph indents using one of two methods:
On the Page Layout tab, in the Paragraph group, set the indent measurement from the Left or Right margin; or
on the Home tab, in the Paragraph group, click the Dialog box launcher.
In the Indentation area, select Left to indent text from the left margin, similar to using the marker on the ruler; or select Right to indent text from the right margin, similar to using the marker on the ruler; or select Special to display a list from which you can choose either First Line Indent, similar to using the marker on the ruler, or Hanging Indent, similar to using the marker on the ruler.
Once you select one of these items, By becomes available and you can type in precise measurements for your indentations.
Also in the Indentation area, you can check the box for Mirror indents to ensure that your left and right indents will be adjusted appropriately for odd and even pages.
In the Preview box at the bottom of the Paragraph dialog box, you can see how the indent measurements you’ve entered will look before you finalize the settings.
Adjusting IndentsOnce a text indent is active, you can adjust it using one of the following methods:
Drag the appropriate indent marker to the new measurement on the ruler, or
on the Home tab, in the Paragraph group, click the Dialog box launcher, and make the appropriate changes in the Indentation area.
You can increase or decrease the amount of the indent on the ruler using the default tab stop at 0.5". On the Home tab, in the Paragraph group, click (Increase Indent) or (Decrease Indent) to increase or decrease the indent from its current location.
Exercise1 Open the Top 25 Companies Going Green document and save it as Top 25 Companies Going Green -
Student.
2 Click in the first paragraph for Bank of America.
Notice how the description for this company starts at a certain point but the rest of the paragraph aligns at the left margin and not the beginning of the description.
3 With the ruler displayed, point the mouse cursor at the hanging indent marker and drag it to the beginning of the paragraph, starting with Reduced.
168 7300-1 v1.00 © 2009 CCI Learning Solutions Inc.

Unit 4: Using Microsoft Offi
ce Word 2007
S e t t i n g T a b s a n d I n d e n t s L e s s o n 1 9
The paragraph is now indented at a certain point to make it easier to read the description.
4 Position the cursor in the second paragraph for the Ceres company.
5 Repeat step 4 to match the hanging indent with the same location as in the first paragraph.
6 Repeat steps 5 and 6 for the remaining paragraphs.
Hint: Select all the remaining text and then drag the hanging indent marker to affect all remaining paragraphs at one time.
7 Scroll through the document to see how all the paragraphs are indented.
Notice how there is enough space between the company name and the description. The only exception may be with Enterprise where the text could be considered a bit close to the company name.
8 Select the text for all the companies.
9 On the Home tab, in the Paragraph group, click the Dialog box launcher.
10 In the Indentation: Special area, click the incremental button twice to increase the measurement by a small amount. Click OK.
Hint: You can also adjust the indent marker by dragging it to a new location on the ruler.
11 Scroll through your document again to see how this has affected your document.
12 Save and close the document.
Adding Bullets and Numbering2-2.1.7
There are a number of different ways to emphasize or separate list information. You can use bullets if there is no priority on the list items, or apply numbers to prioritize the list. You can also use the Outline feature to show a progression:
Word provides a variety of the most commonly used bulleting and numbering styles. You can customize these styles to create a different look for any document.
7300-1 v1.00 © 2009
CCI Learning Solutions Inc. 169

Unit 4: Using Microsoft Offi
ce Word 2007
L e s s o n 1 9 S e t t i n g T a b s a n d I n d e n t s
To apply a list style to your text, on the Home tab, in the Paragraph group, click the arrow for the appropriate list button.
By default, the bullet or number style that will appear when you click the button will be the same style that was used last. If you want to choose a new style, click on the arrow beside the button to view the range of options shown in the Library.
One advantage of using the automatic list feature to organize information is that, when you need to move or copy an item in a numbered or multilevel list, Word reorganizes the information and adjusts the bullets or renumbers the points accordingly.
Customizing ListsAs noted, using the Bullets or Numbering button automatically applies the last style of bullets or numbers used to your new list. However, once you have applied one of these features, you can easily change it using the options in the Library.
Alternatively, you can define a new style for the bullet or numbering.
Exercise1 Open the Recommendations for Stretch Your Workout document and then save as Recommendations for
Stretch Your Workout - Student.
2 With the exception of the title, select the rest of the document.
3 On the Home tab, in the Paragraph group, click (Bullets).
Notice how Word has now applied bullets to this text in the appropriate lines, as well as indented these points using the default bullet option for the solid bullet characters.
170 7300-1 v1.00 © 2009 CCI Learning Solutions Inc.
3
1 2
1
2
Bullets
Multilevel List
3 Numbering
Note: The list style shown in the Preview may differ if the samples were customized by another person previously using your system.

Unit 4: Using Microsoft Offi
ce Word 2007
S e t t i n g T a b s a n d I n d e n t s L e s s o n 1 9
Suppose you only want bullets on the first set of points, not the last two as they are for another set of recommendations.
4 Select the last two lines in the document and on the Home tab, in the Paragraph group, click (Numbering).
5 To move these two points back to the left margin, on the Home tab, in the Paragraph group, click (Decrease Indent).
6 Select the bullet points once more, and then on the Home tab, in the Paragraph group, click the arrow for Bullets.
7 Click a bullet of your choice from the Bullet Library list.
Jane Woods, the Project Consultant for this customer, wants you to add some notes to the bottom set of points.
8 Select the two numbered points and then on the Home tab, in the Paragraph group, click (Multilevel List).
9 Click the option that shows as 1) a), i) (should be the second choice in the List Library area).
10 At the end of the first point, Talk to employees, press .
Word automatically inserts a new number for you. As you will be entering a subpoint, you need to indicate to Word to move to a new level.
11 On the Home tab in the Paragraph group, click (Increase Indent). Type: Involve employees to ensure their participation in going green and press .
12 Type: Write down all suggestions - do not review during that meeting.
13 Save and close the document.
7300-1 v1.00 © 2009
CCI Learning Solutions Inc. 171

Unit 4: Using Microsoft Offi
ce Word 2007
L e s s o n 1 9 S e t t i n g T a b s a n d I n d e n t s
SummaryIn this lesson, you learned what indents and tab settings are and how they can affect the position and appearance of paragraphs. You should now be able to:
identify tab settings or positions identify different types of tab settings set a tab position change a tab position
identify different types of indents set an indent adjust an indent add bullets and numbering
Review Questions1. You should always use tab settings instead of spaces to line up columns of text to prevent misaligned text
due to using different fonts.a. True b. False
2. Which of the following tab characters will set a decimal tab?a.b.c.d.e.
3. To delete a tab setting from the ruler, you need to recreate the tab settings.a. True b. False
4. Which of the following indent markers allows you to set up a hanging indent?a.b. c.
5. You cannot customize the bullet character or the numbering scheme for the text.a. True b. False
172 7300-1 v1.00 © 2009 CCI Learning Solutions Inc.

Unit 4: Using Microsoft Offi
ce Word 2007
P r o o f i n g Y o u r D o c u m e n t L e s s o n 2 0
Lesson 20 Proofing Your DocumentObjectivesIn this lesson, you will learn how to proof your document. On completion, you will be able to:
check the spelling check the grammar find and replace items
use the thesaurus research items display document statistics
Skills
2-1.3.4 Find and/or Find and Replace information2-1.3.5 Check spelling2-2.2.1 Use language tools
Checking the Spelling and Grammar2-1.3.5 2-2.2.1
Before sending your document to print, you should always proof it for correct spelling, grammar, and context. Word provides tools to automate proofing and also displays visual hints if it encounters an item that should be reviewed.
Red wavy lines indicate the word is not recognized in either the current or custom Word dictionary.
Green wavy lines indicate a grammatical or structural error.
Blue wavy lines indicate a potential contextual error.
The Spelling and Grammar feature provides options, such as the ability to create custom dictionaries for special terms you may use in your work, to help you check for spelling and grammatical errors. The spelling portion checks for incorrect spelling, duplicate words, and occurrences of incorrect capitalization. The grammar portion detects sentences with grammatical errors or weak writing style, based on widely accepted standards in the language overall as well as some regional variations (such as American vs. British English).
The Spelling and Grammar feature works in the background to check for mistakes as you type. This enables you to correct mistakes immediately or when you are finished creating the document.
To activate the automatic Spelling and Grammar feature, use one of the following methods:
On the Review tab, in the Proofing group, click Spelling & Grammar; or
press .
When Word finds the first misspelled word in the document, it displays the item in the Spelling and Grammar dialog box in red—the same color as the wavy lines in the document.
Not in DictionaryDisplays the misspelled word in the text box with the surrounding text for reference.
7300-1 v1.00 © 2009
CCI Learning Solutions Inc. 173

Unit 4: Using Microsoft Offi
ce Word 2007
L e s s o n 2 0 P r o o f i n g Y o u r D o c u m e n t
SuggestionsDisplays a list of alternatives for the misspelled word. If the correct word is in the list, click on it and then click Change, or simply double-click the word to change it immediately.
Ignore OnceIgnores this occurrence of this spelling but continues to search for other occurrences of this spelling.
Ignore AllIgnores all occurrences of this spelling; this might apply to a person’s name or some technical jargon.
Add to DictionaryAdds this spelling to your custom dictionary. In addition to providing a regular dictionary, Word allows you to build a custom dictionary so that it will not identify names, jargon, slang, or regional spellings you use often as misspelled words.
ChangeChanges this occurrence with the selected word in the Suggestions box.
Change AllChanges all words with this spelling with the selected word in the Suggestions box.
AutoCorrectAdds this item to the AutoCorrect list so that it will be automatically corrected every time you misspell it; for example, “teh” instead of “the” is a common typo that is in Word’s default AutoCorrect list.
Check grammarAllows you to choose whether to have Word check the grammar at the same time as the spelling.
OptionsAllows you to choose how the spelling and grammar options should work.
UndoReverses spelling or grammar changes made recently in the reverse order to which they were made.
Grammatical errors appear in the same green color in the Spelling and Grammar dialog box as in the document.
[Rule] boxDisplays the reason why the text was marked as a mistake; the title of this box changes to reflect the grammatical error identified.
SuggestionsProvides a list of suggestions as to how to fix this error.
Ignore OnceIgnores this occurrence but continues to find other occurrences of the same grammatical error.
Ignore RuleIgnores this grammatical rule for the entire document.
Next SentenceMoves to the next sentence containing a grammatical error.
ChangeChanges the error identified in the top box with the highlighted option in the Suggestions box.
ExplainProvides an explanation of the error and suggests how to correct it.
OptionsProvides choices for the way the spelling and grammar options should work.
174 7300-1 v1.00 © 2009 CCI Learning Solutions Inc.

Unit 4: Using Microsoft Offi
ce Word 2007
P r o o f i n g Y o u r D o c u m e n t L e s s o n 2 0
Contextual error refers to words that have the same sound but different spellings and meanings depending on the context. Some words that often give rise to contextual errors include:
there (refers to a place), their (possessive form), or they’re (contraction for they are)
its (possessive form) and it’s (contraction for it is)
where (refers to a location) and wear (attire or clothing)
bear (could be the animal, or to endure or support) and bare (plain or empty)
Contextual errors appear in blue text in the Spelling and Grammar dialog box—the same color as the wavy line in the document.
Exercise1 Open the UK Green Companies document.
2 On the Review tab, in the Proofing group, click Spelling & Grammar.
3 Click Ignore Once for the first incident of text it finds where a grammatical error occurs.
4 Depending on the language set for your system, you may find there are other words that appear to be incorrect although are valid in other countries, e.g., programmes. Make appropriate choices for your locale.
5 When the review is complete, close the Spelling and Grammar dialog box.
Using the Thesaurus2-2.2.1
The Thesaurus searches for and displays synonyms (words with similar meanings) and antonyms (words with the opposite meaning) for specific words you select in a document. Word also provides a list of meanings for a selected synonym. If needed, you can look up the synonyms Word displays to find additional substitution ideas.
To activate the Thesaurus, use one of the following methods:
Click the Review tab and, in the Proofing group, click Thesaurus; or
press + ; or
press as you click the word; or
right-click a word, click Synonyms, and then Thesaurus.
When you activate the thesaurus, you are actually activating Word’s Research tool, which you can use in the same manner as you would use hard-copy reference books on your actual desktop.
Search forIdentifies the word or phrase for which you want to find a synonym.
[Thesaurus]Identifies the type of reference material currently being searched, such as a dictionary or a thesaurus, and provides options for other reference materials when you click on the down arrow.
7300-1 v1.00 © 2009
CCI Learning Solutions Inc. 175

Unit 4: Using Microsoft Offi
ce Word 2007
L e s s o n 2 0 P r o o f i n g Y o u r D o c u m e n t
Word provides suggestions in the list below the search boxes. Depending on the word, you may see more or fewer suggestions. Consider the following when using the thesaurus:
Click the or buttons to display more or fewer words.
Use the information in parentheses at the end of each boldface word to identify what part of speech that word is: (n.) stands for “noun,” (v.) is for “verb,” (adj.) is an “adjective,” (adv.) is for “adverb,” and (ant.) is an “antonym.”
Hover the mouse over each word in regular typeface to display a box with a down arrow. Click the down arrow to choose an action, such as inserting this word to replace the original, copying this word to the Clipboard, or looking up further suggestions for this word.
As you look up words, the Back and Forward buttons become available to help you navigate through the lists displayed during your search. You can also click the down arrow for each button to move to a specific list displayed during your search.
Exercise1 With the UK Green Companies document active, select the word, footprint, in the second line of the first
paragraph.
2 On the Review tab, in the Proofing group, click Thesaurus.
3 Point at the word, trail, and then click the arrow. Click Look Up.
Do any of these words convey the same meaning as using “footprint”?
4 Continue looking up words until you find one you want to use, and then click it to replace the word in the document.
5 Close the Research pane with the Thesaurus options.
Finding Items2-1.3.4
You can use the Find feature to locate occurrences of specific words, phrases, symbols, codes, or any combination of these items in your document. You might use the Find feature as a quick way to find a word you think you may have misspelled or to refer back to a particular piece of information. Once you’ve found what you’re looking for, you can replace it, check other occurrences, or continue working with your document.
To activate the Find feature, use one of the following methods:
On the Home tab, in the Editing group, click Find; or
click the page number box on the status bar and then click the Find tab; or
press + .
Find whatProvides a field to enter the word, phrase, symbol, or code you want to find.
MoreDisplays additional criteria you can select to help Word narrow the search. By default, Word does not display the options for More; once on, you can turn this display off using Less.
176 7300-1 v1.00 © 2009 CCI Learning Solutions Inc.
Hints: You could also have pressed +.
You can also click the word to display words

Unit 4: Using Microsoft Offi
ce Word 2007
P r o o f i n g Y o u r D o c u m e n t L e s s o n 2 0
Reading HighlightHighlights all occurrences of the item being searched for in the main document, the headers and footers, and the text boxes.
Match caseSearches for any text with exactly the same casing (capitalized or lower-case characters) as typed into the Find what box.
Find whole words onlyIgnores all words where the search text is only a part of that word. For instance, if you type “red” in the Find what box without setting this option, Word will find all occurrences of these characters, including those that are buried in other, unrelated words, such as “hundred,” “bred,” “credible.”
Use wildcardsUse the ? (question mark) character to represent one character at a time within another word; for example, entering “c?t” will find words like “cat,” “cot,” or “cut,” but not “cart,” “chat,” or “crater.” You can also use the * (asterisk) character to represent any number of characters regardless of the length of the word; for example, entering “br*d*” will find words like “broad”, “bred”, “broaden”, “breed”, “breeder”, “bride.”
Sounds likeEnables you to use a phonetic spelling to narrow the search criteria.
Find all word formsSearches for all forms of a word, whether it is being used as a noun, verb, adjective, or adverb, whether it is singular or plural, and regardless of verb tense.
Match prefixEnables you to search for all words beginning with certain characters, even when you do not know what the rest of the letters are or how many more letters there are. You can insert as many characters as you know for the beginning of the item to find. Word then matches only those words that begin with these characters, for example, if you enter “psyc,” Word will find “psychology,” “psychic,” “psyche,” “psychometrics.”
Match suffixEnables you to search for as many characters as you know appearing at the end of the item to search. Word will then match only those words in the document that end with these characters; for example, entering “try” would yield results such as “symmetry,” “try,” “poetry.”
Ignore punctuation charactersIgnores any punctuation characters such as commas, colons, semi-colons, and periods.
Ignore white-space charactersIgnores regular or non-breaking spaces or tab characters. Select this to ignore characters in the document such as double-spaces.
FormatAllows you to include formatting attributes applied to the text in your search criteria. You could also use the corresponding buttons or shortcut keys to enter a formatting attribute to find.
SpecialSearches for special characters, such as paragraph marks, page breaks, and tab marks.
No FormattingClears any options previously selected with the Format button in the Find what box.
Each time in any one session that you activate the Find feature, Word will display the last search criteria entered. When you exit Word, all the boxes in the Find and Replace dialog box will clear.
7300-1 v1.00 © 2009
CCI Learning Solutions Inc. 177

Unit 4: Using Microsoft Offi
ce Word 2007
L e s s o n 2 0 P r o o f i n g Y o u r D o c u m e n t
Exercise1 Ensure the UK Green Companies document is active.
2 Press + to activate the Find and Replace dialog box.
3 In the Find what field, type: co2 and then click Find Next.
Word finds the first occurrence of this text.
4 Click Find Next again.
5 In this case, there are no other occurrences. Click OK.
6 In the Find and Replace dialog box, click Reading Highlight and then click Highlight All.
In this case, Word automatically highlighted the characters as it was the same that you searched for previously. This can be handy when you want to show all occurrences of a customer’s name or a product.
7 In the Find and Replace dialog box, click Reading Highlight and then click Clear Highlighting.
8 Close the Find and Replace dialog box.
Replacing Items2-1.3.4
You can use this command not only to find text, but to replace it with something you specify once it’s been found. You can apply all the same search criteria as for the Find feature. You can then decide on each replacement individually, or let the replacements occur automatically.
To activate the Replace feature, use one of the following methods:
On the Home tab, in the Editing group, click Replace; or
press + ; or
if the Find and Replace dialog box is open, click the Replace tab.
This dialog box is almost the same as the Find feature, but also has a Replace with box in which you can enter what you would like to replace the results of the Find what search with.
Exercise1 Ensure UK Green Companies is still active. Then press
+ to quickly display the Replace dialog box.
The Project Consultant who wants you to help with this document has decided he wants to see all the points separated for each company instead of in a paragraph. You notice that most of the descriptions show semi-colons between the points.
2 In the Find what field, type: ; (semi-colon).
3 Click in the Replace with field, then click More.
4 In the Replace area, click Special.
178 7300-1 v1.00 © 2009 CCI Learning Solutions Inc.
Hint: If you did not close the dialog box from the previous exercise, click the

Unit 4: Using Microsoft Offi
ce Word 2007
P r o o f i n g Y o u r D o c u m e n t L e s s o n 2 0
5 Click Paragraph Mark.
The Replace with field now shows ^p which is a code for paragraph marks.
6 Click Replace All and then click OK when the replacement is complete.
7 Close the Find and Replace dialog box to see what changed in the document.
Some companies now have multiple lines of text below the company heading text.
8 Close the document without saving.
Using Research Tools2-2.2.1
You can use the Research feature to search for facts and other information, much as you would use encyclopedias or other reference materials. Word includes some specific reference tools and sites you can use for research purposes.
To activate the Research option, use one of the following methods:
On the Review tab, in the Proofing group, click Research; or
press and then click in the document.
Search forProvides a field into which you can enter the text you want to use as your search criteria.
ReferenceProvides a list of sources you can search to find matches for your search criteria; click the down arrow to display the list.
Get services on Office MarketplaceProvides an option for you to go online to the Microsoft Office Marketplace Web site to find more research services.
Research optionsAnother way to display the list of sources you can search to find matches for your search criteria.
7300-1 v1.00 © 2009
CCI Learning Solutions Inc. 179

Unit 4: Using Microsoft Offi
ce Word 2007
L e s s o n 2 0 P r o o f i n g Y o u r D o c u m e n t
Once you have performed a search and retrieved results matching your criteria, you can use the (Expand) or (Collapse) buttons at the left of the titles to show more or less for each topic; alternatively, you can click the
links for each article or Web address to preview the item. Depending on which research service you use, your Web browser may display the information with the Research task pane at the left—similar to using the Search feature within a Web browser.
Many online research services are only available by subscription and, in most cases, there is a cost. If you are interested in third-party research services, use the Get services on Office Marketplace link to obtain further information.
Once you find the information you need, you can copy and paste it into your documents. Keep in mind when doing so that the copyright for information on a Web site belongs to the Web site owner; find out if you need to obtain permission to use the information and, regardless, cite your sources.
180 7300-1 v1.00 © 2009 CCI Learning Solutions Inc.

Unit 4: Using Microsoft Offi
ce Word 2007
P r o o f i n g Y o u r D o c u m e n t L e s s o n 2 0
Exercise1 Create a new blank document. Press and click anywhere in the document.
2 In the Research pane, click the arrow for the All Reference Books field and then choose Encarta Encyclopedia: (your language and country setting).
3 In the Research pane, type: conservation in the Search for field and press .
Results may vary depending on the language set for Research options on your system.
4 Scroll down the items to see what items are found for what was entered.
5 Review the options shown here and then click a link you may be interested in viewing.
6 Read some of the report on the screen and then close the window.
7 Close the Research pane and the document.
Using Document Statistics2-2.2.1
Occasionally, you may want to see statistics describing details of your document, such as the number of pages, paragraphs, lines, words, or characters it contains. You can also display the number of characters, words, paragraphs, or lines used in a document.
To retrieve all of these statistics, use one of the following methods:
On the Review tab, in the Proofing group, click ; or
click the (Word Count) button on the status bar.
Exercise1 Open the Going Green with Ethics document.
Next, review the document for the number of words used in this newsletter.
2 On the status bar, click Words: 428.
3 Click Close and then close the document without saving.
SummaryIn this lesson you looked at different ways to proof your document. You should now be able to:
check the spelling check the grammar find and replace items
use the thesaurus research items display document statistics
7300-1 v1.00 © 2009
CCI Learning Solutions Inc. 181

Unit 4: Using Microsoft Offi
ce Word 2007
L e s s o n 2 0 P r o o f i n g Y o u r D o c u m e n t
Review Questions 1. When a word does not exist in the current dictionary, how does it appear on screen?
a. With a green wavy underlineb. With a purple dotted underlinec. With a red wavy underlined. The book in the status bar has an X in it.
2. What options does the thesaurus offer?a. Synonymsb. Antonymsc. Looking up other wordsd. Any of the abovee. a and b
3. How can you activate the Replace feature?a. On the Home tab, in the Editing group, click Replace.b. Press + .c. Double-click anywhere on the status bar and then select Replace.d. Any of the abovee. a or b
4. Before you can use the online research tools, you must subscribe to every service available.a. True b. False
5. Document statistics include counts of the total numbers of pages, words, characters, paragraphs, and lines of text.a. True b. False
182 7300-1 v1.00 © 2009 CCI Learning Solutions Inc.

Unit 4: Using Microsoft Offi
ce Word 2007
F o r m a t t i n g t h e D o c u m e n t L e s s o n 2 1
Lesson 21 Formatting the Document
ObjectivesIn this lesson, you will learn how to apply additional formatting to further enhance your document. On completion, you will be able to:
change line spacing insert special characters change paper size
change margins insert the date and time
Skills
2-1.4.1 Format a document for printing2-2.1.1 Change spacing options2-2.1.8 Insert symbols/special characters2-2.2.2 Insert and modify data elements into a document
Changing Line Spacing2-2.1.1
Line spacing refers to the amount of space between lines of typed text, measured from the baseline of one line to the baseline of the next. Word automatically adjusts the amount of space between lines according to the size of the characters being used. However, you can also specify that line spacing be set to an exact point size.
It’s important to note that this setting will not adjust to accommodate larger text if the font size is changed. It’s also important to note that, if you decrease line spacing too much, the lines of text may overwrite each other, or the text may not display.
You can set line spacing using one of the following methods:
On the Home tab, in the Paragraph group, click (Line Spacing); or
on the Home tab, in the Paragraph group, click the Dialog box launcher. Then, in the Indents and Spacing tab of the Paragraph dialog box, click the arrow for Line spacing to choose the spacing you require; or
press the shortcut key for the following commonly used line spacing optionsSingle +One-and-a-Half +Double +
7300-1 v1.00 © 2009
CCI Learning Solutions Inc. 183
Unit 4: Using Microsoft Offi
ce Word 2007
L e s s o n 2 1 F o r m a t t i n g t h e D o c u m e n t
Exercise1 Open the Tolano Environmental Consulting Employee List and then select the entire document.
2 On the Home tab, in the Paragraph group, click (Line Spacing).
3 Click 1.0 to choose single spacing.
Notice the amount of spacing between each line of text has decreased.
4 With the entire document selected, on the Home tab, in the Paragraph group, click (Line Spacing). Then click 1.5 for one and a half line spacing.
Notice the document has just increased from 3 to 4 pages in length.
5 Change the document back to single line spacing.
Setting Paragraph Spacing2-2.1.1
Paragraph spacing refers to the amount of space between paragraphs of text. Although it is possible to create extra space between paragraphs by pressing to insert blank lines, most published documents are set up to insert a specific amount of space between paragraphs. This enables you to set spacing slightly smaller than a full line, which reduces the amount of white space on a page and ensures consistency throughout a document.
To set or change the paragraph spacing, use one of the following methods:
On the Home tab, in the Paragraph group, click the Dialog box launcher. Then, in the Spacing area, set the appropriate measurement for the spacing. You can set the spacing for Before, After, or both.
Alternatively, on the Page Layout tab, in the Paragraph group, set the spacing as required:
Exercise1 Ensure Tolano Environmental Consulting Employee List is still active.
2 On the Home tab, in the Paragraph group, click (Show/Hide ¶) to display the formatting codes.
Notice there is spacing between each of the employee names but these are not set up with a paragraph mark (i.e., pressing ).
Suppose you want to increase this amount of spacing between the names to make the report a bit easier to read.
3 Select the line with Sid Taylor’s e-mail address.
4 On the Page Layout tab, in the Paragraph group, click the increment button twice to change the Spacing: After to be 18 pt.
5 Select the next employee’s email address and then press to repeat the last action.
6 Repeat step 5 for the remainder of names in the New York office.
7 On the Home tab, in the Paragraph group, click (Show/Hide ¶) to turn this feature off.
184 7300-1 v1.00 © 2009 CCI Learning Solutions Inc.

Unit 4: Using Microsoft Offi
ce Word 2007
F o r m a t t i n g t h e D o c u m e n t L e s s o n 2 1
Changing the Page Setup2-1.4.1
There are several options you can use to alter the way pages are set up for different types of documents. These can be changed depending on the document type and could include options for setting the margins to print differently for odd and even pages or changing the paper size in order to print an envelope. Take note that some options, such as collating the pages or printing single- or double-sided requires these options to be set in the Properties for the printer in the Print dialog box.
Changing the Paper Size The default paper size is 8½" by 11" (Letter); you can change this for any document using the Page Layout tab. To change the paper size of a document, use one of the following methods:
On the Page Layout tab, in the Page Setup group, click Size; or
double-click anywhere in the darker area of the ruler, and then click the Paper tab.
7300-1 v1.00 © 2009
CCI Learning Solutions Inc. 185

Unit 4: Using Microsoft Offi
ce Word 2007
L e s s o n 2 1 F o r m a t t i n g t h e D o c u m e n t
Paper sizeLists standard paper sizes such as Letter or Legal (used in North America), or A4 and B5 (used in other regions, such as Europe and Australia). You can also specify envelope sizes.
To create a document of another size, click Custom size and type the horizontal and vertical measurements for custom paper, such as personalized note paper. The paper sizes described will vary depending on the printer installed on your system.
Paper sourceSelects the tray that contains the paper you indicate for use in printing this document. Depending on the number of trays your printer offers, you may be able to use one paper tray for the first page, perhaps for letterhead, and a different tray with blank paper for subsequent pages in the document.
PreviewDisplays a thumbnail preview of the way your document will look once it’s printed. Use Apply to to indicate whether you want changes to apply to the entire document, this section or selected text, or from this point forward.
Print OptionsSet various options for how the printer(s) connected to your system will print documents. For example, you can choose to print the Document Properties or hidden text for a document.
Exercise1 Ensure Tolano Environmental Consulting Employee List is still active.
This document has been saved for 8.5″x 11″ size paper. Suppose you need to change this to the size used in the UK office, A4.
2 Move to the top of the document and then on the Page Layout tab, in the Page Setup group, click Size.
3 In the list, click A4 (210 x 297 mm).
4 Scroll through the document to see what has changed.
The paper is a slightly narrower and longer which is why you now see the first entry for Cape Town on the bottom of page 1.
Changing the OrientationOrientation refers to the way the document will print on the page. Portrait refers to a vertical orientation, while Landscape refers to a horizontal orientation. To change the orientation for a document, use one of the following methods:
On the Page Layout tab, in the Page Setup group, click Orientation; or
double-click a darker area of the active ruler, click the Margins tab, and then select the orientation you want to use.
Exercise1 Open the Going Green with Ethics document.
186 7300-1 v1.00 © 2009 CCI Learning Solutions Inc.

Unit 4: Using Microsoft Offi
ce Word 2007
F o r m a t t i n g t h e D o c u m e n t L e s s o n 2 1
2 On the Page Layout tab, in the Page Setup group, click Orientation.
3 Click Landscape.
Notice how the document is now wider as it fills the landscape orientation.
4 Close the document without saving.
Changing Margins2-1.4.1
Margins determine the amount of space between the edge of the paper and the area where the text is printed. You can adjust the margin settings for the entire document or for specific parts of the document.
You must be in Print Layout view in order for the arrows that adjust the margins to appear on the horizontal and vertical rulers. The Draft view does not include the vertical ruler.
The boundaries for the top and bottom margins are easy to see; they appear as the divider line between the lighter (inside margins) and darker (outside margins) shades on the ruler. When you position the mouse pointer at the divider line, a ScreenTip appears:
The margin boundaries for the left and right margins appear on the top ruler, although the indent markers may obscure the left margin markers. You can access the left margin marker by pointing precisely between the Left Indent and First Line Indent markers. You can access the right margin marker by pointing above the Right Indent marker.
To change your margins, use one of the following methods:
On the Page Layout tab, in the Page Setup group, click Margins; or
to adjust the margins using the ruler, point the mouse pointer at the margin and, when the appropriate arrow appears, drag to the measurement you want for the margin; or
7300-1 v1.00 © 2009
CCI Learning Solutions Inc. 187
3
1 2
1
2
Left Margin Marker
Right Margin Marker
3 Top Margin Marker

Unit 4: Using Microsoft Offi
ce Word 2007
L e s s o n 2 1 F o r m a t t i n g t h e D o c u m e n t
double-click one of the darker areas of the horizontal or vertical ruler.
Top Defines the amount of space from the top edge of the paper to the beginning of the top line of text.
Bottom Defines the amount of space from the bottom edge of the paper to the ending of the bottom line of text.
Left Defines the amount of space from the left edge of the paper to where the text starts on the left side.
Right Defines the amount of space from the right edge of the paper to where the text wraps at the right side.
188 7300-1 v1.00 © 2009 CCI Learning Solutions Inc.

Unit 4: Using Microsoft Offi
ce Word 2007
F o r m a t t i n g t h e D o c u m e n t L e s s o n 2 1
Gutter Adds an amount of white space to the top or a side margin if the document is to be bound (such as with a coil binding, in a three-hole binder, or in card stock folders with metal fasteners).
Gutter position
Defines where the gutter or binding will be for the document (such as at the left side or at the top, or on the inside margin for double-sided pages).
Each method of changing the margins provides the flexibility to change some or all of the margins at the same time. The Margins command lists the most common measurements for margins, but you can also click Custom Margins to set different measurements. When using the Page Setup dialog box, you can set the measurements by typing them into the appropriate boxes or by clicking the up or down arrows at the right of each box to increase or decrease the measurements incrementally.
Exercise1 Ensure Tolano Environmental Consulting Employee List is still active.
2 Move to the top of the document and then on the Page Layout tab, in the Page Setup group, click Margins.
3 In the list, click Moderate.
The text now begins closer to the left edge than previously.
4 Close the document without saving.
Adding Special Characters2-2.1.8
You may sometimes need special characters, such as an é (accented “e”), a © (copyright symbol), or a ™ (trademark symbol). To insert a special character, use one of the following methods:
On the Insert tab, in the Symbols group, click ; or
on the Insert tab, in the Symbols group, click More Symbols.
The first method lists the most recently or commonly used symbols. Click the symbol you want to insert directly into the current location. Use the second method to choose from a broad range of symbols such as those displayed in the preceding illustration.
7300-1 v1.00 © 2009
CCI Learning Solutions Inc. 189

Unit 4: Using Microsoft Offi
ce Word 2007
L e s s o n 2 1 F o r m a t t i n g t h e D o c u m e n t
When you open the Symbol dialog box, you will also see a tab for Special Characters. This is where you will find a range of additional symbols such as ¶ (paragraph mark) and § (section mark), which don’t normally appear in print but which you might need to print for a particular reason; as well as symbols for a non-breaking space and a non-breaking hyphen:
Exercise1 Open the UK Green Companies document.
2 Press + to display the Find and Replace dialog box and type: 1.25 in the Find what field. Click Find Next.
3 Close the Find and Replace dialog box.
4 Click at the beginning of the 1.25 and then on the Insert tab, in the Symbols group, click Symbol.
5 In the list, click the pound sign.
The text should now appear as £1.25.
6 Close the document without saving.
Inserting the Date and Time2-2.2.2
You can use the Date and Time feature to insert the current date/time into a document (much as you might stamp a print document with date of receipt) or to display the current date. The latter option is handy for a document that you open, alter slightly, and re-use at different times for variations on a similar purpose. For example, perhaps you use a standard letter to introduce a new product or a new employee; although most of the document is the same, significant details change, and it is important for the printed copy to show the date when the letter was last updated rather than the date it was originally created.
To insert the date and time in a document, on the Insert tab, in the Text group, click .
You can select from a variety of date and time formats, as you prefer.
190 7300-1 v1.00 © 2009 CCI Learning Solutions Inc.

Unit 4: Using Microsoft Offi
ce Word 2007
F o r m a t t i n g t h e D o c u m e n t L e s s o n 2 1
To set up the document to always show the current date, click Update automatically.
Exercise1 Create a new blank document.
2 On the Insert tab, in the Text group, click Date & Time.
3 Click the date format of your choice and click Update automatically. Then click OK.
4 Press after the inserted text and then type in your name.
5 Save this file as Blank Letter - Student, and then close it.
If this was a document where you always want the current date displayed, such as a template, you have now added this feature into the document. To demonstrate how the date will change to match the computer’s date, you will now change the current date.
6 In the notification area, click the time and then click Change date and time settings.
7 Click Change date and time and then change the date to be one month from today’s date. Click OK.
8 Click OK once more.
9 Open the Blank Letter - Student document.
What date appears in your document?
10 Repeat steps 6 to 8 to change the date back to the current date.
SummaryIn this lesson, you learned how to apply formatting features to enhance your document. You should now be able to:
change line spacing insert special characters change paper size
change margins insert the date and time
Review Questions1. Line spacing refers to the amount of white space between each line of text.
a. True b. False
2. Paragraph spacing refers to the amount of white space between each line of text.a. True b. False
3. Where are the margin boundaries on the ruler?a. In the dark areas of the rulerb. At the divider line between the light and dark areas of the rulerc. At the far edge of left and right side of the rulerd. Underneath the indent markers in the light area of the ruler
4. You can use the Insert, Symbol feature to insert special characters such as the copyright symbol, a single opening quote, an em dash, and so on.a. True b. False
5. You can have Word insert the date as a code that will update automatically regardless of when you open the document.a. True b. False
7300-1 v1.00 © 2009
CCI Learning Solutions Inc. 191

Unit 4: Using Microsoft Offi
ce Word 2007
L e s s o n 2 2 P r i n t i n g D o c u m e n t s
Lesson 22 Printing DocumentsObjectivesIn this lesson you will learn to preview your document before printing, and then print the document. On completion, you will be able to:
preview the document change the zoom for the previewed document print the document, including different output types
manage print jobs identify common printing problems
Skills
2-1.4.2 Preview a file before printing2-1.4.3 Print files, specifying common print options2-1.4.4 Manage printing and print jobs2-1.4.5 Identify and solve common problems associated with printing2-1.4.6 Output documents in electronic format2-1.4.7 Identify issues related to outputting files in electronic format
Previewing the Document2-1.4.2
The Print Preview feature lets you view the document as it will appear when printed. This gives you an opportunity to review the document before distribution and discover if there problems with the appearance or layout. You can change the margins or orientation, move paragraphs or add hard page breaks while displaying one or more pages at a time.
To preview a document, click the Office Button, point at Print, and then click Print Preview.
192 7300-1 v1.00 © 2009 CCI Learning Solutions Inc.

Unit 4: Using Microsoft Offi
ce Word 2007
P r i n t i n g D o c u m e n t s L e s s o n 2 2
In the Preview mode, you will have many of the same options available for managing the document as in the Print Layout or Draft views. The Print Preview tab also includes commands to move around in this view.
When you position your mouse over the previewed document, the pointer will change to a (zoom-in magnifying glass). You can click this icon on the document to zoom in; if the magnifying glass appears as (zoom-out magnifying glass), you can click the document to zoom out to the previous magnification.
Exercise1 Open the Tolano Environmental Consulting document.
2 Click the Office Button and point at Print. Then click Print Preview.
3 Position the magnifying glass near the company logo and then click.
Notice Word zooms into the document so you can see this portion. Notice also that the magnifying glass now shows a – in it, indicating you can click to zoom out.
4 On the Print Preview tab, in the Zoom group, click Zoom to choose a different percentage.
5 In the Percent field, click the incremental button to change this to 125% and click OK.
Hint: You could also have selected the existing percent and typed in the new figure.
6 On the Print Preview tab, in the Zoom group, click Page Width.
7 On the Print Preview tab, in the Zoom group, click Two Pages.
Although your document is only one page in length, this option lets you view the pages with page 1 on the left side. This is different than how it would print if your printer has the ability to print double-sided (duplex).
8 On the Print Preview tab, in the Preview group, click Close Print Preview.
Printing a Document2-1.4.3 2-1.4.4 2-1.4.5 2-1.4.6 2-1.4.7
Word provides several different ways to print, and gives you the choice of printing all or part of your document.
To select specific options for printing the document, use one of the following:
Click the Office Button and click Print; or
click the Office Button, point at Print, and then click Print; or
press + ; or
in Print Preview mode, click Print.
7300-1 v1.00 © 2009
CCI Learning Solutions Inc. 193

Unit 4: Using Microsoft Offi
ce Word 2007
Note: You can also customize the Quick Access toolbar to include the (Quick Print) button.
L e s s o n 2 2 P r i n t i n g D o c u m e n t s
PrinterAllows you to select a printer from the list of printers installed on that computer. You can use the Properties button to choose options for how the output appears, such as single- or double-sided, color or black and white.
Page rangePermits you to select how much of the document you want to print. When you use the Pages field, you can enter specific information:
# – # Print from one page to another, inclusive (e.g., 5–7)#,#,# Print only the following pages (e.g., 3,7,10)- # Print from page 1 to a specific page (e.g., 1–6)# - Print from a specific page to the end of the document (e.g., 13– )
CopiesEnables you to enter the number of copies to be printed and choose whether to have your document collated or assembled in page order. If you choose Collate, Word will print out one full copy of the document at a time, with the pages in the correct order. Otherwise, Word will print the specified number of copies of the first page before printing copies of the second page, and the pages will have to be collated manually.
Print whatOffers choices of what to print from the list:
PrintOffers choices to print the entire document, or only the odd or even pages.
ZoomSets multiple pages to print on each sheet of paper; the larger the number of pages per sheet, the smaller the text will be when printed.
To print one copy of the entire document to the default printer, click the Office Button, point at Print, and then click Quick Print.
Managing Your Print JobsYou can use the print queue to check printer status, see the number of jobs lined up in the print queue, or pause or cancel a print request. To access the print queue, click Start, Control Panel. In the Hardware and Sound area, click Printer, then click the icon for the printer you are using.
Hint: You may also see a (printer) icon appear in the notification area whenever you send a document to print. You can click this icon to view the print jobs.
194 7300-1 v1.00 © 2009 CCI Learning Solutions Inc.

Unit 4: Using Microsoft Offi
ce Word 2007
P r i n t i n g D o c u m e n t s L e s s o n 2 2
Document Name Displays the name of the document.
Status Displays the current printing status, such as spooling, printing, or paused.
Owner Displays the name of the user who sent the document to the network printer.
Pages/Size Displays the pages sent to the printer and the size of the file.
Submitted Displays the time and date the document was sent to the printer.
To change the status of a document to be printed, right-click the file in the queue and then click the appropriate command.
How long a document remains in the print queue depends on the size of the document, the speed of your printer, and the position of your print job in the queue. If you are printing several documents, the print queue displays the total number of jobs waiting to be printed.
You generally have permission to print and manage your own documents in the print queue, but you cannot change or adjust print jobs submitted by others.
Exercise1 With the Tolano Environmental Consulting document active, click the Office Button and then click Print.
2 In the Number of copies field, click the incremental button to change this to 3.
3 Then click OK.
4 Double-click the printer button that appears in the notification area.
5 If the document is still there, right-click the file and then click Cancel.
Looking at Different Output FormatsThe most common format for output is a hard copy from your printer. However, you can output documents in a variety of formats to suit different needs. Most of these formats can be set using the Send command in the Office Button menu.
PDFThe Portable Document Format (PDF) file format can be used to share Word documents with others who might not have Word installed on their computers. The layout is preserved but this format does not allow the document to be edited in Word. This format generally reduces the document size, so that it can be sent via e-mail as well as downloaded from a Web site more quickly.
FaxThis is short for facsimile (fax) format. Depending on the set up at the other end, the recipient will either receive a printed document or an online version. The recipient cannot make changes to this output format.
E-mail AttachmentYou can send the document in an e-mail message, or as an attachment. It will be possible for the recipient to make changes to this output format.
7300-1 v1.00 © 2009
CCI Learning Solutions Inc. 195
Hint: If you do not have the option to send a document in PDF or XPS format, you may need to download the add-in tool from the Microsoft Office Web site. This add-in was included in the latest update for Microsoft Office.

Unit 4: Using Microsoft Offi
ce Word 2007
L e s s o n 2 2 P r i n t i n g D o c u m e n t s
Another way to output a Word document is to save it as Web content, which makes it possible for this document to be set up as a Web page on the organization’s intranet or Web site. You can save to this format using the Save as type field. Once you’ve saved, check the contents of the Web file to see whether formatting options have been lost during the conversion to this format. Web pages use HTML formatting to ensure that the content can be viewed from any operating environment; as such, Word options such as tables and SmartArt diagrams may not look or work the same on a Web page.
Note that your system will need to be configured correctly before you can send a document to someone else. For example, you must have a live connection to the Internet to send e-mail or use the fax option; you must also have a valid e-mail account set by the organization or with an Internet Service Provider (ISP). Also, when sending documents via e-mail, be aware of the file size; some mail servers have a restriction on the size of any attachments they will accept.
Be sure to think about any links in your documents prior to sending them to someone else. For instance, if your sales report has a link to an Excel worksheet that contains the latest sales numbers, be sure to include that Excel file when you send the report.
Exercise1 Ensure the Tolano Environmental Consulting document is open on the screen.
2 Click the Office Button and then click Save As.
3 In the Save as type field, click the down arrow and change this to Single File Web Page.
4 Change the name to Tolano Environmental Consulting (Web) - Student and then click Save.
Notice that the view of the document has changed to Web Layout
5 Close the document.
Identifying Common Problems with PrintingWhen you want a hard copy of a file, you will need to send the file to print. Following are some of the problems you may encounter when printing:
If your printed copies do not show all the information from the original file, such as pictures and fonts, check how much memory is available on the printer; there may not be enough to print a large number of pictures or effects.
If the font does not look the same in print as it did on screen, check to see if the font is available to the printer. Some printers may substitute a similar font if the actual font is not available.
If the printed text does not print close to the edges of the page even though it appears that way on screen, check your printer settings; most laser and inkjet printers have default margins that do not allow printing close to the edge of the paper. You may be able to rectify this by using a dot matrix printer or by setting up your page differently; otherwise, you may need to take your print job to a dedicated printing service.
If your document simply does not print, check to ensure that the printer is online, it is stocked with paper, ink or toner, it is connected to the network, there are no error messages displayed, and you’ve selected the correct printer. (Note that when you change printers, that printer becomes the selected printer for that program until you exit the program or reset your system to the default printer.)
If error messages are displayed, follow up: For example, the printer might be out of ink or toner, there might be a paper jam, or there may be something wrong with the printer connection. Some errors are straightforward, such as changing an ink cartridge, trying a different printer port, clearing a simple paper jam, confirming that the cord is plugged into a wall outlet, and ensuring that no cables are loose. If you have gone through all the quick fixes and you are still unable to print your document, check with an IT specialist.
If none of the foregoing fixes apply, check whether someone has updated or changed the printer driver. A driver problem could prevent the system from recognizing the printer or perhaps even your logon ID. The printer may need to be uninstalled and re-installed.
196 7300-1 v1.00 © 2009 CCI Learning Solutions Inc.

Unit 4: Using Microsoft Offi
ce Word 2007
P r i n t i n g D o c u m e n t s L e s s o n 2 2
If the colors in your document do not match those on screen, it could be due to your printer or your monitor. Not all monitors display colors as they will appear in print, and not all printers print colors as they display on screen. If color is moderately important to this job, a little trial and error may be called for. If it is very important, you may need to take your file to a printing service.
If your output is printing on the wrong size of paper and your printer has multiple trays or duplex (double-sided) printing capabilities, check the printer and your file settings before you send the document to print. You may simply have selected the wrong paper tray for that particular printer.
Familiarize yourself with the printer and its settings. Most print problems simply require a bit of maintenance, such as changing the toner cartridge, adding more paper, or clearing a paper jam. For more technical problems, speak to your IT person.
SummaryIn this lesson, you learned to preview documents prior to printing and then print them. You should now be able to:
preview the document change the zoom for the previewed document print the document, including different output types
manage print jobs identify common printing problems
Review Questions1. You can use the Print Preview feature to check that the document will print in the same manner as it appears
on screen.a. True b. False
2. Which method can you use to change some of the printing options for a document?a. Click the Office Button, then click Print.b. Quick Access toolbar, click .c. You can press + .d. Any of the abovee. a or c
3. You can use the Properties button to set features for your printer, such as printing in color or printing double-sided.a. True b. False
4. The only output format supported for documents is printing to paper.a. True b. False
5. What may be the cause of a printer to not print your document?a. The document was sent to a different printer.b. The printer has a paper jam.c. The printer is not turned on.d. Someone has taken your printed output.e. Any of the abovef. a, b, or c
7300-1 v1.00 © 2009
CCI Learning Solutions Inc. 197

Unit 4: Using Microsoft Offi
ce Word 2007
L e s s o n 2 4 U s i n g P u b l i s h i n g F o r m a t T o o l s
Lesson 23 Working withHeaders and Footers
ObjectivesIn this lesson, you will learn how to add text that needs to appear at the top or bottom of each page. On completion, you will be able to:
insert page breaks insert section breaks create headers or footers
make changes to headers or footers add page numbers only
Skills
2-2.1.5 Insert and delete a page break or section break2-2.1.9 Insert, modify and format page numbers2-2.1.10 Create, modify and format headers and footers
Using Breaks2-2.1.5
At times, you will need to break text for a specific purpose such as to start a new page or to break a line but keep it in paragraph format. Word provides two different types of breaks you can insert into documents:
Inserting Page Breaks When Word calculates the amount of text that will fill a page in your document, it inserts a soft page break—a break that occurs automatically. If you are in Draft view with non-printing characters set to display, a soft page break will be represented by a dotted line.
When you want to break a page at a specific location, you will need to insert a hard or manual page break. This is preferable to pressing continuously until you reach a new page, as any change in the text may require that you go back and change or remove these. A hard page break will break text in the same place, no matter what other changes you make. A hard break displays as a dashed line whenever non-printing characters display, regardless of the view mode.
198 7300-1 v1.00 © 2009 CCI Learning Solutions Inc.

Unit 4: Using Microsoft Offi
ce Word 2007
W o r k i n g w i t h H e a d e r s a n d F o o t e r s L e s s o n 2 3
To enter a manual or hard page break, use one of the following methods:
On the Insert tab, in the Pages group, click Page Break; or
press + ; or
on the Page Layout tab, in the Page Setup group, click Breaks, and then click Page.
You can remove a manual page break in the same way as you would delete a text character.
Exercise1 Open the Tolano Environmental Consulting Employee List document.
2 Move to the bottom of page 1 and notice that the Cape Town heading appears here.
3 Position the cursor at the beginning of the Cape Town text and press + .
This text should now appear at the top of page 2.
4 Scroll to the bottom of page 2 and then repeat step 3 to break the page so Toronto appears on the next page.
5 Scroll through the rest of the document to break pages so every branch office appears on its own page.
Now practice deleting a page break.
6 To view where you can delete the page breaks, on the Home tab, in the Paragraph group, click (Show/Hide ¶). Position the cursor at the end of page 2, just before the Page Break code, and press
twice.
Notice the page break code and the blank line no longer appear.
7 Close the document without saving.
Using Section Breaks A section break needs to be inserted when something about the page layout has to change; for example, the first page of a document may be laid out one way with subsequent pages laid out differently. A section break is represented by a double dotted line and words describing the type of section break (as follows) in parentheses.
Next PageStarts the new section on the next page; this might be used to change page orientation or insert a different header.
ContinuousStarts the new section on the same page; this might be used to switch from a single-column format to a two- or three-column format and back again.
Even PageStarts the new section on the next even page; this would be used to change the layout for the left side of an open book.
Odd PageStarts the new section on the next odd page; this would be used to change the layout for the right side of an open book.
You can remove a section break in the same way as you would a page break; however, be aware that removing section breaks may change the layout in your document. For example, if you delete a section break you’ve inserted in order to switch to landscape orientation to accommodate a financial table, you may inadvertently change the entire document to landscape orientation.
7300-1 v1.00 © 2009
CCI Learning Solutions Inc. 199

Unit 4: Using Microsoft Offi
ce Word 2007
L e s s o n 2 4 U s i n g P u b l i s h i n g F o r m a t T o o l s
Exercise1 Open the Tolano Environmental Consulting document.
Suppose you are planning to add some statistical figures to this report that will span a 16-month period. You need the next page to be landscape mode.
2 Press + to move quickly to the end of the document.
3 On the Page Layout tab, in the Page Setup group, click Breaks and then Next Page.
4 Ensure you are on page 2 and then on the Page Layout tab, in the Page Setup group, click Orientation and then click Landscape.
Notice how Word keeps the original document orientation intact but page 2 now has landscape orientation applied. Section breaks help to keep portions of your report with certain formatting intact while you add or change other parts of the same document.
5 Close the document without saving.
Using Headers and Footers2-2.1.9 2-2.1.10
Headers and footers are text or graphics that appear at the top or bottom of every page; they may include the document title, page number, author’s name, or company logo. Headers and footers can be the same on every page, alternating on even- and odd-numbered pages, or perhaps changing from one section or chapter of a large document to the next.
The header prints within the top margin and the footer prints within the bottom margin; you can adjust the distance from the edge of the paper to the document text.
You can create headers and footers using the Insert tab and Header & Footer group. You can insert a header or footer initially or later. When set, Word will display the Header & Footer Tools Design tab for you to make modifications.
A dash line with an identifying tag will appear at the top or bottom margin of a page; this is where you can enter or modify text or elements that you want inside the header or footer.
In a document with section breaks, Word identifies the different sections in the header or footer. This is helpful if you want to print specific sections or need to check where changes are required.
200 7300-1 v1.00 © 2009 CCI Learning Solutions Inc.

Unit 4: Using Microsoft Offi
ce Word 2007
W o r k i n g w i t h H e a d e r s a n d F o o t e r s L e s s o n 2 3
The Link to Previous option gives you the opportunity to use the same header or footer as was used in the previous section. If you turn this feature off, you can insert a new header or footer.
Two default tab stops are set up for headers and footers. The first centers the text and the second right-aligns it; you can adjust these as necessary. You can also change text alignment, insert indents, and apply formatting to headers and footers.
Headers and footers usually include no more than two or three lines of text. While you can insert pictures, it is a good idea not to use too much information in headers and footers. The screen display will help you identify the header or footer area and the way the content looks within that space.
To edit an existing header or footer, double-click the header or footer area and modify as needed.
If you wish to use a different header or footer for the first page of a document, or to hide the header and footer on the first page, under Header & Footer Tools, in the Design tab, in the Options group, click Different First Page to turn it off. You can also use this option to prevent the page number from appearing on the front page, such as with a title or cover page of a report.
Adding Page Numbering You can add page numbers to a document without including anything else in the header or footer. To insert page numbers into your document, on the Insert tab, in the Header & Footer group, click Page Number.Top of Page Displays possible positions from a gallery of top-of-page numbering
options.
Bottom of Page Displays possible positions from a gallery of bottom-of-page numbering options.
Page Margins Displays possible positions from a gallery of margin numbering options.
Current Position Displays numbering options (page number only, page # of #, and so on) to apply to the current page number location.
Format Page Numbers
Displays various numbering styles (1, 2, 3; i, ii, iii), as well as the option to start numbering somewhere other than the number 1.
Exercise1 Open the Tolano Environmental Consulting document and save as Tolano Environmental Consulting with
footer - Student.
7300-1 v1.00 © 2009
CCI Learning Solutions Inc. 201

Unit 4: Using Microsoft Offi
ce Word 2007
L e s s o n 2 4 U s i n g P u b l i s h i n g F o r m a t T o o l s
2 On the Insert tab, in the Header & Footer group, click Footer.
3 Click Blank (Three Columns).
4 Click the first [Type text] field and type: Corporate Profile.
5 Click the second [Type text] field and type: M09-001.
6 Click the third [Type text] field and then under Header & Footer Tools, on the Design tab, in the Header & Footer group, click Page Number.
7 Click Current Position, scroll down the list and then click Two Bars.
8 Under Header & Footer Tools, on the Design tab, in the Position group, click the incremental button twice for Footer from Bottom to change it to 48 pt.
9 Under Header & Footer Tools, on the Design tab, in the Position group, click Close Header and Footer.
10 Save and close the document.
SummaryIn this lesson, you learned how to add text that needs to appear at the top or bottom of each page. You should now be able to:
insert page breaks insert section breaks create headers or footers
make changes to headers or footers add page numbers only
Review Questions 1. To insert a page break manually, you would:
a. Press + .b. Press + .c. Press until you arrive at a new page.d. Insert tab, Pages group, Page Breake. Any of the abovef. b or d
2. Which option would you use to change the paper orientation from this point forward?a. Next Pageb. Even Pagec. Continuousd. Odd Page
3. The header and footer text must be the same on every page, even if you need to set odd or even pages.a. True b. False
4. Page numbers must always appear on the first page of a document.a. True b. False
5. Page numbers must always be numeric format (e.g., 1, 2, 3 ...).a. True b. False
202 7300-1 v1.00 © 2009 CCI Learning Solutions Inc.

Unit 4: Using Microsoft Offi
ce Word 2007
U s i n g P u b l i s h i n g F o r m a t T o o l s L e s s o n 2 4
Lesson 24 Using Publishing Format Tools
ObjectivesIn this lesson, you will learn to use formatting tools which will give your document a consistent look. On completion, you will be able to:
use publishing format tools use styles for a consistent look apply column formats to text
create footnotes and endnotes work with hyperlinks
Skills
2-2.1.11 Create, modify and apply styles2-2.1.12 Create and modify columns2-2.2.2 Insert and modify data elements into a document
What are Publishing Format Tools?Frequently used in desktop publishing, publishing format tools allow you to apply styles, manipulate pictures, automate repetitive text, create outlines, and so on. These tools are similar to those found in a dedicated desktop publishing program but may not be as flexible. They allow you to set up and maintain a consistent look in your documents.
Published documents refers to documents you share with an audience, through your intranet, the Internet, or in print. Shared documents should have a consistent look that identifies your company, the products or services sold, or what you or your organization represents.
Working with Styles2-2.1.11
A style is a combination of character and paragraph formatting that you create and save with a unique name. Styles save time when formatting as you create a style and then apply it to multiple pieces of text. When you change the formatting attributes of that style, all text formatted with that style will automatically update to the same attributes.
There are two main types of styles:
Character StyleAffects the selected text only and can include any character formatting attributes found in the Font dialog box.
Paragraph StyleAffects the appearance and position of the entire paragraph and can include both paragraph and character formatting. Note that applying a paragraph style to a paragraph with character formatting may turn off that character formatting.
Word has several standard styles built in to help you format typical or recurring portions of your document, such as headings. The Normal style contains the default formatting for all new documents.
7300-1 v1.00 © 2009
CCI Learning Solutions Inc. 203

Unit 4: Using Microsoft Offi
ce Word 2007
L e s s o n 2 4 U s i n g P u b l i s h i n g F o r m a t T o o l s
The Styles task pane lists styles used in the current document. Styles created for a particular template can appear in all new documents to make it easy for you to standardize the appearance of all the reports, newsletters, and memos you might need to publish in that style. You can apply styles before or after you type the text.
To create a style, you must first determine what formatting you want to set up, and then create a naming structure or hierarchy for this style.
PropertiesLists the types of properties you can enter or change for this style.
FormattingIdentifies the attributes used in a style.
Add to Quick Style listAdds this style to the template currently attached to the active template; in most cases this is the Normal template which contains the list of styles displayed in the Style Gallery. If you do not select this feature, the new style is added to the active document only.
Automatically updateUpdates the style whenever you change attributes of this style manually in the text.
FormatDisplays a list of formatting commands available to you when you are creating the style.
Consider the following points about naming a style:
You can use any combination of characters and spaces for the style name, with the exception of the backslash (\), semicolon (;) or brace ({ }) characters.
Style names are case sensitive.
Each style name within a document must be unique.
Using Quick StylesMicrosoft created and designed a set of styles called Quick Styles that contain common formatting options for that type of text. For instance, the Normal style uses 11-point Calibri font; the Heading 1 style is set to highlight a major heading in the document. You can also add any style you create to the Quick Style Gallery.
Once you select text, point to a style option; the Quick Styles feature will display a preview of how your choice will look once you have applied that style to the text.
204 7300-1 v1.00 © 2009 CCI Learning Solutions Inc.

Unit 4: Using Microsoft Offi
ce Word 2007
U s i n g P u b l i s h i n g F o r m a t T o o l s L e s s o n 2 4
As you point from one style to another, the preview of the selected text will change accordingly, although Word will keep the original style highlighted. The graphic above shows Normal as the original style while indicating a preview of the Heading 1 style.
Click More in the Quick Styles list to display the full gallery of Quick Styles.
Save Selection as a New Quick StyleSaves the formatting choices you have selected as a style you can choose from the Quick Style gallery.
Clear FormattingRemoves the style and all formatting from the selection of text.
Apply Styles Displays a window where you can select from a list of styles. You can also press + + to display this window.
The Quick Styles feature is also available on the Mini toolbar:
There is no live preview using this option to select a Quick Style. The Mini toolbar enables you to select items quickly based on what is most commonly used.
Understanding the Styles WindowWhen you click the Dialog box launcher for the Styles group, the Styles pane appears with more options:
Show Preview Turns a preview of this style with its attributes on or off.
Disable Linked Styles
Disables styles that are set up in the Based on field.
New Style Creates a new style using the Create New Style from Formatting dialog box.
Style Inspector
Displays a dialog box in which to review the attributes for this style with easy access to customizing or managing it.
Manage Styles Sets default options for which styles will display in the Styles pane using the default attributes for specific styles. You can also edit styles in this dialog box.
Options Allows you to select options for how the Styles pane will appear when active.
7300-1 v1.00 © 2009
CCI Learning Solutions Inc. 205

Unit 4: Using Microsoft Offi
ce Word 2007
L e s s o n 2 4 U s i n g P u b l i s h i n g F o r m a t T o o l s
If you want to view the formatting options for a style, point at its name in the Styles list; a ScreenTip will list the formatting attributes associated with this style.
If you want to make changes to the way the style is used, click the down arrow beside the style name; a dialog box will list several options for managing the usage of this style in the document:
Modifying Styles One advantage of using styles becomes evident when you make formatting changes. When you redefine the formatting of a style, Word automatically changes all paragraphs in the document formatted with that style.
Styles can be based on another style with the new formatting added to create a variation of that style. All new styles are based on the Normal style, unless you choose to have them based on something else. Consequently, if you change the base style, all variations of that style will reflect that change. You can modify the attributes for a style at any time.
To modify a style, use one of the following methods:
On the Home tab, in the Styles group, click Change Styles; to change the attributes for one of the Quick Styles, or to set your style as the default, or
on the Home tab, in the Styles group, click the Dialog box launcher to display the Styles pane. Point at the style to be changed, click the down arrow for the style, and then click Modify; or
on the Home tab, in the Styles group, click More for the Quick Styles gallery and then click Apply Styles, then click Modify. You can also press + + to display this window quickly.
When the Modify Style dialog box appears, you can make changes as required:
You can also use the Automatically update option to modify a style by changing the existing text, and have the change reflected throughout the document, wherever the style was applied. Alternatively, in the Styles pane, you can click the down arrow for the style and then click Update [Style Name] to Match Selection.
206 7300-1 v1.00 © 2009 CCI Learning Solutions Inc.

Unit 4: Using Microsoft Offi
ce Word 2007
U s i n g P u b l i s h i n g F o r m a t T o o l s L e s s o n 2 4
Exercise1 Open the UK Green Companies document and save as UK Green Companies with styles - Student.
Previously you applied formatting to the subheadings although you had to apply these individually with the Format Painter. If you make changes to the formatting options on one of the headings, you would need to use the Format Painter to update each heading. You can now see how this is much easier with styles.
2 Ensure the cursor is in the main title.
3 On the Home tab, in the Styles group, point at Heading 1 in the gallery.
Word should display a preview of the formatting for this style.
4 Move the mouse pointer to point at Heading 2.
5 Go back and click Heading 1 to apply this style to the main title.
The style may not contain the exact formatting you want but the focus here is to apply the styles and we will modify the styles later in this exercise.
6 Click at the beginning of the Big Green Smile heading.
7 On the Home tab, in the Styles group, click Heading 2.
8 Repeat step 7 for each of the company names.
9 On the Home tab, in the Styles group, click the Dialog box launcher to display the Styles pane.
10 Point at Heading 1 to display the box that lists the formatting attributes used in this style.
11 Click the arrow for this style and then click Modify.
12 Change the color of this style to be any green of your choice.
13 Click Format and then click Paragraph.
14 Change the Spacing: Before to be 0 and the Spacing: After to be 6 pt.
15 Click OK twice.
The title at the top of the page should now be in green and the spacing changed.
16 In the Styles pane, click the arrow for Heading 2 and then click Modify.
17 Change the color of this style to be a green but a different one than chosen in step 12.
18 Click Format and then Font. Change the font size to be 12, and click Shadow in the Effects area.
19 Click OK twice.
You have now successfully changed some formatting attributes for the Heading 2 style and Word has applied this change to all text that has this style applied.
Now try creating a style to offset the descriptions.
20 Click in the paragraph below Big Green Smile. Then in the Styles pane, click New Style.
21 In the Name field, type: Description.
22 Click Format and then Numbering.
23 Click the Bullets tab and select a bullet of your choice.
24 Click OK twice.
25 Click in the paragraph for the next company.
26 In the Styles pane, click Description.
27 Repeat steps 25 and 26 for the remaining company descriptions.
28 Close the Styles pane.
29 Save and close the document.
7300-1 v1.00 © 2009
CCI Learning Solutions Inc. 207

Unit 4: Using Microsoft Offi
ce Word 2007
L e s s o n 2 4 U s i n g P u b l i s h i n g F o r m a t T o o l s
Applying Columns2-2.1.12
Word allows you to set up newspaper-style columns in a document using the Columns feature. In a newspaper-style column, text from the bottom of one column flows to the top of the next; this makes it an ideal layout for documents such as newsletters and reports. The number of columns you create depends on factors such as paper size and orientation, font size, and document layout (for example, for print or the Web), as well as the column width and margins you choose.
You can apply columns to text before or after you type. You may find it easier to type and edit the text first, and then apply multiple columns formatting. Note that when you are working with multiple columns, Draft view will display the appropriate column widths but the columns will not display side by side; to view columns side by side, use Print Layout view.
To create columns, on the Page Layout tab, in the Page Setup group, click Columns.
To set up additional options for the columns, click More Columns.
PresetsOffers options for a number of different column layouts. The One, Two, and Three options provide columns of equal width and are generally used for newspaper-style columns. The Left and Right column layouts are used for Web pages or for print publications with columns of uneven widths; for example, a software manual might be laid out with a wide column for body text and a narrow column or sidebar for additional tips or keywords that help you quickly find topics in the main text.
Number of columnsProvides incremental buttons you can use to set the number of columns you want.
Width and spacingAlters the width and spacing between one column and the next. Use the Equal column width option to create columns of the same width; when this box is selected, only the options for column 1 will display, as any changes you make will affect the other columns equally.
208 7300-1 v1.00 © 2009 CCI Learning Solutions Inc.

Unit 4: Using Microsoft Offi
ce Word 2007
U s i n g P u b l i s h i n g F o r m a t T o o l s L e s s o n 2 4
Apply toIdentifies which text you want the column structure applied to; options include Whole document, From this point forward, and Selected text.
Line betweenInserts a vertical line between each of the columns in the document.
Start new columnBecomes available when you choose From this point forward in the Apply to field; functions in much the same way as inserting a section break in text that is not in column format.
Once you have columns set up, you can make a variety of changes to them. For example:
To change the number of columns, select the text and use the Columns command to change the number.
To insert or turn off vertical lines between each column, in the Columns dialog box, click Line between.
To adjust column width or the spacing between columns, use the Columns dialog box or simply drag the appropriate markers in the ruler to adjust each side of a column.
To apply indents to the text within columns, adjust that column’s indent markers on the ruler.
If the text from one column to the next is breaking in a way that makes it difficult to read, you can insert a column break and force some text into the next column. To force text from one column into the next, use one of the following methods:
On the Page Layout tab, in the Page Setup group, click Breaks and then click Column; or
press + + .
Similarly, if your columns run across more than one page, you may want to control where the text breaks between pages to ensure that it makes sense to the reader. To force a page break in your column layout, use one of the following methods:
On the Page Layout tab, in the Page Setup group, click Breaks and then click Page; or
on the Insert tab, in the Pages group, click Page Break;, or
press + .
Sometimes, you may need to change the column layout to more or fewer columns in the middle of a page. To have two different column layouts on a page, insert a Continuous section break between the two different layouts.
Note that when you change the column layout of a document, the entire document changes unless you specify otherwise. To change only the column layout for a portion of the document, select that portion of text and make the appropriate column layout change. Word automatically inserts the appropriate section breaks for this selection.
Exercise1 Open the Top 25 Companies Going Green and save as Top 25 Companies Going Green with columns -
Student
2 On the Page Layout tab, in the Page Setup group, click Columns. Then click Two.
Word has now formatted the document into a two column layout, including the title. To set the title to appear in a line above the columns, you will need to set this layout for the title.
3 Select the entire line in the first column containing the title.
4 On the Page Layout tab, in the Page Setup group, click Columns and then click One.
5 With the title still selected, press + to center this selection.
The title is now centered between the left and right margins in this report, and the rest of the document is in columns.
6 Select the blank line at the end of the document and repeat steps 3 and 4 to change this to one column layout as well.
7300-1 v1.00 © 2009
CCI Learning Solutions Inc. 209

Unit 4: Using Microsoft Offi
ce Word 2007
L e s s o n 2 4 U s i n g P u b l i s h i n g F o r m a t T o o l s
7 Print preview the document to see how the columns on this last page are formatted.
8 Close the print preview and save the document again.
Using Footnotes and Endnotes2-2.2.2
References, additional information, and sources are often added to text as either footnotes or endnotes. Footnotes are located at the bottom of the page containing the reference; endnotes are located at the end of the section or document. Which one is used depends on the bibliographic system being used.
Consider the following regarding footnotes and endnotes:
Footnotes and endnotes automatically renumber when you add, delete, move, or copy them.
Endnotes appear at the end of the document, but can also be placed at the end of a section.
Both footnotes and endnotes consist of two linked parts: the reference mark within the text and the corresponding note at the bottom of the page or the end of the section or document.
Footnote/endnote text can be of any length and can be formatted in the same ways as regular text.
Footnote and endnote reference marks are usually numbers, but can also be letters or characters.
Endnote numbering is usually consecutive from the beginning of the document to the end.
Inserting a footnote or endnote in Print Layout view shows the reference mark in the body text and the footnote or endnote area. Normal view displays a separate pane at the bottom of the screen for entering footnote or endnote text.
Creating Footnotes and Endnotes To view the content of footnotes or endnotes, hover the mouse pointer over the note reference mark in the main text; a preview window box will appear displaying the text of the note. To display the note text in a separate pane at the bottom of your screen, double-click on the note reference mark.
To insert a footnote or endnote, on the References tab, in the Footnotes group, click Insert Footnote. Word then automatically moves to the bottom of the page to insert the new footnote, using the default settings for footnotes.
To change the default settings or to choose an endnote instead, on the References tab, in the Footnotes group, click the Dialog box launcher.
LocationOffers a choice between footnotes and endnotes, and where they will be inserted in the document.
FormatOffers a range of formats for the numbering system or the option to create a custom mark. You can also choose whether to number this note consecutively from the last footnote/endnote in the document, or start with a different number (for example, if a large document is split into two files, you may want to pick up the numbering where the last footnote in the previous file left off).
Apply changesApplies the footnote or endnote to the entire document or to selected text only
If you want to delete or move a footnote or endnote, use the note reference mark in the document window rather than the text in the note pane. If you move or delete an automatically numbered note through the reference mark, Word will renumber the notes accordingly.
You can also convert footnotes to endnotes or vice versa, as necessary.
210 7300-1 v1.00 © 2009 CCI Learning Solutions Inc.

Unit 4: Using Microsoft Offi
ce Word 2007
U s i n g P u b l i s h i n g F o r m a t T o o l s L e s s o n 2 4
Exercise1 With the Top 25 Companies Going Green with columns - Student document active, move to the end of
this document.
2 Delete the * from the beginning of the last line of information and then select the rest of the paragraph. On the Home tab, in the Clipboard group, click .
This is an example of an endnote as it applies to the entire document.
3 Press + to move quickly to the top of the document. Click at the end of the title there.
4 On the References tab, in the Footnotes group, click Insert Endnote.
5 On the Home tab, in the Clipboard group, click Paste.
6 Scroll up to see where you are in the document.
You should be at the bottom of page 2 as endnotes are generally placed at the end of a document.
7 Save the document.
Using Hyperlinks2-2.2.2
Hyperlinks help you navigate to different locations within a document, to another document, to a Web site, or to your e-mail program to send a message. Word includes a hyperlink option when you are using some other features; for example, you can include hyperlinks when you are generating a table of contents so that readers can jump directly to the corresponding section of the document. You can set up hyperlinks anywhere in a document for specific purposes.
To create a hyperlink, use one of the following methods:
On the Insert tab, in the Links group, click Hyperlink; or
press + .
Link toOffers options about the kind of location you want the link to navigate to.
Text to displayAllows you to enter the specific text you want displayed to represent the link in the document.ScreenTipOffers an option for you to insert text you want to appear when the viewer points at this link.
Look inDisplays the name and location of the file or folder for the link to navigate to when clicked.
BookmarkAllows you to bookmark a specific place within a document for the link to navigate to.
Target FrameAllows you to choose a specific frame on a Web page for the link to navigate to.
AddressAllows you to insert a Web address for the link to navigate to.
7300-1 v1.00 © 2009
CCI Learning Solutions Inc. 211

Unit 4: Using Microsoft Offi
ce Word 2007
L e s s o n 2 4 U s i n g P u b l i s h i n g F o r m a t T o o l s
In addition, you will notice that whenever you type a Web address or e-mail address into a document, Word automatically sets it up as a hyperlink:
To turn this feature off, change the AutoFormat option in the AutoCorrect Options command of the Proofing category in Word Options.
Modifying HyperlinksWhen you need to make a change to an existing hyperlink, you can simply click anywhere on the link, and then use one of the following methods:
On the Insert tab, in the Links group, click Hyperlink; or
press + .
You can then modify any option for this link.
Removing HyperlinksIf you no longer need a hyperlink in the document, you can delete the link completely by deleting the text, or remove the link, leaving the text intact.
To remove a hyperlink, position the cursor anywhere in the link and activate the Hyperlink dialog box. Then click Remove Link.
Exercise1 With the Top 25 Companies Going Green with columns - Student document active, move to the end of the
document.
2 In the endnote text, select the text, www.businesspundit.com/25-big-companies-that-are-going-green.
3 On the Insert tab, in the Links group, click Hyperlink.
4 Ensure the text shown in the Address field still appears as: www.businesspundit.com/25-big-companies-that-are-going-green.
5 Click at the end of this address and enter: / (forward slash).
6 Click at the beginning of this address and enter: http://
The full web address should now be:http://www.businesspundit.com/25-big-companies-that-are-going-green/
7 In the Text to display field, select the text there and type: Top 25 Big Companies Going Green.
8 Click OK.
This is now a hyperlink to this Web site. As you point at the text, it will display a box indicting the address it will go to as well as how you can activate the hyperlink, e.g., +Click.
9 Save and close the document.
SummaryIn this lesson, you learned to use formatting tools to provide a consistent look to your documents. You should now be able to:
use publishing format tools use styles for a consistent look apply column formats to text
create footnotes and endnotes work with hyperlinks
212 7300-1 v1.00 © 2009 CCI Learning Solutions Inc.

Unit 4: Using Microsoft Offi
ce Word 2007
U s i n g P u b l i s h i n g F o r m a t T o o l s L e s s o n 2 4
Review Questions 1. A benefit of using styles to format a document is:
a. Changes to formatting are reflected automatically once they have been made in the style.b. Styles ensure a consistent look throughout your document.c. You can apply styles to any text in the document.d. Any of the abovee. b or c
2. When you select three paragraphs in a document so that they will appear in two columns, what does Word insert before and after the text in columns?a. Page breakb. Section breaksc. Column breaksd. Text-wrapping breaks
3. There is no difference between a footnote and an endnote.a. True b. False
4. To insert a footnote or endnote, which tab would you use?a. Insertb. Page Layoutc. Referencesd. View
5. Why might you want to insert a hyperlink in a document?a. So the viewer can move to another area of the same document.b. So the viewer can send an e-mail to a particular contact.c. So the viewer can navigate to a particular Web site.d. So the viewer can read the contents of another related document.e. Any of the abovef. a, b, or c
7300-1 v1.00 © 2009
CCI Learning Solutions Inc. 213

Unit 4: Using Microsoft Offi
ce Word 2007
L e s s o n 2 5 W o r k i n g w i t h G r a p h i c s
Lesson 25 Working with GraphicsObjectivesIn this lesson, you will learn how to insert pictures, draw simple objects and manipulate them in a document. On completion, you will be able to:
insert clip art images insert pictures saved as files size, crop or trim pictures change properties for a picture
move pictures identify available drawing objects draw simple objects change and arrange drawing objects
Skills
2-1.3.7 Insert pictures and other objects into a file
What are Illustrations?2-1.3.7
Illustrations are visual content inserted into a document. These include photographs, clip art pictures, text boxes, charts, diagrams, and object shapes. To insert one of these objects into a document, click the Insert tab and then the appropriate object in the Illustrations group.
All illustrations are considered objects and, when selected, appear with eight handles, as shown in the following illustration. Handles are the items around the perimeter of the object that confirm the object has been selected and you can now make changes to it. These handles may vary in appearance but always appear around the selected object.
The first object shown is an example of a picture object, the second example is a shape object, and the third is an example of a SmartArt object. Notice that the handles vary in style and color yet each displays these handles when the object is selected. When you select one of the objects within a SmartArt diagram, it also appears with handles, similar to a shape object:
214 7300-1 v1.00 © 2009 CCI Learning Solutions Inc.

Unit 4: Using Microsoft Offi
ce Word 2007
W o r k i n g w i t h G r a p h i c s L e s s o n 2 5
Inserting Pictures You can add pictures to any document from sources such as the Clip Organizer, graphics files, scanned photographs, or you can go online to find pictures on the Microsoft Clip Art and Media Web site. Microsoft provides the facility to insert picture files in a wide variety of file formats; some commonly used formats are Windows Metafile (*.wmf), JPEG File Interchangeable format (*.jpg, *jpeg), Portable Network Graphics (*.png), Windows Bitmap (*.bmp), or Graphics Interchange format (*.gif).
To insert a picture, position the mouse pointer in the document where you want the picture to be placed, and then on the Insert tab, in the Illustrations group, click Picture.
Word displays a dialog box to select the picture file, similar to opening a text file. Navigate to where the picture file is located and then insert it into the document.
Inserting Clip Art Microsoft provides a number of Clip Art graphics. These are available online from the Microsoft Office Online Web site together with graphics you can download to your computer. To insert Clip Art, position the mouse pointer where you want the graphic to be placed, and then on the Insert tab, in the Illustrations group, click Clip Art.
Once you access the command to insert a clip art image, Word displays the Clip Art pane for further action.
Search forAllows you to enter text for Word to search for specific clip art images.
Search inSpecifies where Word will search for matching clip art images. Choose from All collections (everything), My Collections (images saved on your system), Office Collections (images installed or downloaded from the Office Media CD or online), or Web Collections (images collected online).
Results should beSpecifies the media type you want to display; for example, you might choose everything, clip art images only, photographs only, sounds only, or photographs and movies only.
Organize clips
7300-1 v1.00 © 2009
CCI Learning Solutions Inc. 215

Unit 4: Using Microsoft Offi
ce Word 2007
L e s s o n 2 5 W o r k i n g w i t h G r a p h i c s
Displays the Clip Organizer, where Clip Art graphics are stored in a hierarchy so that you can view only the pictures in a specific category, or all available pictures at once. Use this feature to find a graphic already on your system instead of searching for it again.
When the results of your search display, position the mouse pointer over the image you want and use one of the following methods to insert it:
Click the image in the list; or
point at the graphic and then click the down arrow beside it:
The small icon at the lower left corner of each image identifies the following features about this image:
It can be obtained online from the Microsoft Web site.
It is not available from the existing collection.
There is animation with this image.
To determine whether this image is suitable, place your mouse pointer over the image. A screen tip appears with some keywords associated with this image to help match your search criteria.
Clip art on Office OnlineSearch the online Microsoft Clip Art and Media Web site for specific clip art images, the latest images, or choose from several categories of images.
216 7300-1 v1.00 © 2009 CCI Learning Solutions Inc.

Unit 4: Using Microsoft Offi
ce Word 2007
W o r k i n g w i t h G r a p h i c s L e s s o n 2 5
Tips for finding clipsDisplays a Help window with information and tips on how to obtain the best results from your image searches.
Note: The following exercises use pictures available in the Microsoft Office Clip Art gallery. These pictures are included in the student data files if you do not have access to the Internet to view all pictures. If the pictures are not available to you, insert any image from the list you have available.
Exercise1 Open the Going Green with Ethics document and save as Going Green with Ethics - Student.
2 Select the title and then on the Home tab, in the Styles group, click Heading 1 to apply this style.
3 Position the insertion point at the end of the title text and then on the Insert tab, in the Illustrations group, click Clip Art.
4 In the Clip Art pane at the right, type: recycling in the Search for field. Then press or click Go.
5 When the list of results appears, scroll through the list until you see the following image and then click it:
The image now appears in your document. Do not worry about the size of the image as you will adjust this in the next exercise.
6 Scroll down and click in front of the paragraph beginning with the text, Going green refers to actions …
7 In the Clip Art pane, scroll until you see the following image and then click it:
8 Scroll in the document and click at the beginning of the paragraph starting with the text, Putting these two ideas together …
9 On the Insert tab, in the Illustrations group, click Picture.
10 In your student data files location, select and insert the recycle can picture.
11 Click at the end of this paragraph and press to create a new line.
12 On the Insert tab, in the Illustrations group, click Picture.
13 In the student data files location, select and insert the wind power picture.
7300-1 v1.00 © 2009
CCI Learning Solutions Inc. 217

Unit 4: Using Microsoft Offi
ce Word 2007
L e s s o n 2 5 W o r k i n g w i t h G r a p h i c s
14 Close the Clip Art pane and then save the document.
Manipulating Graphics2-1.3.7
You can insert pictures into a document as inline objects (the default setting) or as floating objects.
An inline object acts as a text character in a paragraph.
A floating object can be placed anywhere (floats) in the document.
Regardless of which way you insert a picture initially, you will be able to switch from inline to floating or vice versa, as you wish.
218 7300-1 v1.00 © 2009 CCI Learning Solutions Inc.

Unit 4: Using Microsoft Offi
ce Word 2007
W o r k i n g w i t h G r a p h i c s L e s s o n 2 5
You must select a picture before you can manipulate it. Once selected, the picture displays the eight handles, as seen in the following:
Once you insert a picture, the Picture Tools ribbon appears and offers you a variety of ways to manipulate it.
Sizing a Picture When you insert a picture into a document, it appears at its original size, or the largest size that the page will accommodate. You can resize or scale the picture to any proportions you want. You use the same method to size a picture whether it is inline or floating.
You can use the handles to size a picture:
Vertically, by dragging the middle horizontal handle at the top or bottom edge in or out.
Horizontally, by dragging the middle vertical handle at the left or right edge in or out.
On two adjacent sides at once, by dragging one of the corner handles in or out.
If you want to ensure that your resized picture remains in proportion, press before you drag the appropriate handle.
Cropping a Picture Cropping refers to the ability to “cut off” certain portions of the picture. In Word, you can only crop pictures horizontally (at the top or bottom) or vertically (at the sides); for more precise cropping, you need to use a dedicated graphics program.
When the Cropping feature is active, the cursor changes to .
To crop the top or bottom of the picture, drag the top or bottom .
To crop the left or right side of the picture, drag the left or right .
To adjust two adjacent sides of a picture, drag one of the corners (the angle displayed will change depending on which corner handle you select.
Exercise1 Ensure the Going Green with Ethics - Student document is active and move to the beginning of the
document.
2 Click the picture below the title to select it.
3 Under Picture Tools, on the Format tab, in the Size group, click Crop.
7300-1 v1.00 © 2009
CCI Learning Solutions Inc. 219

Unit 4: Using Microsoft Offi
ce Word 2007
L e s s o n 2 5 W o r k i n g w i t h G r a p h i c s
Notice the different handles around the picture. You will now crop some of the white area around the picture.
4 Position the mouse pointer on the middle vertical left handle and drag to the right until at the left edge of the picture.
5 Repeat step 4 for the right side.
6 Repeat for the bottom edge, using the horizontal middle handle at the bottom of the picture.
When complete, the picture should appear similar to the following:
You can now resize the picture to a more appropriate size.
7 Under Picture Tools, on the Format tab, in the Size group, click Crop to turn off this tool.
The handles should change back to the combination of circles and squares.
8 Position the mouse pointer at the top right corner handle and drag downwards and to the left to reduce the size in this direction. Resize the picture so it is approximately double the height of the text.
9 On the ruler, click the Tab Selector box until the Right Tab character appears and then click near the right margin on the ruler.
10 Click at the left of the picture so you see the cursor and then press .
Your picture is now aligned at the right of the title line for this newsletter.
11 Scroll to the next picture and then click to select it.
12 Resize this picture so it is approximately the same height as the entire paragraph.
13 Scroll to the next picture and select it. Crop the bottom portion of the picture to remove the shadow effect in the picture.
14 Resize this picture to be approximately the same height as the paragraph of text.
15 Select the last picture and resize it to be half its original size.
16 Save the document.
Changing the Properties for a Picture The way a picture inserts into a document depends on the properties set for this picture. You can adjust these properties to suit the effect you want in the document. Some of these properties include:
Adding or changing the line style, fill, or arrow options of the picture.
Changing the size of the picture.
Changing the layout of the picture in relation to the text, or having text wrap around the picture.
Setting precise measurements for cropping, or altering color options for the overall appearance of the picture.
Changing options for the appearance of text in a text box.
220 7300-1 v1.00 © 2009 CCI Learning Solutions Inc.

Unit 4: Using Microsoft Offi
ce Word 2007
W o r k i n g w i t h G r a p h i c s L e s s o n 2 5
Many properties can be modified using commands such as Text Wrapping or Picture Effects on the Picture Tools Format ribbon or from the drop-down menu. Alternatively, you can use one of the following methods to display the appropriate dialog box for multiple changes:
Click the picture and under Picture Tools, on the Format tab, click the Dialog box launcher for the group properties to adjust; or
right-click the picture and then click Format Picture.
Moving a Picture The drag-and-drop method is the easiest way to move a picture. However, take note of whether the picture is inline or floating before you try to move it, as this determines how and where you can move the picture:
If it is an inline object, as you drag the mouse pointer it displays as .
If it is a floating object, as you drag the mouse pointer it displays as .
Exercise1 Ensure the Going Green with Ethics - Student document is active and select the three recycling boxes
picture.
2 Under Picture Tools, on the Format tab, in the Arrange group, click Text Wrapping.
3 Click Tight.
4 With the picture still selected, if necessary, press the key to move this picture so it appears to be centered between the lines of text for this paragraph.
5 Click the recycling can picture in the next paragraph.
6 Repeat steps 2 and 3 to change the text wrapping to Tight for this picture.
7 Position the mouse pointer anywhere within the picture and then drag so the top of the picture aligns with the top of the first line of text in the paragraph.
7300-1 v1.00 © 2009
CCI Learning Solutions Inc. 221

Unit 4: Using Microsoft Offi
ce Word 2007
L e s s o n 2 5 W o r k i n g w i t h G r a p h i c s
8 Right-click the last picture in the document and then click Format Picture.
9 Click Shadow in the category of options at the left. Then click Presets and click Offset Bottom.
10 Click Color and then click Dark Blue, Text 2, Lighter 40%. Click Close.
11 Center align this picture between the margins.
12 Save and close this document.
Drawing Objects 2-1.3.7
You can enhance documents by creating your own drawings using the Shapes feature on the Insert tab, in the Illustrations group. Click Shapes to see all the options available.
When creating a number of shapes for a drawing, consider creating them in a drawing canvas. A drawing canvas keeps all drawing objects together in a frame. This allows you to manipulate individual objects within the drawing canvas, and also manipulate the group of objects within the drawing canvas together as one large object. To create a drawing canvas, on the Insert tab, in the Illustrations group, click Shapes and then click New Drawing Canvas.
The handles around the drawing canvas will be similar to those for an individual picture, but will be darker in color. When you select an object, the Drawing Tools ribbon displays options for formatting that object. These options also provide a preview of the effect your changes will have on that object.
222 7300-1 v1.00 © 2009 CCI Learning Solutions Inc.
Note: If you want a drawing canvas every time you create a shape, click the Office Button, Word Options, and in the Advanced category, under Editing options, click Automatically create drawing canvas when inserting AutoShapes.

Unit 4: Using Microsoft Offi
ce Word 2007
W o r k i n g w i t h G r a p h i c s L e s s o n 2 5
Note the following when working with objects:
After you click the shape you want drawn, the mouse pointer will changes to a (cross hair).
You can create most objects by clicking the top left corner of the object and dragging the mouse until the object is the size you want.
Once you draw an object, the tool you’ve selected becomes de-selected. To draw another object of the same type, click the appropriate tool again.
To select an object, click the object. To select multiple objects, use one of the following methods:
Click the first object, press or , and then click each object; or
On the Home tab, in the Editing group, click Select, and then Select Objects. You can then draw a selection box around all the objects you want to select.
Once you select an object, handles appear around it. The number of handles that appear will depend on the drawing object; for example, a straight line or arrow will only have two handles whereas a square or oval will show eight handles. These handles will remain visible until you click somewhere else in the document. You can then apply or remove as many options for the object as required. Following are some things you can do with an object:
To size an object, click the object to display the handles. Point to one of the handles until the mouse pointer changes to a double-headed arrow, and then click and drag the handle until the object is the desired size.
To move an object, click the object to select it. Point anywhere on the object (but not on one of the handles) until the mouse pointer changes to a four-headed arrow, and then click and drag it to its new location. Word displays a dashed-line image of the object for reference as you are moving it.
To delete an object, click the object to select it and press .
When drawing objects that require precise placement, on the View tab, in the Show/Hide group, click Gridlines. Gridlines then appear on screen to help you align objects. (These lines are for reference only; they will not appear in print.)
To draw a straight line or a perfectly proportioned object such as a square, circle, or triangle, click and drag to begin drawing the object, and press as you draw the object to the required size.
To draw an object outward from its center point, press as you draw the object to its required height or width.
To draw two objects that share a side or point, start by drawing the first object. Then draw the second object and move it so the side or point to be shared is overtop the appropriate side or point of the first object. A dashed lined image will appear for the second object as you move it into place, but will revert to a solid line once you release the mouse button.
To insert text into an object or edit text that’s already there, use one of the following methods:
Select the object in order to display the Drawing Tools ribbon, and then on the Format tab, in the Insert Shapes group, click (Edit Text). An insertion point will appear in the shape, allowing you to type or edit the contents; or
7300-1 v1.00 © 2009
CCI Learning Solutions Inc. 223
Note: While the Shapes feature provides numerous tools to create simple drawings, for more features and flexibility when manipulating pictures or drawings, you need a dedicated program.

Unit 4: Using Microsoft Offi
ce Word 2007
L e s s o n 2 5 W o r k i n g w i t h G r a p h i c s
On the Insert tab, in the Text group, select the Text Box feature. The Text Box Tools ribbon will appear, offering you many of the same features as the Drawing Tools ribbon.
You can also manipulate shapes with features such as cutting, copying, pasting, and formatting. Note, however, that when you cut and paste a shape rather than drawing a new one, it will appear close to the location from which you cut the original shape.
Exercise1 Create a new document and save the document as Drawing - Student.
2 On the Insert tab, in the Illustrations group, click Shapes and then click New Drawing Canvas.
You will begin drawing a shape to simulate a light bulb that will eventually contain an image you will place to appear inside the bulb.
3 Click within the canvas to ensure it is selected, if not already so.
4 Under Drawing Tools, on the Format tab, in the Insert Shapes group, click the (Oval) tool in the gallery. If this tool is not visible, click the More button and select it from the Basic Shapes group.
5 Within the drawing canvas, click near the center of the canvas and drag until the oval has an egg shape.
6 Under Drawing Tools, on the Format tab, in the Insert Shapes group, click the More button, then click the (Flowchart: Stored Data) tool in the gallery.
7 In another area of the drawing canvas, draw a shape similar to the following:
8 Save the document.
Editing Shapes 2-1.3.7
Editing shapes can refer to sizing, moving, or enhancing an object and its properties. You must select the object before you can make any changes. As noted, many of the options in the Drawing Tools and Text Box Tools ribbons are the same, with variations for the object type.
224 7300-1 v1.00 © 2009 CCI Learning Solutions Inc.

Unit 4: Using Microsoft Offi
ce Word 2007
W o r k i n g w i t h G r a p h i c s L e s s o n 2 5
Arranging Objects As you add objects to your document, you may find it time-consuming to repeatedly select multiple objects that will share the same attributes or that may be moved to another place in the document. You may also need to control the stacking order of overlaid objects. Use the commands found under Drawing Tools, on the Format tab, in the Arrange group:
GroupGroups selected objects into a single object, reverts items in the selected group to separate objects, or regroups only those objects ungrouped originally.
Bring to FrontBrings the selected shape forward one layer at a time, or to the top layer.
Send to BackSends the selected shape back one layer at a time, or to the last layer.
Align or DistributeAligns the edges of multiple objects along a single line (such as Left, Center, Right or Top, Middle, Bottom), or distributes objects evenly across the page horizontally or vertically. Also allows you to view gridlines, set features of the grid (such as line spacing or having objects on the grid “snap to” the nearest gridlines).
Rotate or FlipRotates or flips the object(s) in different directions.
If working with text boxes, you can also find these commands under Text Box Tools, on the Format tab, in the Arrange group.
Exercise1 Ensure the Drawing - Student document is active and the drawing canvas is visible.
2 Select the stored data shape, if not already selected.
3 Drag the green handle down and to the left (counter-clockwise) to rotate this shape to become vertical.
4 Then drag it to sit below the oval, similar to the bottom portion of a light bulb.
5 Using the handles, drag the data shape so it “fits” the bottom of the light bulb. Resize the shape as necessary.
6 With the shape still selected, under Drawing Tools, on the Format tab, in the Shape Styles group, click the arrow for Shape Fill.
7 Click White, Background 1, Darker 35% in the first column of colors.
8 With the shape still selected, under Drawing Tools, on the Format tab, in the Shape Styles group, click the arrow for Shape Outline.
9 Choose the same color as in step 7 for the outline of this shape.
Now try a slightly different effect for this shape.
10 With the shape still selected, under Drawing Tools, on the Format tab, in the Shape Styles group, click More for the Shape Styles gallery and then click Diagonal Gradient - Dark.
11 Click the oval and then under Drawing Tools, on the Format tab, in the Shape Styles group, click the arrow for Shape Fill. Then click Picture.
12 In the student data files location, select the question picture.
7300-1 v1.00 © 2009
CCI Learning Solutions Inc. 225

Unit 4: Using Microsoft Offi
ce Word 2007
L e s s o n 2 5 W o r k i n g w i t h G r a p h i c s
13 Save the document again.
14 With the shape still selected, under Drawing Tools, on the Format tab, in the Shape Styles group, click the arrow for Shape Outline. Click Olive Green, Accent 3, Darker 25% for the color.
15 With the shape still selected, under Drawing Tools, on the Format tab, in the Shape Styles group, click the arrow for Shape Outline. Click Dashes and then click Dash.
16 Click the stored data shape (light bulb base) and then under Drawing Tools, on the Format tab, in the Shape Styles group, click More for the Shape Styles gallery and then click Diagonal Gradient – Accent 3.
Your shape should then appear similar to the following:
17 Starting in the white space at the top left of the oval, click and drag to the lower right of the shapes to select both shapes in this diagram.
18 Under Drawing Tools, on the Format tab, in the Arrange group, click Group and then Group.
Notice how you have only one set of handles around the diagram.
19 Under Drawing Tools, on the Format tab, in the Insert Shapes group, click the (Text Box) tool in the gallery.
20 Starting close to the left side of the drawing canvas, draw a text box about the same height as the oval in your drawing. Then type: Speak to one of our Project Consultants for all your questions on green corporate citizenship.
21 Click the text box to select it and then under Text Box Tools, on the Format tab, in the Text Box Styles group, click More to view the gallery. Point at different styles to preview the effect and then click Solid Fill, Compound Outline, Accent 3.
22 Select the text box and the light bulb shape. Group these items.
23 Save and close the document.
226 7300-1 v1.00 © 2009 CCI Learning Solutions Inc.

Unit 4: Using Microsoft Offi
ce Word 2007
W o r k i n g w i t h G r a p h i c s L e s s o n 2 5
SummaryIn this lesson, you learned how to insert pictures and draw simple objects and then manipulate them in your document. You should now be able to:
insert clip art images insert pictures saved as a file size, crop or trim pictures change the properties for a picture
move pictures identify available drawing objects draw a simple object change and arrange drawing objects
Review Questions1. What types of pictures can be inserted into a Word document?
a. Clip art imagesb. Photographsc. Scanned imagesd. Any of the abovee. a or b
2. You can only use the Clip Organizer to find a clip art image.a. True b. False
3. How can you change the format properties for a picture?a. Under Picture Tools, on the Format tab, in the Picture Styles group, click the Dialog box launcher.b. Right-click the picture and then click Format Picture.c. Click on the appropriate effect for the picture on the Illustrations ribbon.d. All of the abovee. a or b
4. You do not have to select a drawing object before making changes to it.a. True b. False
5. Of the following choices, which option best explains why you would use the Group command?a. To treat a number of objects as one objectb. To copy or paste these objects to another documentc. To mark the objects to be changedd. Any of the above
7300-1 v1.00 © 2009
CCI Learning Solutions Inc. 227

Unit 4: Using Microsoft Offi
ce Word 2007
L e s s o n 2 6 W o r k i n g w i t h T a b l e s
Lesson 26 Working withTables
ObjectivesIn this lesson, you will learn how to create simple tables, insert data, and manipulate the table or the information in the table. On completion, you will be able to:
use tables effectively use the Draw Table feature create a table using Insert Table enter information into a table select items in a table format a table
adjust borders (lines) or shading in a table add or remove rows or columns merge or split rows or columns split a table convert text to a table or vice versa sort information in a table
Skills
2-2.1.13 Work with tables2-2.1.14 Modify table structure2-2.1.15 Format tables
Understanding How Tables Work2-2.1.13
Use the Table feature to arrange columns of text and numbers, group paragraphs side by side, or create forms. You can create tables using the Draw Table or Insert Table command.
Each horizontal line in a table is a row, each vertical block is a column, and the intersection of each row and column is a cell. When working with a table, you are working with cells within the table.
You can enter text, numbers or graphics into each cell. Text longer than the width of the cell will automatically wrap to the next line in the same cell. End of cell markers display by default to make it easier to see where you are working in the table. To show or hide markers, on the Home tab, in the Paragraph group, click (Show/Hide¶).
You can create a table before or after you type the text. You can also convert a table into text or vice versa.
You create a table based on the default settings. You can apply many design features to a table. Design the overall appearance and layout of the table first; then make detailed adjustments later. By default, Word adds a single line border to the table, but you can adjust this as required.
You can apply alignment and formatting to the cell contents, as well as to the cell itself, merge adjacent cells horizontally or vertically, and rotate text in a cell by 90 degrees.
Use the (Table Selector) to select the entire table; it appears at the top left corner of a table when your cursor is in or near the table.
Once you create a table, the Table Tools ribbon appears for further action in the design or layout of the table:
228 7300-1 v1.00 © 2009 CCI Learning Solutions Inc.

Unit 4: Using Microsoft Offi
ce Word 2007
W o r k i n g w i t h T a b l e s L e s s o n 2 6
Drawing a Table The Draw Table feature enables you to draw a table of any size and shape, create rows, columns, and cells of any height and width, and modify the cells in size or number quickly, as required.
Use one of the following methods to activate the Draw Table feature:
On the Insert tab, in the Tables group, click Table and then click Draw Table; or
under Table Tools, on the Design tab, in the Draw Borders group, click Draw Table.
The Draw Table feature will become active and the mouse pointer will change to the (pencil) symbol for drawing lines and borders. Once you see this symbol, consider the following:
Start by drawing the outside border for the box. Click approximately where you want the top left corner of the table to be, and then drag to where you want the lower right corner of the table. Word will display a symbol when you drag as a guide to show that you are creating the outside border of table. Watch for the guides on the horizontal and vertical rulers as these can help you determine the measurements for the top left and bottom right corners of the table.
To draw a horizontal border, click at the location where you want the left side of the border to begin and then drag across to where the end of the border will be. If there are no vertical borders within the table, Word will display a full border from the left to the right of the outside borders, as shown here.
To draw a vertical border, click at the location where you want the top of the border to begin and then drag to where the end of the border will be. If there are no horizontal borders within the table, Word will display a full border from the top to the bottom of the outside borders. In the first diagram below, notice that Word draws a border to create a cell once it encounters a horizontal border. In the second diagram, Word has drawn a longer border to create a full column once the mouse pointer has gone past the horizontal border.
7300-1 v1.00 © 2009
CCI Learning Solutions Inc. 229

Unit 4: Using Microsoft Offi
ce Word 2007
L e s s o n 2 6 W o r k i n g w i t h T a b l e s
To draw a diagonal border, click at the one of the corners of the cell and then drag diagonally to the opposite corner of the cell.
You can use the Eraser tool to erase borders in the table. Use it the same way as you used the pencil tool to draw the border; that is, click at the beginning of the border and drag to where you want to finish erasing the border. Word will display the (eraser) symbol to show that you are in Erase mode instead of Draw mode. You can erase one border at a time, such as in the first example below, which shows only the vertical border in this row being erased, leaving a larger cell. Alternatively, you can erase several borders by clicking and dragging to select those borders.
To turn off the Draw Table or Eraser tools, click the button.
230 7300-1 v1.00 © 2009 CCI Learning Solutions Inc.

Unit 4: Using Microsoft Offi
ce Word 2007
W o r k i n g w i t h T a b l e s L e s s o n 2 6
Inserting a Table Use the Insert Table command when you want to create a simple table with even column widths and row heights. You can adjust these at any time during or after text entry.
To insert a table, use one of the following methods:
On the Insert tab, in the Tables group, click Table.
In the drop-down menu, position your mouse pointer over the box in the upper left corner and begin dragging across, down, or diagonally over the grid to specify the number of columns and rows you want. As you drag, Word will display the number of columns and rows for reference in the title area of this list. Use this feature to create a table of up to 10 columns by 8 rows.
If you need a table larger than 8 × 10, use the Insert Table feature. You can also use this feature to display a dialog box with more options:
Table sizeEnter the number of columns and rows by typing the number into the box or using the incremental buttons.
AutoFit behaviorSelects options for specifying an exact cell size or adjusting cell size to accommodate contents.
Remember dimensions for new tablesRemembers the options you’ve selected as the default settings for all new tables you create. You can adjust column widths or row heights as needed after the table is created.
Working with Text Once you create a table layout, Word places the insertion point in the first cell of the table for you to begin typing. You can use the following methods to move within a table:
Press to add more lines of text in the same cell. This will increase the row height.
Use the arrow keys to move through the text in the cell.
Use the key to jump forward to the next cell.
Use the + combination to jump backward to the previous cell.
Press + to insert a tab character.
Selecting Items in the TableTo make changes to anything in the table, you must first select it. Following are some shortcuts for selecting several items at once:
To select an entire column, click at the top of the column when you see .
To select an entire row, click in the selection bar for the row.
To select multiple columns or rows, click and drag across the columns or rows.
To select one cell, move the cursor to the left border of that cell and then click when you see .
To select multiple adjacent cells, click and drag across those cells.
7300-1 v1.00 © 2009
CCI Learning Solutions Inc. 231

Unit 4: Using Microsoft Offi
ce Word 2007
L e s s o n 2 6 W o r k i n g w i t h T a b l e s
Exercise1 Create a new document and save it as Tolano Services Order - Student.
2 On the Insert tab, in the Tables group, click Table, and then click in the grid to select 5 columns by 6 rows.
3 In the first cell at the top left of the table, type: Tolano Environmental Consulting - Order for Services.
The text will wrap around in this cell. You will change this later in this Lesson.
4 Click in the first cell of the second row and type: Customer.
5 Continue entering text in the cells as noted in the following:
During the creation this table with text, you realize you need more cells in the Payment Options row. You can use the Draw Table feature to help with this requirement.
6 Under Table Tools, on the Design tab, in the Draw Borders group, click Draw Table.
Notice the mouse pointer changes to a pencil symbol.
7 Starting at the top border of the second cell in the Payment Options row, click and drag down to draw a border, thereby creating two cells.
8 Repeat step 7 for the remaining cells in this row.
9 Click Draw Table again to turn it off.
10 Type the text as shown in the following:
11 Save the document.
Formatting the Table2-2.1.14 2-2.1.15
You can format the text in a table in the same manner as you format regular text. You can also apply formatting options to the entire table or parts of it.
You may find it easier to format or adjust items once there is text in the table, especially if there are large pieces of text. Having the text in the cells will help you determine the best width for columns, styles for headings and titles, and so on.
232 7300-1 v1.00 © 2009 CCI Learning Solutions Inc.

Unit 4: Using Microsoft Offi
ce Word 2007
W o r k i n g w i t h T a b l e s L e s s o n 2 6
Using Table StylesTable Styles are similar to Quick Styles but are pre-designed formats you can apply to a table. This is a quick and easy way to enhance a table using a standard and consistent style. To view the Table Styles gallery, under Table Tools, on the Design tab, in the Table Styles group, click More.
Like Quick Styles, this feature allows you to preview the formatting so you can see how it will look on the table before selecting it. You can also use Table Styles to modify an existing table, or you can create your own table style and display it on the Table Styles list for easy access.
Modifying the Borders and Shading When Word creates a table for the first time, the table appears with single line borders around every cell. You can modify these lines to display different colors, styles, and widths, or to not show at all. You can also modify the lines or borders for specific cells.
Under Table Tools, on the Design tab, in the Table Styles group, click the arrow for Borders.
You can also change the look of your table by adding shading to the cells, similar to some of the designs in the Table Styles gallery. Under Table Tools, on the Design tab, in the Table Styles group, click the arrow for Shading.
Changing the borders or shading for a cell in a table is similar to selecting text or a paragraph and then applying the borders or shading to that text.
In addition to changing the colors of your borders, you can modify the properties using features in the Draw Borders group. For instance, you can select a color for the border and then draw the border in the table, or change the border color and then draw over an existing line to change the color for that border. Under Table Tools, on the Design tab, in the Draw Borders group, click the appropriate option to draw borders into the table.
7300-1 v1.00 © 2009
CCI Learning Solutions Inc. 233
Note: You can also use the Borders or Shading feature on the Home tab, in the Paragraph group.

Unit 4: Using Microsoft Offi
ce Word 2007
L e s s o n 2 6 W o r k i n g w i t h T a b l e s
Exercise1 Ensure the Tolano Services Order - Student document is active and the cursor is within the table.
2 Under Table Tools, on the Design tab, in the Table Styles group, click More to display the gallery.
3 Point at different table styles to preview the effect.
4 Then click Light List – Accent 3.
5 Select the Order Date text and bold it.
Using a table style to format the table was quick and easy to do.
There are some areas of the form where you may want to adjust the borders.
6 Point the mouse pointer at the beginning of the Order Date text and click to select the entire cell.
7 Under Table Tools, on the Design tab, in the Table Styles group, click the arrow for Borders. Then click Borders and Shading.
Word displays the Borders and Shading dialog box for you using the same colors and options as other borders in the table. You can then use these as a guide for where you may want to change or adjust the borders. Notice also how Word displays the cell as having a border only at the top.
8 In the Preview area, click the (Bottom Border) button and then (Left Border). Then click OK.
9 Save the document.
Changing the AlignmentTable alignment refers to the position of the table relative to the left and right margins of the document. You can also change the alignment of text vertically within the table.
To change the alignment for the table, under Table Tools, on the Layout tab, in the Table group, click Properties and click the desired alignment from options in the Table tab.
To change the vertical alignment of text in the table, select the cells and then use one of the following methods:
Under Table Tools, on the Layout tab, in the Alignment group, click the appropriate alignment option; or
On the Home tab, in the Paragraph group, click the appropriate alignment option.
234 7300-1 v1.00 © 2009 CCI Learning Solutions Inc.

Unit 4: Using Microsoft Offi
ce Word 2007
W o r k i n g w i t h T a b l e s L e s s o n 2 6
Inserting & Deleting Rows/Columns/Cells You can insert additional rows and columns into a table after you have created it. New rows may be inserted above or below the current row location; new columns may be inserted to the left or right of the current column. You can insert rows, columns, or cells individually or several at once by selecting the appropriate number of units in the table first before activating the Insert command.
To insert a single row or column, position the mouse pointer where you want the new row or column inserted. Under Table Tools, on the Layout tab, in the Rows & Columns group, click the appropriate option.
Cells can also be inserted into specific locations of the table. Use caution with this option as you can change the structure of your table quickly if you select the wrong option. In some cases, it may be easier to split or merge cells and modify the text instead of inserting or deleting individual cells.
To insert cells, under Table Tools, on the Layout tab, in the Rows & Columns group, click the Dialog box launcher.
To delete cells, rows, columns, or an entire table, under Table Tools, on the Layout tab, in the Rows & Columns group, click the arrow for Delete and then the appropriate option.
To delete cells specifically, under Table Tools, on the Layout tab, in the Rows & Columns group, click the arrow for Delete, click Delete Cells, and then click the appropriate option.
Adjusting the Width or Height You can adjust the width of each column, the height of each row, and the overall alignment of your table. You can also evenly space selected rows or columns in a table.
Use one of the following methods to adjust the column width or row height:
Under Table Tools, on the Layout tab, in the Table group, click Properties, then click the appropriate tab for the item to adjust; or
under Table Tools, on the Layout tab, in the Cell Size group, click the incremental buttons or type a measurement to change the Height or Width accordingly; or
place the mouse pointer on a vertical line on either side of the column to adjust and, when you see , drag left or right to the desired column width; or
place the mouse pointer on a horizontal line for the row to adjust and, when you see , drag up or down to the desired row height; or
click the in the ruler for the column to be adjusted and drag it to the desired width.
To distribute the width for each column or height of each row evenly, use one of the following methods:
Under Table Tools, on the Layout tab, in the Cell Size group, click or ; or
under Table Tools, on the Layout tab, in the Cell Size group, click AutoFit.
7300-1 v1.00 © 2009
CCI Learning Solutions Inc. 235

Unit 4: Using Microsoft Offi
ce Word 2007
L e s s o n 2 6 W o r k i n g w i t h T a b l e s
Merging and Splitting CellsTable cells can be merged to create a single cell, or a cell can be split into multiple columns or rows. Merging cells is particularly useful when creating a title row for your table. To merge cells, select the cells and then under Table Tools, on the Layout tab, in the Merge group, click Merge Cells.
To split a cell into multiple cells, select the cell and then under Table Tools, on the Layout tab, in the Merge group, click Split Cells.
Exercise1 Ensure the Tolano Services Order - Student document is active and then select the entire first row
containing the title.
2 Under Table Tools, on the Layout tab, in the Merge group, click Merge Cells.
3 On the Home tab, in the Paragraph group, click Center.The title is now centered horizontally in the first row.
4 Under Table Tools, on the Layout tab, in the Table group, click View Gridlines to turn this feature on.
5 Click in the cell immediately to the left of the cell containing the text, Visa.
6 On the Insert tab, in the Symbols group, click Symbol, then click More Symbols. If the Symbol button is grayed out, click inside the table cell so that the mouse pointer appears as an insertion point in the cell, and then click Symbol.
7 In the Font field, click the arrow to select Wingdings from the list
8 Scroll in the list until you see the hollow circle (displays as Wingdings: 161 in the bottom portion of the Symbol dialog box). Then click Insert, and then Close.
9 Select the symbol and then on the Home tab, in the Font group, click the arrow for Font Size and then click 9.
10 Copy this symbol into the cells for the other credit cards.
11 Click in one of the cells containing the symbol.
12 Under Table Tools, on the Layout tab, in the Alignment group, click (Align Center Right).13 Click in one of the other cells containing the symbol and on the
Quick Access toolbar, click (Repeat Middle Right Align).14 Repeat step 13 for the remaining two cells with this symbol.
You decide you would like a blank row between the payment information and the services ordered.
15 Select the Services on order row and then under Table Tools, on the Layout tab, in the Rows & Columns group, click Insert Above.
16 While the new row is still selected, under Table Tools, on the Layout tab, in the Merge group, click Merge Cells.
17 Select the Services on order row once more and repeat step 16.
18 Starting in the second cell in the row below the Services on order row, select every cell to the end of the row.
19 Under Table Tools, on the Layout tab, in the Merge group, click Merge Cells.
20 With the newly-merged cell selected, position the cursor overtop the left gridline for this cell and drag to the left until the first cell is approximately the same width as the cells containing the hollow circle symbol.
236 7300-1 v1.00 © 2009 CCI Learning Solutions Inc.
Hint: You could also press to perform the same action.

Unit 4: Using Microsoft Offi
ce Word 2007
W o r k i n g w i t h T a b l e s L e s s o n 2 6
21 Press to create a new row.
22 Select both blank rows and under Table Tools, on the Layout tab, in the Rows & Columns group, click Insert Below.
23 Repeat step 22 until you have 14 blank rows.
24 Select one of the cells with the symbol in it. Then on the Home tab, in the Clipboard group, click .
25 Select all the cells in the first column of the blank rows, and then on the Home tab, in the Clipboard group, click Paste.
26 With the first column of the rows still selected, under Table Tools, on the Layout tab, in the Alignment group, click (Align Center Right).
27 Save the document.
28 Open the Tolano Environmental Consulting document, and then select all the points below the Services heading. Copy these bullets.
29 Switch to the form and select all 14 cells in the second column below the Services on order row. Paste the bullet points from the Tolano Environmental Consulting document.
30 With these cells still selected, on the Home tab, in the Paragraph group, click (Bullets) to turn off this feature. Then on the ruler, drag the Left Indent markers back to the left edge of this column.
31 Save the document.
32 Close the Tolano Environmental Consulting document.
Splitting a TableYou may occasionally need to split a table into separate parts such as in an application form where one section is for the applicant and the second section is for Human Resources to use during an interview.
Select any cell in a table row which will become the first row in the second table, and then under Table Tools, on the Layout tab, in the Merge group, click Split Table. Tables can only be split horizontally (row-wise, and columns will remain intact).
7300-1 v1.00 © 2009
CCI Learning Solutions Inc. 237

Unit 4: Using Microsoft Offi
ce Word 2007
L e s s o n 2 6 W o r k i n g w i t h T a b l e s
Exercise1 Ensure the Tolano Services Order - Student document is active and then place the cursor in the Services
on order row.
2 Under Table Tools, on the Layout tab, in the Merge group, click Split Table.
You now have two tables for this form and can make changes or adjustments to either table in this document.
3 Save and close the document.
Converting Text or Tables2-2.1.13
You can convert text into a table by separating the parts you want inserted into different cells with tab characters, commas, or paragraph marks. However, be careful about the number of tab characters (or whichever character you use as the separator) between columns as Word will designate each tab character as a new column in the table.
To convert text to a table format, select the text and then use one of the following methods:
On the Insert tab, in the Tables group, click Table, and click Convert Text to Table; or
on the Insert tab, in the Tables group, click Insert Table.
Sometimes you may want to convert the table back into text to be used in other programs, such as spreadsheet or database programs. These programs use separator characters to identify where to sort data into individual columns, and do not recognize the table format in Word. To convert a table into text format, click anywhere in the table. Then under Table Tools, on the Layout tab, in the Data group, click Convert to Text.
Paragraph marksInserts a paragraph mark separating each column entry, which results in each column entry becoming a single line.
TabsInserts a tab character separating each column entry, as if you had set tab stops for each piece of data. Each row of data becomes a single line of text.
CommasInserts a comma between each column entry, creating a file that you can export into a spreadsheet or database program that recognizes commas as separator characters.
OtherInserts another character to separate each column entry. Use this option to export the file into a program that requires a different character such as ″.
238 7300-1 v1.00 © 2009 CCI Learning Solutions Inc.

Unit 4: Using Microsoft Offi
ce Word 2007
W o r k i n g w i t h T a b l e s L e s s o n 2 6
Convert nested tablesA nested table is a table you can create within a larger one, such as when using a table to list checkboxes for a variety of credit cards within a Purchase Order table form. Use this option to convert the nested table to individual lines of text in the same location of the Purchase Order table form.
Exercise1 Open the Tolano Employee List document.
2 Under Table Tools, on the Layout tab, in the Data group, click Convert to Text.
3 Ensure Tabs is selected as the option for Separate text with. Then click OK.
The entire table is now converted to information separated by tab characters.
4 On the Home tab, in the Paragraph group, click (Show/Hide ¶) to view the tab characters.
To convert this type of report to a table format, you must select the lines of text you want to be part of the table.
5 Select all the text except for the blank line at the end of the report.
6 On the Insert tab, in the Tables group, click Table and then click Convert Text to Table.
7 Change the Separate text at option to be Tabs, and verify that the Number of columns is set to 10. Then click OK.
The text is converted to a table format but you will need to change the format of some rows or cells.
8 On the Home tab, in the Paragraph group, click (Show/Hide ¶) to turn this feature off.
Sorting Information in a Table2-2.1.15
You can sort information in a table in ascending (for example, A-Z or 0-9) or descending (for example, Z-A or 9-0) order. The type of data determines the sort type in the table and how many columns there are of information. For example, you may want to sort a list of names alphabetically by the last name but you notice the list contains people with the same last name. You could set the sort to be ascending by the last name first and then by the first name.
You can activate the Sort command quickly by selecting the cells (or table) and then using one of the following methods:
Under Table Tools, on the Layout tab, in the Data group, click Sort; or
On the Home tab, in the Paragraph group, click (Sort).
7300-1 v1.00 © 2009
CCI Learning Solutions Inc. 239

Unit 4: Using Microsoft Offi
ce Word 2007
L e s s o n 2 6 W o r k i n g w i t h T a b l e s
Sort bySelects the column for the first priority to be sorted as well as the type of content to be sorted.
Then bySelects the second and third priorities to be sorted.
My list hasIndicates whether you have a row of column headings; this prevents the column title row from being included in the sort.
Exercise1 With the Tolano Employee List document active on the screen, select the New York row.
2 Under Table Tools, on the Layout tab, in the Rows & Columns group, click Delete and then click Delete Rows.
3 Repeat step 2 for the Cape Town, Toronto, London, Tokyo, and Sydney rows to delete each row.
Suppose you want to sort the list of employees by last name and then first name.
4 Under Table Tools, on the Layout tab, in the Data group, click Sort.
5 Click the arrow for Sort by and click Last Name. Leave the other options for this sort option as is.
6 Click the arrow for the first Then by and click First Name. Leave the other options as is.
7 Click OK.
The document is now sorted by last name and then by first name.
Now try sorting the data by Position.
8 Under Table Tools, on the Layout tab, in the Data group, click Sort.
9 Click the arrow for Sort by and click Position.
10 Click the arrow for Then by, click (none) and then click OK.
The document is now sorted in alphabetical order by the position for each employee. Notice also that within each Position group, the rows are also sorted by first and last name in alphabetical order even though you did not specify this in the two Then by fields. This is because you had already sorted them in steps 4 to 7 above.
11 Close the document without saving.
SummaryIn this lesson you learned how to create simple tables, add data, and manipulate the table or information in the table. You should now be able to:
use tables effectively use the Draw Table feature create a table using Insert Table enter information into a table select items in a table format the table
adjust borders (lines) or shading in a table add or remove rows or columns merge or split rows or columns split a table convert text into a table or vice versa sort information in a table
240 7300-1 v1.00 © 2009 CCI Learning Solutions Inc.

Unit 4: Using Microsoft Offi
ce Word 2007
W o r k i n g w i t h T a b l e s L e s s o n 2 6
Review Questions1. How can you create a table?
a. On the Insert tab, in the Tables group, click Table, Insert Table.b. On the Insert tab, in the Illustrations group, click Table.c. On the Quick Access toolbar, click Draw Table.d. On the Insert tab, in the Tables group, click Table, Draw Table.e. Any of the abovef. a or d
2. You can erase drawn lines in the same manner as you can create lines.a. True b. False
3. Which symbol allows you to select an entire column?a.b.c. d.
4. Table formatting includes which of the following?a. Adjusting the column widthb. Adding borders or shading c. Formatting attributes such as boldd. Any of the abovee. a or b
5. If you convert a tabbed report into a table, you cannot change it back to a tabbed report again.a. True b. False
7300-1 v1.00 © 2009
CCI Learning Solutions Inc. 241

Unit 4: Using Microsoft Offi
ce Word 2007
L e s s o n 2 7 W o r k i n g w i t h O t h e r s
Lesson 27 Working withOthers
ObjectivesIn this lesson, you will learn how to share information with others for reviewing purposes. On completion, you will be able to:
share information with others insert and delete comments track changes made in documents
accept or decline changes made in a document protect documents
Skills
2-2.2.3 Use tools that support collaborative creation and editing of documents2-2.2.4 Protect a document from unauthorized viewing or modification
Sharing Information with Others2-2.2.3
Working in a workgroup can make it necessary for you to incorporate input from many sources. As you or others make changes to or comments on a document, you can display them on screen. Navigate through these items with the buttons on the Review tab.
When making changes directly in a document, use revision marks to show where text has been added, deleted, moved, or formatted. These changes are marked in different colors based on the user making the change. When you hover over a revision mark, a screen tip displays the name of that user, the date and time of their change, and the specific change made. You can also print your document with markup and comments showing for archiving purposes.
Working with Comments Comments are similar to sticky notes and can be set to display in balloon objects, within the document, or in the Reviewing Pane. Comments only display on screen; they will not be printed as part of your document, unless you choose that option.
242 7300-1 v1.00 © 2009 CCI Learning Solutions Inc.
Unit 4: Using Microsoft Offi
ce Word 2007
W o r k i n g w i t h O t h e r s L e s s o n 2 7
When reviewing comments, you can choose to hide or display them on the screen. You can also record your own audio comment and insert it into the document.
Take note of the following when using comments:
To insert a comment, on the Review tab, in the Comments group, click New Comment. To navigate backward and forward through comments in a document, on the Review tab, in the Comments
group, click (Previous Comment) or (Next Comment).
To delete a comment, use one of the following methods:
– On the Review tab, in the Comments group, click (Delete Comment); or
– on the Review tab, in the Changes group, click (Reject and Move to Next); or
– right-click the comment and click Delete Comment.
To see all the comments or changes in a separate window, on the Review tab, in the Tracking group, click , and then:
– Click Reviewing Pane Vertical to open a window at the left side of the screen; or click Reviewing Pane Horizontal to open a window at the bottom of the screen.
You can then navigate through all the comments and other markups in the document.
You can print the markup items in the document as part of the document or as a separate list. Click the Office Button, click Print, and in the Print what field, choose from the options in the drop-down menu.
Exercise1 Open the Top 25 Companies Going Green and save as Top 25 Companies Going Green with comments -
Student.
2 On the Review tab, in the Comments group, click New Comment.3 Type: Be sure to indent all the text so it is easy to read. as the text for this comment.
4 Click at the end of the title and then on the Review tab, in the Comments group, click New Comment.Notice how as you insert a new comment, Word automatically numbers the comments.
5 Type: Can we find actual Web site addresses we can use and then insert them with the appropriate companies for reference?
6 Move to the end of the document and then at the end of the last line, on the Review tab, in the Comments group, click New Comment.
7 Type: Be sure to check this link before distributing this to the Project Consultants to ensure this information is still active here.
7300-1 v1.00 © 2009
CCI Learning Solutions Inc. 243

Unit 4: Using Microsoft Offi
ce Word 2007
L e s s o n 2 7 W o r k i n g w i t h O t h e r s
8 Save and close the document.
Tracking ChangesWhen you want others to review a document with control over the final changes, distribute copies to others with the Track Changes feature activated. You can also turn this feature on to track changes you make in an existing document.
You can view your changes in a variety of formats, including balloons to the right of the text, a reviewing pane to the left of or below the text, or with a line through deleted text in the body of the document, depending on what you find most readable.
You can have a document reviewed by several different individuals and distinguish their changes and comments as revision marks by having each individual’s changes appear in a different color.
You can combine comments and changes made separately by different reviewers and accept or reject whatever combination of suggestions you find most beneficial.
You can password-protect your document so that only certain people can make changes, restrict the type of changes reviewers can make, or ensure that no changes can be made to a document at all once it’s been finalized.
To turn on Track Changes, use one of the following methods:
On the Review tab, in the Tracking group, click Track Changes; or
press + + .
In a document that contains tracked changes, Word will move to the next change or comment once you accept or reject the change:
To accept a change, click the change and then on the Review tab, in the Changes group, click Accept. To accept all changes in the document, click the arrow for Accept and then Accept All Changes Shown or
Accept All Changes in Document. To reject a change, click the change and then Reject. To reject all changes in the document, click the arrow for Reject and then Reject All Changes Shown or
Reject All Changes in Document.
244 7300-1 v1.00 © 2009 CCI Learning Solutions Inc.

Unit 4: Using Microsoft Offi
ce Word 2007
W o r k i n g w i t h O t h e r s L e s s o n 2 7
To show all marked items in a document, on the Review tab, in the Tracking group, click to select which options to display:
7300-1 v1.00 © 2009
CCI Learning Solutions Inc. 245

Unit 4: Using Microsoft Offi
ce Word 2007
L e s s o n 2 7 W o r k i n g w i t h O t h e r s
Use the Reviewing Pane if you find all the balloon items too distracting on the screen. Be aware of the following when working with the Reviewing Pane:
Make changes or insertions as if the Reviewing Pane was not there. Once the change is made, it will be inserted in the Reviewing Pane automatically in the appropriate location.
Click the arrow for the (Display for Review) button to change the view for the tracked document, such as Final that will hide all tracked changes and display the document as if you had accepted all tracked changes.
To delete an item in the Reviewing Pane, click on the heading for that item and then click the Reject Change/Delete Comment button on the Reviewing toolbar.
Be sure to turn off the Track Changes option when you no longer need it.
Exercise1 Open the Going Green Newsletter and save as Going Green Newsletter - Student. Then on the Review tab,
in the Changes group, click Next.
2 Read the comment. Then select the title and apply the Heading 1 style.
3 On the Review tab, in the Changes group, click Next to go to the tracked change.
4 On the Review tab, in the Changes group, click Accept.
Notice how Word automatically moved to the next comment or tracked item when you clicked Accept.
5 On the Review tab, in the Changes group, click Next to go to the tracked change. On the Review tab, in the Changes group, click Accept to accept the two column format.
6 Read the comment. Position the cursor anywhere in the two-column format and on the Page Layout tab, in the Page Setup group, click Columns and then click More Columns. Click Line between to turn this feature on. In the Spacing field for Col #1, change the measurement to be slightly smaller than shown. Then click OK.
7 On the Review tab, in the Changes group, click Next to go to the tracked change.
8 Read the comment, and then select the three definitions as highlighted by the comment and adjust the indent to your preference.
9 On the Review tab, in the Changes group, click Next to go to the tracked change. Read the comment and then change the pictures to your preference per the final comment in this document.
Your document should then appear similar to the following, depending on where you placed the items:
10 Right-click on each of the balloons indicating a formatting change and click Accept Format Change.
246 7300-1 v1.00 © 2009 CCI Learning Solutions Inc.

Unit 4: Using Microsoft Offi
ce Word 2007
W o r k i n g w i t h O t h e r s L e s s o n 2 7
11 On the Review tab, in the Comments group, click the arrow for Delete, then click Delete All Comments in Document.
12 Save and close the document.
Protecting Documents2-2.2.4
Word provides several methods of protecting your documents against unwanted changes through the Security Options and the Protect Document tools.
There are several reasons to add security options to protect a document:
To prevent unauthorized users from opening a document. Unless they know the password, a user cannot open or read the document at all.
To control sharing options. You can permit others to open the document as read-only, which requires them to save the file with a different file name, keeping the original intact. You can select the Read-only recommended check box without setting a password.
To control privacy. You can remove personal information when saving, and provide privacy warnings.
To increase macro security to reduce virus attacks.
You can use the Protect Document tool to:
Limit formatting. Formatting restrictions can be applied to allow only specific styles to be used, thereby controlling the appearance of the document.
Limit types of editing. Editing restrictions can be set to allow only specific types of editing.
Limit who can edit. Additional restrictions can be set to allow only users who know the password to make changes.
Adding a Password to a DocumentA password can contain any combination of letters, numbers, spaces, and symbols. Passwords are case sensitive, so if you use upper case when you assign a password, it must be entered the same way each time.
If you need to share a password for a sensitive document, change the password as soon as others are finished with it and control has been passed back to you.
When you create a password, write it down and keep it in a safe place. If you lose it, you will not be able to open or access your document. Consider keeping a password-protected list of passwords, or providing this list to the network administrator for safe keeping.
You can secure documents with two types of passwords:
Encryption Key or CodeThis is more secure than just adding a password as encryption happens at the file system level rather than the application level. Encryption usually converts the document into a code that will only be decoded when an encryption key is entered
The maximum number of characters for an encryption key is 39.
Read-Only or Modify PasswordsThis type of password is applied and managed at the software application level and includes the following:
A password to open means you must enter the password before you can open the file. You can then make changes and save the document with the same name.
A password to modify means you must enter the password before you can make any changes, and then save the document with the same name.
A password for open and modify access means you must enter the password for both access levels before you can make any changes and save them to the document.
7300-1 v1.00 © 2009
CCI Learning Solutions Inc. 247

Unit 4: Using Microsoft Offi
ce Word 2007
L e s s o n 2 7 W o r k i n g w i t h O t h e r s
A password set for read-only means you must enter the password before you can open the document. You can make changes but you must save the file with a new name.
The maximum number of characters for a password is 17.
To encrypt a document, click the Office Button, point at Prepare, and then click Encrypt Document.
To add a password to a document to read or modify the document, click the Office Button, click Save As, click Tools, and then click General Options.
Removing or Changing PasswordsTo remove or change a password you must know the existing password. You then simply change or delete the password at the time of saving the document.
Exercise1 Open the Tolano Employee List document and save as Tolano Employee List with password - Student.
2 Click the Office Button and then click Save As.
3 In the Save As dialog box, click Tools and then click General Options.
4 In the Password to open field, type: Tolano and then click OK.
For the purpose of this exercise, we are using an easy password for you to remember. In real life, you should choose a password using the guidelines discussed previously.
5 Retype the password when prompted and then click OK.
6 Click Save to save the file again with the password.
7 Close the file.
8 Open the Tolano Employee List with password - Student document.
9 Type in the password when prompted.
The file now displays on the screen.
248 7300-1 v1.00 © 2009 CCI Learning Solutions Inc.
Note: Use Protect Document to set up restrictions on what or who can modify the document.
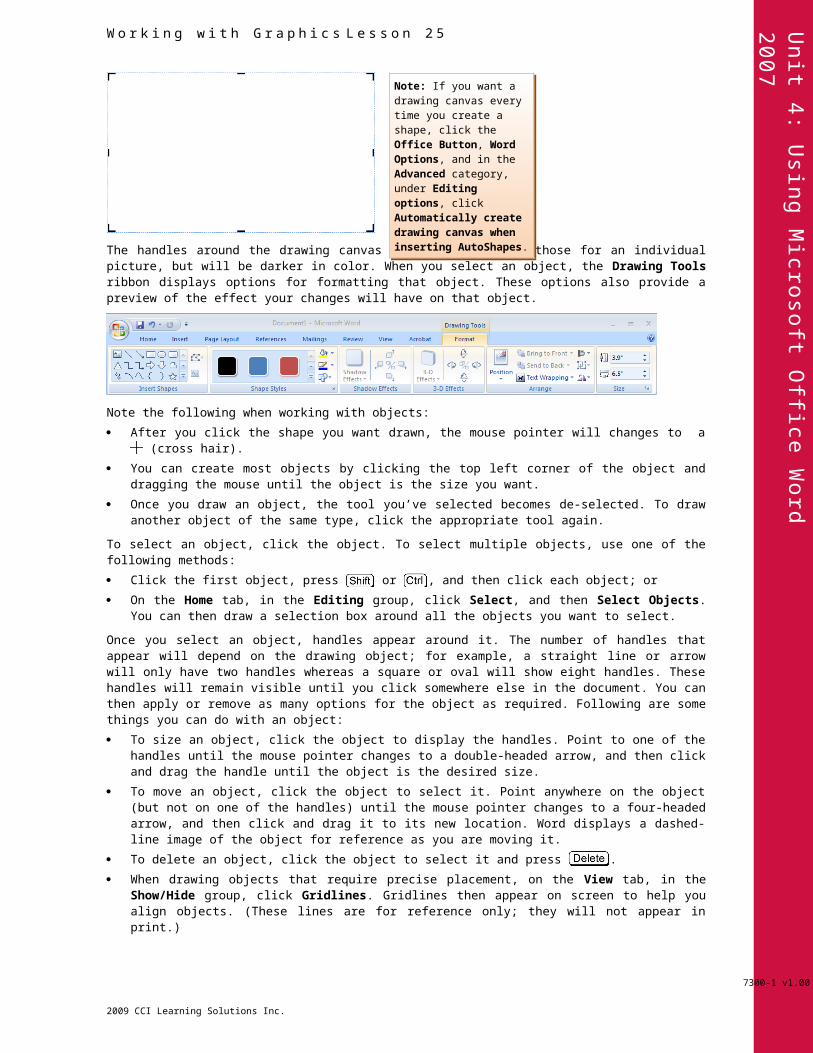
Unit 4: Using Microsoft Offi
ce Word 2007
W o r k i n g w i t h O t h e r s L e s s o n 2 7
10 Click the Office Button and then click Save As. Click Tools and then click General Options.
11 Click Read-only recommended and then click OK.
12 Save the document again and then close it.
13 Open the document and enter the password when prompted.
14 Click Yes in response to the question “Open as read-only?”
Notice the Read-Only indicator next to the filename.
15 Close the document, and open it again. If the prompt “Do you want to open as read-only again?” appears, click No. Enter the password to open when prompted.
16 Click No again to the prompt “Open as read-only?”
17 Click the Office Button and then click Save As. Click Tools and then click General Options.
18 In the Password to modify, type: list for the password and then click OK.
19 Type in the password to modify again when prompted.
20 Save the document again and then close it.
21 Open the file again and enter both passwords as prompted.
22 Save and close the document.
Restricting Access to the Document An alternative to adding a password to a document is to restrict specific formatting or editing of the document. The document can be opened but cannot be changed without entering the correct password. This is beneficial when you want people to review the document, provide comments, or fill in forms, but not modify the contents of the document.
To restrict a document, on the Review tab, in the Protect group, click Protect Document. The Restrict Formatting and Editing pane will appear and offer options for different types of restrictions.
Formatting restrictionsPrevents others from making any formatting changes, or specific types of formatting using the Settings link.
Editing restrictionsLimits others from making changes to the document for tracked changes, comments, or fill-in forms, and sets up exceptions for those who may have access to this shared document.
Start enforcementBecomes active only after selecting one of the previous restriction types.
Exercise1 Open the Tolano Environmental Consulting document and save as Tolano Environmental Consulting
restricted - Student.
2 On the Review tab, in the Protect group, click Protect Document, and then click Restrict Formatting and Editing.
Hint: If you are on a stand-alone system, when you click Protect Document, the Restrict Formatting and Editing pane appears automatically.
3 In the Restrict Formatting and Editing pane, click the checkbox under 2. Editing restrictions.
4 Ensure No changes (Read only) is selected and then click Yes, Start Enforcing Protection.
5 Type: tolano as the password in both fields. Then click OK.
7300-1 v1.00 © 2009
CCI Learning Solutions Inc. 249

Unit 4: Using Microsoft Offi
ce Word 2007
L e s s o n 2 7 W o r k i n g w i t h O t h e r s
6 Close the Restrict Formatting and Editing pane.
7 Save and close the document.
8 Open the Tolano Environmental Consulting restricted - Student document.
9 Select any word in the document and press .
Are you able to make any changes?
Try to turn off the password.
Hint: If using a stand-alone system, you can proceed to step 11.
10 On the Review tab, in the Protect group, click Protect Document, and then click Restrict Formatting and Editing.
11 In the Restrict Formatting and Editing pane, click Stop Protection.
12 Type: tolano for the password and click OK.
Notice all options in the Restrict Formatting and Editing pane are available. In real life you would choose a password that is more difficult to determine if you want to truly restrict others from making any changes to the document.
13 Save and then close the document.
SummaryIn this lesson, you learned how to share information with others for reviewing purposes. You should now be able to:
share information with others insert and delete comments track changes made in documents
accept or decline changes made in a document protect documents
Review Questions1. How can you insert a comment into a document?
a. On the Insert tab, in the Comments group, click Comment.b. On the Review tab, in the Comments group, click New Comment.c. Press + + .d. Any of the abovee. a or b
2. Revision marks identify what changes were made in a document and by whom.a. True b. False
3. How can you activate the Track Changes feature?a. On the Review tab, in the Tracking group, click Track Changes.b. Double-click the TRK box in the status bar.c. Press + + .d. Any of the abovee. a or c
4. Encrypting a document occurs at the file system level; a key or code is needed to decrypt the document. Password-protecting occurs in the application and can be added or removed within the program.a. True b. False
5. You might want to restrict editing on a document to protect the content of the document.a. True b. False
250 7300-1 v1.00 © 2009 CCI Learning Solutions Inc.