VDIS10015 Developing Visual Imagery - Lecture 2
9
VIRTU DESIGN INSTITUTE Written by Rachel Hawkins DEVELOPING VISUAL IMAGERY VISUAL COMMUNICATION SKILLS VDIS10015 - LECTURE 2
-
Upload
virtu-institute -
Category
Education
-
view
223 -
download
0
Transcript of VDIS10015 Developing Visual Imagery - Lecture 2

VIRTU DESIGN INSTITUTE
Written by Rachel Hawkins
DEvElopING vISUal ImaGEry
VIsUal CommUnICaTIon skIlls VDIs10015 - lEcTUrE 2

VIRTU DESIGN INSTITUTE: VISUal CommUNICaTIoN SkIllS, VDIS10015 - Lecture 2 2
In lecture 1 we discussed visual communication and the designers goal to communicate information and messages with intent. Image is the most effective way of communicating a message or concept quickly. Image, photos, pictures and illustrations can tell us so much more in a single look than words on a page. colour, texture, tone, line, scale and perspective all communicate simultaneously to evoke memory and emotions.
In this lecture we will discuss how to develop and refine drawing and other visual representation tools that can be used to create original imagery. We will look at different ways of creating image as well as ways to improve our skills. These skills are physical but also cognitive tools for professional practice. our focus is on the development of drawing rather than a particular level of drawing technique.
assessment task one and two requires you to create original imagery for inclusion in your design.
“a pIcTUrE IS WorTh a ThoUSaND WorDS”
When talking about drawing there seems to be two distinct groups of people, those that can draw and those that say “I can’t draw”. When we were children and given pencil and paper no one put their hand up to say we couldn’t draw, we just went for it. There was no judgment on our creative outcomes other than pure brilliance. as adults we place too much pressure on ourselves to have ‘perfect’ results. The first step in improving your skills is to remove judgment and give it a go with child like playfulness.
For those that have refined skill in drawing, I encourage you to try something new. Use different materials or try drawing with your eyes closed.

VIRTU DESIGN INSTITUTE: VISUal CommUNICaTIoN SkIllS, VDIS10015 - Lecture 2 3
rEFINING mark makING SkIllS
This skill of drawing and painting involves making a series of marks that together make up an expressive representation of something. It my be figurative or abstract. a mark itself may be a line or a dot. There are many different ways to combine these marks - cross-hatching, shading, stippling, scribbling, random marks – small patterns, swirling circles.
a good way to refine your mark making skill is to experiment with the pressure and movement applied different materials to create marks. Document the results of your experimentation with notations for your future reference.
Improve your hand control for drawing with a pen/pencil by practicing different line movements. See the example on the next page. you can vary the pressure applied to the drawing tool to change the line weight. The fluidity of your movement will determine how controlled or expressive your line is.
you may think that these drawing skills are not required anymore due to digital software however tools like Wacom tablets mean you can draw directly into software
http://heidiandtheprojects.wordpress.com/2013/04/29/mark-making-techniques/

VIRTU DESIGN INSTITUTE: VISUal CommUNICaTIoN SkIllS, VDIS10015 - Lecture 2 4
rEFINING mark makING SkIllS coNT.
http://www.artofwa.com.au/?page_id=810

VIRTU DESIGN INSTITUTE: VISUal CommUNICaTIoN SkIllS, VDIS10015 - Lecture 2 5
mastering the art of drawing is not limited to our penmanship. perhaps the most challenging aspect of drawing is our observation skills. The way our brain observes and analyses objects and then translates it into our mark making. a good drawer is able to separate what they“see” from what their “brain tells them they see”. a good drawer is also well practiced at making the connections from their observations to their marks.
Below are observations you need to look out for to improve your drawing. Try setting up a still life to draw from when practicing your observation skills.
1. see eDgesIdentify the edge of an object or space and its contours. you are looking for where one thing starts or finishes and another begins. In a landscape drawing this might be the horizon. Edges are often either the lightest or darkest points in the gradient of a shape. Defining edges is important at the beginning of a drawing. children often only draw the edges while adults tend to focus to much on the contents. Try and find the median between the two.
2. see sCale & pRopoRTIonsmap the relationships between the shapes in you see. look for differences and similarities in size and proportions. observe the difference in size in relation to the distance or proximity of the object. you may know that objects in the distance are smaller however the eye may observe optical illusions that translate into your drawing.
3. see angles & peRspeCTIVeangles in our drawings help to communicate perspective. observe the relationships of the angles of shapes and the negative space around them. observe the focal point and vanishing point of the perspective. you can establish the perspective by first identifying the primary vertical and then the primary horizontal in your drawing.
4. see gRaDIenT/lIghT/shaDowlight is what allows us to see form. When light hits an object it throws a shadow. It is important that drawings reflect both the shape and shadow. observe the highlights and mid tones of the object/shapes lighting. Use shading to express shadows. Directional light often has angles to be observed. observe the gradation of light and dark in a shadow.
5. see negaTIVe spaCesWe are conditioned to pay attention to things and objects which results in us ignoring empty space. Shape observes objects while negative
space observes everything around an object. Try drawing only the negative space. you may reveal that without the negative space the image is flat with no object.
6. see ColoRobserve specific color changes created by lighting and reflected light. observe where one color may end and another begins without their being an edge or contour. color in your drawing can provide emotional and sensory motivation. It’s depth can enrich shadows and gradients.
7. see paTTeRns anD TexTUResobserve any repetitions of shape or texture in your drawing. The pattern may be part of a shape or cause by the lighting. It may be a repeat pattern or random pattern. Texture and pattern ad richness to surfaces in your drawing. pattern insists on being seen and can produce great eye movement in a composition by virtue of repetition.
8. see holIsTICally & DRaw expRessIVelymove between observing your drawing as a whole and then as detail. ad the expression of emotion and feeling to your drawing by allowing fluidity and gesture into your mark making. Try to capture a moment in your drawing by using both observation and gesture together. a gestural drawing may pay less attention to edges and outlines.
oBSErvaTIoN DraWING SkIllS

VIRTU DESIGN INSTITUTE: VISUal CommUNICaTIoN SkIllS, VDIS10015 - Lecture 2 6
photography is possibly the most used type of imagery used in modern design. as a designer you have access to photos you have taken yourself, stock imagery you can purchased or photography that you have commissioned. The style of photography and lighting used can determine a mood, error and feeling.
With digital cameras built into our phones, photography is everywhere. Software like Instagram allow you to apply mood enhancing affects instantly for sharing. as a designer, you need to be able to understand how to use such affects and imagery appropriately in your design work.
carbon paper may be a thing of the past but it is a great way to reproducing your drawings onto other mediums to ad texture and pattern. It is a great tool if you are most comfortable tracing. It can help you to reflect your drawing and still achieve a hand drawn result.
Stencil art can be as simple or complex as you make it. It is a great way to create powerful silhouettes using block shapes. Stencil art focuses on the negative space to create an image. This is a great tool for those who are not that confident with their drawing skills as you can use solid objects, paper and folding to create your stencils.
carBoN papEr STENcIlSphoToGraphy
http://www.sherwoodonline.com/images/products/p-8.jpg
http://4.bp.blogspot.com/-056w5IG3cjI/TyyTkbhieiI/aaaaaaaaaeI/rIjmxheXkx4/s1600/cutting+the+stencil+02.jpg
http://farm4.staticflickr.com/3427/3362398500_42f095be80_z.jpg

VIRTU DESIGN INSTITUTE: VISUal CommUNICaTIoN SkIllS, VDIS10015 - Lecture 2 7
If you lack the confidence to draw directly from observation a great tool is tracing. you can use a transparent tracing paper to trace from a photo or physical object.
another option is to trace onto normal paper or fabric using a light box. This illuminates the image and paper to make it more easily visible for drawing. If you don’t have access to a light box you can try taping your picture and paper to a window during daylight hours for the same affect.
It is important not to misunderstand tracing for copying. The idea is not to copy someone else’s work but to use tracing as a tool to enhance your observation skills to create something new. Tracing from your own original photos is a good way to ensure the work is 100% your own.
observational drawing requires our brain to translate from 3D to 2D. When tracing we are already dealing with 2D. Taking out this step often assist our brain in observing shapes and gradients better making the process easier.
you can use tracing paper to slowly build up an image through layers of line. The use
of multiple layers often ads depth and texture to a drawing. This tactile aspect enriches the drawing by creating more interest for the eye.
When tracing, our main observation and focus are ‘edges’. This can mean that our finished trace is a silhouette. Silhouettes are powerful images often used in design and marketing. Silhouettes allow for implied meaning and for the viewers memory and imagination to be activated. For this to be successful the edges and contours must be detailed and accurate.
TracING ShapE & Form
http://www.instructables.com/files/deriv/FQc/JD7r/hJZ860mk/FQcJD7rhJZ860mk.larGE.jpg
http://www.mightyartdemos.com/bookdemosimages/borg-step-2.jpghttp://1.bp.blogspot.com/-pSEBi6Z1ozm/T_ti_1c-_cI/aaaaaaaaD9E/bst5avBlZoy/s1600/adornedTrace.jpg
VIRTU DESIGN INSTITUTE: VISUal CommUNICaTIoN SkIllS, VDIS10015 - Lecture 2 8
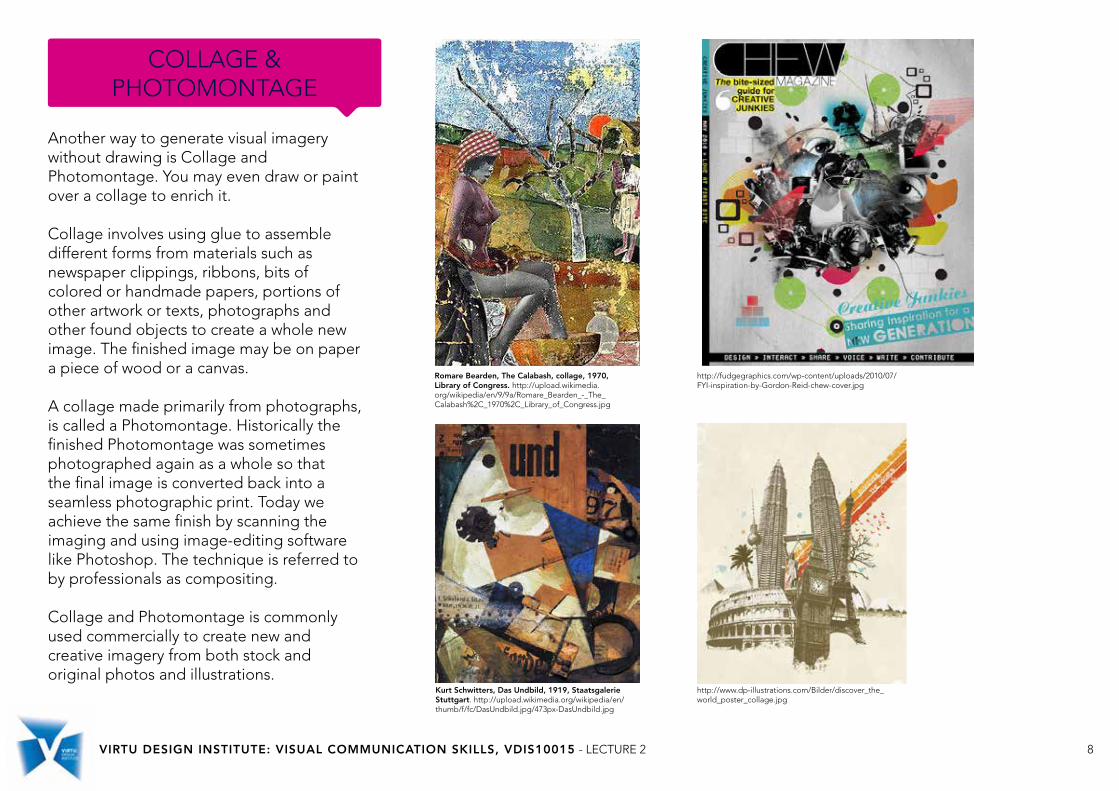
another way to generate visual imagery without drawing is collage and photomontage. you may even draw or paint over a collage to enrich it.
collage involves using glue to assemble different forms from materials such as newspaper clippings, ribbons, bits of colored or handmade papers, portions of other artwork or texts, photographs and other found objects to create a whole new image. The finished image may be on paper a piece of wood or a canvas.
a collage made primarily from photographs, is called a photomontage. historically the finished photomontage was sometimes photographed again as a whole so that the final image is converted back into a seamless photographic print. Today we achieve the same finish by scanning the imaging and using image-editing software like photoshop. The technique is referred to by professionals as compositing.
collage and photomontage is commonly used commercially to create new and creative imagery from both stock and original photos and illustrations.
collaGE & phoTomoNTaGE
http://fudgegraphics.com/wp-content/uploads/2010/07/FyI-inspiration-by-Gordon-reid-chew-cover.jpg
http://www.dp-illustrations.com/Bilder/discover_the_world_poster_collage.jpg
Romare Bearden, The Calabash, collage, 1970, library of Congress. http://upload.wikimedia.org/wikipedia/en/9/9a/romare_Bearden_-_The_calabash%2c_1970%2c_library_of_congress.jpg
kurt schwitters, Das Undbild, 1919, staatsgalerie stuttgart. http://upload.wikimedia.org/wikipedia/en/thumb/f/fc/DasUndbild.jpg/473px-DasUndbild.jpg

VIRTU DESIGN INSTITUTE: VISUal CommUNICaTIoN SkIllS, VDIS10015 - Lecture 2 9
DIGITal ImaGE DEvElopmENT & maNIpUlaTIoN
a significant amount of visual image creation and manipulation is now done digitally through image specific software such as adobe Illustrator and photoshop.
Each of the softwares is programed with a series of filters and effects to individualize and enrich your visual imagery.
There will be two short videos on the youtube channel that explain some basic tools in both photoshop and Illustrator.
photoshop: often an original image or illustration is scanned into the computer for use or an original photograph is edited.
The software allows you to edit every aspect of the image and this is frequently done in industry. most commonly a designer will be required to deep etch or retouch an image in photoshop.
Deep etching - This means to cut out an object or person from a background. It also implies that there is a transparent background in the image.
retouching - The means to edit a photo so to enhance the appearance of objects or a person. It may involve editing the lighting, colouring, saturation and contrast in the image as well as the removal of blemishes.
Illustrator:Illustrator has seen the growth of vector based illustration. The software allows the user to trace objects digitally or draw from scratch using a series of shape and line tools. The software allows you to cut shapes away from one another or link them. you can ad texture, transparency, gradient, colour and perspective to create complex illustrations that can be reproduced at any scale.