Using the SAP Adapter - Oracle Help Center Using the SAP Adapter describes how to configure the SAP...
51
Oracle® Cloud Using the SAP Adapter Release 17.3 E68142-13 September 2017
Transcript of Using the SAP Adapter - Oracle Help Center Using the SAP Adapter describes how to configure the SAP...
Oracle® CloudUsing the SAP Adapter
Release 17.3E68142-13September 2017

Oracle Cloud Using the SAP Adapter, Release 17.3
E68142-13
Copyright © 2015, 2017, Oracle and/or its affiliates. All rights reserved.
Primary Author: Mark Kennedy
This software and related documentation are provided under a license agreement containing restrictions onuse and disclosure and are protected by intellectual property laws. Except as expressly permitted in yourlicense agreement or allowed by law, you may not use, copy, reproduce, translate, broadcast, modify,license, transmit, distribute, exhibit, perform, publish, or display any part, in any form, or by any means.Reverse engineering, disassembly, or decompilation of this software, unless required by law forinteroperability, is prohibited.
The information contained herein is subject to change without notice and is not warranted to be error-free. Ifyou find any errors, please report them to us in writing.
If this is software or related documentation that is delivered to the U.S. Government or anyone licensing it onbehalf of the U.S. Government, then the following notice is applicable:
U.S. GOVERNMENT END USERS: Oracle programs, including any operating system, integrated software,any programs installed on the hardware, and/or documentation, delivered to U.S. Government end users are"commercial computer software" pursuant to the applicable Federal Acquisition Regulation and agency-specific supplemental regulations. As such, use, duplication, disclosure, modification, and adaptation of theprograms, including any operating system, integrated software, any programs installed on the hardware,and/or documentation, shall be subject to license terms and license restrictions applicable to the programs.No other rights are granted to the U.S. Government.
This software or hardware is developed for general use in a variety of information management applications.It is not developed or intended for use in any inherently dangerous applications, including applications thatmay create a risk of personal injury. If you use this software or hardware in dangerous applications, then youshall be responsible to take all appropriate fail-safe, backup, redundancy, and other measures to ensure itssafe use. Oracle Corporation and its affiliates disclaim any liability for any damages caused by use of thissoftware or hardware in dangerous applications.
Oracle and Java are registered trademarks of Oracle and/or its affiliates. Other names may be trademarks oftheir respective owners.
Intel and Intel Xeon are trademarks or registered trademarks of Intel Corporation. All SPARC trademarks areused under license and are trademarks or registered trademarks of SPARC International, Inc. AMD, Opteron,the AMD logo, and the AMD Opteron logo are trademarks or registered trademarks of Advanced MicroDevices. UNIX is a registered trademark of The Open Group.
This software or hardware and documentation may provide access to or information about content, products,and services from third parties. Oracle Corporation and its affiliates are not responsible for and expresslydisclaim all warranties of any kind with respect to third-party content, products, and services unless otherwiseset forth in an applicable agreement between you and Oracle. Oracle Corporation and its affiliates will not beresponsible for any loss, costs, or damages incurred due to your access to or use of third-party content,products, or services, except as set forth in an applicable agreement between you and Oracle.

Contents
Preface
Audience vi
Documentation Accessibility vi
Related Resources vi
Conventions vi
1 Getting Started with the SAP Adapter
SAP Adapter Capabilities 1-1
What Application Version Is Supported? 1-2
About Oracle Integration Cloud Service 1-2
About Oracle Integration Cloud Service Connections 1-2
About Oracle Integration Cloud Service Integrations 1-3
Typical Workflow for Creating and Including an Adapter Connection in an Integration1-3
2 Creating an SAP Adapter Connection
Prerequisites for Creating a Connection 2-1
Uploading an SSL Certificate 2-1
Creating a Connection 2-3
Adding a Contact Email 2-4
Configuring Connection Properties 2-4
Configuring Connection Security 2-5
Configuring an Agent Group 2-5
Testing the Connection 2-5
Editing a Connection 2-6
Cloning a Connection 2-6
Deleting a Connection 2-7
3 Creating an Integration
iii
4 Adding the SAP Adapter Connection to an Integration
Configuring Basic Information Properties 4-1
What You Can Do from the Basic Info Page 4-1
What You See on the Basic Info Page 4-2
Configuring SAP Adapter Trigger Objects and Methods Properties 4-2
What You Can Do from the Trigger Objects and Methods Page 4-2
What You See on the Trigger Objects and Methods Page 4-3
Configuring SAP Adapter Invoke Objects and Methods Properties 4-6
What You Can Do from the Invoke Objects and Methods Page 4-6
What You See on the Invoke Objects and Methods Page 4-6
Reviewing Configuration Values on the Summary Page 4-8
What You Can Do from the Summary Page 4-8
What You See on the Summary Page 4-9
5 Creating Mappings and Lookups in Integrations
6 Administering Integrations
A Configuring Inbound and Outbound Communication
SAP Inbound Communication A-1
Prerequisites A-1
Configuring a Logical System A-2
Configuring a Partner Profile A-4
Configuring Inbound Process Code A-5
Configuring a Distribution Model A-6
SAP Outbound Communication A-7
Configuring an RFC Destination and Program ID A-7
Creating a Port A-9
Configuring a Logical System A-10
Configuring a Distribution Model A-11
Configuring a Partner Profile A-11
Summary A-13
B Adding JAR Files to the Agent Class Path
iv

C JCO Connection Properties Files
v

Preface
Using the SAP Adapter describes how to configure the SAP Adapter as a connectionin an integration in Oracle Integration Cloud Service.
Topics
• Audience
• Documentation Accessibility
• Related Resources
• Conventions
AudienceUsing the SAP Adapter is intended for developers who want to use the SAP Adapter inintegrations in Oracle Integration Cloud Service.
Documentation AccessibilityFor information about Oracle's commitment to accessibility, visit the OracleAccessibility Program website at http://www.oracle.com/pls/topic/lookup?ctx=acc&id=docacc.
Access to Oracle Support
Oracle customers that have purchased support have access to electronic supportthrough My Oracle Support. For information, visit http://www.oracle.com/pls/topic/lookup?ctx=acc&id=info or visit http://www.oracle.com/pls/topic/lookup?ctx=acc&id=trsif you are hearing impaired.
Related ResourcesSee these Oracle resources:
• Oracle Cloud
http://cloud.oracle.com
• Using Oracle Integration Cloud Service
• Using the Oracle Mapper
ConventionsThe following text conventions are used in this document:
Preface
vi

Convention Meaning
boldface Boldface type indicates graphical user interface elements associatedwith an action, or terms defined in text or the glossary.
italic Italic type indicates book titles, emphasis, or placeholder variables forwhich you supply particular values.
monospace Monospace type indicates commands within a paragraph, URLs, codein examples, text that appears on the screen, or text that you enter.
Preface
vii
1Getting Started with the SAP Adapter
Review the following conceptual topics to learn about the SAP Adapter and how to useit as a connection in integrations in Oracle Integration Cloud Service. A typicalworkflow of adapter and integration tasks is also provided.
Topics
• SAP Adapter Capabilities
• What Application Version Is Supported?
• About Oracle Integration Cloud Service
• About Oracle Integration Cloud Service Connections
• About Oracle Integration Cloud Service Integrations
• Typical Workflow for Creating and Including an Adapter Connection in anIntegration
SAP Adapter CapabilitiesThe SAP Adapter enables you to perform operations on SAP objects as part of anintegration in Oracle Integration Cloud Service.
The SAP Adapter provides the following benefits:
• Business objects (BAPIs), function modules (RFCs), or ALE/EDI messages(IDOCs) supported
• BAPI synchronous communication
• RFC synchronous communication
• IDOC execution through a queue in SAP
• Filtering of BAPI and RFC objects by functional area
• Search functionality at the SAP object level
• Support of direct connection to SAP
• Connection testing during configuration
• Caching of SAP metadata
The SAP Adapter is one of many predefined adapters included with Oracle IntegrationCloud Service. You can configure the SAP Adapter as a connection in an integration inOracle Integration Cloud Service. See the following sections:
• About Oracle Integration Cloud Service
• About Oracle Integration Cloud Service Connections
• About Oracle Integration Cloud Service Integrations
Video
1-1

What Application Version Is Supported?For information about which application version is supported by this adapter, see theadapter certification matrix:
Oracle Integration Adapters Certification
About Oracle Integration Cloud ServiceOracle Integration Cloud Service is a complete, secure, but lightweight integrationsolution that enables you to connect your applications in the cloud. It simplifiesconnectivity between your applications and connects both your applications that live inthe cloud and your applications that still live on premises. Oracle Integration CloudService provides secure, enterprise-grade connectivity regardless of the applicationsyou are connecting or where they reside.
Oracle Integration Cloud Service provides native connectivity to Oracle Software as aService (SaaS) applications, such as Oracle Sales Cloud, Oracle RightNow Cloud,and so on. Oracle Integration Cloud Service adapters simplify connectivity by handlingthe underlying complexities of connecting to applications using industry-wide bestpractices. You only need to create a connection that provides minimal connectivityinformation for each system. Oracle Integration Cloud Service lookups map thedifferent codes or terms used by the applications you are integrating to describesimilar items (such as country or gender codes). Finally, the visual data mapperenables you to quickly create direct mappings between the trigger and invoke datastructures. From the mapper, you can also access lookup tables and use standardXPath functions to map data between your applications.
Once you integrate your applications and activate the integrations to the runtimeenvironment, the dashboard displays information about the running integrations so youcan monitor the status and processing statistics for each integration. The dashboardmeasures and tracks the performance of your transactions by capturing and reportingkey information, such as throughput, the number of messages processed successfully,and the number of messages that failed processing. You can also manage businessidentifiers that track fields in messages and manage errors by integrations,connections, or specific integration instances.
About Oracle Integration Cloud Service ConnectionsConnections define information about the instances of each configuration you areintegrating. Oracle Integration Cloud Service includes a set of predefined adapters,which are the types of applications on which you can base your connections, such asOracle Sales Cloud, Oracle Eloqua Cloud, Oracle RightNow Cloud, and others. Aconnection is based on an adapter. For example, to create a connection to a specificRightNow Cloud application instance, you must select the Oracle RightNow adapterand then specify the WSDL URL, security policy, and security credentials to connect toit.
Video
Chapter 1What Application Version Is Supported?
1-2
About Oracle Integration Cloud Service IntegrationsIntegrations are the main ingredient of Oracle Integration Cloud Service. An integrationincludes at the least a trigger (source) connection (for requests sent to OracleIntegration Cloud Service) and invoke (target) connection (for requests sent fromOracle Integration Cloud Service to the target) and the field mapping between thosetwo connections.
When you create your integrations, you build on the connections you already createdby defining how to process the data for the trigger (source) and invoke (target)connections. This can include defining the type of operations to perform on the data,the business objects and fields against which to perform those operations, requiredschemas, and so on. To make this easier, the most complex configuration tasks arehandled by Oracle Integration Cloud Service. Once your trigger (source) and invoke(target) connections are configured, the mappers between the two are enabled so youcan define how the information is transferred between the trigger (source) and invoke(target) data structures for both the request and response messages.
Video
Typical Workflow for Creating and Including an AdapterConnection in an Integration
You follow a very simple workflow to create a connection with an adapter and includethe connection in an integration in Oracle Integration Cloud Service.
Step Description More Information
1 Create the adapter connectionsfor the applications you want tointegrate. The connections canbe reused in multipleintegrations and are typicallycreated by the administrator.
Creating an SAP Adapter Connection
2 Create the integration. Whenyou do this, you add trigger andinvoke connections to theintegration.
Creating an Integration and Adding the SAP AdapterConnection to an Integration
3 Map data between the triggerconnection data structure andthe invoke connection datastructure.
Mapping Data of Using Oracle Integration CloudService
4 (Optional) Create lookups thatmap the different values used bythose applications to identify thesame type of object (such asgender codes or country codes).
Creating Lookups of Using Oracle Integration CloudService
5 Activate the integration. Managing Integrations of Using Oracle IntegrationCloud Service
6 Monitor the integration on thedashboard.
Monitoring Integrations of Using Oracle IntegrationCloud Service
Chapter 1About Oracle Integration Cloud Service Integrations
1-3

Step Description More Information
7 Track payload fields inmessages during runtime.
Assigning Business Identifiers for Tracking Fields inMessages and Managing Business Identifiers forTracking Fields in Messages of Using OracleIntegration Cloud Service
8 Manage errors at the integrationlevel, connection level, orspecific integration instancelevel.
Managing Errors of Using Oracle Integration CloudService
Chapter 1Typical Workflow for Creating and Including an Adapter Connection in an Integration
1-4
2Creating an SAP Adapter Connection
A connection is based on an adapter. You define connections to the specific cloudapplications that you want to integrate. The following topics describe how to defineconnections:
Topics
• Prerequisites for Creating a Connection
• Uploading an SSL Certificate
• Creating a Connection
• Editing a Connection
• Cloning a Connection
• Deleting a Connection
Prerequisites for Creating a ConnectionYou must satisfy the following prerequisites for creating a connection with the SAPAdapter.
1. Know the Client login parameter, an ID with a numeric value.
2. Know the code for the Language login parameter.
For example, the code for English is en.
3. Know the host name or IP address of the Application Server upon which the SAPinstance runs.
4. Know the System Number or Instance Number for the application serverinstance.
5. Know the System ID for the application server connection, a value such as N4S.
6. Know the username and password for access.
7. If you are connecting to an on-premises application, know the name of the agentgroup you are using.
8. Follow the applicable instructions in Configuring Inbound and OutboundCommunication for configuring inbound and outbound communication.
9. If you use the on-premises agent with the SAP Adapter, you have to add someadditional JAR files to the agent’s class path. See Adding JAR Files to the AgentClass Path or more information.
Uploading an SSL CertificateCertificates are used to validate outbound SSL connections. If you make an SSLconnection in which the root certificate does not exist in Oracle Integration CloudService, an exception is thrown. In that case, you must upload the appropriate
2-1
certificate. A certificate enables Oracle Integration Cloud Service to connect withexternal services. If the external endpoint requires a specific certificate, request thecertificate and then upload it into Oracle Integration Cloud Service.
To upload an SSL certificate:
1. From the Oracle Integration Cloud Service home page, click the
menu in the upper left corner.
2. Click Settings > Certificates.
All certificates currently uploaded to the trust store are displayed in the Certificatesdialog. The Filter By > Type list displays the following details:
• Preinstalled: Displays the certificates automatically installed in OracleIntegration Cloud Service. These certificates cannot be deleted.
• Uploaded: Displays the certificates uploaded by individual users. Thesecertificates can be deleted and updated.
You can also search for certificates in the Search field. The search results arelimited to a maximum of ten records sorted by name for performance and usabilityreasons. To ensure that your search results are more granular, enter as much ofthe certificate name as possible.
3. Click Upload at the top of the page.
4. In the Upload Certificate dialog box, select the certificate type. Each certificatetype enables Oracle Integration Cloud Service to connect with external services.
• Trust Certificate: Use this option to upload a trust certificate.
a. Enter a unique alias for the certificate.
b. Click Browse, then select the trust file (for example, .cer or .crt) toupload.
• Message Protection Certificate: Use this option to upload a keystorecertificate with SAML token support. Create, read, update, and delete (CRUD)operations are supported on this type of certificate.
a. Enter a unique alias for the certificate.
b. Click Browse, then select the certificate file (.cer or .crt) to upload.
• Identity Certificate: Use this option to upload a certificate for two-way SSLcommunication.
a. Click Browse, then select the keystore file (.jks) to upload.
b. Enter the password of the keystore being imported.
c. Enter the comma-separated list of aliases from the keystore beingimported.
d. Enter the comma-separated list of passwords corresponding to keyaliases.
e. If you want to display the passwords in clear text, select Show KeyPassword(s). This enables you to ensure that you are correctly entering alist of keystore passwords.
5. Click Upload.
Chapter 2Uploading an SSL Certificate
2-2
6. Click the certificate name to view details such as the subject of the certificate, theissuer of the certificate, the date the certificate was issued, and the date thecertificate expires.
Creating a ConnectionThe first step in creating an integration is to create the connections to the applicationswith which you want to share data.
1. In the Oracle Integration Cloud Service home page, click Connections.
2. Click Create.
The Create Connection — Select Adapter dialog is displayed.
3. Select an adapter from the dialog. You can also search for the type of adapter touse by entering a partial or full name in the Search field, and clicking Search.
The Create New Connection dialog is displayed.
4. Enter the information to describe the connection.
• Enter a meaningful name to help others find your connection when they beginto create their own integrations. The name you enter is automatically added incapital letters to the Identifier field. If you modify the identifier name, do notinclude a blank space (for example, Sales Opportunity).
• Select the role (direction) in which to use this connection (trigger, invoke, orboth). Only the roles supported by this adapter are displayed for selection.When you select a role, only the connection properties and security policiesappropriate to that role are displayed on the Connections page. If you selectan adapter that supports both invoke and trigger, but select only one of thoseroles, then try to drag the adapter into the section you did not select, youreceive an error (for example, configure an Oracle RightNow Cloud Adapter asonly an invoke, but drag the adapter to the trigger section).
• Enter an optional description of the connection.
Chapter 2Creating a Connection
2-3

5. Click Create.
Your connection is created and you are now ready to configure connection details,such as email contact, connection properties, security policies, connection logincredentials, and (for certain connections) agent group.
Adding a Contact EmailFrom the Connection Administrator section of the connection, you can add a contactemail address for notifications.
1. In the Email Address field, enter an email address to receive email notificationswhen problems occur.
2. In the upper right corner, click Save.
Configuring Connection PropertiesEnter connection information so your application can process requests.
1. Click Configure Connectivity.
The Connection Properties dialog is displayed.
2. Click the Upload File checkbox.
3. Select the JCO connection properties file to use. For information about availablefiles, see JCO Connection Properties Files.
4. Click Upload.
5. Click OK.
Chapter 2Creating a Connection
2-4
Configuring Connection SecurityConfigure security for your SAP connection by selecting the security policy and settinglogin credentials.
1. Click Configure Credentials.
2. Enter your login credentials.
a. Select the security policy. Only the Username Password Token policy issupported. It cannot be deselected.
b. Enter a username and password to connect to the SAP instance.
c. Reenter the password a second time.
3. Click OK.
Configuring an Agent GroupConfigure an agent group for accessing your on-premises application.
1. Click Configure Agents.
The Select an Agent Group window appears.
2. Click the name of the agent group.
3. Click Use.
You are now ready to test your connection.
Related Topics:
• About Agents and Integrations Between On-Premises Applications and OracleIntegration Cloud Service
• Managing Agent Groups and the On-Premises Agent
• Monitoring Agents
Testing the ConnectionTest your connection to ensure that it is successfully configured.
1. In the upper right corner of the page, click Test.
2. Select the type of connection testing to perform:
• Validate and Test: Performs a full validation of the WSDL, includingprocessing of the imported schemas and WSDLs. Complete validation cantake several minutes depending on the number of imported schemas andWSDLs. No requests are sent to the operations exposed in the WSDL.
• Test: Connects to the WSDL URL and performs a syntax check on the WSDL.No requests are sent to the operations exposed in the WSDL.
If successful, the following message is displayed and the progress indicator shows100%.Connection connection_name was tested successfully.
3. If your connection was unsuccessful, an error message is displayed with details.Verify that the configuration details you entered are correct.
Chapter 2Creating a Connection
2-5

4. When complete, click Save, then click Close.
Editing a ConnectionYou can edit connection settings after creating a new connection.
1. On the Oracle Integration Cloud Service home page, click Connections.
2. On the Connections page, search for the connection name.
3. Select Edit from the connection Actions menu or click the connection name.
The Connection page is displayed.
4. Make any necessary edits.
If you edit a connection currently used by an active integration, a dialog isdisplayed indicating that you must re-activate the integration for the connectionupdates to take effect.
Cloning a ConnectionYou can clone a copy of an existing connection, even if the connection is locked. Thisprovides a quick way to create a new connection.
1. On the Oracle Integration Cloud Service home page, click Connections.
2. On the Connections page, search for the connection name.
3. Select Clone from the connection Actions menu.
Chapter 2Editing a Connection
2-6
The Clone Connection dialog is displayed.
4. Enter the connection information.
5. Click Clone.
6. Click Edit to configure the credentials of your cloned connection. Cloning aconnection does not copy the credentials.
See Editing a Connection for instructions.
Deleting a ConnectionYou can delete a connection from the connection menu.
1. On the Oracle Integration Cloud Service home page, click Connections.
2. On the Connections page, search for the connection name.
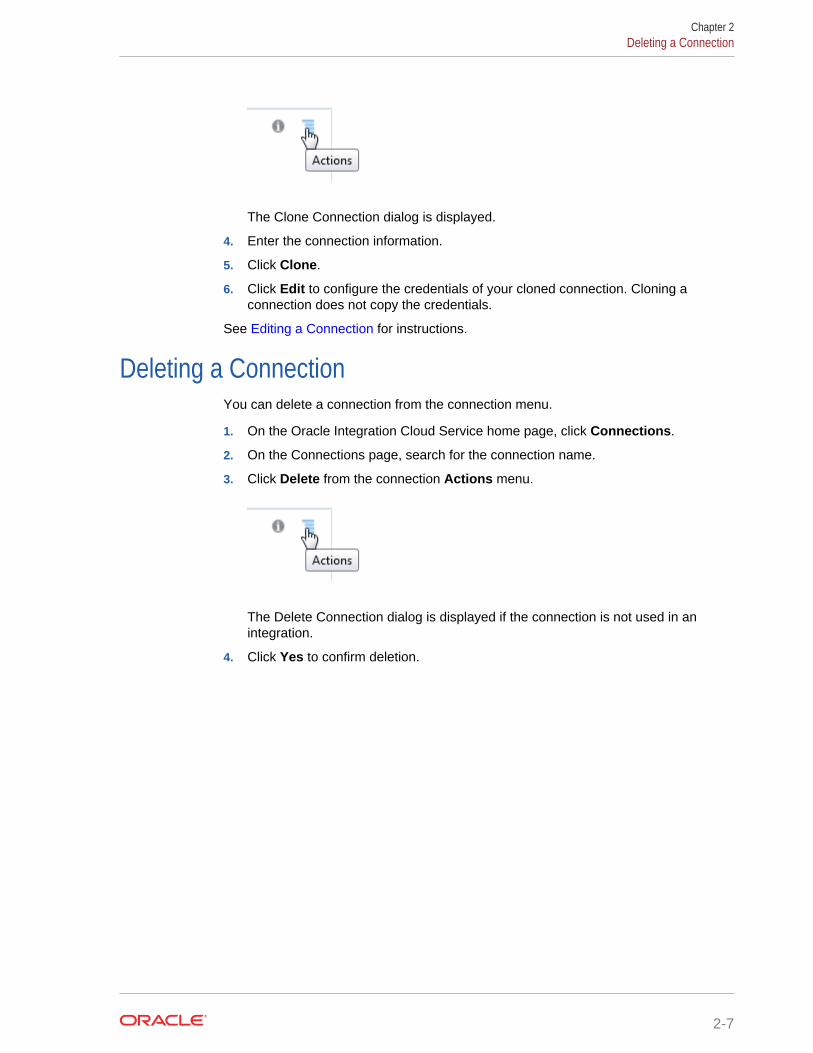
3. Click Delete from the connection Actions menu.
The Delete Connection dialog is displayed if the connection is not used in anintegration.
4. Click Yes to confirm deletion.
Chapter 2Deleting a Connection
2-7

3Creating an Integration
Integrations use the adapter connections you created to your applications, and definehow information is shared between those applications. You can create, import, modify,or delete integrations; create integrations to publish or subscribe to messages; addand remove request and response enrichment triggers; and create routing paths fordifferent invoke endpoints in integrations. Click the following topic for more information:
Topic
• Creating Integrations (in Using Oracle Integration Cloud Service)
3-1

4Adding the SAP Adapter Connection to anIntegration
When you drag the SAP Adapter into an integration, the Adapter EndpointConfiguration Wizard is invoked. This wizard guides you through configuration of SAPAdapter endpoint properties.
The following sections describe the wizard pages that guide you through configurationof the SAP Adapter as an endpoint in an integration.
Topics
• Configuring Basic Information Properties
• Configuring SAP Adapter Trigger Objects and Methods Properties
• Configuring SAP Adapter Invoke Objects and Methods Properties
• Reviewing Configuration Values on the Summary Page
See SAP Adapter Capabilities.
Configuring Basic Information PropertiesYou can enter a name and description on the Basic Info page of each adapter in yourintegration.
Topics
• What You Can Do from the Basic Info Page
• What You See on the Basic Info Page
What You Can Do from the Basic Info PageYou can specify the following values on the Basic Info page. The Basic Info page isthe initial wizard page that is displayed whenever you drag an adapter to the section ofthe integration canvas supported by your adapter.
• Specify a meaningful name.
• Specify a description of the responsibilities.
4-1
What You See on the Basic Info PageThe following table describes the key information on the Basic Info page.
Element Description
What do you want to call your endpoint? Provide a meaningful name so that others canunderstand the responsibilities of thisconnection. You can include Englishalphabetic characters, numbers, underscores,and dashes in the name. You cannot includethe following:• Blank spaces (for example, My Inbound
Connection)• Special characters (for example, #;83& or
righ(t)now4)• Multibyte characters
What does this endpoint do? Enter an optional description of theconnection’s responsibilities. For example:This connection receives an inboundrequest to synchronize accountinformation with the cloud application.
Configuring SAP Adapter Trigger Objects and MethodsProperties
Enter the SAP Adapter trigger object and method property values for your integration.
Topics
• What You Can Do from the Trigger Objects and Methods Page
• What You See on the Trigger Objects and Methods Page
What You Can Do from the Trigger Objects and Methods PageYou can specify the following values and actions on the Objects and Methods page.
• Choose between:
– Business Objects (BAPIs)
– Function Modules (RFCs)
– ALE/EDI Messages (IDOCs)
• Select a functional area.
• Select an object and one of its methods.
• Apply processing options to change runtime behavior.
Chapter 4Configuring SAP Adapter Trigger Objects and Methods Properties
4-2
What You See on the Trigger Objects and Methods PageThe Objects and Methods page changes depending on which category you choose.
When the Objects and Methods page is displayed, you can choose which of thefollowing categories to use:
• Business Objects (BAPIs): The Business Application Programming Interface isthe standard SAP interface. BAPIs allow integration at the business level ratherthan the technical level. This provides for greater linkage stability andindependence from the underlying communication technology.
• Function Modules (RFCs): RFC allows for remote calls between two SAPsystems (R/3 or R/2) or between an SAP system and a non-SAP system.
• ALE/EDI Messages (IDOCs): Intermediate Document is a standard data structurefor electronic data interchange (EDI) between application programs written for thepopular SAP business system or between an SAP application and an externalprogram.
Depending on which category you choose, you are asked to select objects ormethods. After you choose objects or methods, click the Processing Options link tochange runtime behavior.
Business Objects (BAPIs)
The following table describes the page you see if you select Business Objects(BAPIs).
Element Description
Processing Options Program ID. Enter a case-sensitive program identifierspecified on the SAP gateway server. The program ID isa unique identifier for your communication sessionspecified by your system administrator. The valueentered in this field must match the one exposed on thegateway. For the gateway service property, enter theservice name.
Application Components Expose a hierarchy of components such as sales,finance and HR.
Select Functional Area Select a functional area, such as Sales and Distribution.
Choose Objects to Filter BAPIMethods
Select an object to see the BAPI methods available in it.You are shown the list of available objects based on thefunctional area you selected above.
Objects Select an object, such as Sales Order.
Methods Select a method, such as CreateFromData.
Function Modules (RFCs)
The following table describes the page you see if you select Function Modules (RFCs).
Chapter 4Configuring SAP Adapter Trigger Objects and Methods Properties
4-3
Element Description
Processing Options Program ID. Enter a case-sensitive program identifierspecified on the SAP gateway server. The program ID isa unique identifier for your communication sessionspecified by your system administrator. The valueentered in this field must match the one exposed on thegateway. For the gateway service property, enter theservice name.
Select Functional Area Select a functional area that is available in the selectedRFC category to filter the RFC method list. If you selecta functional area, the RFC method list and the GroupsUI list are updated.
Methods Select a method, such as CreateFromData.
ALE/EDI Messages (IDOCs)
The following table describes the page you see if you select ALE/EDI Messages(IDOCs).
Chapter 4Configuring SAP Adapter Trigger Objects and Methods Properties
4-4

Element Description
Processing Options There are the following processing options for IDOCs:AutoSYSTAT01, EncodeIDOC, ControlCharacter andProgramID.
• AutoSYSTAT01– Yes: The adapter sends a SYSTAT01 message
upon a successful reception of an IDOCmessage.
– No: Nothing is sent back to SAP by the adapterupon successful reception of an IDOCmessage.
• EncodeIDOC– Flatfile: SAP uses a non-XML text-based
format called the Flatfile IDOC format forserializing IDOC messages to the file system.In a Flatfile IDOC, all IDOC records, includingthe control record and the data record, arestored in lines of text separated by a linedelimiter.
– No: SAP uses the XML format to send fieldnames and complete data to IDOC records.
• ControlCharacterThis property dictates how the adapter deals withcharacters in the payload that are not supported bythe XML 1.0 standard.
– Remove: The adapter removes the characterfrom the payload.
– Space: The adapter replaces the character witha space.
– Encode: The adapter encodes the characterinto its decimal format.
• Program IDEnter a case-sensitive program identifier specifiedon the SAP gateway server. The program ID is aunique identifier for your communication sessionspecified by your system administrator. The valueentered in this field must match the one exposed onthe gateway. For the Gateway Service property,enter the service name.
Note: The program ID provided at design timeoverrides the Program ID provided inside theproperties file.
Groups Select a group of methods such as matmas, rather thanan individual method..
Methods Select an individual method, such as matmas01.
Chapter 4Configuring SAP Adapter Trigger Objects and Methods Properties
4-5
Configuring SAP Adapter Invoke Objects and MethodsProperties
Enter the SAP Adapter invoke object and method property values for your integration.
Topics
• What You Can Do from the Invoke Objects and Methods Page
• What You See on the Invoke Objects and Methods Page
What You Can Do from the Invoke Objects and Methods PageYou can specify the following values and actions on the Objects and Methods page.
• Choose between:
– Business Objects (BAPIs)
– Function Modules (RFCs)
– ALE/EDI Messages (IDOCs)
• Select a functional area.
• Select an object and one of its methods.
• Apply processing options to change runtime behavior.
What You See on the Invoke Objects and Methods PageThe Objects and Methods page changes depending on which category you choose.
When the Objects and Methods page is displayed, you can choose which of thefollowing categories to use:
• Business Objects (BAPIs): The Business Application Programming Interface isthe standard SAP interface. BAPIs allow integration at the business level ratherthan the technical level. This provides for greater linkage stability andindependence from the underlying communication technology.
• Function Modules (RFCs): RFC allows for remote calls between two SAPsystems (R/3 or R/2) or between an SAP system and a non-SAP system.
• ALE/EDI Messages (IDOCs): Intermediate Document is a standard data structurefor electronic data interchange (EDI) between application programs written for thepopular SAP business system or between an SAP application and an externalprogram.
Depending on which category you choose, you are asked to select objects ormethods. After you choose objects or methods, click the Processing Options link tochange runtime behavior.
Business Objects (BAPIs)
The following table describes the page you see if you select Business Objects(BAPIs).
Chapter 4Configuring SAP Adapter Invoke Objects and Methods Properties
4-6
Element Description
Processing Options Use the Commit Transaction option to specify whetherthe interaction with SAP is stateful or stateless.
Select Functional Area Select a functional area, such as Sales and Distribution.
Objects Select an object, such as Sales Order.
Methods Select a method, such as CreateFromData.
Function Modules (RFCs)
These are the SAP communication methods that are supported by the SAP adapter foroutbound processing.
Transactional RFC (tRFC): This is an asynchronous communication method thatexecutes the called function in the target system only once. The listener to the portneed not be available at the time the SAP RFC client program executes a tRFC. ThetRFC component stores the called RFC function together with the corresponding datain the SAP database under a unique transaction ID (TID).
Queued RFC (qRFC): This is also an asynchronous communication method thatguarantees that multiple requests are processed in the order specified by the sender.tRFC can be serialized using queues (inbound and outbound queues). The tRFCrequests that are serialized using the inbound/outbound queues in SAP are calledqueued RFC (qRFC). qRFC is an extension of tRFC that processes requests that haveno predecessors in the same queue. You can use qRFC to guarantee that severalrequests are processed in a defined order.
The following table describes the page you see if you select Function Modules (RFCs).
Element Description
Processing Options Use the Commit Transaction option to specify whetherthe interaction with SAP is stateful or stateless..
Use the RFCOptions option to specify:
• SYNC RFC — No RFC processing.• Transactional RFC — Transactional RFC
communication.• Queued RFC — Process the requests in a queue.
You are prompted for the name of the queue whichis already defined in SAP.
Select Functional Area Select a functional area, such as Sales and Distribution.
Methods Select a method, such as CreateFromData.
ALE/EDI Messages (IDOCs)
The following table describes the page you see if you selectALE/EDI Messages(IDOCs).
Chapter 4Configuring SAP Adapter Invoke Objects and Methods Properties
4-7
Element Description
Processing Options There is one processing option for IDOCs —QueueName.
Use the QueueName option to process the requests ina queue. You are prompted for the name of the queuewhich is already defined in SAP.
Groups Select a group of methods such as matmas, rather thanan individual method..
Methods Select an individual method, such as matmas01.
Reviewing Configuration Values on the Summary PageYou can review the specified adapter configuration values on the Summary page.
Topics
• What You Can Do from the Summary Page
• What You See on the Summary Page
What You Can Do from the Summary PageYou can review configuration details from the Summary page. The Summary page isthe final wizard page for each adapter after you have completed your configuration.
• View the configuration details you defined for the adapter. For example, if youhave defined an inbound trigger (source) adapter with a request business objectand immediate response business object, specific details about this configurationare displayed on the Summary page.
• Click Done if you want to save your configuration details.
• Click a specific tab in the left panel or click Back to access a specific page toupdate your configuration definitions.
• Click Cancel to cancel your configuration details.
Chapter 4Reviewing Configuration Values on the Summary Page
4-8
What You See on the Summary PageThe following table describes the key information on the Summary page.
Element Description
Summary Displays a summary of the configurationvalues you defined on previous pages of thewizard.
The information that is displayed can vary byadapter. For some adapters, the selectedbusiness objects and operation name aredisplayed. For adapters for which a generatedXSD file is provided, click the XSD link to viewa read-only version of the file.
To return to a previous page to update anyvalues, click the appropriate tab in the leftpanel or click Back.
Chapter 4Reviewing Configuration Values on the Summary Page
4-9
5Creating Mappings and Lookups inIntegrations
You must map data between trigger (source) connections and invoke (target)connections in integrations. You can also optionally create lookups in integrations.
Topics
• Mapping Data (in Using Oracle Integration Cloud Service)
• Creating Lookups (in Using Oracle Integration Cloud Service)
5-1

6Administering Integrations
Oracle Integration Cloud Service provides you with the information and tools requiredto activate, monitor, and manage your integrations in the runtime environment.
Topic
• Administering Oracle Integration Cloud Service (in Using Oracle Integration CloudService)
6-1

AConfiguring Inbound and OutboundCommunication
As part of the prerequisites for setting up the SAP Adapter, you have to configureinbound and outbound communication.
The following sections describe how to configure the SAP Adapter for inbound andoutbound communication.
Topics
• SAP Inbound Communication
• SAP Outbound Communication
• Summary
SAP Inbound CommunicationDuring SAP inbound communication, the SAP Adapter acts as a client sendingrequests to the SAP system.
This section describes how to configure the adapter for communication.
Topics
• Prerequisites
• Configuring a Logical System
• Configuring a Partner Profile
• Configuring Inbound Process Code
• Configuring a Distribution Model
PrerequisitesTake the following actions before you begin configuration.
Note:
You may need to consult with your SAP Administrator for the followingconfiguration tasks.
The following entries need to be updated on the system on which the Oracle WeblogicServer is running.
• The hosts file of the system (maintained in the etc folder) should have thefollowing entry:
A-1
SAP_System_Host_IP SAP_System_Hostname SAP_System_Hostname_With_Domain_Name
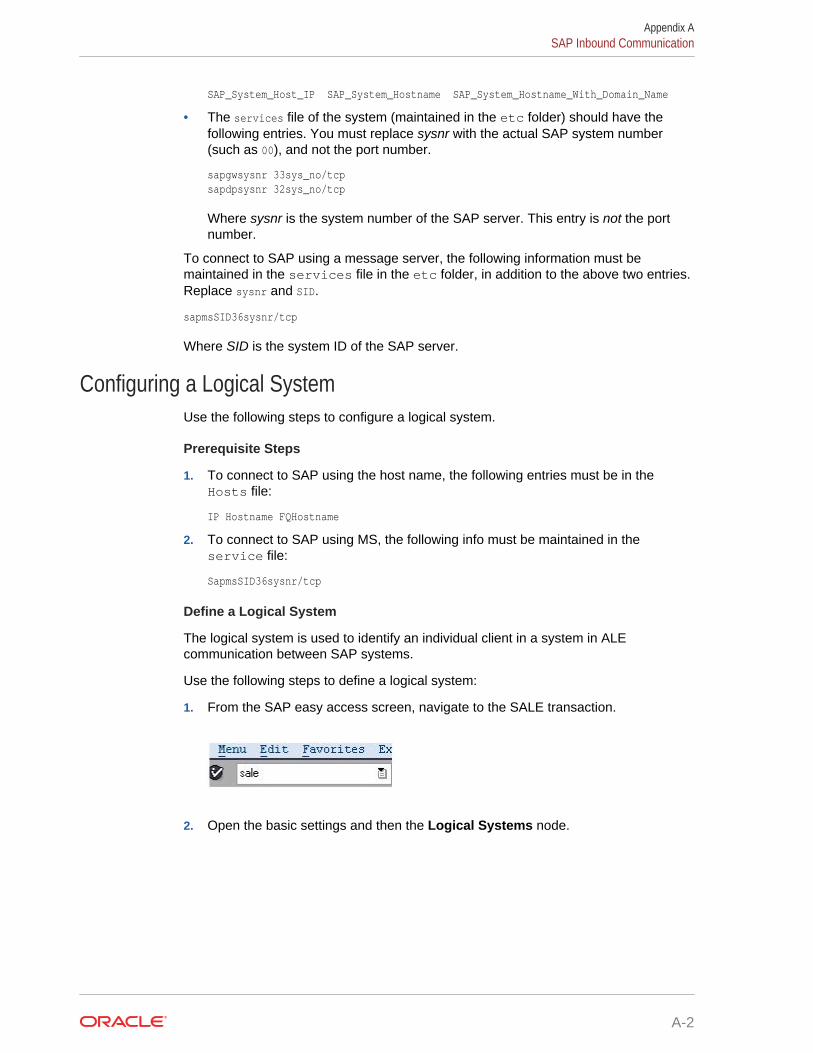
• The services file of the system (maintained in the etc folder) should have thefollowing entries. You must replace sysnr with the actual SAP system number(such as 00), and not the port number.
sapgwsysnr 33sys_no/tcpsapdpsysnr 32sys_no/tcp
Where sysnr is the system number of the SAP server. This entry is not the portnumber.
To connect to SAP using a message server, the following information must bemaintained in the services file in the etc folder, in addition to the above two entries.Replace sysnr and SID.
sapmsSID36sysnr/tcp
Where SID is the system ID of the SAP server.
Configuring a Logical SystemUse the following steps to configure a logical system.
Prerequisite Steps
1. To connect to SAP using the host name, the following entries must be in theHosts file:
IP Hostname FQHostname
2. To connect to SAP using MS, the following info must be maintained in theservice file:
SapmsSID36sysnr/tcp
Define a Logical System
The logical system is used to identify an individual client in a system in ALEcommunication between SAP systems.
Use the following steps to define a logical system:
1. From the SAP easy access screen, navigate to the SALE transaction.
2. Open the basic settings and then the Logical Systems node.
Appendix ASAP Inbound Communication
A-2
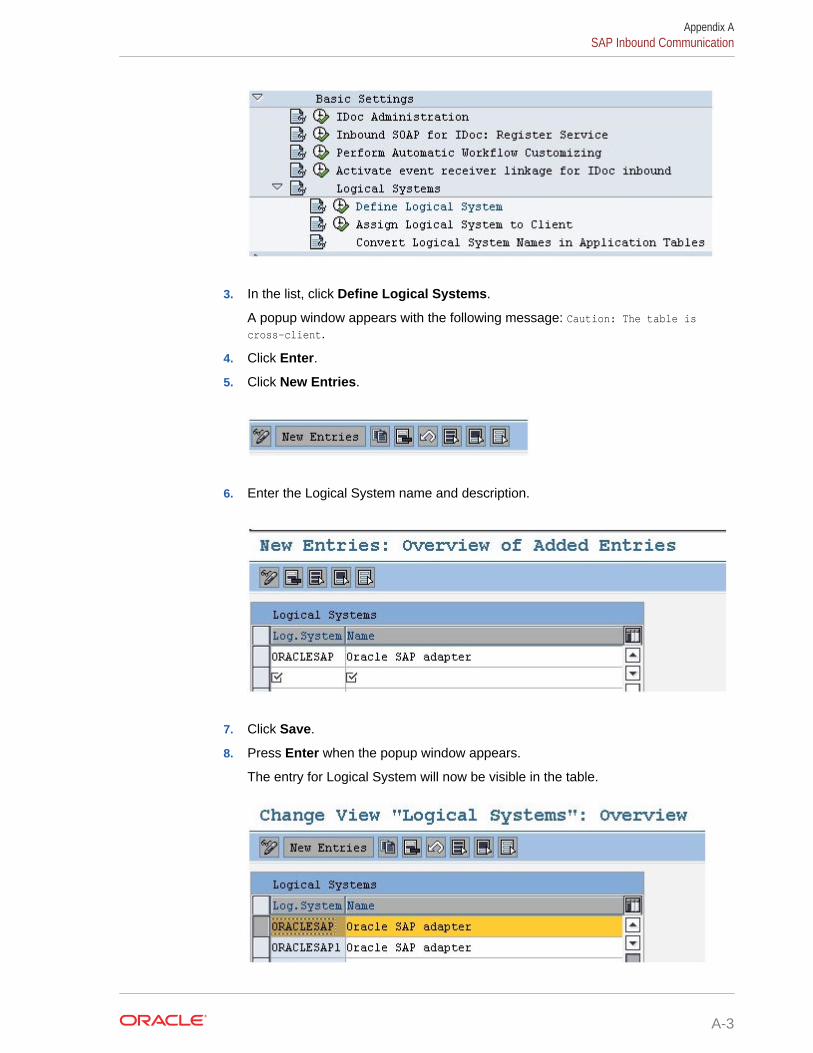
3. In the list, click Define Logical Systems.
A popup window appears with the following message: Caution: The table iscross-client.
4. Click Enter.
5. Click New Entries.
6. Enter the Logical System name and description.
7. Click Save.
8. Press Enter when the popup window appears.
The entry for Logical System will now be visible in the table.
Appendix ASAP Inbound Communication
A-3

Configuring a Partner ProfileIn SAP, all partner systems involved in a distribution model have a profile. There areseveral profile types, such as customer profiles and vendor profiles. This distinction isgenerally not necessary and you usually create your partners profiles using a genericLogical System type.
To create a partner profile:
1. Run the we20 transaction.
2. Click Partner Type LS.
3. Click Create.
4. Enter the Partner No. — the logical system name that was created earlier.
5. Click Save.
6. Click the Add icon to add the inbound parameters.
For a sender partner system (inbound parameters are filled in), the followingimportant settings are set per the message type in the partner profile:
• A process code used to indicate which function module to use to convert theIDoc data to SAP data.
• The time the IDoc was input — when the IDoc is created in the system, or onrequest (using the RBDAPP01 program).
• The post processing agent that will treat the data input errors if required. Thepost processing agent can be either a user or any other HR organizationalunit.
7. Enter the message types that must be received from the partner systems.
Appendix ASAP Inbound Communication
A-4

Configuring Inbound Process CodeThe process code contains the details of the function module that are used for IDocprocessing. The message type can be linked to the process code.
To define the process code:
1. Click on the message type in inbound parameters.
2. Click on the process code and press F4 to get the process codes available in theSAP system.
3. Choose the appropriate process code for that particular message type.
4. Check both the Trigger Immediately radio button and the Cancel ProcessingAfter Syntax Error check box.
Appendix ASAP Inbound Communication
A-5
5. Click Save.
Configuring a Distribution ModelThe distribution model determines the sender and receiver of the IDoc’s and definesthe transfer rules.
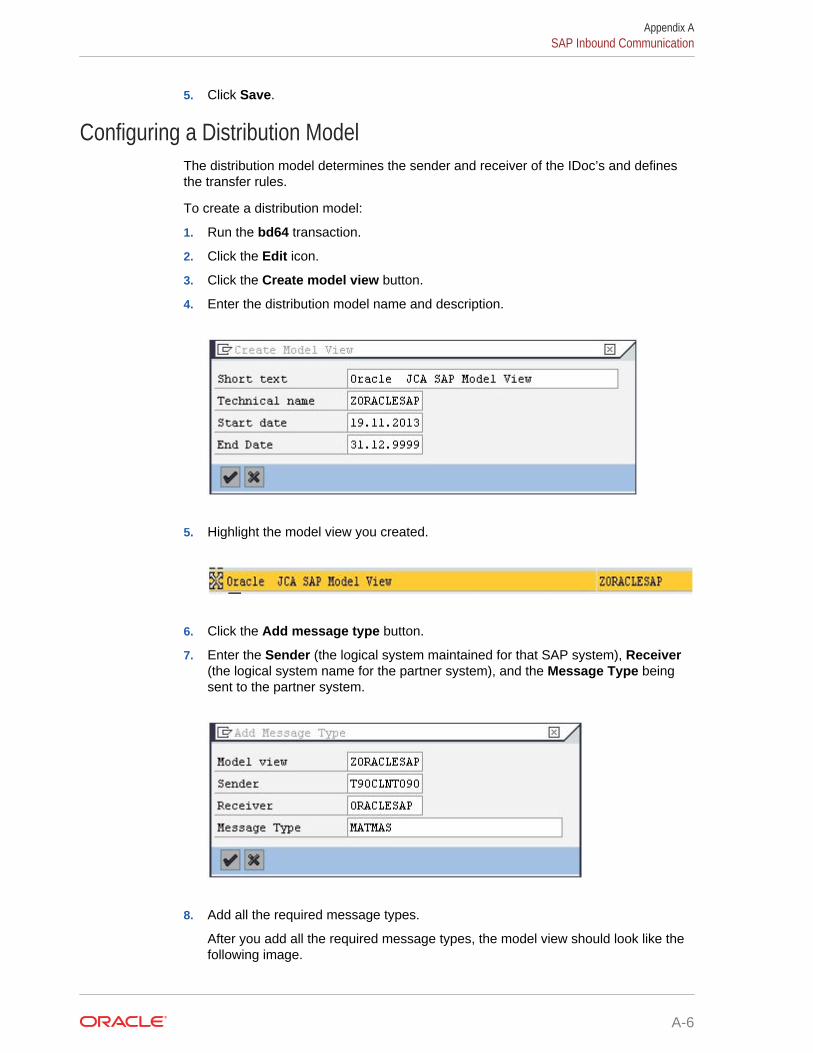
To create a distribution model:
1. Run the bd64 transaction.
2. Click the Edit icon.
3. Click the Create model view button.
4. Enter the distribution model name and description.
5. Highlight the model view you created.
6. Click the Add message type button.
7. Enter the Sender (the logical system maintained for that SAP system), Receiver(the logical system name for the partner system), and the Message Type beingsent to the partner system.
8. Add all the required message types.
After you add all the required message types, the model view should look like thefollowing image.
Appendix ASAP Inbound Communication
A-6
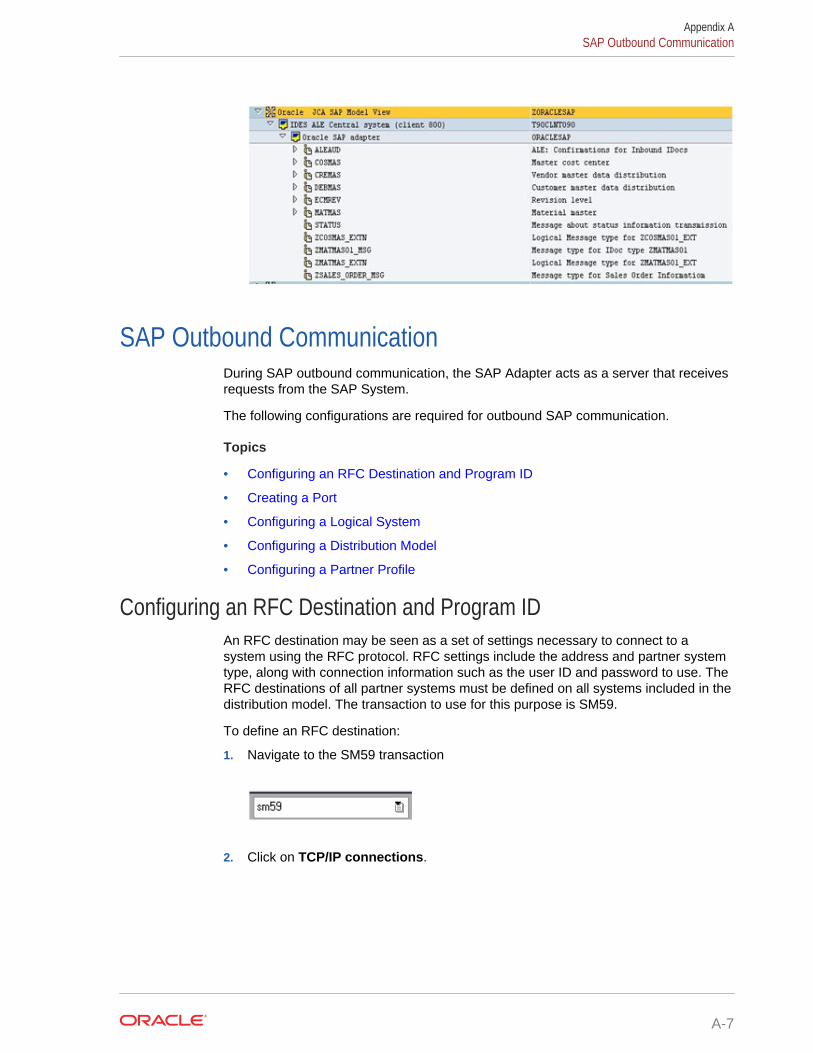
SAP Outbound CommunicationDuring SAP outbound communication, the SAP Adapter acts as a server that receivesrequests from the SAP System.
The following configurations are required for outbound SAP communication.
Topics
• Configuring an RFC Destination and Program ID
• Creating a Port
• Configuring a Logical System
• Configuring a Distribution Model
• Configuring a Partner Profile
Configuring an RFC Destination and Program IDAn RFC destination may be seen as a set of settings necessary to connect to asystem using the RFC protocol. RFC settings include the address and partner systemtype, along with connection information such as the user ID and password to use. TheRFC destinations of all partner systems must be defined on all systems included in thedistribution model. The transaction to use for this purpose is SM59.
To define an RFC destination:
1. Navigate to the SM59 transaction
2. Click on TCP/IP connections.
Appendix ASAP Outbound Communication
A-7
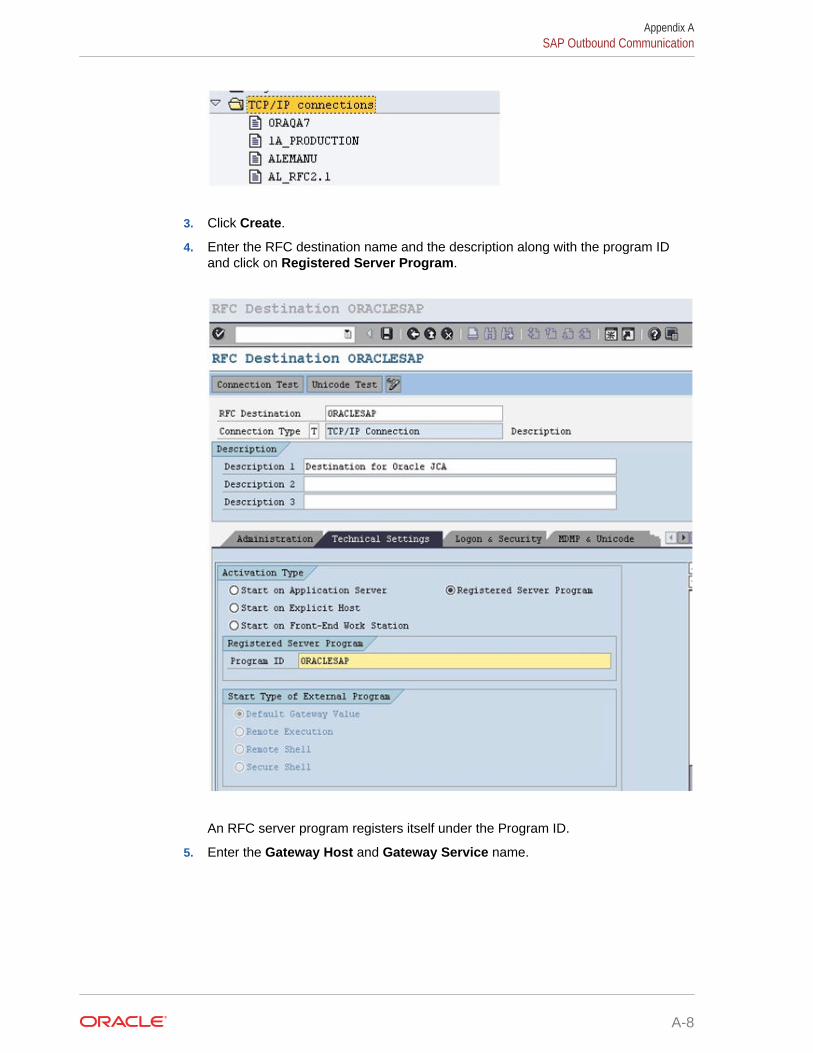
3. Click Create.
4. Enter the RFC destination name and the description along with the program IDand click on Registered Server Program.
An RFC server program registers itself under the Program ID.
5. Enter the Gateway Host and Gateway Service name.
Appendix ASAP Outbound Communication
A-8

6. Click Save.
The RFC destination is now configured.
Note:
The program ID is case sensitive. For example, “ORAQA1” is not equivalent to“oraqa1”.
Creating a PortThe IDoc port contains the information about the way data is sent between the trigger(source) or invoke (target) systems. The type of port defines the information containedwithin the port. For the “Internet” port type, the port contains the IP address of theinvoke system. For the “file” port type, the directory or file name information ismaintained. The “tRFC” port contains information about the RFC destination of theinvoke system. “tRFC” ports are used for IDoc transmission using ALE.
To create a tRFC port:
1. Run the we21 transaction.
2. Click on the Transactional RFC entry in the ports list.
Appendix ASAP Outbound Communication
A-9
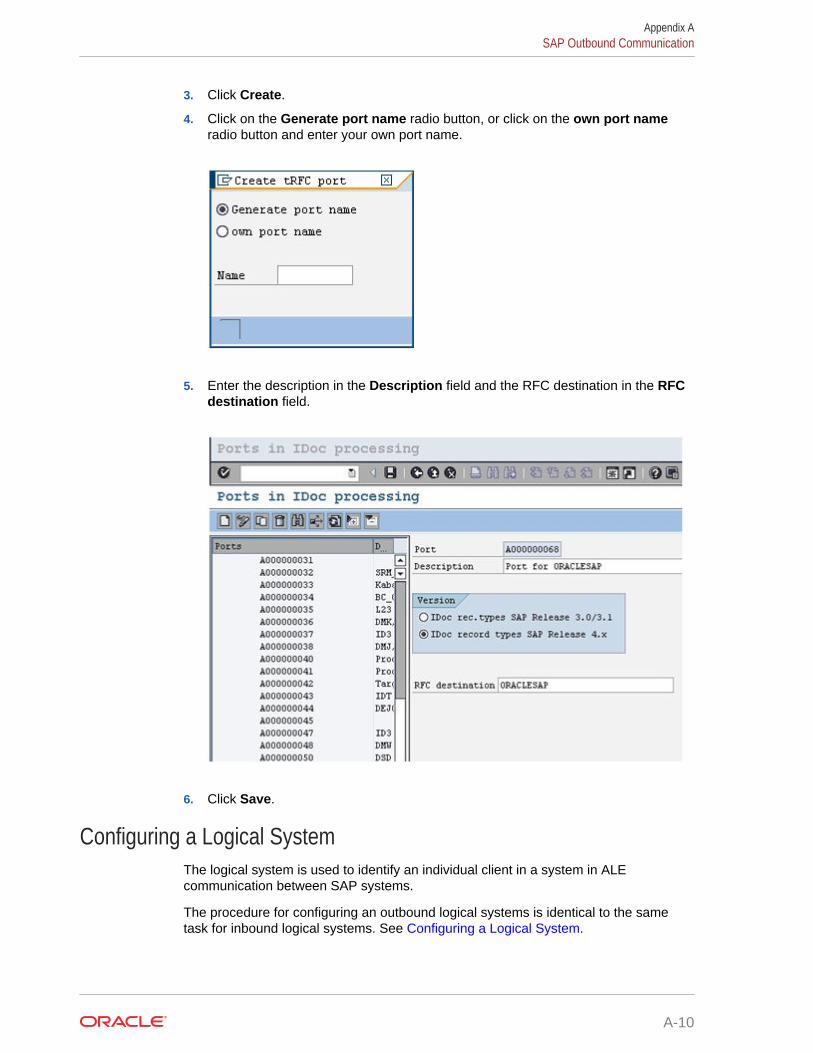
3. Click Create.
4. Click on the Generate port name radio button, or click on the own port nameradio button and enter your own port name.
5. Enter the description in the Description field and the RFC destination in the RFCdestination field.
6. Click Save.
Configuring a Logical SystemThe logical system is used to identify an individual client in a system in ALEcommunication between SAP systems.
The procedure for configuring an outbound logical systems is identical to the sametask for inbound logical systems. See Configuring a Logical System.
Appendix ASAP Outbound Communication
A-10

Configuring a Distribution ModelThe distribution model determines the sender and receiver of the IDoc’s and definesthe transfer rules.
The procedure for configuring an outbound distribution model is identical to the sametask for inbound distribution models. See Configuring a Distribution Model.
Configuring a Partner ProfileIn SAP, all partner systems involved in a distribution model have a profile. There areseveral profile types, such as customer profiles and vendor profiles. This distinction isgenerally not necessary and you usually create your partners profiles using a genericlogical system type.
For a receiver partner system (outbound parameters are filled in), the followingsettings are specified in the partner profile:
• The receiver port to which the data will be sent.
• The sending method: either one IDoc at a time, or by packets.
• The IDoc type that will be sent to that partner. For a given message type, the typeof IDoc might vary depending on the receiver system. You might have differentversions of SAP in your system landscape.
To create a partner profile:
1. Run the we20 transaction.
2. Click Partner Type LS.
3. Click Create.
4. Enter the Partner No. — the logical system name that was created earlier.
Appendix ASAP Outbound Communication
A-11
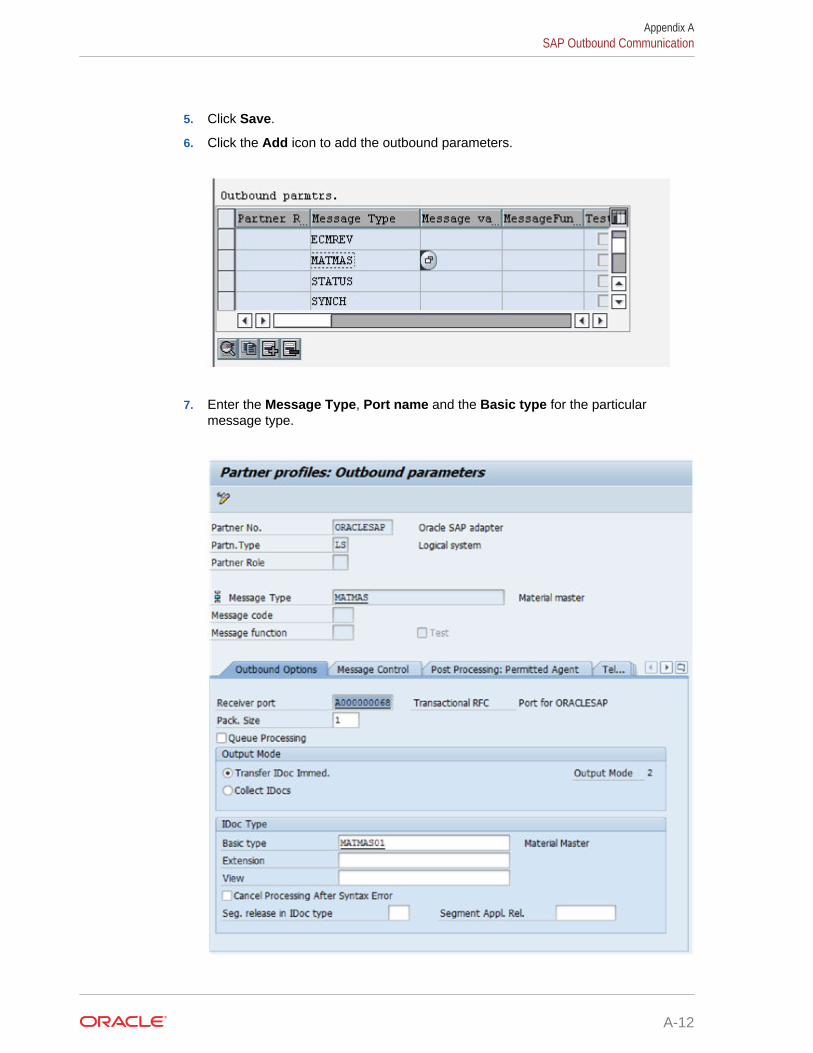
5. Click Save.
6. Click the Add icon to add the outbound parameters.
7. Enter the Message Type, Port name and the Basic type for the particularmessage type.
Appendix ASAP Outbound Communication
A-12

8. Click Save.
SummaryThe inbound and outbound configurations are now ready for IDoc exchange.
When sending or receiving IDocs from SAP, you can see the inbound and outboundIDocs and their status in the SAP application window
Appendix ASummary
A-13
BAdding JAR Files to the Agent Class Path
If you use the on-premises agent with the SAP Adapter, you have to add someadditional JAR files to the agent’s class path.
Add the following files to the $AGENT_HOME/thirdparty/lib directory.
• sapjco3.jar
• sapidoc3.jar
• sapjoc3.dll (for Windows)
• libsapjco3.so (for Linux)
These files are provided by the SAP administrator or you can download the installationfiles from the SAP service marketplace under service.sap.com/connectors.
B-1

CJCO Connection Properties Files
When configuring a connection on the Connections page for the SAP Adapter, youmust select the JCO connection properties file to use. This appendix describes thedifferent file types you can upload.
Adapter_inbound_Direct.properties
#Common properties for Load Balanced/Direct Connection Type: These parameters will be used in both connection types. #Description: #jco.client.client = Client represent a self-contained unit in an SAP system with separate master records and its own set of tables. Eg: 811 #jco.client.lang = The language determines the code page used for communicating between SAP Adapter and the application server. Eg: EN
jco.client.client = jco.client.lang =
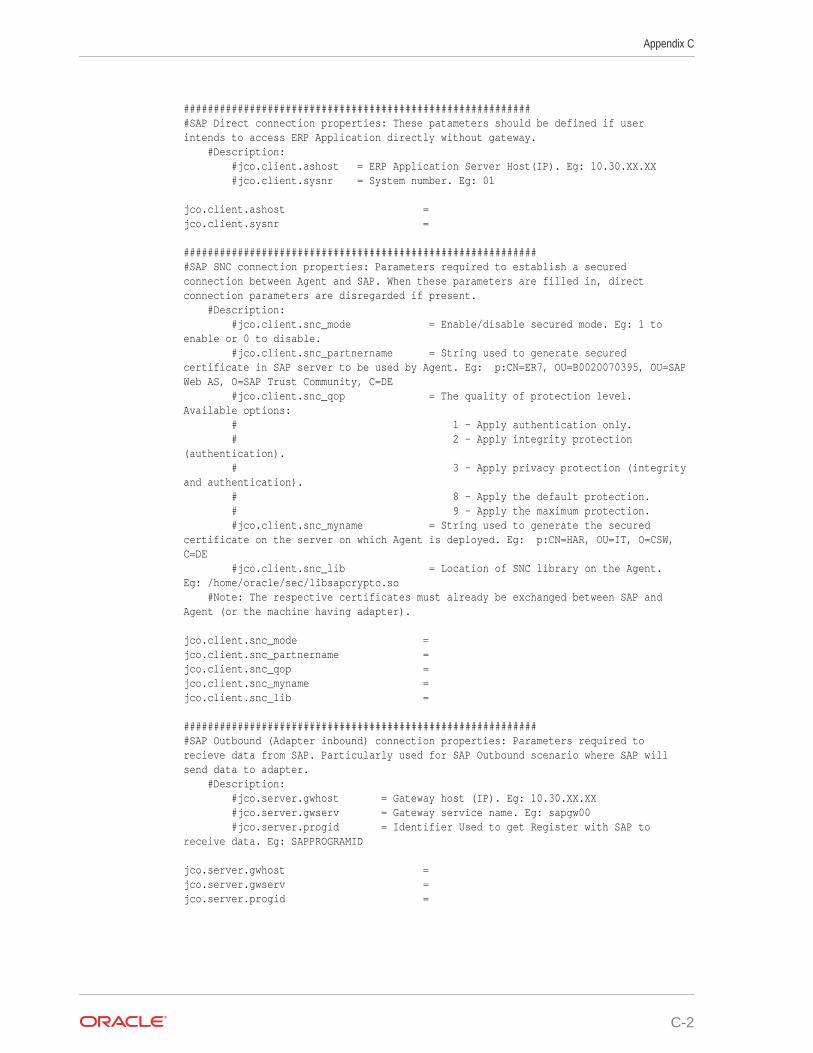
###########################################################SAP Direct connection properties: These patameters should be defined if user intends to access ERP Application directly without gateway. #Description: #jco.client.ashost = ERP Application Server Host(IP). Eg: 10.30.XX.XX #jco.client.sysnr = System number. Eg: 01
jco.client.ashost = jco.client.sysnr =
############################################################SAP Outbound (Adapter inbound) connection properties: Parameters required to recieve data from SAP. Particularly used for SAP Outbound scenario where SAP will send data to adapter. #Description: #jco.server.gwhost = Gateway host (IP). Eg: 10.30.XX.XX #jco.server.gwserv = Gateway service name. Eg: sapgw00 #jco.server.progid = Identifier Used to get Register with SAP to receive data. Eg: SAPPROGRAMID
jco.server.gwhost = jco.server.gwserv = jco.server.progid =
Adapter_inbound_Direct_SNC.properties
#Common properties for Load Balanced/Direct Connection Type: These parameters will be used in both connection types. #Description: #jco.client.client = Client represent a self-contained unit in an SAP system with separate master records and its own set of tables. Eg: 811 #jco.client.lang = The language determines the code page used for communicating between SAP Adapter and the application server. Eg: EN
jco.client.client = jco.client.lang =
C-1
###########################################################SAP Direct connection properties: These patameters should be defined if user intends to access ERP Application directly without gateway. #Description: #jco.client.ashost = ERP Application Server Host(IP). Eg: 10.30.XX.XX #jco.client.sysnr = System number. Eg: 01
jco.client.ashost = jco.client.sysnr =
############################################################SAP SNC connection properties: Parameters required to establish a secured connection between Agent and SAP. When these parameters are filled in, direct connection parameters are disregarded if present. #Description: #jco.client.snc_mode = Enable/disable secured mode. Eg: 1 to enable or 0 to disable. #jco.client.snc_partnername = String used to generate secured certificate in SAP server to be used by Agent. Eg: p:CN=ER7, OU=B0020070395, OU=SAP Web AS, O=SAP Trust Community, C=DE #jco.client.snc_qop = The quality of protection level. Available options: # 1 - Apply authentication only. # 2 - Apply integrity protection (authentication). # 3 - Apply privacy protection (integrity and authentication). # 8 - Apply the default protection. # 9 - Apply the maximum protection. #jco.client.snc_myname = String used to generate the secured certificate on the server on which Agent is deployed. Eg: p:CN=HAR, OU=IT, O=CSW, C=DE #jco.client.snc_lib = Location of SNC library on the Agent. Eg: /home/oracle/sec/libsapcrypto.so #Note: The respective certificates must already be exchanged between SAP and Agent (or the machine having adapter).
jco.client.snc_mode = jco.client.snc_partnername = jco.client.snc_qop = jco.client.snc_myname = jco.client.snc_lib =
############################################################SAP Outbound (Adapter inbound) connection properties: Parameters required to recieve data from SAP. Particularly used for SAP Outbound scenario where SAP will send data to adapter. #Description: #jco.server.gwhost = Gateway host (IP). Eg: 10.30.XX.XX #jco.server.gwserv = Gateway service name. Eg: sapgw00 #jco.server.progid = Identifier Used to get Register with SAP to receive data. Eg: SAPPROGRAMID
jco.server.gwhost = jco.server.gwserv = jco.server.progid =
Appendix C
C-2

Adapter_inbound_Loadbalanced.properties
#Common properties for Load Balanced/Direct Connection Type: These parameters will be used in both connection types. #Description: #jco.client.client = Client represent a self-contained unit in an SAP system with separate master records and its own set of tables. Eg: 811 #jco.client.lang = The language determines the code page used for communicating between SAP Adapter and the application server. Eg: EN
jco.client.client = jco.client.lang =
############################################################SAP Load balanced connection properties: These patameters should be defined if user wants to access SAP system which is behind the message Server. #Description: #jco.client.group = Group Name of the messaging server. Eg: PUBLIC #jco.client.r3name = SAP system name to identify the system. Eg: R/3 #jco.client.mshost = The message server is responsible for communication between SAP application servers. It passes requests from one application server to another within the system. Eg: 10.30.XX.XXX #jco.client.msserv = Name of the service in SAP Gateway HOST. Eg: sapgw00
jco.client.group = jco.client.r3name = jco.client.mshost = jco.client.msserv =
############################################################SAP Outbound (Adapter inbound) connection properties: Parameters required to recieve data from SAP. Particularly used for SAP Outbound scenario where SAP will send data to adapter. #Description: #jco.server.gwhost = Gateway host (IP). Eg: 10.30.XX.XX #jco.server.gwserv = Gateway service name. Eg: sapgw00 #jco.server.progid = Identifier Used to get Register with SAP to receive data. Eg: SAPPROGRAMID
jco.server.gwhost = jco.server.gwserv = jco.server.progid =
Adapter_inbound_Loadbalanced_SNC.properties
#Common properties for Load Balanced/Direct Connection Type: These parameters will be used in both connection types. #Description: #jco.client.client = Client represent a self-contained unit in an SAP system with separate master records and its own set of tables. Eg: 811 #jco.client.lang = The language determines the code page used for communicating between SAP Adapter and the application server. Eg: EN
jco.client.client = jco.client.lang =
############################################################SAP Load balanced connection properties: These patameters should be defined if user wants to access SAP system which is behind the message Server.
Appendix C
C-3
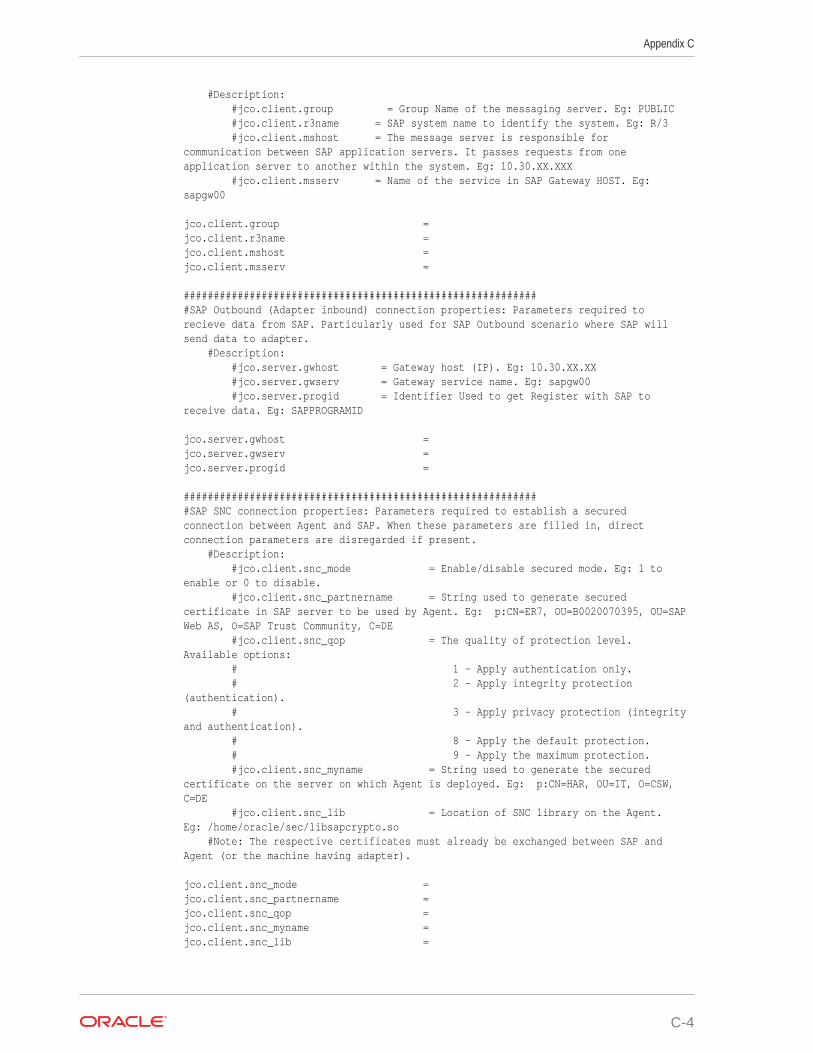
#Description: #jco.client.group = Group Name of the messaging server. Eg: PUBLIC #jco.client.r3name = SAP system name to identify the system. Eg: R/3 #jco.client.mshost = The message server is responsible for communication between SAP application servers. It passes requests from one application server to another within the system. Eg: 10.30.XX.XXX #jco.client.msserv = Name of the service in SAP Gateway HOST. Eg: sapgw00
jco.client.group = jco.client.r3name = jco.client.mshost = jco.client.msserv =
############################################################SAP Outbound (Adapter inbound) connection properties: Parameters required to recieve data from SAP. Particularly used for SAP Outbound scenario where SAP will send data to adapter. #Description: #jco.server.gwhost = Gateway host (IP). Eg: 10.30.XX.XX #jco.server.gwserv = Gateway service name. Eg: sapgw00 #jco.server.progid = Identifier Used to get Register with SAP to receive data. Eg: SAPPROGRAMID
jco.server.gwhost = jco.server.gwserv = jco.server.progid =
############################################################SAP SNC connection properties: Parameters required to establish a secured connection between Agent and SAP. When these parameters are filled in, direct connection parameters are disregarded if present. #Description: #jco.client.snc_mode = Enable/disable secured mode. Eg: 1 to enable or 0 to disable. #jco.client.snc_partnername = String used to generate secured certificate in SAP server to be used by Agent. Eg: p:CN=ER7, OU=B0020070395, OU=SAP Web AS, O=SAP Trust Community, C=DE #jco.client.snc_qop = The quality of protection level. Available options: # 1 - Apply authentication only. # 2 - Apply integrity protection (authentication). # 3 - Apply privacy protection (integrity and authentication). # 8 - Apply the default protection. # 9 - Apply the maximum protection. #jco.client.snc_myname = String used to generate the secured certificate on the server on which Agent is deployed. Eg: p:CN=HAR, OU=IT, O=CSW, C=DE #jco.client.snc_lib = Location of SNC library on the Agent. Eg: /home/oracle/sec/libsapcrypto.so #Note: The respective certificates must already be exchanged between SAP and Agent (or the machine having adapter).
jco.client.snc_mode = jco.client.snc_partnername = jco.client.snc_qop = jco.client.snc_myname = jco.client.snc_lib =
Appendix C
C-4
Adapter_outbound_Direct.properties
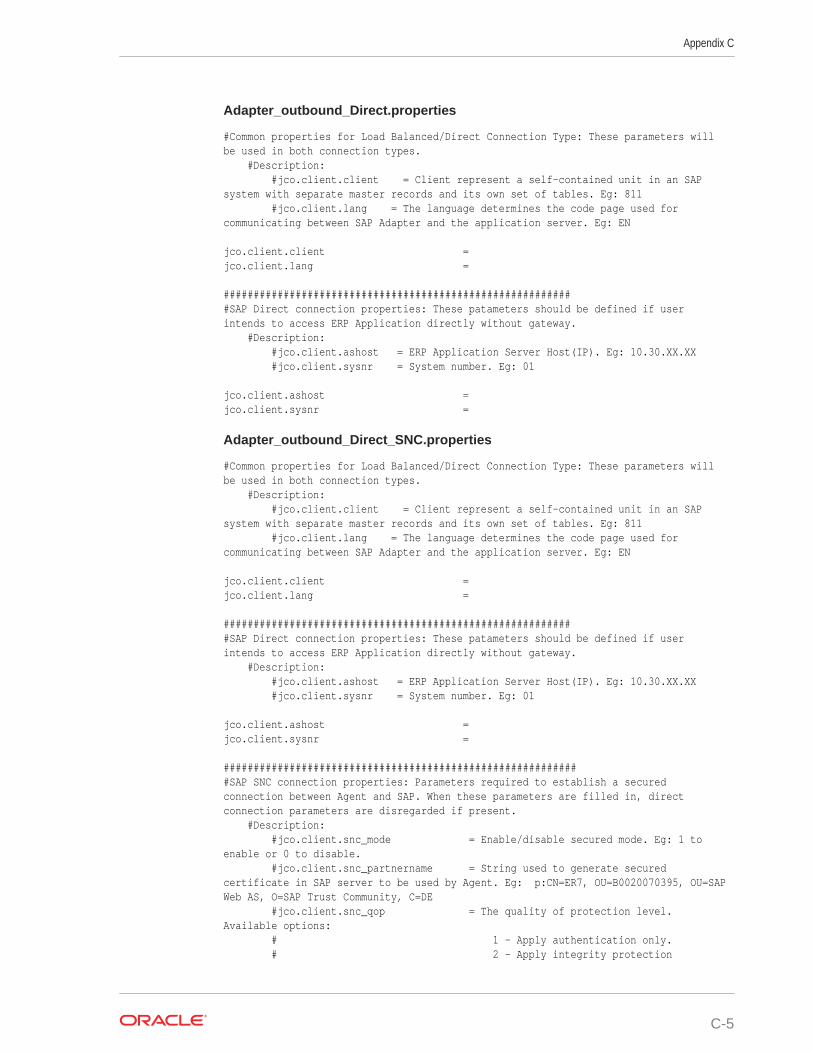
#Common properties for Load Balanced/Direct Connection Type: These parameters will be used in both connection types. #Description: #jco.client.client = Client represent a self-contained unit in an SAP system with separate master records and its own set of tables. Eg: 811 #jco.client.lang = The language determines the code page used for communicating between SAP Adapter and the application server. Eg: EN
jco.client.client = jco.client.lang =
###########################################################SAP Direct connection properties: These patameters should be defined if user intends to access ERP Application directly without gateway. #Description: #jco.client.ashost = ERP Application Server Host(IP). Eg: 10.30.XX.XX #jco.client.sysnr = System number. Eg: 01
jco.client.ashost = jco.client.sysnr =
Adapter_outbound_Direct_SNC.properties
#Common properties for Load Balanced/Direct Connection Type: These parameters will be used in both connection types. #Description: #jco.client.client = Client represent a self-contained unit in an SAP system with separate master records and its own set of tables. Eg: 811 #jco.client.lang = The language determines the code page used for communicating between SAP Adapter and the application server. Eg: EN
jco.client.client = jco.client.lang =
###########################################################SAP Direct connection properties: These patameters should be defined if user intends to access ERP Application directly without gateway. #Description: #jco.client.ashost = ERP Application Server Host(IP). Eg: 10.30.XX.XX #jco.client.sysnr = System number. Eg: 01
jco.client.ashost = jco.client.sysnr =
############################################################SAP SNC connection properties: Parameters required to establish a secured connection between Agent and SAP. When these parameters are filled in, direct connection parameters are disregarded if present. #Description: #jco.client.snc_mode = Enable/disable secured mode. Eg: 1 to enable or 0 to disable. #jco.client.snc_partnername = String used to generate secured certificate in SAP server to be used by Agent. Eg: p:CN=ER7, OU=B0020070395, OU=SAP Web AS, O=SAP Trust Community, C=DE #jco.client.snc_qop = The quality of protection level. Available options: # 1 - Apply authentication only. # 2 - Apply integrity protection
Appendix C
C-5

(authentication). # 3 - Apply privacy protection (integrity and authentication). # 8 - Apply the default protection. # 9 - Apply the maximum protection. #jco.client.snc_myname = String used to generate the secured certificate on the server on which Agent is deployed. Eg: p:CN=HAR, OU=IT, O=CSW, C=DE #jco.client.snc_lib = Location of SNC library on the Agent. Eg: /home/oracle/sec/libsapcrypto.so #Note: The respective certificates must already be exchanged between SAP and Agent (or the machine having adapter).
jco.client.snc_mode = jco.client.snc_partnername = jco.client.snc_qop = jco.client.snc_myname = jco.client.snc_lib =
Adapter_outbound_Loadbalanced.properties
#Common properties for Load Balanced/Direct Connection Type: These parameters will be used in both connection types. #Description: #jco.client.client = Client represent a self-contained unit in an SAP system with separate master records and its own set of tables. Eg: 811 #jco.client.lang = The language determines the code page used for communicating between SAP Adapter and the application server. Eg: EN
jco.client.client = jco.client.lang =
############################################################SAP Load balanced connection properties: These patameters should be defined if user wants to access SAP system which is behind the message Server. #Description: #jco.client.group = Group Name of the messaging server. Eg: PUBLIC #jco.client.r3name = SAP system name to identify the system. Eg: R/3 #jco.client.mshost = The message server is responsible for communication between SAP application servers. It passes requests from one application server to another within the system. Eg: 10.30.XX.XXX #jco.client.msserv = Name of the service in SAP Gateway HOST. Eg: sapgw00
jco.client.group = jco.client.r3name = jco.client.mshost = jco.client.msserv =
Adapter_outbound_Loadbalanced_SNC.properties
#Common properties for Load Balanced/Direct Connection Type: These parameters will be used in both connection types. #Description: #jco.client.client = Client represent a self-contained unit in an SAP system with separate master records and its own set of tables. Eg: 811 #jco.client.lang = The language determines the code page used for communicating between SAP Adapter and the application server. Eg: EN
jco.client.client = jco.client.lang =
Appendix C
C-6

############################################################SAP Load balanced connection properties: These patameters should be defined if user wants to access SAP system which is behind the message Server. #Description: #jco.client.group = Group Name of the messaging server. Eg: PUBLIC #jco.client.r3name = SAP system name to identify the system. Eg: R/3 #jco.client.mshost = The message server is responsible for communication between SAP application servers. It passes requests from one application server to another within the system. Eg: 10.30.XX.XXX #jco.client.msserv = Name of the service in SAP Gateway HOST. Eg: sapgw00
jco.client.group = jco.client.r3name = jco.client.mshost = jco.client.msserv =
############################################################SAP SNC connection properties: Parameters required to establish a secured connection between Agent and SAP. When these parameters are filled in, direct connection parameters are disregarded if present. #Description: #jco.client.snc_mode = Enable/disable secured mode. Eg: 1 to enable or 0 to disable. #jco.client.snc_partnername = String used to generate secured certificate in SAP server to be used by Agent. Eg: p:CN=ER7, OU=B0020070395, OU=SAP Web AS, O=SAP Trust Community, C=DE #jco.client.snc_qop = The quality of protection level. Available options: # 1 - Apply authentication only. # 2 - Apply integrity protection (authentication). # 3 - Apply privacy protection (integrity and authentication). # 8 - Apply the default protection. # 9 - Apply the maximum protection. #jco.client.snc_myname = String used to generate the secured certificate on the server on which Agent is deployed. Eg: p:CN=HAR, OU=IT, O=CSW, C=DE #jco.client.snc_lib = Location of SNC library on the Agent. Eg: /home/oracle/sec/libsapcrypto.so #Note: The respective certificates must already be exchanged between SAP and Agent (or the machine having adapter).
jco.client.snc_mode = jco.client.snc_partnername = jco.client.snc_qop = jco.client.snc_myname = jco.client.snc_lib =
Appendix C
C-7


![Oracle Fusion Middleware SAP ABAP BW Adapter Guide for ... · PDF file[1]Oracle® Fusion Middleware Getting Started with SAP ABAP BW Adapter for Oracle Data Integrator 12c (12.2.1.2.0)](https://static.fdocuments.in/doc/165x107/5aa0fe377f8b9a89178ed1f1/oracle-fusion-middleware-sap-abap-bw-adapter-guide-for-1oracle-fusion-middleware.jpg)