Using NIL Resources to Store Preprocess and Analyze fMRI Datapages.wustl.edu › files › pages ›...
50
Using Neuro-Imaging Laboratory (NIL) Resources to Store, Preprocess, and Analyze fMRI Data Author: Timothy B. Brown Date: 08 Jun 2011 1 Using Neuro-Imaging Laboratory Resources to Store, Preprocess, and Analyze fMRI Data Introduction ................................................................................................................................. 3 What’s the purpose/goal of all this?........................................................................................ 3 What is the Neuro-Imaging Laboratory? ................................................................................ 3 How is the Neuro-Imaging Laboratory subdivided? .............................................................. 3 What WUSM resources are we planning to use?.................................................................... 4 About the CNDA ........................................................................................................................ 5 What does using the CNDA provide for me? ......................................................................... 5 How do I get a CNDA account? ............................................................................................. 5 How is data organized within the CNDA? ............................................................................. 6 Getting my data into the CNDA ................................................................................................. 8 What is the CNDA Prearchive? .............................................................................................. 8 How do I send my data directly from the scanner to the CNDA? .......................................... 8 How do I upload data from my desktop computer or the IAC SunOS/Solaris computers to the CNDA?.............................................................................................................................. 8 How do I move my image data from the prearchive into a CNDA project? ........................ 10 Using CNDA pipelines ............................................................................................................. 13 What are CNDA pipelines? .................................................................................................. 13 How do I associate a CNDA pipeline with a project? .......................................................... 13 How do I use a CNDA pipeline for preprocessing a set of data? ......................................... 21 Who do I contact to get help with the CNDA? ......................................................................... 21 Using NIL maintained resources for analysis outside of the CNDA ........................................ 22 What is a NIL Un*x account and how do I get one? ............................................................ 22 How do I set up the VPN connection to access NIL maintained computer systems? .......... 22 How do I change my VPN password? .................................................................................. 24 What NIL maintained CPUs should I use? ........................................................................... 25 How do I access NIL systems? ............................................................................................. 25 How do I setup my shell startup files to handle both Linux and Sun OS/Solaris Systems?. 25 How do I use VNC to access NIL Systems?......................................................................... 28 What VNC Client software should I use on my desktop? .................................................... 29 How do I start a VNC Server on NIL systems? .................................................................... 29 What should be in my xstartup file? ..................................................................................... 30 How do I find my VNC Server session number if I forget it? .............................................. 30 How do I connect to the VNC Server that I’ve started? ....................................................... 31 How do I run FIDL on the NIL maintained machines? ........................................................ 31 How do I run background jobs using the Sun Grid Engine? ................................................ 31 How do I kill/stop my VNC Server?..................................................................................... 32 How can I make sure I receive important notifications about using NIL Systems? ............. 32 Getting data out of the CNDA for further analysis ................................................................... 34 Where should I store my data for access by NIL maintained computer systems? ............... 34 How do I retrieve/download data from the CNDA using the standard CNDA Web interface? ............................................................................................................................................... 34
Transcript of Using NIL Resources to Store Preprocess and Analyze fMRI Datapages.wustl.edu › files › pages ›...
Using Neuro-Imaging Laboratory (NIL) Resources to
Store, Preprocess, and Analyze fMRI Data
Author: Timothy B. Brown Date: 08 Jun 2011
1
Using Neuro-Imaging Laboratory Resources to Store, Preprocess, and Analyze fMRI Data
Introduction ................................................................................................................................. 3
What’s the purpose/goal of all this?........................................................................................ 3
What is the Neuro-Imaging Laboratory? ................................................................................ 3
How is the Neuro-Imaging Laboratory subdivided? .............................................................. 3
What WUSM resources are we planning to use? .................................................................... 4
About the CNDA ........................................................................................................................ 5
What does using the CNDA provide for me? ......................................................................... 5
How do I get a CNDA account? ............................................................................................. 5
How is data organized within the CNDA? ............................................................................. 6
Getting my data into the CNDA ................................................................................................. 8
What is the CNDA Prearchive? .............................................................................................. 8
How do I send my data directly from the scanner to the CNDA? .......................................... 8
How do I upload data from my desktop computer or the IAC SunOS/Solaris computers to
the CNDA?.............................................................................................................................. 8
How do I move my image data from the prearchive into a CNDA project? ........................ 10
Using CNDA pipelines ............................................................................................................. 13
What are CNDA pipelines? .................................................................................................. 13
How do I associate a CNDA pipeline with a project? .......................................................... 13
How do I use a CNDA pipeline for preprocessing a set of data? ......................................... 21
Who do I contact to get help with the CNDA? ......................................................................... 21
Using NIL maintained resources for analysis outside of the CNDA ........................................ 22
What is a NIL Un*x account and how do I get one? ............................................................ 22
How do I set up the VPN connection to access NIL maintained computer systems? .......... 22
How do I change my VPN password? .................................................................................. 24
What NIL maintained CPUs should I use? ........................................................................... 25
How do I access NIL systems? ............................................................................................. 25
How do I setup my shell startup files to handle both Linux and Sun OS/Solaris Systems? . 25
How do I use VNC to access NIL Systems?......................................................................... 28
What VNC Client software should I use on my desktop? .................................................... 29
How do I start a VNC Server on NIL systems? .................................................................... 29
What should be in my xstartup file? ..................................................................................... 30
How do I find my VNC Server session number if I forget it? .............................................. 30
How do I connect to the VNC Server that I’ve started? ....................................................... 31
How do I run FIDL on the NIL maintained machines? ........................................................ 31
How do I run background jobs using the Sun Grid Engine? ................................................ 31
How do I kill/stop my VNC Server?..................................................................................... 32
How can I make sure I receive important notifications about using NIL Systems? ............. 32
Getting data out of the CNDA for further analysis ................................................................... 34
Where should I store my data for access by NIL maintained computer systems? ............... 34
How do I retrieve/download data from the CNDA using the standard CNDA Web interface?
............................................................................................................................................... 34

Using Neuro-Imaging Laboratory (NIL) Resources to
Store, Preprocess, and Analyze fMRI Data
Author: Timothy B. Brown Date: 08 Jun 2011
2
How do I retrieve/download data from the CNDA using URI specifications from a browser?
............................................................................................................................................... 35
How do I retrieve/download data from the CNDA using command line tools? ................... 43
Appendix A: Document Revision History ................................................................................ 47
Appendix B: CCIR Procedure Assessment Form ..................................................................... 49

Using Neuro-Imaging Laboratory (NIL) Resources to
Store, Preprocess, and Analyze fMRI Data
Author: Timothy B. Brown Date: 08 Jun 2011
3
Using Neuro-Imaging Laboratory Resources to Store, Preprocess, and Analyze fMRI Data
Introduction
What’s the purpose/goal of all this?
The goal is to make available to fMRI researchers in the Psychology Department the computing
and data storage resources of the Neuro-Imaging Laboratory (NIL, http://www.nil.wustl.edu).
Using these resources will hopefully better integrate the neuroimaging researchers in the
Psychology Department with medical school neuroimaging researchers and avoid duplication of
efforts with regard to software development, software maintenance, and hardware maintenance.
What is the Neuro-Imaging Laboratory?
The Neuro-Imaging Laboratory is part of the Mallinckrodt Institute of Radiology at the
Washington University School of Medicine. Within the Mallinckrodt Institute of Radiology, the
Radiological Sciences Division is the division tasked with the development of basic sciences
associated with radiology. The Radiological Sciences Division is divided into multiple
laboratories each devoted to a different basic radiological science. The Neuro-Imaging
Laboratory is one of those laboratories.
How is the Neuro-Imaging Laboratory subdivided?
The Neuro-Imaging Laboratory is itself further divided into sub-groups.
Neuroinformatics Research Group
One such group is the Neuroinformatics Research Group (NRG). The NRG is focused on the
integration, mining, and sharing of data across the neurosciences. Neuroinformatics is the
application of information science to neuroscience. Information science is concerned with the
analysis, collection, manipulation, storage, retrieval, and dissemination of information. So,
roughly speaking, the neuroinformatics group is all about providing resources and techniques for
better using computers (software and hardware) for storage, sharing, and analysis of
neuroimaging data.
The NRG hosts a data archive for managing and sharing study data collected by the Washington
University neuroimaging community. This archive is called the Central Neuro-Imaging Data
Archive (CNDA).
Computer Support Group
Another subdivision of the Neuro-Imaging Laboratory is the Computer Support Group (CSG).
The CSG is the computer systems administration group within NIL. As its name implies, the
CSG provides computer support to the other groups within NIL. The CSG folks are the ones you
would turn to in order to get new accounts created, get access to the computers that control the
scanners, get access to NIL computer systems in general, get access to NIL computer systems
from you home, etc.
In particular, they are responsible for:

Using Neuro-Imaging Laboratory (NIL) Resources to
Store, Preprocess, and Analyze fMRI Data
Author: Timothy B. Brown Date: 08 Jun 2011
4
• Maintaining and granting access to the Virtual Private Network (VPN) to which you will
need to get access in order to use any NIL computer systems
• Maintaining and granting access to the PCs in the scanner rooms (other than the
computers that directly control the scanners)
• System administration of NIL Un*x systems, including granting Un*x accounts.1
RIIS
The RIIS group is responsible for maintaining and granting access to the computers that actually
control the scanners. The RIIS is independent from the CSG. The scanner control computers are
maintained separately so that appropriate billing can be done for any hours used on the scanners.
What WUSM resources are we planning to use?
• We will use the Central Neuro-Imaging Data Archive (CNDA) for storage and long-term
archiving of “raw” fMRI scanning data. In this context, “raw” refers to data that is retrieved
directly from the MRI scanners and has not been through any preprocessing other than that
which might have been done by the scanner.
• We will use the CNDA’s pipeline mechanism for performing standardized preprocessing of
fMRI data. In particular standardized BOLD preprocessing.
• We will use computers maintained by the Computer Support Group (CSG), which is part of
the NIL, to carry out a significant amount of the analysis (after preprocessing) of fMRI data.
You will not be limited to using only these NIL maintained computers. You can download
the preprocessed data to other computers, including your own desktop system2, for analysis.
This will be useful if the analysis software that you want to use is not available on the
NIL/CSG maintained machines. However, the NIL maintained machines should have the
most up-to-date and maintained versions of software like FIDL available.3
• We will use NIL/CSG maintained disk space for storage of data during analysis. This space
is referred to as the Bluearc space.
1 Un*x systems include systems operating the Linux and SunOS/Solaris operating systems. UNIX is an officially
trademarked term owned by The Open Group. “Un*x" is often used to indicate all operating systems similar to
UNIX without violating any trademarks. 2 In this case, and for the rest of this document, the term “desktop computer” or “desktop system” is not intended to
be limited to a desktop computer to the exclusion of laptops, notebooks, or netbooks. 3 Currently (June 2011), the NIL maintained computers we have been assigned to use are
• petsun23 – running Solaris 10 (specifically SunOS 5.10)
• petsun24 – running Solaris 10 (specifically SunOS 5.10)
• linux1 – running Linux kernel 2.6.18 (CentOS distribution release 5.5)

Using Neuro-Imaging Laboratory (NIL) Resources to
Store, Preprocess, and Analyze fMRI Data
Author: Timothy B. Brown Date: 08 Jun 2011
5
About the CNDA
What does using the CNDA provide for me?
The Central Neuroimaging Data Archive (CNDA) is “a resource for managing study data
collected by the Washington University neuroimaging community. It includes a secure database,
automated pipelines for processing managed data, and tools for exploring and accessing the
data.”4 The primary mechanism for accessing the CNDA is via the CNDA website
(https://cnda.wustl.edu).
In addition to providing secure, backed-up, web accessible, sharable archiving of scanning data,
the CNDA also makes available standardized pre-processing pipelines. These pre-processing
pipelines are analogous to (indeed originally based upon) the pre-processing scripts that were
previously used on a number of Un*x based servers in the Psychology Department. Using the
CNDA pipelines for preprocessing will help ensure that we will always be using the latest
changes and improvements to the standardized fMRI preprocessing.
When the “raw” data has been successfully preprocessed, the resulting files are automatically
stored in the CNDA. These “Reconstructions”, as they are referred to in the CNDA, are then
available for downloading from the CNDA. The downloading can be done via the CNDA’s web-
based interface or by using command line tools that are available from the CNDA. Using the
command line tools allows you to create scripts to download large quantities of data (that may
take hours to download) and then run those scripts as “batch” jobs that are left running
unattended over several hours or overnight.
How do I get a CNDA account?
To get a CNDA account, use a web browser and visit https://cnda.wustl.edu. Below the User and
Password fields and the Login button, is a link labeled “Register”. Follow that link to fill out and
submit the New User Registration form. Once your account is created you should receive an
email from the Neuroinformatics Research Group (NRG) letting you know that your account has
been successfully created. The email you receive confirming your account creation should look
similar to the following:
From: [email protected]
Date: Thursday, 09 July 2009 14:59
Subject: Welcome to CNDA
Welcome to the CNDA Web Archive!
You can now log on to the CNDA at: https://cnda.wustl.edu
Your username is: tbb
For support, contact the CNDA Management
Note that the support contact link is to the email address [email protected]. That is where
you should send email to initiate support requests.
4 From the CNDA website.

Using Neuro-Imaging Laboratory (NIL) Resources to
Store, Preprocess, and Analyze fMRI Data
Author: Timothy B. Brown Date: 08 Jun 2011
6
How is data organized within the CNDA?
The primary unit of organization of data within the CNDA is the Project. All your scanning data
will be associated with a particular CNDA project. Typically you will create a new project for
each study you perform.
After logging in to the CNDA, you should be presented with the CNDA Home page for your
CNDA account. Your CNDA Home page will look similar to Figure 1. Notice the list of Projects
near the bottom of the page. These are the projects for which you have some defined role within
the CNDA. Depending on the role you are given in a project (owner, member, or collaborator)
and the project accessibility levels defined by the project owner) you may have full access to the
project to upload new data, submit pipeline jobs, or even delete project data, or you may only
have access to view the project data. Each project has a unique Project ID. The project IDs
visible in Figure 1 are: NP891, NP896, and TBBKOJICOPY.
Figure 1: Example CNDA Home page
The next major unit of data organization within the CNDA is the Subject. A project can consist
of multiple Subjects. Subjects are identified by a Subject ID. Data for subjects is further
organized into 1 or more MR Sessions for the subject. An MR Session is identified by an MR ID
and consists of a set of scans that came from one scanning session with the Subject.
The Subject ID and the MR ID can at times be the same text. This can possibly lead to some
confusion. For example, a subject with the Subject ID of ab30491 can also have a session with

Using Neuro-Imaging Laboratory (NIL) Resources to
Store, Preprocess, and Analyze fMRI Data
Author: Timothy B. Brown Date: 08 Jun 2011
7
the MR ID of ab30491. It is important when interacting with the CNDA to be aware of not only
the particular ID that you are specifying in an operation, but also what type of ID it is that you
are specifying.
Subjects can be shared across multiple Projects. Each subject should initially be associated with
only one project. Then the owner of that project can share the subject with other CNDA projects.
If you select a project from the list of projects on your CNDA Home page, you will see the
project page for the selected project. The project page will look similar to Figure 2. Notice that
the lower portion of the page now has a set of tabs labeled Subjects and MR Sessions. You can
select data to work with by Subject ID or by MR Session ID. Selecting the Subjects tab lists all
subjects in the project organized by Subject ID; selecting the MR Sessions tab lists all the MR
sessions for the project organized by MR ID.
Figure 2: An Example CNDA Project Page

Using Neuro-Imaging Laboratory (NIL) Resources to
Store, Preprocess, and Analyze fMRI Data
Author: Timothy B. Brown Date: 08 Jun 2011
8
Getting my data into the CNDA
What is the CNDA Prearchive?
The CNDA prearchive is a temporary storage location for your image data. Images in the
prearchive have not officially been placed into the real archive. In short, the prearchive is a
temporary holding area for your image data. This gives you a chance to review the details of
images you plan to place in the CNDA before placing the images directly in the archive. It is
generally a good idea to place your image data in the prearchive first and then inspect/validate
the data before transferring it to the archive proper.
The techniques described below will move image data into the prearchive either directly from the
scanner or from another computer. Subsequent sections will cover how to transfer data from the
prearchive into the archive
How do I send my data directly from the scanner to the CNDA?
The image browser that is part of the scanner software has a built in option for transferring
scanner data to the CNDA prearchive. Open an image browser and click on the folder containing
the image data to be transferred. Select Transfer � Send To � CNDA.
When registering a subject (before scanning) you will need to include a line in the “Comments”
field of the following form:
Project:NP###, Session:#####, Subject:####
Without this information, when the data is sent to the CNDA prearchive, it will not be associated
with your project so that you can see it and import it into the archive proper.
How do I upload data from my desktop computer or the IAC SunOS/Solaris computers to the CNDA?
There are several different ways to upload data to the CNDA. The first is to use what is referred
to in the CNDA as “Option 1: Compressed upload”. This is likely to be the most efficient
uploading mechanism and is described here.
If you have raw image data stored either on your desktop computer or elsewhere that you want to
upload to the CNDA using the Compressed upload option, you must first make sure that all
image files that you want to upload are available in uncompressed DICOM format5. Note that if
you have already run some analysis or preprocessing software using the images, the software you
used may have compressed the DICOM images for you and left only compressed versions
behind. It is important to make sure that before you upload the DICOM images, they are first
uncompressed.6
5 ECAT format is also supported for PET images.
6 As the option name “compressed upload” implies, you will ultimately upload a compressed file. However, the
“compressed” in the option name refers to compressing the archive file that you will upload. The archive file (a
single file containing other files) must be created using uncompressed images and then the archive itself must be
compressed before uploading.

Using Neuro-Imaging Laboratory (NIL) Resources to
Store, Preprocess, and Analyze fMRI Data
Author: Timothy B. Brown Date: 08 Jun 2011
9
Next all the DICOM format image files that you want to upload must be placed in a compressed
archive file. One acceptable format for the archive to be uploaded is the ZIP file format which is
both a data archive format and a data compression format.7 Files in this format generally have a
.zip file extension. Another acceptable format for the archive to be uploaded is the combined
tar’d and GNU Zip (gzip) format, which is generally created by using the tar tool (which derives
its name from tape archive) to create an archive file with a .tar extension and then using gzip to
compress the tar file resulting in a file with the multipart extension .tar.gz.
Once you have a compressed archive file containing your DICOM format images (.zip or
.tar.gz) , then you can begin the upload process by selecting the Upload � Images menu at the
top of your CNDA Home page.
On the CNDA Upload page under “Option 1: Compressed upload” select the project to which the
image files should be uploaded. You should see a Project label next to a pull down selection box
showing you the Projects to which you may upload images.
For the Destination, select the prearchive. This will give you a chance to review the details of
your upload and match the data to the proper subject and session ID before placing the images in
the archive proper.
Next, select the Browse button next to the file specification box and select the compressed
archive file to be uploaded.
Finally, select the Upload button to start the file upload. You should see a “progress bar”
indicating the percent of upload progress. Once the Upload progress has reached 100%, then the
Extract/Review progress bar should begin showing the progress of the extracting of files from
the uploaded compressed archive. The extract process will look through your compressed
archive for DICOM format image files to be placed into the prearchive.
Once the extraction is complete, you should see a message below the progress bars stating,
“Your file was successfully uploaded. Click here to review and archive your uploaded sessions.”
Clicking on the here link will take you to the CNDA prearchive where you will see any data that
you have uploaded to the prearchive sorted by Session ID.
If you need to return to the prearchive (e.g. you forgot to click here to visit the prearchive after
uploading images, or you needed to logout of the CNDA after uploading and want to return to
the prearchive to review your uploaded data at a later time) then you can simply go to your
CNDA Home page and choose Upload � Go to prearchive from the menus across the top of the
page, and then select the Project to which you have uploaded prearchive data from the dropdown
list presented.
7 In this context, an archive file is a mechanism for combining a set of files into one file (the archive file) containing
the entire set of files. The files placed in the archive file can be accessed and extracted individually or as a group
from the archive file. Notice that this type of archiving does not (necessarily) imply that any compression is
performed, either on the individual files placed in the archive file or the archive file as a whole. A file in the ZIP file
format, both is an archive file and the archive file is compressed.

Using Neuro-Imaging Laboratory (NIL) Resources to
Store, Preprocess, and Analyze fMRI Data
Author: Timothy B. Brown Date: 08 Jun 2011
10
How do I move my image data from the prearchive into a CNDA project?
If you are not already viewing the prearchive, login to your CNDA account and choose
Upload � Go to prearchive. You should then see a list of the sessions that you have uploaded to
the prearchive (one row per upload). If you do not see the upload that you are wanting to move
into a project, check carefully to see that the correct project is selected in the pull down menu
right above the list of uploads.
Once you have found the row for the uploaded data that you wish to move, you can view the
uploaded data by clicking on the Session/subject item at the very left of the list of prearchive
data. Note that the scissors icon to the immediate right of the Session/subject identifier is
“remove icon”. Clicking on the scissors will allow you to remove an upload.
When you have selected the Session/subject row for the data you wish to move, you will be
presented with an “Image Session Creation Form”. See Figure 3 for an example of an Image
Session Creation Form.
Figure 3: Example Image Session Creation Form page
Using Neuro-Imaging Laboratory (NIL) Resources to
Store, Preprocess, and Analyze fMRI Data
Author: Timothy B. Brown Date: 08 Jun 2011
11
On this form, you should verify that the information presented about the project, subject, session
id, data, scanner, number of scans, scan type, quality, etc. are all correct. As is shown in Figure
3, if the subject does not already exist, it can be automatically created for you. However, you
should seriously consider selecting the Add New Subject link in order to be able to populate
demographic data for the subject including the Subject ID, Birth/Age information, handedness,
race, etc.
You should carefully verify the Session ID to be used. If you have a Session ID that is not unique
within your project (i.e. matches the ID for an existing session within your project), there should
be a message in red stating that your session ID is a duplicate of a session which already exists in
the project. If you still proceed to press the Submit button with a duplicate session ID (within a
project) you will overwrite the existing session. This is probably not what you intend to do.8
It is also important to make sure that each scan has the proper scan type listed in the Type
column. These scan types are used later to specify how the image files are used during
preprocessing and to specify which images are to be downloaded using the command line
download tools.
Once you have verified and/or updated all the appropriate information for the uploaded data,
press the Submit button at the bottom of the page to move the data from the prearchive to the
actual CNDA project.
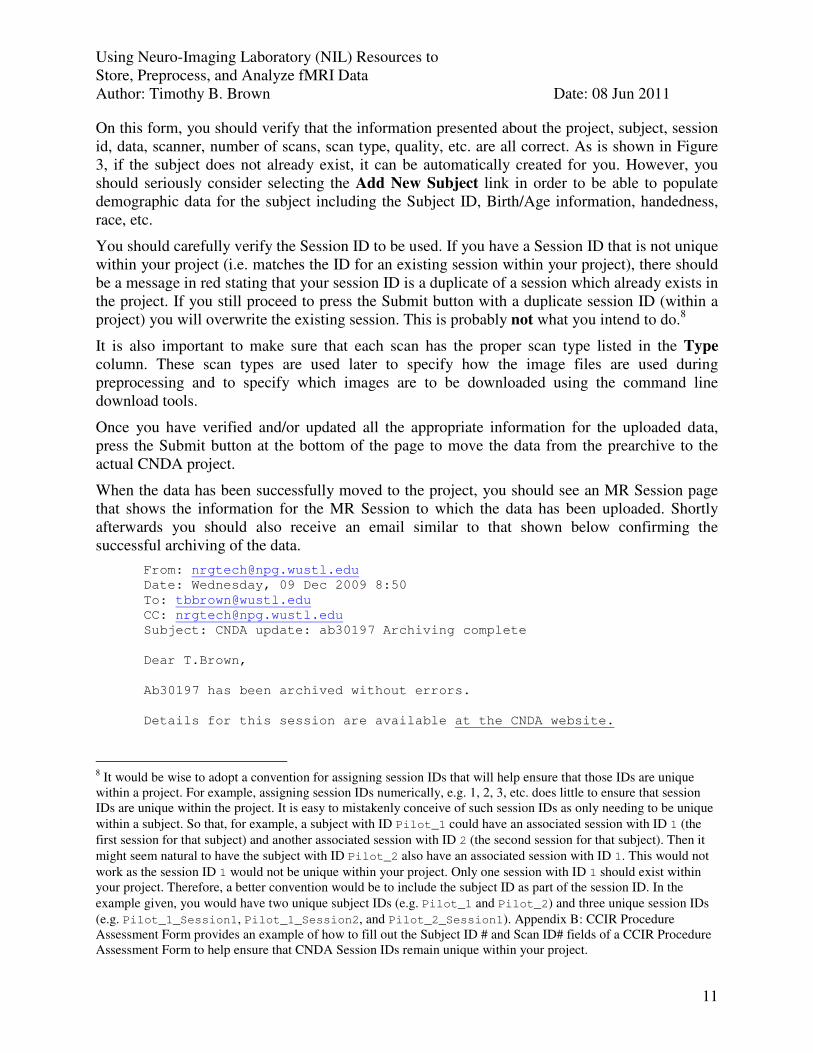
When the data has been successfully moved to the project, you should see an MR Session page
that shows the information for the MR Session to which the data has been uploaded. Shortly
afterwards you should also receive an email similar to that shown below confirming the
successful archiving of the data.
From: [email protected]
Date: Wednesday, 09 Dec 2009 8:50
Subject: CNDA update: ab30197 Archiving complete
Dear T.Brown,
Ab30197 has been archived without errors.
Details for this session are available at the CNDA website.
8 It would be wise to adopt a convention for assigning session IDs that will help ensure that those IDs are unique
within a project. For example, assigning session IDs numerically, e.g. 1, 2, 3, etc. does little to ensure that session
IDs are unique within the project. It is easy to mistakenly conceive of such session IDs as only needing to be unique
within a subject. So that, for example, a subject with ID Pilot_1 could have an associated session with ID 1 (the
first session for that subject) and another associated session with ID 2 (the second session for that subject). Then it
might seem natural to have the subject with ID Pilot_2 also have an associated session with ID 1. This would not
work as the session ID 1 would not be unique within your project. Only one session with ID 1 should exist within
your project. Therefore, a better convention would be to include the subject ID as part of the session ID. In the
example given, you would have two unique subject IDs (e.g. Pilot_1 and Pilot_2) and three unique session IDs
(e.g. Pilot_1_Session1, Pilot_1_Session2, and Pilot_2_Session1). Appendix B: CCIR Procedure
Assessment Form provides an example of how to fill out the Subject ID # and Scan ID# fields of a CCIR Procedure
Assessment Form to help ensure that CNDA Session IDs remain unique within your project.

Using Neuro-Imaging Laboratory (NIL) Resources to
Store, Preprocess, and Analyze fMRI Data
Author: Timothy B. Brown Date: 08 Jun 2011
12
CNDA Team.

Using Neuro-Imaging Laboratory (NIL) Resources to
Store, Preprocess, and Analyze fMRI Data
Author: Timothy B. Brown Date: 08 Jun 2011
13
Using CNDA pipelines
What are CNDA pipelines?
CNDA pipelines are a set of standardized processes that can be applied to your scanning data.
The CNDA pipeline that is most likely to be used by Psychology Department fMRI researchers
is the pipeline that performs standard BOLD preprocessing. This BOLD preprocessing pipeline
is not the only pipeline available. There are also pipelines which:
• create Automated Phantom QA data,
• analyze seed based correlation, and
• build FreeSurfer data
among other things.9
How do I associate a CNDA pipeline with a project?
Before a pipeline can be run on a scan session that has been uploaded to the CNDA, the pipeline
to be run must first be associated with the project in which the data resides. To do this you first
select the project of interest from your CNDA Home page.
When viewing the project page, you will see a set of tabs near the top of the page with headings
like: Details, Publications, History, etc. Which tabs you actually see for a project will depend on
what rights/permissions you have to that project. If you do not have the necessary permissions to
modify the project, you will only see the Details, Publications, and History tabs. If this is the
case, and you want to add a pipeline to the project, you will have to ask the project owner to
grant you the necessary permissions.
If you do have the appropriate permissions to add a pipeline to the project, you will see a tab
labeled “Pipelines”.10
Select the Pipelines tab to start the process of associating a pipeline with
the project. You should then see a display that looks similar to Figure 4.
The top section of the display in Figure 4 should list any pipelines that are already associated
with the project.11
However, there are times when even though some pipelines have already been
associated with the project, no pipelines are listed. I’ve found that the following steps can be
taken to ensure that all associated pipelines are actually listed. First, select the “Add More
Pipelines” button to show a list of possible pipelines to be added. Next, select the “Show Project
Pipelines” button under the list of addable pipelines. This returns you to the list of pipelines
currently associated with the project and seems to consistently list the correct set of associated
pipelines.
9 It is my understanding that there is a mechanism or process in place by which researchers can request the creation
of new pipelines. However, as of this writing, I have not investigated how that is done. 10
You may also see tabs labeled Access and Manage for the project. 11
You may have to scroll to the right to view the full pipeline description.

Using Neuro-Imaging Laboratory (NIL) Resources to
Store, Preprocess, and Analyze fMRI Data
Author: Timothy B. Brown Date: 08 Jun 2011
14
Figure 4: Example project pipeline display
Once you’ve seen the list of already associated pipelines and verified that the one you want to
use is not already associated with the project. You can select the “Add More Pipelines” button.
Now the list of pipelines should include only those pipelines that are not already associated with
the project. For this example, we will add the standard BOLD preprocessing pipeline. The
pipeline’s name is listed as “GenericBoldPreprocessing.xml” and the description reads:
Pipeline to pre-process BOLD scan types. Includes the Functional Connectivity post-
processing.
Further description of this preprocessing pipeline can be viewed by clicking on the “More Info”
link to the right of the pipeline description.
To the left end of each row in the list of available pipelines are links labeled “Add” and
“Details”. It is a good idea to select the Details link to the left of the pipeline you are planning to
add. This will take you to a page that describes the input parameters required to run the
preprocessing pipeline. You will probably want to print out that “details” page to have available
as a reference before actually adding the pipeline to the project.

Using Neuro-Imaging Laboratory (NIL) Resources to
Store, Preprocess, and Analyze fMRI Data
Author: Timothy B. Brown Date: 08 Jun 2011
15
The details pages for the Generic Bold Preprocessing pipeline are shown in Figure 5, Figure 6,
and Figure 7.
In the processing details document, after the pipeline authors, there is a description of the “Input
Parameters Required” for the current version of the pipeline. If you have previously been using
C-shell scripts that were originally created by Avi Snyder and then modified on a case-by-case
basis for preprocessing your BOLD images, then you should find the set of input parameters
listed for the preprocessing pipeline very similar to the set of variables for which you set values
at the beginning of the preprocessing C-shell scripts.
In fact, there is often a correspondence between the variables in the C-shell scripts and the
pipeline input parameters. However, the values for the pipeline input parameters should not
always be set to the same value that you would use for the corresponding script variables.
For example, the mprs pipeline input parameter corresponds to the mprs C-shell script variable.
However, when setting the value for the C-shell script variable, you specify the scan number
within the scanning session (e.g. 4) that corresponds to the MPRAGE scans for your project.
When specifying the value for the pipeline input parameter, you need to specify the scan type.
The scan type for each set of scans is listed on the session page for each session. An example
session page is shown in Figure 8.

Using Neuro-Imaging Laboratory (NIL) Resources to
Store, Preprocess, and Analyze fMRI Data
Author: Timothy B. Brown Date: 08 Jun 2011
16
Figure 5: Page 1 of Generic BOLD Preprocessing Details

Using Neuro-Imaging Laboratory (NIL) Resources to
Store, Preprocess, and Analyze fMRI Data
Author: Timothy B. Brown Date: 08 Jun 2011
17
Figure 6: Page 2 of Generic BOLD Preprocessing Details

Using Neuro-Imaging Laboratory (NIL) Resources to
Store, Preprocess, and Analyze fMRI Data
Author: Timothy B. Brown Date: 08 Jun 2011
18
Figure 7: Page 3 of Generic BOLD Preprocessing Details

Using Neuro-Imaging Laboratory (NIL) Resources to
Store, Preprocess, and Analyze fMRI Data
Author: Timothy B. Brown Date: 08 Jun 2011
19
Figure 8: Session Page for session ab30197
Note that the “Scans” section of the page shows a table with headers Scan, Type, Usability, Files,
and Note. It is the value listed under the Type header that needs to be specified for the mprs
pipeline input parameter.
So for the example shown in Figure 8, if you would have specified scan set 4 for mprs in the
shell script, you will need to specify t1_mpr_1mm_p2_pos50 for the mprs pipeline input
parameter.
Sometimes the value that you would set for a script variable and the value for a pipeline input
parameter are identical. For example, the script variable economy and the pipeline input
parameter economy both take numeric values (from 0 to 6) that have the same meanings.
So, when specifying values for the pipeline input parameters using a C-shell script as an
example, be careful to note whether you should specify the parameter in the same manner for the
CNDA pipeline as it was specified in the C-shell script.
Two of the pipeline input parameters for the Generic BOLD Preprocessing script warrant further
discussion here. The first is the target input parameter. The details page for the pipeline states
that for the target input parameter you should, “Enter the path to the study representative target

Using Neuro-Imaging Laboratory (NIL) Resources to
Store, Preprocess, and Analyze fMRI Data
Author: Timothy B. Brown Date: 08 Jun 2011
20
to be used to do the atlas registration.” It also directs you to the web page
http://nrg.wikispaces.com/atlas_targets for more details. The specified web page tells you a file
system path name to use to specify a particular target. For example, to specify target 711-2C you
are told to specify the path /data/petsun43/data1/atlas as the value for the target input
parameter.
This turns out to be incorrect. Instead, the value to be specified for the target input parameter is
much more straightforward. You should simply specify the target name. So to use atlas target
711-2C, you should specify 711-2C for this parameter. The web page at
http://nrg.wikispaces.com/atlas_targets is still useful as a listing of the atlas targets that are
available.
The other input parameter that needs discussion here is the t1w input parameter. It is unclear to
me as of this writing what the t1w input parameter actually specifies. The name and description
on the details page seem to indicate that the user should specify the scan types for T1-weighted
scans. However, I haven’t found an example C-shell script that actually uses a corresponding t1w
variable, and the MPRAGE scans that are specified by the mprs input parameter seem to be the
T1-weighted scans for the session. My experience to date has been that you can leave the t1w
input parameter blank.
It is also worth noting that there is a difference in how you specify multiple values for a pipeline
input parameter compared to how multiple values are specified for a variable in a C-shell
preprocessing script. In the C-shell script, multiple values for a single variable were separated by
spaces. For example, you might specify the BOLD scans for a session in the C-shell script by
setting the values for the fstd variable as follows:
set fstd = ( 11 12 13 14 15 )
For the input parameters specified for a CNDA pipeline, multiple values are to be separated with
commas. So the values for the fstd input parameter, which are specified by scan type instead of
scan number, might be listed like:
ep2d_bold_Stroop1, ep2d_bold_Stroop2, ep2d_bold_Stroop3,
ep2d_bold_Stroop4, ep2d_bold_Stroop5
You should be aware that when you associate a pipeline with a project, you are not causing the
pipeline to automatically execute for each subject in the project. Also, the input parameters that
you specify when associating a pipeline with a project are project-wide default values for the
parameters. These default values can be checked and changed when you actually request that a
pipeline be run for a particular scan session.
To go ahead and associate a pipeline with a project:
• Have the details page for the pipeline available to use as a reference
• Press the “Add” button to the left of the pipeline you want to associated with the project
• Fill in the input parameters page, and
• Press the Submit button.

Using Neuro-Imaging Laboratory (NIL) Resources to
Store, Preprocess, and Analyze fMRI Data
Author: Timothy B. Brown Date: 08 Jun 2011
21
How do I use a CNDA pipeline for preprocessing a set of data?
Once you have a particular pipeline associated with a project, you can invoke that pipeline on an
MR session. To invoke the pipeline, you will need to first go to the MR Session page for the
session to be processed using the pipeline. See Figure 8 above for an example MR Session page.
In the “Actions” box near the top of the page to the right of the “Details” and “Projects” tabs
there is an action labeled “Build” with a icon of a wrench next to it. This is where you initiate a
run of a preprocessing script. On the page for the MR session for which you want to run a
pipeline, select the “Build” action.
A browser window will pop up asking you to select the pipeline to launch for the MR session.
Select the appropriate pipeline and press the “Submit” button. (If the appropriate pipeline is not
available for selection, see the “How do I associate a CNDA pipeline with a project?” section
above.)
Once you have pressed the “Submit” button, you will be presented with a page asking you to
set/verify the input parameters for this run of the pipeline. This is where you can verify/change
the input parameters from the default values that were specified when the pipeline was associated
with the project.
When the pipeline processing is complete, an email will be sent to the email address associated
with your CNDA account. If you want to specify other email addresses to receive notification,
list them in the box provided at the bottom of the page.
When the pipeline parameters have been specified to your satisfaction, press the “Run
processing” button at the bottom of the page. You should then receive a notice that the “build
process was successfully launched.”
If the pipeline fails, you will receive an email with a subject line similar to:
CNDA update: Processing failed for MR Session ID
If the pipeline succeeds, you will receive an email with a subject line similar to:
CNDA update: Session MR Session ID processed
Who do I contact to get help with the CNDA?
The proper email address for getting support for the CNDA is:
That email address should always get your question to a CNDA support person.
As of this writing, the support for CNDA is handled by Genevieve Gurney. Her contact
information is:
Name: Genevieve Gurney
Email: [email protected]

Using Neuro-Imaging Laboratory (NIL) Resources to
Store, Preprocess, and Analyze fMRI Data
Author: Timothy B. Brown Date: 08 Jun 2011
22
Using NIL maintained resources for analysis outside of the CNDA
What is a NIL Un*x account and how do I get one?
In order to analyze data using Washington University standard tools for fMRI analysis (e.g.
FIDL) and other Un*x based software, we will make use of computer systems maintained by the
Computer Support Group (CSG) within the Neuro-Imaging Laboratory (NIL). To access these
systems, you will need to have a NIL Un*x account. A NIL Un*x account gives you login/shell
level access to NIL/CSG maintained Un*x systems.
A NIL Un*x account is not the same as an RIIS account which is necessary for you to use the
scanners. Even though your NIL Un*x account may have the same username as your RIIS
account and may, if you choose, have the same password as your RIIS account, the two accounts
are separate entities. You may have one without having the other.
To get a NIL Un*x account, visit the NIL homepage at http://www.nil.wustl.edu. In the menu of
links to the left of the page, you should see a link labeled “Documents and Forms”. When you
select the “Documents and Forms” link, you will be presented with a list of forms from which to
choose. One of those forms/links should be the “New User Request Form”. Selecting that link
will allow you to download or open a Microsoft Word™ format document titled “MIR Client
Computer Access Request Form”.
Fill out this form to request a NIL Un*x account. When filling out the form:
• Be sure that on page 3 you fill in “Section C” and check the box requesting a “UNIX
login (Sun or Linux)” and the box requesting “VPN Access”.
• In the line labeled “Other” in “Section C”, please note the user group(s) to which you
would like your account to belong (e.g. ccp, staff, shimony, etc.) If you do not know what
groups you should be in, please ask your lab director.
• Also on the “Other” line, please include an indication of what command line shell you
would like to have as your default login shell (e.g. csh, tcsh, bsh, bash, ksh, etc.) If you
do not know which shell to request, tcsh is a reasonable default choice. Users transferring
their work from the IAC Solaris systems will likely be most comfortable with the tcsh
shell. If you have some other shell preference, feel free to make your choice known on
this line.
• Also on page 3, you will need to get the approval signature of a Lab or Section Chief.
FAX the form to the MIR Executive Director’s office at the phone number given at the top of the
form.
How do I set up the VPN connection to access NIL maintained computer systems?
In order to connect to the NIL machines to process your data, you will not only need a NIL Un*x
account, you will also need to become part of a Virtual Private Network (VPN). A VPN
connection becomes a new network connection (apart from your standard internet connection)
that uses the same hardware as your standard internet connection.

Using Neuro-Imaging Laboratory (NIL) Resources to
Store, Preprocess, and Analyze fMRI Data
Author: Timothy B. Brown Date: 08 Jun 2011
23
To setup this VPN connection, you will need to install VPN client software on the computer you
will be using to connect to the VPN. To get the VPN client software, take the following steps:
1. Make sure your system is not currently running a VPN client. If you have not previously
installed or run VPN client software, it is not likely that you will be running a VPN
client. If you have previously installed and used a VPN client, then you should make sure
to close down your current VPN client software before trying to install the VPN client
software described below.
2. Make sure your system is connected to the internet.
3. Use your internet browser to visit: https://mirvpn.wustl.edu/nil
The page you arrive at should display “CISCO SSL VPN Service” in the upper left and
have a login dialog in the middle prompting you to entry your username and password.
4. Enter you NIL VPN username and password.
Note that the username and password to be used here are not your NIL Un*x username
and password, but your NIL VPN username and password. When you requested a NIL
Un*x account, you should have also indicated that you needed NIL VPN access and thus
been supplied with a NIL VPN username and password.
5. A Java applet will be launched that will “analyze your system” (check your hardware,
operating system, etc.) to determine what software needs to be installed on your system.
It will then download and install the appropriate VPN client software. You may have to
click “yes” or “OK” to approve the installation of the software.
6. After the software is downloaded and installed, it should automatically start the VPN
Client software (Cisco AnyConnect VPN Client). However, the connection that it
automatically establishes is to a VPN called mirvpn.wustl.edu. This is not the VPN
to which you want to be connected. To fix this, start the VPN client software (from your
Start menu in Windows or from the Finder in Mac OS X). You should see a window
titled “Cisco AnyConnect VPN Client” and containing three tabs labeled Connection,
Statistics, and About. Select the Connection tab, and press the Disconnect button to
disconnect from the mirvpn.wustl.edu VPN.
7. Next, modify the contents of the “Connect to:” box changing the specification from
mirvpn.wustl.edu to mirvpn.wustl.edu/nil, and then press the Select
button at the bottom of the window.
8. You’ll be prompted for your Username and Password. (Again, this is your NIL VPN
username and password being requested, and your Username will probably already be
correctly filled in.) Verify your Username, enter your Password, and press the Connect
button.
9. When the Cisco AnyConnect VPN Client window goes away, you should be successfully
connected to the VPN. Verify this by either using ssh to connect to one of the NIL
machines or using your VNC client software to attach to an existing VNC Server session.
10. To disconnect from the VPN, start the VPN client software as is described in step 6
above. Then choose the Connection tab, and select Disconnect.

Using Neuro-Imaging Laboratory (NIL) Resources to
Store, Preprocess, and Analyze fMRI Data
Author: Timothy B. Brown Date: 08 Jun 2011
24
11. To reconnect to the VPN later, start the VPN client. Notice that on the Connection tab
now the “Connect to:” field is already prepopulated with the correct VPN specification
(mirvpn.wustl.edu/nil) and your Username should already be correctly
prepopulated. Simply enter your NIL VPN password and press the Connect button.
12. You should then be able to access NIL systems and resources.
Special Note 1:
The VPN client software installed using the above process has some advantages over the client
software that was recommended in previous versions of this document. First, the previous client
software had some difficulty working correctly under some of the most recent versions of Mac
OS X. The previous client software also had difficulties at times working when the desktop
system using the software was attached to the network via a wired (not wireless) connection in
the Psychology Building. This version of the VPN client software is purported to no longer have
these problems.
Special Note 2:
Similarly, when using previously provided VPN client software, you could not access local
network resources like printers when attached to the VPN. This should not be the case with the
VPN client software installed using the process described above.
Special Note 3:
If, when you try to attach to the NIL VPN using the VPN client installed with the above steps,
you find yourself completely cut off from network access while the VPN client is running, then
you are probably not properly registered in the Active Directory group which allows you to
access the NIL VPN using this client software.
If this happens to you, shut down the NIL VPN client software and send an email to NIL systems
support at [email protected] describing the situation. They should be able to get you
registered in the appropriate Active Directory group to allow you NIL VPN access via this client
software.
How do I change my VPN password?
The VPN username assigned to you when you were granted VPN access is intended to remain
your VPN username for as long as you have reason to have VPN access. The VPN password
assigned to you when you were granted VPN access is intended to be temporary. You should
change that password. However, it is not obvious how to do so. The following are the necessary
steps for changing your VPN password.
1. Visit the following link: https://nilmail07.wustl.edu/IISADMPWD/aexp2b.asp
2. You will be shown a form to fill in with the following fields:
Domain:
Account:
Old password:
New password:
Confirm new password:

Using Neuro-Imaging Laboratory (NIL) Resources to
Store, Preprocess, and Analyze fMRI Data
Author: Timothy B. Brown Date: 08 Jun 2011
25
3. To change your password, fill in the form and press the OK button.
4. The Domain field should be filled in with neuroimage.wustl.edu
What NIL maintained CPUs should I use?
We have been asked to use the following systems for our fMRI analysis.
• petsun23.neuroimage.wustl.edu
• petsun24.neuroimage.wustl.edu
• linux1.neuroimage.wustl.edu
How do I access NIL systems?
Once you have your VPN client up and running and have established a VPN connection to the
neuroimage.wustl.edu domain, you should be able to get simple shell-level access to the NIL
systems by using client software like telnet or ssh. After establishing a connection using
telnet or ssh, use your Un*x account name and password to login.
Just as you changed your temporary VPN password, you will most likely also want to change
your assigned Un*x account password. Use the passwd command to change your Un*x
password.
How do I setup my shell startup files to handle both Linux and Sun OS/Solaris Systems?
Some of the environment variables and settings that are appropriate for your account when you
login to a Linux-based system are not appropriate when you login to a Solaris-based system and
vice versa. In fact, some of the commands that you would like to run upon logging in to a Solaris
system can handicap you greatly if they are run upon logging in to a Linux system.
However, your home directory will be the same regardless of whether you login to a NIL
managed Linux system or a NIL managed Solaris system. Therefore, the same files from your
home directory will be used to setup your environment (set environment variables, set aliases for
commands, set default file protections for files you create while logged in, etc.)
This presents a minor problem in creating account setup files that will perform different setup
actions based upon the operating system of the computer on which you are working. To help
alleviate this problem, a set of template account setup files for C-Shell users have been created.
These template setup files check to see what operating system is currently being used and then
execute other setup files that are appropriate for that operating system.
The template account setup files are in the directory:
/home/usr/wupsy/login_templates.
The files currently in that directory are:
• .cshrc
• .login

Using Neuro-Imaging Laboratory (NIL) Resources to
Store, Preprocess, and Analyze fMRI Data
Author: Timothy B. Brown Date: 08 Jun 2011
26
• .hp.cshrc
• .hp.login
• .linux.cshrc
• .linux.login
• .sgi.cshrc
• .sgi.login
• .sol.cshrc
• .sol.login
• .sun.cshrc
• .sun.login
The two basic startup configuration files for the C-Shell12
are .cshrc and .login. Both of these
files are used by the C-Shell (the tool which presents you with a command line prompt, interprets
your commands, and attempts to carry out your commands by executing programs and scripts) to
setup your environment.13
The .cshrc file is executed before the .login file and is executed
every time the system creates a new environment for you (e.g. every time you start a new
command-line terminal.) The .login file is executed after the .cshrc file, but is only executed
once for each time the user logs in to the system.
The distinction between when .cshrc and .login are executed can be confusing if you don’t
already understand how and when a Un*x system decides to “create a new environment” for you.
Rather than trying to describe the details of that mechanism, it is usually sufficient to follow the
guidelines below when deciding what environment setup commands should go in your .cshrc
file and what environment setup commands should go in your .login file.
• Commands that set environment variables (e.g. setenv commands) should go in the
.login file. The most common exception to this is setting the path (list of directories) in
which you want the system to look for the implementations of commands that you enter.
• Commands that produce “output” to a terminal screen that you want to be should go in
the .login file.
• Commands that create aliases (abbreviations) for other commands (e.g.
alias rm ‘rm -i’ which forces the “remove” command to prompt you and wait for
confirmation before actually removing a file) should be placed in the .cshrc file.
The template .cshrc and .login files do nothing more than determine what operating system is
currently in use and then execute the commands in a corresponding platform-specific .cshrc or
.login file. For example, if you are starting a new C-shell on a Linux-based system, the
template .cshrc file will do nothing more than to execute the .linux.cshrc file. Similarly,
12
The most common login shell/environment for Psychology Department users of NIL managed Un*x systems. 13
Setting up your environment includes such things as determining where the shell will look for the executable
programs that correspond to commands that you enter, determining what aliases (abbreviations) for commands will
be recognized, setting environment variables which determine how other programs will behave.

Using Neuro-Imaging Laboratory (NIL) Resources to
Store, Preprocess, and Analyze fMRI Data
Author: Timothy B. Brown Date: 08 Jun 2011
27
when logging in to a Solaris-based system, the .cshrc file will do nothing more than to execute
the .sol.cshrc file.
Steps to take for new users
If you are a relatively new user of NIL managed Un*x systems, then I suggest you simply copy
all of the template shell startup files into your home directory. This can be done with the
following commands:
$ cd ~
$ mv .login .login.orig
$ mv .cshrc .cshrc.orig
$ mv .sol.login .sol.login.orig
$ mv .sol.cshrc .sol.cshrc.orig
$ cp /home/usr/wupsy/login_templates/.* .
(Do not worry about the warning messages you get indicating that
/home/usr/wupsy/login_templates/. and /home/usr/wupsy/login_templates/.. are
directories.)
Steps to take for not so new users
If you have been using NIL managed Solaris systems (cnindsXX, petsunXX, etc.) for a while
and have made changes to the existing shell startup files, then I suggest taking the following
steps:
Login to a NIL managed Solaris based system (such as petsun23 or petsun24) and replace your
existing .cshrc and .login files using the following commands:
$ mv ~/.login ~/.login.preLinux
$ cp /home/usr/wupsy/login_templates/.linux.login ~/.linux.login
$ cp /home/usr/wupsy/login_templates/.login ~/.login
$ mv ~/.cshrc ~/.cshrc.preLinux
$ cp /home/usr/wupsy/login_templates/.linux.cshrc ~/.linux.cshrc
$ cp /home/usr/wupsy/login_templates/.cshrc ~/.cshrc
If you have previously made modifications to your .sol.cshrc file, you may want to edit the
.linux.cshrc file just copied into your home directory to add command aliases, paths to
commands, and other changes similar to those you may have mad to the .sol.cshrc file.
However, before you do any editing of the .linux.cshrc file, please take the following into
account:
First, the existing template version of the .linux.cshrc file already takes care of the following
items. You do not need to change the .linux.cshrc file to account for these things:
1. It places your current directory (referred to as “.”) in your path. So you can execute
scripts that are in your current directory by just typing the script’s file name.
2. It looks for a bin directory in your home directory. If such a directory exists, it places
that directory in your path. This allows you to place your own personal scripts into your
own ~/bin directory and execute them from the command line prompt by simply typing
the script’s file name.

Using Neuro-Imaging Laboratory (NIL) Resources to
Store, Preprocess, and Analyze fMRI Data
Author: Timothy B. Brown Date: 08 Jun 2011
28
3. It sets the noclobber variable to try to prevent file redirection operations from
accidentally overwriting existing files.
4. It turns on file name completion and autolisting so that you can get a list of the files that
match the partial name you’ve typed so far by pressing the tab key.
5. It sets up an alias for the rm command to prompt you before deleting files.
6. It sets up an alias for the cp command to try to prevent accidental overwriting of files by
copying.
7. It sets up an alias for the mv command to try to prevent accidental overwriting of files by
moving/renaming.
8. It sets a umask value that tries to ensure that other users in the same user group can
access files that you have created.
Again, all these things are already done in the template .linux.cshrc file. So you should not
need to make any changes to your copy of that file to get those “features”.
Second, simply copying your existing .sol.cshrc file to a new file named .linux.cshrc in
order to try to get all your changes made for the Solaris environment to happen for a Linux
environment is a bad idea.
Some commands that many users already have in their .sol.cshrc file will cause corruption of
your PATH environment variable when you log in to a Linux system. This corruption will cause
you to lose access to even simple commands like ls and cd.
If you find that you need to alter your path for use on a Linux-based system, simply edit your
.linux.cshrc file and add commands like:
set path = ($path /usr/local/bin)
to add /usr/local/bin (for example) to your path.
However, before adding a directory to your path, please first check to see if it is already on your
path. Some of the directories that you had to add to your path for a Solaris-based system are
already added to your path by the system-wide login files for Linux. For example,
/usr/local/bin should already be on your path. So adding it yourself as is shown above should
not be necessary.
To see a space separted list of the directories that are already on your path when logged in to a
Linux-based system, enter the following command:
$ echo $path
How do I use VNC to access NIL Systems?
You probably will not be able to run all the analysis software that you would like using a simple
telnet or ssh connection to the NIL systems. Instead, you will likely want to establish a Virtual
Network Computing (VNC) connection from your desktop computer to the NIL systems.
Establishing a VNC connection involves:
1. Selecting VNC Client software for your desktop system and installing that software.

Using Neuro-Imaging Laboratory (NIL) Resources to
Store, Preprocess, and Analyze fMRI Data
Author: Timothy B. Brown Date: 08 Jun 2011
29
2. Starting a VNC Server on one of the NIL systems.
3. Connecting your VNC Client software with the VNC Server that you have started on the
NIL systems.
What VNC Client software should I use on my desktop?
There are many choices for VNC Client software for your desktop computer. For Microsoft
Windows™ systems, I’ve had pretty good luck with UltraVNC (http://www.unvc.com/). For
Macs, Chicken of the VNC seems to be the default local choice. For Linux, “almost all Linux
distributions include an updated/customized version of the RealVNC free edition. For example,
in Debian and its derivatives, the RealVNC server and client appear under the packages named
vnc4server and xvnc4viewer, respectively.”14
How do I start a VNC Server on NIL systems?
To start a VNC Server to interact with your local VNC client software, you will need to use ssh
or telnet to start a terminal session with the NIL machine with which you want to interact.
Remember that to make such a connection to a NIL machine you will need to first establish a
VPN connection to the NIL network.
Once you’ve successfully connected to one of those machines, then you will need to issue a
command to start a VNC Server.
Issue a command similar to the following in order to start a VNC Server for the first time.
% vncserver –depth 24 –nolisten local –geometry 1250x800
Note that you will want to change the 1250x800 in the command to something that is appropriate
for the width and height (width x height) for the display of the system from which you will be
connecting to this VNC Server.15
The first time you issue this command, you will be prompted to enter a password to be used to
access the VNC Server that you are creating. You will need to enter this password whenever you
connect to this server using your VNC client.
If you successfully start a VNC Server process for the first time, the response you will receive
from the system will include a line that identifies the new “desktop”. The line will look similar
to:
New ‘petsun23:2 (tbbrown)’ desktop is petsun23:2
At the time you start your first VNC Server process, you should also see messages indicating that
a new default startup script has been created for you, that applications in that default startup
script are being started, and that a log file for the session is being maintained. E.g.:
Creating default startup script /home/usr/tbbrown/.vnc/xstartup
Staring applications specified in /home/usr/tbbrown/.vnc/xstartup
14
From http://en.wikipedia.org/wiki/RealVNC. Retrieved 03 Jan 2010. 15
See http://www.realvnc.com/products/free/4.1/man/vncserver.html for a description of the –geometry and –depth
command line switches. As an alternative to the –depth option –cc 3 can be used. However, The –cc 3 option is
intended for use with “old” X applications. The –depth option seems to be the better choice.

Using Neuro-Imaging Laboratory (NIL) Resources to
Store, Preprocess, and Analyze fMRI Data
Author: Timothy B. Brown Date: 08 Jun 2011
30
Log file is /home/usr/tbbrown/.vnc/petsun23:2.log
The machine name reported (petsun23 in the above example), the username (tbbrown in the
above example), and the session number (shown as :2 in the above example) will all be specific
to the machine you are using, your username, and the VNC Server session number assigned by
the vncserver command in your case.
Also note that if the server is created correctly, there will now be a .vnc subdirectory in your
home directory. If you change directory (cd) down into the .vnc subdirectory, you will see files
named petsun23:2.log, petsun23:2.pid, passwd, and xstartup.
The item of particular interest to you for using the VNC Server that you’ve just started is the
number after the colon (:) in the .pid file. This is the VNC Server session number and is needed
in order to connect to or shut down the VNC Server. In the example above, the session number is
2.
What should be in my xstartup file?
To make your VNC session more useful, I suggest that after the first time you start a VNC
Server, you immediately shutdown the server and modify the xstartup file in your ~/.vnc
directory.
Stop the VNC server using a command like the one shown in the “How do I kill/stop my VNC
Server?” section below.
Replace the file ~/.vnc/xstartup in your home .vnc directory by issuing the following
commands:
% cd ~/.vnc
% mv xstartup xstartup.original
% cp /home/usr/wupsy/vnc_templates/xstartup ~/.vnc/xstartup
Once you have made this change to the xstartup file, you should start a new VNC Server
process. Then you can exit from the telnet or ssh connection. The VNC Server will be left
running even after you log out.
How do I find my VNC Server session number if I forget it?
If you want to connect to a VNC Server session but have forgotten the session number (which is
needed to connect), then you can find the session number by:
1. Logging into the machine on which the VNC Server session is running.
2. Change to the ~/.vnc directory: cd ~/.vnc
3. List the contents of the directory: ls
4. Look for a file with a name that begins with the machine name (e.g. petsun23) and ends
with the extension .pid. For example, petsun23:2.pid.
5. The number after the colon and before the .pid extension is your VNC Server session
number.

Using Neuro-Imaging Laboratory (NIL) Resources to
Store, Preprocess, and Analyze fMRI Data
Author: Timothy B. Brown Date: 08 Jun 2011
31
How do I connect to the VNC Server that I’ve started?
To connect to the VNC Server you have created, first make sure you have established a VPN
connection to the neuroimage.wustl.edu network. Next, start your VNC client software. Use
the VNC client software to “connect” to the VNC Server session. The server session will be
specified by giving the node name (machine name) of the machine to which you want to connect
(e.g. petsun23.neuroimage.wustl.edu), followed by a colon (:), followed by the result of
adding 5900 to your VNC Server session number.
In the above example, we would specify the server session to which to connect as:
petsun23.neuroimage.wustl.edu:5902
The exact mechanism used to connect your VNC Client to the VNC Server will depend upon
what VNC Client software you are running. You will most likely need to specify your VNC
Server password (established the first time you started a VNC Server on the NIL systems) in
order to connect.
Once you have successfully established a connection between your VNC client and the VNC
Server, you are likely to have at least a single terminal window on the desktop provided by the
window manager.
If there is no terminal window, you are using the template xstartup file as is suggested above,
and you are connecting to a Solaris system, you can start a terminal window by “right clicking”
on your desktop, selecting Tools, and then selecting Terminal. You can then start X-terminals
from the command line window of an existing terminal by entering:
% xterm &
If there is no terminal window, you are using the template xstartup file as is suggested above,
and you are connecting to a Linux system, you can start a terminal window by selecting the
Applications menu in the upper left hand corner of your screen and proceeding through menus
and submenus as follows:
Applications � Accessories � Terminal
How do I run FIDL on the NIL maintained machines?
FIDL can be invoked on the NIL maintained systems by simply issuing the fidl command at the
shell command prompt in any terminal window, similar to:
% fidl &
How do I run background jobs using the Sun Grid Engine?
Long running “background” jobs can be run on an NRG maintained computing cluster. Shell
scripts that are generated by FIDL that are expected to run for a relatively long time would be
good candidates for consideration to be run on this Sun Grid Engine cluster.
See http://nrg.wikispaces.com/SGE_QSubWiki for instructions on how to use the cluster.

Using Neuro-Imaging Laboratory (NIL) Resources to
Store, Preprocess, and Analyze fMRI Data
Author: Timothy B. Brown Date: 08 Jun 2011
32
How do I kill/stop my VNC Server?
To kill/stop your VNC Server, you will need to know the server session number (in the above
examples that session number is 2) and the machine on which the server session is running (e.g.
petsun23). Log in to the machine using ssh or telnet and issue a command like the following:
% vncserver –kill :2
Replace the 2 in the above command with your server session number.
How can I make sure I receive important notifications about using NIL Systems?
An email mailing list (NIL USERS IN PSYCH) has been created to which users of NIL managed
systems in the Psychology Department should subscribe. If you use any computing resources
(servers like linux1, petsunXX; BlueArc disk space; etc) managed by the Computer Support
Group (CSG) of the Neuro-Imaging Laboratories (NIL), and are using those resources because of
your affiliation with the Washington University Department of Psychology, then you should
subscribe to this list.
The list is intended to be used to send out notifications that are important to all such users (e.g.
availability of new server machines, availability and installation locations for new software
packages, warnings about system outages, etc.)
To subscribe to this list, send an email message to [email protected]
containing a single line similar to the following:
subscribe [email protected] <your full name>
Things to note:
1. <your full name> should be replaced with at least your first and last name. If you give
just one name, like “Tim”, your subscription request will be automatically rejected by the
LISTSERV.
2. Do not include the angle brackets (less than and greater than signs) in your single line of
the email. That is, your subscription line should look something like:
subscribe [email protected] Tim Brown
Not like:
subscribe [email protected] <Tim Brown>
3. Send the subscription request email to [email protected], not to
You cannot send anything to [email protected] until you are a member of
the list.
4. After you have submitted a subscription request and your membership has been
approved, you can then send messages to the list by sending email to:

Using Neuro-Imaging Laboratory (NIL) Resources to
Store, Preprocess, and Analyze fMRI Data
Author: Timothy B. Brown Date: 08 Jun 2011
33
5. In order to try to avoid having spam emails sent through this list, only members of the list
can send email to the list, and membership has to be granted through a quick review
process.
Using Neuro-Imaging Laboratory (NIL) Resources to
Store, Preprocess, and Analyze fMRI Data
Author: Timothy B. Brown Date: 08 Jun 2011
34
Getting data out of the CNDA for further analysis
Where should I store my data for access by NIL maintained computer systems?
In order to use FIDL or other software to analyze your data on the NIL systems, you will need to
download the data from the CNDA to some file system accessible from the NIL systems. Often
you will not want to download all of the data from the original scanning session. Instead, you
may select to download just a few of the files created during the original scanning session and
most (or all) of the files generated by the BOLD preprocessing pipeline.
Of course, you could choose to download the data directly to your desktop computer or any lab
specific computer on which you want to perform analysis. However, for the most efficient access
from the NIL systems, the data downloaded needs to be stored in a place that is easily and
efficiently accessible by those systems. We (the Psychology Department) have space available
under the /data/nil-external directory.
There are two subdirectories under /data/nil-external that are specifically for use by
laboratories in the Psychology Department. They are /data/nil-external/psych and
/data/nil-external/psychf. In these directories there should be lab specific subdirectories
for storage of your data (e.g. CCP, DCL, and HRL). The directory structure to use within the lab
specific directories is to be decided by your lab directors. Contact your lab director to determine
how to organize your data within the lab specific directories.
How do I retrieve/download data from the CNDA using the standard CNDA Web interface?
There is more than one way to download files for a session using the standard CNDA Web
interface. One of the more flexible ways is to select the project of interest from your CNDA
homepage, select the session of interest from the project page, and then select “Manage Files” in
the Actions box at the upper right hand side of the session page.
Selecting the “Manage Files” action will cause a “File Manager” window to pop-up in front of
your session page. The File Manager window looks like a traditional file folder navigation tree
with + and – characters to the far left of folder (i.e. directory) names and a specialized check box
just to the right of the + or – character. See Figure 9 for an example.
The + or – character indicates whether the view you are seeing of the file is “closed” or “open”.
The + means you are seeing only the folder name and not the contents of the folder, the – means
you are seeing the folder and an indented list of its contents below the folder name. Clicking on
the + or – toggles the view that you see.
The specialized check box to the right of the + or – indicates the selection status for the folder,
with a check mark on a grey background indicating that the entire folder and all its subfolders
and files have been selected, a minus sign on a grey background indicating that some but not all
of the content of the folder have been selected, and an empty box with a white background
indicating that none of the content of the folder has been selected. You change the selection
status by clicking on the check box for a folder or subfolder.

Using Neuro-Imaging Laboratory (NIL) Resources to
Store, Preprocess, and Analyze fMRI Data
Author: Timothy B. Brown Date: 08 Jun 2011
35
Figure 9: CNDA File Manager
Once you have selected the folders that you want to download, you can select the format for the
resulting downloaded file in the pull down menu near the lower right hand corner of the File
Manager (options are zip and tar.gz). Then selecting the Download button will download the
contents of the selected folders.
How do I retrieve/download data from the CNDA using URI specifications from a browser?
Since downloading files using the standard Web interface from the CNDA can be tedious and
cannot easily be scripted for submittal as a long running “batch” job, the Neuroinformatics
Research Group (NRG, the maintainers of the CNDA) have made available a mechanism for
listing and retrieving data stored in the CNDA using a Representational State Transfer (REST)
software architecture. While the details of the REST software architectural style are well beyond
the scope of this document, the effect for users wanting to list or retrieve the files stored in the
CNDA is significant.
This software architecture makes viewing and downloading listings of files, individual files, and
groups of files straightforward once you understand the “file system”-like hierarchy that the
REST interface makes available and you understand how to build a Universal Resource
Identifier (URI) that identifies the file(s) and what you would like to retrieve.

Using Neuro-Imaging Laboratory (NIL) Resources to
Store, Preprocess, and Analyze fMRI Data
Author: Timothy B. Brown Date: 08 Jun 2011
36
The easiest way to understand the “file system” and construction of URI’s is to examine the
results of creating URI’s and entering them into the address field of a web browser. For these
examples, we’ll start out looking at listings and data from the project titled “Encoding and
Remembering Events Across the Lifespan: Functional correlates of effective segmentation”. This
project has a CNDA Project ID of NP891.
First example URI
The first example URI we will use is:16
https://cnda.wustl.edu/REST/projects/NP891/experiments/vc29901/DIR?format=html
This URI can be broken down as follows:
https: Indicates that we will be using HyperText Transfer Protocol in secure mode
for requesting and receiving results
cnda.wustl.edu Is the name of the host to which we are making a request
REST This is the beginning of the file-system-like path name indicating what we
want to retrieve from the server (cnda.wustl.edu). The use of REST
indicates that we are making a request that involves the REST software
mechanism.
projects The path continues with an indication that we are looking for information (a
listing or file) that is organized by project ids.
NP891 This is the project id
experiments The path continues with an indication that we are looking for information (a
listing or file) that is organized by experiments. In this context the term
“experiment” corresponds to an MR session.
vc29901 The MR Session ID
DIR Allows access directly to the session directory in the archive.
?format=html Indicates that we would like the results provided back to us in HTML format
(a web browser compatible markup language)
Let’s consider the result of entering the above URI into the address bar of a web browser.
16
In order to use the URI specified and see the results shown, your CNDA account must have access to the NP891
project. Many readers will not have such access to the NP891 project. If this is the case, you will need to select a
project to which your CNDA account does have access and substitute that project ID for NP891 in the examples.
Similarly, you will need to choose a valid MR Session ID that is part of your chosen project and substitute that
session ID for vc29901 in the examples.

Using Neuro-Imaging Laboratory (NIL) Resources to
Store, Preprocess, and Analyze fMRI Data
Author: Timothy B. Brown Date: 08 Jun 2011
37
The first thing to note is that if we are not already logged in to the CNDA using the browser, we
will be prompted for a username and password in order to get access to the CNDA data specified
by the URI. Use your normal CNDA username and password.
After successfully validating our username and password, we get a listing of the contents of the
“directory” specified by our path. That is a listing of the contents of the vc29901 session within
project NP891.
The results are provided back to the requesting client software, in this case the web browser. The
browser will use those results to present something similar to Figure 10.
Figure 10: More user-friendly presentation of first URI results
What we have effectively retrieved is similar to what we would get when issuing an ls command
from a Un*x shell prompt.
These are the files and subdirectories that are at the path:
/REST/projects/NP891/experiments/vc29901
on the cnda.wustl.edu server.
Of the contents shown in Figure 10, several items are files:
• Transfer.err
• Transfer.log
• dcmtoxnat.log

Using Neuro-Imaging Laboratory (NIL) Resources to
Store, Preprocess, and Analyze fMRI Data
Author: Timothy B. Brown Date: 08 Jun 2011
38
• Transfer_Transfer.xml
• GenericBoldPreprocessing_Params20090529.xml
• GenericBoldPreprocessing_Params20091122.xml
Several are “subdirectories”:
• SCANS/
• UPLOADS/
• PROCESSED/
Notice that, just as is often true of the Un*x ls command, the names that end with slashes /
represent subdirectories.
Moving down through the directory structure
Suppose I wanted to list the contents of the SCANS subdirectory. How would I construct a URI
to use to get those results? It seems natural that you would add SCANS into the URI to end up
with a URI like:
https://cnda.wustl.edu/REST/projects/NP891/experiments/vc29901/DIR/SCANS?format=html
Notice that the ?format=html clause is always placed at the end.
Figure 11 shows the result of entering that URI into a browser. Indeed, this is the set of
subdirectories of the SCANS directory.
Figure 11: Listing of contents of SCANS subdirectory

Using Neuro-Imaging Laboratory (NIL) Resources to
Store, Preprocess, and Analyze fMRI Data
Author: Timothy B. Brown Date: 08 Jun 2011
39
You can use a similar technique to get list the contents of the PROCESSED subdirectory which
itself just contains a subdirectory named BOLD (see Figure 12).
Figure 12: Contents of PROCESSED subdirectory
We can continue working our way down through the directory structure to the
PROCESSED/BOLD/boldrun1 subdirectory to get something like Figure 13.
Figure 13: The boldrun1 directory
Actually downloading some files
While it’s useful to be able to navigate around the directory structure like this, the real goal here
is to be able to download some of the files to a local machine (e.g. your desktop machine or the
NIL systems) for further processing. Once you’ve found a URI that lists the files that you want,
all you have to do to download the files is change the format argument that we’ve added to the
end of the URI.

Using Neuro-Imaging Laboratory (NIL) Resources to
Store, Preprocess, and Analyze fMRI Data
Author: Timothy B. Brown Date: 08 Jun 2011
40
Let’s use format=zip instead of format=html to access the contents of the boldrun1 directory
that is shown in Figure 13. So now our URI is:
https://cnda.wustl.edu/REST/projects/NP891/experiments/vc29901/DIR/PROCESSED/BOLD/bold
run1?format=zip
Using this URI will result in a ZIP format file being downloaded through your browser to
wherever you specify to save the ZIP file. The ZIP file will contain the files that we saw listed in
Figure 13.
Creating a shorter form of the URI using the accession number
As you listed the contents of directories in your browser using URIs, you may have noticed that
one of the columns in each listing is titled URI. If the item in the column is a file, the URI
column shows a URI that will cause that file to be downloaded. If the item in the column is a
subdirectory, the URI in that column will get you a listing of the contents of that directory. In
either case, these URIs are supplied as a link that you can click on to either cause a file to be
downloaded or to list the contents of a subdirectory.
You also may have noticed that the URIs specified in that column look slightly different than the
ones we’ve been using above to get to the various subdirectories. That is because the URI
supplied for that column use a slightly different navigation technique to get to the appropriate
files and directories.
Each session that is uploaded to the CNDA is assigned a unique identifier. That unique identifier
is called the session’s accession number. If you know the MR session’s accession number, you
can use that information to create shorter URIs to access parts of the session.
In the example shown above, the MR Session vc29901 in project NP891 was assigned accession
number CNDA_E00541. Using this information, you can replace the portion of the path specified
in the URI that reads:
/projects/<project id>/experiments/<session id>
with:
/experiments/<accession number>
Thus:
https://cnda.wustl.edu/REST/projects/NP891/experiments/vc29901/
DIR?format=html
can be shortened to:
https://cnda.wustl.edu/REST/experiments/CNDA_E00541/DIR?format=html
You and others on your team probably will know the Project ID and the MR Session ID for the
data you want to access. You are less likely to know (at least initially) the accession number that
has been assigned to your MR session data. So your URIs will probably be easier to read and
understand if you use the longer form, which includes the Project ID and the MR Session ID. But
you need to at least understand how the shorter form URIs are created.

Using Neuro-Imaging Laboratory (NIL) Resources to
Store, Preprocess, and Analyze fMRI Data
Author: Timothy B. Brown Date: 08 Jun 2011
41
Using recursion to see or retrieve more data
Earlier we saw how to create a URI to list (and then to retrieve) data in the
PROCESSED/BOLD/boldrun1 subdirectory for or selected example session. Of course, it would be
tedious if we had to construct a separate URI to list or retrieve each of the boldrun1, boldrun2,
boldrun3, boldrun4, and boldrun5 subdirectories.
Instead of creating separate URIs for each of the boldrunN subdirectories, we can simply add
another “argument” to the end of the URI. Let’s add the text “&recursive=true” to the end of
the URI. Part of the result of using this URI is shown in Figure 14.
Figure 14: Adding recursion to a URI
Notice that the immediate contents of the BOLD directory are included and the contents of each
subdirectory of the BOLD directory are also included. If any subdirectory of the BOLD directory
had further subdirectories, then the contents of those sub-subdirectories would also be included
and so on down the directory structure. Of course, to download all of these files, we would
simply need to change the format=html argument to format=zip in the URI.
Note that the order of the arguments is not relevant. The recursive=true could come before the
format=zip in the URI. The important thing to understand is that the question mark (?) in the
URI signals the beginning of the arguments and the ampersand (&) separates multiple arguments.

Using Neuro-Imaging Laboratory (NIL) Resources to
Store, Preprocess, and Analyze fMRI Data
Author: Timothy B. Brown Date: 08 Jun 2011
42
So that reversing the order of the arguments in the URI used in Figure 14 would result in the end
of that URI reading:
BOLD?recursive=true&format=html
We could list the entire contents of the PROCESSED directory and all of its subdirectories by using
a URI like:
https://cnda.wustl.edu/REST/projects/NP891/experiments/vc29901/
DIR/PROCESSED?format=html&recursive=true
Of course, we could then retrieve the entire contents of the PROCESSED directory and all of its
subdirectories by changing format=html to format=zip. At the time of this writing, this results
in a 1.55GB zip compressed file being downloaded.
Expanding upon this, we could download the entire set of data for the MR Session vc29901
within project NP891 with the following URI.
https://cnda.wustl.edu/REST/projects/NP891/experiments/vc29901/
DIR?format=zip&recursive=true
At the time of this writing, this results in a 1.72GB zip compressed file being downloaded.
Using wildcards to see or retrieve more data
The SCANS subdirectory for the vc29901 session itself has subdirectories that are numbered 1
through 13 for each of the various scans that made up the session. Each of these numbered
subdirectories has subdirectories of its own named DICOM and SNAPSHOTS.
Suppose we wanted to get a list of (or retrieve) all the files in the DICOM subdirectories for all of
the 13 scans, and we did not want the contents of the SNAPSHOTS subdirectories included. We
could do this using “wildcard” characters. A URI like:
https://cnda.wustl.edu/REST/projects/NP891/experiments/vc29901/
DIR/SCANS/*/DICOM?format=html
would give us a listing of those DICOM files.
Of course, changing the format to zip instead of html would download a zip file containing
those files.
Some additional notes
There are a couple other things that are worth knowing about accessing the CNDA data files
using URIs. First, sometimes you will get a page that says something to the effect of, “Specified
request didn’t match any stored files” or “The server has not found anything matching the
request URI”. These are most likely to be the result of an incorrectly composed URI (project id
incorrect, session id misspelled, etc.)
However, you will sometimes get a similar response when you have typed the URI correctly.
This is generally attributable to your CNDA account not having access to the session you have
specified. You may need to contact the owner of the project in question and make sure that your
account has access to the project in order to access the files using these URIs.
A second thing to note is that if you mistype the name of the format that you want, say you
accidentally type format=ziip instead of format=zip, then the results will be formatted as if

Using Neuro-Imaging Laboratory (NIL) Resources to
Store, Preprocess, and Analyze fMRI Data
Author: Timothy B. Brown Date: 08 Jun 2011
43
you had not specified any format at all. Thus, the results will be an XML file and will be handled
by your browser the way it handles XML files.
The last thing to note, at least for now, is that the above example using wildcards is just a
“scratch the surface” introduction. You should feel free to experiment and try placing wildcard
characters at other places in the URI to see what happens. If you are familiar with filename
wildcard characters used within Un*x shells, then you might want to try some of those wildcard
characters too.
How do I retrieve/download data from the CNDA using command line tools?
The previous section contains examples to help understand the construction of URIs to list or
retrieve files from the CNDA. But entering those URIs into a browser’s address bar doesn’t
allow you to put downloads of files from the CNDA into script files and run them as
“background” or cron jobs. To do that we need a command line tool that can issue requests to a
web server (URIs) and save the result of those requests.
One such tool is cURL (http://curl.haxx.se). cURL is open source and binary installation
packages are available for a large variety of operating systems (Windows, DOS, HP-UX, various
flavors of Linux, Solaris, and Mac OS X among them). cURL has been installed on the NIL
systems for our use.
cURL has a lot of features, and we do not plan to cover them all (or anywhere close to all of
them) in this short section. For more information about using cURL, you should refer to the
cURL manual (http://curl.haxx.se/docs/manual.html).
As in the previous section, we’ll learn by viewing some simple examples. We’ll start by using
the first URI that we used in the previous section
https://cnda.wustl.edu/REST/projects/NP891/experiments/vc29901/DIR
We’ll issue the command
% curl https://cnda.wustl.edu/REST/projects/NP891/experiments/vc29901/DIR
at the shell command prompt.
The first problem you’ll note is that since you are issuing an https request, cURL will want to
verify a Secure Socket Layer (SSL) certificate. For now, we’ll bypass that issue by adding the –k
option to the command line.
% curl -k https://cnda.wustl.edu/REST/projects/NP891/experiments/vc29901/DIR
This command gives us output that looks like:
<html>
<head>
<title>Status page</title>
</head>
<body>
<h3>The request requires user authentication</h3><p>You can get technical
details <a href="http://www.w3.org/Protocols/rfc2616/rfc26
0.4.2">here</a>.<br>

Using Neuro-Imaging Laboratory (NIL) Resources to
Store, Preprocess, and Analyze fMRI Data
Author: Timothy B. Brown Date: 08 Jun 2011
44
Please continue your visit at our <a href="/">home page</a>.
</p>
</body>
</html>
Figure 15: First cURL ouput
Two things to note about this output are:
1. It is indicating that you need to have “user authentication” (a specified username and
password) to access the data of interest.
2. The output was sent right back to the console (the standard output location).
We’ll first deal with the user authentication issue, then see how to send the results elsewhere.
The easiest way to specify a username when using cURL is to use the –u command line option.
% curl –k –u tbb https://cnda.wustl.edu/REST/projects/NP891/experiments/vc29901/DIR
This works, but causes cURL to prompt us for the appropriate password. The results are again
sent to the standard output location (our shell window), but they are now in XML format.
The prompting for a password will have to be removed if we’re going to use this in a background
shell script. We can fix that by using –u <username>:<password>. We can change to HTML
output by adding the same ?format=html that we used in the previous section.
% curl –k –u tbb:password https://cnda.wustl.edu/REST/projects/NP891/experiments/vc29901/DIR?format=html
If you redirect the output from the standard output location to a file (the technique that usually
works is to add > <filename> to the end of the command line) and then open up the file in a
browser, you’ll see that we now have used a command line to download a file that corresponds to
Figure 10.
Now you can begin to see how cURL commands can be embedded in scripts to download the
data that you need from the CNDA. Let’s skip ahead to where (in the previous section) we built a
URI to download the entire contents of the PROCESSED directory and all of its subdirectories.
That URI was
https://cnda.wustl.edu/REST/projects/NP891/experiments/vc29901/
DIR/PROCESSED?format=zip&recursive=true
If we use that URI in a cURL command with –k and –u <username>:<password>, we will have
created a command line that will download a zip file containing all the specified files. In some
command line shells, the ampersand before the recursive=true part of the command will cause
problems. These can usually be fixed by putting double quotes (“”) around the entire URI.
Don’t forget to redirect the output from this command to a file. If you don’t redirect the
output, the entire multi-gigabyte zip file will be sent to your terminal/console/standard output.
You might notice that cURL displays a “progress meter” indicating the amount of transferred
data, transfer speeds, estimated time left, etc. To turn off this display add the –s option to the
command line.
Using Neuro-Imaging Laboratory (NIL) Resources to
Store, Preprocess, and Analyze fMRI Data
Author: Timothy B. Brown Date: 08 Jun 2011
45
A better way to specify an output file.
If you redirect the output from a cURL command using the standard redirect operator (a greater
than sign, >, added to the end of the command line followed by the name of the file to which to
send the output) then there is a limit on the size of the output file that can be created. That limit is
roughly 2GB. So if you issue a cURL command like:
% curl –k –u tbb:password myuri > myfile.zip
where password is replaced with your CNDA password, and myuri is replaced with the URI
specifying what you want to download, then if the resulting myfile.zip file should be larger than
2GB, then the download will fail with an error message indicating, “Failed writing body”.
To avoid this problem, you should specify the output file for your cURL command using the –o
command line option. This would change the above command to:
% curl –k –u tbb:password –o myfile.zip myuri
IMPORTANT NOTE: Unzipping large files
The standard unzip command that is available at /usr/bin/unzip on Solaris machines and is
likely to be the command used when you just enter:
% unzip myfile.zip
from those machines, does not support “large” zip files. In this case, “large” is defined as being
greater than 2GB. It is very likely that many of the zip files that you download from the CNDA
will exceed this size limit. Therefore, a version of the unzip command has been installed on the
Solaris machines that does support large files. The unzip command with large file support has
been installed at /usr/local/bin/unzip. So you should use a command like:
% /usr/local/bin/unzip myfile.zip
to unzip large files downloaded from the CNDA when using Solaris.
Removing your username and password from the cURL command line
It is not really a good idea to put your CNDA username and password in cURL command lines.
It is probably even less of a good idea to embed your CNDA username and password in scripts
that you’ve written to use cURL to download sets of files.
One way to avoid this is to use the –n command line option on the curl command. This option
causes cURL to look in the user’s home directory for a file named .netrc (_netrc on Windows)
for the user’s login name and password.
Lines in your .netrc file take the form:
machine <host-name> login <user-name> password <password>
where you substitute the machine name for <host-name>, your username for <user-name>, and
your password for <password>.
You should protect your .netrc file so that only you can read or write it. Use the following
command to properly protect your .netrc file.
% chmod u+rw-x,go-rwx .netrc

Using Neuro-Imaging Laboratory (NIL) Resources to
Store, Preprocess, and Analyze fMRI Data
Author: Timothy B. Brown Date: 08 Jun 2011
46
Once you’ve created the .netrc file, you can leave the –u option out of your curl command lines
and replace it with –n.
An alternative to cURL: wget
Another command line tool that can be used to download files with specified URIs is the wget
tool. A command of the following form should download the appropriate zip file from the
CNDA:
% wget -–http-user your_CNDA_username
--http-passwd your_CNDA_password
-O desired_name_for_zip_file
“https://cnda.wustl.edu/REST/projects/...”
Note that this command should be issued all on one line as opposed to being broken across lines
as the example shows. Also note that the –O option is a hyphen and an uppercase letter O. The
lowercase letter o means something entirely different and should not be used. The numeral zero,
0, does not work either.
If you have created a .netrc file as described in the previous section, you will not need to
specify your username or password on the command line. wget will automatically look in your
.netrc file for that information. So then your wget command will look something like the
following:
% wget -O desired_name_for_zip_file “https://cnda.wustl.edu/REST/...”

Using Neuro-Imaging Laboratory (NIL) Resources to
Store, Preprocess, and Analyze fMRI Data
Author: Timothy B. Brown Date: 08 Jun 2011
47
Appendix A: Document Revision History
Date Description
08 Jun 2011 • Modified discussion of getting and installing VPN client software to
refer to using the newer CISCO SSL VPN Service client software
available at https://mirvpn.wustl.edu/nil. See the section How do I
set up the VPN connection to access NIL maintained computer
systems? Removed instructions for previously recommended VPN
client software.
• Removed references to cnindsXX machines and referred users to
petsun23, petsun24, and linux1 instead. See the section What NIL
maintained CPUs should I use?
• Added section on creating login/startup files to allow login to both
Linux and Sun OS/Solaris. See the section How do I setup my shell
startup files to handle both Linux and Sun OS/Solaris Systems?
• Added instructions for subscribing to NIL Users in Psych email
mailing list. See the section How can I make sure I receive
important notifications about using NIL Systems?
19 May 2010 • Crossed out text indicating that users should use the built-in VPN
client software in Snow Leopard. (Did not delete because the built-
in VPN client software in Snow Leopard is actually the officially
supported VPN client software. But there seems to be something
unique to the configuration of the Psychology Building wired
network that is causing a problem.) Added text indicating that Snow
Leopard users should (for now) behave as if they were using the
previous version of the OS (Leopard).
05 May 2010 • Added footnote emphasizing session ID uniqueness within a project
• Added footnote indicating that using the example URIs requires the
user’s CNDA account to have access to the specified project.
• Added Example CCIR Procedure Assessment Form Appendix to
illustrate one way to keep session IDs unique within a project.
26 Apr 2010 • Added instructions on using sed to modify xstartup file.
12 Apr 2010 • Added note about unzipping large zip files using the version of the
unzip command which has been compiled to have large file support.
07 Apr 2010 • Added explanation of using the –o option to the curl command for
Using Neuro-Imaging Laboratory (NIL) Resources to
Store, Preprocess, and Analyze fMRI Data
Author: Timothy B. Brown Date: 08 Jun 2011
48
downloading files greater than 2GB.
• Added better description of using wget as an alternative to curl
• Added information about properly protecting a user’s .netrc file
26 Mar 2010 • Removed incorrect phone number for CNDA support contact.
• Added Document Revision History Section

Using Neuro-Imaging Laboratory (NIL) Resources to
Store, Preprocess, and Analyze fMRI Data
Author: Timothy B. Brown Date: 08 Jun 2011
49
Appendix B: CCIR Procedure Assessment Form

Using Neuro-Imaging Laboratory (NIL) Resources to
Store, Preprocess, and Analyze fMRI Data
Author: Timothy B. Brown Date: 08 Jun 2011
50
Note the filled in Subject ID # and Scan ID # (in red). Notice that the Scan ID #, which
corresponds to the CNDA MRI Session ID, starts with the Subject ID #. This will help ensure
unique CNDA MRI Session IDs within your project.