Using CorelDRAW Graphics Suite X3 with VersaLaser™ · PDF fileUsing CorelDRAW®...
11
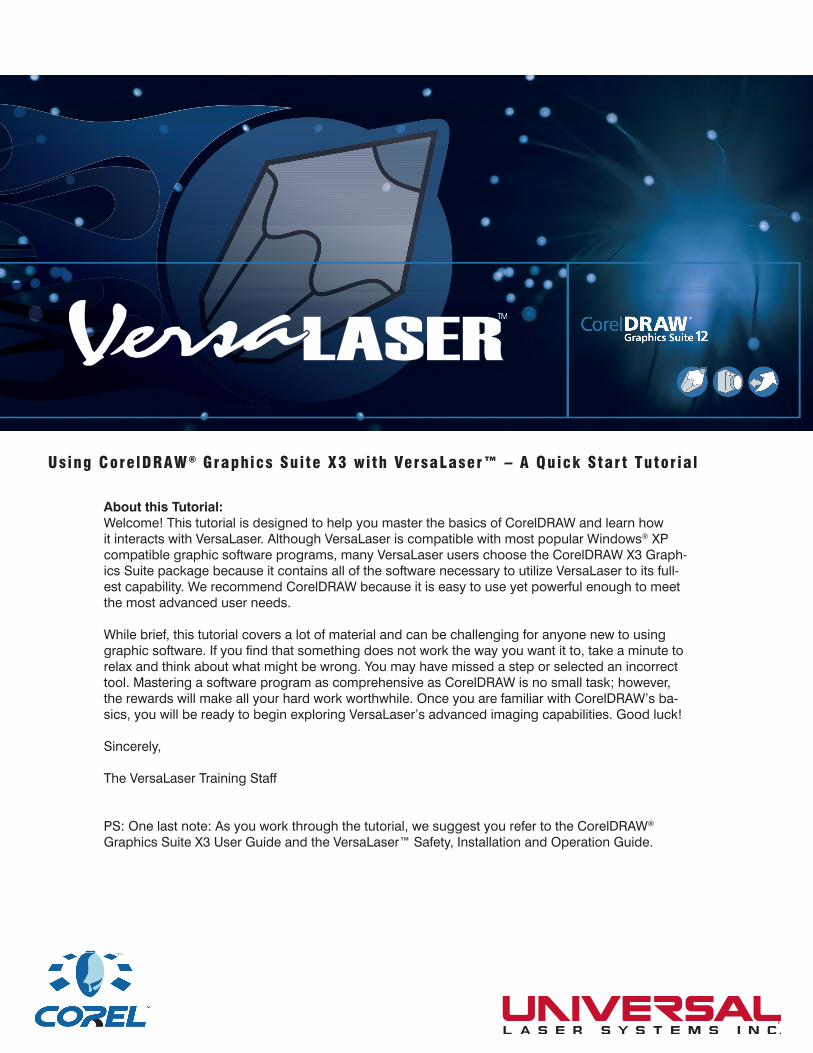
Using CorelDRAW ® Graphics Suite X3 with VersaLaser™ – A Quick Start Tutorial About this Tutorial: Welcome! This tutorial is designed to help you master the basics of CorelDRAW and learn how it interacts with VersaLaser. Although VersaLaser is compatible with most popular Windows ® XP compatible graphic software programs, many VersaLaser users choose the CorelDRAW X3 Graph- ics Suite package because it contains all of the software necessary to utilize VersaLaser to its full- est capability. We recommend CorelDRAW because it is easy to use yet powerful enough to meet the most advanced user needs. While brief, this tutorial covers a lot of material and can be challenging for anyone new to using graphic software. If you find that something does not work the way you want it to, take a minute to relax and think about what might be wrong. You may have missed a step or selected an incorrect tool. Mastering a software program as comprehensive as CorelDRAW is no small task; however, the rewards will make all your hard work worthwhile. Once you are familiar with CorelDRAW’s ba- sics, you will be ready to begin exploring VersaLaser’s advanced imaging capabilities. Good luck! Sincerely, The VersaLaser Training Staff PS: One last note: As you work through the tutorial, we suggest you refer to the CorelDRAW ® Graphics Suite X3 User Guide and the VersaLaser™ Safety, Installation and Operation Guide.
Transcript of Using CorelDRAW Graphics Suite X3 with VersaLaser™ · PDF fileUsing CorelDRAW®...
�
Using CorelDRAW® Graphics Suite X3 with VersaLaser™ – A Quick Star t Tutor ial
About this Tutorial: Welcome! This tutorial is designed to help you master the basics of CorelDRAW and learn how it interacts with VersaLaser. Although VersaLaser is compatible with most popular Windows® XP compatible graphic software programs, many VersaLaser users choose the CorelDRAW X3 Graph-ics Suite package because it contains all of the software necessary to utilize VersaLaser to its full-est capability. We recommend CorelDRAW because it is easy to use yet powerful enough to meet the most advanced user needs.
While brief, this tutorial covers a lot of material and can be challenging for anyone new to using graphic software. If you find that something does not work the way you want it to, take a minute to relax and think about what might be wrong. You may have missed a step or selected an incorrect tool. Mastering a software program as comprehensive as CorelDRAW is no small task; however, the rewards will make all your hard work worthwhile. Once you are familiar with CorelDRAW’s ba-sics, you will be ready to begin exploring VersaLaser’s advanced imaging capabilities. Good luck!
Sincerely,
The VersaLaser Training Staff
PS: One last note: As you work through the tutorial, we suggest you refer to the CorelDRAW® Graphics Suite X3 User Guide and the VersaLaser™ Safety, Installation and Operation Guide.

�
Using CorelDRAW® Graphics Suite X3 with VersaLaser™ – A Quick Star t Tutor ial
Section I: Gett ing Started
1.1: Configuring CorelDRAW to Work With Your VersaLaser
Before you can begin processing any materials, you must configure CorelDRAW to work with your VersaLaser. The basic setup includes three important steps:
• You must set CorelDRAW’s default workspace orientation to fit VersaLaser’s table size; • You must set CorelDRAW’s line thickness to Hairline for vector output*; • You must set CorelDRAW’s color palette to match VersaLaser’s color processing management software.
This last point is very important. Why? Because the colors that you assign to your artwork tell VersaLaser what to do. The color RED instructs VersaLaser to cut all the way through material; the color BLUE instructs VersaLaser to score or vector etch the surface of a material without cutting it; and the color BLACK instructs VersaLaser to raster etch** the surface of a material.
We will discuss the use of colors in greater detail later in this tutorial. In the meantime, please refer to Section 2-5 in your VersaLaser Installation Guide for complete details on configuring CorelDRAW to work correctly with VersaLaser.
Tip: If you don’t have your VersaLaser yet, don’t worry! You can practice using the default color palette pro-vided in CorelDRAW to get a feel for how colors control VersaLaser’s cutting and etching functions.
*About vector etching and cutting: Vector images are line images. Vector cutting is when the laser follows the outline of an object and cuts it out. Vector etching and cutting is much quicker than raster etching. If you give a vectorized image a fill and a hairline outline, it will raster etch first and then vector cut.
**About raster etching: Raster images are sometimes called bit-mapped images. Raster etching works like old-fashioned dot matrix printing, in which the laser goes back and forth to etch the image. In any graphics program, if an object has a fill, it will raster etch. The laser system processes raster images more slowly than vector images.
1.2: Sett ing the Default Workspace
After configuring the CorelDRAW software, start the program from your Windows XP-compatible PC as follows:
Click START a ALL PROGRAMS a COREL GRAPHICS SUITE X3 a CORELDRAW X3
Begin by selecting FILE a NEW from CorelDRAW’s Main Menu task bar to open a new document.
Next, go to the Main Menu task bar and click on LAYOUT a PAGE SETUP (GRAPHIC 1)
(GR
AP
HIC
1)
�
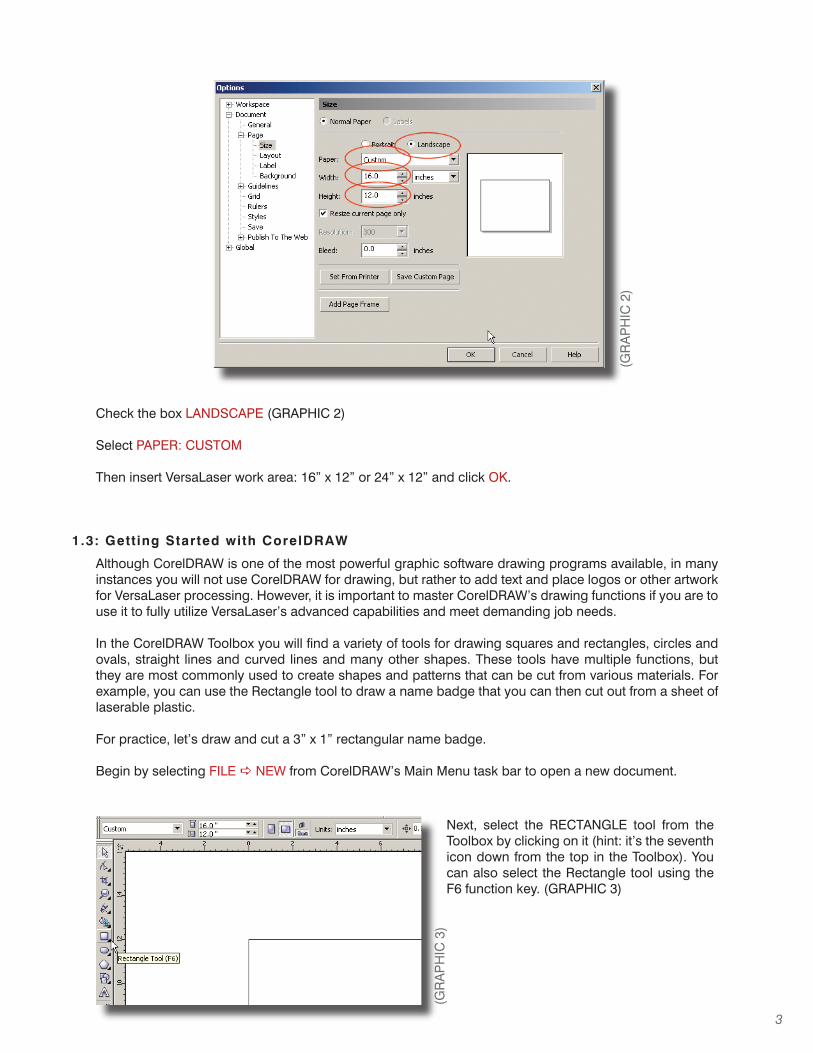
Check the box LANDSCAPE (GRAPHIC 2)
Select PAPER: CUSTOM
Then insert VersaLaser work area: 16” x 12” or 24” x 12” and click OK.
1.3: Gett ing Started with CorelDRAW
Although CorelDRAW is one of the most powerful graphic software drawing programs available, in many instances you will not use CorelDRAW for drawing, but rather to add text and place logos or other artwork for VersaLaser processing. However, it is important to master CorelDRAW’s drawing functions if you are to use it to fully utilize VersaLaser’s advanced capabilities and meet demanding job needs.
In the CorelDRAW Toolbox you will find a variety of tools for drawing squares and rectangles, circles and ovals, straight lines and curved lines and many other shapes. These tools have multiple functions, but they are most commonly used to create shapes and patterns that can be cut from various materials. For example, you can use the Rectangle tool to draw a name badge that you can then cut out from a sheet of laserable plastic.
For practice, let’s draw and cut a 3” x 1” rectangular name badge.
Begin by selecting FILE a NEW from CorelDRAW’s Main Menu task bar to open a new document.
(GR
AP
HIC
2)
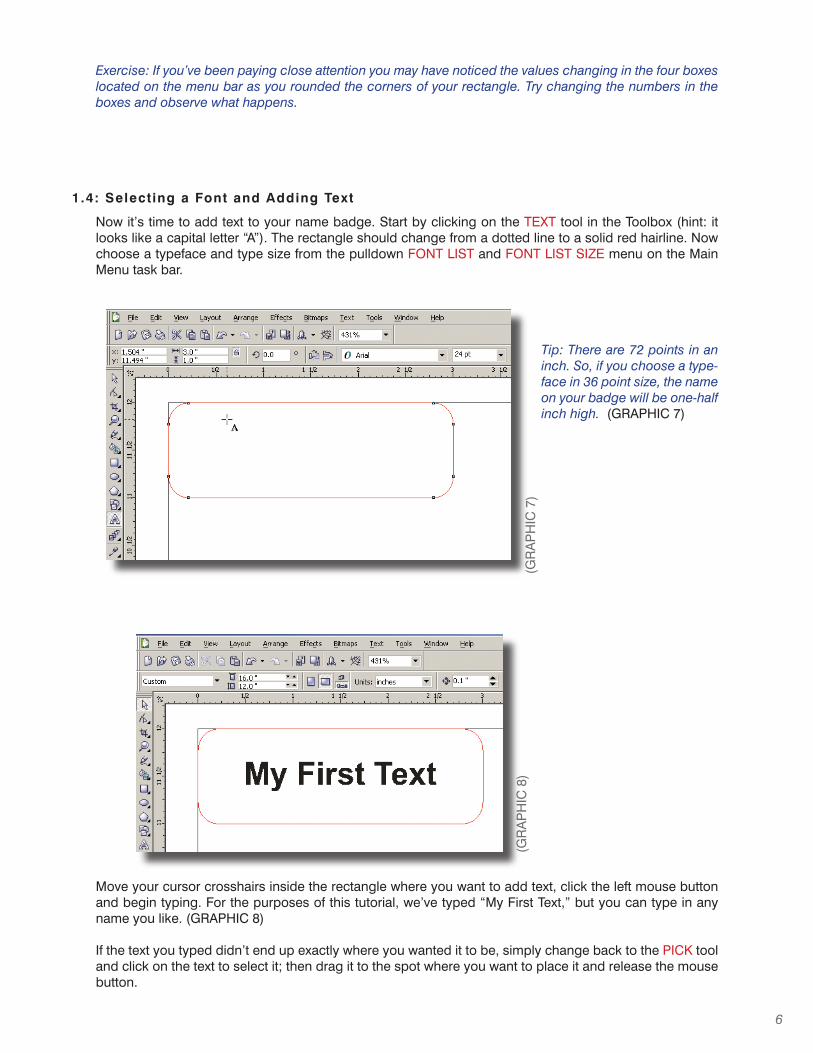
Next, select the RECTANGLE tool from the Toolbox by clicking on it (hint: it’s the seventh icon down from the top in the Toolbox). You can also select the Rectangle tool using the F6 function key. (GRAPHIC 3)
(GR
AP
HIC
3)

�
Now, move your cursor crosshairs to the top left corner of the workspace to the approximate spot where you want to begin drawing the rectangle. Using the rulers at the top and side of CorelDraw’s workspace as a guide, hold down the left mouse button and move the cursor down and to the right. When you’ve drawn a rectangle approximately 3” x 1” in size, release the left mouse button.
Unless you’re very lucky, chances are your rectangle will not be exactly 3” tall by 1” wide. You could correct this by clicking on the rectangle to select it and then carefully drag one of the corner “handles” until it is the right size, but there is a much easier way to fix this. Using your mouse, click on the rectangle to select it; only this time type the exact width (3.0”) and the exact height (1.0”) into the two white boxes second from top left in the menu bar and press the “Enter” key. Your rectangle is now perfectly sized! (GRAPHIC 4)
Now move your cursor back to the Toolbar and choose the PICK tool. The PICK tool is the main selection tool in CorelDRAW (hint: it’s at the top of the Toolbar and looks like an arrow). If you click and hold your left mouse button on the “x” in the center of the rectangle, you can move it anywhere around the work surface.
(GR
AP
HIC
4)
Extra Credit Exercise: Try moving the rectangle without first choosing the PICK tool. What happened? Did you draw another rectangle? If so, you can delete it by clicking EDIT and then UNDO MOVE from the menu bar. You can experiment with different tools at any time during this tutorial to get a feel for how each one interacts with the objects onscreen – don’t worry, you can use the UNDO tool as many times as necessary to get back to where you started.

�
At this point you’ve drawn a 3” x 1” rectangular box to use for a name badge.
Remember when we told you earlier that CorelDRAW uses colors to tell VersaLaser what to do? Now’s your chance to put that knowledge to use. First, click on the rectangle to select it using the PICK tool. Next, change to the OUTLINE tool from the Toolbox (hint: it looks like a tip of a fountain pen). Click once on the OUTLINE PEN tool and a “flyout” menu will appear. Click again on the OUTLINE PEN tool in the flyout menu and an options box will appear. At this time choose width: HAIRLINE and color: RED. (GRAPHIC 5)
Advanced User Tip: There are many “shortcuts” built into CorelDRAW designed to speed up your work. For example, instead of using the flyout OUTLINE PEN menu to select the color of your rectangle, you can sim-ply click your RIGHT mouse button on RED in CorelDRAW’s color palette to achieve the same effect. As you become more experienced with CorelDRAW, the time-saving benefits of these shortcuts will become clear.
Let’s give our name badge rounded edges. To radius the corners on your name badge, select the SHAPE TOOL (hint: it’s the second icon down in the Toolbox) and then highlight the rectangle you just created by clicking on it. You will see four handles, one on each corner of the rectangle. Using your left mouse button, click and hold one of the handles and move it left or right to form a rounded corner. When the corner is rounded to your liking, release the mouse button. (GRAPHIC 6)
(GR
AP
HIC
6)
(GR
AP
HIC
5)
�
1.4: Selecting a Font and Adding Text
Now it’s time to add text to your name badge. Start by clicking on the TEXT tool in the Toolbox (hint: it looks like a capital letter “A”). The rectangle should change from a dotted line to a solid red hairline. Now choose a typeface and type size from the pulldown FONT LIST and FONT LIST SIZE menu on the Main Menu task bar.
Tip: There are 7� points in an inch. So, if you choose a type-face in �� point size, the name on your badge will be one-half inch high. (GRAPHIC 7)
(GR
AP
HIC
7)
Exercise: If you’ve been paying close attention you may have noticed the values changing in the four boxes located on the menu bar as you rounded the corners of your rectangle. Try changing the numbers in the boxes and observe what happens.
Move your cursor crosshairs inside the rectangle where you want to add text, click the left mouse button and begin typing. For the purposes of this tutorial, we’ve typed “My First Text,” but you can type in any name you like. (GRAPHIC 8)
If the text you typed didn’t end up exactly where you wanted it to be, simply change back to the PICK tool and click on the text to select it; then drag it to the spot where you want to place it and release the mouse button.
(GR
AP
HIC
8)

7
1.5: Edit ing Text
Part of the enjoyment of working with a graphic software program like CorelDRAW is the creative freedom it gives you to quickly test various type styles and sizes. In this section you can experiment to find the combination of type size and style that perfectly complements your name badge.
First, choose the PICK tool from the Main Menu task bar (hint: it looks like an arrow) and click on the text you created to select it.
Next, click TEXT from the top menu followed by EDIT TEXT. Notice that a menu box pops up and the cursor changes shape to look like a capital letter “I.” (GRAPHIC 9)
(GR
AP
HIC
9)
Advanced Tip: Here’s a neat trick for centering the text in your name badge quickly and easily. Using the PICK tool, left click on the text to select it, then press and hold the SPACE key and click on the name badge. Now release the SPACE key and press “C” and then “E” on your keyboard. The type will now be perfectly centered horizontally and vertically in the name badge.
Tip: Sometimes making a mistake can be a valuable learning lesson. If you select the rectangle by mis-take, try pulling and dragging the “handles” and observe what happens. Remember, you can always use CorelDRAW’s UNDO command to return to the point at which you started.
Hold down the left mouse button and drag it along any or all of the text you want to change in the pop-up box. (Tip: The text you select will have a dark highlight.) Now click on the typeface box to choose a font. Note that if you run your cursor up and down the list without clicking, the various typefaces will be dis-played to make your choice easy. Once you find a font and size you like, click OK.
Congratulations! At this point you have successfully created a name badge using CorelDRAW’s drawing tools. You’re almost ready to print the badge to VersaLaser for processing. First, you need to understand how the colors that you assign to your artwork control VersaLaser functions.

�
Section II : Printing to VersaLaser
2.1: Using Colors to Control VersaLaser Processing
Remember when we told you that the colors you assign to your artwork tell VersaLaser what to do? We’re ready to process your name badge, so now’s the time to put those colors to use. You can assign the following three colors to tell VersaLaser what to do:
• Red colored outlined objects, set to a hairline thickness, will vector cut; • Blue outlined objects, also set to a hairline thickness, will be vector marked; • Black colored (filled) and shades of black (grays or grayscale) objects will be raster etched.
Advanced Topic: Raster etching is the technique where the laser beam traverses left and right, etching hori-zontal lines of material as it steps down the work piece vertically, similar to a laser or inkjet printer. Vector cutting or vector marking is the technique in which the laser beam follows a path to cut or mark a desired outline, which is similar to a pen plotter. The difference between vector cutting (completely passing through the work piece) and vector marking the material (lightly marking the surface) is laser power applied. You determine whether you want your artwork raster etched, vector marked or vector cut into the work piece by the colors you assign to the elements of the objects in your graphic images.
Let’s assign colors to our name badge. First, we want the name on the badge to raster etch, so you don’t need to do anything – just leave it colored black (black is the default “color” in CorelDRAW).
Next, we want to vector cut the badge, so you need to assign the color RED to the badge outline as fol-lows:
Choose the PICK tool from the Toolbox and LEFT CLICK on it to select it.
Now move your cursor onto CorelDRAW’s color palette and RIGHT CLICK on the color RED.
Tip: Did the entire rectangle fill in red? If so, you LEFT CLICKED by mistake. Use CorelDRAW’s UNDO func-tion to remove the fill and try again.
That’s all there is to it! All you need to do now is select FILE a PRINT from the Main Menu task bar as you would on any other type of printer. The VersaLaser print driver will then pop up and prompt you to enter the type of material you are processing and its thickness. You can then use VersaLaser’s on-screen control panel to preview the print job if you wish; or simply press VersaLaser’s START button to process your job.
Tip: Remember, you must set CorelDRAW’s color palette to match VersaLaser’s color processing manage-ment software to run your job successfully.
Congratulations! You have now mastered the basics of CorelDRAW and understand how the graphic software interacts with VersaLaser. At this time you should be able to:
• Set up the color palette for CorelDRAW • Set the workspace size in CorelDRAW • Use drawing tools to create artwork (rectangle with radius corners) • Set the size of a rectangle • Add and size text • Move and edit text • Assign colors for etching and cutting • Print to VersaLaser
2.2: Conclusion of Basics

�
In the following section you will find an assortment of advanced user tips that will help speed your mastery of some of CorelDRAW’s more advanced functions. You will find them useful for improving VersaLaser’s productivity. Good luck and enjoy!
3.1: Etching and Cutt ing Text
Section I I I : Advanced User Tips
Keep text solid black if you want to etch it. If you want to cut out the outline of the text (cut out a letter) turn off the fill (black) and turn on a Red Hairline outline.
3.2: Working with Logos
Personalizing items with a client’s logo is simple once the logo is in your computer. The two most common places to get a logo are from pre-scanned artwork (typically supplied by the client via email or disk), or by using a desktop scanner to scan a clean logo from letterhead or other printed item.
To scan a logo: Click FILE a ACQUIRE and follow the prompts to scan the image.
(Tip: Be sure your scanner is connected correctly and is USB-compatible with Windows XP.)
To acquire a logo from disk or email: Click FILE a IMPORT and follow the prompts to import the image.
(Tip: The file type you want to work with is typically a .tif, .jpg or .eps.)
Once the logo is on your workspace, use the PICK tool to move and resize the logo as necessary.
To outline in red for cutting: select text (step one and two of #6) – click on Outline Tool (on the left side – third from bottom) – click on Outline Tool that pops up (far left) – now, a box pops up – inside the box select outline width of Hairline and make the outline color red. (GRAPHIC 10)
Now you need to remove the black fill so it doesn’t etch – to do that, make sure text is selected, then click on the FILL tool – a bar will pop up with an X – click the X to remove the fill.
(GR
AP
HIC
10)
3.3: Grouping and Duplicating Images
Once you begin running production-type work on VersaLaser – making 100 name badges, for example – you may find that the artwork fills only a tiny portion of your workspace. Of course, you could run one name badge at a time, but doesn’t it make more sense to run 25 of them at once to speed up productivity? CorelDRAW supplies an easy solution to this need with its Duplicate Image function.
To duplicate an image, you must first group all of the individual elements in your artwork together as fol-lows:

�0
First, select the PICK tool and LEFT CLICK your mouse to drag a box around all items you want to group. (GRAPHIC 11)
Now you can move your grouped artwork into the upper left-hand corner of CorelDRAW’s (and VersaLaser’s) workspace in preparation for duplicating it.
To create duplicates of your grouped artwork, first click the PICK tool on the group to select it.
Now select EDIT a DUPLICATE from the Main Menu. (GRAPHIC 12)
(GR
AP
HIC
11)
(GR
AP
HIC
12)
The grouped image will be duplicated and slightly offset from the original. Use the PICK tool to move it to the correct position.

To create additional duplicates simply repeat the EDIT a DUPLICATE command from the Main Menu. (GRAPHIC 13)
Tip: In the case of the name badge, you will probably want a different name on each badge. Simply select the TEXT tool from the Toolbox, highlight each badge name by double-clicking on it and type in the new name.
��
3.4: Mirroring Graphics and Text
Once you begin getting hands-on experience with VersaLaser you will find that certain materials, such as certain acrylics, produce a nicer finish when etched on the rear surface instead of front. However, you can’t simply image the rear as you would the front because the image will be reversed. However, CorelDRAW provides an easy solution by allowing you to mirror graphics and text.
To mirror graphics and text: Group the artwork as described in Section 3.3 and select the group using the PICK tool.
Now select ARRANGE a TRANSFORMATIONS a SCALE a MIRROR a APPLY from the Main Menu task bar.
3.5: Thank You for Using this Tutorial
Thank you for taking time to work through this tutorial. We hope it has been useful. To further explore CorelDRAW, please refer to the CorelDRAW Graphics Suite X3 User Guide.
(GR
AP
HIC
13)