Using BurnInTest with WinPE - passmark.com · This document does not intend to cover product...
24
PassMark TM Software Using BurnInTest on a system with no Operating System - WinPE Page 1 of 24 Copyright © 2011-2014 PassMark ® White Paper Using BurnInTest on a system with no Operating System WinPE 3.0 and WinPE 4.0 CD/DVD, USB or PXE network boot Edition: 3.0 Date: 30 May 2014 BurnInTest Version: 8.0 BurnInTest is a trademark of PassMark software
Transcript of Using BurnInTest with WinPE - passmark.com · This document does not intend to cover product...
PassMarkTM
S o f t w a r e
Using BurnInTest on a system with no Operating System - WinPE
Page 1 of 24
Copyright © 2011-2014
PassMark® White Paper
Using BurnInTest on a system with no
Operating System
WinPE 3.0 and WinPE 4.0
CD/DVD, USB or PXE network boot
Edition: 3.0
Date: 30 May 2014
BurnInTest Version: 8.0
BurnInTest is a trademark of PassMark software
PassMarkTM
S o f t w a r e
Using BurnInTest on a system with no Operating System - WinPE
Page 2 of 24
Copyright © 2011-2014
Overview
Many BurnInTest users can benefit from testing PC hardware when there is no Operating System
installed, or the Operating System is inoperable. This can be useful for testing PC hardware:
1. In a production line environment,
2. That is to be shipped with Linux,
3. In a known virus free environment and
4. To try to determine the cause of corruption of an Operating System.
This document aims to assist people in setting up an environment that allows PassMark BurnInTest to
be used in these situations.
This paper is applicable to the Windows Professional edition of BurnInTest v8.0. This version of
BurnInTest requires Microsoft Windows in order to run. To run BurnInTest on a system without an
operating system you need to set up a “Pre-install environment” that allows Microsoft Windows to be
booted from a CD/DVD, USB Flash Drive or via PXE (Preboot eXecution Environment). This document
describes setting up a Microsoft Window Pre-install environment (WinPE) environment that includes
both Windows and BurnInTest V8.0 on a bootable CD/DVD or bootable USB Flash Drive (UFD). The
document also describes how to inject new device drivers into the Windows image for updated
hardware.
This document does not intend to cover product licensing issues and it is up to the reader to review
this. The names of actual companies and products mentioned herein may be the trademarks of their
respective owners.
Thanks to one of our many BurnInTest User’s, Tripredacus, for his documentation on the WinPE
installation process with BurnInTest.
Audience
This paper is targeted at companies and individuals that need to run BurnInTest on a system without a
working or installed Operating system. It is aimed at people with technical PC knowledge.
PassMarkTM
S o f t w a r e
Using BurnInTest on a system with no Operating System - WinPE
Page 3 of 24
Copyright © 2011-2014
Standard Environment
The standard environment described in this document is:
WinPE 3.0.
BurnInTest PRO v8.0 (or higher).
Hardware including at least 512MB of RAM (32-bit WinPE) or 1GB (64-bit WinPE).
Please note that WinPE 4.0 is covered in the section “WinPE 4.0 - Windows Kits 8.0”.
Limitations
This guide is designed to allow BurnInTest to be run from a Windows PE 3.0 or WinPE 4.0 environment.
It does not cover the differences of PE v2.x or PE v1.x (Windows XP - 2003 / BartPE).
Currently, we plan to support the following BurnInTest tests under the above standard environment:
CPU;
RAM;
Disk (disk volumes only);
Optical disk (read tests);
Network (Standard);
USB (using the Passmark USB 2.0 Loopback plugs);
Parallel Port ;
Serial port;
Plugin (BurnInTest plugins).
Currently we do not plan to support the following tests under WinPE (feedback from users with their
experience, may influence this list):
Video Playback;
Sound;
2D;
3D;
Printer;
Tape.
Please note that we have intentionally not restricted any of the BurnInTest tests in software, as I am
sure there are WinPE users that have or will get these tests working under WinPE. Send us an email.
Some system information normally displayed by BurnInTest will not be available under WinPE, this
includes (but may not be limited to) the Graphics card, HDD model and USB controller/device
information.
This guide also does not enable networking, and uses the WINPESHL.INI method to launch the
program.
PassMarkTM
S o f t w a r e
Using BurnInTest on a system with no Operating System - WinPE
Page 4 of 24
Copyright © 2011-2014
Windows PE 3.0 can be obtained with the Microsoft Windows Automated Installation Kit (WAIK) or from
the Microsoft OEM Preinstall Kit (OPK) Tools. There are differences with the capabilities of the PE in
each of these versions, but these differences have no impact on this guide.
This guide is written using the OPK Tools and WAIK. It will also make x86 and x64 versions, and you
need to use drivers suitable to your build. It is recommended that you track which drivers you end up
putting into your PE. You will only need to install drivers for NIC and non-standard Mass Storage
Controllers, such as RAID cards. This guide was prepared and tested on a Windows 7 Ultimate
workstation.
Note that in our testing the 32-bit version of BurnInTest will not run in a 64-bit WinPE environment –
use the 64-bit version of BurnInTest in this scenario.
You will need to run the tools with (elevated) Administrator privileges.
Downloads
Microsoft Windows Automated Installation Kit (WAIK) can be downloaded here:
http://www.microsoft.com/download/en/details.aspx?displaylang=en&id=5753
Microsoft OEM Preinstall Kit (OPK) can be downloaded here (you will need to be a registered Microsoft
OEM and have an account with Microsoft): http://www.microsoft.com/oem/sblicense/OPK/default.mspx
or
http://oem.microsoft.com/script/contentpage.aspx?PageID=501924
Microsoft devcon utility (for installing serial port and parallel port device drivers in WinPE):
http://support.microsoft.com/kb/311272
The latest version of the BurnInTest PRO can be downloaded here:
http://passmark.com/download/bit_download.htm
PassMarkTM
S o f t w a r e
Using BurnInTest on a system with no Operating System - WinPE
Page 5 of 24
Copyright © 2011-2014
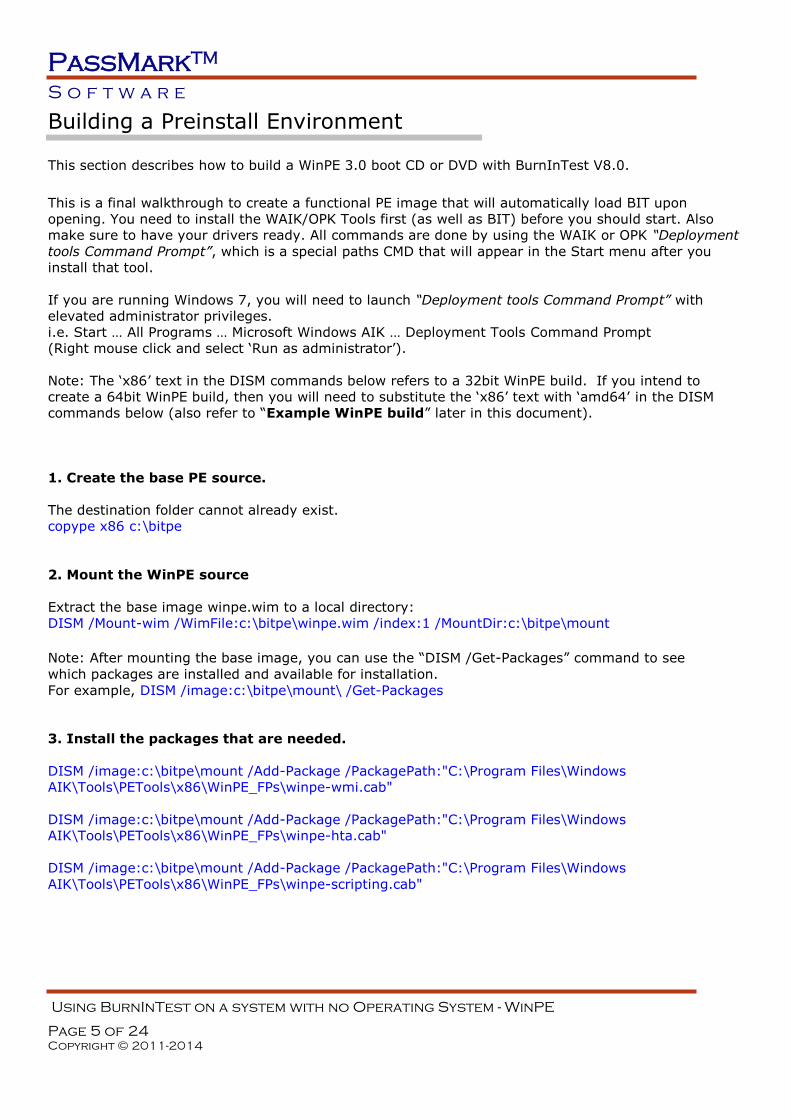
Building a Preinstall Environment
This section describes how to build a WinPE 3.0 boot CD or DVD with BurnInTest V8.0.
This is a final walkthrough to create a functional PE image that will automatically load BIT upon
opening. You need to install the WAIK/OPK Tools first (as well as BIT) before you should start. Also
make sure to have your drivers ready. All commands are done by using the WAIK or OPK “Deployment
tools Command Prompt”, which is a special paths CMD that will appear in the Start menu after you
install that tool.
If you are running Windows 7, you will need to launch “Deployment tools Command Prompt” with
elevated administrator privileges.
i.e. Start … All Programs … Microsoft Windows AIK … Deployment Tools Command Prompt
(Right mouse click and select ‘Run as administrator’).
Note: The ‘x86’ text in the DISM commands below refers to a 32bit WinPE build. If you intend to
create a 64bit WinPE build, then you will need to substitute the ‘x86’ text with ‘amd64’ in the DISM
commands below (also refer to “Example WinPE build” later in this document).
1. Create the base PE source.
The destination folder cannot already exist.
copype x86 c:\bitpe
2. Mount the WinPE source
Extract the base image winpe.wim to a local directory:
DISM /Mount-wim /WimFile:c:\bitpe\winpe.wim /index:1 /MountDir:c:\bitpe\mount
Note: After mounting the base image, you can use the “DISM /Get-Packages” command to see
which packages are installed and available for installation.
For example, DISM /image:c:\bitpe\mount\ /Get-Packages
3. Install the packages that are needed.
DISM /image:c:\bitpe\mount /Add-Package /PackagePath:"C:\Program Files\Windows
AIK\Tools\PETools\x86\WinPE_FPs\winpe-wmi.cab"
DISM /image:c:\bitpe\mount /Add-Package /PackagePath:"C:\Program Files\Windows
AIK\Tools\PETools\x86\WinPE_FPs\winpe-hta.cab"
DISM /image:c:\bitpe\mount /Add-Package /PackagePath:"C:\Program Files\Windows
AIK\Tools\PETools\x86\WinPE_FPs\winpe-scripting.cab"
PassMarkTM
S o f t w a r e
Using BurnInTest on a system with no Operating System - WinPE
Page 6 of 24
Copyright © 2011-2014
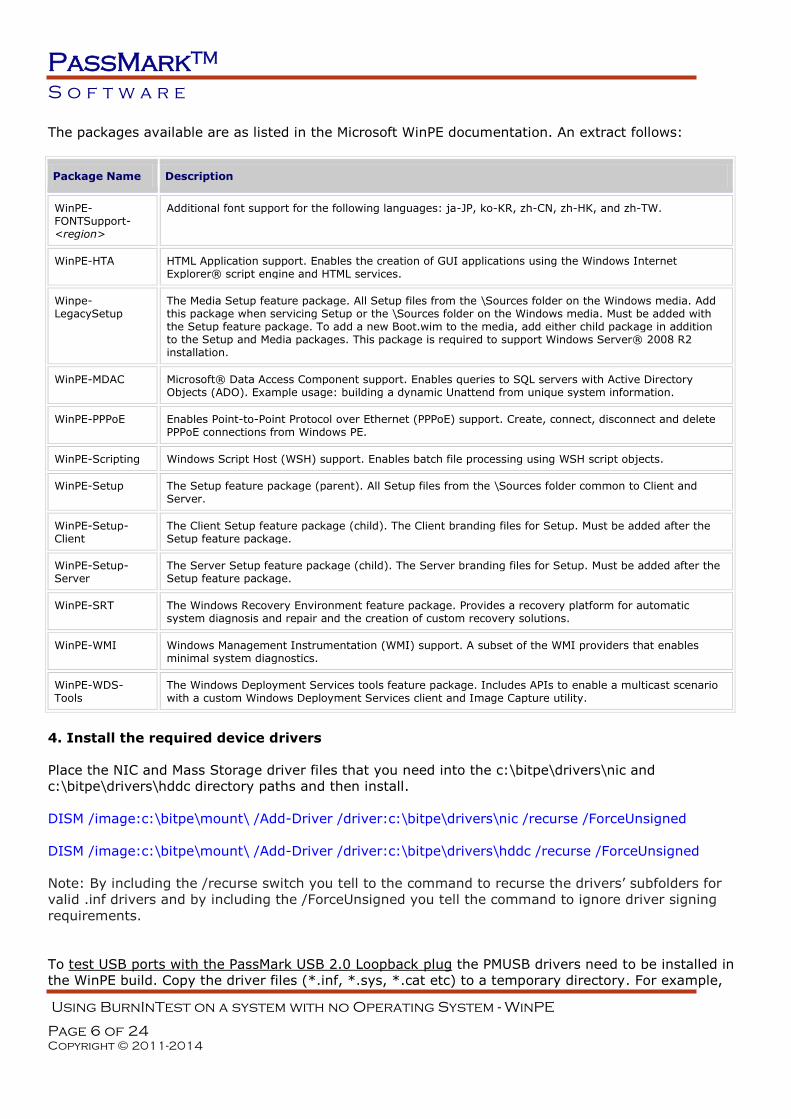
The packages available are as listed in the Microsoft WinPE documentation. An extract follows:
Package Name Description
WinPE-FONTSupport-<region>
Additional font support for the following languages: ja-JP, ko-KR, zh-CN, zh-HK, and zh-TW.
WinPE-HTA HTML Application support. Enables the creation of GUI applications using the Windows Internet Explorer® script engine and HTML services.
Winpe-LegacySetup
The Media Setup feature package. All Setup files from the \Sources folder on the Windows media. Add this package when servicing Setup or the \Sources folder on the Windows media. Must be added with the Setup feature package. To add a new Boot.wim to the media, add either child package in addition to the Setup and Media packages. This package is required to support Windows Server® 2008 R2 installation.
WinPE-MDAC Microsoft® Data Access Component support. Enables queries to SQL servers with Active Directory Objects (ADO). Example usage: building a dynamic Unattend from unique system information.
WinPE-PPPoE Enables Point-to-Point Protocol over Ethernet (PPPoE) support. Create, connect, disconnect and delete PPPoE connections from Windows PE.
WinPE-Scripting Windows Script Host (WSH) support. Enables batch file processing using WSH script objects.
WinPE-Setup The Setup feature package (parent). All Setup files from the \Sources folder common to Client and Server.
WinPE-Setup-Client
The Client Setup feature package (child). The Client branding files for Setup. Must be added after the Setup feature package.
WinPE-Setup-Server
The Server Setup feature package (child). The Server branding files for Setup. Must be added after the Setup feature package.
WinPE-SRT The Windows Recovery Environment feature package. Provides a recovery platform for automatic system diagnosis and repair and the creation of custom recovery solutions.
WinPE-WMI Windows Management Instrumentation (WMI) support. A subset of the WMI providers that enables minimal system diagnostics.
WinPE-WDS-Tools
The Windows Deployment Services tools feature package. Includes APIs to enable a multicast scenario with a custom Windows Deployment Services client and Image Capture utility.
4. Install the required device drivers
Place the NIC and Mass Storage driver files that you need into the c:\bitpe\drivers\nic and
c:\bitpe\drivers\hddc directory paths and then install.
DISM /image:c:\bitpe\mount\ /Add-Driver /driver:c:\bitpe\drivers\nic /recurse /ForceUnsigned
DISM /image:c:\bitpe\mount\ /Add-Driver /driver:c:\bitpe\drivers\hddc /recurse /ForceUnsigned
Note: By including the /recurse switch you tell to the command to recurse the drivers’ subfolders for
valid .inf drivers and by including the /ForceUnsigned you tell the command to ignore driver signing
requirements.
To test USB ports with the PassMark USB 2.0 Loopback plug the PMUSB drivers need to be installed in
the WinPE build. Copy the driver files (*.inf, *.sys, *.cat etc) to a temporary directory. For example,
PassMarkTM
S o f t w a r e
Using BurnInTest on a system with no Operating System - WinPE
Page 7 of 24
Copyright © 2011-2014
for a 32-bit WinPE build, copy the 32-bit Passmark USB 2.0 Loopback driver files to
c:\bitpe\drivers\usb and install the INF package.
DISM /image:c:\bitpe\mount\ /Add-Driver /driver:c:\bitpe\drivers\usb /recurse /ForceUnsigned
Note: After installing the drivers, you can use the “DISM /Get-Drivers” command to see which
drivers are installed.
For example,
DISM /image:c:\bitpe\mount\ /Get-Drivers -- View 3rd party drivers
DISM /image:c:\bitpe\mount\ /Get-Drivers /all -- View all drivers
5. Install the BurnInTest software and msvfw32.dll.
After step 2, you can find the directory structure of the PE with Windows Explorer.
First, put the msvfw32.dll (Microsoft Video for Windows, required regardless of whether you use the
Video playback test) into mount\windows\system32. This must be the version suitable for your target
Operating System. If you use the wrong dll (e.g. 64-bit on 32-bit Windows), BurnInTest will simply not
start – and no error message will be displayed.
During the creation of this document the following versions of msvfw32.dll were used:
32-bit: 6.1.7600.16385, 117KB, from a 32-bit Windows 7 installation (\windows\system32).
64-bit: 6.1.7600.16385, 141KB, from a 64-bit Windows 7 installation (\windows\system32).
Second, in BurnInTest, choose the option to Install to USB (File->Install BurnInTest to a USB drive…).
Specify the Installation location Directory as mount\program files\BurnInTest, specify the installation
type as Licensed and paste your license key into the Username and key section.
If you have a BurnInTest configuration you want to use, place this configuration in the new BurnInTest
folder as well. The steps following assume that a configuration, test.bitcfg, has been prepared to test
the CPU, Optical Drive, RAM, Network and HDD, and has been copied to the mount\program
files\BurnInTest directory.
The following example uses a program called setres to set the resolution to 1024x768. The default
resolution for Win PE is 800x600. These files have been installed, but they are optional.
Note: If you want your own image for the WinPE background, replace the default image
mount\Windows\System32\winpe.bmp with you own image.
6. Automate the launching of BIT.
There are two methods that you can use to launch BIT. You can either edit
\mount\windows\system32\startnet.cmd or create a winpeshl.ini file and place it in the
\mount\windows\system32 directory. For testing purposes, it is recommended you use the
startnet.cmd method, because you will have access to the command prompt. If you use winpeshl.ini,
you will not be able to use a command prompt, but will stop regular users from having direct access
into the PE itself once booted. You should not use both options, if winpeshl.ini is present, it will ignore
the startnet.cmd file. If you are going to test the hard disk, it will need to be formatted first. This guide
uses the idea that the hard drive is blank, and we will use the PE to format the disk first. You would not
PassMarkTM
S o f t w a r e
Using BurnInTest on a system with no Operating System - WinPE
Page 8 of 24
Copyright © 2011-2014
want to use this option if you are going to test computers with Windows or other OS installed on them
already.
See the full command lines under startnet.cmd to see what the batch files are doing.
winpeshl.ini
[LaunchApps]
%SYSTEMDRIVE%\Windows\System32\wpeinit.exe
%SYSTEMDRIVE%\Windows\System32\diskpart.exe, " /s
%SYSTEMDRIVE%\Windows\System32\diskpart.txt”
"%SYSTEMDRIVE%\Program Files\BurnInTest\bit.exe", "-h -x –r -c test.bitcfg"
Note the use of quotations – it is important.
Note:
-C [configfilename]
Loads the configuration file specified by [configfilename]
test.bitcfg specifies an optional configuration file copied in step 5.
-h
Set the screen resolution to 1024 x 768 with 32-bit color on startup.
-r
Executes the tests immediately without needing to press the go button. It also skips the pre-test
warning message.
-x
Skip the DirectX version checks at startup time. This can be useful for users that do not want to install
the latest version of DirectX and do not want to use the DirectX tests (eg. 3D tests).
Warning!
Diskpart.exe is only required if your disk is unformatted – this will delete any data on physical drive 0.
If you hard disk is formatted, do not include the disk partitioning tool line shown above.
Ie. The following line should only be used to format a hard disk – it is optional:
%SYSTEMDRIVE%\Windows\System32\diskpart.exe,
"%SYSTEMDRIVE%\Windows\System32\diskpart.txt"
Please note that at the time of writing the BurnInTest Raw disk test is not supported under WinPE.
Note: BurnInTest 8.0 automatically configures the serial ports to allow them to be detected and tested, so no additional configuration is required to test serial ports. If you want to test parallel ports you need to ensure the parallel port service is started and install the drivers. For
example:
winpeshl.ini
[LaunchApps]
%SYSTEMDRIVE%\Windows\System32\wpeinit.exe
"%SYSTEMDRIVE%\Windows\System32\net", "start parport"
"%SYSTEMDRIVE%\Windows\devcon.exe", "install x:\windows\inf\msports.inf ACPI\PNP0401"
"%SYSTEMDRIVE%\Windows\devcon.exe", "restart *PNP0401"
"%SYSTEMDRIVE%\Program Files\BurnInTest\bit.exe", "-h -x"
*devcon will need to be downloaded from Microsoft and included in the WinPE build in the Windows directory.
PassMarkTM
S o f t w a r e
Using BurnInTest on a system with no Operating System - WinPE
Page 9 of 24
Copyright © 2011-2014
Startnet.cmd
wpeinit
diskpart /s diskpart.txt
"x:\Program Files\burnintest\bit.exe" –h -x -r -c test.bitcfg
Notes:
BurnInTest 8.0 automatically configures the serial ports to allow them to be detected and tested, so no additional configuration is required to test serial ports.
if you want to test parallel ports you need to ensure the parallel port service is started and install the drivers. Add these commands to Startnet.cmd before bit.exe is started, for example, startnet,cmd:
wpeinit
net start parport
devcon install x:\windows\inf\msports.inf ACPI\PNP0401
devcon restart *PNP0401
"x:\Program Files\burnintest\bit.exe" –h –x
*devcon will need to be downloaded from Microsoft and included in the WinPE build in the Windows directory.
diskpart.txt
select disk 0
clean
create partition primary
select partition 1
active
format quick fs=ntfs
assign letter=c
Warning!
This is only if your disk is unformatted – this will delete any data on physical drive 0.
7. Commit the changes and save the image
Create a winpe.wim image from the local directory.
DISM /unmount-Wim /MountDir:c:\bitpe\mount /Commit
8. Make the boot disk
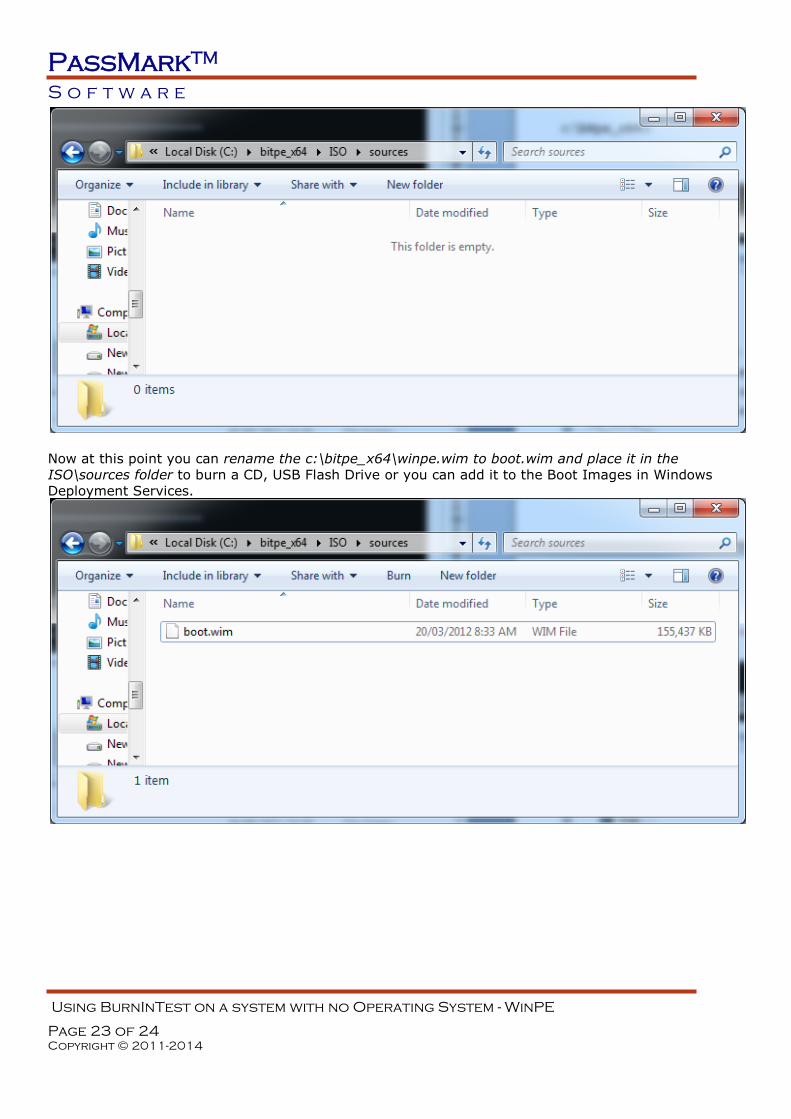
Now at this point you can rename the c:\bitpe\winpe.wim to boot.wim and place it in the ISO\sources
folder to burn a CD, USB Flash Drive or you can add it to the Boot Images in Windows Deployment
Services.
9a. To make a bootable CD/DVD
To make an iso image for buring to CD:
OSCDIMG -n -h -bc:\bitpe\etfsboot.com c:\bitpe\iso c:\bitpe.iso
Now burn the iso image (c:\bitpe.iso) to the CD/DVD. You can use the CD/DVD burning software that
comes with Windows 7 or use third-party software.

PassMarkTM
S o f t w a r e
Using BurnInTest on a system with no Operating System - WinPE
Page 10 of 24
Copyright © 2011-2014
9b. To make a bootable USB Flash Drive (UFD)
From the command prompt, partition and format the UFD. Make sure you select the correct disk
number, as this will delete everything on the disk (the below example shows a UFD with physical disk
number 2 and volume letter X.
C:\Users\Administrator>diskpart
DISKPART> list disk
DISKPART> select disk 2
DISKPART> clean
DISKPART> create partition primary
DISKPART> select partition 1
DISKPART> active
DISKPART> format fs=fat32 (or ntfs)
DISKPART> assign
DISKPART> exit
C:\Users\Administrator>xcopy c:\bitpe\iso\*.* X:\ /s /e /f
PassMarkTM
S o f t w a r e
Using BurnInTest on a system with no Operating System - WinPE
Page 11 of 24
Copyright © 2011-2014
Example WinPE build
A 64-bit build example:
<Open the “Deployment tools Command Prompt” with administrator privileges>
copype amd64 c:\bitpe_x64
DISM /Mount-wim /WimFile:c:\bitpe_x64\winpe.wim /index:1 /MountDir:c:\bitpe_x64\mount
DISM /image:c:\bitpe_x64\mount /Add-Package /PackagePath:"C:\Program Files\Windows AIK\Tools\PETools\amd64\WinPE_FPs\winpe-wmi.cab"
DISM /image:c:\bitpe_x64\mount /Add-Package /PackagePath:"C:\Program Files\Windows AIK\Tools\PETools\amd64\WinPE_FPs\winpe-hta.cab"
DISM /image:c:\bitpe_x64\mount /Add-Package /PackagePath:"C:\Program Files\Windows AIK\Tools\PETools\amd64\WinPE_FPs\winpe-scripting.cab"
<Install required device drivers for your target Operating System – refer Step 4> For example, to install the PassMark USB 2.0 Loopback drivers that
are in c:\bitpe_x64\drivers\usb:
DISM /image:c:\bitpe_x64\mount\ /Add-Driver /driver:c:\bitpe_x64\drivers\usb /recurse /ForceUnsigned
<Install 64-bit BurnInTest and 64-bit msvfw32.dll for your target Operating System – refer step 5>
<Create startnet.cmd or winpeshl.ini – refer step 6>
DISM /unmount-Wim /MountDir:c:\bitpe_x64\mount /Commit
<Copy winpe.wim to iso\sources\boot.wim – refer step 8>
OSCDIMG -n -h -bc:\bitpe_x64\etfsboot.com c:\bitpe_x64\iso c:\bitpe_x64.iso
<Burn c:\bitpe_x64.iso to an optical disk or copy it to a Bootable USB Flash Drive, refer step 9>
Please consult the documentation that comes with the WAIK/OPK Tools for further information or configurations.

PassMarkTM
S o f t w a r e
Using BurnInTest on a system with no Operating System - WinPE
Page 12 of 24
Copyright © 2011-2014
Adding drivers to the WinPE image
This section describes how to install device drivers into an existing WinPE image for updated hardware.
1. Make a copy of the WinPE image to work with.
For example, if your WinPE image is on a UFD, copy the contents of the UFD to c:\pctk
2. Create a directory to mount the image into.
e.g. c:\pctk\mount (this must be an empty directory).
3. Copy your driver files
Copy your driver files (*.inf, *.sys, *.cat etc) to a temporary directory, e.g. copy the 32-bit Passmark
USB 2.0 Loopback drivers to c:\pctk\drivers.
4. Check if your image file (.wim) has more than 1 image in it.
DISM /Get-Wiminfo /wimfile:c:\bitpe\sources\boot.wim
… Index : 1
…
5. Mount the WinPE image from the .wim file
Extract the base image to a local directory.
DISM /Mount-wim /WimFile:c:\bitpe\sources\boot.wim /index:1 /MountDir:c:\bitpe\mount
6. Install an INF package (typically a driver) to a Windows PE image.
DISM /image:c:\bitpe\mount\ /Add-Driver /driver:c:\bitpe\drivers /recurse /ForceUnsigned
Deployment Image Servicing and Management tool Version: 6.1.7600.16385 Image Version: 6.1.7600.16385 Searching for driver packages to install... Found 1 driver package(s) to install. Installing 1 of 1 - c:\pctk\drivers\PMUSB2.inf: The driver package was successfully installed. The operation completed successfully.
7. Save the changes
Create a WinPE image from the local directory.
DISM /unmount-Wim /MountDir:c:\bitpe\mount /Commit
8. Create a bootable CD/DVD or UFD.
Follow steps 8 and 9 in the “Building a Preinstall Environment” to create a bootable CD/DVD or UFD.
Notes:
Please note that we can't guarantee that all hardware will work after including the drivers, as the
changes required may be more than just adding drivers. For example, just adding graphics card
devices drivers won't allow the 3D test to run as it also needs DirectX (as such we don't support all
tests under WinPE).
We have successfully tested this driver installation process with our USB 2.0 Loopback plugs.
PassMarkTM
S o f t w a r e
Using BurnInTest on a system with no Operating System - WinPE
Page 13 of 24
Copyright © 2011-2014
Deploy an Image using PXE
There are a number of options to Network boot a client system with a Windows image located on a server. We have tested and documented one of the more common methods: using Microsoft Windows Deployment Services (WDS) to host and deploy a boot image containing BurnInTest for Windows.
Creating a Windows image with BurnInTest (.wim file)
To create a Windows image (e.g. boot.wim), the Microsoft WAIK or OPK can be used as described earlier in this document. In this document example we created a boot.wim containing 64-bit Windows 7 (WinPE) with BurnInTest, the USB 2.0/3.0 loopback plug device drivers, and the configuration for the serial and parallel ports, as described in the earlier section “Building a Preinstall Environment”.
Alternatively, a full Windows image could be used and deployed. Please refer to the Microsoft WDS documentation for details.
PassMarkTM
S o f t w a r e
Using BurnInTest on a system with no Operating System - WinPE
Page 14 of 24
Copyright © 2011-2014
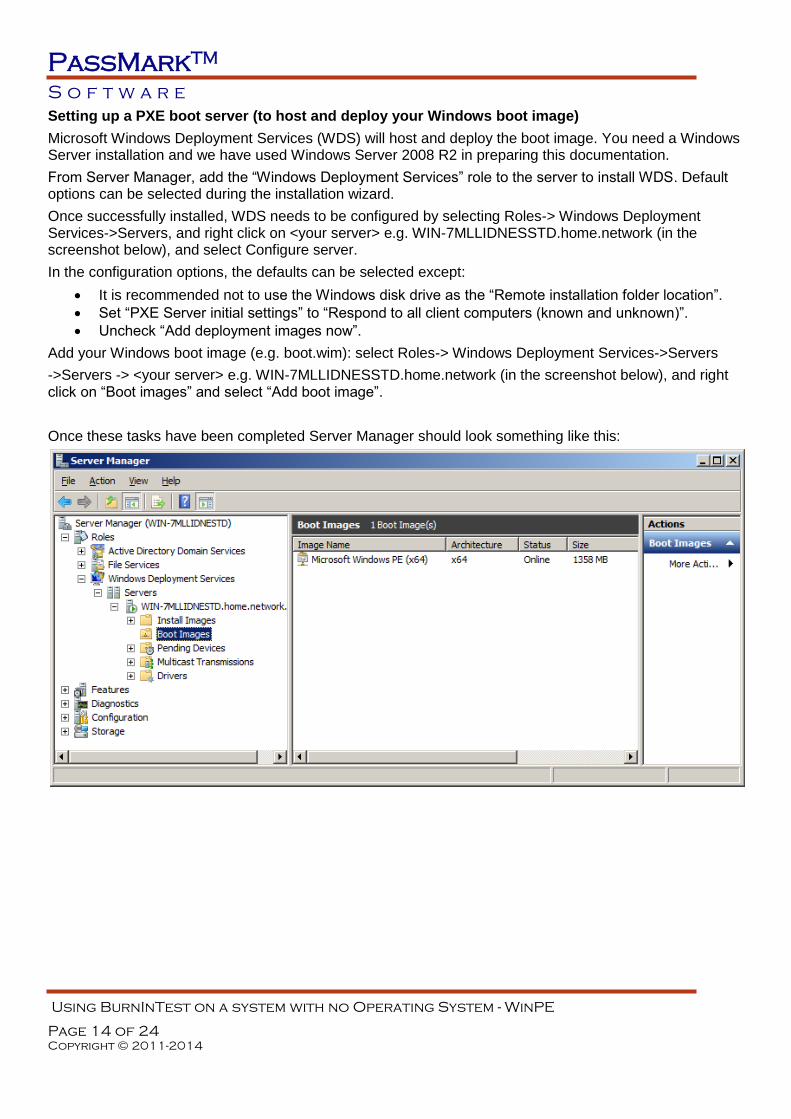
Setting up a PXE boot server (to host and deploy your Windows boot image)
Microsoft Windows Deployment Services (WDS) will host and deploy the boot image. You need a Windows Server installation and we have used Windows Server 2008 R2 in preparing this documentation.
From Server Manager, add the “Windows Deployment Services” role to the server to install WDS. Default options can be selected during the installation wizard.
Once successfully installed, WDS needs to be configured by selecting Roles-> Windows Deployment Services->Servers, and right click on <your server> e.g. WIN-7MLLIDNESSTD.home.network (in the screenshot below), and select Configure server.
In the configuration options, the defaults can be selected except:
It is recommended not to use the Windows disk drive as the “Remote installation folder location”.
Set “PXE Server initial settings” to “Respond to all client computers (known and unknown)”.
Uncheck “Add deployment images now”.
Add your Windows boot image (e.g. boot.wim): select Roles-> Windows Deployment Services->Servers
->Servers -> <your server> e.g. WIN-7MLLIDNESSTD.home.network (in the screenshot below), and right click on “Boot images” and select “Add boot image”.
Once these tasks have been completed Server Manager should look something like this:
PassMarkTM
S o f t w a r e
Using BurnInTest on a system with no Operating System - WinPE
Page 15 of 24
Copyright © 2011-2014
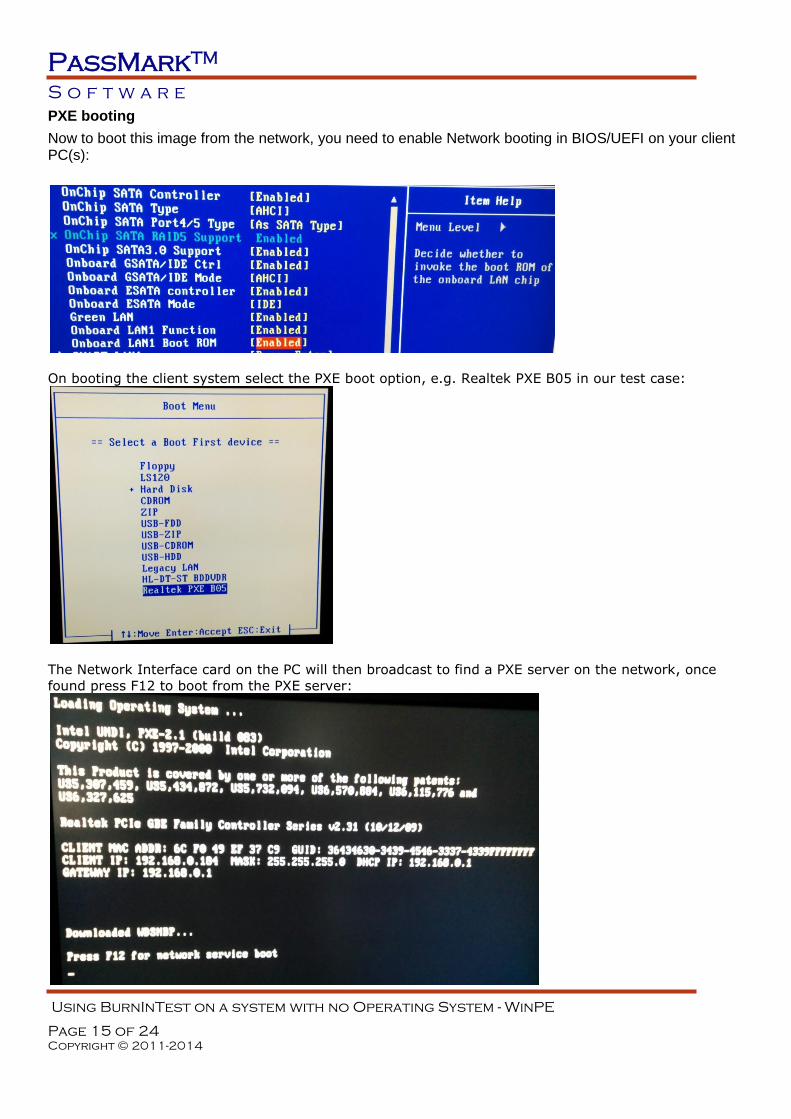
PXE booting
Now to boot this image from the network, you need to enable Network booting in BIOS/UEFI on your client PC(s):
On booting the client system select the PXE boot option, e.g. Realtek PXE B05 in our test case:
The Network Interface card on the PC will then broadcast to find a PXE server on the network, once
found press F12 to boot from the PXE server:
PassMarkTM
S o f t w a r e
Using BurnInTest on a system with no Operating System - WinPE
Page 16 of 24
Copyright © 2011-2014
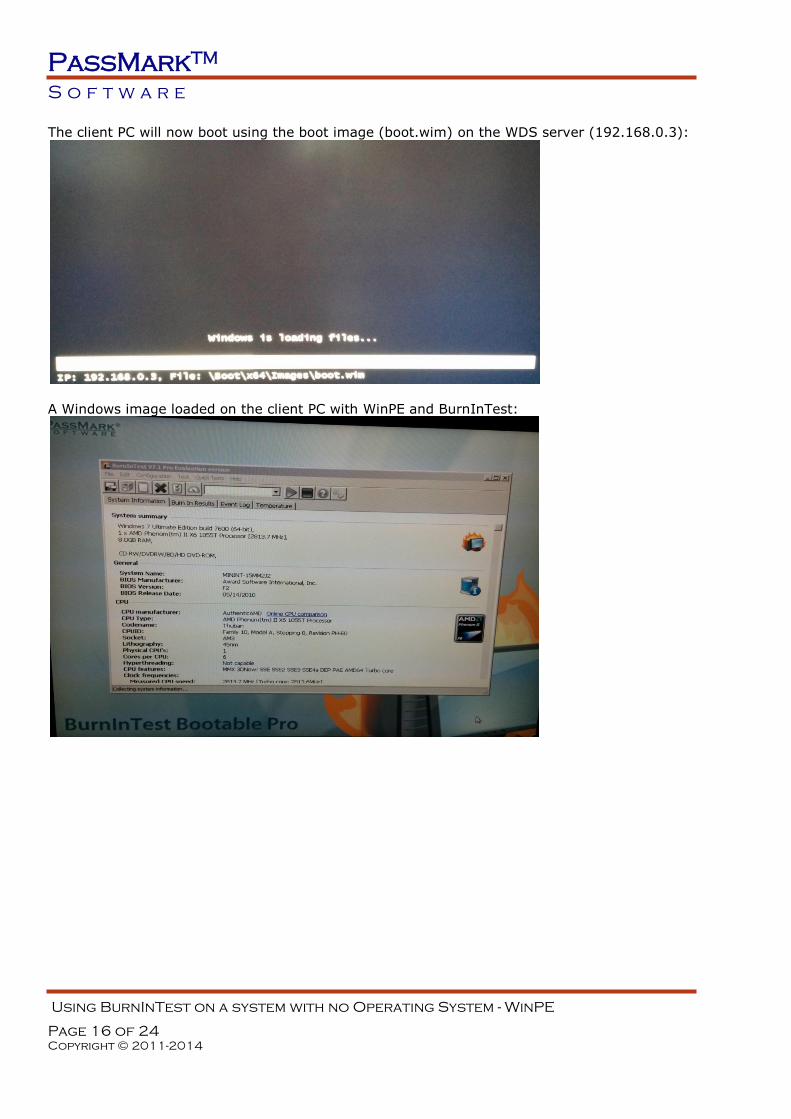
The client PC will now boot using the boot image (boot.wim) on the WDS server (192.168.0.3):
A Windows image loaded on the client PC with WinPE and BurnInTest:
PassMarkTM
S o f t w a r e
Using BurnInTest on a system with no Operating System - WinPE
Page 17 of 24
Copyright © 2011-2014
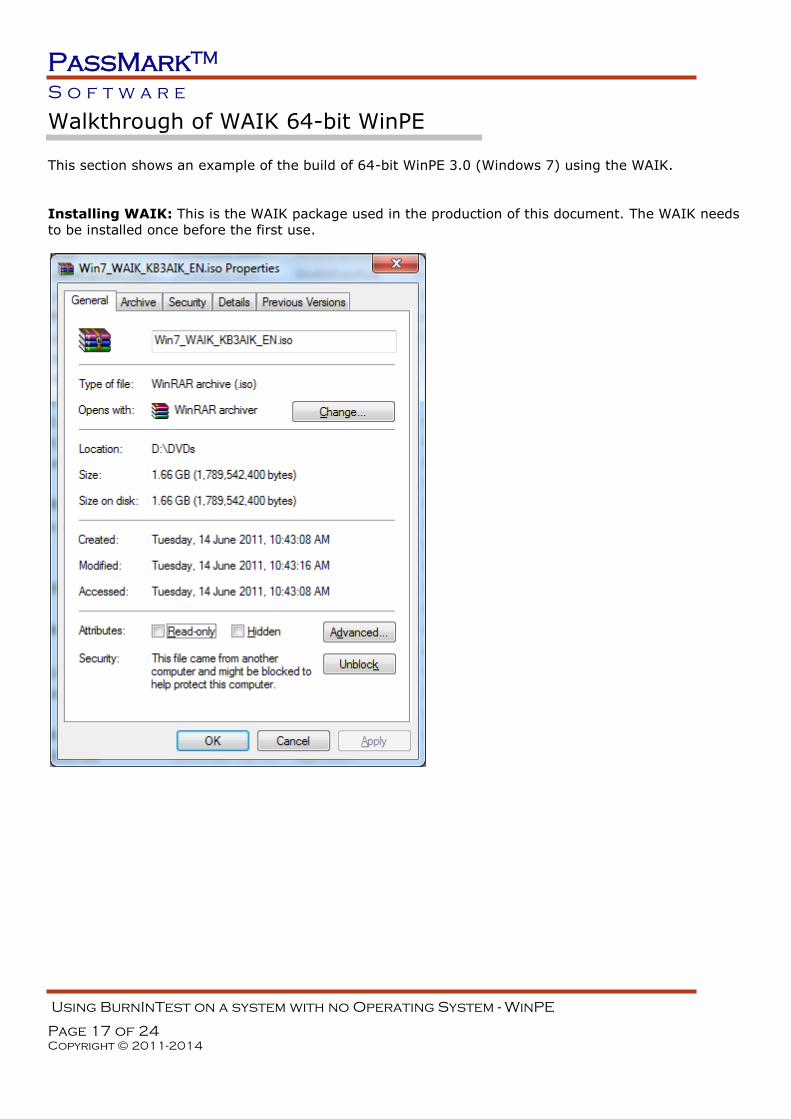
Walkthrough of WAIK 64-bit WinPE
This section shows an example of the build of 64-bit WinPE 3.0 (Windows 7) using the WAIK.
Installing WAIK: This is the WAIK package used in the production of this document. The WAIK needs
to be installed once before the first use.
PassMarkTM
S o f t w a r e
Using BurnInTest on a system with no Operating System - WinPE
Page 18 of 24
Copyright © 2011-2014
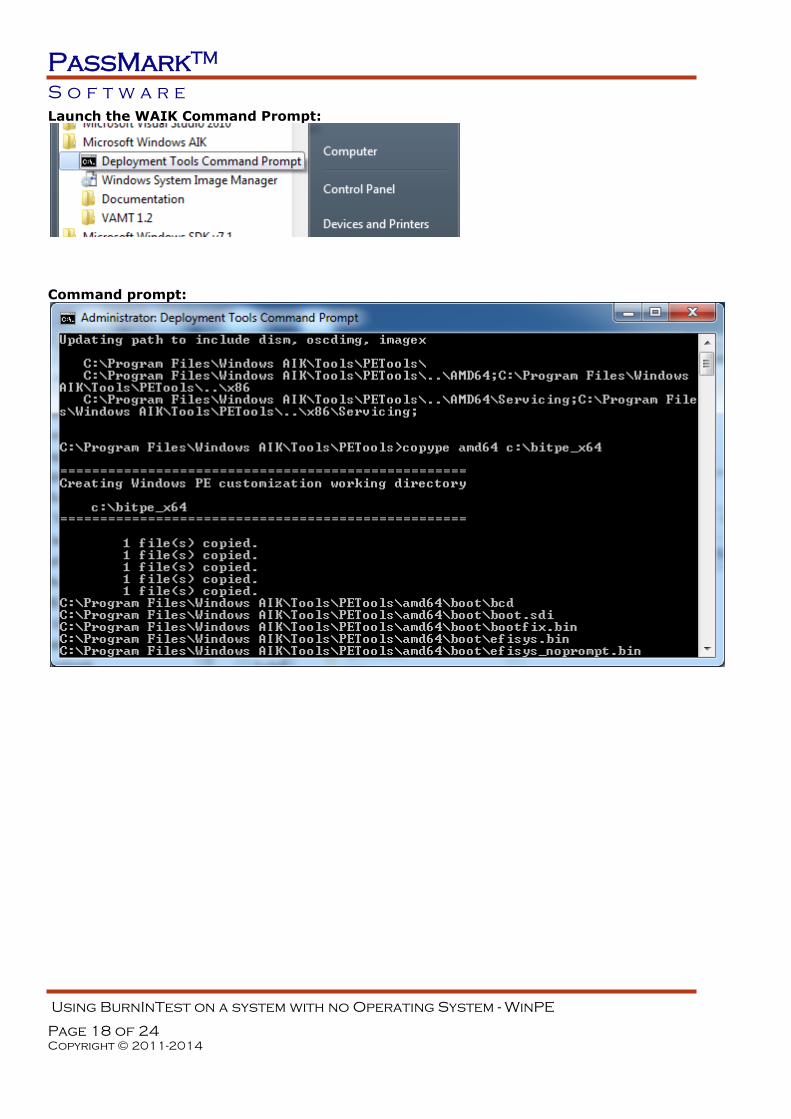
Launch the WAIK Command Prompt:
Command prompt:

PassMarkTM
S o f t w a r e
Using BurnInTest on a system with no Operating System - WinPE
Page 19 of 24
Copyright © 2011-2014
Walkthrough using command prompt – this shows steps 1,2,3 and 7 from the section “Building a
Preinstall Environment”. Please note that the BurnInTest specific steps of 4 and 5 are performed using
Windows Explorer (and not the command prompt – hence not shown here).
Updating path to include dism, oscdimg, imagex
C:\Program Files\Windows AIK\Tools\PETools\
C:\Program Files\Windows AIK\Tools\PETools\..\AMD64;C:\Program Files\Windows
AIK\Tools\PETools\..\x86
C:\Program Files\Windows AIK\Tools\PETools\..\AMD64\Servicing;C:\Program File
s\Windows AIK\Tools\PETools\..\x86\Servicing;
C:\Program Files\Windows AIK\Tools\PETools>copype amd64 c:\bitpe_x64
===================================================
Creating Windows PE customization working directory
c:\bitpe_x64
===================================================
1 file(s) copied.
1 file(s) copied.
1 file(s) copied.
1 file(s) copied.
1 file(s) copied.
C:\Program Files\Windows AIK\Tools\PETools\amd64\boot\bcd
C:\Program Files\Windows AIK\Tools\PETools\amd64\boot\boot.sdi
C:\Program Files\Windows AIK\Tools\PETools\amd64\boot\bootfix.bin
C:\Program Files\Windows AIK\Tools\PETools\amd64\boot\efisys.bin
C:\Program Files\Windows AIK\Tools\PETools\amd64\boot\efisys_noprompt.bin
C:\Program Files\Windows AIK\Tools\PETools\amd64\boot\etfsboot.com
C:\Program Files\Windows AIK\Tools\PETools\amd64\boot\fonts\chs_boot.ttf
C:\Program Files\Windows AIK\Tools\PETools\amd64\boot\fonts\cht_boot.ttf
C:\Program Files\Windows AIK\Tools\PETools\amd64\boot\fonts\jpn_boot.ttf
C:\Program Files\Windows AIK\Tools\PETools\amd64\boot\fonts\kor_boot.ttf
C:\Program Files\Windows AIK\Tools\PETools\amd64\boot\fonts\wgl4_boot.ttf
11 File(s) copied
C:\Program Files\Windows AIK\Tools\PETools\amd64\EFI\boot\bootx64.efi
C:\Program Files\Windows AIK\Tools\PETools\amd64\EFI\microsoft\boot\bcd
C:\Program Files\Windows AIK\Tools\PETools\amd64\EFI\microsoft\boot\fonts\chs_bo
ot.ttf
C:\Program Files\Windows AIK\Tools\PETools\amd64\EFI\microsoft\boot\fonts\cht_bo
ot.ttf
C:\Program Files\Windows AIK\Tools\PETools\amd64\EFI\microsoft\boot\fonts\jpn_bo
ot.ttf
C:\Program Files\Windows AIK\Tools\PETools\amd64\EFI\microsoft\boot\fonts\kor_bo
ot.ttf
C:\Program Files\Windows AIK\Tools\PETools\amd64\EFI\microsoft\boot\fonts\wgl4_b
oot.ttf
7 File(s) copied
1 file(s) copied.
Success
PassMarkTM
S o f t w a r e
Using BurnInTest on a system with no Operating System - WinPE
Page 20 of 24
Copyright © 2011-2014
Updating path to include peimg, cdimage, imagex
C:\Program Files\Windows AIK\Tools\PETools\
C:\Program Files\Windows AIK\Tools\PETools\..\AMD64
c:\bitpe_x64>DISM /Mount-wim /WimFile:c:\bitpe_x64\winpe.wim /index:1 /MountDir:
c:\bitpe_x64\mount
Deployment Image Servicing and Management tool
Version: 6.1.7600.16385
Mounting image
[==========================100.0%==========================]
The operation completed successfully.
c:\bitpe_x64>DISM /image:c:\bitpe_x64\mount /Add-Package /PackagePath:"C:\Progra
m Files\Windows AIK\Tools\PETools\amd64\WinPE_FPs\winpe-wmi.cab"
Deployment Image Servicing and Management tool
Version: 6.1.7600.16385
Image Version: 6.1.7600.16385
Processing 1 of 1 - Adding package WinPE-WMI-Package~31bf3856ad364e35~amd64~~6.1
.7600.16385
[==========================100.0%==========================]
The operation completed successfully.
c:\bitpe_x64>DISM /image:c:\bitpe_x64\mount /Add-Package /PackagePath:"C:\Progra
m Files\Windows AIK\Tools\PETools\amd64\WinPE_FPs\winpe-hta.cab"
Deployment Image Servicing and Management tool
Version: 6.1.7600.16385
Image Version: 6.1.7600.16385
Processing 1 of 1 - Adding package WinPE-HTA-Package~31bf3856ad364e35~amd64~~6.1
.7600.16385
[==========================100.0%==========================]
The operation completed successfully.
c:\bitpe_x64>DISM /image:c:\bitpe_x64\mount /Add-Package /PackagePath:"C:\Progra
m Files\Windows AIK\Tools\PETools\amd64\WinPE_FPs\winpe-scripting.cab"
Deployment Image Servicing and Management tool
Version: 6.1.7600.16385
Image Version: 6.1.7600.16385
Processing 1 of 1 - Adding package WinPE-Scripting-Package~31bf3856ad364e35~amd6
4~~6.1.7600.16385
[==========================100.0%==========================]
PassMarkTM
S o f t w a r e
Using BurnInTest on a system with no Operating System - WinPE
Page 21 of 24
Copyright © 2011-2014
The operation completed successfully.
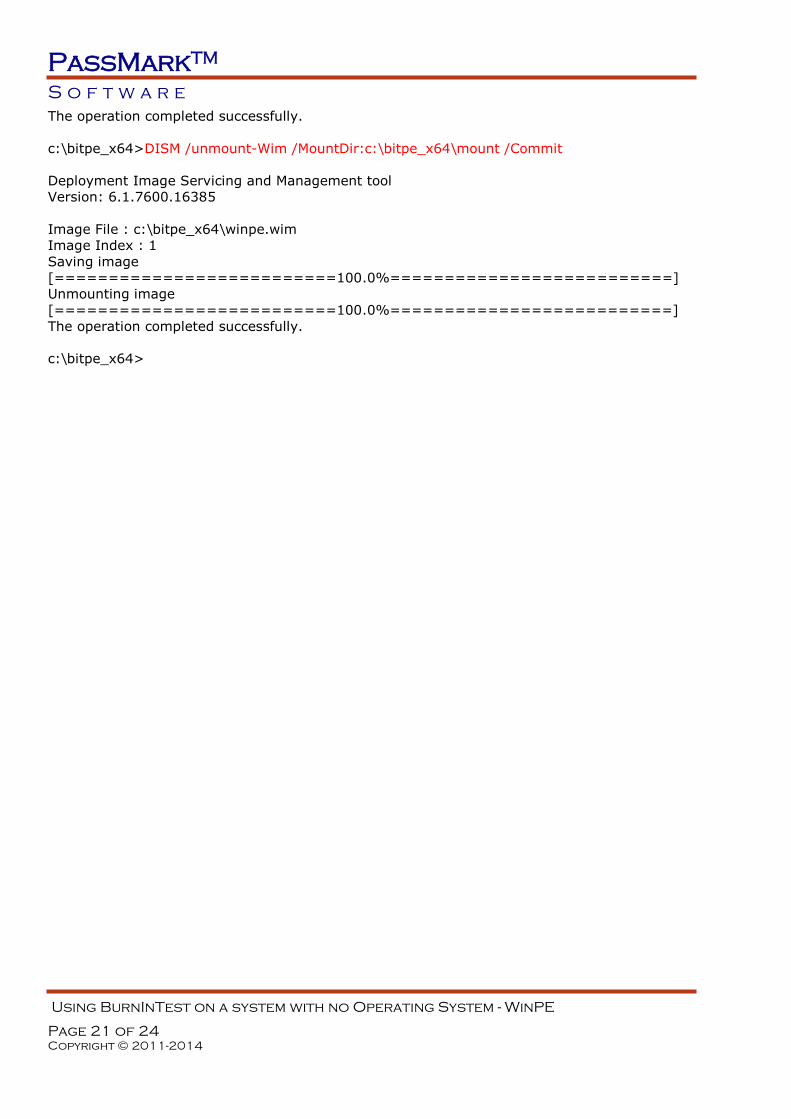
c:\bitpe_x64>DISM /unmount-Wim /MountDir:c:\bitpe_x64\mount /Commit
Deployment Image Servicing and Management tool
Version: 6.1.7600.16385
Image File : c:\bitpe_x64\winpe.wim
Image Index : 1
Saving image
[==========================100.0%==========================]
Unmounting image
[==========================100.0%==========================]
The operation completed successfully.
c:\bitpe_x64>
PassMarkTM
S o f t w a r e
Using BurnInTest on a system with no Operating System - WinPE
Page 22 of 24
Copyright © 2011-2014
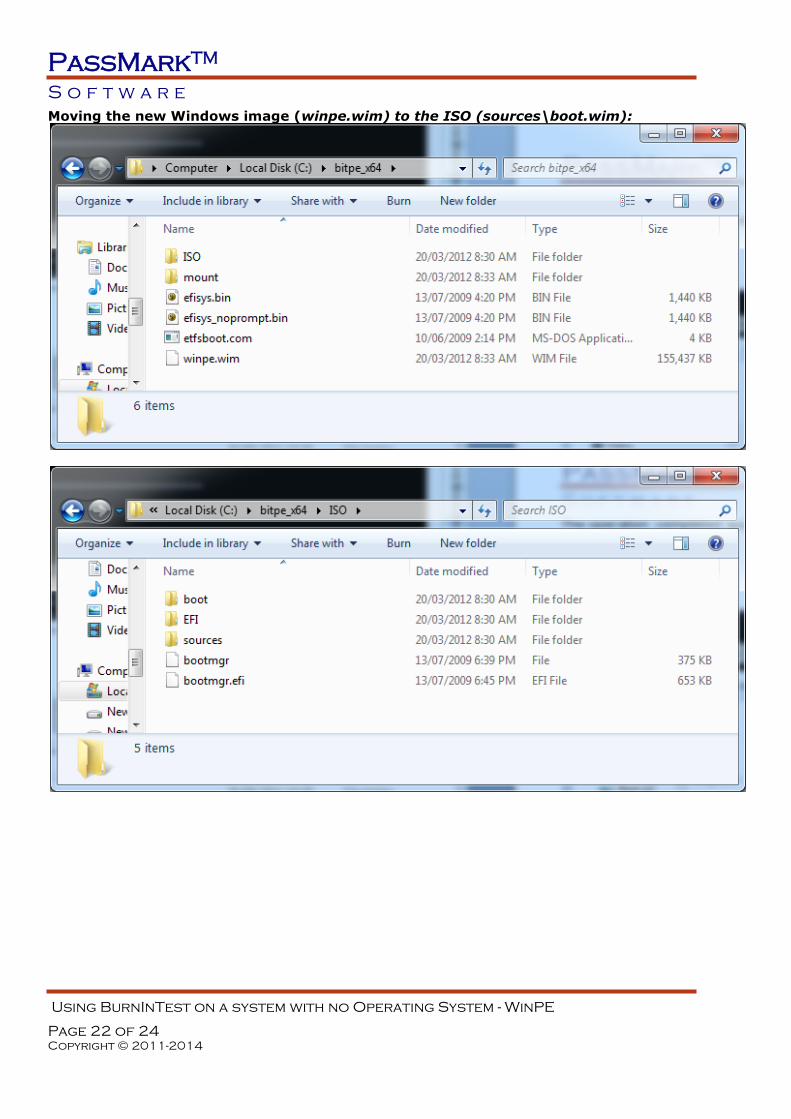
Moving the new Windows image (winpe.wim) to the ISO (sources\boot.wim):
PassMarkTM
S o f t w a r e
Using BurnInTest on a system with no Operating System - WinPE
Page 23 of 24
Copyright © 2011-2014
Now at this point you can rename the c:\bitpe_x64\winpe.wim to boot.wim and place it in the
ISO\sources folder to burn a CD, USB Flash Drive or you can add it to the Boot Images in Windows
Deployment Services.

PassMarkTM
S o f t w a r e
Using BurnInTest on a system with no Operating System - WinPE
Page 24 of 24
Copyright © 2011-2014
WinPE 4.0 - Windows Kits 8.0
BurnInTest can be installed in a WinPE 4.0 Windows 8 image. 32-bit BurnInTest 8.0 has been tested
with 32-bit WinPE 4.0.
Download
WinPE 4.0 - Windows ADK (Windows Kits 8.0) is available for download from the Microsoft website.
E.g.:
http://www.microsoft.com/download/en/confirmation.aspx?id=28997
The build process
The build process is almost identical to WinPE 3.0. An example of creating a bootable USB Flash Drive
with 32-bit WinPE 4.0 and BurnInTest 8.0 follows:
copype x86 c:\bitpe
DISM /image:c:\bitpe\mount /Add-Package /PackagePath:"C:\Program Files (x86)\Windows
Kits\8.0\Assessment and Deployment Kit\Windows Preinstallation Environment\x86\WinPE_OCs\winpe-
wmi.cab"
DISM /image:c:\bitpe\mount /Add-Package /PackagePath:"C:\Program Files (x86)\Windows
Kits\8.0\Assessment and Deployment Kit\Windows Preinstallation Environment\x86\WinPE_OCs\winpe-
hta.cab"
DISM /image:c:\bitpe\mount /Add-Package /PackagePath:"C:\Program Files (x86)\Windows
Kits\8.0\Assessment and Deployment Kit\Windows Preinstallation Environment\x86\WinPE_OCs\winpe-
scripting.cab"
<Install required device drivers for your target Operating System – refer to Step 4 in the section
“Building a Preinstall Environment”>
<Install 64-bit BurnInTest and 64-bit msvfw32.dll for your target Operating System – refer step 5>
<Create startnet.cmd or winpeshl.ini – refer step 6>
DISM /unmount-Wim /MountDir:c:\bitpe\mount /Commit
<Follow Step 9b to make a bootable UFD>
<Copy C:\bitpe\media to the UFD>
Please consult the documentation that comes with the Windows ADK for further information or
configurations.