User Manual - IREX Digital Reader 1000S
59
User Manual IREX Digital Reader® 1000S Version: DR1000S‐EN 2.0 DRAFT
Transcript of User Manual - IREX Digital Reader 1000S

User Manual IREX Digital Reader® 1000S
Version: DR1000S‐EN 2.0
DRAFT

IREX® Digital Reader 1000 – Reading at Its Finest .............. 4
Getting Started ...................................................................... 4
Your IREX Digital Reader ................................................... 7
Charging ................................................................................ 7
Buttons and Switches ............................................................ 9
On‐Screen Features ............................................................. 12
Viewing and Managing Content ...................................... 16
The Home Screen ................................................................ 16
Viewing Your Content ......................................................... 16
Managing Your Content ...................................................... 19
Reading .......................................................................... 21
Content Categories ............................................................. 21
Reflowing Content ............................................................... 22
Navigating Pages and Views ................................................ 23
Zooming .............................................................................. 26
Annotations ......................................................................... 27
Closing an Open Document or Application ......................... 30
Notes .............................................................................. 31
Creating a New Note ........................................................... 31
Note Taking Tools ................................................................ 31
Saving Notes ........................................................................ 33
Renaming Notes .................................................................. 34
Searching ........................................................................ 35
Searching for Reading Material on the Device .................... 35
Searching for a Word in a Text ............................................ 36
Purchased Content and DRM .......................................... 38
Registration and Activation ................................................. 38
Adobe DRM ......................................................................... 39
DRAFT

Opening Books with Special DRM Types ............................. 40
Settings .......................................................................... 41
Page Margins ....................................................................... 42
Time & Date ........................................................................ 42
Stylus Calibration ................................................................ 43
Device Management ........................................................... 43
SD Card Information ............................................................ 44
Screen Rotation ................................................................... 44
Navigation Sensors .............................................................. 44
Power Management ............................................................ 45
Language ............................................................................. 46
Advanced Settings ............................................................... 46
Device Information .............................................................. 47
Connecting to a Computer .............................................. 49
Connecting .......................................................................... 49
Transferring Items to the Device ......................................... 50
Managing Content ............................................................... 51
Making a Backup ................................................................. 51
Switching Devices ........................................................... 52
Recovering Reading Materials ............................................. 52
Device Reactivation ............................................................. 53
Additional Information ................................................... 54
Copyrights ........................................................................... 54
Product Specifications ......................................................... 57
Help ..................................................................................... 58
DRAFT

IREX® DIGITAL READER 1000 – READING AT ITS FINEST Welcome to the world of digital reading! At IREX, we take pride in offering you the best possible reading and writing experience from a digital reader. As the leader in electronic paper display technologies, we have taken yet another monumental step with this generation of digital readers. We hope you will join us in our continued effort to conserve natural resources and protect the environment by reducing the amount of paper that is printed each day. The IREX team wishes you a memorable reading experience.
GETTING STARTED If you haven’t already charged your device’s battery, please follow the instructions in the Quick Start Guide that came in the box. When the device is charging, the light indicator on the front of the device will turn orange and a charging symbol will appear on the battery icon in the lower right corner of the screen. The light indicator turns green once the battery is fully charged.
DRAFT
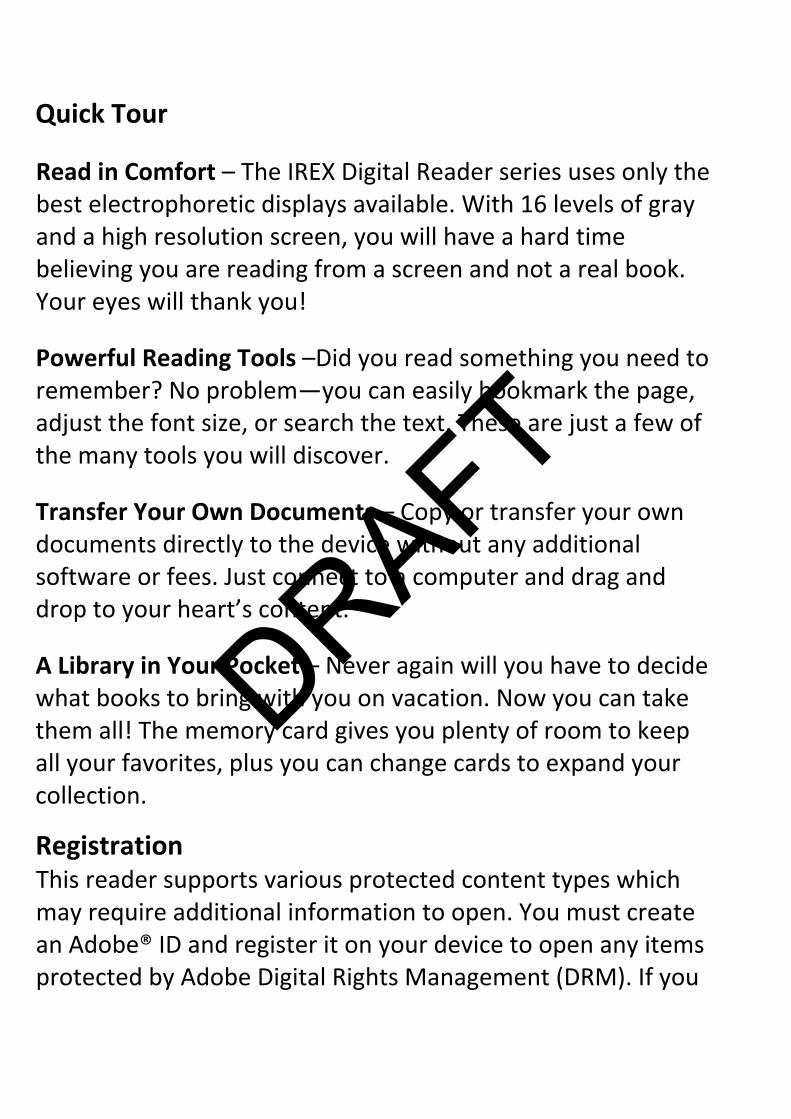
Quick Tour
Read in Comfort – The IREX Digital Reader series uses only the best electrophoretic displays available. With 16 levels of gray and a high resolution screen, you will have a hard time believing you are reading from a screen and not a real book. Your eyes will thank you!
Powerful Reading Tools –Did you read something you need to remember? No problem—you can easily bookmark the page, adjust the font size, or search the text. These are just a few of the many tools you will discover.
Transfer Your Own Documents – Copy or transfer your own documents directly to the device without any additional software or fees. Just connect to a computer and drag and drop to your heart’s content.
A Library in Your Pocket – Never again will you have to decide what books to bring with you on vacation. Now you can take them all! The memory card gives you plenty of room to keep all your favorites, plus you can change cards to expand your collection.
Registration This reader supports various protected content types which may require additional information to open. You must create an Adobe® ID and register it on your device to open any items protected by Adobe Digital Rights Management (DRM). If you
DRAFT

haven’t yet registered and authorized your device, please follow the printed instructions that came with your device or see the Purchased Content and Adobe DRM chapter in this manual.
Software Updates As new features become available for your device, software updates will be released. New software updates can be found on the IREX support website.
1. Go to the IREX support website; choose your device type, and then click on Downloads.
2. Connect your device to your computer with the included USB cable.
3. Download the software update from the website. 4. Open the .ZIP file and copy the contents of the software
update to the root of your SD card (don’t place it in a folder).
5. Eject the device drive from the computer and restart it to install the new software.
DRAFT

YOUR IREX DIGITAL READER In this chapter, you will learn about the different parts of your IREX Digital Reader, as well as how to use the navigation sensors, Menu, and other on‐screen features.
CHARGING
1. Charge your device by using the included USB cable and plugging it into a computer or an electrical outlet using a
DRAFT

wall adapter. The light above the display will turn orange indicating that the battery is charging.
2. Continue charging until the indicator light turns green. The device can be used while charging.
If the device has a completely empty battery, the indicator light will not turn on and the device cannot be used during the first hour of charging. When the indicator light turns orange, the device can be used, though not to its full capacity. A green light indicates that the battery is fully charged.
DRAFT

BUTTONS AND SWITCHES
Power & Menu Sensor – Pressing and holding the power sensor for one and a half seconds turns the device on. The Home screen will appear when the device is ready for use. To turn the device off, open the Menu and choose Turn Off Device. The device will turn itself off.
DRAFT

Once the device has turned on, the middle sensor will operate the Menu. The Menu contains tools for changing views, sorting, deleting files, or others. Menu options change depending on your location within the device. Navigation Sensors – Moves the on‐screen cursor up, down, and side‐to‐side. Arrows also turn pages in reading material. Enter Sensor – Opens items, pushes buttons, and confirms Menu choices. Stylus – Chooses items on the screen and allows you to click on‐ screen buttons and hyperlinks. Indicator Light – Indicates what your device is currently doing. A steady red light indicates that the battery is very low, while a steady orange indicates that the battery is busy charging. A steady green light indicates that the battery is fully charged. When the device is busy opening a very large item or in the middle of a time‐consuming process, the indicator light will flash green. SD Card – Stores all files, folders, and settings. Never remove the SD card while the Digital Reader is busy. You can safely remove the card by opening the Menu and choosing Safely Remove. To eject the card, gently push the card and release. You can now pull it free from the device. To insert a new card,
DRAFT

place it into the device and gently push it until it clicks into place. USB Port – Charges the device. To charge the battery, connect the device into a computer or wall adapter accessory using the included USB cable. Plug the wall adapter into an electrical outlet. The light above the display will turn orange indicating that the battery is charging. Continue charging until the indicator light turns green. The device can be used while charging. The device can be connected to a computer to transfer content. If the USB port on your computer also supplies power, the device will charge using the connection. When the device is connected to your computer, you will not be able to use it. Eject the device drive from your computer to resume use. Reset – Reset the device by using the stylus or the tip of a ballpoint pen and very gently pressing the reset button on the bottom of the device. Pressing the button with too much force could damage the electronics inside.
DRAFT

ONSCREEN FEATURES
Menus
Above is an example of what you would see if you opened the Menu while reading a book. If you open the Menu from another location, you will be allowed to choose from different functions than seen here.
Open the Menu by pressing the Menu button one time. Use the sensors to move to an action, and press Enter once to choose it. Press the Menu button to close the Menu. The Menu can also be used with the stylus that came with your device. To open the Menu, tap on the Menu icon or text in the lower left‐hand corner of your screen. Choose an action by tapping once with the stylus. To close the Menu, tap on the Menu icon or text in the lower left‐hand corner of your screen.
DRAFT
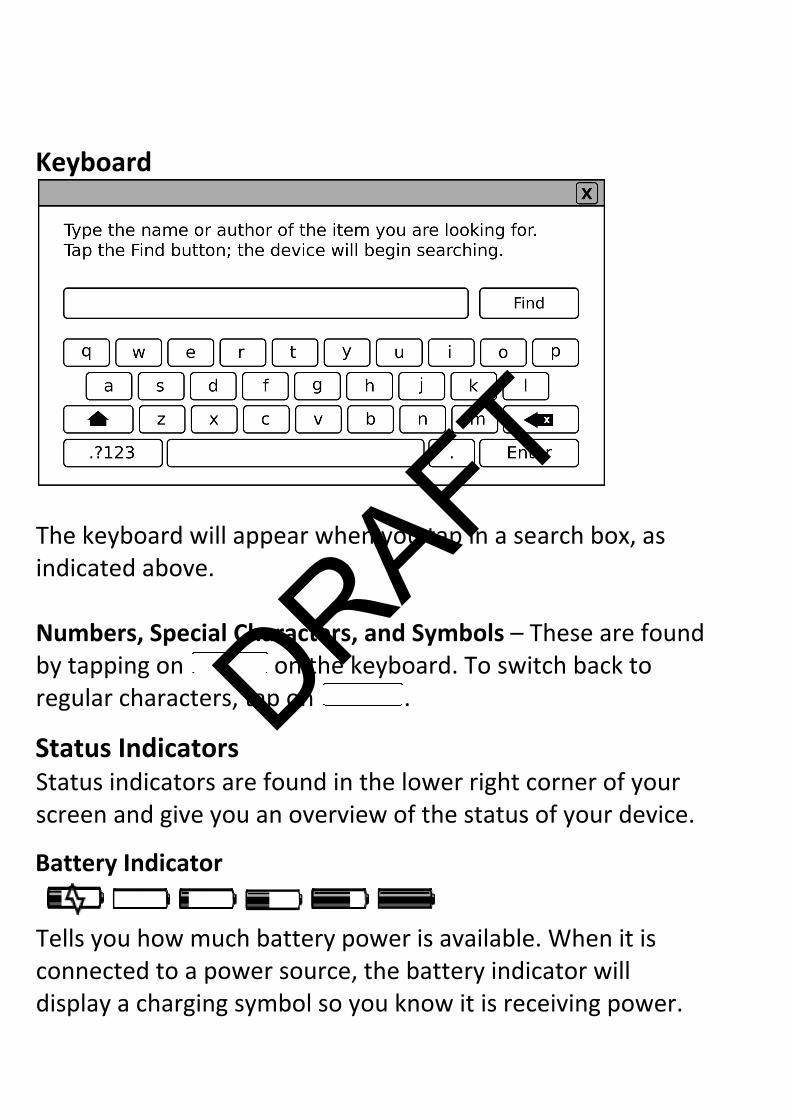
Keyboard
The keyboard will appear when you tap in a search box, as indicated above. Numbers, Special Characters, and Symbols – These are found by tapping on on the keyboard. To switch back to regular characters, tap on .
Status Indicators Status indicators are found in the lower right corner of your screen and give you an overview of the status of your device.
Battery Indicator
Tells you how much battery power is available. When it is connected to a power source, the battery indicator will display a charging symbol so you know it is receiving power.
DRAFT
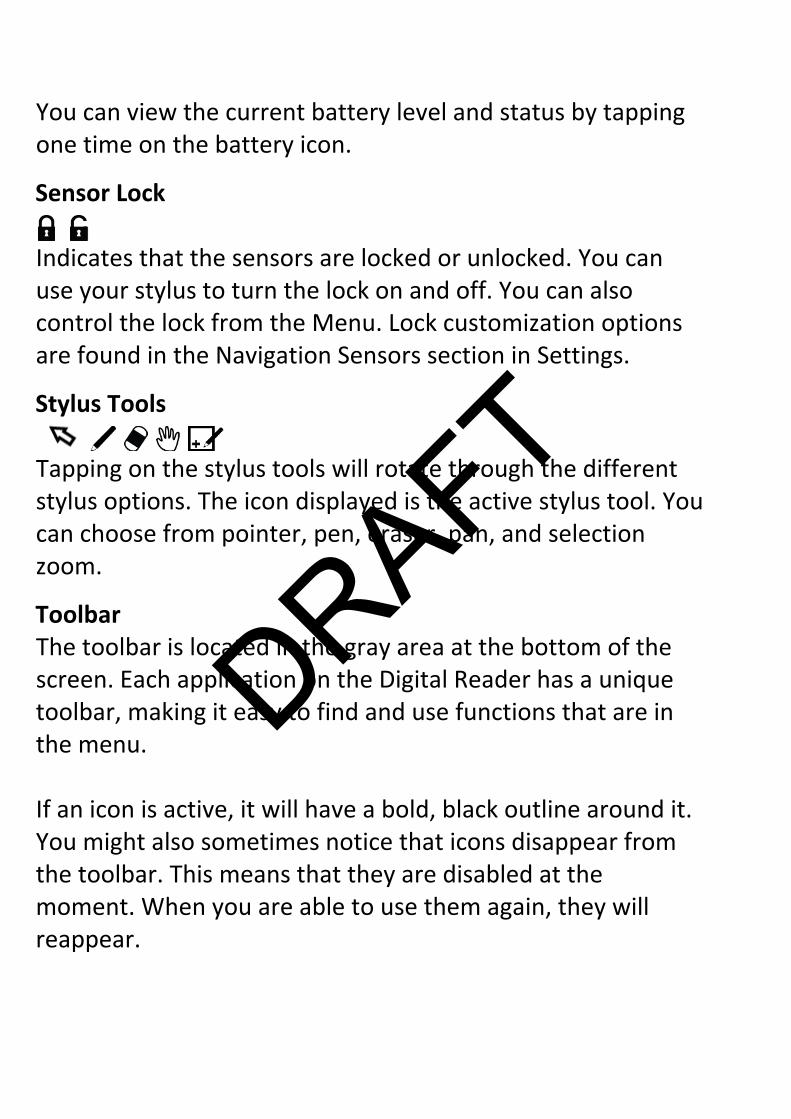
You can view the current battery level and status by tapping one time on the battery icon.
Sensor Lock
Indicates that the sensors are locked or unlocked. You can use your stylus to turn the lock on and off. You can also control the lock from the Menu. Lock customization options are found in the Navigation Sensors section in Settings.
Stylus Tools
Tapping on the stylus tools will rotate through the different stylus options. The icon displayed is the active stylus tool. You can choose from pointer, pen, eraser, pan, and selection zoom.
Toolbar The toolbar is located in the gray area at the bottom of the screen. Each application on the Digital Reader has a unique toolbar, making it easy to find and use functions that are in the menu. If an icon is active, it will have a bold, black outline around it. You might also sometimes notice that icons disappear from the toolbar. This means that they are disabled at the moment. When you are able to use them again, they will reappear.
DRAFT
Screen Rotation You can switch from portrait to landscape mode anytime by choosing Rotate from the Menu.
DRAFT

VIEWING AND MANAGING CONTENT This chapter details the ins and outs of finding and managing the reading materials on your device.
THE HOME SCREEN The Home screen provides entry points to all the different categories and sections on your device. The first icons (Books, News, and Images) are categories that show a list of all books, periodicals, and images you own. The Personal Documents icon opens the Personal Documents folder on the SD card. The Help icon opens the Help folder on the SD card. You will also find Search and Settings. Each of these sections is described in detail in this manual. As an advanced setting, you can add the SD card to the Home screen. From the Home screen, you can also choose Continue Reading, which allows you to continue reading the last opened item.
VIEWING YOUR CONTENT The Home screen has category icons allowing you to see the different types of content saved on your device. When you select a category, you will see all of your relevant items appear on the screen, similar to the illustration below.
Screen Features
DRAFT

Header The header lists the category you are currently browsing (such as Books or News). Following this description is supplemental information. In the example above, Books (category) are ordered by title (supplemental information).
Cover Thumbnail or Icon Each item you have saved on your device will be represented by an icon. If an item has not been indexed by the device, a default icon will be used. Items that have already been indexed will be represented by an image of the cover or first page.
DRAFT
Title and Author The item’s name or title is listed first, with the author listed underneath the title.
Un‐indexed Title An item that has never been opened or indexed has a default icon.
Search Tap on this icon to search for an item on the device.
Shortcuts Tap on this icon to view all the shortcuts made on the device.
Document Tabs As you open documents on the reader, you will see that tabs appear on the right side of the screen. You can easily switch between open documents and applications by tapping on the tabs with the stylus. The first tab will always be the last folder you used.
Index When your content has been sorted by title or by author, an index bar will appear on the far right side of the screen. Tap on a letter with the stylus to see a list of all books that begin with that letter. Letters that are not represented by your list of items will be gray.
Page Indicator This indicator displays how many pages are in each category. Move to the next or previous page by tapping on the arrows
DRAFT

with your stylus or by touching and holding a sensor for half of a second.
MANAGING YOUR CONTENT When selected from the Home screen, your Books, News, Images, Personal Documents, Shortcuts, and Help items will appear on the screen. You can sort your items, change the appearance of the items, and delete items you no longer wish to keep.
Sorting Your Content By default, the device will sort your items by name. You can easily change this by following the instructions below.
1. Open the Menu by using the Menu button or by tapping on the Menu icon.
2. Choose the way you want to sort the items: Sort by Title, Sort by Author, Sort by Date Added, or Sort by Recently Read. The Menu will close and the screen will refresh.
Changing the View Your device can show your items in two different views: as lists or as cover thumbnails. Items displayed as a list will show the name and author for each item. Switching to cover thumbnails will display a large thumbnail of the item cover (or first page) with the name under the icon.
1. Open the Menu by using the Menu button or by tapping on the Menu icon.
DRAFT

2. Choose View as List or View as Covers. The Menu will close and the screen will refresh.
Deleting Content from Your Device To permanently remove items from your device:
1. Open the Menu by using the Menu button or by tapping on the Menu icon.
2. Choose Delete. The Menu will close. Items that can be deleted are indicated with a delete icon.
3. Tap the delete icon or press Enter on each item you want to delete. Restore the item by tapping or pressing Enter a second time.
4. Choose Done Deleting, located at the top of the page. 5. Confirm that you want to delete the item(s).
Creating Shortcuts Creating a shortcut to a file or folder is one way to quickly find your items. All of the shortcuts you have made are displayed in the Shortcut category on the Home screen. Move the selection box around the file or folder you want to create a shortcut to.
1. Open the Menu by using the Menu button or by tapping on the Menu icon.
2. Choose Add Shortcut. The Menu will close and the shortcut has been created.
DRAFT

Warning: If you delete, rename, or move the file or folder, the shortcut will no longer work because the Digital Reader cannot find it. You can either put the file or folder back in place or delete the shortcut and make a new one to the new location.
READING
In this chapter, you will find information about the features you will discover while reading your favorite book, magazine, or newspaper.
CONTENT CATEGORIES You can organize and group your reading material into five different categories: Books, News, Images, Help, and Personal Documents. You can buy books, newspapers, and magazines online, or you can transfer your own personal documents from your computer as described later in this manual. In the Help category, you will find the user manual and terms of use. You can open and read any of the following document formats on this device: PDF, ePub, NP, and PDB (Books and News) and JPG, GIF, PNG, and TIFF (Images).
DRAFT
REFLOWING CONTENT
Changing the Font Size Adjusting the font size is possible for most of your reading materials. Your device will remember the font size for each book. If you have enabled writing on PDF’s in your settings (see Advanced Settings), you must view the document in Original Layout to use this feature. Changing the font size will remove the writing tools from the menu.
1. Open the Menu and choose Adjust Font Size. 2. Choose Original Layout, Small, Medium, Large, or Extra
Large from the secondary Menu. The Menu will close and the font will adjust in size.
Page Numbering Increasing the size of the font on a page means that the total length of the text increases. The device adds more pages to hold overflow text. The page numbering remains the same, regardless of the size of the font. A one‐page item whose default font has been increased such that it results in overflow text will not show pages 1 and 2. Instead, the item will show a first page 1 displaying the first portion of the text and a second page 1 displaying the overflow text.
DRAFT
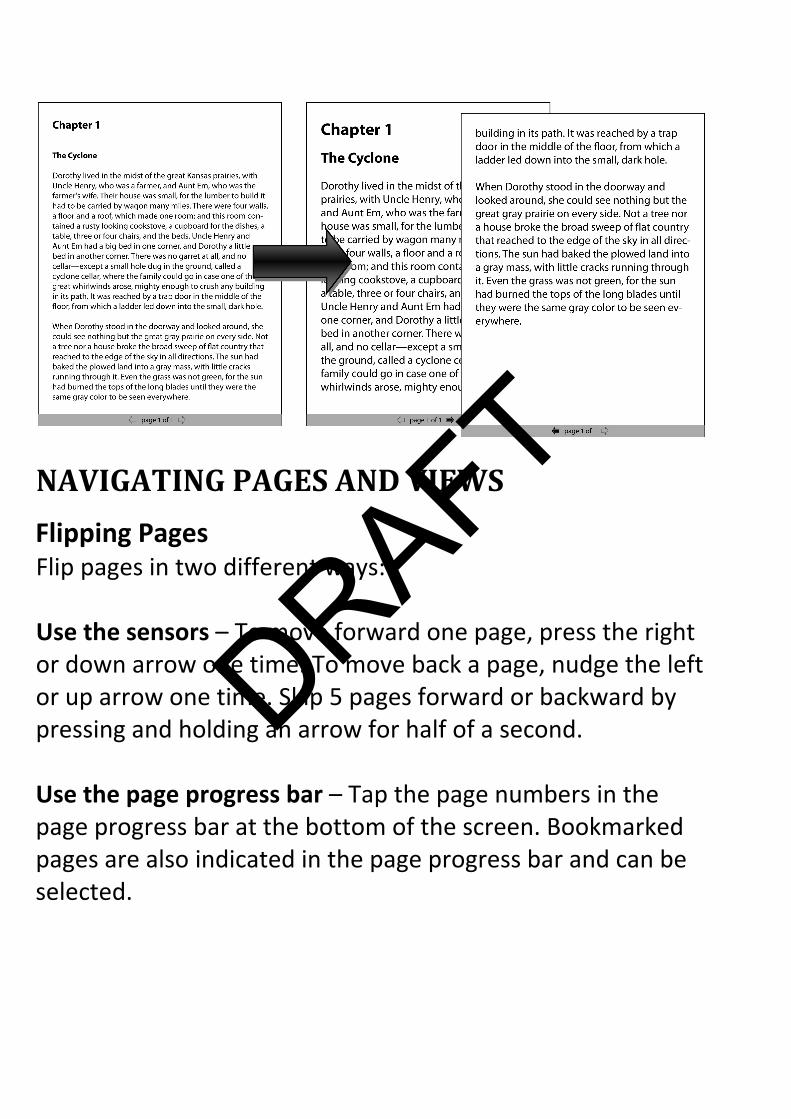
NAVIGATING PAGES AND VIEWS
Flipping Pages Flip pages in two different ways: Use the sensors – To move forward one page, press the right or down arrow one time. To move back a page, nudge the left or up arrow one time. Skip 5 pages forward or backward by pressing and holding an arrow for half of a second. Use the page progress bar – Tap the page numbers in the page progress bar at the bottom of the screen. Bookmarked pages are also indicated in the page progress bar and can be selected.
DRAFT
Moving to a Specific Page You can quickly jump to another page by using the Go to Page feature found in the menu.
1. Open the Menu and choose Go to Page. A pop‐up window will open.
2. Type in the page number you want to view and then tap on the Go to Page button.
Views For an easy overview of your bookmarks, the content inside your book, or document information, use the Menu to switch to different views.
Table of Contents A Table of Contents is available for any book or reading material whereby the publisher included the information. Images will not display a Table of Contents.
1. Open the Menu and choose View Table of Contents. The Table of Contents will open to display all the main and sub‐headings.
2. Choose the chapter you would like to view. The Table of Contents will close and the selected chapter will appear.
Bookmarks Bookmarks are collected and organized automatically. The size of this list can vary depending on how actively you work with your items. Images cannot be bookmarked.
DRAFT

1. Open the Menu and choose View Bookmarks. The view will open to display a list of all the bookmarks you have created.
2. Choose the bookmarked page you would like to see. The view will close and the bookmarked page will appear.
Document Information The About this Document view will display the following information about the item: thumbnail image, title, author, publisher, date added to the device, file name, pages, and authorizations.
1. Open the Menu and choose About this Document. The view will open to display the available information.
2. Choose Close About this Document from the top of the screen or open the Menu and choose Continue Reading to close the document information and return to the book.
Hyperlinks Hyperlinks can be used to navigate to another location in the text. Use the stylus to tap on the hyperlink. The page will turn to the location of the link. While you can move from place to place inside the same text using hyperlinks, hyperlinks cannot be used to open new items. As you are moving around in a document using tools such as hyperlinks and bookmarks, you are building up a page history.
DRAFT

You can go back and forward in the history by choosing Jump to Previous or Jump to Next from the Menu.
ZOOMING With PDF Zooming enabled (see Advanced Settings), it is possible to zoom and pan the viewport of PDF documents.
Full Screen Full screen mode expands the document to fit the entire screen, hiding the page progress bar and status area. To exit full screen mode, select full screen from the menu a second time.
1. Open the Menu and choose Full Screen. 2. The document will fill the entire screen.
Fit on Screen Fit on screen will undo any zooming and panning that have been used on the page and resize it to fit on the screen again.
1. Open the Menu and choose Zooming. 2. Choose Fit on Screen. 3. The entire document page will resize to fit on the screen.
Page Flow With Page Flow selected, the document becomes one long, continuous page that you can scroll up and down using the Pan tool or by using the navigation sensors.
1. Open the Menu and choose Zooming.
DRAFT

2. Choose Page Flow from the secondary menu. 3. The document pages will join to become one long page.
Zooming In
1. Open the Menu and choose Zooming. 2. Choose Selection Zoom. 3. Use the stylus to draw a diagonal line from the upper left
corner to the lower right corner of the area you want to zoom.
Panning
1. Zoom in on the document. 2. Open the Menu and choose Zooming. 3. Choose Pan. 4. Use the stylus or navigation sensors to move the
document around on the screen, in and out of view.
Tip: Tap on the stylus icons in the lower right corner of the screen to quickly choose tools such as zoom and panning!
ANNOTATIONS Bookmarking pages and adding handwritten notes are two key features that enhance the digital reading experience. Page bookmarks are available in all of your book format types while writing features are only found in PDF documents.
DRAFT

Warning: You will lose your bookmarks and notes if you rename or move the document to another location on the SD card.
Writing on a PDF By enabling the writing on PDF feature (see Advanced Settings), you can use the stylus to write notes directly on the pages of your PDF documents.
Using the Pen
1. Open the Menu and choose Writing. 2. Choose Pen or a Pen Size (fine, small, normal, large or
extra large) from the secondary menu. 3. The stylus is now a pen and will write on the page.
Erasing Pen Marks
1. Open the Menu and choose Writing. 2. Choose Eraser from the secondary menu. 3. Touch the lines you want to erase and they will gray out
on the screen. This means they have been erased. 4. When you turn the page or open a menu, the lines will
completely remove from the page.
DRAFT
Bookmarking Bookmarks can be added or removed from any page in your reading material. When a bookmark is added, it is also added to the Bookmarks view. When the size of the text has been resized, bookmarks become slightly difficult to track. As mentioned previously, adjusting text might result in extra pages being added, though page numbers remain the same. If you place a bookmark on page 1, it will appear on page 1 overflows as well.
Creating a Bookmark Tap the upper right corner of the page with the stylus or open the Menu and choose Add Bookmark.
Deleting a Bookmark Tap the bookmark in the upper right corner of the page or Open the Menu and choose Delete Bookmark.
Viewing Your Bookmarks Open the Menu and choose View Bookmarks. The view will open, showing a list of all your bookmarks. Choose the bookmarked page you would like to see. The view will close and the bookmarked page or note will appear.
DRAFT
CLOSING AN OPEN DOCUMENT OR APPLICATION There are two ways a document is closed. You can close it yourself or the device closes it for you. In both cases, there is no need to worry about losing your work because it is always saved automatically. It remembers what page you were on so the next time you open the document, it opens in the same place.
Close a Task Yourself
1. Open the Menu and choose Close Document. 2. The last opened folder appears.
Let the Device Close your Document or Application Once the tab area has filled up, the oldest document or application opened will be saved, closed, and removed from the tabs. This happens each time you open a new document or application.
DRAFT

NOTES The Notes program is a handy application for keeping track of you notes or doodles. This chapter explains how to create a note, use the note taking tools, and rename your notes.
CREATING A NEW NOTE You can quickly open a new note by choosing Notes from the Home screen and then Create New Note. A blank note will open and you can begin writing, sketching, or scribbling with the stylus. The following sections will explain the different note features.
NOTE TAKING TOOLS The following sections will describe how to use the note taking tools available. These include the pen and eraser, adding, clearing, and deleting pages, as well as saving and renaming notes.
Pen and Eraser When you open a note, the pen tool is already active and you can begin writing on the pages. You will find different pen sizes by opening the Menu and choosing Pen Size. To remove pen lines on a page, use the eraser or Clear Page options. A small pen or eraser icon will appear in the lower right corner of the screen to show you which one is currently being used.
DRAFT

Using the Pen
1. Open the Menu and choose Pen or Pen Size and select fine, small, normal, large, or extra large from the secondary menu.
2. The stylus is now a pen and will write on the page.
Erasing Pen Marks
1. Open the Menu and choose Eraser. 2. Touch the lines you want to erase and they will gray out
on the screen. This means they have been erased. When you turn the page or open a menu, the lines will completely remove from the page.
Tip: Tap on the pen or eraser icon in the lower right corner of the screen to quickly switch between the two!
Inserting, Clearing, and Deleting Pages This section will describe how you can insert new pages in a note, clear all the writing from a page at once, or delete an entire page.
Inserting a New Page in the Current Location
1. Open the Menu and choose Insert Page. 2. A blank page will be added to your current location in the
note.
DRAFT
Adding a New Page to the End
1. Go to the last page of your note and flip once more to the next page with the sensors or navigation arrow.
2. A blank page will be added to the end of the note.
Clearing a Page
1. Turn to the page you want to clear the writing from. 2. Open the Menu and choose Clear Page. 3. Confirm by choosing Yes and all pen marks will be cleared
from the page.
Deleting a Page
1. Turn to the page you want to delete. 2. Open the Menu and choose Delete Page. 3. Confirm by choosing Yes and the page will be removed
from the note.
SAVING NOTES The Digital Reader saves your notes automatically for you so you don’t have to. It will save each time you turn a page or close the note. The note will be named with the date and time it was created and added to the list of notes on the reader. You are able to rename a note.
DRAFT

RENAMING NOTES Notes are automatically named with the time and date they were created. You are able to give the note a new name if you choose.
1. Open the note you want to rename. 2. Open the Menu and choose Rename… 3. Type in the new name for the note and then tap on the
Rename button.
DRAFT
SEARCHING This chapter will explain the different ways you can search for something to read, as well as how you can search within the text of a book, newspaper, or document.
SEARCHING FOR READING MATERIAL ON THE DEVICE You can search the SD card for items you have downloaded or saved.
1. Choose Search from the Home screen. 2. Type the name or author of the item you are looking for
using the on‐screen keyboard and stylus. 3. Tap the Find button; the device will begin searching.
Matching results will be displayed. –or–
1. Tap on , found in the upper right corner of the screen (except on the Home and Settings screen).
2. Type the name or author of the item you are looking for using the on‐screen keyboard and stylus.
3. Tap the Find button; the device will begin searching. Matching results will be displayed.
DRAFT
Search Results for Reading Material Once the search is complete, the results are displayed in a new screen. The closest matches to your search will appear at the top. This view is unique compared to the ones you see when managing or browsing your content. This view is a collection of virtual links to the items you own. You can open the items, but you are not able to delete them.
SEARCHING FOR A WORD IN A TEXT When reading a text, you can search for words throughout the entire text. To search for a word:
1. Open the Menu and choose Find Word. 2. The on‐screen keyboard will appear; type the word(s) you
want to find. 3. Tap Find. The matching word in the text will be
highlighted and a pop‐up will appear.
Search Results in a Text Once the device has started searching, you can move through the text finding more matches. To find the next matching word in the text, tap on . To find the previous matching word, tap on .
DRAFT

When you are finished, tap on in the upper right corner of the pop‐up. The pop‐up will close. You will remain on the page where the last word was found.
DRAFT
PURCHASED CONTENT AND DRM The Digital Reader is able to open many different file formats, including ones protected by Adobe Digital Rights Management (DRM). This chapter will explain how to create a MYIREX account, create an Adobe ID, and use Adobe Digital Editions to synchronize content.
REGISTRATION AND ACTIVATION Creating a MIREX account and activating your device is critical. Without this you will not be able to download or open any items that are protected by Adobe Digital Rights Management (DRM).
MYIREX Account Your MYIREX account is where content from participating retailers is securely stored and saved until you sign in and download it to your Digital Reader. You can create your free account in minutes on the IREX website. If you already have an MYIREX Account, you do not need to create a new one.
1. Go to https://myirex.irexnet.com/. 2. Click on the ‘Create an Account’ button and provide the
required information. 3. Sign in online at any time to view, download, and manage
your inbox items.
DRAFT

ADOBE DRM Many books purchased online are protected by Adobe DRM. To open these books, you must have an Adobe ID and Adobe Digital Editions downloaded and installed on your computer. Both of these are available free online. If you already have an Adobe ID, you do not need to create a new one.
Downloading and Activating Adobe Digital Editions Adobe Digital Editions can be used to activate your Digital Reader and transfer content to the device.
1. Go to http://www.adobe.com/products/digitaleditions and follow the instructions to download Digital Editions to your computer.
2. Install Digital Editions on your computer. When it is finished installing, start the program.
3. Follow the instructions to authorize your computer and activate Digital Editions. If you do not have an Adobe ID, you can create one during the set up process or by going to http://www.adobe.com/membership.
Transferring Content using Adobe Digital Editions To read protected items on your Digital Reader, you must transfer them to the device using Digital Editions.
1. Start Digital Editions. 2. Connect the Digital Reader to your computer using the
included USB cable.
DRAFT

3. Authorize the Digital Reader when Digital Editions recognizes that it has been connected. You cannot read content on the reader without this authorization.
4. You can now purchase and synchronize content for the reader using Digital Editions.
OPENING BOOKS WITH SPECIAL DRM TYPES Some content purchased from online stores may be protected with different DRM types other than Adobe. You will be able to download or transfer the content onto your Digital Reader. When you open the item, you maybe be required to provide information such as a user name, password, or credit card number before it will open. For more information about this subject, please visit the IREX support website.
DRAFT

SETTINGS You can edit and adjust several settings on your device. This chapter will review the different options for each setting offered.
Most setting pages are designed for use with the sensors as well as a stylus.
• With the stylus, tap on the choice you wish to activate.
• To activate a setting with the sensors, move the selection box around the setting and press Enter to select it.
DRAFT

Some settings are a little more complicated and will require more interaction to make changes. When necessary, extra instructions have been provided.
PAGE MARGINS The page margin dictates the amount of white space that surrounds the text in a book (or other reading material). Adjust the white space with the page margins setting. Choose No Margins, Small Margins, Medium Margins, or Large Margins. The default setting is Medium.
TIME & DATE Setting the time zone, time, and date ensures that reading material is transferred to the device with the correct time and date stamp. It is important to set the correct time, date, and time zone when you are purchasing or borrowing books.
Set the Time Zone, Time, or Date with Stylus
1. Tap on the up or down arrow to scroll through the numbers or options.
2. Return to Settings to save the changes.
DRAFT

Set the Time Zone, Time, or Date with Sensors
1. Use the sensors to move to the value you wish to change. 2. Scroll through the numbers or options using the sensors
and select the value. 3. Press the sensors to move to the next value. 4. Return to Settings to save the changes.
STYLUS CALIBRATION Calibrate your stylus to improve how accurately it touches items on the screen, a particularly useful tool if you are left‐handed. To calibrate the stylus, tap on the Begin Calibration button and follow the instructions on the screen.
DEVICE MANAGEMENT This settings section contains three separate functions.
Resetting Your Settings When you reset settings, you will restore the settings back to their factory defaults. This will also clear your MYIREX information. To reset the settings, tap on the Reset Settings button.
DRAFT
Formatting the SD Card Formatting the SD card means that all content stored on the card is permanently erased. You will always be asked to confirm formatting before the card is cleared.
SD CARD INFORMATION This section will describe information related to the SD card inserted in your device. You can see the available space for new items and the amount of space that is already used on the card.
SCREEN ROTATION When you rotate the device interface, the screen will turn either clockwise or anti‐clockwise. This setting allows you to choose the rotation direction so you can hold the device in the way that is most comfortable for you.
NAVIGATION SENSORS These settings options allow you to control the lights next to the sensors, the sound, and customize the sensor lock.
Lights This setting is for the green lights next to the sensor panels. It will not affect the light at the top of the screen. You can choose between On and Off.
DRAFT
Sound The ‘beep’ you hear when using the sensors can be controlled with this setting. You can choose between having the sound On or Off.
Sensor Lock This setting determines what sensor areas will lock when the Sensor lock is activated. Locking the sensors will help prevent accidentally page turning or opening menus when you are holding the device or using the stylus to write.
POWER MANAGEMENT Power management preferences will help you monitor the amount of power the device is using in different situations and uses. The automatic shutdown setting has two options to set; when to use the setting, and how long to wait until it uses it. If you prefer that the device always automatically shuts down, even when it is attached to a computer or other power source, you should choose Always. If you only want your device to automatically shutdown when it is running on the battery, you should choose ‘Only when running on battery’. When this setting is active and the device is connected to a computer or power source, it will never automatically shut down.
DRAFT
LANGUAGE You can choose the language to be used on the device interface in this section. The current available languages are: English, German, Spanish, French, Italian, Dutch, and Greek.
ADVANCED SETTINGS
PDF Document Zoom With PDF Document zoom enabled, you will have the ability to zoom and pan on PDF formatted documents. To use this feature, the box that says ‘Enable Zoom’ should be checked. To learn how to use the zoom and panning features, please see the Zooming section in Reading. Remember that zooming is not available in reflowable document formats such as EPUB, TXT, and PDB.
PDF Annotation The PDF Annotation setting allows you to use the stylus to write directly on your PDF formatted documents. To write on the PDF, the zoom must be set to Original Layout. The Annotations section in Reading explains more about the pen and eraser tools and how to use them on a PDF. Annotations cannot be exported or merged to the PDF document at this point in time. If you transfer or rename the file, your annotations (bookmarks and notes) will be lost. To use this feature, the box that says ‘Enable writing’ should be checked.
DRAFT

Folder Based Navigation Enabling the folder based navigation feature will place an additional icon called ‘SD Card’ onto the Home screen and allow you to browse the folder structure that is saved on the SD card inserted in the Digital Reader. While browsing the folders, you will see the file names displayed instead of the titles as shown in the other categories. To use this feature, the box that says ‘Enable folder navigation’ should be checked.
Automatic Thumbnail Generation When the Digital Reader is disconnected from your computer, it will index new documents that it finds saved on the SD card. With automatic thumbnail generation enabled, the device will create cover thumbnails for the new documents while it is indexing. Indexing will become slower with this option enabled. To use this feature, the box that says ‘Enable thumbnail generation’ should be checked.
DEVICE INFORMATION The device information screen displays all of the detailed information about your device and the internal system. Examples of information you will find here include the serial number and software version number.
DRAFT

A customer service representative might ask for details found in your device information. The serial number is also found on the barcode sticker located on the back of device and the product box.
DRAFT
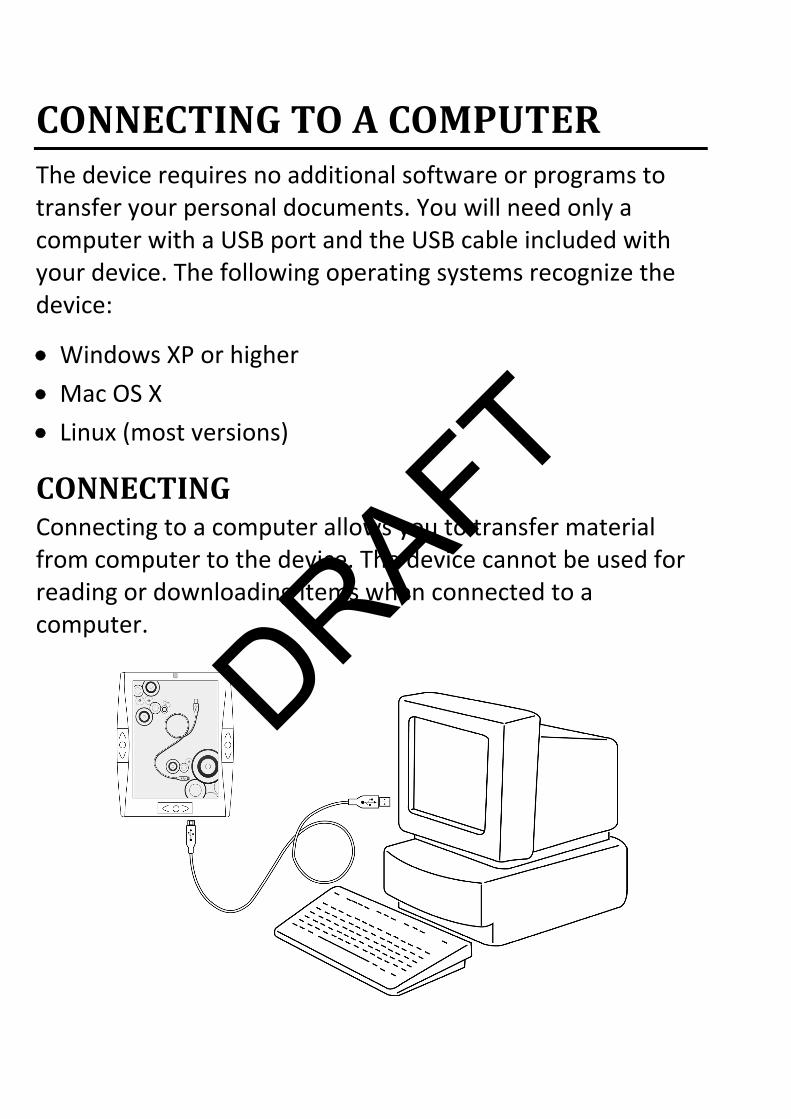
CONNECTING TO A COMPUTER The device requires no additional software or programs to transfer your personal documents. You will need only a computer with a USB port and the USB cable included with your device. The following operating systems recognize the device:
• Windows XP or higher
• Mac OS X
• Linux (most versions)
CONNECTING Connecting to a computer allows you to transfer material from computer to the device. The device cannot be used for reading or downloading items when connected to a computer.
DRAFT

To Connect to a Computer
1. Plug the small end of the USB cable into the USB port located on the bottom of the device.
2. Plug the larger end of the cable into the USB port on your computer. The device will connect and be recognized as a Mass Storage Device by the computer.
TRANSFERRING ITEMS TO THE DEVICE Once you have successfully connected to a computer, you are ready to begin transferring content. 1. Locate the device where you normally find other USB
devices on your computer. 2. Open the device drive and you will find several folders:
Books, News, Images, Personal Documents, and Help. Transfer your items into the respective folder.
3. Eject the device drive from your computer.
Supported Formats The following formats can be opened on your device: PDF, ePub, PDB, NP, JPG, GIF, PNG, TIFF, and BMP. IREX is continuously improving the software which may result in additional supported formats; please visit our website regularly for information regarding software updates. Tip: Many free PDF printers and converters are available on the Internet. With a PDF printer or converter installed on
DRAFT

your computer, you can easily print all of your documents in PDF format directly to your device.
MANAGING CONTENT You can organize and manage your content using your computer. If an item is deleted, moved, or renamed, all the information about that item will be lost. Bookmarks will be deleted and the device will not remember the last read page or font size.
MAKING A BACKUP Making a backup of your content is easy and recommended in the event your device is lost or sent in for repair. If you return your device for repair and leave the SD card inside the device, you will lose all the information on the card.
1. Connect your device to a computer. 2. Locate the device where you normally find other USB
devices on your computer. 3. Open the drive for the device and copy or move all the
contents from the drive to a location on your computer. 4. Eject the device drive from your computer.
DRAFT
SWITCHING DEVICES If you have purchased a new device or received a replacement device, follow the instructions in the following two sections to transfer your purchased content to the new device.
RECOVERING READING MATERIALS Always make a backup of your content before sending your device in for repair or formatting the SD card. To make a backup, follow the instructions in Connecting to a Computer.
1. Connect your device to a computer. 2. Locate the device where you normally find other USB
devices on your computer. 3. Open the drive for the device and copy or move all the
content from your backup location back to the device. 4. Use Adobe Digital Editions to authorize the device. See
Purchased Content and DRM for instructions for downloading and using Adobe Digital Editions.
5. Eject the device drive from your computer.
You may also be able to restore content you have purchased from a store or website; please check with individual retailers to see if they offer this service. You must reactivate your device before opening items that are protected by Adobe Digital Rights Management. You will
DRAFT
find instructions for reactivating your device in the next section.
DEVICE REACTIVATION To read Adobe DRM‐protected content on your new device, you will need to reactivate your Adobe ID. To do this, you must use the same email address and password as you used to activate your previous device. Follow the instructions in the Purchased Content and DRM chapter for activating your Adobe ID. If you cannot open certain items after you have reactivated your device, please visit the IREX support sites for additional help.
DRAFT

ADDITIONAL INFORMATION Please read this information carefully as it contains instructions for the maintenance and the safe use of IREX Digital Reader products.
COPYRIGHTS ©2010 IREX® Technologies BV. All rights reserved. Reproduction in whole or in parts is prohibited without the prior written consent of the copyright owner. Specifications are subject to change without notice. Trademarks are the property of IREX or their respective owners. IREX Technologies does not accept any liability for damages resulting from corrupted or lost data due to erroneous operation or malfunction of the device, software, personal computers, peripheral devices, USB, or SD cards. For complete terms of use and warranty information, read the “Terms of Use and Warranty Information” document found under Help on the device or visit the IREX website.
Adobe® This device contains Adobe® Reader® Mobile software under license from Adobe Systems Incorporated, Copyright © 1995‐2010 Adobe Systems Incorporated. All rights reserved. Adobe and Reader are trademarks of Adobe Systems Incorporated.
DRAFT

Open Source This product includes third‐party open source software, which is subject to different and/or additional licenses, disclaimers and notices. For details on this software and its licenses, refer to the “Open Source Software Notice” document located in the Help section on this device.
Product Warranty Damage and defects that are not the direct result of shipping or manufacturing will not be covered by warranty. Please be aware that the display screen of this device is made from glass and can be scratched or broken if mistreated. Any damage caused by fire, accident, misuse, or unauthorized alterations to the device is not covered by warranty.
Battery Safety The Digital Reader uses a rechargeable Lithium Ion battery to power the device. The battery is charged by connecting the Digital Reader to a power source using the included USB cable. • Do not expose the battery to fire, or direct sunlight. • Do not attempt to open or alter the battery. • Do not dispose of the battery with household waste. • Keep the battery out of reach of children.
Exposure to Moisture Do not expose this device to water, extreme humidity, or liquids of any kind. Damage caused by moisture is not covered by warranty. If the device does get wet, turn the
DRAFT
device off, wait for it to dry, and turn it on again. If the device does not work properly after drying, you can contact customer support to arrange for it to be repaired. It is also advised to avoid exposure to dust and sand as much as possible.
Extreme Temperatures Avoid using the device in temperatures below 0°C/32°F or above 35°C/95°F. The device can be stored in temperatures ranging from ‐10°C/14°F to 45°C/113°F.
Exposure to Direct Sunlight Do not leave the display exposed to direct sunlight for extended periods of time. Use a protective cover to shield the device from the sun.
Cleaning Only use a soft, damp, lint free cloth to clean your device. Cleaning solutions and aerosol sprays can damage the device and should not be used. Make sure the device is unplugged while cleaning and avoid getting moisture in the openings.
Professional Maintenance Never open the device casing or attempt to repair it. Opening the device will void any warranty and release the manufacturer from all responsibilities. If you feel your device is defective, please contact customer support to arrange for it to be repaired.
DRAFT

Proper Disposal of the Device Please join IREX in conserving natural resources and protecting the environment by recycling your device when it has reached the end of its life cycle. You can contact your local authorities for information about laws and regulations regarding the proper disposal of this device.
Make Back‐Ups It is always a good idea to make a back‐up of your information on a regular basis. This Digital Reader is a portable device like any other, and it is possible that it may be lost or the information on the memory card is accidentally erased.
PRODUCT SPECIFICATIONS 10.2 inch Electronic Paper Display 1024 x 1280 pixels 16‐level grey scale Freescale i.MX31L Processor 128 MB RAM 1 GB SD Card (interchangeable with other SD Cards) Wacom® touch sensor input using stylus Rechargeable, internal Lithium‐Ion battery Mini‐USB connector Dimensions (HxWxD): 268x217x12mm Weight: +/‐ 570 grams Operating temperature: between 0°C/32°F and 35°C/95°F Storage temperature: between ‐20°C/‐4°F and 45°C/113°F
DRAFT

Supported formats: Adobe® PDF / ePUB/ TXT / HTML / JPEG / PNG / GIF / TIFF / BMP
PC System Requirements Windows® XP or Vista® 800 MHz processor or better Minimum of 128 MB RAM Minimum of 25 MB available hard disk space USB port
Included Accessories USB cable Stylus 1 GB SD Card Quick Start Guide
HELP To reset the device, use the stylus or the tip of a ballpoint pen and very gently press the reset button on the bottom of the device. Pressing the button with too much force could damage the electronics inside. If you continue to have problems with your device, please contact customer support. US only
1‐877‐259‐IREX (4739)
www.irexdigitalreader.com/support
Outside the US
DRAFT

1‐805‐539‐1739
www.irexreader.eu/support
DRAFT