UNIT 2 .NET Languages C# Language Fundamentals Operators, … YEAR/PLATFORM TECHNOLOGY/Unit...
54
UNIT 2 DEPT OF CSE ,RGCET. UNIT 2 .NET Languages C# Language Fundamentals Operators, Types, and Variables Variables and Types "Variables" are simply storage locations for data. You can place data into them and retrieve their contents as part of a C# expression. The interpretation of the data in a variable is controlled through "Types". C# is a "Strongly Typed" language. Thus all operations on variables are performed with consideration of what the variable's "Type" is. There are rules that define what operations are legal in order to maintain the integrity of the data you put in a variable. The C# simple types consist of the Boolean type and three numeric types - Integrals, Floating Point, Decimal, and String. The term "Integrals", which is defined in the C# Programming Language Specification, refers to the classification of types that include sbyte, byte, short, ushort, int, uint, long, ulong, and char. More details are available in the Integral Types section later in this lesson. The term "Floating Point" refers to the float and double types, which are discussed, along with the decimal type, in more detail in the Floating Point and Decimal Types section later in this lesson. The string type represents a string of characters and is discussed in The String Type section, later in this lesson. The next section introduces the boolean type. The Boolean Type Boolean types are declared using the keyword, bool. They have two values: true or false. In other languages, such as C and C++, boolean conditions can be satisfied where 0 means false and anything else means true. However, in C# the only values that satisfy a boolean condition is true and false, which are official keywords. Listing 2-1 shows one of many ways that boolean types can be used in a program. Displaying Boolean Values: Boolean.cs using System; class Booleans { public static void Main() { bool content = true;
-
Upload
vuonghuong -
Category
Documents
-
view
247 -
download
0
Transcript of UNIT 2 .NET Languages C# Language Fundamentals Operators, … YEAR/PLATFORM TECHNOLOGY/Unit...

UNIT 2 DEPT OF CSE ,RGCET.
UNIT 2
.NET Languages
C# Language Fundamentals
Operators, Types, and Variables
Variables and Types
"Variables" are simply storage locations for data. You can place data into them and
retrieve their contents as part of a C# expression. The interpretation of the data in a variable is
controlled through "Types". C# is a "Strongly Typed" language. Thus all operations on variables
are performed with consideration of what the variable's "Type" is. There are rules that define
what operations are legal in order to maintain the integrity of the data you put in a variable.
The C# simple types consist of the Boolean type and three numeric types - Integrals,
Floating Point, Decimal, and String. The term "Integrals", which is defined in the C#
Programming Language Specification, refers to the classification of types that include sbyte,
byte, short, ushort, int, uint, long, ulong, and char. More details are available in the Integral
Types section later in this lesson. The term "Floating Point" refers to the float and double types,
which are discussed, along with the decimal type, in more detail in the Floating Point and
Decimal Types section later in this lesson. The string type represents a string of characters and is
discussed in The String Type section, later in this lesson. The next section introduces the boolean
type.
The Boolean Type
Boolean types are declared using the keyword, bool. They have two values: true or false. In other
languages, such as C and C++, boolean conditions can be satisfied where 0 means false and
anything else means true. However, in C# the only values that satisfy a boolean condition is true
and false, which are official keywords. Listing 2-1 shows one of many ways that boolean types
can be used in a program.
Displaying Boolean Values: Boolean.cs
using System;
class Booleans
{
public static void Main()
{
bool content = true;

UNIT 2 DEPT OF CSE ,RGCET.
bool noContent = false;
Console.WriteLine("It is {0} that C# Station provides C# programming language content.",
content);
Console.WriteLine("The statement above is not {0}.", noContent);
}
}
In the above example the boolean values are written to the console as a part of a sentence. The
only legal values for the bool type are either true or false, as shown by the assignment of true to
content and false to noContent. When run, this program produces the following output:
It is True that C# Station provides C# programming language content.
The statement above is not False.
Integral Types
In C#, an integral is a category of types. For anyone confused because the word Integral sounds
like a mathematical term, from the perspective of C# programming, these are actually defined as
Integral types in the C# programming language specification. They are whole numbers, either
signed or unsigned, and the char type. The char type is a Unicode character, as defined by the
Unicode Standard. For more information, visit The Unicode Home Page. table 2-1 shows the
integral types, their size, and range.
Table 2-1. The Size and Range of C# Integral Types
Integral types are well suited for those operations involving whole number calculations.
The char type is the exception, representing a single Unicode character. As you can see from the
table above, you have a wide range of options to choose from, depending on your requirements.

UNIT 2 DEPT OF CSE ,RGCET.
Floating Point and Decimal Types
A C# floating point type is either a float or double. They are used any time you need to
represent a real number, as defined by IEEE 754. For more information on IEEE 754, visit the
IEEE Web Site. Decimal types should be used when representing financial or money values.
table 2-2 shows the floating point and decimal types, their size, precision, and range.
The Floating Point and Decimal Types with Size, precision, and Range
Floating point types are used when you need to perform operations requiring fractional
representations. However, for financial calculations, the decimal type is the best choice because
you can avoid rounding errors.
The string Type
A string is a sequence of text characters. You typically create a string with a string literal,
enclosed in quotes: "This is an example of a string." You've seen strings being used in Lesson 1,
where we used the Console.WriteLine method to send output to the console. Some characters
aren't printable, but you still need to use them in strings. Therefore, C# has a special syntax
where characters can be escaped to represent non-printable characters. For example, it is
common to use newlines in text, which is represented by the '\n' char. The backslash, '\',
represents the escape. When preceded by the escape character, the 'n' is no longer interpreted as
an alphabetical character, but now represents a newline.
We have to escape that too by typing two backslashes, as in '\\'. table 2-3 shows a list of
common escape sequences.
C# Character Escape Sequences

UNIT 2 DEPT OF CSE ,RGCET.
Another useful feature of C# strings is the verbatim literal, which is a string with a @
symbol prefix, as in @"Some string". Verbatim literals make escape sequences translate as
normal characters to enhance readability. To appreciate the value of verbatim literals, consider a
path statement such as "c:\\topdir\\subdir\\subdir\\myapp.exe". As you can see, the backslashes
are escaped, causing the string to be less readable. You can improve the string with a verbatim
literal, like this: @"c:\topdir\subdir\subdir\myapp.exe".
C# Operators
Results are computed by building expressions. These expressions are built by combining
variables and operators together into statements. The following table describes the allowable
operators, their precedence, and associativity.
Operators with their precedence and Associativity

UNIT 2 DEPT OF CSE ,RGCET.
Left associativity means that operations are evaluated from left to right. Right
associativity mean all operations occur from right to left, such as assignment operators where
everything to the right is evaluated before the result is placed into the variable on the left.
Most operators are either unary or binary. Unary operators form expressions on a single
variable, but binary operators form expressions with two variables. Listing 2-2 demonstrates how
unary operators are used.
Control Statements – Selection
If Statement
Switch Statement
Break Statement
Goto Statement
The if Statement
An if statement allows you to take different paths of logic, depending on a given condition.
When the condition evaluates to a boolean true, a block of code for that true condition will
execute. You have the option of a single if statement, multiple else if statements, and an optional
else statement.
using System;
class IfSelect
{
public static void Main()
{
string myInput;
int myInt;
Console.Write("Please enter a number: ");
myInput = Console.ReadLine();
myInt = Int32.Parse(myInput);
// Single Decision and Action with braces

UNIT 2 DEPT OF CSE ,RGCET.
if (myInt > 0)
{
Console.WriteLine("Your number {0} is greater than zero.", myInt);
}
// Single Decision and Action without brackets
if (myInt < 0)
Console.WriteLine("Your number {0} is less than zero.", myInt);
// Either/Or Decision
if (myInt != 0)
{
Console.WriteLine("Your number {0} is not equal to zero.", myInt);
}
else
{
Console.WriteLine("Your number {0} is equal to zero.", myInt);
}
// Multiple Case Decision
if (myInt < 0 || myInt == 0)
{
Console.WriteLine("Your number {0} is less than or equal to zero.", myInt);
}
else if (myInt > 0 && myInt <= 10)
{

UNIT 2 DEPT OF CSE ,RGCET.
Console.WriteLine("Your number {0} is in the range from 1 to 10.", myInt);
}
else if (myInt > 10 && myInt <= 20)
{
Console.WriteLine("Your number {0} is in the range from 11 to 20.", myInt);
}
else if (myInt > 20 && myInt <= 30)
{
Console.WriteLine("Your number {0} is in the range from 21 to 30.", myInt);
}
else
{
Console.WriteLine("Your number {0} is greater than 30.", myInt);
}
}
}
The switch Statement
Another form of selection statement is the switch statement, which executes a set of logic
depending on the value of a given parameter. The types of the values a switch statement operates
on can be booleans, enums, integral types, and strings.
using System;
class SwitchSelect
{
public static void Main()

UNIT 2 DEPT OF CSE ,RGCET.
{
string myInput;
int myInt;
begin:
Console.Write("Please enter a number between 1 and 3: ");
myInput = Console.ReadLine();
myInt = Int32.Parse(myInput);
// switch with integer type
switch (myInt)
{
case 1:
Console.WriteLine("Your number is {0}.", myInt);
break;
case 2:
Console.WriteLine("Your number is {0}.", myInt);
break;
case 3:
Console.WriteLine("Your number is {0}.", myInt);
break;
default:
Console.WriteLine("Your number {0} is not between 1 and 3.", myInt);
break;
}

UNIT 2 DEPT OF CSE ,RGCET.
decide:
Console.Write("Type \"continue\" to go on or \"quit\" to stop: ");
myInput = Console.ReadLine();
// switch with string type
switch (myInput)
{
case "continue":
goto begin;
case "quit":
Console.WriteLine("Bye.");
break;
default:
Console.WriteLine("Your input {0} is incorrect.", myInput);
goto decide;
}
}
}
Control Statements - Loops
• While loop.
• Do loop.
• For loop.
• Foreach loop.
The while Loop

UNIT 2 DEPT OF CSE ,RGCET.
A while loop will check a condition and then continues to execute a block of code as long
as the condition evaluates to a boolean value of true. Its syntax is as follows: while (<boolean
expression>) { <statements> }. The statements can be any valid C# statements. The boolean
expression is evaluated before any code in the following block has executed. When the boolean
expression evaluates to true, the statements will execute. Once the statements have executed,
control returns to the beginning of the while loop to check the boolean expression again.
When the boolean expression evaluates to false, the while loop statements are skipped and
execution begins after the closing brace of that block of code. Before entering the loop, ensure
that variables evaluated in the loop condition are set to an initial state. During execution, make
sure you update variables associated with the boolean expression so that the loop will end when
you want it to.
using System;
class WhileLoop
{
public static void Main()
{
int myInt = 0;
while (myInt < 10)
{
Console.Write("{0} ", myInt);
myInt++;
}
Console.WriteLine();
}
}
The do Loop
A do loop is similar to the while loop, except that it checks its condition at the end of the
loop. This means that the do loop is guaranteed to execute at least one time. On the other hand, a
while loop evaluates its boolean expression at the beginning and there is generally no guarantee

UNIT 2 DEPT OF CSE ,RGCET.
that the statements inside the loop will be executed, unless you program the code to explicitly do
so. One reason you may want to use a do loop instead of a while loop is to present a message.
using System;
class DoLoop
{
public static void Main()
{
string myChoice;
do
{
// Print A Menu
Console.WriteLine("My Address Book\n");
Console.WriteLine("A - Add New Address");
Console.WriteLine("D - Delete Address");
Console.WriteLine("M - Modify Address");
Console.WriteLine("V - View Addresses");
Console.WriteLine("Q - Quit\n");
Console.WriteLine("Choice (A,D,M,V,or Q): ");
// Retrieve the user's choice
myChoice = Console.ReadLine();
// Make a decision based on the user's choice
switch(myChoice)
{
case "A":

UNIT 2 DEPT OF CSE ,RGCET.
case "a":
Console.WriteLine("You wish to add an address.");
break;
case "D":
case "d":
Console.WriteLine("You wish to delete an address.");
break;
case "M":
case "m":
Console.WriteLine("You wish to modify an address.");
break;
case "V":
case "v":
Console.WriteLine("You wish to view the address list.");
break;
case "Q":case "q":
Console.WriteLine("Bye.");
break;
default:
Console.WriteLine("{0} is not a valid choice", myChoice);
break;
}
// Pause to allow the user to see the results

UNIT 2 DEPT OF CSE ,RGCET.
Console.Write("press Enter key to continue...");
Console.ReadLine();
Console.WriteLine();
} while (myChoice != "Q" && myChoice != "q"); // Keep going until the user wants to
quit
}
}
The for Loop
A for loop works like a while loop, except that the syntax of the for loop includes
initialization and condition modification. for loops are appropriate when you know exactly how
many times you want to perform the statements within the loop. The contents within the for loop
parentheses hold three sections separated by semicolons (<initializer list>; <boolean
expression>; <iterator list>) { <statements> }. The initializer list is a comma separated list of
expressions. These expressions are evaluated only once during the lifetime of the for loop. This
is a one-time operation, before loop execution. This section is commonly used to initialize an
integer to be used as a counter.
Once the initializer list has been evaluated, the for loop gives control to its second section,
the boolean expression. There is only one boolean expression, but it can be as complicated as
you like as long as the result evaluates to true or false. The boolean expression is commonly used
to verify the status of a counter variable.
When the boolean expression evaluates to true, the statements within the curly braces of the
for loop are executed. After executing for loop statements, control moves to the top of loop and
executes the iterator list, which is normally used to increment or decrement a counter. The
iterator list can contain a comma separated list of statements, but is generally only one statement.
using System;
class ForLoop
{
public static void Main()
{
for (int i=0; i < 20; i++)

UNIT 2 DEPT OF CSE ,RGCET.
{
if (i == 10)
break;
if (i % 2 == 0)
continue;
Console.Write("{0} ", i);
}
Console.WriteLine();
}
}
The foreach Loop
A foreach loop is used to iterate through the items in a list. It operates on arrays or
collections such as ArrayList, which can be found in the System.Collections namespace. The
syntax of a foreach loop is foreach (<type> <iteration variable> in <list>) { <statements> }.
The type is the type of item contained in the list. For example, if the type of the list was int[]
then the type would be int.
The iteration variable is an identifier that you choose, which could be anything but should
be meaningful. For example, if the list contained an array of people's ages, then a meaningful
name for item name would be age. The in keyword is required.
using System;
class ForEachLoop
{
public static void Main()
{
string[] names = {"Cheryl", "Joe", "Matt", "Robert"};
foreach (string person in names)
{
Console.WriteLine("{0} ", person);

UNIT 2 DEPT OF CSE ,RGCET.
}
}
}
Classes and Objects
C# provides many powerful ways of defining classes, such as providing different access
levels, inheriting features from other classes, and allowing the programmer to specify what
happens when types are instantiated or destroyed.
Classes can also be defined as generic through the use of type parameters that enable
client code to customize the class in a type-safe and efficient manner. A single generic class,
for example System.Collections.Generic.List in the .NET Framework Class Library, can be
used by client code to store integers, strings, or any other type of object.
Objects, classes and structs have the following properties:
Objects are instances of a given data type. The data type provides a blueprint for the
object that is created — or instantiated — when the application is executed.
New data types are defined using classes and structs.
Classes and structs form the building blocks of C# applications, containing code and data.
A C# application will always contain of at least one class.
A struct can be considered a lightweight class, ideal for creating data types that store
small amounts of data, and does not represent a type that might later be extended via
inheritance.
C# classes support inheritance, meaning they can derive from a previously defined class.
Classes are declared by using the keyword class followed by the class name and a set of
class members surrounded by curly braces. Every class has a constructor, which is called
automatically any time an instance of a class is created. The purpose of constructors is to
initialize class members when an instance of the class is created. Constructors do not have
return values and always have the same name as the class.
// Namespace Declaration
using System;
// helper class
class OutputClass
{
string myString;
// Constructor
public OutputClass(string inputString)
UNIT 2 DEPT OF CSE ,RGCET.
{
myString = inputString;
}
// Instance Method
public void printString()
{
Console.WriteLine("{0}", myString);
}
// Destructor
~OutputClass()
{
// Some resource cleanup routines
}
}
// Program start class
class ExampleClass
{
// Main begins program execution.
public static void Main()
{
// Instance of OutputClass
OutputClass outCl = new OutputClass("This is printed by the output class.");
// Call Output class' method
outCl.printString();
}}
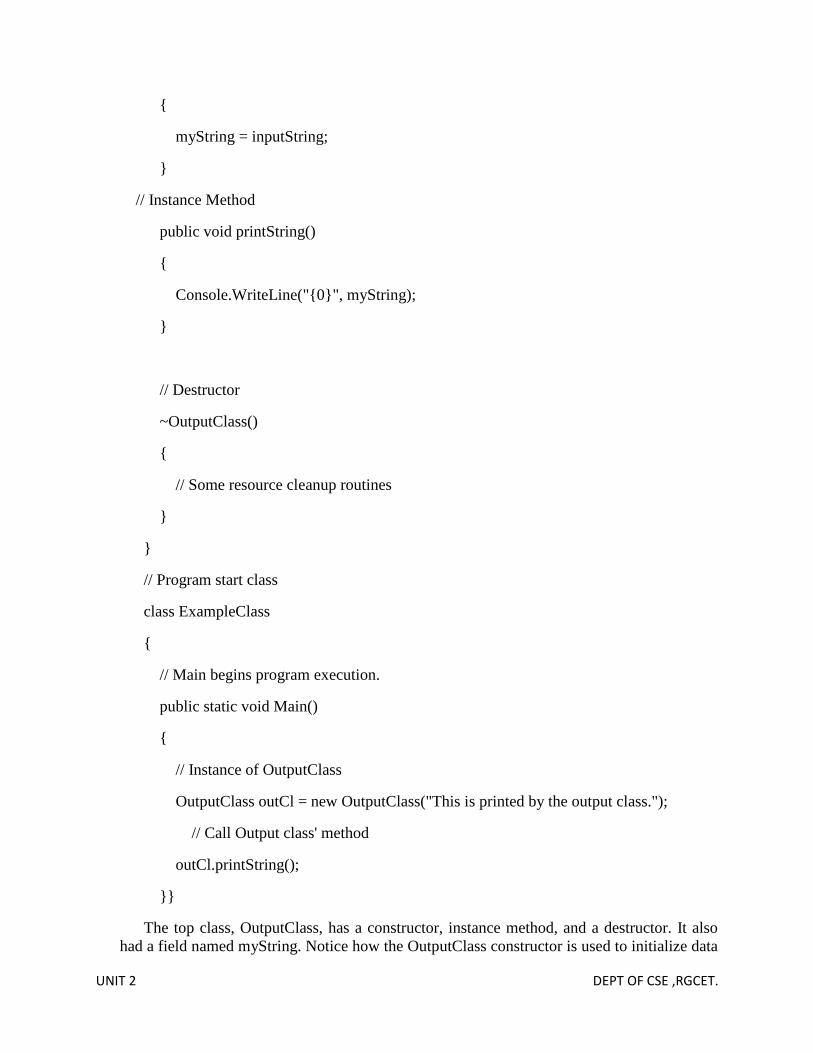
The top class, OutputClass, has a constructor, instance method, and a destructor. It also
had a field named myString. Notice how the OutputClass constructor is used to initialize data

UNIT 2 DEPT OF CSE ,RGCET.
members of the class. In this case, the OutputClass constructor accepts a string argument,
inputString. This string is copied to the class field myString.
Constructors are not mandatory, as indicated by the implementation of ExampleClass. In
this case, a default constructor is provided. A default constructor is simply a constructor with
no arguments.
However, a constructor with no arguments is not always useful. To make default
constructors more useful, you can implement them with initializers. Here is an example:
public OutputClass() : this("Default Constructor String") { }
This default constructor is followed by an initializer. The colon, ":", marks the beginning of
the initializer, followed by the this keyword. The this keyword refers to this particular object. It
effectively makes a call to the constructor of the same object it is defined in. After the this
keyword is a parameter list with a string. The action taken by the initializer above is to invoke
the OutputClass constructor that takes a string type as an argument. The initializer helps you to
ensure your class fields are initialized when a class is instantiated.
The example above illustrates how a class can have multiple constructors. The specific
constructor called depends on the number of parameters and the type of each parameter.
In C#, there are two types of class members, instance and static. Instance class members
belong to a specific occurrence of a class. Every time you declare an object of a certain class,
you create a new instance of that class. The ExampleClass Main() method creates an instance of
the OutputClass named outCl. You can create multiple instances of OutputClass with different
names. Each of these instances are separate and stand alone. For example, if you create two
OutputClass instances as follows:
OutputClass oc1 = new OutputClass("OutputClass1");
OutputClass oc2 = new OutputClass("OutputClass2");
We create two separate instances of OutputClass with separate myString fields and separate
printString() methods. On the other hand, if a class member is static, you can access it simply by
using the syntax <classname>.<static class member>. The instance names are oc1 and oc2.
Suppose OutputClass had the following static method:
public static void staticPrinter()
{
Console.WriteLine("There is only one of me.");
}
Then you could call that function from Main() like this:
OutputClass.staticPrinter();

UNIT 2 DEPT OF CSE ,RGCET.
We must call static class members through their class name and not their instance name. This
means that you don't need to instantiate a class to use its static members. There is only ever one
copy of a static class member. A good use of static members is when there is a function to be
performed and no intermediate state is required, such as math calculations. Matter of fact, the
.NET Frameworks Base Class Library includes a Math class that makes extensive use of static
members.
Another type of constructor is the static constructor. Use static constructor to initialize static
fields in a class. You declare a static constructor by using the keyword static just in front of the
constructor name. A static constructor is called before an instance of a class is created, before a
static member is called, and before the static constructor of a derived class (covered in a later
chapter). They are called only once.
OutputClass also has a destructor. Destructors look just like constructors, except they have a
tilde, "~", in front of them. They don't take any parameters and do not return a value. Destructors
are places where you could put code to release any resources your class was holding during its
lifetime. They are normally called when the C# garbage collector decides to clean your object
from memory.
OBJECTS:
Objects are programming constructs that have data, behavior, and identity. Object data is
contained in the fields, properties, and events of the object, and object behaviors are defined by
the methods and interfaces of the object.
Objects have identity — two objects with the same set of data are not necessarily the
same object. Objects in C# are defined through classes and structs — these form the single
blueprint from which all objects of that type operate.
Objects have the following properties:
Everything you use in C# is an object, including Windows Forms and controls.
Objects are instantiated; that is, they are created from templates defined by classes
and structs.
Objects use Properties (C# Programming Guide) to obtain and change the
information they contain.
Objects often have methods and events that allow them to perform actions.
Visual Studio provides tools for manipulating objects: the Properties Window
allows you to change the attributes of objects such as Windows Forms. The
Object Browser allows you to examine the contents of an object.
All C# objects inherit from the Object.
The object type is an alias for Object in the .NET Framework. In the unified type system of
C#, all types, predefined and user-defined, reference types and value types, inherit directly or
indirectly from Object. You can assign values of any type to variables of type object. When a
variable of a value type is converted to object, it is said to be boxed. When a variable of type
object is converted to a value type, it is said to be unboxed.

UNIT 2 DEPT OF CSE ,RGCET.
The following sample shows how variables of type object can accept values of any data type
and how variables of type object can use methods on Object from the .NET Framework.
// keyword_object.cs
using System;
class SampleClass
{
public int i = 10;
}
class MainClass
{
static void Main()
{
object a;
a = 1; // an example of boxing
Console.WriteLine(a);
Console.WriteLine(a.GetType());
Console.WriteLine(a.ToString());
a = new SampleClass();
SampleClass classRef;
classRef = (SampleClass)a;
Console.WriteLine(classRef.i);
}
}
Methods
Methods are extremely useful because they allow you to separate your logic into different
units. You can pass information to methods, have it perform one or more statements, and retrieve
a return value. The capability to pass parameters and return values is optional and depends on
what you want the method to do. Here's a description of the syntax required for creating a
method:

UNIT 2 DEPT OF CSE ,RGCET.
attributes modifiers return-type method-name(parameters )
{
statements
}
The return-type can be any C# type. It can be assigned to a variable for use later in the
program. The method name is a unique identifier for what you wish to call a method. To promote
understanding of your code, a method name should be meaningful and associated with the task
the method performs. Parameters allow you to pass information to and from a method. They are
surrounded by parenthesis. Statements within the curly braces carry out the functionality of the
method.
One Simple Method: OneMethod.cs
using System;
class OneMethod
{
public static void Main()
{
string myChoice;
OneMethod om = new OneMethod();
do
{
myChoice = om.getChoice();
// Make a decision based on the user's choice
switch(myChoice)
{
case "A":
case "a":
Console.WriteLine("You wish to add an address.");
break;

UNIT 2 DEPT OF CSE ,RGCET.
case "D":
case "d":
Console.WriteLine("You wish to delete an address.");
break;
case "M":
case "m":
Console.WriteLine("You wish to modify an address.");
break;
case "V":
case "v":
Console.WriteLine("You wish to view the address list.");
break;
case "Q":
case "q":
Console.WriteLine("Bye.");
break;
default:
Console.WriteLine("{0} is not a valid choice", myChoice);
break;
}
// Pause to allow the user to see the results
Console.WriteLine();
Console.Write("press Enter key to continue...");
Console.ReadLine();
Console.WriteLine();
} while (myChoice != "Q" && myChoice != "q"); // Keep going until the user wants to
quit
}

UNIT 2 DEPT OF CSE ,RGCET.
string getChoice()
{
string myChoice;
// Print A Menu
Console.WriteLine("My Address Book\n");
Console.WriteLine("A - Add New Address");
Console.WriteLine("D - Delete Address");
Console.WriteLine("M - Modify Address");
Console.WriteLine("V - View Addresses");
Console.WriteLine("Q - Quit\n");
Console.Write("Choice (A,D,M,V,or Q): ");
// Retrieve the user's choice
myChoice = Console.ReadLine();
Console.WriteLine();
return myChoice;
}
}
Methods, fields, and other class members can be accessed, identified, or manipulated
through the "." (dot) operator. Since we want to call getChoice(), we do so by using the dot
operator through the om reference: om.getChoice(). The program then executes the
statements in the getChoice() block and returns. To capture the value getChoice() returns, we
use the "=" (assignment) operator. The returned string is placed into Main()'s local
myChoice variable.
Fields and Properties
Fields are objects or values contained in a class or struct. Fields allow classes and
structures to encapsulate data. For simplicity, these examples use fields that are public, but this is
not recommended in practice. Fields should generally be private. Access to fields by external
classes should be indirect, by means of methods, properties, or indexers. For more information,
see Methods, Properties and Indexers.
Fields store the data a class needs to fulfill its design. For example, a class representing a
calendar date might have three integer fields: one for the month, one for the day, and one for the

UNIT 2 DEPT OF CSE ,RGCET.
year. Fields are declared within the class block by specifying the access level of the field,
followed by the type of the field, followed by the name of the field. For example:
public class CalendarDate
{
public int month;
public int day;
public int year;
}
Accessing a field in an object is done by adding a period after the object name, followed
by the name of the field, as in objectname.fieldname. For example:
CalendarDate birthday = new CalendarDate();
birthday.month = 7;
A field can be given an initial value by using the assignment operator when the field is declared.
To automatically assign the month field to 7, for example, you would declare month like this:
public class CalendarDateWithInitialization
{
public int month = 7;
//...
}
Fields are initialized immediately before the constructor for the object instance is called,
so if the constructor assigns the value of a field, it will overwrite any value given during field
declaration. For more information, see Using Constructors.A field initializer cannot refer to other
instance fields.
Fields can be marked as public, private, protected, internal, or protected internal. These
access modifiers define how users of the class can access the fields. For more information, see
Access Modifiers.
A field can optionally be declared static. This makes the field available to callers at any
time, even if no instance of the class exists. For more information, see Static Classes and Static
Class Members.
A field can be declared readonly. A read-only field can only be assigned a value during
initialization or in a constructor. A static readonly field is very similar to a constant, except that
the C# compiler does not have access to the value of a static read-only field at compile time, only
at run time.

UNIT 2 DEPT OF CSE ,RGCET.
The Array Type
Another data type is the Array, which can be thought of as a container that has a list of
storage locations for a specified type. When declaring an Array, specify the type, name,
dimensions, and size.
PROPERTIES
Overview of Properties
Properties provide the opportunity to protect a field in a class by reading and writing to it
through the property. In other languages, this is often accomplished by programs implementing
specialized getter and setter methods. C# properties enable this type of protection while also
letting you access the property just like it was a field.
Another benefit of properties over fields is that you can change their internal implementation
over time. With a public field, the underlying data type must always be the same because calling
code depends on the field being the same. However, with a property, you can change the
implementation. For example, if a customer has an ID that is originally stored as an int, you
might have a requirements change that made you perform a validation to ensure that calling code
could never set the ID to a negative value. If it was a field, you would never be able to do this,
but a property allows you to make such a change without breaking code. Now, lets see how to
use properties.
Encapsulating Type State with Properties
The practice of accessing field data via methods was good because it supported the object-
oriented concept of encapsulation. For example, if the type of m_id or m_name changed from an
int type to byte, calling code would still work.
Accessing Class Fields With Properties
using System;
public class Customer
{
private int m_id = -1;
public int ID
{
get
{
return m_id;
}

UNIT 2 DEPT OF CSE ,RGCET.
set
{
m_id = value;
}
}
private string m_name = string.Empty;
public string Name
{
get
{
return m_name;
}
set
{
m_name = value;
}
}
}
public class CustomerManagerWithProperties
{
public static void Main()
{
Customer cust = new Customer();
cust.ID = 1;
cust.Name = "Amelio Rosales";
Console.WriteLine(
"ID: {0}, Name: {1}",

UNIT 2 DEPT OF CSE ,RGCET.
cust.ID,
cust.Name);
Console.ReadKey();
}
}
The Customer class has the ID and Name property implementations. There are also
private fields named m_id and m_name; which ID and Name, respectively, encapsulate. Each
property has two accessors, get and set. The accessor returns the value of a field. The set
accessor sets the value of a field with the contents of value, which is the value being assigned by
calling code. The value shown in the accessor is a C# reserved word.
When setting a property, just assign a value to the property as if it were a field. The
CustomerManagerWithProperties class uses the ID and Name properties in the Customer class.
The first line of Main instantiates a Customer object named cust. Next the value of the m_id and
m_name fields of cust are set by using the ID and Name properties.
To read from a property, use the property as if it were a field. Console.WriteLine prints the
value of the m_id and m_name fields of cust. It does this by calling the ID and Name properties
of cust.
Inheritance and Polymorphism
Inheritance is one of the primary concepts of object-oriented programming. It allows you to
reuse existing code. Through effective employment of reuse, you can save time in your
programming.
Inheritance: BaseClass.cs
using System;
public class ParentClass
{
public ParentClass()
{
Console.WriteLine("Parent Constructor.");
}
public void print()
{
Console.WriteLine("I'm a Parent Class.");

UNIT 2 DEPT OF CSE ,RGCET.
}
}
public class ChildClass : ParentClass
{
public ChildClass()
{
Console.WriteLine("Child Constructor.");
}
public static void Main()
{
ChildClass child = new ChildClass();
child.print();
}
}
Output:
Parent Constructor.
Child Constructor.
I'm a Parent Class.
The top class is named ParentClass and the main class is called ChildClass. What we
want to do is create a child class, using existing code from ParentClass. First we must declare our
intention to use ParentClass as the base class of ChildClass. This is accomplished through the
ChildClass declaration public class ChildClass : ParentClass. The base class is specified by
adding a colon, ":", after the derived class identifier and then specifying the base class name.
C# supports single class inheritance only. Therefore, you can specify only one base class
to inherit from. However, it does allow multiple interface inheritance, a subject covered in a later
lesson.
ChildClass has exactly the same capabilities as ParentClass. Because of this, you can also
say ChildClass "is" a ParentClass. This is shown in the Main() method of ChildClass when the
print() method is called. ChildClass does not have its own print() method, so it uses the
ParentClass print() method. We can see the results in the 3rd line of output. Base classes are
automatically instantiated before derived classes.See the output The ParentClass constructor
executed before the ChildClass constructor.

UNIT 2 DEPT OF CSE ,RGCET.
POLYMORPHISM:
Another primary concept of object-oriented programming is Polymorphism. It allows you
to invoke derived class methods through a base class reference during run-time. This is handy
when you need to assign a group of objects to an array and then invoke each of their methods.
They won't necessarily have to be the same object type. However, if they're related by
inheritance, you can add them to the array as the inherited type. Then if they all share the same
method name, that method of each object can be invoked.
A Base Class With a Virtual Method: DrawingObject.cs
using System;
public class DrawingObject
{
public virtual void Draw()
{
Console.WriteLine("I'm just a generic drawing object.");
}
}
This will be the base class for other objects to inherit from. It has a single method named
Draw(). The Draw() method has a virtual modifier. The virtual modifier indicates to derived
classes that they can override this method. The Draw() method of the DrawingObject class
performs a single action of printing the statement, "I'm just a generic drawing object.", to the
console.
Derived Classes With Override Methods: Line.cs, Circle.cs, and Square.cs
using System;
public class Line : DrawingObject
{
public override void Draw()
{
Console.WriteLine("I'm a Line.");
}
}

UNIT 2 DEPT OF CSE ,RGCET.
public class Circle : DrawingObject
{
public override void Draw()
{
Console.WriteLine("I'm a Circle.");
}
}
public class Square : DrawingObject
{
public override void Draw()
{
Console.WriteLine("I'm a Square.");
}
}
This shows three classes. These classes inherit the DrawingObject class. Each class has a
Draw() method and each Draw() method has an override modifier. The override modifier allows
a method to override the virtual method of its base class at run-time. The override will happen
only if the class is referenced through a base class reference. Overriding methods must have the
same signature, name and parameters, as the virtual base class method it is overriding.
Program Implementing Polymorphism: DrawDemo.cs
using System;
public class DrawDemo
{
public static int Main( )
{
DrawingObject[] dObj = new DrawingObject[4];
dObj[0] = new Line();
dObj[1] = new Circle();
dObj[2] = new Square();

UNIT 2 DEPT OF CSE ,RGCET.
dObj[3] = new DrawingObject();
foreach (DrawingObject drawObj in dObj)
{
drawObj.Draw();
}
return 0;
}
}
The above program that uses the classes defined. This program implements
polymorphism. In the Main() method of the DrawDemo class, there is an array being created.
The type of object in this array is the DrawingObject class. The array is named dObj and is being
initialized to hold four objects of type DrawingObject.
Next the dObj array is initialized. Because of their inheritance relationship with the
DrawingObject class, the Line, Circle, and Square classes can be assigned to the dObj array.
Without this capability, you would have to create an array for each type. Inheritance allows
derived objects to act like their base class, which saves work.
After the array is initialized, there is a foreach loop that looks at each element of the
array. Within the foreach loop the Draw() method is invoked on each element of the dObj array.
Because of polymorphism, the run-time type of each object is invoked. The type of the reference
object from the dObj array is a DrawingObject. However, that doesn't matter because the derived
classes override the virtual Draw() method of the DrawingObject class. This makes the overriden
Draw() methods of the derived classes execute when the Draw() method is called using the
DrawingObject base class reference from the dObj array. Here's what the output looks like:
Output:
I'm a Line.
I'm a Circle.
I'm a Square.
I'm just a generic drawing object.
The override Draw() method of each derived class executes as shown in the DrawDemo
program. The last line is from the virtual Draw() method of the DrawingObject class. This is
because the actual run-time type of the fourth array element was a DrawingObject object. The
code in this example can be compiled with the following command line:
csc DrawDemo.cs DrawingObject.cs Circle.cs Line.cs Square.cs

UNIT 2 DEPT OF CSE ,RGCET.
It will create the file DrawDemo.exe, which defaulted to the name of the first file on the
command line.
Operator Overloading
The syntax required to implement an overloaded operator is much the same as a static
method with a couple exceptions. You must use the operator keyword and specify the operator
symbol being overloaded. Here's a skeleton example of how the dot product operator could be
implemented:
public static Matrix operator *(Matrix mat1, Matrix mat2)
{
// dot product implementation
}
Notice that the method is static. Use the keyword operator after specifying the return type,
Matrix in this case. Following the operator keyword, the actual operator symbol is specified and
then there is a set of parameters to be operated on. See for a full example of how to implement
and use an overloaded operator.
Implementing an Overloaded Operator: Matrix.cs
using System;
class Matrix
{
public const int DimSize = 3;
private double[,] m_matrix = new double[DimSize, DimSize];
// allow callers to initialize
public double this[int x, int y]
{
get { return m_matrix[x, y]; }
set { m_matrix[x, y] = value; }
}
// let user add matrices
public static Matrix operator +(Matrix mat1, Matrix mat2)
{

UNIT 2 DEPT OF CSE ,RGCET.
Matrix newMatrix = new Matrix();
for (int x=0; x < DimSize; x++)
for (int y=0; y < DimSize; y++)
newMatrix[x, y] = mat1[x, y] + mat2[x, y];
return newMatrix;
}
}
class MatrixTest
{
// used in the InitMatrix method.
public static Random m_rand = new Random();
// test Matrix
static void Main()
{
Matrix mat1 = new Matrix();
Matrix mat2 = new Matrix();
// init matrices with random values
InitMatrix(mat1);
InitMatrix(mat2);
// print out matrices
Console.WriteLine("Matrix 1: ");
PrintMatrix(mat1);
Console.WriteLine("Matrix 2: ");
PrintMatrix(mat2);
// perform operation and print out results
Matrix mat3 = mat1 + mat2;
Console.WriteLine();

UNIT 2 DEPT OF CSE ,RGCET.
Console.WriteLine("Matrix 1 + Matrix 2 = ");
PrintMatrix(mat3);
Console.ReadLine();
}
// initialize matrix with random values
public static void InitMatrix(Matrix mat)
{
for (int x=0; x < Matrix.DimSize; x++)
for (int y=0; y < Matrix.DimSize; y++)
mat[x, y] = m_rand.NextDouble();
}
// print matrix to console
public static void PrintMatrix(Matrix mat)
{
Console.WriteLine();
for (int x=0; x < Matrix.DimSize; x++)
{
Console.Write("[ ");
for (int y=0; y < Matrix.DimSize; y++)
{
// format the output
Console.Write("{0,8:#.000000}", mat[x, y]);
if ((y+1 % 2) < 3)
Console.Write(", ");
}
Console.WriteLine(" ]");
}

UNIT 2 DEPT OF CSE ,RGCET.
Console.WriteLine();
}
}
Similar to the skeleton example of the dot product operator, the Matrix class in Listing 18-1
contains an operator overload for the + operator. For your convenience, I've extracted the
pertinent overload implementation in the code below:
// let user add matrices
public static Matrix operator +(Matrix mat1, Matrix mat2)
{
Matrix newMatrix = new Matrix();
for (int x=0; x < DimSize; x++)
for (int y=0; y < DimSize; y++)
newMatrix[x, y] = mat1[x, y] + mat2[x, y];
return newMatrix;
}
The operator is static, which is the only way it can and should be declared because an
operator belongs to the type and not a particular instance. There are just a few rules you have
to follow when implementing operator overloads. What designates this as an operator is the
use of the keyword operator, followed by the + symbol. The parameter types are both of the
enclosing type, Matrix. The implementation of the operator overload creates a new instance
of the return type and performs a matrix add.
Operator Rules
C# enforces certain rules when you overload operators. One rule is that you must implement
the operator overload in the type that will use it. This is sensible because it makes the type self-
contained. Another rule is that you must implement matching operators. For example, if you
overload ==, you must also implement !=. The same goes for <= and >=. When you implement
an operator, its compound operator works also. For example, since the + operator for the Matrix
type was implemented, you can also use the += operator on Matrix types.
Struts
Structs are defined using the struct keyword, for example:
public struct PostalAddress
{

UNIT 2 DEPT OF CSE ,RGCET.
// Fields, properties, methods and events go here...
}
Structs share almost all the same syntax as classes, although structs are more limited than
classes:
Within a struct declaration, fields cannot be initialized unless they are declared as const
or static.
A struct may not declare a default constructor —a constructor with no parameters — or a
destructor.
Copies of structs are created and destroyed automatically by the compiler, so a default
constructor and destructor are unnecessary. In effect, the compiler implements the default
constructor by assigning all the fields of their default values (see Default Values Table). Structs
cannot inherit from classes or other structs.
Structs are value types — when an object is created from a struct and assigned to a variable,
the variable contains the entire value of the struct. When a variable containing a struct is copied,
all of the data is copied, and any modification to the new copy does not change the data for the
old copy. Because structs do not use references, they do not have identity — there is no way to
distinguish between two instances of a value type with the same data. All value types in C#
inherently derive from ValueType, which inherits from Object.Value types can be converted to
reference types by the compiler in a process known as boxing.
Structs have the following properties:
Structs are value types while classes are reference types.
Unlike classes, structs can be instantiated without using a new operator.
Structs can declare constructors, but they must take parameters.
A struct cannot inherit from another struct or class, and it cannot be the base of a class.
All structs inherit directly from System.ValueType, which inherits from System.Object.
A struct can implement interfaces.
The struct type is suitable for representing lightweight objects such as Point, Rectangle,
and Color. Although it is possible to represent a point as a class, a struct is more efficient in
some scenarios. For example, if you declare an array of 1000 Point objects, you will allocate
additional memory for referencing each object; in this case, a struct would be less expensive.
Since the .NET Framework contains an object called Point, we'll call our struct "CoOrds"
instead.
public struct CoOrds
{
public int x, y;
public CoOrds(int p1, int p2)
{

UNIT 2 DEPT OF CSE ,RGCET.
x = p1;
y = p2;
}
}
It is an error to declare a default (parameterless) constructor for a struct. A default
constructor is always provided to initialize the struct members to their default values. It is also an
error to initialize an instance field in a struct.
When you create a struct object using the new operator, it gets created and the
appropriate constructor is called. Unlike classes, structs can be instantiated without using the
new operator. If you do not use new, the fields will remain unassigned and the object cannot be
used until all of the fields are initialized.There is no inheritance for structs as there is for classes.
A struct cannot inherit from another struct or class, and it cannot be the base of a class. Structs,
however, inherit from the base class Object . A struct can implement interfaces, and it does that
exactly as classes do.
Unlike C++, you cannot declare a class using the keyword struct. In C#, classes and structs
are semantically different. A struct is a value type, while a class is a reference type. For more
information, see Value Types.
This example demonstrates struct initialization using both default and parameterized
constructors.
public struct CoOrds
{
public int x, y;
public CoOrds(int p1, int p2)
{
x = p1;
y = p2;
}
}
// Declare and initialize struct objects.
class TestCoOrds
{
static void Main()

UNIT 2 DEPT OF CSE ,RGCET.
{
// Initialize:
CoOrds coords1 = new CoOrds();
CoOrds coords2 = new CoOrds(10, 10);
// Display results
System.Console.Write("CoOrds 1: ");
System.Console.WriteLine("x = {0}, y = {1}", coords1.x, coords1.y);
System.Console.Write("CoOrds 2: ");
System.Console.WriteLine("x = {0}, y = {1}", coords2.x, coords2.y);
}
}
Output
CoOrds 1: x = 0, y = 0
CoOrds 2: x = 10, y = 10
Interfaces
An interface looks like a class, but has no implementation. The only thing it contains are
definitions of events, indexers, methods and/or properties. The reason interfaces only provide
definitions is because they are inherited by classes and structs, which must provide an
implementation for each interface member defined.
Defining an Interface: MyInterface.cs
interface IMyInterface
{
void MethodToImplement();
}
The above example defines an interface named IMyInterface. A common naming
convention is to prefix all interface names with a capital "I". This interface has a single method
named MethodToImplement(). This could have been any type of method declaration with
different parameters and return types. Notice that this method does not have an implementation
(instructions between curly braces - {}), but instead ends with a semi-colon, ";". This is because
the interface only specifies the signature of methods that an inheriting class or struct must
implement. Listing 13-2 shows how this interface could be used.

UNIT 2 DEPT OF CSE ,RGCET.
Using an Interface: InterfaceImplementer.cs
class InterfaceImplementer : IMyInterface
{
static void Main()
{
InterfaceImplementer iImp = new InterfaceImplementer();
iImp.MethodToImplement();
}
public void MethodToImplement()
{
Console.WriteLine("MethodToImplement() called.");
}
}
The InterfaceImplementer class implements the IMyInterface interface. Indicating that a
class inherits an interface is the same as inheriting a class. In this case, the following syntax is
used:
class InterfaceImplementer : IMyInterface
Now that this class inherits the IMyInterface interface, it must implement its members. It
does this by implementing the MethodToImplement() method. Notice that this method
implementation has the exact same signature, parameters and method name, as defined in the
IMyInterface interface. Any difference between the method signature in the interface and the
method signature in the implementing class or struct will cause a compiler error. Additionally, a
class or struct that inherits an interface must include all interface members;
Interfaces may also inherit other interfaces. Following shows how inherited interfaces are
implemented.
Interface Inheritance: InterfaceInheritance.cs
using System;
interface IParentInterface
{
void ParentInterfaceMethod();
}
UNIT 2 DEPT OF CSE ,RGCET.
interface IMyInterface : IParentInterface
{
void MethodToImplement();
}
class InterfaceImplementer : IMyInterface
{
static void Main()
{
InterfaceImplementer iImp = new InterfaceImplementer();
iImp.MethodToImplement();
iImp.ParentInterfaceMethod();
}
public void MethodToImplement()
{
Console.WriteLine("MethodToImplement() called.");
}
public void ParentInterfaceMethod()
{
Console.WriteLine("ParentInterfaceMethod() called.");
}
}
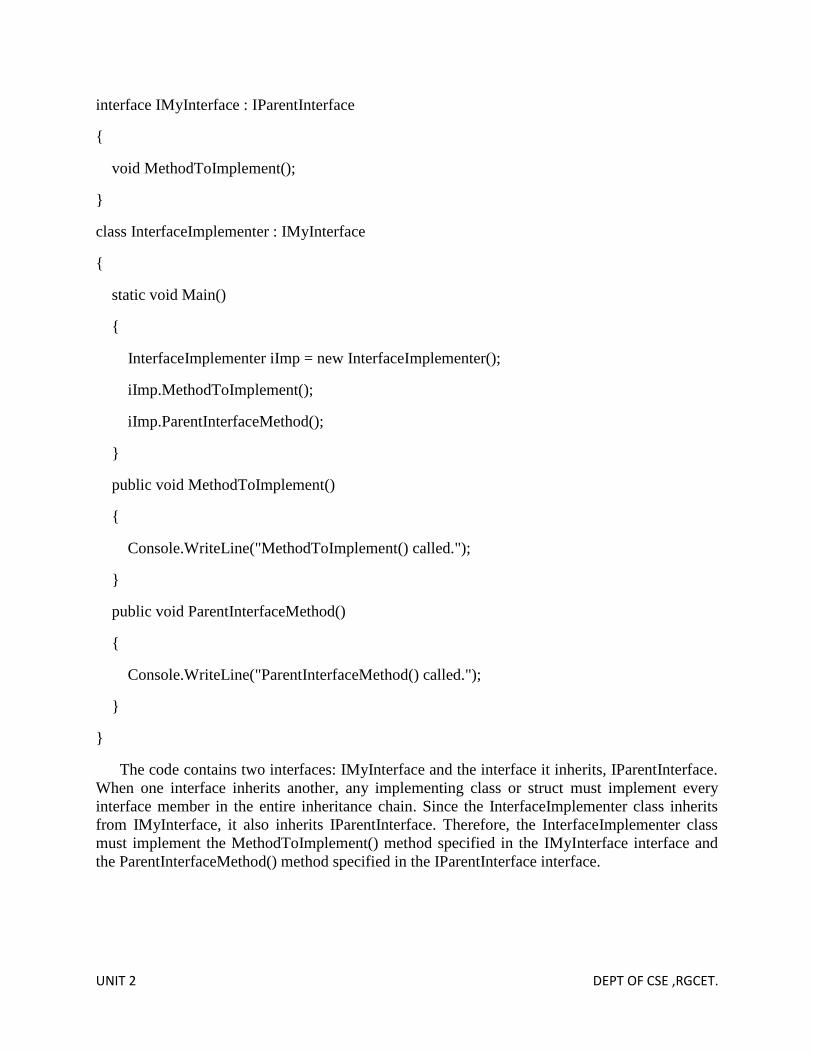
The code contains two interfaces: IMyInterface and the interface it inherits, IParentInterface.
When one interface inherits another, any implementing class or struct must implement every
interface member in the entire inheritance chain. Since the InterfaceImplementer class inherits
from IMyInterface, it also inherits IParentInterface. Therefore, the InterfaceImplementer class
must implement the MethodToImplement() method specified in the IMyInterface interface and
the ParentInterfaceMethod() method specified in the IParentInterface interface.

UNIT 2 DEPT OF CSE ,RGCET.
Indexers and Collections
Indexers are real easy. They allow your class to be used just like an array. On the inside of a
class, you manage a collection of values any way you want. These objects could be a finite set of
class members, another array, or some complex data structure. Regardless of the internal
implementation of the class, its data can be obtained consistently through the use of indexers.
An Example of An Indexer: IntIndexer.cs
using System;
/// <summary>
/// A simple indexer example.
/// </summary>
class IntIndexer
{
private string[] myData;
public IntIndexer(int size)
{
myData = new string[size];
for (int i=0; i < size; i++)
{
myData[i] = "empty";
}
}
public string this[int pos]
{
get
{

UNIT 2 DEPT OF CSE ,RGCET.
return myData[pos];
}
set
{
myData[pos] = value;
}
}
static void Main(string[] args)
{
int size = 10;
IntIndexer myInd = new IntIndexer(size);
myInd[9] = "Some Value";
myInd[3] = "Another Value";
myInd[5] = "Any Value";
Console.WriteLine("\nIndexer Output\n");
for (int i=0; i < size; i++)
{
Console.WriteLine("myInd[{0}]: {1}", i, myInd[i]);
}
}
}
The above coding shows how to implement an Indexer. The IntIndexer class has a string
array named myData. This is a private array that external users can't see. This array is initialized
in the constructor, which accepts an int size parameter, instantiates the myData array, and then
fills each element with the word "empty".
The next class member is the Indexer, which is identified by the this keyword and square
brackets, this[int pos]. It accepts a single position parameter, pos. As you may have already
guessed, the implementation of an Indexer is the same as a Property. It has get and set accessors
that are used exactly like those in a Property. This indexer returns a string, as indicated by the
string return value in the Indexer declaration.

UNIT 2 DEPT OF CSE ,RGCET.
The Main() method simply instantiates a new IntIndexer object, adds some values, and prints
the results. Here's the output:
Indexer Output
myInd[0]: empty
myInd[1]: empty
myInd[2]: empty
myInd[3]: Another Value
myInd[4]: empty
myInd[5]: Any Value
myInd[6]: empty
myInd[7]: empty
myInd[8]: empty
myInd[9]: Some Value
Using an integer is a common means of accessing arrays in many languages, but the C#
Indexer goes beyond this. Indexers can be declared with multiple parameters and each parameter
may be a different type. Additional parameters are separated by commas, the same as a method
parameter list. Valid parameter types for Indexers include integers, enums, and strings.
Additionally, Indexers can be overloaded.
COLLECTIONS:
A generic collection is strongly typed (type safe), meaning that you can only put one type
of object into it. This eliminates type mismatches at runtime. Another benefit of type safety is
that performance is better with value type objects because they don't incur overhead of being
converted to and from type object. With generic collections, you have the best of all worlds
because they are strongly typed, like arrays, and you have the additional functionality, like
ArrayList and other non-generic collections, without the problems.
Creating Generic List<T> Collections
The pattern for using a generic List collection is similar to arrays. You declare the List,
populate it's members, then access the members. Here's a code example of how to use a List:
List<int> myInts = new List<int>();
myInts.Add(1);
myInts.Add(2);

UNIT 2 DEPT OF CSE ,RGCET.
myInts.Add(3);
for (int i = 0; i < myInts.Count; i++)
{
Console.WriteLine("MyInts: {0}", myInts[i]);
}
The first thing you should notice is the generic collection List<int>, which is referred to
as List of int. If you looked in the documentation for this class, you would find that it is defined
as List<T>, where T could be any type. For example, if you wanted the list to work on string or
Customer objects, you could define them as List<string> or List<Customer> and they would
hold only string or Customer objects. In the example above, myInts holds only type int.
Using the Add method, you can add as many int objects to the collection as you want.
This is different from arrays, which have a fixed size. The List<T> class has many more methods
you can use, such as Contains, Remove, and more.
There are two parts of the for loop that you need to know about. First, the condition uses
the Count property of myInts. This is another difference between collections and arrays in that an
array uses a Length property for the same thing. Next, the way to read from a specific position in
the List<T> collection, myInts[i], is the exact same syntax you use with arrays.
The next time you start to use a single-dimension array, consider using a List<T> instead.
That said, be sure to let your solution fit the problem and use the best tool for the job. i.e. it's
common to work with byte[] in many places in the .NET Framework.
Working with Dictionary<TKey, TValue> Collections
Strings and Regular Expressions
A C# string is an array of characters declared using the string keyword. A string literal is
declared using quotation marks.
string s = "Hello, World!";
We can extract substrings, and concatenate strings.
string s1 = "orange";
string s2 = "red";
s1 += s2;
System.Console.WriteLine(s1); // outputs "orangered"
s1 = s1.Substring(2, 5);
System.Console.WriteLine(s1); // outputs "anger"

UNIT 2 DEPT OF CSE ,RGCET.
String objects are immutable, meaning that they cannot be changed once they have been
created. Methods that act on strings actually return new string objects. In the previous example,
when the contents of s1 and s2 are concatenated to form a single string, the two strings
containing "orange" and "red" are both unmodified. The += operator creates a new string that
contains the combined contents. The result is that s1 now refers to a different string altogether. A
string containing just "orange" still exists, but is no longer referenced when s1 is concatenated.
The System.Text.RegularExpressions.Regex class can be used to search strings. These
searches can range in complexity from very simple to making full use of regular expressions.
The following are two examples of string searching using the Regex class.
We can modify a regular expression pattern with options that affect matching behavior.
Regular expression options can be set in one of two basic ways: they can be specified in the
options parameter in the Regex(pattern, options) constructor, where options is a bitwise OR
combination of RegexOptions enumerated values, or they can be set within the regular
expression pattern using the inline (?imnsx-imnsx:) grouping construct or (?imnsx-imnsx)
miscellaneous construct.
In inline option constructs, a minus sign (-) before an option or set of options turns off those
options. For example, the inline construct (?ix-ms) turns on the IgnoreCase and
IgnorePatternWhiteSpace options and turns off the Multiline and Singleline options. All regular
expression options are turned off by default.
Handling Exceptions
Exceptions
Exceptions are unforeseen errors that happen in your programs. Most of the time, you
can, and should, detect and handle program errors in your code. For example, validating user
input, checking for null objects, and verifying the values returned from methods are what you
expect, are all examples of good standard error handling that you should be doing all the
time.
However, there are times when you don't know if an error will occur. For example, you
can't predict when you'll receive a file I/O error, run out of system memory, or encounter a
database error. These things are generally unlikely, but they could still happen and you want
to be able to deal with them when they do occur. This is where exception handling comes in.
When exceptions occur, they are said to be "thrown". What is actually thrown is an object
that is derived from the System.Exception class. In the next section, I'll be explaining how
thrown exceptions are handled with try/catch blocks.
The System.Exception class provides several methods and properties for obtaining
information on what went wrong. For example, the Message property provides summary
information about what the error was, the Stacktrace property provides information from the
stack for where the problem occurred, and the ToString() method is overridden to reveal a
verbose description of the entire exception.

UNIT 2 DEPT OF CSE ,RGCET.
Identifying the exceptions you'll need to handle depends on the routine you're writing.
For example, if the routine opened a file with the System.IO.File.OpenRead() method, it
could throw any of the following exceptions:
• SecurityException
• ArgumentException
• ArgumentNullException
• PathTooLongException
• DirectoryNotFoundException
• UnauthorizedAccessException
• FileNotFoundException
• NotSupportedException
• It's easy to find out what exceptions a method can raise by looking in the .NET
Frameworks SDK Documentation. Just go to the Reference/Class Library section and look in
the Namespace/Class/Method documentation for the methods you use. The exception in the
list above were found by looking at the OpenRead() method definition of the File class in the
System.IO namespace. Each exception identified has a hyperlink to its class definition that
you can use to find out what that exception is about. Once we have figured out what
exceptions can be generated in your code, you need to put the mechanisms in place to handle
the exceptions, should they occur.
• try/catch Blocks
• When exceptions are thrown, you need to be able to handle them. This is done by
implementing a try/catch block. Code that could throw an exception is put in the try block an
exception handling code goes in the catch block. Since an OpenRead() method could throw
one of several exceptions, it is placed in the try block. If an exception is thrown, it will be
caught in the catch block. The code will print message and stack trace information out to the
console if an exception is raised.
• Note: The programs in this lesson cause exceptions on purpose. The exception that you
see is generated intentionally to show you what the exception message looks like before you
see it yourself in your own programs.
Using try/catch Blocks: tryCatchDemo.cs
using System;
using System.IO;
class tryCatchDemo
{

UNIT 2 DEPT OF CSE ,RGCET.
static void Main(string[] args)
{
try
{
File.OpenRead("NonExistentFile");
}
catch(Exception ex)
{
Console.WriteLine(ex.ToString());
}
}
}
Although the code only has a single catch block, all exceptions will be caught
there because the type is of the base exception type "Exception". In exception handling, more
specific exceptions will be caught before their more general parent exceptions. For example,
the following snippet shows how to place multiple catch blocks:
catch(FileNotFoundException fnfex)
{
Console.WriteLine(fnfex.ToString());
}
catch(Exception ex)
{
Console.WriteLine(ex.ToString());
}
If the file doesn't exist, a FileNotFoundException exception will be thrown and caught by
the first catch block. However, if a PathTooLongException exception was raised, the second
catch part would catch the exception. This is because there isn't a catch block for the
PathTooLongException exception and the generic Exception type catch block is the only
option available to catch the exception.
Exceptions that are not handled will normally bubble up the stack until a calling routine in
the call chain handles them. If you forget to include try/catch blocks in a part of your code and

UNIT 2 DEPT OF CSE ,RGCET.
there aren't any try/catch blocks earlier in the call chain, your program will abort with a message
describing the exception. To your users this would be very cryptic and uncomfortable. It is good
practice to provide exception handling in your programs.
• Finally Blocks
An exception can leave your program in an inconsistent state by not releasing
resources or doing some other type of cleanup. A catch block is a good place to figure out
what may have gone wrong and try to recover, however it can't account for all scenarios.
Sometimes we need to perform clean up actions whether or not your program succeeds.
These situations are good candidates for using a finally block.
As we know, a file stream must be closed when you're done with it. In this case, the file
stream is the resource that needs to be cleaned up. The outStream is opened successfully,
meaning the program now has a handle to an open file resource. When trying to open the
inStream, a FileNotFoundException exception is raised, causing control to go immediately to
the catch block.
• It's possible to close the outStream in the catch block, but what if the algorithm executed
successfully without an exception? On success, the file would never be closed. Fortunately,
we've included a finally block, which will always be executed. That's right, regardless of
whether the algorithm in the try block raises an exception or not, the code in the finally block
will be executed before control leaves the method.
Implementing a finally Block: FinallyDemo.cs
using System;
using System.IO;
class FinallyDemo
{
static void Main(string[] args)
{
FileStream outStream = null;
FileStream inStream = null;
try
{
outStream = File.OpenWrite("DestinationFile.txt");
inStream = File.OpenRead("BogusInputFile.txt");
}

UNIT 2 DEPT OF CSE ,RGCET.
catch(Exception ex)
{
Console.WriteLine(ex.ToString());
}
finally
{
if (outStream != null)
{
outStream.Close();
Console.WriteLine("outStream closed.");
}
if (inStream != null)
{
inStream.Close();
Console.WriteLine("inStream closed.");
}
}
}
}
A finally block is not required and you may ask what happens if you just put code after the
catch block. True, under normal circumstances, if the exception is caught, all code following the
catch will be executed. However, try/catch/finally is for exceptional circumstances and it is
better to plan for the worst to make your program more robust. For example, if one of the catch
handlers rethrew an exception or caused another exception, the code following the catch block
(not in a finally block) would never be executed. Also, if you don't catch the exception at all,
program flow would immediately do a stack walk looking for an exception handler that fits and
the code following the catch blocks would not be executed. Since there is too much potential for
code in an algorithm to not be executed, a finally block is your insurance for executing those
critical actions we need.
Delegates and Events

UNIT 2 DEPT OF CSE ,RGCET.
A delegate is a C# language element that allows you to reference a method. If you were a
C or C++ programmer, this would sound familiar because a delegate is basically a function
pointer. However, developers who have used other languages are probably wondering, "Why
do I need a reference to a method?". The answer boils down to giving you maximum
flexibility to implement any functionality you want at runtime. We cannot solve this problem
by passing a delegate to your algorithm and letting the contained method, which the delegate
refers to, perform the comparison operation. Such an operation is performed below
Declaring and Implementing a Delegate: SimpleDelegate.cs
using System;
// this is the delegate declaration
public delegate int Comparer(object obj1, object obj2);
public class Name
{
public string FirstName = null;
public string LastName = null;
public Name(string first, string last)
{
FirstName = first;
LastName = last;
}
// this is the delegate method handler
public static int CompareFirstNames(object name1, object name2)
{
string n1 = ((Name)name1).FirstName;
string n2 = ((Name)name2).FirstName;
if (String.Compare(n1, n2) > 0)
{
return 1;
}
else if (String.Compare(n1, n2) < 0)

UNIT 2 DEPT OF CSE ,RGCET.
{
return -1;
}
else
{
return 0;
}
}
public override string ToString()
{
return FirstName + " " + LastName;
}
}
class SimpleDelegate
{
Name[] names = new Name[5];
public SimpleDelegate()
{
names[0] = new Name("Joe", "Mayo");
names[1] = new Name("John", "Hancock");
names[2] = new Name("Jane", "Doe");
names[3] = new Name("John", "Doe");
names[4] = new Name("Jack", "Smith");
}
static void Main(string[] args)
{
SimpleDelegate sd = new SimpleDelegate();

UNIT 2 DEPT OF CSE ,RGCET.
// this is the delegate instantiation
Comparer cmp = new Comparer(Name.CompareFirstNames);
Console.WriteLine("\nBefore Sort: \n");
sd.PrintNames();
// observe the delegate argument
sd.Sort(cmp);
Console.WriteLine("\nAfter Sort: \n");
sd.PrintNames();
}
// observe the delegate parameter
public void Sort(Comparer compare)
{
object temp;
for (int i=0; i < names.Length; i++)
{
for (int j=i; j < names.Length; j++)
{
// using delegate "compare" just like
// a normal method
if ( compare(names[i], names[j]) > 0 )
{
temp = names[i];
names[i] = names[j];
names[j] = (Name)temp;
}
}
}

UNIT 2 DEPT OF CSE ,RGCET.
}
public void PrintNames()
{
Console.WriteLine("Names: \n");
foreach (Name name in names)
{
Console.WriteLine(name.ToString());
}
}
}
Events
A C# event is a class member that is activated whenever the event it was designed for
occurs. I like to use the term "fires" when the event is activated. Anyone interested in the
event can register and be notified as soon as the event fires. At the time an event fires,
registered methods will be invoked.
Events and delegates work hand-in-hand to provide a program's functionality. It starts
with a class that declares an event. Any class, including the same class that the event is
declared in, may register one of its methods for the event. This occurs through a delegate,
which specifies the signature of the method that is registered for the event. The delegate may
be one of the pre-defined .NET delegates or one you declare yourself. Whichever is
appropriate, you assign the delegate to the event, which effectively registers the method that
will be called when the event fires. Example shows a couple different ways to implement
events.
Declaring and Implementing Events: Eventdemo.cs
using System;
using System.Drawing;
using System.Windows.Forms;
// custom delegate
public delegate void Startdelegate();
class Eventdemo : Form
{

UNIT 2 DEPT OF CSE ,RGCET.
// custom event
public event Startdelegate StartEvent;
public Eventdemo()
{
Button clickMe = new Button();
clickMe.Parent = this;
clickMe.Text = "Click Me";
clickMe.Location = new Point(
(ClientSize.Width - clickMe.Width) /2,
(ClientSize.Height - clickMe.Height)/2);
// an EventHandler delegate is assigned
// to the button's Click event
clickMe.Click += new EventHandler(OnClickMeClicked);
// our custom "Startdelegate" delegate is assigned
// to our custom "StartEvent" event.
StartEvent += new Startdelegate(OnStartEvent);
// fire our custom event
StartEvent();
}
// this method is called when the "clickMe" button is pressed
public void OnClickMeClicked(object sender, EventArgs ea)
{
MessageBox.Show("You Clicked My Button!");
}
// this method is called when the "StartEvent" Event is fired
public void OnStartEvent()

UNIT 2 DEPT OF CSE ,RGCET.
{
MessageBox.Show("I Just Started!");
}
static void Main(string[] args)
{
Application.Run(new Eventdemo());
}
}