Understanding Your Camera 2: UUU200 · • Digital Single Reflex Camera ... Understanding Your...
16
Understanding Your Camera 2: UUU200
Transcript of Understanding Your Camera 2: UUU200 · • Digital Single Reflex Camera ... Understanding Your...
Understanding Your Camera 2: UUU200
Understanding Your Camera 2
Exposure & Metering
Objective
Materials
Objective
Materials
After completing this class, the student will have an understanding of basic photography and basic creative DSLR camera functions.
Items required for participation are the following:• Digital Single Reflex Camera• Camera Manual• Normal (50mm) Lens• DSLR Instruction Booklet (provided)• Pen or pencil
Standards AddressedStandards Addressed1. The definition of photography.2. The function of the International Standards Organization rating for sensitivity to light and how it affects the exposure as well as the aesthetic look of a photograph.3. The mechanics of the shutter and how it affects the exposure as well as the aesthetic look of a photograph.4. The mechanics of the aperture and how it affects the exposure as well as the aesthetic look of a photograph.
Independent PracticeIndependent PracticeRecord an image demonstrating:• a shallow depth of field• a medium depth of field• stopped motion• a blurred subject implying its motion• panning
Understanding Your Camera 2
Exposure & Metering

7 ThingsThat Make Us
UNIQUE...®
Photography ClassesRental EquipmentCamera Trade-InWe Sell Used EquipmentCamera RepairEquipment FinancingExpert Tech SupportNJ’s Best Photo Lab
33333333

Please Don’t Make This Class Your Last!
Visit www.UniqueUniversity.com
We offer hundreds of classes, seminars, workshops, and excursions throughout the year... Some are taught
by the world’s most well-known photographers.
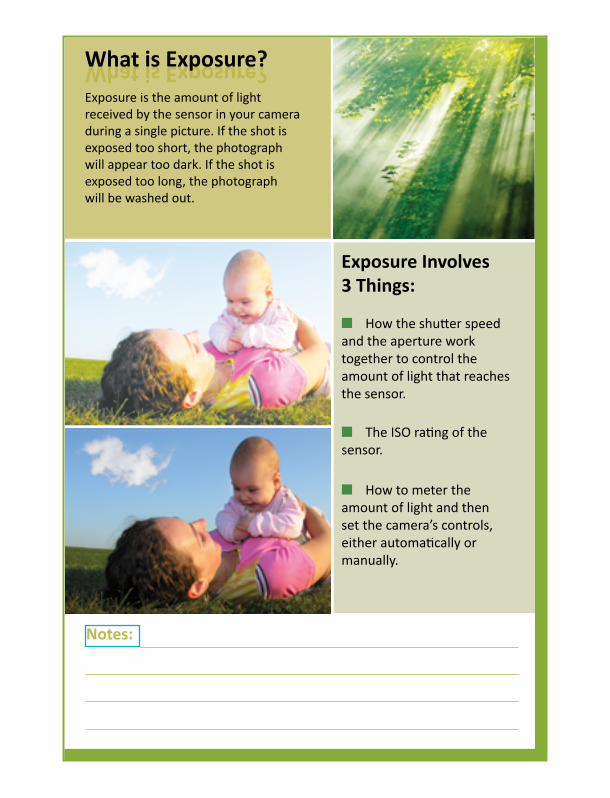
What is Exposure?
Notes:
What is Exposure?
Exposure Involves 3 Things:
n How the shutter speedand the aperture worktogether to control theamount of light that reachesthe sensor.
n The ISO rating of thesensor.
n How to meter theamount of light and thenset the camera’s controls, either automatically or manually.
Exposure is the amount of lightreceived by the sensor in your cameraduring a single picture. If the shot isexposed too short, the photographwill appear too dark. If the shot is exposed too long, the photographwill be washed out.
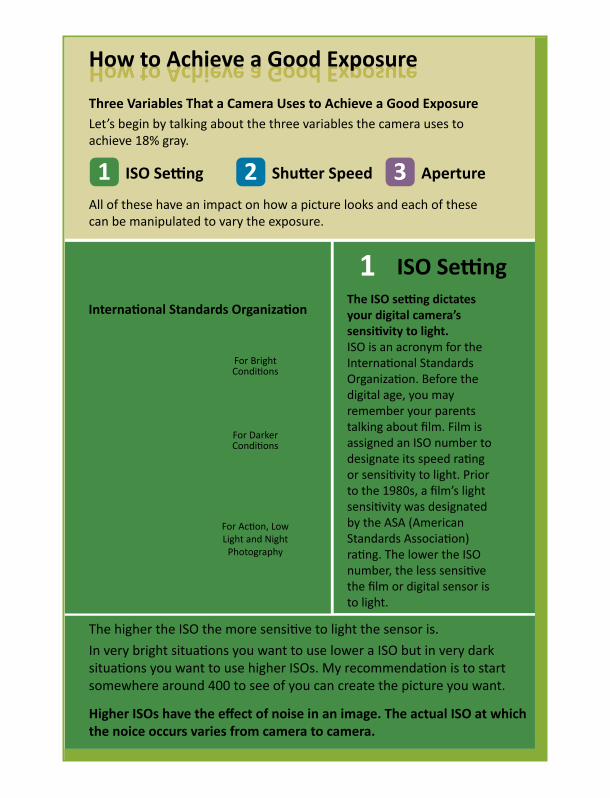
The ISO setting dictates your digital camera’s sensitivity to light.ISO is an acronym for theInternational StandardsOrganization. Before the digital age, you may remember your parents talking about film. Film is assigned an ISO number to designate its speed rating or sensitivity to light. Prior to the 1980s, a film’s light sensitivity was designated by the ASA (American Standards Association) rating. The lower the ISO number, the less sensitive the film or digital sensor is to light.
Three Variables That a Camera Uses to Achieve a Good ExposureLet’s begin by talking about the three variables the camera uses to achieve 18% gray.
All of these have an impact on how a picture looks and each of thesecan be manipulated to vary the exposure.
How to Achieve a Good ExposureHow to Achieve a Good Exposure
The higher the ISO the more sensitive to light the sensor is.
In very bright situations you want to use lower a ISO but in very dark situations you want to use higher ISOs. My recommendation is to start somewhere around 400 to see of you can create the picture you want.
Higher ISOs have the effect of noise in an image. The actual ISO at which the noice occurs varies from camera to camera.
1 ISO Setting 2 3Shutter Speed Aperture
International Standards Organization
ISOISO 50
ISO 100
ISO 200
ISO 400
ISO 800
ISO 1600
ISO 3200
Low ISOFor Bright Conditions
Medium ISOFor Darker Conditions
High ISOFor Action, LowLight and Night
Photography
The effect is Noise or Grain
1 ISO Setting
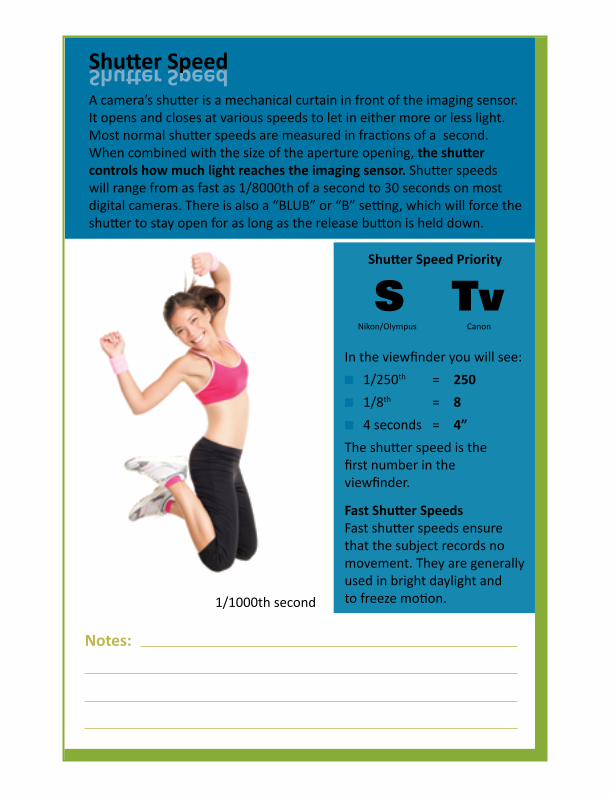
A camera’s shutter is a mechanical curtain in front of the imaging sensor. It opens and closes at various speeds to let in either more or less light. Most normal shutter speeds are measured in fractions of a second.When combined with the size of the aperture opening, the shutter controls how much light reaches the imaging sensor. Shutter speedswill range from as fast as 1/8000th of a second to 30 seconds on most digital cameras. There is also a “BLUB” or “B” setting, which will force the shutter to stay open for as long as the release button is held down.
Fast Shutter Speeds Fast shutter speeds ensurethat the subject records nomovement. They are generally used in bright daylight and to freeze motion.
Shutter Speed Priority
Nikon/Olympus Canon
S TvIn the viewfinder you will see:
n 1/250th = 250
n 1/8th = 8
n 4 seconds = 4”
The shutter speed is the first number in theviewfinder.
Notes:
Shutter SpeedShutter Speed
1/1000th second
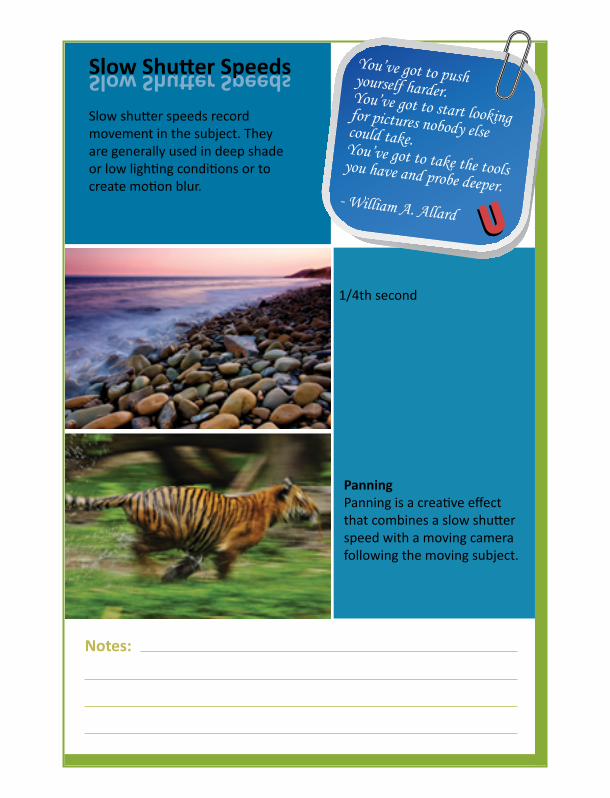
Slow shutter speeds recordmovement in the subject. Theyare generally used in deep shadeor low lighting conditions or tocreate motion blur.
Notes:
Slow Shutter SpeedsSlow Shutter Speeds
Panning Panning is a creative effectthat combines a slow shutterspeed with a moving camerafollowing the moving subject.
1/4th second
You’ve got to pushyourself harder.You’ve got to start lookingfor pictures nobody elsecould take.You’ve got to take the toolsyou have and probe deeper.- William A. Allard
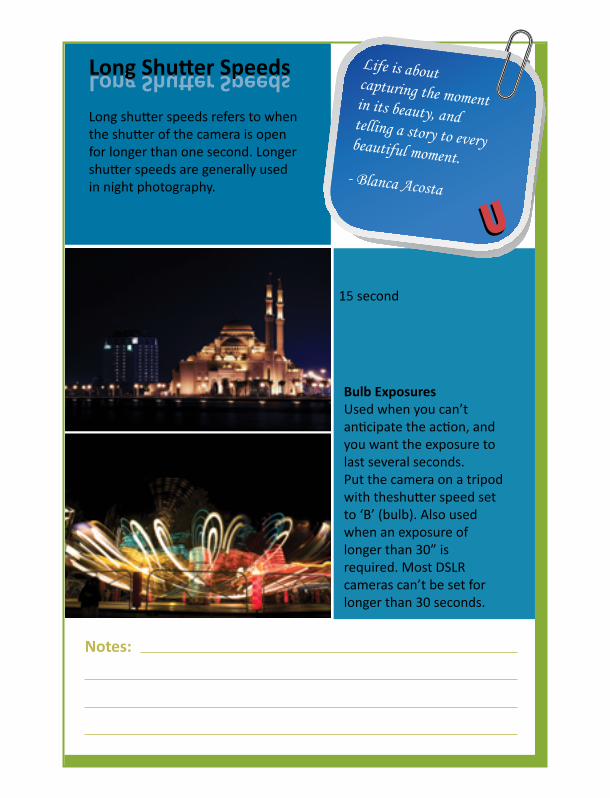
Long shutter speeds refers to whenthe shutter of the camera is openfor longer than one second. Longershutter speeds are generally usedin night photography.
Notes:
Long Shutter SpeedsLong Shutter Speeds
Bulb ExposuresUsed when you can’t anticipate the action, and you want the exposure to last several seconds. Put the camera on a tripod with theshutter speed set to ‘B’ (bulb). Also usedwhen an exposure oflonger than 30” isrequired. Most DSLRcameras can’t be set forlonger than 30 seconds.
15 second
Life is aboutcapturing the momentin its beauty, and telling a story to everybeautiful moment.
- Blanca Acosta
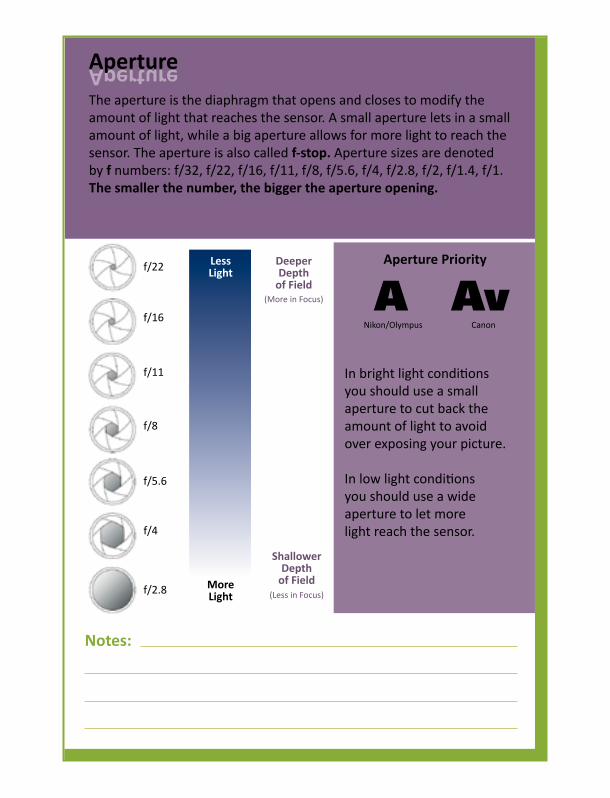
The aperture is the diaphragm that opens and closes to modify theamount of light that reaches the sensor. A small aperture lets in a smallamount of light, while a big aperture allows for more light to reach thesensor. The aperture is also called f-stop. Aperture sizes are denotedby f numbers: f/32, f/22, f/16, f/11, f/8, f/5.6, f/4, f/2.8, f/2, f/1.4, f/1.The smaller the number, the bigger the aperture opening.
In bright light conditionsyou should use a smallaperture to cut back theamount of light to avoidover exposing your picture.
In low light conditionsyou should use a wide aperture to let more light reach the sensor.
Aperture Priority
Nikon/Olympus Canon
A Av
Notes:
ApertureAperture
f/22 DeeperDepth
of Field
ShallowerDepth
of Field
f/16
f/11
f/8
f/5.6
f/4
f/2.8
(More in Focus)
(Less in Focus)
LessLight
MoreLight
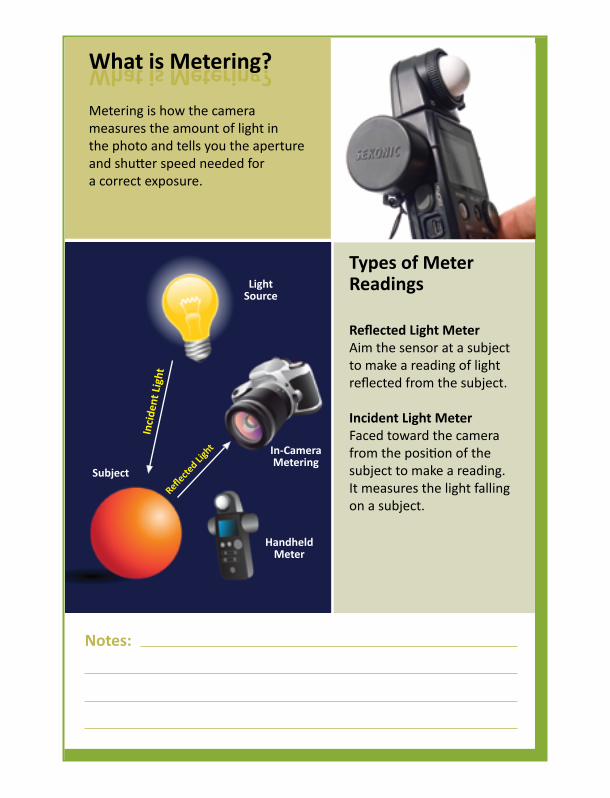
Metering is how the camera measures the amount of light in the photo and tells you the apertureand shutter speed needed fora correct exposure.
Reflected Light MeterAim the sensor at a subjectto make a reading of lightreflected from the subject.
Incident Light MeterFaced toward the camerafrom the position of thesubject to make a reading.It measures the light fallingon a subject.
Notes:
What is Metering?What is Metering?
Types of MeterReadingsLight
Source
Inci
dent
Lig
htReflecte
d Ligh
t
HandheldMeter
In-CameraMetering
Subject
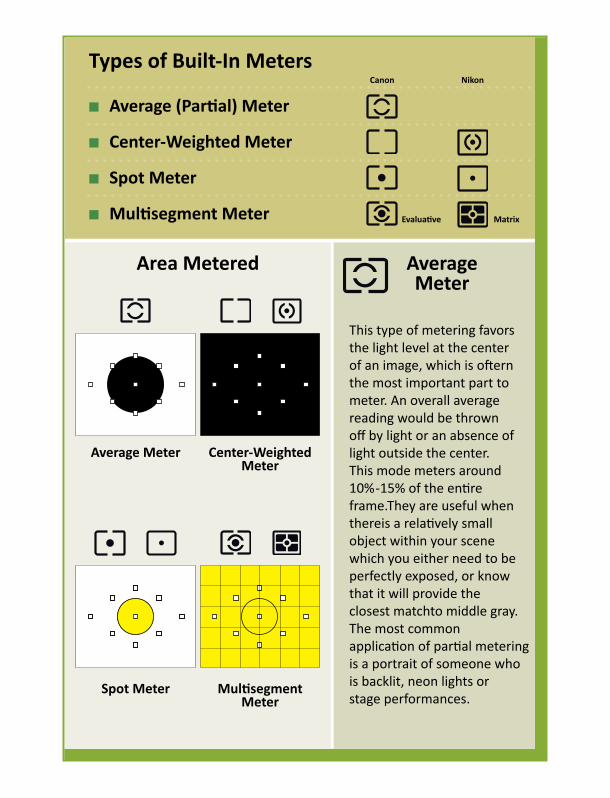
n Average (Partial) Meter
n Center-Weighted Meter
n Spot Meter
n Multisegment Meter
This type of metering favorsthe light level at the centerof an image, which is ofternthe most important part tometer. An overall averagereading would be thrownoff by light or an absence oflight outside the center.This mode meters around10%-15% of the entire frame.They are useful when thereis a relatively small object within your scenewhich you either need to be perfectly exposed, or know that it will provide the closest matchto middle gray. The most common application of partial metering is a portrait of someone who is backlit, neon lights or stage performances.
Types of Built-In MetersCanon Nikon
Evaluative Matrix
Average Meter
Area Metered
Average Meter
Spot Meter
Center-WeightedMeter
MultisegmentMeter
This meter reads only a very small part of an image and is useful for exact measurements of individual areas. This willtypically be the very centerof the scene, but some cameras allow the user toselect a different off-centerspot, or to recompose bymoving the camera aftermetering. An average, or center-weighted meter would be thrown off by dark or bright areassurrounding the subject.
This type of metering favors the light level at the center of an image,which is often the most important part to meter. An overall averagereading would be thrown off by light or an absence of light outside thecenter. One advantage of this method is that is less influenced by smallareas that vary greatly in brightness at the edges of the viewfinder; asmany subjects are in the cental part of the frame, consistant results canbe obtained. The most common application is for evenly-lit subjects.
Center-Weighted Meter
SpotMeter
Notes:
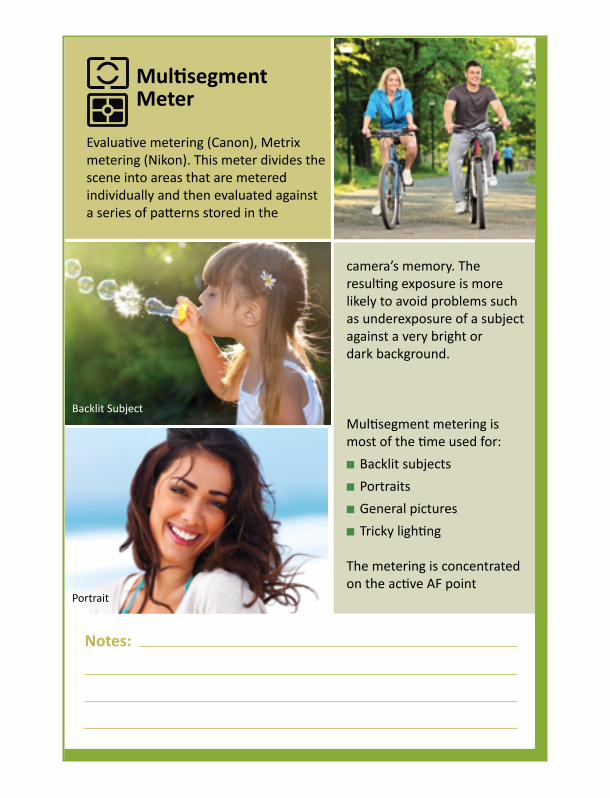
camera’s memory. The resulting exposure is morelikely to avoid problems suchas underexposure of a subjectagainst a very bright or dark background.
Multisegment metering ismost of the time used for:
n Backlit subjects
n Portraits
n General pictures
n Tricky lighting
The metering is concentratedon the active AF point
Evaluative metering (Canon), Metrixmetering (Nikon). This meter divides thescene into areas that are meteredindividually and then evaluated againsta series of patterns stored in the
Multisegment Meter
Notes:
Backlit Subject
Portrait
Exposure Modes
Notes:
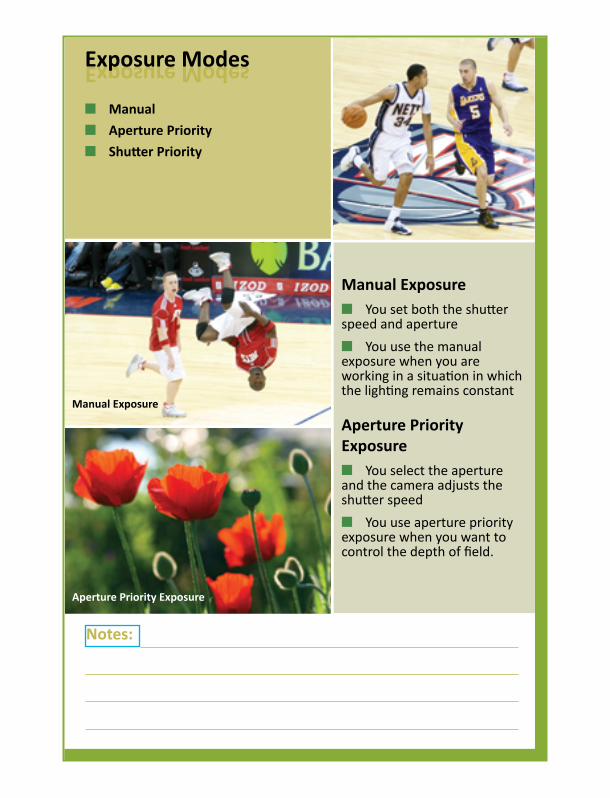
Exposure Modes
Manual Exposuren You set both the shutterspeed and aperture
n You use the manualexposure when you areworking in a situation in whichthe lighting remains constant
Aperture PriorityExposuren You select the apertureand the camera adjusts theshutter speed
n You use aperture priorityexposure when you want tocontrol the depth of field.
n Manual
n Aperture Priority
n Shutter Priority
Manual Exposure
Aperture Priority Exposure
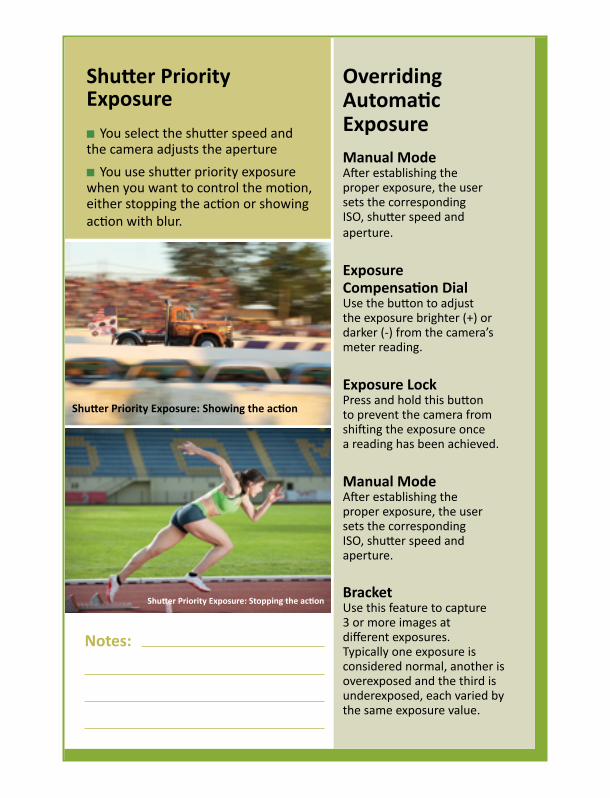
n You select the shutter speed andthe camera adjusts the aperture
n You use shutter priority exposurewhen you want to control the motion,either stopping the action or showingaction with blur.
Shutter Priority Exposure
Notes:
Shutter Priority Exposure: Showing the action
Shutter Priority Exposure: Stopping the action
Manual ModeAfter establishing theproper exposure, the usersets the correspondingISO, shutter speed andaperture.
Exposure Compensation DialUse the button to adjustthe exposure brighter (+) ordarker (-) from the camera’smeter reading.
Exposure LockPress and hold this buttonto prevent the camera fromshifting the exposure oncea reading has been achieved.
Manual ModeAfter establishing theproper exposure, the usersets the correspondingISO, shutter speed andaperture.
BracketUse this feature to capture3 or more images atdifferent exposures.Typically one exposure is considered normal, another is overexposed and the third isunderexposed, each varied bythe same exposure value.
OverridingAutomaticExposure