Ultrasonic Touch Guitar - LEGO Engineering · Ultrasonic Touch Guitar ‐ NXT Overview Challenge...
12
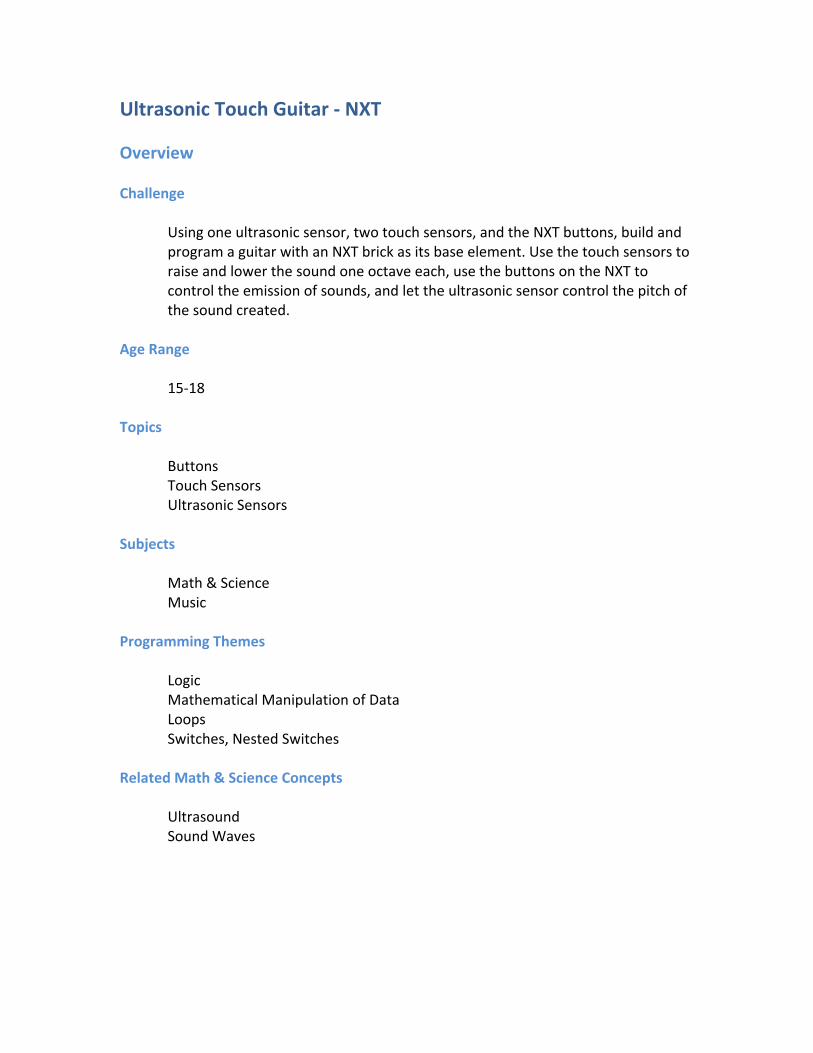
Ultrasonic Touch Guitar ‐ NXT Overview Challenge Using one ultrasonic sensor, two touch sensors, and the NXT buttons, build and program a guitar with an NXT brick as its base element. Use the touch sensors to raise and lower the sound one octave each, use the buttons on the NXT to control the emission of sounds, and let the ultrasonic sensor control the pitch of the sound created. Age Range 15‐18 Topics Buttons Touch Sensors Ultrasonic Sensors Subjects Math & Science Music Programming Themes Logic Mathematical Manipulation of Data Loops Switches, Nested Switches Related Math & Science Concepts Ultrasound Sound Waves
Transcript of Ultrasonic Touch Guitar - LEGO Engineering · Ultrasonic Touch Guitar ‐ NXT Overview Challenge...
Ultrasonic Touch Guitar ‐ NXT Overview Challenge
Using one ultrasonic sensor, two touch sensors, and the NXT buttons, build and program a guitar with an NXT brick as its base element. Use the touch sensors to raise and lower the sound one octave each, use the buttons on the NXT to control the emission of sounds, and let the ultrasonic sensor control the pitch of the sound created.
Age Range 15‐18 Topics Buttons Touch Sensors Ultrasonic Sensors Subjects
Math & Science Music
Programming Themes Logic Mathematical Manipulation of Data Loops Switches, Nested Switches Related Math & Science Concepts Ultrasound Sound Waves

Building and Programming Materials
• NXT brick • Touch Sensors x 2 • Ultrasonic Sensor • NXT Ultrasonic Touch Guitar (see Ultrasonic_Touch_Guitar_Instructions.pdf)
Building Instructions
1. Build an Ultrasonic Touch Guitar (See Ultrasonic_Touch_Guitar_Instructions.pdf)
2. Connect one touch sensor each to ports 1 and 4 of an NXT brick. 3. Connect one ultrasonic sensor to port 2 of the NXT brick.

Programming Instructions
Using Mindstorms NXT‐G, program the guitar to play notes when the NXT brick’s buttons are pressed (left, right, and enter, in any combination). The pitch of the note emitted will be determined using the distance from the ultrasonic sensor to a moving barrier on the fretboard of the guitar. This pitch can be shifted up an octave (twice the frequency of the original note) by pressing one touch sensor, and down an octave (half the frequency of the original note) by pressing the other touch sensor. 1. Start with an infinite loop with a switch inside, set to be controlled by logic. Place
a “Sound” block on the switch’s false, or lower, path, set to stop all sound.
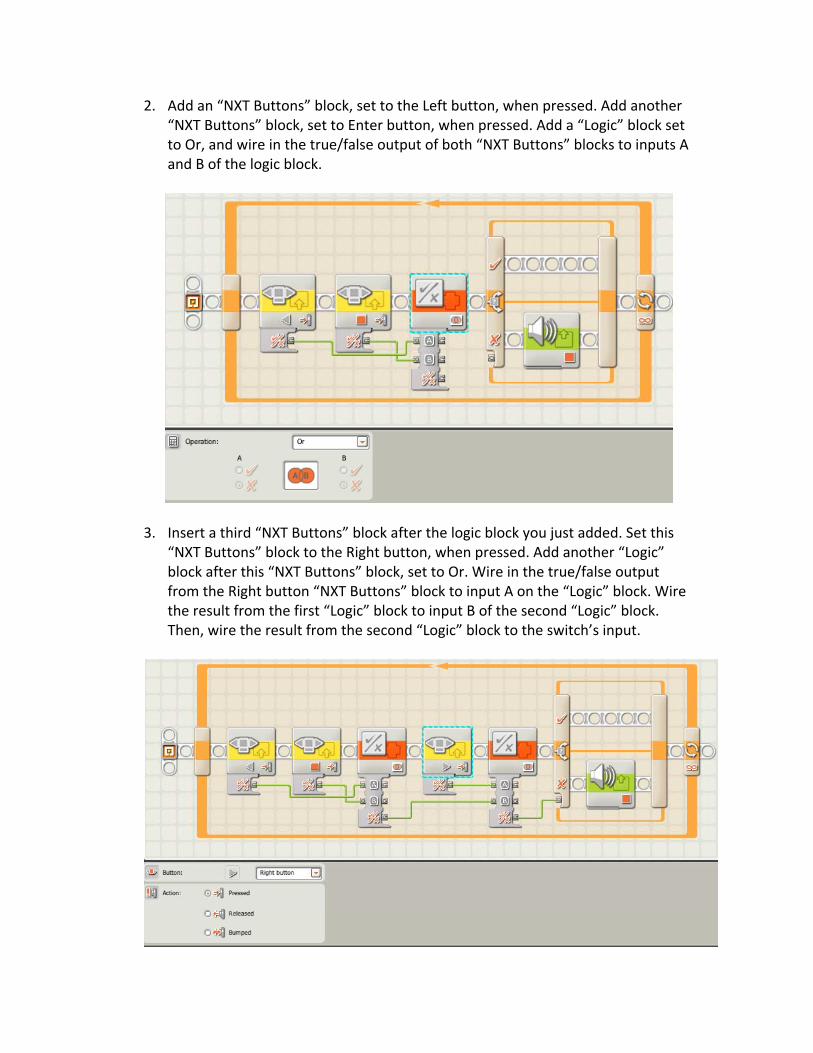
2. Add an “NXT Buttons” block, set to the Left button, when pressed. Add another “NXT Buttons” block, set to Enter button, when pressed. Add a “Logic” block set to Or, and wire in the true/false output of both “NXT Buttons” blocks to inputs A and B of the logic block.
3. Insert a third “NXT Buttons” block after the logic block you just added. Set this
“NXT Buttons” block to the Right button, when pressed. Add another “Logic” block after this “NXT Buttons” block, set to Or. Wire in the true/false output from the Right button “NXT Buttons” block to input A on the “Logic” block. Wire the result from the first “Logic” block to input B of the second “Logic” block. Then, wire the result from the second “Logic” block to the switch’s input.

4. On the switch’s true, or upper, beam, add a “Touch Sensor” block set to port 1, when pushed. Add a second “Touch Sensor” block set to port 4, when pushed. Add a “Logic” block set to Xor. Wire the true/false outputs of both “Touch Sensor” blocks to inputs A and B of the Xor “Logic” block.

5. Add a logic switch after the Xor “Logic” block. This is the first nested switch. Wire the result of the Xor “Logic” block to the nested switch’s input. On the nested switch’s false, or lower, path, add an “Ultrasonic Sensor” block, set to port 2., with distance units of centimeters. Add a “Math” block, set to Multiplication with value A = 160. Wire the distance output from the “Ultrasonic” block to input B of the “Math” block. Add a “Sound” block after the “Math” block, set to play a Tone, volume 75, for 0.5 seconds, with the Wait for Completion box unchecked.

6. On the first nested switch’s true, or upper, path, place a touch sensor switch, port 1, when pressed. This is the second nested switch. On the second nested switch’s false path, place an “Ultrasonic Sensor” block, set to port 2, distance measured in centimeters. Add a “Math” block, set to Multiplication, value A = 160. Wire the distance output of the “Ultrasonic Sensor” block to input B of the “Math” block. Add another “Math” block, set to Multiplication, value B = 2. Wire in the result of the first “Math” block to input A of the second “Math” block. (You could combine the math blocks to one single block with a set input of 320, but for clarity, the blocks were left separate.) Add a “Sound” block, set to play a tone for 0.5 seconds, volume 75, with Wait for Completion unchecked.

7. On the second nested switch’s true path, place an “Ultrasonic Sensor” block, set to port 2, distance measured in centimeters. Add a “Math” block, set to Multiplication, value A = 160. Wire the distance output of the “Ultrasonic Sensor” block to input B of the “Math” block. Add another “Math” block, set to Division, value B = 2. Wire in the result of the first “Math” block to input A of the second “Math” block. (You could combine the math blocks to one single block with a set input of 80, but for clarity, the blocks were left separate.) Add a “Sound” block, set to play a tone for 0.5 seconds, volume 75, with Wait for Completion unchecked.

The final, overall schematic of the program is given below, for coherence:

In Action
Set up the instrument by holding the NXT brick in your left hand (or strumming guitar hand – if you’re left‐handed, you may wish to use your right hand for this part) and holding the moving platform on the “fretboard” in your other hand. Hold the moving platform with your fingers curled over the touch sensors for better control.
To play the instrument, sounds are triggered when one or more of the Left, Right, or Enter buttons on the NXT brick are pressed with the strumming hand. The pitch output by the instrument can be controlled by sliding the moving platform with the fretting hand up and down the “fretboard”. The buttons on the moving platform can be pressed and held, one at a time, to increase or decrease the pitch by an octave (a factor of 2), depending on which button is pressed. If both buttons are pressed, the net change in pitch is zero (since any number n x 2 / 2 = n, the original pitch generated).
For more variety, change the values in the “Math” blocks and change the duration of the sound in the playing “Sound” block. See if the sound can become smoother or more “stepped” sounding (i.e. there is a lot of “zipper noise” due to the quantization of pitch values and therefore the sound does not seem smooth to the ear). Change the octave buttons to increase or decrease by 2 octaves at a time (pitch value x 4 or pitch value / 4), or even allow for increase in octave by bumping a touch switch repeatedly (one bump up = pitch x 2, or 1 octave up; two bumps up = pitch x 4, or 2 octaves up, etc). Resources/Help Related Activities
• Ultrasonic Theremin • Music Box • LEGO RCX Piano
Building & Programming References
• The NXT • Ultrasonic_Touch_Guitar.rbt
Knowledge Base
• What are some possible uses for the NXT touch sensor? How do I program it with NXT‐G?
• What is the NXT‐G switch block for? • How do I create a loop in NXT‐G so that I can repeat one sequence of events over
and over? • Why would I need to use logic inputs and outputs in NXT‐G? What is an example
of a program that uses logic inputs and outputs?

Classroom Management Procedure
1. Begin the lesson with a description of how ultrasonic and touch sensing works.
An introductory approach might be to explain that touch sensing with the NXT sensor works based on whether or not the button is pressed, outputting a logical 0 or 1 depending on state (in NXT‐G, the true state is selected with radio buttons on the “Touch Sensor” block – either when pressed, released, or bumped). Ultrasonic sensing can be likened to the echolocating ability of bats and submarines, merely a propogation of a waveform that is then reflected back to the source. The time between the emission of the wave and its return yields the distance. More advanced classes can be taught the electronics of resistors and the physics of ultrasound – basically, that velocity of the wave emitted multiplied by the time it took to reflect, when divided in half, yields the distance the object is from the source:
[ velocity (m/s) × time elapsed (s) ] ÷ 2 = distance (m) to reflective surface Electronic instruments, especially the electric guitar and bass, can also be included in this introductory period, with the potential addition of how the electronics in these instruments work. This is especially helpful for teaching electromagnetic theory using various types of pickups in a guitar or bass as examples. Perhaps a good activity to complete beforehand, or at the start of this explanation, would be to build and describe the workings of en electromagnet, as the pickups in an electric guitar or bass work essentially as reverse electromagnets.
2. Each student or group of students should have an NXT brick with all parts necessary to create an ultrasonic touch guitar as detailed in this course pack, as well as two touch sensors, an ultrasonic sensor, and three connecting cords.
3. Each student or group of students should construct the ultrasonic touch guitar, attach one touch sensor each to ports 1 and 4 of the NXT brick, and attach the ultrasonic sensor to port 2 of the NXT brick.
4. Have each student or group of students program their NXT bricks either using
the instructions, or on their own if they are ready for the challenge. (Alternatively, the NXT bricks can be pre‐loaded with the Ultrasonic Touch Guitar program to save time, if programming equipment is not readily available, or to accommodate younger classes.)
5. Have students experiment with the instrument, making changes to the program
as they go if possible.

6. Collaborate as a class and compile a list of changes that might be helpful to the program, changing the qualities of the sound emitted. For example, how can the instrument be programmed to play only in musical half‐steps, whole steps, or octaves? How can the smoothest sound gradient be obtained when moving the platform across the “fretboard”? Does changing the surface of the moving platform facing the ultrasonic sensor, perhaps by attaching paper, plastic, wood, or metal, create more control over the pitch of the instrument? Is it easier to use a hand in front of the ultrasonic sensor than to use the moving platform?
7. Try out some ideas if the class is motivated and able to, or wrap up by talking about the activity and additional uses of ultrasonic‐ and touch‐sensing systems. Electronic instruments and their design and usage can also be discussed and explored further. Additional musical instrument‐building sessions can be held as a means of progressive learning.
Worksheets & Handouts
1. Ultrasonic Touch Guitar Building Instructions [Ultrasonic_Touch_Guitar_Instructions.pdf]