uccessful Home Canning - West Virginia · uccessful Home Canning ... This publication is adapted...
14
West Virginia Department of Agriculture Kent A. Leonhardt, Commissioner 1900 Kanawha Blvd., East Charleston, WV 25305 Successful Home Canning West Virginia Department of Agriculture www.agriculture.wv.gov
Transcript of uccessful Home Canning - West Virginia · uccessful Home Canning ... This publication is adapted...
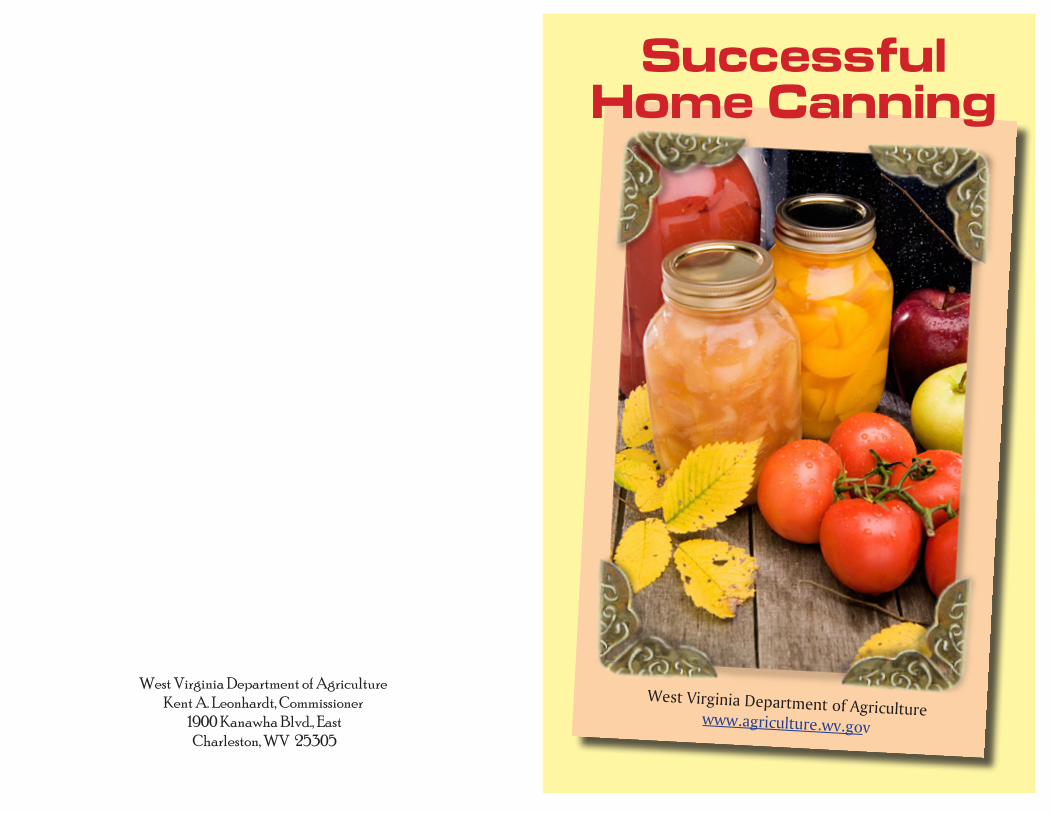
West Virginia Department of Agriculture Kent A. Leonhardt, Commissioner
1900 Kanawha Blvd., EastCharleston, WV 25305
Successful Home Canning
West Virginia Department of Agriculture www.agriculture.wv.gov

This publication is adapted from the United States Department of Agriculture’s Complete Guide to Home Canning, 1994, and Kerr Home Canning and
Freezing Book, 1996. Reviewed by Amy O’Dell, M.S., Graduate Student, and Guendoline Brown, Ph.D., Nutrition and Health Specialist, 1999. ***
West Virginia Department of Agriculture1900 Kanawha Blvd., EastCharleston, WV 25305
~ Contacts ~
WVDA Executive Division: 304-558-3200
WVDA Marketing & Development: 304-558-2210
WVDA Communications Division - Market Bulletin: 304-558-3708
Table of Contents
Canning Vegetables ............................................1
Canning Fruits ....................................................6
Freezing Fruits & Vegetables ...........................11
Pressure Canners ...............................................16
Pressure Canning of Fruits .............................18
Home Canning of Meats & Poultry ................19
***
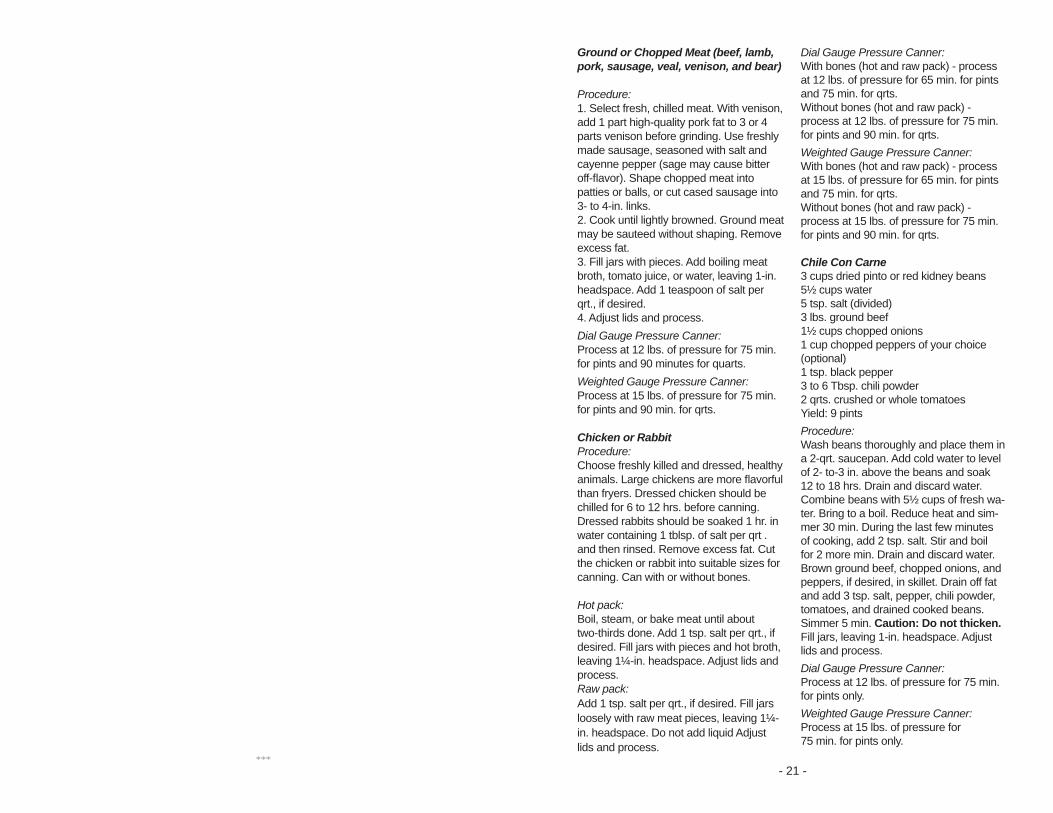
Ground or Chopped Meat (beef, lamb, pork, sausage, veal, venison, and bear)
Procedure:1. Select fresh, chilled meat. With venison,add 1 part high-quality pork fat to 3 or 4parts venison before grinding. Use freshlymade sausage, seasoned with salt andcayenne pepper (sage may cause bitteroff-fl avor). Shape chopped meat intopatties or balls, or cut cased sausage into3- to 4-in. links.2. Cook until lightly browned. Ground meatmay be sauteed without shaping. Removeexcess fat.3. Fill jars with pieces. Add boiling meatbroth, tomato juice, or water, leaving 1-in. headspace. Add 1 teaspoon of salt per qrt., if desired.4. Adjust lids and process.Dial Gauge Pressure Canner:Process at 12 lbs. of pressure for 75 min. for pints and 90 minutes for quarts.Weighted Gauge Pressure Canner:Process at 15 lbs. of pressure for 75 min.for pints and 90 min. for qrts.
Chicken or RabbitProcedure: Choose freshly killed and dressed, healthy animals. Large chickens are more fl avorfulthan fryers. Dressed chicken should be chilled for 6 to 12 hrs. before canning. Dressed rabbits should be soaked 1 hr. in water containing 1 tblsp. of salt per qrt . and then rinsed. Remove excess fat. Cut the chicken or rabbit into suitable sizes for canning. Can with or without bones.
Hot pack:Boil, steam, or bake meat until about two-thirds done. Add 1 tsp. salt per qrt., if desired. Fill jars with pieces and hot broth, leaving 1¼-in. headspace. Adjust lids and process.Raw pack:Add 1 tsp. salt per qrt., if desired. Fill jars loosely with raw meat pieces, leaving 1¼-in. headspace. Do not add liquid Adjust lids and process.
Dial Gauge Pressure Canner:With bones (hot and raw pack) - process at 12 lbs. of pressure for 65 min. for pintsand 75 min. for qrts.Without bones (hot and raw pack) - process at 12 lbs. of pressure for 75 min. for pints and 90 min. for qrts.Weighted Gauge Pressure Canner:With bones (hot and raw pack) - process at 15 lbs. of pressure for 65 min. for pintsand 75 min. for qrts.Without bones (hot and raw pack) - process at 15 lbs. of pressure for 75 min. for pints and 90 min. for qrts.
Chile Con Carne3 cups dried pinto or red kidney beans5½ cups water5 tsp. salt (divided)3 lbs. ground beef1½ cups chopped onions1 cup chopped peppers of your choice (optional)1 tsp. black pepper3 to 6 Tbsp. chili powder2 qrts. crushed or whole tomatoesYield: 9 pintsProcedure: Wash beans thoroughly and place them in a 2-qrt. saucepan. Add cold water to level of 2- to-3 in. above the beans and soak12 to 18 hrs. Drain and discard water. Combine beans with 5½ cups of fresh wa-ter. Bring to a boil. Reduce heat and sim-mer 30 min. During the last few minutes of cooking, add 2 tsp. salt. Stir and boil for 2 more min. Drain and discard water. Brown ground beef, chopped onions, and peppers, if desired, in skillet. Drain off fat and add 3 tsp. salt, pepper, chili powder, tomatoes, and drained cooked beans.Simmer 5 min. Caution: Do not thicken.Fill jars, leaving 1-in. headspace. Adjust lids and process.Dial Gauge Pressure Canner:Process at 12 lbs. of pressure for 75 min. for pints only.Weighted Gauge Pressure Canner:Process at 15 lbs. of pressure for75 min. for pints only.
- 21 -
Canning and Processing Directions ~
Meat Preparation - beef, veal, pork, lamb, and large game animals. If meat is home produced, chill it to 40 degrees For lower immediately after slaughter. This is to prevent spoilage and allow for tenderizing. If the meat is to be held longer than 2 to 3 days, freeze it at 0 degrees F or lower until ready to can. Then thaw it slowly in the refrigerator. Keep all meat as cool as possible during preparation for canning. Remove meat from bones, and trim off gristle, bruised spots, and fat. During processing, fat can rise to the top of the jar and keep the lid from sealing. Handle meat quickly and process as soon as the containers are packed. Cut the meat into convenient sizes for your needs—strips, cubes, chunks, slices, chops, or larger pieces. If desired, strong-fl avored wild meats can be soaked for 1 hour in brine water (1 tablespoon salt per quart of water) before cutting it into pieces. Rinse before heating. Then process according to the following directions.
Strips, Chunks, or Cubes of Meat (beef, pork,veal, venison, bear, and lamb)Procedure: Choose quality chilled meat. Remove excess fat. Remove large bones.Hot Pack:Precook meat until rare by roasting, stewing, or browning in a small amount of fat. Add 1 teaspoon of salt per quart to the jar, if desired. Fill jars with pieces and add boiling broth, meat drippings, water, or tomato juice (especially with wild game), leaving 1 in. headspace.Raw Pack:Add 1 tsp. of salt per qrt. to the jar, if desired. Fill jars with raw meat pieces, leaving 1-in. headspace. Do not add liq-uid. Wipe mouth of jar with a clean cloth; adjust lids and process.
Dial Gauge Pressure Canner:Process at 12 lbs. of pressure for 75 min. for pints and 90 min. for qrts.
Weighted Gauge Pressure Canner: Pro-cess at 15 lbs. of pressure for 75 min. for pints and 90 min. for qrts.
Stock (Broth)Beef: Saw or crack fresh trimmed beef bones to enhance fl avor. Rinse bones and place in large stock pot or kettle, cover bones with water, add lid, and simmer 3 to 4 hrs. Remove bones, cool broth, and pick off meat. Skim off fat, add meat removed from bones to broth, and reheat to boiling. Fill jars, leaving 1-in. headspace. Adjust lids and process.
Dial Gauge Pressure Canner:Process at 12 lbs. of pressure for 20 min. for pints and 25 min. for qrts.
Weighted Gauge Pressure Canner:Process at 15 lbs. of pressure for 20 min. for pints and 25 min. for qrts.
Chicken or Turkey: Place large carcass bones in a large stockpot, add enough water to coverbones, cover pot, and simmer 30 to 45 min. or until meat can be easily stripped from bones. Remove bones and pieces, cool broth, strip meat, discard excess fat, and return meat to broth. Reheat to boiling and fi ll jars, leaving 1-in. head-space. Adjust lids and process.
Dial Gauge Pressure Canner:Process at 12 lbs. of pressure for 20 min. for pints and 25 min. for qrts.
Weighted Gauge Pressure Canner:Process at 15 lbs. of pressure for 20 min. or pints and 25 min. for quarts.
- 20 -
General Recommendations for Packing Glass Jars
Canning Vegetables
These processing recommendations are for West Virginia conditions (maxi-mum altitude, 4,000 ft.). For canning directions in other locations,consult with your county Extension offi ce. Begin with high-quality, fresh foods. Discard diseased and moldy food. Remove small diseased cuts and spots from food. Vegetables must be processed in a pressure canner to ensure food safety. Processing time varies according to the specifi c vegetable, size of container pack, and type of pressure canner. Processing times are listed on the chart according to specifi c characteristics. Note that salt is for seasoning only and is not necessary to preserve. Salt may be omitted if desired. However, if you wish to add salt, 1 tsp. may be added per quart, or ½ tsp. per pint.
Raw Pack ~Pack the vegetable tightly withoutcrushing. Cover with boiling water, leaving 1-in. headspace at top of jar.(Note exceptions for specifi c vegetbles.)Adjust lids and process.
Hot Pack ~Heat vegetables as directed. Pack hot vegetables loosely to about 1 inch of top. Cover with boiling hot cooking liquid, or if liquid contains grit, use fresh boiling water. Leave 1-in. headspace at top of jar.
Test for Seal ~ After the jars have cooled for 12 to 24 hrs., remove the screw bands and test seals with one of the following options:Option 1: Press the middle of the lid with a fi nger or thumb. If the lid springs up when you release your fi nger, the lid is unsealed.Option 2: Tap the lid with the bottom of a teaspoon. If it makes a dull sound, the lid is not sealed. If the food is in contact with the underside of the lid, it will also cause a dull sound. If the jar is sealed correctly, it will make a ringing, highpitched sound.Option 3: Hold the jar at eye level and look across the lid. The lid should be concave (curved downward slightly in the center). If the center of the lid is either fl at or bulging, it may not be sealed.
Check for Spoilage ~ Check the jars before opening. Examine the jars for signs of broken seals such as spurting liquid, an off-odor, or mold. NEVER taste food as a check for spoilage. Home canned food may contain botulism-causing toxins if foods are notcanned properly. Always boil home canned vegetables 13 minutes before tasting.
- 1 -
Beans, snap andItalian pieces
Beans, snap andItalian pieces
Beets
Carrots
Carrots
Hot
Raw
Hot
Hot
Raw
About 14 lbs. is needed to make 7 qrts. Wash, trim, and cut or snap in 1-in. pieces or leave whole. Pack hot beans loosely almost to top. Cover with boiling hot water leaving 1-in. headspace.
Wash, trim, and cut or snap in 1-in. pieces or leave whole. Pack tightly almost to top jar. Cover with boiling water leav-ing 1-in. headspace.
About 21 lbs. is needed to make 7 qrts. Trim off beet tops; leave 1-in. stem and roots to reduce bleeding of color. Scrub well. Cover with boiling water. Boil until skins slip off easily (15-25 min.). Cool; remove skin and trim off stems and roots. Leave small beets whole; cut large in ½ -in. cubes or slices. Pack hot beets almost to top. Cover with fresh hot water, leaving 1-in. headspace.
About 17½ lbs. are needed to make 7 qrts. Select small carrots no more than 1¼-in. in diameter. Larger carrots are too fi brous. Wash, peel, and rewash carrots. Slice or dice. Cover with boiling water; bring to boil and simmer for 5 minutes. Fill jars. Cover with cooking liquid or hotwater leaving 1-in. headspace.
Wash, peel, and rewash car-rots. Slice or dice. Pack tightly into jars. Add fresh hot water, leaving 1-in. headspace.
Vegetable Pack Preparation Process Time
Dial gauge- pints: 12 lbs. for 20 min.; qrts.:12 lbs. for 25 min. Weighted gauge- pints: 15 lbs. for 20 min.; qrts.: 15lbs. for 25 min.
Processing times the same as for hot pack, above.
Dial gauge- pints: 12 lbs. for 30 min.; qrts.: 12 lbs. for 35 min. Weighted gauge- pints: 15 lbs. for 30 min.; qrt.: 15 lbs.for 35 min.
Dial gauge- pints: 12 lbs. for 25 min.; qrts.: 12 lbs. for 30 min. Weighted gauge- pints: 15 lbs. for 25 min.; qrts.: 15 lbs. for 30 min.
Process the same as for hot pack, above.
Canner Type ~
- 2 -
Home Canning of Meats & Poultry These recommendations are for West Virginia conditions (maximum alti-tude, 4,000 feet). For canning directions in other locations, consult your county Extension office.
Fresh or frozen meats and poultry can be canned safely at home. Since these products are low-acid foods, they must be processed in a pressure canner to be sure that spoilage organisms, including those that cause botu-lism, are destroyed. For a safe product, follow all canning directions exactly.
To get ready for a safe canning season ~ • Be sure your pressure canner is in goodworking condition and that the pressuregauge was checked for accuracy thisseason at your county Extension offi ce.The weighted gaug - the one that jiggles -doesn’t have to be tested.• Check the gasket. If it is nicked, replace it.• Have suffi cient jars on hand and discardany with nicks and/or cracks. Use only pintor quart Mason jars made specially forhome canning. Straight-sided or wid-mouthjars are easier to work with.• Buy new lids. Old screw bands can beused if they are not rusted or bent.Just before canning ~• Be sure your knives are sharp.• Sanitize all cutting surfaces. (See con-tainers of household bleach for directions.)• Review directions for using the pressurecanner.Yields of Canned Food from Fresh ~The number of jars you can fi ll with meat or poultry depends upon the size of pieces and the way the meat is packed. For a quart jar, allow about the following amounts of fresh untrimmed meat with bone or ready-to-cook chicken:Meat: Number of lbs.Round (beef) 3 to 3½Rump (beef) 5 to 5½Pork loin 5 to 5½Chicken:Canned with bone 3½ to 4¼Canned without bone 5½ to 6¼
After Canning ~• To cool, place hot jars, well separated,on rack or folded cloth away from drafts.• Cool at room temp. for 12 to 24 hrs.• When jars are cool, remove the screw-band and test the seal. If the lid did not seal, you have three options:
Option 1: Use the food the same day orrefrigerate immediately and use within several days.
Option 2: Freeze the food in the same jar, if tempered for freezing, by increas-ing the headspace to 1½ inches, or freeze it in anotherfreezer container. Mark that the food needs to be boiled in an uncovered con-tainer for 20 min. before using.
Option 3: Reprocess. Remove the lid and check the jar seal surface for tiny nicks. Fully process the jar for the cor-rect time and at the correct temperature.
Before Using ~As an added safety precaution, boil home-canned meat or poultry for 20 minutes in an uncovered saucepan. If the meat smells spoiled during boiling, destroy it without tasting. If, after boiling,the meat or poultry is not to be used at once, or if it’s to be used in salads or cold dishes, refrigerate it immediately. Use within 1 to 2 days.
- 19 -
Pressure Canningof Fruits
Fruit Pack Pressure Canner Pressure Canner Dial Gauge Weighted Gauge
Applesauce
Apples, sliced
Cherries
Fruit Puress
Peaches, Apricots, Nectarines
Pears
Plums
Rhubarb
Hot
Hot
Raw
Hot
Hot or Raw
Hot
Hot or raw
Hot
7 lbs. pressure for 8 min. for pints and 10 min. for qrts.
7 lbs. pressure for 8 min. for pints and qrts.
7 lbs. pressure for 10 min. for pints and qrts.
7 lbs. pressure for 8 min. for pints and qrts.
7 lbs. pressure for 10 min. for pints and qrts.
7 lbs. pressure for 10 min. for pints and qrts.
7 lbs. pressure for 10 min. for pints and qrts.
7 lbs. pressure for 8 min. for pints and qrts.
10 lbs. pressure for 8 min. for pints and 10 min. for qrts.
10 lbs. pressure for 8 min. for pints and qrts.
10 lbs. pressure for 10 min. for pints and 10 min. for qrts.
10 lbs. pressure for 8 min. for pints and qrts.
10 lbs. pressure for 10 min. for pints and qrts.
10 lbs. pressure for 10 min. for pints and qrts.
10 lbs. pressure for 10 min. for pints and qrts.
10 lbs. pressure for 8 min. for pints and qrts.
Processing in a boiling-water canner is the preferred method for fruits. However, if you choose to process ina pressure canner, the process tables for dial gauge and weighted gauge pressure canner are included in this publication.
- 18 -
Vegetable Pack Preparation Process Time Canner Type ~
Corn, creamstyle
Corn, WholeKernal
Corn, WholeKernal
Peas, green orEnglish, shelled
Hot
Hot
Raw
Hot
About 20 lbs. (in husk) is needed to make 9 pints. Husk corn, remove silk, and wash ears. Blanch ears 4 min. in boil-ing water. Cut corn from cob at about the center of kernel. Scrape remaining corn from cob with a table knife. In sauce-pan, to each quart of corn and scrapings, add 2 cups of boiling water. Heat to boiling. Use pints only. Add ½ tsp. salt to each jar, if desired. Fill pint jar with hot corn mixture, leaving 1-in. headspace.
About 3½ lbs. (in husk) isneeded to make 7 qrts. Canning of some sweeter varieties or too immature kernels may cause browning. Select corn ready for eating fresh. Husk corn, remove silk, and wash. Blanch 3 min. in boiling water for hot or raw pack. Cut corn from cob at about three-fourths the depth of the kernel. Do not scrape cob. In saucepan, add 1 cup of hot water for each quart of corn, bring to a boil, and simmer 5 min. Fill jars with hot corn and liquid, leaving 1-in. headspace.
After blanching and cutting kernels from cob, fi ll jars with corn, leaving 1-in. headspace. Do not shake or press down. Add 1 tsp. of salt to each jar, if desired. Add fresh boiling wa-ter, leaving 1-in. headspace.
About 3½ lbs. (in pods) is needed to make 7 qrts. Shell and wash peas. In saucepan, cover with boiling water and bring to boil for 2 min. Fill jars loosely with hot peas and added cooking liquid, leaving 1-in. headspace.
Dial gauge- pints: 12 lbs. for 85 min. Weighted gauge-pints: 15 lbs. for 85 min.
Dial gauge- pints: 12 lbs. for 55 min.; qrts.: 12 lbs. for 85 min. Weighted gauge-pints: 5 lbs. for 55 min.; qrts.: 15 lbs. for 85 min.
Process as for hot pack, above.
Dial gauge- pints or qrts.: 2 lbs. for 40 min. Weighted gauge- pints or qrts.: 15 lbs. for 40 min.
- 3 -
Vegetable Pack Preparation Process Time Canner Type ~
Peas, green orEnglish, shelled
Peppers, hot,sweet, jalapeno,chile, andpimento
Pumpkin andwinter squash,cubed
Raw
Hot
Hot
Shell and wash peas. Fill jars with raw peas, add boiling water, leaving 1-in. headspace. Do not shake or press down peas.
About 9 lbs. is needed to make 9 pints. Use pints or half-pints only. Select fi rm, yellow, red, or green peppers. Don’ t use diseased or soft peppers. Caution: If you choose hot pep-pers, wear plastic gloves while handling them or wash hands thoroughly with soap and water before touching your face. Re-move core and seeds. Quarter large peppers; small can be left whole. Slash two or four slits in each pepper, and either blanch or blister peppers. (Blister: oven or broiler - place peppers in 400 degree F oven or broiler for 6-8 min. until skin blisters. Range top - cover hot burner with heavy iron mesh. Place peppers on burner for several minutes until they blister.) Allow peppers to cool. Place in pan and cover with cool cloth. After several minutes, peel each pepper. Add ½ tsp. salt to each pint jar, if desired. Fill jars loosely with peppers and add fresh boiled water, leaving 1-in. headspace.
About 16 lbs. is needed to make7 qrts. Wash, remove seeds, cut into 1-in. slices, and peel. Cut fl esh into 1-in. cubes. Boil 2 min. in water. Caution: Do not mash or puree. Fill jars with cubes and cooking liquid, leaving 1-in. headspace.
Process as for hot pack, above.
Dial gauge- half-pints or pints: 12 lbs. for 35 min. Weighted gauge-half-pints or pints: 15 lbs. for 35 min.
Dial gauge- pints: 12 lbs. for 55 min.; qrts.: 12 lbs. for 90 min. Weighted gauge-pints: 15 lbs. for 55 min.; qrts.: 15 lbs. for 90 min.
- 4 -
Operating the Pressure Canner ~
1. Put 2- to-3 inches of hot water in thecanner. Place fi lled jars on the rack, usinga jar lifter. Fasten canner lid securely.
2. Leave weight off vent port or openpetcock. Heat at the highest setting untilsteam fl ows from the petcock or ventport.
3. Maintain high heat setting, exhauststeam 10 minutes, and then placeweight on vent port or close petcock.The canner will pressurize during thenext 3 to 5 minutes.
4. Start timing the process when thepressure reading on the dial gauge in-dicates that the recommended pressurehas been reached, or when the weightedgauge begins to jiggle or rock.
5. Regulate heat under the canner tomaintain a steady pressure at or slightlyabove the correct gauge pressure. Quickand large pressure variations duringprocessing may cause unnecessaryliquid losses from jars. Weighted gaugeson Mirro canners should jiggle about 2 to3 times per minute. On Presto canners,they should rock slowly throughout theprocess.6. When the timed process is completed,turn off the heat, remove the cannerfrom heat if possible, and let the cannerdepressurize. DO NOT FORCE-COOLTHE CANNER. Forced cooling mayresult in food spoilage. Cooling the can-ner with cold running water or openingthe vent port before the canner is fullydepressurized will cause loss of liquidfrom jars and seal failures. Force-coolingmay also warp the canner lid of oldermodel canners, causing steam leaks.
Depressurization of older models should be timed. Standard-size heavy-walled canners require about 30 minutes when loaded with pints and 45 minutes with quarts. Newer thin-walled canners cool more rapidly and are equipped with vent locks. These canners are depressurized when their vent lock piston drops to a normal position.
7. After the canner is depressurized,remove the weight from the vent port oropen the petcock. Wait 2 minutes, unfas-ten the lid, and remove it carefully. Liftthe lid away from you so that the steamdoes not burn your face.
8. Remove jars with a lifter and placethem on towel or cooling rack, if desired.Process the jars using the correct timeand pressure specifi ed for your altitude.Allow canner to cool at room tempera-ture until it is completely depressurized.
- 17 -
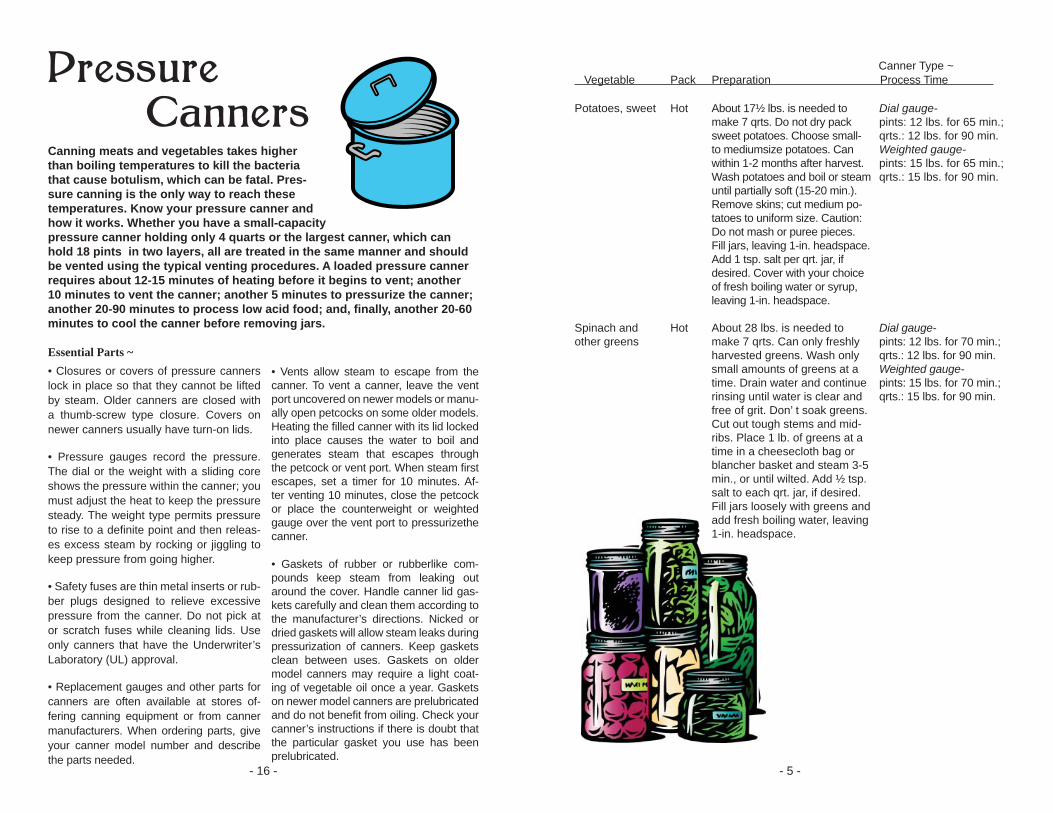
Pressure CannersCanning meats and vegetables takes higher than boiling temperatures to kill the bacteria that cause botulism, which can be fatal. Pres-sure canning is the only way to reach these temperatures. Know your pressure canner and how it works. Whether you have a small-capacity pressure canner holding only 4 quarts or the largest canner, which can hold 18 pints in two layers, all are treated in the same manner and should be vented using the typical venting procedures. A loaded pressure canner requires about 12-15 minutes of heating before it begins to vent; another 10 minutes to vent the canner; another 5 minutes to pressurize the canner; another 20-90 minutes to process low acid food; and, fi nally, another 20-60 minutes to cool the canner before removing jars.
Essential Parts ~ • Closures or covers of pressure cannerslock in place so that they cannot be liftedby steam. Older canners are closed witha thumb-screw type closure. Covers onnewer canners usually have turn-on lids.
• Pressure gauges record the pressure.The dial or the weight with a sliding coreshows the pressure within the canner; youmust adjust the heat to keep the pressuresteady. The weight type permits pressureto rise to a defi nite point and then releas-es excess steam by rocking or jiggling tokeep pressure from going higher.
• Safety fuses are thin metal inserts or rub-ber plugs designed to relieve excessivepressure from the canner. Do not pick ator scratch fuses while cleaning lids. Useonly canners that have the Underwriter’sLaboratory (UL) approval.
• Replacement gauges and other parts forcanners are often available at stores of-fering canning equipment or from cannermanufacturers. When ordering parts, giveyour canner model number and describethe parts needed.
• Vents allow steam to escape from thecanner. To vent a canner, leave the ventport uncovered on newer models or manu-ally open petcocks on some older models.Heating the fi lled canner with its lid lockedinto place causes the water to boil andgenerates steam that escapes throughthe petcock or vent port. When steam fi rstescapes, set a timer for 10 minutes. Af-ter venting 10 minutes, close the petcockor place the counterweight or weightedgauge over the vent port to pressurizethecanner.
• Gaskets of rubber or rubberlike com-pounds keep steam from leaking outaround the cover. Handle canner lid gas-kets carefully and clean them according tothe manufacturer’s directions. Nicked ordried gaskets will allow steam leaks during pressurization of canners. Keep gasketsclean between uses. Gaskets on oldermodel canners may require a light coat-ing of vegetable oil once a year. Gasketson newer model canners are prelubricated and do not benefi t from oiling. Check yourcanner’s instructions if there is doubt thatthe particular gasket you use has beenprelubricated.
- 16 -
Vegetable Pack Preparation Process Time Canner Type ~
Potatoes, sweet
Spinach andother greens
Hot
Hot
About 17½ lbs. is needed to make 7 qrts. Do not dry pack sweet potatoes. Choose small- to mediumsize potatoes. Can within 1-2 months after harvest. Wash potatoes and boil or steam until partially soft (15-20 min.). Remove skins; cut medium po-tatoes to uniform size. Caution: Do not mash or puree pieces. Fill jars, leaving 1-in. headspace. Add 1 tsp. salt per qrt. jar, if desired. Cover with your choice of fresh boiling water or syrup, leaving 1-in. headspace.
About 28 lbs. is needed to make 7 qrts. Can only freshly harvested greens. Wash only small amounts of greens at a time. Drain water and continue rinsing until water is clear and free of grit. Don’ t soak greens. Cut out tough stems and mid-ribs. Place 1 lb. of greens at a time in a cheesecloth bag or blancher basket and steam 3-5 min., or until wilted. Add ½ tsp. salt to each qrt. jar, if desired. Fill jars loosely with greens and add fresh boiling water, leaving 1-in. headspace.
Dial gauge- pints: 12 lbs. for 65 min.; qrts.: 12 lbs. for 90 min. Weighted gauge-pints: 15 lbs. for 65 min.; qrts.: 15 lbs. for 90 min.
Dial gauge- pints: 12 lbs. for 70 min.; qrts.: 12 lbs. for 90 min. Weighted gauge- pints: 15 lbs. for 70 min.; qrts.: 15 lbs. for 90 min.
- 5 -
Canning Fruits
These processing recommendations are for West Virginia conditions (maximum altitude, 4,000 feet). For canning directions in other locations,
consult your county Extension offi ce.
Fruit ~Because of their high acidity, fruits may be processed safely in a boiling-water canner. Low-acid foods (most vegetables and all meats) must be processed using a pressure canner. Some fruits that are not high in acid content can be processed in a boiling-water canner if acid is added in the form of lemon juice, citric acid, or vinegar. Figs are one fruit that falls into this catagory.
Equipment ~Boiling-water canners are readily avail-able on the market, but any large metal container may be used. It should be deep enough to allow water to cover rack and jars, plus an additional 2 inch-es. A wire or wooden rack and a tight-fi tting lid are necessary. A rack with dividers is helpful, since it prevents jars from touching one another and falling against the sides of the canner during processing. A pressure canner may be used, provided it is deep enough. If using as a boilingwater bath canner, the cover should not be fastened; the petcock should be left open so steam can escape and pressure does not build up in the canner. Instructions are also given for actual pressure canning.
Canning Jars ~1. Check jars for cracks or chips. Use onlycanning or canning-freezing jars.2. Secure a fresh supply of lids at the startof the season. Screw bands can be reusedas long as they are in good condition.
General Recommendations for Packing ~ Glass JarsSyrup solutions for 9-pint or 4-quart load:Type % Sugar Cups Water Cups Sugarvery light light medium heavy very heavy
Combine water and sugar. Bring to a boil and pour over raw fruits in jars. For hot packs, bringwater and sugar to a boil, add fruit, reheat to boil, and fi ll into jars immediately.Hot pack is superior to raw pack because fl oating and discoloration are minimized.Hot Pack ~Boil fruit in syrup or water for 2-5 min. Fruits with high juice content may bepreheated without added liquid and then packed in the juice that cooks out.Raw Pack ~Pack raw fruit into jars. Cover with boiling water, juice, or syrup.
1020304050
6½5¾5¼54¼
¾1½2¼3¼4¼
- 6 -
Freezing Vegetables ~
Asparagus
Beans:green or wax
Beans: lima
Beets
Broccoli
Carrots
Corn
Eggplant
Greens: beet, chard, kale, spinach, etc.
Peas, green
Peas, sugar snap
Pumpkin and winter squash
Tomatoes
Zucchini and other summer squash
Remove woody part of stalks. Leave in spears or cut into 1- to 2-in. lengths. Blanch according to thickness of stalk:small-2 min.; medium-3 min.; large-4 min. Can be trayfrozen.
Leave whole, snap, or cut french style. Blanch 3 min.
Shell and sort according to size. Blanch small beans 2 min.; medium beans, 3 min.; large beans, 4 min.
Remove tops and cook whole in boiling water until tender. Remove skins and slice or dice.
Pare stems if tough and discard woody parts. Split lengthwise so that heads arenot more than 1½ in. across. Blanch 3 min. Can be tray frozen.
If small, leave whole and blanch 5 min. Blanch diced, sliced, or lengthwise strips 2 min.
Whole kernel or cream style - Heat ears in boiling water for 4 min. Cool promptly and drain. For whole kernel, cut kernels from cob at about two-thirds the depth of the ker-nels. For cream style, cut corn from cob at about center of kernels. Scrape cobs with back of knife to remove juice and heart of kernel. On the cob - Blanch small ears (1¼ in. or less in diam-eter) 7 min.; medium ears (1¼ to 1½ in.) 9 min.; large ears (over 1½ in.) 11 min. Can be wrapped in laminated freezer paper, heavy-duty foil, or plastic wrap.
Peel and cut intoa in. slices or lengthwise strips. To pre-serve color, soak 5 min. in ascorbic acid solution. Drain. Blanch 4 min. Can be tray frozen.
Remove tough stems. Blanch very tender leaves 1½ min.; beet greens, chard, mustard greens, turnip greens, and spinach 2 min.; collards 3 min.
Shell and blanch 1½ min.
Blanch whole 2 min.
Cut or break into fairly uniform pieces. Remove seeds. Cook pieces until soft in boiling water, steam, pressure cooker, or oven. Remove pulp from rind. Mash or sieve. To cool, place in a shallow pan and place pan in ice cold water and stir.
Quality of frozen raw tomatoes is poor. Freeze stewed tomtoes, tomato sauce, and/or favorite spaghetti sauce.
Slice (½ in.) and blanch 3 min.
- 15 -
To serve frozen vege tables:Cook most frozen vegetables while they are still frozen. Corn on the cob, however, should be partially thawed before cooking so that the cob will be heated through by the time the corn is cooked. To save vitamins, minerals, bright color, and fl avor, drop frozen vegetables into a small amount of boiling water (about ½ cup to a pint package), cover, and cook for 5 to 15 min., depending upon the vegetable. Frozen vegetables can be added directly to soups and/or stews.
Freezing Fruit ~ Preparation - refer to chart for headspace
Apples
Applesauce
Blackberries, boysenberries and loganberries
Blueberries and huckleberries
Strawberries
Cherries, sour
Cherries, sweet
Grapefruit and oranges
Peaches and nectarines
Rhubarb
Peel, quarter, and core. Can be frozen raw-syrup packed, dry sugar packed, or packed without sugar. Dip in lemon juice solution, as directed under Fruits; drain and add ascorbic acid solution before packing. Slices can be steamed fi rst and then sugar packed-½ cup sugar over a quart of sliced apples. To steam: place slices in a single layer in steamer and steam 1½ to 2 min. Drain and cool.
Prepare with or without sugar as for the table. Cool. For better fl avor, add spices just before serving the thawed product.
Syrup pack is preferred method for berries to be served uncooked. Whole berries can also be dry sugar packed or packed unsweetened.
To tenderize skins, steam 1 min. Cool and pack as di-rected.
Remove caps. Can be used whole or sliced. Can be syrup packed or packed dry, with or without sugar. Sprinkle with 2 tablespoons ascorbic acid solution per each qrt. of fruit before packing.
Remove pits. Dry sugar pack is best for pies(2/3 cups sugar to 1 qrt. cherries). Add ascorbic acid solution, as directed, before packing.
Chill in cold water. Remove pits if desired. Pack in syrup, dry sugar, or pack with no sweetener. Add 2 tablespoons ascorbic acid solution, as directed, before packing.
Section fruit; remove membranes and seeds. Cover with syrup, using excess fruit juice as part of liquid. For better color quality, add 2 tablespoons ascorbic acid solution to each quart of fruit.
Peel and pit. For better product, peel without boiling water dip. Slice into lemon juice solution, as directed. If dry pack-ing, sugar packing, or water packing, add ascorbic acid solution, as directed, before packing. If syrup pacing, slice peaches directly into syrup and add ascorbic acid solution.
Cut in 1- or 2-in. pieces. Can be packed raw, but heating in boiling water for 1 minute and cooling promptly help retain fl avor and color. Can be syrup or dry sugar packed. Can be packed unsweetened.
- 14 -
Sweetened Vs. Unsweetened Fruit ~Additional sweetness is not essential to preserving fruit, but it does help canned fruit retain shape, color, and fl avor. Sweetening may be in the form of sugar syrup, sugar, corn syrup, or mild-fl avored honey. Use of brown sugar, molasses, or other strong-fl avored sweeteners is not recommended. Their fl avor will overpower the true fruit fl avor.
Sugar syrup: Combine sugar with water or juice extracted from some of the fruit. Use amounts indicated on the table depending on the natural sweetness of the fruit and your own taste. Remember, however, heavier syrups supply many more calories. Sugar added directly to the fruit - In a saucepan, sprinkle the amount of sugar desired over raw fruit. Let stand until juice appears. Heat to simmering over low heat for 2-5 minutes. Pack fruit in jars, along with juice. Other sweeteners - light corn syrup or mild-fl avored honey may be used to replace one-half the sugar called for in canning fruit. Noncaloric or artifi cial sweeteners - use according to manufacturer’s instructions.
Unsweetened fruit: Pack and can fruit in its own juice, in extracted juice, or in water. To use extracted fruit juice, thoroughly crush ripe, sound, juicy fruit. Heat to sim-mering over low heat. Strain through a jelly bag or several layers of cheesecloth. If adding sugar, heat sugar and liquid together at this time, until sugar dissolves. Skim if necessary.
General Rules for Boiling-Water Canner ~1. Clean jars and rims in hot water anddetergent before each use, making sure torinse thoroughly. If processing less than 10min., jars must be sterilized. (To sterilize, boil jars 14 min. in water which covers jars by1 in. [Rule: 10 min. for conditions less than1,000 ft. altitude; add an additional min. foreach 1,000 ft.; 14 min. accommodates W.Va. conditions of up to 4,000 ft.]; save hot waterfor processing fi lled jars.) Boil lids accordingto manufacturer’s directions.
2. Prepare syrup if desired.
3. Prepare fruit. Place peeled, sliced, halved, or quartered fruit immediately in an antioxi-dant solution, such as Fruit Fresh®, to pre-vent discoloration, or in a solution made bymixing six 500 milligram Vitamin C tablets in1 gal. of water. Drain before packing.
4. Fill clean jars using hot or raw-packmethod. Pack fruit closely without crushing.Add hot water, juice, or syrup, leaving ½ in.headspace. Canned fruit may fl oat if packedloosely, if syrup is too heavy, or if some airremains.
5. Remove air bubbles by sliding a plasticutensil around and through fruit. If neces-sary, add more syrup, water, or juice.
6. Wipe jar rim clean. Adjust lids. Tightenscrew bands securely but not too tight.7. Place fi lled jars on rack in canner fi lled with
boiling water. Jars should not touch each other so the hot water circulates around the jars.
8. Jars should be covered with 2 inches ofwater. Cover canner with lid.
9. When water comes to a rolling boil, startto count the processing time.
10. Boil gently for the recommended time.
11. When the processing time is up, removejars immediately. Cool on rack or towel away from drafts. DO NOT RETIGHTEN BANDS.12. The day after canning, check the sealby pressing in the center of the lid. It willbe slightly concave and not move. Removescrew bands from cooled jars. Label withcontents and date.
Maintaining Color and Flavor ~To ensure that your canned foods retainop-timum colors and fl avors during processing and storage:- use only freshly picked, high-quality foods
at the proper maturity and free of diseasesand bruises.- presoak fruit in an antioxidant solution be-
fore canning.- use the hot-pack method.- store the jars in a relatively cool, dark place,
preferably between 50 and 70 degrees F.- can no more food than you will use in one
year.
- 7 -
Fruit Pack Preparation Process Time Canner Type ~
Apples
Applesauce
Berries (except strawberries)
Berries (except strawberries)
Hot
Hot
Hot
Raw
About 19 lbs. is needed to make7 qrts. Wash, pare, core; cut into pieces. Place cut fruit in antioxidant solution. Drain; then boil 5 min. in water, juice, or syrup, stirring to prevent burning. One pint of solution is needed for 5 lbs. of apples. Pack hot into jars. Add liquid leaving ½-headspace.
About 21 lbs. of apples areneeded for 7 qrts. Prepareapplesauce – place apple slices in water and boil quickly until tender, 5-20 min., stirring occasionally to prevent burn-ing. If sugar is added, reheat sauce to boiling, stirring con-stantly. Pack hot applesauce leaving ½-inch headspace.
About 12 lbs. is needed for7qrts. Wash berries; drain; cap and stem if necessary. Heat berries in boiling water for 30 sec.; drain. Fill jars and add hot water, juice, or syrup to ½-in. headspace.
Wash berries; drain. Fill jars but leave room for solution. Shake berries down while fi lling jar. Coverwith boiling water, juice, or syrup leaving ½-in. headspace.
Process pints or qrts. for 30 min. Dial gauge canner- pint or qrts.: 7 lbs. for 8 min. Weighted gauge canner- pint or qrts.: 10 lbs. for 8 min.
Process pints for 20 min.; qrts. for 30 min. Dial gauge canner- pints: 7 lbs. for 8 min.; qrts: 7 lbs. for 10 min. Weighted gauge canner- pints: 10 lbs. for 8 min.; quarts: 10 lbs. for 10 min.
Process pints or qrts. for 20 min. Dial gauge canner- pints or qrts: 7 lbs. for 8 min. Weighted gauge canner- pints or qrts:10 lbs. for 8 min.
Process pints for 20 min. and qrts. for 30 min. Dial gauge canner- pints: 7 lbs. for 8 min.; qrts: 7 lbs. for 10 min. Weighted gauge canner-pints: 10 lbs. for 8 min.; qrts.: 10 lbs. for 10 min.
- 8 -
Measures of water and sugar for approximately 9 pints of fruit:Syrup Type Approx. % sugar Cups water Cups sugar Very light 10 6½ ¾Light 20 5¾ 1½Medium 30 5¼ 2¼Heavy 40 5 3¼Very heavy 50 4¼ 4¼
Make syrup well in advance as it must be cold before pouring over fruit. Heat water and sugar together. Bring to a boil. Let cool. Place fruit into container and then pour cold syrup over fruit; or fi ll container about 1/4 full with syrup and slice fruit directly into syrup. Add more syrup if needed. Leave headspace as directed. Hold fruit under syrup with crumpled piece of waxed paper or plastic wrap.
Freezing without sugar:Tray pack - Spread a single layer of prepared fruit on shallow trays. Freeze, and package immediately.Dry pack - Pack prepared fruit in containers with no sugar, syrup or other liquid. Some berries can be packaged this way but freezer life is short.Liquid pack - Noncaloric sweeteners can be used instead of sugar. For better fl avor, however, freeze with plain water or fruit juice and add the sweetener at time of serving.
To serve frozen fruits:Thaw unopened in refrigerator or at room temperature. Texture is best when some ice crystals remain. Fruits packed in syrup are generally best used for uncooked des-serts. Fruits packed in granulated sugar or packed unsweetened are best used for cooking purposes.
Vegetables:For best quality, taste, and nutritive value, freeze freshly gathered vegetables. If there is a delay, refrigerate vegetables until you are ready to freeze them.• Wash well; peel, trim, and cut as desired.• Vegetables should be blanched or scalded before freezing. This short heat treat-ment stops enzyme action that changes fl avor, texture, color, and nutritive value.• Vegetables are usually packed dry. They can be frozen in single layer on a cookiesheet (tray pack) and then packed in suitable containers. Single thickness bagsrequire an outside cover. Remove all possible air. Seal.
Blanching or scalding:In boiling water - This method uses large amounts of water (4 qrts.) to small amounts oprepared vegetables (1 lb.) so that water returns quickly to boiling after the vegetable is added.• Use a large kettle or blancher with tight-fi tting lid. A wire blanching basket, strainer,or cheesecloth bag can be used to hold the vegetables.• Bring specifi ed amount of water to a vigorous boil. Place vegetables in basket andplunge into boiling water. Cover and start counting immediately.• At end of blanching time, remove vegetables and cool quickly in cold running or icewater. Vegetables cool in about the same length of time as needed for blanching.Drain and package.• You can reuse the boiling water, but keep it at the proper level and be sure it isboiling vigorously when vegetables are added. In microwave oven - Check yourmanufacturer’s manual for recommendations.
- 13 -
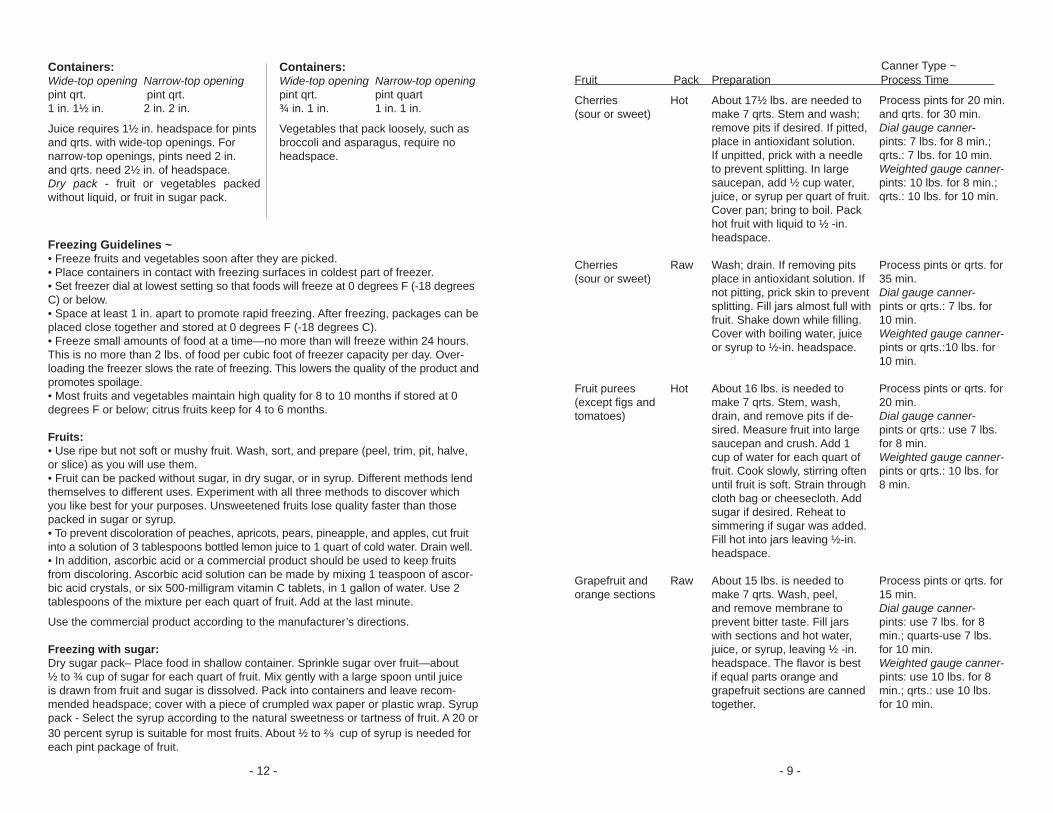
Containers:Wide-top opening Narrow-top openingpint qrt. pint qrt.1 in. 1½ in. 2 in. 2 in.
Juice requires 1½ in. headspace for pintsand qrts. with wide-top openings. For narrow-top openings, pints need 2 in. and qrts. need 2½ in. of headspace.Dry pack - fruit or vegetables packed without liquid, or fruit in sugar pack.
Freezing Guidelines ~ • Freeze fruits and vegetables soon after they are picked.• Place containers in contact with freezing surfaces in coldest part of freezer.• Set freezer dial at lowest setting so that foods will freeze at 0 degrees F (-18 degrees C) or below.• Space at least 1 in. apart to promote rapid freezing. After freezing, packages can be placed close together and stored at 0 degrees F (-18 degrees C).• Freeze small amounts of food at a time—no more than will freeze within 24 hours. This is no more than 2 lbs. of food per cubic foot of freezer capacity per day. Over-loading the freezer slows the rate of freezing. This lowers the quality of the product and promotes spoilage.• Most fruits and vegetables maintain high quality for 8 to 10 months if stored at 0 degrees F or below; citrus fruits keep for 4 to 6 months.
Fruits:• Use ripe but not soft or mushy fruit. Wash, sort, and prepare (peel, trim, pit, halve, or slice) as you will use them.• Fruit can be packed without sugar, in dry sugar, or in syrup. Different methods lendthemselves to different uses. Experiment with all three methods to discover which you like best for your purposes. Unsweetened fruits lose quality faster than those packed in sugar or syrup.• To prevent discoloration of peaches, apricots, pears, pineapple, and apples, cut fruit into a solution of 3 tablespoons bottled lemon juice to 1 quart of cold water. Drain well.• In addition, ascorbic acid or a commercial product should be used to keep fruits from discoloring. Ascorbic acid solution can be made by mixing 1 teaspoon of ascor-bic acid crystals, or six 500-milligram vitamin C tablets, in 1 gallon of water. Use 2 tablespoons of the mixture per each quart of fruit. Add at the last minute.
Use the commercial product according to the manufacturer’s directions.
Freezing with sugar:Dry sugar pack– Place food in shallow container. Sprinkle sugar over fruit—about ½ to ¾ cup of sugar for each quart of fruit. Mix gently with a large spoon until juice is drawn from fruit and sugar is dissolved. Pack into containers and leave recom-mended headspace; cover with a piece of crumpled wax paper or plastic wrap. Syrup pack - Select the syrup according to the natural sweetness or tartness of fruit. A 20 or 30 percent syrup is suitable for most fruits. About ½ to b cup of syrup is needed for each pint package of fruit.
Containers:Wide-top opening Narrow-top openingpint qrt. pint quart¾ in. 1 in. 1 in. 1 in.
Vegetables that pack loosely, such asbroccoli and asparagus, require no headspace.
- 12 -
Fruit Pack Preparation Process Time Canner Type ~
Cherries (sour or sweet)
Cherries (sour or sweet)
Fruit purees (except fi gs and tomatoes)
Grapefruit and orange sections
Hot
Raw
Hot
Raw
About 17½ lbs. are needed tomake 7 qrts. Stem and wash;remove pits if desired. If pitted, place in antioxidant solution. If unpitted, prick with a needle to prevent splitting. In large saucepan, add ½ cup water, juice, or syrup per quart of fruit. Cover pan; bring to boil. Pack hot fruit with liquid to ½ -in. headspace.
Wash; drain. If removing pits place in antioxidant solution. If not pitting, prick skin to prevent splitting. Fill jars almost full with fruit. Shake down while fi lling. Cover with boiling water, juice or syrup to ½-in. headspace.
About 16 lbs. is needed to make 7 qrts. Stem, wash, drain, and remove pits if de-sired. Measure fruit into large saucepan and crush. Add 1 cup of water for each quart of fruit. Cook slowly, stirring often until fruit is soft. Strain through cloth bag or cheesecloth. Add sugar if desired. Reheat to simmering if sugar was added. Fill hot into jars leaving ½-in. headspace.
About 15 lbs. is needed to make 7 qrts. Wash, peel, and remove membrane to prevent bitter taste. Fill jars with sections and hot water, juice, or syrup, leaving ½ -in. headspace. The fl avor is best if equal parts orange and grapefruit sections are canned together.
Process pints for 20 min. and qrts. for 30 min. Dial gauge canner- pints: 7 lbs. for 8 min.; qrts.: 7 lbs. for 10 min. Weighted gauge canner- pints: 10 lbs. for 8 min.; qrts.: 10 lbs. for 10 min.
Process pints or qrts. for 35 min. Dial gauge canner- pints or qrts.: 7 lbs. for 10 min. Weighted gauge canner- pints or qrts.:10 lbs. for 10 min.
Process pints or qrts. for 20 min. Dial gauge canner-pints or qrts.: use 7 lbs. for 8 min. Weighted gauge canner- pints or qrts.: 10 lbs. for 8 min.
Process pints or qrts. for 15 min. Dial gauge canner-pints: use 7 lbs. for 8 min.; quarts-use 7 lbs. for 10 min. Weighted gauge canner- pints: use 10 lbs. for 8 min.; qrts.: use 10 lbs. for 10 min.
- 9 -
Fruit Pack Preparation Process Time Canner Type ~
Peaches
Pears
Rhubarb
Hot
Hot
Hot
About 17½ lbs. are needed tomake 7 qrts. Dip fruit in boilingwater for 30 to 60 sec. until skins loosen. Dip quickly in cold water and slip off skins. Cut in half; remove pits and slice if desired. Place fruit in antioxidant solution and drain before boiling. In large saucepan, place fruit in water, juice, or syrup and bring to boil. Pack hot fruit into jars; cover with boiling liquid, leaving ½-in. headspace. Raw packs make poor-quality peaches.
About 17½ lbs. are needed for 7 qrts. Wash, peel, halve, and core. Place fruit in antioxidant solution and drain before boil-ing. In large saucepan, place fruit in water, juice, or syrup and boil for 5 min. Pack hot fruit into jars; cover with boiling liquid, leaving ½-in. headspace. Raw packs make poor quality pears.
About 10½ lbs. are needed for 7 qrts. Trim leaves; wash, cut in ½- to 1-in. pieces. In a large saucepan, add ½ cup sugar for each quart of fruit. Let stand until juice appears. Heat gently to boiling. Fill jars without de-lay, leaving ½ -in. headspace.
Process pints for 30 min. and qrts. for 35 min. Dial gauge canner-pints or qrts.: 7 lbs. for 10 min. Weighted gauge canner- pints or qrts.: 10 lbs. for 10 min.
Process pints for 30 min.; qrts. for 35 min. Dial gauge canner- pints or qrts.: 7 lbs. for 10 min. Weighted gauge canner- pints or qrts.: 10 lbs. for 10 min.
Process pints or qrts. for 20 min. Dial gauge canner- pints or qrts.: 7 lbs. for 8 min. Weighted gauge canner- pints or qrts.: 10 lbs. for 8 min.
- 10 -
Freezing Fruits & Vegetables
Freezing is a simple and quick way to preservefruits and vegetables. Choose top-quality fruits
and vegetables and follow recommended methodsto get high-quality, nutritious foods for year-round enjoyment.
Containers ~Containers should be moisture-vapor resistant,durable, easy to handle, and made for food storage.Some common containers are:• Dual-purpose glass jars (for either canning orfreezing) are tapered for ease in removingfrozen foods. Jars must be sterilized before use.To sterilize empty jars, put them right side upon the rack in a boiling-water canner. Fill thecanner and jars with hot (not boiling) water to1 inch above the tops of the jars. Boil 14 min.Remove and drain hot sterilized jars one at atime.• Rigid polyethylene boxes come in differentsizes. Lids should fi t tightly.• Commercial paperboard cottage-cheese-typecartons are not airtight but could be used if aplastic bag is used as the carton liner.• Protective cartons may be necessary if plasticbags will be moved around in the freezer.• Boil-in-bag pouches can be used. Whenpackaging, be sure to press out as much air aspossible before sealing.
Packaging ~ Head space is necessary to allow for expansionduring freezing. Amount of headspace to allowbetween food and closure:Liquid pack - fruit in juice, syrup, sugar, or water; crushed fruit or juice.
Labeling ~ Use freezer or masking tape and felt-tipped pen or waxed pencil. Label should include name of product, freezing date, type of pack, and other information you want.
Approximate Amount Needed to Yield 1 Pint of Frozen Product ~ Fruit Fresh Apples 1¼ to 1½ lbs.Berries 1 to 1½ lbs.Cantaloupes 1 to 1¼ lbs.Cherries 1¼ to 1½ lbs.Cranberries 1½ lb.Nectarines 1 to 1½ lbs.Peaches 1 to 1½ lbs.Pineapple 1¼ lbs.Plums 1 to 1½ lbs.Raspberries 1 pintRhubarb b to 1 lb.Strawberries b qrt.
Vegetable Fresh Beans, lima, in pod 2 to 2½ lbs.Beans, snap, green, or wax b to 1 lb.Beets 1¼ - 1½ lbs.Broccoli 1 lb.Carrots 1¼ - 1½ lbs.Corn (in husks) 2 - 2½ lbs.Eggplant 1 lb.Greens: spinach, kale, mustard 1 - 1½ lbs.Peas 2 - 2½ lbs.
- 11 -