
Turning the Projector On/Off - Aaxa Technologies, Inc the Projector On/Off ... Press and hold the...
20
Transcript of Turning the Projector On/Off - Aaxa Technologies, Inc the Projector On/Off ... Press and hold the...
Table of Contents......................................................................................................1Warnings ......................................................................................................................2Accessories ..................................................................................................................3General Operation
Turning the Projector On/Off ..........................................................4Projector Description .........................................................................5
Focus Adjustment / Throw Distance ............................................6 Tripod Adapter .......................................................................................6Input / Output ............................................................................................................7Menu System
AV Input .....................................................................................................8 SD Card .......................................................................................................9-14 USB Data ...................................................................................................15 Settings ......................................................................................................16-17Troubleshooting .......................................................................................................18Specifications .............................................................................................................19
Table of Contents
1
.................................1.............................................2
........................................................3
On//OffO ............ ......................................................4tion ............................................. .........................................5
menntt // ThThroroww Diststance ........................... ........................6dapteerr ......................................... .......................................................66
ut ..................................................................................................................77ystem
AAV V InInpup t ..... .............. ............................................................................................88 SD Cardd ........................... ..........................................................................................9-1-1-1444 USB Data ..... ................ ......................................................................................... Settings ....................................................................................................Trooublb eshooting ................................................ ............................................
pececififications ................................................... ..................... ....................
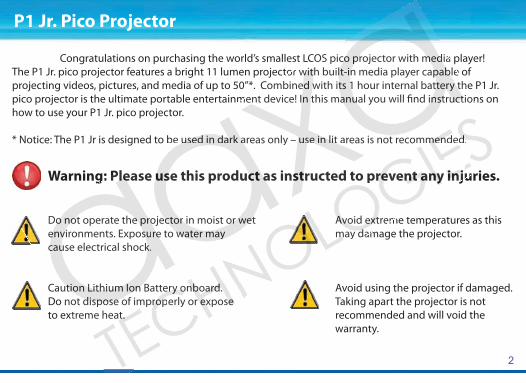
Congratulations on purchasing the world’s smallest LCOS pico projector with media player! The P1 Jr. pico projector features a bright 11 lumen projector with built-in media player capable of projecting videos, pictures, and media of up to 50”*. Combined with its 1 hour internal battery the P1 Jr. pico projector is the ultimate portable entertainment device! In this manual you will find instructions on how to use your P1 Jr. pico projector.
* Notice: The P1 Jr is designed to be used in dark areas only – use in lit areas is not recommended.
Warning: Please use this product as instructed to prevent any injuries.
Do not operate the projector in moist or wet Avoid extreme temperatures as this environments. Exposure to water may may damage the projector.cause electrical shock.
Caution Lithium Ion Battery onboard. Avoid using the projector if damaged. Do not dispose of improperly or expose Taking apart the projector is not to extreme heat. recommended and will void the warranty.
P1 Jr. Pico Projector
2
LCOS piccoo pprojector with mmeddiaaa tor wwitith h buillt-inn media player cappabble e e
Combineed wwith itts 11 hour internal battteeryry t thehehement device! IIn tthis maanuual you will find ininststruuctctiooonnn
be ususeded in dadark aareas only – usse e inin l litit areas is not recommmenenddedd.
g: Plelease ususe this productct aas inststructed to prreevennt t anany y ininjujujuririri
Doo nnoot operate thee p rorojeectc orr i in moist oror w wetet AvAvoio d exexttremememeenvivironments. Expossurere to wawater may y mam y dadadammmccauuse electrical shockk.
Caututioion LiLiththiuiumm Ioonn Battereryy ononboboarard.d. o not ddisispoposese of imprropo erly or r exexposese
xtreme heat.t.
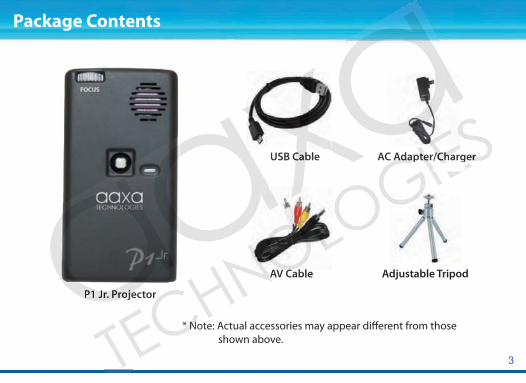
USB Cable AC Adapter/Charger
AV Cable Adjustable Tripod
* Note: Actual accessories may appear different from those shown above.
P1 Jr. Projector
3
Package Contents
P1 JJr. Prorojejector
USB CCabble AC AdAdapapteter//ChChargeerr
AV C CablAV CC bl
* NoN te: A

Turning On the Projector
Press and hold the power button for 3 seconds to turn the projector on. The welcome screen should appear while the projector is loading and will automatically load into the onboard media player.
Note: Please make sure the P1 Jr is fully charged before use. Charge time can be up to 3-4 hours. To charge the projector: 1. Attach the power adapter to the projector 2. Attach the power adapter to the wall outlet
Turning Off the Projector
Hold the power button for 3 seconds until the optical engineturns off.
4
General Operation
le thento the
is ffulullyly chargeed bbefore use. 4 houurrs. . ToTo charge ththe pprojector:
adapter tto ththe projectorowerr a adad pterr too the wall outlet
rning OffOff t thhe Projectorr
old thee poower button for 3 3 seecoc nddss untill the e opoptical enenggines offff.

1. Projection lens The projection lens emits the image from the projector. Make sure there is nothing obstructing the lens to obtain a clear image.
2. Focus adjustment If the projected image is not in focus, move the ring to the left or right to bring the image into focus. A clear picture can be acheived at a distance of 10” - 90“. Please see page 6 for focus and throw distances.
3. JoystickUse the joystick to navigate through each menu. The joystick behaves differently in each submenu. The diagram below depicts the language used in the rest of the manual to describe the functionality of the joystick.
4. Escape (ESC)In most scenarios, the escape button exits from the current menu to the top level menu. Please see each menu section to learn more about this button.
5
General Operation
from m tht e othing obsstrructingg tthe
ge.
mentcteedd imimagge isis notot in focus, mmovve e ththee ring
left oorr riighght to bringng thehe image inntoo focuuss. A A lear pictuturee can be acheiveded aat a distaancce of 10” - 90“.
PPlelease seee ppage 6 for focus andn tthrow disstances.
cke the jooysystitick to navigatete t thhrouughgh e each menunu. ThThe joystit ckck behehavess
fferenttly iin each submenu. . Thhe diiagagram bebeloloww depictts s tthe lalangnguauageed in tthee rest of the manuaal to ded scribe the functctioionanality of thhe jooysystititickckck
pe (E( SCSC)cennara iooss, t thehe e escapape buttttonon e exixitsts f froromm ththe e currrrrrenenenvel menunu. PlPlease seee e eaach menunu sectitiononn tttooo

Tripod Adapter
Insert the tripod to the bottom of
the projector as shown to the left.
Confirm that the tripod is securely
fastened before turning on the
projector.
General Operation
6
Focus Adjustment / Throw Distance
The focus can be adjusted by turning the wheel located at the front of the projector. The projector is capable of the distances specified on the right.
TrTrippodo AAdad ptpterer
Inssertrt ttheh tripod too the bboottotom m of
ththe e projojector ass s shoownwn t too ththe leleftft. . .
CoConfirm thaat t the e trtripipodod is secucucurrr
fasteneneded b befforore turnrninng g g ononon
prp ojojeector.
ngg the wheel lloccated aat te projo ecctotor r isis c capapablle of the
he right.t

1. A/V Port – The P1 Jr. can project video from standard composite video sources. A resolution of 720x480 can be supported. Please see page (8) for more information about AV Input Devices.
2. Power Button - To turn on/off the projector, press this button for 3 seconds.
3. Mini USB Port – The Mini USB port is designed for data input from USB OTG devices. Please see the USB Data description on page 14 to learn more.
4. Projector Power – The P1 Jr. accepts 100-240V 50-60hz power at 2000ma. The charge receptacle is found on the back of the projector. The P1 Jr. can be operated during charging.
5. SD Card – The P1 Jr. can accept up to 8GB SD Cards. For accepted file formats please see the specifications page (19) for additional information.
Inputs / Outputs
7
n/off ththe e pprojector,3 secondds.
Port t –– ThThee MiMinin USSB pport is designed foor dadatat inpnpuut from USUSBB OTOTG G dedeviv ces.s. P Pleeeasasasdescrcripiptiionon o onn papagege 1 4 tot lleae rn more.
Projecctoor Power – The P1 J r. a accepeptst 100-24040VV 50-60h0hzz powewer atat 200000mma.a.a. TTTund onn the back of the prrojeectc or. The P1 Jr. can n bebe o operatedd duuriringngng
5

The AAXA P1 Jr. pico projector features an onboard media player complete with onboard menu system. The onboard menu system allows the user to select from different video inputs as well as video and picture playback.
AV (Audio / Video) Input
Selecting the AV input will enable the P1 Jr. to display video from a device connected to the AV port. Input resolution can be either NTSC or PAL of up to 720x480 video resolution.a. To connect an A/V cable, insert the 3.5mm portion into 3.5-2.5mm adapter. Place that in to the A/V port of the projector and the other end to external device.
Menu System
8
enablee thehe P P1 Jr. to d disisplplay nnected tto t the AV port. Inpuput
eitherer N NTSC oor PPAL of up to eo reesosolulutitioon.
nnecctt ann A A/V/V c cabable, ininseertr ttheh 3.5mm portiiononnto 3.5-5-2..55mm adapter. P laace t thaatt in to the A/A/V V
port oof thhe projector and tthee o thherer e endd toxternnal device.ernnal device.

Menu System
AV (Audio / Video) Input (cont’d) b. Click on the “AV input” icon in the main menu. A blue screen will appear and the projector will be ready to accept an A/V signal. c. Turn on the external device and make sure it is properly set up to output video. d. Possible A/V sources: Standard Composite (included), iPod/iPhone, HTC Series, Nokia Series, DVD Player (non Bluray / HD), Cable Box (non HD), Nintendo Wii (composite only), Microsoft Xbox (composite only), Sony Playstation (composite only). You may purchase the cable necessary to connect your external device from AAXA or your AAXA dealer. Please see your device’s instruction manual for more information. Please ensure your device has video output capabilities. For example some cell phones have the video output feature blocked.
SD Card
Selecting the SD Card input opens a submenu to allow you to select the type of data you would like to access. The submenu includes access to: Videos, Photos, Music and Files. Please see the SD Card Memory section on page 10 to see the menu items.
USB Data
Selecting the USB Data input will allow the user to access data on their USB OTG (On-The-Go) device. Please see the USB Data section on page 15 for additional information.
Setup
Selecting the Setup option allows the user to change various settings on the P1 Jr. Please see the Settings
9
Menu System
reenn w will apppeaar and the projecttoro wwililil
s prp operly set upp to oututpuut video.te ((inclclududeded),), i iPod//iPPhone, HTHTC SeSeries, Nokia a SeSerries, DVD PPP
HD), Ninntetendn o Wiii (c(comompopossite only), MiMicrc os foftt XbXboxox (compmposositite oonononlyy).). Y You mayy puurchase the ccablble nenecec ssary to connect yyouourr exteternrnalal
ur AAXXAA dedealer. Pleaasese sseee your deeviice’s iinsnstrtrucctition manual fofor momorereensure yyouourr device has viddeoe ooutput ccappabilities. For examamplple someme ccelell l phphononneseses
outpuput t featuure e blocked.
d
lecting g tthe e SD Card inpuut t opopenns s a a susubmenu u toto aallllow youu t to seelelect thehe t typype e ofof d d datatatcess. ThThe e submenu includees aaccessss to: Videdeosos, PPhotoss, , MMusiicc anand d Filees.s PPleleeasasas
ion oon page 10 to see thee meenu items.
ataa
g thhe e USSBB DaDatata i inpnpuut will l alalloloww ththe e ususere ttoo acceeessssssB Dataa s secectition on paagge 15 for r aadditiioonalalal iiin
etup opoptionon a lllowows thththeee

To access data from the SD Card slot:
a. Insert the SD Card as shown. The gold connectors on the card should face down. Maximum of 8GB SDHC cards are supported.
b. Access the SD Card Memory menu from the main menu.
c. Select one of the icons to access related data on the SD card.
10
SD Card Memory
on the HC cards
menuu f from thhe e mamain menu.
ns to acccesesss related data onn thhe SD caardd.

Videos
Selecting the video menu brings up the video selection submenu seen on the right. To navigate to a video, press the joystick up and down. To select and play a video, click the joystick. For compatible video formats, please see the specifications page.
During playback, the joystick controls are:Volume Control: Right/LeftFast-Foward/Rewind: Up/Down Speeds of 2x, 4x, 8x, 16x, 32x; to play at normal speed, cycle through all speedsOpen Video Playback Menu: EnterStop: Escape
After the menu is opened, use the joystick to operate the following controls: 1. Previous 5. Next 2. Rewind 6. Stop 3. Play / Pause 7. Repeat / Shuffle / Cycle 4. Fast-Forward 8. Brightness / Contrast
11
SD Card Memory
o
ck up andeo, clicck k ththe
ideo forormamats, pleaasese s papagege.
yback, thhe jjoystick controlss a rere:me CConontrol: RRigght/Left
Fastst-F-Fowowarard/d/Rewwindnd: Up/Down SpSpeeeedsds o off 2x2 , 4x4 , 88x, 161 x, 32x; to play y att normal speeded, , cycycle e thhrorough all spspeeeedds
Open Video Plaaybback k MeMenu: EnteterrStop: Escape
AfA ter the menunu iss opened, , use ththe e jojoysystitickck toto oopeperaratete t thehe f followiwingng c conontrtrolols:s: 1. PPrereviviouous 5. Nextt2. Rewind d 6. Stoopp3. Plaay y / / PaPaususe e 77. R Repeppeaeaeattt
Fast-FoForwwarard 8... BBB iriri

Photos
Photos will initially be seen in thumbnail mode. Selecting a photo will begin displaying the pictures in slideshow mode (bottom right).The slideshow can be customized in the Settings Menu. Please see the Slideshow page to see what settings can be customized.
During the slideshow, joystick controls are:Previous/Next: Left/RightPause: Enter the slideshow submenu by clicking on the joystick to bring up the submenu. Select play / pause by clicking on the joystick.Open Slideshow Controls: Enter (below)Exit: Escape
Use the joystick to operate the controls once the menu has been opened. 1. Previous 5. Zoom2. Play / Pause 6. Repeat / Shuffle / Cycle3. Next 7. Brightness / Contrast4. Stop 12
SD Card Memory
e. he
m rigght).zed in tthehe
e the Slidideseshow paagegecann b be customomizzede .
e slideshowow, joystick controlols s arare:ous/N/Nexe t: Leeft//Right
Paususe:e: E Entntere tthe sslidedeshow submenu bby clc icickinggoon tthehe j joyoyststick tot bbringng up the submenenuu. SSeleleectpplay / pause bby y clclickikingng o on the joysystiti kck.Open Slideshoww CContrtrolols: Enterer ( (bebelow)Exit: Escape
UsU e the joystiickck ttoo operate e the e ccontntrorolsls o oncncetht e memenunu h hass b been opopeneneded. . 1. PPrereviviouous 5. Zoomm2. Play / Paususee 6. Reppeaeatt / ShShShuu
Nexxtt 77. BrBrigigghththtnnnStop

Music
To listen to music on the P1 Jr., select the Music icon. A list of available music files will appear. Click on the desired song to begin playing. Move the joystick up and down to navigate between songs. To select a song, press enter(click on the joystick).
During playback, joystick controls are:Volume Control: Left/RightPrevious/Next Song: Up/DownOpens Control Menu: EnterStop/Exit: Escape*Note: The above controls only apply when the control menu is not open.
Use the joystick to operate the controls once the menu has been opened. 1. Previous 4. Stop 2. Next 5. Repeat 1 / Repeat All / Shuffle 3. Play / Pause
T
SD Card Memory
13
ic pear.
playiy ng. n to navavigigatatee
a song, p reress enterer).
yback, jooyststick controls aree::me CConontrol: LLefft/Right
Prevvioiousus/N/Nexxt Soongg: Up/DownOpOpenenss CoContntroll Meenunu: EnterSStop/Exit: Escacapee*Note: The aboveve ccono trrolols s onlly apppplyly when n ththe coconntrorol l memenu i is s s nnn
Use the joystickk t to o opopeerate the coontntror ls ooncnce e ththee mem nununu 1. PrPrevevioious 44. . StStopop 2 2. NeNext 5.5. R Reppeae t 1 / / / ReReRe 33. Play // P Pause

SD Card MemorySD Card Memory
Files
The file menu allows for browsing and deletion of the files currently on the SD card. Click on the Files icon from the main menu to enter the submenu. To navigate through the list, press up and down on the joystick. To delete a file, select it from the list by clicking on the joystick. This will give you the option to delete. To view the file properties, select the file and it will appear on the right.
14
SD Card Memory
on k on
o enter oughg thehe l listt,
e joysticick.k T To deletetehe lilistst b by y cliickkingg on the
ll giveve y youou the opttioion toto delete. e file proopererties, select the fi filee a nd
l appepeaar on thhe right.

The P1 Jr has the ability to read data from a USB OTG (On-The-Go) enabled device (such devices include cell phones, flash drives, etc). This allows the user to view the data stored on the USB OTG enabled device from the P1 Jr.
To access the data on your USB OTG device, plug your USB device to the back of the P1 Jr (shown below). Once the connection is made, select USB Data from the main menu and the data will appear. You should now be able to access the data on your device.
If the data does not appear, try reconnecting the device. If that does not resolve the issue, check with your device manufacturer to confirm that the device is a USB OTG device.
15
USB Data Display
Go) enabblled d device (such ddeveviciceeedata sstotored oon tthe USB OTG enabbledd ddd
e, plug yoyouru U USBS devvicce to thee b bacck k of the P1 JrJr ( (shshown belololoUSB Datata ffror m the mamainin m menu and thhee dadatat wilill apapppear. YoYou u shshouuulll
n yoyourur d device.e
ppear, try rrecconnecting the ded vvice. If thhatt does not resolvee t thehe i issuee, , chchececk k wiw thhh yyyrer too c confirmm tthat the device is aa USBSB OTGG ddevice.

Settings Menu
The Settings menu can be accessed through the main menu by selecting the Setup icon. This submenu allows the user to customize the P1 Jr.
Slideshow – The slideshow setting allows the user to change the speed, transition style, and display mode of the slideshow. Please see the slideshow section to see more details about changing the settings.
Language – Supported languages include: English, French, German, Italian, Spanish
Keystone – The P1 Jr.’s keystone settings can be changed here. Please see the Keystone section on the following page to see how this affects the image.
About - Selecting this will display general information about the projector.
Reset - Selecting this will restore the projector to the factory defaults.
16
the userer t to d displaay y mmode off
eshohoww sectioionn toto seeg the e ssettttinings.
porteded l lana guaagees include: English,h,Frennchch, GeGermrmana , Ittaliai n, Spanish
ystonee – TThhe P1 Jr.’s keysystotonen ssete titingngs can bebe chahanged herere. ease seee tthe Keystone secttionn on tthehe follllowiwingng page toto see h howow t this s affaffeccctststs
t - SSellece ting this will disispplayay ggeneral infforormam tionon aaboboutut t thehe p pprrr
elecectit ngg t thihiss wiwill rreestoree t thehe p prorojejectctoror to o tht e fafaactctct

Slideshow
Slide show speed – Controls how long each picture is viewed. Intervals range from 3 seconds - 5 minutes.
Transition - Controls the transition between each picture.
Display mode - “Fit to screen” will compres or enlarge the picture to the native resolution of the projector. Pictures may become distorted when compressed or enlarged.“Normal” will display pictures in their actual resolution.
Keystone
The P1 Jr.’s keystone settings will only affect vertical keystone. This means only the top and bottom of the image may be adjusted. Press the joystick left or right to change the keystone.
17
Settings Menu
wed.
n each pipictc urure.e.
compmpres or eenlaarge the tion ooff ththee projectorr. P icctut res
when coompmpressed or enlargrgeded.play pipictctures inn ththeir actual resoluttion.n.
ystonee
he P1 Jrr.’s kkeystone settingss w ilill onnlyly a affect verertitical keysysttone. ThThisis m meaeans ooonlnlnlge mmayy be adjusted. Presss thee joystick left or righght toto change e thhee kekekeyyy
18
Troubleshooting
THE PROJECTOR DOES NOT TURN ON
Possible CausesThere is no power
The power button was not held long enough
NO PICTURE / FILE NOT SUPPORTED
Possible CausesThe video source is not properly connected or selected
Incorrect file extension / Video is ecoded with incorrect codec
IMAGE IS BLURRED
Possible CausesThe projector is not in focus
Image appears stretched when connected to an external device.
SolutionCheck to ensure the power outlet or battery source is good. Check the power adapter to ensure a proper connection with the wall outlet as well as the Projector. Confirm that the unit is fully charged and has enough power.
To power on the projector, the power button needs to be depressed for a full 3 seconds. Try holding the power button until the optical engine turns on.
SolutionCheck the video source signal to ensure that it is properly connected.Select the correct input source by choosing the input desired from the main menu.
Please refer to “Specifications” page to see which file types and codecs are supported. Verify that the file was encoded properly.
SolutionAdjust the focus with the focus adjustment dial until the image comes into focus.
Verify the output setting on the device is configured to 4:3 aspect ratio.
Troubleshooting
ble Cauusessojectoor iss not in focus
ears sts retetched when connecnecteded to an externarn l devicevice.
properlyy con connectedd or sselected
file extetension on / V/ Video is es ecodecodedd withth incocorrect codec
AGE IS BLUURREED
SoluululutiononononChecccck thhhhe vieee deo soursousousou ce signal to ensure thaaatat it is propeopeopeoperlyrly rlyrly connonnonnonnectectecteeddddSeleccct tc he ce ce ce correctct it it innnnput source by cby cby cby chooshooshooshoosing ing ing ing ththththe input dedededesssires d frd fr fr frooo
o ensure the e e poooweo r outttlett ooor o battery source is good. CCheChecChe k thk thk thk theeeedapter to ensure a prooopo er connnnnecttttion with the wall outlet aaaas wewewewell all as ths ths ths the
Confionfinfinfirm trmrmrm hat the unnitnn isiss s fully chargrgrgerg d d d d and has enough powwwwer.
To powerr on on on on the the ee proproprojpro eeectoe r, the powerererr but b b b ton ononon needneedneedneedss to be bebe be ddeprd essed fod fod fod for ar ar a r a fullllullullssecoss nds. Try holololdingdindindin thethethethe pow po po p er button unnnntiltiltil til thethethethe optioptioptioptical engine tne tne tne turnsurnsurnsurns on. on. on.on.
Pleleeale seeee referferferfer to “Specificificififications””” ” pppagep to seeee e wwwhicw h file tye tye tye tysuppsuppsuppsupported. Verify that tt tt tt the fihhh le wwwwasasasas encodddded pededed roproproprope
SoluuuutitiontitiAdjust tst tst tst the fe fe fe focusooo witititth thh th th t e fofofofocccucu
VeriVeriVeriV fyfy tfy tfy the ohe ohe ohe output se

PROJECTION SYSTEM
Projection Lens: Manual FocusProjection Image: 10 ~ 50 inchesLamp: Single Chip White LED 15,000 Hours
GENERAL SPECIFICATIONS Audio Output: Onboard 1w Mono speakerSupported Languages: English, French, German, Italian, SpanishAspect Ratio Control: 4:3Dimensions: 105*56*20mmWeight: 126gPower Consumption: 5V, 2000mA, 6 WattsPower Supply: AC100~240V(Free Voltage) 50Hz/60HzConformances: CE, UL
INPUTS / OUTPUTS Video In: Composite A/V (2.5mm Jack)USB: Mini USB PortSD Card: SDHC (8GB maximum)
SUPPORTED FORMATS
Video: AVI; MPG; 3GP; RMVB; RM; VOB; DATVideo Codecs: DivX; XViD; MPEG-2; RV (8/9/10)
Audio Files: MP3Audio Codecs: AAC; MPEG2; ;
Images: JPG
19
Specifications
e LEDs
Onnboboarardd 1w Monono spspeaker EEnglglish, French, Gerermaman,
Itaalian, SpanishConntrtrolol:: 4:33
ionss:: 1105*5*56*20mmeight: 12626g
ower Coonssumption: 5V5 , 20200000mA, 6 WaWattswer Suupply: ACC100~240V(Free VoVoltl agge)
550H0Hz/z 60Hzmaancn ees: CE, UL
OUTPUPUTSTS
CCompossiti e e A/A//V V V (2(2(2 MiMinini U USBSBB P P Pooo S SDHHHCCC (((
UPPORTTEDD FORMATS
VViddeo: AVVI; MPG; 3GP; RMMVB;B; R RRMMM VVOBO ; DATVViddeo Codedecss:: DiD vX; XViDD;; MPMPEEG-2; RV V (8(8/99/1/10)0)
AAudio FiFileles: M MP3AAudio Codecs: AAAC;C; M MPEPEG22; ; ;;
IImages: J JPGPG


