Trauma Management with Cast Application AADO Dr. … · Trauma Management with Cast Application...
53
Principles of Casting Trauma Management with Cast Application AADO Dr. WH Yip Queen Elizabeth Hospital 10 th August 2014
Transcript of Trauma Management with Cast Application AADO Dr. … · Trauma Management with Cast Application...

Principles of Casting
Trauma Management with Cast Application
AADO
Dr. WH Yip
Queen Elizabeth Hospital
10th August 2014

Introduction
Basic Principles of Fracture Treatment
Reduction
Immobilization
○ Temporarily
○ Definitive
Rehabilitation
Plaster Cast
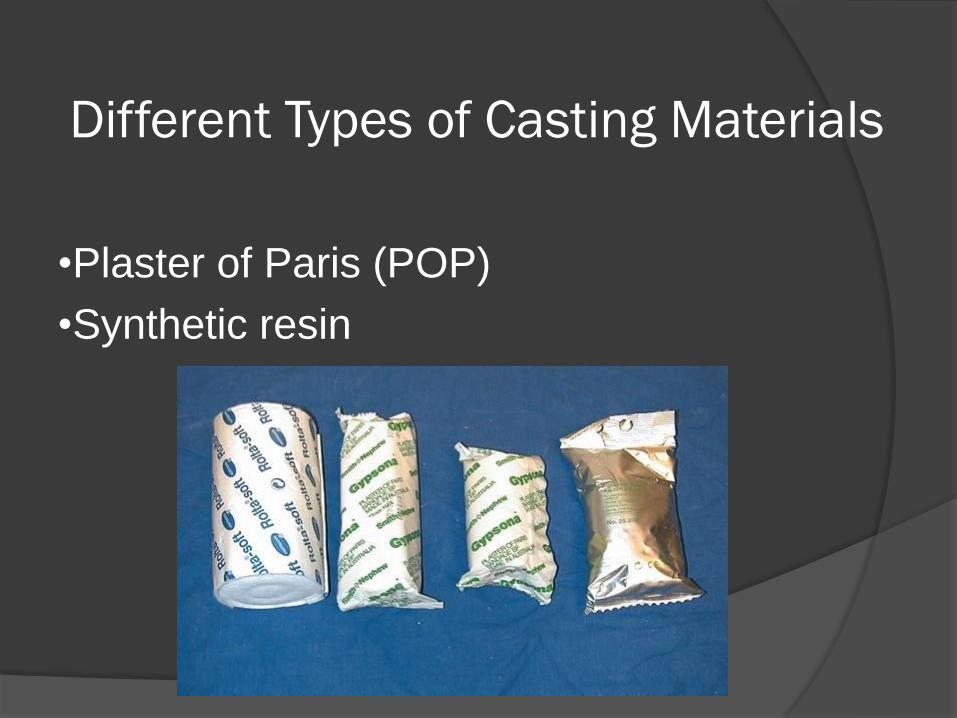
Different Types of Casting Materials
•Plaster of Paris (POP)
•Synthetic resin

Plaster of Paris (POP)
Gypsum Early use in Paris to make building plaster and
cement
Chemical formula: calcium sulphate dihydrate (CaSO4.2H20)
Produced by heating gypsum to about 150°C
CaSO4·2H2O + heat → CaSO4·0.5H2O + 1.5H2O
(released as steam)
When the dry plaster powder mixed with water, it
reforms into gypsum → exothermic reaction

Plaster of Paris (POP)
Setting time
Starts about 10 minutes after mixing and is
complete in about 45 minutes
Not fully set for 72 hours
Impregnating fabric materials with gypsum to make plaster bandage Gyspona: on leno cloth
Orthoflex: on rubber elastic fabric
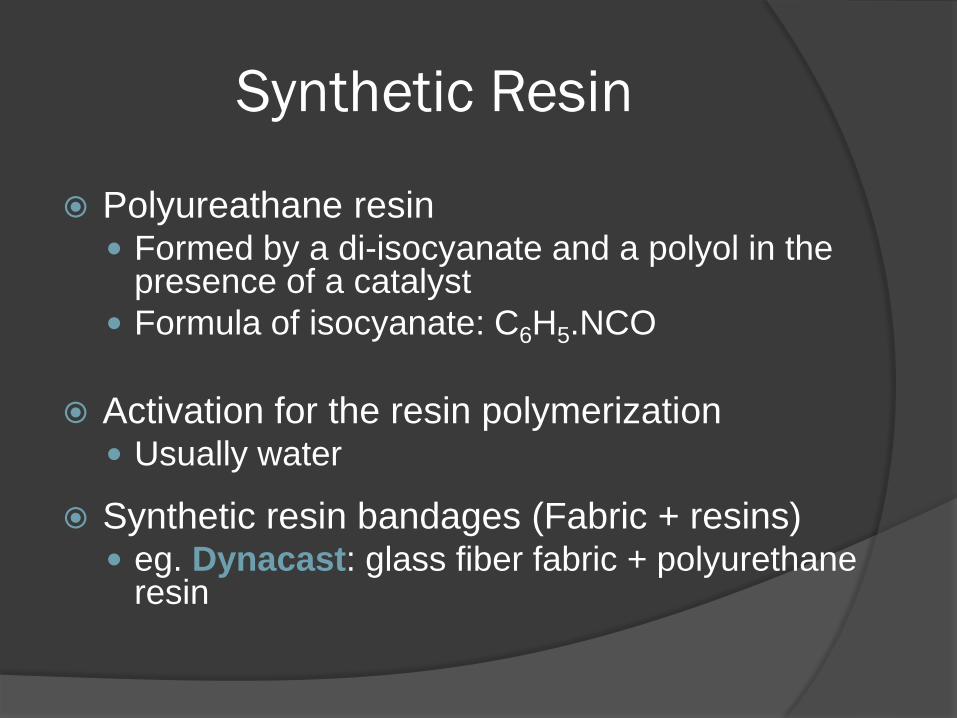
Synthetic Resin
Polyureathane resin Formed by a di-isocyanate and a polyol in the
presence of a catalyst
Formula of isocyanate: C6H5.NCO
Activation for the resin polymerization Usually water
Synthetic resin bandages (Fabric + resins) eg. Dynacast: glass fiber fabric + polyurethane
resin

Ideal Casting Material
Easily applicable
Conforming to the injured limb
Able to set rapidly
Adequate strength to hold reduction
Radiolucent
Light
Water resistant
Good ventilation

POP Synthetic Resin
Inexpensive Shorter setting time
Good molding capacity More radiolucent
Long storage time Lighter
Easy to handle Stronger
Water resistant
Better ventilation
Advantages
Resin Bandage is not a superior material

CR + POP
What does it mean ?

CR (Close reduction) Manipulation of the fracture to improve the position of the
fragments
As soon as possible
Under appropriate anaesthesia/muscle relaxant/sedation
Manoeuvre : ○ Traction Distal part of the limb is pulled in line of the bone
○ Counter-traction
○ Manipulation As the fragments disengaged, they are repositioned (by reversing the
original direction of forces)
○ May need to exaggerate the deformity first

POP
Application of cast
Maintain the position with a “3-point fixation” Casting
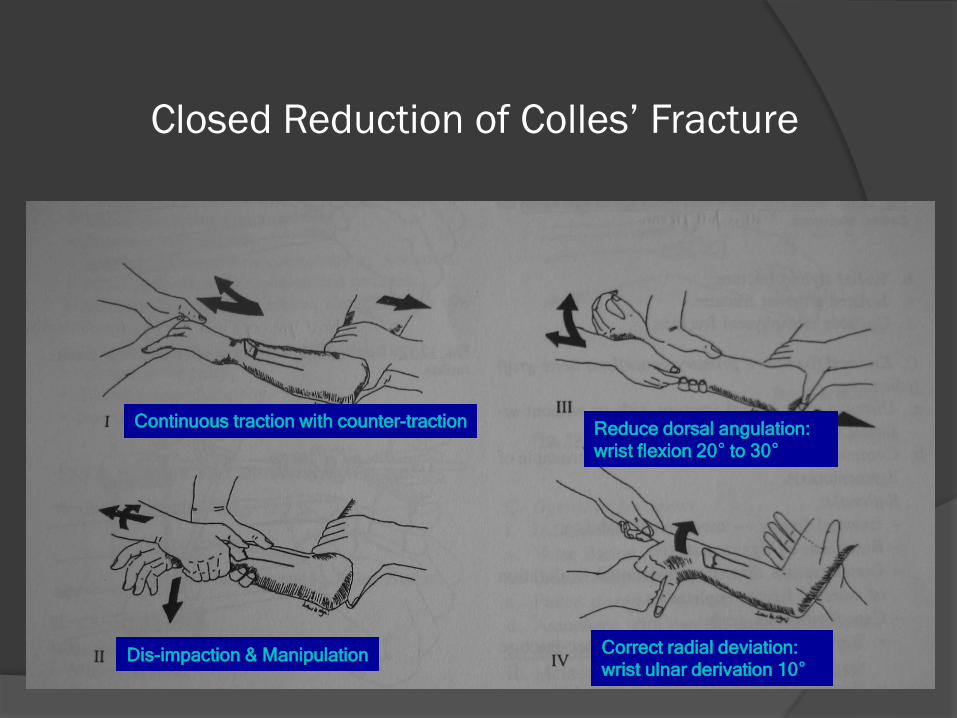
Closed Reduction of Colles’ Fracture
Continuous traction with counter-traction
Dis-impaction & Manipulation
Reduce dorsal angulation:
wrist flexion 20° to 30°
Correct radial deviation:
wrist ulnar derivation 10°

Soft Tissue Hinge
Interlocking
Exaggerate the deformity release the
interlocking without excessive traction
Fragments repositioned by
reversing the deforming force
Reduction maintained by the soft
tissue hinge (ligamentotaxis)

Molding 3-Points Fixation: •A third force to neutralise the couples and the
system becomes stable
•It takes a curved cast to produce a straight bone
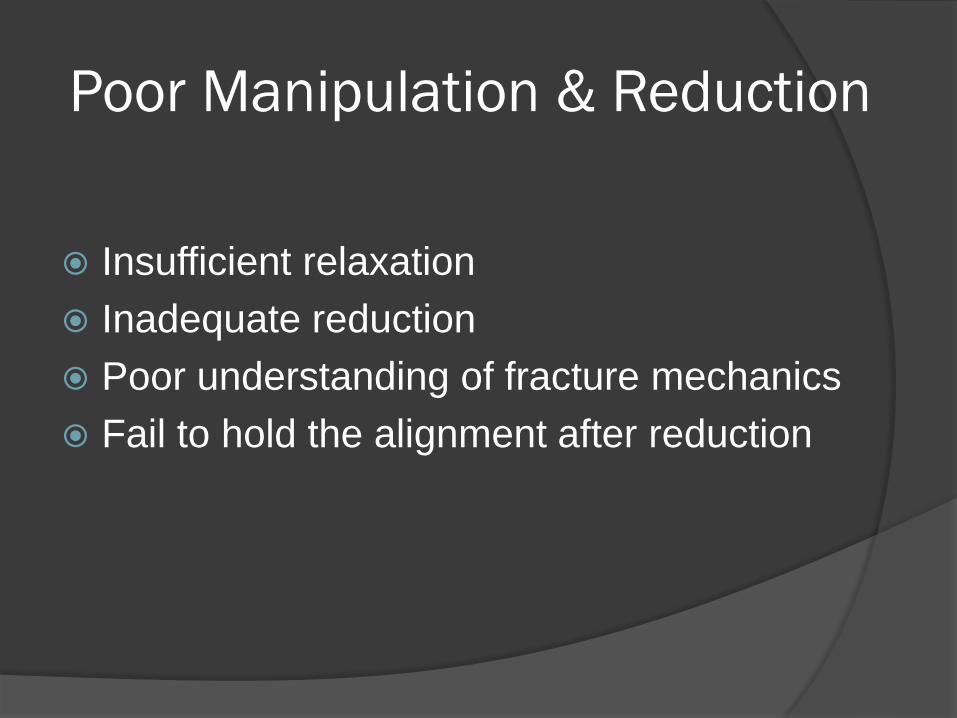
Poor Manipulation & Reduction
Insufficient relaxation
Inadequate reduction
Poor understanding of fracture mechanics
Fail to hold the alignment after reduction

Preparation before casting
Determine the aim: Temporarily Vs Definitive
Choose the appropriate casting material
Use the appropriate size bandage
e.g. 4” hand & forearm, 6” leg, 8” thigh
Pain control for close reduction
Get an assistant
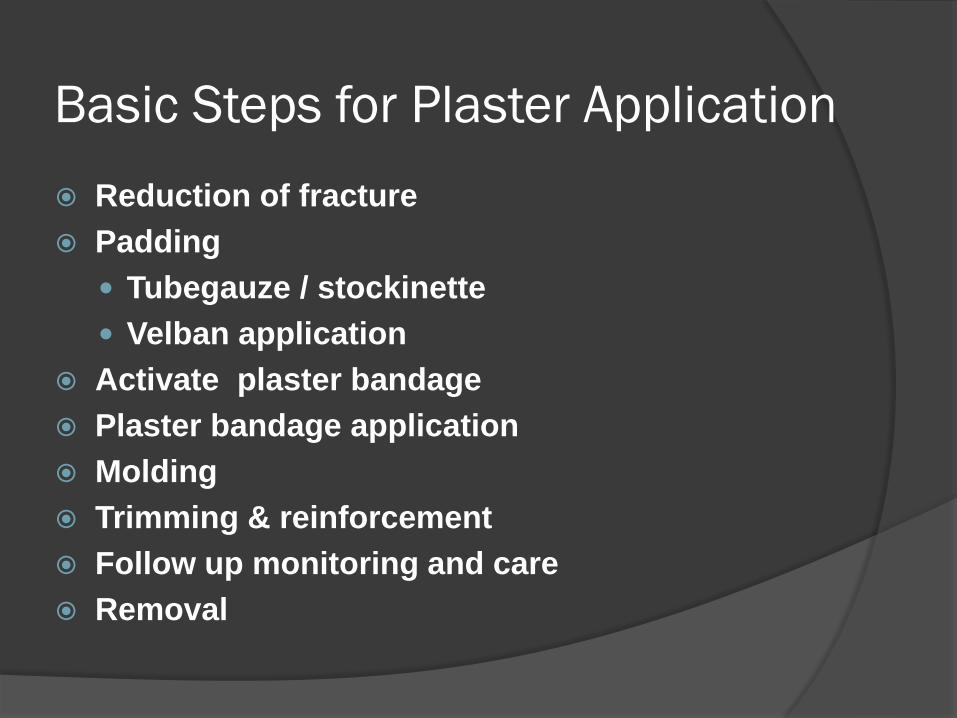
Basic Steps for Plaster Application
Reduction of fracture
Padding
Tubegauze / stockinette
Velban application
Activate plaster bandage
Plaster bandage application
Molding
Trimming & reinforcement
Follow up monitoring and care
Removal

Stockinette first
Extending to the joint
above and longer
than the limb for easy
handling of the
extremity
Padding –
Stockinette

Padding –
Velban
Smooth and even
Overlapping 50% of the preceeding turn
Thin layer is enough, otherwise would affect the fittness & strength of the cast
Thicker at bony prominences
Control swelling

Plaster Bandage Activation
Lifted with dry hands
Thorough immersion in water at room temperature
Gently squeezed out water until no more bubbles
Remove from water and further squeeze out excessive water
at 30° angle to allow air bubbles to escape
Roll out 10-20cm POP bandage before
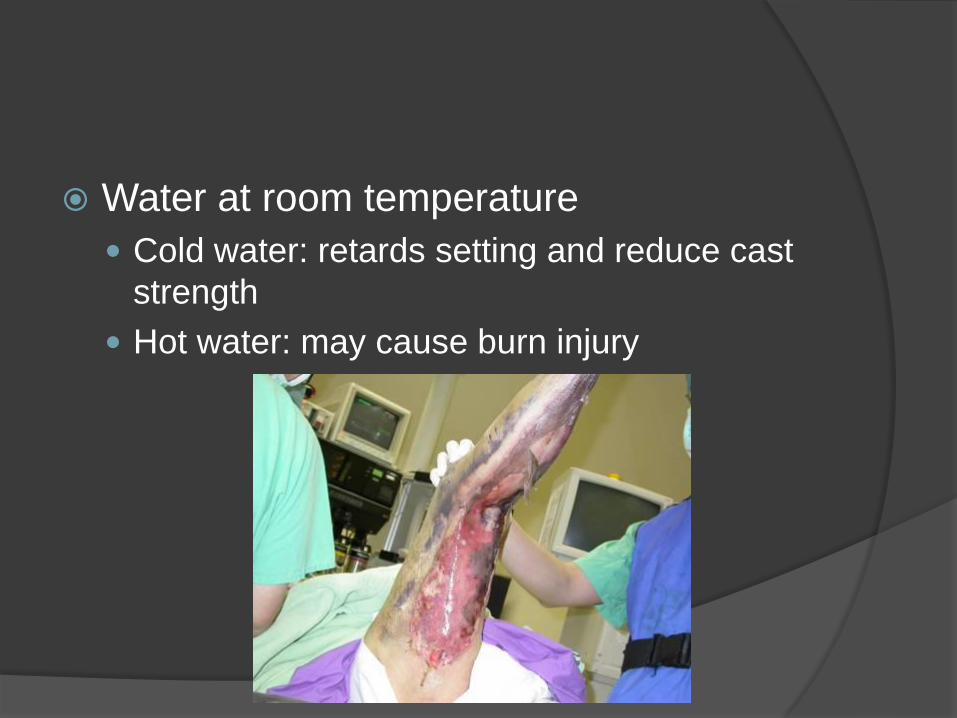
Water at room temperature
Cold water: retards setting and reduce cast
strength
Hot water: may cause burn injury

Smoothly and evenly applied
Cast may breaks at the junction
between thick and thin layers (stress
risers)
Applied with finger tips to ensure that
the bandage will not be too tight
Continuous folds to cover at least half
of previous fold
Smooth out every layer to remove air
Figure-of-8 when crossing joint,
prevent in-folding of plaster causing
sore
Plaster Bandage Application

Plaster Bandage Application
Cutting out or out-folding the
angles of POP slab to avoid
pressure point at corner
Stockinette fold back at the end to
make the edge smooth
23

Molding
To fit external anatomy of the limb & create 3-point fixation
Start during application
Continuous & Dynamic
Use palms and thenar eminences (NOT fingers)

What are they doing ?
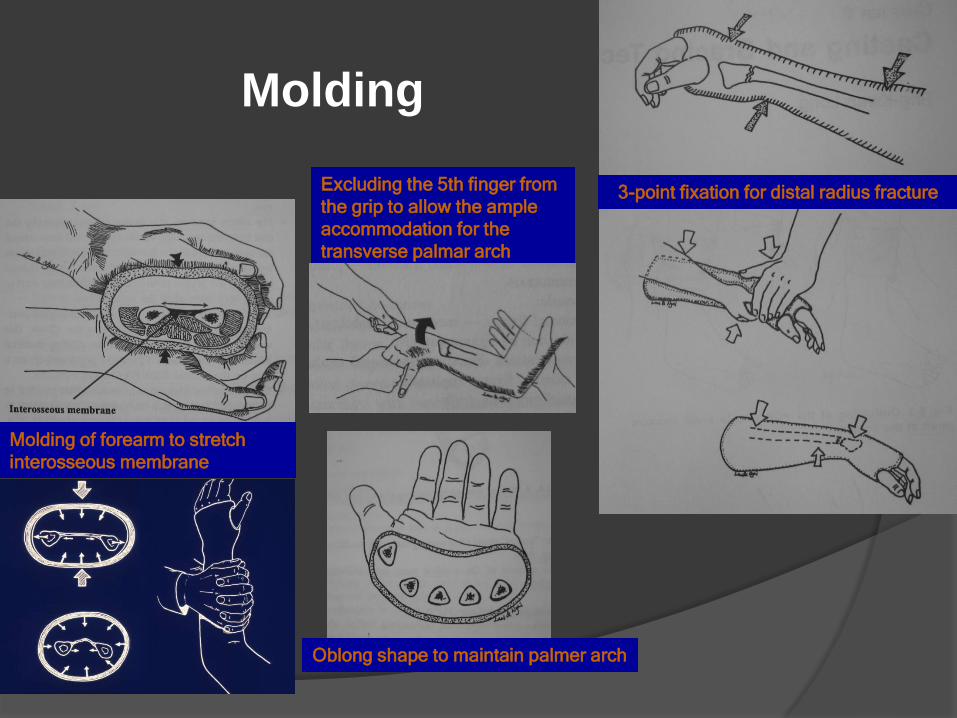
Molding
3-point fixation for distal radius fracture
Oblong shape to maintain palmer arch
Molding of forearm to stretch
interosseous membrane
Excluding the 5th finger from
the grip to allow the ample
accommodation for the
transverse palmar arch

Trimming
Allow unobstructed motion for joints that
need not to be immobilized
Prevent impingement sore
e.g. Short arm POP for distal radius #
Extends from knuckles & palmer crease to below
elbow check free motion of elbow, thumb, little
finger, & MCPJs

Check Before Trim

Trimming
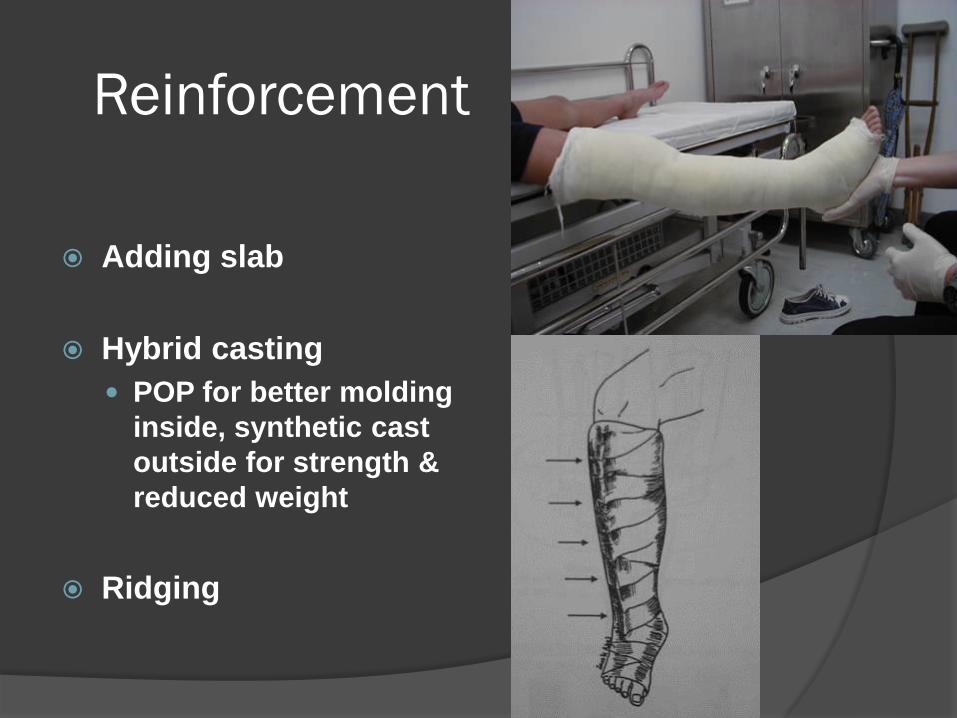
Reinforcement
Adding slab
Hybrid casting
POP for better molding
inside, synthetic cast
outside for strength &
reduced weight
Ridging

For Wound Inspection
Making a hump with
thick gauze over the
wound site for opening
of window
Cut out the hump after
POP set

Other Types of Casting
¾ Slab for distal radius
U-slab for humerus
Sarmiento cast for tibia

Cast Removal
Initial bivalve at diametrically opposite points on
the circumference
Concave side
Cutting should not pass bony prominence
Oscillating electric plaster saw or plaster shears
Spreader, bender
Immerse POP in water, peel out after softened

Basic Equipment

Oscillating Electric Saw
Vibrates at low amplitude
Cuts off stiff material but not skin
Only used on dry and padded plaster
Stepping without dragging
The blade can become very hot

36
Oscillating
Electric Saw

37
Always split on
the Concave side
Do NOT split plaster
on the Convex side

Spreader

Plaster Shears

Pitfalls in Plastering
Poor plaster technique will end up with:
Poor reduction mal-alignment
Excessive padding / Edema subsided loosening
Too tight Neurovascular compromise / compartment syndrome
Too hot deep burn
Poor application across joint joint buckling
Lamination of plaster air trapped weaken the cast
Poor molding failed immobilization / impingement
Poor trimming sharp edges / impingement sore Saw injury on removal
41
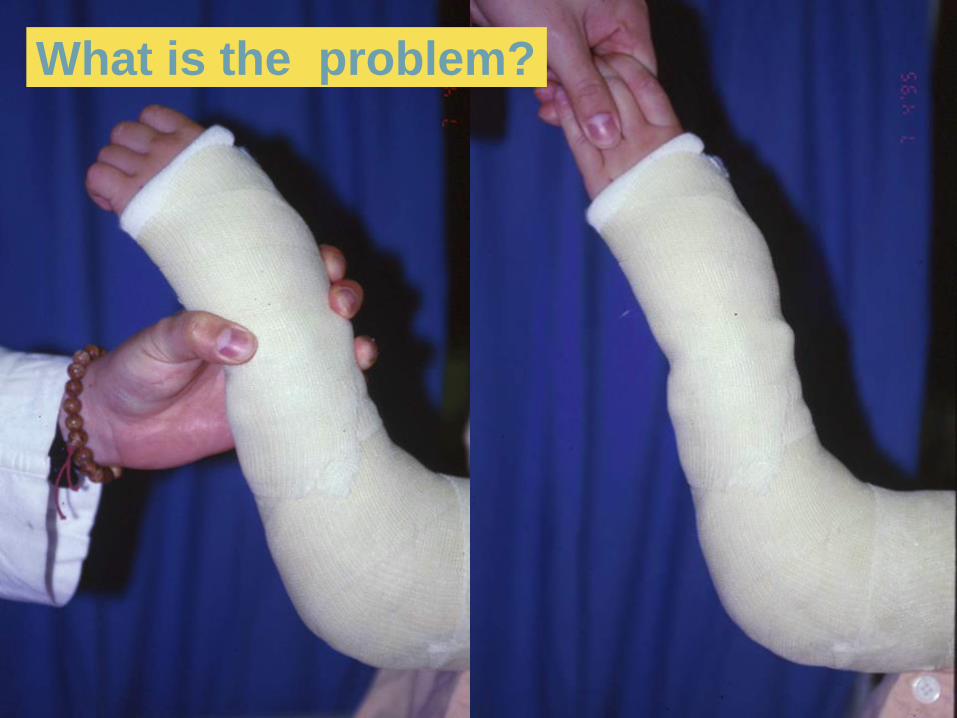
What is the problem?

42 Don’t “sign” on the cast!
Poor Handling

What is the problem?

Buckling
Figure –of- 8

Pressure Sore

Clues of Plaster Sore
Itching & burning sensation
Fever, sleep disturbance & fretfulness
Offensive smell or discharge
Fluid-stained plaster
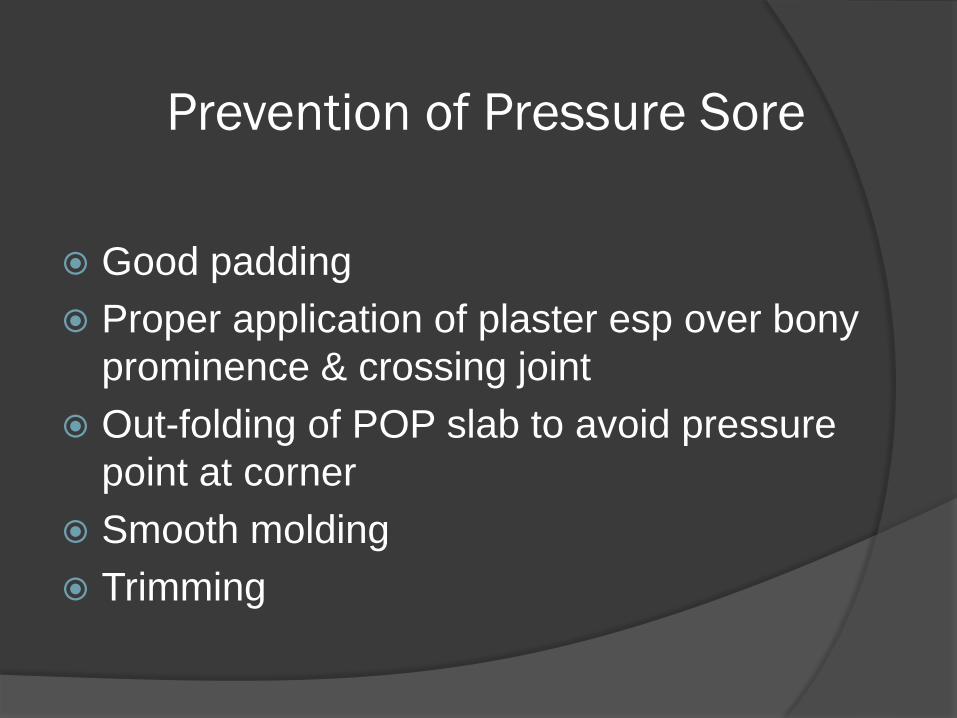
Prevention of Pressure Sore
Good padding
Proper application of plaster esp over bony
prominence & crossing joint
Out-folding of POP slab to avoid pressure
point at corner
Smooth molding
Trimming

Plaster Burn
Heat generated can cause burn, especially if patient is unconscious
Lower limb long leg POP need more layers for strength more exothermic reaction
Suggest to use pre-fabricated splint or synthetic cast for LL

Allergy

Follow Up Care
Check POP fitness
Detect complications: earlier vs late
Frequency & timing
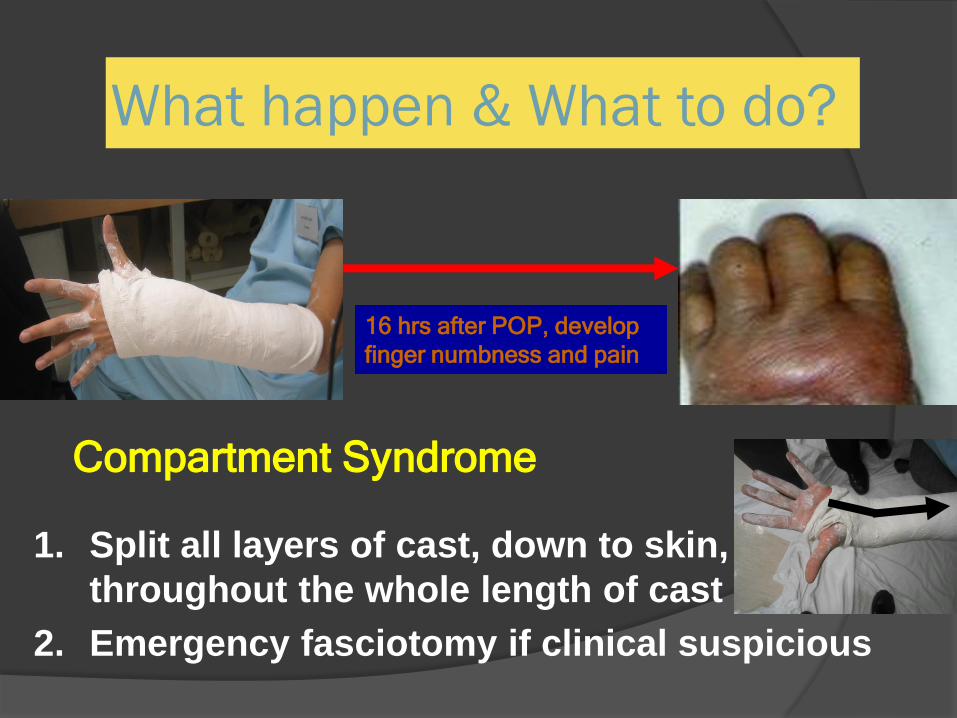
What happen & What to do?
16 hrs after POP, develop
finger numbness and pain
1. Split all layers of cast, down to skin,
throughout the whole length of cast
2. Emergency fasciotomy if clinical suspicious
Compartment Syndrome

Incomplete Slab
- for Acute Cases with Gross Swelling
Use ¾ dorsal slab for initial treatment of distal radial fracture to prevent over tightening of cast
Reduce the risk of distal edema / compartment syndrome
Complete cast and then bivalve For better maintainence of
reduction

The End
Thank You!