TrainingGuide - Caterease · TABLEOFCONTENTS Unit1:MenuManagerSetupFunctions 5...
59
Training Guide Customizing Your Food/Service Items in Menu Manager
Transcript of TrainingGuide - Caterease · TABLEOFCONTENTS Unit1:MenuManagerSetupFunctions 5...
Training GuideCustomizing Your Food/Service Items in
Menu Manager

Customizing Your Food/ServiceItems in Menu Manager
© Copyright 2014

TABLE OF CONTENTS
Unit 1: Menu Manager Setup Functions 5Setting Up Food Service Types 5Accessing Item Types from Event Manager 6Copying an ExistingMenu 9Adding Items to aMenu or Sub-Menu 9Creating a Description, Recipe, Label, Notes or Image for an Item 11Editing Additional Menu Item Details 12Fields Available in theMenu Items Grid 13Using the Prep Area Feature 15Generating a Production Sheet for an Event Order 16Establishing a Category for a New Menu Item 17Adding aQuickpick Item 18
Unit 2: Creating an Ingredients List 20Adding a New Ingredients List 20Adding an Ingredient to an Ingredient List 21Printing an Ingredients List 23Tracking UsedMenu Items via theMenu Item Usage Report 24
Unit 3: Using the Menu Manager Tabs 26AddingModifiers to aMenu Item 28Editing Additional Modifier Item Details 30Adding Required Items to aMenu Item 32Editing Additional Required Item Details 33Printing a Required Items List 35Tracking Required Items Activity 36Adding Package Items to aMenu Item 37Editing Additional Package Item Details 39
Unit 4: Menu Manager Tools 41CopyingMenu Items 41Making aMenu Inactive 43Inserting Page Breaks 44Using the Inventory Feature 44Using the In-Stock Feature 44Selecting an Inventory Item for an Event 45Assigning From and To Times for Inventoried Items 46Performing an Inventory Check in Event Manager 47Batch ProcessingMenu Items 52Updating Costing from Ingredients List 53

TABLE OF CONTENTS
Updating Costing from Another Source 55UpdatingMenu Pricing 56Updating Event Costing 57

Menu Manager SetupFunctions
Unit 1: Menu Manager Setup Functions
The Menu Manager is where you go to add or edit food/service menus. Nothing is hard-coded in MenuManager: Prices, costs, menu items (or even entire menus) can be added, deleted, or easily edited. Forthose Caterease users who want to get more advanced with their menus, we offer features such as cost,category, item code, digital images, description, ingredients, and required items. You even have the abil-ity to link menu items to the guest count, hide them in prints, set individual markup rates, and track yourinventory of reusable items.
Objectives
After completing this unit, you will be able to:
l Assign a menu item type to a menu item.l Add a new menu in Menu Manager.l Add a sub-menu to a menu.l Add a new menu item to a menu.l Add a price to a menu item.l Use the Quick-Column Customizing button to access menu item details.
Setting Up Food Service Types
You can establish up to eight food/service item types. Types are used in all fin-ancial calculations, and each of these types can be renamed and rearranged to suityour preferences. Your prints and reports reflect the types you establish and theorder in which you arrange them.
Setting Up Food Service Types
1. Click the Administration ribbon tab at the top of the screen.
2. Click General > Food/Service Item Types.Result: The Food/Service Item Types window opens.
3. To add a new Food/Service Item Type, click into the Type field and type thenew name over “NA.”Note: You can rename an existing field by clicking into the Type field, high-lighting the existing name, and typing a new name.
4. Click the down arrow to the right of the Image field and select an imagefrom the drop-down list.Note: images that do not display on the window by default are as follows:(Beer); (Wine); (Flowers), and (Delivery).
- 5 -

Unit 1: Menu Manager Setup Functions
5. Click into the checkbox under the Active field to activate the new Food/Ser-vice Type.Note: Removing the checkbox from the Active field makes the Food/ServiceType inactive, meaning the inactive field will not be an option on the Sub-Event display of Event Manager.
6. Click into the Associate Charges area to associate a Room, Labor, Deliveryor Misc (Miscellaneous) charge to the Item Type.
7. [Optional] To rearrange the order of your Food/Service Types, click into theType or Image field and hold down your left mouse button. Then simplymove the fields up or down into the desired location.Note: Click the Reset button at the top right-hand side of the screen torestore the default settings.
Accessing Item Types from Event Manager
1. In Event Manager, click the Settings button from the Food/Service tab andselect Show Item Type Tabs.Result: A series of tabs, one for each established item type, displays at thetop of the window (although you may change the alignment to bottom, right,or left).
2. [Optional] From the All Items view (the default view) click on the FoodItems column to view types that have been designated Food.
- 6 -

Unit 1: Menu Manager Setup Functions
3. [Optional] Click on the other tabs (Beverage Items; Liquor Items; EquipmentItems; Labor Items; Room Items; Other Items) to filter each item separately.
4. Click the Save Window Settings button if you would like to retain thisnew look as your default.
Adding a New Menu
All of your programs default menus - for food and beverage items, rental equipmentand even miscellaneous charges such as setup fees, etc. - are managed in MenuManager. Here you can edit existing menus and create new ones - even organizingitems into "sub-menus" for easier access.
Adding a New Menu or Sub-Menu
Tip: If you click the titleof a "sub-menu" beforeadding a newmenu inStep 2, the newmenuwill be added on thesame "sub-menu" level.You can also drag anddropmenu titles into dif-ferent positions in thetitle pane, optionallymak-ing them sub-menusofother menus. As youdrag, payattention toyour mouse pointer forthe indicators describedbelow.
1. Click the Setup sidebar on the left-hand side of the screen and clickMenuManager.Result: The Menu Manager window opens.Note: As an option, you can click the Administration ribbon tab at the top ofthe screen and choose Menus > Menu Manager.
- 7 -

Unit 1: Menu Manager Setup Functions
2. Click the Add New Menu button , located along the left pane of the win-dow.Result: A new menu is added to your menu list, with your cursor ready totype a new title.Note: This button is identical to the Add Menu Item button at the top of theMenu Manager window (as well as the Add Record button in the Home rib-bon tab at the top of the screen); be careful not to confuse them.
3. Type a name for your new menu, and then press your [Enter] key.Result: Your new menu name is saved.
4. [Optional] Create a sub-menu of another menu by first selecting a title in the
left pane of the window and then clicking the Add Sub-Menu button .
5. Add new menus to your new menu as desired.Note: It is recommended when adding items to a new menu that you takecare to set the first item up with the appropriate "Type,""Category," "PrepArea,"etc., because each additional item you create will mirror the first inthese settings.
l Drop Above : Indicates that the menu you are dragging will bedropped above another menu.
l Drop Below : Indicates that the menu you are dragging will be
- 8 -

Unit 1: Menu Manager Setup Functions
dropped below another menu.
l Drop As Child : Indicates that the menu you are dragging willbecome a sub-menu of another menu.
Copying an Existing Menu
Tip:Once you copyamenu, you can drag anddrop its title into a dif-ferent position in the titlepane, optionallymakingit a sub-menu of anothermenu. As you drag, payattention to your mousepointer for the indicatorsdescribed below.
1. On the left-hand side of the Menu Manager window, right-click the title ofthe menu you want to copy.Result: A pop-up list of options appears.
2. Choose Copy Menu.Result: A Copy Menu window appears, offering certain options.
3. Click the checkbox next to options you want to include in the copy, and thenclick OK.Result: A copy of the menu is added to your menu list, with the cursor in theTitle field, ready for you to type a new title.Note: Options include the choice to include ingredients or required items foritems in the original menu, as well as "sub-items" for any menu packageitems.
4. Type a name for the new copy, and then press your [Enter] key.
Adding Menu Items to Default Menus
You can add or edit menu items in your program's default menus, including basicdetails such as name and price, as well as additional information such as cost. Youare able to create a detailed item description and a default quantity when an item isordered in an event. You even have the option to link the quantity of an item to theguest count of a party, or to have an item hidden on certain prints, by default.Note: You can also copy menu items from one menu to another (in addition to beingable to copy entire menus)in Menu Manager.
Adding Items to a Menu or Sub-Menu
- 9 -

Unit 1: Menu Manager Setup Functions
Tip: It is strongly recom-mended that you estab-lish the item Type,Category, and PrepArea (asdesired) appro-priately for the first itemin a newmenu PRIORto adding additionalitems. Newmenu itemsdefault this informationfrom the line you havehighlighted when youclick theAdd Recordbutton.
1. Click the Setup sidebar on the left-hand side of the screen and clickMenuManager.Result: The Menu Manager window opens.Note: As an option, you can click the Administration ribbon tab at the top ofthe screen and choose Menus > Menu Manager.
2. In the left pane of Menu Manager, click the title of the menu or sub-menuyou want to add an item to.Note: Click the small plus-sign to the left of a menu title to access its "sub-menus."
3. Click the Add Menu Item button , located at the top of the Menu Man-ager window.Result: A new blank line is added to the bottom of this menu. (You can altern-
atively use the Insert Menu Item button to insert a blank line ABOVEthe record you are currently on, or simply drag and drop your new line intoa different position in the list.)Note: This button is identical to the Add New Menu button near the left paneof your Menu Manager. Do not confuse them. You can also use the Add
Record button in the Home ribbon tab at the top of the screen.
4. Type a Name for the new menu item.
- 10 -

Unit 1: Menu Manager Setup Functions
5. Press your [Enter] key.Result: Your cursor is moved one column to the right, most likely to thePrice column.Note: As a default, Menu Manager uses the Name of your new item as itsDescription (see "Creating a Description ...," below). This allows you toinclude this text on your printed documents with any font formatting youwant.
6. Type a Price for the new item, or click the down arrow at the right of thisfield to get assistance from the drop-down calculator.
7. [Optional] Enter a Comment for the item, which can optionally be displayedon your various custom prints and reports.
8. [Optional] Enter a Category and/or Prep Area for the item, which can be dis-played on your custom prints or used to track your menu items.Note: Each of these fields offers a custom quickpick list you can control. Seetip for important information about default setting for these fields.
9. Click the down arrow next to the Type column (far right column) and choosean appropriate type for the menu item.Note: Your options, depending upon what you have set up, include Food,Beverage, Liquor, Equipment, Labor, Room, Delivery, Floral, Beer, Wine,or Other.
Important: Each event might have different tax, service charge, or gratuityrates for each type of menu item, so it is extremely important that the appro-priate Type be chosen for each item. See tip for important information aboutdefault settings for this field.
10. See "Editing Additional Menu Item Details," below, for more informationyou can customize about this item - including default quantities, linking quant-ities to an event's guest count, item inventory, and more.
11. [Optional] Click in the Description tab at the bottom of Menu Manager andadd additional details as desired, using the formatting tools in the Home rib-bon tab at the top of the screen.Note: This is a limitless text box, and you can choose whether or not toinclude this text on your various custom event prints.
Creating a Description, Recipe, Label, Notes or Image for an Item
1. Click into the Description text block at the bottom of the Menu Manager win-dow and type as desired.Note: Descriptions can be included on custom prints in lieu of Item Names toallow for more detail and more flexibility in font formatting. The Name ofyour new menu item will be entered here as a default.
- 11 -

Unit 1: Menu Manager Setup Functions
2. [Optional] Click the Recipe, Label, or Notes tab and enter text as desired.Note: Event Manager offers special prints for both menu item "Recipes" and"Labels" (or place cards for buffet lines); "Notes" can be included on customevent prints.
3. [Optional] Use the font formatting tools on the Home ribbon tab at the top ofthe screen to format the text you have entered.
4. [Optional] Right-click in the small, empty box at the bottom left of MenuManager and choose Load From File to browse to an image to use for themenu item.Note: Images can be included on custom event prints, if desired.
Editing Additional Menu Item Details
Tip: If you want the newcolumnsyou've selectedto be displayed in theMenuManager grid asadefault, click theSaveCurrent Window Set-tings button at the topright of the window.
1. Click the Quick Column Customizing button , located at the top left of themenu item grid in Menu Manager.Result: A drop-down list of optional columns appears.Note: See "Fields Available in the Menu Items Grid," below, for a list ofavailable columns for this grid.
2. Click the checkbox next to any column heading to have that column appear inthe grid.Result: Any columns with checks next to them appear in the grid.
Note: The Automatically Set Column Widths button on the top right-hand side of the Menu Manager window is selected by default, meaning that
- 12 -

Unit 1: Menu Manager Setup Functions
any selected columns will automatically shrink to fit in this window withoutthe need to scroll horizontally.
3. [Optional] Hold your left mouse button down on a column heading in the listand drag up and down to reposition that column in the grid.Note: You can also drag column headings left and right in the grid itself.
4. Enter information into the new fields as described in "Fields Available in theMenu Items Grid," below.
Fields Available in the Menu Items Grid
The following fields are available for display in the menu item grid in Menu Man-ager:
Field DescriptionName* Identifies the menu item; can be printed on event prints in lieu of or in addi-
tion to description (see below).Cost Indicates the cost of the menu item; can be directly typed into the field, or can
be automatically calculated as a sum of ingredient item costs.Markup Multiplies times the item cost (above) to automatically calculate the Price
(below); a "10%" markup would be entered as "1.1" (Cost X 1.1 = Price).Price* Indicates the price of the menu item.No Tax Offers a checkbox to make the menu item non-taxable as a default.No SC Offers a checkbox to remove service charge from the menu item as a default.No Grat Offers a checkbox to allow you to make this individual item exempt from any
gratuity normally assigned to items of this Type.Unit Identifies the unit of purchase for the menu item; can be used for tracking
pur-poses.Comment* Allows up to 50 characters of general comment about a menu item; can be
- 13 -

Unit 1: Menu Manager Setup Functions
Field Descriptionoptionally included on prints.
Prep Area* Indicates the area or personnel responsible for preparing the menu item;e.g., “Kitchen,”, “Bar,” “Cold Prep”; can be used for tracking purposes oroptionally included on prints; event menus are separated based on this fieldon the Production Sheet event sub-print.
Category* Allows you to categorize menu items for tracking purposes; offers a customiz-able quickpick list of options, while "Type" (see below) is a hard-coded field(e.g., items with a Type of "Liquor" can be separated into categories of "Beer-,""Wine,""Liquor,"etc.); can be optionally included on custom prints.
Menu Title Lists the title of the menu the item is located in; helpful when reviewing allitems from all menus simultaneously.
Hide Offers a checkbox allowing you to hide this menu item by default on eventprints that are set to allow item hiding; achieves the purpose of “passingnotes” to the kitchen or other back-of-house staff.
Inactive Designates this item as being temporarily inactive; it will appear grayed outhere in Menu Manager, and will not be visible at all when selecting items foran event.
Default Qty Allows you to establish a default quantity for the item when pulled into anevent; can be used in conjunction with "Linked" below to calculate a quantityper guest (e.g., a Default Quantity of "3" for each guest attending the event").
Linked Offers a checkbox allowing you to link the quantity of this menu item to theguest count of an event as a default.
Rounding Used in conjunction with the two options above to avoid partial quantities;e.g., a pastry with the Default Quantity of "1.5" which is also Linked to theguest count for a party of 25, will default a quantity of "37.5" pastries. In thiscase you might round it "Up."
Min Qty Allows you to establish a minimum quantity for an item when it is selected intoan event.
Delivery Offers a checkbox allowing you to designate a menu item as deliverable as adefault; items must have this box checked to appear on delivery prints andreports.
Acct Code Offers a unique identifier for the menu item; used in interfaces with third-party software.
Item ID Offers a unique identifier for the menu item; used in interfaces with third-party software.
Vendor Identifies a vendor responsible for providing the menu item.Inventory Offers a checkbox for you to designate a menu item as inventoried; establish
the number in inventory using the field below.In Stock Allows you to establish the number of a particular item that you have in invent-
ory; use in conjunction with the field above.Web OrderGroup
Offers a custom quickpick list you can create to group menu items, so certaincustomers only see certain menu items when processing orders over theWeb.
Publish Offers a checkbox allowing you to designate whether or not a menu itemshould be published to your web ordering website.
URL Allows you to enter a website address.Type* Allows you to categorize items as being "Food,""Bever-
age,""Liquor,""Equipment,""Labor,""Room" or "Other"; list is hard-coded;THIS DETAIL IS IMPERATIVE AS IT DETERMINES TAX, SERVICE CHARGE ANDGRATUITY RATES FOR INDIVIDUAL ITEMS.
Modified Indicates when a menu item was modified in the system.Item Code This field is usually used to identify an item in an interface with other invent-
ory programs. For example, the Item Code in Caterease relates to the PLU fieldin Foodtrak.If you have no interface, you might want to use the field for in-house tracking, or ignore it completely.
Bar Code You can enter a bar code number into this field. Bar codes can be printed aspart of any contract, and will print in classic bar code format. Additionally, bar
- 14 -

Unit 1: Menu Manager Setup Functions
Field Descriptioncode labels can be generated from the Food/Service Activity Query.
UserDefinedFields
You can make up your own custom fields pertaining to menu items and dis-play them in this grid as well.
* Displayed on the grid by default.
Assigning a Prep Area for a New Menu Item
The Prep Area field gives you the powerful ability to generate an event print withseparate sections or pages showing the responsibilities for each prep area, depart-ment, or person. For example, if an order has menu items with the Prep Areas ofKitchen, Bar, and Setup, then three sections or pages (one for each of those areas)will be generated when you print the Production Sheet for that order.
Using the Prep Area Feature
1. Access the Menu Manager by clicking the Menu Manager button from theSetup sidebar on the left-hand side of your screen.
2. On the left-hand side of the Menu Manager, click the title of the menu con-taining the item.
3. Click the menu item on the right-hand side of the screen in which you wantto designate a Prep Area.Note: If the Prep Area column is not currently displayed on your screen,
retrieve it from your Quick Column Customizing tool (see the section onCustomizing Columns).
4. In the blank Prep Area field, click the down arrow at the right of the field toselect a Prep Area for the menu item from the drop-down quickpick list.Note: Prep Area Quickpicks are added in Setup > Quickpicks > MenuItems > Prep Area.
- 15 -

Unit 1: Menu Manager Setup Functions
Generating a Production Sheet for an Event Order
The Production Sheet can be printed from the Event Manager to show all menuitems for an order grouped by Prep Area. You can choose to have the groups appeartogether on one page or on separate pages, for easy distribution.
Generating a Production Sheet for an Event Order
1. Access the Event Manager by clicking the Event Manager button from theMain sidebar on the left-hand side of your screen.
2. Use any of the search tools to retrieve an event.
3. Click the Prints button, located at the top of the Caterease screen.
4. Select Event Subprints > Production Sheet.Note: You may also access this print from the Setup sidebar > Mis-cellaneous Print Designer > Production Sheet.
5. Click the Print button, located at the upper left-hand side of the window.Note: You can choose to have the Production Sheet print a separate page foreach Prep Area by clicking the New Page For Each Prep Area checkbox.
- 16 -

Unit 1: Menu Manager Setup Functions
Establishing a Category for a New Menu Item
You can distinguish a menu item from the general item Type by further defining itas a category (for example, you would like to track just your monthly beer and winesales, instead of all liquor sales).
Establishing a Category for a New Menu Item
1. Access the Menu Manager by clicking the Menu Manager button from theSetup sidebar on the left-hand side of your screen.
2. On the left-hand side of the Menu Manager, click the title of the menu con-taining the item you want to categorize.
3. Click the menu item for which you want to select a Category.
4. If the Category column is not currently displayed on your screen, retrieve it
from your Quick Column Customizing tool .
5. Select a Category from the drop-down quickpick list.Note: Categories can be entered as quickpicks in Setup > Quickpicks >Menu Items > Category.
- 17 -

Unit 1: Menu Manager Setup Functions
Adding Quickpick Items to the Menu Manager
Throughout your Caterease program there are several drop-down lists, or “quick-picks,” to assist you in data entry. These lists exist to save you the tedium of doubleentry and to keep your data consistent. For example, rather than having to type themenu item Prep Area “Cold Prep” multiple times (and risk accidental misspellings),you can simply select it from your menu item Prep Area quickpick list. These listsare completely under your control; you can edit/modify them at any time. You areable to create quickpick lists for five fields of information in the Menu Manager:Prep Area, Category, Unit, and Comment, and Web Order Group.
Adding a Quickpick Item
1. From the Setup sidebar of the main Caterease screen, select Quickpicks.Result: The Setup Quickpick List screen opens.
2. Click on the Expand button next toMenu Items to view the correspondingquickpick lists.
3. Click one of the following: Prep Area, Category, Unit, Comment, or WebOrder Group.
4. Add a new quickpick item to the list by clicking the Add New Item button
, located on the upper right-hand side of the window.Result: A new, blank field appears.
5. Type a name for your new quickpick item.
6. Press [Enter].
7. Repeat steps 4-6 to create the remaining quickpick lists.
8. When finished, click Close.Note: You can delete a quickpick item by clicking the item to select, then
- 18 -

Unit 1: Menu Manager Setup Functions
clicking the Delete Current Item button , located at the top of the SetupQuickpick Lists form. You can also modify an existing quickpick item byclicking on the item, then typing the name of the new quickpick item. You canrearrange quickpick items in the list by clicking on an item, holding your leftmouse button down, and dragging and dropping the item into place.
- 19 -

Creating an IngredientsList
Unit 2: Creating an Ingredients List
You can have Caterease keep track of your menu item ingredients. This is a two-step process. First, youwant to establish an overall ingredients list – with every ingredient you use for any item on your menus.Then, you want to retrieve items from this list as ingredients for individual food items. Once you’ve cre-ated your overall ingredients list, you can then link individual ingredients to specific menu items.
When you add a menu item, you can select ingredients from the Ingredients List, assign each ingredienta unit/measure and cost, and the total cost of the item will be automatically computed at the bottom ofthe Ingredients tab. You can then use the Auto Sum button to transfer this cost to the cost in the menuitem display. In addition, you have access to several Event Ingredients print lists (for tracking purposes).
Objectives:
After completing this unit, you will be able to:
l Create a new Ingredients List.l Add ingredient items to the Ingredients List.l Print an Ingredients List.
Adding a New Ingredients List
1. Access the Ingredients List by clicking the Setup sidebar on the left-handside of your screen, then clicking Ingredients List.
2. To add a new Ingredients List, click the Add List button , located on theupper left-hand side of your screen.Note: This button is identical to the Add Ingredient button. Do not confusethem.Result: A confirmation prompt appears.
3. Click Yes to confirm your choice.Result: A new, empty ingredients list is added.
4. Type the name of the new list into the highlighted field.
5. Press [Enter] to save your ingredients list.
6. [Optional] Use the Ingredients List Title Panel to modify your list.
l Delete List – Deletes the currently highlighted ingredients list and all ofits items.Note: This function cannot be undone; you will be prompted to confirmyour choice.
- 20 -

Unit 2: Creating an Ingredients List
l Add Sublist – This adds a new ingredients list as a sub-list of the cur-rently highlighted list.Note: You can also hold your [Shift] key down and drag and ingredientslist on top of another to make a sub-list.
l Move Up One Level – This moves an ingredients sub-list up one level tomake it an independent ingredients list.
l Move Up – This moves the highlighted ingredients list up one position inthe list.Note: You can also drag and drop ingredients lists into new positions.
l Move Down – This moves the highlighted ingredients list down one pos-ition in the list.
l Rename Ingredients List (access by right-clicking) – This option letsyou rename the currently highlighted list.
l Expand All (access by right-clicking) – This option expands your list ofingredients lists to show all sub-lists at all levels.
l Collapse All (access by right-clicking) – This option collapses your listso that only lists at the main level (as opposed to sub-lists) are shown.
Adding an Ingredient to an Ingredient List
1. To add a new ingredient to a particular list, click the Add Ingredient button
- 21 -

Unit 2: Creating an Ingredients List
, located at the top of the Ingredients List window.Note: This button is the same as the Add List button. Do not confuse the two.
2. Type a name or Description for the new item and press [Enter].
3. Type the Unit the ingredient is purchased in or select from the correspondingdrop-down list, then press [Enter].
4. In the Measure field, type the measurement this ingredient is used in orselect from the corresponding quickpick list, then press [Enter].
5. In the Type field, type the ingredient type or select from the correspondingdrop-down list, then press [Enter].
6. Type the cost per measure of the ingredient into the Cost field, or use thedrop-down arrow located at the right of the field to access a calculator.
7. [Optional] Click the Quick Column Customizing button to accessoptional ingredients list fields, such as Category, Prep Area, Comment, Title,Vendor, and Item ID.
8. When finished, click the X at the top of the window to save your changesand close the window.
Refer to the table below for a description of the various available fields.
Name DescriptionDescription This field indicates the name of the ingredient item.Unit This is the unit this ingredient is purchased in. Examples include
Dozen, Case, Bottle, etc. It has a corresponding quickpick list theuser can customize.
Measure This is the measurement this ingredient is used in. When thisingredient is used for a menu item, the Measure will increase pro-portionately, depending on the quantity of items ordered.
Type This could be used for tracking purposes. Examples include Dairy,Vegetable, Spice, etc. This field has a corresponding quickpick listthe user can customize.
Cost This is the cost per measure of the ingredient. When this ingredi-ent is used for a menu item, this cost is multiplied by the quantityused.
Category This field indicates the category of a particular item. Examplesinclude Dairy, Meat, Baked goods, Seafood, etc. This could beused for tracking purposes, and has a corresponding quickpicklist the user can customize.
Title The field displays the title of the list an ingredient is found in. If auser chooses to view “All Lists” in search of a hard-to-find item,this field lets him know which list to look in next time.
Vendor This purpose of this field is to select a vendor an item is pur-chased from. It has a corresponding quickpick list the user cancustomize.
Prep Area This field allows the user to indicate where the food was prepared.Examples include Hot Line, Cold Prep, etc. This field has a cor-responding quickpick list the user can customize.
Item ID This field allows the user to associate a particular item ID, for
- 22 -

Unit 2: Creating an Ingredients List
Name Descriptiontracking purposes.
Printing an Ingredients List
The Ingredients List can be printed from the Event Manager to show all menu itemsfor an order grouped by Prep Area. You can choose to have the groups appeartogether on one page or on separate pages, for easy distribution.
Printing an Ingredients List
1. Access the Event Manager by clicking the Event Manager button from theMain sidebar on the left-hand side of your screen.
2. Use any of the search tools to retrieve an event.
3. Click the Prints button and select Subprints.
4. Select Ingredients > Ingredients List.Note: You may also access the Ingredients List from Setup > MiscellaneousPrint Designer. Click the plus sign to the left of Ingredients and then selectIngredients List.
5. Click the Print button, located at the upper left-hand side of the window.
Tracking Used Menu Items via the Menu Item Usage Report
This report will list the total quantities of menu items used within a specific day ordate range you indicate. This window lets you establish your choices for what youwant the report to show. You can choose to have unused items colored or zeroed
- 23 -

Unit 2: Creating an Ingredients List
out items suppressed in the report. In addition, you can elect to include the eventdetails.
Tracking Used Menu Items via the Menu Item Usage Report
1. Click Reports >Menu Manager >Menu Item Usage.
2. In the pop-up window, select an event Date Range by clicking a cor-responding radio button.
l Less Than Or Equal To (Specific Date):Click this option to include only items from events on or before the spe-cific date.Note: You can type a date into the Date field, or you may click the downarrow and access the drop-down calendar.
l Greater Than Or Equal To (Specific Date):Click this option to include only items from events on or after the spe-cific date.Note: You can type a date into the Date field, or click the down arrowand access the drop-down calendar.
l Within Date RangeClick this option to include items from all events within your establisheddate rangeNote: Establish a date range by typing directly into the Date fields or byclicking the down arrows and accessing the drop-down calendars.
l Relative Date RangeClick this option to include items from all events within a relative daterange.Note: Establish a date range by clicking the down arrows and selectingan option, such as This Week, This Month, Last Week, Last Month, etc.
3. [Optional] Exclude a particular status by selecting from the Exclude Statusdrop-down list. Options include Prospective, Tentative, Definite, Cancelled,and Closed.
4. [Optional] Color Unused Items in the report by clicking the Color Item IfUnused checkbox in the Options section of the pop-up window.
5. [Optional] To show the event details for each menu item used, click theShow Details checkbox.
6. Click OK to generate the report.
- 24 -

Unit 2: Creating an Ingredients List
- 25 -

Using the Menu ManagerTabs
Unit 3: Using the Menu Manager Tabs
Objectives:
Upon completing this unit, you will be able to:
l Assign an image to a menu item.l E-mail the image.l Add a required items list to a menu item.l Select a required item from the required items database.
Including Digital Images of Your Menu Items
You can make your menus come alive by including a digital image of your menuitems. You can display them on your screen for your clients to see, e-mail them, orprint them and attach them to your contracts.
Assigning Images
1. In your Menu Manager, select the menu items you want to assign an imageto.
2. In the lower left-hand corner of the Menu Manager screen, click your rightmouse button in the image box. (The box will be empty – blank – if an imagehas yet to be assigned to this item.)
3. Select Load From File.
4. Browse to your image and select it.
5. Click Open.Note: Alternatively, you may double-click the image to insert it.
- 26 -

Unit 3: Using the Menu Manager Tabs
Emailing an Image
Tip: The ability to e-mailan image is also avail-able in Event Manager.From the Food/Ser-vice tab in Event Man-ager, right-click on theimage and selectEmailPicture. The image beinserted asan attach-ment to the e-mail, andthe To field of the e-mailwill auto-populate theevent contact's e-mailaddress.
1. In your Menu Manager, click on the name of the menu item you would like toe-mail an image of.
2. In the lower left-hand corner of the Menu Manager screen, click your rightmouse button in the image box. (The box will be empty – blank – if an imagehas yet to be assigned to this item.)
3. Select Email Picture.Result: An e-mail window opens, with the image attached at the bottom of the
- 27 -

Unit 3: Using the Menu Manager Tabs
window. The e-mail is ready to be addressed and sent.
Establishing Menu Item Modifiers
You can assign modifiers to your various menu items, and these modifiers can beoptionally retrieved with those items when building a menu for an event. Examplesmight include the menu item "Caesar Salad" with the optional modifiers of"Chicken" or "Salmon,"or a sandwich menu item with modifiers to identify bread orcheese choices, etc. (Modifiers can optionally have additional prices associatedwith them.)
Adding Modifiers to a Menu Item
1. Click the Setup sidebar on the left side of the screen and clickMenu Man-ager.Result: The Menu Manager window opens.Note: As an option, you can click the Administration ribbon tab at the top ofthe screen and choose Menus > Menu Manager.
- 28 -

Unit 3: Using the Menu Manager Tabs
2. Add modifier items to your default menus , as you would any menu item sothey can be selected as "modifiers" in Step 6, below.Note: "Modifiers" are simply menu items attached to another item, and thusmust exist somewhere in your default menus. You might create a separatemenu entitled "Modifiers" to store all of these items.
3. In the left-hand pane of Menu Manager, click the title of the menu or sub-menu that contains items you want to edit.Note: Click the plus sign button to the left of a menu title to access its sub-menus.
4. In the main pane of Menu Manager, select the menu item to which you wantto add modifiers.
5. Click the Modifiers tab at the bottom of the Menu Manager.Note: If there is noModifiers tab, click the Show Menu Item Details button
at the top right of the screen.
6. Click the Select Modifiers button at the right side of the Modifiers tab.Result: The Select Menu items window opens.
7. In the left pane of the Select Menu Items window, click title of the menuwhere your modifier items are stored.
8. Highlight and select items in one of the following ways:Note: All selected items will be inserted at the bottom of the Modifiers tabby default, but can be dragged and dropped to any position.
l Double-click a single item.Result: That item is inserted in the Modifiers tab, and the Select MenuItems window remains open.
- 29 -
Unit 3: Using the Menu Manager Tabs
l Hold your mouse button down on one individual item (without moving)for a half-second and drag that item from the Select Menu Items windowonto the Modifiers tab.Result: The item is inserted in the Modifiers tab.
l Select a group of items by dragging over them, or using your [Shift] or[Ctrl] keys, and then hold your left mouse button down and drag anddrop them onto the Modifiers tab.Result: The items are inserted in the Modifiers tab.
l Click the Select Items button at the top left of the Select Menu Itemswindow.Result: Any highlighted items are inserted in the Modifiers tab, and theSelect Menu Items window remains open.
l Click OK.Result: Any highlighted items are inserted in the Modifiers tab, and theSelect Menu Items window closes.
9. [Optional] Enter a Selection Comment for your modifiers.Note: This comment can be used as a hint when selecting items for an event;examples might include "Choose One," "Per Person,"etc.
10. [Optional] Add or remove a price to be associated with the modifier.Note: This price will be retrieved with the modifier when it is selected intoan event, and will default to the price applied when the modifier was added toyour menus (Step 2, above).
Editing Additional Modifier Item Details
Tip: If you want the newcolumnsyou've selectedto be displayed in theModifiers tab grid asadefault, click theSaveCurrent Window Set-tings button at the topright of theMenuMan-ager window.
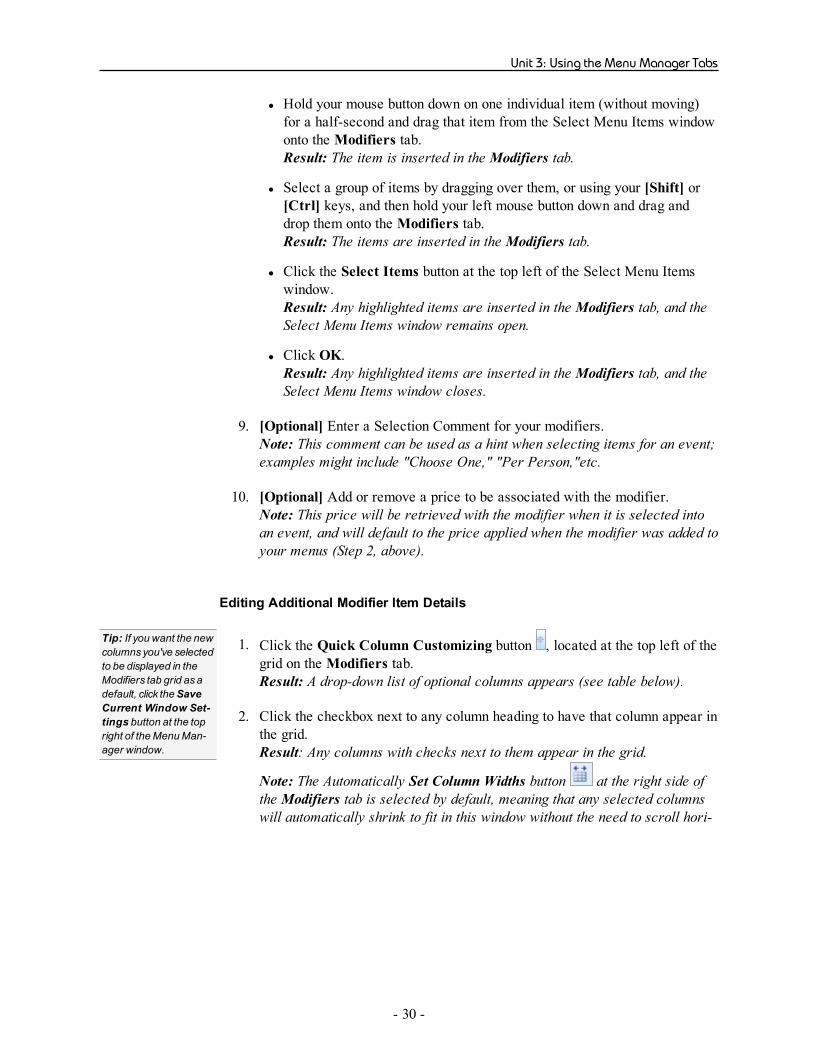
1. Click the Quick Column Customizing button , located at the top left of thegrid on the Modifiers tab.Result: A drop-down list of optional columns appears (see table below).
2. Click the checkbox next to any column heading to have that column appear inthe grid.Result: Any columns with checks next to them appear in the grid.
Note: The Automatically Set Column Widths button at the right side ofthe Modifiers tab is selected by default, meaning that any selected columnswill automatically shrink to fit in this window without the need to scroll hori-
- 30 -

Unit 3: Using the Menu Manager Tabs
zontally.
3. [Optional] Hold your left mouse button down on a column heading in the listand drag up and down to reposition that column in the grid.Note: You can also drag column headings left and right in the grid itself.
4. Enter information into the new fields as described below.
Field DescriptionName* Identifies the modifier item.SelectionComment*
Can be used as a hint when selecting items for an event; examplesmight include "Choose One,""Per Person,"etc.
Cost Indicates the cost of the item; will default to cost applied to modifieritem when it was setup
Markup Multiplies times the item cost (above) to automatically calculate thePrice (below); a "10%" markup would be entered as "1.1" (Cost X 1.1= Price)
Price* Indicates the price of the item.Hide Offers a checkbox allowing you to hide this item by default on event
prints that are set to allow item hiding; achieves the purpose of“passing notes” to the kitchen or other back-of-house staff.
DefaultQty
Allows you to establish a default quantity for the item when pulled intoan event; can be used in conjunction with "Linked" below to calculate aquantity per guest (e.g., a Default Quantity of "3" for each guest attend-ing the event).
Linked Offers a checkbox allowing you to link the quantity of this item to theguest count of an event as a default.
Rounding Used in conjunction with the two options above to avoid partial quant-ities; e.g., a pastry with the Default Quantity of "1.5" which is alsoLinked to the guest count for a party of 25, will default a quantity of"37.5" pastries. In this case you might round it "Up."
Min Qty Allows you to establish a minimum quantity for an item when it is selec-ted into an event.
Type* Allows you to categorize items as being "Food,""Bever-age,""Liquor,""Equipment,""Labor,""Room" or "Other"; will default tocost applied to modifier item when it was set up.
* Displayed on the grid by default.
Adding Required (Packing List) Items to a Menu Item
If a menu item requires certain items - chafing dishes, utensils, napkins, plates, etc.- each time it is served, you can attach a custom list of those "required items" to
- 31 -

Unit 3: Using the Menu Manager Tabs
that menu item. This way, whenever you retrieve that menu item into an event, thecorresponding list of required items will be retrieved and automatically totaled upbased on the quantity of menu items you order.Note: You must first set up your default list of required items before you can attachthem to a menu item as described here.
Adding Required Items to a Menu Item
1. Click the Setup sidebar on the left side of the screen and clickMenu Man-ager.Result: The Menu Manager window opens.Note: As an option, you can click the Administration ribbon tab at the top ofthe screen and choose Menus > Menu Manager.
2. In the left-hand pane of Menu Manager, click the title of the menu or sub-menu that contains items you want to edit.Note: Click the small plus-sign button to the left of a menu title to access itssub-menus.
3. In the main pane of Menu Manager, select the menu item to which you wantto add required items.
4. Click the Required Items tab at the bottom of the Menu Manager.Note: If there is no Required Items tab, click the Show Menu Item Details
button at the top right of the screen.
5. Click the Select Items button at the right side of the Required Itemstab.Result: The Select items window opens.
6. Highlight and select items in one of the following ways:Note: All selected items will be inserted at the bottom of the Required Itemstab by default, but can be dragged and dropped to any position.
- 32 -

Unit 3: Using the Menu Manager Tabs
l Double-click a single item.Result: That item is inserted into the Required Items area, and theSelect Items window remains open.
l Hold your mouse button down on one individual item (without moving)for a half-second and drag that item from the Select Items window ontothe Required Items tab.Result: The item is inserted in the Required Items tab.
l Select a group of items by dragging over them, or using your [Shift] or[Ctrl] keys, and then hold your left mouse button down and drag anddrop them onto the Required Items tab.Result: The items are inserted into the Required Items area.
l Click the Drop Items button at the top left of the Select Items window.Result: Any highlighted items are inserted into the Required Items area,and the Select Items window remains open.
7. Click OK.Result: Any highlighted items are inserted in the Required Items tab, and theSelect Items window closes.
8. Enter a Default Qty for your modifiers.Note: This is the default quantity of this item required for each order of thismenu item, and will be automatically multiplied times the number of menuitems ordered for an event (unless the "Linked" check box is empty, asdescribed below).
9. [Optional] Add or remove a check to the Linked checkbox, optionally link-ing the quantity of this item to the number of corresponding menu itemsordered in an event.Note: With this box checked, the Default Qty entered in Step 7, above, willbe multiplied times the quantity of this corresponding menu item ordered foran event. With the box empty, the Default Qty entered above will remain thequantity for any event (unless changed in the event itself.
Editing Additional Required Item Details
Tip: If you want the newcolumnsyou've selectedto be displayed in theRequired Items tabgrid asa default, clicktheSave Current Win-dow Settings button atthe top right of theMenuManager window.
1. Click the Quick Column Customizing button , located at the top left of thegrid on the Required Items tab.Result: A drop-down list of optional columns appears (see table below).
2. Click the checkbox next to any column heading to have that column appear inthe grid.Result: Any columns with checks next to them appear in the grid.
Note: The Automatically Set Column Widths button at the right-handside of the Required Items tab is selected by default, meaning that any
- 33 -

Unit 3: Using the Menu Manager Tabs
selected columns will automatically shrink to fit in this window without theneed to scroll horizontally.
3. [Optional] Hold your left mouse button down on a column heading in the listand drag up and down to reposition that column in the grid.Note: You can also drag column headings left and right in the grid itself.
4. Enter information into the new fields as described below.
Field DescriptionDescription* Identifies the required item.Unit* Identifies the unit of purchase for the required item.Category* Allows you to categorize required items for tracking purposes;
offers a customiz-able quickpick list of options.Vendor Identifies a vendor responsible for providing the required item.Comment Offers a space for an additional comment about the required item.Default Qty* Indicates the default quantity of this required item necessary for
the corresponding menu item; will multiply times the quantity ofmenu items ordered if the "Linked" checkbox (below) is selected.
Link* Allows you to link the quantity of this required item to the quantityof the corresponding menu item ordered for an event; e.g., if 1"Dinner Plate" is needed for a menu item and "Linked" is enabled,an event that orders 25 of that menu item will require 25 "DinnerPlates."
Rounding Used in conjunction with the two options above to avoid partialquantities; e.g., if 25 orders of a menu item can fit in one chafingdish, the Default Qty of the chafing dish would be ".04" (1/25).Using the option to round "Up" will prevent fractional quantities ofthe chafing dish.
* Displayed on the grid by default.
Printing a Required Items List
You can print a Required Items List (Packing List) with specific grouping details,such as Category, Vendor, etc.
- 34 -

Unit 3: Using the Menu Manager Tabs
Printing a Required Items List
1. Access the Event Manager by clicking the Main sidebar item from the left-hand side of your screen, then clicking the Event Manager button.
2. Use the Search tools to find an existing event for which you want to print arequired items list.
3. Click Prints at the top of the Caterease screen.
4. Select Event Subprints > Ingredients > Required Items List.Note: You are also able to access this print by clicking Setup > Mis-cellaneous Print Designer > and clicking Required Items.
5. Click the Preview button.
6. [Optional] Edit the print by clicking the Edit in Word button or the Edit inExcel button.
7. Click the Print button.
8. [Optional] Click the Email button to e-mail a copy of the print.
9. [Optional] Click the Export button to export the print.
Tracking Required Items Usage
The Required Items Manager not only allows you to create custom lists of requireditems, but it also offers a handy Required Items Activity tool that tracks the usageof those items.
- 35 -

Unit 3: Using the Menu Manager Tabs
Tracking Required Items Activity
1. Click the Setup sidebar on the left-hand side of the screen and clickRequired Items.Result: The Required Items manager window opens.Note: As an option, you can click the Administration ribbon tab at the top ofthe screen and choose Menus > Required Items.
2. Click a title in the left pane of the window to find the item or items you wantto track, or click "All Lists" to track items from multiple lists.
3. Click one or several items in the list to select them.Note: To select more than one item, hold your[Ctrl] key down as you clickthem.
4. Click the Required Items Activity Query button at the top right of thewindow.Result: The Required Items Activity window opens, showing a grid listingusage of the currently selected items.
- 36 -

Unit 3: Using the Menu Manager Tabs
5. Customize the grid (sort, group, filter, export or print data) as described pre-viously.
Creating an Automatic Menu Item Package
If you have menu items you often sell together, you can combine them into a menu"package." This way, you simply select the package itself, and Caterease will actu-ally chase all of the various items down in their separate menus automatically.
Adding Package Items to a Menu Item
1. Click the Setup sidebar on the left side of the screen and clickMenu Man-ager.Result: The Menu Manager window opens.Note: As an option, you can click the Administration ribbon tab at the top ofthe screen and choose Menus > Menu Manager.
2. Select the menu item you want to use as your package, or add a new item.Note: You must first choose an item to act as your package, then connectassociated items to it.
3. Click the Package Items tab at the bottom of the Menu Manager.Note: If there is no Package Items tab, click the Show Menu Item Details
- 37 -
Unit 3: Using the Menu Manager Tabs
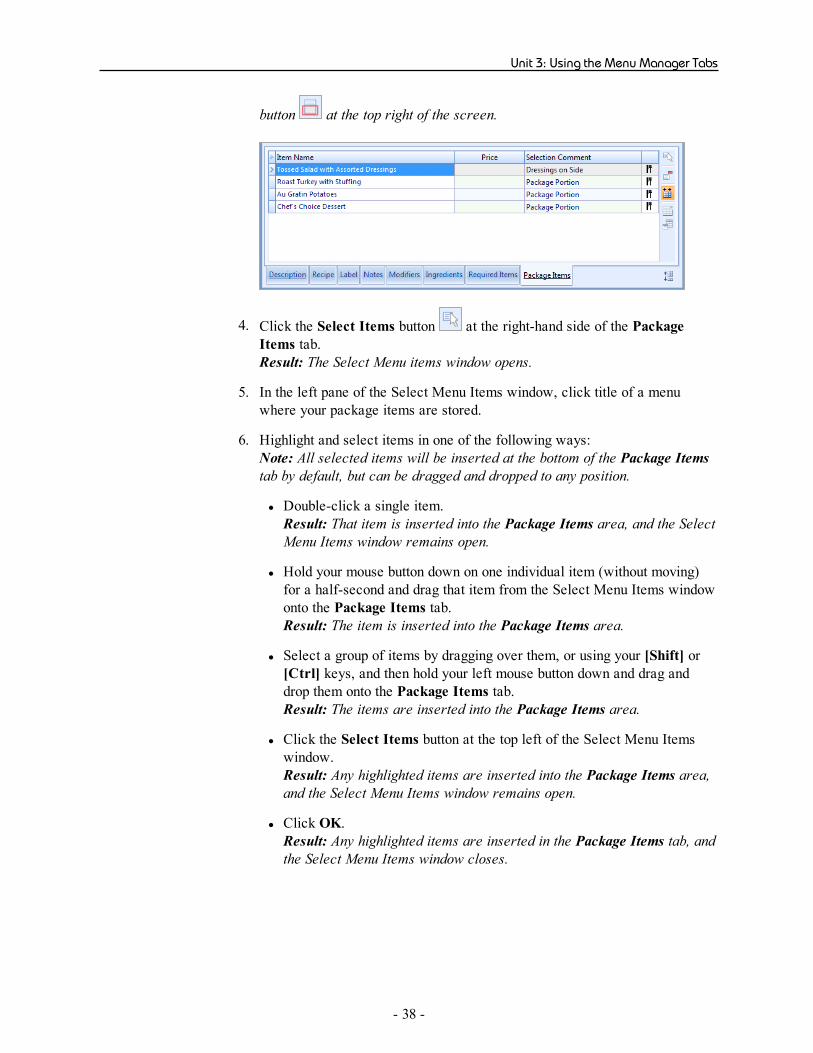
button at the top right of the screen.
4. Click the Select Items button at the right-hand side of the PackageItems tab.Result: The Select Menu items window opens.
5. In the left pane of the Select Menu Items window, click title of a menuwhere your package items are stored.
6. Highlight and select items in one of the following ways:Note: All selected items will be inserted at the bottom of the Package Itemstab by default, but can be dragged and dropped to any position.
l Double-click a single item.Result: That item is inserted into the Package Items area, and the SelectMenu Items window remains open.
l Hold your mouse button down on one individual item (without moving)for a half-second and drag that item from the Select Menu Items windowonto the Package Items tab.Result: The item is inserted into the Package Items area.
l Select a group of items by dragging over them, or using your [Shift] or[Ctrl] keys, and then hold your left mouse button down and drag anddrop them onto the Package Items tab.Result: The items are inserted into the Package Items area.
l Click the Select Items button at the top left of the Select Menu Itemswindow.Result: Any highlighted items are inserted into the Package Items area,and the Select Menu Items window remains open.
l Click OK.Result: Any highlighted items are inserted in the Package Items tab, andthe Select Menu Items window closes.
- 38 -

Unit 3: Using the Menu Manager Tabs
7. [Optional] Enter a Selection Comment for your package items.Note: This comment can be used as a hint when selecting items for an event;examples might include "Package Portion," "Per Person," etc.
8. [Optional] Add or remove a price to be associated with the package item.Note: This price will be retrieved with the package when it is selected intoan event, and will default to the price applied when the package item wasadded to your menus.
Editing Additional Package Item Details
Tip: If you want the newcolumnsyou've selectedto be displayed in thePackage Items tab gridasa default, click theSave Current WindowSettings button at thetop right of theMenuManager window.
1. Click the Quick Column Customizing button , located at the top left of thegrid on the Package Items tab.Result: A drop-down list of optional columns appears (see table below).
2. Click the checkbox next to any column heading to have that column appear inthe grid.Result: Any columns with checks next to them appear in the grid.
Note: The Automatically Set Column Widths button at the right-handside of the Package Items tab is selected by default, meaning that any selec-ted columns will automatically shrink to fit in this window without the need toscroll horizontally.
3. [Optional] Hold your left mouse button down on a column heading in the listand drag up and down to reposition that column in the grid.Note: You can also drag column headings left and right in the grid itself.
4. Enter information into the new fields as described below.
Field DescriptionItemName*
Identifies the package item.
Price* Indicates the price of the item.SelectionComment*
Can be used as a hint when selecting items for an event; examplesmight include "Package Portion," "Per Person," etc.
Cost Indicates the cost of the item; will default to cost applied to packageitem when it was set up.
Type* Allows you to categorize items as being "Food," "Beverage," "Liquor,""Equipment," "Labor," "Room" or "Other"; will default to cost applied tomodifier item when it was set up.
- 39 -

Unit 3: Using the Menu Manager Tabs
Field DescriptionDefaultQty
Allows you to establish a default quantity for the item when pulled intoan event; can be used in conjunction with "Linked" below to calculate aquantity per guest (e.g., a Default Quantity of "3" for each guest attend-ing the event).
Linked Offers a checkbox allowing you to link the quantity of this item to theguest count of an event as a default.
Rounding Used in conjunction with the two options above to avoid partial quant-ities; e.g., a pastry with the Default Quantity of "1.5" which is alsoLinked to the guest count for a party of 25, will default a quantity of"37.5" pastries. In this case you might round it "Up."
Min Qty Allows you to establish a minimum quantity for an item when it is selec-ted into an event.
* Displayed on the grid by default.
- 40 -

Menu Manager Tools
Unit 4: Menu Manager Tools
Objectives:
Upon completing this unit, you will be able to:
l Update the cost of a menu item based on the current ingredients list.l Use the Auto Sum feature to change menu item costs on-the-fly.l Update the cost of event food/service items based on the current menu cost.l Update the price of a menu item based on current menu cost.l Use the Markup feature to update the price of individual menu items.
Copying Items from Menu to Menu
You can copy existing menu items from one menu to another - either individually ormultiple items at one time.
Copying Menu Items
1. In the left pane of the Menu Manager window, click the title of the menu con-taining items you want to copy.
2. In the main pane of the window, select the item or items you want to copy.Note: Select multiple items by either holding your[Shift]key down to select agroup of contiguous items or holding your[Ctrl]key down to select items atrandom.
3. Click your right mouse button over any one of the selected items.Result: A pop-up menu of options appears.Note: If you right-click an item that's not currently selected, all selecteditems become unselected.
4. Choose Special Editing > Copy Selected Items.Result: A confirmation message appears.
- 41 -

Unit 4: Menu Manager Tools
5. Click Yes.Result: An informational message appears.
6. Click OK.
7. In the left pane of the Menu Manager window, click the title of the menu intowhich you want to copy the items.
8. In the main pane of the window, click your right mouse button and chooseSpecial Editing > Paste (All Copied Items).Result: A confirmation message appears.
9. Click Yes.
Important Note: If this menu already contains items, you will be promptedwhether or not to delete them prior to pasting the copied items. Click No tohave the existing items remain in the menu and then paste the copied items;click Yes to remove the existing items from the menu first.
Making a Menu Temporarily Inactive
You can make one of your default menus temporarily inactive, so that it will notappear when selecting menu items for an event, and will not appear on your MenuSummary print. This can be particularly useful for seasonal menus.
- 42 -

Unit 4: Menu Manager Tools
Making a Menu Inactive
1. In the left pane of the Menu Manager window, right-click a menu title.Result:A pop-up menu appears.
2. Select View/Edit Menu Details.Result: The details window for the selected menu appears.Note: As an alternative, you can click a title to select it and then click the
View/Edit Menu Details button on the right-hand side of the titles pane.
3. Click the checkbox labeled Inactive.Result: The menu is made inactive.Note: The menu's title will still appear in this left pane of Menu Manager, butwill be grayed out; it will no longer be shown when selecting menu items foran event or when generating the Menu Summary print.
Inserting Page Breaks
The page break inserts a marker after the item you select. This marker indicatesthat the item is to appear on a separate page. A well-placed page break will enableyour prints to be more logically organized (perhaps serving as dividers among soupsand salads, entrees, desserts, etc.).
- 43 -

Unit 4: Menu Manager Tools
Inserting Page Breaks
1. Click on any Sub-Event in Event Manager.
2. From the Food/Service tab, right-click where you would like a new page tobegin.
3. Select Page Break (on prints).Result: A yellow line is inserted under the last item name which will appearbefore the page break. When you generate a print, the designated item willdisplay on its own page.
Creating an Inventory for Reusable Items
You can designate a reusable menu item as an inventoried item and record the totalnumber you have in stock. You can even set custom times for the items, in case youneed additional time to clean or restock them, etc.
Using the Inventory Feature
1. Access the Menu Manager by clicking the Menu Manager button on theSetup sidebar on the left-hand side of your screen.
2. On the left-hand side of the Menu Manager, click the title of the menu con-taining the item you would like to inventory.
3. Click the checkbox in the Inventory column for the menu item you want toinventory.Note: If the Inventory column is not currently displayed on your screen,
retrieve it from your Quick Column Customizing tool .
Using the In-Stock Feature
1. From Menu Manager, click inside the In Stock column for the menu itemyou want to set an in-stock amount for.Note: If the In Stock column is not currently displayed on your screen,
retrieve it from your Quick Column Customizing tool .
2. Type a number into the field or use the left/right arrows to select a numberfor the In Stock item.
- 44 -

Unit 4: Menu Manager Tools
Selecting an Inventory Item for an Event
1. Access the Event Manager by clicking the Event Manager button on theMain sidebar on the left-hand side of your screen.
2. Search for the event for which you want to select inventory items.
3. Click the Sub-Event display to open.
4. Click the Display Menus button .Result: The Select Menu Items window opens.
5. Select the appropriate menu for inventory items.
6. Click the inventory item to select.Result: The In Stock amount and the In Use amount will be displayed on thebottom of the Select Menu Items window.
7. Click OK to select the menu item and close the window.
- 45 -

Unit 4: Menu Manager Tools
Assigning From and To Times for Inventoried Items
You can assign a special “From” and “To” times to all inventoried menu items, dif-ferent from the “Start” and “End” times of the corresponding event itself. This willenable you to accurately keep track of the availability of every reusable menu itemin your inventory. For example, a client rents an LCD projector for an event but willbe using it for only the first hour of the event. Establishing a “From” and “To” timewill prevent an inventory conflict when you rent the DVD player again during theday.
1. Access the Event Manager by clicking the Event Manager button on theMain sidebar on the left-hand side of your screen.
2. Search for the event you want to establish “From” and “To” times for.
3. Click the Sub-Event display to open.
4. Click the menu item you want to establish “From” and “To” times for.Note: If there if is more than one sub-event, click on the sub-event where theinventory item is located.Note: If the menu items are not currently displayed, click the Food/Servicetab on the bottom of the page.
5. Right-mouse click and select New Food/Service Window at the bottom ofthe pop-up window.
6. In the Food/Service Item Details View window, click the Quick Column
Customizing button next to the Menu Item Name column.
- 46 -

Unit 4: Menu Manager Tools
7. At the bottom of the drop-down list, click the Inventory From and Invent-ory To checkboxes.Result: The names will appear at the top of the menu item details grid.
Note: Click the Save Current Window Settings button to save this as adefault setting every time you open Caterease.
8. In the Inventory From field, click the down arrow located on the right-handside of the field to access the drop-down calendar.
9. Click in the Time field and type or use the up-and-down arrows to select thetime.Note: You can select the current time and date by clicking the Now button atthe bottom of the drop-down calendar.
10. Repeat steps 8 and 9 in the Inventory To field.
11. Click the Close button.
Performing an Inventory Check in Event Manager
After you have selected an inventory item for an event, you can then perform aquick inventory conflict check to determine whether you have an inventory conflict.
- 47 -

Unit 4: Menu Manager Tools
1. Access the Event Manager by clicking Event Manager from the Main side-bar.
2. Use the Search tools to search for the desired event.
3. Click the Inventory Conflict Check button at the bottom left-hand side ofthe Event Manager screen.Note: If there is an inventory conflict, a pop-up window will display.
Changing Item Inventory Times in a Batch
1. Access the Food/Service tab in the Event Manager's Sub-Event display.
2. Click the New Food/Service Window button , located on the right-handside of the window.Result: The Food/Service Item Details View window opens.
3. Click the Quick-Column Customizing button , located at the left of theMenu Item Name column.
4. Click into the Inventory From and Inventory To checkboxes to add thesefields to the grid.
5. If you would like to change the Inventory From or Inventory To time of oneitem, select the desired item and click the down arrow to the right of the fieldto access the drop-down calendar.
- 48 -

Unit 4: Menu Manager Tools
6. For multiple items, select all of the items you would like to create custominventory check-out or return times for.Note: Click on one inventory item and hold your [Shift] or [Ctrl] key downto select additional items.
7. Right-click anywhere within the grid and select Special Editing > BatchProcessing.Result: The Batch Processing window opens.
- 49 -

Unit 4: Menu Manager Tools
8. Click the checkbox next to the field or fields (Inv From and/or Inv To) youwould like to batch-process.
9. Click the down arrow located to the right of a particular field to select theinventory from/inventory to date.
10. Type into the Time field to indicate the inventory from/inventory to time, oruse the up-and-down arrows to select a time.
- 50 -

Unit 4: Menu Manager Tools
11. Click OK.Result: An informational prompt appears.
12. Click OK at the prompt, and then click the X, located at the top right-handcorner of the window, to close the Food/Service Item Details window.
Making Changes to Menu Items in Batch
You can make changes to multiple menu items in your default menus sim-ultaneously. Change such details as menu item Type, Category, whether the item ispublished to your online ordering website, whether an item is inventoried or a hostof other options - including basic font formatting of menu item Descriptions,Recipes, Labels or Notes.
- 51 -

Unit 4: Menu Manager Tools
Batch Processing Menu Items
1. In the left pane of the Menu Manager window, click the title of the menu con-taining items you want to edit (or click All Menus to select items from mul-tiple menus simultaneously).
2. In the main pane of the window, select multiple items by either holding your[Shift] key down to select a group of contiguous items or holding your [Ctrl]key down to select items at random.
3. Click your right mouse button over any one of the selected items.Result: A pop-up menu of options appears.Note: If you right-click an item that's not currently selected, all selecteditems become unselected.
4. Choose Special Editing > Batch Processing.Result: The Batch Processing window opens.
- 52 -

Unit 4: Menu Manager Tools
5. On the General tab of the Batch Processing window, click the checkboxnext to any field you would like to change for all of your selected menuitems.
6. In the field itself, enter the new value you would like for all selected menuitems.Note: Most fields have for your convenience. Some, such as No Tax, No SC,Linked, Hide, etc., have checkboxes that you can enable or disable for allselected menu items.
7. [Optional] Click the Formatting tab and establish formatting changes (fontstyle, size and alignment), then click the checkbox at the bottom of the tab toindicate which detail of all selected menu items you want reformatted(Descriptions, Recipes, Labels or Notes).
8. When finished, click OK.Result: Your changes are applied to all selected menu items and a con-firmation message appears.Note: Depending on the number of changes/items, this could take a fewminutes.
9. Click OK to close the confirmation message window.
Updating Menu Costing
You can quickly update menu item costs (and even prices) from your program's mas-ter ingredients list or using interfaces with other menu management software. Oncemenu information is updated, you can even update the costs of future events youhave already booked.
Updating Costing from Ingredients List
Tip: After you haveupgraded the costs ofyour menu items, youmaywant to upgradethe costs of your futureeventsbased on thesenew item costs.
1. Click the Setup sidebar on the left side of the screen and clickMenu Man-ager.Result: The Menu Manager window opens.Note: As an option, you can click the Administration ribbon tab at the top ofthe screen and choose Menus > Menu Manager.
2. Click the Select ribbon tab at the top of the screen and click the General but-ton.
- 53 -
Unit 4: Menu Manager Tools
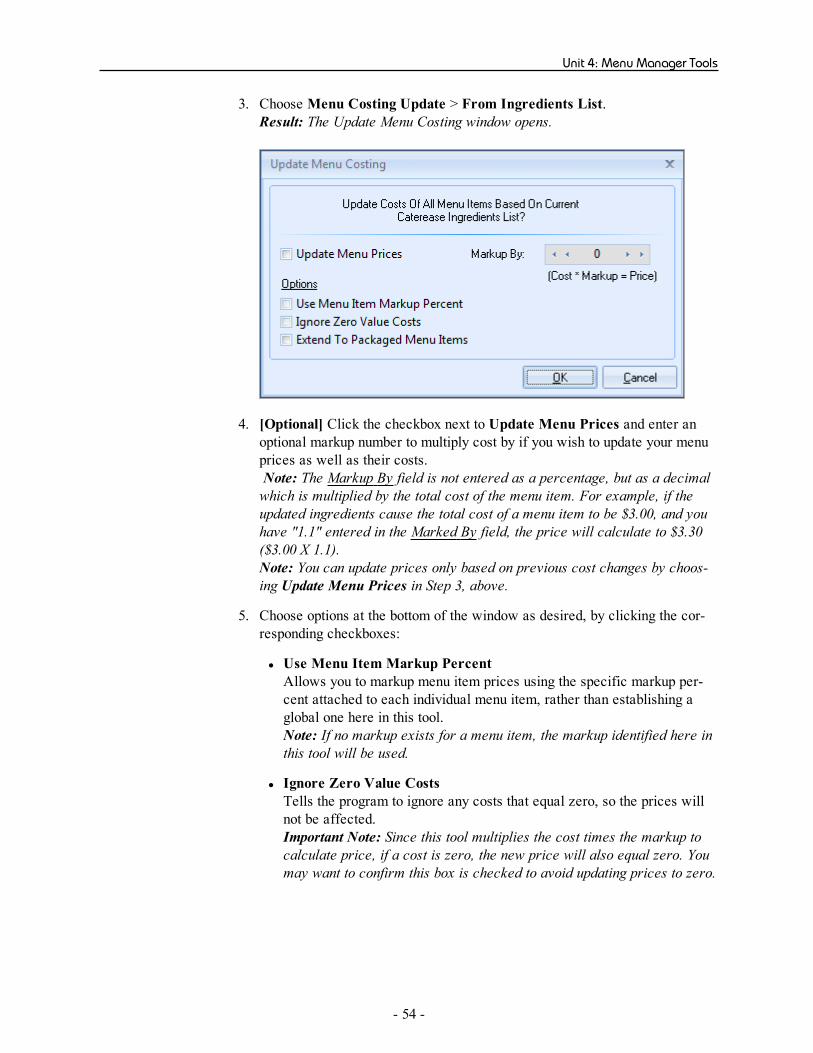
3. Choose Menu Costing Update > From Ingredients List.Result: The Update Menu Costing window opens.
4. [Optional] Click the checkbox next to Update Menu Prices and enter anoptional markup number to multiply cost by if you wish to update your menuprices as well as their costs.Note: The Markup By field is not entered as a percentage, but as a decimalwhich is multiplied by the total cost of the menu item. For example, if theupdated ingredients cause the total cost of a menu item to be $3.00, and youhave "1.1" entered in the Marked By field, the price will calculate to $3.30($3.00 X 1.1).Note: You can update prices only based on previous cost changes by choos-ing Update Menu Prices in Step 3, above.
5. Choose options at the bottom of the window as desired, by clicking the cor-responding checkboxes:
l Use Menu Item Markup PercentAllows you to markup menu item prices using the specific markup per-cent attached to each individual menu item, rather than establishing aglobal one here in this tool.Note: If no markup exists for a menu item, the markup identified here inthis tool will be used.
l Ignore Zero Value CostsTells the program to ignore any costs that equal zero, so the prices willnot be affected.Important Note: Since this tool multiplies the cost times the markup tocalculate price, if a cost is zero, the new price will also equal zero. Youmay want to confirm this box is checked to avoid updating prices to zero.
- 54 -

Unit 4: Menu Manager Tools
l Extend to Packaged Menu ItemsExtends cost and/or price markups to items on the Package Items tab atthe bottom of Menu Manager, in addition to regular menu items.
6. Click OK.Result: A notification message appears.
7. Click OK.Result: The update tool closes down and your menu costs and/or prices areupdated.
Updating Costing from Another Source
Tip: Remember thatitemsare only linked inthis interface if the ItemCode in Catereasematches the cor-responding number inyour menuman-agement program.Those correspondingnumbers ( PLU's) are lis-ted here in the firstcolumn on this interfacewindow (with the head-ing "ItemCode"). Youcan print this list (Step 8,above), and enter thosenumbers into the ItemCode column inCaterease.
1. Click the Setup sidebar on the left-hand side of the screen and clickMenuManager.Result: The Menu Manager window opens.Note: As an option, you can click the Administration ribbon tab at the top ofthe screen and choose Menus > Menu Manager.
2. Click the Select ribbon tab at the top of the screen and click the General but-ton.
3. Choose Menu Costing Update > From Other Source and choose yourmenu management program.Result: A browse window appears, open to the folder you have established asyour export folder for this interface.Note: If you are prompted that you have not yet established an export folder(or that the folder you have selected does not contain the appropriate file),check to confirm you have already exported information from your menumanagement program.
4. Select the file of menu information to be imported and click Open.Result: A confirmation message appears.Note: This message might include important information such as the mod-ified date of your selected costing file, and the date you last updated yourmenu costing.
5. Click Yes to confirm.Result: A split screen appears listing menu items, prices and costs beingimported from Food-Trak and their corresponding items in Caterease.
6. [Optional] Click Include Sell Price if you wish the sell prices of items to beupdated along with their costs.
7. Click Process Update.
8. Click Print (top left of form) if you want to generate a report of all items lis-ted on this screen, including both those that were updated and those that didnot find matches in Caterease.
- 55 -

Unit 4: Menu Manager Tools
Updating Menu Pricing
You can update pricing for all menu items at one time, based on changes to itemcosts.
Updating Menu Pricing
1. Click the Setup sidebar on the left-hand side of the screen and clickMenuManager.Result:The Menu Manager window opens.Note:As an option, you can click the Administration ribbon tab at the top ofthe screen and choose Menus > Menu Manager.
2. Click the Select ribbon tab at the top of the screen and click the General but-ton.
3. Choose Menu Pricing Update.Result:The Update Menu Pricing window opens.
4. Enter a markup number to be multiplied by item costs to calculate the newprices.Note: The Markup By field is not entered as a percentage, but as a decimalwhich is multiplied by the total cost of the menu item. For example, if theupdated ingredients cause the total cost of a menu item to be $3.00, and youhave "1.1" entered in the Marked By field, the price will calculate to $3.30($3.00 X 1.1). (This number will be ignored by menu items with individualmarkups already assigned.)Note: You can update costs and prices together by choosing Menu CostingUpdate in Step 3, above.
5. Choose options at the bottom of the window as desired, by clicking the cor-responding checkboxes:
- 56 -

Unit 4: Menu Manager Tools
l Ignore Zero Value CostsTells the program to ignore any costs that equal zero, so the prices willnot be affected.
l Extend to Packaged Menu ItemsExtends price markups to items on the Package Items tab at the bottom ofMenu Manager, in addition to regular menu items
Important Note:Since this tool multiplies the cost times the markup to cal-culate price, if a cost is zero, the new price will also equal zero. You maywant to confirm this box is checked to avoid updating prices to zero.
6. Click OK.Result:A notification message appears
7. Click OK.Result: The update tool closes down and your menu costs and/or prices areupdated.
Updating Event Costing
Once you have updated the costs of items in your default menus, you can use thosenew numbers to update the costs of future events you have already booked.
Updating Event Costing
Tip: You can alsoupdate costing of a spe-cific event byopeningthat event in Event Man-ager, going to theSelect ribbon tab andclickingGeneral >Cost-ing Update.
1. Click the Setup sidebar on the left side of the screen and clickMenu Man-ager.Result: The Menu Manager window opens.Note: As an option, you can click the Administration ribbon tab at the top ofthe screen and choose Menus > Menu Manager.
2. Click the Select ribbon tab at the top of the screen and then choose General> Event Costing Update at the top of your Caterease screen.Result: The Event Costing Update window opens.
- 57 -

Unit 4: Menu Manager Tools
3. Click either to update costs for all events after a certain date or for all eventswithin a certain date range.
4. [Optional] Click the checkbox next to Exclude Cancelled Events to ignorethe costs of any event in your date range with a status of "Cancelled."
5. Click OK.Result: A confirmation message appears.
6. Click Yes to confirm.Result: A notification message appears.
7. Click OK on your results message.Results:The Event Costing Update window closes and events in your daterange have been updated.
- 58 -