Track Bumpers – Wood or Plastic Your Choice
10
Track Bumpers – Wood or Plastic Your Choice An assembly method is presented to build track bumpers for non-ballasted track such as Atlas O 21 st Century, Ross Custom, Gargraves etc. Whether you decide to build with wood or plastic both designs are easy to assemble and either one will look great on your layout. Plastic Bumper Note: because of dissimilar plastic (ABS and Styrene) used in the construction it is recommended that a glue such as Plastruct Plastic Weld or Testors Model Cement that is compatible with different types of plastic be used. Plastic Bumper Cut List Part Type Part Number Length (inches) QTY Upright Posts ABS H-Column 1/4” H-8 1 ½ 4 Cross Member ABS I-Beam 5/16” B-10 3 1 Bottom Ties ABS H-Column 1/4” H-8 2 ¾ 2 Bumper Sub Wall ABS I-Beam 5/16” B-10 3 1
Transcript of Track Bumpers – Wood or Plastic Your Choice
Track Bumpers – Wood or Plastic
Your Choice
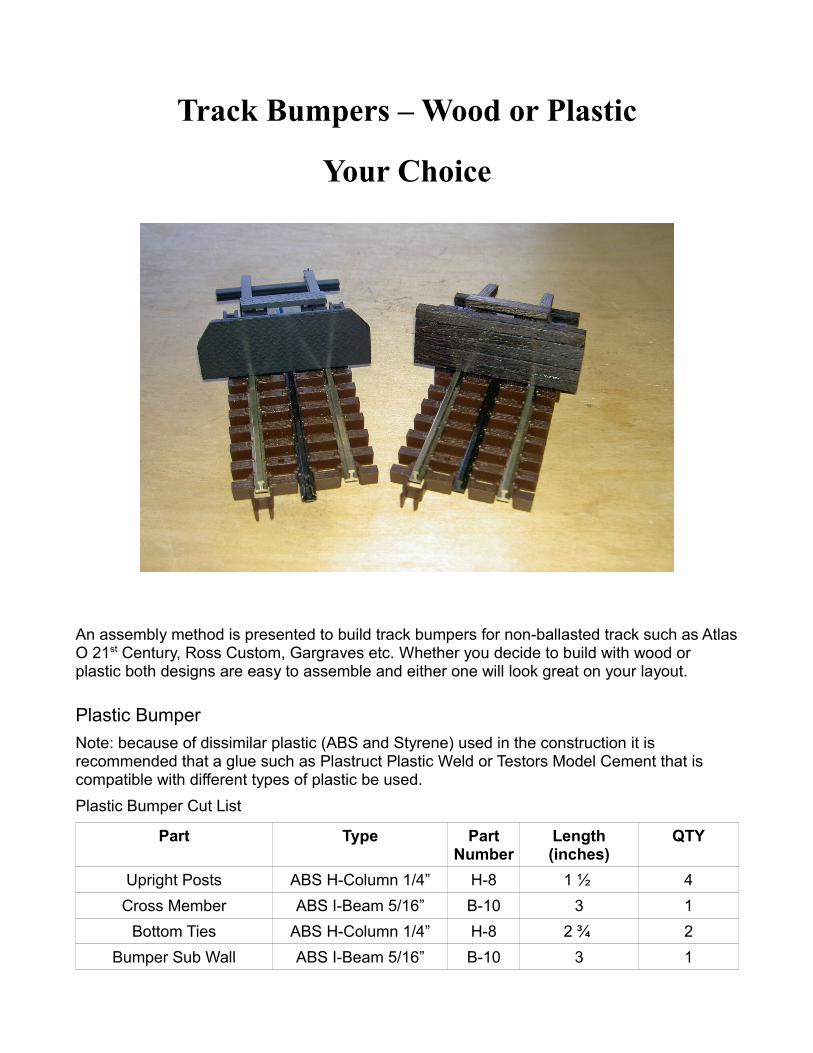
An assembly method is presented to build track bumpers for non-ballasted track such as Atlas O 21st Century, Ross Custom, Gargraves etc. Whether you decide to build with wood or plastic both designs are easy to assemble and either one will look great on your layout.
Plastic BumperNote: because of dissimilar plastic (ABS and Styrene) used in the construction it is recommended that a glue such as Plastruct Plastic Weld or Testors Model Cement that is compatible with different types of plastic be used.Plastic Bumper Cut List
Part Type Part Number
Length(inches)
QTY
Upright Posts ABS H-Column 1/4” H-8 1 ½ 4Cross Member ABS I-Beam 5/16” B-10 3 1
Bottom Ties ABS H-Column 1/4” H-8 2 ¾ 2Bumper Sub Wall ABS I-Beam 5/16” B-10 3 1

2 ¾ 2 ½
11
Bumper Wall 80 mil thick white styrene
SSS-108 3 x 1 1/8 1
Bumper Wall Plating Diamond plate PS-152 3 x 1 1/8 1Back Tie ABS H-Column 3/16” H-6 2 ½ 1
Angled Ties ABS H-Column 3/16” H-6 2 ¾ 2Light Panel Wall 80 mil thick white
styreneSSS-108 ½ x 1 ½ 1
Light Panel Wall Plating Diamond plate PS-152 ½ x 1 ½ 1
Note: while Plastruct parts numbers are used Evergreen Models offers the same parts. Plastruct PS-152 diamond plate is used for the bumper wall however other plating types may be more appropriate such as the Double Diamond or Thread Plate.
1 – Cut ABS H-8 bottom ties and upright posts to size. Use a track section as a jig to glue the posts to the bottom tie. Center a bottom tie on one outside rail then glue the outside and inside posts to the sides of the tie making sure the front faces line up and the posts fit through the track ties and bottom out on the assembly table. The posts will act as stops for the bumper assembly when placed on track therefor no glue or clips will be necessary to secure the completed bumper to the track. For Atlas O track the width of the ABS H-8 member is enough so that the posts when glued to the sides have clearance to fit on both sides of the
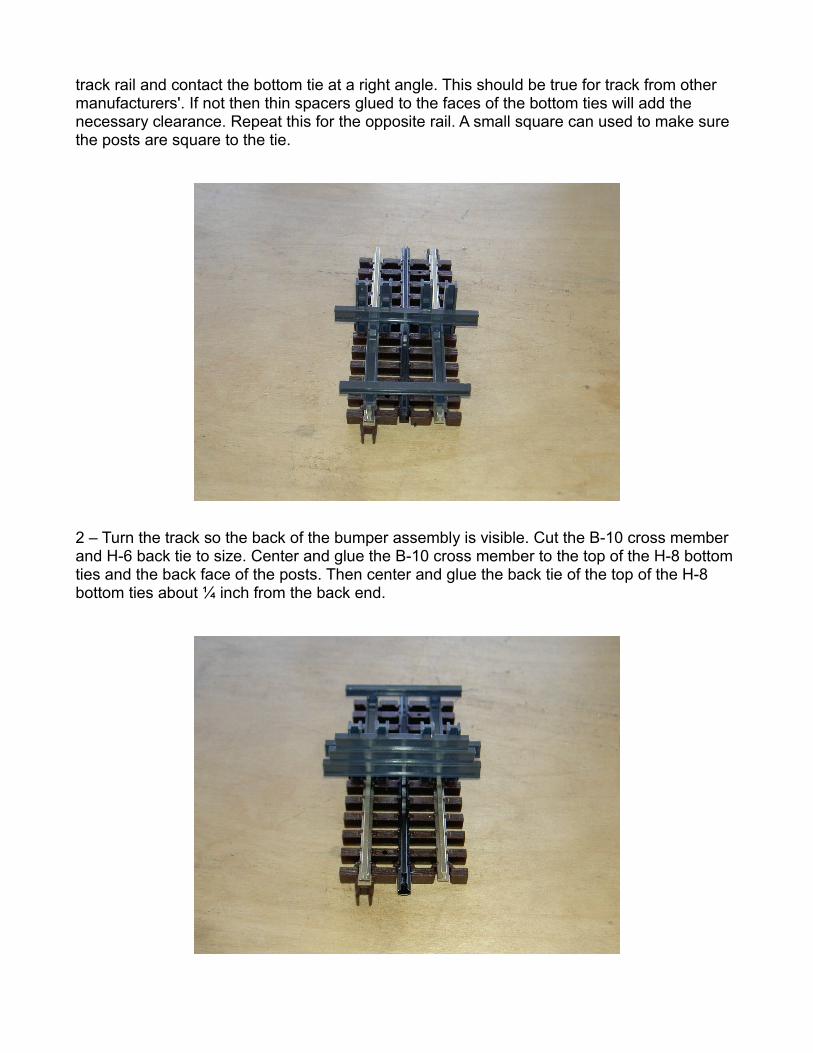
track rail and contact the bottom tie at a right angle. This should be true for track from other manufacturers'. If not then thin spacers glued to the faces of the bottom ties will add the necessary clearance. Repeat this for the opposite rail. A small square can used to make sure the posts are square to the tie.
2 – Turn the track so the back of the bumper assembly is visible. Cut the B-10 cross member and H-6 back tie to size. Center and glue the B-10 cross member to the top of the H-8 bottom ties and the back face of the posts. Then center and glue the back tie of the top of the H-8 bottom ties about ¼ inch from the back end.
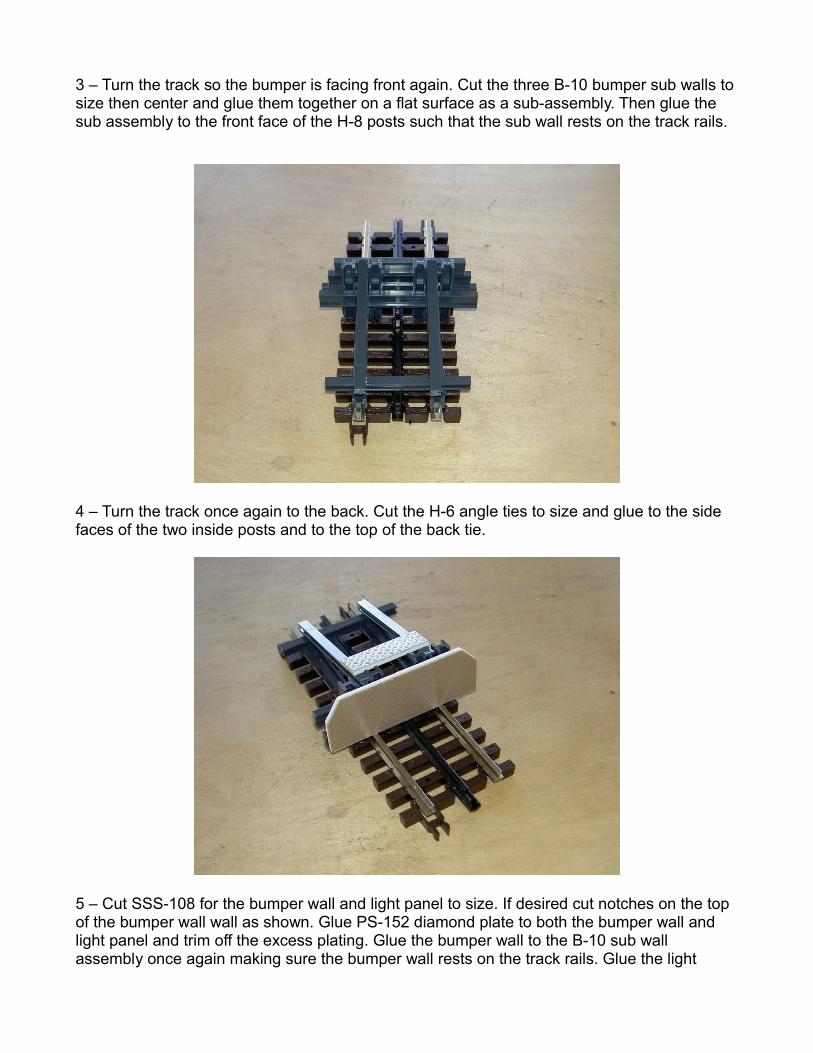
3 – Turn the track so the bumper is facing front again. Cut the three B-10 bumper sub walls to size then center and glue them together on a flat surface as a sub-assembly. Then glue the sub assembly to the front face of the H-8 posts such that the sub wall rests on the track rails.
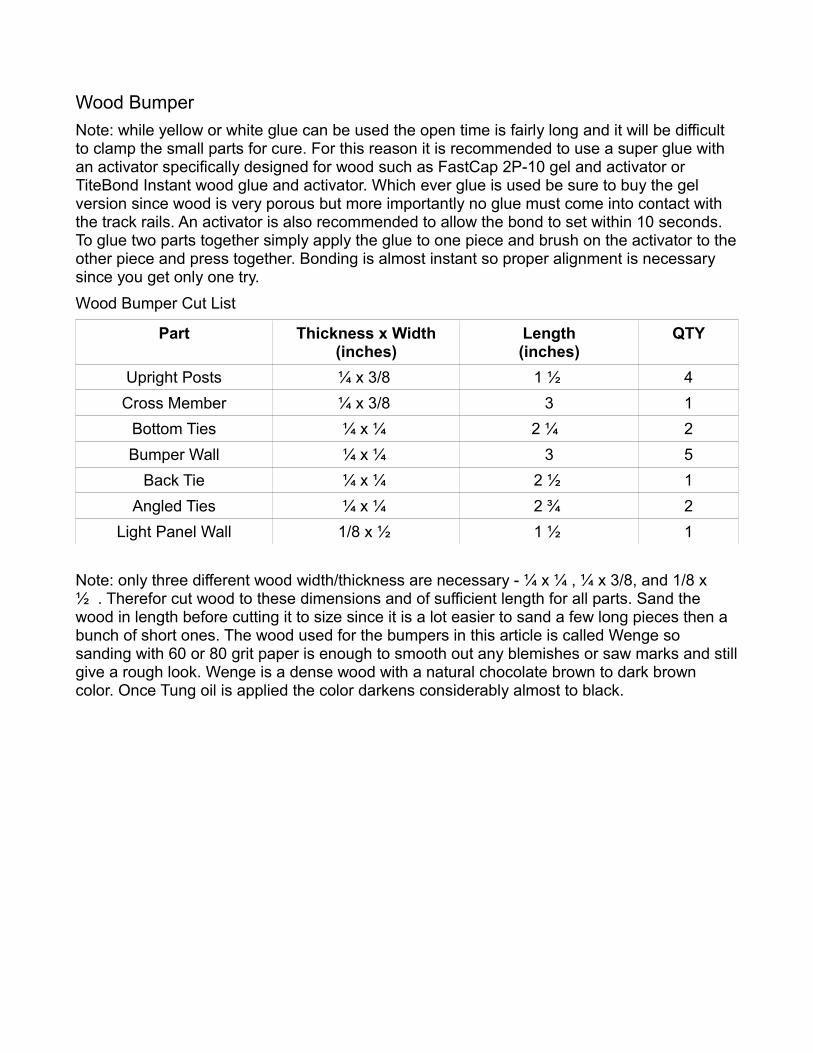
4 – Turn the track once again to the back. Cut the H-6 angle ties to size and glue to the side faces of the two inside posts and to the top of the back tie.
5 – Cut SSS-108 for the bumper wall and light panel to size. If desired cut notches on the top of the bumper wall wall as shown. Glue PS-152 diamond plate to both the bumper wall and light panel and trim off the excess plating. Glue the bumper wall to the B-10 sub wall assembly once again making sure the bumper wall rests on the track rails. Glue the light

panel to the top of the H-6 angled ties.
6 - The bumper is now complete and ready for paint.
Wood BumperNote: while yellow or white glue can be used the open time is fairly long and it will be difficult to clamp the small parts for cure. For this reason it is recommended to use a super glue with an activator specifically designed for wood such as FastCap 2P-10 gel and activator or TiteBond Instant wood glue and activator. Which ever glue is used be sure to buy the gel version since wood is very porous but more importantly no glue must come into contact with the track rails. An activator is also recommended to allow the bond to set within 10 seconds. To glue two parts together simply apply the glue to one piece and brush on the activator to the other piece and press together. Bonding is almost instant so proper alignment is necessary since you get only one try. Wood Bumper Cut List
Part Thickness x Width(inches)
Length(inches)
QTY
Upright Posts ¼ x 3/8 1 ½ 4Cross Member ¼ x 3/8 3 1
Bottom Ties ¼ x ¼ 2 ¼ 2Bumper Wall ¼ x ¼ 3 5
Back Tie ¼ x ¼ 2 ½ 1Angled Ties ¼ x ¼ 2 ¾ 2
Light Panel Wall 1/8 x ½ 1 ½ 1
Note: only three different wood width/thickness are necessary - ¼ x ¼ , ¼ x 3/8, and 1/8 x ½ . Therefor cut wood to these dimensions and of sufficient length for all parts. Sand the wood in length before cutting it to size since it is a lot easier to sand a few long pieces then a bunch of short ones. The wood used for the bumpers in this article is called Wenge so sanding with 60 or 80 grit paper is enough to smooth out any blemishes or saw marks and still give a rough look. Wenge is a dense wood with a natural chocolate brown to dark brown color. Once Tung oil is applied the color darkens considerably almost to black.
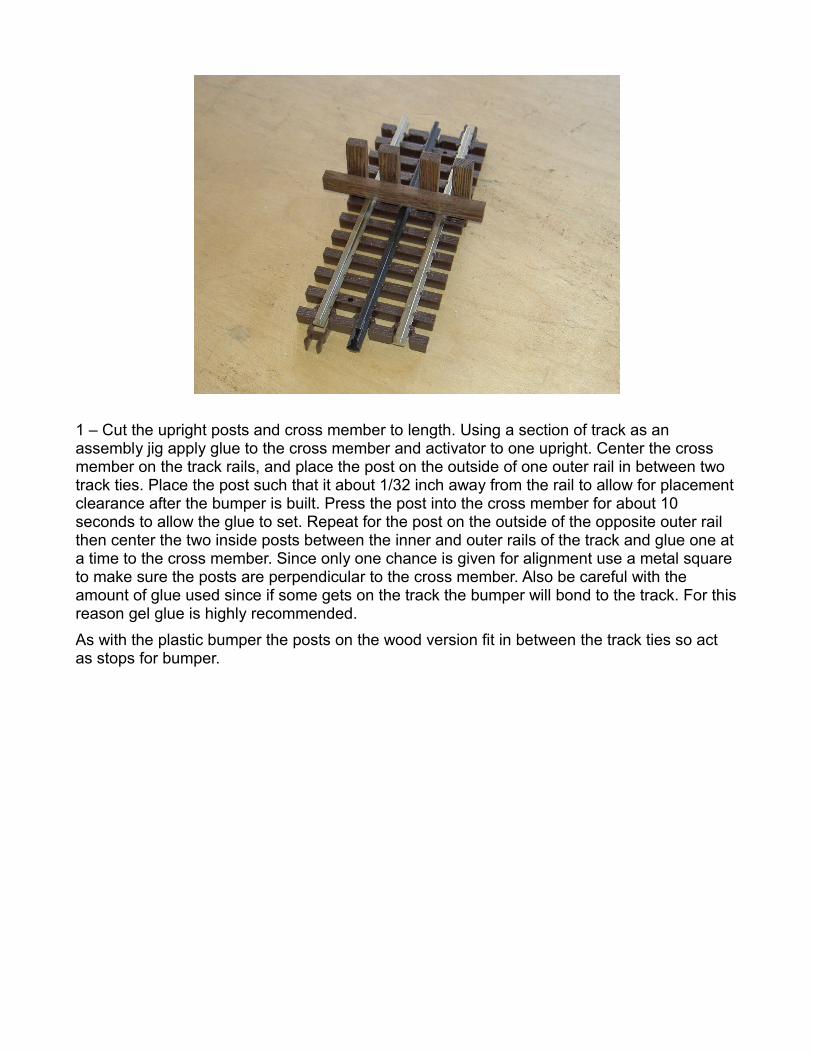
1 – Cut the upright posts and cross member to length. Using a section of track as an assembly jig apply glue to the cross member and activator to one upright. Center the cross member on the track rails, and place the post on the outside of one outer rail in between two track ties. Place the post such that it about 1/32 inch away from the rail to allow for placement clearance after the bumper is built. Press the post into the cross member for about 10 seconds to allow the glue to set. Repeat for the post on the outside of the opposite outer rail then center the two inside posts between the inner and outer rails of the track and glue one at a time to the cross member. Since only one chance is given for alignment use a metal square to make sure the posts are perpendicular to the cross member. Also be careful with the amount of glue used since if some gets on the track the bumper will bond to the track. For this reason gel glue is highly recommended.As with the plastic bumper the posts on the wood version fit in between the track ties so act as stops for bumper.
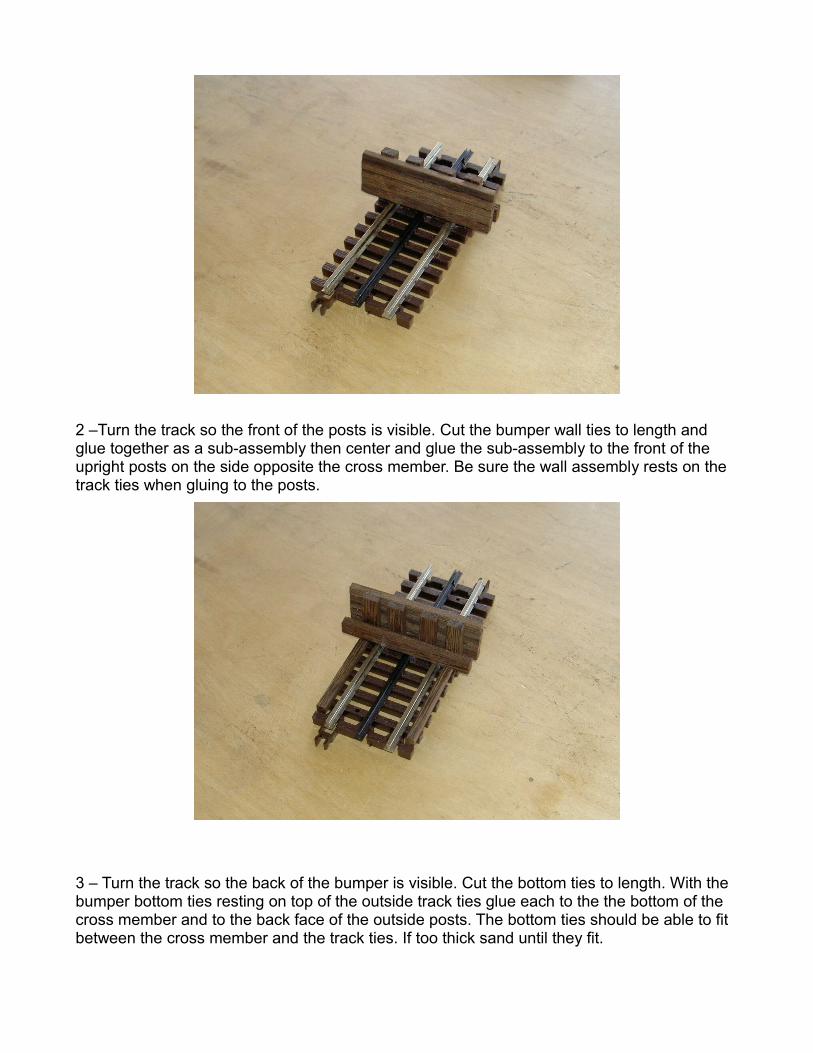
2 –Turn the track so the front of the posts is visible. Cut the bumper wall ties to length and glue together as a sub-assembly then center and glue the sub-assembly to the front of the upright posts on the side opposite the cross member. Be sure the wall assembly rests on the track ties when gluing to the posts.
3 – Turn the track so the back of the bumper is visible. Cut the bottom ties to length. With the bumper bottom ties resting on top of the outside track ties glue each to the the bottom of the cross member and to the back face of the outside posts. The bottom ties should be able to fit between the cross member and the track ties. If too thick sand until they fit.
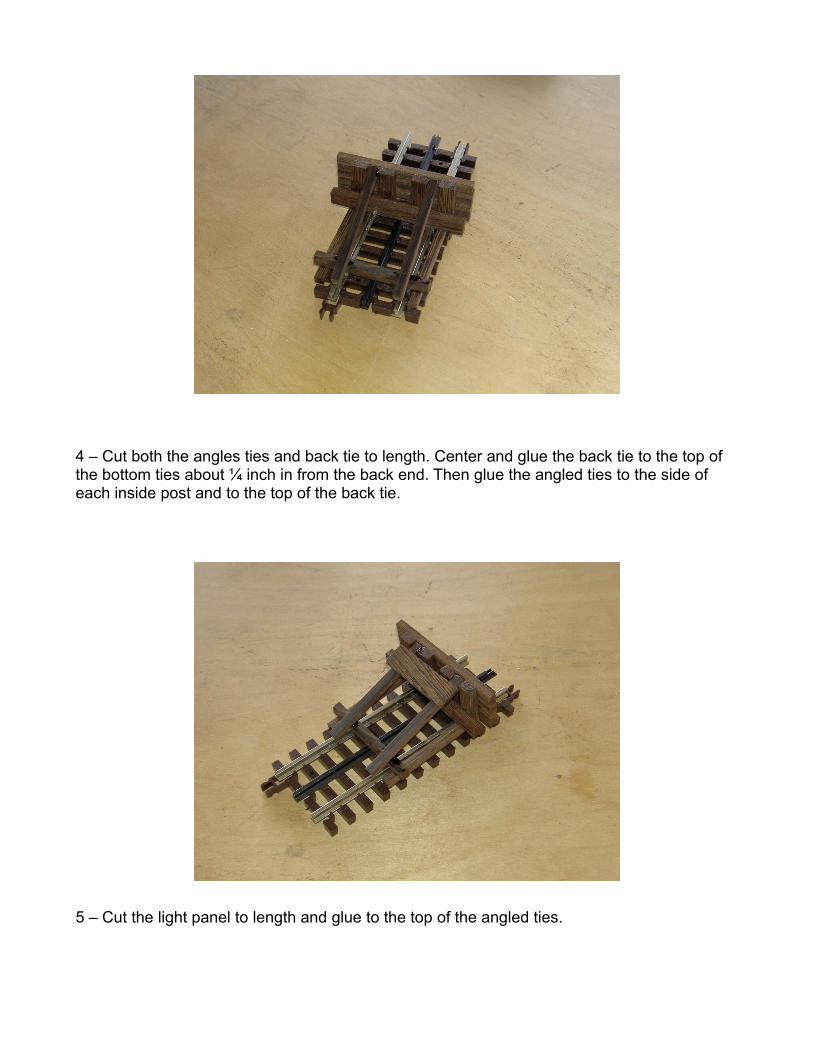
4 – Cut both the angles ties and back tie to length. Center and glue the back tie to the top of the bottom ties about ¼ inch in from the back end. Then glue the angled ties to the side of each inside post and to the top of the back tie.
5 – Cut the light panel to length and glue to the top of the angled ties.

6 - The bumper assembly is now ready for stain, oil or paint.For a more prototypical appearance a light can be added to the assembly by drilling a hole in the light panel for the lamp assembly. Miniature red LED and incandescent lamps are available up to about 14 volts from companies such as Miniatronics. Unfortunately there does not appear to be a red miniature lamp in the 18-20 volt range which could then be tied into track voltage. An initial web search did show one white bulb with solderable leads from Eicko– part number Eiko 00333 0.72 watt 18 volt .04 amp T1.75 Bi-Pin (G3.17) Base #7370 Automotive Miniature Light Bulb, length .6 inches and width .2 inches . Depending on the size bulb used the width of the light panel may have to change.
Author biography:Joseph Fauty is owner of Model Structures for Model Railroads – www.ModelStructuresINC.com. His company specializes in wood bridges and decking for model train layouts and custom designed plastic structures for O scale modelers.