
Titanium Mobile: How-To - Amazon Web...
24
Titanium Mobile: How-To Getting Started With Appcelerator Titanium August 17, 2010 Release GSL For Linux
Transcript of Titanium Mobile: How-To - Amazon Web...
Titanium Mobile: How-To
Getting Started With Appcelerator Titanium
August 17, 2010
Release GSL
For Linux
Getting Started with Appcelerator Titanium (Linux)
Copyright © 2010 Appcelerator, Inc. All rights reserved.Appcelerator, Inc. 444 Castro Street, Suite 818, Mountain View, California 94041
No part of this publication may be reproduced, stored in a retrieval system, or transmitted, in any form or by any means, mechanical, elec-tronic, photocopying, recording, or otherwise, without prior written permission of Appcelerator, Inc., with the following exceptions: Any per-son is hereby authorized to store documentation on a single computer for personal use only and to print copies of documentation for personal use provided that the documentation contains Appcelerator's copyright notice.
The Appcelerator name and logo are registered trademarks of Appcelerator, Inc. Appcelerator Titanium is a trademark of Appcelerator, Inc. All other trademarks are the property of their respective owners.
No licenses, express or implied, are granted with respect to any of the technology described in this document. Appcelerator retains all intellectual property rights associated with the technology described in this document. Every effort has been made to ensure that the information in this document is accurate. Appcelerator is not responsible for typographical or technical errors. Even though Appcelerator has reviewed this document, APPCELERATOR MAKES NO WARRANTY OR REPRESENTATION, EITHER EXPRESS OR IMPLIED, WITH RESPECT TO THIS DOCUMENT, ITS QUALITY, ACCURACY, MERCHANTABILITY, OR FITNESS FOR A PARTICULAR PURPOSE. AS A RESULT, THIS DOCUMENT IS PROVIDED "AS IS," AND YOU, THE READER, ARE ASSUMING THE ENTIRE RISK AS TO ITS QUALITY AND ACCURACY. IN NO EVENT WILL APPCELERATOR BE LIABLE FOR DIRECT, INDIRECT, SPECIAL, INCIDENTAL, OR CONSEQUENTIAL DAMAGES RESULTING FROM ANY DEFECT OR INACCURACY IN THIS DOCUMENT, even if advised of the possibility of such damages. THE WARRANTY AND REMEDIES SET FORTH ABOVE ARE EXCLUSIVE AND IN LIEU OF ALL OTHERS, ORAL OR WRITTEN, EXPRESS OR IMPLIED. No Appcelerator dealer, agent, or employee is authorized to make any modification, extension, or addition to this warranty. Some states do not allow the exclusion or limitation of implied warranties or liability for incidental or consequential damages, so the above limitation or exclusion may not apply to you. This warranty gives you specific legal rights, and you may also have other rights which vary from state to state.
2 Release GSL, 8/17/10

Getting Started with Appcelerator Titanium (Linux)
Contents
Step 0: Introduction .................................................................................................... 4Step 0: Development environment requirements .......................................................................4
Step 1: Installing Titanium And Your SDK ................................................................ 5Step 1: Install Titanium and mobile SDK’s .................................................................................5
Install the 32-bit execution libraries .......................................................................................6Install the Sun Java 6 JDK ....................................................................................................6Install Android SDK ...............................................................................................................7Install Titanium Developer ...................................................................................................10
Step 2: Running the Sample Applications .............................................................. 13Step 2: Run the sample mobile apps .......................................................................................13
Create the HelloWorld project .............................................................................................14Run the default project for Android ......................................................................................16Edit the default project, creating “Hello World” on the Android ...........................................17Download the Kitchen Sink app ..........................................................................................19Import the Kitchen Sink project ...........................................................................................20Run the Kitchen Sink app on the Android emulator ............................................................21Next steps ...........................................................................................................................21Troubleshooting ...................................................................................................................22
3Release GSL, 8/17/10
Step 0: IntroductionGetting Started with Appcelerator Titanium (Linux)
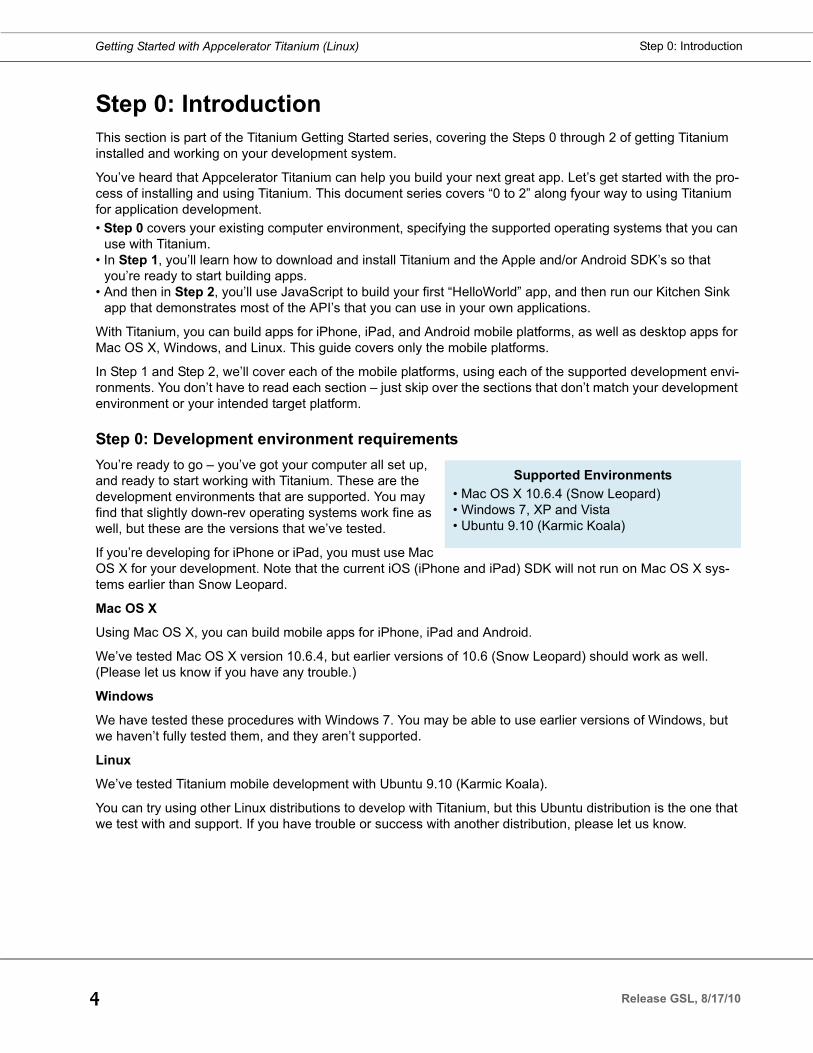
Step 0: IntroductionThis section is part of the Titanium Getting Started series, covering the Steps 0 through 2 of getting Titanium installed and working on your development system.
You’ve heard that Appcelerator Titanium can help you build your next great app. Let’s get started with the pro-cess of installing and using Titanium. This document series covers “0 to 2” along fyour way to using Titanium for application development.• Step 0 covers your existing computer environment, specifying the supported operating systems that you can
use with Titanium.• In Step 1, you’ll learn how to download and install Titanium and the Apple and/or Android SDK’s so that
you’re ready to start building apps.• And then in Step 2, you’ll use JavaScript to build your first “HelloWorld” app, and then run our Kitchen Sink
app that demonstrates most of the API’s that you can use in your own applications.
With Titanium, you can build apps for iPhone, iPad, and Android mobile platforms, as well as desktop apps for Mac OS X, Windows, and Linux. This guide covers only the mobile platforms.
In Step 1 and Step 2, we’ll cover each of the mobile platforms, using each of the supported development envi-ronments. You don’t have to read each section – just skip over the sections that don’t match your development environment or your intended target platform.
Step 0: Development environment requirementsYou’re ready to go – you’ve got your computer all set up, and ready to start working with Titanium. These are the development environments that are supported. You may find that slightly down-rev operating systems work fine as well, but these are the versions that we’ve tested.
If you’re developing for iPhone or iPad, you must use Mac OS X for your development. Note that the current iOS (iPhone and iPad) SDK will not run on Mac OS X sys-tems earlier than Snow Leopard.
Mac OS X
Using Mac OS X, you can build mobile apps for iPhone, iPad and Android.
We’ve tested Mac OS X version 10.6.4, but earlier versions of 10.6 (Snow Leopard) should work as well. (Please let us know if you have any trouble.)
Windows
We have tested these procedures with Windows 7. You may be able to use earlier versions of Windows, but we haven’t fully tested them, and they aren’t supported.
Linux
We’ve tested Titanium mobile development with Ubuntu 9.10 (Karmic Koala).
You can try using other Linux distributions to develop with Titanium, but this Ubuntu distribution is the one that we test with and support. If you have trouble or success with another distribution, please let us know.
Supported Environments• Mac OS X 10.6.4 (Snow Leopard)• Windows 7, XP and Vista• Ubuntu 9.10 (Karmic Koala)
4 Release GSL, 8/17/10

Step 1: Installing Titanium And Your SDKGetting Started with Appcelerator Titanium (Linux)
Step 1: Installing Titanium And Your SDKThis section is part of the Titanium Getting Started series, covering the Steps 0 through 2 of getting Titanium installed and working on your development system.
This document is for development using Linux. You can also develop using Windows or Macintosh, which are covered in related sections.
We used a system running Ubuntu 9.10 (Karmic Koala), 64-bit. You can probably use other versions, but this is the version we tested.
For downloaded files, the filenames given here are current as of when we created this guide. In general, it should be ok to use a later update of the listed files.
Step 1: Install Titanium and mobile SDK’sAppcelerator’s Developer Web site contains information you’ll need to configure your development system, and then begin development using the sample programs. Using Firefox, or another Web browser, navigate tohttp://developer.appcelerator.com/get_started
Here’s the Web page you’ll see:
At the bottom of the page, you’ll see several helpful getting started videos that you can watch. You can watch them now or later; when you’re ready, continue on with these instructions.
5Release GSL, 8/17/10

Step 1: Installing Titanium And Your SDKGetting Started with Appcelerator Titanium (Linux)
You’ll be installing the components on the right that you’ll use to develop mobile applications with Titanium.
Note that Apple’s iOS (iPhone) SDK is not covered here, since iOS (iPhone) development is supported only on the Mac.
There are several API revision levels, and different ver-sions of the SDK’s that we’ll be navigating through in this section. You’ll want to follow these installation steps in order.
We’ll be using a terminal window for these commands. To open a new terminal window from the Gnome menu in Ubuntu, choose Applications -> Accessories -> Terminal. Some of these commands should be executed as root, so we’ll be using the sudo command. When you use sudo, it will ask for your user password (if you have one).
Install the 32-bit execution librariesFirst, install the 32-bit libraries, which are needed in order to run 32-bit applications from within the 64-bit Ubuntu environment:
The apt-get command will evaluate the packages that need to be installed.
Answer “y” (or just “Enter”, as that’s the default) to perform the installation.
Install the Sun Java 6 JDKTo install the JDK, we’ll follow the following steps:• Install the Java 6 JDK• Modify the PATH environment variable• Verify the installation
Install the Java 6 JDK with the following command:
Components to Install• The 32-bit execution libraries• Sun Java Development Kit 6 (aka 1.6)• Google’s Android SDK (for Android apps)• Specific platform packages in the Android
SDK• Titanium Developer
$ sudo apt-get install ia32-libs
$ sudo apt-get install sun-java6-jdk
6 Release GSL, 8/17/10

Step 1: Installing Titanium And Your SDKGetting Started with Appcelerator Titanium (Linux)
Before the installation is complete, you’ll see the Java license agreement. Use the left, right, up and down arrows on the keyboard to navigate within the text window. Then when you see the OK button highlight, press Enter if you agree to the license.
You can verify that your JDK installation was successful by opening a new terminal window (don’t reuse an existing window), and entering the following command:
The system should be able to find the Java compiler; if it does, then output of the command should be the com-piler’s version information:
Install Android SDKUnlike iOS (iPhone) development on the Mac, there is no login or approval process for Android development. However, there are numerous steps that you have to follow to download and install the Android SDK, and then register it for use in Titanium. In preparation, it’s helpful to read about the Android SDK here:http://developer.android.com/sdk/installing.html
When you’re ready, go to the Android SDK download page:http://developer.android.com/sdk/index.html
In the following steps, we’ll show you how to:• Download the Android SDK• Move the Android SDK to a convenient directory• Start the Android SDK and AVD Manager GUI• Download and install the proper Android APIs• Verify that the Android SDK is installed properly
Using Firefox, get the Android SDK. In the "Get Android 2.2" panel, you'll see a link to install the "SDK starter package". Click that link, then download android-sdk_r06-linux_86.tgz from the following page. When you click “Save”, Firefox will place it in your Downloads directory. The Android SDK will take up about 1 GB of disk space.
Now, move and extract the archive to your $HOME directory with the following commands:
Now you'll have an android-sdk-linux_86 directory in your $HOME directory. Because the tools expect this at /opt/android-sdk, you’ll need to create a symlink, using these commands:
$ javac -version
$ cd $HOME/Downloads
$ mv android-sdk_r06-linux_86.tgz $HOME
$ cd $HOME$ tar -xzf android-sdk_r06-linux_86.tgz
$ cd /opt
$ sudo ln –s $HOME/android-sdk-linux_86 android-sdk
7Release GSL, 8/17/10

Step 1: Installing Titanium And Your SDKGetting Started with Appcelerator Titanium (Linux)
Start the Android SDK and AVD Manager GUI as follows:
This will start the Android SDK and AVD Manager GUI. You’ll see this screen:
On the left panel, click on “Available Packages”. Expand the list in the right panel to see the various versions of the Android tools, and select the following items:• SDK Platform Android 1.6, API 4, revision 3• Google APIs by Google Inc., Android API 4, revision 2
As you develop and test for other versions of Android, you’ll want to install additional SDK and API versions. But it will be easier for now to install only those listed above.
Now, click on “Install Selected”, click “Accept All” and “Install” on the confirmation screen, and the selected components will be downloaded and installed.
$ cd /opt/android-sdk
$ tools/android
8 Release GSL, 8/17/10

Step 1: Installing Titanium And Your SDKGetting Started with Appcelerator Titanium (Linux)
Once this has completed, click on “Installed Packages” in the left panel to see what got installed. Your display should look something like this:
After the installation has finished, close the installer. The Android tools need to be in your directory search path. In your home directory, edit the file named “.profile” with your favorite text editor, and append the follow-ing lines. (Because we require the 1.6 tools so that we can build an application that will run on all of the cur-rently shipping platforms, make sure to put platforms/android-4 in the path, and not one of the other platforms.)
Your .profile should look something like this:
At this point, you should log out and log in again (or reboot) to get your .profile changes recognized.
Finally, let’s verify that the Android SDK installation works. Open a new terminal window, and enter the follow-ing commands:
PATH=”/opt/android-sdk/tools:$PATH”PATH=”/opt/android-sdk/platforms/android-4/tools:$PATH”
export PATH
$ aapt v
$ android list
9Release GSL, 8/17/10

Step 1: Installing Titanium And Your SDKGetting Started with Appcelerator Titanium (Linux)
If all is well, you’ll see a report of the installed Android tools.
With these steps complete, all the tools needed by Titanium Developer are in place. When you create a Tita-nium Mobile application, Developer will be able to find the tools it needs to compile your application, run the emulator, and install your app.
Install Titanium DeveloperIn this section, you’ll install Titanium, and the Titanium Developer user interface. We’ll cover the following steps:
• Download and install Titanium• Create an Appcelerator account for Titanium development• Connect your Android SDK with Titanium Developer• Use the “New Project” button to verify proper SDK installation
Using your Web browser, again navigate tohttp://developer.appcelerator.com/get_started
You’ll be returning to the Getting Started page you saw earlier:
10 Release GSL, 8/17/10

Step 1: Installing Titanium And Your SDKGetting Started with Appcelerator Titanium (Linux)
Let’s install Titanium. First, click on the “Download and Install” link under Step 2 on the getting started page. That will bring you to the main download page. At the bottom of the page, you’ll see these download links.
Click on “Download for Linux (64 Bit)” and save the file to your hard drive. If you used Firefox, this will down-load “Titanium Developer.tgz” to your $HOME/Downloads directory. Move and extract the archive as you did for the Android SDK. In a terminal window, you could use these commands. Notice that we need to use the escape character (\) before the space in the name of this file. (Alternatively, you can use double-quotes around any filename that contains spaces.)
The "Titanium Developer-1.2.1" directory should now be in your $HOME directory.
We’ll cover Step 3 on the getting started page a bit later, after we’ve finished installing Titanium, and after we build a “Hello World” app from Titanium’s default sample application.
Now, start Titanium Developer:
It's just fine to accept the default, which will install Titanium in your $HOME directory. Two packages will be downloaded and automatically installed.
$ cd $HOME/Downloads
$ mv Titanium\ Developer.tgz $HOME
$ cd $HOME$ tar -xzf Titanium\ Developer.tgz
$ rm Titanium\ Developer.tgz
$ cd $HOME/Titanium\ Developer-1.2.1$ ./Titanium\ Developer
11Release GSL, 8/17/10

Step 1: Installing Titanium And Your SDKGetting Started with Appcelerator Titanium (Linux)
The first time you start Titanium Developer, you’ll need to sign up to create an account with Appcelerator. This is free – just follow the instructions that appear on the screen in Developer. Be sure, of course, to remember the login credentials you create since you’ll use them to log in each time you use Titanium Developer.
After you’re logged in, click the Profile mini-icon in the Perspectives area, in the upper left corner of Titanium Developer’s main window. In Developer’s profile configuration screen, you need to specify where to find your Android SDK. Your display will look like this:
At the bottom of that window, you’ll see a field called “Android SDK” – click on the icon at the right of that field, and locate your Android SDK. Assuming that you placed the Android SDK folder in /opt, you would enter the following pathname in the Android SDK field:/opt/android-sdk
Now select “Projects” from the Perspectives buttons at the top right corner of the Titanium Developer screen to begin development using Titanium. Let’s start with a New Project – click on the “New Project” button at the top of the screen. In the New Project panel, click on the “Project type” field and choose “Mobile” from the pop-up menu. In the lower part of the screen, you’ll see a line called “Installed Mobile Platforms”. After a few seconds
12 Release GSL, 8/17/10

Step 2: Running the Sample ApplicationsGetting Started with Appcelerator Titanium (Linux)
Titanium Developer should locate your Android SDK, and a green checkmark should appear for it. (And the red X for the iPhone SDK is expected, since iPhone development needs to be done on a Mac, not under Linux.)
Now you’ve successfully installed Titanium Developer, the Java JDK and the Android SDK. Next, in Step 2, you’ll start working with a “Hello World” app, and the Titanium sample applications.
Your Titanium account is available in several types, at different price points, with different support and training resources. To get started, we’ll continue to use a Community account, which is free. When you get ready to develop your own app using Titanium, you’ll want to consider upgrading your account to Titanium Professional or Titanium Enterprise to help speed up your work.
Step 2: Running the Sample ApplicationsThis section is part of the Titanium Getting Started series, covering the Steps 0 through 2 of getting Titanium installed and working on your development system.
This document is for development using Linux. You can also develop using Windows or Macintosh, which are covered in related sections.
Step 2: Run the sample mobile appsIn this section, we’ll build a simple “HelloWorld” application in Titanium, and then we’ll run one of the sample apps available on the Appcelerator Web site.
Step-by-step, here are the topics we’ll cover.• Create a default project using Titanium — See Create the HelloWorld project on page 14• Run the default project on the Android emulator — See Run the default project for Android on page 16• Edit the default project’s source file (“Hello World”) — See Edit the default project, creating “Hello World”
on the Android on page 17• Download Titanium’s Kitchen Sink app — See Import the Kitchen Sink project on page 20• Import the Kitchen Sink source code into Developer — See Import the Kitchen Sink project on page 20• Run the Kitchen Sink app on the Android emulator — See Run the Kitchen Sink app on the Android emu-
lator on page 21
13Release GSL, 8/17/10

Step 2: Running the Sample ApplicationsGetting Started with Appcelerator Titanium (Linux)
Create the HelloWorld projectLet’s start where we left of at the end of Step 1. You should have Titanium’s New Project window open, ready to enter the details of your first app.
Before you enter things into Titanium Developer’s New Project window, decide on a directory somewhere where the app’s source files will live. (Expect this to take about 300 MB.) Perhaps you created an Appcelerator directory inside your $HOME directory.
We’ll call our app “HelloWorld”, so for our example, we’ll let Titanium Developer create the HelloWorld directory inside your existing $HOME/Appcelerator directory. Let’s assume that $HOME is actually the /home/devon directory for this example. Let’s also assume that your company name is devoncompanyinc, so your com-pany’s URL would be www.devoncompanyinc.com.
Now make entries like these in the New Project window:
Project type: Mobile
Name: HelloWorldApp Id: com.devoncompanyinc.helloworld
Directory: /home/devon/Appcelerator
Company/Personal URL: www.devoncompanyinc.comTitanium SDK version: 1.4.0
14 Release GSL, 8/17/10

Step 2: Running the Sample ApplicationsGetting Started with Appcelerator Titanium (Linux)
When you’ve filled in the fields, click “Create Project” to have Titanium Developer create all the source files for your HelloWorld project. Titanium Developer will then open the HelloWorld project screen, which looks like this one:
At this point, you can explore the contents of the new HelloWorld directory. You’ll see various files that are used by Titanium, plus a Resources directory – that’s where your JavaScript code goes. With only a few exceptions which you’ll learn later, you should make all your changes in the Resources directory; the other files and direc-tories are used by Titanium, and you should not change them.
In the Resources directory, open app.js using your favorite text editor. You’ll see the JavaScript code for a sim-ple default project. In the next section we’ll run this application so you can see what it does. Later you’ll learn how to deploy an app to a physical device; for now, we’ll run the HelloWorld app in an emulator on your Linux system.
15Release GSL, 8/17/10

Step 2: Running the Sample ApplicationsGetting Started with Appcelerator Titanium (Linux)
Run the default project for AndroidTo run the HelloWorld project we just created, click on the “Test & Package” tab at the top of the Titanium Developer window. That will bring up this screen:
Click the Android tab if it’s not already selected to indicate that you’ll be using the Android emulator. If Titanium Developer has properly located the Android SDK, you’ll see the SDK field at the bottom of the screen populate with a pop-up list of available SDK versions. Select “APIs 1.6” from that list if it’s not already selected.
Now, click on the “Launch” button to compile the JavaScript code and start the application in the Android emu-lator. You’ll see messages in the Titanium Developer window like these:
It will take several minutes for the application to build and for the emulator to launch and start up the applica-tion. There’s no user intervention needed here; you just have to wait for Titantium Developer and the Android
16 Release GSL, 8/17/10

Step 2: Running the Sample ApplicationsGetting Started with Appcelerator Titanium (Linux)
emulator to eventually start the app. If the Android emulator shows the “Locked” screen, press the emulator's “Menu” button to unlock it.
When you finally see the emulated Android screen appear, you’ll see that this window looks just like an Android display. As the app starts executing in the emulated Android, it will automatically put up the Appceler-ator logo:
Then the image will automatically flip to the “I am Window 1” display, with two tabs named (unsurprisingly) “Tab 1” and “Tab 2”.
This sample application doesn’t do much, but you’ll see that if you click on “Tab 2” at the bottom of the screen, the text changes to “I am Window 2”. When you’re finished experimenting with the two tabs (which probably won’t be very long!), return to the Titanium Developer window and click the “Stop” button at the bottom of it. This will terminate the Android emulator.
If you don’t get the results you’re expecting, take a look at the Troubleshooting section below, and see if the suggestions there might help.
Edit the default project, creating “Hello World” on the AndroidLet’s change the message in the window to “Hello World”. This requires only very simple edits to the app.js file in the Resources directory, in the application’s source directory. In our example, that’s the $HOME/Appcelera-tor/HelloWorld source directory.
Again using your favorite text editor, open app.js, in the Resources directory. Search for “I am Window 1” – you’ll find this in the first half of the app.js source file. Search also for “I am Window 2” which you’ll find in the second half of the app.js file.
Make the following changes in the app.js file:• Change “I am Window 1” to “Hello World!”• Change “I am Window 2” to “Hello again”
17Release GSL, 8/17/10

Step 2: Running the Sample ApplicationsGetting Started with Appcelerator Titanium (Linux)
Look at the following code extracts from app.js to see exactly how to make these changes. Here’s the first sec-tion of code, before the change of “I am Window 1” to “Hello World!”:
And here’s what it will look like after your change:
Now, here’s the second section of code, before the change of “I am Window 2” to “Hello again”:
And here’s what the second section will look like, after your change:
Save your changes to app.js, go back to the Titanium Developer window, and again click “Launch” to start the changed application. Again Titanium will compile the JavaScript code (because you changed it), and eventu-ally it will relaunch the Android emulator. If you experience timing issues between Titanium Developer and the Android emulator, just “Launch” again as described in the Troubleshooting section (see Troubleshooting 22).
You’ll see your HelloWorld app automatically run on the emulated Android, and the message on the Android’s screen will be “Hello World!”. If you click “Tab 2”, the message should change to “Hello again”. When you’re fin-
var label1 = Titanium.UI.createLabel({color:'#999',
text:'I am Window 1',
font:{fontSize:20,fontFamily:'Helvetica Neue'},textAlign:'center',
width:'auto'
});
var label1 = Titanium.UI.createLabel({color:'#999',
text:'Hello World!',
font:{fontSize:20,fontFamily:'Helvetica Neue'},textAlign:'center',
width:'auto'
});
var label2 = Titanium.UI.createLabel({
color:'#999',text:'I am Window 2',
font:{fontSize:20,fontFamily:'Helvetica Neue'},
textAlign:'center',width:'auto'
});
var label2 = Titanium.UI.createLabel({
color:'#999',text:'Hello again',
font:{fontSize:20,fontFamily:'Helvetica Neue'},
textAlign:'center',
width:'auto'});
18 Release GSL, 8/17/10

Step 2: Running the Sample ApplicationsGetting Started with Appcelerator Titanium (Linux)
ished playing with the tabs, return again to Titanium Developer’s window and click the “Stop” button to termi-nate the Android emulator.
Download the Kitchen Sink appNow that you’ve successfully built Titanium’s default project, let’s move on to build the much larger KitchenSink sample app. Appcelerator’s Kitchen Sink application demonstrates many of the APIs that are available in Tita-nium. You can adapt the code in the Kitchen Sink app to your own applications.
The first step is to get the source code for the KitchenSink app, which you can download from Appcelerator’s Web site:http://developer.appcelerator.com/doc/kitchensink
The source code repository lives on Github, and you can get the source code from there. Click on the link “Kitchen Sink on Github”, and from there, click on the “Download Source” button near the top of the Github page. The downloaded file will be an archive called something like “appcelerator-KitchenSink-1.3.3-1-g4d1c4f8.tar.gz”. Save this file, and if you’re using Firefox, it will end up in your Downloads directory. You can expand it to your Appcelerator directory using commands like these:
When you expand appcelerator-KitchenSink-1.3.3-1-g4d1c4f8.tar.gz, you’ll get a KitchenSink directory inside the appcelerator-KitchenSink-4d1c4f8 directory. Our examples assume that you’ll copy this directory into your existing Appcelerator directory in your $HOME directory – the Kitchen Sink source files would then live in $HOME/Appcelerator/KitchenSink. You can do this with these commands:
$ cd $HOME/Downloads
$ mv appcelerator-KitchenSink-1.3.3-1-g4d1c4f8.tar.gz $HOME/Appcelerator
$ cd $HOME/Appcelerator$ tar –xzf appcelerator-KitchenSink-1.3.3-1-g4d1c4f8.tar.gz
$ cd $HOME/Appcelerator/ appcelerator-KitchenSink-4d1c4f8
$ mv KitchenSink $HOME/Appcelerator
19Release GSL, 8/17/10

Step 2: Running the Sample ApplicationsGetting Started with Appcelerator Titanium (Linux)
Import the Kitchen Sink projectBecause the Kitchen Sink app is already a fully structured project, we’ll be importing this into Titanium Devel-oper. This contrasts with what we did earlier with the default project, where we created a new project from scratch. In that case, Titanium Developer created the default project, ready to edit.
To import the Kitchen Sink app’s source code, click the “Import Project” button at the top of Titanium Devel-oper’s window. Navigate to the Kitchen Sink directory, and click OK to import the project.
After a few moments, Titanium Developer will present the following project screen:
Now the KitchenSink project is ready to go – the next step is to execute it on the Android emulator.
20 Release GSL, 8/17/10

Step 2: Running the Sample ApplicationsGetting Started with Appcelerator Titanium (Linux)
Run the Kitchen Sink app on the Android emulatorAs you did above, go to the Test & Package tab, note that the Android tab is selected, select “APIs 1.6” for the SDK field, and then click the “Launch” button.
Titanium Developer will build the project. When the build is finished, Developer should install the app on your Android emulator. You should see the Kitchen Sink logo automatically appear on the Android emulator, and then automatically flip to reveal Kitchen Sink’s tabs and buttons.
Next stepsNow that you’ve successfully built the default app and imported the Kitchen Sink app, you’re ready to start looking at the JavaScript code for these and other sample apps.
21Release GSL, 8/17/10

Step 2: Running the Sample ApplicationsGetting Started with Appcelerator Titanium (Linux)
TroubleshootingYou may encounter timing issues with Titanium Developer and the emulator. The last message you should see in the Titanium Developer window is “[INFO] Deployed Hello World … Application should be running.” When using the Android emulator, Titanium Developer sometimes times out before the emulator is ready to accept the new application as input. If that happens, try again by clicking “Launch” again. Generally, this works after two or three tries. But be sure to wait a minute or two after the “… Application should be running.” message appears in Titanium Developer before deciding that the sample app didn’t start properly on the emulator. When this works properly, the sample app should automatically start on the emulator – there’s nothing you have to do on the emulator to start up the sample app.
If your app doesn’t start, there are several additional things you can try. When using the Android emulator, some of these issues are more common after you’ve started the emulator several times.1. Read the messages in the Titanium Developer window to see if there are any clues to the problem. Also try changing
the Filter to “Trace”, to view additional messages.2. Make sure you have enough free disk space and available RAM. The RAM requirements are very modest, so that’s
unlikely to be a problem, and you should have at least 1 GB of free disk space at all times.3. When using the Android emulator, perhaps the adb server is stuck. In this case, you would restart the adb server like
this:
4. When using the Android emulator, check to see that there is exactly one Android emulator running. If there are two, then kill one of them.
5. When using the Android emulator, in the Android SDK and AVD Manager, try killing any existing AVD’s, which will force Titanium to recreate them. This is not normally necessary, but can be needed if the AVD’s are out of order.
6. Perhaps you have added too many apps to your emulated mobile device. If that happens, just remove some of the apps.
7. Sometimes when importing Titanium projects, the build assets don’t import correctly, especially if you’re importing into a platform different from where the project was originally created. If this happens, you may need to copy the assets into a new project. To do this, create a new project and then replace its Resources directory with the Resources directory of the project that didn’t import successfully. Be aware that the TiApp.xml file includes the project id and other information, so it may have to be updated as well to reflect changes.
8. Check how long the path to your project directory is. This is the full name of your project directory, starting from the root. Some Titanium errors are caused by a path that’s too long. Try using a shorter path to your source directory by moving your sources higher in the directory hierarchy.
9. Titanium Developer has advanced proxy-detection capabilities, and will usually find a way to connect during authentica-tion when you log in. However, if you're in an unusual corporate network environment, you may require custom configu-ration of some environment variables.
10. Check out the help resources on Appcelerator’s Developer Web. Point your browser to:http://developer.appcelerator.com/
and click the Q&A tab. Many developers find answers to their questions here.11. Submit a support request. Be sure to include the following information with your support request:
• What problem you’re experiencing• The version of Titanium you’re using• Whether you’re building a mobile or desktop app• Trace messages from Titanium Developer• The version(s) of the mobile tools (emulator) you have• The JDK version you’re using• Your operating system and version (e.g., Windows 7)• Anything else you think might be helpful to understanding your issue
$ adb kill-server$ adb devices
22 Release GSL, 8/17/10

Getting Started with Appcelerator Titanium (Linux)
Revision History
8/5/2010 Initial release8/17/2010 Minor formatting changes
23Release GSL, 8/17/10
Getting Started with Appcelerator Titanium (Linux)
24 Release GSL, 8/17/10
![Titanium Workshop - [Sainté Mobile Days]](https://static.fdocuments.in/doc/165x107/554d2016b4c905c5208b4a36/titanium-workshop-sainte-mobile-days.jpg)


![20110525[Taipei GTUG] titanium mobile簡介](https://static.fdocuments.in/doc/165x107/54c806414a79599c148b458c/20110525taipei-gtug-titanium-mobile.jpg)


