TIPS - Welding Productivitymagazine.weldingproductivity.com/2016/oct/d/13-tips-wp-oct.pdf · one...
5
Oxyfuel advice from the Annual Ironworker Instructor Training Program by Travis Ham, senior product manager, gas equipment, ESAB, Victor Technologies TIPS
Transcript of TIPS - Welding Productivitymagazine.weldingproductivity.com/2016/oct/d/13-tips-wp-oct.pdf · one...

Oxyfuel advice from the Annual Ironworker
Instructor Training Programby Travis Ham, senior product
manager, gas equipment, ESAB, Victor Technologies
TIP
S

During the week of July 18, a team of ESAB experts attended the 32nd Annual Ironworker Instructor Training Program, held at Washtenaw Community College, Ann Arbor, Mich., where hundreds of ironworkers from
around the United States and Canada attended the “train the trainer” event. With their new knowledge and skills, participants returned to their local training halls better able to help the next generation of apprentices turn out as journeymen.
ESAB conducted two classes at this year’s training show with one focused on plasma cutting and another focused on oxyfuel training. The oxyfuel training event covered essential safety rules, proper equipment setup, cutting advice and correct shutdown procedures. For those that didn’t attend, this article delivers 13 tips on using oxyfuel from the event.
STAND ASIDE
When slowly opening the cylinder valve, always stand to the side of the regulator. In the (highly unlikely) event the regulator fails, it would be most prone to fail in a manner that directs the force of the gas in the direction of the regulator bonnet and pressure adjusting knob. Then, open the oxygen cylinder valve all the way, but only open acetylene valves half to one full turn. Open alternate fuel cylinder valves all the way.
30OCTOBER 2016
LEAK TEST
Use a wrench to tighten all metal-to-metal connections, including the ones between the gas hoses and the torch. Next, leak test the connections by saturating (not just wetting, but fully saturating) them with leak test fluid and watching for growing bubbles. Use an approved leak test solution.
RIGHT SIZE TIP
For the best cut quality, use the right size tip for the metal thickness at hand and adjust gas pressure according to the tip chart for your specific brand of cutting outfit. Note that flow rates may vary between brands, so refer to the tip chart if you’re not familiar with a torch.
31OCTOBER 2016
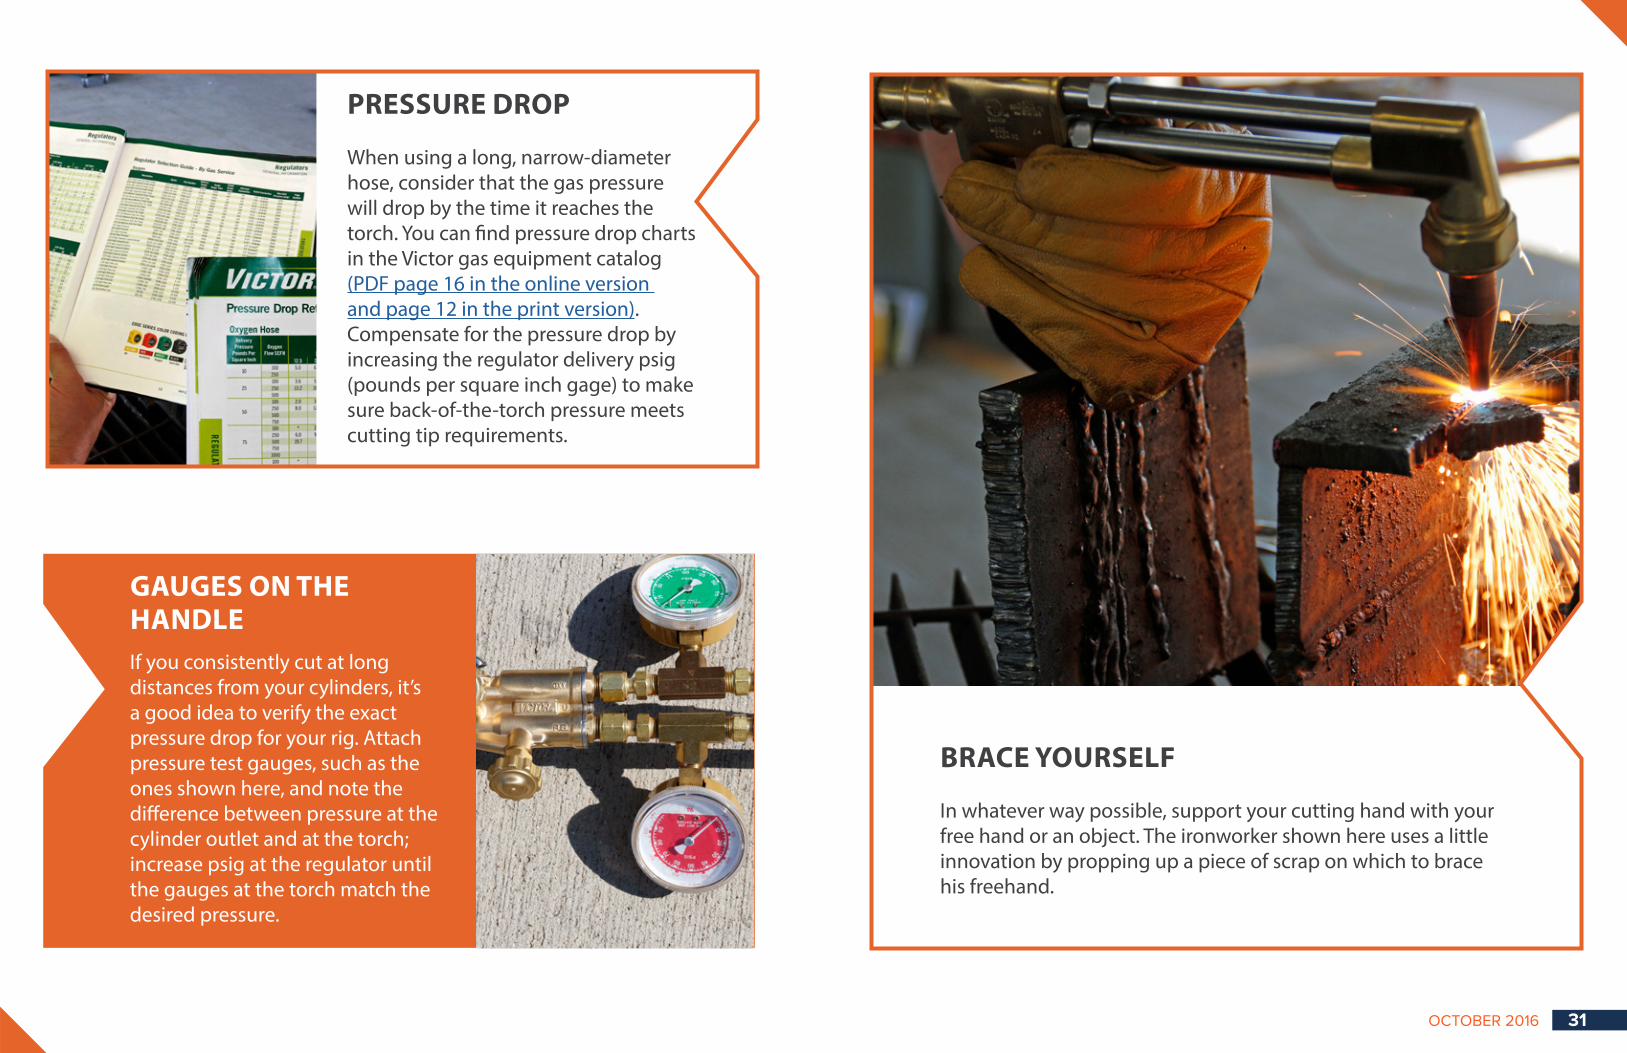
PRESSURE DROP
When using a long, narrow-diameter hose, consider that the gas pressure will drop by the time it reaches the torch. You can find pressure drop charts in the Victor gas equipment catalog (PDF page 16 in the online version and page 12 in the print version). Compensate for the pressure drop by increasing the regulator delivery psig (pounds per square inch gage) to make sure back-of-the-torch pressure meets cutting tip requirements.
GAUGES ON THE HANDLEIf you consistently cut at long distances from your cylinders, it’s a good idea to verify the exact pressure drop for your rig. Attach pressure test gauges, such as the ones shown here, and note the difference between pressure at the cylinder outlet and at the torch; increase psig at the regulator until the gauges at the torch match the desired pressure.
BRACE YOURSELF
In whatever way possible, support your cutting hand with your free hand or an object. The ironworker shown here uses a little innovation by propping up a piece of scrap on which to brace his freehand.
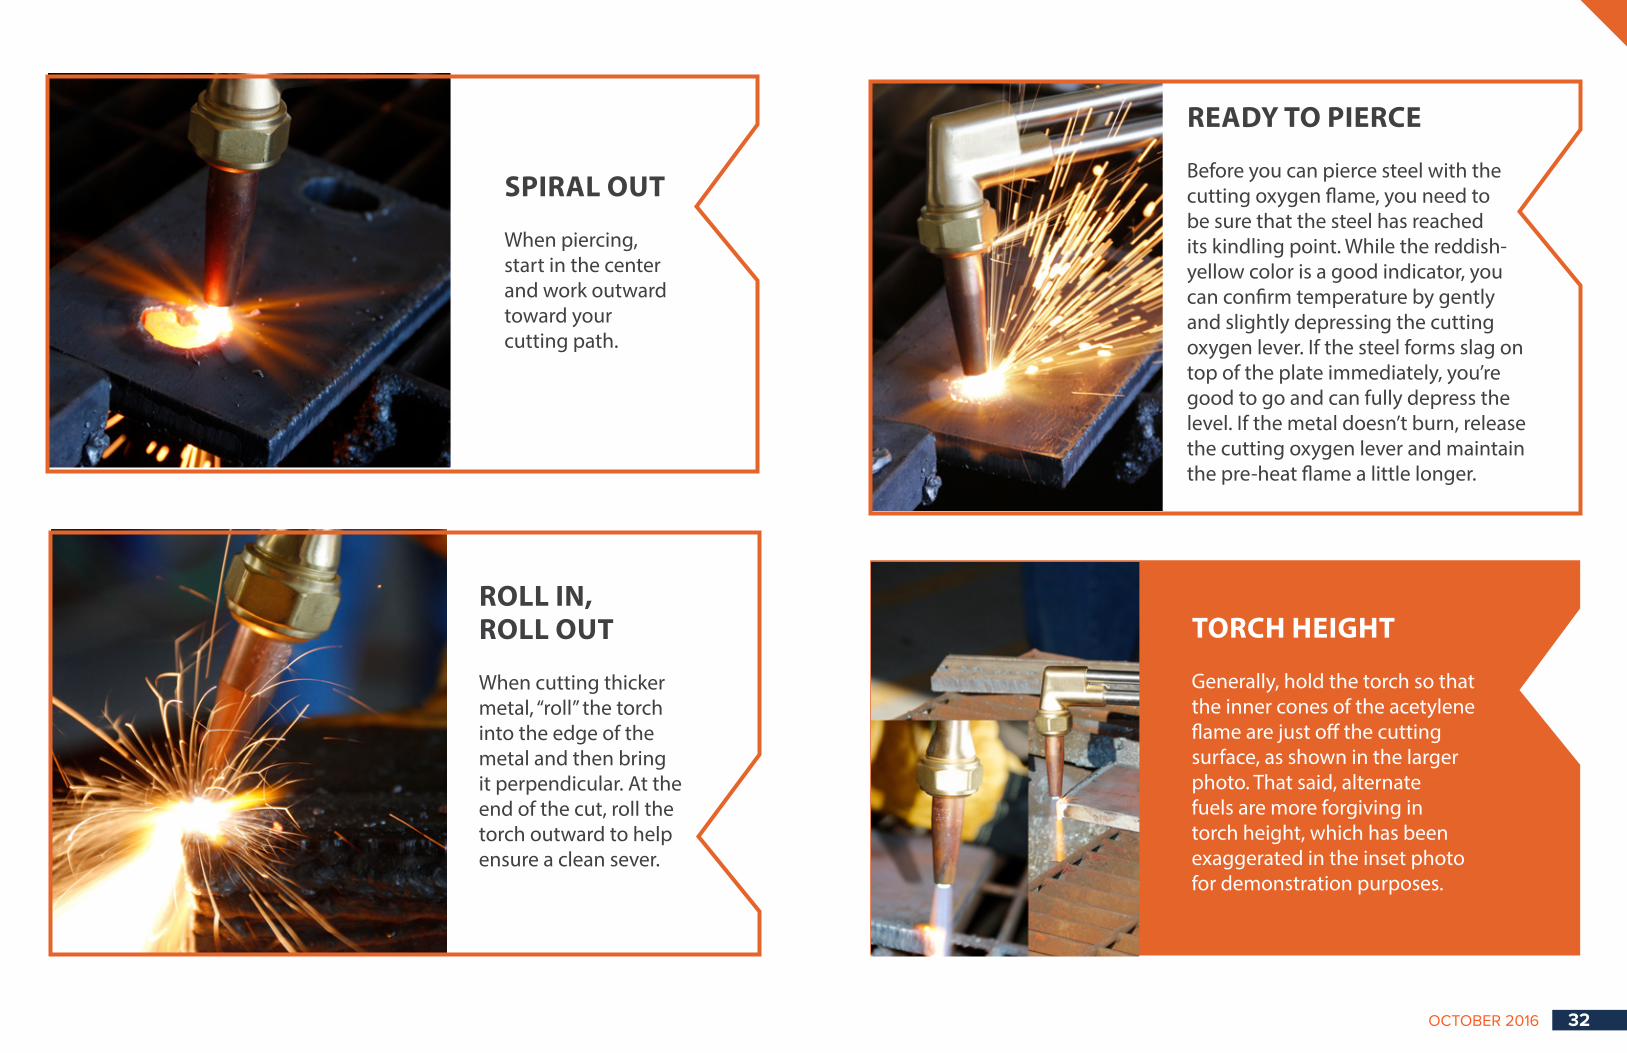
READY TO PIERCE
Before you can pierce steel with the cutting oxygen flame, you need to be sure that the steel has reached its kindling point. While the reddish-yellow color is a good indicator, you can confirm temperature by gently and slightly depressing the cutting oxygen lever. If the steel forms slag on top of the plate immediately, you’re good to go and can fully depress the level. If the metal doesn’t burn, release the cutting oxygen lever and maintain the pre-heat flame a little longer.
32OCTOBER 2016
TORCH HEIGHT
Generally, hold the torch so that the inner cones of the acetylene flame are just off the cutting surface, as shown in the larger photo. That said, alternate fuels are more forgiving in torch height, which has been exaggerated in the inset photo for demonstration purposes.
SPIRAL OUT
When piercing, start in the center and work outward toward your cutting path.
ROLL IN, ROLL OUT
When cutting thicker metal, “roll” the torch into the edge of the metal and then bring it perpendicular. At the end of the cut, roll the torch outward to help ensure a clean sever.

LIGHTING ALTERNATE FUELSPropane has a different density than air, so it tends to “float” away from the torch tip. If you have trouble lighting the torch, especially in windy conditions, hold the torch against the plate at a 45-degree angle so the plate “traps” the gas. Once lit, introducing the pre-heat oxygen can also extinguish the flame, which happened shortly after this photo was taken. If the flame goes out, relight the torch and hold the tip against the plate at a 45-degree angle and slowly introduce pre-heat oxygen until the flame snaps into place.
SECURED CYLINDERS
It’s all too easy to forget to secure cylinders when moving them around a job site. If you don’t have a cylinder cart handy, try a reinforcing column.
OXYGEN FIRST, FUEL LASTShut off the torch oxygen valve first, and then close the torch fuel valve. This technique leak checks both valves every time the torch is shut down. A snap or pop indicates a leaking oxygen valve, while a small flame at the end of the tip indicates a fuel gas leak.
For companies, unions and other instructors who would like to conduct their own oxyfuel training class, ESAB, through its Victor brand, offers a complete instructional DVD. The DVD includes 36 min. of visual instruction as well as an instructor guide and student reference materials. To obtain a copy of the Victor Oxy-Fuel Safety Video, contact your local ESAB representative and request literature item 65-2505. VICTOR TECHNOLOGIES
ESAB
33OCTOBER 2016


![cccc - jamiahammadia.com Risala 2009/Sep-Oct.pdf»»»»'''',,,#ÖÖÖZZZZŠŠŠr###™™™™uuuuZZZZßßßßZZZZ†††***ÑÑÑñññ]]]|g§§§§cccc:::(((](https://static.fdocuments.in/doc/165x107/5ae0e5fa7f8b9ab4688df1da/cccc-risala-2009sep-octpdfzzzzsssruuuuzzzzzzzzgcccc.jpg)