
Time Machine Solaris 10 for Oracle 9i - Solution-Soft · Quick Start Guide – Time Machine Solaris...
23
Quick Start Guide – Time Machine Solaris 10 for Oracle 9i DB The following is a quick guide to evaluating Solution-Soft’s Time Machine with Oracle 9i 9.2.0.1.0 (R2) Database on Solaris 10 installed on a SPARC machine. This paper will show how simple it is to integrate Time Machine to perform date & time (temporal) testing with Oracle 9i Databases running under their own user accounts. NOTE: This paper is specific to Time Machine for use with Solaris 10. For those running on other platforms please refer to the Time Machine manual or contact Solution-Soft support at [email protected] Time Machine for Oracle 9i is supported on Windows, AIX, HP-UX, Linux, and Solaris System Configuration used in creating this paper: OS: SunOS 5.10, Solaris 10, 1 CPU, 384 MB ram Time Machine: Version 4.01 R48 for Solaris 5.1.0 Build Date: 10/27/10 Oracle 9i: Release 2 Build Number: 9.2.0.1.0 Publish Date: Aug 1, 2011 Contents Oracle9i Installation................................................................................................................ 2 Post-Install Configuration (SQLPLUS)................................................................................. 17 TimeMachine Configuration ................................................................................................. 18 Client/Listener Configuration (External Client Accessing DB) ............................................. 19
Transcript of Time Machine Solaris 10 for Oracle 9i - Solution-Soft · Quick Start Guide – Time Machine Solaris...

Quick Start Guide – Time Machine Solaris 10 for Oracle 9i DB
The following is a quick guide to evaluating Solution-Soft’s Time Machine with Oracle 9i 9.2.0.1.0 (R2) Database on Solaris 10 installed on a SPARC machine. This paper will show how simple it is to integrate Time Machine to perform date & time (temporal) testing with Oracle 9i Databases running under their own user accounts.
NOTE: This paper is specific to Time Machine for use with Solaris 10. For those running on other platforms please refer to the Time Machine manual or contact Solution-Soft support at [email protected]
Time Machine for Oracle 9i is supported on Windows, AIX, HP-UX, Linux, and Solaris
System Configuration used in creating this paper: OS: SunOS 5.10, Solaris 10, 1 CPU, 384 MB ram Time Machine: Version 4.01 R48 for Solaris 5.1.0 Build Date: 10/27/10 Oracle 9i: Release 2 Build Number: 9.2.0.1.0 Publish Date: Aug 1, 2011
Contents Oracle9i Installation ................................................................................................................ 2
Post-Install Configuration (SQLPLUS)................................................................................. 17
TimeMachine Configuration ................................................................................................. 18
Client/Listener Configuration (External Client Accessing DB) ............................................. 19

Oracle9i Installation
1. Create 2 user accounts that will be using the Oracle db. We used “oracle1” and “oracle2”. i. Create 2 folders for each user, “u01” and “u02”, outside of the user’s home directories.
i. These folders will come into play in step 9.
2. Download the 3 CD’s for Oracle9i Database on Solaris 10. i. Files we used were A99349-01.zip, A99350-01.zip, A99351-01.zip
3. Make a copy of the 3 CD’s to their respected user home folders
i. Unzip each CD into its own folder, such as “DISK1” “ DISK2” “ DISK3” ii. You should have a directory tree similar to
…/oracle1/DISK1 …/oracle1/DISK2 …/oracle1/DISK3 …/oracle2/DISK1 …/oracle2/DISK2 …/oracle2/DISK3
iii. Warning : Each user installing Oracle needs to have full ownership of their installation files. So in the “oracle1” folder the 3 zip files (A99349-01.zip, A99350-01.zip, A99351-01.zip) should be under the ownership of user “oracle1” before unzipping. Same goes for oracle2. Otherwise you need to manually change the ownership of the entire unzipped directory with chown or chmod.
4. Log in as the first user, “oracle1” and go into the “DISK1” folder and execute “./runInstaller ”. Then
follow the installation GUI. i. If an error appears about writing to a “tmp” directory, log in as root and chmod 777 to the
“ tmp” folder. Then log back to the oracle user and the runInstaller will work. ii. When using xming to xterm for the installation, you cannot “su” to another user account to
do the install; otherwise you will get an “xterm” error. Log in initially as the user you want to perform the install for.

5. Click “Next” on the Welcome page
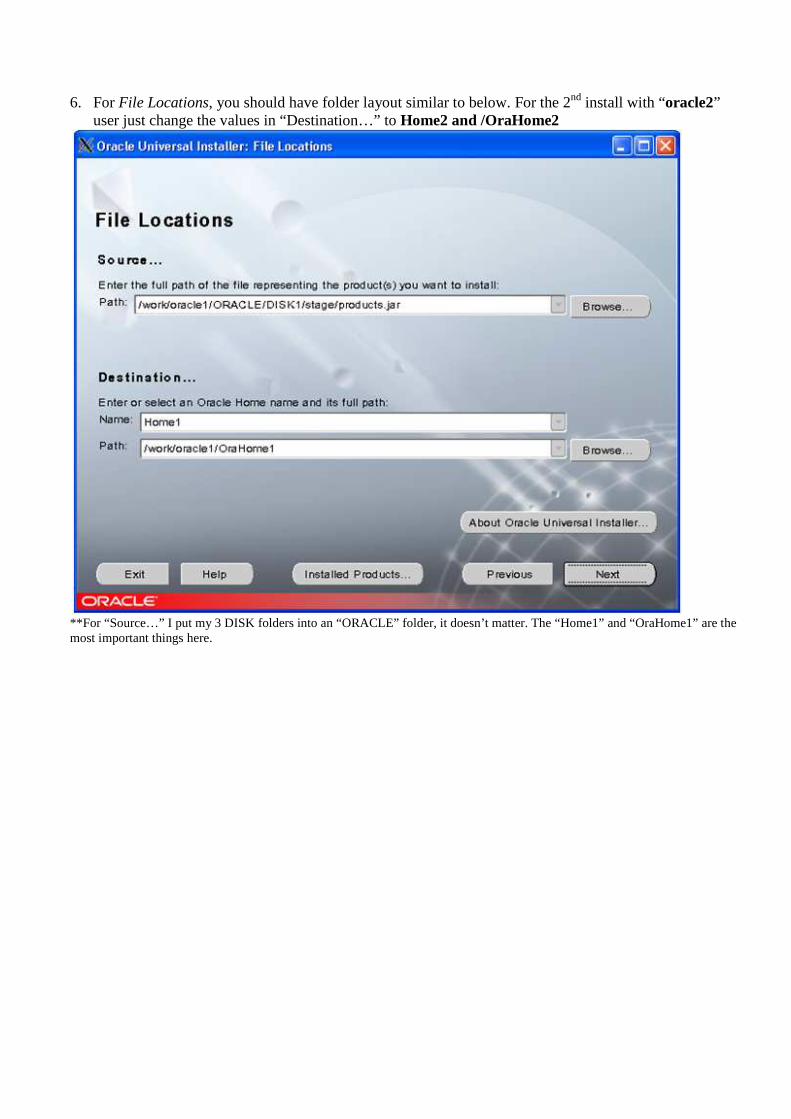
6. For File Locations, you should have folder layout similar to below. For the 2nd install with “oracle2” user just change the values in “Destination…” to Home2 and /OraHome2
**For “Source…” I put my 3 DISK folders into an “ORACLE” folder, it doesn’t matter. The “Home1” and “OraHome1” are the most important things here.

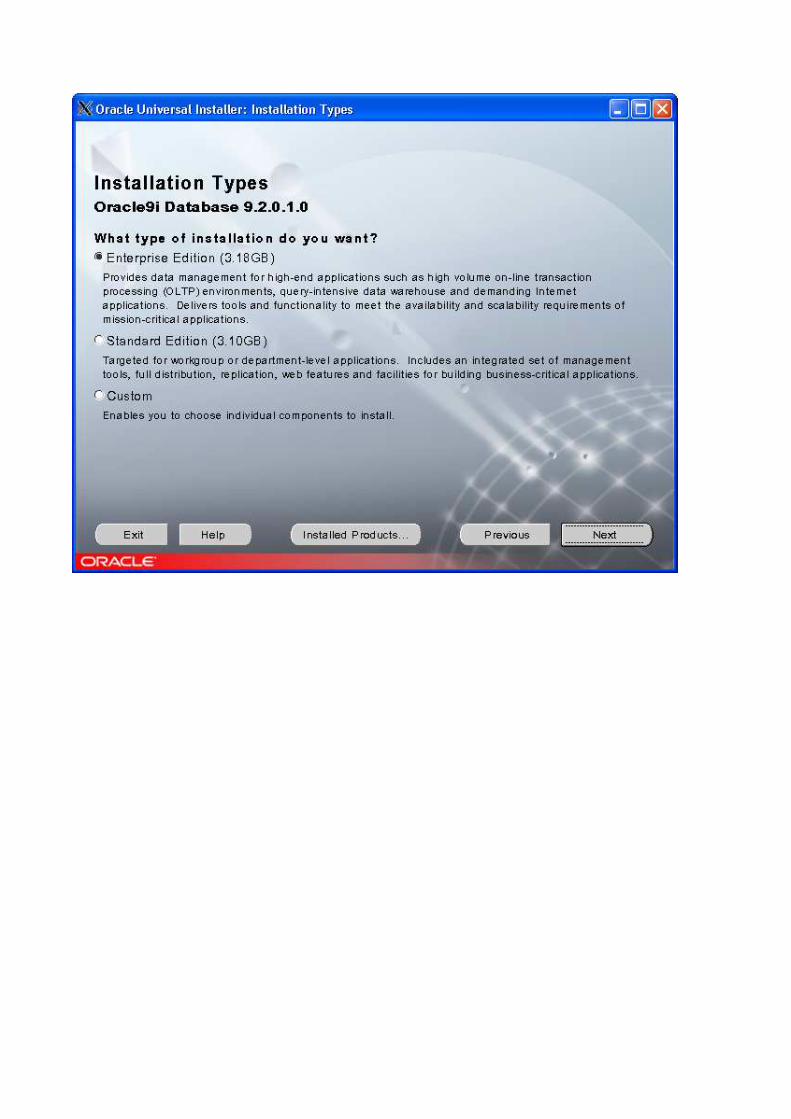
7. The next 3 pages we clicked “Next” for this guide.

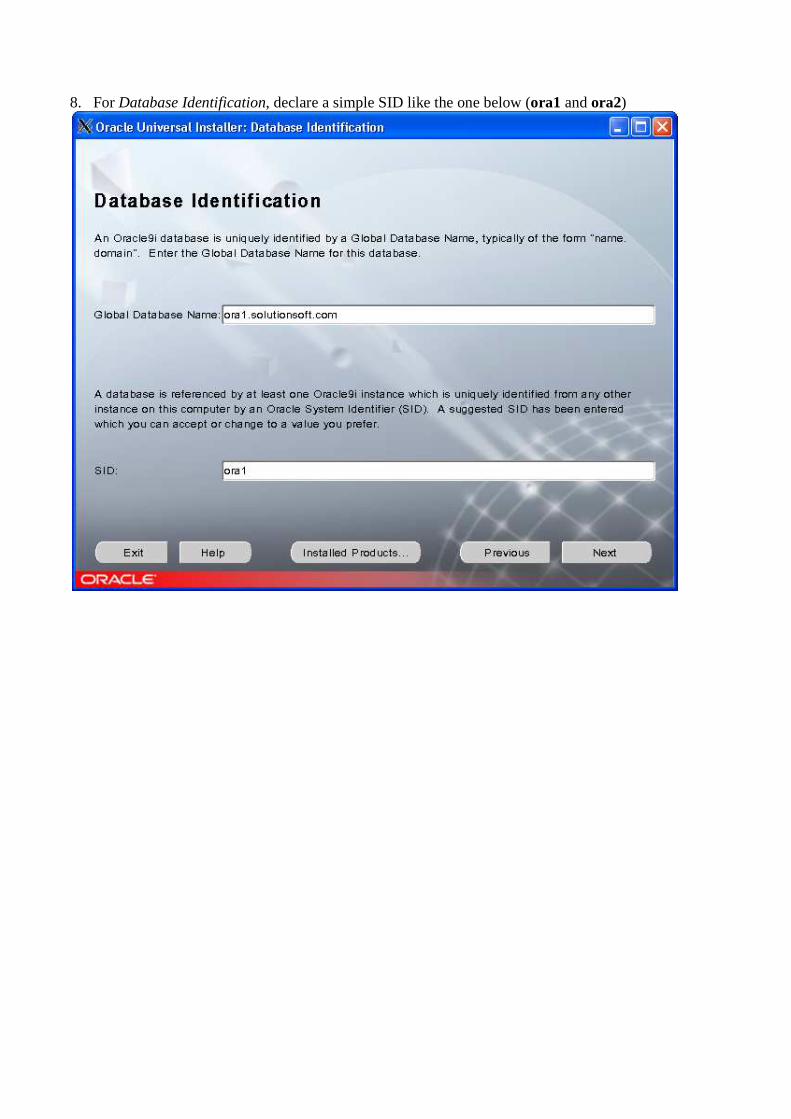
8. For Database Identification, declare a simple SID like the one below (ora1 and ora2)

9. For Database File Location, use the u01 and u02 directories that were created in step 1.
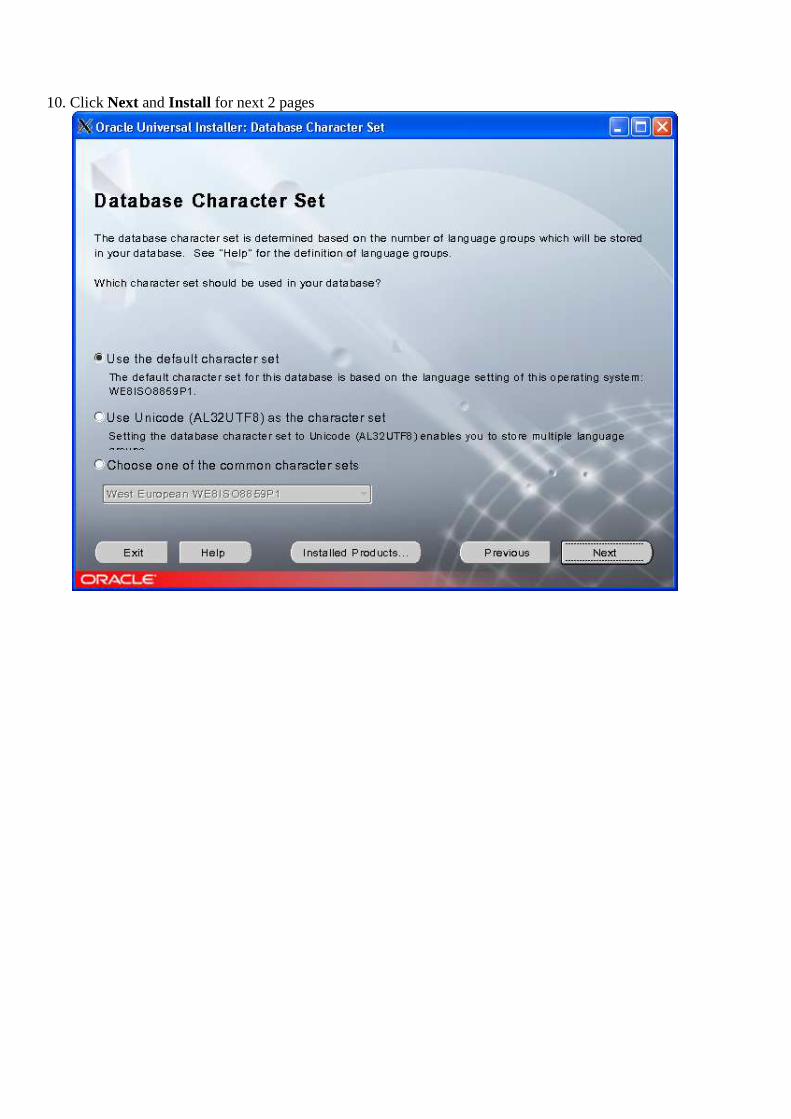
10. Click Next and Install for next 2 pages

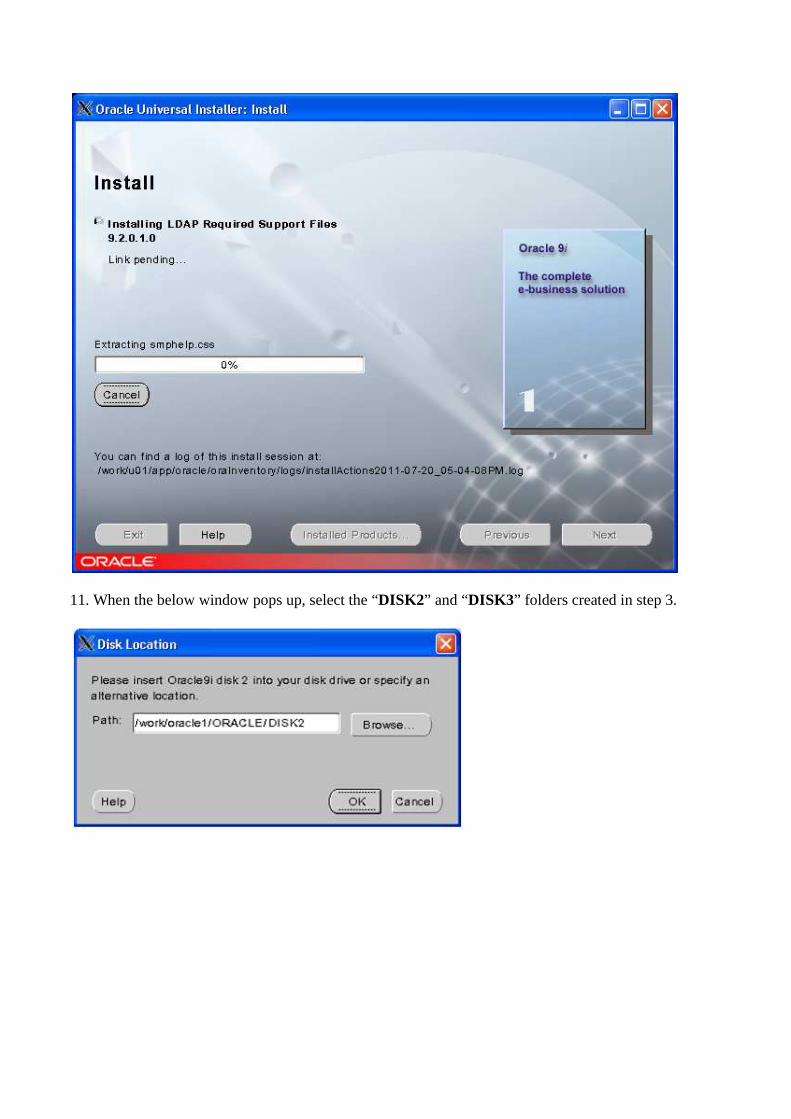
11. When the below window pops up, select the “DISK2” and “DISK3” folders created in step 3.
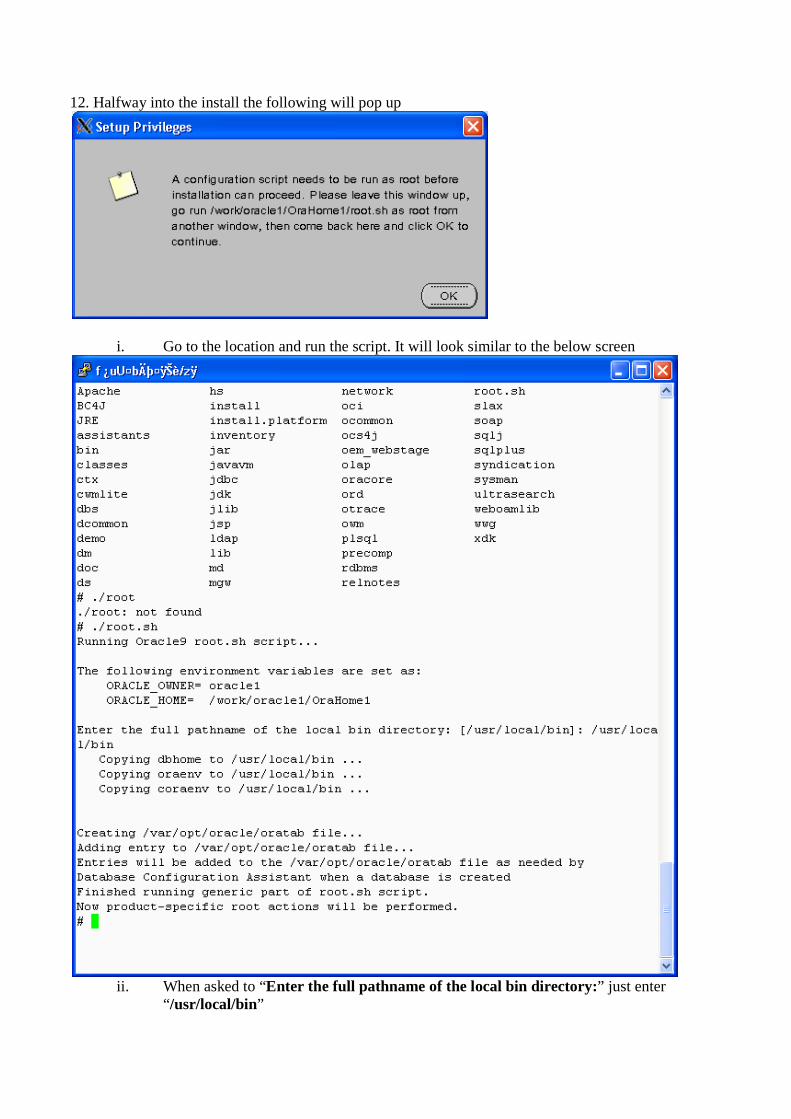
12. Halfway into the install the following will pop up
i. Go to the location and run the script. It will look similar to the below screen
ii. When asked to “Enter the full pathname of the local bin directory:” just enter
“ /usr/local/bin”

13. Create SYS and SYSTEM passwords. We used the same password for both to be easy. Passwords need to start with a letter (a-z, A-Z).

14. Click Next
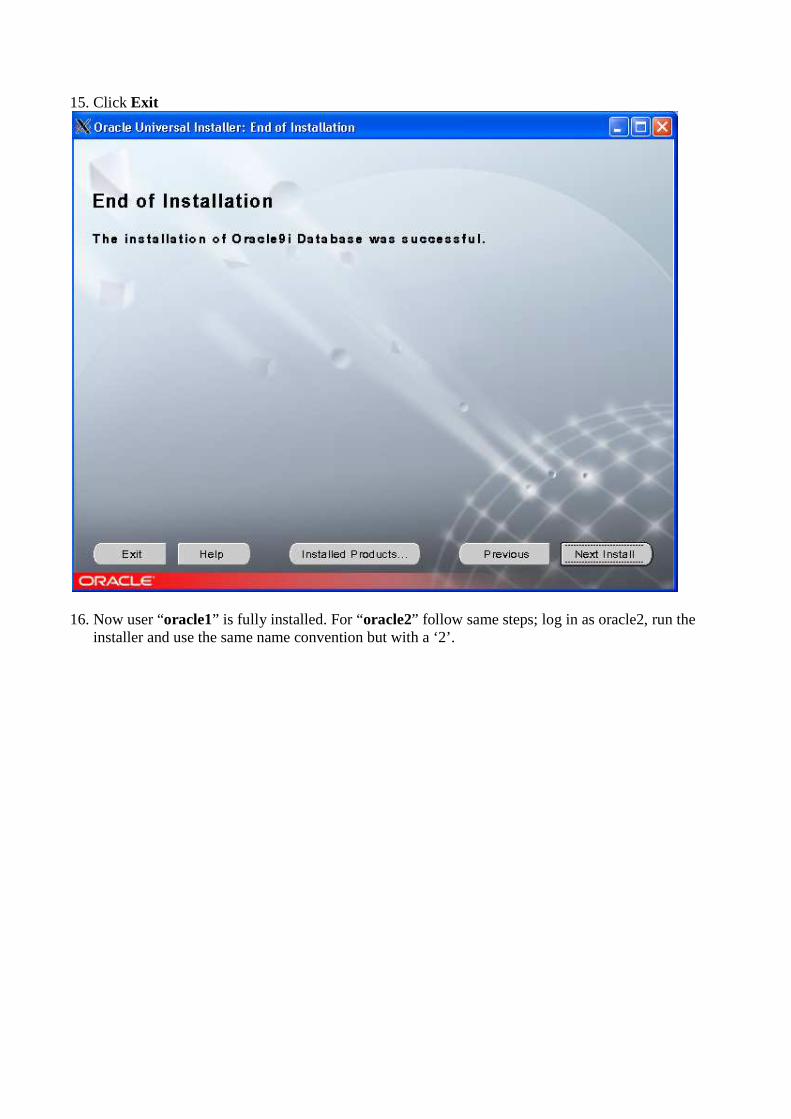
15. Click Exit
16. Now user “oracle1” is fully installed. For “oracle2” follow same steps; log in as oracle2, run the
installer and use the same name convention but with a ‘2’.
Post-Install Configuration (SQLPLUS)
Before starting up SQLPLUS to access your database you need to set up oracle shell environmental variables.
1. Execute the following commands depending on your shell. a. For csh
setenv ORACLE_SID "ora1" setenv ORACLE_BASE "/work/u01/app/oracle" setenv ORACLE_HOME "/work/u01/app/OraHome1"
b. For bash export ORACLE_SID=ora1 export ORACLE_BASE=/work/u01/app/oracle export ORACLE_HOME=/work/u01/app/OraHome1
c. Type “env” to check if the environment variables were loaded.
2. Now go into your “u01/app/OraHome1/bin” folder and execute “./sqlplus”.
3. Log in to sqlplus
a. For our guide we used “sys as sysdba” with the password for SYS we created in the “Oracle Install” Step 13
4. Once logged in, type “startup” to officially start the Oracle database for use.
5. Now you’re done, enter “exit”.

TimeMachine Configuration
Before running TimeMachine to create a virtual clock and access it from your SQLPLUS database, you need to configure TimeMachine Dynamic Link Library
1. Follow “6b)Solaris Sparc - Supplemental Setup” in the TimeMachine Manual
After completing “6b)Solaris Sparc - Supplemental Setup” it’s time to create a virtual clock.
2. Go into the TimeMachine directory (/etc/ssstm) and execute the below command as root a. tmuser –a –u oracle1 –x (enter your own virtual date)
3. Go back to “u01/app/OraHome1/bin” and execute “./sqlplus”. 4. Log in and you will see your virtual date in the sql welcome header.
Client/Listener Configuration (External Client Accessing DB)
Before running the client you need to start the Listener service. Before running the Listener service you need to make sure that you’ve started up the Oracle Database (“startup” in sqlplus).
1. Go to the “u01/app/OraHome1/bin” and execute “./lsnrctl”.
2. Enter “start”
3. Now the listener service is started and you can make outside client queries to the database.
a. The Listener Configuration uses 3 files “listener.ora” “ tnsnames.ora” “ sqlnet.ora” located in “u01/app/OraHome1/network/admin” that can be configured as you wish. However the default configuration is fine and how we left it in this guide. For more details please refer to http://download.oracle.com/docs/cd/B10501_01/network.920/a96580/listener.htm
The next steps show how to install the Oracle client. This guide installs a 32bit Windows client and connects to the Oracle9i database. The below link has instructions for configuring the client for Unix/Linux/Windows.
http://download.oracle.com/docs/cd/B19306_01/server.102/b14357/ape.htm
4. Download the “Oracle Instant Client” for your correct platform with the below link http://www.oracle.com/technetwork/database/features/instant-client/index-097480.html
a. Download the “Client Basic” and “Client Package – SQL *Plus” We used the packages below.
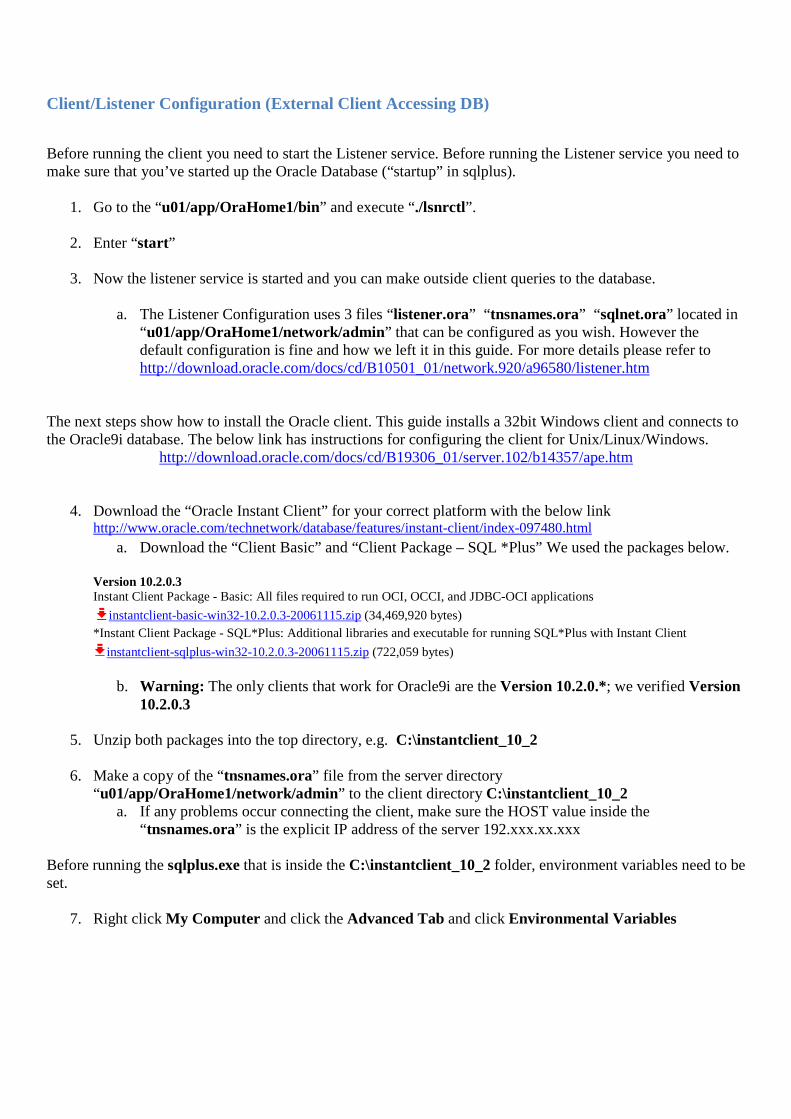
Version 10.2.0.3 Instant Client Package - Basic: All files required to run OCI, OCCI, and JDBC-OCI applications
instantclient-basic-win32-10.2.0.3-20061115.zip (34,469,920 bytes) *Instant Client Package - SQL*Plus: Additional libraries and executable for running SQL*Plus with Instant Client
instantclient-sqlplus-win32-10.2.0.3-20061115.zip (722,059 bytes)
b. Warning: The only clients that work for Oracle9i are the Version 10.2.0.*; we verified Version 10.2.0.3
5. Unzip both packages into the top directory, e.g. C:\instantclient_10_2 6. Make a copy of the “tnsnames.ora” file from the server directory
“u01/app/OraHome1/network/admin” to the client directory C:\instantclient_10_2 a. If any problems occur connecting the client, make sure the HOST value inside the
“ tnsnames.ora” is the explicit IP address of the server 192.xxx.xx.xxx Before running the sqlplus.exe that is inside the C:\instantclient_10_2 folder, environment variables need to be set.
7. Right click My Computer and click the Advanced Tab and click Environmental Variables


8. Create 2 new “User Variables” called SQLPATH and TNS_ADMIN with the installed client folder C:\instantclient_10_2 as the Variable Value
9. Scroll down the “System variables” and edit the “Path” variable. Paste the location C:\instantclient_10_2 in the Variable value in front of all the present values. Make sure to include a ‘;’ to separate it from the current values, as below.
10. Press OK . Your final window should look similar to below
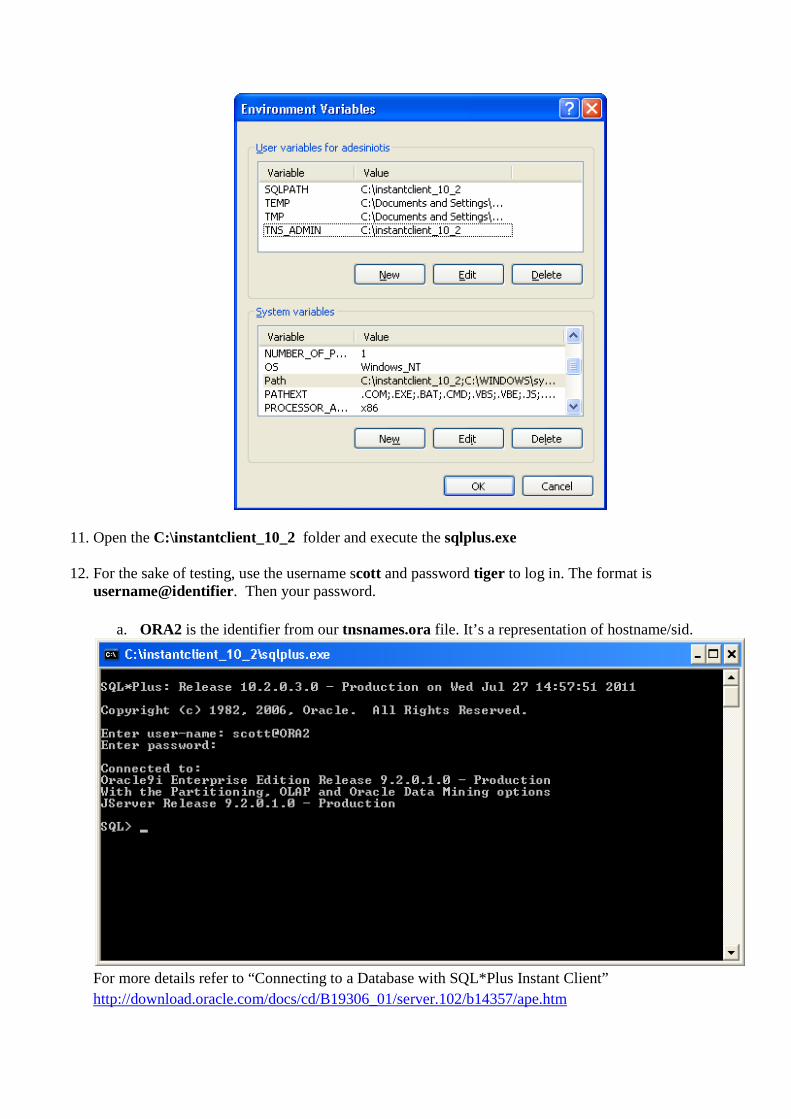
11. Open the C:\instantclient_10_2 folder and execute the sqlplus.exe 12. For the sake of testing, use the username scott and password tiger to log in. The format is
username@identifier. Then your password.
a. ORA2 is the identifier from our tnsnames.ora file. It’s a representation of hostname/sid.
For more details refer to “Connecting to a Database with SQL*Plus Instant Client” http://download.oracle.com/docs/cd/B19306_01/server.102/b14357/ape.htm
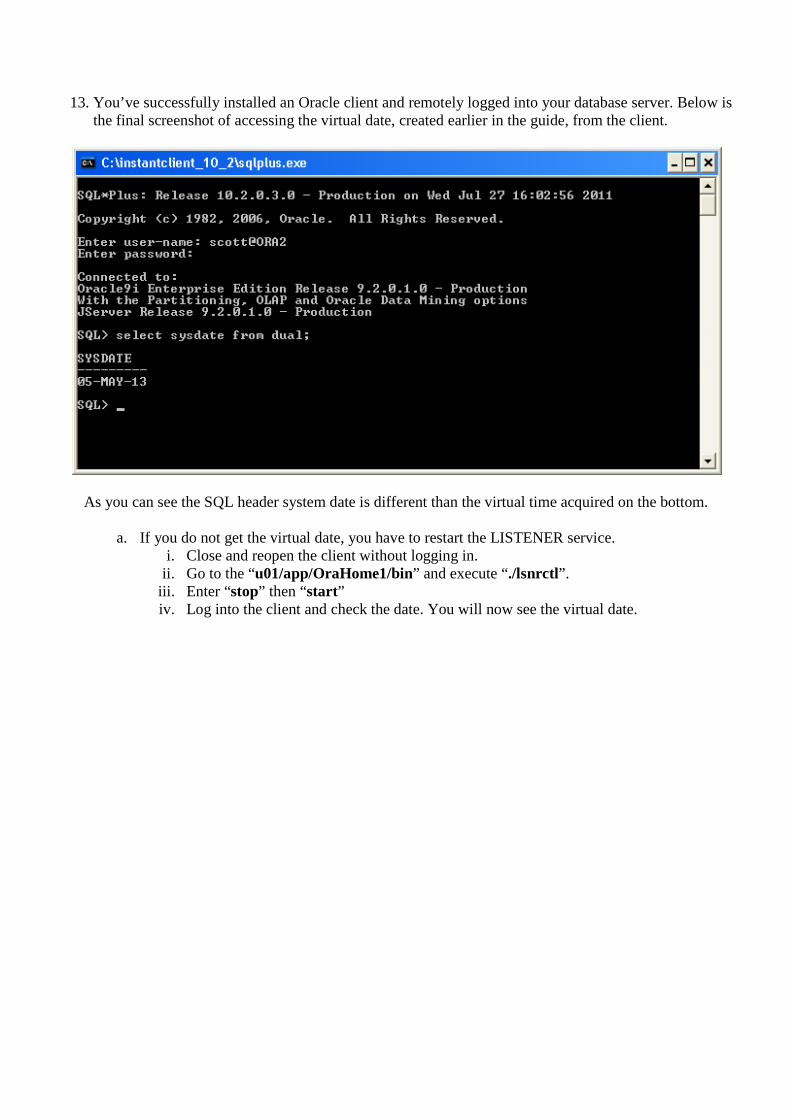
13. You’ve successfully installed an Oracle client and remotely logged into your database server. Below is the final screenshot of accessing the virtual date, created earlier in the guide, from the client.
As you can see the SQL header system date is different than the virtual time acquired on the bottom.
a. If you do not get the virtual date, you have to restart the LISTENER service. i. Close and reopen the client without logging in. ii. Go to the “u01/app/OraHome1/bin” and execute “./lsnrctl”. iii. Enter “stop” then “start” iv. Log into the client and check the date. You will now see the virtual date.