Thuraya ATLAS IP Satellite Terminal - The AST Group Atlas IP... · ATLAS IP, Maritime Broadband...
94
Thuraya ATLAS IP Satellite Terminal User Manual Revision 2.0
Transcript of Thuraya ATLAS IP Satellite Terminal - The AST Group Atlas IP... · ATLAS IP, Maritime Broadband...

Thuraya ATLAS IPSatellite Terminal
User ManualRevision 2.0

Atlas IP Terminal User Manual
Page 2 of 94
Proprietary Information Not To Be Disclosed Without Written Authorisation FromAddvalue Innovation Pte Ltd, All Rights Reserved
LIST OF CONTENT:
REGULATORY INFORMATION _____________________________________________________ 3
SAFETY INSTRUCTIONS __________________________________________________________ 5
IMPORTANT INFORMATION TO INSTALLERS AND USERS ___________________________ 8
COPYRIGHT______________________________________________________________________ 8
WARRANTY ______________________________________________________________________ 8
TRADEMARKS____________________________________________________________________ 9
1 INTRODUCTION _____________________________________________________________ 10
2 THURAYA NETWORK COVERAGE _____________________________________________ 11
3 MAIN UNITS ________________________________________________________________ 11
4 GETTING STARTED __________________________________________________________ 16
5 USING PRIMARY HANDSET___________________________________________________ 20
6 USING WEB CONSOLE _______________________________________________________ 42
7 ENTERING SAFE MODE ENVIRONMENT ______________________________________ 79
8 USING ALERT BUTTON ______________________________________________________ 83
9 TROUBLESHOOTING ________________________________________________________ 85
10 ERROR CODES ____________________________________________________________ 88
11 GLOSSARY ________________________________________________________________ 94

Atlas IP Terminal User Manual
Page 3 of 94
Proprietary Information Not To Be Disclosed Without Written Authorisation FromAddvalue Innovation Pte Ltd, All Rights Reserved
REGULATORY INFORMATION
FEDERAL COMMUNICATION COMMISSION NOTICE
FCC Identifier: QO4-AVIATLASIP
USE CONDITIONS:
This device complies with Part 15 of the FCC Rules. Operation is subject to the following twoconditions:
(1) This device may not cause harmful interference, and(2) This device must accept any interference received, including interference that may
cause undesired operation.
NOTE:This equipment has been tested and found to comply with the limits for a Class B digitaldevice, pursuant to Part 15 of the FCC Rules. These limits are designed to provide reasonableprotection against harmful interference in a residential installation. This equipment generatesuses and can radiate radio frequency energy and, if not installed and used in accordance withthe instructions, may cause harmful interference to radio communications. However, there isno guarantee that interference will not occur in a particular installation.
If this equipment does cause harmful interference to radio or television reception, which canbe determined by turning the equipment off and on, the user is encouraged to try to correct theinterference by one of the following measures:
· Reorient or relocate the receiving antenna.· Increase the separation between the equipment and receiver.· Connect the equipment into an outlet on a circuit different from that to which the
receiver is connected.· Consult the dealer or an experienced radio/TV technician for help.
IMPORTANT NOTE: EXPOSURE TO RADIO FREQUENCY RADIATION
This device complies with FCC radiation exposure limits set forth for an uncontrolledenvironment. The antenna used for this transmitter must be installed to provide a separationdistance of at least 100cm from all persons and must not be co-located or operating inconjunction with any other antenna or transmitter.
FCC CAUTION:
Any changes or modifications not expressly approved by the manufacturer could void theuser’s authority, which is granted by FCC, to operate this Maritime Broadband SatelliteTerminal, ATLAS IP.

Atlas IP Terminal User Manual
Page 4 of 94
Proprietary Information Not To Be Disclosed Without Written Authorisation FromAddvalue Innovation Pte Ltd, All Rights Reserved
Declaration of Conformity:
Addvalue Innovation Pte Ltd., 8, Tai Seng Link, Level 5 (Wing 2), Singapore 534158.
declares under our sole responsibility that the Product, brand name as Thuraya and model:ATLAS IP, Maritime Broadband Satellite Terminal to which this declaration relates, is inconformity with the following standards and/or other normative documents:
ETSI EN 301 489-1, -17, -19, -20, ETSI EN 301 444, ETSI EN 300 328, EN 60945,
IEC 60950 - 1 AND EN 60950-1,
We hereby declare that all essential radio test suite have been carried out and that the abovenamed product is in conformity to all the essential requirements of Directive 1999/5/EC.
The Conformity Assessment procedure referred to Article 10 and detailed in Annex [III] or [IV]of Directive 1999/5/EC has been followed with involvement of the following notified body(ies):
TIMCO ENGINEERING, INC., P.O BOX 370,NEW BERRY, FLORIDA 32669.
Identification mark: 1177 (Notified Body number)
The technical documentation relevant to the above equipment are held at:
· Addvalue Innovation Pte Ltd., 8, Tai Seng Link, Level 5 (Wing 2), Singapore 534158.
· Signed by Mr. Tan Khai Pang (Chief Technology Officer, September 29, 2014) andMr. Prabakar Kuttaniseeri (Manager- Quality Management, September 29, 2014).
Atlas IP Terminal User Manual
Page 5 of 94
Proprietary Information Not To Be Disclosed Without Written Authorisation FromAddvalue Innovation Pte Ltd, All Rights Reserved
SAFETY INSTRUCTIONS
For the sake of safety and protection, read the manual before attempting to use Thuraya AtlasIP Terminal.
The following general safety precautions must be observed during all phases of operation,service and repair of this equipment. Failure to comply with these precautions or with specificwarnings elsewhere in this user guide violates safety standards of intended use of theterminal.
Addvalue Innovation Pte Ltd assumes no liability for the customer's failure to comply withthese requirements.
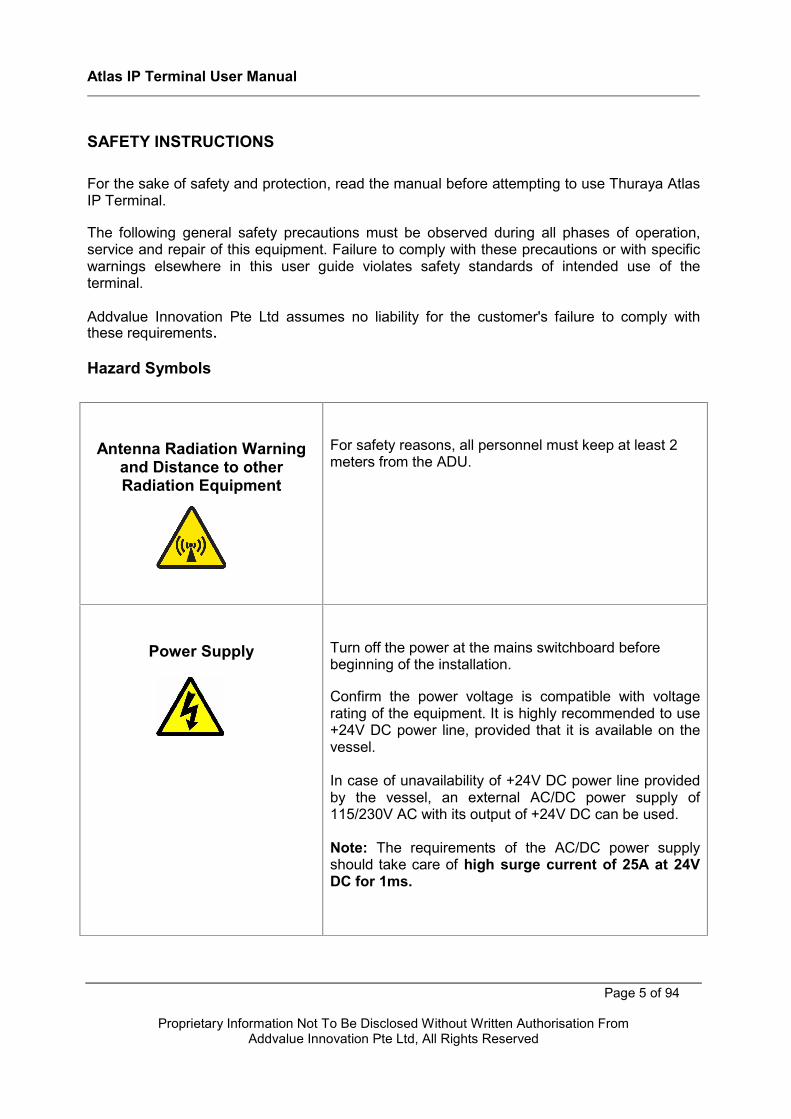
Hazard Symbols
Antenna Radiation Warningand Distance to otherRadiation Equipment
For safety reasons, all personnel must keep at least 2meters from the ADU.
Power Supply Turn off the power at the mains switchboard beforebeginning of the installation.
Confirm the power voltage is compatible with voltagerating of the equipment. It is highly recommended to use+24V DC power line, provided that it is available on thevessel.
In case of unavailability of +24V DC power line providedby the vessel, an external AC/DC power supply of115/230V AC with its output of +24V DC can be used.
Note: The requirements of the AC/DC power supplyshould take care of high surge current of 25A at 24VDC for 1ms.

Atlas IP Terminal User Manual
Page 6 of 94
Proprietary Information Not To Be Disclosed Without Written Authorisation FromAddvalue Innovation Pte Ltd, All Rights Reserved
Grounding, cables andconnections
The chassis of the equipment must be connected to anelectrical ground. This will minimise electric shock andmutual interference. In short, the EQUIPMENT must begrounded to the vessel.
Service Do not attempt to access to the interior of the equipment.Only qualified personnel authorized by its manufacturermay perform service. Failure to comply with this rule willresult in the warranty void.
Under certain conditions, dangerous voltages may existeven with the power cable removed. To avoid injuries,always disconnect power before accessing theequipment.
Alert Symbol
Alert Button For triggering an emergency alert.
Equipment Ventilation
To ensure adequate cooling of the equipment, 5-centimeter of unobstructed space must bemaintained around all sides of the unit except the bottom side. The ambient temperature rangeof the equipment is: -25°C to +55°C.
Fire Precautions
The equipment must not be operated in the presence of flammable gases or fumes as well asany explosive atmosphere. Operation of any electrical equipment in such an environmentconstitutes a definite safety hazard.

Atlas IP Terminal User Manual
Page 7 of 94
Proprietary Information Not To Be Disclosed Without Written Authorisation FromAddvalue Innovation Pte Ltd, All Rights Reserved
Obtaining Licensing For Thuraya Transceivers
Under rights given under ITU Radio Regulations, local telecommunications administrationsestablish and enforce national rules and regulations governing types of emissions, powerlevels, and other parameters that affect the purity of signal, which may be radiated in thevarious frequency bands of the radio spectrum.
To legally operate Thuraya equipment, it is necessary to obtain permission from the localtelecommunications regulatory authorities of the country you are operating from. Using yourequipment in any country without permission causes you to run the risk of confiscation of theequipment by the local authorities. The normal procedure to bring such equipment into anothercountry is to apply for a license before travel. If a license has not been obtained before travel,the equipment may be put in to storage by local authorities until such time license is obtained.

Atlas IP Terminal User Manual
Page 8 of 94
Proprietary Information Not To Be Disclosed Without Written Authorisation FromAddvalue Innovation Pte Ltd, All Rights Reserved
IMPORTANT INFORMATION TO INSTALLERS AND USERS
General
It is important that the user of this equipment read and observe all safety requirements andoperate the terminal according to the descriptions published in this manual.
Failure to comply may result in risk of injury or equipment failure and voids the validity of thewarranty provided by equipment manufacturer.
The terminal consists of 2 systems, BDU and ADU and they must be used as provided by themanufacturer or authorized dealer. Do not substitute any one of the system which is notprovided by the manufacturer or authorized dealer. Should needs of servicing or replacementis required, always contact the distributor or manufacturer for instructions.
Any modifications or attempts to open up the devices by not authorized personnel will void thewarranty.
Contents in this manual are subjected to change without notice and may contain errors orinaccuracies. The manual us periodically revised and updated. To obtain latest version, pleaseenquire it from product manufacturer or distributor.
Installation
Refer to Installation Manual for Thuraya Atlas IP Terminal.
COPYRIGHT
© Copyright 2015 Addvalue Innovation Pte Ltd.
All rights reserved. This publication and its contents are proprietary to Addvalue Innovation PteLtd. No part of this publication may be reproduced in any form or by any means without thewritten permission of Addvalue Innovation Pte Ltd.
WARRANTY
Addvalue Innovation Pte Ltd has made every effort to ensure the correctness andcompleteness of the material in this document. Addvalue Innovation Pte Ltd shall not be liablefor errors contained herein. The information in this document is subject to change withoutnotice. Addvalue Innovation Pte Ltd makes no warranty of any kind with regard to this material,including, but not limited to, the implied warranties of merchantability and fitness for aparticular purpose.
Atlas IP Terminal User Manual
Page 9 of 94
Proprietary Information Not To Be Disclosed Without Written Authorisation FromAddvalue Innovation Pte Ltd, All Rights Reserved
TRADEMARKS
All trademarks, marks, names, or product names referenced in this publication are theproperty of their respective owners, and Addvalue Innovation Pte Ltd neither endorses norotherwise sponsors any such products or services referred to herein.
Microsoft, Windows, Windows NT, Windows 2000, Windows XP and Windows 7 are registeredtrademarks of Microsoft Corporation in the U.S.A. and/or other countries.
All other company and product names may be the registered trademarks or trademarks of theirrespective owners.

Atlas IP Terminal User Manual
Page 10 of 94
Proprietary Information Not To Be Disclosed Without Written Authorisation FromAddvalue Innovation Pte Ltd, All Rights Reserved
1 INTRODUCTION
Thuraya Atlas IP is a maritime-specific broadband terminal and it supports broadband datacommunications at speed up to 444kbps and asymmetric streaming at 16kbps to 384 kbps.
The Atlas IP features improved power efficiency, a smaller form factor and greater versatilitythan rival maritime broadband products. The terminal features a single cable connection to thestabilised antenna, direct bulkhead mounting and built-in Wi-Fi.
Used with a computer or laptop, the Atlas IP with its primary handset gives an user access to:
Email and webmail
Secure communications
Internet browsing
SMS and instant messaging
Videoconferencing and streaming
Phone services
File transfers
It also includes a range of features designed to support improved communications functionalityand enhance shipboard operations. These include port forwarding, which can automaticallytransfer data from shipboard equipment and devices in support of M2M reporting routines, anEnglish/Chinese web interface, a built-in firewall, continuous GPS output and the ability to limitdata sessions by time or volume.
Services
The terminal has the following services:
Services Specification
Standard IP Up to 444 kbps
Streaming IP Up to 384 kbps (Asymmetric)
Circuit Switch Voice CS Voice
SMS Up to 160 Characters
The terminal has built-in Web Console, allowing you to manage your phone book, messagesand calls, and customize the terminal to your specific needs.

Atlas IP Terminal User Manual
Page 11 of 94
Proprietary Information Not To Be Disclosed Without Written Authorisation FromAddvalue Innovation Pte Ltd, All Rights Reserved
2 THURAYA NETWORK COVERAGE
Thuraya's robust satellite network provides coverage in the most remote locations, ensuringcongestion-free satellite communications to keep you connected at all times. From innovativesatellite design to the reliability of each Thuraya device and accessory, we provide a trulysuperior satellite communication solution beyond the boundaries of terrestrial systems andcellular networks.
The above map represents Thuraya’s expectations of coverage.
3 MAIN UNITS
The terminal includes the following main units:
BDU
ADU
Primary Handset

Atlas IP Terminal User Manual
Page 12 of 94
Proprietary Information Not To Be Disclosed Without Written Authorisation FromAddvalue Innovation Pte Ltd, All Rights Reserved
3.1 Above Deck Unit (ADU)
The ADU is a maritime-based 3-axis controlled antenna. The antenna is self-tracking based onpatented beam squint technology. The simple and robust electromechanical system, with onemotor per free axis, provides full coverage in azimuth and elevation. Tracking is accomplishedby measuring signals being continuously broadcast from the satellite.
The radome covers the antenna equipment, which is composed of:
Antenna Unit
RF and GPS circuit
Rotary joint
Antenna pedestal
The antenna unit includes LNA (low noise amplifier), HPA (high power amplifier) and trackingreceiver circuitry to ensure communication even in adverse circumstances.
All signals (and DC power) shall pass through a single coaxial antenna cable, which connectsthe ADU to the BDU.
3.2 Below Deck Unit (BDU)
The BDU has been developed for maximum flexibility and is the controlling unit for theterminal. It features a reliable industry standard interface connectors and enables users tohave optimal connectivity no matter what the conditions or your position at sea.

Atlas IP Terminal User Manual
Page 13 of 94
Proprietary Information Not To Be Disclosed Without Written Authorisation FromAddvalue Innovation Pte Ltd, All Rights Reserved
The BDU has a built-in Web Console, which can be accessed from a computer connected tothe BDU, using an Internet browser. The Web Console provides easy configuration of theBDU, firmware upgrade and daily use. For more information, refer to the chapter of the WebConsole.
The BDU is supplied by a +12V or +24V DC power supply, and it supplies power to the ADUvia a single coaxial antenna cable.
Status LEDs
There are 4 Status LEDs to indicate the operational status of the BDU at one glance.
Each LED is assigned to the following function:
Terminal Status
Antenna Status
Registered Network Status
Data Status
SIM Card Slot
The BDU has a SIM (Subscriber Identity Module) card slot located at the front panel of theBDU. The terminal requires a dedicated Thuraya SIM card to access the Thuraya network andconfigure the settings of the terminal.

Atlas IP Terminal User Manual
Page 14 of 94
Proprietary Information Not To Be Disclosed Without Written Authorisation FromAddvalue Innovation Pte Ltd, All Rights Reserved
Connectivity Ports and Button
The following diagram shows the front panel of the BDU and the alert button on its top.
a. Antenna Connector (TNC)b. Wi-Fi Connector (SMA)c. GPIO Portd. LAN Ports (RJ45)e. PoE Port (RJ45)f. Primary Handset Portg. RS-232 Serial Porth. SIM Card Sloti. USB Mini B Portj. Grounding Studk. Resettable Circuit Breakerl. Power Switchm. DC Inputn. Alert Button
ab
g
c
j
k
l
m
fe
d
h
n

Atlas IP Terminal User Manual
Page 15 of 94
Proprietary Information Not To Be Disclosed Without Written Authorisation FromAddvalue Innovation Pte Ltd, All Rights Reserved
3.3 Primary Handset
The wired Primary Handset has a colour LCD and keypad for making and receiving voice callsand sending SMS using an interface similar with a mobile phone. It can serve as a remoteaccess for user to access various BDU functions. The Primary Handset connector is pluggedinto the BDU primary handset port and it is powered directly from the BDU.

Atlas IP Terminal User Manual
Page 16 of 94
Proprietary Information Not To Be Disclosed Without Written Authorisation FromAddvalue Innovation Pte Ltd, All Rights Reserved
4 GETTING STARTED
System Configuration
Solid line refers to the basic configuration.
ADU
BDU
Router
External Devices
Above Deck Unit(To be installed in an exposed area)
Below Deck Unit(To be installed in protected area)
AC/DC Power
Supply Unit
PoE (1x)
LAN (3x)
I/O Interface
NavigationEquipment
GPS O/P (NMEA 0183)
Wi-Fi
RS232 Serial
Primary Handset
25-m Antenna Cable

Atlas IP Terminal User Manual
Page 17 of 94
Proprietary Information Not To Be Disclosed Without Written Authorisation FromAddvalue Innovation Pte Ltd, All Rights Reserved
Preparation for Operation
4.2.1 Install the SIM card.
The terminal requires a SIM card to access the Thuraya network and configure the settings ofthe BDU. Please refer to your Airtime Service Provider for more information.
a. Tilt up the SIM card slot rubber cover.
Note: Make sure the BDU is switched off
before inserting or removing the SIM card.
b. Position the SIM card with its gold-contacts facing down. (There is asymbol of SIM Card with its arrow onthe front panel to ensure the correctorientation of the SIM Card when it isbeing inserted.)
c. Push the SIM card gently until it clicksand is locked in place.

Atlas IP Terminal User Manual
Page 18 of 94
Proprietary Information Not To Be Disclosed Without Written Authorisation FromAddvalue Innovation Pte Ltd, All Rights Reserved
d. Tilt down the SIM card cover to itsoriginal position.
4.2.2 Connecting Primary Handset
The Primary Handset is powered from the BDU through the Primary Handset Port.
a. Plug in the Primary Handset connectorinto the Handset port on the BDU frontpanel. Make sure the key of thehandset is aligned to the red mark ofthe handset port.
4.2.3 Connecting the Wi-Fi Antenna
a. Connect the Wi-Fi antenna to the Wi-Fi’s connector on the BDU front panel.Rotate the connector in the clockwisedirection until it is secured.

Atlas IP Terminal User Manual
Page 19 of 94
Proprietary Information Not To Be Disclosed Without Written Authorisation FromAddvalue Innovation Pte Ltd, All Rights Reserved
4.2.3 Powering Up The Terminal
a. Use the ON/OFF switch on the BDU’sfront panel.
b. Wait for all LED indicators to turngreen to indicate the terminal iscompletely power up. Refer the tablebelow for meaning of the statusindicators.
LED Name Status Meaning
TERMINAL Blinking Green BDU is functioning as the “heartbeat”.
Steady Red BDU powers up or detects failure.
ANTENNA
Steady Green ADU is functioning.
Steady Red ADU detects failure.
No Light ADU is calibrating.
REGISTERED
Steady Amber Registration to network in progress.
Steady Green Registration to network.
Steady Red Network failure/Error
DATA
Steady Green In Data Mode, user can browse internet.
No light (Off) In Voice Mode, user can make a voice call usingPrimary Handset but cannot activate dataconnection and browse internet.
Atlas IP Terminal User Manual
Page 20 of 94
Proprietary Information Not To Be Disclosed Without Written Authorisation FromAddvalue Innovation Pte Ltd, All Rights Reserved
5 USING PRIMARY HANDSET
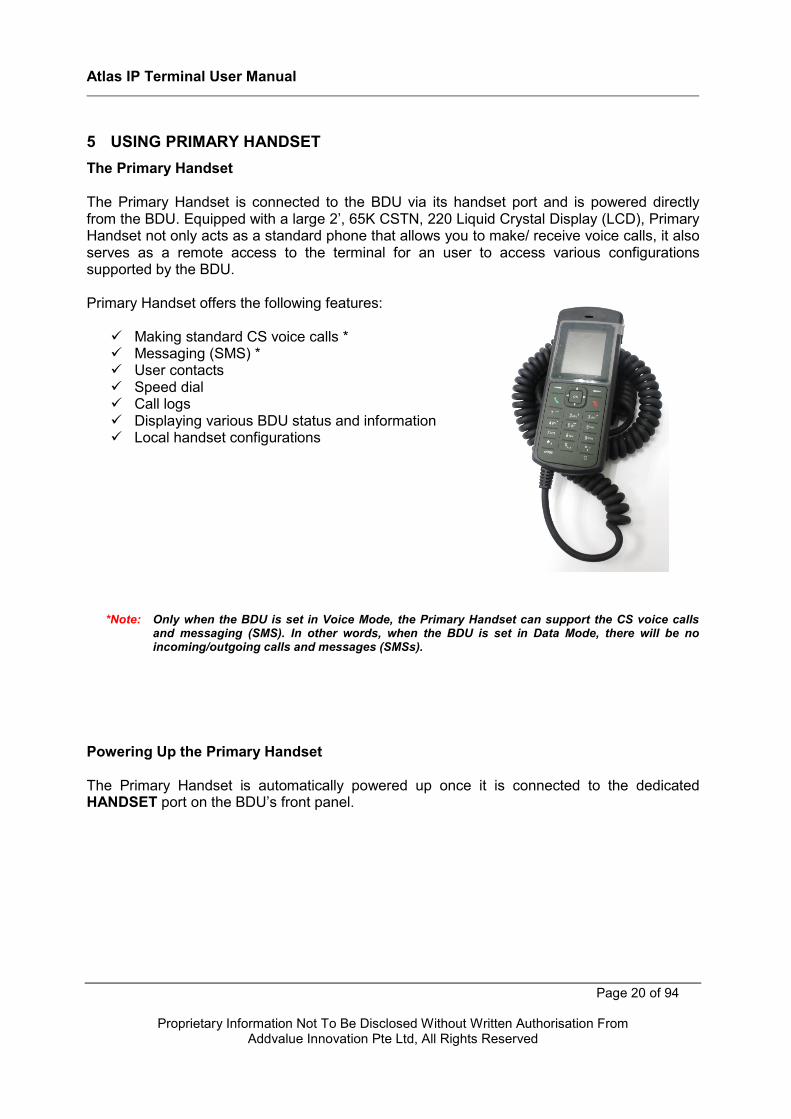
The Primary Handset
The Primary Handset is connected to the BDU via its handset port and is powered directlyfrom the BDU. Equipped with a large 2’, 65K CSTN, 220 Liquid Crystal Display (LCD), PrimaryHandset not only acts as a standard phone that allows you to make/ receive voice calls, it alsoserves as a remote access to the terminal for an user to access various configurationssupported by the BDU.
Primary Handset offers the following features:
Making standard CS voice calls * Messaging (SMS) * User contacts Speed dial Call logs Displaying various BDU status and information Local handset configurations
*Note: Only when the BDU is set in Voice Mode, the Primary Handset can support the CS voice callsand messaging (SMS). In other words, when the BDU is set in Data Mode, there will be noincoming/outgoing calls and messages (SMSs).
Powering Up the Primary Handset
The Primary Handset is automatically powered up once it is connected to the dedicatedHANDSET port on the BDU’s front panel.

Atlas IP Terminal User Manual
Page 21 of 94
Proprietary Information Not To Be Disclosed Without Written Authorisation FromAddvalue Innovation Pte Ltd, All Rights Reserved
Overview of Primary Handset
1. Earpiece2. Display3. Hands-free Headset Jack4. OK Key5. 4-Way Navigation Ring6. Select Left Key7. Select Right Key8. Call/Answer Key9. Call/Menu End Key10. Keypad (Alpha-Numeric)11. Mode Key12. Clear Key13. Microphone14. Service Port15. Ringer*
*Note: The ringer is located at the back of the Primary Handset.
12
3
5
7
4
6
8
9
10
12
14
11
13

Atlas IP Terminal User Manual
Page 22 of 94
Proprietary Information Not To Be Disclosed Without Written Authorisation FromAddvalue Innovation Pte Ltd, All Rights Reserved
5.3.1 Keypad - Description and Functions
Keys Description/Functions
4-way navigation ring.
Press the 4-way navigation ring to scroll left, right, up, anddown on the display. Enables scrolling through names, phonenumbers, menus or settings.
OK key.
Pressing this key selects/confirms the function highlighted onthe display.
Left selection key.
The function of this key depends on the guiding text shown onthe display above the key.
Right selection key.
The function of this key depends on the guiding text shown onthe display above the key.
Call/Answer key
After entering a phone number: Initiates a call to thenumber.
From Main Display screen: Opens a list of dialed calls
When Ringing: Answers the incoming call..
Call/Menu End key
Press this key to end active calls or exits from any menus orsub menus.
Keypad
Used to enter numbers and characters.Press 0 to add a space when writing text.
The functions available depend on whether you are typing aphone number (number mode) or text (text mode).

Atlas IP Terminal User Manual
Page 23 of 94
Proprietary Information Not To Be Disclosed Without Written Authorisation FromAddvalue Innovation Pte Ltd, All Rights Reserved
Keys Description/Functions
Star * keyWhen entering a phone number, press this key to insert a *.Press and hold this key to insert a +.
When writing text, press this key to access a list of specialsymbols.
Hash # key
When entering a phone number, press this key to insert a #.
To quickly change the text input method when writing text, pressthis key repeatedly and check the indicator at the top of thedisplay.
In standby mode, press and hold this key to set the PrimaryHandset into silent mode.
Mode key
To select the terminal operating mode (Voice or Data).
Clear Key
Press key once to clear one character at a time or press andhold this key to clear the whole text entry.

Atlas IP Terminal User Manual
Page 24 of 94
Proprietary Information Not To Be Disclosed Without Written Authorisation FromAddvalue Innovation Pte Ltd, All Rights Reserved
5.3.2 The Main Display Screen
Status Indicator lineThe indicator line shows status symbol informing you about the operating conditions ofthe BDU.
Network Indicator LineThe indicator line shows the registration status and region information of the terminal.
Selection Key line
The Selection key line operates using the Left or Right selection keys
with the to access menus and controls.
Status Indicator Line
Selection Key Line
Network Indicator Line

Atlas IP Terminal User Manual
Page 25 of 94
Proprietary Information Not To Be Disclosed Without Written Authorisation FromAddvalue Innovation Pte Ltd, All Rights Reserved
Primary Handset Status Indicators
Table below explains the meaning of each status indicator displayed in the Main Displayscreen.
5.3.3 Primary Handset Operations
Making a Voice Call (Only Supported in Voice Mode)
Before making a voice call, please make sure that:
The BDU is set to Voice Mode.
Primary Handset is connected to the BDU. ( Status indicator should be on.)
The BDU has successfully registered with the network and ready for circuit-switched
voice connection services. ( Status indicator should be on.)
You can use the following two options for making a call:
Manual Dial: Using the alphanumeric keypad, dial 00 <country code> <phone number>.
Press key.
Using Contacts or Call Log list from the Primary Handset: Enter the Contacts list of the Primary Handset; scroll to the desired number and
press key, or
Status Indicator Description
Signal Strength Indicator
New Short Message (SMS) in Inbox
Handset Disconnected from Terminal
Handset Connected to Terminal
Voice Mode
Data Mode
Handset in Silent Mode
Handset Keypad Lock is active

Atlas IP Terminal User Manual
Page 26 of 94
Proprietary Information Not To Be Disclosed Without Written Authorisation FromAddvalue Innovation Pte Ltd, All Rights Reserved
Enter the Log list of the Primary Handset; scroll to the desired number and press
key.
Note: For voice calls and SMS, you may also use '+' by pressing and holding the key instead of “00”at the beginning of dialled number string as an alternative (‘+’ <country code> <phone number>).
To end a Call
Press .
Receiving a call (Only when the BDU is set in Voice Mode)
When there is an incoming call, the Primary Handset will:
Ring.
The calling party’s number will be displayed on the screen.If the number is stored in the contacts, the corresponding name of contact will bedisplayed.
To answer an incoming call, press the key.
Adjusting volume during a call
Use the 4-way navigation ring to adjust the volume. Press up key to increase the volumeand press down key to decrease the volume.
Using the Menus
You can access the Menu System by pressing the Right selection key in the Main Displayscreen.
The main menu of the Primary Handset includes nine (9) menu options with each menu optionhaving their respective sub-menus.
You can use the 4-way navigation ring to navigate to the desired menu option and
press to confirm your selection. You can also end the menu or sub menus and return to
the Main Display screen at any time by pressing the key.

Atlas IP Terminal User Manual
Page 27 of 94
Proprietary Information Not To Be Disclosed Without Written Authorisation FromAddvalue Innovation Pte Ltd, All Rights Reserved
Table below summarizes the functionalities within each menu option:
Contacts
This menu manages your user contacts.
Log
This menu allows you to view call histories.
Telephony
This menu configures settings related to voice telephony services.
Signal
This menu displays the terminal information of satellite signal and GPS.
Messaging
This is menu is for SMS related services.
Settings
This menu configures BDU settings of Time Zone and Language.
Terminal
This menu displays general BDU information.
Security settings
This menu provide a factory reset to the handset.
Phone manager
This menu configures local handset settings.

Atlas IP Terminal User Manual
Page 28 of 94
Proprietary Information Not To Be Disclosed Without Written Authorisation FromAddvalue Innovation Pte Ltd, All Rights Reserved
Contacts Menu
Indicates contacts that are saved in SIM card.
The following options are available when pressing the Left selection key whilebrowsing through the contacts:
New contact
Add new contact to the memory. To add contact:
a. Select New contact.
b. Enter the name for the contact.
Note: Press key to browse for symbols.
c. Enter the number for the contact.
Note: Stored number can be in any one of the following formats:
‘+’ <country code> <phone number>
00 <country code> <phone number>
Press key longer to insert '+' sign.
Saving of contact without number is not allowed.
d. Select Save (Left selection key) or pressing the key to save thecontact to the selected memory.
Note: Refer to “Tips for writing the text” section under New message for more information on textwriting.
Edit contactEdit information of this contact
The Contacts menu allows you to store, retrieve and update namesand phone numbers of your contacts in the SIM card memory. You
can also access this menu by pressing Left selection key inMain Display screen.
This menu lists all the contacts saved in SIM card memory where,

Atlas IP Terminal User Manual
Page 29 of 94
Proprietary Information Not To Be Disclosed Without Written Authorisation FromAddvalue Innovation Pte Ltd, All Rights Reserved
CallMake a voice call to this contact.
SearchSelect this to enter a specific name to search within the contact list.
DeleteDelete selected contact.
Note: You can also delete the selected contact by pressing the Clear key.
View numberDisplay the number of the selected contact.
Assign Speed DialAdd the selected contact to the speed dial list.
Reload ContactsSelect this to reload contacts from the BDU/SIM card into the local memory of thePrimary Handset.
Memory StatusSelect this to view the memory status of the contacts.
While browsing through the contact list, press the key to view the phone name andnumber or the selected contact. The following options are available when pressing the Left
selection key while viewing the selected contact:
CallMake a voice call to this contact.
Send messageOpen a SMS editor to send a text message to this contact.
Edit contactEdit information of this contact.
DeleteDelete this contact.
Forward contactForward information of this contact using SMS.

Atlas IP Terminal User Manual
Page 30 of 94
Proprietary Information Not To Be Disclosed Without Written Authorisation FromAddvalue Innovation Pte Ltd, All Rights Reserved
Assign Speed DialAdd this contact to the speed dial list.
Note: You can also make a voice call to the selected contact when browsing through or viewing the
contacts by pressing the Call key.
Log Menu
Missed calls
Received calls
Dialled calls
Call history of the particular category is displayed in chronological order when selected. Up to5 latest entries of each category can be saved.
The following options are available when pressing the Left selection key whilebrowsing through or viewing the call log:
DeleteDelete the selected log entry from the list.
Note: You can also delete the entry by pressing the Clear key.
CallCall the number in the selected log entry.
SendSend an SMS to the number in the selected log entry.
The Log menu allows you to view historical information aboutphone calls and data usage in chronological order with thefollowing sub menus:

Atlas IP Terminal User Manual
Page 31 of 94
Proprietary Information Not To Be Disclosed Without Written Authorisation FromAddvalue Innovation Pte Ltd, All Rights Reserved
SaveSave the number from the selected log entry to the contact list.
Note: This option is not available when the log entry already has an entry in the contact list.
Note: You can also make a voice call to the number of the selected log entry when browsing through or
viewing the call log by pressing the Call key.
Clear call listsSelect this to clear the call log entries. Available log options are:
Missed calls
Received calls
Dialled calls
All callsDelete all logs including Missed, Received and Dialled logs.
Telephony Menu
Speed dial
SettingContain options to enable/disable the speed dial feature.
Speed Dial ListSelect this to configure the speed dial list. The following options are available when
pressing the Left selection key while browsing through the list:
AssignAssign a contact to the selected entry. To assign a contact:
The Telephony menu allows you to configure telephony related settingswith the following sub menus:

Atlas IP Terminal User Manual
Page 32 of 94
Proprietary Information Not To Be Disclosed Without Written Authorisation FromAddvalue Innovation Pte Ltd, All Rights Reserved
a. Select Speed Dial List.
b. Browse through the list to locate an empty entry.
c. Select Options by pressing Left selection key.
d. Select Assign and press from the option.
e. Select the desired contact to assign to the speed dial list.
f. Press to confirm your selection.
DeleteRemove contact from the selected entry. This option is not available for emptyentry.
Note: You can also delete the entry by pressing the Clear key.
CallMake call using the number from the selected entry. This option is not available forempty entry.
Note: You can also make a voice call to the number of the selected entry by pressing the Callkey.
You can make a voice call directly from the Main Display screen by pressing the
corresponding speed dial entry number + Call key once the speed dial feature is enabledwith a valid contact entry.
Signal Menu
GPS statusShow current Latitude and Longitude coordinates, Speed (knots) and Date &Time ofacquisition on the BDU.
The Signal menu provides the following sub menus to get theinformation of the terminal’s GPS.

Atlas IP Terminal User Manual
Page 33 of 94
Proprietary Information Not To Be Disclosed Without Written Authorisation FromAddvalue Innovation Pte Ltd, All Rights Reserved
Messaging Menu
The Messaging menu allows the user to write new messages, viewstored messages from Inbox, Drafts and/or Sent folders and configuresettings related to SMS with the following sub menus:
New Message (Only Supported in Voice Mode)Select this to create and send a new message. To create new message:
a. Select New Message by pressing the key. A SMS editor will be displayed on thePrimary Handset screen for writing new message.
b. Type in your SMS message using the alphanumeric keypad.
c. To send the message, press the key and select Send.
d. Enter the recipient’s phone number, and press the key. Alternatively you can
select Search by pressing the Left selection key to select the phonenumber from the contacts.
Options:
You can press the Left selection key to select options available when writing themessage.
SendSelect this when you are ready to send your message.
SaveSelect this to save the message into the draft folder.
Clear screenSelect this to clear all the written text.

Atlas IP Terminal User Manual
Page 34 of 94
Proprietary Information Not To Be Disclosed Without Written Authorisation FromAddvalue Innovation Pte Ltd, All Rights Reserved
Tips for writing the text:
Press the 0 key to add a space.
To quickly change the text input mode when writing text, press keyrepeatedly and check the indicator at the top of the display:
o <ABC>: Capital letterso <123>: Numberso <abc>: Small letterso <Abc>: Initial Capital letter followed by small letters
To add a number in alphabet mode, press and hold the desired number key.
Inserting symbols to your message:
To get a list of special symbols, press the .key.
Using the 4-way navigation ring , navigate to the desired symbol.
Press to confirm selection.
Clearing text:
To clear text, press once to clear one character at a time.
To clear the whole text entry, press and hold to clear the whole text entry.
InboxContain new/opened text messages that you have received. When browsing through the
messages list using the 4-way navigation ring,
Indicates an unread (new) message and
Indicates read (opened) text messages.
The following are available options when pressing the Left selection key while browsingthrough or viewing the messages in this folder:

Atlas IP Terminal User Manual
Page 35 of 94
Proprietary Information Not To Be Disclosed Without Written Authorisation FromAddvalue Innovation Pte Ltd, All Rights Reserved
Open
Open selected message. You can also press while browsing through themessage list to open the selected message (This option is not available when viewingthe message).
ReplySelect this to reply to the selected message sender.
DeleteDelete selected message.
Note: You can also delete the selected message by pressing the Clear key.
ForwardForward this message to another recipient.
CallMake a voice call to the selected message sender.
SaveSave the selected message into the Draft folder.
DetailsDisplay the details of the selected message.
Add to contactSelect this to add the phone number of the selected message into the contact list.
Note: You can also make a voice call to the selected message contact when browsing through the
messages list by pressing the Call key.
SentContain text messages that you have sent. The following are available options when pressing
the Left selection key while browsing through or viewing the messages in this folder:
Open
Open selected message. You can also press while browsing through themessage list to open the selected message (This option is not available when viewingthe message).

Atlas IP Terminal User Manual
Page 36 of 94
Proprietary Information Not To Be Disclosed Without Written Authorisation FromAddvalue Innovation Pte Ltd, All Rights Reserved
DeleteDelete selected message.
Note: You can also delete the selected message by pressing the Clear key.
SendSend the selected message to another recipient.
SaveSave the selected message into the Draft folder.
Add to contactSelect this to add the phone number of the selected message into the contact list.
Note: You can also make a voice call to the selected message contact when browsing through the message
list by pressing the Call key.
DraftContain text messages that you have saved. The following are available options when
pressing the Left selection key while browsing through or viewing the messages in thisfolder:
Open
Open selected message. You can also press while browsing through themessage list to open the selected message (This option is not available when viewingthe message).
DeleteDelete selected message.
Note:
You can also delete the selected message by pressing the Clear key.
SendSend this message to another recipient.
SaveSave the selected message into the Draft folder

Atlas IP Terminal User Manual
Page 37 of 94
Proprietary Information Not To Be Disclosed Without Written Authorisation FromAddvalue Innovation Pte Ltd, All Rights Reserved
Add to contactSelect this to add the phone number of the selected message into the contact list.
Note: You can also make a voice call to the selected message contact when browsing through the message
list by pressing the Call key.
OptionsThe following settings are available in this sub menu:
Message CentreSelect this to set the number of the SMS service centre.
Save sent messageSelect this to enable or disable the saving of sent messages. When this option isenabled, all successfully sent messages are saved in the Sent folder.
Memory statusSelect this to view the memory status of the messages.
Reload MessagesSelect this to reload messages from the BDU into the local memory of the PrimaryHandset.
Delete allSelect this to clear the messages in a particular folder. Available folder options are:
All messagesDelete messages in all folders including Inbox, Sent and Draft.
Inbox
Sent
Draft

Atlas IP Terminal User Manual
Page 38 of 94
Proprietary Information Not To Be Disclosed Without Written Authorisation FromAddvalue Innovation Pte Ltd, All Rights Reserved
Settings Menu
Local Time ZoneChange the local time zone of the handset.
LanguageChange the menu display language.
Terminal Menu
Terminal InfoDisplay a list of information of the BDU.
ModelModel name of the BDU
The Settings menu provides the following sub menus to configurethe time zone and language.
The Terminal menu provides the information of the BDU, theactivation and deactivation of the Firewall and MAC filtering, andFactory Reset to be carried out on the terminal.

Atlas IP Terminal User Manual
Page 39 of 94
Proprietary Information Not To Be Disclosed Without Written Authorisation FromAddvalue Innovation Pte Ltd, All Rights Reserved
Serial numberSerial number of the BDU.
Software versionSoftware version of the BDU
Thuraya ModuleFirmware version of Thuraya Module
IMEI numberIMEI number of the BDU
IMSI numberIMSI number of the SIM card
Own NumberTelephone Number of the SIM card
FirewallTo select Disabled or Enabled the Firewall.
MAC FilteringTo select Disabled or Enabled the Mac Filtering.
Factory resetTo perform a Factory Reset on the terminal. enter the password “admin” and click OK.
Security settings Menu
Factory resetTo Perform factory reset on the Handset.
The Security menu provides an option to carry out a factory reset tothe Handset.

Atlas IP Terminal User Manual
Page 40 of 94
Proprietary Information Not To Be Disclosed Without Written Authorisation FromAddvalue Innovation Pte Ltd, All Rights Reserved
Phone manager Menu
DisplayConfigure settings that are related to Primary Handset display.
WallpaperTo select the available wallpaper for the handset background.
BacklightTo set the duration of the display backlight to remain on. Settings range fromAlways On (Backlight permanently turned on), 15 seconds to 1 minute.
Note: The backlight will be slightly dimmer and finally off when there is no keypad activity aftersometime. However, this feature is not available when the setting is set to Always On.
ToneConfigure tone setting for the standard and ring tones.
Standard tone
Key toneContain options to enable/disable the key tone.
Message toneContain options to enable/disable the message tone.
Volume
The Phone manager menu provides the following sub menus to
configure settings that are local to the Primary Handset:

Atlas IP Terminal User Manual
Page 41 of 94
Proprietary Information Not To Be Disclosed Without Written Authorisation FromAddvalue Innovation Pte Ltd, All Rights Reserved
Configure the volume for the standard tones (both key and message
tones). Using the 4-way navigation ring , press up/right toincrease and down/left to decrease the volume.
Ring tone
ToneSelect desired ring tone pattern.
VolumeConfigure the volume of the ring tone. Using the 4-way navigation ring
, press up/right to increase and down/left to decrease the volume.
AboutDisplay a list of information of the Primary Handset.
ModelModel name of the Primary Handset
Software versionSoftware version of the Primary Handset
Hardware versionHardware version of the Primary Handset
CopyrightContain Copyright message

Atlas IP Terminal User Manual
Page 42 of 94
Proprietary Information Not To Be Disclosed Without Written Authorisation FromAddvalue Innovation Pte Ltd, All Rights Reserved
6 USING WEB CONSOLE
6.1 Register to the Network
a. Connect your computer to the BDU using a LAN cable.
b. When the connection has been established, open the web browser (for example:Internet Explorer, Google Chrome or Firefox.) .
c. Type http://192.168.2.1/ in the Address field and press Enter. When the Loginscreen appear, type in admin in the Username field and admin in the passwordfield.
d. Click “Login” button.
The BDU Web Console will appear on your screen.
The terminal will automatically register to the network. This process will includeGPS acquisition, satellite tracking and registration with the network, which will take2 to 3 minutes. Upon successful registration, with all four BDU’s status indicators litin green, the terminal will be ready for normal operation.

Atlas IP Terminal User Manual
Page 43 of 94
Proprietary Information Not To Be Disclosed Without Written Authorisation FromAddvalue Innovation Pte Ltd, All Rights Reserved
6.2 Navigating the Web Console
6.2.1 Status Indicators
In Voice Mode, the status indicator will appear with CS Voice Icon:
In Data Mode, the status indicator will appear with Data Icon:
These icons indicate the status of the BDU;
Green indicates the item is active.
Grey indicates the item is inactive.
Status Icons
Voice Icon: indicates the Circuit Switch status (Voice calls, SMS)
Data Icon: indicates the Packet Switch information (Internet Browsing, FTP, email)
Signal Icon: indicates the signal strength of the satellite.
System Operation Mode Icons
Log Out
Radio Silence ON (meaning the ADU’s transmitter is disable.)
6.2.2 Menu Icons
CS Voice Icon
Data Icon

Atlas IP Terminal User Manual
Page 44 of 94
Proprietary Information Not To Be Disclosed Without Written Authorisation FromAddvalue Innovation Pte Ltd, All Rights Reserved
Below you can see all of the sub menu tabs, under each icon menu item.
Home Phone SMS Data Settings
Phone Book Compose Connection Language
Call History Inbox Data Profiles Terminal Info
Sent Port Forwarding Wi-Fi
Draft Firewall Tracking
Mac Filtering Misc
Settings Admin
Modem
About
Home Menu
Click on Home icon.
The Web Console displays the terminal information of Region, satellite’s received signalstrength and GPS information (Latitude, Longitude, Date/Time, Speed and Course).
In Voice Mode, a prefix of “V” will be displayed.
In Data Mode, a prefix of “D” will be displayed.

Atlas IP Terminal User Manual
Page 45 of 94
Proprietary Information Not To Be Disclosed Without Written Authorisation FromAddvalue Innovation Pte Ltd, All Rights Reserved
Phone Menu
Click on Phone icon.
Phone menu provide the following options:
Phonebook
The Phonebook entries can be stored on the SIM card.It allows you to view, add, edit and delete entries on your Phonebook list and to sendSMS messages directly from the Phonebook entries.

Atlas IP Terminal User Manual
Page 46 of 94
Proprietary Information Not To Be Disclosed Without Written Authorisation FromAddvalue Innovation Pte Ltd, All Rights Reserved
Call History
View option
The View option allows you to view the Call History entries.
From the drop-down menu, select:
View Option Description
Dialled Call To view the list of dialed calls only.
Received Call To view the list of received calls only.
Missed Call To view the list of missed calls only.
All To view the list of the dialed, received and missedcalls.
Sending SMS from the Call History list
Follow these steps to send SMS from the Call History list:
a. Select the entry from the list.b. Click Send SMS.c. The Call History console switches over to the Compose SMS console.

Atlas IP Terminal User Manual
Page 47 of 94
Proprietary Information Not To Be Disclosed Without Written Authorisation FromAddvalue Innovation Pte Ltd, All Rights Reserved
d. Type in the text message and click Send.
Deleting a Call History entry
Follow these steps to delete a Call History entry:
a. Select the entry from the Call History list.b. Click Delete.c. Click Ok to confirm or click Cancel to abort deleting the entry.d. Click Refresh to refresh the Call History list.
Atlas IP Terminal User Manual
Page 48 of 94
Proprietary Information Not To Be Disclosed Without Written Authorisation FromAddvalue Innovation Pte Ltd, All Rights Reserved
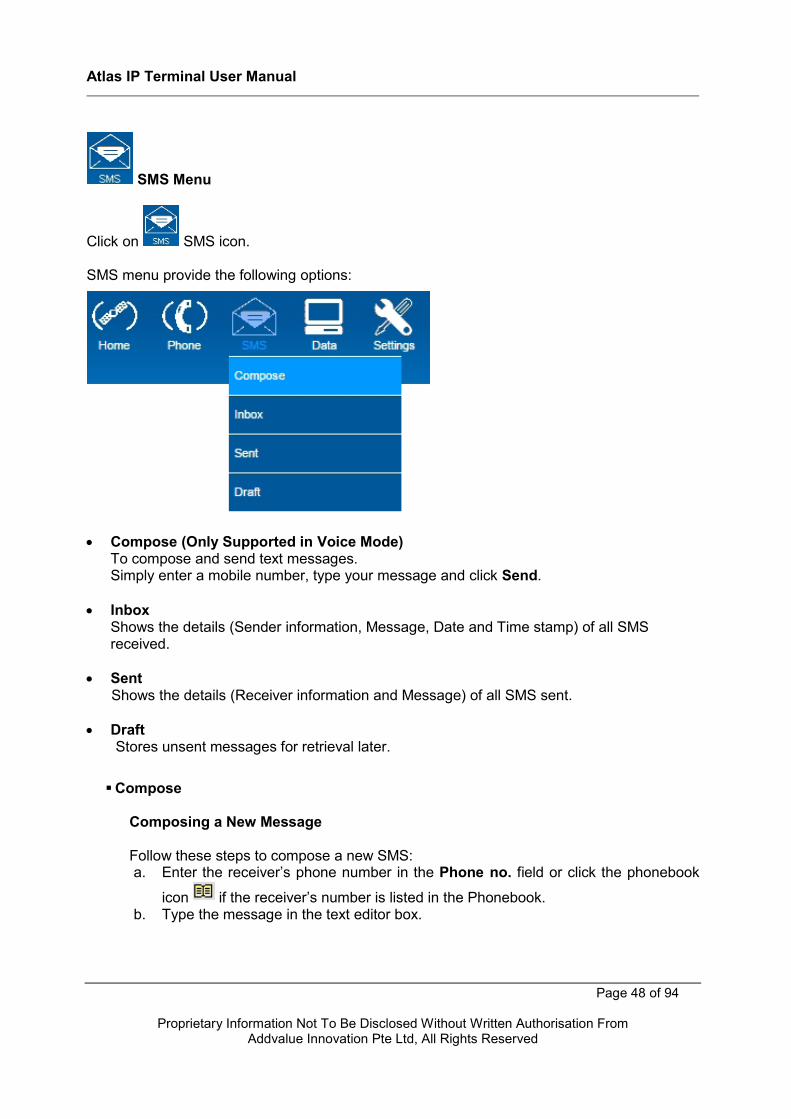
SMS Menu
Click on SMS icon.
SMS menu provide the following options:
Compose (Only Supported in Voice Mode)To compose and send text messages.Simply enter a mobile number, type your message and click Send.
InboxShows the details (Sender information, Message, Date and Time stamp) of all SMSreceived.
SentShows the details (Receiver information and Message) of all SMS sent.
DraftStores unsent messages for retrieval later.
Compose
Composing a New Message
Follow these steps to compose a new SMS:a. Enter the receiver’s phone number in the Phone no. field or click the phonebook
icon if the receiver’s number is listed in the Phonebook.b. Type the message in the text editor box.

Atlas IP Terminal User Manual
Page 49 of 94
Proprietary Information Not To Be Disclosed Without Written Authorisation FromAddvalue Innovation Pte Ltd, All Rights Reserved
Note: Message is limited to 160 characters (using 7 bit encoded default alphabets) including
spaces between words. But it is limited to 70 characters per message using Unicode (UCS2)text message (such as message typed in Chinese, etc).
If the user does not need to store a copy of the sent SMS into SIM card, do uncheck “Store acopy in the SIM” checkbox.
c. Click Send button to send the SMS.d. To save an unsent SMS, click Save button and the unsent SMS will be saved in
Draft.e. To clear the typed message on the text editor, click Clear button.
Inbox
Shows the details (Sender information, Message, Date and Time stamp) of all SMSreceived.

Atlas IP Terminal User Manual
Page 50 of 94
Proprietary Information Not To Be Disclosed Without Written Authorisation FromAddvalue Innovation Pte Ltd, All Rights Reserved
Replying to a SMS
Follow these steps to reply a SMS:
a. Click on a SMS to select it.The selected SMS will be highlighted in light blue.
b. Click Reply.c. Click OK to reply with the original contents or Cancel to reply without the original
content.
The Inbox console switches over to Compose console.
d. Enter your reply in the text editor.e. Click Send to send your reply SMS. The reply SMS will be sent to the recipient.
Forwarding an SMS
Follow these steps to forward an SMS:a. Click on a SMS to select it.
The selected SMS will be highlighted in light blue.b. Click Forward.
The Inbox console switches over to the Compose console.c. Enter the receiver’s number in the Phone No. field.d. Click Send to forward the SMS. The SMS will be sent to the recipient.
Deleting a single SMS from the Inbox list
Follow these steps to delete a single SMS from the Inbox list:a. Click on a SMS to select it.b. Click Delete.c. Click OK to confirm or click Cancel to abort deleting the SMS.

Atlas IP Terminal User Manual
Page 51 of 94
Proprietary Information Not To Be Disclosed Without Written Authorisation FromAddvalue Innovation Pte Ltd, All Rights Reserved
Deleting multiple SMS from the Inbox list
Follow these steps to delete multiple SMS from the Inbox list:a. Select the message by checking the checkboxes beside each SMS.b. Click Delete.c. Click OK to confirm the delete, or Cancel to abort the delete.d. Click Refresh to refresh the Inbox list.
Sent
Shows the details (Receiver information and Message) of all SMS sent.
Resending a sent SMS
Follow these steps to resend a sent SMS (sending the same SMS to the samereceiver):
a) Click on a SMS to select it.b) Click Resend.c) The SMS will be sent to the recipient.Forwarding a sent SMS

Atlas IP Terminal User Manual
Page 52 of 94
Proprietary Information Not To Be Disclosed Without Written Authorisation FromAddvalue Innovation Pte Ltd, All Rights Reserved
Follow these steps to forward a sent SMS to another recipient:
a. Click on a SMS to select it.b. Click Forward.c. The Sent console switches over to the Compose console.
d. Enter the receiver’s number in the Phone No. field.e. Click Send.The SMS will be sent to the recipient.
Deleting a SMS from the Sent list
Follow these steps to delete a single SMS from the Sent list:
Click on a SMS to select it.a. Click Delete.b. Click OK to confirm or click Cancel to abort deleting the SMS.
Deleting multiple SMS from the Sent list

Atlas IP Terminal User Manual
Page 53 of 94
Proprietary Information Not To Be Disclosed Without Written Authorisation FromAddvalue Innovation Pte Ltd, All Rights Reserved
Follow these steps to delete multiple SMS from the from the Sent list:
a. Select the message by checking the checkboxes beside each SMS.b. Click Delete.c. Click OK to confirm the delete, or Cancel to abort the delete.d. Click Refresh to refresh the Sent list.
Draft
Stores SMS saved from the Compose console.
Sending a draft SMS to another recipient
Follow these steps to send a draft SMS:
a. Click on a SMS to select it.b. Click Send. The SMS will be sent to the recipient.

Atlas IP Terminal User Manual
Page 54 of 94
Proprietary Information Not To Be Disclosed Without Written Authorisation FromAddvalue Innovation Pte Ltd, All Rights Reserved
Forwarding a draft SMS to another recipient
Follow these steps to forward a draft SMS to another recipient:
a. Click on a SMS to select it.b. Click Forward.
The Draft console switches over to the Compose console.c. Enter the receiver’s number in the Phone No. Field.d. Click Send to forward the SMS. The SMS will be forwarded to the recipient.
Deleting a SMS from the Draft list
Follow these steps to delete a SMS from the Draft list:
a. Click on a SMS to select it.b. Click Delete.c. Click OK to confirm or click Cancel to abort deleting the SMS.

Atlas IP Terminal User Manual
Page 55 of 94
Proprietary Information Not To Be Disclosed Without Written Authorisation FromAddvalue Innovation Pte Ltd, All Rights Reserved
Deleting multiple SMS from the Draft list
Follow these steps to delete multiple SMS from the Draft list:
a. Select the message by checking the checkboxes beside each SMS.b. Click Delete.c. Click OK to confirm the delete, or Cancel to abort the delete.d. Click Refresh to refresh the Draft list.

Atlas IP Terminal User Manual
Page 56 of 94
Proprietary Information Not To Be Disclosed Without Written Authorisation FromAddvalue Innovation Pte Ltd, All Rights Reserved
Data Menu
Click on Data icon.
Data menu provides the following options:
Connection
Click “Activate Default Profile” to activate the PDP context

Atlas IP Terminal User Manual
Page 57 of 94
Proprietary Information Not To Be Disclosed Without Written Authorisation FromAddvalue Innovation Pte Ltd, All Rights Reserved
APN and the assigned public IP Address details will be displayed and the user canproceed to access the Internet and use the related features.
To disconnect the data connection, click “Disconnect” and The PDP context will bedeactivated.
Data Profiles
Data profiles define the connection type.
You can select from a list of profiles to be the default primary profile and connectiontype. From Profile 8 to Profile 25, the user create an own customized primary profile.
Note: The Standard profile is set as the default primary profile and the default connectiontype is standard (this is charged by the VOLUME [in kilobytes] of data used).
Profile NameChange the profile name as desired.
Connection TypeChange the type of connection ( “Standard” or “Streaming” )
By default the connection type will be Standard.

Atlas IP Terminal User Manual
Page 58 of 94
Proprietary Information Not To Be Disclosed Without Written Authorisation FromAddvalue Innovation Pte Ltd, All Rights Reserved
Access Point Name (APN)
The APN is required for the satellite connection. Depending on the Service Provider,follow these steps to change the Access Point Name:
a. Enter the new APN in the field space provided (e.g. standard-vbr).b. Enter the username and password if required.
IP ConfigurationBy default, the Dynamic IP Address is selected. If using Static IP Address, then selectStatic IP Address and enter the IP Address in the space provided.
Port Forwarding
Port Forwarding is a feature for Router (multiple-user) mode.
This feature sets the terminal to direct incoming traffic on certain TCP/UDP port to aspecific port on a local PC (IP Address).
Follow these steps to add a new forwarding rule:
a. Click Add button.

Atlas IP Terminal User Manual
Page 59 of 94
Proprietary Information Not To Be Disclosed Without Written Authorisation FromAddvalue Innovation Pte Ltd, All Rights Reserved
b. Enter Incoming Port number in the space provided.(For example, the user is expecting HTTP traffic, the port is 1001).
c. Enter the Destination IP Address.(For example, the IP Address of the PC that is connected to the terminal).
d. Select Protocol: TCP / UDP.(e.g. for HTTP, it will be TCP).e. Enter Destination Port number in the space provided (For example: listening port
of the particular service (for example TCP port 80 for web server) on the PC that isconnected to the termianl).
f. Click Apply to allow the settings to take effect.
Firewall
Enable Firewall Settings
a. Navigate to Data>Firewall>Setup to enable Firewall protection.( By default, theFirewall is disabled.)
b. Select Enable.c. Click Update.

Atlas IP Terminal User Manual
Page 60 of 94
Proprietary Information Not To Be Disclosed Without Written Authorisation FromAddvalue Innovation Pte Ltd, All Rights Reserved
RulesTo define rules to allow or reject with selected traffic type packets.
Mac Filtering
Click Mac Filtering to view and select Enabled or Disabled
Reject ListAll PCs/Laptops will be allowed to access the terminal except for those (MACaddresses) listed in the Reject List.

Atlas IP Terminal User Manual
Page 61 of 94
Proprietary Information Not To Be Disclosed Without Written Authorisation FromAddvalue Innovation Pte Ltd, All Rights Reserved
Allow ListAll PCs/Laptops will be denied access to the terminal except for those (MACaddresses) listed in the Allow List. When selecting this list, at least one entry should bethere to access the terminal.
SettingThe selection of the Ethernet mode is to be used for incoming traffic connection.
Under Ethernet mode,
a. Router Mode (Single User)
Enable this mode to forward all incoming traffic to a single laptop or desktopbased on IP address specified by users
b. Router Mode (Multi-User)
Enable this mode for users to use the Port Forwarding to redirect incomingtraffic to the intended IP addresses of different laptops or desktops for theusers to have a few services

Atlas IP Terminal User Manual
Page 62 of 94
Proprietary Information Not To Be Disclosed Without Written Authorisation FromAddvalue Innovation Pte Ltd, All Rights Reserved
Settings Menu
Click on Settings icon.
Setting menu provides the following options:

Atlas IP Terminal User Manual
Page 63 of 94
Proprietary Information Not To Be Disclosed Without Written Authorisation FromAddvalue Innovation Pte Ltd, All Rights Reserved
Language
Select the desired language for the Web Console to be displayed. (English, Chinese-Simplified, Chinese-Traditional, Spanish and Vietnamese).
Terminal InfoThis tab shows general information about the terminal, Call Log and Call/DataUsage.
Information
Displays information;
a. Software Versionb. Hardware Versionc. Modem Versiond. MCU Versione. Model IDf. IMEI & IMSI Numbersg. Subscriber Numberh. ADU Information ( Serial Number, Model ID, Hardware and Software Version)

Atlas IP Terminal User Manual
Page 64 of 94
Proprietary Information Not To Be Disclosed Without Written Authorisation FromAddvalue Innovation Pte Ltd, All Rights Reserved
Call LogDisplays the call history including the voice call and data sessions.
Select CS under Call Log Type to display the voice call history.

Atlas IP Terminal User Manual
Page 65 of 94
Proprietary Information Not To Be Disclosed Without Written Authorisation FromAddvalue Innovation Pte Ltd, All Rights Reserved
Select PS under Call Log Type to display the data session history.
Call / Data Usage
Displays the total Call Usage and total Data Usage.Click Clear to reset counter for both call and data usage .

Atlas IP Terminal User Manual
Page 66 of 94
Proprietary Information Not To Be Disclosed Without Written Authorisation FromAddvalue Innovation Pte Ltd, All Rights Reserved
Wi-Fi
By default, the Wi-Fi is disabled.
Setup
a. Select Enabled to turn on the Wi-Fi module. (Go to Wireless Setting to enableWi-Fi to be accessible by other devices.)
b. Click Update.c. Once the Wi-Fi service is enabled, a pop-up message box indicates the Wi-Fi
service is activated.

Atlas IP Terminal User Manual
Page 67 of 94
Proprietary Information Not To Be Disclosed Without Written Authorisation FromAddvalue Innovation Pte Ltd, All Rights Reserved
System info
Display the information of Ethernet MAC Address, WLAN MAC Address andSoftware Version.
Wireless Settings
a. Choose ideal Network Mode and Channel.b. If required, Network Name (SSID) can be renamed by the user.c. Choose ideal Channeld. Click Update.
Security Settings
To disable security mode, select Disabled.
To other security mode, follow the steps to configure the security settings of the Wi-Fi module.

Atlas IP Terminal User Manual
Page 68 of 94
Proprietary Information Not To Be Disclosed Without Written Authorisation FromAddvalue Innovation Pte Ltd, All Rights Reserved
a. Select the security mode and authentication key.
Note: There are four sets of security passwords available for your securityconfiguration and you can only select one set of password.
b. Under Security Mode of WEP, select the Default Key to enable the desirepassword from Key.
c. Under Security Mode of WPA/WPA2 - Personal, select the Encryption Typeand key in desired password in Passphrase.
Tracking
Settings
a. Select Disabled if you do not need GPS reporting.b. Select Enabled if you need GPS reporting.c. Select either IP Data or SMS mode.d. Key in the desire Frequency in seconds. (The time interval to update the
server.)e. Key in Server Phone Number (Voice Mode only).f. Key in Server IP Address (Data Mode only).g. Key in Server Port number (Data Mode only).h. Server Connection Type is fixed to TCP (Data Mode only).

Atlas IP Terminal User Manual
Page 69 of 94
Proprietary Information Not To Be Disclosed Without Written Authorisation FromAddvalue Innovation Pte Ltd, All Rights Reserved
i. Key in Distance Interval.j. Key in Speed Limit (Alarm).k. Key in 3 Authorized Phone Numbers and Emergency Phone Numbers (SMS
mode only).l. Key in number of Retries when the alert fails to send out due to unexpected
error.m. Key in desired seconds in Resend Frequency and Maximum Number of
Tries..
Geo Fence
a. There are two ways to enter latitude/longitude:i. Degrees, minutes, seconds.ii. Decimal degrees.
b. Select the desire latitude/longitude format.c. Click Add.d. Select Trigger Type:
i. Inii. Outiii. In/Out

Atlas IP Terminal User Manual
Page 70 of 94
Proprietary Information Not To Be Disclosed Without Written Authorisation FromAddvalue Innovation Pte Ltd, All Rights Reserved
e. Select the type of Geo Fence:i. Circle (1 points, radius)ii. Rectangle (2 points)iii. Polygon (minimum 3 points. maximum 10 points)
f. Key in the Latitude, Longitude and other values, depending on the type of GeoFence. Click Apply to confirm.
Emergency Text

Atlas IP Terminal User Manual
Page 71 of 94
Proprietary Information Not To Be Disclosed Without Written Authorisation FromAddvalue Innovation Pte Ltd, All Rights Reserved
Misc
SMS
The Service Centre Address has been predefined with SMSC contact number and itcan be modified with the required contact number, depending the Service Provider.
Alternatively, click Predefined SMSC. Select the desired service centre addressand then click OK to take effect.
External Ringer
Click Enabled to activate the external ringer (or buzzer) when there is an incomingcall. The external ringer’s wires are connected to Pin 9 and Pin 10 of the BDU GPIOOutput Port.Debug

Atlas IP Terminal User Manual
Page 72 of 94
Proprietary Information Not To Be Disclosed Without Written Authorisation FromAddvalue Innovation Pte Ltd, All Rights Reserved
Click Enabled to enable the log file.

Atlas IP Terminal User Manual
Page 73 of 94
Proprietary Information Not To Be Disclosed Without Written Authorisation FromAddvalue Innovation Pte Ltd, All Rights Reserved
Admin
Change Password
Follow these steps to change the Web Console Login Password:
a. Enter the old password in the Old Password field.b. Enter the new password in the New Password field.c. Re-enter the new password in the Re-type Password field.d. Click Update.e. The Web Console login password is now changed.
Firmware Upgrade
Firmware upgrade is to update the BDU with the latest firmware. Please refer toyour respective distributor for your firmware download.
Warning:DO NOT abort the upgrading process or unplug the power of the BDU during thefirmware upgrade process at any time. Doing so will corrupt the existing firmwareloaded onto the BDU.
Follow these steps to upgrade the firmware for the BDU:
a. Download or acquire the new firmware from your respective distributor and saveit in your computer’s hard drive.
Note:Make sure the BDU is switched on and connected to the desktop/laptop computerusing the LAN cable.
b. Select Firmware Upgrade.
Read the Disclaimer message carefully before proceeding with the FirmwareUpgrade.

Atlas IP Terminal User Manual
Page 74 of 94
Proprietary Information Not To Be Disclosed Without Written Authorisation FromAddvalue Innovation Pte Ltd, All Rights Reserved
c. Browse to the location of the new firmware, select a correct file (*.bin) and click“Upload".
d. Firmware upgrade will take 1 minute to complete.
Reboot Terminal
Click Reboot to reboot the terminal. Refresh the browser to update the WebConsole page after reboot.
Factory Reset
To perform a Factory Reset, enter the security code “admin” and click FactoryReset.
Note:If the Web Console Login Password has been changed, then the security codewill be updated and reflected on the Web Console Login Password.
Please be informed that firmware upgrading is done at your own riskand the equipment manufacturer will not be held responsible for anypossible malfunction or damage to the system due to upgrading thefirmware.
If you encounter any problems or have any questions, please contact
the equipment distributor for technical support

Atlas IP Terminal User Manual
Page 75 of 94
Proprietary Information Not To Be Disclosed Without Written Authorisation FromAddvalue Innovation Pte Ltd, All Rights Reserved
Warning: All the settings and user data (Call History, Call/Data Usage, etc.) of theBDU will be cleared and reset to the default settings.
System Operation Mode
There are 2 operational modes; Data or Voice which is used for IP data and CSvoice respectively. Select the desired mode and then click Update Settings.
Warning:Setting Data or Voice mode will take at least 2 minutes for the terminal to takeeffect. During the period of setting Data to Voice mode in effect, the user will notable to make voice call using primary handset.

Atlas IP Terminal User Manual
Page 76 of 94
Proprietary Information Not To Be Disclosed Without Written Authorisation FromAddvalue Innovation Pte Ltd, All Rights Reserved
Modem
Error Log
The Error Log will display the error code number with its short description asillustrated below.
Refer to Chapter 9 Error Codes for more information in the remedial actions orsolutions.
Download Log Files
The Log Files can be compressed into a single archive file.

Atlas IP Terminal User Manual
Page 77 of 94
Proprietary Information Not To Be Disclosed Without Written Authorisation FromAddvalue Innovation Pte Ltd, All Rights Reserved
Click Create Log Archive and the process of the compressing the log files into asingle archive file will take several minutes to complete.
After completing the creation of the log archive file, click Download Log Archiveand save it as your preferred location.
The compressed log archive file is very useful for the Service Provider torecommend a solution if possible.

Atlas IP Terminal User Manual
Page 78 of 94
Proprietary Information Not To Be Disclosed Without Written Authorisation FromAddvalue Innovation Pte Ltd, All Rights Reserved
Firmware Upgrade
Click Safe Mode and then OK to enter Safe Mode.
The terminal will restart and enter into the Safe Mode environment.
Refer to Chapter 7 Entering Safe Mode Environment.

Atlas IP Terminal User Manual
Page 79 of 94
Proprietary Information Not To Be Disclosed Without Written Authorisation FromAddvalue Innovation Pte Ltd, All Rights Reserved
7 ENTERING SAFE MODE ENVIRONMENT
Firmware Upgrade
The firmware upgrade is similar as Setting Admin ► Admin ► Firmware Upgradeand it is only applicable for the application firmware.
Browse for correct file (*.bin) and then click Upload.
Modem Firmware Upgrade
The modem firmware upgrade is especially for the built-in modem which requires itsfirmware to be upgrade. Choose Modem Firmware Upgrade and click ChooseFile.
Browse the file (*.tar) before clicking Update Firmware. Follow the instructions tillthe Device Status shows the Modem Upgrade Successful and a pop-up messagewill be shown to reboot the terminal.
Please be informed that firmware upgrading is done at your own risk and theequipment manufacturer will not be held responsible for any possible malfunctionor damage to the system due to upgrading the firmware.
If you encounter any problems or have any questions, please contact the
equipment distributor for technical support

Atlas IP Terminal User Manual
Page 80 of 94
Proprietary Information Not To Be Disclosed Without Written Authorisation FromAddvalue Innovation Pte Ltd, All Rights Reserved
Reboot Terminal
Click Reboot for the terminal to restart.

Atlas IP Terminal User Manual
Page 81 of 94
Proprietary Information Not To Be Disclosed Without Written Authorisation FromAddvalue Innovation Pte Ltd, All Rights Reserved
Factory Reset
Click Factory Reset with the security code “admin” for the terminal to carry out thefactory reset.
The factory reset will clear all the settings and user data of the BDU and reset it tothe default settings.
Mac Filtering
Click Enabled or Disabled and then Update.

Atlas IP Terminal User Manual
Page 82 of 94
Proprietary Information Not To Be Disclosed Without Written Authorisation FromAddvalue Innovation Pte Ltd, All Rights Reserved
Firewall
Click Enabled or Disabled and then Update.
Logout
To log out from the Web Console.

Atlas IP Terminal User Manual
Page 83 of 94
Proprietary Information Not To Be Disclosed Without Written Authorisation FromAddvalue Innovation Pte Ltd, All Rights Reserved
8 USING ALERT BUTTON
An Alert Button is easily to be found on the top, right bottom of the BDU and it is used fortriggering an emergency alert.
Before using the Alert Button, the pre-configuration in both Data and Voice Modes is to beset up under the tracking page. On the Web Console, select Settings and then clickTracking. (Refer to Settings Menu and look for Tracking on the settings)
Once the pre-configuration is set up, the Alert Button function is ready to use.
Lift up the Alert Button cover, press and hold it for at least 4 seconds. The Alert Button willthen be illuminated to indicate that it is active. Additionally, the alert button icon will beblinking on the Web Console’s indicator.
Note:
The illumination of Alert Button can only be disabled via the Web Console.
The pre-defined message appended with the GPS location will be sent out in the followingmodes:
In Voice Mode, the message will be sent via SMS.
In Data Mode, the message will be sent via IP Data*.
Note:
Alert button via Data Mode requires the subscription of Backend Tracking Service. Without thebackend server and leaving the backend server IP address empty, the illuminated Alert Buttonwill disable after 5 seconds.

Atlas IP Terminal User Manual
Page 84 of 94
Proprietary Information Not To Be Disclosed Without Written Authorisation FromAddvalue Innovation Pte Ltd, All Rights Reserved
In order to disable the Alert Button, click Turn Off Alarm button.

Atlas IP Terminal User Manual
Page 85 of 94
Proprietary Information Not To Be Disclosed Without Written Authorisation FromAddvalue Innovation Pte Ltd, All Rights Reserved
9 TROUBLESHOOTING
Antenna / Satellite Signal Level
Symptoms Descriptions / Remedial Actions
Low Signal Strength Baron Web Console
Check any obstruction such as the hull or monkey bridge ofthe vessel that may block the ADU’s line of sight.
Check any interference signal from other electronics devicesthat are close to the ADU.
Check to ensure that the antenna cable is properly secured.
Depending on the antenna’s location on the vessel, thevessel’s route may cause the ADU’s line of sight to beblocked by any structure of the vessel, depending on theelevation of the satellite.
Data Connection
Symptoms Descriptions / Remedial Actions
Unable to active PrimaryPDP context
Ensure you are using a valid APN.
Ensure that the satellite signal strength is good.
Ensure that the BDU is set as Data Mode.
Ensure your SIM card supports PS services.
Ensure your prepaid credit is not exhausted.
Unable to access internetafter successfully PrimaryPDP context activation
Ensure proper PC/laptop Ethernet settings.
Ensure no firewall/proxy settings are preventing access tothe BDU.
Ensure that the PC/laptop is configured to obtain IP addressautomatically (DHCP).
“Always On” feature is notworking
Ensure feature is enabled via Web Console.
A standard background connection has to be manuallyactivated for the first time after enabling this feature.
PoE LAN Port (RJ45)
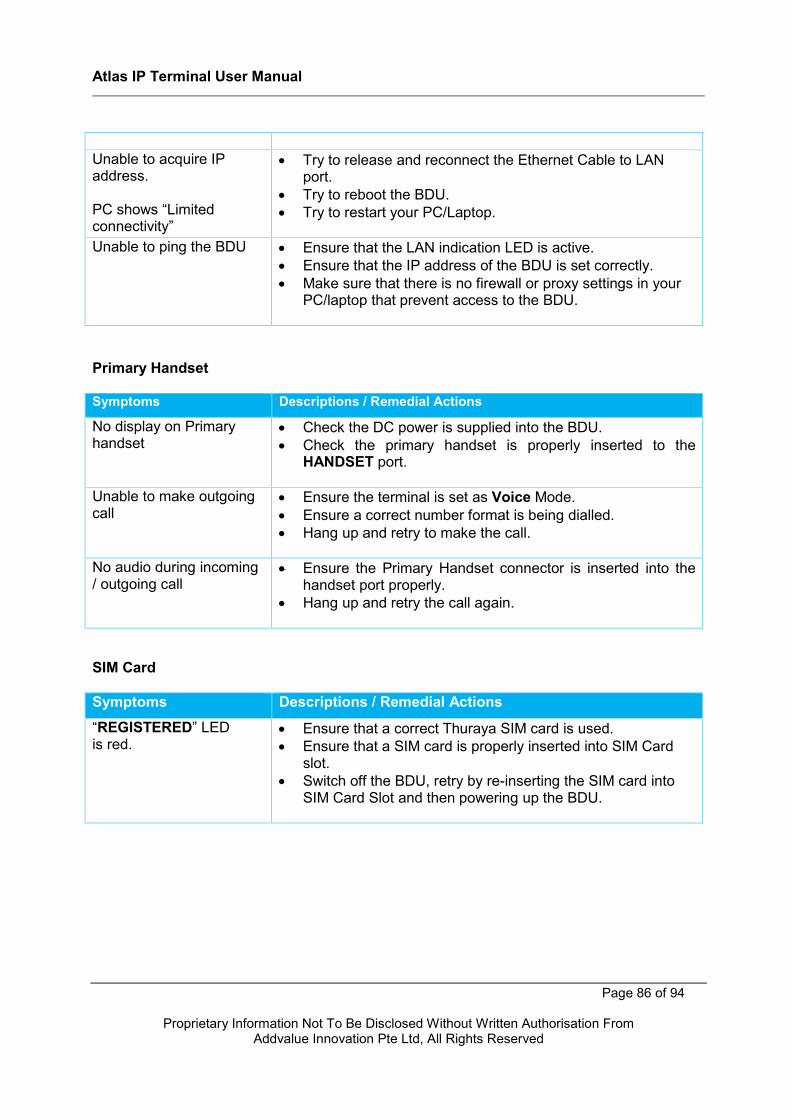
Symptoms Descriptions / Remedial Actions
No LAN indication Ensure that the Ethernet Cable is plugged into the PoE LANport (RJ45) or the standard LAN port (RJ45) properly.
Check to ensure that the Ethernet Port on your PC / Laptopis working fine.
Atlas IP Terminal User Manual
Page 86 of 94
Proprietary Information Not To Be Disclosed Without Written Authorisation FromAddvalue Innovation Pte Ltd, All Rights Reserved
Unable to acquire IPaddress.
PC shows “Limitedconnectivity”
Try to release and reconnect the Ethernet Cable to LANport.
Try to reboot the BDU.
Try to restart your PC/Laptop.
Unable to ping the BDU Ensure that the LAN indication LED is active.
Ensure that the IP address of the BDU is set correctly.
Make sure that there is no firewall or proxy settings in yourPC/laptop that prevent access to the BDU.
Primary Handset
Symptoms Descriptions / Remedial Actions
No display on Primaryhandset
Check the DC power is supplied into the BDU.
Check the primary handset is properly inserted to theHANDSET port.
Unable to make outgoingcall
Ensure the terminal is set as Voice Mode.
Ensure a correct number format is being dialled.
Hang up and retry to make the call.
No audio during incoming/ outgoing call
Ensure the Primary Handset connector is inserted into thehandset port properly.
Hang up and retry the call again.
SIM Card
Symptoms Descriptions / Remedial Actions
“REGISTERED” LEDis red.
Ensure that a correct Thuraya SIM card is used.
Ensure that a SIM card is properly inserted into SIM Cardslot.
Switch off the BDU, retry by re-inserting the SIM card intoSIM Card Slot and then powering up the BDU.

Atlas IP Terminal User Manual
Page 87 of 94
Proprietary Information Not To Be Disclosed Without Written Authorisation FromAddvalue Innovation Pte Ltd, All Rights Reserved
Terminal (BDU) fails to power up
Symptoms Descriptions / Remedial Actions
No light appear on BDULEDs.
Ensure the power switch on the BDU’s front panel is at “On”position.
To reset the circuit breaker on the BDU’s front panel bydepressing the lever of the circuit breaker inward fully.
Check to ensure that the input DC power to the BDU willhave at least +24VDC, 10A or +12VDC, 20A.
Web Console
Symptoms Descriptions / Remedial Actions
Unable to access WebConsole
Ensure that there is no problem with the Ethernetconnectivity.
Ensure that IP address is entered correctly.
Try to refresh the browser.
Unable to login Ensure that correct username and password are used(Password and username are case sensitive).
Ensure that you do not open more than the maximum WebConsole sessions allowed.
Retry by closing and reopening the web browser.
Web page does not seemto be updated or there areunexpected errorsoccurred.
Refresh the web page.
Update the web browser to the latest version and retry.

Atlas IP Terminal User Manual
Page 88 of 94
Proprietary Information Not To Be Disclosed Without Written Authorisation FromAddvalue Innovation Pte Ltd, All Rights Reserved
10 ERROR CODES
CodeNumber
Description Remedial Actions / Solutions
0 No error. No action required. The BDU is functioningproperly.
1 Failed to read IMEI The BDU failed to read the IMEI. Pleaserestart the BDU.
If the problem persists, contact your ServiceProvider.
2 Illegal ME The terminal is not accepted by the network.
3 IMEI not accepted The network does not allow emergency callsfrom this IMEI.
101 Invalid antenna model Check the correct antenna unit with its label“Antenna is only for use with Atlas IP BDU”.
102 HPA disabled The ADU transmitter is powered off. Pleaserestart the BDU.
103 HPA thermal alarm The ADU transmitter has overheated. It maypower off to prevent hardware damage.Please allow the system to cool down bypowering off for a short time.
104 HPA fan fault The fan inside the ADU has reported aproblem. Please restart the BDU.
If the problem persists, the ADU may needreplacement.
105 HPA unknown fault The ADU transmitter has reported an unknownerror code.
If the problem persists, the antenna may needreplacement.
106 ATB failure Check the antenna cable connections aresecured at both ADU and BDU antenna ports.
107 Antenna communication problem Check the antenna cable connections are

Atlas IP Terminal User Manual
Page 89 of 94
Proprietary Information Not To Be Disclosed Without Written Authorisation FromAddvalue Innovation Pte Ltd, All Rights Reserved
secured at both ADU and BDU antenna ports.Restart the BDU.
108 Calibration failure Check the antenna cable connections aresecured at both ADU and BDU antenna ports.Restart the BDU.
201 No SIM card in primary slot Verify that the SIM card is present inside theBDU’s SIM card slot.
SIM card may be inserted wrongly. RemoveSIM card and ensure it is inserted properlyaccording to its oriented symbol on the BDUfont panel.
SIM Card contacts may be dirty. Clean theSIM card contact with a dry cloth.
If the problem persists, replace the SIM cardwith a known good SIM card otherwise pleasereturn the BDU to your Service Provider forservice.
203 SIM communication problem Power down the BDU and try again.
204 SIM Locked The SIM card is locked. Enter the PUK tounlock the SIM card.
205 SIM Missing file SIM card was incorrectly programmed withmissing required field(s). Please contact yourService Provider.
301 Illegal MS The subscriber information is rejected or theSIM card is not producing correctauthentication information. Please contact theService Provider.
302 PLMN not allowed Network connection failure due to PLMN whichis not allowed. Please contact your ServiceProvider.
303 Roaming not allowed You are using an authorised SIM card from acarrier that does not have a roamingagreement with your Service Provider. Pleasecontact the Service Provider.

Atlas IP Terminal User Manual
Page 90 of 94
Proprietary Information Not To Be Disclosed Without Written Authorisation FromAddvalue Innovation Pte Ltd, All Rights Reserved
304 IMSI unknown HLR The subscriber information is not recognizedby the network. Please contact your ServiceProvider.
305 IMSI unknown VLR The subscriber information is not on thenetwork's roaming list. Please contact yourService Provider.
306 Service not supported Network connection failure due to serviceoption which is not supported. Please contactyour Service Provider.
307 Service not subscribed Verify the correct settings in the web consoleand contact your Service Provider to activateauthorised service.
308 Network detached mobile Verifying the settings on the web console.Restart the BDU and try again.
If the problem persists, please contact yourService Provider.
309 GPRS not allowed Verify the correct settings in the web consoleand contact your Service Provider to activateauthorised service.
310 Service not allowed Verify the correct settings in the web consoleand contact your Service Provider to activateauthorised service.
311 Identity cannot be derived Network registration failure. The BDU will retryautomatically. If the problem persists, pleasecontact your Service Provider.
312 Location area not allowed Network connection failure due to the terminalwhich is not allowed in the location area.
Please contact your Service Provider.
313 Temporary registration failure Network registration failure. The BDU will retryautomatically. If the problem persists, pleasecontact your Service Provider.
314 General registration failure Network registration failure. The BDU will retryautomatically. If the problem persists, pleasecontact your Service Provider.

Atlas IP Terminal User Manual
Page 91 of 94
Proprietary Information Not To Be Disclosed Without Written Authorisation FromAddvalue Innovation Pte Ltd, All Rights Reserved
315 Registration retries exhausted Network re-connection failure. Restart theBDU if the problem persists.
401 Signal lost Make sure no obstruction is blocking satellitesignal and the ADU has a clear sky view in thedirection of the satellite.
403 No GPS Make sure no obstruction is blocking satellitesignal and no object is placed over the ADU.Wait for 5 minutes for the GPS position to beupdated.
If the problem persists, restart the BDU.
404 Old GPS A new GPS fix is obtained during theconnection process, superseding the old fix.The terminal will reacquire the connection.
If the problem continues and the newconnection cannot be re-established, pleasecontact your Service Provider.
501 LLC or SNDCP failure Network connection failure caused by LLC orSNDCP failure. Restart the BDU.
If the problem persists, please contact yourService Provider.
502 Unknown PDP type Network connection failure. Restart the BDU.
If the problem persists, please contact yourService Provider.
503 User authentication failure Network registration failure. The BDU will retryautomatically. If the problem persists, pleasecontact your Service Provider.
504 PDP Option is not supported. Network connection failure because theservice option is not supported.
Please contact your Service Provider toactivate authorised service.
505 NSAPI already used Network connection failure because the

Atlas IP Terminal User Manual
Page 92 of 94
Proprietary Information Not To Be Disclosed Without Written Authorisation FromAddvalue Innovation Pte Ltd, All Rights Reserved
service is already in use for this subscriber.Restart the BDU. If the problem persists,please contact your Service Provider.
506 PDP deactivated by network Network connection failure or the network maybe down.
Please contact your Service Provider.
507 PDP retries exhausted Network connection failure or the network maybe down. Please contact your ServiceProvider.
508 Missing or unknown APN Network connection failure due to the missingor invalid of APN,
Please contact your Service Provider to thecorrect network settings.
509 QOS rejected Network connection failure due to rejectedQOS by the network.
If the problem persists, please contact yourService Provider.
510 PDP insufficient resources Network connection failure due to insufficientresources.
If the problem persists, please contact yourService Provider.
511 PDP reactivation required Verify the correct settings in the web consoleand contact your Service Provider to activateauthorised service.
513 PDP transaction id in use Network connection failure due to atransaction ID.
If the problem persists, please contact yourService Provider.
514 PDP not subscribed Verify the correct settings in the web consoleand contact your Service Provider to activateauthorised service.
515 PDP activation rejected Network connection failure due to unknowncause.

Atlas IP Terminal User Manual
Page 93 of 94
Proprietary Information Not To Be Disclosed Without Written Authorisation FromAddvalue Innovation Pte Ltd, All Rights Reserved
If the problem persists, please contact yourService Provider.
516 PDP temporarily unavailable Network access temporarily unavailable.Please wait for the terminal to reacquire aconnection within 3 to 5 minutes..
If the problem persists, contact your ServiceProvider.
601 Invalid position Network service is not available due to invalidGPS position. Verify the ADU has a clear skyview in the direction of the satellite.
If the problem persists, contact your ServiceProvider.
602 Invalid position for beam Registration is delayed or a handover is inprogress. Please wait for the terminal to re-register within 1 to 3 minutes.
If the problem persists, contact your ServiceProvider.
603 Lack of resources Network connection failure due to insufficientresources.
If the problem persists, please contact yourService Provider.
604 Wait for streaming channel Network connection delayed due to resourcerequirement. Please wait 1 minute for resourceallocation.
605 Non availability of service Network service is not available.
Please contact your Service Provider.
606 QOS not satisfied Quality of service requested cannot besatisfied at this time.
Please try again later, or configure a lower bitrate or best effort service.
607 Access barred The service option is not available in thecurrent spot beam. The BDU will attempt to

Atlas IP Terminal User Manual
Page 94 of 94
Proprietary Information Not To Be Disclosed Without Written Authorisation FromAddvalue Innovation Pte Ltd, All Rights Reserved
find a more suitable signal automatically.
If this message persists, please contact yourService Provider.
11 GLOSSARY
AC Alternating CurrentADU Above Decks UnitAPN Access Point NameATB Antenna Tracking BoardBDU Below Decks UnitDC Direct CurrentDHCP Dynamic Host Configuration ProtocolFTP File Transfer ProtocolGPS Global Position SystemGPIO General Purpose Input / OutputGPRS General Packet Radio ServiceHPA High Power AmplifierHLR Home Location RegisterID IdentityIP Data Internet Protocol DataIMEI International Mobile Equipment IdentityIMSI International Mobile Equipment IdentityLAN Local Area NetworkLED Light Emitting DiodeLNA Low Noise AmplifierLLC Logical Link ControlMS Mobile SubscriberNAT Network Address TranslationNSAPI Network Service Access Point IdentifierPAT Port Address TranslationPoE Power Over EthernetPLMN Public Land Mobile NetworkPDP Packet Data ProtocolQOS Quality of ServiceSIM Subscriber Identity ModuleSNDCP Sub Network Dependent Convergence ProtocolVLR Visitor Location Register