Thermal Solution LED Downlight IP54 - THE A GROUP · LED Downlight IP54 CITIZEN COB ... Dimming...
7
Thermal Solution LED Downlight IP54 CITIZEN COB The A + Group www.the-agroup.com.hk Ⓡ
Transcript of Thermal Solution LED Downlight IP54 - THE A GROUP · LED Downlight IP54 CITIZEN COB ... Dimming...
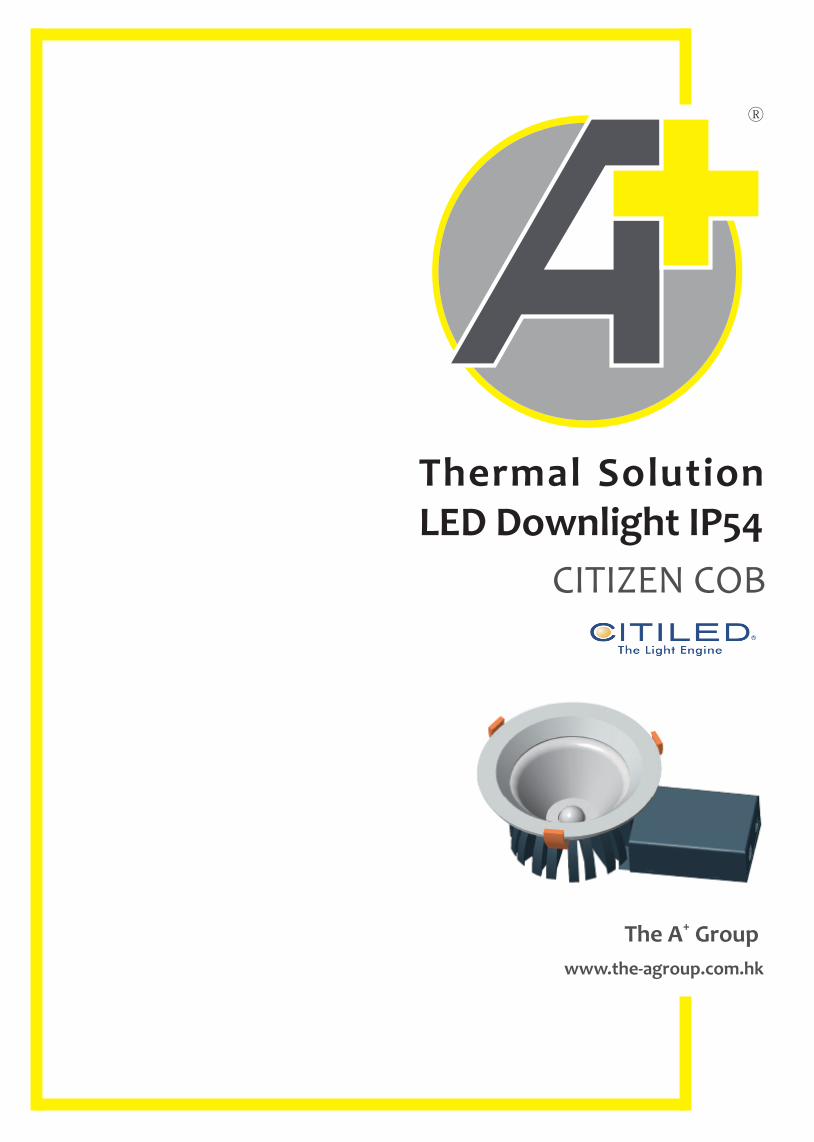
Thermal SolutionLED Downlight IP54
CITIZEN COB
The A+ Groupwww.the-agroup.com.hk
Ⓡ
THE A + GROUP
01 02
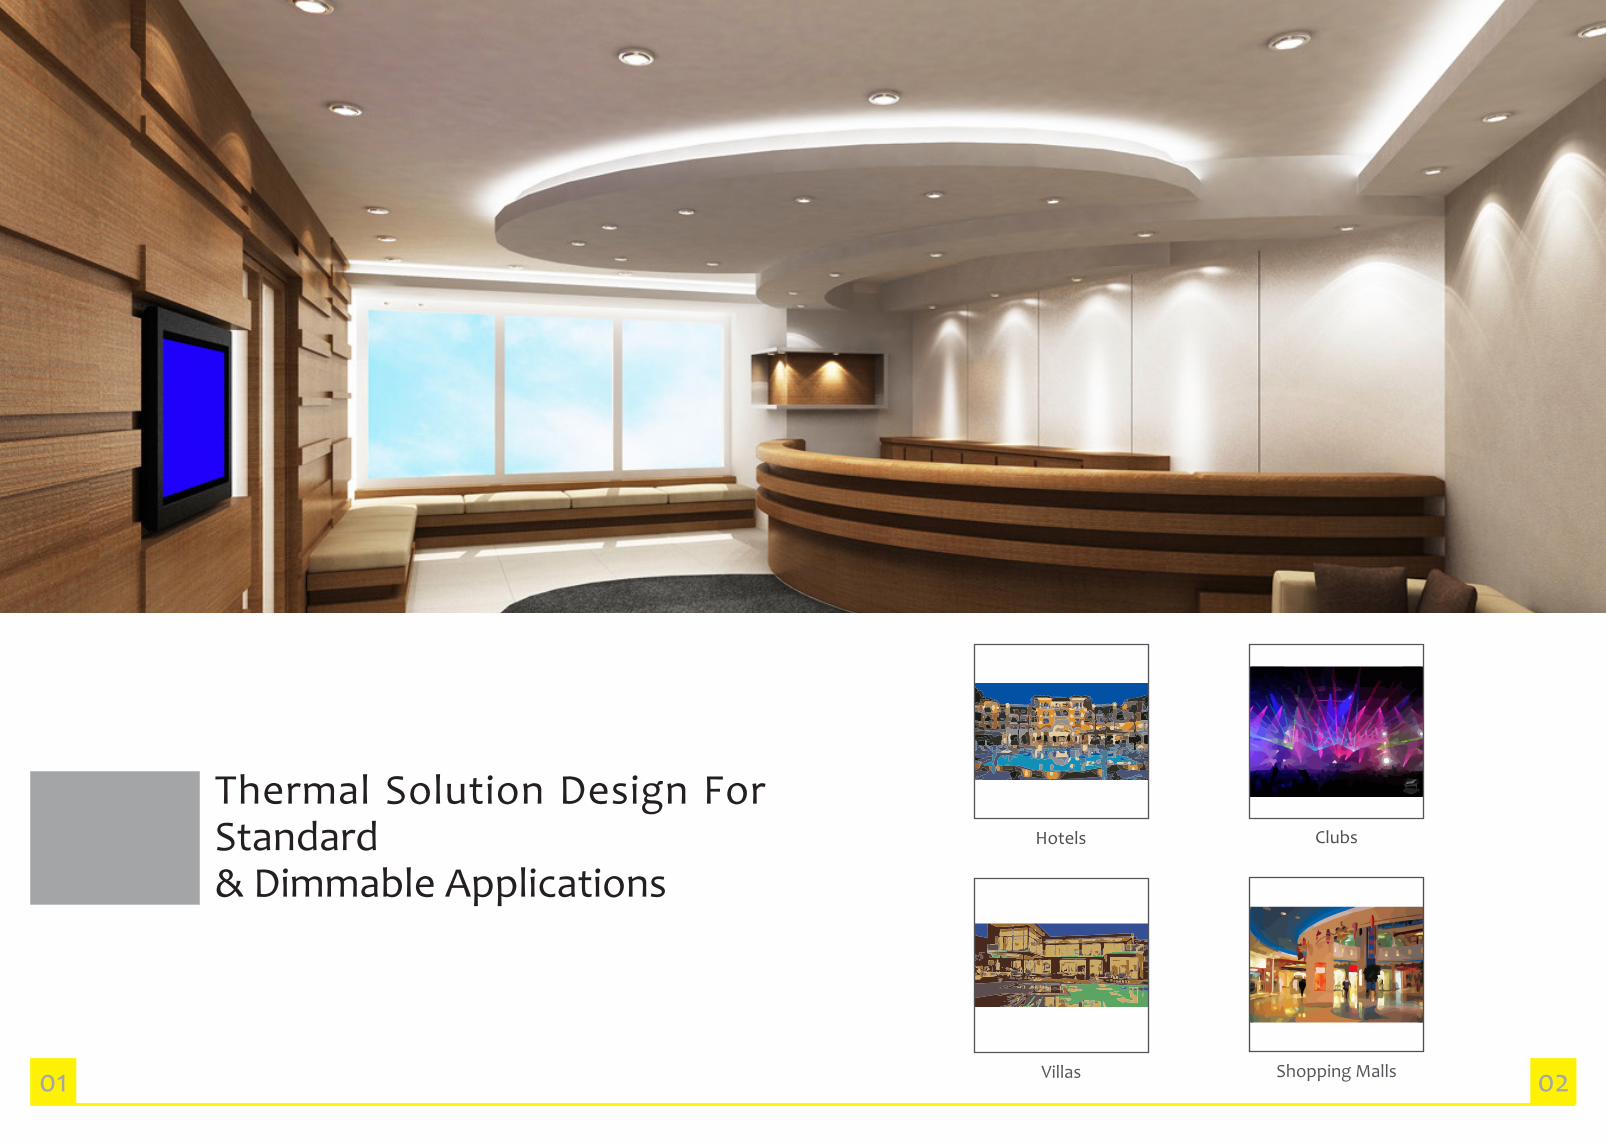
Clubs
Villas
Hotels
Shopping Malls
Thermal Solution Design For Standard& Dimmable Applications
THE A + GROUP
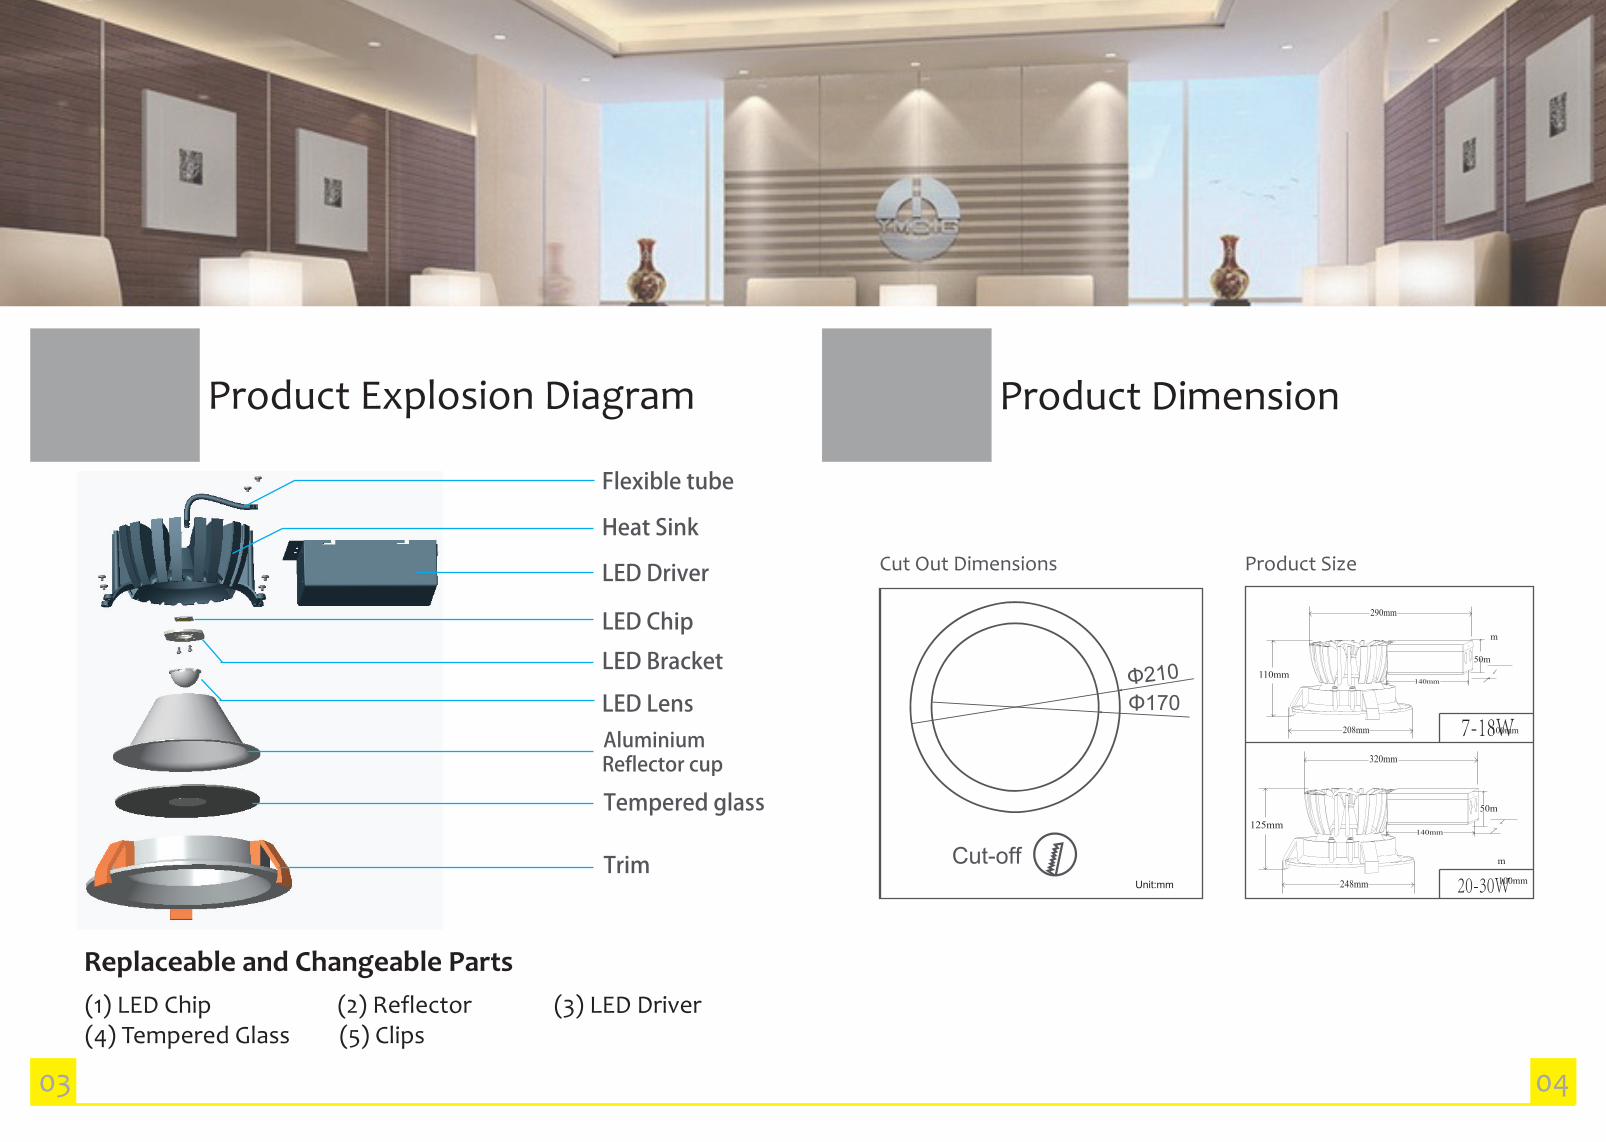
Flexible tube
Heat Sink
LED Driver
LED Chip
LED Bracket
LED Lens
Aluminium Reflector cup
sTempered glas
Trim
Product Dimension
50m
m
100mm
50m
m
100mm20-30W
7-18W208mm
290mm
140mm110mm
248mm
320mm
140mm125mm
Product Size
Unit:mm
Cut-off
210170
Cut Out Dimensions
Product Explosion Diagram
03 04
Replaceable and Changeable Parts(1) LED Chip (2) Reflector (3) LED Driver(4) Tempered Glass (5) Clips
THE A + GROUP
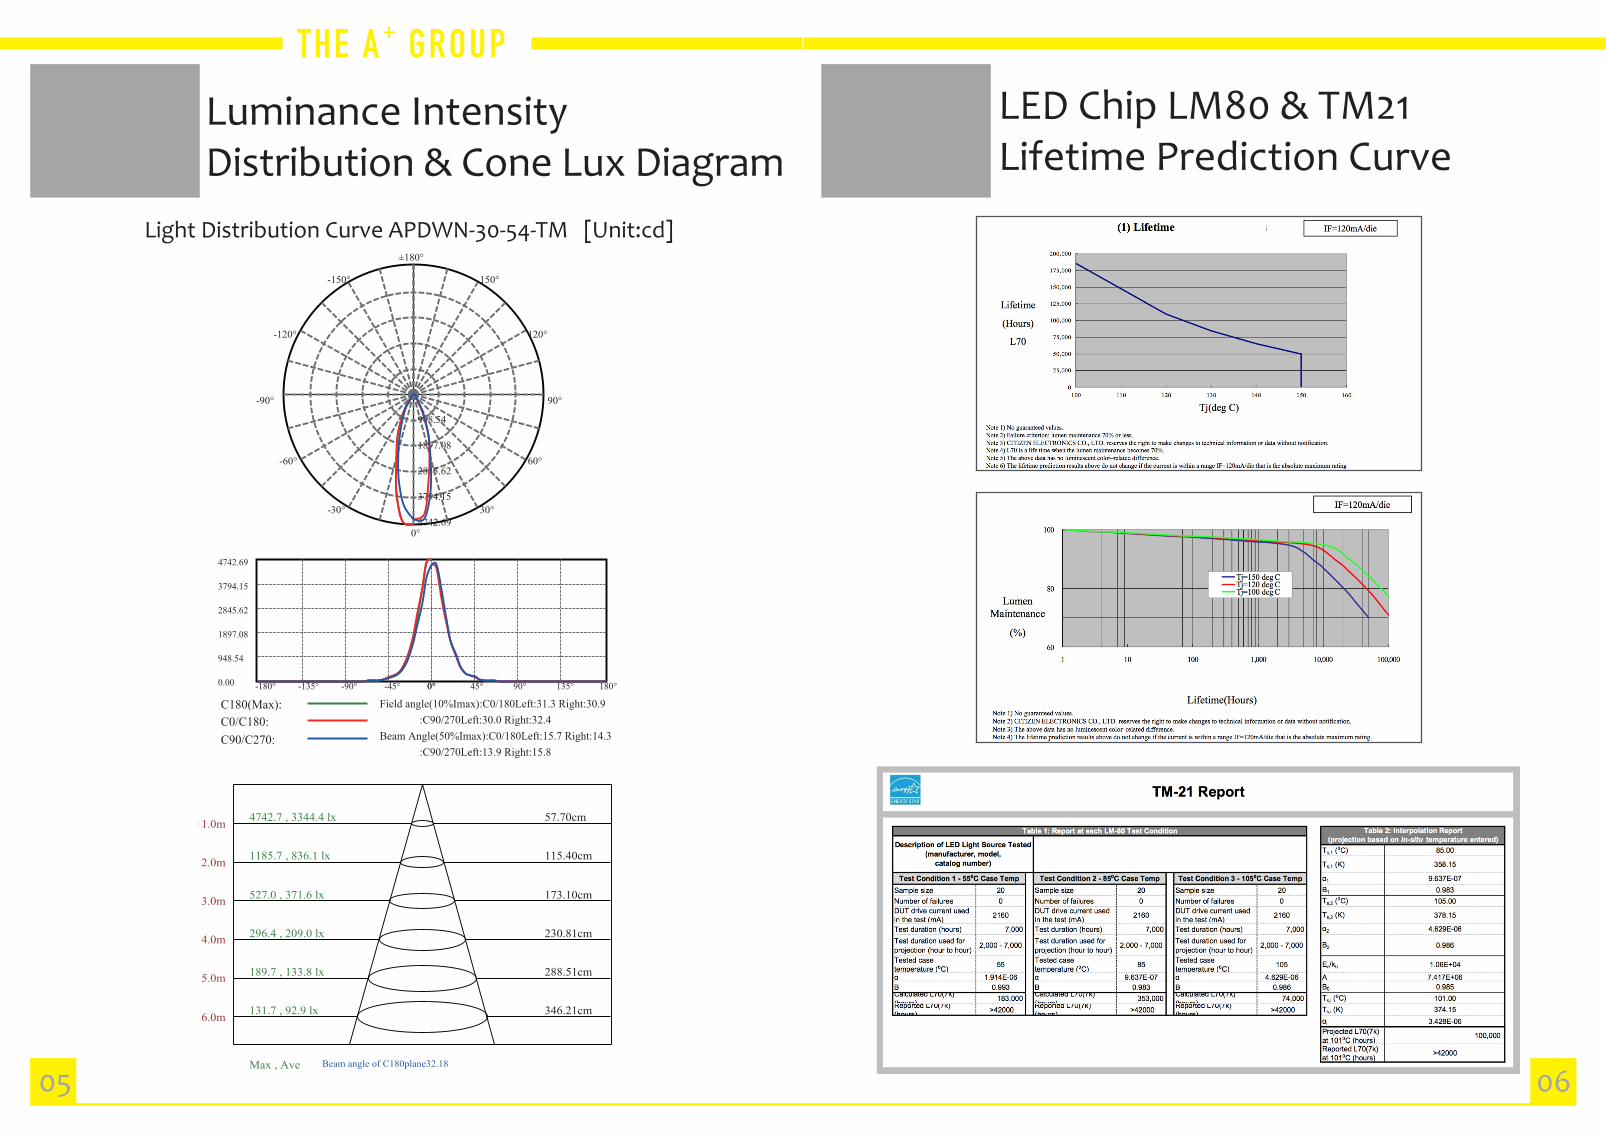
Luminance Intensity Distribution & Cone Lux Diagram
Light Distribution Curve APDWN-30-54-TM [Unit:cd]
0°
90°
±180°
-90°
-60°
-30°
60°
30°
-120°
-150°
120°
150°
948.54
1897.08
2845.62
3794.15
4742.69
0.00
948.54
1897.08
2845.62
3794.15
4742.69
0°0° 45°-45° 90°-90° 135° °081°531--180°
C180(Max):C0/C180:C90/C270:
Field angle(10%Imax):C0/180Left:31.3 Right:30.9:C90/270Left:30.0 Right:32.4
Beam Angle(50%Imax):C0/180Left:15.7 Right:14.3:C90/270Left:13.9 Right:15.8
1.0m 57.70cm4742.7 , 3344.4 lx
2.0m 115.40cm1185.7 , 836.1 lx
3.0m 173.10cm527.0 , 371.6 lx
4.0m 230.81cm296.4 , 209.0 lx
5.0m 288.51cm189.7 , 133.8 lx
6.0m 346.21cm131.7 , 92.9 lx
Max , Ave Beam angle of C180plane32.18
LED Chip LM80 & TM21 Lifetime Prediction Curve
05 06

THE A + GROUP
Product
Model No. APDNDM-07-54 APDNDM-12-54 APDNDM-15-54 APDNDM-16-54 APDNDM-18-54 APDNDM-20-54 APDNDM-22-54
CCT 3000K/4000K/5000K
Lumen Output 90-100lm/WLight Source CITIZEN LED
CRI ≧80
Beam Angle 60˚/ 90˚/120˚Power
Requirement AC100-277V 50/60Hz
Power Consumption 7W 12W 15W 16W 18W 20W 22W
Housing Material Aluminum / Die Cast Aluminum / Tempered Glass
Operation Temperature -20℃~ +40℃
LED Lifespan 35000-50000 hrsProtection
Rating IP 54
Dimming Option 0-10V / DMX512
Product Standard
Product Warranty 5-years limited warranty
Product Certifications and Standards
Standard Rohs IP EMC LVD
Certificate Standards
IEC 62321 IEC 60529 EN-55015: 2013 EN-60598-1: 2015
EN-61000-3-2: 2014 EN-60598-2-2: 2012
EN-61000-3-3: 2013 EN-62031: 2008
EN-61547: 2009 EN-62471: 2008
EN-62493: 2010
EN-61347-1: 2015
EN-61347-2-13: 2014
IEC-62384
Standard Ordering Data
Product
Model No. APDWN-07-54 APDWN-12-54 APDWN-15-54 APDWN-16-54 APDWN-18-54 APDWN-20-54 APDWN-22-54
CCT 3000K/4000K/5000K
Lumen Output 90-100lm/WLight Source CITIZEN LED
CRI ≧80
Beam Angle 60˚/ 90˚/120˚Power
Requirement AC100-277V 50/60Hz
Power Consumption 7W 12W 15W 16W 18W 20W 22W
Housing Material Aluminum / Die Cast Aluminum / Tempered Glass
Operation Temperature -20℃~ +40℃
LED Lifespan 35000-50000 hrs
Protection Rating IP 54
Product Standard
Product Warranty 5-years limited warranty
07
Dimmable Ordering Data
Product Certifications and Standards
Standard Rohs IP EMC LVD
Certificate Standards
IEC 62321 IEC 60529 EN-55015: 2013 EN-60598-1: 2015
EN-61000-3-2: 2014 EN-60598-2-2: 2012
EN-61000-3-3: 2013 EN-62031: 2008
EN-61547: 2009 EN-62471: 2008
EN-62493: 2010
EN-61347-1: 2015
EN-61347-2-13: 2014
IEC-62384
08
THE A + GROUP
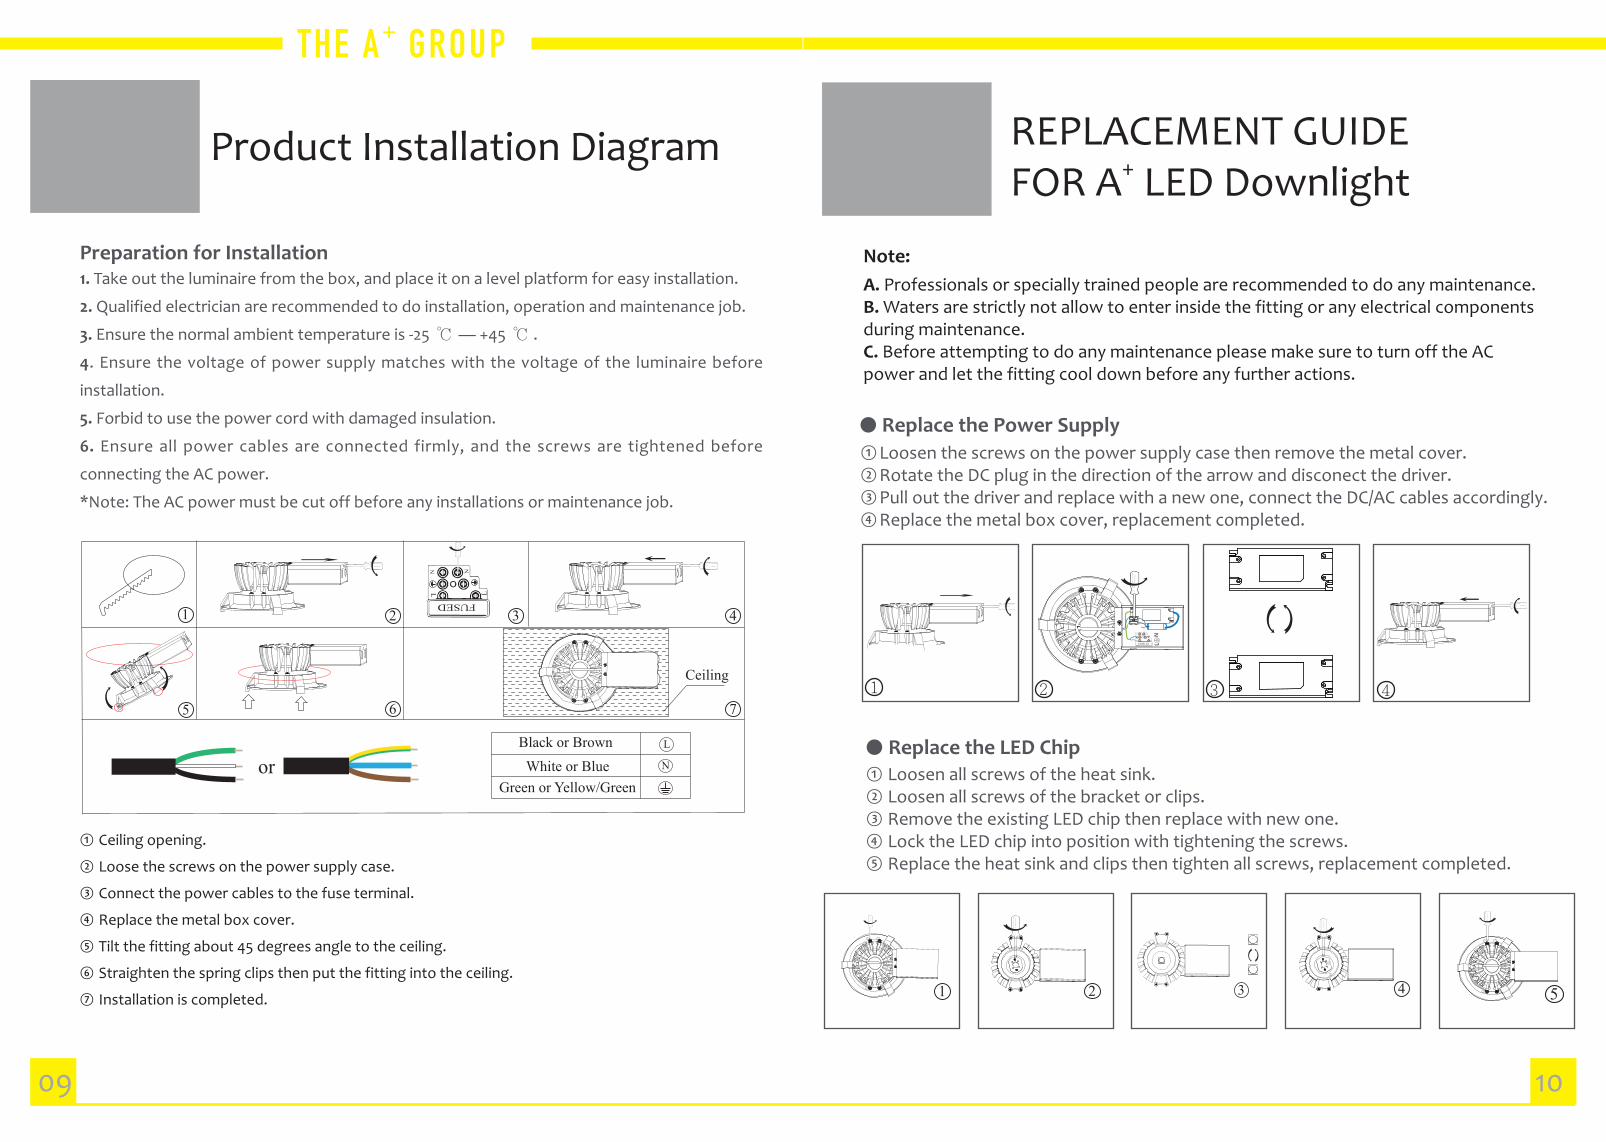
Product Installation Diagram
09
orBlack or Brown
White or BlueGreen or Yellow/Green
L
N
FUSED
LL
NN
2 3 4
5 6 7
Ceiling
1 Ceiling opening
2 Loose the screws on the power supply case .
3 According to the line color connected to the power supply
4 Replacement complete.
5 Tilt about 45 degrees.
6 Straight spring, Put the lights in the ceiling
7 Drop the spring fastener, Installation is complete .
1
Preparation for Installation1. Take out the luminaire from the box, and place it on a level platform for easy installation.
2. Qualified electrician are recommended to do installation, operation and maintenance job.
3. Ensure the normal ambient temperature is -25 ℃ — +45 ℃ .
4. Ensure the voltage of power supply matches with the voltage of the luminaire before
installation.
5. Forbid to use the power cord with damaged insulation.
6. Ensure all power cables are connected firmly, and the screws are tightened before
connecting the AC power.
*Note: The AC power must be cut off before any installations or maintenance job.
10
REPLACEMENT GUIDE FOR A+ LED Downlight
①Loosen the screws on the power supply case then remove the metal cover.②Rotate the DC plug in the direction of the arrow and disconect the driver.③Pull out the driver and replace with a new one, connect the DC/AC cables accordingly.④Replace the metal box cover, replacement completed.
NLFUSED
LL
NN
1 2
3 4 1 2 32
1
4
1 2
3 4 5
Replace the Power Supply
①Loosen all screws of the heat sink.②Loosen all screws of the bracket or clips.③Remove the existing LED chip then replace with new one.④Lock the LED chip into position with tightening the screws.⑤Replace the heat sink and clips then tighten all screws, replacement completed.
Replace the LED Chip
①Ceiling opening.
②Loose the screws on the power supply case.
③Connect the power cables to the fuse terminal.
④Replace the metal box cover.
⑤Tilt the fitting about 45 degrees angle to the ceiling.
⑥Straighten the spring clips then put the fitting into the ceiling.
⑦Installation is completed.
Note:A. Professionals or specially trained people are recommended to do any maintenance.B. Waters are strictly not allow to enter inside the fitting or any electrical components during maintenance.C. Before attempting to do any maintenance please make sure to turn off the AC power and let the fitting cool down before any further actions.
1 2 3 4

Address Unit 7, 18/F., Metro Centre II, No. 21 Lam Hing Street,
Kowloon Bay, Kowloon, Hong Kong
Web Sitewww.the-agroup.com.hk
E-mail [email protected]
EditorAu Pui Man
Ⓡ
We reserves all rights to make any changes to technical information's or data without notification, should there be any dispute the decision of The A+ Group shall be final.