
THE ZORK ANTHOLOGY DOS CD-ROM INSTALLATIONmocagh.org/infocom/zorkanthology-refcard.pdf · THE ZORK...
16
THE ZORK ANTHOLOGY DOS CD-ROM INSTALLATION Refer to Page 14 for Macintosh Installation Minimum System Requirements • IBM PC or 100% compatible • CD-ROM drive (150K bps) • 512K RAM • CGA/EGAJMCGAJVGA/SVGA graphics card • MS-DOS (5 .0 to 6.2 supported) •Hard disk drive with 2 MB available The Zork Anthology Installation 1. Insert The Zork Anthology CD into your CD-ROM drive (the following instructions will assume your CD-ROM drive is drive D:). Note: If you are in the WINDOWS environment, you must first exit WINDOWS by typing simultaneously: <ALT> <f4>. Repeat this step until you have exited all WINDOWS applications. To exit WINDOWS, answer "OK" by pressing <ENTER> when prompted. When you have arrived at a DOS prompt, follow the DOS installation instructions listed below. To install from DOS, at the DOS prompt, type D: and press <ENTER>. You should now be at the CD-ROM DOS prompt, which should look something like "D: \>." Type INSTALL and press <ENTER>. This should bring up the introduction to the installer program. The installer will ask you to determine a few installation preferences for your computer system. Follow the on- screen instructions carefully. 2. The installer will first ask you if you want the ability to launch all The Zork Anthology games from WINDOWS. Press <SPACE> to alternate between YES and NO, then press <ENTER> to make your selection. 3. If you answered "Yes" to setup to launch from WINDOWS, the installer will ask you to select the hard drive in which WINDOWS is installed or will be installed in your system. Use the arrow keys to select the hard drive you want, then press <ENTER> to select the hard drive currently flashing on your screen. 4. If you answered " Yes" to setup to launch from WINDOWS, you will then be asked to enter a directory name in which WINDOWS is installed or will be installed in. The default directory "\WINDOWS" will appear on screen. To use the default name, press <ENTER>; otherwise, backspace to delete that name and type in the correct name. 5. It is necessary for The Zork Anthology to be copied onto your hard drive (you cannot play the games off of the CD-ROM). The installer will ask you to select the hard drive to which you wish to install. Use the arrow keys to select the hard drive you want, then press <ENTER> to select the hard drive currently flashing on your screen. 6. You will then be asked to enter a directory name for The Zork Anthology. The default directory "\ZORK" will appear on the screen. To use the default name, press <ENTER>; otherwise, backspace to delete that name and type a new name of a maximum of eight characters. Note: This step will be skipped if you answered "YES" to setup to launch from WINDOWS. The default directory "\ZORK" will be used. 7. If the directory you chose already exists on your hard drive, you will be given the option to a) choose another directory, b) overwrite the directory (copy over it) or c) cancel the installation. Use the arrow keys to make a selection and then press <ENTER>. (If you are setting up to launch from Windows, you will not be able to choose another directory.) 8. The installer will give you the option of installing ALL GAMES from The Zork Anthology or installing one game at a time (thereby running this install program each time for each game you wish to install). Use the arrow keys to make a selection and then press <ENTER>. Note: This step will be skipped if you answered " YES " to setup to launch from WINDOWS. All the games will be installed. 1
Transcript of THE ZORK ANTHOLOGY DOS CD-ROM INSTALLATIONmocagh.org/infocom/zorkanthology-refcard.pdf · THE ZORK...

THE ZORK ANTHOLOGY DOS CD-ROM INSTALLATION Refer to Page 14 for Macintosh Installation
Minimum System Requirements
• IBM PC or 100% compatible • CD-ROM drive (150K bps) • 512K RAM • CGA/EGAJMCGAJVGA/SVGA
graphics card
• MS-DOS (5.0 to 6.2 supported) •Hard disk drive with 2 MB available
The Zork Anthology Installation
1. Insert The Zork Anthology CD into your CD-ROM drive (the following instructions will assume your CD-ROM drive is drive D:).
Note: If you are in the WINDOWS environment, you must first exit WINDOWS by typing simultaneously: <ALT> <f4>. Repeat this step until you have exited all WINDOWS applications. To exit WINDOWS, answer "OK" by pressing <ENTER> when prompted. When you have arrived at a DOS prompt, follow the DOS installation instructions listed below.
To install from DOS, at the DOS prompt, type D: and press <ENTER>. You should now be at the CD-ROM DOS prompt, which should look something like "D:\>." Type INSTALL and press <ENTER>. This should bring up the introduction to the installer program.
The installer will ask you to determine a few installation preferences for your computer system. Follow the onscreen instructions carefully.
2. The installer will first ask you if you want the ability to launch all The Zork Anthology games from WINDOWS. Press <SPACE> to alternate between YES and NO, then press <ENTER> to make your selection.
3. If you answered "Yes" to setup to launch from WINDOWS, the installer will ask you to select the hard drive in which WINDOWS is installed or will be installed in your system. Use the arrow keys to select the hard drive you want, then press <ENTER> to select the hard drive currently flashing on your screen.
4. If you answered "Yes" to setup to launch from WINDOWS, you will then be asked to enter a directory name in which WINDOWS is installed or will be installed in . The default directory "\WINDOWS" will appear on screen. To use the default name, press <ENTER>; otherwise, backspace to delete that name and type in the correct name.
5. It is necessary for The Zork Anthology to be copied onto your hard drive (you cannot play the games off of the CD-ROM). The installer will ask you to select the hard drive to which you wish to install. Use the arrow keys to select the hard drive you want, then press <ENTER> to select the hard drive currently flashing on your screen.
6. You will then be asked to enter a directory name for The Zork Anthology. The default directory "\ZORK" will appear on the screen. To use the default name, press <ENTER>; otherwise, backspace to delete that name and type a new name of a maximum of eight characters.
Note: This step will be skipped if you answered "YES" to setup to launch from WINDOWS. The default directory "\ZORK" will be used.
7. If the directory you chose already exists on your hard drive, you will be given the option to a) choose another directory, b) overwrite the directory (copy over it) or c) cancel the installation. Use the arrow keys to make a selection and then press <ENTER>. (If you are setting up to launch from Windows, you will not be able to choose another directory.)
8. The installer will give you the option of installing ALL GAMES from The Zork Anthology or installing one game at a time (thereby running this install program each time for each game you wish to install). Use the arrow keys to make a selection and then press <ENTER>.
Note: This step will be skipped if you answered "YES" to setup to launch from WINDOWS. All the games will be installed.
1

9. When the installation is complete, a screen will confirm which games have been installed. We recommend that you re-boot your computer.
10. To play a game from DOS, type CD \ZORK (or the directory you installed to) at the prompt and press <ENTER>. Then type the name of the game you wish to play and press <ENTER>:
Type ZORK1 then press <ENTER> to run Zork: The Great Underground Empire.
Type ZORK2 then press <ENTER> to run Zork II: The Wizard of Frobozz.
Type ZORK3 then press <ENTER> to run Zork Ill: The Dungeon Master.
Type BZORK then press <ENTER> to run Beyond Zork.
Type ZORKO then press <ENTER> to run Zork Zero.
Type PLANETF then press <ENTER> to run Planetfall.
11 . If you chose "YES" to setup to launch from WINDOWS, start WINDOWS by typing WIN and pressing <ENTER> at a DOS prompt. Open The Zork Anthology program group, then select the game you wish to run by double-clicking the icon of the game.
The Zork Anthology Troubleshooting
Symptom Possible Cause
lnsl•ll•tlon c1111not be Hard drive contains too many programs completed . and does not have enough room for
The Zork Anthology.
lnst•ller runs out of You ara trying to install onto a corn· disk o.pmce. pressed drive.
G11111e response time grad- The Installer is not de-allocaUng ually decreues. memory buffers.
In Windows, The Zork Windows is running under a shell program Anthology program group other then Program Manager. 1111d Icons do not 11ppe ....
DEMOS Installation Minimum System Requirements:
Solution
Backup any inlrequenUy used programs then delete them from the hard disk drive you are attempting to install to and try again.
Disk compression utilities cannot predict exact disk space; they can only estimate. The Zork Anthology files may not compress as much as your disk compressor expects. Try Installing into the uncompressed section of the drive.
Reboot your machine and restart the game.
Other shell programs other than the Windows Program Manager are not supported. Meke sure that in your System.ini file in the Windows directory. the shell command reads ·shell:Progmen.exe.'
Note: The minimum system requirements for the DEMOS differ from the minimum system requirements for The Zork Anthology. If you attempt to run the DEMOS without the minimum requirements, your PC might crash.
• IBM PC or 100% compatible • 386/25 MHz or faster • 1 MB RAM • CD-ROM drive (150K bps) • VGA compatible graphics card • MS-DOS (5.0 to 6.2 supported)
• Hard disk drive with 2 MB available • Mouse (only recommended) • One of the following digital sound devices or a compatible sound
device: Sound Blaster, Sound Blaster Pro, Sound Blaster 16, Pro AudioSpectrum, Pro AudioSpectrum 16, Gravis Ultrasound, LifeSize Sound Enhancer or The Sound Source
1. Insert The Zork Anthology CD into your CD-ROM drive. (The following instructions will assume your CD drive is drive D:)
If you are in the WINDOWS environment, you must exit WINDOWS by typing simultaneously: <ALT> <F4> Repeat this step until you have exited all WINDOWS applications. Answer "OK" to exit WINDOWS by pressing <ENTER> when prompted. When you have arrived at a DOS prompt, follow the DOS installation instructions listed below.
To install from DOS, at the DOS prompt type D: and press <ENTER>. You should now be at the CD-ROM DOS prompt.
2

At the CD ROM prompt "D:\>" type:
CD \DEMOS <ENTER> INSTALL <ENTER>
The installer will ask you to determine a few installation preferences for your computer system. Follow the onscreen instructions carefully.
2. The installer will ask you if you would like to view the READ.ME file, which contains additional information about installing and running the DEMOS. Press <ENTER> to view the READ.ME file or type NO and press <ENTER> to move on to the next screen.
3. It is necessary for some of the DEMO files to be copied onto your hard drive. The DEMOS requires both your hard drive and the CD-ROM disc to run. The installer will ask you to select the hard drive to which you wish to install. Use the arrow keys to select the hard drive you want, then press <ENTER> to select the hard drive currently flashing on your screen.
4. You will then be asked to enter a directory name for the DEMOS. The default directory "\ACTDEMOS" will appear on the screen. To use the default name, press <ENTER>; otherwise, backspace to delete that name and type a new name of a maximum of eight characters.
5. If the directory you chose already exists on your hard drive, you will be given the option to a) choose another directory, b) overwrite the directory (copy over it) or c) cancel the installation. Use the arrow keys to make a selection and then press <ENTER>.
6. The installer will then ask you if you want the ability to launch Activision New Product Demos from WINDOWS. Press <SPACE> to alternate between YES and NO, then press <ENTER> to make your selection. Note: Only the Return to Zork Demo utilizes this feature.
7. If you answered "Yes" to setup to launch from WINDOWS, the installer will ask you to select the hard drive in which WINDOWS is installed or is going to be installed in your system. Use the arrow keys to select the hard drive you want, then press <ENTER> to select the hard drive currently flashing on your screen.
8. If you answered "Yes" to setup to launch from WINDOWS, you will then be asked to enter a directory name in which WINDOWS is installed or is going to be installed in. The default directory "\WINDOWS" will appear on screen. To use the default name, press <ENTER>; otherwise, backspace to delete that name and type in the correct name.
9. Now you will be asked to select your CD-ROM drive.
10. The next few screens are for setting up the sound driver for the Simon the Sorcerer Demo. They are the ones titled "DIGPAK Sound Driver Setup" (at the top) and "Simon the Sorcerer Music Driver Setup" (the last screen).
a. Press Y to auto-detect for Sound Blaster.
b. Next use the up and down arrow keys to highlight your sound device driver. Then press <ENTER> to accept.
Note: Watch the red box, third line from the bottom of the screen, to see what the installer has detected. When you see the detection information, write down the Base 1/0 address and IRQ number listed. You will need this information later for setting up the sound driver for the other demos.
c. If you are ready to test the sound driver you have selected, press Y . You will either be asked if the sound played OK or it will tell you the sound driver failed to initialize. If you did not hear the sound play or it failed to initialize, go back to selecting a sound driver step.
d. When you have finished selecting the sound driver you will need to select a music driver. Locate the one best suited to your computer setup.
11 . The next few screens are for setting the sound and system configuration for all the other demos. Use the settings that you noted in step 1 Ob above.
12. The next screen will display your current system configuration default settings. You can change these settings now or later. Use the <SPACE> bar to select YES or NO and press <ENTER>. For more information on the settings for the system configuration, refer to the enclosed Troubleshooting Guide or the documentation for your sound device.
3

To change the settings later, go to the Activision New Product Demos directory on the hard drive and run the INSTALL program. Assuming you installed the demos in the \ACTDEMOS directory on the C: drive, just type:
C:\ACTDEMOS\INSTAU
When installation is complete, a screen will confinn the DEMOS have been installed.
To run a DEMO from your hard drive and CD-ROM, get to the Activision demo directory by typing CD\ACTDEMOS and press <ENTER>
Type RTZ then press <ENTER> to play the Return to Zork Demo.
Type MECH2 then press <ENTER> to view the MechWarrior 2: The Clans Demo.
Type PLANETF then press <ENTER> to view the Planetfall Demo.
Type SIMON then press <ENTER> to play the Simon the Sorcerer Demo.
If you chose "YES" to setup to launch from WINDOWS, start WINDOWS by typing WIN and pressing <ENTER> at a DOS prompt. Open the Return to Zork program group, then double-click the the Return to Zork icon.
HOW TO PLAY RETURN TO ZORK Infocom has invented an adventure game interface like no other! Return to Zork enhances your game playing experience by providing the interface right where you want it. Use your mouse to journey through a magical mix of live action and cinematic quality computer graphics and you'll discover a maximum of unexpected interactions with just a minimum of clicks.
Navigating through the Empire of Zork Your cursor will appear on your screen as a Hand icon. Use your mouse to move the Hand icon around your screen and let Navigation Arrows lead you to your next magical destination. Don't be so quick to leave a location, you may find a Zoom In icon which takes you in for a closer look and gives you access to information that could change your travel plans!
Moving to the next scene:
Move your cursor around your screen until it changes to the Navigation Arrow of your choice. Then click the LEFT button to travel in the direction of the arrow.
Looking for a change in scenery? The U-Tum Arrow allows you to turn around and face the opposite direction from you same location.
Back-Up Arrows let you move to the location directly behind you. Use these arrows to back-track and select a different route or to just make sure you didn't pass anything up!
Zooming in for a closer look:
Move your cursor around your screen; if you find a Zoom In icon, click the LEFT button. To zoom out and return to the previous scene, move your cursor around your screen until it becomes the Zoom Out icon and just click the LEFT button again. Remember, a Zoom In icon may give you access co information that may not make sense until later in your journey.
The Zoom In icon takes closer look.
The Zoom Out icon takes you back to the you in for a previous scene.
4

Navigating with your Keyboard
If you do not have a mouse connected to your system (or even if you do) you can use your keyboard to navigate through the Lost Empire of Zork.
Use either the Cursor Arrows or the Numeric Keypad on your keyboard to move your cursor around the screen. Make your cursor move even faster by holding down a directional key.
Note: Use the • key on your keyboard's numeric keypad in place of all references to the LEFT button on a mouse and the - key for all references to the RIGHT button.
Using your Inventory The RIGHT button on your mouse allows you to display the contents of your inventory at any time.
If you decide not to use your inventory, simply click anywhere else on the screen and your inventory display will disappear. As you move your cursor over the different items in your inventory, a description of the item will appear on your screen. To select an item from your inventory, just place your cursor over it and click with your LEFT button. Most items will be displayed in your inventory over a split background. Click your LEFT button on the upper left portion of the square to carry the item. or click on the lower right portion of the square to use the item.
g D D [] •• [!] . ~ ri [!;] [!] i. [!] •
use Button Left Mo Right M ouse Button
. \
" ~ To move to next scene or interact with items
Displays inventory
Your cursor changes to the Hand icon whenever you decide to move around empty-handed; when you pick up an item, the Hand icon will change to the form of the item that you have picked up (until you come to a Navigation arrow). If you pick up an item, you are not required to place it in your inventory in order to proceed. Carry the item around as long as you'd like-you are now a daring adventurer, capable of doing more than one thing at a time!
You have been provided with a few permanent items in your inventory. Use these items regularly during your excursion. You'll want to keep them in mind during encounters with characters-they make great conversation pieces! These items will appear over a solid background on your inventory display:
• Map - Plots the path you have taken in your travels on two full screens. A blinking red dot marks your current location.
Camera - Allows you to take unlimited pictures and keep mementos of scenery you'd like to remember. Simply click your LEFT button to reveal if the person, object or location is a photogenic one. If it is, your camera will take a picture for you.
Photo Album - Lets you take a look at all the photographs you've taken during your journey.
Tape recorder - Lets you rewind, fast-forward and play back important conversations that are automatically recorded during your travels. Use the buttons of the upper right-hand side to scroll through the characters you have on tape.
5

You will come across many other items that you can pick up and store in your inventory during your great underground adventure. To store an object in your inventory, click your RIGHT button to display your inventory, then click your LEFT button over an empty square.
If you lose an item, don 't despair! In most cases you'll be able to find the item by logically considering the action you took to misplace it. However, some actions are irreversible, in those cases, do despair.
Interaction between Inventory Items
You can use an item from your inventory with another item in your inventory to perform ingenious tasks. Remember the least likely combination of items may produce the most effective results.
I. Click your RIGHT button to display the contents of your inventory.
2. Select an object and click your LEFT button on the upper left portion of the square to carry it, e .g. Matches.
3. Click your RIGHT button to display your inventory again.
4. Place your cursor over the lower right corner of another item, e .g. the Tickets. "Use Matches with Tickets" will appear at the top of the inventory display.
5. Click your LEFT button to reveal all possible interactions between the two items, such as "Burn Tickets."
6 . Don't try this example at home. Only trained professionals can win after this particular interaction.
Action Interface As you navigate through each scene, your cursor will appear as a Navigation Arrow, a hand, or the inventory item you are carrying. When you point to an item or person which you can interact with, the name of that item or person will appear over the cursor.
Interacting with an Item in a Scene
iB urn Tickete
Your travels will take you through endless adventure-filled scenes that contain many items you can interact with. Click the LEFT button to display all action interface options for the item you are pointing to.
The animating icons will "act out" all possible interactions for the item you selected. Move your cursor over each icon to reveal a written description of the interaction each icon represents. Click the LEFT button over the action interface option you would like to perform. If you decide not to perform any of the interactions available, simply click your LEFT button in the middle of the diamond, or anywhere else on the screen.
Interacting with the Item you are Carrying
You may decide to use an item you are carrying without interacting with another, e.g. drop it, eat it, etc. To do this, simply click anywhere on the screen where you won't interact with another item or travel with a Navigation Arrow. In other words, if the item is visible as your cursor and no text indicating interaction with an object or person is displayed, you can click to display the action interface for the item you are carrying.
6

Interacting with Characters
• You can interact with most characters (those who care to talk to you). in two special ways. The first way is by engaging a character in conversation. and the second is by playing Question and Answer.
Conversations
Conversations with characters may provide you with clues that may (or may not) help you in your journey through the Underground Empire. To have a conversation with a character, select the Talk To icon from the Action Interface display. Once you select the Talk To icon and engage a character in conversation. you will see a column of icons on one side of the screen.
Click on these icons with your LEFT button to attempt to direct the tone of the conversation with your body language. Move your cursor over these icons to reveal a written description of each icon over your cursor. You'll discover that it's easier to strike a nerve with some characters than with others .
• ~ -• QGA
After having a conversation with a character or selecting the Ask About icon from the Action Interface, a column of icons will appear on your screen. These icons allow you to ask questions in a variety of ways. You can ask a character about items in your inventory, locations on the map, photographs from your photo album. or recordings of other characters .
Using the Zork System Menu You can access the Zork System Menu in the upper left-hand corner of your screen at
II
II any point in the game. Just move your cursor to the upper left-hand corner of your screen until your cursor changes to the Zork Disk icon, and then click the LEFT button.
You can then click anywhere off of the Zork System Menu to continue your game or click "Quit" to end the game. Click "SAVE" on the Zork System Menu at any point in the game to save your current game. Your game will
be saved from your most recent adventure experience. We suggest you save your games frequently. Don't let a grue get you without a record of your current travels!
Your Zork System Menu also lets you give up (in case West Shanbar's got you walking in circles) and start a new game from the beginning-just click on the RESTART option.
Game Score
You can save up to 99 different games at one time. You can also re-name a previous game. or save a new game under a previous title. Once you have saved a game. you can click on the LOAD option to load it and begin playing from the last saved scene in that game. This lets you try out your latest harebrained ideas or avoid solving puzzles you 've
7
Text On/Off
Quit
Sounds On/Off
already solved. To load a previously saved game, click on the title of the game to highlight it, and then click the LOAD button on the screen.
You can click "SOUND", "EFECTS", "TEXT" or "MUSIC" to turn each of these options ON or OFF .
• Walk through On
If you are playing a CD ROM version of Return to Zork. your Zork System Menu will include an additional setting for CD ROM Effects. You may have already noticed that your navigation is sometimes interrupted by animated transitions between locations called "Walk Through Movies." You can turn Movies ON or OFF. To change this setting, click the Movies button on the Zork System Menu.
Walk through Off The Zork System Menu also lets you check your current game score. Your score is the number directly preceding the total possible points. Although points are accumulated
for performing any action or task that furthers your progress in the game. you don't have to score all possible points to win.
Taking Short Cuts
You can use the function keys on your keyboard to help you speed your adventure through the Great Underground Empire of Zork.
FI - This key displays the Zork System Menu and lets you take a look at your score, quit, restart, save and load games, or change your game settings.
F2- This function key gives you a quick way to save your game when you anticipate a quick death. just press F2 and the Save Game display will appear immediately on your screen.
Fl - Use this key to load a previous game instantly! Press F3 as early as the opening title sequence that fol lows the Infocom logo to display the load Game screen and continue a game right away.
F4- Not feeling like your usual keen-eyed adventurer today? Press F4 to repeat the last message printed on your screen.
HOW TO PLAY SIMON THE SORCERER When Calypso the Wizard was kidnapped by an evil Sorcerer, a lack of qualified Merlin types forced him to search within the realms of the mortal world for a suitable clairvoyant hero.
Impressed by Simon's masterful wizardry (and seemingly impaired by bouts of severe desperation), Calypso deemed Simon a magical maven and entrusted him with a quest not commonly recommended for twelve-yearolds.
Your mission is to help young Simon brave this unknown world of mystery, magic, and fantasy and rescue Calypso - for only he has the power to return Simon to his own world .
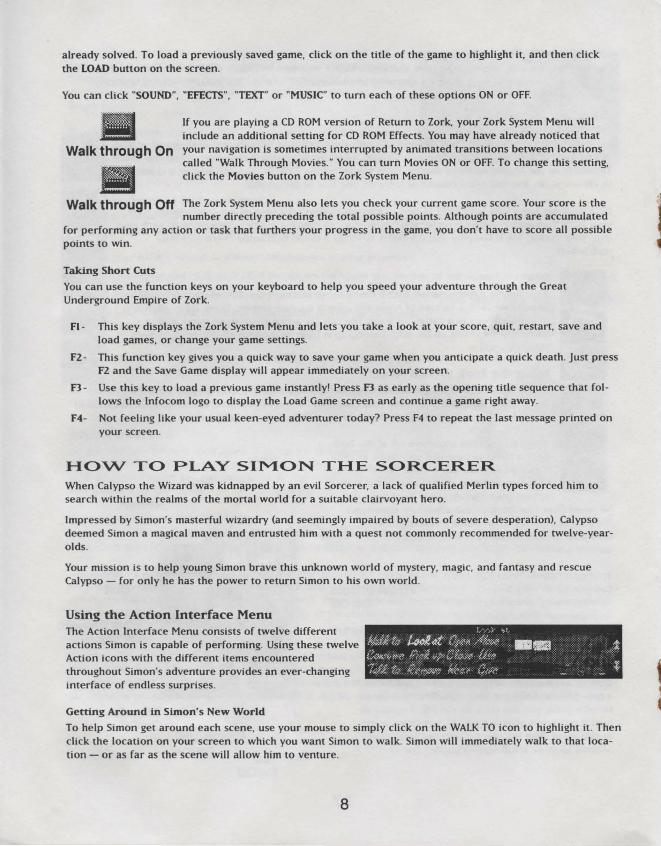
Using the Action Interface Menu The Action Interface Menu consists of twelve different actions Simon is capable of performing. Using these twelve Action icons with the different items encountered throughout Simon's adventure provides an ever-changing interface of endless surprises.
Getting Around in Simon's New World
To help Simon get around each scene, use your mouse to simply click on the WALK TO icon to highlight it. Then click the location on your screen to which you want Simon to walk. Simon will immediately walk to that location - or as far as the scene will allow him to venture.
8

As you move your mouse around your screen, the name of the Action icon. inventory item, or item in the scene your cursor points to will appear in the ID bar directly underneath the scene.
NOD!: Whenever your cursor points to any area in the scene Simon is in, WALK TO becomes the default Action icon. Whenever your cursor points to the Action Interface Menu or your Inventory, LOOK AT becomes the default Action icon.
Doing Things in Simon's New World
To use an Action icon with an item (whether it is in a scene or in your Inventory), highlight the Action icon you would like to use by clicking on it. The ID bar will display the Action icon you selected. Then, click on the item you would like that action directed towards. The name of the item selected will appear in the ID bar briefly; and then Simon will either perform the action, tell you the result of his action or alert you of your naivete in requesting such a preposterous action. Some Action icons will only produce an action if two items are selected. For example, the USE icon will usually require you to select two items before Simon can produce an action. After the first item is selected, a prompting instruction will appear in the ID bar (in this case "With What?"), then another item must be selected to complete the action. If you find that you do not have a second item to use with the first item selected, click anywhere else on the screen to cancel the action.
NOD!: Clicking twice on an area of the screen with no items or completing an action will return you to the default Action icon.
WALK TO CONSUME TALK TO LOOK AT PICK UP REMOVE OPEN
CLOSE WEAR MOVE USE GIVE
Directs Simon to do the "Sorcerer Shuffle" towards a selected location in a scene. Invites Simon to eat, drink or be wary. Gives Simon the opportunity to be a first-rate conversationalist - or a second-rate sensationalist. Allows Simon to take a closer look. Lets Simon pick up certain items and automatically store them in his Inventory. Allows Simon to rid himself of an article of clothing and put it in his inventory. Orders Simon to open doors, gates, etc. - of course most 12-year-olds aren't very good at following orders. Opposite of open. Dares Simon to make a fashion statement. Tells Simon to push or pull a selected item. Instructs Simon to employ a two-item combination. Allows Simon to display his gen-erosity towards another character in the game.
Talking to Characters (or Things)
Sometimes Characters (or Things) strike up conversations with Simon, and other times Simon will have to initiate conversations by selecting the TALK TO icon.
Simon is usually given a list of dialogue options that appear over the Action Interface Menu, from which he can choose to direct the tone of each conversation.
Most conversations continue until Simon or the other party decides otherwise by selecting a dialogue option that will allow Simon to conclude the converstaion, such as "I really don't want to speak to you any more."
Once the conversation has ended, Simon can choose to re-engage in conversation by selecting the TALK TO icon and then the character to whom he wishes to speak. This feature lets you segue from serious sorcery, cooperate in comical conversations and then continue collecting Calypso clues.
You can also use the postcard to quit the game. just click on QUIT. You must then verify that you really want to quit by typing "Y" or "N".
To purchase these and other Activision/lnfocorn titles, please contact your local retailer, or in the US call 1 (800) 477-3650.
9

DEMOS Troubleshooting For optimal DOS performance:
Set up your system to have as much free conventional RAM as possible.
Select the XMS/EMS option during Installation. Set up as much extended memory (XMS) as possible.
Disk caching software is strongly recommended, as SMARTDrive or other hard disk caching software programs can increase performance.
We do not recommend using disk compression software. Such data compression utilities may be Incompatible and cause unreliable performance.
Symptom
lnetallatlon cannot be completed.
lnetaller rune out of dlekapace.
Game dlaplaya "Sound driver unl011ded" or .. Not enough free memory" without ...,. ehowtng • graphical ecrean . (Note: It I• normal for "Sound drl· ver unloaded" to be di• played fNWY time you quit the progrem.)
Possible Cause
Your hard drive contains too many programs and does not have enough space.
You are trying to install onto a compressed drive.
There is not enough free conventional memory.
HOW TO MAKE A BOOT DISK (Note: Read ell of the Instructions before you start.)
1. Insert a blank disk into drive A
2. At the DOS prompl typa: C: and press <ENTER>
3. Type: CD\ and press <ENTER>
4. Type: Format A: IS and press <ENTER>
Solution
Backup any infrequenUy used programs, then delete them from the h,..d disk drive you are attempting to install to and try again.
Disk compression utilities cannot predict exact disk space; they can only esti· mate. The Demo files may not compress as much as your disk compressor expects. Try installing into the uncompressed section al the drive.
The Return lo Zor1< Demo requires between 580K to 600K of free conventional memory. One easy way to obtain more free convention8' memory is to use a "boot disk." Refer lo the instructions on How to Make a Boot Disk.
(If the computer displays "Format Terminated" try typing: Format A: /s /1:720 or try typing Format A : /s /1:360)
The screen will display "lnserl naw diskette for drive A: and press enter when ready." Press <ENTER> to begin formatting. The screen will then say, "Volume Label (11 characters ... ) ." Press <ENTER> and when asked to format another, type N and press <ENTER> to exit to the DOS prompt.
5. Copy the AUTOEXEC.BAT and CONFIG.SYS files from the hard drive to the boot disk. At the C:\> prompt, type: COPY CONFIG.SYS A: and press <ENTER>. Then type: COPY AUTOEXEC.BAT A: and press <ENTER>
6. To change to the A drive, type: A : and press <ENTER>
7. Modify your CONFIG.SYS file . Type: EDIT CONFIG.SYS and press <ENTER> (If you get an error message, type: Set Path:C:\DOS and press <ENTER>; then type: EDIT CONFIG.SYS and press <ENTER> again.)
8. Each builet point below contains inslructions which need to be fully executed before proceeding to the next bullet point Ignore all ref,..enees to the AUTOEXEC.BAT file until asked to specifically use~ in step 10.
Rernari< out each line that contains any of the words listed below by typing "REM" in front al the line.
Example: REM DEVICE= C:\WINDOWS\SMARTDRV.SYS
In the CONFIG.SYS: ANSI , FASTOPEN, FCBS, POWER, RAMDRV, SHARE, SMARTDAV, STACKS, VESA
In the AUTOEXEC.BAT: AD COM, AD WRAP, ATIRIB, BILLMINDER, DOSKEY, DOSSHELL DISKREET, FASTOPEN, IMAGE, JOIN, LIGHTNING, MENU, MIRROR, MODE, MSAV, NAV, NC, NCACHE, NCACHE2, PC-CACHE, PCKWIK, POWER, SHARE, SMARTDRV, SUBST, VESA, VSAFE. WIN
If you see "/l..: 1,...- after BrlY line that begins with "LH" or "DEVICEHIGH," delete it so the line reads "DEVICEHIGH=C:\" or "LH C:\ .. ." Change each line that reads "DEVICE=. to "DEVICEHIGH=" Change each line that starts with "C:\" lo "LH C:\"
10

If the line fragment listed below is not listed In your file, add the line accordingly.
CON FIG.SYS
DEVICE=C:\005\HIMEM.SYS
DEVICE=C:\DOS\EMM386.EXE NOEMS
DOS=HIGH,UMB
DEVICEHIGH=your cd-rom driver
OEVICEHIGH=mouse driver
Files=10
Buffers=10
AUTOEXEC.BAT
PROMPT$P$G
PATH=C:\DOS;
LH C:\DOS\MOUSE
Add this line if you do not find the word HIMEM.SYS in the fi le
This line must read EXACTLY es shown. Add~ ff you do not find the word EMM386.EXE in the file
Add this line if not found. NOTE: this can also be on two lines i.e. DOS=HIGH end OOS=UMB
Look for the line the! contains /D:MSCD001 or very similar. Be sure the line hes a drive letter O.e. C:) directly after the Devicehigh= [i.e. Devicehigh=C:~
Look for the line that contains the word MOUSE. You may not have this line. Be sure the line contains a drive letter O.e. C:) directly after the Devicehlgh=
This line must read EXACTLY es shown.
This line must read EXACTLY es shown.
Your path may be bigger
The line containing the word MOUSE. Be sure it contains a drive letter i.e. C:
LH C:\DOS\MSCDEX.EXE /D:MSCD001 /M:15 The line with the matching /D:MSCD001 from the CONFIG.SYS. Be sure the line contains a drive letter I.e. C:
When you finish modffying the file , hold down the [ALT] key and press the (F] key. When the menu drops down press the [XJ key. The Screen will say 'Loecled file is not saved; save~ now: Press <ENTER> to save the file and go bacl< to DOS.
9. Modify your AUTOEXEC.BAT file; type: EDIT AUTOEXEC.BAT end press <ENTER>
10. Repeet Step 8 for the AUTOEXEC.BAT file.
Now you should have a disk that can be usad to start your computer and leave you with enough memory to run the program. Just insert the disk into Drive A: and restart your computer. It should use the disk In drive A: to boot from .
Symptom Possible Cause
a.me repea1a aame aound Incorrect sound card settings or lock• on Intro screen
HOW TO FIND YOUR SOUND CARD SEmNGS
1. Type: C: end press <ENTER>
2. Type: CO\ end press <ENTER>
3. Type: SET and press <ENTER>
Solution
The demos require you to input the kind of sound card you own and what 1/0 Address, IRQ, and OMA channel it is set to. To help determine this information, Refer to the instructions on How to Find Your Sound Card Settings:
4. Locate the line that contains "BLASTER= .. ." and write it down. If no Blaster= line Is listed contact your sound device manufacturer to obtain the correct values.
E.Xllmple line: Se! Blaater=A220 15 01 H5 P330 T6 (Note: Your line may not contain all the letters listed.)
5. Type: CD\ACTDEMOS and press <ENTER>
6. Type: INSTALL and press <ENTER>
7. Press <ENTER> to continue.
8. View the READ.ME file ff you wish.
9. Now seleci your CD-ROM drive end press <ENTER>.
11

10. The next few sa-eais are for setting up the sound driver for the Simon the Sorcerer Demo. They ..-e the ones tiUed "DIGPAK Sound Driver Setup" (at the top) and "Simon the Sorcerer Music Driver Setup" (the last screen) .
a. Press Y to auto-detect for Sound Blaster.
b. Next use the up and down arrow keys to highlight your sound device driver. Then press <ENTER> to accept.
Note: Watch the red box, third line from the bottom of the screen, to see what the installer has detected. When you see the detection information, write down the Base 1/0 address and IRQ number listed. You will need this information later for setting up the SOl>"ld driver for the other demos.
c. If you are ready to test the sound driver you have selected, press Y. You will either be asked if the sound played OK or it will tell you the sound driver failed to inttialize. If you did not hear the sound play or it failed to initialize, go back to selecting a sound driver step.
d. When you have finished selecting the sound driver, you will need to select a music driver. Locate the one best suited to yoix computer setup.
11 . The next few sa-eens are for setting the sound and system configuration for all the other demos. Use the settings noted in step 10b above.
12.Select "Yes· to the question "Do you want to change the settings right now?"
13.Look at the Blaster= ... lineyou wrote down (Step 4) and locate the number directly after the ·r
If you do not have a "T," select Sound 81 .. ter Clone and press <ENTER> If the nixnber is 1, 2 or 3, select Creetlve t...be Sound 81 .. ter or Sound Blaeter Clone and press <ENTER> If the number listed is 4 or 5, select Creetlve t...be Sound 81 .. ter PRO and press <ENTER> If the number listed is 6, choose Creetlve Lee Sound 81 .. ter 16 and press <ENTER>. If your Blaster line reads SET BLASTER=A220 01 i5 T4 or the ·o· comes before the "i," you may need to select Pro Audio Spectrum 16 for your sound device and music device. Be sure your Pro Audio Spectrum 's OMA channel is set to 3. Skip steps 14, 15 and 16.
14.Look al the Blaster= ... line you wrote down and locate the number direcUy after the "A." Insert this numberfor the 1/0 port address and press <ENTER>
15,Look at the Blaster= ... line again and locate the number direcUy after the "i." Insert this number for the IRQ and press <ENTER>
16.Look at the Blaster= ... line once again and locate the number directly after the "D." Insert this numberfor the OMA channel and press <ENTER>
17.Select a music device. It should be the same you selected for the sound device.
18.Select "NO" for all of the additional system options listed.
19. Choose "NO" for "Do you want to change the settings right now?"
20.Press <ENTER> until you are out lo DOS.
Now the sound card settings should be right. If problems persist, contact your sound device manufacturer lo obtain the correct settings.
Symptom Possible Cause
No dlgltel eound la hMrd. 1. Incorrect sound card settings
Dlgltel eudlo pleye .t wrong •P"d or I• clicking or muddy.
Fl••hlng m-ge: "dlek •ror ha• occurred, R91rylng ..• "
2. No sound card
3. Improper sound card installation
4. CD-ROM software volume too low
5. CD audio output not connected
The incorrect sound card settings have been selected.
1. The CD-ROM drive is losing the image on the disk.
Solution
1. Refer to instructions for ·Game repeats same sound or locks on intro screen.~
2. A sound card must be installed in your system to play the demos. Purchase and install any of the supported sound cards listed on the system sticker (located on the box) or call 1 (800) 477-3650 in the U.S. to order a UfeSize Sound Enhancer from Activision.
3. Some digital audio sound cards require software drivers to be loaded through the CONFIG.SYS or AUTOEXEC.BAT files. Please consult your manual to determine if you need to install these drivers for your card.
4. Consult the manufactixe~s manual. Many CD-ROM drives come with software that allows you to select the volume from yoix keyboard. If this is the case, select 80-90% of the maximum volume.
5. If your CD-ROM doesn~ internally connect to your sound card, you may need to attach speakers to the jack located on the front of your CD-ROM drive.
Be sure to select the sound-smoothing option from the installer. If sound-smoothing is selected, f°'low the instructions for "Game repeats same sound or k>cks on the intro screen.·
1. Your CD-ROM drive needs to memorize what is on the disk. To get the CDROM drive to memorize the disk, execute the following instructions:
12

CD-ROM Movte audio echoea or br .. ka up
Error m• .. ge: "KB required v.iue too 1 .. ge. Reduce Pll ... "
Error Message: "Application hH vtolated aya1em Integrity."
2. Your CD has been ejected or your hard drive has errors.
CD-ROM drive is too slow, turbo is not activated or the incorrect sound card set· tings have been selected.
Windows has strict settings and memory allocation requirements to run
Windows has strict settings and memory allocation requirements to run
a) Type: C: and press <ENTER>
b) Type: CD\ACTDEMOS and press <ENTER>
c) Type: EDIT RTZ.BAT and press <ENTER>
d) Once the MS-DOS editor has opened up, press <ENTER> to drop the file down one line.
e) Press the Up-Arrow key to move into the newly created blank line.
~ Type: DIA D: (If your CD-ROM drive is not drive D. type the correct drive letter.) and press <ENTER>
g) Type: PAUSE
h) Hold down the <ALT> key and press the F key. When the menu drops down press the X key. The screen will say "Loeded file is not saved save it now." Press <ENTER> to save the file and e' it to DOS.
EXAMPLE file: Dird: Pause @echo off C: CD\ACTDEMOS LOADHIGH drivers\sblaster MADE CD RTZCD -0 -X -L -M:DRIVERS\ADUB -P:D:\ Drivers\sb'aster u
Note: This error may also be caused by the CD-ROM drive buffers being set to high in the MSCDEX line.
2. Place The Zork Anthology CD In the CD·ROM drive and select retry. If this does not work, run a hard disk diagnastic utility to oorrect any lost chains or clusters it reports. After all of the errors have been corrected, erase AetlXn to Zork Demo off the hard drive and reinstall the program from the CD-ROM drive again.
Run the TESTCD program located in your hard drive directory where the demas were installed. Be sure It reads 150 KB/second sustained transfer rate. If it does not, your CD-ROM drive is too slow. If the TESTCD program reports lower than 150 KB sustained transfer rate. depress the turbo button on the front of your computer and run the program again. If this does not work, f~low the instructions for "Game repeats same sol..l'ld or locks on intro screen:
If you experience this error. follow the instructions on how to make a tx>ot disk.
Follow the instructions fa '"Game repeats same sound or locks at the intro screen."
If you continue to experience problems, re--conftgure your system settings from the install program. Make sure XMS/EMS memory is disabled, sound drivers are not loaded in upper memory and sound-smoothing is off.
In the event this suggestion does not correct the errors when running from Windows, exit Windows and run the Return to Zork Demo from DOS.
13

THE ZORK ANTHOLOGY MACINTOSH CD-ROM INSTALLATION
The Zork Anthology Installation Minimum System Requirements:
• Supported Macintosh Models: Mac Plus, SE, Classic, II series, LC series, Performa series, Centris series, Quadra series, PowerBook series and the Power Macintosh series
• CD-ROM drive (150K bps) • B/W or Coler System •System 6.0.7 to 7.5 supported • Hard disk drive with 2 MB available • ISO 9660 File Access and Foreign
File Access files in System Folder
Recommended Installation for the Zork Anthology
1. Insert The Zork Anthology CD into your CD-ROM drive and double-click on the Zork Anthology icon on the desktop.
2. Double-click on the Zork Anthology Install icon. The lnfocom logo screen will appear; click anywhere on the logo screen to continue.
3. The Install window will then appear. It is separated into three sections:
• The lower portion of the window is a help box that lists information and instructions depending on where the mouse arrow is pointing.
• The left side shows the installation options available to you .
• The right side shows an icon for each disk on your system.
There are two installation options:
• Recommended Installation - Selecting the Full Install icon will allow you to install a// the games on The Zork Anthology CD to your system (using only 2 MB of disk space).
• Other Installations - By clicking the Show Other Installations icon (on the upper left-hand side) you can display a new box where each game icon can be selected individually. To return to the Recommended Installation option, click the Show Recommended Installation icon on the upper left-hand side.
4. To install, select a game icon by clicking on it and dragging it to the hard drive icon (on the right side of the Installer window) to which you want to install The Zork Anthology.
Note: The games must be copied onto your hard drive. You cannot play the games off of the CD-ROM.
5. When the installation is complete, select the Quit button.
6. To begin playing a game, locate the Zork Anthology folder on the hard disk you intalled to and double-click on the game icon of your choice.
The Zork Anthology Troubleshooting Symptom Possible Cause
The Zork Anthology Running System 6.0.7 MultiFinder. quits during ln•1mll.tlon
The error meuage "The ISO 9660 File Access end Foreign File Zork Anthology CD I• Access are not being loaded. unread.J>le" appear•
Solution
Change Start-up configuration to start up with Finder
Make sure the extensions ISO 9660 File Access and Foreign File Access are in the System Folder and restart your computer. These files are commonly found in the software that comes with your CO-ROM drive. They also can be found in the Apple System Install disks.
14

DEMOS Installation
Minimum System Requirements:
(Note: The minimum system requirements for the Return to Zork Demo differ from the minimum system requirements for The Zork Anthology.)
• Supported Macintosh Models: LC Ill , LC 475 and higher, Performa 475 and higher, Centris series, Quadra series, llfx, PowerBook 180c, PowerBook Duo 270c
• 13' color monitor or greater •System 7.0 to 7.5 supported • Hard disk drive with 3 MB available
Recommended Installation
• 68030/25 MHz or faster Macintosh (68040 recommended)
• 32 Bit Data Bus • 4 MB RAM with minimum 2,500K
available (8 MB recommended) • Apple CD 300 or Double-speed
CD-ROM drive (300K bps) • 640 x 480 x 256 (8-bit) color graphics
1. Insert The Zork Anthology CD into your CD-ROM drive and double-click on the Zork Anthology icon on the desktop.
2. Double-click on the Zork Anthology Install icon. The lnfocom logo screen will appear; click anywhere on the logo screen to continue.
3. The Install window will then appear. It is separated into three sections:
• The lower portion of the window is a help box that lists information and instructions depending on where the mouse arrow is pointing.
• The left side shows the installation options available to you.
• The right side shows an icon for each disk on your system.
4. To install the demo, click on the Show Other Installations icon, then choose the Return to Zork Demo icon and drag it to the hard drive icon (on the right side of the Installer window) to which you want to install. Some demo files must be copied to your hard drive; the demo will not run entirely off of your CD-ROM.
5. When the installation is complete, you will be prompted to restart your computer.
6. To begin the demo, locate the Return to Zork Demo folder on your hard disk and double-click on the Return to Zork icon.
Note: To run the Return to Zork Demo, make sure The Zork Anthology CD is in your CD-ROM drive.
How to Play Return to Zork
Refer to page 4 of this guide on how to play Return to Zork. Below are the list of commands that are specific to the Macintosh version.
Mouse Button Allows you to travel in the direction of the arrow on the screen, zoom in on an area, or pick up items.
Space Bar Allows you to display the contents of your inventory at any time. If you decide not to use your inventory, simply press the Space Bar again to remove it.
Back Slash (\) Repeats the last message printed on your screen.
X + 0, S, Q Open a saved game, Save the current game, and Quit Demo.
X + 1, 2, 3,... Incrementally increases volume.
15

DEMOS Troubleshooting
Note for users with 4 MB RAM: If you only have 4 MB of RAM, you may see the following error message: "There is not enough memory available to open Return to Zork. " This is due to the system software using over 1500K bytes of total memory. To verify this, select About This Macintosh .•• in the Apple Menu. An easy solution is as follows :
1. Create a new folder in the Extensions Folder of the System Folder and name it "Extensions Not Being Used."
2. While in the Extensions Folder, select all items in the folder except the new folder. Drag all the items to your new folder.
3. Open the new folder and drag the Apple CD-ROM, Sound Manager, ISO 9660 File Access, and Foreign File Access items back to the Extensions Folder. These are necessary to run the game.
4. Restart your computer before running the Return to Zork Demo. To restore your system software to its original configuration after playing the Return to Zork Demo, drag all items from the new folder into the Extensions Folder and restart your computer.
Symptom Possible Cause
The Return to Zork Oemo Virtual Memory is on quits without W•rnlng
Movie play la very slow, Disk compression software being used sound cut• out, or sound Is out of sync
CO speed setting is too slow
The computer you are using is too slow
W•lk~through movtes are The computer you are using is too slow too slow
No sound or movles Low memory
Customer Service
Solution
Tum Virtual Memory off from the Memory control panel .
Do not use disk compression software.
Set the Apple CD speed to "Fester" in the Apple CD control panel.
You need an LC 111/68030, 25 MHz or fester computer to play the Return to Zorl< Demo.
Open the Return to Zorl< Demo System Menu and click on the Music button to tum off music.
Open the Return to Zorl< Demo System Menu and click on the Walk-Through button to turn off the walk-through movies.
Restart your computer and start the Return to Zorl< Demo.
If you have any comments, questions or suggestions about The Zork Anthology or any other Activision product, you can contact us at (310) 479-5644 between the hours of 9:00 a.m. and 5:00 p.m. (Pacific Time) Monday through Friday, with except holidays, or contact a customer service representative through the following on-line services:
Activision BBS: (310) 479-1335
Available 24 hours a day Up to 14,400 Baud Settings: 8 Bits , No Parity, 1 Stop Bit (8 , N, 1)
CompuServe: 76004,2122 or [GO GAMEPUB] in the Game Publishers Forum B
Prodigy: ACTl10B
GEnie: ACTIVISION
America Online: MEDIAJAKE or use keyword "ACTIVISION" to locate the Activision forum.
Internet: [email protected]
For customer service outside of the U.S. refer to the RETURNS section at the end of The Zork Anthology manual.
16