Photoelectric Effect Photoelectric Effect (How Einstein really became famous!)

The Photoelectric Effect & Its Applications Robert B. Friedman & Rick Kessler
Background & Purpose What Is The Photoelectric Effect?
In short, when light illuminates a piece of metal, the light kicks off electrons from the metal’s surface and these electrons can be detected as a change in the electric charge of the metal or as an electric current. Hence the name: photo for light and electric for the current. The explanation behind this simple phenomenon opened the door to revolutionary modern physics concepts regarding the composition of light, quantum mechanics, and what is now referred to as the “wave-particle duality” of nature. The wave-particle duality of nature is perhaps one of the greatest mysteries of our universe and a very interesting philosophical subject! Your goal in this lab is to reproduce the photoelectric effect for yourselves and to understand how it demonstrates the particle behavior of light. The Physics of Light Right Before 1905 By the end of the 19th century (1800s) physicists believed that they had a firm understanding of electricity, magnetism, gravity and mechanics. Furthermore, the hot debate over whether light was composed of particles or waves was all but over with the consensus leaning towards a wave description. Scientists such as Fresnel were able to show that light would reflect, refract, diffract and interfere just like any other wave such as water or sound. Furthermore, a famous theoretical physicist by the name of James Clerk Maxwell was able to show that light is made by fluctuations in electric and
magnetic forces; hence light was understood to be a form of electromagnetic (EM) radiation. He showed that these EM force fluctuations could travel through space like waves on water. So if an electron were sitting somewhere in space and such a wave passed, the electron would bob up and down like a boat on rough seas. This description seemed sufficient to explain what light was. The theories of physics developed up to that time, including the EM wave model of light, are now called the “classical model.”
http://www2.kutl.kyushuu.ac.jp/seminar/MicroWorld1_E/Part3_E/P36_E/photo.htm
http://www.physics.nmt.edu/~raymond/classes/ph13xbook/node26.html
The “Ultraviolet Catastrophe” Yet, not all was well. In particular there was one very nagging dilemma known as the
“ultraviolet catastrophe.” It was called a “catastrophe” because it was a calculation that gave results that were in striking disagreement with observations. The classical model of light predicted that the total energy radiated by a hot object would be an infinite amount of energy! The term “ultraviolet” is there because this infinite energy came from the fact that the shorter the wavelength of the light one looked at, the more of that light the object seemed to be giving off. So when someone started adding up these energies, the contribution for the higher energy, shorter wavelength light became larger and
2005 Yerkes Summer Institute Photoelectric Effect Lab 1

larger without end. This infinite energy calculation didn’t make any sense and didn’t match observations and experiments.
An analogy to this
ore
ata
g the
dilemma is trying to determine the number of fish in the sea. If you think that the smaller the size of a fish, the more fish of that size there are, you could estimate the number of fish in the sea. But, if you think fish can get smaller and smaller and smaller, you would be lead to the conclusion that there were an endless number of fish because as you got to smaller and smaller fish, there would be mand more to count. Of course, this is not the case in reality because at some point fish cannot get any smaller so there is an end to what you are trying to count; there is a “smallest fish.”
http://www.biodiversity911.org/fisheries/happy_fish_tale.html
A physicist named Max Planck realized that if light had some smallest energy, then the ultraviolet catastrophe was no longer a problem: the theory and dcould be reconciled. However, Planck did not believe that radiation could reallyhave a “smallest energy,” and assumed that his mathematical trick for avoidinUV catastrophe was not a feature of the true nature of light (for more details about the photoelectric effect, see Appendix A).
The Photoelectric Effect Mystery Another dilemma was how to properly explain the photoelectric effect. Around the same time, physicists knew that if one were to shine an ultraviolet light onto a charged metal plate in a vacuum, the metal plate would lose its charge, or discharge. The brighter the UV light, the faster the plate lost its charge. Yet, it appeared that the same was not true for longer-wavelength light. One could not discharge a negatively charged metal plate with long wavelength light. It didn’t even matter how bright the long wavelength light was, it had no effect. This observation was strange to say the least, especially if the classical model of light was right. In the classical model, the energy of an EM wave depends only on the amplitude (height) of the wave. Think about it this way: the bigger the amplitude of a wave on a lake, the higher it will rock your boat up and down and you will claim that the intensity of the rocking is greater. Well, it certainly requires more energy to rock your boat higher and higher, so it’s not hard to believe that the energy of a wave depends on its amplitude.
It is an important fact that the energy of a classical wave only depends on the amplitude and not the wavelength. This phenomenon of wave behavior, if true for light, contradicts the observations of the photoelectric effect. The classical model claims that if the intensity (brightness) of light is increased, then the energy of the light will increase, regardless of the light’s wavelength. But, why was it impossible to discharge the metal with very intense long wavelength light?? The Photoelectric Effect Explained! ( … is worth a Nobel Prize … )
Einstein realized that Planck’s trick to avoid the UV catastrophe was more than just some trick. In 1905 Einstein published an important paper on Planck’s idea and his explanation of the photoelectric effect. He made the important and unobvious assumption that Planck’s trick was the true nature of light. Einstein claimed that light was made of particles called quanta, that each had some small fixed energy which depended on the wavelength of the light. The shorter the wavelength, the more energy each of these quanta had, the longer the wavelength the smaller the energy of the quanta. So a quantum of red light would have less energy than a quantum of blue light. This concept was very different from the classical model; it was the birth of what is called the “quantum model.”
Einstein also reasoned that light should behave and interact like any other particle! It was pretty well understood that when the negative metal plate discharged, it was losing negative electrons
2005 Yerkes Summer Institute Photoelectric Effect Lab 2

from its surface. It was originally believed that when the EM wave hit the plate, the incident radiation caused the electrons in the metal to jiggle. It was also believed that if the wave had enough energy (i.e. a large-enough amplitude) it could jiggle the electrons right off the metal. Escenario: that the light quanta would each strike an electron, like one billiard ball hitting another. If a quantum of light had enough energy then it wouknock the electron off, but if the light quantum did not have sufficient energythen the electron would jiggle a little in the metal but remain attached. (Imagine a ping pong ball hitting a billiard ball – the ping pong ball wouldn’thit the billiard ball hard enough to move it.)
instein suggested another
ld ,
er n is
This description was enough to both explain the weird wavelength-dependent behavior observed and to make some observable predictions. Incidentally, these are two very important requirements for a scientific hypothesis: it should both explain observations and predict new ones that can be tested. Einstein’s hypothesis was the following: when a light illuminates ametal plate, light quanta collide with electrons in the plate and, depending onthe energy needed to eject the electron from the metal, the electrons are eithfreed or remain stuck in the metal. The energy needed to rip off an electrocalled the “work function.” The higher the value of the work function, the moreneeded to eject an electron. Different metals have different work functions. Thijargon; we’ll call this special energy the “energy threshold.”
-
If the light quanta don’t have enough energy to overcome this energy threhappens. Since the energy of the quanta depends on the wavelength of the light,special wavelength that has just enough energy so that any longer wavelength ligelectron, and any shorter wavelength light has even more energy than needed. Tis called the “threshold wavelength.” We can now see why some lights work alights do not produce sufficiently energetic light. Einstein’s theory also explainsif we crank up the intensity of a light with wavelength longer than the threshold.the light, its individual quanta are still the same energy each. Only a sufficiently(high enough energy) light will knock off electrons.
It is still true that the brighter the light, the morecoming out. In the case of the quanta model, the total esum of all the quanta energies. So the brighter the lighare coming out. If the number of quanta grows with thlight, and each quantum knocks off one electron, then amore quanta, will be able to knock off more electrons th(Of course it must be a light with a wavelength shorter
So what happens when the light quanta have moenergy threshold? Einstein predicted that such high-eneits extra energy to the ejected electrons. So, if you werewavelength shorter than the threshold, electrons would
extra energy. The extra energy would be equal to the energy of the quanta minuenergy threshold. It took 10 years, until 1915, for someone to check this predictthey found that Einstein was right. This result was a fantastic success for Einsteadvance for physics and our understanding of the nature of light. It is why EinstPrize for this work and not some of his other outstanding achievements.
2005 Yerkes Summer Institute Photoelectric Effec
http://www.pool-andbilliards.com/
energy (or work) s is silly physics
shold, then nothing there must be some ht cannot kick off an his special wavelength nd some do not: some why nothing happens No matter how bright short wavelength
total energy is nergy was equal to the t, the more quanta
e brightness of the brighter light, with an a dimmer light.
than the threshold.) re energy than the rgy light would give to use light with a
pop off with some s the energy of the ion, but when they did, in, and an important ein won his Nobel
t Lab 3

Wave-Particle Duality The photoelectric effect shows that light behaves like a bunch of little particles, but what about
all the other important results like diffraction and interference that indicate light is a wave? Good question. In fact, light behaves both ways, depending the situation. It turns out that things considered to be particles, like electrons and protons, can behave like waves! This completely crazy idea is now called the wave-particle duality of nature. Everything from a photon to an electron to a baseball behaves like both waves and particles, depending on how you look at it. Photoelectric Effect Lab A Mechanical Analogy It is possible to visualize some of the concepts in the photoelectric effect by using colliding balls to represent scattering particles and obstacles to represent energy thresholds. In order to illustrate the concept in a more clear way, a life-size model of a photon ejecting an electron has been constructed. The model is set up as in Figure 1 and consists of the following:
• An inclined track to roll a small ball down • Several paper towel rolls cut to different lengths with thin rubber bottoms • A golf ball • A ping-pong ball
The photoelectric effect is then reproduced in this model as follows:
A. Insert the ping-pong ball into a tube so that it rests on the rubber bottom B. Mount the tube at the bottom of the track C. Place the golf ball at some height along the track and release it to roll down the track D. When the golf ball reaches the end of the track it collides with the rubber bottom of the tube E. The ping-pong ball resting on the inside of the rubber bottom feels the collision of the golf ball
and bounces
Figure 1
2005 Yerkes Summer Institute Photoelectric Effect Lab 4

Carry out this demonstration with the help of the lab instructors. Please pay close attention to what happens. Based on what you already know about Einstein’s explanation of the photoelectric effect answer the following questions in your lab notebook:
www.pgc.sk/english.htt
1. What particle does the golf ball represent? The ping-pong ball? 2. What changes occur to the golf ball when it is placed higher or
lower on the track? What effect does this represent in the photoelectric effect?
3. What does the length of the tube represent? What would it take to get the ping-pong ball to be “ejected” from the tube?
This model captures most of the important aspects of the photoelectric effect, but it does fall a little short. First of all, the concept of light intensity is not covered here at all. This model only demonstrates one photon and one electron.
1. How might you adjust the model to account to for greater intensity light? 2. What about the fact that a metal plate’s surface can have many electrons?
The Photoelectric Effect with a Zinc Plate The basics of the photoelectric effect can be studied with relatively simple experimental setups. The most basic and important observation we will test today is that UV light can discharge a negatively charged zinc plate while visible light cannot. We will adjust the intensities of the lights to also verify that the intensity has no effect for the visible light case. To make these observations we must make use of a common device called an electroscope. An electroscope is an apparatus that detects the presence of charge on an object that is brought close to it. If done carefully, you can even compare the charge on two different objects. Static Electricity & Electroscopes We have all heard the saying “opposites attract.” While this may or may not be true in relationships, this is definitely true in electricity and magnetism. In nature there seem to be two signs a charged object can have: positive or negative. As you may already know, electric force holds atoms together; electrons have negative charge and protons have positive charge, while neutrons have no charge. The protons inside the nucleus of the atom keep the electrons bound.
The electric force is also responsible for binding atoms into molecules. The electrical properties of different materials are all due to how well these forces are able to keep electrons sitting still in the material. In insulators such as wood or glass, electrons are prohibited from moving very much, while in conductors such as metals, they are free to flow around.
2005 Yerkes Summer Institute Photoelectric Effect Lab 5

An electroscope works on the basic principle that two metal objects with the same charge will repel each other. An electroscope is made by hanging a strip of ultra-thin gold foil along another strip of stiffer aluminum. All of this is sealed in a insulating container and is only connected to the outside world by some small conducting wire or “lead.” At the end of the lead a conducting ball or plate is attached (see Figure 2). When the electroscope becomes charged, positively or negatively, the whole system acquires that charge. In particular, the foil and metal strips inside the container become charged. Since same charges rthe thin foil will be forced away from the sturdier metal becausthey both have the same charge. So, when an electroscope is charged, the gold foil appears to float and turn upwards!
epel,
e
In order to use our electroscopes to learn about the photoelectric effect, we will first make use of them to detect common static charge. You should be familiar with static if you’ve ever seen your clothes stuck together after they’ve been in the dryer or if you’ve ever shocked your friend with a spark from your finger. Why do you think your clothes are sticking together? Where do you think the charge on your finger comes from? Static charge on an object comes from removing electrons from, or adding them to an object. When your clothes tumble around in the dryer, they exchange some of their electrons; with what charge does this leave your clothes if they are sticking? When you walk on a carpet, your feet rub the hairs of the carpet and electrons move from the rug to you; with what charge does this leave you? How about the carpet hairs? What do you think is happening when you make a spark with your friend?
Figure 2
Let’s play with some electroscopes and see what they can do. Don’t worry about being hurt or shocked by the electroscope or any charged object we will be working with today. The charges will not be any stronger that those you might experience with the laundry! You should have the following materials in front of you:
http://projectsol.aps.com/electrical/electric_charges.asp
• A gold foil electroscope with a metal ball on top • A plastic rod • A piece of silk cloth
Follow the instructions below and record your observations in your lab notebooks after each step.
For each step, make sure to record what you are doing, what effect your actions seem to have, and why you think the effect happens, even if you don’t know for sure!
2005 Yerkes Summer Institute Photoelectric Effect Lab 6
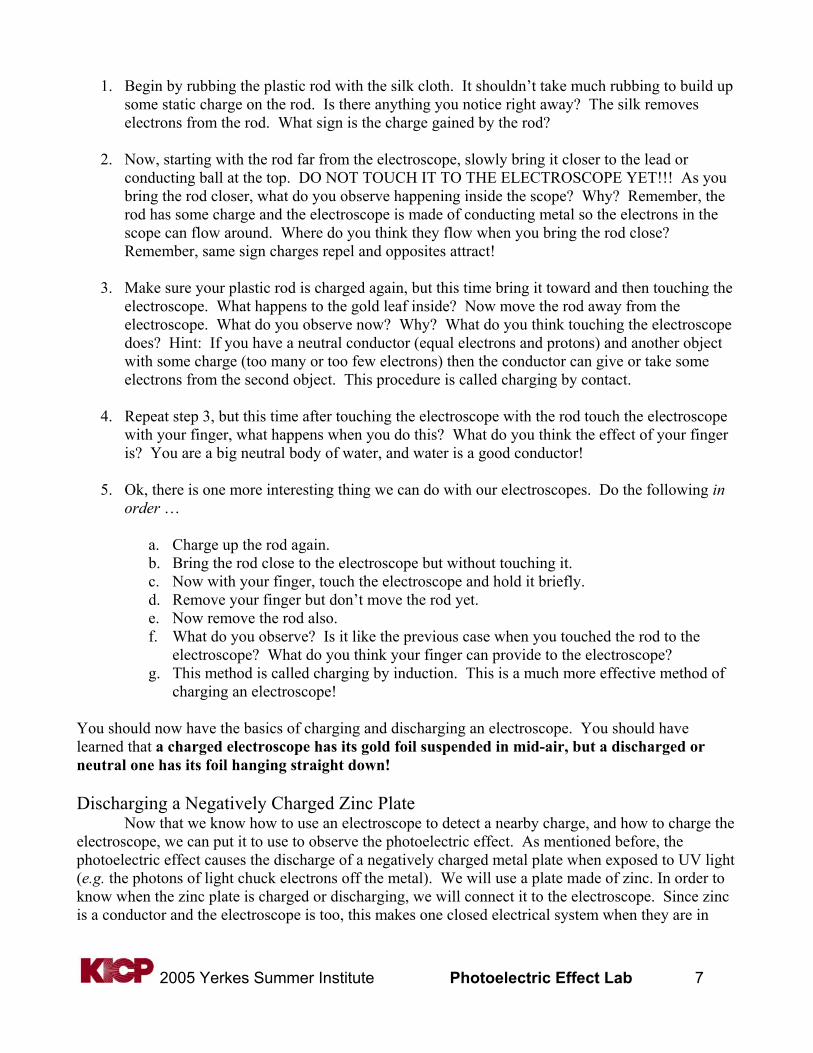
1. Begin by rubbing the plastic rod with the silk cloth. It shouldn’t take much rubbing to build up some static charge on the rod. Is there anything you notice right away? The silk removes electrons from the rod. What sign is the charge gained by the rod?
2. Now, starting with the rod far from the electroscope, slowly bring it closer to the lead or
conducting ball at the top. DO NOT TOUCH IT TO THE ELECTROSCOPE YET!!! As you bring the rod closer, what do you observe happening inside the scope? Why? Remember, the rod has some charge and the electroscope is made of conducting metal so the electrons in the scope can flow around. Where do you think they flow when you bring the rod close? Remember, same sign charges repel and opposites attract!
3. Make sure your plastic rod is charged again, but this time bring it toward and then touching the
electroscope. What happens to the gold leaf inside? Now move the rod away from the electroscope. What do you observe now? Why? What do you think touching the electroscope does? Hint: If you have a neutral conductor (equal electrons and protons) and another object with some charge (too many or too few electrons) then the conductor can give or take some electrons from the second object. This procedure is called charging by contact.
4. Repeat step 3, but this time after touching the electroscope with the rod touch the electroscope
with your finger, what happens when you do this? What do you think the effect of your finger is? You are a big neutral body of water, and water is a good conductor!
5. Ok, there is one more interesting thing we can do with our electroscopes. Do the following in
order …
a. Charge up the rod again. b. Bring the rod close to the electroscope but without touching it. c. Now with your finger, touch the electroscope and hold it briefly. d. Remove your finger but don’t move the rod yet. e. Now remove the rod also. f. What do you observe? Is it like the previous case when you touched the rod to the
electroscope? What do you think your finger can provide to the electroscope? g. This method is called charging by induction. This is a much more effective method of
charging an electroscope! You should now have the basics of charging and discharging an electroscope. You should have learned that a charged electroscope has its gold foil suspended in mid-air, but a discharged or neutral one has its foil hanging straight down! Discharging a Negatively Charged Zinc Plate Now that we know how to use an electroscope to detect a nearby charge, and how to charge the electroscope, we can put it to use to observe the photoelectric effect. As mentioned before, the photoelectric effect causes the discharge of a negatively charged metal plate when exposed to UV light (e.g. the photons of light chuck electrons off the metal). We will use a plate made of zinc. In order to know when the zinc plate is charged or discharging, we will connect it to the electroscope. Since zinc is a conductor and the electroscope is too, this makes one closed electrical system when they are in
2005 Yerkes Summer Institute Photoelectric Effect Lab 7

contact. Thus, if we charge the plate, the electroscope will be charged too. So, how do we best charge a zinc plate (think about the above exercise)? Now you may have noticed when you were using the electroscopes that they seem to slowly lose their charge even if they are left alone, without being touched. This is because the air around you is full of water vapor and water is a good conductor. If the scope is negatively charged, excess electrons on the electroscope can slowly spill off and spread out into the air; if the scope is positively charged, then it can slowly draw extra electrons from around it through the air. Now, what we eventually want to observe is the discharge of the electroscope-zinc-plate system from the UV light. How might you tell that the UV light has an extra effect on the system, separate from the air? In other words, if the air can slowly discharge the plate, would we expect to see the discharge happen slower, faster, or at the same speed if we also add in a UV light? Photodiode Lab What is a Photodiode?
In this lab you will investigate a practical application of the photoelectric effect, namely its use in "photodiodes" that measure the intensity (brightness) of incident light. A photodiode is a part of an electrical circuit (a “circuit element”) that releases electrons when light shines on it. The "photo" prefix refers to the incident light; the "diode" suffix is electrical engineering jargon that means that when the electrons are liberated, they can only flow in one direction through the circuit element. There are a few important differences between these photodiodes and the zinc plate electroscope we used earlier:
1. The photodiode is sensitive to most of the visible light spectrum rather than only ultraviolet or higher energy light. Can you guess why?
2. We will use charge from a battery to help pull the liberated electrons off of the photodiode. By
itself, the photodiode is charge neutral so to effectively charge it (like the zinc plate) we use a battery.
3. We will use a "digital voltmeter" (DVM) to get accurate measurements of the incident light
intensity. A voltmeter measures the voltage across some circuit element. The Photodiode Circuit Before we get seriously started working with photodiodes, let’s take a moment to understand electric circuits. A circuit is basically a closed, conducting (usually metal) loop where charged particles, usually electrons, can travel. A circuit typically contains a number of “circuit elements” that can modify the path, the speed or the number of the charged particles. We call the motion of charged particles through a circuit a current. The current is bigger when either the charged particles move faster, or when there are more of them. The unit of current is called an Ampere.
Usually the most important circuit element is the battery, or voltage source. The battery provides an electric force that moves the electrons in the circuit. The strength of a battery, called the voltage, is measured in units of Volts. Another important circuit element is a resistor,
2005 Yerkes Summer Institute Photoelectric Eff
http://newton.ex.ac.uk/ teaching/CDHW/Sensors/
ect Lab 8

so called because it is an insulator that resists the motion of electrons. The strength of a resistor is measured in units of resistance called Ohms. The more Volts you have in a battery, the more force you have to move electrons and thus more electrons can move faster and so the current is bigger. The more Ohms in a resistor, the more resistance you have against the motion of the electrons and thus the electrons move slower and the current is smaller. Voltage and resistance regulates current in a circuit. The photodiode we are using provides extra electrons when we shine light onto it. How do you think this change affects the current in the circuit?
Use the materials in your lab kit to construct the photodiode circuit as shown in the Figure 3. Your kit contains:
• 1 black plastic board with attached “alligator clips” • 1 battery • 1 battery clip • 1 “digital voltmeter” (DVM) • 2 cables for the DVM, 1 red and 1 black
A resistor and two short wires should already be taped to the board. This resistor will prevent too much current from passing through the circuit and possibly damaging the elements. The battery leads are protected with tape to avoid draining the battery during shipping; you can remove the tape and attach the battery clip. The cables have a “banana-plug” on one end and an “alligator clip” on the other. The “alligator clip” looks like the jaws of an alligator.
Figure 3
2005 Yerkes Summer Institute Photoelectric Effect Lab 9

When your circuit is ready, measure the voltage across the resistor with your DVM using the red and black cables in your kit:
1. Attach the black “banana-plug” into the DVM hole labeled COM (COM stands for common, or ground)
2. Attach the red “banana-plug” into "V" 3. Turn the dial to the "20 V" setting 4. The other end of each cable has an alligator clip; attach each clip to one side of the resistor (red
cable on “+” side, black cable on “-” side)
Since the liberated electrons from the photodiode travel along the wires of the circuit and moving charges generate an electric current in the circuit, you might wonder why we do not try to measure this electric current. It turns out that these electric currents are really small, about 1 millionth of an Ampere. A vacuum cleaner uses about 10 Amperes, or 10 million times more current than what these photodiodes generate. It is rather difficult to measure such tiny electric currents. To make this lab doable, we pass the current across a resistor, converting the current into a voltage. Voltages are much easier to measure, and you will measure the voltage across a resistor when light is incident on the photodiode.
Once you see a signal on your DVM, move your hand over the photodiode; the voltage should decrease as you cover the photodiode, and increase again when you remove your hand. You can also try turning lights on and off, and adjusting window shades. Record your observations and sketch a diagram of your circuit in your lab notebooks. The Photodiode Circuit as a Linear Detector
Now, let's have some fun and make some quantitative measurements of the “transmission” of light through some common materials. The transmission is defined as the fraction, or percentage, of light that passes through a material. For glass, the transmission is nearly 100%; for black paper the transmission is close to 0%. The basic procedure will be to record the voltage measurement with ambient light, and then cover the photodiode with the material of interest and re-measure the voltage. The ratio of these two voltages is the transmission through the test material.
We want to make these transmission measurements as accurately as possible. If you try to make a measurement of the transmission and just hold a piece of black paper over the photodiode, light will sneak in from the sides [under the black paper] and hit the photodiodes. This sneaky light could lead you to incorrectly measure a large transmission through black paper. To fix this problem, you are going to build a "light funnel" around the photodiode so that light cannot sneak in from the sides. Use the flexible paper in your photodiode lab kit to make a cylinder; the black surface goes on the inside to absorb stray light and the gray surface goes on the outside to reflect light away. Place your light funnel around the photodiode and use black tape to secure your light funnel to the electronics board.
The opening at the top of your cylindrical light funnel is called an "aperture.” An aperture is any opening that lets light through. Many instruments like cameras and telescopes control the aperture very precisely to make sure that the appropriate amount of light gets through. Make sure that your aperture is as round as possible (not oval!) so that we can make some quantitative measurements later. Now check for light leaks. Put your eye directly over the light funnel and check for light sneaking in from the bottom. Use black tape to seal off the bottom and prevent these light leaks. OK, now you are ready to measure transmission. For each measurement you will:
1. Record the voltage with ambient light from the room
2005 Yerkes Summer Institute Photoelectric Effect Lab 10

2. Measure the voltage with a test material over the photodiode 3. After removing the test material, re-measure the ambient light 4. Calculate the ratio of the ambient and test material voltage measurements
(transmission = test/ambient) Each transmission calculation consists of three measurements. After the first two measurements (ambient then test material), why do we re-measure the voltage with ambient light? Measure the transmission as described above for the following materials:
• White paper • Black paper • Glass • Colored glass • Pair of sunglasses • Anything else of interest
If the voltage drops below 2V, turn the dial on your DVM to the "2V" setting so that we get
better accuracy. How does the transmission through white paper compare with the sunglasses? Can you see through these materials with your eyes? Is there a paradox?
The above tests are interesting, but since we don't actually know any of the true transmissions, there is no guarantee that we are really making accurate measurements. Now let's try another quantitative measurement where we can predict the transmission, and then check if the measurement agrees with the prediction. In most scientific measurements, such "cross checks" are crucial for having confidence in the results. This method is also a means of calibrating our detector. The quantitative cross check involves measuring the transmission through two different size apertures, and then comparing the ratio of transmissions with the ratio of the aperture areas. Since one aperture is smaller than the other, less light is able to reach the photodiode.
Take the small black piece of poster board in your lab kit and cut a small hole using one of the coins as a template. Now you have a second aperture that is smaller than your original aperture. Measure the transmission through the smaller aperture the same way that you measured the transmission earlier.
Now let's try to predict the transmission through the smaller aperture. Use a ruler to measure the diameter of each aperture. If they are not exactly round, make a few measurements and use the average value. Now divide each diameter in half to get the radius. If “R” is the radius of your light funnel, and “r” is the radius of the smaller aperture, then the area of each aperture is …
• A = π⋅R2 (area of light funnel aperture) • a = π⋅r2 (area of smaller coin aperture)
Calculate the value of the two areas, and their ratio a/A. How does this ratio compare with the ratio of the transmission of the smaller aperture to the bigger aperture? Based on this cross check, what uncertainty would you assign to your transmission measurements? The Human Eye vs. The Photodiode Circuit
Both your eye and the photodiode detect light. How are these two detectors similar? How are they different? This lab extension will explore the comparisons between your eyes and the photodiode.
2005 Yerkes Summer Institute Photoelectric Effect Lab 11

We have a set of filters with different transmissions. Hold each filter between your eye and a light source, and try to guess the transmission. After making a guess for each filter, measure the transmissions using your photodiode.
What can you conclude?
The Camera The Human Eye
http://www.pasadenaeye.com/faq/faq15/faq15_text.html Digital Cameras
While this may be the very first time that you have heard of the photoelectric effect, you have certainly made some use of it many times in your life. The photoelectric effect is what makes digital cameras work. Any digital camera contains a grid of little metal “pixels” that become charged when they are illuminated. This grid sits on what is called a CCD chip. When someone takes a picture with a digital camera, the camera shutter opens and light spills onto the CCD chip. The image is then stored as the information about the charge on each pixel in the grid. Your eye contains a similar, but biological, version of a CCD chip: the “rods and cones” of your retina. While the nature of your eye is a bit different, it also relies on the photoelectric effect to see the world around you!
So far we have studied a single photodiode, or what we might also call one pixel. Digital cameras, however, have millions of pixels. Let's try and figure out how they cram so many pixels into a tiny little camera.
First let's try the naïve method. If I bought 1 million photodiodes at 57 cents each from Arrow electronics…
1. What is the total cost? 2. How big is this array of 1000 x 1000 photodiodes? 3. If you can measure the voltage from a pixel once per second, how long does it take to read
every pixel? 4. Is this a reasonable consumer product? Would you buy it?
Unless you are very rich, we need to reduce cost, size, and readout time. There is technology
called a "charged coupled device” (CCD) that can pack very tiny photodiodes onto a silicon wafer. Not only are these pixels small and cheap, but also the signals from millions of pixels can be measured and analyzed in just a few seconds!
2005 Yerkes Summer Institute Photoelectric Effect Lab 12

If you take a picture of the night sky with a digital camera using a CCD, you will see nothing in your image. So how do astronomers get such nice images using a CCD at the focus of their telescopes?
How about color? There are three primary colors needed to construct any mixed color. How do you think a digital camera with a CCD records color? Appendix A: The Ultraviolet Catastrophe
The ultraviolet catastrophe refers to the startling and counter-intuitive result that one arrives at when attempting to calculate the total energy of all the radiation in a closed oven with metal sides. Since any hot object will produce EM radiation, this hot oven should fill up with its own radiation waves. The only catch is that the wave has to have a value of zero at the points where it touches the sides. Kind of like the ends of a guitar string are fixed to the guitar and only the middle of the string can move up and down. Such waves are called “modes,” and the longer the wavelength of the mode, the less of them you can fit in the box. The notes on a guitar string are kind of like these modes.
Now, one should be able to just add up the energy of all of the modes and get the total energy in the oven. That’s where the problem occurred. At this point in history, physicists believed that there was an equal chance for any type of wavelength mode to exist in the oven. So you were just as likely to find a long wavelength radio wave as you were to find a short wavelength gamma ray! But since you can fit more and more short wavelength modes in the oven, the number of short wavelength modes keeps going up. This means that there would be an infinite number of modes in the oven and the total energy is infinite! This is why it was called the “ultraviolet catastrophe:” it was a problem at high energies or short wavelengths, in the direction of and past the UV. It made no sense. When physicists began to understand that this ultraviolet catastrophe was a real problem, one physicist by the name of Max Planck derived a formula that could correct the problem by assuming that the probability of finding a mode with a certain wavelength was smaller for short wavelength modes than for long wavelength. So even though you could fit more short wavelength modes in the oven, the probability of finding them was smaller. The only catch was that to do this Planck had to assume that the radiation in the oven came in little packets of energy. This assumption meant that the energy of a mode didn’t depend on its amplitude (height) as one might expect for a wave, but instead was a fixed quantity that depended on the wavelength. For most types of waves, the strength or energy in a wave depends on the height of the wave, not on its wavelength or frequency. Imagine being on a boat: the higher the wave the more likely people will get tossed off, although the distance between the waves is irrelevant. What Planck suggested was the complete opposite: whether you got knocked off the boat depended on the distance between the waves, not the height. In this case, a tsunami might not have any effect on your boat, but small ripples could throw you off! In effect, Planck also assumed that light or radiation came in quanta, or photons. He never gave them this name, though, and just assumed that this was some clever math trick that made things look good.
2005 Yerkes Summer Institute Photoelectric Effect Lab 13